

Contact SAMSUNG WORLDWIDE
If you have any questions or comments relating to Samsung products,
please contact the SAMSUNG customer care centre.
Country
AUSTRALIA 1300 362 603 www.samsung.com/au
CHINA 800-810-5858
INDIA 3030 8282
INDONESIA 0800-112-8888 www.samsung.com/id
JAPAN 0120-327-527 www.samsung.com/jp
MALAYSIA 1800-88-9999 www.samsung.com/my
NEW ZEALAND 0800 SAMSUNG (0800 726 786) www.samsung.com/nz
PHILIPPINES 1800-10-SAMSUNG(726-7864) www.samsung.com/ph
SINGAPORE 1800-SAMSUNG(726-7864) www.samsung.com/sg
THAILAND 1800-29-3232
TAIWAN 0800-329-999 www.samsung.com/tw
VIETNAM 1 800 588 889 www.samsung.com/vn
SOUTH AFRICA 0860-SAMSUNG(726-7864 ) www.samsung.com/za
U.A.E 800-SAMSUNG (726-7864)
Customer Care Centre
400-810-5858
010-6475 1880
HONG KONG:3698 - 4698 www.samsung.com/hk
1-800-3000-8282
1800 110011
02-689-3232
8000-4726
Web Site
www.samsung.com/cn
www.samsung.com/in
www.samsung.com/th
www.samsung.com/ae
LCD TV
user manual
BN68-01717A-00
imagine the possibilities
Thank you for purchasing this Samsung product.
To receive more complete service, please register
your product at
www.samsung.com/global/register
Model Serial No.
Without producing harmful VOC (Volatile Organic Compounds),
Samsung’s Eco-friendly “Crystal Design” expresses color gradation
thanks to our dual injection technology.
Precautions When Displaying a Still Image
A still image may cause permanent damage to the TV screen.
Do not display a still image on the LCD panel for more than 2 hours as it can cause screen image retention. This image retention is also
•
known as "screen burn". To avoid such image retention, reduce the degree of brightness and contrast of the screen when displaying a still
image.
Displaying still images from Video games and PC for longer than a certain period of time may produce partial after-images.
•
To prevent this effect, reduce the ‘brightness’ and ‘contrast’ when displaying still images.
© 2008 Samsung Electronics Co., Ltd. All rights reserved.
Watching the LCD TV in 4:3 format for a long period of time may leave traces of borders displayed on the left, right and center of
•
the screen caused by the difference of light emission on the screen. Playing a DVD or a game console may cause a similar effect
to the screen. Damages caused by the above effect are not covered by the Warranty.

Contents
CONNECTING AND PREPARING YOUR TV
List of Parts ........................................................ 2
Installing the Wall Mount Kit ............................... 2
Viewing the Control Panel .................................. 3
Viewing the Connection Panel ........................... 4
Viewing the Remote Control ............................... 6
Installing Batteries in the Remote Control .......... 7
Switching On and Off ......................................... 7
Placing Your Television in Standby Mode........... 7
Viewing the Menus ............................................. 8
Using the TOOLS Button .................................... 8
Plug & Play ......................................................... 9
SETTING THE CHANNELS
Storing Channels Automatically ....................... 10
Storing Channels Manually ...............................11
Adding / Locking Channels .............................. 12
Sorting the Stored Channels ............................ 13
Assigning Channels Names ............................. 13
Fine Tuning Channel Reception ....................... 14
SETTING THE PICTURE
Changing the Picture Standard ........................ 15
Adjusting the Custom Picture ........................... 16
Conguring Detailed Settings on the Picture ... 16
Conguring Picture Option ............................... 18
Resetting the Picture Settings to the Factory
Defaults ............................................................
Viewing the Picture In Picture (PIP) ................. 20
SETTING THE SOUND
Sound Features ................................................ 21
Selecting the Sound Mode ............................... 22
Connecting Headphones (Sold separately) ..... 22
SETTING THE TIME
Setting and Displaying the Current Time .......... 23
Setting the Sleep Timer .................................... 23
Switching the Television On and Off
Automatically ....................................................
FUNCTION DESCRIPTION
Choosing Your Language ................................. 24
Melody / Entertainment / Energy Saving ......... 25
NETWORK SETTINGS
Network Connection ......................................... 27
Cable Network Setup ....................................... 29
Selecting the Source ........................................ 30
Editing the Input Source Names ...................... 31
Product Guide .................................................. 32
19
24
English - 1
SETTING THE PC
Setting up Your PC Software
(Based on Windows XP) ..................................
Display Modes .................................................. 33
Setting up the TV with your PC ........................ 34
33
WISELINK PRO
Connecting a USB Device ................................ 35
Using the WISELINK Pro Function .................. 36
Using and Sorting Photo List ............................ 38
Viewing a Photo or Slide Show ....................... 40
Using and Sorting the Music List ...................... 42
Playing a Music ............................................... 44
Using and Sorting the Movie List ..................... 45
Playing a Movie File ........................................ 46
Deleting the Photo/Music/Movie File ............... 49
Using the Setup Menu ...................................... 49
WISELINK PRO-DLNA
Setting the DLNA Network ............................... 50
Installing the DLNA Application ........................ 50
Using the DLNA Application ............................. 52
Using the DLNA Function ................................. 56
CONTENT LIBRARY
Activating the Content Library .......................... 57
Using the Content Library ................................ 58
Using Additional Content Using External
USB Memory Storage ......................................
ABOUT ANYNET
What is Anynet+? ............................................ 61
Connecting Anynet+ Devices ........................... 61
Setting Up Anynet+ .......................................... 62
Scanning and Switching between Anynet+
Devices ............................................................
Recording ......................................................... 65
Listening through a Receiver ........................... 65
Check Points before Requesting Service ......... 66
+
59
63
RECOMMENDATIONS FOR USE
Teletext Feature ............................................... 67
Auto Wall-Mount (Sold separately)
(depending on the model) ................................
Using the Anti-Theft Kensington Lock
(depending on the model) ................................
Securing the TV to the Wall .............................. 71
Troubleshooting: Before Contacting
Service Personnel ............................................
Specications ................................................... 73
Symbol Press Note One-Touch
69
70
72
Button
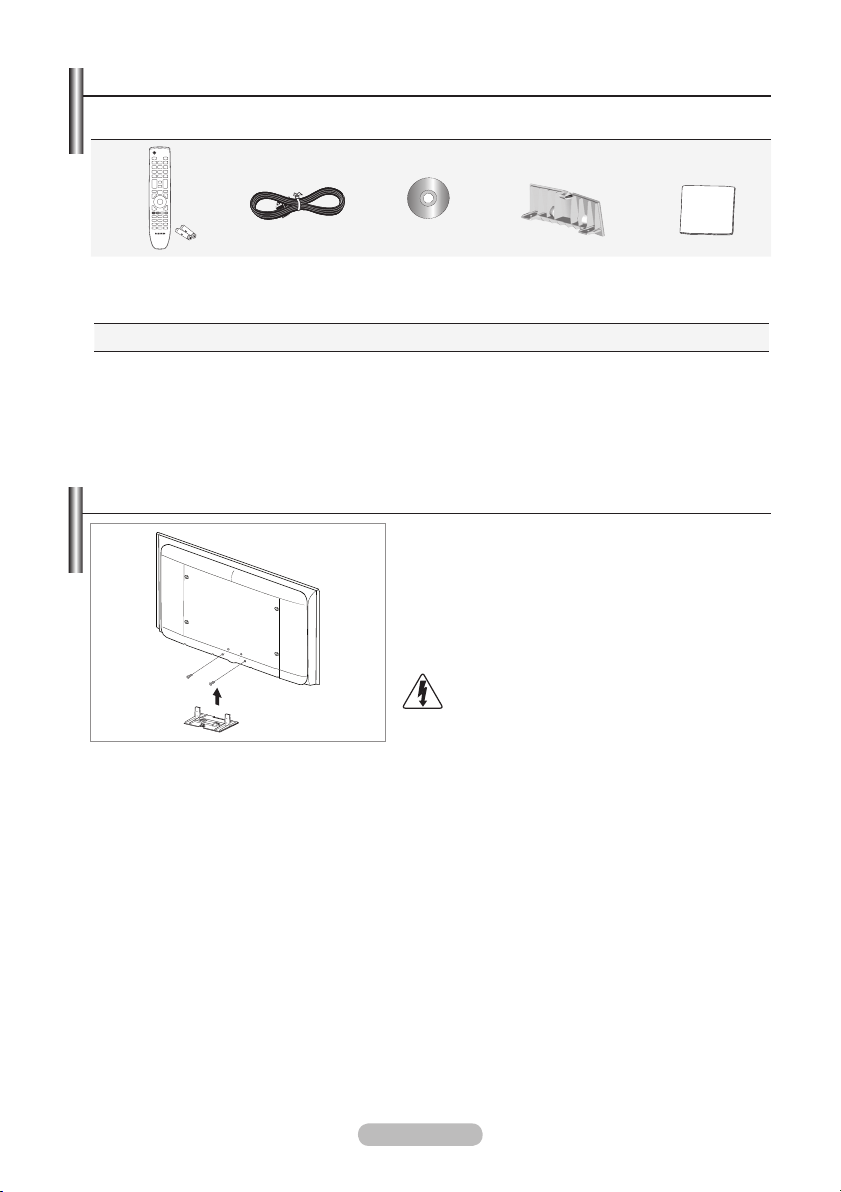
List of Parts
Please make sure the following items are included with your LCD TV.
If any items are missing, contact your dealer.
Remote Control &
Batteries (AAA x 2)
Owner’s Instructions
•
➣
Warranty card / Safety Guide / Registration Cards (Not available in all locations)
Power Cord Program CD Cover-Bottom Cleaning Cloth
Warranty card
•
Safety Guide
•
Installing the Wall Mount Kit
Wall mount items (sold separately) allow you to mount
the TV on the wall.
For detailed information on installing the wall mount,
see the instructions provided with the Wall Mount items.
Contact a technician for assistance when installing the
wall mounted bracket.
Samsung Electronics is not responsible for any damage
to the product or injury to yourself or others if you elect to
install the TV on your own.
Do not install your Wall Mount Kit while your TV is
turned on. It may result in personal injury due to
electric shock.
Remove the stand and cover the bottom hole with a
➣
cap and fasten with two screws.
Registration Cards
•
English - 2
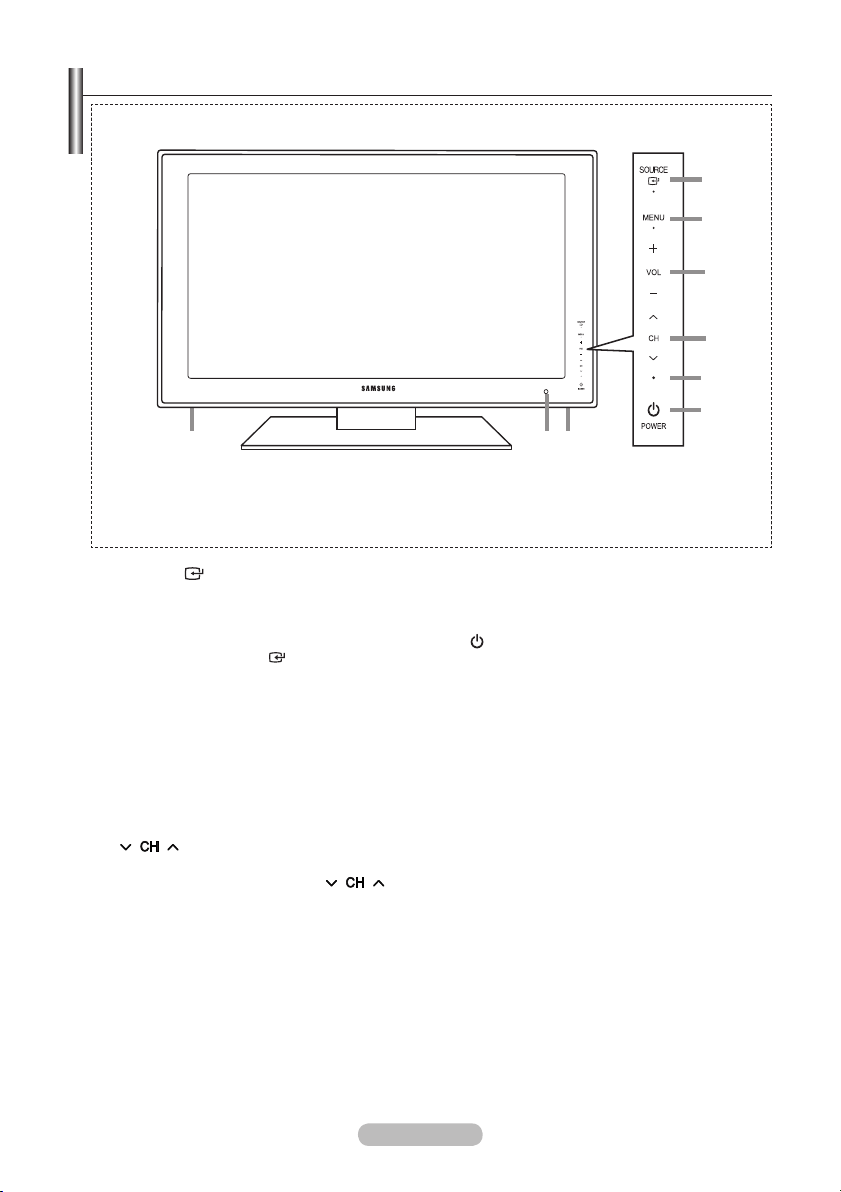
Viewing the Control Panel
88
4
1
2
3
6
5
7
The product colour and shape may vary depending on the model.
➣
Front Panel buttons
Touch each button to
operate.
SOURCE
1
Toggles between all the available input sources
(TV, AV1, AV2, S-Video, Component1,
Component2, PC, HDMI1, HDMI2, HDMI3,
HDMI4). In the on-screen menu, use this button
as you use the
control.
MENU
2
Press to see an on-screen menu of your
features.
- VOL +
3
Press to decrease or increase the volume.
In the on-screen menu, use the - VOL + buttons
as you use the ◄ and ► buttons on the remote
control.
4
Press to change channels.
In the on-screen menu, use the
buttons as you use the ▼ and ▲ buttons on
the remote control.
(Without the Remote Control, you can turn on
the TV by using the Channel buttons.)
ENTER
button on the remote
TV’s
English - 3
5
Power Indicator
Blinks and turns off when the power is on and
lights up in stand-by mode.
POWER
6
Press to turn the TV on and off.
Remote Control Sensor
7
Aim the remote control towards this spot on
the TV.
Speakers
8
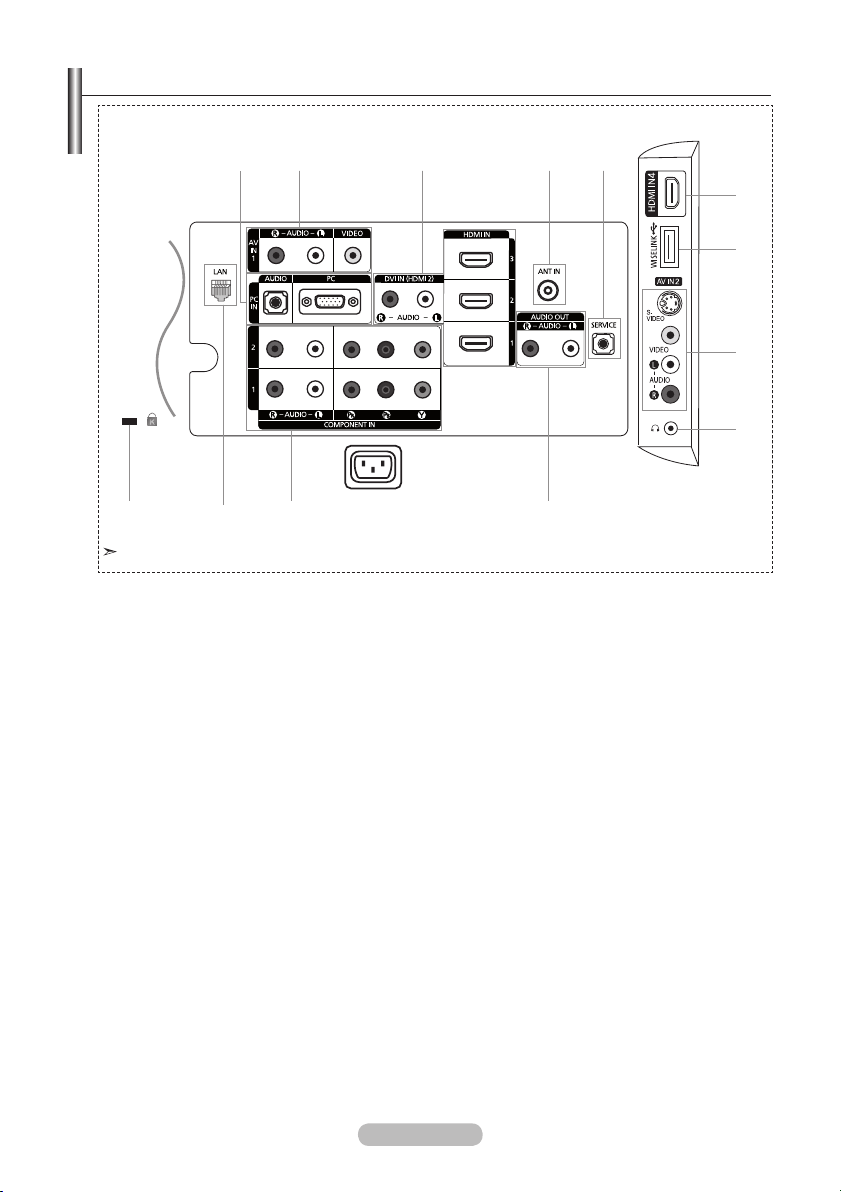
Viewing the Connection Panel
1
2 3 4 5
[Side Panel Jacks]
3
6
7
8
@
The product colour and shape may vary depending on the model.
Whenever you connect an external device to your TV, make sure that power on the unit is turned off.
➣
When connecting an external device, match the colour of the connection terminal to the cable.
➣
1 PC IN [PC] / [AUDIO]
-
Connect to the video and audio output jack on your PC.
2 Connecting External
Connect RCA cable to an appropriate external A/V device such as VCR, DVD or Camcorder.
-
Connect RCA audio cables to [R - AUDIO - L] on the rear of your set and the other ends to
-
corresponding audio out connectors on the A/V device.
HDMI IN 1, HDMI IN 2, HDMI IN 3, HDMI IN 4
3
Supports connections between HDMI-connection-enabled AV devices (Set-Top Boxes, DVD players)
-
No additional Audio connection is needed for an HDMI to HDMI connection.
-
When using an HDMI/DVI cable connection, you must use the HDMI IN 2 jack.
-
➣
What is HDMI?
-
“High Denition Multimedia interface” allows the transmission of high denition digital video data
and multiple channels of digital audio.
-
The HDMI/DVI terminal supports DVI connection to an extended device with the appropriate
cable (not supplied). The difference between HDMI and DVI is that the HDMI device is smaller
in size, has the HDCP (High Bandwidth Digital Copy Protection) coding feature installed, and
supports multi - channel digital audio.
The TV may not output sound and pictures may be displayed with abnormal colour when DVD
➣
players/Cable Boxes/Satellite receivers supporting HDMI versions older than 1.3 are connected.
When connecting an older HDMI cable and there is no sound, connect the HDMI cable to the
HDMI IN 2 jack and the audio cables to the DVI IN (HDMI2) [R-AUDIO-L] jacks on the back of
the TV. If this happens, contact the company that provided the DVD player/Cable Box/Satellite
receiver to conrm the HDMI version, then request a rmware update. HDMI cables that are not
1.3 may cause annoying icker or no screen display.
!
A/V Devices (AV IN 1)
Power Input
90
English - 4

DVI IN(HDMI2) [R-AUDIO-L]
DVI audio outputs for external devices.
-
➣
Supported modes for HDMI/DVI and Component
HDMI/DVI 50Hz X X X O O O O
HDMI/DVI 60Hz X O X X O O O
Component O O O O O O O
480i 480p 576i 576p 720p 1080i 1080p
4 ANT IN
To view television channels correctly, a signal must be received by the set from one of the following
sources:
An outdoor aerial / A cable television network / A satellite network
-
5 SER
VICE
Connect this to the jack on the optional wall mount bracket. This will allow you to adjust the TV viewing
angle using your remote control.
6 WISELIN
-
7 S-VIDEO or VIDEO / R-AUDIO-L
-
K
Connect a USB mass storage device to view movies and photos and listen to music les.
Connect RCA or S-VIDEO cable to an appropriate external A/V device such as VCR, DVD or
Camcorder.
Connect RCA audio cables to [R-AUDIO-L] on your set and the other ends to corresponding audio out
-
connectors on the A/V device.
8
HEADPHONES JACK
Headphone may be connected to the headphone output on your set. While the head phone is
-
connected, the sound from the built-in speakers will be disabled.
9 AUDIO OU
Connect RCA audio cables to AUDIO OUT [R-AUDIO-L] on the rear of your set and the other ends to
-
T [R-AUDIO-L]
corresponding audio in connectors on the Amplier or DVD Home Theatre.
0 COMPONEN
Connect component video cables (optional) to component connector ("P
-
T IN 1,2
R", "PB", "Y") on the rear of your
set and the other ends to corresponding component video out connectors on the DVD.
If you wish to connect both the Set-Top Box and DVD, you should connect the Set-Top Box to the DVD
-
and connect the DVD to component connector ("P
The P
R, PB and Y connectors on your component devices (DVD) are sometimes labeled Y, B-Y and R-Y
-
R", "PB", "Y") on your set.
or Y, Cb and Cr.
Connect RCA audio cables (optional) to [R - AUDIO - L] on the rear of your set and the other ends to
-
corresponding audio out connectors on the DVD.
! LAN
Connect a LAN cable to this port to connect to the Network.
-
@
Kensington Lock (depending on the model)
The Kensington Lock (optional) is a device used to physically x the system when used in a public
-
place.
If you want to use a locking device, contact the dealer where you purchased the TV.
-
The location of the kensington lock may be different depending on its model.
-
English - 5
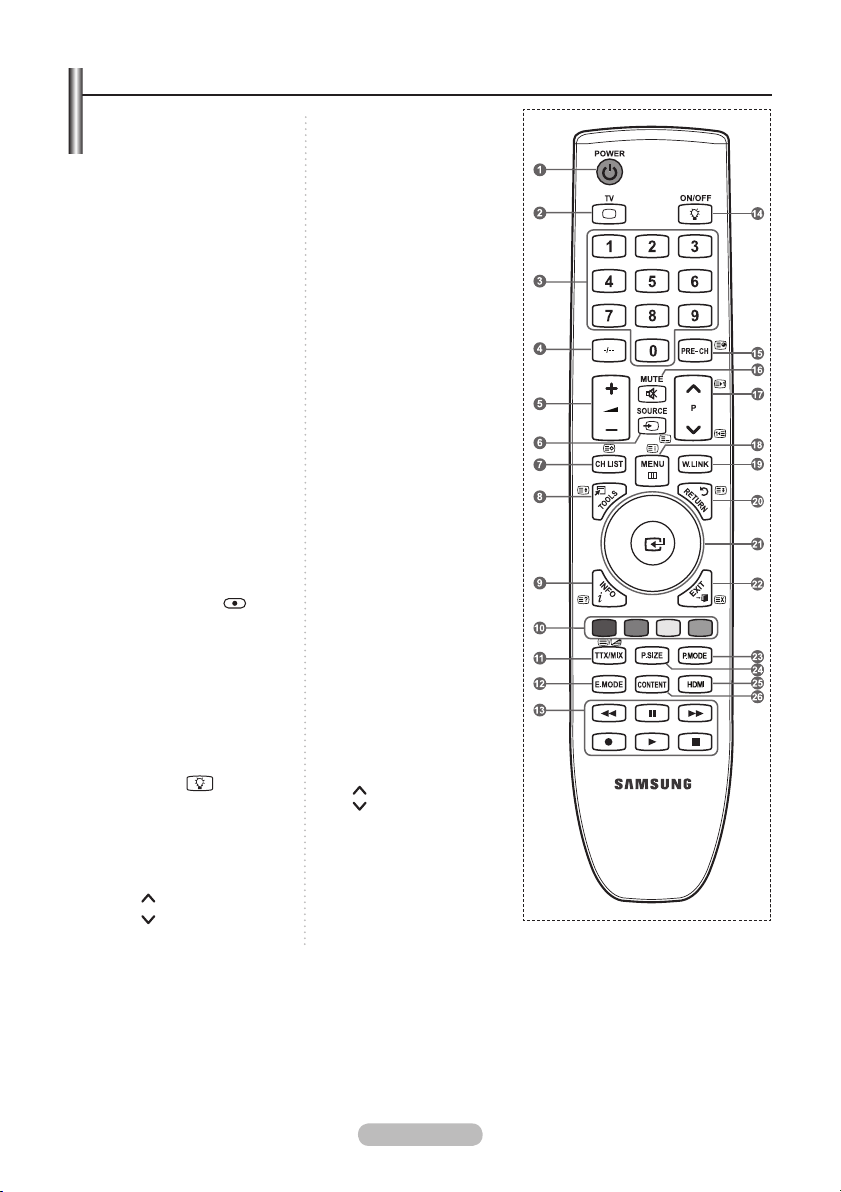
Viewing the Remote Control
1 Television Standby button
2
Selects the TV mode
directly
3
Number buttons for direct
channel access
4
One/Two-digit channel
selection
5
+ : Volume increase
– : Volume decrease
6
Available source selection
7
It display "Channel List"
on the screen.
8
Use to quickly select
frequently used functions.
9
Use to see information on
the current broadcast
0
Colour buttons :
Use these buttons in
the Channel list and
WISELINK, etc.
@
Press to select the optional
display and sound modes
for sports, cinema and
games.
#
Use these buttons in
the DMA, WISELINK
and Anynet+. ( : This
remote can be used
to control recording on
Samsung recorders with
the Anynet+ feature)
$ Press to backlight the
buttons on the remote.
This function is convenient
for using at night or when
the room is dark. (Using
the remote control with the
ON/OFF
set to On will reduce the
battery usage time.)
% Previous channel
^
Temporary sound switch-
off
&
P : Next channel
P : Previous channel
light button
*
Displays the main on-
screen menu
(
This function enables you
to view and play photo
and music files from an
external device.
)
Returns to the previous
menu
a
Control the cursor in the
menu.
Use wheel button
in the Content Library,
WISELINK Pro, and
Product Guide menus.
b
Exit the on-screen menu
c
Picture effect selection
d
Picture size selection
e
Selects the HDMI mode
directly.
f
This function enables you
to view “Content Library”.
Teletext Functions
Exit from the teletext
2
display
6 Teletext mode selection
(LIST/FLOF)
7 Teletext store
8 Teletext size selection
9 Teletext reveal
0 Fastext topic selection
! Alternately
Double, or Mix.
% Teletext sub page
& P
: Teletext next page
P :
* Teletext index
) Teletext hold
b Teletext cancel
Teletext previous
page
select
Teletext,
The performance of the remote control may be affected by bright light.
➣
English - 6
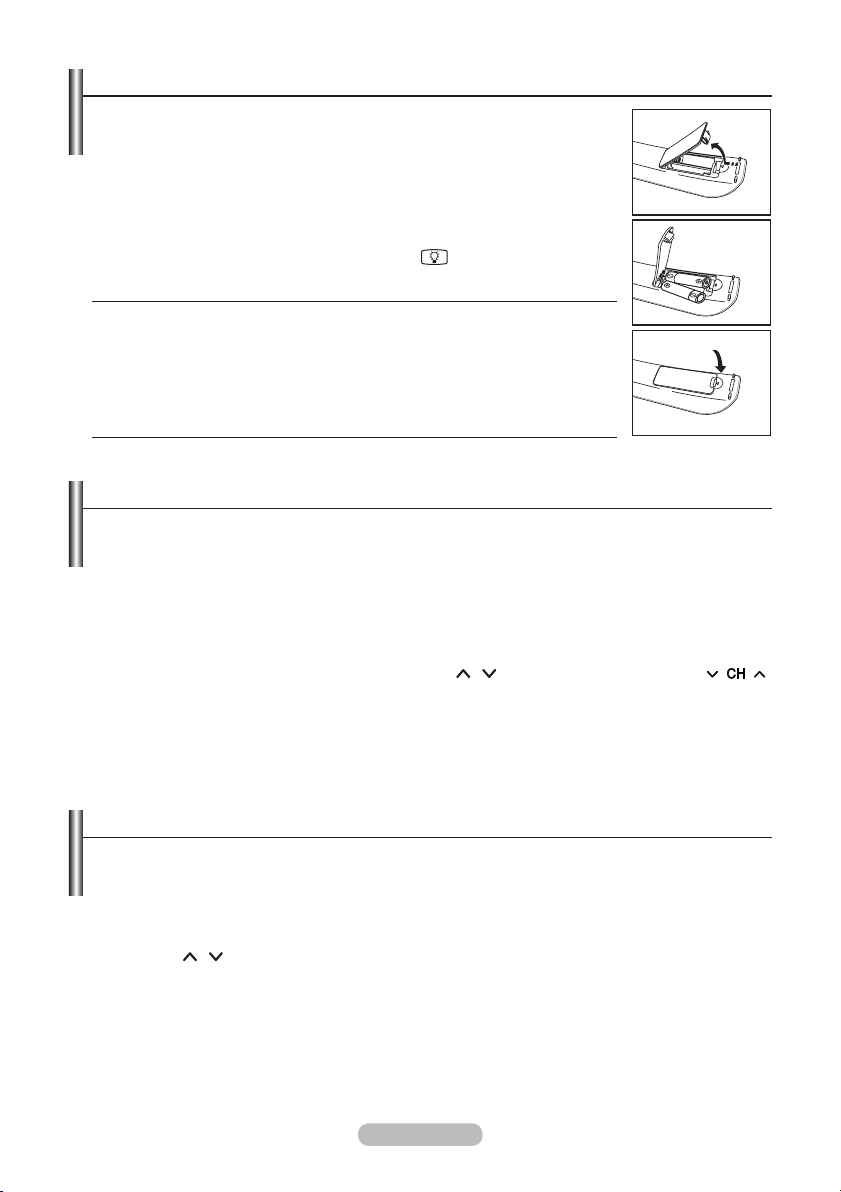
Installing Batteries in the Remote Control
1. Lift the cover at the back of the remote control upward as shown in the gure.
2. Install two AAA size batteries.
Make sure to match the "+" and "–" ends of the batteries with the
➣
diagram inside the compartment.
3
. Replace the cover.
Remove the batteries and store them in a cool, dry place if you won’t be
➣
using the remote control for a long time.
Using the remote control with the ON/OFF
➣
reduce the battery usage time.
➣
If the remote control doesn’t work, check the following:
1. Is the TV power on?
2. Are the plus and minus ends of the batteries reversed?
3. Are the batteries drained?
4. Is there a power outage, or is the power cord unplugged?
5. Is there a special uorescent light or neon sign nearby?
light button set to On will
Switching On and Off
The mains lead is attached to the rear of your set.
1. Plug the mains lead into an appropriate socket.
➣
The standby indicator lights up
2. Press the P button
You also can press the POWERP button or the TV button on the remote control to turn the TV
➣
on.
The programme that you were watching last is reselected automatically.
➣
3
. Press the numeric button (0~9) or channel up/down (
button
on your set.
When you switch the set on for the very rst time, you will be asked to choose language in which the
➣
menus are to be displayed.
4. To switch your set off, press the POWERP button again.
on your set.
on your set.
/ ) button on the remote control or
Placing Your Television in Standby Mode
Your set can be placed in standby mode in order to reduce the power consumption. The standby
mode can be useful when you wish to interrupt viewing temporarily (during a meal, for example).
1. Press the POWERP button on the remote control.
➣
The screen is turned off and a red standby indicator appears on your set.
. To switch your set back on, simply press the POWERP, numeric buttons (0~9), T
2
up/down ( / ) button again.
Do not leave your set in standby mode for long periods of time (when you are away on holiday, for
➣
example).
It is best to unplug the set from the mains and aerial.
English - 7
V button or channel
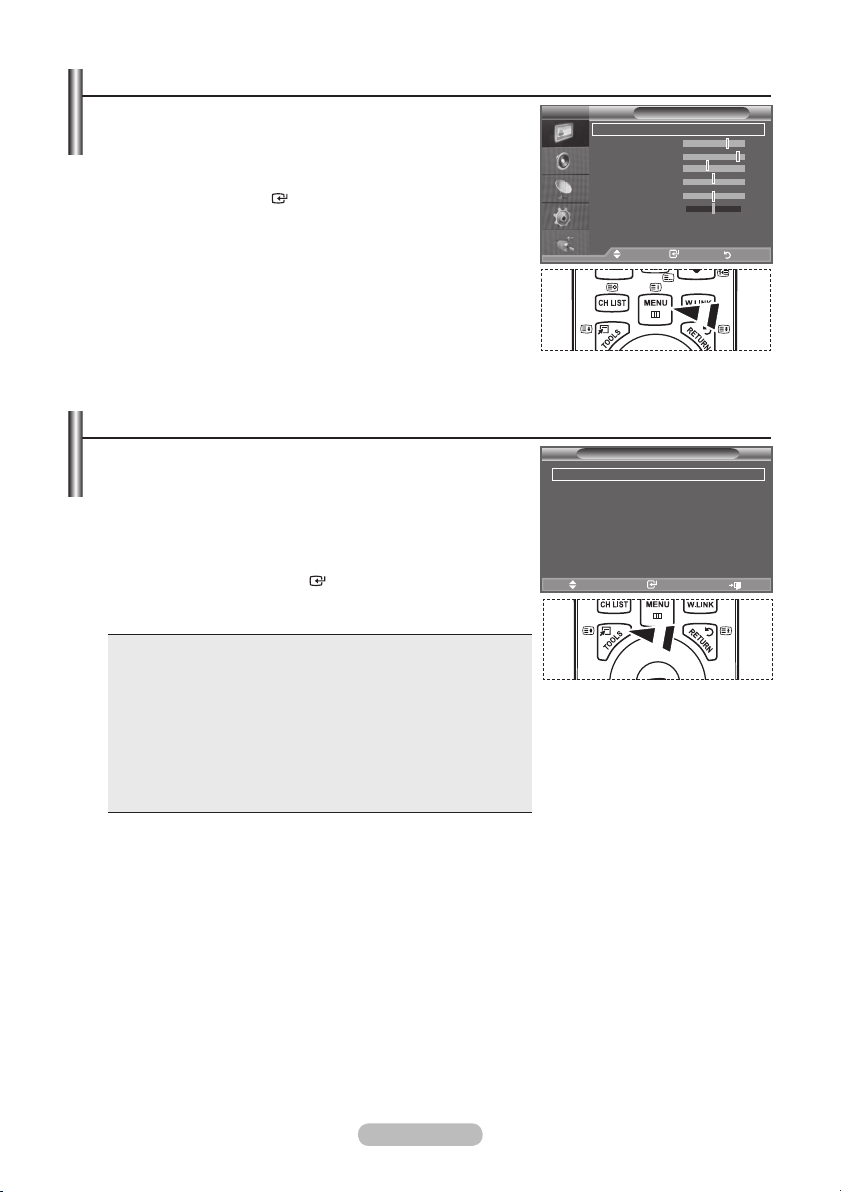
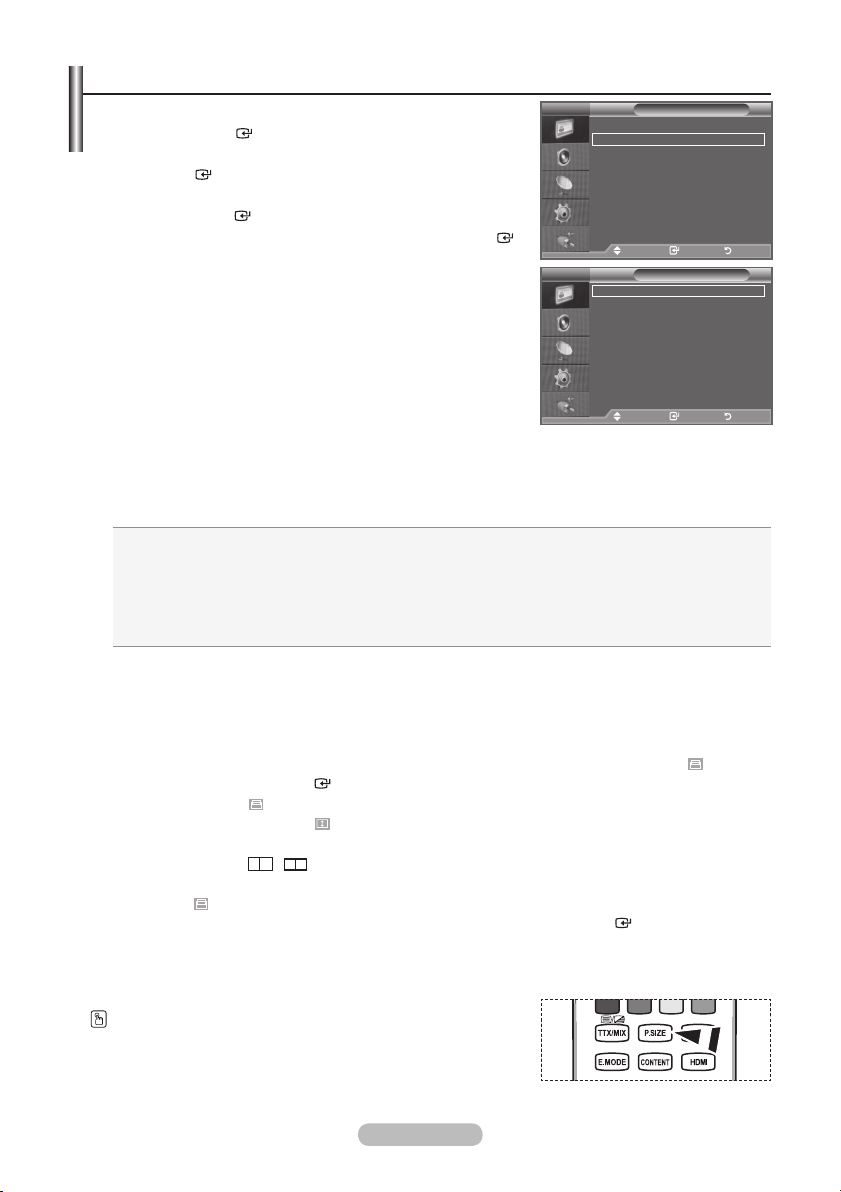
Viewing the Menus
1. With the power on, press the MENU button.
The main menu appears on the screen. The menu’ s left side has
icons: Picture, Sound, Channel, Setup, Input.
2
. Press the ▲ or ▼ button to select one of the icons.
Then press the
ENTER
button to access the icon’s sub-menu.
3. Press the EXIT button to exit.
The on-screen menus disappear from the screen after about
➣
one minute.
Using the TOOLS Button
You can use the TOOLS button to select your frequently
used functions quickly and easily. The “Tools” menu change
depending on which external input mode you are viewing.
1. Press the TOOLS button.
The “Tools” menu will appear.
. Press the ▲ or ▼ button to select a menu.
2
3. Press the ▲/▼/◄/►/
use the selected items. For a more detailed description of each
function, refer to the corresponding page.
Anynet+ (HDMI-CEC), see page 62
♦
Picture Mode, see page 15
♦
Sound Mode, see page 21
♦
Sleep Timer, see page 23
♦
SRS TS XT, see page 21
♦
Energy Saving, see page 26
♦
Dual l-ll, see page 22
♦
PIP, see page 20
♦
Auto Adjustment, see page 34
♦
ENTER
buttons to display, change, or
TV
Mode : Standard
acklight 7
B
Contrast 95
Brightness 40
Sharpness 50
Colour
Tint G50 R50
Detailed Settings
sMore
Move Enter Return
Anynet+ (HDMI-CEC)
Picture Mode : Standard
Sound Mode : Custom
Sleep Timer : Off
SRS TS XT : Off
Energy Saving : Off
Dual l-ll : Mono
Move Enter Exit
Picture
50
Tools
English - 8
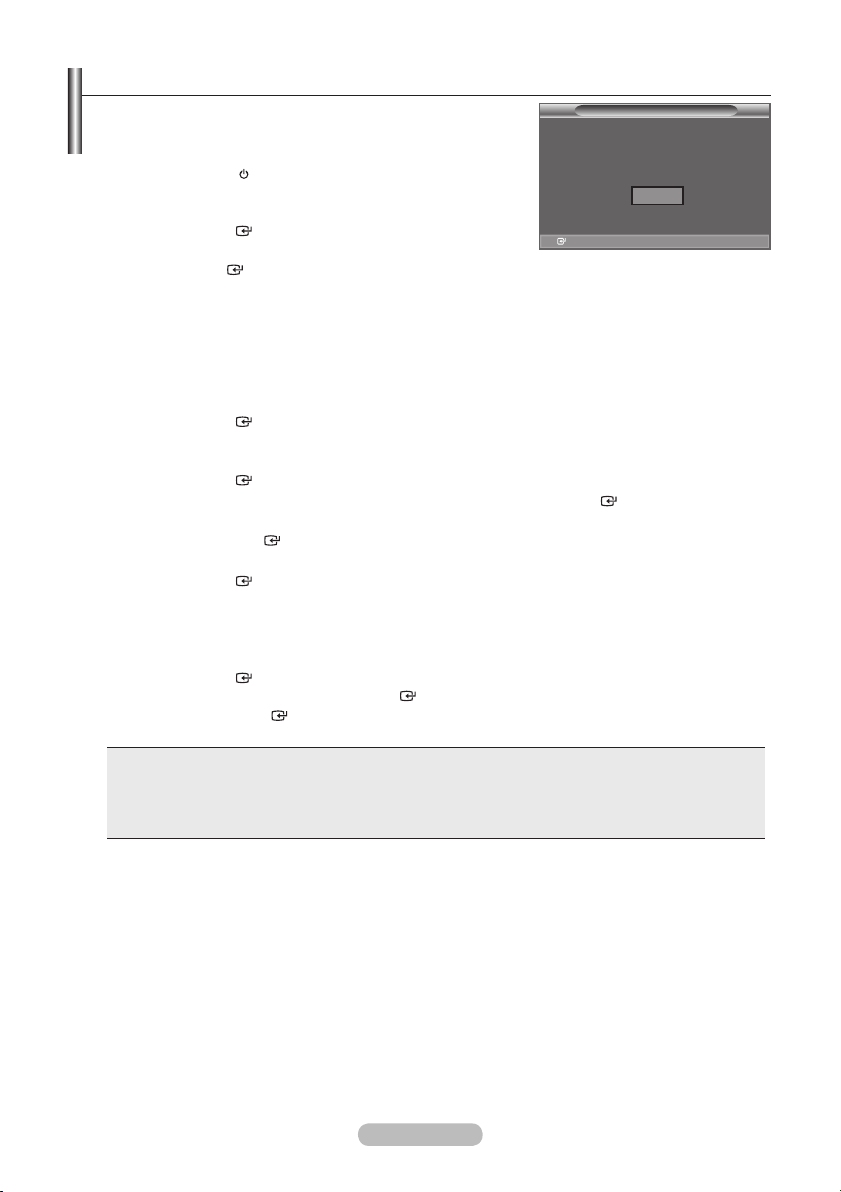
Plug & Play
When the TV is initially powered on, several basic settings
proceed automatically and subsequently. The following
settings are available.
1. Press the POWER
The message "Start Plug & Play" is displayed with "OK" selected.
2. Select the appropriate language by pressing the
Press the
3. Press the
then the
➣
➣
➣
4
. The message "Check antenna input." is displayed with "OK" selected.
Press the
➣
5
. Select the appropriate area by pressing the
Press the
6.
The "Auto Store" menu is displayed with the "Start" selected. Press the
➣
➣
➣
7
. Press the
Select the "Month", "Day" , "Year", "Hour", "Minute", or "am/pm" by pressing the ◄ or ► button.
Set the "Month", "Day" , "Year", "Hour", "Minute", or "am/pm" by pressing the ▲ or ▼ button.
➣
8
. Press the
When you have nished, press the
➣
♦
♦
♦
♦
ENTER
◄
ENTER
We recommend setting the TV to "Home Use" mode for the best picture in your home
environment.
"Store Demo" mode is only intended for use in retail environments.
If the unit is accidentally set to “Store Demo” mode and you want to return to “Home Use”
(Standard): Press the Volume button on the TV. When the volume OSD is displayed, press and
hold the MENU button on the TV for 5 seconds.
ENTER
Please check that the antenna cable is connected correctly.
ENTER
The channel search will start and end automatically.
Press the
After all the available channels are stored, the "Clock Set" menu appears.
ENTER
You can also set the “Month”, “Day”, “Year”, “Hour” and "Minute" by pressing the number buttons
on the remote control.
ENTER
Even if the
several seconds.
Language: Select your language.
Area: Select your area.
Auto Store: Automatically scans for and stores channels available in the local area.
Clock Set: Sets the current time for the TV clock.
button on the remote control.
▲
▲
or ▼ button.
button.
or ▼ button.
ENTER
button to conrm your choice.
or ► button to select “Store Demo” or “Home Use”,
button.
button.
button to conrm your choice.
ENTER
ENTER
button at any time to interrupt the memorization process.
button.
button to conrm your setting. The message “Enjoy your viewing” is displayed.
ENTER
button is not pressed, the message will automatically disappear after
Plug & Play
Start Plug & Play.
OK
Enter
button.
English - 9
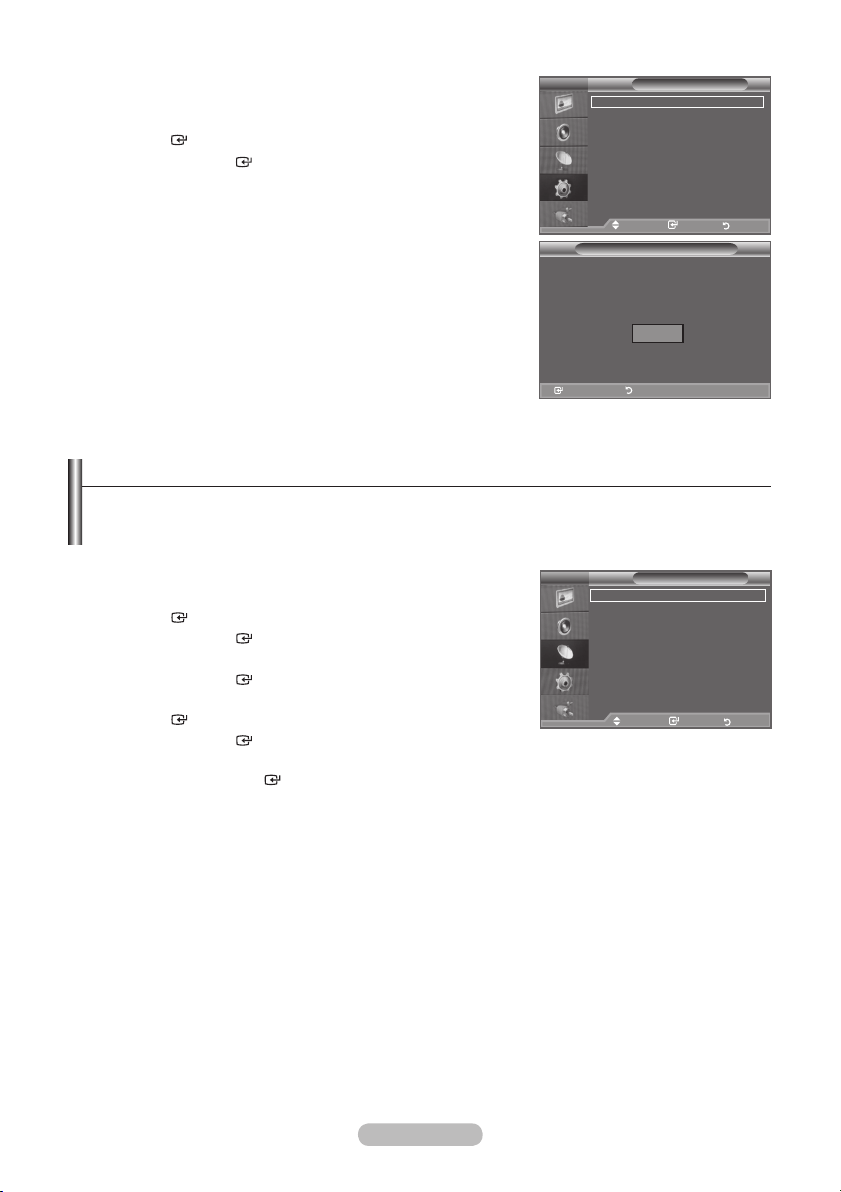
If you want to reset this feature...
1. Press the MENU button to display the menu.
Press the ▲ or ▼ button to select "Setup", then press the
ENTER
2. Press the
button.
ENTER
button again, to select "Plug & Play".
For further details on setting up options, refer to the page 9.
The “Plug & Play” feature is only available in the TV mode.
➣
TV
Plug & Play
Language
Time
Cable Network Setup
Auto Wall-Mount
Melody : Off
Entertainment
Energy Saving
PIP
Move Enter Return
Start Plug & Play.
Return
Enter
Setup
: English
Plug & Play
Enter Return
: Off
: Off
OK
Storing Channels Automatically
You can scan for the frequency ranges available to you (and availability depends on your area).
Automatically allocated programme numbers may not correspond to actual or desired programme
numbers. However, you can sort numbers manually and clear any channels you do not wish to
watch.
1. Press the MENU button to display the menu.
Press the ▲ or ▼ button to select "Channel", then press the
ENTER
2. Press the
button.
ENTER
button to select "Area".
3. Select the appropriate area by pressing the ▲ or ▼ button.
Press the
ENTER
button to conrm your choice.
TV
Area :
Auto Store
Manual Store
Channel Manager
Sort
Name
Fine Tune
4. Press the ▲ or ▼ button to select "Auto Store", then press the
ENTER
5. Press the
➣
➣
button.
ENTER
button.
The TV will begin memorizing all of the available channels.
Press the
ENTER
button at any time to interrupt the memorization process and return to the
Move Enter Return
"Channel" menu.
6. After all the available channels are stored, the "Sort" menu appears. (refer to page 13)
Channel
Asia/W.Europe
English - 10
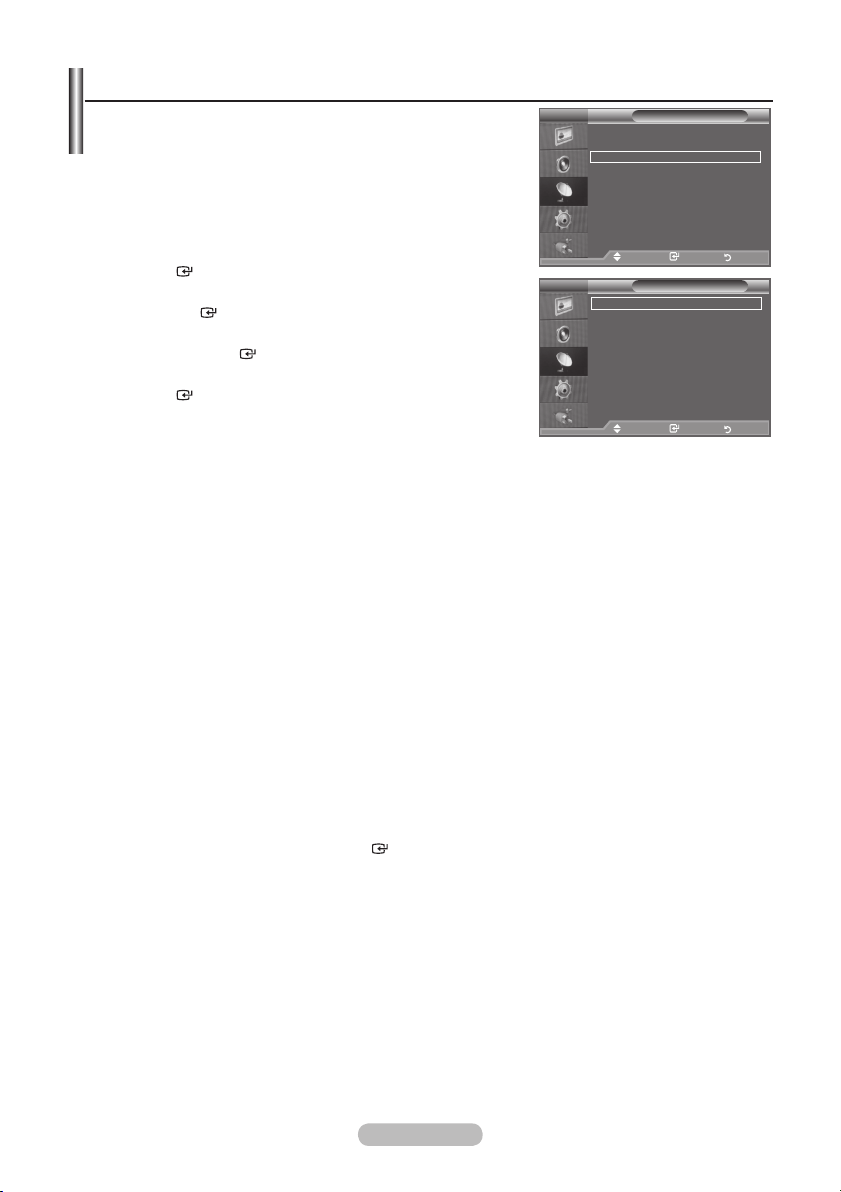
Storing Channels Manually
You can store television channels, including those received via
cable networks.
When storing channels manually, you can choose:
♦
Whether or not to store each of the channels found.
♦ The programme number of each stored channel which you wish
to identify.
1.
Press the MENU button to display the menu.
Press the ▲ or ▼ button to select "Channel", then press the
ENTER
button.
2. Press the ▲ or ▼ button to select "Manual Store", then press
the
ENTER
button.
3. Select the required option by pressing the ▲ or ▼ button, then
press the
ENTER
button.
TV
Area :
Auto Store
Manual Store
Channel Manager
Sort
Name
Fine Tune
Move Enter Return
Move Enter Return
TV
Programme : P 2
Colour System : Auto
Sound System
Channel : C 3
Search : 77 MHz
Store : ?
4. When you are satised with your setting, press the
ENTER
5. Press the EXIT button to exit.
♦
Programme (Programme number to be assigned to a channel)
-
➣
♦
Colour System:
-
♦
Sound System:
-
♦
Channel (When you know the number of the channel to be stored)
-
-
➣
➣
Search (When you do not know the channel numbers)
♦
-
-
button.
Move Enter Return
Press the ▲ or ▼ button until you nd the correct number.
You can also select the channel number directly by pressing the numeric buttons (0~9).
Auto/PAL/SECAM/NTSC4.43/NTSC3.58
Press the ▲ or ▼ button to select the required colour standard.
BG/DK/I/M
Press the ▲ or ▼ button to select the required sound standard.
Press the ▲ or ▼ button to select C (Air channel) or S (Cable channel).
Press the ► button, then press the ▲ or ▼ button to select the required number.
You can also select the channel number directly by pressing the numeric buttons (0~9).
If there is abnormal sound or no sound, re-select the sound standard required.
Press the ▲ or ▼ button to start the search.
The tuner scans the frequency range until the rst channel or the channel that you selected is
received on the screen.
Store (When you store the channel and associated programme number)
♦
Set to "OK" by pressing the
-
➣
Channel mode
-
P (Programme mode): When completing tuning, the broadcasting stations in your area have been
ENTER
button.
assigned to position numbers from P00 to P99. You can select a channel by entering the position
number in this mode.
-
C (Air channel mode): You can select a channel by entering the assigned number to each air
broadcasting station in this mode.
-
S (Cable channel mode): You can select a channel by entering the assigned number for each cable
channel in this mode.
Channel
Asia/W.Europe
Manual Store
: BG
English - 11
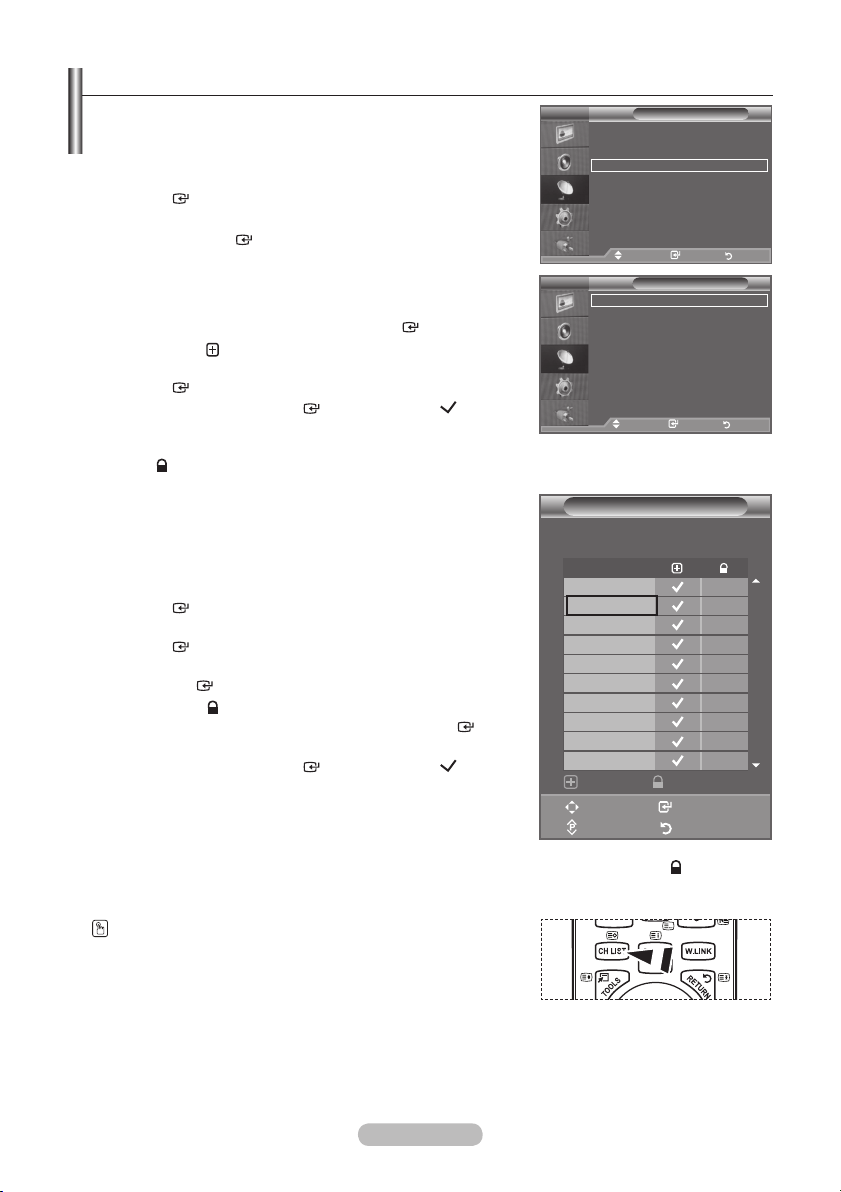
Adding / Locking Channels
Using the Channel Manager, you can conveniently lock or add
channels.
1. Press the MENU button to display the menu.
Press the ▲ or ▼ button to select "Channel", then press the
ENTER
2. Press the ▲ or ▼ button to select "Channel Manager", then
press the
♦ Adding channels
Using
3. Select Channel List by pressing the
4. Move to the (
button, select a channel to be added, and press the
ENTER
➣
➣
button.
ENTER
button.
the Channel List, you can add channels.
ENTER
button.
) eld by pressing the ▲, ▼, ◄ or ►
button to add the channel.
If you press the
ENTER
button again, the ( ) symbol
next to the channel disappears and the channel is not
added.
“
” is active when "Child Lock" is selected to "On".
TV
Area :
Auto Store
Manual Store
Channel Manager
Sort
Name
Fine Tune
Move Enter Return
TV
Channel List
Child Lock
Move Enter Return
Channel
Channel Manager
: Off
Asia/W.Europe
♦ Locking channels
This feature allows you to prevent unauthorized users, such as
children, from watching unsuitable programmes by muting out
video and audio.
5. Press the ▲ or ▼ button to select "Child Lock", then press the
ENTER
button.
6. Select "On" by pressing the ▲ or ▼ button, then press the
ENTER
button.
7. Press the ▲ or ▼ button to select "Channel List", then press
the
ENTER
8. Move to the (
select a channel to be locked, and press the
button.
) eld by pressing the ▲, ▼, ◄ or ► button,
ENTER
button.
➣
If you press the
ENTER
button again, the ( ) symbol
next to the channel disappears and the channel lock is
cancelled.
➣
A blue screen is displayed when "Child Lock" is activated.
9. Press the EXI
➣
Select "On" or "Off" in "Child Lock" to easily turn the channels which selected on "
T button to exit.
or inactive.
You can select these options by simply pressing the CH LIST
button on the remote control.
Channel List
P 1 C3
Prog.
0 C--
1 C
3
2 BBC 1
3 C74
4 C75
5 C76
6 S3
7 S4
8 S6
9 S7
Add Lock
Enter
Move
Page Return
1 / 10
" to be active
English - 12
Sorting the Stored Channels
This operation allows you to change the programme numbers
of the stored channels.
This operation may be necessary after using the auto store.
1. Press the MENU button to display the menu.
Press the ▲ or ▼ button to select "Channel", then press the
ENTER
button.
2. Press the ▲ or ▼ button to select "Sort", then press the
ENTER
button.
3. Select the channel number that you wish to change by
pressing the ▲ or ▼ button.
Press the
➣
ENTER
button.
The selected channel number and name are moved to right
side.
4
. Select the number of the programme to which the channel is to
be moved by pressing the ▲ or ▼ button.
5
. Press the
ENTER
button. The channel is moved to its new
position and all other channels are shifted accordingly.
6. Repeat steps 3 to 5 for another channel to be sorted.
7
. Press the EXIT button to exit.
TV
Area :
Auto Store
Manual Store
Channel Manager
Sort
Name
Tune
Fine
Move Enter Return
TV
Prog. Ch. Name
C--
0
1 C23
2 C1
3 C3
4 S1
s
Move Enter Return
Assigning Channels Names
Channel names will be assigned automatically when channel
information is broadcast. These names can be changed,
allowing you to assign new names.
1. Press the MENU button to display the menu.
Press the ▲ or ▼ button to select "Channel", then press the
ENTER
button.
2. Press the ▲ or ▼ button to select "Name", then press the
ENTER
button.
3. If necessary, select the channel to be assigned to a new
name by pressing the ▲ or ▼ button. Press the
ENTER
button
The selection bar is displayed around the name box.
➣
4
.
To... Then...
Select a letter, number or symbol Press the ▲ or ▼ button
Move on the next letter Press the ► button
Move back the previous letter Press the ◄ button
Conrm the name
➣
The following characters are available: Letters of the alphabet (A~Z) / Numbers (0~9) / Special
Press the
ENTER
button
characters (+, -, *, /, space)
. Repeat steps 3 to 4 for each channel to be assigned to a new name.
5
6
. Press the EXIT button to exit.
TV
Area :
Auto Store
Manual Store
Channel Manager
Sort
Name
Fine Tune
Move Enter Return
V
T
Prog. Ch. Name
C-- -----
0
1 C23 ----2 C16 ----3 C3 ----4 S1 ---- s
Move Enter Return
Channel
Asia/W.Europe
Sort
6
Channel
Asia/W.Europe
Name
English - 13
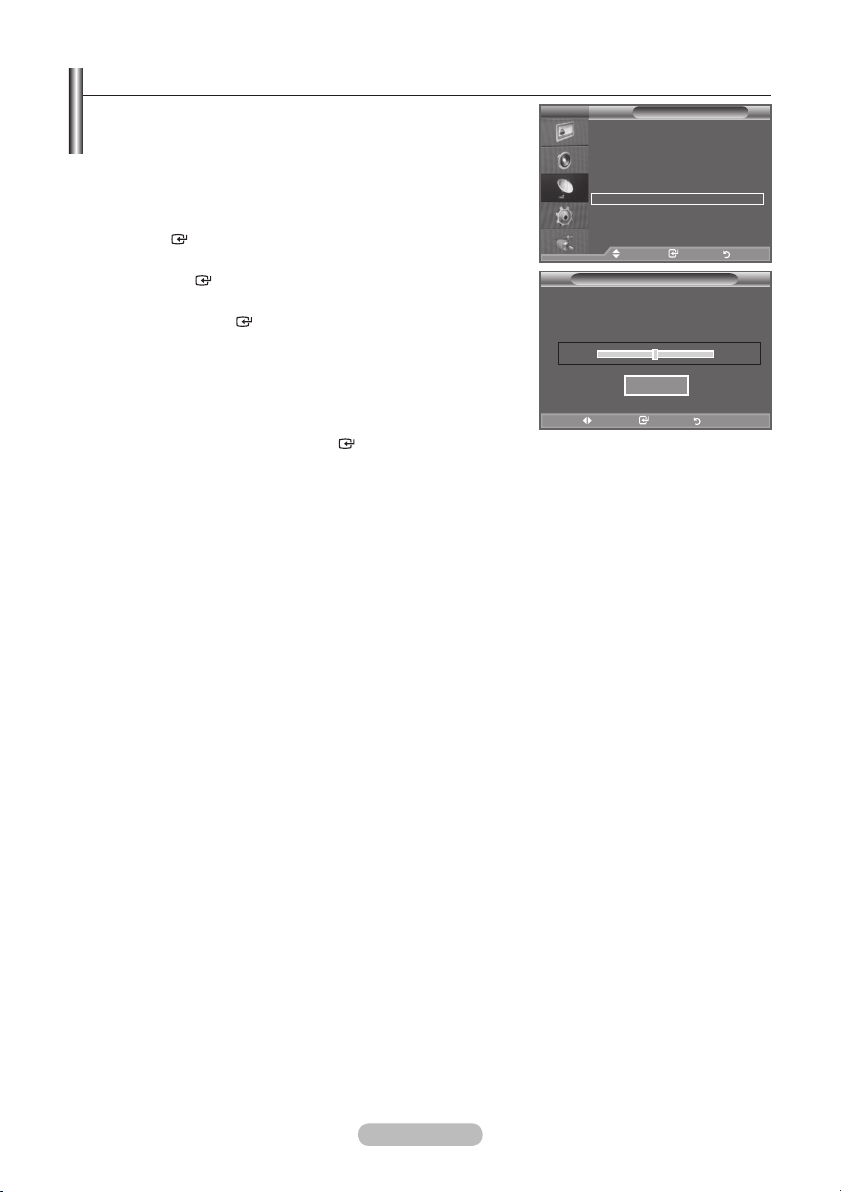
Fine Tuning Channel Reception
Use fine tuning to manually adjust a particular channel for
optimal reception.
1. Use the number buttons to directly select the channel that
you want to ne tune.
2. Press the MENU button to display the menu.
Press the ▲ or ▼ button to select "Channel", then press the
ENTER
3. Press the ▲ or ▼ button to select "Fine
the
ENTER
button.
Tune", then press
button.
4. Press the ◄ or ► button to adjust the ne tuning.
Press the
ENTER
button.
5. Press the EXIT button to exit.
Fine tuned channels that have been saved are marked with
➣
an asterisk "*" on the right-hand side of the channel number
in the channel banner. And the channel number turns red.
➣
To reset the ne-tuning, select "Reset" by pressing the ▲ or ▼
button and then press the
ENTER
button.
TV
Area :
Auto Store
Manual Store
Channel Manager
Sort
Name
Fine
Move Enter Return
P 1
Adjust Save Return
Channel
Asia/W.Europe
Tune
Fine Tune
Reset
0
English - 14
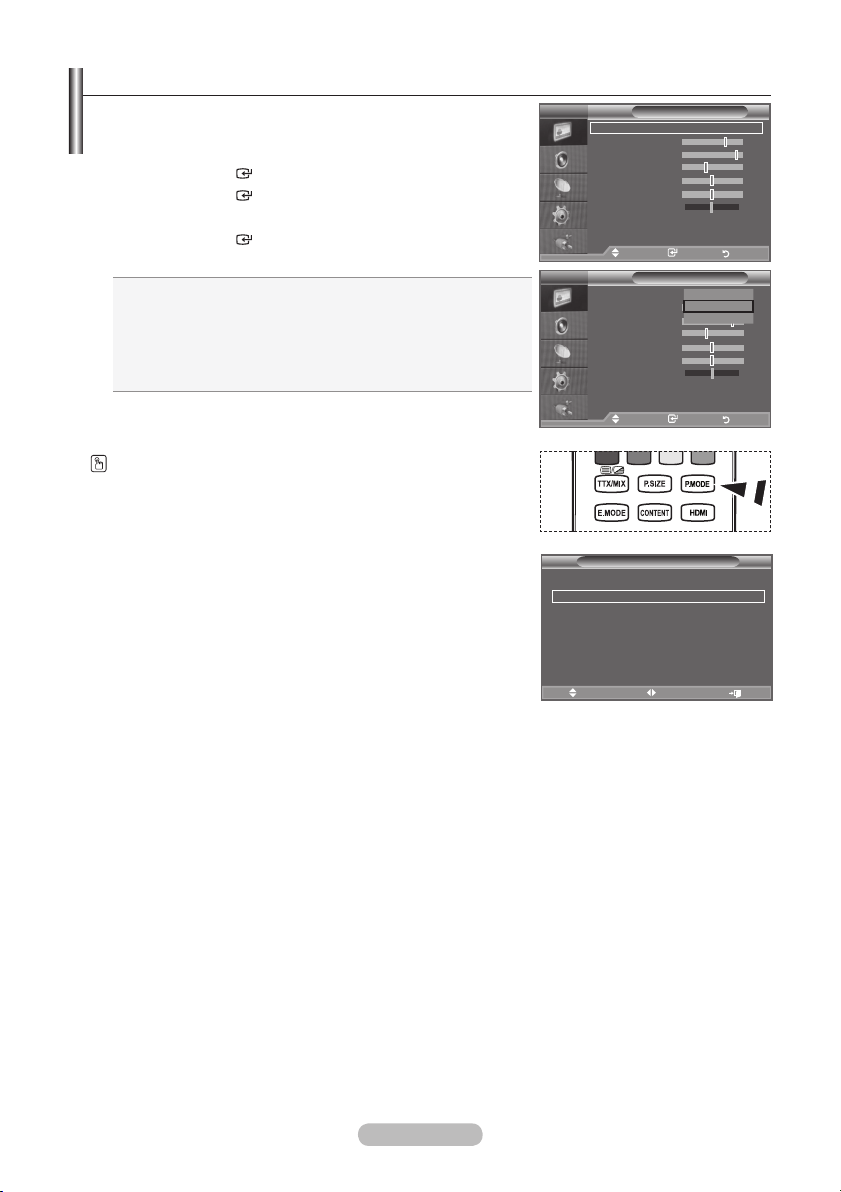
Changing the Picture Standard
You can select the type of picture which best corresponds to
your viewing requirements.
1. Press the MENU button to display the menu.
Press the
2. Press the
3. Press the ▲ or ▼ button to select the desired picture effect.
Press the
4. Press the EXIT button to exit.
♦
♦
♦
The Picture mode must be adjusted separately for each input
➣
source.
You can also press the P.MODE button on the remote control to
select one of the picture settings.
ENTER
ENTER
ENTER
button, to select "Picture".
button again, to select "Mode".
button.
Dynamic: Selects the picture for high-definition in a bright
room.
Standard: Selects the picture for optimum display in a
normal environment.
Movie: Selects the picture for comfortable display in a dark
room.
TV
Mode : Standard
acklight 7
B
Contrast 95
Brightness 40
Sharpness 50
Colour
Tint G50 R50
Detailed Settings
sMore
Move Enter Return
V
T
Mode :
Backlight 7
Contrast
Brightness 40
Sharpness 50
Colour
Tint G50 R50
Detailed Settings
sMore
Move Enter Return
Picture
50
Picture
95
50
Dynamic
Standard
Standard
Movie
Easy Setting
1. Press
the TOOLS button on the remote control.
2. Press the ▲ or ▼ button to select “Picture Mode”.
3. Press the ◄ or ► button to select the desired picture mode.
4. Press the EXIT or TOOLS button to exit.
Anynet+ (HDMI-CEC)
Picture Mode ◄ Standard ►
Sound Mode
Sleep Timer : Off
SRS TS XT : Off
Energy Saving : Off
Dual l-ll : Mono
Move Adjust Exit
Tools
: Custom
English - 15
Adjusting the Custom Picture
Your set has several settings which allow you to control picture
quality.
1. T
o select the desired picture effect, follow the
"Changing the Picture Standard" instructions number 1 to 3.
2. Press the ▲ or ▼ button to select a particular item. Press the
ENTER
button.
3. Press the ◄ or ► button to decrease or increase the value of a
particular item. Press the
ENTER
button.
4. Press the EXIT button to exit.
Backlight: Adjusts the screen brightness by adjusting the LCD
♦
backlight brightness. (0~10)
Contrast: Adjusts the lightness and darkness between objects
♦
and the background.
rightness: Adjusts the brightness of the whole screen.
B
♦
Sharpness: Adjusts the outline of objects to either sharpen them
♦
or make them more dull.
Colour: Adjusts the colours, making them lighter or darker.
♦
Tint: Adjusts the colour of objects, making them more red or
♦
green for a more natural look.
The adjusted values are stored according to the selected Picture mode.
➣
In PC mode, you can only make changes to "Backlight”, “Contrast" and “Brightness”.
➣
TV, AV1, AV2, S-Video modes of the PAL system, you cannot use the "Tint" Function.
➣
You can return to the factory defaults picture settings by selecting the "Reset".
➣
(Refer to "Resetting the Picture Settings to the Factory Defaults" on page 19)
The energy consumed during use can be signicantly reduced if the level of brightness of the picture
➣
is reduced, and then this will reduce the overall running cost.
TV
Mode : Standard
acklight 7
B
Contrast 95
Brightness 40
Sharpness 50
Colour
Tint G50 R50
Detailed Settings
sMore
Move Enter Return
▲
Backlight
▼
Move Adjust Return
Picture
50
7
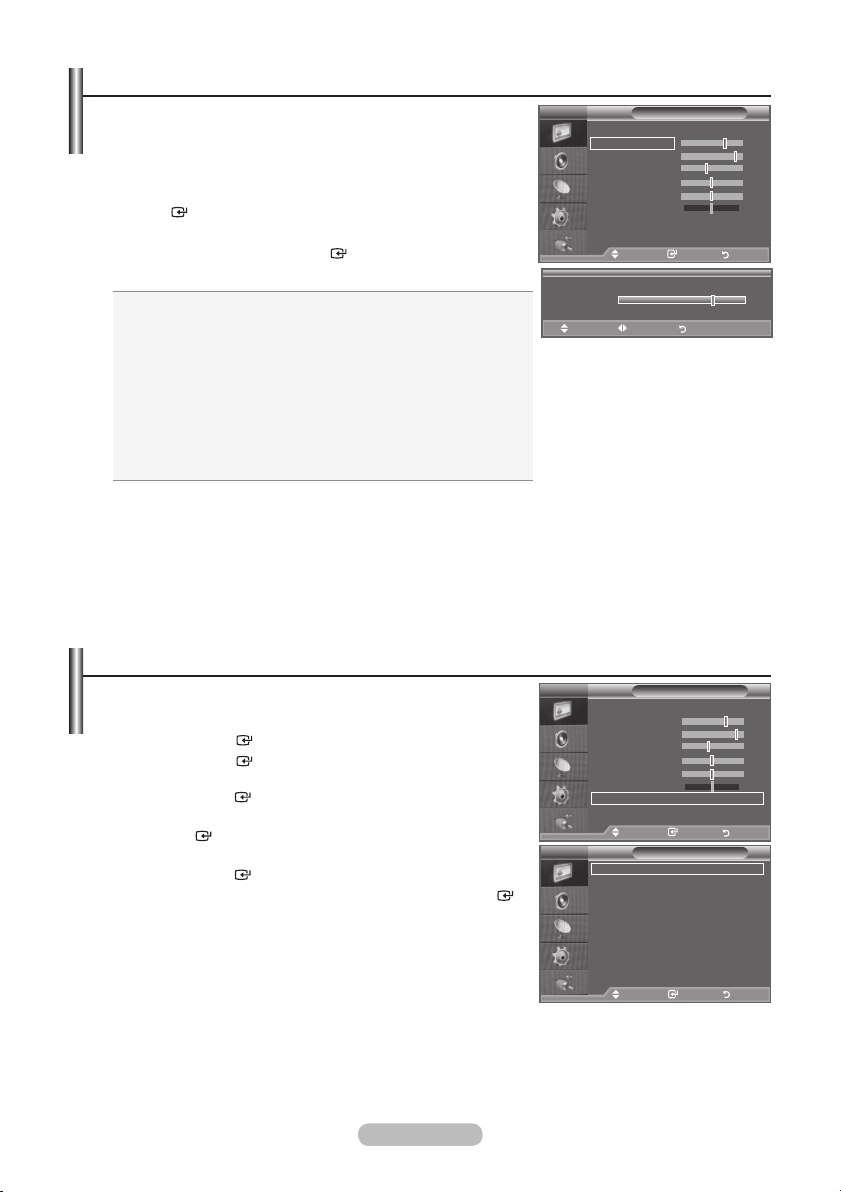
Conguring Detailed Settings on the Picture
You can set detailed picture settings.
1. Press the MENU button to display the menu.
Press the
2. Press the
ENTER
ENTER
button, to select "Picture".
button to select “Mode”.
Press the ▲ or ▼ button to select “Standard” or “Movie”, then
press the
ENTER
button.
3. Press the ▲ or ▼ button to select "Detailed Settings", then press
the
ENTER
button.
4. Select the required option by pressing the ▲ or ▼ button, then
press the
5. When you are satised with your setting, press the
ENTER
button.
ENTER
button.
6. Press the EXI
"Detailed Settings" is available in "Standard" or "Movie" mode.
➣
➣
In PC mode, you can only make changes to “Dynamic Contrast”,
T button to exit.
“Gamma” and “White Balance” from among the “Detailed
Settings” items.
♦
B
lack Adjust: Off/Low/Medium/High
You can directly select the black level on the screen to adjust the screen depth.
♦
Dynamic Contrast: Off/Low/Medium/
High
You can adjust the screen contrast so that the optimal contrast is provided.
English - 16
TV
Mode : Standard
acklight 7
B
Contrast 95
Brightness 40
Sharpness 50
Colour
Tint G50 R50
Detailed Settings
sMore
Move Enter Return
TV
Black Adjust : Off
Dynamic Contrast
Gamma : 0
Colour Space : Native
White Balance
Flesh
Edge Enhancement
xvYCC
Move Enter Return
Picture
50
Detailed Settings
: Medium
Tone : 0
: Off
: Off

Gamma: -3 ~ +3
♦
You can adjust the Primary Colour (Red, Green, Blue) Intensity.
Press the ◄ or ► button until you reach the optimal setting.
Colour Space: Auto/Native/Custom
♦
Colour space is a Colour matrix composed of “Red”, “Green” and “Blue” Colours.
Select your favourite Colour space to experience the most natural Colour.
♦ Auto: Auto Colour Space automatically adjusts to the most natural colour tone based on
programme sources.
♦ Native: Native Colour Space offers deep and rich colour tone.
♦ Custom: Adjusts the colour range to suit your preference.
Customizing the Colour Space
➣
Colour:
Red/Green/Blue/Yellow/Cyan/Magenta
Adjusts the Colour range to suit your preference.
“Colour” is available when “Colour Space” is set to “Custom”.
Press the ▲ or ▼ button to select “Red”, “Green”, “Blue”, “Yellow”, “Cyan” or “Magenta”.
Press the EN
Red/Green/Blue: In “Colour”, you can adjust the RGB values for the selected colour.
Press the ▲ or ▼ button to select "Red", "Green" or "Blue" to change it.
Press the EN
Press the ◄ or ► button to decrease or increase the value of a particular item. Press the
EN
TER button.
Reset: Resets the colour space to the default values.
White
♦
♦
♦
♦
Balance: R-Offset/G-Offset/B-Offset/R-Gain/G-Gain/B-Gain/Reset
You can adjust the colour temperature for more natural picture colours.
R-Offset/G-Offset/
adjusted screen.
Select the required option by pressing the ▲ or ▼ button, then press the
Press the ◄ or ► button until you reach the optimal setting.
Reset: The previously adjusted white balance will be reset to the factory defaults.
Flesh
Tone: -15 ~ +15
You can emphasize the pink 'flesh tone' in the picture.
Press the ◄ or ► button until you reach the optimal setting.
Changing the adjustment value will refresh the adjusted screen.
➣
Edge Enhancement: Off/On
You can emphasize object boundaries in the picture.
xvYCC: Off/On
Setting the xvYCC mode to On increases detail and colour space when watching movies from an
external device (ie. DVD player) connected to the HDMI or Component IN jacks. You must set the
Picture Mode to Movie to enjoy this feature.
➣
Only available in "HDMI" and "Component" on "Movie" mode.
If xvYCC function is active, PIP cannot be selected.
➣
TER button.
TER button.
B-Offset/R-Gain/G-Gain/B-Gain: Changing the adjustment value will refresh the
ENTER
button.
English - 17
Conguring Picture Option
1. Press the MENU button to display the menu.
Press the
ENTER
button, to select "Picture".
2. Press the ▲ or ▼ button to select "Picture Options", then press
the
ENTER
button.
TV
More
Picture Options
Reset
3. Select the required option by pressing the ▲ or ▼ button, then
press the
4. When you are satised with your setting, press the
button.
5. Press the EXI
➣
Colour
♦
You can select the most comfortable colour tone to your eyes.
➣
ENTER
button.
ENTER
T button to exit.
In PC mode, you can only make changes to the “Colour
Tone” and “Size” from among the items in “Picture Options”.
Tone: Cool2/Cool1/Normal/Warm1/Warm2
The adjusted values are stored according to the selected
Move Enter Return
TV
Colour Tone : Normal
Size
Digital NR : Auto
DNIe
HDMI Black Level
100Hz Motion Plus
Blue Only Mode
Move Enter Return
"Picture" mode.
When the picture mode is set to Dynamic or Standard, Warm1 and Warm2 cannot be selected.
➣
Size: 1
♦
6:9/Wide Zoom/Zoom/4:3/Just Scan
You can select the picture size which best corresponds to your viewing requirements.
16:9: Adjusts the picture size to 16:9 appropriate for DVDs or wide broadcasting.
♦
Wide Zoom: Magnify the size of the picture more than 4:3.
♦
Zoom: Magnifies the 16:9 wide picture (in the vertical direction) to fit the screen size.
♦
4
♦
:3: This is the default setting for a video movie or normal broadcasting.
♦
Just Scan: Use the function to see the full image without any cutoff when HDMI (720p/1080i/
1080p) or Component (1080i/1080p) signals are input.
In PC Mode, only "16:9" and "4:3" mode can be adjusted.
➣
Settings can be adjusted and stored for each external device you have connected to an input of
➣
the TV.
Temporary image retention may occur when viewing a static image on the set for more than two
➣
hours.
"Wide Zoom": Move the screen up/down using the ▲ or ▼ button after selecting the
➣
pressing the ► or ENTER button.
"Zoom": Select
➣
by pressing the ◄ or ►button. Use the ▲ or ▼ button to move the picture up
and down. After selecting , use the ▲ or ▼ button to magnify or reduce the picture size in the
vertical direction.
When Double (
➣
After selecting “Just Scan” in HDMI (1080i/1080p) or Component (1080i/1080p) mode:
➣
Select
by pressing the ◄ or ►button. Use the ▲, ▼, ◄ or ► button to move the picture.
, ) mode has been set in PIP, the Picture Size cannot be set.
Reset: Press the ◄ or ► button to select “Reset”, then press the ENTER button.
You can initialize the setting.
If you use the “Just Scan” function with HDMI 720p input, 1 line will be cut at the top, bottom, left
➣
and right as in the overscan function.
Picture
: OK
Picture Options
: 16:9
: Off
: Normal
: Off
: Off
by
You can select these options by simply pressing the P.SIZE
button on the remote control.
English - 18
Digital NR: Off/Low/Medium/High/Auto
♦
If the broadcast signal received by your TV is weak, you can activate the Digital Noise Reduction
feature to help reduce any static and ghosting that may appear on the screen.
When the signal is weak, select one of the other options until the best picture is displayed.
➣
DNIe: Off/ Demo/On
♦
This TV includes the DNIe function so as to provide a high visual quality. If you set DNIe to on, you can
view the screen with the DNIe feature activated. If you set the DNIe to Demo, you can view the applied
DNIe and normal pictures on the screen, for demonstration purposes. Using this function, you can view
the difference in the visual quality.
DNIe™ (Digital Natural Image engine)
➣
This feature brings you more detailed image with 3D noise reduction, detail enhancement,
contrast enhancement and white enhancement. New image compensation Algorithm gives
brighter, clearer, more detailed image to you.
eyes.
This function is not available in "Movie" and "Standard" mode.
➣
H
DMI Black Level: Normal/Low
♦
You can directly select the black level on the screen to adjust the screen depth.
➣
This function is active only when the external input connects to HDMI(RGB signals).
♦
Hz Motion Plus: Off/Low/Medium/High/Demo
100
Removes drag from fast scenes with a lot of movement to provide a clearer picture.
➣
This function is not available in PC mode.
If you enable "100 Hz Motion Plus", noise may appear on the screen.
➣
If this occurs, set "100Hz Motion Plus" to "off" or select one of the other options.
Blue Only Mode: Off/On
♦
This function is for AV device measurement experts. This function displays the blue signal only by
removing the red and green signals from the video signal so as to provide a Blue Filter effect that is
used to adjust the Colour and Tint of video equipment such as DVD players, Home Theaters, etc.
Using this function, you can adjust the Colour and Tint to preferred values appropriate to the signal
level of each video device using the Red/Green/Blue/ Cyan/Magenta/Yellow Colour Bar Patterns,
without using an additional Blue Filter.
➣
“Blue Only Mode” is available when the picture mode is set to “Movie” or “Standard”.
DNIe™ technology will t every signal into your
Resetting the Picture Settings to the Factory Defaults
You can return to the factory defaults picture settings.
o select the desired picture effect, follow the "Changing the
1. T
Picture Standard" instructions number 1 to 3 (On page 15).
2. Press the ▲ or ▼ button to select "Reset", then press the
ENTER
3. Press the ▲ or ▼ button to select "OK" or "Cancel".
Press the
4. Press the EXIT button to exit.
The "Reset" will be set for each "Picture" mode.
➣
button.
ENTER
button.
English - 19
TV
More
Picture Options
Reset : O
Move Enter Return
Picture
OK
K
Cancel
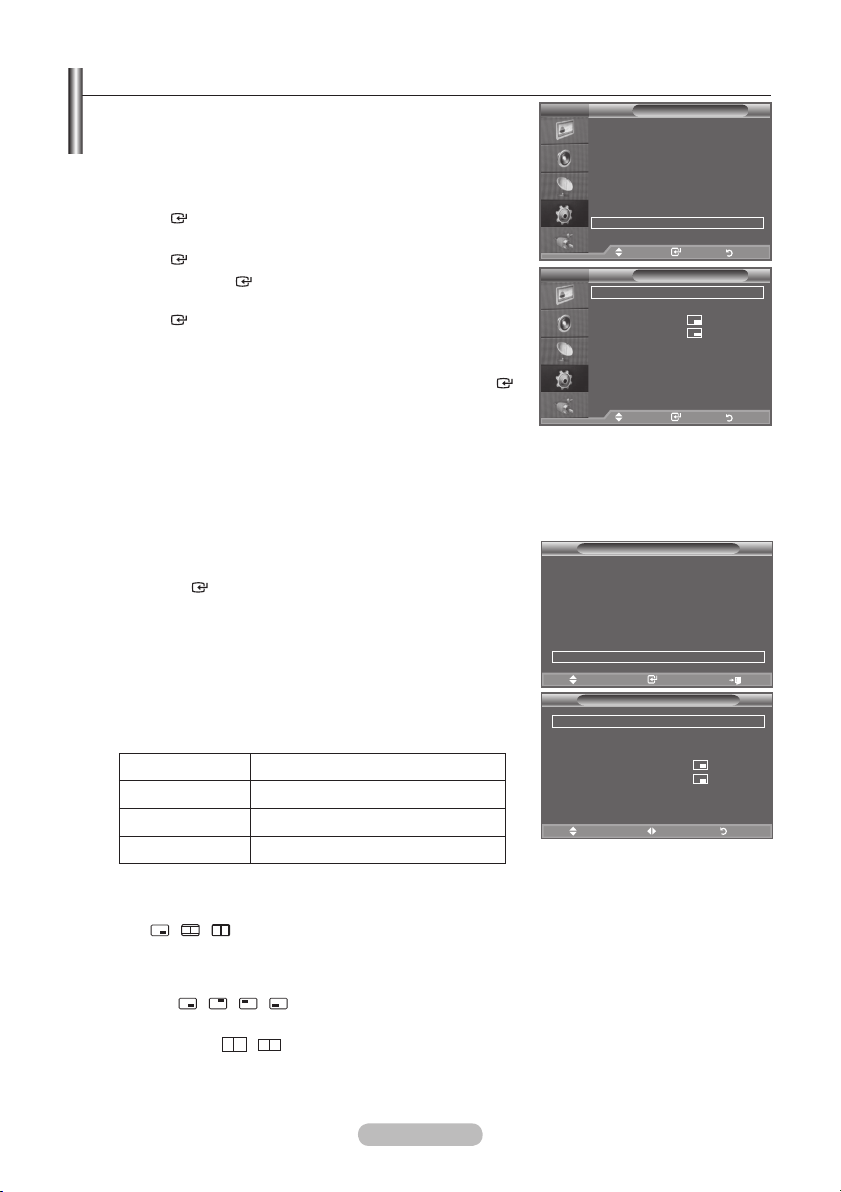
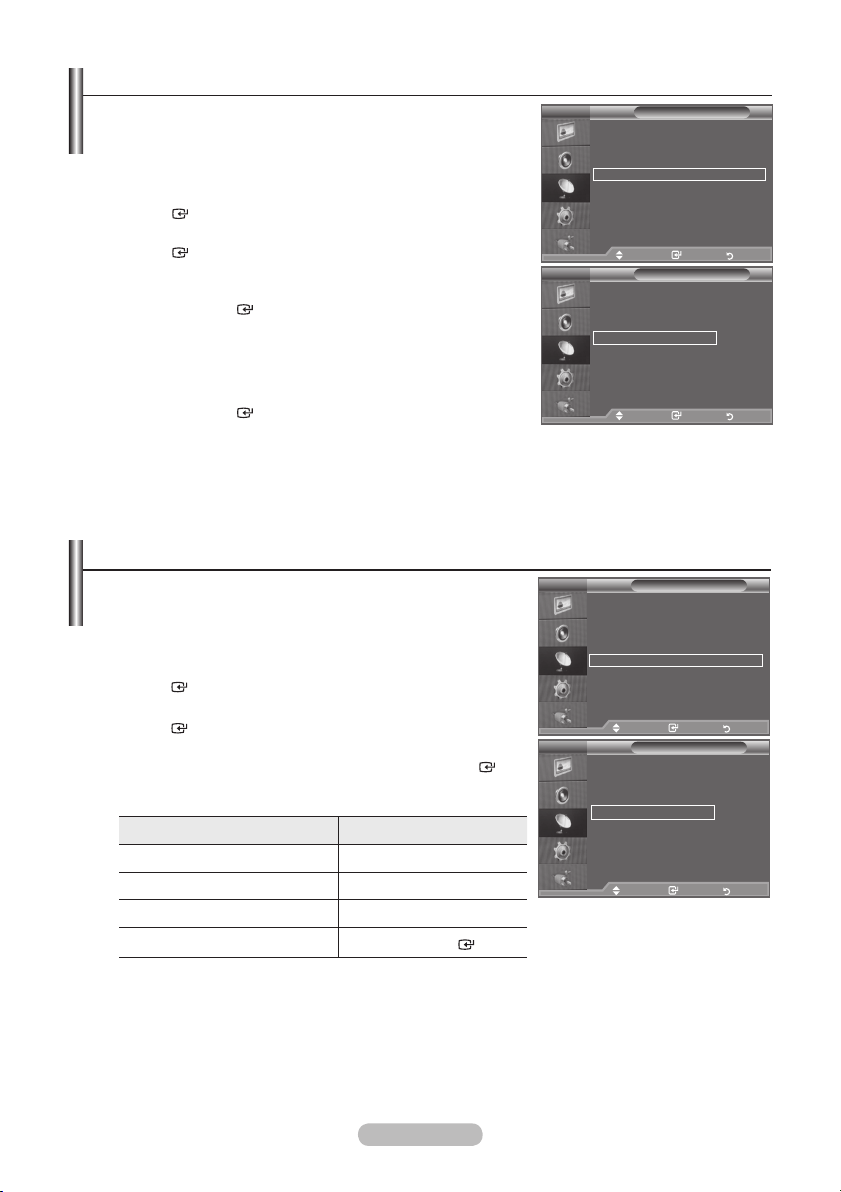
Viewing the Picture In Picture (PIP)
You can display a sub picture within the main picture of set
programme or video input. In this way, you can watch the
picture of set programme or video input from any connected
equipment while watching the main picture.
1. Press the MENU button to display the menu.
Press the ▲ or ▼ button to select "Setup", then press the
ENTER
button.
2. Press the▲ or ▼ button to select "PIP", then press the
ENTER
3. Press the
button.
ENTER
button to select “PIP”.
Press the▲ or ▼ button to select "On", then press the
ENTER
button.
4. Select the required option by pressing the ▲ or ▼ button, then
press the EN
5. When you are satisfied with your setting, press the
TER button.
ENTER
button.
6. Press the EXIT button to exit.
➣
You may notice that the picture in the PIP window becomes
slightly unnatural when you use the main screen to view a game
or karaoke.
Easy Setting
1. Press the TOOLS button on the remote control.
. Press the ▲ or ▼ button to select “PIP”, then press the
2
ENTER
button.
3. Press the ◄ or ► button to select the “On”.
4. Press the ▲ or ▼ button to select a particular item.
5. Press the ◄ or ► button to select the required option.
6.
♦
PIP: On/Off
Press the EXI
T or TOOLS button to exit.
You can activate or deactivate the PIP function.
Main picture Sub picture
Component 1, 2 TV, AV1, AV2
HDMI 1, 2, 3, 4 TV, AV1, AV2
PC TV, AV1, AV2
Source
♦
You can select a source of the sub-picture.
Size:
♦
/ /
You can select a size of the sub-picture.
If main picture is in "HDMI" mode, "Size" is available.
➣
Position:
♦
/ / /
You can select a position of the sub-picture.
➣
♦
Programme
In Double (
, ) mode, "Position" cannot be selected.
You can select a channel of the sub-picture only when the "Source" is set to "TV".
TV
TV
Anynet+ (HDMI-CEC)
Picture Mode : Standard
Sound Mode : Custom
Sleep Timer : Off
SRS TS XT : Off
Energy Saving : Off
PIP
PIP : ◄ On ►
Source
Programme : P 1
Size :
Position :
Setup
Plug & Play
: English
Language
Time
Cable Network Setup
Auto Wall-Mount
Melody : Off
Entertainment
Energy Saving
PIP
Move Enter Return
Mode : Custom
Equalizer
PIP : On
TS XT : Off
SRS
: TV
Source
olume : Off
Auto V
:
Size
Internal Mute
Position
Reset
Programme
Move Enter Return
Move Enter Return
Move Enter Exit
: TV
Move Adjust Return
: Off
: Off
PIP
: Off
:
: P 1
Tools
PIP
English - 20
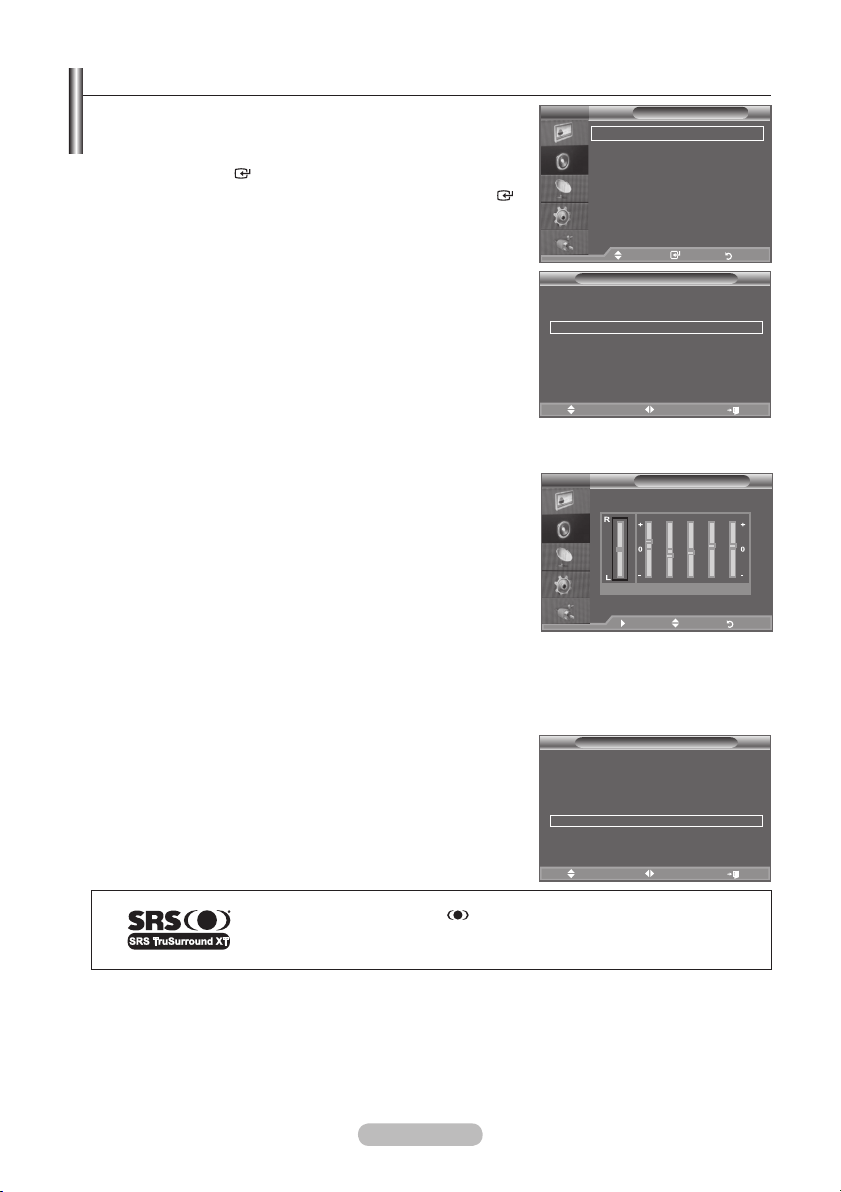
Sound Features
1. Press the MENU button to display the menu. Press the ▲ or ▼
button to select "Sound", then press the ENTER button.
2. Select the required option by pressing the ▲ or ▼ button, then
press the
3. When you are satised with your setting, press the
button.
4. Press the EXIT button to exit.
♦
Mode: Standard/Music/Movie/Speech/Custom
You can select the type of special sound effect to be used when
watching a given broadcast.
Easy Setting
1. Press the TOOLS button on the remote control.
2
3. Press the ◄ or ► button to select the desired sound mode.
4.
ENTER
button.
ENTER
. Press the ▲ or ▼ button to select "Sound Mode".
Press the EXI
T or TOOLS button to exit.
TV
TV
Mode : Custom
Equalizer
SRS
Auto V
V Speaker : On
T
Sound Select
Move Enter Return
Anynet+ (HDMI-CEC)
Picture Mode : Standard
Sound Mode ◄ Custom ►
Timer : Off
Sleep
SRS TS XT : Off
Energy Saving : Off
Dual l-ll : Mono
Move Adjust Exit
Sound
TS XT : Off
olume : Off
: Main
Tools
Equalizer: Balance/100Hz/300Hz/1kHz/3kHz/10kHz
♦
TV
Equalizer
The sound settings can be adjusted to suit your personal
preferences.
If you make any changes to these settings, the sound mode
➣
is automatically switched to "Custom".
Balance 100Hz 300Hz 1kHz 3kHz 10kHz
Move Adjust Return
SRS
TS XT: Off/On
♦
TruSurround XT is a patented SRS technology that solves the problem of playing 5.1 multichannel
content over two speakers. TruSurround delivers a compelling, virtual surround sound experience
through any two-speaker playback system, including internal television speakers. It is fully compatible
with all multichannel formats.
Easy Setting
1. Press the TOOLS button on the remote control.
2. Press the ▲ or ▼ button to select “SRS TS XT”.
3. Press the ◄ or ► button to select the "Off" or "On".
4. Press the EXI
T or TOOLS button to exit.
Anynet+ (HDMI-CEC)
Picture Mode : Standard
Sound Mode : Custom
Sleep Timer : Off
SRS TS XT ◄
Energy Saving
Dual l-ll : Mono
Move Adjust Exit
Tools
: Off
Off ►
TruSurround XT, SRS and Symbol are trademarks of SRS Labs, Inc.
TruSurround XT technology is incorporated under license from SRS Labs,
Inc.
♦
Auto Volume: Off/On
Each broadcasting station has its own signal conditions, and so it is not easy to adjust the volume
every time the channel is changed. This feature lets you automatically adjust the volume of the
desired channel by lowering the sound output when the modulation signal is high or by raising the
sound output when the modulation signal is low.
English - 21

TV Speaker: Off/On
♦
If you want to hear the sound through separate speakers, cancel the internal amplifier.
The - VOL + and MU
➣
When “TV Speaker” is set to “Off”, you can operate only “Sound Select” (in PIP mode) in Sound
➣
TE buttons do not operate when the "TV Speaker" is set to Off.
menu.
♦
Sound Select: Main/Sub
When the PIP feature is activated, you can listen to the sound of the sub (PIP) picture.
− Main: Used to listen to the sound of the main picture.
− Sub: Used to listen to the sound of the sub picture.
Selecting the Sound Mode
You can set the sound mode in the "Tools" menu.
When you set to "Dual I-II", the current sound mode is displayed
on the screen.
1. Press
the TOOLS button on the remote control.
2. Press the ▲ or ▼ button to select “Dual I-II".
3. Press the ◄ or ► button to select required option.
4. Press the
Stereo
NICAM
Stereo
If the stereo signal is weak and an automatic switching occurs, then switch to the Mono.
➣
This function is only activated in stereo sound signal. It is deactivated in mono sound signal.
➣
This function is only available in TV mode.
➣
A2
ENTER
button.
Audio Type Dual
Mono MONO
Stereo STEREO
Dual DUAL
Mono MONO
Stereo MONO
Dual
MONO
↔
1 ↔
↔
↔
DUAL
1/2
MONO
DUAL
2
STEREO
DUAL
1
2
Default
Automatic
change
DUAL 1
Automatic
change
DUAL 1
Anynet+ (HDMI-CEC)
Picture Mode : Standard
Sound Mode : Custom
Sleep Timer : Off
SRS TS XT : Off
Energy Saving : Off
Dual l-ll
Move Adjust Exit
Tools
◄ Mono ►
Connecting Headphones (Sold separately)
You can connect a set of headphones to your set if you wish to
watch a TV programme without disturbing the other people in the
room.
➣
When you insert the head set jack into the corresponding port, you
can operate only "Auto Volume" and "Sound Select"(in PIP mode) in
Sound menu.
➣
Prolonged use of headphones at a high volume may damage your
hearing.
➣
You will not receive sound from the speakers when you connect headphones to the system.
➣
The headphone volume and TV volume are adjusted differently.
English - 22
TV Side Panel

Setting and Displaying the Current Time
You can set the TV’s clock so that the current time is
displayed when you press the INFO button. You must also set
the time if you wish to use the automatic On/Off timers.
1. Press the MENU button to display the menu.
Press the ▲ or ▼ button to select "Setup", then press the
ENTER
2. Press the ▲ or ▼ button to select "Time", then press the
ENTER
3. Press the
4.
To... Press the....
Move to "Month", "Day", "Year",
"Hour", "Minute" or "am/pm"
Set the "Month", "Day", "Year", "Hour",
"Minute" or "am/pm"
Conrm the setting
button.
button.
ENTER
button to select "Clock Set".
◄ or ► button.
▲ or ▼ button.
ENTER
button
Mode : Custom
TV
Equalizer
Plug & Play
TS XT : Off
SRS
: English
Language
olume : Off
Auto V
Time
Internal Mute
Cable Network Setup
Reset
Auto Wall-Mount
Melody : Off
Entertainment
Energy Saving
PIP
TV
: Off
: Off
: Off
Move Enter Return
Move Enter Return
Clock Set
Month
p
01
q
Hour00Minute
12
Move Adjust Return
Setup
Day
01
Year
2008
am/pm
am
. Press the EXI
5
The current time will appear every time you press the INFO button.
➣
➣
You can also set "Month", "Day", "Year", "Hour" and "
T button to exit.
Minute" by pressing the number buttons on the
remote control.
➣
If you disconnect the power cord, you have to set the clock again.
Setting the Sleep Timer
You can select a time period of between 30 and 180 minutes
after which the television automatically switches to standby
mode.
1. Press the MENU button to display the menu.
Press the ▲ or ▼ button to select "Setup", then press the
ENTER
button.
2. Press the ▲ or ▼ button to select "Time", then press the
ENTER
button.
3. Press the ▲ or ▼ button to select "Sleep Timer", then press
the
ENTER
button.
4. Press the ▲ or ▼ button repeatedly until the desired time
appears (Off, 30, 60, 90, 120, 150, 180).
Press the
ENTER
button.
5. Press the EXIT button to exit.
The
TV automatically switches to standby mode when the
➣
timer reaches 0.
Easy Setting
1. Press
the TOOLS button on the remote control.
2. Press the ▲ or ▼ button to select “Sleep Timer”.
3. Press the ◄ or ► button to select the minute.
4. Press the EXIT
or TOOLS button to exit.
Mode : Custom
TV
Equalizer
Plug & Play
SRS
Language
Auto V
Time
Internal Mute
Cable Network Setup
Reset
Auto Wall-Mount
Melody : Off
Entertainment
Energy Saving
PIP
Move Enter Return
TV
Clock Set : 12:00 am
Sleep Timer :
Timer 1 :
Timer 2 :
Timer 3 :
Move Enter Return
Anynet+ (HDMI-CEC)
Picture Mode : Standard
Sound Mode : Custom
Sleep Timer
SRS TS XT : Off
Energy Saving : Off
Dual l-ll : Mono
Move Adjust Exit
Setup
TS XT : Off
: English
olume : Off
: Off
: Off
: Off
Time
Tools
◄ Off
Off
30
0
6
90
1
20
150
180
►
Move Enter Return
English - 23

Switching the Television On and Off Automatically
1. Press the MENU button to display the menu.
Press the ▲ or ▼ button to select "Setup", then press the
ENTER
button.
2. Press the ▲ or ▼ button to select "Time", then press the
ENTER
button.
3. Press the ▲ or ▼ button to select "Timer 1", "Timer 2",
"Timer 3", then press the
ENTER
button.
Three different On/Off Timer Settings can be made.
You must set the clock first.
➣
4
. Press the ◄ or ► button to select the required item below.
Press the ▲ or ▼ button to adjust to the setting satised.
Time
On
♦
: Select hour, minute, am/pm and "Activate"/
"Inactivate". (To activate timer with the setting satised, set to
"Activate".)
♦
: Select hour, minute, am/pm and "Activate"/
Time
Off
"Inactivate". (To activate timer with the setting satised, set to
TV
Plug & Play
Language
Time
Cable Network Setup
Auto Wall-Mount
Melody : Off
Entertainment
Energy Saving
PIP
Move Enter Return
TV
On Time
5
12
6
Off
12
Volume
10
Repeat
►
"Activate".)
Volume : Select the desired turn on volume level.
♦
Programme : When the On Timer is active, you can turn on a specic channel.
♦
Repeat : Select "Once", "Everyday", "Mon~Fri", "Mon~Sat" or "Sat~Sun".
♦
Y
ou can set the hour and minute directly by pressing the number buttons on the remote control.
➣
Auto Power Off
➣
When you set the timer On, the TV will eventually turn off, if no controls are operated for 3 hours
after the TV was turned on by timer. This function is only available in timer On mode and prevents
overheating, which may occur if a TV is on for too long time.
Setup
: English
: Off
: Off
Timer 1
:
00
am
Time
:
00
am
Programme
Once
Move Adjust Return
Inactivate
Inactivate
1
Choosing Your Language
When you start using your set for the first time, you must
select the language which will be used for displaying menus
and indications.
1. Press the MENU button to display the on-screen menu.
Press the ▲ or ▼ button to select "Setup", then press the
ENTER
button.
2. Press the ▲ or ▼ button to select "Language", then press
the
ENTER
button.
3. Select a particular language by pressing the ▲ or ▼ button
repeatedly.
Press the
ENTER
button.
4. Press the EXIT button to exit.
English - 24
TV
Plug & Play
: English
Language
Time
Cable Network Setup
Auto Wall-Mount
Melody : Off
Entertainment
Energy Saving
PIP
: Off
: Off
Move Enter Return
Setup

Melody / Entertainment / Energy Saving
Mode : Custom
1. Press the MENU button to display the menu.
Press the ▲ or ▼ button to select "Setup", then press the
ENTER button.
2. Select the required option by pressing the ▲ or ▼ button, then
press the EN
TER button.
3. When you are satised with your setting, press the ENTER
button.
4. Press the EXIT button to exit.
♦
Melody: Off/Low/Medium/
High
TV
Equalizer
Plug & Play
SRS
Language
Auto V
Time
Internal Mute
Cable Network Setup
Reset
Auto Wall-Mount
Melody : Off
Entertainment
Energy Saving
PIP
Move Enter Return
The TV power on/off melody sound can be adjusted.
T
he Melody does not play
➣
− When no sound is output from the TV because the MUTE button has been pressed.
− When no sound is output from the TV because the
- (Volume) button has been pressed.
− When the TV is turned off by the Sleep Timer function.
♦
Entertainment: Off/Sports/Cinema/Game
The “Entertainment” mode enables you to select the optimal display and sound for sports, cinema
and games.
− Off: Switch the "Entertainment" function off.
− Sports: Provides
the optimal picture and sound quality for sports. You can enjoy more thrilling
colour and sound.
− Cinema: Provides
the optimal picture and sound quality for cinema. You can experience a richer
picture and enhanced sound.
− Game: Provides
the optimal picture and sound quality for games. This mode accelerates the
playing speed when using an external game console connected to the TV.
➣
If you set any of the three “Entertainment” modes to On, the settings will be locked and can not be
adjusted. If you want to make Picture and Sound mode adjustments, the “Entertainment” mode
must be turned off.
➣
If you set any of the three “Entertainment” modes to On, “SRS TS XT” and “Equalizer” function is
not available.
The “Entertainment” settings are saved for each input source.
➣
This function is not available in PC mode.
➣
Setup
TS XT : Off
: English
olume : Off
: Off
: Off
: Off
Move Enter Return
You can press the E.MODE button on the remote control
repeatedly to change the “Entertainment” setting.
English - 25

Energy Saving: Off/Low/Medium/High/Auto
♦
This feature adjusts the screen brightness depending on the surrounding lighting conditions.
− Off: Turns off the energy saving function.
− Low: Sets the TV to low energy saving mode.
− Medium: Sets the TV to medium energy saving mode.
− H
igh: Sets the TV to high energy saving mode.
− Auto: Automatically adjusts the brightness of the TV screen in accordance with the scenes.
Easy Setting
1. Press the TOOLS button on the remote control.
2
. Press the ▲ or ▼ button to select “Energy Saving”.
3. Press the ◄ or ► button to select the "Off", "Low",
"Medium", "High" or "Auto".
4
. Press the EXI
T or TOOLS button to exit.
Anynet+ (HDMI-CEC)
Picture Mode : Standard
Sound Mode : Custom
Sleep Timer : Off
SRS TS XT : Off
Energy Saving
Dual l-ll : Mono
Move Adjust Exit
Tools
◄ Off
►
English - 26

Network Connection
LAN Connection for a DHCP Environment
The procedures to set up the network using Dynamic Host Configuration Protocol (DHCP) are described
below. Since an IP address, subnet mask, gateway, and DNS are automatically allocated when DHCP is
selected, you do not have to enter them manually.
The Modem Port
on the Wall
2
External Modem
(ADSL/VDSL/Cable TV)
Modem Cable
1
LAN
Cable
TV Rear Panel
1. Connect the [LAN] port on the rear panel of the TV and the external modem with a LAN Cable.
2. Connect the LAN port on the wall and the external modem with a Modem Cable.
You can connect the LAN via a Sharer (Router).
IP Sharer
The Modem
Port on the Wall
The terminals (the position of the port and the type) of the external device may differ depending on the
➣
External Modem
(ADSL/VDSL/
TV)
Cable
Modem Cable
LAN Cable
LAN Cable
TV Rear Panel
manufacturer.
If the IP address allocation by the DHCP server has failed, turn the external modem off, turn it on
➣
again after at least 10 seconds and then try again.
For the connections between the external modem and the Sharer (Router), refer to the owner’s
➣
manual of the corresponding product.
You cannot use a manual-connection-type ADSL modem because it does not support DHCP. You have
➣
to use an automatic-connection-type ADSL modem.
English - 27

LAN Connection for Static IP Environment
The procedures to set up the network using a static IP address are described below. You have to manually enter the IP address, subnet mask, gateway, and DNS that are provided by your Internet Service
Provider (ISP).
You can connect the LAN via a Sharer (Router).
he LAN Port
T
on the Wall
LAN Cable
IP Sharer
LAN
Cable
TV Rear Panel
1. Connect the [LAN] port on the rear panel of the TV and the IP Sharer with a LAN Cable.
2. Connect the LAN port on the wall and the IP Sharer with a LAN Cable.
➣
The terminals (the position of the port and the type) of the external device may differ depending on
the manufacturer.
➣
If you are using a static IP address, your ISP will inform you of the IP address, subnet mask, gateway,
and DNS. You must enter these values to complete the network settings. If you do not know the
values, ask your network administrator.
➣
For the information on how to congure and connect a Sharer (Router), refer to the owner
’s manual
for the corresponding product.
If you use an IP Sharer (IP Router) that supports DHCP, you can set up the device as either DHCP or
➣
static IP.
For the procedures to use a static IP address, ask your Internet Service Provider.
➣
English - 28

Cable Network Setup
1. Press the MENU button to display the menu.
Press the ▲ or ▼ button to select “Setup”, then press the
ENTERE button.
2. Press the ▲ or ▼ button to select “Cable Network Setup”,
then press the ENTER
➣
Please check if the LAN cable is connected.
Auto Setup
If you connect the LAN cable and it supports DHCP, the Internet
Protocol (IP) Settings are automatically configured. (refer to page
27)
3. Press the ENTER
Setup”.
4. Press the ▲ or ▼ button to select “Auto Setup”, then press
the ENTER
➣
➣
E
The Internet Protocol is set automatically.
Select “Network Test” to check the network connectivity.
Manual Setup
To connect the TV to the LAN using a static IP address, you must
set up the Internet Protocol (IP). Please check if the LAN cable is
connected. (refer to page 28)
3. Press the ENTER
Setup”.
4. Press the ▲ or ▼ button to select “Manual Setup”, then
press the ENTER
5. Press the ▲, ▼, ◄ or ►button to move to an item, and
press the numeric button to configure the selected item.
Press the ENTER
Select “Network Test” to check the network connectivity.
➣
E
button.
E
button to select “Internet Protocol
button.
E
button to select “Internet Protocol
E
button.
E
button.
TV
Plug & Play
Language
Time
Cable Network Setup
Auto Wall-Mount
Melody : Off
Entertainment
Energy Saving
PIP
Move Enter Return
Cable Network Setup
Internet Protocol Setup : Auto Setup
Test
Network
Address :
IP
Subnet Mask :
Gateway :
DNS Server :
Move Enter Return
Cable Network Setup
Internet Protocol Setup :
Network Test
IP Address :
Subnet Mask
Gateway :
DNS Server :
0 ~ 9
Move
Setup
: English
:
Number Enter Return
: Off
: Off
0 0 0 0
0 0 0 0
0 0 0 0
0 0 0 0
Manual Setup
0 0 0 0
0 0 0 0
0 0 0 0
0 0 0 0
Network Test
You can test or confirm the network connection status after setting
up the network.
3. Press the ▲ or ▼ button to select “Network Test”, then press
the ENTER
➣
4. Press the EXIT button to exit.
E
button.
The current network settings will appear.
English - 29
Cable Network Setup
Internet Protocol Setup : Auto Setup
Test
Network
Address :
IP
Subnet Mask :
Gateway :
DNS Server :
Move Enter Return
0 0 0 0
0 0 0 0
0 0 0 0
0 0 0 0

When unable to connect to a wired network
If your Internet service provider has registered the MAC address of the device used to connect to the
•
Internet for the first time and authenticates the MAC address each time you connect to the Internet,
your TV may not be able to connect to the Internet as the MAC address differs from that of the device
(PC) used to connect to the Internet the first time. In this case, ask your Internet service provider about
the procedures to connect devices other than your PC (such as your TV) to the Internet.
If your Internet service provider requires an ID or password to connect to the Internet (network), your
•
TV may not be able to connect to the Internet. In this case, you have to enter your ID or password
when connecting to the Internet using an Internet Sharer (Router).
The internet connection may fail due to a firewall problem. In this case, contact your Internet service
•
provider.
If you cannot connect to the Internet even if you have followed the procedures of your Internet service
•
provider, please contact a Samsung Electronics Service Center.
Selecting the Source
You can select among external sources connected to your TV’s
input jacks.
1. Press the MENU button to display the menu.
Press the ▲ or ▼ button to select "Input", then press the
ENTER button.
2. Press the ENTER
When no external device is connected to your set, only "TV"
➣
button again, to select "Source List".
is activated in the "Source List". "AV1", "AV2",
"S-Video", "Component1", "Component2", "PC", "HDMI1",
"HDMI2", "HDMI3", "HDMI4" are activated only when they
are connected to your set.
3
. Select the required device by pressing the ▲ or ▼ button.
Press the EN
TER button.
Mode : Custom
TV
Equalizer
: TV
Source List
TS XT : Off
SRS
Edit Name
olume : Off
Auto V
Anynet+(HDMI-CEC)
Internal Mute
WIESLINK Pro (USB/DLNA)
Reset
Content Library
Product Guide
Mode : Custom
TV
Equalizer
T
SRS
AV1 : ----
Auto V
AV2 : ----
Internal Mute
S-Video : ----
Reset
Component1 : ---Component2 : ---PC : ----
sMore
: Off
Move Enter Return
Move Enter Return
Source List
V
TS XT : Off
olume : Off
: Off
Move Enter Return
Move Enter Return
Input
Press the SOURCE button on the remote control to toggle
between all the available source.
TV mode can be selected by pressing the TV button,
number buttons(0~9), and the P / button on the remote
control. You can also watch HDMI mode simply by pressing
the HDMI button on the remote control.
English - 30

Editing the Input Source Names
Name the device connected to the input jacks to make your
input source selection easier.
1. Press the MENU button to display the menu.
Press the ▲ or ▼ button to select "Input", then press the
TER button.
EN
2. Press the ▲ or ▼ button to select "Edit Name", then press the
EN
TER button.
3. Press the ▲ or ▼ button to select the device that you wish to
edit.
Press the ENTER button.
4. Press the ▲ or ▼ button to select the required device.
Press the EN
TER button.
5. Press the EXIT button to exit.
When a PC with a resolution of 1920 x 1080@60Hz is
➣
connected to the HDMI IN 2 port, you should set the
"HDMI2" mode to "PC" in the "Edit Name" of the "Input"
mode.
Mode : Custom
TV
Equalizer
: TV
Source List
TS XT : Off
SRS
Edit Name
olume : Off
Auto V
Anynet+(HDMI-CEC)
Internal Mute
WIESLINK Pro (USB/DLNA)
Reset
Content Library
Product Guide
Mode : Custom
TV
Equalizer
A
SRS
AV2 : ----
Auto V
S-Video : ----
Internal Mute
Component1 : ----
Reset
Component2 : ----
PC : ----
HDMI1 : ----
sMore
: Off
Move Enter Return
Move Enter Return
V1 : ----
Edit Name
TS XT : Off
olume : Off
: Off
Move Enter Return
Move Enter Return
Input
Cable S
Satellite STB
PVR STB
AV Receiver
----
VCR
DVD
s
TB
English - 31

Product Guide
The Product Guide gives you information on the most important features of this TV.
1. Press the MENU button to display the menu. Press the ▲ or ▼
E
button to select “Input”, then press the ENTER
button.
2. Press the ▲ or ▼ button to select “Product Guide”, then press
the ENTER
E
button.
3. Press the ◄ or ► button to select a Guide (“Picture Quality”,
“Entertainment” or “Connectivity”) and press the ENTER
E
button.
4. You can navigate the Product Guide screen by using the ◄ and ► buttons.
Picture Quality Full HD 1080p
100Hz Motion Plus
Entertainment Content Library
Entertainment Mode
Connectivity WISELINK Pro
DLNA
4HDMI
Anynet+
. Press the EXIT button to exit.
5
TV
Source List
Edit Name
Anynet+(
WIESLINK Pro (USB/DLNA)
Content Library
Product Guide
Move Enter Return
Input
: TV
HDMI-CEC)
Using the Remote Control Button in Product Guide Menu
Button Operations
Yellow Button Shows the contents of the Product Guide sequentially. (AutoPlay)
Wheel (◄/►) Move the cursor and select an item.
E
ENTER
RETURN Return to the previous menu.
EXIT Stop the current function and return to the “Product Guide” main menu.
Select the currently selected item.
English - 32

Setting up Your PC Software (Based on Windows XP)
The Windows display-settings for a typical computer are shown below. The
actual screens on your PC may be different depending upon your particular
version of Windows and your particular video card. Even if your actual screens
look different, the same, basic set-up information will apply in almost all cases.
(If not, contact your computer manufacturer or Samsung Dealer.)
1. First, click on "Control Panel" on the Windows start menu.
2
. When the control panel window appears, click on "Appearance and Themes"
and a display dialog-box will appear.
3
. When the control panel window appears, click on "Display" and a display
dialog-box will appear.
4
. Navigate to the "Settings" tab on the display dialog-box.
The correct size setting (resolution): Optimum- 1920 X 1080
If a vertical-frequency option exists on your display settings dialog box, the correct value is
"60" or "60 Hz". Otherwise, just click "OK" and exit the dialog box.
Display Modes
Both screen position and size will vary depending on the type of PC monitor and its resolution.
The resolutions in the table are recommended.
D-Sub Input
➣
Mode Resolution
IBM
VESA
T 1920 x 1080RB 66.587 59.934 138.500 + / -
CV
➣
HDMI/DVI Input
Mode Resolution
VESA
CEA 1920 x 1080p 67.500 60.000 148.500 + / +
➣
When using an HDMI/DVI cable connection, you must use the HDMI IN 2 jack.
➣
The interlace mode is not supported.
➣
The set might operate abnormally if a non-standard video format is selected.
➣
Separate and Composite modes are supported. SOG is not supported.
➣
Too long or low quality VGA cable can cause picture noise at high resolution modes
640 x 350
720 x 400
640 x 480
640 x 480
640 x 480
800 x 600
800 x 600
800 x 600
1024 x 768
1024 x 768
1024 x 768
1280 x 1024
1280 x 1024
1360 x 768
1600 x 1200
640 x 480
800 x 600
1024 x 768
1280 x 1024
1360 x 768
1600 x 1200
Horizontal
Frequency
31.469
31.469
31.469
37.861
37.500
37.879
48.077
46.875
48.363
56.476
60.023
63.981
79.976
47.712
75.000
Horizontal
Frequency
31.469
37.879
48.363
63.981
47.712
75.000
(kHz)
(kHz)
Vertical
Frequency (Hz)
70.086
70.087
59.940
72.809
75.000
60.317
72.188
75.000
60.004
70.069
75.029
60.020
75.025
60.015
60.000
Vertical
Frequency (Hz)
59.940
60.317
60.004
60.020
60.015
60.000
(1920x1080 or 1600x1200).
English - 33
Pixel Clock
Frequency (MHz)
25.175
28.322
25.175
31.500
31.500
40.000
50.000
49.500
65.000
75.000
78.750
108.000
135.000
85.500
162.000
Pixel Clock
Frequency (MHz)
25.175
40.000
65.000
108.000
85.500
162.000
Sync Polarity
Sync Polarity
(H/V)
+ / -
- / +
- / -
- / -
- / + / +
+ / +
+ / +
- / -
- / + / +
+ / +
+ / +
+ / +
+ / +
(H/V)
- / + / +
- / + / +
+ / +
+ / +

Setting up the TV with your PC
Press the SOURCE button to select PC mode.
➣
1. Press the MENU button to display the menu.
TER
Press the EN
2. Select the required option by pressing the ▲ or ▼ button,
then press the EN
3. When you are satised with your setting, press the EN
button.
4. Press the EXI
Auto Adjustment
♦
Auto adjustment allows the PC screen of set to self-adjust to
the incoming PC video signal. The values of fine, coarse and
position are adjusted automatically.
button, to select "Picture".
TER button.
TER
T button to exit.
TV
Mode : Standard
acklight 7
B
Contrast 95
Brightness 45
Sharpness 5
Auto Adjustment
Screen
Detailed Settings
sMore
Move Enter Return
Auto Adjustment in progress
Picture
Adjustment
Please wait.
0
Easy Setting
1. Press the TOOLS button on the remote control.
2
. Press the ▲ or ▼ button to select “Auto Adjustment”, then
press the EN
Screen Adjustment:
♦
TER button.
Coarse/Fine
The purpose of picture quality adjustment is to remove or reduce
picture noise. If the noise is not removed by Fine-tuning alone,
then adjust the frequency as best as possible (coarse) and Finetune again. After the noise has been reduced, readjust the picture
so that it is aligned on the center of screen.
Press the ▲ or ▼ button to select "Coarse" or "Fine", then press
the EN
TER button.
Press the ◄ or ► button to adjust the screen quality.
Press the EN
TER button.
Position
Adjust the PC’s screen positioning if it does not fit the TV screen.
Press the ▲ or ▼ button to adjusting the Vertical-Position.
Press the ◄ or ► button to adjust the Horizontal-Position.
Press the EN
TER button.
Image Reset
You can replace all image settings with the factory default
values.
Anynet+ (HDMI-CEC)
Picture Mode : Standard
Sound Mode : Custom
Sleep Timer : Off
SRS TS XT : Off
Energy Saving : Off
PIP
Auto
Adjustment
Move Enter Exit
TV
TV
TV
Tools
Screen Adjustment
50
Coarse
Fine 93
Position
Image Reset
Coarse
Fine 93
Position
Image Reset
Move Enter Return
Position
Move Enter Return
Screen Adjustment
50
English - 34
Move Enter Return

Connecting a USB Device
1. Press the POWER button on the remote control or front
panel.
The TV is powered on.
➣
2. Connect a USB device containing photo, music and/or
movie les to the WISELINK jack (USB jack) on the side
of the TV.
If you enter the WISELINK Pro mode with no USB
➣
device connected the message No external storage
device found. Check the connection status. will appear.
In this case, insert the USB device, exit the screen by
pressing the W.LINK button on the remote control and
enter the WISELINK Pro screen again.
MTP (Media Transfer Protocol) is not supported.
➣
The le system only supports FAT16/32 (The NTFS le system is not supported).
➣
Certain types of USB Digital camera and audio devices may not be compatible with this TV.
➣
WISELINK Pro only supports USB Mass Storage Class devices (MSC). MSC is a Mass Storage
➣
Class Bulk-Only Transport device. Examples of MSC are Thumb drives and Flash Card Readers
(Both USB HDD and HUB are not supported.)
Please connect directly to the USB port of your TV. If you are using a separate cable connection,
➣
there may be a USB Compatibility problem.
Before connecting your device to the TV, please back up your les to prevent them from damage or
➣
loss of data. SAMSUNG is not responsible for any data le damage or data loss.
Do not disconnect the USB device while it is loading.
➣
MSC supports MP3 and JPEG les, while a PTP device supports JPEG les only.
➣
The sequential jpeg format is supported.
➣
The higher the resolution of the image, the longer it takes to display on the screen.
➣
The maximum supported JPEG resolution is 15360x8640 pixels.
➣
For unsupported or corrupted les, the “Not Supported File Format” message is displayed.
➣
If the number of photo les exceeds 4000 (or the number of music les exceeds 3000), any les
➣
exceeding the 4000 limit may not be displayed in the Photo List (or Music List).
MP3 les with DRM that have been downloaded from a non-free site cannot be played.
➣
Digital Rights Management (DRM) is a technology that supports the creation of content, the
distribution and management of the content in an integrated and comprehensive way, including the
protection of the rights and interests of the content providers, the prevention of the illegal copying of
contents, as well as managing billings and settlements.
TV Side Panel
USB Drive
English - 35

Using the WISELINK Pro Function
This function enables you to view and listen to photo, music and/or movie les saved on a USB Mass
Storage Class (MSC) device.
Entering the WISELINK Pro Menu
1. Press the MENU button. Press the ▲ or ▼ button to
select “Input”, then press the ENTERE button.
2. Press the ▲ or ▼ button to select “WISELINK Pro
(USB/DLNA)”, then press the ENTER
The “WISELINK Pro” menu is displayed.
➣
E
button.
WISELINK Pro
PHOTO
SUM
851.98MB/995.00MB Free
Press the W.LINK button on the remote control to
O
Photo
SUM
Music Setup
Movie
Device e Exit
display the “WISELINK Pro” menu.
3. Press the Red button, then press the ▲ or ▼ button to select the corresponding USB Memory
Device (i.e. if connected through a hub). Press the ENTER
This function differs depending on the USB Memory Device / DLNA device connected to TV.
➣
The selected USB device name appears at the bottom left of the screen.
➣
E
button.
4. Press the ◄ or ► button to select an icon (Photo, Music, Movie, Setup), then press the ENTER
button. To exit “WISELINK Pro” mode, press the W.LINK button on the remote control.
Removing a USB Memory Device Safely
You can remove the device safely from the TV.
1. Press the TOOLS button in the WISELINK Pro le
list screen, or while a Slide Show, music or movie is
being played.
2. Press the ▲ or ▼ button to select “Remove Safely”,
then press the ENTER
E
button.
3. Remove the USB device from the TV.
Photo
Preference
Monthly
SUM
Timeline
image_1.jpg
Month : Jan
Date :
Jan.01.2008
Colour : Gray
Composition :
Folder : P-other
Favourite :
★ ★ ★
Jan Nov
Device
Favourites Setting
▲
s Select
▲
Play Current Group
Delete
Information
Remove Safely
Jump
E
Option
English - 36

English - 37
Screen Display
Photo
image_1.jpg
Month : Jan
Date :
Colour : Gray
Composition :
Folder : P-other
Favourite :
Jan.01.2008
★ ★ ★
1
2 6
1File(s) Selected
SUM
Preference
Monthly
Timeline
5 7
3 4
Jan Nov
Device
Favourites Settings
▲
Select
Jump
Option
1. Currently selected le: The currently selected le is highlighted. Photo and movie les are displayed
as thumbnail images.
2. Information Window: Shows information about the currently selected le. There is a separate
information window for photo and movie les only. For music les, the le information is also
displayed in the location where the le is displayed.
3. Current Sort Standard: This eld shows the current standard for sorting les. Press the ▲ or ▼
button to change the standard for sorting les.
4. View Groups: Shows the sorting groups. The sorting group including the currently selected photo is
highlighted.
5. Current Device: Shows the currently selected device name. Press the Red button to select a device.
6. Item Selection Information: Shows the number of photos that are selected by pressing the Yellow
button.
7. Help Items
Red (Device) button: Selects a connected device.
•
Green (Favourites Settings) button: Changes the favourites setting for the selected le. Press
•
this button repeatedly until the desired value appears.
Yellow (Select) button: Selects le from the le list. Selected les are marked with a symbol c.
•
Press the yellow button again to cancel a le selection.
πµ (Jump) button: Jumps to the previous sorting group / Jumps to the next sorting group.
•
TOOLS (Option) button: Displays the option menus. (The option menu changes according to the
•
current status.)

Using the Remote Control Button in WISELINK Pro Menu
Button Operations
▲/▼/◄/►/ Wheel Move the cursor and select an item.
Select the currently selected item.
ENTER
∂/∑
E
While playing a slide show, movie, or music le:
- Pressing the ENTER
- Pressing the ENTER
E
button during play pauses the play.
E
button during pause resumes the play.
Play or pause the Play Slide Show, Music or movie.
RETURN Return to the previous menu.
TOOLS Run various functions from the Photo, Music and Movie menus.
∫
π/µ
Stop the current slide show, Music or Movie le.
Jump to previous group / Jump to next group.
INFO Show le information.
W.LINK Exit WISELINK Pro mode.
TV Stop WISELINK Pro mode and Returns to TV mode.
EXIT Stop the current function and return to the WISELINK Pro main menu.
Using and Sorting Photo List
You can sort photos in the Photo List by a particular standard.
1. Press the ▲ or ▼ button to select a sorting
standard in the Photo list.
The photos are sorted according to the newly
➣
Photo
selected sorting standard.
To move to the previous / next group, press the
➣
π
(REW) or µ (FF) button.
2. Press the
∂
(Play) / ENTERE button to start
the Slide Show in the order selected by the user.
The information of a photo le is automatically
➣
set.
The “Colour” and “Composition” information
➣
SUM
extracted from a photo le may be different
from the user’s expectations.
Photo information is automatically set. You can
➣
change the “Colour”, “Composition”, and “Favourite”.
Photos for which information cannot be displayed are set as “Unclassied”.
➣
PTP does not support folder sort mode.
➣
Preference
Monthly
Timeline
image_1.jpg
Month : Jan
Date :
Colour : Gray
Composition :
Folder : P-other
Favourite :
Jan Nov
Device
Favourites Settings
Jan.01.2008
★ ★ ★
▲
Select
Jump
Option
English - 38

English - 39
Sorting Standard for the Photo List
Monthly
•
It sorts and shows photos in the le by month. It sorts only by month (from January to December)
regardless of year.
Timeline
•
It sorts and shows photos by date. It sorts by year and month from the earliest photo.
Colour
•
It Sorts photos by colour. You can change the photo colour information.
“Colour” options: Red, Yellow, Green, Blue, Magenta, Black, Gray, Unclassied.
➣
Composition
•
It Sorts photos by composition. You can change the compositional information of photos.
“Composition” options:
➣
(horizontal), (vertical), (object), (perspective), (pattern),
Unclassied.
•
Folder
It Sorts photos by folder. If there are many folders in USB, the photos les are shown in order in each
folder. The photo le in the Root folder is shown rst and the others are shown in alphabetical order by
name.
•
Preference
It Sorts photos by preference (Favourite). You can change the photo preferences.
Changing the Favourites setting
➣
Select the desired photo in the Photo list, then press the Green button repeatedly until the desired
setting appears.
“Favourite” options:
➣
★ ★ ★, ★ ★ ★, ★ ★ ★, ★ ★ ★
Photo List Option Menu
Slide Show
•
Using this menu, you can play a SlideShow using the
photo les on the USB memory device.
Play Current Group
•
Photo
image_1.jpg
Month : Jan
Date :
Jan.01.2008
Colour : Gray
Composition :
Folder : P-other
Favourite :
★ ★ ★
Using this menu, you can play a SlideShow using only
the photo les in the currently selected sorting group.
Preference
Delete
•
Using this menu, you can delete the selected photo les.
Change Group
•
SUM
Jan Nov
Monthly
Timeline
Device
Favourites Settings
▲
Select
You can change the “Colour” and “Composition” information of photo les.
The group information of the current le is updated and the le is moved to the new group.
➣
To change the information of multiple les, select the les you want by pressing the yellow button.
➣
Slide Show
Play Current Group
Delete
Information
▼
Jump
Option

Information
•
The photo le information including, the name, the size, the resolution, the date modied and the path is
displayed.
You can view the information of photo les during a SlideShow using the same procedures.
➣
Alternatively, select a photo from the photo list and
O
press the INFO button to view the information.
Remove Safely
•
You can remove the device safely from the TV.
Viewing a Photo or Slide Show
Viewing a Slide Show
1. Press the ◄ or ► button to select the desired
photo in the Photo list.
2. Press the TOOLS button.
3. Press the ▲ or ▼ button to select “Slide Show”,
then press the ENTER
All les in the photo list will be used for the
➣
E
button.
Slide Show.
►
Normal 20/22 image_1.jpg 440x440 2.0KB 2008/1/1
➣
During the slide show, les are displayed in order
SUM
E Pause Previous Next Option Return
from the currently shown le.
The Slide Show progresses in the order sorted in the Photo list.
➣
Music les can be automatically played during the Slide Show if the “Background Music” is set to
➣
“On”. (Refer to page 42).
While a photo list is displayed, press the
➣
∂
(Play)/
ENTERE button on the remote control to start slide
show.
SlideShow Control Buttons
➣
ENTER
∂
∑
E
Play/Pauses the Slide Show.
Play the Slide Show. TOOLS
Pause the Slide Show.
English - 40
∫
π/µ
Exit Slide Show and return to the
photo list.
Run various functions from the
Photo menus.
Change the Slide Show playing
speed.

English - 41
Playing current group
1. Press the ▲ or ▼ button to select a sorting standard.
(“Monthly”, “Timeline”, “Colour”, “Composition”, “Folder”, “Preference”)
2. Press the
π
(REW) or µ (FF) button to select the desired group.
3. Press the TOOLS button.
4. Press the ▲ or ▼ button to select “Play Current Group”, then press the ENTER
Only the photos in the sorting group including the selected les will be used for the Slide Show
➣
E
button.
To perform a SlideShow with only the selected les
1. Press the ◄ or ► button to select the desired photo in the Photo list.
2. Press the yellow button. Repeat the above operation to select multiple photos.
c
The
➣
➣
➣
3. Press the
➣
mark appears to the left of the selected photo.
If you select one le, the SlideShow will not be performed.
To deselect all selected les, press the TOOLS button and select “Deselect All”.
∂
(Play) / ENTERE button.
The selected les will be used for the Slide Show.
Slide Show Option Menu
Stop Slide Show / Start Slide Show
•
You can start or stop a SlideShow.
Rotate
•
You can rotate photos saved on a USB memory device.
Whenever you press the ◄ button, it rotates by
➣
270˚, 180˚, 90˚, and 0˚.
Whenever you press the ► button, it rotates by 90˚,
➣
180˚, 270˚, and 0˚.
If you have select “Zoom”, the “Rotate” deactivated.
➣
Zoom
•
Tools
Stop Slide Show
Rotate
Zoom
Slide Show Speed : Normal
Background Music : Off
Background Music Setting
Information
Remove Safely
U
Move E Enter e Exit
You can magnify photos saved on a USB memory device. (x1 → x2 → x4)
To move the enlarged photo image, press the ENTER
➣
E
button, then press the ▲/▼/◄/►
buttons. Note that when the enlarged picture is smaller than the original screen size, the location
change function doesn’t work.
The enlarged le is not saved.
➣
•
Slide Show Speed
You can select the slide show speed.
You can select the Slide Show speed only during a slide show.
➣
You can also change the speed of the Slide Show by pressing the
➣
π
(REW) or µ (FF) button
during the Slide Show.
.

Background Music → On / Off
•
If you set “Background Music” to On, the background music will be played when viewing photos one by
one or in a Slide Show.
If you set “Background Music” to On, a screen appears immediately where you can set the Background
Music.
To use this feature, there must be music and photo les stored on the USB device.
Background Music Setting
•
You can select background music when watching a SlideShow.
If you turn off the “Background Music”, even if the “Background Music Settings” have been set up,
➣
the background music will not be played.
Loading music les is needed to change BGM mode. Play music les in music category to load.
➣
BGM Mode → Mood / Selected File / Shufe
•
BGM Mood → Energetic / Rhythmical / Sad / Exciting / Calm
•
If you set “BGM Mode” to “Mood”, you can select a mood.
➣
You cannot select a mood not part of the music les on the USB memory device.
➣
Select Music File
•
If you set “BGM Mode” to “Selected File”, you can select a music le.
➣
Information
•
The photo le information is displayed.
Remove Safely
•
You can remove the device safely from the TV.
Using and Sorting the Music List
You can sort music les in the Music List by a particular standard.
1. Press the ▲ or ▼ button to select a sorting
standard in the Music list.
Music les are sorted according to the newly
➣
selected sorting standard.
To move to the previous / next group, press the
➣
π
(REW) or µ (FF) button.
2. Press the ENTER
E
button to start playing music
in the order selected by the user.
The information of the music les is
➣
automatically set.
The “Mood” information extracted from a music
➣
le may differ from the expectations of the user.
Music information is automatically set. You can change the “Mood” and “Favourite”.
➣
Music les for which information cannot be displayed are set to “Unclassied”.
➣
If there is no title information for a music le, the lename is displayed.
➣
If no information is available for the Genre, Artist, Album, or Year, the corresponding item is
➣
displayed as blank.
English - 42
Music
Thanks
Jee
Album 1
2005
Pop
Energetic ★ ★ ★
Preference
Title
Artist
Device
SUM
I Love You
Sad ★ ★ ★
F G H I J L P S T V
▲
Favorites Settings
Darby
Album 2
2005
Pop
Select
Better than yesterday
Catherine
Album 3
2005
Pop
Calm ★ ★ ★
Jump
Option

English - 43
Sorting Standard for the Music List
Title
•
It sorts the Music titles in symbol/Number/alphabet/special order, and shows the music le.
Artist
•
It sorts the music le by artist in symbol/Number/alphabet/special order.
Mood
•
It sorts music les by the mood. You can change the music mood information.
“Mood” options: Energetic, Rhythmical, Sad, Exciting, Calm, Unclassied
➣
•
Genre
It sorts music les by the genre.
•
Folder
It sorts music les by the folder. If there are many folders in USB, the les are shown in order in each
folder. The music le in the Root folder is shown rst and the others are shown in alphabetical order by
name.
•
Preference
It sorts music les by preference (Favourite). You can change the music les preferences.
➣
Changing the Favourites setting
Select the desired music le in the Music list, then press the Green button repeatedly until the
➣
desired setting appears.
To change the information of multiple les, select les by pressing the yellow button.
➣
“Favourite” options:
➣
★ ★ ★, ★ ★ ★, ★ ★ ★, ★ ★ ★
Music List Option Menu
Play Current Group
•
Using this menu, you can only play music les in the
currently selected sorting group.
Delete
•
Using this menu, you can delete the selected music
les.
Change Group
•
You can change the mood information of music les.
The group information of the current le is updated and
the le is moved to the new group.
To change the information of multiple les, select les by pressing the yellow button.
➣
•
Information
Music
Thanks
Jee
Album 1
2005
Pop
Sad ★ ★ ★
Artist
Mood
Genre
Device
SUM
I Love You
Darby
Album 2
2005
Pop
Sad ★ ★ ★
Rhythmical Sad Exciting Calm ...
▲
Favorites Settings
Better than yesterday
Play Current Group
Delete
Change Group
Information
Exciting ★ ★ ★
Select
Jump
Catherine
Album 3
2005
Pop
▼
Option
The music le information including the name, the size, the date modied and the path is displayed.
You can view the information of music les during a SlideShow using the same procedures.
➣
Alternatively, select a music le from the music list
O
and press the INFO button to view the information.
Remove Safely
•
You can remove the device safely from the TV.

Playing a Music
Playing a music le
1. Pressing the ◄ or ► button to select a music le to
be played,
2. Press the
➣
∂
(Play) / ENTERE button.
This menu only shows les with the MP3 le
extension. Files with other le extensions are
not displayed, even if they are saved on the
same USB device.
π
➣
(REW) or µ (FF) buttons do not function
during play.
The selected le is displayed at the top with its
➣
playing time.
To adjust the music volume, press the volume button on the remote control. To mute the sound,
➣
press the MUTE button on the remote control.
The playing duration of a music le may be displayed as ‘00:00:00’ if its playing time information
➣
is not found at the start of the le.
Music Play Control
➣
E
ENTER
∂
∑
Music function information icon
➣
Buttons
Play/Pauses the music le.
Play the music le TOOLS
Pause the music le
SUM
∫
7/14 00:01:15 00:05:41
I Love You
Pause Previous Next Option Return
Exit play mode and return to the
music list.
Run various functions from the
Music menus.
When all music les in the folder (or the selected le) are repeated. “Repeat Mode” is “On”.
When all music les in the folder (or the selected le) are played once. “Repeat Mode” is
“Off”.
Playing the music group
1. Press the ▲ or ▼ button to select a sorting standard.
(“Title”, “Artist”, “Mood”, “Genre”, “Folder”, “Preference”)
2. Press the
π
(REW) or µ (FF) button to select the desired group.
3. Press the TOOLS button.
4. Press the ▲ or ▼ button to select “Play Current Group”, then press the ENTER
The music les in the sorting group including the selected le are played.
➣
E
button.
Playing the selected music les
1. Press the ◄ or ► button to select the desired music le in the music list.
2. Press the yellow button. Repeat the above operation to select multiple music les.
c
The
➣
3. Press the
➣
mark appears to the left of the selected music le.
∂
(Play) / ENTERE button.
Only the selected le is played.
English - 44

English - 45
Music Play Option Menu
Repeat Mode → On / Off
•
You can play music les repeatedly.
Information
•
The music le information is displayed.
Remove Safely
•
You can remove the device safely from the TV.
Using and Sorting the Movie List
You can sort movies in the Movie List by a particular standard.
1. Press the ▲ or ▼ button to select a sorting
standard in the Movie list.
The movie les are sorted according to the
➣
newly selected sorting standard.
To move to the previous / next group, press the
➣
π
(REW) or µ (FF) button.
2. Press the
∂
(Play) / ENTERE button to play
the movie in the order selected by the user.
The movies are sorted according to the newly
➣
selected sorting standard.
Movie information is automatically set. You can
➣
change the “Favorite”.
Sorting Standard for the Movie List
Movie
Preference
SUM
Title
Timeline
Tools
Repeat Mode
◄ On ►
Information
Remove Safely
U
Move L Adjust e Exit
movie_1.jpg
Date : Jan.01.2008
Folder : movie-folder
Favourite :
★ ★ ★
SYMBOL
A M
□
Device
Favourites Settings
ENG
▲
Select
Jump
Option
Title
•
It sorts and displays the Movie titles in symbol/Number/alphabet/special order.
Timeline
•
It sorts and shows movies by date. It sorts by year and month from the earliest movie.
Folder
•
If there are many folders in USB, the movies les are shown in order in each folder
. The movie le in the
Root folder is shown rst and the others are shown in alphabetical order by name.
Preference
•
It sorts movies by preference. (Favorite) You can change the movie preferences.
Changing the Favourites setting
➣
Select the desired movie le in the movie list, then press the Green button repeatedly until the
➣
desired setting appears.
“Favourite” options:
➣
★ ★ ★, ★ ★ ★, ★ ★ ★, ★ ★ ★

Movie List Option Menu
Play Current Group
•
Using this menu, you can only play movie les in the
Movie
currently selected sorting group.
Delete
•
Using this menu, you can delete the selected movie les.
Information
•
The movie le information including the name, the size,
Preference
the date modi ed and the path is displayed.
SUM
O
Alternatively, select a movie le from the movie list
and press the INFO button to view the information.
•
Remove Safely
You can remove the device safely from the TV.
Playing a Movie File
Playing a movie le
1. Pressing the ◄ or ► button to select a movie to
be played,
2. Press the
➣
➣
➣
➣
➣
∂
(Play) / ENTERE button.
The selected le is played.
The selected le is displayed at the top with its
playing time.
The playing duration of a movie le may be
displayed as ‘00:00:00’ if its playing time
information is not found at the start of the le.
You can watch exciting gaming multimedia
SUM
les, but the gaming function is not supported.
Movie doesn’t support subtitles. (for example, not support smi, srt and sub
support subtites included in movie les)
movie_1.jpg
Date : Jan.01.2008
Folder : movie-folder
Favourite :
★ ★ ★
SYMBOL
A M
Title
Timeline
1/5 00:00:48 00:23:05
ABC.avi
ENG
□
▲
Device
Favourites Settings
E
Pause -20sec +20sec Option
Select
les, etc and not
Play Current Group
Delete
Information
Remove Safely
Jump
Option
Return
Manufactured under license from Dolby Laboratories. Dolby and the doubleD symbol are trademarks of Dolby Laboratories.
English - 46

English - 47
Supported Video Formats
➣
Container Type
Video Codec Type Resolution (Max) Frame Rate
Video Codec
Audio codec
XviD 720 x 576
avi
MPEG2 720 x 576
H.264 HP 1920 x 1088
24/25/30
AC3, MPEG1 (Layer
1, 2, 3), PCM
MPEG-4 ASP 720 x 576
mp4
H.264 HP 1920 x 1088 24/25/30
MPEG-4 ASP 720 x 576 24/25/30
PS MPEG2 1920 x 1088 24/25/30
TS MPEG2 1920 x 1088 24/25/30
➣
ideo Play Control Buttons
V
ENTER
∂
∑
∫
E
Play/Pause Movie le
Play the movie le
Pause the movie le
Exit play mode and return to the movie list.
ADPCM (MS, IMA),
AAC LC
AC3, MPEG1 (Layer
1, 2, 3), LPCM
AC3, MPEG1 (Layer
1, 2, 3), LPCM
TOOLS Run various functions from the movie menus.
◄ / ►/ Wheel Skip forwards or backwards through the movie le in 20 second intervals.
▲ / ▼/ Wheel Play the next le or the previous le.
➣
Movie function information icon
When all movie les in the folder (or the selected le) are repeated.
“Repeat Mode” is “On”.
When all movie les in the folder (or the selected le) are played once.
“Repeat Mode” is “Off”.
Playing the movie group
1. Press the ▲ or ▼ button to select a sorting standard. (“Title”, “Timeline”, “Folder”, “Preference”)
2. Press the π (REW) or µ (FF) button to select the desired group.
3. Press the TOOLS button.
4. Press the ▲ or ▼ button to select “Play Current Group”, then press the ENTER
E
button.
Playing the selected movie les
1. Press the ◄ or ► button to select the desired movie le in the movie list.
2. Press the yellow button. Repeat the above operation to select multiple music les.
The cmark appears to the left of the selected movie le.
➣
3. Press the ∂ (Play) / ENTER
Only the selected le is played.
➣
E
button.

Playing movie continuously
If you exit playing movie, playing it continuously later is possible.
With “Play continuously” function, you can watch movie without watching again from beginning or
bothering searching.
1. Select movie le you want to play continuously by pressing ◄ or ► button from the Movie List.
2. Press the ∂ (Play) / ENTER
E
button.
3. Select play continuously by pressing Blue button.
Movie will begin to play from where it was stopped being played.
➣
If “Cont. movie play help” function was set “On”, a pop-up message will appear when you play
➣
movie le you want to play continuously. (Refer to page 49)
4. To exit “WISELINK Pro” mode, press the W.LINK button on the remote control.
Movie Play Option Menu
Repeat Mode
•
You can play the movie repeatedly.
Picture Size
•
Fit: Play video at the TV screen size.
–
Original: Play video at the original size.
–
Information
•
Tools
Repeat Mode ◄ On ►
Picture Size : Fit
Information
Remove Safely
U
Move L Adjust e Exit
The movie le information is displayed.
Remove Safely
•
You can remove the device safely from the TV.
English - 48

English - 49
Deleting the Photo/Music/Movie File
1. Press the ◄ or ► button to select the desired le in
the Photo/Music/Movie list.
To delete multiple les, select les by pressing
➣
Photo
the yellow button.
2. Press the TOOLS button.
3. Press the ▲ or ▼ button to select “Delete” (or
“Delete selected File”), then press the ENTER
button.
4. Press the ◄ or ► button to select “OK”, then press
the ENTER
➣
➣
➣
➣
➣
➣
➣
E
button.
The le is deleted.
When a read-only le is deleted, the “This File is read-only le. Delete it?” message appear.
Read-only les among multiple les cannot be deleted.
If you select “Cancel”, the deletion is cancelled.
While removing les, don’t remove the USB memory device.
You cannot remove the PTP-connected digital camera picture les.
You cannot recover deleted Photo/Music/Movie les.
E
SUM
Preference
Monthly
Timeline
image_1.jpg
Month : Jan
Date :
Colour : Gray
Composition :
Folder : P-other
Favourite :
Jan Nov
Device
Favourites Settings
Using the Setup Menu
Setup displays the user settings of the WISELINK Pro
menu.
1. Press the W.LINK button on the remote control to
display the WISELINK Pro menu.
2. Press the ◄ or ► button to select “Setup”, then
press the ENTER
E
button.
3. Press the ▲ or ▼ button to select the desired
option.
4.
Press the ◄ or ► button to select the option, then
press the ENTER
➣
To exit WISELINK Pro mode, press the W.LINK
E
button.
button on the remote control.
Slide Show Speed → Fast/Slow/Normal
•
Select to control the slide show speed.
Music Repeat Mode → On/Off
•
Select to repeatedly play music les.
Movie Repeat Mode → On/Off
•
Select to repeatedly play movie les.
Cont. movie play help → On/Off
•
Select to display the help pop-up message for
continuous movie playback.
Screen Saver Run Time → 1 min/3 min/5 min
•
Select to set the waiting time before the screen saver appears.
Information
•
Select to viewing the information of the connected device.
Remove Safely
•
You can remove the device safely from the TV.
WISELINK Pro
SETUP
Photo
Music Setup
SUM
Setup
Slide Show Speed ◄ Normal ►
Music Repeat Mode : On
Movie Repeat Mode : On
Cont. movie play help : On
Screen Saver Run Time : 3 min
Information
Remove Safely
SUM
SUM
Movie
▲
Select
851.98MB/995.00MB Free
Slide Show
Play Current Group
Delete
Information
▼
Jump
Option
Device e Exit
Jan.01.2008
★ ★ ★
Device Move Adjust Return

Setting the DLNA Network
DLNA allows you to watch videos and pictures saved on your PC on your TV through a network
connection in Wiselink Pro mode. This removes the need to copy them to a USB storage device and then
connect the device to your TV. To use DLNA, the TV must be connected to the network and the DLNA
application must be installed on your PC.
Network Connections Diagram
PC
LAN
LAN
TV
External Modem
(ADSL/VDSL/Cable
1
TV)
3
2
1. Connect the [LAN] port on the rear panel of the TV to the external modem with a LAN Cable.
2. Connect the PC to which the “DLNA PC Share Manager” program will be installed and the external
modem using a LAN cable.
3. Connect the LAN port on the wall and the external modem with a Modem Cable.
You can connect the TV to the PC directly without connecting it through a Sharer(Router).
➣
Connecting to the Network
1. When connecting to the network is complete, set up the network on the TV.
A Wireless Internet connection does not support DLNA.
➣
The rst 3 digits (subnet address) of the IP addresses of the TV and the PC must be the same
➣
(e.g. IP Address: 123.456.789.XX )
2. Run a “Network Test” to check the network settings.
Installing the DLNA Application
To play content on the PC on the TV, you have to rst install the application.
System Requirements
1. Insert the Program CD supplied with this TV into your PC.
2. 20MB of free hard disk space is needed for the program installation.
If you share les, up to 20MB of hard disk drive space is required for each 100 les.
➣
If you cancel le sharing, the hard disk drive space used for the thumbnail information is also
➣
freed.
Supported Formats
1. Image: JPEG (jpg, jpeg)
2. Audio: MP3 (mp3)
3. Video: MPEG1(mpg, mpeg), MPEG2 PS/TS(mpg, mpeg, trp, ts, tp), divx(mpg, mpeg, avi), MPEG4 /
H.264 (mpg, mpeg)
English - 50

English - 51
Install the application
1. Run the Setup.exe le on the Program CD supplied with the product.
Alternatively, you can download the le from www.samsung.com.
➣
2. Install the SAMSUNG PC Share Manager as shown in the gures below.
► ►
► ►
►
3. When the installation is complete, the PC Share Manager icon appears on your Desktop.
➣
Double-click the icon to run the program.

Using the DLNA Application
The Program Screen Layout
1
2 3 4 5
6
7
1. Menus: The following application menus are provided : “File”, “Share”, “Server”, and “Help”.
2. Click to share the selected PC server folder.
3. Click to cancel sharing.
4. Click to refresh the PC folder and les.
5. Click to synchronize the share status.
6. The folders and les of the PC to be shared are listed.
7. Folders shared by the user are listed.
File
Property: Shows information on the selected le or folder.
Method 1: Select a le or folder and select the “File” menu
Name Modied
and then select the “Property” sub-menu.
Method
2: Select a le or folder, right-click over the selected
le or folder and then select “Property” from the pop-up menu.
Name
English - 52
Name

English - 53
Exit: Exits the DLNA application.
If you select “Exit” without applying the changes after
changing the shared status, a message will appear asking
if you want to apply the changed settings to the PC. Select
“Yes” to apply the changes and exit the application.
Share
Sharing a Folder
You can share a folder from your PC to the TV. The
maximum number of folders that can be shared is 32.
Your PC will operate as a server to the TV.
➣
Method 1: Select a folder in “My Computer”, select the
“Share” menu and then select the “Share Folder” sub-menu.
Method
2: Select a folder in “My Computer”, right-click over
the selected folder and then select “Share Folder” from the
pop-up menu.
3: Locate the mouse pointer over a folder in the “My
Method
Computer” folder list in the left pane and drag&drop the folder
into the Shared Folders pane. If a message appears asking
you to conrm the shared folder, select “Yes”.
Name
Yes No
Name Modied
Name Modied
Name Modied
Cancelling a Shared Folder
You can cancel a shared folder on your PC. Select a folder
from the “Shared Folder” pane and select “Unshare Folder”.
Method 1: Select a folder from the “Shared Folder” pane,
select the “Share” menu and then select “Unshare Folder”.
Method
2: Select a folder from the “Shared Folder” pane,
right-click over the selected folder and then select “Unshare
Folder” from the pop-up menu.
Yes No
Name Modied
Name Modied

Method 3: Locate the mouse pointer over a folder in the
“Shared Folder” pane and drag&drop the folder into the “My
Computer” pane. If a message appears asking you to conrm
the cancelation, select “Yes”.
Name Modied
Yes No
Applying the Current Settings
Perform this when synchronization is necessary due to a new shared folder or canceling a shared folder.
The “Set Changed State” menu applies changes to shared folders to the data saved with the PC share
program.
Since applying changes to the internal data is a time-consuming process, this function enables users to
apply changes to the data only when required.
Until the “Set Changed State” menu is selected, the changed state of the shared folder is not applied to
the server.
Changes to the shared folders are not applied to your PC until you select the “Set Changed State” menu.
Method 1: Select the “Share” menu and select the “Refresh
DB” sub-menu.
Name Modied
Method
2: Click the “Set Changed State” icon.
Setting the Access Permission
To enable the TV to nd your PC, the TV must be set to “Set
Device Policy” in the Access Permission Settings window.
In addition, the PC server and the TV must be on the same
subnet.
Method: Select the “Share” menu and select “Set Device
Policy”.
Rejected items are represented in gray.
You can change the access permissions by using the Allow
“Accept”/”Deny” button.
To delete an item, select the item and select “Delete Item”.
English - 54
Name

English - 55
Server
Server
You can run or stop using your PC as a server.
Run DLNA Digital Media Server when Windows Starts
You can determine whether to start the PC server automatically when Windows starts.
Change server name
You can rename the PC server. Enter a new name and
click “OK”. The new name will appear at the top right of the
window and will appear on the TV.
Name Modied
Name Modied
Name
Help
Version
The program version information message box appears.
Name Modied

Using the DLNA Function
Using the DLNA Menu
DLNA (Digital Living Network Alliance) enables content
saved on a DLNA server (usually your PC) connected
WISELINK Pro
to your TV or over a network to be played.
Wiselink Pro enables playing content saved on a USB
PHOTO
memory device connected to the TV, while DLNA
enables playing content saved on a DLNA server (your
PC) connected to your TV or over the network. The
procedures to use the content are the same as those
for WISELINK Pro.
If you install the PC share manager program supplied
SUM
Photo
Music Setup
Movie
with the TV onto a PC, you can have the PC perform
the role of a DLNA server over the network.
1. Press the W.LINK button on the remote control to display the “DLNA” menu.
2. Press the ◄ or ►button to select an icon (Photo, Music, Movie, Setup), then press the ENTER
button.
To exit “DLNA” mode, press the W.LINK button on the remote control.
➣
Photo
Photo List option menu
•
Sorting Photo List / Viewing the Information / Rotating the Photo le / Viewing a Slide Show.
During a Slide Show option menu
•
Play & Pause / Slide Show Speed / Zoom / Rotate
Music
•
Music List option menu
Sorting Music List / Viewing the Information / Playing a music le
Music Play Option Menu
•
Play & Pause / Repeat Mode
Movie
•
Movie List option menu
Sorting Movie List / Viewing the Information / Playing a Movie le
Movie Play Option Menu
•
Play & Pause / Repeat Mode
Setup
Slide Show Speed / Music Repeat Mode / Movie Repeat Mode / Screen Saver Run Time / Information
DLNA does not support the following functions.
➣
-
The Background Music and Background Music Setting functions.
-
Sorting les by preference in the Photo, Music, and Movie folders.
-
The Change Group Info function.
-
The Delete function.
-
The Safe Remove function.
-
The π (REW) / µ (FF) button functions while a movie is playing.
➣
The Skip (◄/► button) or Pause function may not work while a movie is playing for the DLNA
other manufacturers, depending on the corresponding content information.
➣
The playing time may not be displayed while a movie is playing.
DLNA : Server
Device e Exit
of
E
English - 56

English - 57
Activating the Content Library
The “Content Library” enables you to view or play the built-in contents on the TV or stored on your USB
device. The Delete, Move and Update functions will not work with the built-in content on the TV.
1. Press the MENU button. Press the ▲ or ▼ button to
select “Input”, then press the ENTER
E
button.
2. Press the ▲ or ▼ button to select “Content Library”,
then press the ENTER
The “Content Library” main menu is displayed.
➣
Press the CONTENT button on the remote control to
O
E
button.
display the “Content Library” main menu.
TV
Source List
Edit Name
Anynet+(
WIESLINK Pro (USB/DLNA)
Content Library
Product Guide
Move Enter Return
Input
: TV
HDMI-CEC)
3. Press the ◄ or ► button to select an icon (Gallery,
Content Library
Cooking, Game, Children, Fitness), then press the
E
ENTER
➣
➣
button.
The selected item will be run.
Refer to the explanation for the button in the
Gallery
display when the user uses the button while
content is running.
Cooking
Setup
Game Children Fitness
R
USB
Returne
Exit
Gallery
Button Operations
Wheel (▲/▼/◄/►) Move the cursor and select an item.
ENTER
E
Select the currently selected item.
RETURN Return to the previous menu.
EXIT Stop the current function and return to the “Content Library” main menu.
TV Stop Content Library mode and Returns to TV mode.
Colour button Button that provide functions are described on the corresponding page.
– VOL + You can control the volume of the played content.
CONTENT Exit Content Library mode.
Contents Library contains text, graphics, images, multimedia, and other materials for informational and promotional purposes
only. Materials in Contents Library has been modied and keeps being revised and updated. The Materials in the Contents
Library may not be suitable for all audiences.
Information in the Contents Library is provided “as is.” Although the information provided to you in the Contents Library
is obtained or complied from sources we believe to be reliable, Samsung cannot and does not guarantee the accuracy,
validity, timeliness or completeness of any information or data made available to you for any particular purpose. Under
no circumstances, including negligence, shall Samsung be held liable, whether in contract or tort, for any direct, indirect,
incidental, special or consequential damages, attorney fees, expenses, or any other damages whatsoever arising out of, or
in connection with, any information contained in, or the use of, the Contents Library, even if advised of the possibility of such
damages.

Using the Content Library
Gallery
Art/Relaxation/Party
•
This function plays a SlideShow with high resolution images and background music and produces
various atmospheres. Using the Gallery function of the TV, you can change your home atmosphere.
Press the yellow button to playback all imageries.
➣
There is default music for each for the “Art”, “Relaxation”, and “Party” options.
➣
Press INFO button to see the credit and detail information in English for the imagery. Press INFO
➣
button again or press ► button for the credit information to go away (currently, the credit supports
English only.)
The copyrights of the “Gallery” contents and all issues related to them are reserved by Gallery
➣
Player, Inc.
For additional “Gallery” contents, check for information through www.samsung.com. Please refer to
➣
the “Using Additional Content Using External USB Memory Storage” section (page 59) to see how
to play additional imagery.
Cooking
Starters / Main Courses / Desserts
•
You can view various recipes that you can then easily follow step by step. Enjoy these contents which
give you great ideas for meals.
The recipes introduced in the “Cooking” contents on the Samsung TV are based on recipes
➣
published by Anness Publishing.
The copyrights of the “Cooking” contents and all issues related to them are reserved by Practical
➣
Pictures.
Game
Dynamic Bowling/Minimini Cook: This category provides entertainment games for the whole
•
family.
For the buttons used in the games, refer to the directions on the screen.
➣
For the 2 embedded games, the copyrights are reserved by each of the corresponding game
➣
providers and all issues related to copyrights are reserved by the corresponding game providers.
More detail instruction on how to play a game is given at the beginning of each game page.
➣
Children
Story / Song / Play
•
This is educational and interactive content that children can watch repeatedly. Enjoy existing stories,
songs and games with the Boowa and Kwala characters.
The copyrights of the “Children” contents and issues related to them are reserved by UpToTen.
➣
English - 58

English - 59
Fitness (depending on the country)
Basic Stretches / Massage
•
This is bene cial health management content that provides stretching and massage exercises that can
be enjoyed by the whole family.
This is bene cial health management content that provides stretching and massage exercises that
➣
can be enjoyed by the whole family. The “Basic Stretches” contents for the Samsung TV are based
on the book Stretching by Suzanne Martin which is published by DK and the “Massage” contents are
based on the books published by Anness Publishing.
The copyrights to “Basic Stretches” are reserved by the DK Publishing Company. The copyrights
➣
to the “Massage” content are reserved by Practical Pictures. All issues related to copyrights are
reserved by the corresponding company.
Using the Remote Control Button in Fitness menu
Button Operations
Wheel (◄/►) View to previous step / View to next step
ENTER
E
Play or pause (in Basic and Advanced Stretches)
Screen Saver Run Time
Off / 4 hour / 8 hour / 10 hour
•
Select to set the waiting time before the screen saver appears.
Press the yellow button to select “Setup” in the “Content Library” main menu.
Using Additional Content Using External USB Memory Storage
You can download contents onto a USB memory device and play them on your TV. (The contents on the
external USB device are played directly without being copied to the built-in Flash memory of the TV.)
Playing and Exiting New Content
1. Press the Red button in the “Content Library” main
menu.
The USB Browser main screen is displayed.
➣
A list of les saved on the USB device is
➣
displayed.
2. Press the ▲ or ▼ button to move to the le (or
folder) you want to play. Press the ENTER
E
button.
The selected content is played.
➣
Not support game program.
➣
The use of contents is the same as in using
➣
the TV memory contents.
To return to the USB browser main screen,
➣
press the EXIT button.
To exit “Content Library” mode, press the
➣
P>/< button on the remote control.
Content Library
Gallery
Cooking
Content Library
Cooking
Game Children Fitness
Setup
USB
USB
Cooking
Gallery
Fitness
Children
Gallery
R
Returne
Exit
1/1 >>
<<
TV Memory
Show UDNR
▼ ▲
Return

“Content Library” only supports USB Mass Storage Class devices (MSC). MSC is a Mass
➣
Storage Class Bulk-Only Transport device. Examples of MSC are Thumb drives and Flash Card
Readers (Both USB HDD and HUB are not supported.)
Downloading New Contents
New content other than the built-in contents will be provided via the Samsung.com website with or without
charge.
•
Downloading Content
Visit the www.samsung.com website and open the Content Library page.
1.
2. Enter the product number (UDN, Unique Device Number) when it is asked.
3. Select a content item in the Contents Download page.
4. Download the contents onto the USB memory device.
➣
“Content Library” only supports USB Mass Storage Class devices (MSC). MSC is a Mass
Storage Class Bulk-Only Transport device. Examples of MSC are Thumb drives and Flash Card
Readers (Both USB HDD and HUB are not supported.)
Go to “Content Library” main menu by pressing “Contents” button or choosing “Content Library”
5.
(Menu → Input → “Content Library”)
6.
Plug the USB memory into USB port on the side of the TV.
Finding a product number (Unique Device Number, UDN)
•
1.
Insert the USB memory into the USB port on the side of the TV.
2. In the USB Browser main screen, press the Green button (Show UDN).
3. The 18-digit number on the screen is the product code.
Provided Content
•
Additional contents are available on www.samsung.com.
-
English - 60

English - 61
What is Anynet+?
Anynet+ is an AV network system that enables an easy-to-use AV interface for users by controlling
all connected AV devices through the Anynet+ menu when Samsung Electronics AV devices are
connected.
Connecting Anynet+ Devices
The Anynet+ system supports AV devices supporting Anynet+ only.
Check if there is an Anynet+ mark on the AV device to be connected to the TV.
To directly connect to TV
TV
or [HDMI 4] jack
HDMI 1.3 Cable
Anynet+
Device 1
HDMI 1.3 Cable
Anynet+
Device 2
HDMI 1.3 Cable
Anynet+
Device 3
HDMI 1.3 Cable
Anynet+
Device 4
To connect to Home Theater
TV
Home Theatre
HDMI 1.3 Cable HDMI 1.3 Cable
Anynet+ Device 2
HDMI 1.3 Cable
Anynet+ Device
HDMI 1.3 Cable
HDMI 1.3 Cable
Anynet+
Device 1
3 Anynet+ Device 4
Connect the [HDMI 1],
[HDMI 2], [HDMI 3]
on the TV and the
HDMI OUT jack of
the corresponding
Anynet+ device using
the HDMI cable.
1. Connect the
[HDMI 1],
[HDMI 2]
,
[HDMI 3]
or
[HDMI 4]
jack
on the TV and
the HDMI OUT
jack of the
corresponding
Anynet+ device
using the HDMI
cable.
2
. Connect the
HDMI IN jack of
the home theatre
and the HDMI
OUT jack of the
corresponding
Anynet+ device
using the HDMI
cable.
Connect only one receiver.
➣
You can connect an Anynet+ device using the HDMI 1.3 cable. Some HDMI cables may not support
➣
Anynet+ functions.
Anynet+ works when the AV device supporting Anynet+ is in the Standby or On status.
➣
Anynet+ supports up to 8 AV devices in total.
➣

Setting Up Anynet+
The following settings are to use Anynet+ functions.
Using the Anynet+ Function
1. Press
2. Press the ENTER
3. Press the ▲ or ▼ button to select "On", then press the
➣
➣
➣
The TOOLS button. Then Press the ENTER button to
select "Anynet+(HDMI-CEC)".
Press the ▲ or ▼ button to select "Setup", then press the
EN
TER button.
button to select "Anynet+ (HDMI-CEC)",
then press the ENTER button.
TER button.
EN
The "Anynet+ (HDMI-CEC)" function is enabled.
If you select "Off", "Anynet+ (HDMI-CEC)" is disabled.
When the "Anynet+ (HDMI-CEC)" function is disabled, all the
Anynet+ related operations are deactivated.
Anynet+ (HDMI-CEC)
Picture Mode : Standard
Sound Mode : Custom
Sleep Timer : Off
SRS TS XT : Off
Energy Saving : Off
Dual l-ll : Mono
Move Enter Exit
TV P9
View TV
Select Device
Record
Menu on Device
Device Operation
Receiver :Off
Setup
Move Enter
Return
Anynet+ (HDMI-CEC)
Auto Turn Off
Searching Connections
Move Enter Return
Tools
Setup
: Off
: Off
Off
On
Turning an
1. Press the ▲ or ▼ button to select "Auto Turn Off", then press
2. Press the ▲ or ▼ button to select "Yes", then press the
Press the EXIT button to exit.
➣
Anynet+ Device Off Automatically when the TV is Turned Off
the EN
TER button.
ENTER button.
The "Auto turn off" function is enabled.
➣
If you select "No", the "Auto turn off" function is cancelled.
➣
The Select Device setting of the TV remote control is to be set
Setup
Anynet+ (HDMI-CEC)
Auto Turn Off
Searching Connections
Move Enter Return
: On
: Off
to TV to use the Anynet+ function.
If you set "Auto Turn Off" to "Yes", connected external devices are also turned off when the TV is
➣
turned off. However, if the device is recording, it may not be turned off.
English - 62
No
Yes

English - 63
Scanning and Switching between Anynet+ Devices
1. Press the TOOLS button.
Then press the ENTER button to select "Anynet+(HDMICEC)".
2. Press the ▲ or ▼ button to select "Select Device", then press
the EN
TER button.
3. Press the ▲ or ▼ button to select to a particular device and
press the EN
TER button. It is switched to the selected device.
4. If you cannot nd a device you want, press the ▲ or ▼ button to
select "Setup", then press the EN
TER button.
5. Press the ▲ or ▼ button to select "Searching Connections",
then press the EN
TER button.
The message "Conguring Anynet+ connection" is displayed.
When searching devices completes, the connected devices are
listed in the Anynet+ menu.
Switching to the selected devices may take up to 2 minutes.
➣
You cannot cancel the operation during the switching
operation.
➣
The time required to scan for devices is determined by the number of connected devices.
➣
When the device scan is complete, the number of found devices is not displayed.
➣
Although the TV automatically scans devices when it is turned on using the POWER button, devices
connected when the TV is on or under a specic circumstance are not displayed in the device list.
Therefore select "Searching Connections" menu to search devices.
➣
If you have selected external input mode by pressing the SOURCE button, you cannot use the
Anynet+ function. Make sure to switch to an Anynet+ device by using the TOOLS button.
TV P9
View TV
Select Device
Record
Menu on Device
Device
Operation
:Off
Receiver
Setup
Move Enter
Return
Setup
Anynet+ (HDMI-CEC)
Auto Turn Off
Searching Connections
Move Enter Return
: On
: Yes

Anynet+ Menu
The Anynet+ menu changes depending on the type and status of the Anynet+ devices connected
to the TV.
Anynet+ Menu Description
View TV Switches from Anynet+ to TV broadcast mode.
Select Device Your TV connects to the corresponding device.
Record Starts a recording. (This menu works only for a device supporting
Menu on Device Shows the menu of the connected device.
Device Operation Shows the play control menu of the connected device.
Receiver Sound is output through the receiver.
Setup You can set the environment for using Anynet+.
V Remote Control Buttons Available in Anynet+ Mode
T
Device Type Operating Status Available Buttons
Anynet+ Device
Device with built-in Tuner
Audio Device When Receiver is activated
➣
The Anynet+ function only works when the remote control is set to TV.
➣
The
➣
You cannot control Anynet+ devices using the buttons on the TV. You can control Anynet+ devices
only using the TV remote control.
The TV remote control may not work under certain conditions. In this case, re-select the Anynet+
➣
device.
The Anynet+ functions don’t operate for the products from other manufacturers.
➣
In Anynet+ mode, the colour buttons may not work properly.
➣
The , operations may differ depending on the device.
➣
button works only while in the recordable state.
recording.)
Example. When a DVD Recorder is connected, the DVD Recorder’s
title menu appears.
Example. When a DVD Recorder is connected, the play control
menu of the DVD Recorder appears.
After switching to the
device, when the menu of
the corresponding device is
displayed on the screen.
After switching to the device,
while playing a file
After switching to the device,
when you are watching a TV
programme
Numeric buttons
▲/▼/◄/►/EN
Colour buttons
EXIT button
(Backward search)/
(Forward search)/
(Stop)/ (Play)/
(Pause)
/ button
P
VOL - / + button
TE button
MU
TER buttons
English - 64

English - 65
Recording
You can make a recording of a TV programme using a recorder.
Press the
Recording begins. (Only when the Anynet+ enabled recording device is connected.)
The current TV programme is recorded in the Watching TV status. If you are watching video from
➣
another device, the video from the device is recorded.
You can also record the source streams by selecting Record after pressing the TOOLS button.
➣
Before recording, check whether the antenna jack is properly connected to the recording device.
➣
For the antenna connection to the recording device, refer to its user manual.
button.
Listening through a Receiver
You can listen to sound through a receiver instead of the TV speaker.
1. Press the TOOLS button. Then Press the EN
select "Anynet+(HDMI-CEC)".
Press the ▲ or ▼ button to select "Receiver", then press the
EN
TER button.
2. Press the ◄ or ► button to select to "On", then press the
ENTER
Now you can listen to sound through the receiver.
3
. Press the EXIT button to exit.
➣
When the receiver is set to On, you can listen to the TV sound
through the 2-channel receiver.
If the receiver is exclusively for a home theatre only
➣
(supporting audio only), it may not appear in the device list.
In case of a content with copyright problem, listening through the receiver may not properly operate.
➣
If there is a power interruption to the TV when the “Receiver” is set to “On” (by disconnecting the
➣
power cord or a power failure), the “TV Speaker” may be set to “Off” when you turn the TV on again.
(see page 22)
button.
TER button to
TV P9
View TV
Select Device
Record
Menu on Device
Device Operation
Receiver :Off
Setup
Move Enter
Return

Check Points before Requesting Service
Symptom Solution
Anynet+ does not
work.
I want to start
Anynet+.
I want to exit Anynet+. ■
he Connecting to
T
Anynet+ device…
message appears on
the screen.
T
he Anynet+ device
does not play.
he connected device
T
is not displayed.
T
he TV programme
cannot be recorded.
Check if the device is an Anynet+ device. The Anynet+ system supports Anynet+
■
devices only.
■ Connect only one receiver.
■ Check if the Anynet+ device power cord is properly connected.
■ Check the Anynet+ device’s Video/Audio/HDMI 1.3 cable connections.
■ Check whether Anynet+ (HDMI-CEC) is set to On in the Anynet+ setup menu.
■ Check whether the TV remote control is in TV mode.
■ Check whether it is Anynet+ exclusive remote control.
■ Anynet+ doesn’t work at a certain condition. (Searching channels, Operating
WIESLINK Pro, Plug & Play, etc.)
■
When connecting or removing the HDMI 1.3 cable, please make sure to search
devices again or restart your TV.
■
Check if the Anynet+ Function of Anynet+ device is set on.
Check if the Anynet+ device is properly connected to the TV and check if the
■
Anynet+ (HDMI-CEC) is set to On in the Anynet+ Setup menu.
■ Press the TV button on the TV remote control to switch to TV. Then press the
TOOLS button to show the Anynet+ menu and select a menu you want.
Select View TV in Anynet+ menu.
■ Press the SOURCE button on the TV remote control and select a device other
than Anynet+ devices.
Press any of P
■
the channel button operates only when a tuner-embedded Anynet+ device is not
connected.)
You cannot use the remote control when you are configuring Anynet+ or
■
switching to a view mode.
Use the remote control when the Anynet+ setting or switching to view mode is
■
complete.
You cannot use the play function when Plug & Play is in progress.
Check whether or not the device supports Anynet+ functions.
■
■ Check whether or not the HDMI 1.3 cable is properly connected.
■ Check whether Anynet+ (HDMI-CEC) is set to On in the Anynet+ setup menu.
■ Search Anynet+ devices again.
■ You can connect an Anynet+ device using the HDMI 1.3 cable only. Some HDMI
cables may not support Anynet+ functions.
If it is terminated by an abnormal situation such as disconnecting the HDMI 1.3
■
cable or power cord or a power failure, please repeat the device scan.
Check whether the antenna jack on the recording device is properly connected.
/ , PRE-CH, and such to change to the TV mode. (Note that
English - 66

English - 67
Teletext Feature
Most television stations provide written information services via Teletext. The index page of
the teletext service gives you information on how to use the service. In addition, you can select
various options to suit your requirements by using the remote control buttons.
➣
For teletext information to be displayed correctly, channel reception must be stable. Otherwise,
information may be missing or some pages may not be displayed.
(exit)
1.
Exit from the teletext display
2 6 (index)
Used to display the index (contents) page at any time while you
are viewing teletext.
3 8 (store)
Used to store the teletext pages.
4 4 (size)
Press to display the double-size letters in the upper half of the
screen. For lower half of the screen, press it again. To display
normal screen, press it once again.
5 5 (reveal)
Used to display the hidden text (answers to quiz games, for
example). To display normal screen, press it again.
6 / (teletext on/mix)
Press to activate teletext mode after selecting the channel
providing the teletext service. Press it twice to overlap the teletext
with the current broadcasting screen.
7 1 (sub-page)
Used to display the available sub-page.
8 2 (page up)
Used to display the next teletext page.
9 3 (page down)
Used to display the previous teletext page.
0 0 (mode)
Press to select the teletext mode (LIST/FLOF). If you press it
in the LIST mode, it switches into the List save mode. In the
List save mode, you can save teletext page into list using the
8(store) button.
! 9 (hold)
Used to hold the display on a given page if the selected
page is linked with several secondary pages which follow on
automatically. To resume, press it again.
@ 7 (cancel)
Used to display the broadcast when searching for a page.
# Colour buttons (red/green/yellow/blue)
If the FASTEXT system is used by a broadcasting company, the different topics covered on a teletext
page are colour-coded and can be selected by pressing the coloured buttons. Press one of them
corresponding to the required. The page is displayed with other
coloured information that can be selected in the same way. To
display the previous or next page, press the corresponding coloured
button.
➣
You can change teletext pages by pressing the numeric buttons on
the remote control.
1
2
3
4
5
6
7
8
9
0
!
@
#

The teletext pages are organized according to six categories:
Part Contents
A
B
C
D
E
F
Teletext information is often divided between several pages
➣
displayed in sequence, which can be accessed by:
Entering
Selecting a title in a list
Selecting a coloured heading (FASTEXT system)
➣
Press the T
Selected page number.
Broadcasting channel identity.
Current page number or search indications.
Date and time.
Text.
Status information.
FASTEXT information.
the page number
V button to exit from the teletext display.
English - 68

English - 69
Auto Wall-Mount (Sold separately) (depending on the model)
Once the auto wall mount is installed, your TV’s position can be easily adjusted.
TV Rear Panel
SERVICE Cable (Not supplied)
Entering the menu
1. Press the ▲, ▼, ◄ or ► button on your remote control.
The Auto Wall-Mount screen is displayed.
➣
If the Auto Wall-Mount screen is not displayed when
➣
clicking on a direction button while watching your TV, use
the menu to display that screen.
• Press the MENU button to display the menu.
Press the ▲ or ▼ button to select “Setup”, then press the
ENTER
button.
• Press the ▲ or ▼ button to select “Auto Wall-Mount”, then
press the ENTER
button.
Remembering the Position
2. Adjust to the desired position using the ▲,▼,◄,► buttons.
If you press an arrow button when no OSD is displayed on
➣
the TV screen, the Adjustment screen appears.
Press the INFO button to reset. Press the ◄ or ► button to
➣
select “Yes”, then press the ENTER
button.
The position is initialized to the default setting.
3. Press the blue button.
Press the ▲ and ▼ buttons to select a save mode from either
Position 1, Position 2 or Position 3 in order to save the current
position.
To not save the current position, press the RETURN button.
➣
When selecting a save mode, you cannot use the Colour
➣
buttons.
4. Press the ENTER
➣
When Position1 is selected, the message "Current position
button to save.
saved as Position1" is displayed.
5. Press the ENTER
➣
The saved Position appears on the left side of the OSD.
button.
Auto Wall-Mount
Save
Position1
Position2
Position3
Setup
INFO
TV
Plug & Play
Language : English
Time
Cable Network Setup
Auto Wall-Mount
Melody : Off
Entertainment : Off
Energy Saving : Off
PIP
Move Enter Return
Auto Wall-Mount
Position 1 2 3
Adjust Save Centre
Select a mode to Save.
Move Enter Return

Moving to the remembered position
1. Complete Step 1 of “Entering the menu”.
2. Pressing a Colour (Red, Green, Yellow) button moves the auto
wall mount to the saved position.
You can move the wall mount to one of the 3 pre-set
➣
positions by pressing the Red (Position 1),
Green (Position 2) or Yellow (Position 3) buttons.
If you adjust the position after moving to a pre-set position,
➣
the position display will disappear.
For installation, refer to the Installation Manual provided with the wall mount.
➣
For product installation and the installation and moving of the wall mount, make sure to consult a
➣
specialized installation company.
This installation manual is to be used when attaching the wall mount to a wall. When attaching to
➣
other building materials, please contact your nearest dealer.
The auto wall mount will not work when Anynet+ and WIESLINK Pro are operating.
➣
40 and 46 inch models are not compatible with the old electrically powered wall mount model
➣
(WMN5090A*).
Position1
Auto Wall-Mount
Position 1 2 3
Adjust Save Centre
INFO
Using the Anti-Theft Kensington Lock (depending on the model)
The Kensington lock is a device used to physically x the system when using it in a public
place. The appearance and locking method may differ from the illustration depending on the
manufacturer. Refer to the manual provided with the Kensington lock for proper use. The locking
device has to be purchased separately.
1. Insert the locking device into the Kensington
slot on the LCD TV (Figure 1), and turn it in the
locking direction (Figure 2).
2
. Connect the Kensington lock cable.
3. Fix the Kensington lock to a desk or a heavy
stationary object.
The place of the Kensington Lock may be
➣
different depending on its model.
English - 70
Cable
Figure 2
Figure 1
<Optional>

English - 71
Securing the TV to the Wall
Caution: Pulling, pushing, or climbing on the TV may cause the TV to fall. In particular,
ensure your children do not hang over or destabilize the TV; doing so may cause the TV
to tip over, causing serious injuries or death. Follow all safety precautions provided on the
included Safety Flyer. For added stability, install the anti-fall device for safety purposes, as
follows.
Wall
To avoid the TV from falling:
1.
Put the screws into the clamps and rmly fasten them onto the wall. Conrm that the screws have
been rmly installed onto the wall.
➣
You may need additional material such a s an anchor depending on the type of wall.
Since the necessary clamps, screws, and string are not supplied, please purchase these
➣
additionally.
2.
Remove the screws from the center back of the TV, put the screws into the clamps, and then
fasten the screws onto the TV again.
Screws may not be supplied with the product. In this case, please purchase the screws of the
➣
following specications.
Screw Specications
➣
For a 17 ~ 29 Inch LCD TV: M4 X 15
-
For a 32 ~ 40 Inch LCD TV: M6 X 15
-
3.
Connect the clamps xed onto the TV and the clamps xed onto the wall with a strong string and
then tie the string tightly.
➣
Install the TV near to the wall so that it does not fall backwards.
➣
It is safe to connect the string so that the clamps xed on the wall are equal to or lower than the
clamps xed on the TV.
➣
Untie the string before moving the TV.
4.
Verify all connections are properly secured. Periodically check connections for any sign of fatigue
for failure. If you have any doubt about the security of your connections,contact a professional
installer.
Wall

Troubleshooting: Before Contacting Service Personnel
No sound or picture
Normal picture but no sound
Screen is black and power
indicator light blinks steadily
No picture or black and white
picture
Sound and picture
interference
Blurred or snowy picture,
distorted sound
Remote control malfunctions
‘Check signal cable.’
message is displayed
On PC mode, 'Not Supported
Mode.' message is displayed
The damaged picture
appears in the corner of the
screen
The ‘Resets all settings to
the default values’ message
appears.
You may see small particles
if you look closely at the edge
of the bezel surrounding the
TV screen.
The TFT LCD panel uses a panel consisting of sub pixels (6 220 800) which require sophisticated
technology to produce. However, there may be few bright or dark pixels on the screen. These pixels will
have no impact on the performance of the product.
Check that the mains lead has been connected to a wall socket.
♦
Check that you have pressed the
♦
Check the picture contrast and brightness settings.
♦
Check the volume.
♦
Check the volume.
♦
Check whether the MU
♦
Check if "TV Speaker" is on
♦
On your computer check; Power, Signal Cable.
♦
The TV is using its power management system.
♦
Move the computer’s mouse or press any key on the keyboard.
♦
Adjust the colour settings.
♦
Check that the broadcast system selected is correct.
♦
Try to identify the electrical appliance that is affecting the set and move it
♦
further away.
♦
Plug your set into a different mains socket.
Check the direction, location and connections of your aerial.
♦
This interference is often due to the use of an indoor aerial.
Replace the remote control batteries.
♦
Clean the upper edge of the remote control (transmission window).
♦
Check the battery terminals.
♦
Check that the signal cable is rmly connected to the PC or video sources.
♦
Check that the PC or video sources are turned on.
♦
Check the maximum resolution and the frequency of the video adaptor.
♦
Compare these values with the data in the Display Modes.
♦
If "Just Scan" is selected in some external devices, the damaged picture
may appear in the corner of the screen. This symptom is caused by
external devices, not TV.
This appears when you press and hold the EXI
product settings are reset to the factory defaults.
This is part of the product’s design and is not a defect.
TE button has been pressed on the remote control.
button on your set.
T button for a while. The
English - 72

English - 73
Specications
Model Name LA40A750 LA46A750 LA52A750
Screen Size
(Diagonal) 40 inches 46 inches 52 inches
PC Resolution
(Optimum) 1920 x 1080 @ 60 Hz 1920 x 1080 @ 60 Hz 1920 x 1080 @ 60 Hz
Sound
Output 10W x 2 10W x 2 10W x 2
Dimensions (WxDxH)
Body
With stand
Weight
With Stand 19 kg 29 kg 37 kg
Environmental
Considerations
Operating Temperature
Operating Humidity
Storage Temperature
Storage Humidity
Stand Swivel
(Left / Right) 0˚
Design and specications are subject to change without prior notice.
➣
This device is a Class B digital apparatus.
➣
For the power supply and Power Consumption, refer to the label attached to the product.
➣
1040 x 85 x 638 mm
1040 x 272 x 686 mm
1172 x 98 x 712 mm
1172 x 300 x 766 mm
10°C to 40°C (50°F to 104°F)
10% to 80%, non-condensing
-20°C to 45°C (-4°F to 113°F)
5% to 95%, non-condensing
1321 x 107 x 805 mm
1321 x 338 x 861 mm
 Loading...