

Page 1

Samsung
SRD Series
Installation
Guide
EOS Australia PTY LTD
Page 2

Samsung SRD Series
EOS Australia PTY LTD
by Andrew Vo-Nguyen
This guide is designed for installers as a quick guide and a check list of what should
be configured on a DVR on installation. It goes through the most important topics to
ensure all configurations meet the end user's expectations and performs at it's
maximum capacity.
Page 3

Table of Contents
3Contents
Part I DVR Configuration
................................................................................................................................... 51 Naming Camera s
................................................................................................................................... 62 Date & Time
................................................................................................................................... 73 User Manage me nt
................................................................................................................................... 94 Harddrive Management
Part II Recording Configiration
................................................................................................................................... 111 Recording Schedule
................................................................................................................................... 132 Event Record Duration
................................................................................................................................... 143 Recording Qua lity & Resolution
................................................................................................................................... 154 Motion Recording
Part III Network Configuration
................................................................................................................................... 171 IP Settings
................................................................................................................................... 182 Port Numbers
................................................................................................................................... 193 Live Transfer
................................................................................................................................... 204 Smart Phone Connection
Part IV Configurations
5
11
17
22
................................................................................................................................... 221 Updating Firmware
................................................................................................................................... 232 Loading/Saving Configurations
Part V Troubleshooting
EOS Australia PTY LTD
25
3
Page 4

Part
I
Page 5
1 DVR Configuration
The following DVR configurations should be checked and configured on installation of any DVR onto any
site. Settings may vary depending on how the customer wants the DVR configured.
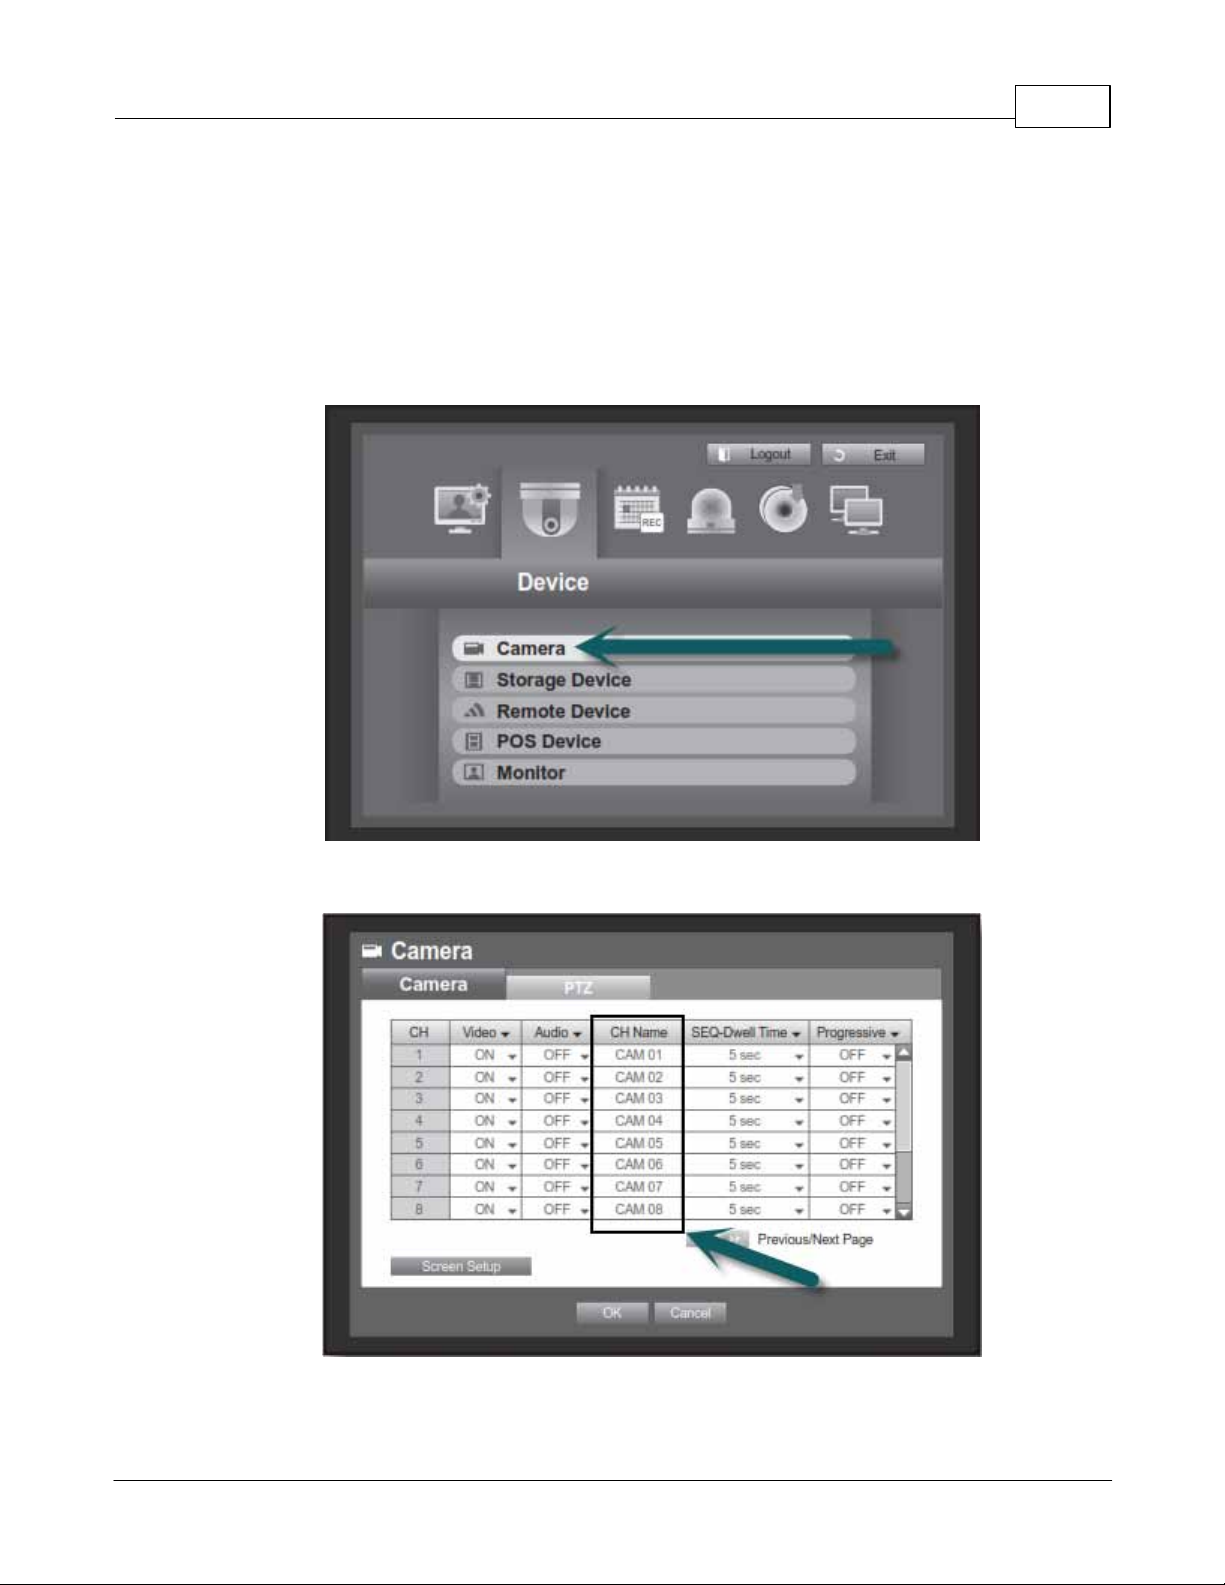
1.1 Naming Cameras
Go to [Menu] > [Device] > [Cameras].
DVR Configuration 5
Double click each camera to change the name.
EOS Australia PTY LTD
Page 6

Samsung SRD Series Insta llation Guide6
1.2 Date & Time
Go to [Menu] > [System] > [Date/Time/Language]
Time and Date should always be checked to ensure all recordings are synchronized with real time. If
your DVR is connected to the internet you can Sync to a Time Server online.
EOS Australia PTY LTD
Page 7
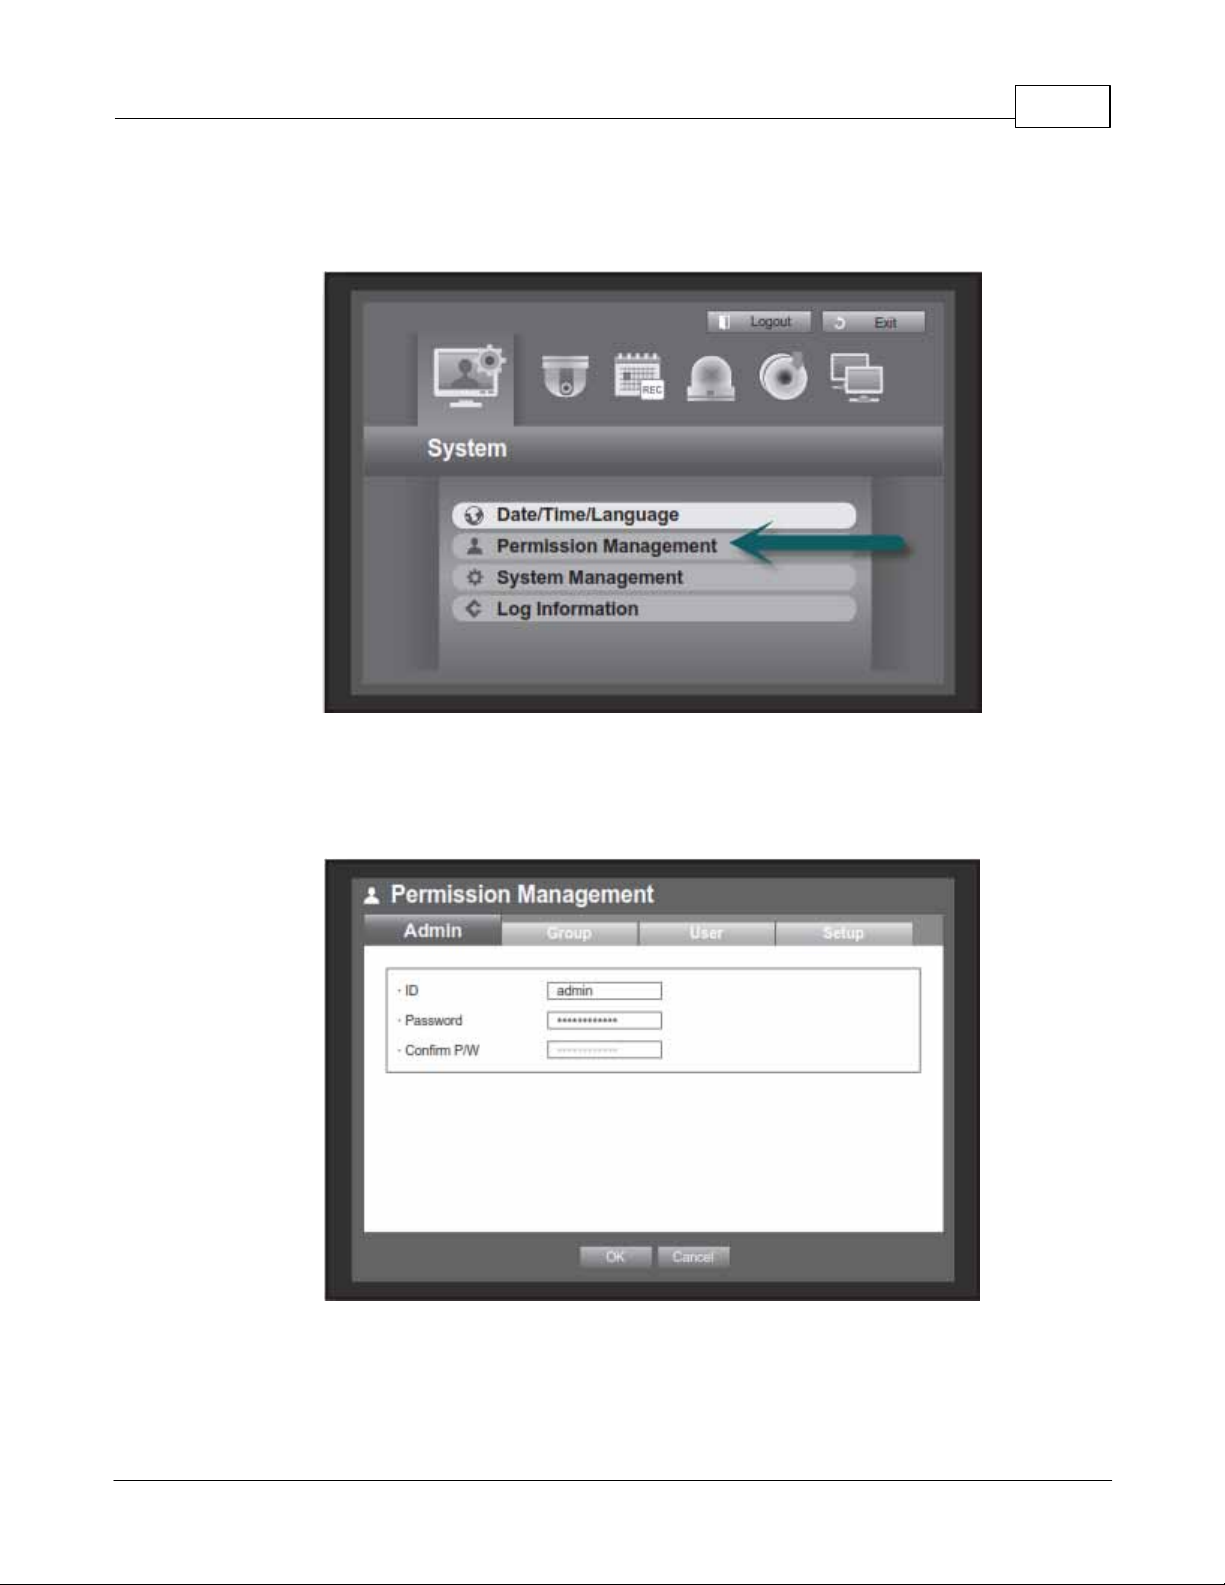
1.3 User Management
Go to [Menu] > [System] > [Permission Management]
DVR Configuration 7
The default 'admin' password is '4321'. This can be changed as a master password or installer password.
It is a good idea to keep the 'admin' password for the installer only, and create users for the end user.
Only 1 admin user can be logged in locally or remotely into the DVR at any given time. Create extra
users for simultaneous logins.
EOS Australia PTY LTD
Page 8

Samsung SRD Series Insta llation Guide8
You must 'Add' a group with permission policies before adding a 'User'. This is fond under the [Group]
tab.
Once a group as been added, go to the [User] tab to add a user.
EOS Australia PTY LTD
Page 9

1.4 Harddrive Management
Go to [Menu] > [Device] > [Storage Device]
DVR Configuration 9
Go to the [Format] tab to view how much storage is used on each Harddrive. Also check the status of
any CD/DVD or USB device.
EOS Australia PTY LTD
Page 10

Part
II
Page 11

2 Recording Configiration
The following recording configurations should be checked and configured on installation of any DVR onto
any site. Settings may vary depending on how the customer wants the DVR configured.
2.1 Recording Schedule
Go to [Menu] > [Record] > [Recording Schedule]
Recording Configiration 11
Right click anywhere on the table to select your Recording Type (No Recording / Continuous , Event,
Both). Left click and drag anywhere on the table to change the schedule to your selected Recording
Type. Alternatively, press the 'All' square on the top left corner of the table to change the whole schedule
to your Recording Type.
EOS Australia PTY LTD
Page 12

Samsung SRD Series Insta llation Guide12
Below are the Recording Type colour codes for the Recording Schedule.
The below Recording Schedule is only for Camera 1, press 'Apply to All CH' to apply to all channels.
EOS Australia PTY LTD
Page 13

2.2 Event Record Duration
Go to [Menu] > [Record] > [Event Record Duration]
Recording Configiration 13
Configure the buffer time before and after a motion event occurs.
EOS Australia PTY LTD
Page 14

Samsung SRD Series Insta llation Guide14
2.3 Recording Quality & Resolution
Go to [Menu] > [Record] > [REC Quality & Resolution]
There are 2 tabs at the top, [Standard] tab relates to Continuous recording and [Event] tab relates to
Motion recording.
Depending on which DVR you have, the Frame rates and Resolutions may vary.
EOS Australia PTY LTD
Page 15

2.4 Motion Recording
Go to [Menu] > [Event] > [Motion Detection]
Recording Configiration 15
In order for your DVR to detect Motion as an Event, make sure 'Mode' is set to 'ON' for each channel
(See below).
Also click on 'Motion Region' to mask and exclude particular areas from Motion Detection.
EOS Australia PTY LTD
Page 16

Part
III
Page 17

3 Network Configuration
3.1 IP Settings
Go to [Menu] > [Network] > [Connection Mode]
Network Configuration 17
Under the [Connection] tab, fill out the network details
Connection Mode: Select 'Static IP' to enter the DVR's local IP Address.
Bandwidth: This is the maximum bandwidth the DVR can throughput.
IP: The Local IP address of the DVR.
Gateway: The Router's IP Address (only used for accessing the internet).
Subnet Mask: The Subnet Mask of the network.
DNS: The DNS address of a DNS Server on the network
(If there is no DNS Server, use the Router's IP).
EOS Australia PTY LTD
Page 18

Samsung SRD Series Insta llation Guide18
3.2 Port Numbers
Go to [Menu] > [Network] > [Connection Mode] > [Protocol] tab
The default ports for an SRD DVR are:
TCP: 554, 555, 556, 557
iPhone: 558 (Is always the last port number in the sequence)
Webviewer Port: 80
EOS Australia PTY LTD
Page 19

3.3 Live Transfer
Go to [Menu] > [Network] > [Live Transfer]
Network Configuration 19
The SRD Series DVR has the ability to stream a different Resolution and Quality over the network.
This ensures that the network stream can stream quicker rather than streaming the Recording
resolution.
EOS Australia PTY LTD
Page 20

Samsung SRD Series Insta llation Guide20
Download iPolis for iPhone
Download iPolis for Android
3.4 Smart Phone Connection
The Samsung SRD Series is compatible with iPhone, iPad and all Android devices. The iPolis Mobile
app gives you the ability to View your cameras live, Playback your cameras, and also Control the Pan
Tilt Zoom function.
Search for keyword 'iPolis' in the App Store or Android Market, or run a QR Scan on below codes.
Once downloading the app and installing it, you will need to 'Add' your DVR as a device.
It is important that in the RTSP Port field, you enter the last Port Number of the TCP Port Sequence
(default 554-558).
If you are connecting locally make sure you are connected to the WiFi of the same network as the DVR.
If you are connecting externally through the internet, make sure;
Your phone has an internet connection that is not on the same network as the DVR.
You have Port Forwarded ports 554, 555, 556, 557, 558 and 80 on the router that is connected to your
DVR.
You have the latest Firmware on your DVR and the latest app on your Smart Phone.
EOS Australia PTY LTD
Page 21

Part
IV
Page 22

Samsung SRD Series Insta llation Guide22
4 Configurations
4.1 Updating Firmware
Go to [Menu] > [System] > [System Management]
To update your DVR's firmware, you need to download the latest firmware file from
http://www.samsungcctv.com/. Once you download the firmware file (.zip file), you need to unzip the file
and place it on the root directory of your USB stick (.img file).
Press the 'Upgrade' button to load the firmware file from your USB stick.
EOS Australia PTY LTD
Page 23

4.2 Loading/Saving Configurations
The SRD Series DVR has the ability Load or Save Configuration files of the same model DVR to save
time configuring multiple DVRs.
Configurations 23
The settings configuration file is saved and loaded from a USB stick. When you save a setting, it is
saved in a folder on the USB called 'detroit'.
EOS Australia PTY LTD
Page 24

Part
V
Page 25

5 Troubleshooting
1.
No cameras are showing on the screen even though they are plugged in
Check [Menu] > [Devices] > [Cameras] and see if any cameras are set to 'Covert'.
2.
The cameras are showing live but no recording is present in search mode
Troubleshooting 25
a)
b)
c)
3.
The cameras a recording continuously even though the Recording Schedule is set to Motion
4.
I can make a connection on the local LAN but not over the internet
5.
I keep getting kicked off when another user logs on
Check [Menu] > [Recording] > [Recording Schedule] to see if the cameras are set to
‘No Recording’.
Check [Menu] > [Event] > [Motion Detection] to see if ‘Motion Detection’ is turned on
and if the motion area has been masked out.
Check [Menu] > [Devices] > [Storage Device] to see if you hard-drives have picked up.
Manual record has been turned on by accident. Press the ‘Record’ button again on the
machine to stop the manual record mode.
Double check your port forwarding settings on the router, check http://
www.portforward.com/ for instruction on how to port forward on your router.
Ensure that you are not using the ‘admin’ user as only 1 admin user is permitted to be
logged in at any given time. Create additional users to prevent this issue.
6.
I cannot control my camera using the Coaxitron feature
7.
The DVR is in a constant rebooting loop
8.
The admin password has been changed but the user has forgotten the password
9.
I can see my cameras over the network but it is slow
EOS Australia PTY LTD
Go to [Menu] > [Devices] > [Camera] > [PTZ] tab and make sure you change the Port
option from RS-485 to Coaxial on your camera.
The hard-drive may have bad sectors, replace the hard-drive.
Hold buttons [Mode] + [PTZ] on the front panel of the DVR for 15 seconds and it will ask
you to factory default the machine. All settings will be wiped out.
Go to [Menu] > [Network] > [Live Transfer] to change the dual stream settings. Lower
the resolution and quality for faster speeds. Also run a speed test on the network to
check the upload speed. A sufficient upload speed would be 0.5Mb/s or higher.
Page 26

Samsung SRD Series Insta llation Guide26
10.
The hard-drive is full but is not cycling
Go to [Menu] > [Record] > [Record Option] and check if overwrite mode is on.
11.
The live screen does not show my cameras, it shows a Samsung wallpaper
Go to [Menu] > [System] > [Permission Managemen]t > [Setup] tab to see if the
Restricted Access is ticked on ‘Live View’
12.
The live screen keeps asking me for a password
The DVR will automatically log you out after 3 minutes, to turn 'Auto-Logout' off, go to:
Go to [Menu] > [System] > [Permission Management] > [Setup] tab and turn 'AutoLogout' option off.
13.
Where can I download latest firmware files and manuals
http:///www.samsungcctv.com/
EOS Australia PTY LTD
 Loading...