

Samsung SCH-R460NBAXAR User Manual

Samsung MyShot™ II
(SCH-R460 Series)
PORTABLE TRI-BAND
MOBILE PHONE
User Manual
Please read this manual before operating your
phone, and keep it for future reference.

Intellectual Property
All Intellectual Property, as defined below, owned by or which is otherwise the property of Samsung or its respective suppliers relating to
the SAMSUNG Phone, including but not limited to, accessories, parts, or software relating there to (the “Phone System”), is proprietary to
Samsung and protected under federal laws, state laws, and international treaty provisions. Intellectual Property includes, but is not limited
to, inventions (patentable or unpatentable), patents, trade secrets, copyrights, software, computer programs, and related documentation
and other works of authorship. You may not infringe or otherwise violate the rights secured by the Intellectual Property. Moreover, you
agree that you will not (and will not attempt to) modify, prepare derivative works of, reverse engineer, decompile, disassemble, or
otherwise attempt to create source code from the software. No title to or ownership in the Intellectual Property is transferred to you. All
applicable rights of the Intellectual Property shall remain with SAMSUNG and its suppliers.
Samsung Telecommunications America (STA), LLC
Headquarters: Customer Care Center:
1301 E. Lookout Drive 1000 Klein Rd.
Richardson, TX 75082 Plano, TX 75074
Toll Free Tel: 1.888.987.HELP (4357)
Internet Address: http://www.samsungusa.com
©2009 Samsung Telecommunications America, LLC is a registered trademark of Samsung Electronics America, Inc. and its related
entities.
Do you have questions about your Samsung Mobile Phone?
For 24 hour information and assistance, we offer a new FAQ/ARS System (Automated Response System) at:
www.samsungtelecom.com/support
R460.07_CF26_WC_070209_F4

GH68-24397A
Printed in Korea.
T9 Text Input is licensed by Tegic Communications and is covered by U.S. Pat. 5,818,437; U.S. Pat. 5,953,541; U.S. Pat. 6,011,554 and
other patents pending.
Nuance®, VSuite™ and the Nuance logo are trademarks or registered trademarks of Nuance Communications, Inc. or its affiliates in the
United States and/or other countries.
Openwave® is a registered Trademark of Openwave, Inc.
The Bluetooth® word mark, figure mark (stylized “B Design”), and combination mark (Bluetooth word mark and “B Design”) are registered
trademarks and are wholly owned by the Bluetooth SIG.
microSD™ and the microSD logo are Trademarks of the SD Card Association.
Disclaimer of Warranties; Exclusion of Liability
EXCEPT AS SET FORTH IN THE EXPRESS WARRANTY CONTAINED ON THE WARRANTY PAGE ENCLOSED WITH THE PRODUCT, THE
PURCHASER TAKES THE PRODUCT “AS IS”, AND SAMSUNG MAKES NO EXPRESS OR IMPLIED WARRANTY OF ANY KIND WHATSOEVER
WITH RESPECT TO THE PRODUCT, INCLUDING BUT NOT LIMITED TO THE MERCHANTABILITY OF THE PRODUCT OR ITS FITNESS FOR ANY
PARTICULAR PURPOSE OR USE; THE DESIGN, CONDITION OR QUALITY OF THE PRODUCT; THE PERFORMANCE OF THE PRODUCT; THE
WORKMANSHIP OF THE PRODUCT OR THE COMPONENTS CONTAINED THEREIN; OR COMPLIANCE OF THE PRODUCT WITH THE
REQUIREMENTS OF ANY LAW, RULE, SPECIFICATION OR CONTRACT PERTAINING THERETO. NOTHING CONTAINED IN THE INSTRUCTION
MANUAL SHALL BE CONSTRUED TO CREATE AN EXPRESS OR IMPLIED WARRANTY OF ANY KIND WHATSOEVER WITH RESPECT TO THE
PRODUCT. IN ADDITION, SAMSUNG SHALL NOT BE LIABLE FOR ANY DAMAGES OF ANY KIND RESULTING FROM THE PURCHASE OR USE OF
THE PRODUCT OR ARISING FROM THE BREACH OF THE EXPRESS WARRANTY, INCLUDING INCIDENTAL, SPECIAL OR CONSEQUENTIAL
DAMAGES, OR LOSS OF ANTICIPATED PROFITS OR BENEFITS.

Table of Contents
Section 1: Getting Started .............................................. 4
Understanding this User Manual . . . . . . . . . . . . . . . . . . . . . . . .4
Installing the Battery . . . . . . . . . . . . . . . . . . . . . . . . . . . . . . . . . 4
Charging the Battery . . . . . . . . . . . . . . . . . . . . . . . . . . . . . . . . . 5
Activating Your Phone . . . . . . . . . . . . . . . . . . . . . . . . . . . . . . . . 6
Memory Card (Optional) . . . . . . . . . . . . . . . . . . . . . . . . . . . . . . 7
Section 2: Understanding Your Phone ........................... 9
Features of Your Phone . . . . . . . . . . . . . . . . . . . . . . . . . . . . . . . 9
Closed View of Your Phone . . . . . . . . . . . . . . . . . . . . . . . . . . . .9
Open View (Front) of Your Phone . . . . . . . . . . . . . . . . . . . . . . . 10
Command Keys . . . . . . . . . . . . . . . . . . . . . . . . . . . . . . . . . . . 12
Understanding the Display Screens . . . . . . . . . . . . . . . . . . . . . 13
Your Phone’s Modes . . . . . . . . . . . . . . . . . . . . . . . . . . . . . . . . 14
Section 3: Call Functions .............................................18
Making a Call — Number Entry Dialing . . . . . . . . . . . . . . . . . . 18
Making a Call — Contact Dialing . . . . . . . . . . . . . . . . . . . . . . 19
Making a Call — Speed Dialing . . . . . . . . . . . . . . . . . . . . . . . 20
Making a Call — Quick Search Dialing . . . . . . . . . . . . . . . . . .20
Making a Call — Voice Dialing . . . . . . . . . . . . . . . . . . . . . . . . 21
Answering a Call . . . . . . . . . . . . . . . . . . . . . . . . . . . . . . . . . . . 23
The In-Use Options Menu . . . . . . . . . . . . . . . . . . . . . . . . . . . . 23
Ignoring a Call . . . . . . . . . . . . . . . . . . . . . . . . . . . . . . . . . . . .24
Adjusting the Call Volume . . . . . . . . . . . . . . . . . . . . . . . . . . . . 24
Calls Log . . . . . . . . . . . . . . . . . . . . . . . . . . . . . . . . . . . . . . . .24
1
Roaming . . . . . . . . . . . . . . . . . . . . . . . . . . . . . . . . . . . . . . . . 29
Section 4: Menu Navigation ......................................... 30
Menu Navigation . . . . . . . . . . . . . . . . . . . . . . . . . . . . . . . . . . 30
Navigation Key Shortcuts . . . . . . . . . . . . . . . . . . . . . . . . . . . . 30
Navigate Using a Shortcut . . . . . . . . . . . . . . . . . . . . . . . . . . . 30
Section 5: Entering Text ............................................... 32
Changing the Text Entry Mode . . . . . . . . . . . . . . . . . . . . . . . . 32
Using T9® Mode . . . . . . . . . . . . . . . . . . . . . . . . . . . . . . . . . . 33
Using Abc Mode . . . . . . . . . . . . . . . . . . . . . . . . . . . . . . . . . . . 34
Entering Numbers . . . . . . . . . . . . . . . . . . . . . . . . . . . . . . . . . 34
Entering Symbols . . . . . . . . . . . . . . . . . . . . . . . . . . . . . . . . . . 34
Section 6: Understanding Your Contacts ....................35
Your Contacts List . . . . . . . . . . . . . . . . . . . . . . . . . . . . . . . . . 35
Adding a New Contacts Entry . . . . . . . . . . . . . . . . . . . . . . . . . 35
Finding a Contacts Entry . . . . . . . . . . . . . . . . . . . . . . . . . . . . 38
Editing an Existing Contact Entry . . . . . . . . . . . . . . . . . . . . . . 40
Speed Dial Numbers . . . . . . . . . . . . . . . . . . . . . . . . . . . . . . . 43
Renaming a Contacts Group . . . . . . . . . . . . . . . . . . . . . . . . . . 44
Deleting a Contacts Entry . . . . . . . . . . . . . . . . . . . . . . . . . . . . 44
Memory Info . . . . . . . . . . . . . . . . . . . . . . . . . . . . . . . . . . . . . . 45
Section 7: Messaging ................................................... 46
Types of Messages . . . . . . . . . . . . . . . . . . . . . . . . . . . . . . . . 46
Create and Send Text Messages . . . . . . . . . . . . . . . . . . . . . . 46
Receive Text Messages . . . . . . . . . . . . . . . . . . . . . . . . . . . . . 47

Send Picture Messages in Camera Mode . . . . . . . . . . . . . . . . 47
Send Picture Messages in Standby Mode . . . . . . . . . . . . . . . . 49
Receive Picture Messages . . . . . . . . . . . . . . . . . . . . . . . . . . . 51
Message Boxes . . . . . . . . . . . . . . . . . . . . . . . . . . . . . . . . . . . 53
Erase Messages . . . . . . . . . . . . . . . . . . . . . . . . . . . . . . . . . . . 58
Message Settings . . . . . . . . . . . . . . . . . . . . . . . . . . . . . . . . . 58
Section 8: Browser ....................................................... 60
Browser . . . . . . . . . . . . . . . . . . . . . . . . . . . . . . . . . . . . . . . . . 60
Launching Browser . . . . . . . . . . . . . . . . . . . . . . . . . . . . . . . . 60
Using Browser . . . . . . . . . . . . . . . . . . . . . . . . . . . . . . . . . . . . 60
Using Links . . . . . . . . . . . . . . . . . . . . . . . . . . . . . . . . . . . . . . 61
How Browser Keys Work . . . . . . . . . . . . . . . . . . . . . . . . . . . . 61
Section 9: Camera ........................................................ 62
The Photo Gallery . . . . . . . . . . . . . . . . . . . . . . . . . . . . . . . . . . 70
Point, Click, and Send Pictures . . . . . . . . . . . . . . . . . . . . . . . . 71
Section 10: Multimedia ................................................72
Accessing Multimedia . . . . . . . . . . . . . . . . . . . . . . . . . . . . . . 72
My Images . . . . . . . . . . . . . . . . . . . . . . . . . . . . . . . . . . . . . . . 72
Music Player . . . . . . . . . . . . . . . . . . . . . . . . . . . . . . . . . . . . . 73
My Ringtones . . . . . . . . . . . . . . . . . . . . . . . . . . . . . . . . . . . . . 76
My Sounds . . . . . . . . . . . . . . . . . . . . . . . . . . . . . . . . . . . . . . . 77
Section 11: Tools .......................................................... 80
Tools Menu . . . . . . . . . . . . . . . . . . . . . . . . . . . . . . . . . . . . . . 80
Bluetooth . . . . . . . . . . . . . . . . . . . . . . . . . . . . . . . . . . . . . . . . 80
Calendar . . . . . . . . . . . . . . . . . . . . . . . . . . . . . . . . . . . . . . . . 82
Memo Pad . . . . . . . . . . . . . . . . . . . . . . . . . . . . . . . . . . . . . . . 84
Alarm Clock . . . . . . . . . . . . . . . . . . . . . . . . . . . . . . . . . . . . . . 85
World Time . . . . . . . . . . . . . . . . . . . . . . . . . . . . . . . . . . . . . . 86
Calculator . . . . . . . . . . . . . . . . . . . . . . . . . . . . . . . . . . . . . . . 87
Stop Watch . . . . . . . . . . . . . . . . . . . . . . . . . . . . . . . . . . . . . . 88
Converter . . . . . . . . . . . . . . . . . . . . . . . . . . . . . . . . . . . . . . . 88
Tip Calculator . . . . . . . . . . . . . . . . . . . . . . . . . . . . . . . . . . . . 91
Section 12: Voice Service ............................................ 92
Launching Voice Service . . . . . . . . . . . . . . . . . . . . . . . . . . . . 92
Voice Commands . . . . . . . . . . . . . . . . . . . . . . . . . . . . . . . . . . 92
Voice Settings . . . . . . . . . . . . . . . . . . . . . . . . . . . . . . . . . . . . 93
Section 13: Changing Your Settings ............................ 97
Settings Menu . . . . . . . . . . . . . . . . . . . . . . . . . . . . . . . . . . . . 97
Location . . . . . . . . . . . . . . . . . . . . . . . . . . . . . . . . . . . . . . . . 97
Display Settings . . . . . . . . . . . . . . . . . . . . . . . . . . . . . . . . . . . 97
Sounds Settings . . . . . . . . . . . . . . . . . . . . . . . . . . . . . . . . . 100
Call Settings . . . . . . . . . . . . . . . . . . . . . . . . . . . . . . . . . . . . 102
Phone Settings . . . . . . . . . . . . . . . . . . . . . . . . . . . . . . . . . . 104
Memory Info . . . . . . . . . . . . . . . . . . . . . . . . . . . . . . . . . . . . 110
Phone Info . . . . . . . . . . . . . . . . . . . . . . . . . . . . . . . . . . . . . . 113
Section 14: Health and Safety Information ............... 114
Health and Safety Information . . . . . . . . . . . . . . . . . . . . . . . 114
Warning Regarding Display . . . . . . . . . . . . . . . . . . . . . . . . . 115
Samsung Mobile Products and Recycling . . . . . . . . . . . . . . . 115
UL Certified Travel Adapter . . . . . . . . . . . . . . . . . . . . . . . . . 115
Consumer Information on Wireless Phones . . . . . . . . . . . . . 116
Road Safety . . . . . . . . . . . . . . . . . . . . . . . . . . . . . . . . . . . . . 121
2

Responsible Listening . . . . . . . . . . . . . . . . . . . . . . . . . . . . . . 123
Operating Environment . . . . . . . . . . . . . . . . . . . . . . . . . . . . . 125
Using Your Phone Near Other Electronic Devices . . . . . . . . . 125
FCC Hearing-Aid Compatibility (HAC) Regulations for Wireless
Devices . . . . . . . . . . . . . . . . . . . . . . . . . . . . . . . . . . . . . . 126
Potentially Explosive Environments . . . . . . . . . . . . . . . . . . . .127
Emergency Calls . . . . . . . . . . . . . . . . . . . . . . . . . . . . . . . . . . 128
FCC Notice and Cautions . . . . . . . . . . . . . . . . . . . . . . . . . . . 129
Other Important Safety Information . . . . . . . . . . . . . . . . . . . . 129
Product Performance . . . . . . . . . . . . . . . . . . . . . . . . . . . . . . 130
Availability of Various Features/Ring Tones . . . . . . . . . . . . . . 130
Battery Standby and Talk Time . . . . . . . . . . . . . . . . . . . . . . . 131
Battery Precautions . . . . . . . . . . . . . . . . . . . . . . . . . . . . . . . 131
Care and Maintenance . . . . . . . . . . . . . . . . . . . . . . . . . . . . . 132
Section 15: Warranty Information .............................134
Standard Limited Warranty . . . . . . . . . . . . . . . . . . . . . . . . . . 134
End User License Agreement for Software . . . . . . . . . . . . . . 137
Index ............................................................................142
3

Section 1: Getting Started
This section explains how to start using your Samsung
MyShot™ II phone by activating your service, setting up your
Voicemail, or getting an understanding of how this manual is put
together.
Understanding this User Manual
The chapters of this guide generally follow the same order as the
menus and sub-menus in your phone. A robust index for quick
reference to most features begins on page 142.
Also included is important safety information that you should
know before using your phone. For more information, refer to
“Health and Safety Information” on page 114.
Notes and Tips
Throughout this guide there is text that is set apart from the rest.
These are intended to point out important information, quick
methods for activating features, to define terms, and more. The
definitions for these methods are as follows:
•
Notes
: Explain alternative options within the current feature, menu, or
sub-menu.
•
Tips
: Provide quick or innovative methods for performing functions
related to the subject at hand.
•
Important
: Points out important information about the current feature
that could affect performance, or even damage your phone.
Text Conventions
This manual provides condensed information about how to use
your phone. To make this possible, the following terms and icon
appear in place of repeatedly-used procedural steps:
highlight
Use the Navigation key ( ) to move a highlighting
effect onto a menu item or screen item of interest.
select
After “highlighting” a menu item or screen item,
press the OK key ( ) to launch, access, or save a
highlighted menu item or screen field of interest.
➔ Used in place of “select” in long “drill down”
procedure steps.
Example:
“...
Settings
➔
Call Settings
➔
Call Answer
...”
Installing the Battery
Note:
Your phone comes packaged with a partially charged rechargeable
standard Li-Ion battery and travel adapter.
Getting Started 4
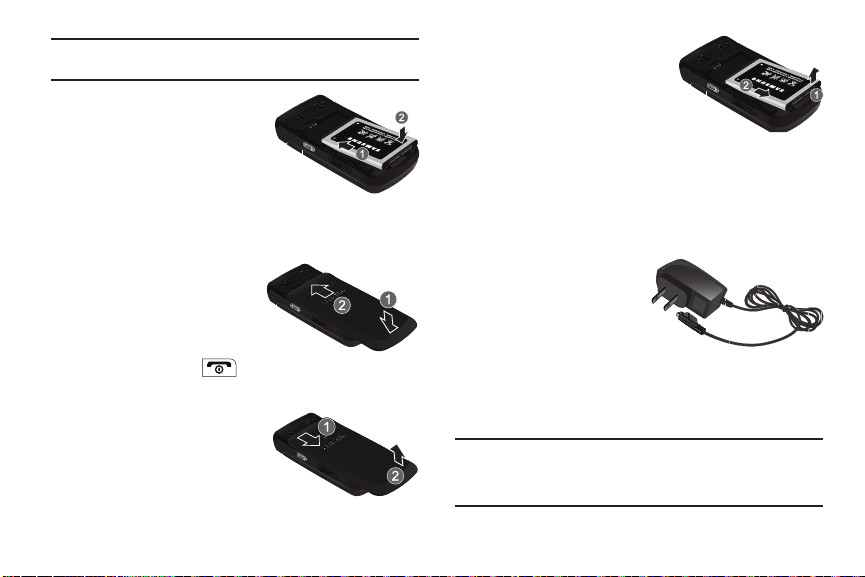
Important!:
You must fully charge the battery the first time you use your
phone, otherwise you could damage the battery.
1. Insert the top end of the
battery first, matching the
gold contacts on the inside of
the battery to those on the
phone.
2. Press lightly on the bottom end of the battery down into the
phone until it slips into place.
3. Press lightly down (1) and
upward on the battery cover
until it clicks into place.
Remove the Battery
1. Press and hold the
key to turn off the phone (if on).
2. Press the battery cover
downward (1) and lift the
cover (2) up and away from
the phone.
5
3. Lift the battery up (1) and
away (2) from the phone,
bottom end first.
Charging the Battery
Your phone is powered by a rechargeable standard Li-Ion battery.
Only use Samsung-approved charging devices and batteries.
Samsung accessories are designed to maximize battery life. Use
of other accessories may invalidate your warranty and may
cause damage.
Use the Travel Adapter
The travel adapter included
with your phone is a
convenient, light-weight
charger that rapidly charges
your phone from any 120/220 VAC outlet.
1. Plug the large end of the Travel Adapter into a standard
120 VAC or 220 VAC wall outlet.
Important!:
For connection to an electrical supply not located in North
America, you must use an adaptor of the proper configuration for
the power outlet. Use of the wrong adapter could damage your
phone and void your warranty.
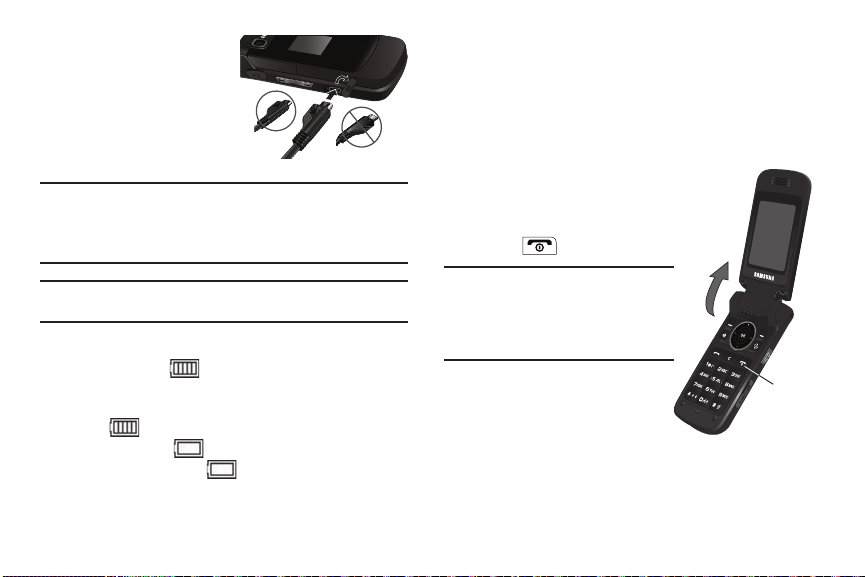
Insert the smaller end of
Correct
Incorrect
2.
the Travel Adapter into the
charger/accessory
connector on the lower
left side of your phone.
Warning!:
Your touch screen responds best to a light touch from the pad of
your finger or a non-metallic stylus. Using excessive force or a
metallic object when pressing on the touch screen may damage
the tempered glass surface and void the warranty. See “Warranty
Information” on page 134.
Important!:
You must unplug the adapter before removing the battery from
the phone during charging to avoid damage.
Low Battery Indicator
The battery indicator ( ) in the upper-right corner of the
display indicates power level. Monitor the battery strength and
ensure your battery is adequately charged.
•
Five bars ( ) indicate a full charge.
•
An empty battery icon ( ) indicates a near empty battery.
•
A blinking empty battery icon ( ) and a tone sounding indicate you
have two to three minutes before the battery is too low to operate the
phone.
If you continue to use your phone without charging its battery, the
phone will shut down.
Activating Your Phone
Contact your Wireless Carrier and follow their instructions for
obtaining service, if necessary. We suggest that you read this
guide to fully understand the services your phone supports.
Turn Your Phone On
1. Open the flip on your phone,
as shown.
2. Press .
Note:
As with any other radio-transmitting
device, do not touch the antenna
while using your phone as this can
affect call quality and can cause the
phone to operate at a higher power
level than is necessary.
3. The phone begins searching
Press
for a network signal.
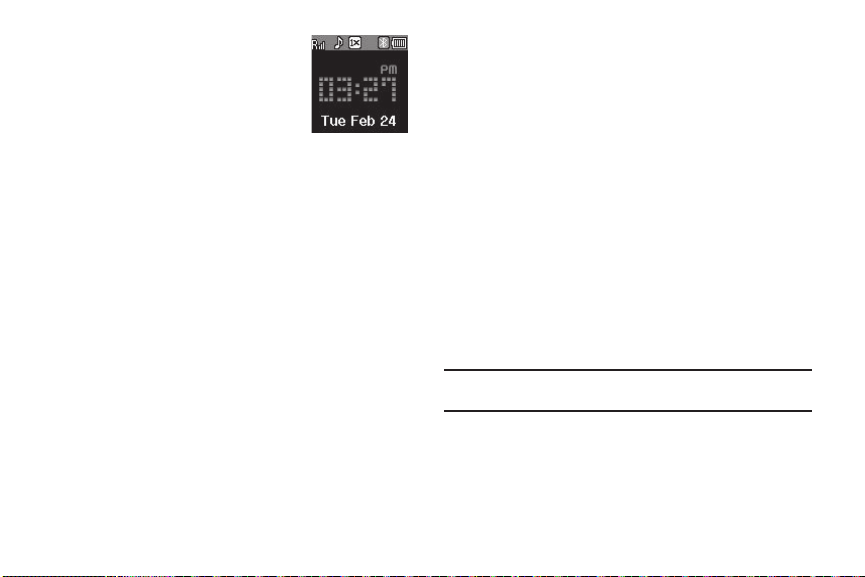
4. Once the phone finds a signal,
the time, date, and day appear in the second line of the
display.
5. You’re now ready to place and receive calls.
Getting Started 6
Note:
If you are outside of your carrier’s coverage or roaming area, the No
Service icon ( ) appears at the top of the phone’s display. If you
cannot place or receive calls, try later when service is available, or at
another location.
Turn Your Phone Off
䊳
Press and hold for two or more seconds. Your
phone powers off.
Note:
If your phone is on and you press for less than one second, the
phone will not power off. This prevents your phone from being turned
off accidentally.
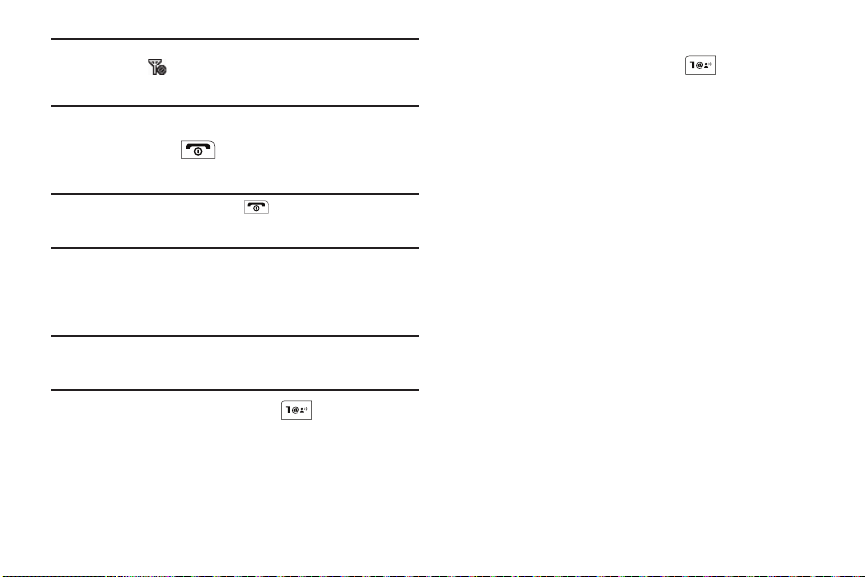
Setting Up Your Voicemail
Voicemail allows callers to leave voice messages, which can be
retrieved any time.
Note:
Once your Voicemail account has been set up, you can use the
Voicemail folder (under the Message menu) to view details of voice
messages in your Voicemail box.
1. In standby mode, press and hold or dial your own
mobile number to dial Voicemail.
2. Follow the prompts in the new user tutorial to setup your
mail box.
7
Listen to Voicemail
1. In standby mode, press and hold or dial your own
mobile number to dial Voicemail. After connecting, you will
hear your voice greeting.
2. You are prompted to enter your password.
Memory Card (Optional)
Your phone has a Memory Card slot on its lower right side. You
can install a microSD™ card to provide additional memory for
storing files (such as, sound files, music, and photos) in your
phone.
Install a Memory Card
1. Open the Memory Card slot cover on the lower right side of
your phone.
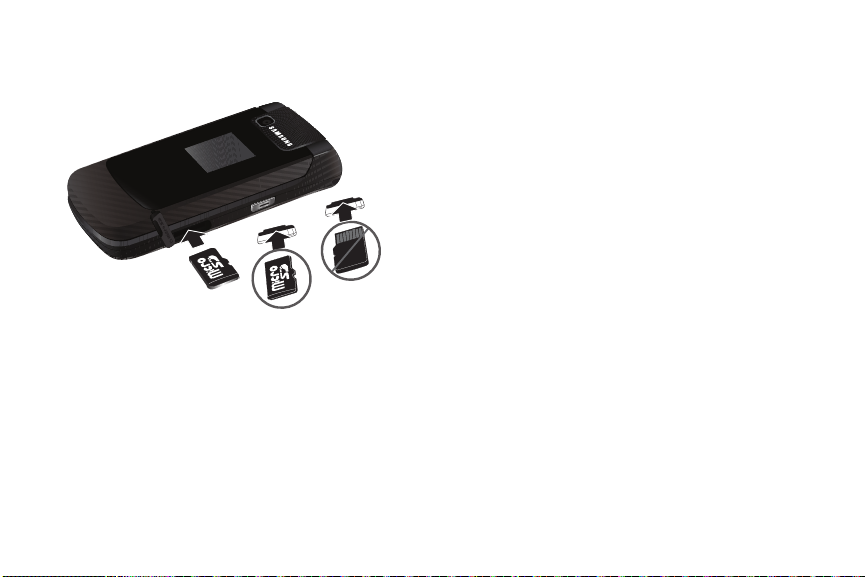
Insert the Memory Card — label side facing up and
Incorrect
Correct
2.
smaller end pointing toward the phone — into the Memory
Card slot.
3. Press the Memory Card up into the slot until the card locks
into place.
4. Replace the Memory Card slot cover.
Remove a Memory Ca rd
1. Open the Memory Card slot cover on the lower right side of
your phone.
2. Press the Memory Card up into the slot until the card lock
releases.
3. Remove the Memory Card from the Memory Card slot.
4. If desired, install another Memory Card. (For more
information, refer to “Install a Memory Card” on page 7.)
5. Replace the Memory Card slot cover.
Getting Started 8
Section 2: Understanding Your Phone
6
7
1
2
4
5
3
This section outlines some key features of your Samsung
MyShot™ II phone. It also describes the screen format and the
icons that will be displayed when the phone is in use.
Features of Your Phone
•
Domestic and international voice and text messaging service (available
on participating networks).
•
High speed data (CDMA 2000 1x Technology)
•
Bluetooth® Wireless Technology (see Note)
•
Global Positioning System (GPS) Technology
•
Digital Assistant Functions
•
Picture (MMS) Messaging
•
Text (SMS) Messaging
•
E-mail Messaging
•
Built-in 1.3 Megapixel Digital Camera
•
Voice Dial
Note:
The MyShot phone supports the wireless handsfree, A2DP (Advanced
Audio Distribution Profile), phonebook access, object push, and file
transfer profiles for Bluetooth® wireless technology.
9
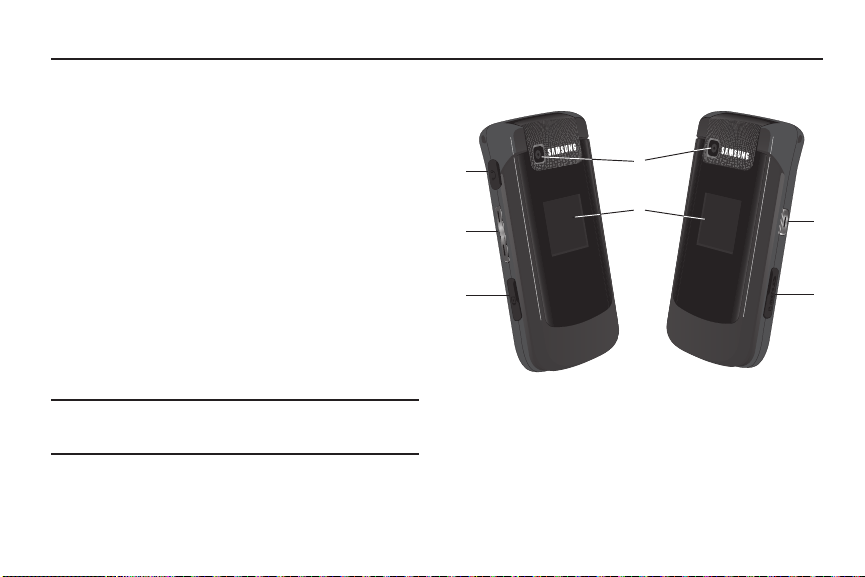
Closed View of Your Phone
Features
1.
Headset Connector
(for hands free operation) or an optional TTY device.
2.
Volume Key
mode, adjust the voice volume during a call, or mute the
ringer during an incoming call.
— Used to connect an optional headset
— Lets you adjust the ring volume in standby
Power / Accessory Connector
3
4
6
7
8
9
10
11
12
14
2
1
13
16
5
15
3.
— Used to connect charging
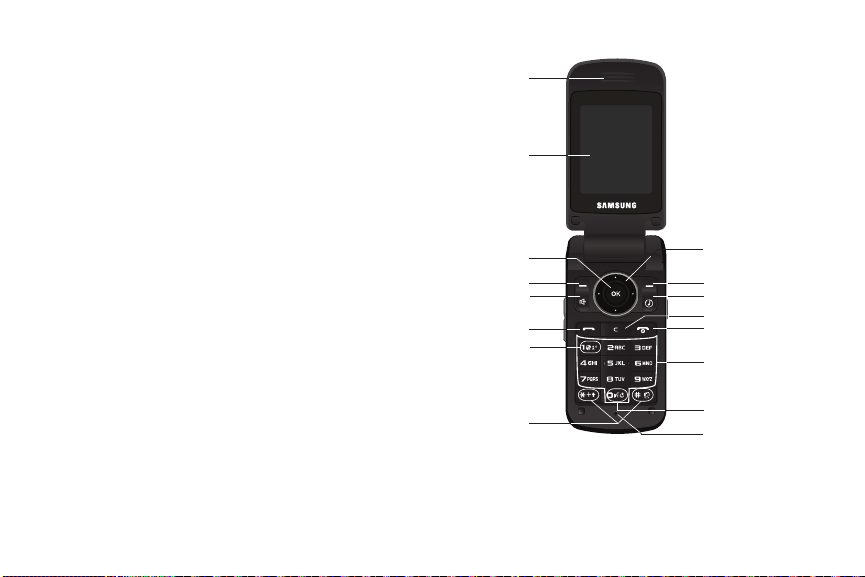
Open View (Front) of Your Phone
accessories or optional accessory cables to your phone.
4.
Camera Lens
5.
Front Display
— The lens of your built-in camera.
— Indicates the status of your phone,
including status icons, message indicators, signal
strength, and so on.
6.
Camera Key
hold, then release to launch the Music Player or press and
— With the flip open or closed, press and
hold to launch the Camera.
7.
Memory Card Slot
microSD™ memory card for additional multimedia file
— Used to plug in an optional
storage.
Features
1.
Earpiece / Speaker
— Lets you hear ringing and alert
tones, alarm tones, and the other parties to calls.
Understanding Your Phone 10

2.
Main Display
— Indicates the status of your phone,
including numbers dialed, feature and function screens,
status icons, message indicators and contents, signal
strength, and so on.
3.
OK Key
— Pressing when navigating through a menu
accepts the highlighted choice in a menu.
4.
Left Soft Key
— Used to navigate through menus and
applications and to select the choice indicated at the
bottom left corner of the Main LCD.
5.
Speakerphone Key
— Enables/disables speakerphone
mode.
6.
SEND Key
— Lets you place or receive a call. In standby
mode, press the key once to access the All Calls log.
7.
Voicemail Key
— Lets you speed dial your Voicemail
account to review your voice messages.
8.
Special Function Keys
— Enter special characters. Perform
various functions.
9.
Microphone
— Lets the other caller hear you clearly when
you are speaking to them.
11
10.
Voice Recognition Key
— Used to launch VoiceSignal voice
recognition system.
11.
Alpha-numeric Keys
— Use these keys to enter numbers,
letters, and characters.
12.
END Key
— Ends a call. If you press and hold the END key,
the power goes On or Off. When you receive an incoming
call, press to send the call to voicemail.
13.
CLR Key
— Deletes characters from the display when you
are in text entry mode. Press this key to return to the
previous menu or screen when navigating features on your
phone.
14.
Music Key
— Used to launch the Music Player.
15.
Right Soft Key
— Used to navigate through menus and
applications and to select the choice indicated at the
bottom right corner of the Main Display.
16.
Navigation Key
— In Menu mode, lets you scroll through
the phone menu options. In Standby mode, lets you access
preset functions and one user-defined function.
Command Keys
Functions for the soft keys are defined by what appears above
each in the display. There are two soft keys, Left ( ) and Right
().
Left Soft Key
Some functions of the Left soft key ( ) are as follows:
•
In standby mode, press the
Settings
soft key ( ) to open the
Settings Menu.
•
When the Left soft key function is Edit, press the
Edit
soft key ( ) to
edit a Contacts entry.
Right Soft Key
Some functions of the Right soft key ( ) are as follows:
•
In standby mode, press the
Contacts
Find
screen.
•
When the Right soft key function is Options, press the
Contacts
soft key ( ) to launch the
Options
soft key
( ) and a pop-up menu appears.
•
When the Right soft key function is Back, press the
Back
soft key ( )
to back up one menu level.
OK Key
•
In standby mode, press to launch the Main Menu.
•
In a menu, press to accept the highlighted selection.
•
In camera mode, press to take a photo or to create a Picture
message.
•
When the OK key function is Edit, press the
Edit
key ( ) to edit a
Draft message.
Send Key
The Send key ( ) is used to answer calls, dial calls, and to
recall the last number(s) dialed, received, or missed.
•
Press once to answer calls.
•
Enter a number and briefly press to make a call.
•
Briefly press in standby mode to display a list of all calls to and
from your phone.
•
Press twice in standby mode to call the most recent number.
•
Press to pick up a waiting call. Press again to switch
back to the other call.
Clear Key
The Clear key ( ) is used to erase or clear numbers, text, or
symbols from the display. You can also use the key to return to a
previous menu or to return to standby mode from any menu.
•
If you enter an incorrect character, briefly press to backspace
(and delete) the character.
•
To erase the entire sentence, press and hold .
•
To back up one menu level, briefly press .
Understanding Your Phone 12
End Key
•
Press and hold the End key ( ) to turn your phone on or off.
•
Briefly press once to disconnect a call.
•
Press to return to standby mode from any menu, or to cancel
the last input.
Navigation Key
Use the directional keys on the Navigation key to browse
menus, sub-menus, and lists. Each directional key also acts as a
shortcut to launch applications.
Camera Key
䊳
In standby mode, press and hold, then release to
activate the camera built into your phone and to take
pictures. (For more information, refer to “Camera” on
page 62.)
13
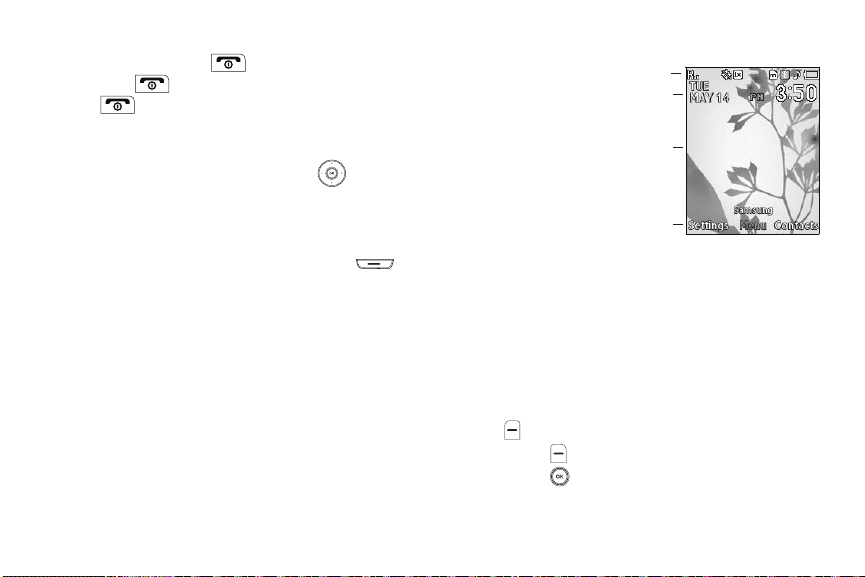
Understanding the Display Screens
Main Display
1. The top line of your
phone’s main display
contains icons that
indicate network status,
battery power, signal
strength, connection type,
and more.
2.
Calendar and Clock display
date, and time.
3. The center portion of the main display shows information
such as call progress information, messages, and photos.
4. The bottom line of the main display shows current soft key
functions.
The sample screen shows that pressing the Left soft key
( ) will display the Settings Menu, pressing the Right
soft key ( ) will show the
pressing will launch the Main Menu.
1
2
3
4
— Displays the current day,
Contacts Find
screen, and
External Display
Your phone has an external display on the
outside of the flip. When you close the
phone, the external display shows a digital or
analog clock. (For more information, refer to
“Clock Format” on page 98.)
Display Screen Icons
Your MyShot phone can show you definitions of the icons that
appear on the top lines of the front and main displays. To access
the Icon Glossary:
䊳
In idle mode, press
Glossary
. A list shows of the icons that can appear on the
Menu
➔
Settings
➔
Phone Info
➔
top lines of the displays.
Dialogue Boxes
Dialogue boxes prompt for action, inform you of status, or warn
of situations such as low battery. Dialogue boxes and their
definitions are outlined below.
•
Choice
–
Example:
“Save message?”
•
Reconfirm
–
Example:
“Erase All Messages?”
Icon
•
Performing
–
Example:
“Sending...” “Connecting...”
•
Completed
–
Example:
“Message Saved”
•
Information
–
Example:
“New Message”
•
Error
–
Example:
“System Error!”
•
Warning
–
Example:
“Low Battery,” “Memory Full!”
Backlights
Backlights illuminate the display and the keypad. When you press
any key or open the phone, the backlights come on. They go off
when no keys are pressed within a period of time set in the
Backlight menu. (For more information, refer to “Backlight” on
page 99.)
Note:
During a phone call, the display backlight dims and turns off after 7
seconds to conserve battery power, regardless of the
Backlight
setting.
Your Phone’s Modes
Standby Mode
Standby mode is the state of the phone once it has found service
and is idle. The phone goes into standby mode:
Understanding Your Phone 14
•
After you power the phone on.
•
When you press after a call or from within a menu.
In standby mode, you will see the time, day, and date as well as
all phone status icons.
Place Calls in Standby Mode
1. While in standby mode, enter a phone number, and press
to place a call.
2. Press to return to standby mode.
Receive Messages in Standby Mode
You can receive messages in standby mode. An alert tone sounds
and a notification message appears in the display when a new
message arrives. The following call message options appear:
•
View Now
— This selection allows you to view the messages now.
•
View Later
— This selection allows you to view the messages at a
later date.
Highlight the desired viewing option and then press .
Adjust the Ringer
In standby mode, press the Volume key (on the left side of the
phone) up or down.
1. In standby mode, press the Volume key up or down to set
the call ringer volume as desired.
15
Options are:
• Ringer Off • Medium
•Vibrate •Medium/High
•Low •High
• Low/Medium • Vibrate/High
When you are satisfied with the setting, press
SET
. Your phone
returns to standby mode.
Tip:
You can also adjust the ringer by pressing
Settings ➔ Volume ➔ Voice Calls
your phone to adjust the ringer volume setting.
Note:
The Silent icon ( ) appears in the display when the phone is in Silent
mode. The Vibrate icon ( ) appears in the display when the phone is
Vibrat e
mode. The Vibrate/Ring icon ( ) appears in the display
in
when the phone is in
Vibrate/High
Menu
➔
Settings
➔
. Use the Volume key on the left side of
mode.
Sound
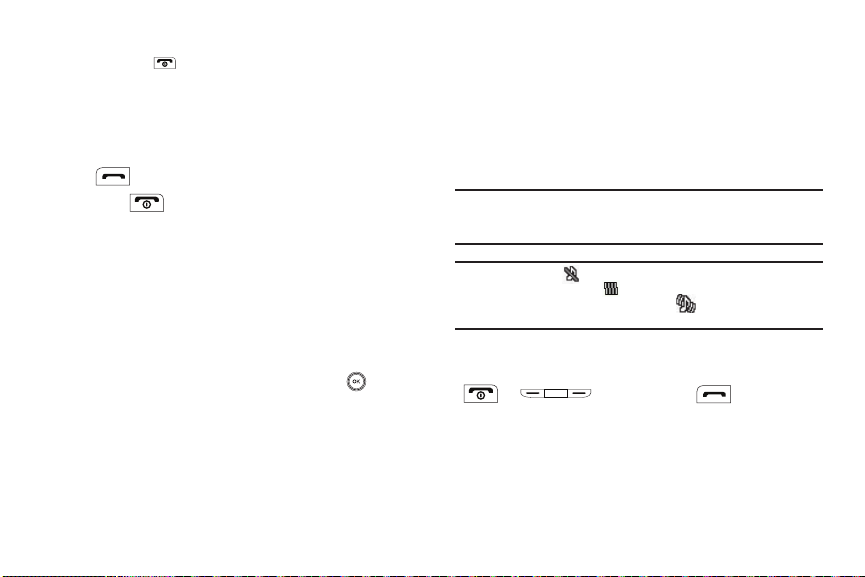
Call Answer Mode
You can choose to answer a call by pressing any key except
or , by pressing only , or by opening
the phone’s flip. (For more information, refer to “Call Answer” on
page 102.)
Talk Mode
You can place and receive calls only when your phone is on.
While in a call, your phone is in talk mode. Press the
Options
soft

key to display a list of menu options. (For more information, refer
to “The In-Use Options Menu” on page 23.)
Enter/Exit Silent Mode
Silences the tones your keypad makes when you press a key.
To enter Silent Mode:
䊳
In standby mode, press and hold . “
Mode
” briefly appears in the display and your phone
Entering Silent
returns to standby mode.
To exit Silent Mode:
䊳
While in Silent mode and standby mode, press and hold
. “
Exit Silent Mode
” briefly appears in the display
and your phone returns to standby mode.
Vibrate Mode
In standby mode, repeatedly press the Volume key
( ) down until “
Vibrate
” appears in the display.
The Volume key is on the left side of phone.
Speakerphone Mode
Speakerphone mode lets you use your phone handsfree and/or
share calls with others.
•
Entering Speakerphone Mode
— In standby mode, press and hold
the Speakerphone key ( ) — below the left soft key.
•
Exiting Speakerphone Mode
— In Speakerphone mode, press and
hold the Speakerphone key ( ).
Handsfree Mode
Handsfree mode lets you operate your phone remotely, without
touching it other than to turn it on or off.
To place your phone in Handsfree mode, do one of the following:
•
Connect an optional wired headset.
– or –
•
Pair and connect an optional Bluetooth technology headset or
handsfree car kit. (For more information, refer to
“Add New Device”
on page 81.)
Camera Mode
Camera mode lets you take pictures with your phone’s camera.
In Camera mode, you can also adjust the resolution and
appearance of your pictures.
(For more information, refer to “Camera” on page 62.)
•
Entering Camera Mode
— In standby mode, press and hold the
Camera key ( ) — on the right side of the phone.
•
Exiting Camera Mode
Note:
You can also enter Camera mode by pressing
Camera
.
— Press .
Understanding Your Phone 16
Menu
➔
Multimedia
➔

Input mode
Input mode determines how you enter text, numbers, and
symbols. While at any text entry screen, press the Left soft key,
then choose the input mode from the pop-up menu using the
Navigation key. Optional input modes are
and
Symbols
. (For more information, refer to “Entering Text” on
T9 Word, Abc, ABC, 123
page 32.)
Tip:
You can cycle between
and holding the key until the phone beeps.
T9 Word, Abc
, and
123
by repeatedly pressing
Lock Mode
When the phone is in Lock Mode, restrictions are placed on
phone use. You can receive calls and messages, but cannot place
outgoing calls (except for emergency numbers) until you unlock
the phone. Lock Mode also restricts access to menus and the
Volume key.
䊳
Unlock your phone by pressing the
Unlock
soft key and
entering the lock code when prompted. (For more
information, refer to “Lock Phone” on page 105.)
Note:
The default lock code is the last four digits of your telephone number.
You can change the lock code as needed. (For more information, refer
to “Change Lock Code” on page 105.)
17
,
Section 3: Call Functions
This section explains how to make and answer calls. This section
also includes the features and functionality associated with
making or answering calls.
Making a Call — Number Entry Dialing
1. With the phone on, enter the number you wish to call using
the keypad.
2. Press to place the call.
Dialing Emergency Numbers
To place an emergency call:
1. With the phone on, enter
2. Press to place the call.
911
using the keypad.
You can specify other numbers as emergency numbers using the
Emergency # settings. (For more information, refer to
“Emergency #” on page 106.)
Important!:
Emergency number 911 is preset into your phone. You can dial
this number almost any time, even when the phone is locked or
restricted.
If you call 911 an audible tone is heard and an Emergency
prompt appears in the display for the duration of the call.
Important!:
Because of various transmission methods, network parameters,
and user settings necessary to complete a call from your
wireless phone, a connection cannot always be guaranteed.
Therefore, emergency calling may not be available on all
wireless networks at all times.
Important!:
DO NOT depend on this phone as a primary method of calling
911 or for any other essential or emergency communications.
Dialing Inter national Numbers
1. In standby mode, enter 011 (the three-digit exit code for
the United States).
2. Enter the country code for the country that you are calling.
3. Enter the number that you wish to call, then press .
Note:
Puerto Rico and Canada are on the North American dialing plan.
Making calls to Puerto Rico and Canada is similar to making calls
within the United States, no unique country codes are necessary.
Call Functions 18
Manual Pause Calling
When you call automated systems (like banking services), you
are often required to enter a password or account number.
Instead of manually entering the numbers each time, you can
store the numbers in your Contacts along with special characters
called pauses.
•
2-Sec Pause
— P pause — A two-second pause stops the calling
sequence for two seconds and then automatically sends the remaining
digits.
•
Wait
— W pause — A hard pause stops the calling sequence until you
press .
To manually call a number with pause(s) without storing it to your
Contacts:
1. Enter the number you wish to call.
2. Press the Options soft key. A pop-up menu containing the
following options appears in the display:
•
2-Sec Pause
•
Wait
3. Highlight the desired pause option.
4. To enter the highlighted pause into your number sequence,
— a two-second pause.
— a hard pause (awaits input from you).
press .
19
Note:
If you select 2-Sec Pause, P appears in the display. If you select Wait,
W appears in the display.
5. Press to call the number.
Making a Call — Contact Dialing
You can store phone numbers and contact names in your phone’s
Contacts list. To call one of your Contacts, do the following:
1. Press the
Contacts
soft key. The Contacts
Find
screen
appears in the display.
2. Enter the first few letters of a Contacts list entry name. (For
more information, refer to “Entering Text” on page 32) The
Contacts list displays the first few entries with names
matching the letters you entered.
3. Highlight the Contact you wish to call and press .
(For more information, refer to “Understanding Your
Contacts” on page 35.)
Making a Call — Speed Dialing
You can store phone numbers and contact names in your phone’s
Contacts list. Speed Dialing lets you quickly and easily dial any
contact in your Contacts list by using that contact’s location
number in the list. You can assign and change location (speed
dial) numbers for your contacts. (For more information, refer to
“Assigning Speed Dial Numbers” on page 42.)
One-Touch Dialing
Speed Dial numbers 2 through 9 are special One-Touch dialing
numbers. You can call the phone numbers stored in your phone’s
Contacts list and assigned Speed Dial numbers 2 through 9 by
pressing and holding a single key.
Example:
For Speed Dial number 3, press and hold the key until the
name and number appear in the display and the number is dialed.
Two-Touch Dialing
Memory locations 10 through 99 are special Two-Touch dialing
locations.
Example:
For location number 13, briefly press , then press and hold
until the name and number appear in the display and the number is
dialed.
Three-Touch Dialing
Memory locations 100 through 999 are special Three-Touch
dialing locations.
Example:
For location number 113, briefly press , briefly press
again, then press and hold until the name and number appear
in the display and the number is dialed.
Pause Dialing From a Contacts Entry
•
If you speed dial a contact that contains (two-second) P pause(s)
simply wait for the pauses to pass and the dialing to complete.
•
If you speed dial a contact that contains (hard) W pause(s), wait for the
appropriate prompt(s) from the number you are calling (credit card
number, bank account number, and so on) and enter the appropriate
response(s).
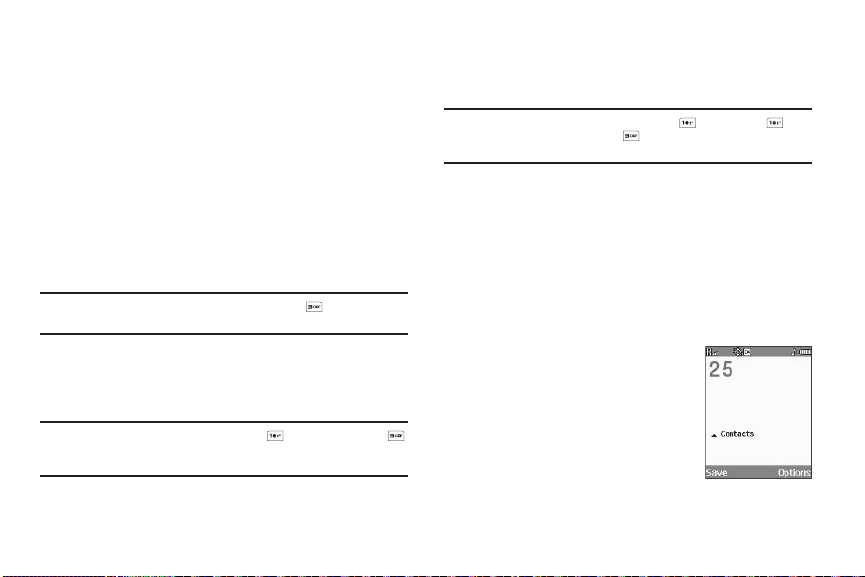
Making a Call — Quick Search Dialing
Use the Quick Search feature to dial any
number stored in your Contacts list by
pressing the number keys that correspond
to the first few letters of a Contact name.
(For more information, refer to “Quick
Search” on page 109.)
Call Functions 20
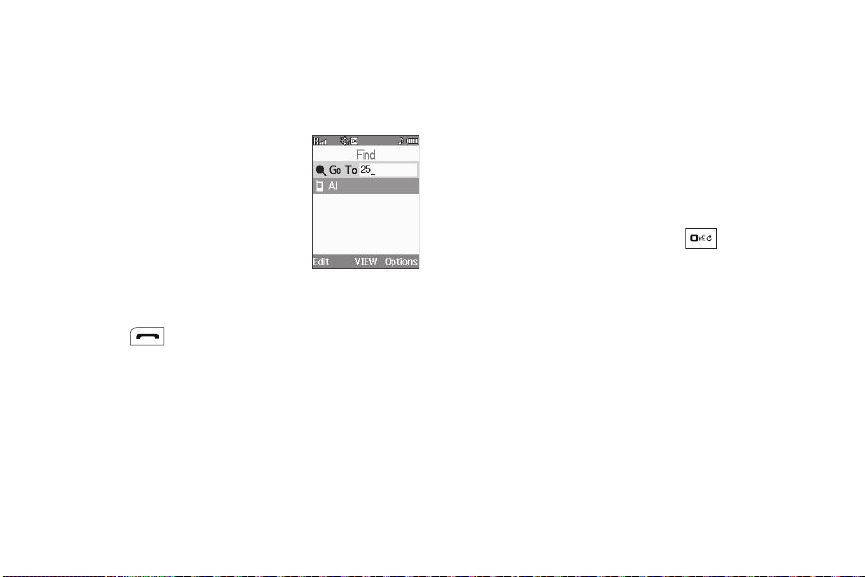
Quick Search Dialing a Contact
To find and dial a Contact, do the following:
1. In standby mode, press the number keys that correspond
to the first few letters of the Contact name, as shown.
2. Press the
Up
Navigation key. The
Contact List screen appears
showing the desired Contact name,
as shown.
If no contact is found,
Contacts
displays.
3. If needed, use the
Found 0 in
Up
and
Down
Navigation keys to highlight the Contact you wish to call.
4. Press to call the highlighted Contact.
Making a Call — Voice Dialing
Your MyShot mobile phone includes state-of-the-art voice
recognition software that lets you dial numbers using your voice.
Using Voice Dial
Use the Voice Dial command to dial any number stored in your
Contacts list by saying the name of the contact (Name Dialing).
You can also use Voice Dial to dial any valid telephone number,
21
even numbers not stored in your Contacts list, by speaking the
individual digits in the number (Digit Dialing).
Voice Dialing Tips:
•
Wait for the beep before speaking.
•
Speak clearly at a normal volume, as if you were talking to someone
on the phone.
•
When saying a name, say the first name then the last name.
Dialing a Name
To dial a name, do the following:
1. In standby mode, press and hold .
“Say a Command” appears in the display and is
pronounced through the earpiece.
2. Say, “Call”.
You are prompted to “Say the name or #”.
3. Speak clearly and say the name of a person in your
Contacts list, first name followed by last name.
If the name is recognized, Voice Dial repeats the name and
dials the number.

If Voice Dial is not sure which name you said, it displays a
choice list of up to three names and prompts you with “Did
you say?” followed by the first name on the list.
4. Say “Yes ” to confirm the name or “No” to hear the next
name, or use the keypad to select the correct name from
the list. (For more information, refer to “Choice Lists” on
page 93.)
•
Press the
Repeat
•
Press the
soft key to say the name again.
Settings
soft key, then press the
Exit
soft key to exit
Voice Dial without dialing.
If the recognized name has multiple numbers stored for it
(that is, Home, Work, Mobile, and so on), Voice Dial
displays the possible choices and prompts you with
“Which number?”
5. Say one of the following number types:
•“Home
”
•“Work
”
•“Mobile
”
Voice Dial dials the specified number.
Dialing a Number
To dial a number using Voice Dial, do the following:
1. In standby mode, press and hold .
“Say a Command” appears in the display and is
pronounced through the speaker.
2. Say “Call”.
VoiceSignal prompts you to “Say the name or #”.
3. Speak clearly and say the telephone number of the person
you want to call. For example, say “7 8 1 5 5 5 6 2 0 0."
If it recognizes the number, Voice Dial repeats and dials the
number. If Voice Dial is not sure it has recognized the
number, it displays a choice list of up to three numbers and
prompts you with “Did you say?” followed by the first
number on the list.
4. Say “Yes ” to confirm the number or “No” to hear the next
one, or use the keypad to select the correct number from
the list. (For more information, refer to “Choice Lists” on
page 93.)
•
To say the name again, press the
•
To exit Voice Dial without dialing, press .
Repeat
soft key.
Call Functions 22

Pause Dialing From a Contacts Entr y
•
If you voice dial a contact that contains (two-second) T pause(s) simply
wait for the pauses to pass and the dialing to complete.
•
If you voice dial a contact that contains (hard) P pause(s), wait for the
appropriate prompt(s) from the number you are calling (credit card
number, bank account number, and so on) and enter the appropriate
response(s).
Answering a Call
Your phone notifies you of a call in the following ways:
•
A ring tone sounds and/or your phone vibrates (Your phone provides
seven ring volume settings including:
Low/Medium, Medium, Medium/High, High
different ring types to distinguish callers.)
and/or
•
A phone number (unless blocked by the caller) and a name appear in
Ringer Off
,
Vibrate, Low
, or
Vibrate/High
the display (If the caller’s number and name are stored in your
Contacts list).
•
If the caller can’t be identified,
restricted number
•
Your phone continues to notify you of the call until one of the following
, or no number appears in the display.
Call from unavailable#, Call from
events occurs:
– You answer the call.
– You ignore the call.
– The calling party ends the call.
– The call is sent to voicemail.
23
Answering an Incoming Call
䊳
Slide your phone open, if closed, or press . The ring
tone and/or vibration stop and the caller’s voice can be
heard in the earpiece.
Tip:
You can set your phone to answer calls automatically or when you press
any key but the key. (For more information, refer to “Call Settings”
on page 102.)
The In-Use Options Menu
While in a call, you can access numerous menus and features.
,
,
Note:
If the call is disconnected while you are accessing an In-Use Option,
the In-Use Option disappears from the display, and the phone
eventually returns to standby mode.
1. While in a call, press the Options soft key.
The following menu items appear in the display:
•
Message
— The
Messages
more information, refer to
•
Contacts
• Recent Calls
— The Contacts Find
— Launches the recent calls portion of the All Calls
log. (For more information, refer to
menu appears in the display. (For
“Messaging”
on page 46.)
screen appears in the display.
“Review Recent Calls”
on
page 24.)
• Connect Bluetooth
— Connect your handset to another Bluetooth
device, such as a headset. (For more information, refer to
“Bluetooth”
•
Send DTMF
• Voice Privacy
on page 80.)
— Send your phone number as DTMF tones.
— When Voice Privacy is enabled (that is, set to
Enhanced), it turns on advanced voice encryption. Set to Standard
to disable Voice Privacy.
•
Location
— Lets you change your phone’s Location setting. (For
more information, refer to
2. Do one of the following:
•
Select the desired sub-menu or feature.
•
Exit the menu by pressing .
Tip:
You can block/restore sound going to the other parties on this call by
pressing the Mute / Unmute soft key. This can reduce noise on
conference calls.
“Location”
on page 97.)
Ignoring a Call
When you ignore an incoming call, the call is immediately
forwarded to your voice mail.
䊳
During an incoming call, press the Ignore soft key. The
caller is forwarded to your voice mail.
Adjusting the Call Volume
In standby mode, repeatedly press the Volume key ( )
down until the Call Volume Level desired appears in the display.
The Volume key is on the left side of phone.
Calls Log
The Calls log retains information about Outgoing, Incoming, and
Missed calls. You can also view times for your last call and the
time totals for all calls. Plus, you can place calls or send
messages to numbers associated with log entries, and you can
save these numbers to your Contacts list.
Review Recen t Call s
The Recent Calls list shows the 30 most recent calls from the All
Calls log.
To access the Recent Calls list:
䊳
In standby mode, press . The
All Calls
screen
appears in the display, listing the 30 most recent calls.
To call the most recent called or calling number:
䊳
In standby mode, press twice in quick succession.
The phone dials the number associated with the most
recent call.
Review the Calls Log
1. In standby mode, press the Menu soft key, then select
Calls. The following Calls logs and options appear in the
display:
• Outgoing Calls
Call Functions 24
• Incoming Calls
• Missed Calls
• All Calls
• Data Calls
•Call Timer
• Data Counter
2. Select the Calls log that you wish to review or the function
you wish to access.
Note:
In cases where there is a Contacts match for a Calls log entry, the
name associated with the number appears in the display instead of the
number.
Outgoing Calls
Your phone retains information about the last 90 outgoing calls
and stores them in the Outgoing calls log. You can review the
Outgoing calls log for the time and date of a call, as well as other
information.
Note:
To quickly view your most recent calls, briefly press in standby
mode. Up to 270 of your most recent outgoing, incoming, and missed
calls appear in the display.
1. At the Calls menu, select Outgoing Calls. A list of your
outgoing calls appears in the display.
25
2. Highlight a call, then press OPEN ( ) to view the Name
of the called party (if in the Contacts list), the number
dialed, the time and date the call was placed, and the
duration of the call (in minutes and seconds).
3. Press the Options soft key. A pop-up menu containing the
following options appears in the display:
•
Save
— Save the number to your Contacts.
•
Details
— Calls to Contacts Only — Shows the entry for the called
Contact.
•
Erase
— Erase the selected call from your Outgoing call log.
•
Lock/Unlock
•
Erase All
•
View Timer
— Protect the selected call from being erased.
— Erase all calls from your Outgoing call log.
— Shows the number of calls and/or the total time
spent on the Last Call, Home Outgoing, Home Incoming, Roaming
Calls, All Calls, Last Reset, and Lifetime Calls.
4. Press the Msg soft key to launch the Create Message
menu. The following options appear in the display:
•
Tex t Me ssag e
— Lets you send a text message to the selected
number called.
•
Picture Message
— Lets you send a picture message to the
selected number called.
Note:
For more information, refer to “Types of Messages” on page 46.

Select the desired message type to compose a message.
5.
Incoming Calls
Your phone retains information about the last 90 Incoming calls
and stores them in the Incoming call log. You can review the
Incoming call log for the time and date of the call, as well as
other information.
1. At the Calls menu, select Incoming Calls. A list of your
Incoming calls appears in the display.
2. Highlight a call, then press OPEN ( ) to view the Name
of the caller (if in the Contacts list), the originating number,
the time and date the call was received, and the duration
of the call (in minutes and seconds).
3. Press the Options soft key. A pop-up menu containing the
following options appears in the display:
•
Save
— Save the number to your Contacts.
•
Details
— Calls from Contacts Only — Shows the entry for the
calling Contact.
•
Erase
— Erase the selected call from your Incoming calls log.
•
Lock/Unlock
•
Erase All
•
View Timer
— Protect the selected call from being erased.
— Erase all calls from your Incoming calls log.
— Shows the number of calls and/or the total time
spent on the Last Call, Home Outgoing, Home Incoming, Roaming
Calls, All Calls, Last Reset, and Lifetime Calls.
4. Press the Msgs soft key. The following options appear in
the display:
•
Text Message
— Lets you send a text message to the selected
calling number.
•
Picture Message
— Lets you send a picture message to the
selected calling number.
Note:
For more information, refer to “Types of Messages” on page 46.
5. Select an option to perform its function.
Missed Calls
Your phone retains information about the last 90 missed calls
(calls that were never picked up) and stores them in the Missed
call log. You can review the Missed call log for the time and date
of the call, as well as other information.
1. At the Calls menu, select Missed Calls. A list of your
missed calls appears in the display.
2. Highlight a call, then press OPEN ( ) to view the Name
of the caller (if in the Contacts list), the originating number,
and the time and date the call was received.
3. Press the Options soft key. A pop-up menu containing the
following options appears in the display:
•
Save
— Save the number to your Contacts.
Call Functions 26

•
Details
— Calls from Contacts Only — Shows the entry for the
calling Contact.
•
Erase
— Erase the selected call from your Missed call log.
•
Lock/Unlock
•
Erase All
•
View Timer
— Protect the selected call from being erased.
— Erase all calls from your Missed call log.
— Shows the number of calls and/or the total time
spent on the Last Call, Home Outgoing, Home Incoming, Roaming
Calls, All Calls, Last Reset, and Lifetime Calls.
4. Press the Msgs soft key. The following options appear in
the display:
•
Tex t Me ssag e
— Lets you send a text message to the selected
called number.
•
Picture Message
— Lets you send a picture message to the
selected called number.
Note:
For more information, refer to “Types of Messages” on page 46.
5. Select an option to perform its function.
All Calls
You can review all of the calls log entries (outgoing, incoming,
and missed calls) for the time and date of a call, as well as other
information.
1. At the Calls menu, select All Calls. A list of all logged calls
appears in the display.
27
2. Highlight a call, then press OPEN ( ) to view further
information about the call.
3. Press the Options soft key. A pop-up menu containing the
following options appears in the display:
•
Save
— Save the number to your Contacts.
•
Details
— Calls from Contacts Only — Shows the entry for the
calling/called Contact.
•
Erase
— Erase the selected call from your Calls log.
•
Lock/Unlock
•
Erase All
•
View Timer
— Protect the selected call from being erased.
— Erase all calls from your Calls log.
— Shows the number of calls and/or the total time
spent on the Last Call, Home Outgoing, Home Incoming, Roaming
Calls, All Calls, Last Reset, and Lifetime Calls.
4. Press the Msgs soft key. The following options appear in
the display:
•
Tex t Me ssag e
— Lets you send a text message to the selected
calling/called number.
•
Picture Message
— Lets you send a picture message to the
selected calling/called number.
Note:
For more information, refer to “Types of Messages” on page 46.
5. Select an option to perform its function.
 Loading...