

Page 1

* Some of the contents of this manual may differ from your phone,
depending on the software installed or your service provider.
ELECTRONICS
PORTABLE CELLULAR
TELEPHONE
SCH-N415
User’s Manual
World Wide Web
http://www .sam sungmobile.com
Printed in KOREA
Code No.: GH68-06798A
English. 02/2005. Rev.1.0
Please read this ma nual before operatin g your
phone, and keep it for future reference.
1
Page 2

Table of con t ents
Table of contents
Important safety precautions .......................7
Unpacking.....................................................9
Your phone .................................................10
Phone la yout......................................... ............. 10
Display.............................................................. 13
Backlight........................................................... 15
Getting started............................................16
Using the battery................................................ 16
Switching on or off the phone............................... 20
Using the soft keys.......................................... ... 21
Your phone’s modes........... ............................ ..... 22
Call functions .............................. ................24
Making a call.......................... ........................... . 24
Ending a call.................................. .................... 25
Emergency dialing.............................................. 25
Using the recent call logs................. .................... 26
Making a call from Phone Book............................. 26
Prepend dialing ................. ............................ ..... 27
Speed dialing............................. ........................ 27
4-digit dialing..................................................... 29
Pause diali ng .................. .. .. ... .. .... .. .. .. ... .... .. .. .. .. . 29
Adjusting the volume during a call........................ 33
Answerin g a ca ll.............. .. .. ... .. .... .. .. .. ... .... .. .. .. .. . 34
Silencing a call ringer.......................................... 34
Viewing missed calls ........................................... 35
Options during a call............ ............................ ... 36
Using ca ller ID .................. ............................ ..... 37
Call forwarding............................................ ....... 37
Call waiting......................... ............................... 38
Three-way calling............................................ ... 39
3
Page 3

Table of cont ents
Table of con t ents
Entering Text ..............................................40
Changing the text input mode................... ........... 41
Using T9 (English) mode...................................... 42
Using Alphabet m ode............................. ............. 44
Using Symbol mode............................................ 46
Using Number mode ......................... .................. 46
Using the menus ............ .............................47
Accessing a menu function by scrolling.................. 47
Using shortcuts.......................... ........................ 48
List of me nu functions......................................... 49
Calls............................................................52
Outgoing
Incoming
Missed
Erase History
Air Time
(Menu 1-1)
(Menu 1-2)
(Menu 1-3)
(Menu 1-4)
(Menu 1-5)
........................................... 52
........................................... 53
............................................... 54
..................................... 54
............................................ 55
Phone Book.................................................56
Find
(Menu 2-1)
Add New Entry
Group Setting
My Phone#
Memory Info
.................................................. 56
(Menu 2-2)
(Menu 2-3)
(Menu 2-4)
(Menu 2-5)
................................... 58
..................................... 61
........................................ 62
...................................... 62
Messages ....................................................63
New MSG
Voice
Inbox
Outbox
Filed MSG
WAP Alert
Erase MSG
MSG Setting
(Menu 3-1)
(Menu 3-2)
(Menu 3-3)
(Menu 3-4)
(Menu 3-5)
(Menu 3-6)
(Menu 3-7)
(Menu 3-8)
........................................... 63
................................................ 65
................................................ 66
.............................................. 67
.......................................... 67
.......................................... 68
......................................... 68
....................................... 69
Planner .......................................................71
Today
Scheduler
Task List
Memo Pad
Alarm
Calculator
World Time
Countdown
Set Time
(Menu 4-1)
(Menu 4-2)
(Menu 4-3)
(Menu 4-4)
(Menu 4-5)
(Menu 4-6)
(Menu 4-7)
(Menu 4-8)
(Menu 4-9)
............................................... 71
.......................................... 73
............................................ 75
.......................................... 76
................................................ 78
.......................................... 79
........................................ 79
........................................ 80
........................................... 81
Voice Tools.. ...................................... ..........82
Voice Memo
Voice Answer
(Menu 5-1)
(Menu 5-2)
....................................... 82
..................................... 83
Sounds........................................................86
Ringer Volume
Ringer Type
Alerts
(Menu 6-3)
Key Tone
Roam Ringer
Power On/Off
(Menu 6-1)
(Menu 6-2)
.................................... 86
....................................... 87
................................................ 88
(Menu 6-4)
........................................... 88
(Menu 6-5)
(Menu 6-6)
...................................... 89
..................................... 89
Display........................................................90
Menu Style
Wallpaper
Backlight
Banner
Dual Clock
Contrast
Power Saving
(Menu 7-1)
(Menu 7-2)
(Menu 7-3)
(Menu 7-4)
(Menu 7-5)
(Menu 7-6)
(Menu 7-7)
........................................ 90
.......................................... 90
........................................... 90
.............................................. 91
......................................... 91
............................................ 92
...................................... 92
Games.........................................................93
Fun Bowling
Honey Ball
Go Hamster
(Menu 8-1)
(Menu 8-2)
(Menu 8-3)
........................................ 93
......................................... 94
....................................... 96
4
5
Page 4

Table of cont ents
Setup ..........................................................97
Answer Method
Auto Key Lock
Auto Retry
Data/Fax
Version
Security
(Menu 9-6)
(Menu 9-1)
(Menu 9-2)
(Menu 9-3)
(Menu 9-4)
(Menu 9-5)
.................................... 97
.................................... 98
......................................... 98
........................................... 98
............................................ 100
........................................... 100
Downloads ................................................104
WAP..........................................................106
Launching the WAP Browser............................... 106
Navigating the WAP Browser............ .................. 106
Entering Text in the WAP Browser....................... 107
Using the Browser Menu Options ................... ..... 107
Health and safety information.................. .109
Exposure to radio frequency (RF) signals ............. 109
Road safet y................ .. .. .. .. ..... .. .. .. .... ... .. .. .. .... . 113
Operating e nv ir on m ent ....................... ... .... .. .. .. . 114
Electronic devices............................................. 114
Potential ly ex pl o si v e en vi ro nment................ .. .. ... 116
Emergency calls........................................ ....... 117
Other im portant safety information............ ......... 118
Care and maintenance ............................... ....... 119
Glossary....................................................121
Quick Reference Card................................125
6
Page 5

Important safety
precautions
Read these guidelines before using your wireless
phone. Failure to comply with them may be
dangerous or ille g a l.
Road safety at all times
Do not use a hand-held phone w hile dri ving; park
the vehicle first.
Switching off when refuelling
Do not use the phone at a refuelling po int (service
station) or near fuels or chemicals.
Switching off in an aircraft
Wireless phones can cause interference. Using
them in an aircraft is both illegal and dangerous.
Switching off in near all medi cal e quipment
Switch off your phone near medical equipment.
Hospitals and health care facilities may be using
equipment that could be sensitive to external RF
energy. Follow any regula t ions or rules in force.
Interference
All wireless phones may be subject to
interference, whic h could aff ect their perf ormanc e.
Special regulatio ns
Follow a ny special regulations in forc e in any area
and always switch off your phone whenev er it is
forbidden to use it, or when it may cause
interference or danger (in a hospital for example).
Water resistance
Your phone is not water-resistant. Keep it dry.
7
Page 6
Important safety precautions
Sensible use
Use only in the normal position (held to the ear).
Avoid unnecessary contact with the antenna when
the phone is swit ched on.
Emergency call
Key in the emergency nu m ber for y ou r pr esent
location, then press . Give all necessary
information as accurately as p ossible. Do not end
the call until give n pe rmission to do so.
Keeping small children away from your phone
Keep the phone and all its parts including
accessories out of re ach of small children.
Accessories and batteries
Use only Samsung-approved accessories and
batteries. Use of any unauthorised accessories
could damage your phone and ma y be dangerous.
Use only Samsung-approv ed batteries and recharge
your battery only with Samsung-approv ed
chargers.
Qualified servic e
Only qualified service personnel may repair your
phone.
For more detailed safety information, see “Health
and safety information” on page 109.
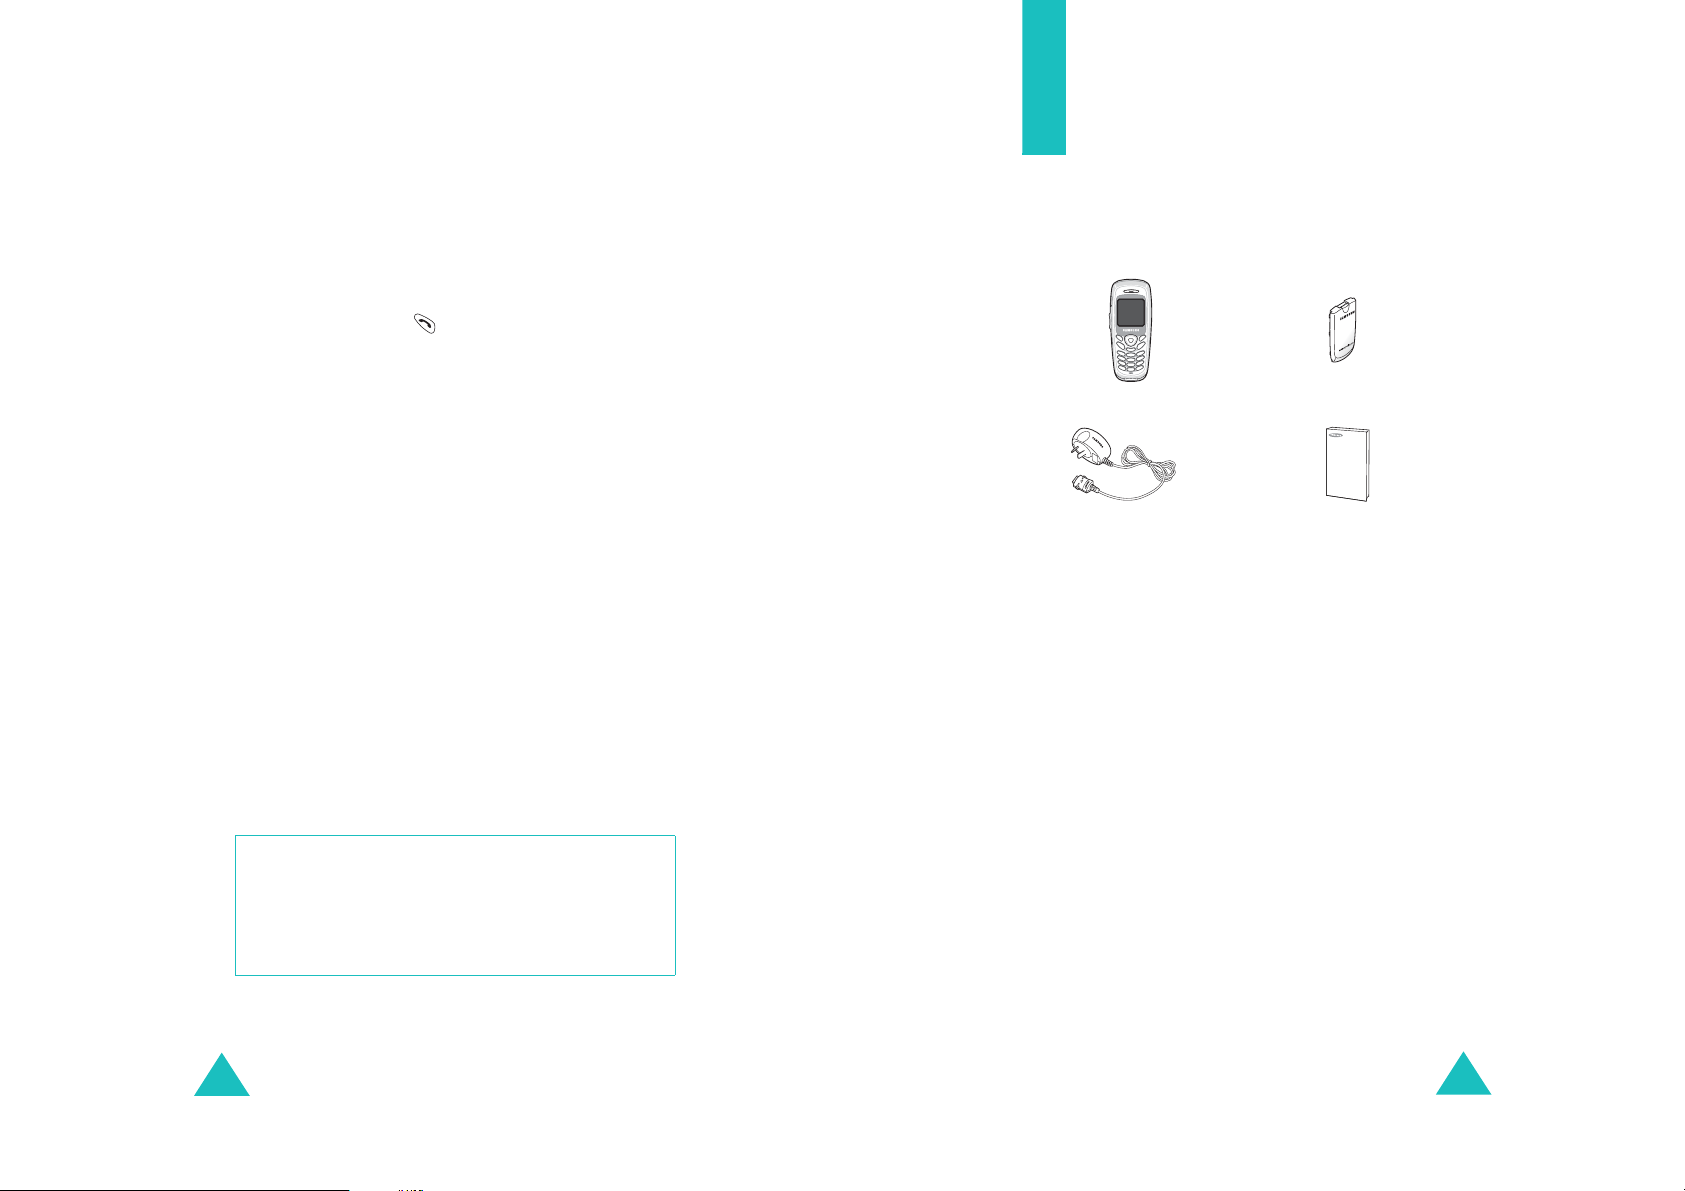
Unpacking
Yo ur p a ckage contains the f ollowing items. The
illustrations below may look different from your
phone and accessories:
Handset
Travel adapter
In addition, you can obtain the following
accessories for your phone from your local
Samsung dealer:
• Headset • Travel adapter
• Standard battery • Cigarette lighter adapter
• Hands-free car kit • Data cable
• Holster
Battery
User’s manual
CAUTION
RISK OF EXPLOSION IF A BATTERY IS
REPLACED BY AN INCORRECT TYPE.
DISPOSE USED BATTERIES ACCORDING TO
THE INSTRUCTIONS.
8
9
Page 7

Your phone
Phone layout
The following illustrations show the main elements
of your phone.
Earpiece
Headset jack
Display
Navigation (Up/
Down/Left/
Volume/menu
browse keys
Soft key (left)
Send key
Right) keys
OK key
Soft key (right)
Power on/off/
Menu exit key
Key
Key
(s)
(soft keys)
(Navigatio n
keys)
Your phone
Description
Performs th e functions indicated by
the text above them, on the bottom
line of the displa y.
In Menu mode, scrolls through menu
options.
In Standby mode, allows you to
enter the Do wnloa ds m enu, allo ws
you to enter the WAP menu, allows
to enter the Messages menu, allows
to enter the Scheduler menu.
In Standby mode, accesses the
Downloads/WAP menu.
Makes or an sw ers a call.
In Standby mode, retrieves the most
recent numbers dialed, received, or
missed. Redials the last number when
pressed and held.
Ends a call. Also switches the phone
on and off when pressed and held.
In Menu mode, cancels you r input and
returns the display to Standby mode.
Cancel/clear
Special
function keys
10
key
Alphanumeric
keys
Microphone
Interface Connector
Deletes characters from the display.
In Menu mode, returns the display to
the previous menu level.
Enters numbers, letters, and some
special characters.
11
Page 8
Your phone
Your phone
Key
(s)
Description
(continued)
In Standby mode, activates Key
Lock mode when pressed and held.
In the text entry mode, changes case
of letters.
In Standby mode, quickly enters or
exits Silent mode when pressed and
held.
In the text entry mode, inserts a
space.
(on the left side of the phone)
During a call, adjusts the voice
volume.
In Standby mode, adjusts the key
tone volume.
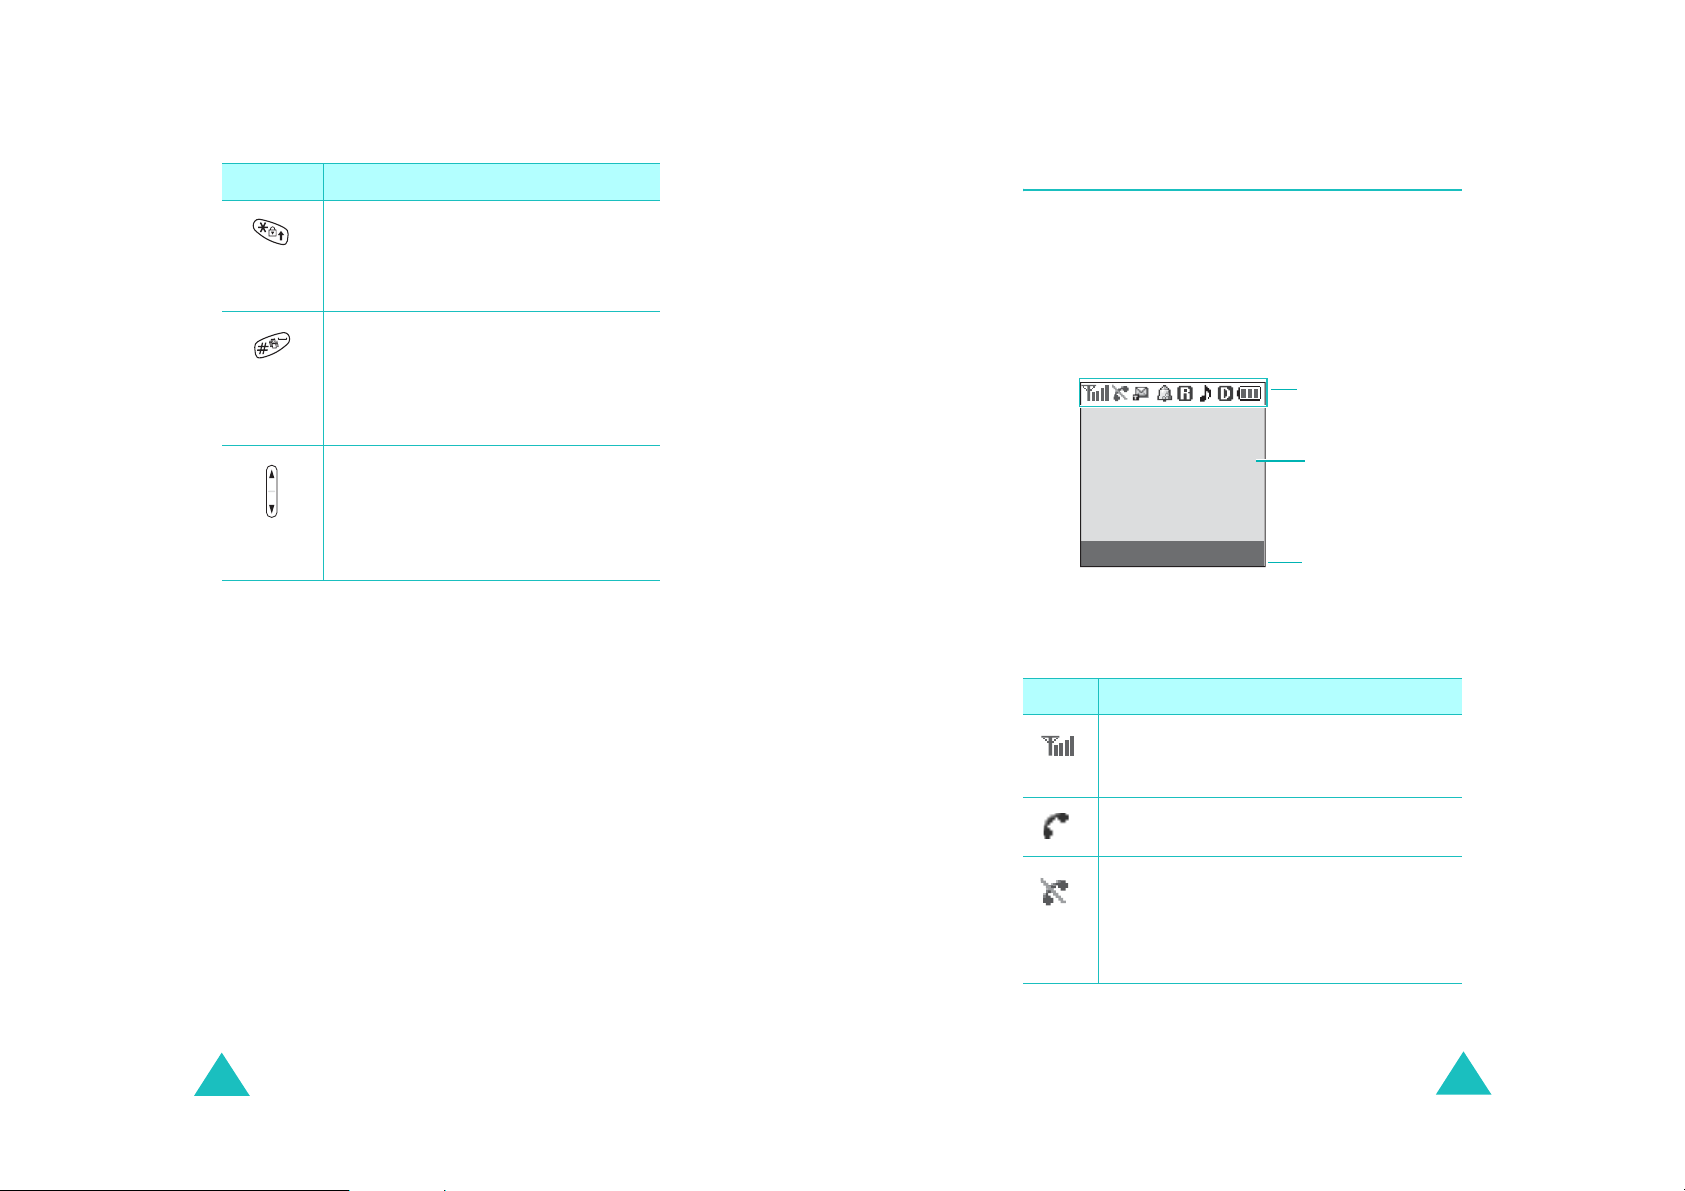
Display
Layout
The display has three areas; the top line of icons,
the text and graphic area, and the bottom line of
soft key indicators.
Icons
Text and
graphics area
Menu Find
Icons
Icon Description
Signal strength
signal strength. The greater the number
of bars, th e b e t ter the signa l .
Soft key function
indicators
: Shows the received
12
Service
: Appears when a call is in
progress.
No service
: Appears when you are
outside a service area. When it displays,
you cannot ma ke or rec eive calls. Wait a
little while for a better signal or move
into an open area to regain service.
13
Page 9

Your phone
Your phone
Icon Description
New text message
new text message received.
New voice mail
voice mail is re ceived.
New WAP push messag e
when a new WAP push message is
received.
Alarm mode
alarm to ring at a specified time.
Roaming
: Appears when you are out of
your home area and have logged onto a
different network; for example, when
travel in g in ot her countries.
Ringer on
: Appears when you set the
ringer volume for calls to one from
Level 1
to
Ringer off
ringer volume for calls to
Vibration mode
ringer volum e for calls is set to
or
High + Vib,
Silent mode .
(continued)
: Appears when a
: Appears when a new
: Appears
: Appears when you set an
Level 8
or to
1-Beep
.
: Appears when you set the
Silent
.
: Appears when the
Vibrate
or when your phone is in
Backlight
The display is illuminated by a backlight. When
you press any key, the backlight comes on. It goes
off if no keys are pressed within a given period of
time, depending on the setting in the
menu (
Menu 7-3
).
Backlight
To specify the length of time for which the
backlight is active, set the
Backlight
menu; see
page 90 for further details.
14
Digital mode
: Indicates when the
phone is logged onto a digital network.
1x mode
: Indicates when the phone is
in 1x digital mode.
Battery status
: Shows the level of your
battery. The more bars you see, the
more power you ha ve remaining.
15
Page 10
Getting started
Using the battery
Your phone is powered by a rechargeable Li-ion
battery. Use only approved batteries and
chargers. Ask you r local Samsung dealer for
further details.
Note
: Y ou must fu lly charge the batter y before us ing
your phone for the first time. A discharged
battery is fully re charged in appr oximately
180 minutes for a standard battery.
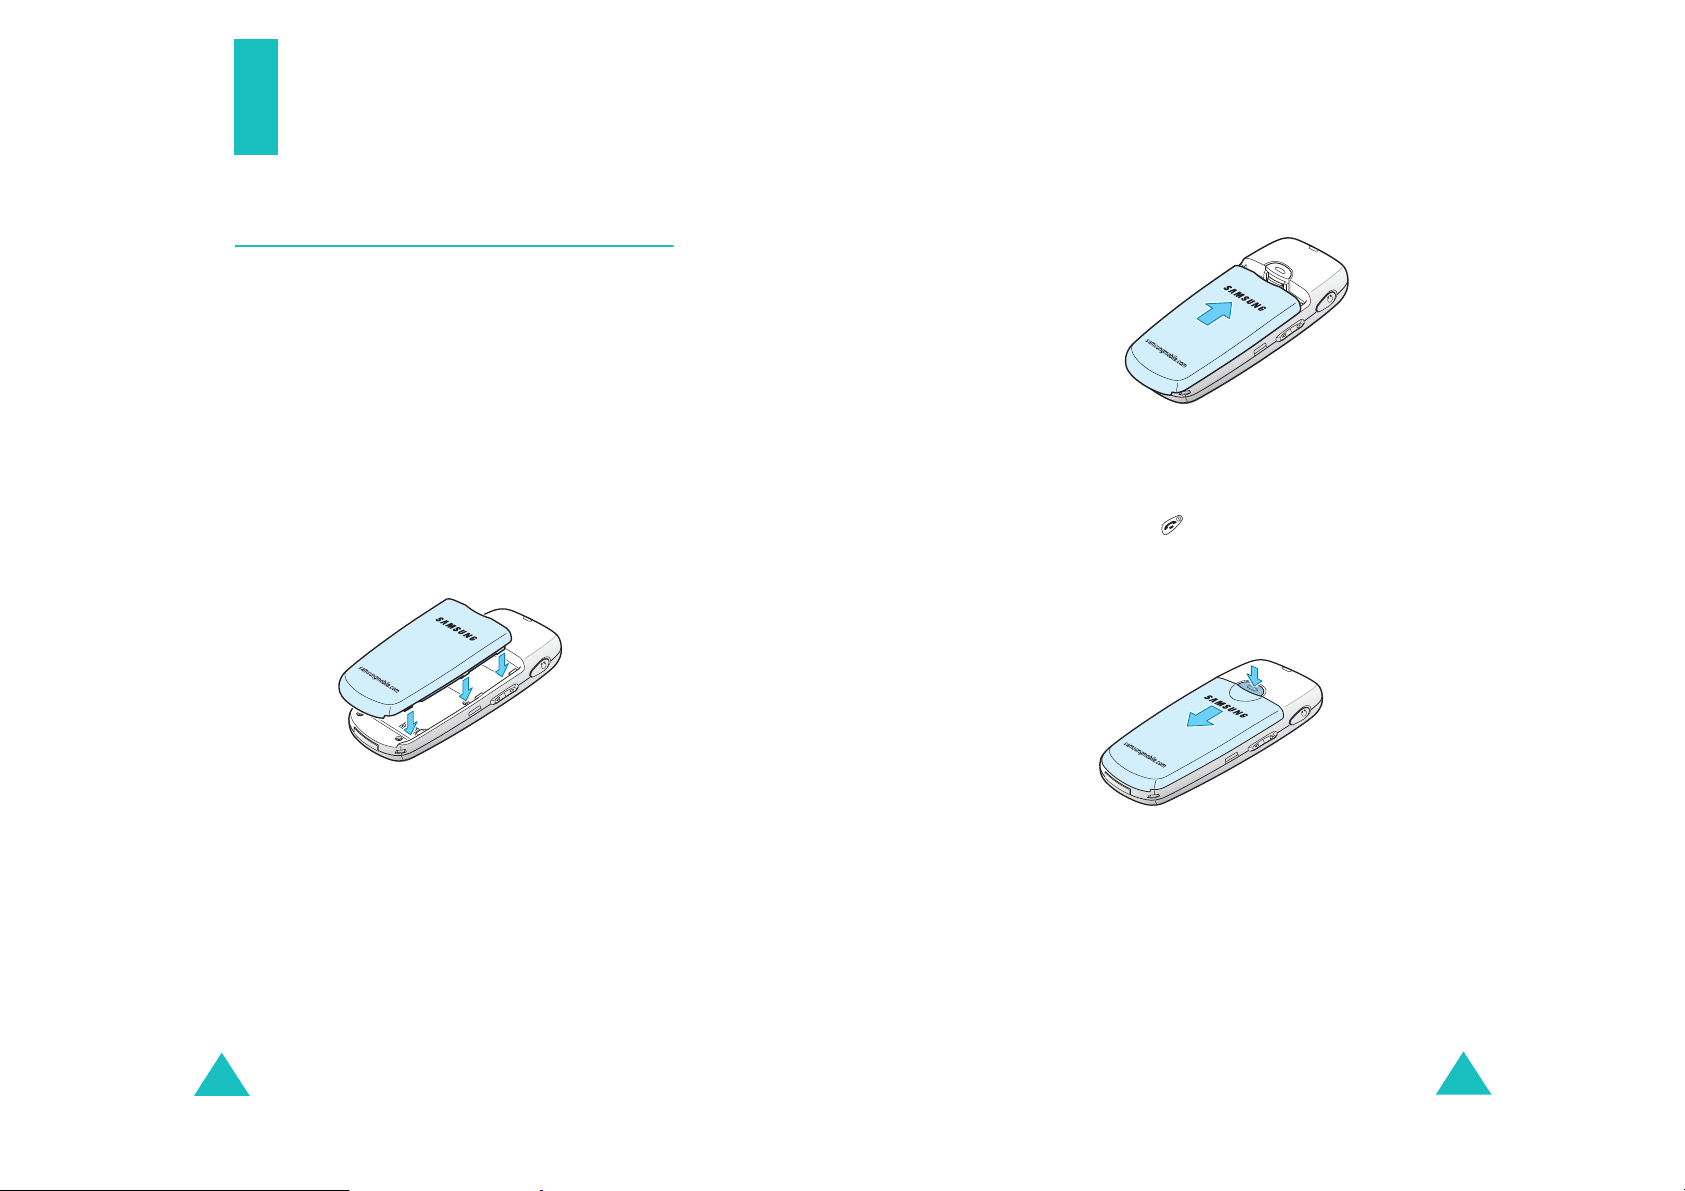
Getting started
2. Press the battery until it clicks into place. Make
sure that the b a tt e ry is properly insta lled
before switching the phone on.
Removing the battery
Installing the battery
1. Place the battery so that the tabs on the end
align with the slots at the bottom of the phone.
16
1. If necessary, switch off the phone by pressing
and holding until the power-o f f image
displays.
2. Slide th e b attery lock toward the top of the
phone and lift away the battery, as shown.
Charging the battery
A travel adapter is provided for charging your
batteries. The travel adapter allows you to use the
phone while the battery is charging, but this will
cause the battery to charge more slowly.
17
Page 11

Getting started
Getting started
1. With the battery in position on the phone, plug
the connector of the travel adapter into the
jack at the bottom of the phone.
Make sure that the arrow on the connector is
facing up, as is the phone.
2. Plug the adapter into a standard AC wall outlet.
The battery strength icon on the display shows
that the battery is charging.
3. When charging is finished, unplug the adapter
from both the power outlet and the phone by
pressing the buttons on both sides of the
connector and pulling the connector out.
Low battery indicator
You can easily tell if your battery needs to be
recharged by ch eckin g the Bat tery Stat us i con( )
at the upper-right corner of your phone’s display.
The presence of all three bars indicates a full
charge, two ba rs indicates a sma ll e r charge, and
one bar indicates an even smaller charge.
When the battery charge level becomes low , the
battery sensor blinks an empty Battery Status icon
( ) and sounds a warnin g tone. If the battery level
becomes too low, the phone automatically turns off.
When this happens, you lose whatever you are
doing and if in a call your phone call cuts off. W atch
the Battery Status icon and make sure that your
battery is adequately charged.
Note
: You must unplug the charger before removing
the battery from the p hone during charging ;
otherwise, the phone could be damaged.
18
19
Page 12

Getting started
Getting started
Switching on or off the phone
1. Press and hold until the po w e r -on image
displays to switch on the phone.
When the system locates servi ces, the greeting
message displays along with the time and
date. You can now place and receive calls.
If the phone is out of service, the No Service
icon ( ) a pp ea r s on the display. In this case,
you cannot place and receive calls. You can try
again later when service is available.
2. When you wish to switch off the phone, press
and hold for more than two seco nds until
the power-off image displays.
WARNING!
Do not switch on the phone when mobile phone
use is prohibited or when it may cause
interference or danger.
Note
: As with any other radio-transmitting device,
do not touch the antenna unnecessarily when
the phone is swi tched on. Contact with t he
antenna affects the c all quality and m ay cause
the phone to operate at a higher power level
than otherwise needed.
Using the soft keys
Your phone offers a set of fu nctions that al lows
you to customize it. These functions are arranged
in menus and submenus, ac cessed using the two
soft keys, and . Each menu and submenu
allows you to view and alter the settings of a
particular function.
The roles of the soft keys vary depending on the
current function you are using; the labels on th e
bottom line of the display just above each key
indicate their curren t role.
Example:
9:43A Tue 04 May
Menu Find
20
Press the left soft
key to access Menu
mode.
Press the right soft
key to fin d a name o r
number from Phone
21
Page 13

Getting started
Getting started
Your phone’s modes
Standby mode
Standby is the most basic state of your phone.
The phone goes into Standby mo de after you turn
it on or whenever yo u briefly press . When your
phone is in Standby mode, you will typicall y see
the greeting message and the current time and
date. If you enter a phone number, you can press
to dial it or press to save it in Phone Book.
Press at any time to return to Standby mode.
Be careful; if you are on a call w hen you p ress ,
the call disconnects and the phone returns to
Standby mode.
Talk mode
You can place and answer calls only when your
phone is turned on. During a call, the phone is in
Talk mode. While you a re in Talk mode, pressing
Menu
the
page 36 for details.
Power Save mode
Your phone comes with a Power Save feature that
is automa tically activated if you r p hone is unable
to find a signal after 15 minutes of searching.
While this feature is active, the phone’s battery
charge is conserved. The phone automatically
rechecks for a signal periodically. To manually
force the phone to recheck for a signal, press any
key.
soft key gives you a list of options. See
Lock mode
When you lock your p hone us ing the
menu (
cannot use the phone. In Lock mode, you can
receive messages and calls, but you cannot place
an outgoing call until you unlock the phone. To
unlock the phone, you need to enter the lock
code.
For details about locking and unlocking your
phone, see page 100.
Menu 9-6-1
) in the
Security
Lock Phone
menu, you
Silent mode
Silent mode disables all sounds on the phone. This
feature is best used in situations where the pho ne
might disturb others, such as in a meeting, in a
library, or in a theater. Your phone can be set to
Silent mode with a press of a key in Standby
mode.
In Standby mode, press and hold until “Enter!
Silent Mode” and the Vibration icon ( ) display.
T o exit and reactivate the previous sound settings,
press and hold until “Exit! Silent mode”
appears. The Vi b ration icon no long e r d isplays.
Key Lock Mode
Yo u ca n lock the keypad by pressing and holding
in Standby mode. By doing this, you can
prevent accidental key pressing To unlock the
keypad, press and then hold . When you
have an incoming call or an alarm occurs in Key
Lock mode, the mode is automatically deactivated
and the phone goes to Standby mode.
Note
: Y ou can set the phone to automatically lock
the keypad after a specified period of time , in
Auto Key Lock
the
page 98.
menu (
Menu 9-2
). See
22
23
Page 14

Call functions
Call functions
Correcting the number
Making a call
In Standby mode, enter the area code and phone
number and press .
Note
: When you have activated the
menu (
automatically retry to make the call if no one
answers or the line is busy. See page 98 for
further details .
While entering a number, press the
to use the following menu options:
4-digit Dial
feature. This option is only available when you
enter 4 digits. For details, see page 29.
Speed Dial
feature. This option is only available when you
enter a number corresponding to a location in
Phone Book. For details, see page 27.
Find
: finds a number from Phone Book.
Hard Pause
2sec Pause
Talk
: places a call to the number.
Save
: saves the number to Phone Book .
Menu 9-3
: allows you to use the 4-digit Dialing
: allows you to use the Speed Dialing
: enters a hard pause.
: enters a 2-second pause.
), the phone will
Auto Retry
Menu
soft key
To clear the Press
last digit displayed .
whole display and hold it for more
than one second.
Ending a call
When you want to end your call, press .
The length of the call display s a long with the
phone number of th e called person . If the numb er
is stored in your Phone Book, the name display s.
Menu
If there is no match, you can press the
key and store the number in Phone Book . For
further details about storing the number in Phone
Book, see page 58.
soft
Emergency dialing
Yo u can place calls to standard emerge nc y
numbers on the Emergency # list, even if y ou r
phone is locked or all of the outgoing calls are
restricted.
For further details about emergency nu mbers, see
page 101.
24
25
Page 15

Call functions
Call functions
Using the recent call logs
The phone stores up to 60 of the ca ll s you have
dialed, received, or missed ch ronologically. The
last call is sa ved in the first p o s ition.
To recall any of these numbers:
1. If there are any characters on the display,
return to Standby mode by pressing .
2. Press . The list of recent ca lls displays.
The following icons indicate the types of calls:
• : Outgoing calls
• : Incoming calls
• : Missed cal ls
3. Press the Navigation keys or the Volume keys
on the left side of the phone until you find the
number you want.
4. Press to dial the highlighted numb e r.
Prepend dialing
The Prepend option lets you add digits, such as
area codes and network fe at ure activa tion codes,
to a phone num be r t ha t is in your call logs or
Phone Book.
To prepend a phone number stored in your phone:
1. Access a call log in the Call lo gs list b y pres sing
.
2. Select the item you want using the Navigation
Menu
keys and press the
The display shows the details of the number.
3. Press the
pop-up list.
4. Press to select t he
5. Enter the area code or network feature code.
6. Press to dial the number.
Menu
soft key to access the menu
soft key .
Prepend
option.
Making a call from Phone Book
Yo u can store the ph on e numbers you called
regularly in the phone’s memory, which is called
“Phone Book”. You then simply recall the number
to dial.
For further details about the Phone Book feature,
see page 56.
26
Speed dialing
Once you have stored phone numbers in Phone
Book, you can dial them easily with a few presses
of the keys.
Note
: When several numbers are saved in one name
entry, the first number you entered is
automatically specified as a spee d dial
number. To change the speed dial number,
Speed dia l
use
see page 59.
of the
Phone Book
options;
27
Page 16

Call functions
One-touch dial
Memory locations 001 throu gh 0 09 are spec ial on etouch locations. You can dial the phone numbers
stored in Phone Book from 001 through 009 simp ly
by pressing one key.
Press and hold the third digit of the memory
location.
Call functions
4-digit dialing
You can qu ickly dial a phone nu m ber in Ph on e
Book by entering its las t 4 consecut ive digit s. This
feature is convenient if you have the num ber
memorized, but you have forgotten where the
number is stored in y our Phone Book.
For example
The number (and name) stored displays, and then
dials.
: Location no. 009
Press and hold .
Two-touch dial
Memory locations 010 thro ugh 099 a re spec ial two touch locations.
Press the second digit(s) briefly, then hold down
the last digit of the memory location.
For example
The number (and name) stored displays, and then
dials.
: Location no. 023
Press briefly and hold down .
Three-touch dial
Memory locations 100 through 500 are special
three-touch locati ons.
Press the first two digit(s) briefly, then hold down
the third digit of the memory location.
1. Enter the last 4 digits of the phone number you
want to dial.
Menu
2. Press the
option. The phone displays the phone
Dial
number that matches the four digits.
If the phone found more than one number that
contains those four di git s, it displays the first
number. Scroll through the numbers using
or to select a num b er.
3. Press to dial the number.
soft key and select the
4-digit
Pause dialing
When you call an automated system, like a
banking service, you are often required to enter a
password or acco unt nu mber. Ins tead of man uall y
entering the numbers each time, you can stor e
the numbers in your Phone Book, separated by
pauses.
There are two kinds of pauses that can be entered
on your phone:
For example
The number (and name) stored displays, and then
dials.
28
: Location no. 123
Press and briefly, then
hold down .
Hard pause
•
sequence until you press .
: A hard pause stops the dialing
29
Page 17

Call functions
Call functions
•
2-sec pause
dialing sequence for 2 seconds and then
automatically sends the remaining digits.
Note
: Multiple tw o seco n d pa use s can be en tere d to
extend the length of a pause. Keep in mind
that pauses count as di gits towards the 32
digit dialing maximum.
: A 2-second paus e st ops the
Storing pauses in a Phone Book entry
To store a number in your Phone Book that
contains pauses:
1. Enter the phone number you want to store,
such as the bank’s teleservice phone number.
Menu
2. Press the
3. Select the required pause type and press .
• Press for
displays, meaning that a hard pause will
occur at that point in the dialing sequence.
• Press for
displays, meaning that a 2-second pause will
occur at that point in the dialing sequence.
4. Enter the digits that need to follow the pause,
such as your account number.
5. Repeat steps 2 through 4 to add more pauses
and numbers, if necessary.
soft key to access the options.
Hard Pause
2sec Pause
. The letter “P”
. The letter “T”
Pause dialing fr om a stor ed Phon e Book
entry
1. Dial the number of the service from Phone
Book.
2. If you stored the number using a hard pause,
wait for the appropriate prompt from the
number you are calling. When prom pted, press
to send the DTMF (Dual tone multi-
frequency) number that follows the pause.
If you stored the number using a 2-second
pause, your phone transmits the number that
follows the “T” pause two seconds after the
connection.
3. “Sending DTMF” flashes o n the display and the
transm itted tone s ou nds.
4. Repeat from step 2, if necessary.
Manual pause dialing
You can enter pauses manually during the dialing
process.
1. Enter the phone number of the service you
want to call, such as a bank’s teleservice
number.
Menu
2. Press the
3. Select the required pause type and press .
soft key to access the options.
6. Store the number in your Phone Book as yo u
normally would by pressing or the
key and following from step 2 on page 59.
30
Save
soft
31
Page 18

Call functions
Call functions
• Press fo r
Hard Pause
. The letter “P”
displays, meaning that a hard pause will
occur at that point in the dialing sequence.
• Press fo r
2sec Pause
. The letter “T”
displays, meaning that a 2-second pause will
occur at that point in the dialing sequence.
4. Enter the number to be sent after the pause
and then press to dial the first number.
5. For a hard pause, press again at the
prompt to send the additional number after
connecting.
If you enter the number using a 2-second
pause(s), the phone sends the number that
follows the pause two seconds after the
connection.
Adjusting the volume during a call
During a call, if y o u w ant to adjust the voice
volume, use the Vol um e ke ys on the left side of
the phone.
Press to increase the volume level and to
decrease the level. The image on the display
shows all eight levels; the mo re b a rs y ou s ee, the
higher the level is.
In Standby mode, you can also adjust the keypad
tone volume using these keys.
32
33
Page 19

Call functions
Call functions
Answering a call
When somebody calls you, the phone alerts you
by ringing.
If the caller can be identified, the caller’s phone
number, or name if stored in you r Ph one Book,
displays.
There are two ways to answer a call depending on
your setting in the
Menu 9-1-2
(
If you select To answer the call,
Any Key press any key, except
SEND Key press .
To end the call, press .
Note
:
• You can answer a call w hile using Phonebook or
menu functions. The current operation stops.
• If you cannot answer incoming calls, you can set
the phone to answer the call by playing a greeting
message and record callers’ messages. For further
details, see page 83.
Call Answer
):
and the Volume keys.
menu
Viewing missed calls
If you fai l to answer a call for an y r e ason, the
phone indicates the missed call by displaying a
text notification on the screen. Additionally, if
caller information is available, a Missed entry is
created and the screen displays the phone numb er
of the last mis sed call.
When the display informs you of the m issed c all,
press to dial the number, or to clear the
message and return to Standby mode.
To view missed calls, access the
(
Menu 1-3
). For details, see page 54.
Missed
menu
Silenci ng a call ringer
You can silence the ringer when a call comes in by
pressing one of the V olume key s on the left side of
the phone. Yo u can also press .
34
35
Page 20

Call functions
Call functions
Options during a call
Your phone pr o vides a number of func tions that
you can use during a call. As many of these
options are network s ervices, yo u may n ot be able
to use all of them at all times.
Menu
Press the
the following options:
Phone Book
menu. See page 56 for details.
Book
Mute/Quit
microphone off, so that the other person on the
phone cannot hear you.
Example
in the room, but do not want the other person on
the phone to hear you.
Silent/Quit
allows you to press keys without hearing annoying
key tones during a call.
Send Tel#:
caller.
Calls
details, see page 52.
: You wish to say something to a person
: allows you to access the
soft key during a call to access
: allows you to access the
: allows you to switch your phone’s
: does not sound the k ey t on e s. I t
sends your telephon e number to yo ur
Calls
Phone
menu. For
Using caller ID
This feature tells you who is calling you by
displaying the caller’s number wh en the ph one
rings. If the number is stored in your Phone Book,
the corresponding name is also displayed. If you
call someone who h as th is fea t ure, your phone
number displays on her/his phone.
Note
: Contact your service provider to set up the
Caller Line Identification service.
Call forwarding
This network feature allows you to forward
incoming calls to another phone number, even
while your phone is turned off . Activating Call
forwarding does not affect outgoing calls made
from your phone.
Note
: Contact your service provider to activate Call
forwarding.
Messages
menu. For details, see page 63.
Planner
For details, see page 71.
36
: allows you to use the
: allows you to access the
Messages
Planner
menu.
37
Page 21

Call functions
Call functions
Call waiting
Call W aiting l ets yo u recei ve a se cond ca ll during a
conversation. Your phone notifies you of a waiting
call by beeping and displayin g “ Ca ll Waiting.”
Your network provides you with the option of
turning the Ca ll Waiting feature on and off, if y o u
have subscribed to the service. Call Waiting is on
by default in the phone. If you choose to have a
undisturbed conversation, simply turn off the
feature for the current ca ll.
Note
: Contact your servic e provider to activate the
Call Waiting service.
To answer a waiting call during a call:
1. When you hear a beep telling that you have a
waiting call, press . The phone connects the
calling person and places the current call on
hold.
2. Press again to switch between the two
calls.
Note
: If you do not respond to a call waiting
notification, the phone will forward t he call to
the voice m ail server or anot her number that
you have set up. Contact your service
provider for more information.
Three-way calli ng
This feature enables you to conduct conference
calls with two separate people at the same time.
The phone records both of them into the Outgoing
call log and you are billed air time for each of
outgoing call s separately. Contact your service
provider to activate Three-way calling.
To place a Three-way call:
1. During a conversation, press . The phone
places the other person on hold.
2. Enter th e p hone number for the third person,
and then press . The phone dials the third
person.
3. When you are connected to the person, press
the and then again to begin your threeway call.
If one of the callers (not y ou) hangs up, you and
the remainin g calle r stay co nnected . If you initiat e
the call and hang up first, all thre e participants a re
disconnected.
38
39
Page 22

Entering Text
At many times when using your phone, you will
need to enter text, such as when storing a name
in Phone Book, creating your pers onal greeting, or
scheduling ev ents on y our cal endar. You can enter
alphanume ric characters int o your phone using
your phone’s keypad.
Your phone has the following text input modes:
Entering Text
Changing the text input mode
When you are in a field that allows characters to
be entered, you will notice the text input mode
indicator on the display.
Example
: Entering a name for a Ph one Book entry
T9(English) mode
•
enter words with only one keystroke pe r letter.
Each key on the keypad has more than one
letter; for example, pressing can enter J, K,
or L. However , T9 mode automatically compares
the series of keystrokes you make with an
internal linguistic dictionary to determine the
most likely w ord, thus requiri ng f ar fewer
keystr okes than the traditional Alphabet
•
Alphabet mode
letters by pressing the key labeled with the
letter you want. Press the k ey once, twice, three
or four times until it displays.
Symbol mode
•
various sy mbols and punctu a ti on marks.
•
Number mode
numbers.
: This mode allows you to
mode.
: This mode allows y ou to ent er
: This mode allows you to enter
: This mode a llows you to enter
Next Abc Menu
To change to ano ther text input mode:
1. Press the
2. Scroll to the mode you want by pressing the
Navigation keys.
3. To select the highlighted mode, press . If
you want to exit the menu without changing to
a new mode, pr ess .
Menu
soft key.
Tex t input
mode indicator
40
The selected text input m ode ind icator appear s
on the display.
41
Page 23

Entering Text
Entering Text
Using T9 (English) mode
T9 is a predictive text input mode that allows you
to key in any character using single keystrokes.
This text input mode is based on a built-in
dictionary.
To enter a word in T9 mode:
1. Press the keys on the phone just onc e per
desired letter. For example, to enter “Hello”,
press , , , , and .
2. The word that you are typing appears on the
display. It may change with each key that you
press.
3.
T ype to the end of the word before editing or
deleting any keystrokes.
4. Put a space between each word by pressing
.
If the word doesn’t display correctly, press
repeatedly to display alternative word choi ces
for the keys that you have pressed.
Smart punctuation
Periods, hyphens, and apostrophes are available
by pressing . T9 mode applies rules of
grammar to insert the correct punctuation. Notice
that is used twice in this example
two punctuation marks:
to display
L e t ’ s e a t .
Changing the letter case
To shift case of the next letter(s) that you type,
press . There are three cases:
• Initial Ca p ital (
• Capitals Lock (
•Lower Case (
Inserting a space
Press to insert a space between words.
T9Word
T9WORD
T9word
)
)
)
Example
5. Continue entering the next word.
Note
42
: Both “Of” and “Me” use and
. The phone displays the most
commonly used choice first.
: T o type words not found in T9 mode, you need
to change the text inpu t mode to Alphabet
mode.
Including a number
Yo u ca n in clude a n umber be twe en let ters with out
exiting T9 mode. Press and hold the
correspondi ng number key.
Scrolling
To move the cursor to the left or right through
your text, press or .
Clearing letters and words
Press once or repeatedly to clear letters one
by one to the left. Press and hold to er ase all
of the lette rs on the display.
43
Page 24

Entering Text
Entering Text
Using Alphabet mode
When typing in Alphabet mode, y ou ne ed to p ress
the keys labeled with the letter you want:
- once for the first letter
- twice for the secon d letter
- and so on
This method is called multi- ta p t yping.
For example, you press three times to display
the letter “C” and two times to display the
letter “K.”
The cursor moves to the right when you press a
different key . When enterin g the same letter twic e
or a different letter on the same key, just wait for
a few seconds for the cursor to move to the right
automati cally, and then enter the next lette r.
Refer to the table below for the list of characters
assigned on each key.
Key Characters in the Order Displayed
. @ ? ! - , & : ’ 1
AB C 2
DE F 3
GH I 4
JKL 5
MN O 6
PQR S 7
TU V 8
WX Y Z 9
0
Changing the letter case
To shift case of the next letter(s) that you type,
press . There are three cases:
• Initial Ca p ital (
• Capitals Lock (
•Lower Case (
Abc
ABC
abc
)
)
)
Inserting a space
Press to insert a space between words.
Including a number
Yo u can quickly inc lude a number betw een letters.
Press and hold the corresponding numb er key.
Scrolling
To move the cursor to the left or right through
your text message, press or .
Clearing letters and words
Press once or repeatedly to clear letters one
by one to the left. Press and hold to erase all
of the lette rs on the display.
44
(Caps Lock mode)
45
Page 25

Entering Text
Using Symbol mode
Symbol mode enables you to enter symbols into
your text.
Press or to display more symbol sets.
Press the keys corresponding to the symbol you
want, then the phone automatically switches back
to the text input mode used just prior to selecting
Symbol mode.
MENU
Using Number mode
Number mode enables you to enter numbers.
Press the keys corresponding to the digits you
want to enter and manually switch back to the
text input mode of choice. For details about
changing the mode, see page 41.
46
Page 26

Using the menus
This phone offers a range of functions that allow
you to tailor the phone to your needs. These
functions are arranged in menus and submenus.
The menus and submenus can be accessed by
scrolling or by usin g th e shortcuts.
Accessing a menu functi on by
scrolling
1. In Standby mode, press the
access Menu mode.
2. Scroll using the Navigation keys to reach the
main menu; for example,
enter the menu.
3. If the menu contains any submenus, for
example,
by scrolling using the Navigation keys. Press
to enter the submenu.
If the menu you have selected contains
submenus, repeat this step.
4. Scroll using the Navigation keys to select the
setting of your choice.
5. Press to confirm the chosen setting.
Notes
:
• You can return to the previous menu level by
pressing .
• You can exit the menu without changing the menu
settings by pressing .
Auto Retry
, find the one you want
Menu
Setup
soft key to
. Press to
47
Page 27

Using the menu s
Using the menus
Using shortcuts
The menu items, such as menus, submenus, and
setting options, are numbered and can be
accessed quickly by using their shortcut numbers.
Note
: The numbers assigned to each menu function
are indicated on the list on page 49.
1. In Standby mode, press the
access Menu mode.
2. Enter the first digit of the shortcut number.
Repeat this for each digit of the shortcut
number.
Example: Accessing the
Press , , and
selects
Setup
Answer Method
Auto Answer
3. Scroll using the Navigatio n keys to select the
setting of your choice.
4. Press to confirm the chosen setting.
Menu
soft key to
Auto Answer
.
, selects
, and selects
.
menu
List of menu functions
The following list shows the menu structu re a nd
indicates the number assigned to each option.
1. Calls
2. Phone Book
(see page 52)
1.1 Outgoing
1.2 Incoming
1.3 Missed
1.4 Erase History
1.4.1 Outgoing
1.4.2 Incoming
1.4.3 Missed
1.4.4. All Calls
1.5 Air Time
1.5.1 Last Call
1.5.2 Total
1.5.3 Lifetime
1.5.4 Erase Total
(see page 56)
2.1 Find
2.2 Add New Entry
2.3 Group Setting
2.4 My Phone#
2.5 Memory Info
48
3. Messages
3.1 New MSG
3.2 Voice
3.3 Inbox
3.4 Outbox
3.5 Filed MSG
3.6 WAP Alert
3.7 Erase MSG
3.7.1 Voice
3.7.2 Old Inbox
3.7.3 New Inbox
3.7.4 Outbox
3.7.5 Filed
3.7.6 All Messages
(see page 63)
49
Page 28

Using the menu s
Using the menus
3.8 MSG Setting
3.8.1 Scroll Timer
3.8.2 MSG Reminder
3.8.3 New MSG
3.8.4 Canned MSG
4. Planner
4.1 Today
4.2 Scheduler
4.3 Task List
4.4 Memo Pad
4.5 Alarm
4.6 Calculator
4.7 World Time
4.8 Countdown
4.9 Set Time
(see page 71)
5. Voice Tools
5.1 Voice Memo
5.1.1 Record
5.1.2 Review
5.1.3 Erase All
5.2 Voice Answer
5.2.1 Inbox
5.2.2 On/Off
5.2.3 Setting
6. Sounds
(see page 86)
(see page 82)
7. Display
7.1 Menu Style
7.2 Wallpaper
7.3 Backlight
7.4 Banner
7.5 Dual Clock
7.6 Contrast
7.7 Power Saving
8. Games
8.1 Fun Bowling
8.2 Honey Ball
8.3 Go Hamster
9. Set up
(see page 97)
9.1 Answer Method
9.2 Auto Key Lock
9.3 Auto Retry
9.4 Data/Fax
9.5 Version
9.6 Security
(see page 90)
(see page 93)
9.1.1 Auto Answer
9.1.2 Call Answer
9.6.1 Lock Phone
9.6.2 Change Lock
9.6.3 Restriction
9.6.4 Emergency #
9.6.5 Erase pbook
9.6.6 Reset Phone
50
6.1 Ringer Volume
6.2 Ringer Type
6.3 Alerts
6.4 Key Tone
6.5 Roam Ringer
6.6 Power On/Off
51
Page 29

Calls
You can use the
• view and dial the most recent outgoing,
incoming, or missed numbers.
• erase the nu m b ers in the call log memory.
• view the duration of calls.
Calls
menu to:
When you press the
screen, the following options are available:
Talk
: dials the number.
Save
: (shown when the number is not stored in
Phone Book) allows you to save the number in
Phone Book.
Menu
soft key on the call log
Calls
Outgoing
The phone stores up to 20 of the most recent
numbers you have dialed. When you acces s this
menu, a list of the outgoing calls displays.
1. Press the Navigation keys to find a number or
name, if it is saved in Phone Book .
2. Press to confirm the highl igh te d nu m ber.
The dialed number or name, if it is saved in
Phone Book, display s a lon g wit h the t ime a nd
date the call was made.
To Press
3.
place a call to the
selected number
use the menu
options
view other calls the Navigation keys .
(Menu 1-1)
.
the
Menu
soft key . For
details, see the next
page.
Show Entry
in Phone Book) displays the phone number and
memory location number.
Prepend
feature code to the number before dialing the
number. See page 27 .
Erase
Send Msg
phone number.
Incoming
This menu lets you view up to 20 of the most
recent calls you have received if you are
subscribed to the Caller Line Identification service.
Contact your service provider for further det ai ls
about this service. When you access this menu, a
list of the incom ing calls displa ys.
For more inform a t ion about scrolling thr ough the
list and accessing the call logs, see “Outgoing” on
page 52.
: (shown when the number is stored
: allows you to add an area code or
: allows you to erase the selected number.
: allows you to send messages to the
(Menu 1-2)
return to Standby
mode
52
.
53
Page 30

Calls
Calls
Missed
If Caller Line Identification is available, your
phone keeps a list of the most recent 20 incoming
calls that you have faile d to answer. Contact your
service provider for the availability.
For more in fo rm ation about scro lling through the
list and accessing the call log, see “ Outgoing” on
page 52.
Erase History
In this menu, you can erase the entries stored in
each of the 3 call logs; outgoing, incoming, and
missed calls. You can also erase all of your call log
entries at one time by selecting
When a confirmation message displays, select
to erase the logs. If you want to cancel the
selection, sel e ct
selection.
(Menu 1-3)
No
(Menu 1-4)
All Calls
. Press to confirm the
.
Yes
Air Time
Your phone records the amount of air time, or talk
time used. Using this option, you can view the
number of the calls to or from your phone, and the
air time for all of the calls. You can easily erase
the air time record at an y time , ex cept
This menu is convenient for estimating your
usage.
Note
: This feature is not intended to be used for
The following op t ions are ava ila b le:
Last Call
Total
: shows the number of all calls you have
made or received and the total duration of the
calls since the air t ime co unter w as la st set to zero
by using the
Lifetime
all calls you have made or received from your
phone since the phone was shipped from the
factory. This time cannot be reset.
Erase Total
call time and resets th e a i r time counter.
(Menu 1-5)
Life Time
billing purposes.
: shows the time of the la st call.
Erase Total
: shows the numbe r and to tal dur ation of
: erase s the last call ti me and total
option.
.
54
55
Page 31

Phone Book
Phonebook allows y ou to store frequently used
phone numbers and the associated names in your
personal directory to make it easy for you to make
a call without having to remember or enter the
phone number. You can store up to 500 entries
including E-mail and URL addresses.
Find
This menu allows you to find an entry using a
person’s name, entry nu m ber, or group name in
your Phone Book.
T o change the finding m ethod, press or until
the option you want displays;
By Entry
Finding an entry by name
When you select this method, all of the Phone
Book entries appear in alphabetical order.
(Menu 2-1)
, or
By Group
.
By Name
,
Phone Book
• Press to place a call to the entry’s speed
dial number.
• Press or left soft key to select the entry.
Information about the entry displays. Move
to each item by pressing or .
Menu
Press the
following optio ns:
-
Talk
: dials the number labeled as speed-
dial number.
Edit
: allows you to change the selected
-
item.
-
Prepend
area codes, ahead of the selecte d numbe r
before dialing. see page 27.
Erase
-
• Press to return to the previous screen.
• Press to exit the menu.
: erases the entry. If you select one
of numbers for the entry, only the number
is erased.
soft key to acces s one of the
: allows you to add digits, such as
1. If necessary, press or to scroll to
.
Name
2. If necessary, press to highlight the name
input box.
3. Enter the first few letters of the name you
want to find.
4. If necessary, press or to scroll through
the entries.
5. When an entry highlights:
56
By
Finding an entry by entry number
When you sele ct this method , the whole list of a ll
of the Phone Book entries appears in numeric
order.
1. Press or to scroll to
2. Press to highlight the number input box.
3. Enter the location number of the entry you
want to find.
4. Follow the procedure from step 4 on page 56.
By Entry
.
57
Page 32

Phone Book
Phone Book
Finding an entry by group
When you sele ct this method, a list of the Phone
Book entries in a group appears.
1. Press or to scroll to
By Group
2. Press to move the group selection field.
3. Press or to select the group yo u want.
Each time you select a group, a list of the
associated entries displays.
4. Follow the procedure from step 4 on page 56.
Add New Entry
(Menu 2-2)
This menu allows you to add a new entry to your
Phone Book.
A name can contain up to 6 numbers in different
categories; Home, Work, Mobile, Pager, Fax and
No label. You can save only one number with a
name in the phone’s memory.
To add a new entry:
1. Enter a phone number and press .
For further det ai ls abo ut e nt ering characters,
see page 29.
2. When
Add New Entry
highlights, press .
3. Select an icon to identify the ca t e gory of the
number to be stored using the Navigation key s
and press .
4. Enter a name and press .
.
5. T o select an option, scroll to it by pressing
or .
The following options are available:
Name
•
: allows y o u to enter a name in this
step if one has not already been entered.
•
Entry
: The first available location displays. If
necessary, enter the entry number using the
number keys.
•
Home/Work/Mobile/Pager/Fax/No label
allows you to store more numbers for each
category.
Speed dial
•
: allows you to select one of the
stored number s t o be used for speed dialing.
•
E-mail
: allows you to store an e-mail
address.
URL
: allows you to store a URL address.
•
•
Group
: allows you to assign the entry to a
caller group. To remove the entry from a
group, select
•
Caller Ringer
No Group
: allows you to select the
.
unique ringer to be used for alerting you to
an incoming call from the person.
Birthday
•
: allows you to save the date of the
person’s birthday.
•
Secret
: allows you to prevent a number from
being displayed when it is accessed or dialed
by unauthorized users. When this option is
set to
Secret-ON
, only people with your
phone’s lock code can view the secret
number.
Image
•
: allows you to select an ima g e to be
used for alerting you to an incoming call from
the person.
:
For further det ai ls abo ut e nt ering characters,
see page 40.
58
59
Page 33

Phone Book
Phone Book
6. If necessary , press the
enter information or use or to change the
setting.
7. When you have finished, press .
8. When a confirmation message displays, select
Yes
and press .
After storing, the phone displays the memory
status of Pho ne B ook for a few secon d s .
Menu
soft key and
Storing a phone num ber fro m s ta nd by
mode
1. In Standby mode, enter a numb er yo u wa nt to
save.
Save
2. Press the
3. To complete storing the number, follow the
procedure from step 2 in “Add New Entry” on
page 58.
soft key or .
Adding a number into an existing entry
You can store up to 6 numbers for a name saved
in the phone’s memory by assigning them to the
different types.
Group Set ting
This menu allows you to change the settings for
the caller groups.
To change the name of a caller group:
1. On the Group Edit list, select the group you
want to e d it usin g or .
2. Press the
3. Select the
4. Clear the old name using .
5. Enter the name yo u want and press .
To change the ringer melody of a caller group:
1. On the Group Edit list, select the group you
want to e d it usin g or .
2. Press the
3. Select the
4. Select the ringe r category you want using or
and press .
5. Select th e ringer you want using or .
Menu
Menu
(Menu 2-3)
soft key.
Rename
soft key.
Sounds
option and press .
option and press .
1. After accessing the
Menu 2-2
(
2. Scroll to the entry to which you want to add
the number by pressing or .
3. Press .
4. To complete storing the number, follow the
procedure from step 3 in “Add New Entry” on
page 58.
60
), enter a number and press .
Add New entry
menu
6. Press to save.
61
Page 34

Phone Book
My Phone#
This menu shows yo ur phone number.
After viewing, press to return to the previous
screen.
Memory Info
This menu shows you how many Phone B ook
locations are used or empty.
After viewing, press to return to the prev iou s
screen.
(Menu 2-4)
(Menu 2-5)
Messages
Your phone can receive voice mail notification s,
text messages, and web messages from your web
server. Yo ur phone can also send text messages, if
your service provider supports this service.
Incoming messages are received even when your
phone is in Lock mode. However, the screen does
not display informa t ion about the message. To
access the message, you need to unlock the
phone.
If you receive an incoming message during a call
conversa t ion, your phone so unds an alert tone ,
depending on your sound settings.
New MSG
Yo u can creat e a short te xt mess age and se nd it to
other mobile phones.
Note
: Message transmission is available only when
your phone is operating in a digital network
and if service is supported by y our service
provider .
(Menu 3-1)
62
Writing and sending a text message
1. Enter a destination number usi ng the numeric
keys and press .
If you press the
Phone Book for a number.
2. To send your message to multiple destinatio n,
press and enter anoth er number. Repeat
this step, as needed.
Find
soft key, you can search
63
Page 35

Messages
3. Enter the message contents.
For further details about how to enter text, see
page 40.
You can u se up to 10 canned messages by
Menu
pressing the
Canned MSG
soft key and selecting
. For details, see page 70.
4. When you have finished e ntering the message,
press .
5. T o select an option, press or .
The following options are available:
•
Send To
: Press the
Select
soft key to
change the destination number. You can also
add more destination numbers by pressing
.
•
Msg
: Press the
Select
soft key to change the
message contents you’ve already entered.
•
CB #
: Press the
Select
soft key to change
the callbac k number.
•
Options
: Press the
Select
soft key to access
the following setting options. Scroll to an
option using or and change the
setting using or .
- Priority
- Delivery Ack
: Select the message priori ty.
: Turn the delivery
acknowledgement feature on or off. When
this is activated, the network informs you
whether or not your message has been read
by the recipient.
- Message Save
: Set whether or not the
phone saves the message in the Outbox
after sending. When you select
, the phone asks if you want to save
Save
Prompt
the message.
Messages
•
Draft
: allows you to store the message in
the Filed MSG menu for future use.
6. Repeat step 4 to set the message options.
7. After changing the setting options, press the
Send
soft key to send the message.
Note
: Pressing before the message is s ent sto ps
the transmission.
Voice
(Menu 3-2)
When you receive a voice message the
corresponding text notification displays. Press
and the phone dials the voice mail center.
If multiple new voice messages are received but
not checked, information of the last one will be
displayed. The information display includes the
time/date stamp and the number of new voice
messages.
Press the
MENU
soft key to access the following
options:
Listen
: allows you to listen to the voice message.
The phone automatically dials the n umber of your
voicemail center.
Clear Icon
: clears the New Message icon and
resets the counter for a new voice message, if
necessary. The system reset s t he c o u n t er
automatically after you listen to all of the new
messages.
Note
: If you didn’t change the number in memory
location 001, You can also access your
voicemail bo x by pressi ng and hold ing
in standby mode.
64
65
Page 36

Messages
Messages
Inbox
Your ph one can store SMS messages and their
corresponding Caller ID in the phone’s mem ory.
When the phone receives a text message, the New
Message icon ( ) and a text no tifica tion wi th t he
call back nu mber appea r. Pr e ss to view the
message immediately. Alternatively, press to
access the message from the Inbox at a later
time.
When you access the
the list of messag es you have re ceived displays.
To view a message, press the Navigation keys to
scroll to the message you want and press . The
phone displa ys the contents. If necessary, press
While viewing a message:
•Press the
options:
Reply
sender.
Forward
another person.
Erase
from the Inbox.
Talk
Save
number to Phone Book.
Extract #’s
from the message text.
(Menu 3-3)
Inbox
menu (
or to scan through the message.
Menu
soft key to use the following
: allows you to send a reply message to the
: allows you to forward the message to
: deletes the currently selected message
: places a call to t h e callback number.
: allows you to save the sender’s phone
: allows you to extract phone numbers
Menu 3-3
),
Extract URL
from the message text.
•Press the
message to the sender. For further details about
sending a message, see page 64.
Outbox
Your phone can store your outgoing messages.
When you access this menu, the list of the
messages you have sent appears.
To view a message, press the Navigation keys to
scroll to the message you want and press . If
necessary, press or to scan through the
message. Yo u can move to the next or previous
message by pressing or .
While reviewing a message:
•Press the
options:
Resend
Erase
•Press the
currently selected me s sa ge. For further details
about sending a message, see page 64.
Filed MSG
Your ph on e can s tore draft messages that are yet
to be sent in the Filed Message box. If you save
the message contents using the
before sending it (see page 65), you can access
them using th is menu.
: allows you to extract URL addresses
Reply
soft key to send a reply
(Menu 3-4)
Menu
soft ke y to acc ess th e f ollow i ng
: allows you to resend the message.
: deletes the message from the Outbox.
Resend
soft key to resend the
(Menu 3-5)
File MSG
menu
Extract Email
addresses from the message text.
66
: allows you to extract e-mail
To review a stored message, press or to
scroll to it and pr ess .
67
Page 37

Messages
Messages
While reviewing a message, press the
key to use the following options:
Resend
further details, see page 64.
Erase
Message box.
WAP Alert
When you receive a new web message from the
web server, your phone alerts you and the
following options display:
View
display the web message.
Clear
you do not wish to read the message at this time.
You can press .
To select an option, scroll to it and press . If
you select
WAP Alert
When you access the
Menu 3-6
(
displays. Press or to scroll to the message
you want to view and press . The phone starts
the WAP browser and displa ys the messag e
contents. If ne cessary, press or to scan
through the contents.
: allows you to rese nd t he m essage. For
: deletes the message from the Filed
(Menu 3-6)
: allows you to access the Web Inbox to
: exits the notification. Select this option if
Clear
, the message is stored in the
menu.
WAP Alert
), a list of the received web message
MENU
menu
soft
MSG Setting
In this menu, you ca n p res et s everal options for
receiving or se nd i ng m e ssages.
Scroll Timer
If an incoming message is too long for the display,
the phone disp la ys it by scrolling the screen
automatically. You can set the time interval the
phone scrolls to the next screen from 1 to 5
seconds.
When you select
to the next screen using the Navigation keys.
MSG Reminder
When a new message is received, the p hone alerts
you by sounding the selected ringer. You can set
how often this will happen.
The following op t ions are ava ila b le:
Off
: The phone alerts you just once at the time of
its receipt.
Once
: The phone alerts you just once when you
receive an incoming message.
Every 2 min
minutes until you open the message.
(Menu 3-8)
(Menu 3-8-1)
Off
, you need to manually scroll
(Menu 3-8-2)
: The phone alerts you every 2
Erase MSG
Using this menu, you can erase all of the
messages in e a ch message bo x. You can also
erase all of the messages at one time by selecting
All Messages
When a confirmation message appears, select
and press .
68
(Menu 3-7)
.
Yes
New MSG
You can set up the following options as default
settings when creating a new message. The
following options are available:
Callback #:
number. It is preset to your phone number
(Menu 3-8-3)
allows you to set the call ba ck
69
Page 38

Messages
Save Message
: allows you to set whether or not
sent messages are saved in the Outbox.
Do Not Save
: The phone does not save the
message.
Prompt Save: The phone asks you whether or not
you want to save the message.
Auto Save
: The phone au tomatically saves the
message.
Entry Method
mode between
Alphabet
Delivery Ack
: allows y ou to selec t the text inpu t
T9 Word
(T9 English) and
.
: allows you to activate or deactivate
the delivery acknowledgement. If activated you
will receive a text to confirm your message w a s
delivered.
Priority
: allows you to select the message
priority
Canned MSG
(Menu 3-8-4)
This menu al lows you to edit 10 canned m essages.
You can use the messag es when wri ting a
message.
1. Select an empty location or the message you
want to change usin g or .
Edit
2. Press the
soft key .
3. Clear the existing message using , if
necessary, and enter a new message.
For further det ai ls abo ut e nt ering characters,
see page 40.
4. When you are finished, press .
70
Page 39

Planner
The Planner feature enables you to:
• keep track of important dates and events.
• create a list of th ings to do and memos.
• set an alarm to ring at a specified time.
• use the phone as a calculator.
• check the current time in an ot her par t of the
world.
• count down to a specific day.
• set the current time and date.
Today
You can schedule up to 9 events for the current
day, indicating each event’s starting and ending
time. You can even have your phone's calendar
alert you before an event commences. Events
scheduled for future dates automatically appear
on your Today schedule on that day.
Scheduling a new event
1. Enter your event contents and press .
2. Enter th e st arting tim e and date usin g t h e
(Menu 4-1)
For further det ai ls abo ut e nt ering characters,
see page 40.
numeric keys.
Notes
:
• You need to enter the time in 12-hour
2
format. Press the
P
key for
• Yo u can move through the input fields using the
Navigation keys.
(PM).
key for A (AM) or the 7
71
Page 40

Planner
Planner
3. Enter the ending time and date using the
number keys.
4. Select when an alarm alerts you to the event,
by pressing or . When you select
, the phone does not ring the alarm.
Alarm
5. Press or
Save
soft key to sto re your event.
No
Viewing your today’s schedule
The list of the events stored on the current day
displays when you select the
).
4-1
menu (
Menu
Today
While viewing the event list, press the Navigation
keys to scroll to an event and:
• Press to view the event information. To view
the Start time and End time settings, use or
. You c an mov e to the pr evious o r next event
by pressing or .
Menu
While viewing the event, press the
soft
key to access the followi ng options:
Edit
: allows you to edit the currently selected
event.
Erase
: allows you to erase the currently
selected event.
Add New
•Press the
: allows you to add a new event.
Menu
soft key to access the following
options:
Add New
Erase
: allows you to add a new event.
: allows you to erase the currently
selected event.
Erase All
72
: allows you to erase all of events.
Scheduler
(Menu 4-2)
This menu allows you to view the current month,
as well as past or future months in calendar
format.
On the calendar, the current day is indicated by a
colored box and the selected day is underlined.
Days with scheduled eve nts are indicated by a b ox
inside the ca le ndar day.
Selecting a day on the calendar
• You can move to the next or the previous by
pressing or .
• You can move up or down the calendar by week
by pressing or .
• You can view the next or previous month by
using the Volume keys on the left side of the
phone.
Menu
On the calendar, press the
soft key to
access the following options:
View
: allows you to view scheduled events of the
selected day.
Add New
: allows you to add a new event for the
selected day.
Erase All
Jump to date
: allows you to erase all of events.
: allows you to directly go to the
specific date you want.
Scheduling an event
You can schedu le up to 9 even ts for one day and
70 events total.
1. Select a day on the calendar, referring to
“Selecting a day on the calendar” on page 73
and press .
73
Page 41

Planner
2. Enter your event information and press .
For further details about entering letters, see
page 40.
3. Enter the starting time and date using the
numeric keys.
Notes
:
• You n eed to enter the time in 12-h our
2
format. Press the
key for
P
(PM).
key for A (AM) or the 7
• You can move through the input fields using the
Navigation keys.
4. Enter the ending time and date using the
number keys.
5. Select when an alarm alerts you to your event,
by pressing or .
When you select
No Alarm
, the phone does
not ring the alarm.
Save
6. Press or
soft key to store your event.
Planner
Edit
: allows you to edit the currently selected
event.
Erase
: allows you to erase the currently
selected event.
Add New
•Press the
: allows you to add a new event.
Menu
soft ke y to acc ess th e f ollow i ng
options:
Add New
Erase
: allows you to add a new event.
: allows you to erase the currently
selected event.
Erase All
Task List
: allows you to erase all of events.
(Menu 4-3)
This feature allows you to enter a list of tasks you
need to be done and assign both priority and a
deadline to them. You can store up to 9 tasks.
Viewing your schedule
Days with scheduled events are indicated by a
green box on the calendar when you access the
Scheduler
and press . The list of the events displays.
While viewing the event list, press the Navigation
keys to scroll to an event and:
• Press to the event information. T o view the
Start tim e an d End time settin gs, us e or .
You can move to the previous or next event by
pressing or .
While viewing the event, press the
key to access the followi ng options:
74
menu (
Menu 4-2
). Select one of them
Menu
soft
Creating a new task
1. Enter the task contents and press .
For further details about how to enter
characters, see page 40.
2. Enter the time and date by which the task
needs to be done by using the numeric keys.
Notes
:
• You need to enter the time in 12-hour
format. Press the
P
key for
(PM).
2
key for A (AM) or the 7
• Yo u can move through the input fields using the
Navigation keys.
75
Page 42

Planner
Planner
3. Select a prio rit y level, either
using or and then press or
High
or
Low
Save
,
soft
key.
Viewing a task
The list of the t asks display s when you acc e ss the
Task List
menu (
Menu 4-3
).
While viewing the task list, press the Navigation
keys to scroll to a task and:
• Press to view details. You can move to the
previous or next task by pressing the Navigation
keys.
Menu
While viewing the task, press the
soft k e y
to access the following options:
Edit
: allows you to edit the currently selected
task.
Erase
: allows you to erase the currently
selected task.
Add New
•Press the
: allows you to add a new task.
Menu
soft key to access th e followin g
options:
Add New
Erase
: allows you to add a new task.
: allows you to erase the currently
selected task.
Erase All
: allows you to erase all of tasks.
Writing a new memo
1. Enter what you need to remember.
For further details about how to enter
characters, see page 40.
2. Press to save the memo.
Viewing a memo
The list of your memos displa ys when you acce ss
Memo Pad
the
menu (
Menu 4-4
).
While viewing the memo list, press the Navigation
keys to scroll to a memo and:
• Press to view details. You can move to the
previous or next task by pressing the Navigation
keys.
While viewing the memo, press the
Menu
soft
key to access the following options :
Edit
: allows you to edit the currently selected
memo.
Erase
: allows you to erase the currently
selected memo.
Add New
•Press the
: allows you to add a new memo.
Menu
soft ke y to acc ess th e f ollow i ng
options:
Add New
: allows you to add a new memo.
Memo Pad
(Menu 4-4)
This feature allows you to make memos of
important things you need to remember.
76
Erase
: allows you to erase the currently
selected memo.
Erase All
: allows you to erase all of memos.
77
Page 43

Planner
Alarm
Planner
(Menu 4-5)
This menu allows you to set the alarm to ring at a
specified time.
To set an alarm:
1. Select an alarm,
Alarm #3
2. Select On by pressing or .
3. Press and enter the time for the alarm to
ring by using the numeric keys.
Notes
:
• You n eed to enter the time in 12-h our
format. Press the
key for
• You can move through the input fields using the
Navigation keys.
4. Select an alarm melody by pressing or .
5. Press and select an alarm frequency option,
either
by pressing or .
6. Press or
setting.
P
Daily, Once, Mon to Fri
Alarm #1
, and press .
2
(PM).
Save
soft key to save the alarm
through
key for A (AM) or the 7
, or
Sat & Sun
Calculator
Using this feature, you can use the phone as a
calculator. The calculator provides you with the
basic arithm e tic functions; addition, subt raction,
multiplication, and division.
To perform a calculator:
1. Enter the first numbe r on the f irs t line usi ng
the numeric keys.
Note
: Use to enter a decimal point and
2. Enter the ope ration for your ca lculation by
pressing the Navigation keys, according to the
graphic on the display; + (add), - (subtract), x
(multiply),
3. Enter the second number.
,
4. To view the result, press .
5. Repeat steps 2 and 4 as many times as
required.
(Menu 4-6)
to change the sign of a nu mber to a
negative (-).
÷
(divide).
To stop the alarm when it rings, press any key.
To deactivate an alarm setting, access the
Off
menu and select
78
. Press .
Alarm
World Time
Yo u can us e this me nu to fin d out w hat time it is in
another part of the world.
Select the city corresponding to your time zone by
pressing the Navig a tion keys on c e or repeat edly.
The local time and date display.
To turn the DST (Daylight Sa ving Time) setting on :
(Menu 4-7)
79
Page 44

Planner
Planner
1. After selecting the time zone you want to apply
the DST, press the
2. The DST icon appears between the time and
the date.
To cancel the setting, select
Countdown
This menu helps you know how much time it takes
for you to do something, or how many days,
hours, and minutes until a specific day arrives.
Yo u ca n create up to 9 counters using this menu.
Creating a c ountdown timer
1. Enter a name for your Countdown timer and
press .
For further detai ls abo ut ent ering text, see
page 40.
2. Enter the time and date you want to count
down from.
Notes
:
• You need to enter the time in 12-hour
format. Press the
key for
• Yo u can mov e through th e input fields using the
Navigation keys.
• You can enter a year between 1980 and 2099.
3. Press or
Viewing a countdown timer
The list of the coun tdow n tim er di splay s whe n y ou
access the
P
(PM).
Save
Countdown
Set DST
(Menu 4-8)
2
key for A (AM) or the 7
soft key to store the timer.
menu (
soft key.
Unset DST
Menu 4-8
.
).
While viewing the counter list, press the
Navigation keys to scroll to a counter and:
• Press to view details. You can move to the
previous or next counter using the Navigation
keys.
While viewing a timer , press the
to access the following options:
Edit
: allows you to edit the currently selected
counter.
Erase
: allows you to erase the currently
selected counte r.
Add New
•Press the
options.
Add New
Erase
selected counte r.
Erase All
Set Time
To display the correct time and date on the idle
screen or to use the Planner features, such as
Today, Scheduler, Task List, Count Down
Alarm
using this menu.
Enter the time and date using the numeric keys.
The minute, hour, month, and day each must be
entered using 2 digits and the year requires all 4
digits. You need to enter the hour in 12-hour
format. To select AM or PM, pres s the
(AM) or the
: allows you to add a new counter.
Menu
soft key to access the following
: allows you to add a new counter.
: allows you to erase the currently
: allows you to erase all of counters.
(Menu 4-9)
, you need to set th e curre nt ti me an d date
7
key for P (PM).
Menu
so ft ke y
, and
2
key for A
80
81
Page 45

Voice Tools
Voice Tools
Voice Memo
This menu allows you to record voice memos.
Record
You can record up to voice memos of 4 minutes
total. This feature shares the memory with the
Voice Answer feature and the amount of time for
memos are dependent on the available memory
less any callers' messages; for exampl e, if your
phone has the callers ' messages of 4 minutes
total, you cannot record any voice memo.
1. Record a memo by speaking to the
microphone.
When you are recording, a timer displays to
show you the elapsed time.
You can pau se recor din g by pr essin g and
then resume by pressing .
2. Press to end recording. The screen provides
you with the following choices. Scroll to an
option and press .
Review:
•
memo. The screen display s the length of the
memo along with the date and time.
•
Re-record
memo and record another one.
Save
•
(Menu 5-1)
(Menu 5-1-1)
allows you to review the voice
: allows you to discard the current
: allows you to save the voice memo.
3. When you are satisfied, select the
and press .
4. Enter a title for the memo and press .
Review
When a list of your voice memos displays, scroll to
the memo you want to review and press . The
phone plays the memo. You can pause playing by
pressing and resume by pressing .
On the memo list, press the
the following options:
Play
Erase
Info
memo, such as the title, length, memory size and
date and time when the memo was recorded.
Erase All
This menu allows you to erase all of the voice
memos.
When a confirming message displays, select
and press .
Voice Answer
If you are not able to answer an incoming call, you
can set your phone to answer a call with the
preset greeting message and record the caller’s
message. As this feature shares the memory with
voice memos, the to ta l length of me ssages is
dependent on the a vailable mem ory less any voice
memos.
(Menu 5-1-2)
MENU
: plays the memo.
: erases the selected memo.
: shows detailed information about the
(Menu 5-1-3)
(Menu 5-2)
Save
option
soft key to use
Yes
82
83
Page 46

Voice Tools
Voice Tools
Inbox
(Menu 5-2-1)
You can listen to the callers’ messages recorded in
your phone. When you access this menu, a list of
the recorded messag es appears.
Note
: If the phone has the callers’ messages waiting
to be checked, it displays the total number of
the messages and caller’s number. Pressing
takes you to the Inbox.
Press or to scroll to a messag and press
to play it.
You can paus e playing by pressing and then
resume by pressing .
Menu
On the message list, press the
soft key to
the following options:
Play
: plays the selected message.
Erase
: erases the selected message.
Info
: shows detailed information about the
message, such as caller’ s number if identified,
length, memory size and date and time when the
message was recorded.
Talk
: places a call to the caller’s number, if
identified.
On/Off
(Menu 5-2-2)
This menu allows you to enab le or disable Voice
Answer mod e.
Greeting
: Your phone provides you with the
default greeting message to be played when a call
comes in. You can also record your own greeting
message.
To record a greeting message:
1. Select
Record
and press .
2. Wait until a beepin g prompt sounds and record
a greeting message by speaking into the
microphone.
You can pause recording by pressing and then
resume by pressing .
3. When recordi n g is complete, pres s . The
phone automatically saves and activates the
message.
If you want to play back the currently selected
Play
message, highlight
and press .
To enable or disable your own greeting message:
1. Highlight
2. Select
Default
Select
My Message
and press .
to use your message or
to use the default message.
3. Press to save your selection.
Note
: Once you have recorded your own message
and then have changed the greeting to the
default message, your message is deleted.
Screening
: allows you to enable or disable the
screening sp e aker which allows you to listen to
the caller’s message while the calle r is leaving it.
Setting
(Menu 5-2-3)
You can change the settings for the voice answer
mode. The following options are available:
84
Wait Time
: allows you to set how long the phone
waits before answering a call with the greeting
message. Selecting
No ring
means that the
phone plays back the message as soon as a call
comes in.
85
Page 47

Sounds
Sounds
You ca n us e the
various so un d se t t ings, such as the :
• ringer volume and type.
• key tone and alert sounds.
• tones that sound while using the phone’s
functions.
Ringer Volume
This menu allows you to adjust the ringer volume
for the following the items:
Calls
: allows you to adjust the ringe r volume for
incoming calls.
Messages
for incoming messag es.
Alarms
for alarm set t ings.
Press the Navigation keys to adjust the volume
level or select a ringer type. The following options
are available:
Silent
Vibrate
incoming call vibrates the phone.
1-Beep
Level 1 ~ 8
shows the volume level; more bars, the louder the
volume.
High+Vib
level and then vibrates.
86
: allows you to ad j u s t t he ri nger volume
: the phone does not sound a ringer.
: the phone switches to Vibration mode. An
: the phone sounds a beep.
: the phone rings in the highest volume
Sounds
: allows you to a djust the rin ger volume
: adjust the volume level. The graphic
menu to custom ize
(Menu 6-1)
Notes
:
• The options a vailable may vary, depending on t he
selected ringer item.
• When “Emergency call only” appears after you end
an emergency call, the ringer volume for calls and
messages is automa tically set to Level 4.
Ringer Type
This menu allows you to set the unique ringer
melodies for incoming calls, messages, and
schedule settings:
To select a ringer type:
1. Select the item you want and press .
The following items are available:
•
Voice Calls
ringer for incoming calls.
•
Messages
ringer for incoming voice mail, text message,
numeric page, and WA P alerts indepen dently.
• Data/Fax In:
a distinctive ringer when you receive data or
fax calls through the phone. This featu re may
not be available depending on your networ k.
Schedule
•
ring for alarm sett in g s.
2. If you select the
message type you want and press .
3. Select the ringer category you want using
or and press .
4. Select the melody you want using or and
press to save it.
(Menu 6-2)
: allows you to set a unique
: allows you to have a distinctive
allows you to be alerted with
: allows you to have a distinctive
Messages
menu, select the
87
Page 48

Sounds
Sounds
Alerts
Your phone gi v es audibl e alerts (beeps) at a
specified time to inform you that certain thin g s
have happened. The alerts only occur in your
earpiece so that the other person does not hear
them.
The following alerts are available:
Minute Beep
phone sounds an alert 10 seconds before each
elapsed minute t o remind you of the length of the
current call.
Service Alert
phone sounds an alert when you exit a service
area or when you return to a service area.
Connect
phone sounds the connect tone when your call is
connected to the system.
Disconnect
phone sounds the disconnect tone when the o ther
person disconnected the ca ll .
Fade
sounds an alert when a dropped call occurs during
conversation in response to a signal fade.
(Menu 6-3)
: When this option is set to On, the
: When this option is se t to On, the
: When this option is set to On, the
: When this option is set to On, the
: When this op t ion is set to On, the phone
Type
: allows you to select a tone that the phone
sounds when you press a key. Choose one of
DTMF, Harmony, Chord
Volume
keypad tone using the Navigation keys or the
Volume keys on the left side of the phone.
: allows you to adjust the volume of the
Roam Ringer
You can set the phone to sound a distinctive ring
when your phone start roaming.
Choose
Normal
Distinctive
to use a normal ringer.
Power On/Off
You can turn on or off the tone that the phone
sounds when it is switched on or off.
Choose On to use the power on/off sound or
not to use it.
and
Piano
.
(Menu 6-5)
to use a distinctive ringer or
(Menu 6-6)
Off
Roam
: When this option is set to On, the pho ne
sounds an alert when your phone starts roaming.
Key Tone
Using this menu, you can set up the keypad tone
that the phone sounds when you press a key.
The following opt ions are avai la b le :
88
(Menu 6-4)
89
Page 49

Display
Display
In this menu, you can customize various settings
for the display, the lights, and menu shortcuts.
Menu Style
This menu allow s you to select the m e n u display
style. You can c hoo se eith er
Wallpaper
You can change the background image (wall
paper) to be displayed in Standby mode.
The following image categories are available:
Embedded Images
default images.
Note: When you select
displays the analog cloc ks fo r th e tw o ti m e
zones selecte d in the
(
Menu 7-5
My Images
images downloaded from the wireless web.
Backlight
You have several options for setting how the
backlight operates. Remember that backlight use
drains your battery faster.
The following opt ions are avai la b le :
8/15/30 Seconds
when you press a key and switches off after 8/15/
30 seconds if you do n ’t pres s a ny key.
(Menu 7-1)
List
or
Icon
.
(Menu 7-2)
: allows you to select one of
Dual Clock
Dual Clock
). See page 91.
: allows you to select one of the
(Menu 7-3)
: the backlight switches on
, the phone
menu
Banner
This menu allows you to set a banner message to
be displayed at the bottom of the display in
Standby mode.
1. If necessary, press and hold to clear the
characters.
2. Enter a new banner message.
For further details about how to enter
characters, see page 40.
3. When you have finishe d entering the message,
press or the
Dual Clock
You can choose two time zones to be displayed
when you select
image (
To select time zones for the dual clock:
1. When
2. Select the time zone for the left clock by
pressing or and press .
3. Select the time zone for the right clock by
pressing or .
4. Press to confirm the selection.
5. To set the DST (Daylight Saving Time), see
below. To exit, press or .
(Menu 7-4)
(Menu 7-5)
Menu 7-5
Location
Save
soft key.
Dual Clock
); for det ails, see page 90.
highlights, press .
for the wallpap er
90
91
Page 50

Display
To apply the daylight saving time:
1. When
display
2. Select
the first cl ock. Otherwise, select
3. Press and repeat step 2 for the second
clock.
4. Press to confirm the selection.
Contrast
This option allows you to see the LCD screen
better in different lighting conditions. Scroll
through the contrast settings to make the screen
darker or brighter.
Power Saving
This menu allows you to set the display to turn off
after the backlight turns off so that you can
conserve your battery power.
Location
DST
On
highlights, press or to
. Press .
to use the daylight saving time for
Off
.
(Menu 7-6)
(Menu 7-7)
Games
Yo u can enjoy three fun games on your phon e:
• Fun Bowling (
• Honey Ball (
• Go Hamster (
To start a game:
1. Select a game by pressing or and press
.
2. The following options are available. T o select an
option, press the corresponding number key :
•
New Game
•
High Score
•
Key Info
•
Continue
game you played.
To end the game, press or .
Note
: If you are in Silent mode, a game sound does
not beep.
Menu 8-1
Menu 8-2
Menu 8-3
: allows you to start a new game.
: shows you the High Sc ore table.
: shows you the key helper screen.
: allows you to continue the la st
)
)
)
On
: After the backlight turns off, the display
turns off, depending on the setting in the
Backlight
Off
: After the backlight turns off, the display
remains on.
92
menu (
Menu 7-3
). See page 90.
Fun Bowling
The goal of the game is to knock down a triangular
group of ten pins by rolling a ball.
When you start a new game, you can select the
required mode.
When the game starts, the screen shows the
character and ball. Move the character first, then
select the spin and direction, and finally set the
power of the ball.
(Menu 8-1)
93
Page 51

Games
Key Commands
To Then press...
Move left .
Move right .
Set the speed or spin
.
or throw the ball
Pause /Resum e the
.
game
Back to the previous
.
screen
Honey Ball
(Menu 8-2)
The goal of the game is to break honey blocks by
bouncing a ball between a bat and the honey
blocks.
When you start a new game, the ball is sitting on
the bat in the middle of the screen. Once you s tart
the ball moving, you must position the bat, so that
the ball continues to bounc e off it . Each time the
ball hits a honey block, the block breaks,
sometimes revealing lette rs that enhance the
efficiency of the bat or ball:
Games
If you reach the final stage of the game, the rules
are slightly different. The honey blocks are much
stronger and need to be hit more than once before
they are destroyed. At the same time, small bees
attack the bat, damaging it a little each time until
it is destroye d a nd you lose a life.
Key Commands
To Then press...
Slope up (right side) .
Slope up (left side) .
Move left , .
Move right , .
Hit the ball , or .
Pause/Resume the
.
game
B
: the bat and ball change back to their standard
form.
C
: the ball sticks to the bat each time it hits it,
giving you time to optimise your position.
H
: the bat increases in length.
P
: the ball is changed into a power ball, so that it
no longer bounces off the blocks. It goes straight
through them, destroying anything that it
touches.
94
95
Page 52

Games
Go Hamster
Go Hamster is an arcade board game. It requires
patience and discretion. The aim is to remove
about 80% of the background while avoiding the
mushroom bombs in order to progress to the next
stage.
When the start screen appears, press any key to
start the game.
(Menu 8-3)
Setup
Many different features of your phone can be
customized to suit your preferences.
Answer Method
Auto Answer
(Menu 9-1)
(Menu 9-1-1)
Key Commands
To Then press...
Move up , .
Move left , .
Move right , .
Move down , .
Stop .
Pause /Resum e the
game
.
This feature works only when the phone is
connected to the headset or an optional hand-free
car kit. With this menu activated, the phone
automatic al ly answers calls after a specified time.
This feature is useful while driving, for instance.
To activate this feature, set how long the phone
waits before answering an incoming call. Select
one from
After 5 seconds
To deactivate this featur e, select
Call Answer
This menu allows you to select how to answer an
incoming call.
The following op t ions are ava ila b le:
Any Key
key except for , and Volume keys.
SEND Key
press .
After 1 second, After 3 seconds
.
OFF
.
(Menu 9-1-2)
: The phone answers when you press any
: The phone answers only when you
, or
96
97
Page 53

Setup
Auto Key Lock
This menu allows you to lock the keypad
automatically after predefined time.
30 seconds
,
Select
Off
and
to unlock the phone.
Auto Retry
When this menu is activated, your phone
automatically redials the number up to 10 times
when a connection fails.
To activate this feature, select how often the
phone will automatically retry the call;
,
seconds
available.
To deactivate this feature, select
30 seconds
(Menu 9-2)
1 minute
(Menu 9-3)
, and
15 secon ds
are available.
10
60 seconds
Off
.
are
Setup
To use digital data or fax services with your
phone, you will need to obtain a digital data/fax
kit from your servi ce provider. This kit conta ins
the necessary cables, software, and user°Øs guide
required for your to conne ct an d us e y our phone
with your computing devi ce .
Note
: The phone must be on a digital network to
receive or send faxes and data.
The following op t ions are ava ila b le:
Voice Call Only
only.
Fax in Only
Data in Only
Receiving a Fax or Data File
To receive a fax or data, ensure that your phone is
connected to your PC and is powered on. Select
one of the Data/Fax options.
: Yo ur ph on e rec e iv es v oic e call s
: Y o u r p hone receives fa x ca lls only.
: Yo ur phone receives data cal ls only.
Depending on your location, t he n umber of times
your phone automatically redials the number may
vary .
Data/Fax
Your pho ne is capable of send ing and receiving
digital data and fax call when connected to a
computing device (laptop, desktop, handhe ld,
palmtop, etc. ) running Windows 95, Windows 98,
Windows NT or later v ersions. The phon e functions
just like a ty pical mod em on you r PC, enabli ng you
to use wireless d at a involving a wide variety of
Windows software applications.
98
(Menu 9-4)
When you receive a fax call, set up the Answer
mode in the fax program on you r PC and click on
Receive
• Automatic Receive (reco m m end ed)
•Manual Receive
Sending a Fax or Data File
When connected to a computing device, your
phone allows wireless fax and data transmissions.
Your computing de vice softwa re in itiates the call
to the destination phone number. The phone
functions as a wireless modem to send the fax or
data file to the number designated by your PC
software.
and select one of the following:
99
Page 54

Setup
Setup
Version
This menu allows yo u t o v iew the soft ware and
hardware versions of your phone. Th is feature is
helpful if you need to the call customer care.
Security
Your phone provides you with various security
options, including a user-programmable lock code
and special number features.
T o access the
lock code. It is preset to “0000” at the factory.
Lock Phone
In this menu, you c an l ock y our pho ne from being
used by unauthorised people.
When the phone is locked, you cannot dial
numbers, except for mak ing an emergency call, or
access menu options. The phone can receive
incoming calls and messages, even though the
phone is in Lock m ode.
The following opt ions are avai la b le :
Unlocked
On Power-up
next time you turn on phone.
Lock Now
(Menu 9-5)
(Menu 9-6)
Security
(Menu 9-6-1)
: The phone remains unlocked.
: The phone locks automatically the
: The phone lock s immediately .
menu, y ou nee d to e nter a
To place an emergency call in Lock mode, enter a
programmed number and then pres s . The
phone recognizes three standard emergency
numbers stor e d in the
(
Menu 9-6-4
To unlock the phone, press one of the soft keys,
Volume keys, Navigation keys, , or and then
enter the 4-digit lock code. The phone is
immediately unlocked.
); see page 101.
Change Lock
This feature allows you to change your current
lock code to a new one. The lock code is preset to
“0000” at the factory.
Enter a new, 4-digit lock code and press . Enter
it again to confirm your c hange and pres s .
Note
: Y o ur pho n e does n ot a llo w v ie win g of the lo ck
code for security reasons. Be sure to write the
lock code down or memorize it if you have
changed.
Restriction
This feature allows you to restrict all of the
outgoing calls.
On
Select
the restriction.
(Menu 9-6-3)
to restrict t he ca lls, o r
Emergency #
Your phone prov ides you with the option of stori ng
three emergency numbers. All of these numbers
can be manually dialed at any time even if your
phone is locked or outgoing calls are restricted.
Emergency #
(Menu 9-6-2)
(Menu 9-6-4)
menu
Off
to deactivate
100
101
Page 55

Setup
Setup
IMPORTANT NOTICE!
Emergency calling may not be available on all
wireless networks at all times. A connection
cannot always be guaranteed, due to various
transmission methods, network parameters and
user settings used to complete a call from your
wireless phone.
DO NOT depend on this phone as a primary
method of dialing 11 1 or for any other essent ial or
emergency communica ti on s.
Remember to always turn your phone on and
check for the adequate signal strength before
placing a call.
To store an emergency number:
1. Press or to select a location and press
.
2. If necessary, press and hold to clear the
old number.
3. Enter the new number you want.
Each emergency nu mber can be u p to 32 digits
long.
Erase Pbook
(Menu 9-6-5)
This feature allows you to clear all of the entries in
Phone Book.
When a confirmation message displays, select
Yes
and press .
Reset Phone
(Menu 9-6-6)
Resettin g the phone cancels al l of your sel ection in
the user-selectable setting options and returns
them to the factory default settings except for the
Phone Book ent rie s scheduler item s a nd voice
memos.
When a confirmation message displays, select
Yes
and press . The phone reboots, turning itself off
and back on, and returns to Standby mode.
4. Press to store the number.
To make an emergency call in Lock mode, simply
enter a programed number, and then press .
102
103
Page 56

Downloads
This menu allows you to download various
multimedia files from the wireless web.
Games
This menu allow s you to download ne w ga mes or
play the downloaded games.
Select
by your service provider and downl oad new
games.
When you pre ss , the following optio ns are
available:
Go
: allows you to access the preset website.
( -1-1)
Get New
to connect to the website preset
Downloads
Folder
ringers.
Memory
downloaded ringers.
Erase All
downloaded ringers.
Images
This menu allows you to download new screen
savers or vie w the downloaded screen savers .
Select
by your service provider and downl oad new screen
savers.
: shows the folder information for the
: shows the status of memory for
: allows you to erase all of the
(-1-3)
Get New
to connect to the website preset
Folder
Memory
Erase All
downloaded games.
Ringers
This menu allows you to download new ri ngers or
listen to the d ow nloaded ringers.
Select
by your service provider and downl oad new
ringers.
When you press , the fo l lowing options are
available:
Go
104
: shows the game folder information.
: shows the status of memory for games.
: allows you to erase all of the
( -1-2)
Get New
: allows you to access the preset website.
to connect to the website preset
When you press , the following options are
available:
Go
: allows you to access the preset website.
Folder
downloaded screen savers .
Memory
downloaded screen savers .
Erase All
downloaded screen savers .
: shows the folder information for the
: shows the status of memory for
: allows you to erase all of the
105
Page 57

WAP
WAP
Your pho ne c omes equi pped with a WAP browser
which makes it possible for you to access the
wireless web.
Launching the WAP Browser
Selecting t he
WAP (Wireless Application Protocol) browser and
accesses the homepage of your service provider.
The contents on the homepage may differ.
Get In WAP
menu launches the
Navigating the WAP Browser
To Press
scroll through
browser items
select an item .
return to the
previous screen
return to the
homepage
the Navigation keys. You can
scroll by one page using the
Volume keys.
.
and hold.
Entering Text in the WAP Browser
You can enter text in the WAP browser as you
would in normal phone mode.
For details about entering text in each mode, see
page 40.
Using the Browser Menu Options
While navigating the web sites, you can access
various options.
To access the Browser M e nu list, press and
Browser Menu
select
the following options:
Home
: takes you back at any time to the
homepage.
Forward
Mark This Page
web page to the Bookmarks list.
View Bookmark
Search
information.
History
the wireless web.
: returns you to the previous web page.
: allows you to search any particular
: shows the rec ords of your conne ct ion to
. Then press to access
: allows you to add the current
: shows the Bo ok marks list.
106
Go To URL
address of a web page. After entering an addres s,
Select Go.
Show URL
you are currently viewing.
: allows you to manually enter the URL
: displays the URL address of the page
107
Page 58

WAP
Refresh This Page
page with updated information.
: refreshes the current web
Health and safety
information
About Browser
WAP browser.
Restart Browser
Preferences
options.
Edit Homepage URL: allows you to change the
startup homepage.
Revert To Default Homepage
homepage.
Image Display: allow s y ou to select wheth e r or
not to display images on the web page.
Cookies
a piece of user’s information that is entered when
you use a website.
: allows you to delete cookies. A cookie is
: shows inform a t ion about the
: restarts the WAP browser.
: provides you w ith t he f urt h e r
: restores the default
Exposure to radio frequency (RF)
signals
Your wi reles s phone is a radi o transmitter and
receiver. It is designed and manufactured not to
exceed the emission limits for exposure to radio
frequency (RF) energy set by the Federal
Communications Commission (FCC) of the U.S.
Government. These limits are part of
comprehensive guidelines and establish permitted
levels of RF e nergy for the ge neral p opulatio n. The
guidelines are based on the safety standards that
were developed by independent scientific
organizat ions through periodic and thro ugh
evaluation of scientific studies.
The standard s include a su bstantial safet y m argin
designed to assure the safety of all persons,
regardless of age and health.
The exposure standa rd f or wireless phones
employs a unit of measurement known as Specific
Absorption Rate (SAR). The SAR limit set by the
FCC is 1.6W/kg.
*
108
* In the U.S. and Ca n ad a , the SA R limit fo r mobile
phones used by the public is 1.6 watts/kg (W/kg)
averaged o ver one gram of tissue. The st an d ard
incorporates a sub stantial margin o f safety to give
additional protection for the public and to account
for any variations in measure me n ts.
109
Page 59

Health and safety information
Health and safety information
SAR tests are conducted using standar d oper ating
positions specified by the FCC with the phone
transmit ting at its highes t c e rt ified power lev e l in
all tested frequency bands. Although the SAR is
determined at t he highest certified p ower level,
the actual SAR level of th e p h one while operating
can be well bel ow the maximum value. This is
because the phone is designed to operate at
multiple power levels so as to use only the po w er
required to reach the network. In general, the
closer you are t o a w ire less base station antenna,
the lower the power output of the phone.
Before a new model phone is a vailable for sale to
the public, it must be tested and certified to the
FCC that it does not exceed the limit established
by the government-a do pte d requirement for safe
exposure. The t e st s a re p erformed in positions
and locations (e.g. , at the ear and worn on the
body) as required by the FCC for each model.
While there may be differences between the SAR
levels of various phones and at variou s pos it io ns ,
they all meet the government requirement.
The FCC has granted an Equipment Authorization
for this model ph one with all reporte d SAR levels
evaluated as in compliance with the FCC RF
exposure guide l ines. SAR inform a tion on this
model phone is on file with the FCC and can be
found under the Displa y Grant section of ht tp ://
www.fcc.gov/oet/fccid after searching on FCC ID
printed in the labe l on the phone.
For body operation
For body worn oper ation, this model phone has
been tested and meets the FCC RF exposure
guidelines when used with a Samsung-supplied or
approved accessory designated for this pr oduct or
when used wit h and accessory that contains no
metal and that positions the handset a minimum
from the body.
The minimum distance for this model phone is
written in the FCC certification in formation from
the body.
None compliance with th e above condit ions may
violate FCC RF exposure guidelines.
For more Inform a ti on c oncerning exposure to
radio frequency signals, see the following
websites:
Federal Communications Commission (FCC)
http://www.fcc.gov/oet/rfsafety
Cellular Telecommunications Industry Associatio n
(CTIA): http://w w w.wow-com.com
U.S.Food and Drug Administration (FDA)
http://www.fda.gov/cdrh/consumer
World Health Organization (WHO)
http://www.who.int/peh-emf/en
FCC certificat ion information f o r t h is model phone
is attached separation paper.
110
111
Page 60

Health and safety information
Health and safety information
Precautions when using batteries
• Never use any charger or battery that is
damaged in any way.
• Use the battery only for its intended purpose.
• If you use the phone near the network’s base
station, it uses less power; talk and standby
time are greatly affected by the signal strength
on the cel lu lar networ k and the parameters set
by the network operator.
• Battery charging time depends on the re maining
battery charge, the type of battery, and the
charger used. The battery can be charged and
discharged hundreds of times, but it will
gradually wear out. When the operation time
(talk time and standby time) is noticeably
shorter than normal, it is time to buy a new
battery.
• If left unu sed, a fully charged b a t tery will
discharge itself over time.
• Use only Samsung-approved batteries and
recharge your battery only with Samsungapproved chargers. When a charger is not in
use, disconnect it from the power source. Do
not leave the battery connected to a charger for
more than a week, since overcharging may
shorten its life.
• Extreme temperatures will affect the charging
capacity of your battery: it may require cooling
or warming first.
• Do not leave the battery in hot or cold places,
such as in a car in summer or winter conditions,
as you will reduce the capacity and lifetime of
the battery. Alw ay s try to keep the battery at
room temperature. A phone with a hot or cold
battery may temporarily no t work, even when
the battery is fully charged. Li-ion batteries are
particularly affected by temperatures below 0
°C (32 °F).
• Do not short-circuit the battery . Accidental
short- circuiting can occur when a metallic
object (coin, clip or pen) causes a direct
connection between the + and – terminals of
the battery (metal strips on the battery), for
example when you carry a spare battery in a
pocket or bag. Short-circuiting the terminals
may damage the battery or the object causing
the short-circuiting.
• Dispose of used batteries in accordan ce w ith
local regulat ions. Alwa ys recycle. Do not dispos e
of batteries in a fi re .
Road safety
Yo ur wirel ess phone g ive s y ou th e powe rful abi lity
to communicate by voice, almost anywhere,
anytime. B ut an important responsibility
accompanies the benefits of wireless pho nes, one
that every user must uphold.
When drivin g a car, driving is your f irst
responsibility . When using your wireless phone
behind the wheel of a car, make sure that you are
following the specia l regu lation s in a g iven area or
country.
112
113
Page 61

Health and safety information
Health and safety information
Operating envi ronment
Remembe r t o f ollow any special re gulations in
force in any area and always switch your phone off
whenever it is forbidden to use it, or when it may
cause interference or danger.
When connecting the phone or any accessory to
another device, read its user’s guide for detailed
safety instru ct ions. Do not connect incompatible
products.
As with other mobile radio transmitting
equipment, users are advised that for the
satisfactory operation of the equipment and for
the safety of personnel, it is recommended that
the equipment should only be used in the normal
operating position (held to your ear with the
antenna pointing over y our shoulder).
Electronic devices
Most modern electronic equipment is shielded
from radio frequency (R F ) s ign als. H ow ever,
certain electronic equipment may not be shielded
against the RF signals from your wireless phone.
Consult the manuf ac t urer to discuss alternati ves.
Pacemakers
Pacemaker manufacturers recommend that a
minimum distance of 15 cm (6 inches) be
maintained between a wireless phone and a
pacemaker to avoid potential interference with the
pacemaker. These recommendations are
consistent with the independent research and
recommendations of Wireless Technology
Research.
Persons with p acemakers:
• Should always keep the phone mor e than 15 cm
(6 inches) from their pacemaker when the
phone is switch ed on
• Should not carry the phone in a breast pocket
• Should use the ear opposite the pacemaker to
minimize potential int er fe rence
If you have any reason to suspect that
interference is taking place, switch your phone off
immediately.
Hearing aids
Some digital wireless phones may interfere with
some hearing a id s. In the event of such
interference, you may wish to consult your
hearing aid manufacturer to discuss alternatives.
Other medical devices
If you use any other personal medical devices,
consult the manuf ac t urer of your device to
determine if it is a d eq uately shielded f rom
external RF energy . Your physician may be able to
assist you in obtaining this information. Switch
your phone off in health care facilities when any
regulations po st e d in these areas ins t ruct you to
do so. Hospi ta l s or health care faci lit ie s may be
using equipment that could be sensitive to
external RF energy.
114
115
Page 62

Health and safety information
Health and safety information
Vehicles
RF signals may affect improperly installed or
inadequately sh ield ed el ectro nic s yst ems in mo to r
vehicles. Check with the manufacturer or its
representative regarding your vehicle.
You should also consult the ma nufacturer of any
equipment that has been added to your vehicle.
Posted facilities
Switch your phone off in any facility where posted
notices require you to do so.
Potentially explosive environment
Switch your phone off when in any area with a
potentially explosive atmosphere and obey all
signs and instructions. Sparks in such areas could
cause an exp losion or f ire resu lting in bodily in jury
or even death.
Users are advised to switch the phone off wh ile at
a refueling poi nt (service station). Users are
reminded of the need to observ e res t ric t ion s on
the use of radio equipment in fuel depots (fuel
storage and distribution areas), chemical plants or
where blasting operations are in progress.
Areas with a pot ent iall y ex plo siv e at m osp he re are
often but not always clearly marked. They include
the areas below decks on boats, chemical transfer
or storage facilities, vehicles using liquefied
petroleum gas (such as propane or butane), areas
where the air contains chemicals or particles, such
as grain, dust or metal powders, and any other
area where you would normal ly be advised to turn
off your vehicle engine.
Emergency calls
This phone, like any wireless phone, operates
using radio signals, w ireless and la ndline net works
as well as user-programed functions, which cannot
guarantee co nn ection in all conditions. Therefore,
you should never rely solely on any wireless phone
for essential communications (medical
emergencies, for example).
Remember, to make or receiv e any calls the phone
must be switched on and in a service area with
adequate signal strength. Emergency calls may
not be possibl e on a ll w ireless phone netw orks or
when certain network services and/or phone
features are in use. Check with local service
providers.
To make an emergency call:
1. If the phone is not on, switch it on.
2. Key in the emergency number for your present
location. Emerge nc y numbers vary by location.
3. Press .
If certain features ar e in us e (call barring, for
example), you may first need to deactivate those
features before you can make an emergency call.
Consult this document and y o ur local cellular
service provider.
When making an emergency call, remember to
give all the necessary information as accurately as
possible. Remember that your phone ma y be the
only means of comm unication at the scene of an
accident; do not end the call until given
permission to do so.
116
117
Page 63

Health and safety information
Health and safety information
Other important safety information
• Only qualified personnel should service the
phone or install the phone in a vehicle. Fa ul ty
installation or s e rv ice may be dange rous and
may invalidate an y warranty applicable to the
device.
• Check regularly that al l wireless phone
equipment in your vehicle is mounted and
operating properly.
• Do not store or carry flamma ble li qui d s , gas e s
or explosive materials in the same compartment
as the phone, its parts or accessories.
• For vehicles equipped with an air bag,
remember that an air bag inflates with great
force. Do not place objects, including both
installed or po rtable wireles s e quipment in the
area over the air bag or in the air bag
deployment area. If wireless equipment is
improperly installed and the air bag inflates,
serious inj ury could result.
• Switch your phone off before boarding an
aircraft. The use of wireless phones in an
aircraft may be dangerous to the operation of
the aircraft, and is illegal.
• Failure to observe these in structions may lead
to the suspension or denia l of te lephone
services to the offender, or legal action, or both.
Care and maintenance
Your phone is a product of superior design and
craftsmanship and should be treated with care.
The suggestions below will help you fulfill any
warranty obligations and allow you to enjoy this
product for many years.
• Keep the phone and all its parts and accessories
out of the reach of small children’s.
• Keep the phone dry. Precipitation, humidity and
liquids conta in minerals that will corrode
electronic circuits.
• Do not use the phone with a wet hand. Doing so
may cause an electric shock to you or damage
to the phone.
• Do not use or store the phone in du sty, dirty
areas, as its moving parts may be damaged.
• Do not store the phone in hot areas. High
temperatures can shorten the life of electronic
devices, damage batteries, and warp or melt
certain plastics.
• Do not store the phone in cold areas. When the
phone warms up to its normal operating
temperature, moisture can form inside the
phone, which may damage the phone ’s
electronic circuit boards.
• Do not drop, knock or shake the phone. Rough
handling can break int ernal circuit boards.
• Do not use harsh chemicals, cleaning solvents
or strong detergents to clean the phone. Wipe it
with a soft c lot h slightly dampe ne d in a mild
soap-and-water soluti on.
• Do not pain t the phone. Paint can clog the
device’s mov in g pa rts and prevent proper
operation.
118
119
Page 64

Health and safety information
• Do not put the phone in or on heating devices,
such as a microwave oven, a stove or a radiator.
The phone may explode when overh eate d.
• Use only the supplied or an approve d
replacem ent antenna. Un authorized an tennas or
modified accessories may damage th e phone
and violate regulations governing radio devices.
• If the phone, battery , charger or an y accessory
is not wor king properly, take it to your ne arest
qualified se rvice facilit y . The pe rsonnel there will
assist you, and if necessary , arr ange for service.
Glossary
To help you understand the main technical terms
and abbreviations used in this book let, and to take
full advantage of the features of your mobile
phone, here are a few definitions:
Airtime
Actual time spent talking on the wireless phone.
Most carriers bill customers based on how many
minutes of airtime they use each month.
Antenna
A device for transmitting or receiving signals. The
size and shape of antennas is determined, in part,
by the frequency of the signal they receive.
Wireless phones and the base station must have
antennas.
Base Station
The fixed radio transmitter/receiver that maintains
communications with mobile radio telephones
within a given area. (Typically called a cell or cell
site)
120
CDMA (Code Division Multiple Access)
A spread-spectrum approach to digital
transmission. With CDMA, each conversation is
digitized and then tagged with a code. The mobile
phone deciphers only a particular code to pick the
right conversation off the air. The transmitted
signal is just above no ise leve l across the ava ilable
bandwidth.
121
Page 65

Glossary
Glossary
Channel
Communications signals transmit along paths
called channels.
Codec
Compression & Decompr ession.
Deactivation
The process of rendering a wireless phone
inactive.
DTMF (Dual-tone Multi-Frequency )
You send DTMF signals when you enter numbers
by pressing the digit keys.
EVRC
(Enhanced Variable Rate Codec) EVRC is a new
global standard for compressing and
decompressing voice signals. EVRC uses a lower
bit rate (the number of bits sent per second) than
existing CDMA vocoders, while providing
significant im provements in voice quality. This
technology enables your phone to provide superb
voice qualit y w h ile b enefiting from th e ability to
process more cellular voice ca lls using less
bandwidth than the voice codecs in CDMA
networks today.
LCD (Liquid Crystal Display)
Commonly used to re fer to the screen display on
the wireless phone.
LED (Light Emitting Diode)
Commonly used to refer to a small light on the
wireless phone or on the Desktop Charger. The
LED lights on the phone to indicate an incoming
call. The lights on the charger indicate that battery
charging is taking place.
Prepend
The addition of a prefix, such as an area code, to a
phone number.
RF
Radio Frequency
Roaming
The ability to use a wireless phone to make and
receive ca lls in places outside of t he home serv ice
area.
Service Charge
The amount paid each month to receive wireless
service.
Frequency
A measure based on time, as one or more waves
per second, in an electrical or lig ht wave
information signal. A signal’s frequency is stated
in cycles-per-second or Hertz (Hz).
122
Standby Time
The amount of tim e a fully charged wi re less
portable or transportable phone ca n be on and idle
without being in use. (See Talk Time)
123
Page 66

Glossary
Talk Time
The length of tim e a pe rson can talk on a po rtab le
or transportable wireless phone without
recharging the battery.
Vocoder
Voice Coder. A device used to convert spe ech into
digital signals.
Wireless
Radio-based Systems that allow transmission of
telephone or data s ignals thr ough the air witho ut a
physical connection, such as a metal wire (copper)
or fiber optic cable.
124
Page 67

+
Save
+
Yes
to enter
Edit
Quick Reference Card
Internal Phone Book
Basic Operation
Enter Number + or
Save a
Make a call Phone number +
+ Navigation (Type) + +
Enter Name + + / to
select Name/Entry/Home/Work
/Mobile/Pager/Fax/ N o label /
Speed dial/E-mail/URL/Group/
Caller Ringer/B irthday/Secret/
number
on the left sid e
(in Standby mode)
End a call
Receive a call
Adjust the key
tone volume
Enter Memory Location of the
Image + / to change the
settings or
information + +
Speed
on the left sid e
(during a call)
Adjust the voice
volume
Redial the last call Press and hold
+/+ /+
number you want, holding the
last digit to automatically dial.
(In Standby mode)
Find
dialing
Phone Book
Search
Press and hold
Switch to Silent
mode
125
Page 68

4: Planner 1: Today
6: WAP Alert
7: Erase MSG
8: MSG Setting
2: Scheduler
3: T ask List
4: Memo Pad
5: Alarm
6: Calcurator
7: World Time
8: Countdown
9: Set Time
8: Games 1: Fun Bowling
9: Set up 1: Answer Method
7: Power Saving
2: Honey Ball
3: Go Hamster
2: Auto Key Lock
3: Auto Retry
4: Data/Fax
5: Version
6: Security
3: Messages 1: New MSG
2: Voice
3: Inbox
4: Outbox
5: Filed MSG
2: Wallpape r
3: Backlight
4: Banner
5: Dual Clock
6: Contrast
2: Phone Book 1: Find
2: Add New Entry
3: Group Setting
4: My Phone #
5: Memo ry In fo
7: Display 1: Menu Style
3: Alerts
4: Key T one
5: Roam Ringer
6: Power On/Off
1: Calls 1: Outgoing
Main Menu
(To access, press the
2: Incoming
3: Missed
4: Erase History
5: Air Time
Menu
soft key.)
5: Voice Tools 1: Voice Memo
6: Sounds 1: Ringer Volume
2: Voice Answer
2: Ringer Type
126
Licensed by QUALCOMM incorporated under one or more of
the following Patents.
U.S Patent No. 4,901,307 5,056,109 5,099,204
5,101,501 5,103,459 5,107,225
5,109,390
127
 Loading...