

i925
DRAFT For Internal Use Only
This document is watermarked because certain important information in the document has not
yet been verified. This document has been sent to you as a draft and for informational purposes only. The
document should only be used for internal purposes and may not be distributed outside of Samsung,
except to Samsung's carrier customer for testing purposes. Distributing the document outside of Samsung,
except to Samsung's carrier customer for testing purposes, could result in legal exposure to
the company if the preliminary, unverified information in the draft turns out to be inaccurate.
ANDROID TABLET
User Manual
Please read this manual before operating your
device and keep it for future reference.
GH68_3XXXXA Printed in Korea
Intellectual Property
DRAFT For Internal Use Only
All Intellectual Property, as defined below, owned by or which is otherwise the property of Samsung or its respective suppliers
relating to the SAMSUNG Galaxy Tab, including but not limited to, accessories, parts, or software relating there to (the “Galaxy Tab
System”), is proprietary to Samsung and protected under federal laws, state laws, and international treaty provisions. Intellectual
Property includes, but is not limited to, inventions (patentable or unpatentable), patents, trade secrets, copyrights, software,
computer programs, and related documentation and other works of authorship. You may not infringe or otherwise violate the
rights secured by the Intellectual Property. Moreover, you agree that you will not (and will not attempt to) modify, prepare
derivative works of, reverse engineer, decompile, disassemble, or otherwise attempt to create source code from the software. No
title to or ownership in the Intellectual Property is transferred to you. All applicable rights of the Intellectual Property shall remain
with SAMSUNG and its suppliers.
Open Source Software
Some software components of this product, including but not limited to 'PowerTOP' and 'e2fsprogs', incorporate source code
covered under GNU General Public License (GPL), GNU Lesser General Public License (LGPL), OpenSSL License, BSD License and
other open source licenses. To obtain the source code covered under the open source licenses, please visit:
http://opensource.samsung.com
.
Disclaimer of Warranties; Exclusion of Liability
EXCEPT AS SET FORTH IN THE EXPRESS WARRANTY CONTAINED ON THE WARRANTY PAGE ENCLOSED WITH THE PRODUCT, THE
PURCHASER TAKES THE PRODUCT "AS IS", AND SAMSUNG MAKES NO EXPRESS OR IMPLIED WARRANTY OF ANY KIND
WHATSOEVER WITH RESPECT TO THE PRODUCT, INCLUDING BUT NOT LIMITED TO THE MERCHANTABILITY OF THE PRODUCT OR
ITS FITNESS FOR ANY PARTICULAR PURPOSE OR USE; THE DESIGN, CONDITION OR QUALITY OF THE PRODUCT; THE
PERFORMANCE OF THE PRODUCT; THE WORKMANSHIP OF THE PRODUCT OR THE COMPONENTS CONTAINED THEREIN; OR
COMPLIANCE OF THE PRODUCT WITH THE REQUIREMENTS OF ANY LAW, RULE, SPECIFICATION OR CONTRACT PERTAINING
VZW_i925_UM_Eng_LKA_TE_120312_D2

THERETO. NOTHING CONTAINED IN THE INSTRUCTION MANUAL SHALL BE CONSTRUED TO CREATE AN EXPRESS OR IMPLIED
DRAFT For Internal Use Only
WARRANTY OF ANY KIND WHATSOEVER WITH RESPECT TO THE PRODUCT. IN ADDITION, SAMSUNG SHALL NOT BE LIABLE FOR
ANY DAMAGES OF ANY KIND RESULTING FROM THE PURCHASE OR USE OF THE PRODUCT OR ARISING FROM THE BREACH OF
THE EXPRESS WARRANTY, INCLUDING INCIDENTAL, SPECIAL OR CONSEQUENTIAL DAMAGES, OR LOSS OF ANTICIPATED PROFITS
OR BENEFITS.
SAMSUNG IS NOT LIABLE FOR PERFORMANCE ISSUES OR INCOMPATIBILITIES CAUSED BY YOUR EDITING OF REGISTRY SETTINGS,
OR YOUR MODIFICATION OF OPERATING SYSTEM SOFTWARE.
USING CUSTOM OPERATING SYSTEM SOFTWARE MAY CAUSE YOUR DEVICE AND APPLICATIONS TO WORK IMPROPERLY. YOUR
CARRIER MAY NOT PERMIT USERS TO DOWNLOAD CERTAIN SOFTWARE, SUCH AS CUSTOM OS. IF YOUR CARRIER PROHIBITS
THIS, IF YOU ATTEMPT TO DOWNLOAD SOFTWARE ONTO THE DEVICE WITHOUT AUTHORIZATION, YOU WILL BE NOTIFIED ON THE
SCREEN THAT THE PHONE WILL NO LONGER OPERATE AND BE INSTRUCTED TO POWER DOWN THE DEVICE. YOU MUST THEN
CONTACT YOUR CARRIER TO RESTORE THE DEVICE TO THE CARRIER-AUTHORIZED SETTINGS.
SAFE™: "SAFE™" (Samsung for Enterprise) is a mark for a Samsung device which has been tested against Samsung's own
internal criteria for interoperability with certain third party security-related solutions for MDM and VPN. The testing includes field
testing with local network connection and menu tree testing which tests functionality of the solutions in conjunction with the
Samsung device. During the testing, the device is tested with the security solutions to see if the solutions work with the device as
described by the third party security solution providers. The testing, for example, includes field testing with local network
connection and menu tree testing which tests functionality of the solutions in conjunction with the Samsung device. For more
information about Samsung's SAFE™ program, please refer to
Disclaimer of Warranties: EXCEPT AS OTHERWISE PROVIDED IN THEIR STANDARD END USER LICENSE AND WARRANTY, TO THE
FULL EXTENT PERMITTED BY LAW SAMSUNG ELECTRONICS CO., LTD., SAMSUNG TELECOMMUNICATIONS AMERICA, LLC, AND
THEIR AFFILIATES (COLLECTIVELY REFERRED TO HEREIN AS THE "SAMSUNG ENTITIES") EXPRESSLY DISCLAIM ANY AND ALL
WARRANTIES, EXPRESS OR IMPLIED, INCLUDING ANY WARRANTY OF MERCHANTABILITY, FITNESS FOR A PARTICULAR PURPOSE,
www.samsung.com/us/safe
.

INTEROPERABILITY OR NON-INFRINGEMENT, WITH RESPECT TO INFORMATION TECHNOLOGY SECURITY PROTECTION, SAFE™
DRAFT For Internal Use Only
DEVICES AND APPLICATIONS TESTED WITH SAFE™ DEVICES. IN NO EVENT SHALL THE SAMSUNG ENTITIES BE LIABLE FOR ANY
DIRECT, INDIRECT, INCIDENTAL, PUNITIVE, OR CONSEQUENTIAL DAMAGES OF ANY KIND WHATSOEVER WITH RESPECT TO
INFORMATION TECHNOLOGY SECURITY PROTECTION, SAFE™ DEVICES OR APPLICATIONS TESTED WITH SAFE™ DEVICES. In
addition, information technology security protection will be affected by features or functionality associated with, among other
things the e-mail platform, master data management, and virtual private network solutions selected by the software provider,
solution provider or user. Choice of an e-mail, master data management, and virtual private network solution is at the sole
discretion of the software provider, solution provider or user and any associated effect on information technology security
protection is solely the responsibility of the software provider, solution provider or user. For complete statement of limited
warranty, please refer to
devices are sold. [101212]
www.samsung.com/us/safe
, available on the web and where Samsung smartphone and Galaxy Tab™
Samsung Telecommunications America (STA), LLC
DRAFT For Internal Use Only
Headquarters:
1301 E. Lookout Drive
Richardson, TX 75082
Customer Care Center:
1000 Klein Rd.
Plano, TX 75074
Toll Free Tel: 1.888.987.HELP (4357)
Internet Address:
http://www.samsung.com
©
2012 Samsung Telecommunications America, LLC. Samsung is a registered trademark of Samsung Electronics Co., Ltd.
Do you have questions about your Samsung Mobile Device?
For 24 hour information and assistance, we offer a new FAQ/ARS System (Automated Response System) at:
www.samsung.com/us/support
The Bluetooth® word mark, figure mark (stylized “B Design”), and combination mark (Bluetooth word mark and “B Design”) are
DRAFT For Internal Use Only
registered trademarks and are wholly owned by the Bluetooth SIG.
®
, VSuite™, T9® Text Input, and the Nuance logo are trademarks or registered trademarks of Nuance Communications,
Nuance
Inc., or its affiliates in the United States and/or other countries.
Swype and the Swype logos are trademarks of Swype, Inc.
microSD™, microSDHC™ and the microSD logo are Trademarks of the SD Card Association.
®
, DivX Certified® and associated logos are trademarks of Rovi Corporation or its subsidiaries and are used under license.
DivX
DivX Certified
ABOUT DIVX VIDEO: DivX
Certified
®
to play DivX® video up to HD 720p, including premium content.
®
®
device that plays DivX video. Visit
is a digital video format created by DivX, LLC, a subsidiary of Rovi Corporation. This is an official DivX
www.divx.com
for more information and software tools to convert your files into DivX
videos.
®
ABOUT DIVX VIDEO-ON-DEMAND: This DivX Certified
device must be registered in order to play purchased DivX Video-onDemand (VOD) movies. To obtain your registration code, locate the DivX VOD section in License settings under Settings > About
device > Legal information. Go to
®
, the Wi-Fi CERTIFIED logo, and the Wi-Fi logo are registered trademarks of the Wi-Fi Alliance.
Wi-Fi
vod.divx.com
for more information on how to complete your registration.
LTE is a trademark of ETSI.
Google, Google Play and other marks are trademarks of Google, Inc.
©Samsung Telecommunications America, LLC (“Samsung”). Samsung, Super AMOLED, and AllShare are all trademarks of
Samsung Electronics Co., Ltd. and/or its related entities. Other company names, product names and marks mentioned herein are
the property of their respective owners and may be trademarks or registered trademarks. Appearance of device may vary.
©Verizon Wireless. Verizon Wireless and the Verizon Wireless logos are trademarks of Verizon Trademark Services LLC. All
company names, trademarks, logos and copyrights not property of Verizon Wireless are the property of their respective owners.
Table of Contents
DRAFT For Internal Use Only
Section 1: Getting Started .......................... 5
Understanding this User Manual . . . . . . . . . . . . 5
Setting Up Your device . . . . . . . . . . . . . . . . . . . 7
Turning the Device On and Off . . . . . . . . . . . . 10
Your Google Account . . . . . . . . . . . . . . . . . . . 10
Your Samsung Account . . . . . . . . . . . . . . . . . 10
Setup Wizard . . . . . . . . . . . . . . . . . . . . . . . . . 11
Help . . . . . . . . . . . . . . . . . . . . . . . . . . . . . . . . 11
Roaming . . . . . . . . . . . . . . . . . . . . . . . . . . . . 11
Task Manager . . . . . . . . . . . . . . . . . . . . . . . . 12
Memory Card . . . . . . . . . . . . . . . . . . . . . . . . . 12
Securing Your Device . . . . . . . . . . . . . . . . . . . 13
Section 2: Understanding Your Device .... 15
Features . . . . . . . . . . . . . . . . . . . . . . . . . . . . 15
Front . . . . . . . . . . . . . . . . . . . . . . . . . . . . . . . 16
Side . . . . . . . . . . . . . . . . . . . . . . . . . . . . . . . . 17
Back . . . . . . . . . . . . . . . . . . . . . . . . . . . . . . . 18
S-Pen . . . . . . . . . . . . . . . . . . . . . . . . . . . . . . 19
Home Screen . . . . . . . . . . . . . . . . . . . . . . . . . 24
Navigation . . . . . . . . . . . . . . . . . . . . . . . . . . . 26
Notifications . . . . . . . . . . . . . . . . . . . . . . . . . . 27
Status Bar . . . . . . . . . . . . . . . . . . . . . . . . . . . 28
Primary Shortcuts . . . . . . . . . . . . . . . . . . . . . 31
Widgets . . . . . . . . . . . . . . . . . . . . . . . . . . . . . 31
Shortcuts . . . . . . . . . . . . . . . . . . . . . . . . . . . . 32
Folders . . . . . . . . . . . . . . . . . . . . . . . . . . . . . . 32
Wallpaper . . . . . . . . . . . . . . . . . . . . . . . . . . . . 33
Apps . . . . . . . . . . . . . . . . . . . . . . . . . . . . . . . 33
Entering Text . . . . . . . . . . . . . . . . . . . . . . . . . 34
Section 3: Contacts and Accounts ...........37
Accounts . . . . . . . . . . . . . . . . . . . . . . . . . . . . 37
Contacts . . . . . . . . . . . . . . . . . . . . . . . . . . . . . 38
Section 4: Messaging ................................47
Types of Messages . . . . . . . . . . . . . . . . . . . . 47
Email . . . . . . . . . . . . . . . . . . . . . . . . . . . . . . . 47
Gmail . . . . . . . . . . . . . . . . . . . . . . . . . . . . . . . 49
Google Talk . . . . . . . . . . . . . . . . . . . . . . . . . . 50
Section 5: Applications .............................51
1

Managing Applications . . . . . . . . . . . . . . . . . . 51
DRAFT For Internal Use Only
AllShare Play . . . . . . . . . . . . . . . . . . . . . . . . . . 53
Amazon . . . . . . . . . . . . . . . . . . . . . . . . . . . . . . 55
Amazon Kindle . . . . . . . . . . . . . . . . . . . . . . . . 55
Amazon MP3 . . . . . . . . . . . . . . . . . . . . . . . . . . 55
Audible . . . . . . . . . . . . . . . . . . . . . . . . . . . . . . 55
Calculator . . . . . . . . . . . . . . . . . . . . . . . . . . . . 55
Calendar . . . . . . . . . . . . . . . . . . . . . . . . . . . . .56
Camera . . . . . . . . . . . . . . . . . . . . . . . . . . . . . . 56
Clock . . . . . . . . . . . . . . . . . . . . . . . . . . . . . . . . 62
Color . . . . . . . . . . . . . . . . . . . . . . . . . . . . . . . .62
Contacts . . . . . . . . . . . . . . . . . . . . . . . . . . . . . 62
Downloads . . . . . . . . . . . . . . . . . . . . . . . . . . . 63
Email . . . . . . . . . . . . . . . . . . . . . . . . . . . . . . . . 63
Gallery . . . . . . . . . . . . . . . . . . . . . . . . . . . . . . .63
Gmail . . . . . . . . . . . . . . . . . . . . . . . . . . . . . . .65
Google . . . . . . . . . . . . . . . . . . . . . . . . . . . . . . .65
Google+ . . . . . . . . . . . . . . . . . . . . . . . . . . . . . 66
Group Cast . . . . . . . . . . . . . . . . . . . . . . . . . . . 66
Help . . . . . . . . . . . . . . . . . . . . . . . . . . . . . . . . 67
IMDB . . . . . . . . . . . . . . . . . . . . . . . . . . . . . . . . 67
Internet . . . . . . . . . . . . . . . . . . . . . . . . . . . . . . 67
2
Kies Air . . . . . . . . . . . . . . . . . . . . . . . . . . . . . .67
Latitude . . . . . . . . . . . . . . . . . . . . . . . . . . . . . .68
Local . . . . . . . . . . . . . . . . . . . . . . . . . . . . . . . .68
Maps . . . . . . . . . . . . . . . . . . . . . . . . . . . . . . . .68
Media Hub . . . . . . . . . . . . . . . . . . . . . . . . . . . .69
Messenger . . . . . . . . . . . . . . . . . . . . . . . . . . .69
Mobile Hotspot . . . . . . . . . . . . . . . . . . . . . . . .69
Music Hub . . . . . . . . . . . . . . . . . . . . . . . . . . . .69
Music Player . . . . . . . . . . . . . . . . . . . . . . . . . .70
My Files . . . . . . . . . . . . . . . . . . . . . . . . . . . . . .72
My Verizon Mobile . . . . . . . . . . . . . . . . . . . . . .72
Navigation . . . . . . . . . . . . . . . . . . . . . . . . . . . .72
NFL Mobile . . . . . . . . . . . . . . . . . . . . . . . . . . .73
Paper Artist . . . . . . . . . . . . . . . . . . . . . . . . . . .73
Play Books . . . . . . . . . . . . . . . . . . . . . . . . . . . .73
Play Magazines . . . . . . . . . . . . . . . . . . . . . . . .73
Play Movies & TV . . . . . . . . . . . . . . . . . . . . . . .74
Play Music . . . . . . . . . . . . . . . . . . . . . . . . . . . .74
Play Store . . . . . . . . . . . . . . . . . . . . . . . . . . . .74
Polaris Office . . . . . . . . . . . . . . . . . . . . . . . . . .74
S Note . . . . . . . . . . . . . . . . . . . . . . . . . . . . . . .75
S Suggest . . . . . . . . . . . . . . . . . . . . . . . . . . . .75

S Voice . . . . . . . . . . . . . . . . . . . . . . . . . . . . . 75
DRAFT For Internal Use Only
Settings . . . . . . . . . . . . . . . . . . . . . . . . . . . . . 76
Setup Wizard . . . . . . . . . . . . . . . . . . . . . . . . . 76
Talk . . . . . . . . . . . . . . . . . . . . . . . . . . . . . . . . 76
Video Player . . . . . . . . . . . . . . . . . . . . . . . . . . 77
Viewdini . . . . . . . . . . . . . . . . . . . . . . . . . . . . . 77
Voice Recorder . . . . . . . . . . . . . . . . . . . . . . . . 78
Voice Search . . . . . . . . . . . . . . . . . . . . . . . . . 78
VPN Client . . . . . . . . . . . . . . . . . . . . . . . . . . . 78
VZ Navigator . . . . . . . . . . . . . . . . . . . . . . . . . 78
YouTube . . . . . . . . . . . . . . . . . . . . . . . . . . . . 79
Zappos . . . . . . . . . . . . . . . . . . . . . . . . . . . . . . 79
Section 6: Connections ............................ 80
Wi-Fi . . . . . . . . . . . . . . . . . . . . . . . . . . . . . . . 80
Wi-Fi Direct . . . . . . . . . . . . . . . . . . . . . . . . . . 82
Mobile Hotspot . . . . . . . . . . . . . . . . . . . . . . . . 83
Bluetooth . . . . . . . . . . . . . . . . . . . . . . . . . . . . 84
VPN . . . . . . . . . . . . . . . . . . . . . . . . . . . . . . . . 86
Tethering . . . . . . . . . . . . . . . . . . . . . . . . . . . . 86
Nearby devices . . . . . . . . . . . . . . . . . . . . . . . 87
Connecting to a Computer . . . . . . . . . . . . . . . 88
Memory Card . . . . . . . . . . . . . . . . . . . . . . . . . 89
Section 7: Settings ....................................91
Accessing Settings . . . . . . . . . . . . . . . . . . . . . 91
Wireless and networks . . . . . . . . . . . . . . . . . . 91
Device . . . . . . . . . . . . . . . . . . . . . . . . . . . . . . 92
More Wireless and Networks Settings . . . . . . 97
Personal . . . . . . . . . . . . . . . . . . . . . . . . . . . . 109
Security . . . . . . . . . . . . . . . . . . . . . . . . . . . . 114
Language and input . . . . . . . . . . . . . . . . . . . 118
Back up and reset . . . . . . . . . . . . . . . . . . . . 124
Accounts . . . . . . . . . . . . . . . . . . . . . . . . . . . 125
System . . . . . . . . . . . . . . . . . . . . . . . . . . . . . 126
S Pen . . . . . . . . . . . . . . . . . . . . . . . . . . . . . . 127
Accessory . . . . . . . . . . . . . . . . . . . . . . . . . . 129
Date and time . . . . . . . . . . . . . . . . . . . . . . . 129
Accessibility . . . . . . . . . . . . . . . . . . . . . . . . . 130
About device . . . . . . . . . . . . . . . . . . . . . . . . 137
USB Settings . . . . . . . . . . . . . . . . . . . . . . . . 138
Section 8: Health and Safety Information 139
Exposure to Radio Frequency (RF) Signals . . 139
Specific Absorption Rate (SAR) Certification
Information . . . . . . . . . . . . . . . . . . . . . . . . 144
FCC Part 15 Information to User . . . . . . . . . . 146
3

Smart Practices While Driving . . . . . . . . . . . .146
DRAFT For Internal Use Only
Battery Use and Safety . . . . . . . . . . . . . . . . . 147
Samsung Mobile Products and Recycling . . .149
UL Certified Travel Charger . . . . . . . . . . . . . . 149
Display / Touch-Screen . . . . . . . . . . . . . . . . . 150
GPS . . . . . . . . . . . . . . . . . . . . . . . . . . . . . . . . 150
Care and Maintenance . . . . . . . . . . . . . . . . .151
Responsible Listening . . . . . . . . . . . . . . . . . .152
Operating Environment . . . . . . . . . . . . . . . . . 154
Restricting Children's Access to Your Mobile Device
156
FCC Notice and Cautions . . . . . . . . . . . . . . . . 156
Other Important Safety Information . . . . . . . .156
Section 9: Warranty Information ............158
Standard Limited Warranty . . . . . . . . . . . . . . 158
End User License Agreement for Software . . . 163
Index .........................................................171
4
Section 1: Getting Started
DRAFT For Internal Use Only
Understanding this User Manual
The sections of this manual generally follow the features of
your device. A robust index for features begins on page 171.
Also included is important safety information beginning on
page 139, that you should know before using your device.
This manual gives navigation instructions according to the
default display settings. If you select other settings,
navigation steps may be different.
Unless otherwise specified, all instructions in this manual
assume that you are starting from the Home screen. To get to
the Home screen, you may need to unlock the device. For
more information, see “Securing Your Device” on page 13.
Note:
Instructions in this manual are based on default settings,
and may vary from your device, depending on the
software version on your device, and any changes to the
device’s Settings.
Unless stated otherwise, instructions in this User Manual
start with the device unlocked, at the Home screen.
All screen images in this manual are simulated. Actual
displays may vary, depending on the software version of
your device and any changes to the device’s Settings.
Getting Started 5
Special Text
DRAFT For Internal Use Only
In this manual, you’ll find text that is set apart from the rest.
These are intended to point out important information, share
quick methods for activating features, to define terms, and
more. The definitions for these methods are as follows:
•
Notes
: Presents alternative options for the current feature or
menu.
•
Tips
: Provides quick or innovative methods, or useful shortcuts.
•
Important
: Points out important information about the current
feature that could affect performance.
•
Warning
: Brings to your attention important information to
prevent loss of data or functionality, or even prevent damage to
your device.
6
Text Conventions
This manual provides condensed information about how to
use your device. To make this possible, the following text
conventions are used to represent frequently-used steps:
➔
Arrows are used to represent the sequence of
selecting successive options in procedures. For
example:
“From the Home screen, touch
Settings
➔
Wi-Fi
.”
Many settings use an On/Off switch. Touch the
On/Off switch to turn a setting On or Off. This
graphic is used to represent the On/Off switch.
Apps
➔
Setting Up Your device
DRAFT For Internal Use Only
Install the 4G LTE SIM (Subscriber Identity Module) card,
battery, and optional memory card, then charge the battery
to begin using your device.
SIM Card
Your device uses a 4G LTE SIM (Subscriber Identity Module).
The 4G LTE SIM is a small, rectangular plastic card that
stores information about your wireless service.
The SIM card is installed under the back cover, and must
remain in the device when in use.
If you purchased your device at a Verizon Wireless store, the
SIM card is activated and ready to use. If you ordered a new
device, the card may need to be activated before you can use
it. For more information about activating the SIM card, visit:
http://www.verizonwireless.com/4GSIM
Caution!
Turn the device off before installing or removing the
SIM card. Do not bend or scratch the SIM card. Take
care when handling, installing, or removing the SIM
card, and avoid exposing the SIM card to static
electricity, water, or dirt. Keep the SIM card out of
reach of small children.
.
Getting Started 7
Installing the 4G LTE SIM Card
DRAFT For Internal Use Only
1. Remove the back cover.
2. With the Verizon Wireless logo facing up, carefully
insert the 4G LTE SIM Card into the slot, pressing gently
until it locks into place.
3. Install the back cover.
Removing the 4G LTE SIM Card
1. Turn off the device, then remove the back cover.
2. Press the 4G LTE SIM Card in gently to release the lock,
then carefully slide the 4G LTE SIM Card out of the slot.
3. Install the back cover.
8
Battery
Your device is powered by a rechargeable, standard Li-Ion
battery. A Wall/USB Charger (Charging Head and USB cable)
is included with the device, for charging the battery.
The battery comes partially charged. You must fully charge
the battery before using your device for the first time. A fully
discharged battery requires up to 4 hours of charge time.
After the first charge, you can use the device while charging.
Warning!
Use only Samsung-approved charging devices and
batteries. Samsung accessories are designed to
maximize battery life. Using other accessories may
invalidate your warranty and may cause damage.
Battery Indicator
The battery icon in the Status Bar shows battery power
level. Before the battery becomes too low to operate, the
battery icon flashes and a tone plays. If you continue using
the device without charging, the device will power off.
Tip:
Task Manager provides helpful information about
extending battery life. For more information, see “Task
Manager” on page 12.

Charging the Battery
DRAFT For Internal Use Only
Your device comes with a Wall/USB Charger (Charging Head
and USB cable) to charge your device from any 110/220 VAC
outlet.
Note:
The battery comes partially charged. You must fully
charge the battery before using your device for the first
time. A fully discharged battery requires up to 4 hours of
charge time. After the first charge, you can use the
device while charging.
1. Insert the USB cable into the port.
2. Connect the USB cable to the charging head.
3. Plug the charging head into a standard AC power
outlet.
4. When charging is complete, unplug the charging head
from the power outlet and remove the USB cable from
the device.
Getting Started 9
Turning the Device On and Off
DRAFT For Internal Use Only
Turning the Device On
Press and hold the
device vibrates and starts up.
Turning the Device Off
1. Press and hold the
device vibrates, and the Device Options menu displays.
2. At the prompt, tap
10
Power off
Power/Lock Key
Power/Lock Key
.
until the
until the
Your Google Account
Your new device uses your Google account to fully utilize its
Android features, including Gmail, Google Talk and the Play
Store. When you turn on your device for the first time, set up
a connection with your existing Google account, or create a
new Google account.
To create a Google account, or set up your Google account on
your device, use Accounts and sync settings (see “Accounts”
on page 125).
Your Samsung Account
Create a Samsung account, for access to Samsung apps on
your device, including Media Hub, Music Hub, and AllShare
Play. For more information, see “Accounts” on page 125.
Setup Wizard
DRAFT For Internal Use Only
The first time you turn your device on, Setup Wizard will
guide you through the basics of setting up your device.
Follow the prompts to choose a default language, set up
accounts, choose location services, and learn more about
your device.
You can also use the Setup Wizard to quickly configure your
device at any time.
From the Home screen, touch
Setup Wizard
.
Apps
➔
Help
Get information about using your device, including videos,
useful tips, and other information.
From the Home screen, touch
Help
.
Apps
➔
Roaming
When you travel outside your home network’s coverage area,
your device can use roaming to acquire service on other
compatible digital networks. When roaming, the
Roaming
icon displays in the Status bar.
Tip:
You can set your device’s roaming behavior. For more
information, see “Mobile networks” on page 97.
During roaming, some services may not be available.
Depending on your coverage area and service plan, extra
charges may apply when connecting to the Internet, or using
data services. Contact Verizon Wireless for more information
about your coverage area and service plan.
Getting Started 11
Task Manager
DRAFT For Internal Use Only
Your device can run apps simultaneously, with some apps
running in the background. Use Task Manager to see which
apps are running on your device, and to end running apps to
extend battery life. You can also uninstall apps from your
device and check memory usage.
1. From any unlocked screen, press and hold the
2. Touch the
3. Touch the
4. Touch the
5. Touch the
6. Touch the
Tip:
Touch and drag your finger on the tabs to scroll the tabs.
12
Home Key
, then select
on your device. Touch
apps you’ve installed on your device. Touch
remove an app from your device.
(Random Access Memory) in use. Touch
to clear processes to increase available RAM.
SD card memory statistics.
RAM, and tips for extending battery life.
Active applications
Downloaded
RAM
tab to display the amount of RAM
Storage
tab for internal system storage and
Help
tab to view information about managing
Task manager
tab to view apps running
End
, or
End all
to close apps.
tab to view information about
Clear memory
.
Uninstall
to
Memory Card
Your device supports optional, removable, microSD™ or
microSDHC™ memory cards of up to 64GB capacity (not
included), for storage of music, pictures, and other files.
For more information about using memory cards, see
“Memory Card” on page 89.
Installing a Memory Card
1. Remove the back cover.
2. With the gold contacts facing down, slide the memory
card into the slot, pushing gently until it locks into
place.
3. Install the back cover.
Removing a Memory Card
DRAFT For Internal Use Only
Important!
To prevent damage to data stored on the memory
card, unmount the card before removing it from the
device.
Menu
1. From the Home screen, touch
Settings ➔ Storage
2. At the prompt, read the warning and select
continue. Wait for the
to appear in the Status bar and Notification panel.
3. Remove the back cover.
4. Gently press on the memory card to release the lock,
then carefully pull the card out.
5. Install the back cover.
➔ Unmount SD card
SD card safe to remove
, then touch
.
OK
to
icon
Securing Your Device
Use your device’s screen lock features to secure your device.
Note:
Unless stated otherwise, instructions in this User Manual
start with the device unlocked, at the Home screen.
To set a personal screen lock, use the Screen lock option
under Security settings. For more information, see “Screen
lock” on page 111.
For other settings related to securing your device, see
“Security” on page 114.
Locking the Device
By default, the device locks automatically when the
screen times out.
– or –
Press the
Power/Lock Key
Getting Started 13
.
Unlocking the Device
DRAFT For Internal Use Only
Unlock the device using one of the default unlock screens, or
use Screen lock options for increased security.
Press the
drag your finger across the screen.
14
Power/Lock Key
, then touch and
Section 2: Understanding Your Device
DRAFT For Internal Use Only
Features
•
5.5-inch HD Super AMOLED™ touch screen, 16:9 aspect ratio
•
CDMA 1X/EV-DO Rev-A /LTE Wireless Technology
•
1.6 GHz quad-core processor with 2GB RAM
•
Android® 4.1, Jelly Bean
®
•
SAFE
•
Create and collaborate with S-Pen
–
Precise and natural writing and drawing experience
–
Exclusive features - Easy Clip, Air View, Quick Command, Idea
Sketch, and Photo Notes
–
Create original content and annotate documents
–
Store on the device, keep tabs with visual and audible alarms
•
Multitask with Popup Note, Popup Video, and Popup Browser
•
Keep in touch
–
SMS (Text) and MMS (Multimedia)
–
Voice
–
Email and Gmail
–
Chat
•
Enjoy pictures, music and video
–
Discover new media with Media Hub and Music Hub
–
Gallery, Music player, and Video player
–
DivX Certified® to play DivX® video up to HD 720p, including
premium content
•
Connect to other devices
–
Wi-Fi 802.11 a/b/g/n
–
Wi-Fi Direct
–
Mobile Hotspot
–
DLNA
–
Bluetooth 4.0
–
USB 2.0 High-speed
–
Tet he ri ng
–
VPN
•
Capture memories
–
8 MP Camera and LED flash + 1.9 MP front-facing camera
–
Seamlessly share pictures via Share Shot to other devices
–
Capture rapid-fire still pictures with Burst Shot
–
Use Best Shot and Best Face to choose the best pictures
•
Control your device with S Voice, for natural voice commands
•
Share with friends
–
Specialized apps, including AllShare Play™ and Group Cast
–
Integrated features, such as Share Shot in Camera
•
Take your content with you
–
16GB device memory (actual formatted capacity may vary)
–
Support for microSD™ and microSDHC™ memory cards up to
64GB capacity (not included)
Understanding Your Device 15
™

Front
DRAFT For Internal Use Only
16
•
Earpiece:
Plays sounds.
•
Light Sensor
is enabled, and when using the Front camera.
•
1.9 Megapixel Front Camera
•
Menu
the current screen or feature. While using your device, you may
notice that the Menu Key dims, but it is always available at a
touch to provide a context-sensitive menu for the current screen
or app (you can set the touch key light duration, see page 105).
•
Home
device is locked. Press and hold to display recent applications or
launch Task Manager. Press twice from an unlocked screen to
launch S Voice.
•
Back
using your device, you may notice that the Back Key dims, but
you can always use it to return to the previous item.
: Detects ambient light when Automatic brightness
: Captures pictures and video.
: Touch to display a context-sensitive menu of options for
: Press to display the Home screen, or Lock screen if the
: Touch to return to the previous screen or option. While

Side
DRAFT For Internal Use Only
•
Volume
: From the Home screen, press to adjust master volume.
During media playback, press
•
Power/Lock
access a device options menu. Press to lock the device, or to
wake the screen for unlocking.
: Press and hold to turn the device on or off, and to
to adjust volume.
Understanding Your Device 17

Back
DRAFT For Internal Use Only
18
•
8 MP Camera
•
LED Flash
•
Microphones (top and bottom)
•
3.5mm Headset Jack
equipment.
•
Speaker
sounds.
•
microUSB
and files, or connect to optional accessories (not included).
: Use when taking photos or recording videos.
: Use when taking photos or recording video.
: Capture audio during recording.
: Plug in an optional headset or TTY
: Play ringtones, music and media playback, and other
: Connect a USB cable for charging or to sync music

S-Pen
DRAFT For Internal Use Only
Create and collaborate with S Pen.
Removing S Pen
S Pen stores inside your device, for convenient access.
Slide S Pen from your device using the notch on the
end of the S Pen.
S Pen Settings
Configure S Pen settings, including options for sounds and
for tracking S Pen when it’s not stored in your device.
For more information about S Pen, and to configure settings,
touch
page 127.
Apps
➔
Settings ➔ S Pen
Understanding Your Device 19
, or see “S Pen” on
Easy Clip
DRAFT For Internal Use Only
Instantly outline and crop images on the screen, in any
shape, to share or paste. You can edit the cropped content,
or personalize it with your own handwriting.
To use Easy Clip:
1. Press and hold the S Pen button, then draw around the
image you want to clip, making sure to close the
shape.
2. Tap the app you want to paste the image into, or if you
do nothing, the image is pasted to Clipboard.
20
Air View
Hover S Pen over the screen to preview content, or view
information about an item on the screen. For example:
•
Hover over an email in a list to preview the message before
opening it.
•
Hover over a photo album to preview the contents, or see a
picture enlarged.
•
Hover over the timeline during video playback to preview and
navigate to specific scenes.
•
In S Planner, hover over dates and events to see details
•
Hover over an icon or screen button to view the item’s title
For more information about Air View, and to configure
settings, touch
, or see “Air view” on page 128.
View
Apps ➔
Settings ➔ S Pen ➔ Air
Quick Command
DRAFT For Internal Use Only
Multitask like never before. Launch Quick Command pad
from any screen, to hand-write tasks. Use S Pen to draw a
Quick Command to launch a feature, or draw a Quick
Command followed by a keyword to personalize the
command. For example, draw a question mark “?” to search
the Internet, or draw a question mark followed by a search
term to search on the term.
For more information about Quick Command, and to
configure settings, touch
➔
Quick Command settings
settings” on page 128.
To launch Quick Command:
Press and hold the S Pen button and swipe upwards on
the screen.
Apps ➔
, or see “Quick Command
Settings ➔ S Pen
Idea Sketch
Express your ideas with an image. Add illustrations by handwriting keywords on the Idea Sketch pad.
To use Idea Sketch:
1. From the Home screen, touch
2. From the toolbar, select the
Idea Sketch
3. Write a search term for something you want to draw or
insert into your S Note. Or, select
category.
4. S Note displays images matching your search term.
Select an image to insert it into your S Note. You can
edit the image, or draw on it, and changes are saved in
the note.
from the menu.
Understanding Your Device 21
Apps ➔
Insert
tool, then choose
List
and choose a
S Note
.

Photo Notes
DRAFT For Internal Use Only
Hand-write a note on the back of pictures to add detail to
your memories.
To add a Photo Note:
1. From the Home screen, touch
Gallery
.
2. Select a picture, then select
3. Use S Pen to write a note on the back of the picture,
then select
Note:
Photo notes are saved with the picture on your device,
but are not transferred when you share the picture.
22
Done
to save the note with the picture.
Apps
➔
Menu ➔ Draw on image
.
Popup Note
Multitask with Popup Note - open an S Note instantly in a
popup window to jot down a quick note during a meeting, or
write down information from another area of the screen.
To use Popup Note:
1. From any screen, press and hold the S Pen button and
double-tap on the screen.
2. Use S Pen to write your note, then save it for later. You
can move the popup window around the screen.
Popup Video
DRAFT For Internal Use Only
Multitask with Popup Video - transform your video player into
a popup window floating on the screen. The video will
continue to play, and the popup window can be resized or
moved anywhere on the screen.
To use Popup Video:
While watching a video, touch the Popup Video
icon in the lower right corner of the screen.
Popup Browser
Multitask with Popup Browser - Launch a new, floating
browser window by selecting a web link from any
application.
To launch Popup Browser:
In any app, touch a web link, then choose
Browser
from the menu.
Popup
Other S Pen gestures
You can perform other functions with S Pen, for example:
•
Go back
: Press and hold the S Pen button, then draw on the
screen.
•
Open menu
on the screen.
•
Screen captur
hold S Pen on the screen.
•
Select text
S Pen over the text to select
: Press and hold the S Pen button, then draw
e: Press and hold the S Pen button, then touch and
: Press and hold the S Pen button, then touch and drag
Understanding Your Device 23
Home Screen
DRAFT For Internal Use Only
The Home screen is the starting point for using your device.
24
•
Status Bar
power, and connection details. For a list of icons, see
Bar”
•
Shortcuts
Home screen by default, and you can add more shortcuts to your
favorite apps. For more information, see
page 32.
•
Widgets
found on the Home screen by default, and you can add your
favorites. For more information, see
Note:
: Presents icons to show network status, battery
“Status
on page 28.
: Shortcuts to apps.These shortcuts are found on the
“Shortcuts”
: Apps that run on the Home screen. These widgets are
“Widgets”
Unless stated otherwise, instructions in this User Manual
start with the device unlocked, at the Home screen.
All screen images in this manual are simulated. Actual
displays may vary, depending on the software version of
your device and any changes to the device’s Settings.
on
on page 31.
Extended Home Screen
DRAFT For Internal Use Only
The Home screen consists of the Home panel, plus panels
that extend beyond the display width to provide more space
for adding shortcuts, widgets and folders.
Slide your finger horizontally across the screen to scroll to
the left or right side panels. As you scroll, the indicator at the
bottom of the display shows your current position.
Customizing the Home Screen
Customize the Home screen to suit your preferences.
•
Add App Shortcuts
page 32.
•
Add Widgets
•
Add Folders
•
Change the Wallpaper
on page 33.
•
Display settings
page 104.
: For more information, see
: For more information, see
: For more information, see
: For more information, see
: For more information, see
“Shortcuts”
“Widgets”
“Folders”
“Display”
on
on page 31.
on page 32.
“Wallpaper”
on
Adding and removing Home screen panels
Your device comes with 7 Home screen panels. You can
customize the Home screen to include up to the seven
default panels.
Menu
Home Key
, then touch
.
1. From the Home screen, touch
Edit
.
2. Slide your finger across the screen to scroll the panels,
and use these controls to configure panels:
Remove
: Touch and hold on a panel, then drag it
Remove
to
Add
up to the default total of seven.
Set as Home
when you press the
Tip:
You can also “pinch” the Home screen to display Edit
options.
.
: Touch a previously-removed panel to add it,
: The panel set as Home will display
Understanding Your Device 25

Navigation
DRAFT For Internal Use Only
Navigate your device’s features using the command keys and
the touch screen.
Warning!
Please note that a touch screen responds best to a
light touch from the pad of your finger or a nonmetallic stylus. Using excessive force or a metallic
object when pressing on the touch screen may
damage the tempered glass surface and void the
warranty. For more information, see “Warranty
Information” on page 202.
Context-sensitive Menus
While using your device, context-sensitive menus offer
options for the feature or screen.
To access context-sensitive menus:
Touch
•
•
Touch and hold on an item.
26
Menu
.
Finger Gestures
Touch
Touch items to select or launch them. For example:
•
Touch the onscreen keyboard to enter characters or text.
•
Touch an item to select it.
•
Touch an app’s icon to launch the application.
Touch and Hold
Activate items by a touch and hold gesture. For example:
•
Touch and hold a widget on the Home screen to move it.
•
Touch and hold on a field to display a pop-up menu of options.
Swipe
Swipe your finger across the screen. For example:
•
Unlocking the screen
•
Scrolling the Home screen or a menu
•
Combine touch and hold with swipe to drag an item.
Pinch
Using two fingers, make a pinch motion on the screen. For
example:
•
Pinch in to zoom in on pictures or screens.
•
Pinch out to zoom out on pictures or screens.

Hand Gestures
DRAFT For Internal Use Only
Your device recognizes motion, to allow you to navigate and
access features by moving the device in specific gestures.
To use gestures, enable the Motion settings. For more
information, see “Motion” on page 126.
Tilt
Touch and hold with your thumbs on the screen, then tilt the
device forward and back to zoom in or out.
•
Tilt to zoom
Gallery or Internet causes the screen to zoom in or out.
Pan
Touch and hold on the screen, then move the device in a
side-to-side motion.
•
Pan to move icon
panning motion (side-to-side) moves a highlighted icon to a new
location on the Home screen.
•
Pan to browse images
in a panning motion while viewing an image moves focus around
in the image.
: When this setting is On, tilting the device while in
: When this setting is On, moving the device in a
: When this setting is On, moving the device
Notifications
Notifications shows information about connections, alerts
and other items.
1. Touch and drag downward from the top of the screen
to display notifications.
2. Touch an item to open the item, or to launch the related
app or feature.
World Clock
While displaying Notifications, touch the time in the Status
bar to display a World clock. Add cities to the clock to display
the time in different zones around the world.
Clearing Notifications
1. Sweep your finger downward from the top of the
screen to display Notifications.
Clear
“Bluetooth”
to clear all
on
2. Touch a notification to clear it, or touch
notifications.
Settings
Use settings at the top of Notifications to control popular
settings. Slide your finger right and left to see all the icons.
•
Bluetooth
: Turn Bluetooth On or Off. See
page 84.
Understanding Your Device 27

•
DRAFT For Internal Use Only
GPS
: Turn Standalone GPS services on or off. See
GPS services”
•
Sound
silenced) and Vibrate (all sounds replaced by vibration).
•
Mobile data
mobile data service. See
•
Screen rotation
control whether the screen automatically updates when you
rotate the device. See
•
Airplane mode
mode”
•
Power saving
“Power saving mode”
•
Driving mode
notifications read out. See
page 123.
•
AllShare Cast
with other devices. see
•
Sync
28
on page 110.
: Switch between your sound settings, Mute (all sounds
: Activate or deactivate your device’s access to
“Mobile networks”
: Enable or disable the Auto rotation setting, to
“Screen timeout”
: Turn Airplane mode On or Off. See
on page 91.
: Enable or disable Power saving mode. See
on page 107.
: Enable or disable Driving mode, to have
“Text-to-speech output”
: Enable or disable AllShare Cast, for easy sharing
“AllShare Play”
: Enable or disable synchronization with your accounts.
“Standalone
on page 97.
on page 104.
“Airplane
on
on page 53.
Status Bar
The Status Bar shows network and battery status and other
details, including these common icons.
Airplane Mode Active
communications are disabled. See “Airplane
mode” on page 91.
USB Connected
computer using a USB cable. For more information
about transferring data between your device and
a computer, see “Transferring Data” on page 88.
Mute
: Volume is muted.
Battery Level
Battery Charging
Device Power Critical
remaining. Charge immediately.
Missing SIM
No Network
: All wireless
: The device is connected to a
: Shown fully charged.
: Battery is charging.
: Battery has very little po wer
: No SIM is installed.
: No wireless network is available.

3G connection
R
DRAFT For Internal Use Only
The arrows are colored when data is being
transferred.
4G LTE Connection
system. The arrows are colored when data is
being transferred.
Signal Strength
greater the number of bars, the stronger the
signal.
Signal Strength Roaming, Open
strength, when the device is roaming. The greater
the number of bars, the stronger the signal.
Signal Strength Roaming, CDMA
strength, when the device is roaming on CDMA
networks. The greater the number of bars, the
stronger the signal.
: device is active on a 3G system.
: device is active on a 4G LTE
: Current signal strength. The
: Current signal
: Current signal
Wi-Fi Active
Wi-Fi network. The greater the number of rays,
the stronger the signal. The arrows are colored
when data is being transferred. For more
information about configuring Wi-Fi, see “Wi-Fi”
on page 80.
Wi-Fi Action Needed
Wi-Fi network. For more information about
configuring Wi-Fi, see “Wi-Fi” on page 80.
New Email Message
Download Successful
successfully.
Update Available
installed app.
Update Successful
app.
Alarm
Silent mode
are silenced, and Vibrate is not active.
: Wi-Fi is active, and connected to a
: Action needed to connect to
: You have new email.
: A file was downloaded
: An update is available for an
: An update was installed for an
: An alarm is set.
: All sounds except media and alarms
Understanding Your Device 29
Vibrate
DRAFT For Internal Use Only
: All sounds except media and alarms are
silenced, and vibration will play for new
notifications.
Music Playing
the background. You can control playback from
Notifications, or from Music player.
Music Paused
control playback from Notifications, or from Mus ic
player.
SD Card Ready
to prepare the card for use. For more information
about using memory cards, see “Memory Card”
on page 89.
SD Card Safe to Remove
unmounted, and it is safe to uninstall it. For more
information about using memory cards, see
“Memory Card” on page 89.
SD Card Removed
uninstalled. For more information about using
memory cards, see “Memory Card” on page 89.
30
: Music is playing, but the app is in
: Music playback is paused. You can
: A memory card scan is underway,
: A memory card was
: A memory card was
Bluetooth Active
information, see “Turning Bluetooth On or Off” on
page 85.
Bluetooth Paired
another Bluetooth device. For more information,
see “Pairing with a Bluetooth Device” on page 85.
: Bluetooth is turned on. For more
: Your device is paired with
Primary Shortcuts
DRAFT For Internal Use Only
Primary Shortcuts appear at the bottom of the display. You
can edit the Primary Shortcuts, except for
Apps
.
Editing the Primary Shortcuts
To add or remove shortcuts:
Touch and hold a shortcut, then drag it from the
Primary Shortcuts to the Home screen, or from the
Home screen to the Primary Shortcuts.
To remove shortcuts:
Touch and hold the shortcut until
then drag the shortcut to the
Remove
Remove
icon.
appears,
Widgets
Widgets are self-contained applications that you can place
on the Home screen for quick access.
Adding Widgets to the Home screen
Adding widgets from the Home screen
1. Navigate to a Home screen panel, then touch and hold
on the screen to display the
2. To uch
3. Touc h th e
Adding Shortcuts from Widgets
1. Navigate to a Home screen panel.
2. Touc h
3. Touch a widget, then follow the prompts to configure
Add to Home screen
Widgets
tab, then touch a widget and follow
the prompts to configure the widget and place it on the
Home screen.
Apps
, then touch the
the widget and place it on the Home screen.
Home screen
, then select
Removing Widgets
Touch and hold the widget until
then drag the widget to the
Delete
Understanding Your Device 31
Widgets
Delete
icon.
menu.
Apps
tab.
.
appears,
Shortcuts
DRAFT For Internal Use Only
Use App shortcuts for quick access to applications from the
Home screen. Your device comes with app shortcuts already
placed on the Home screen, and you can add your favorites.
Adding Shortcuts to the Home Screen
Adding shortcuts from the Home screen
1. Navigate to a Home screen panel, then touch and hold
on the screen to display the
2. Touch
3. Touch an app, then follow the prompts to configure the
Adding Shortcuts from Apps
1. Navigate to a Home screen panel.
2. Touch
3. Touch and hold on an app until it appears on the Home
Add to Home screen
shortcut and add it to the Home screen
Apps
.
screen.
Add to Home screen
, then touch
Apps
menu.
.
Removing Shortcuts
Touch and hold the shortcut until
then drag the shortcut to the Remove icon.
32
Remove
appears,
Folder s
Place folders on the Home screen to organize items.
Adding Folders
1. Navigate to a Home screen panel, then touch and hold
on the screen to display the
2. Select
3. The folder displays on the Home screen. Touch the
Add to Home screen
folder to name it.
Home screen
, then touch
Removing Folders
Touch and hold the folder until
then drag the folder to the Remove icon.
Folder
Remove
menu
.
appears,

Wallpaper
DRAFT For Internal Use Only
Choose a picture to display in the background of the Home
screen. You can choose from pre-loaded wallpaper images,
or select a picture you’ve taken with the Camera or
downloaded.
1. From the Home screen, touch and hold on the screen
to display the
screen
2. Choose a source:
•Gallery
optional installed memory card. Touch a picture to select it,
then use the crop tool to resize the picture, if desired. Touch
Done
• Live wallpapers
wallpapers. Touch a wallpaper, then touch
• Wallpaper
a wallpaper, then touch
Note:
You can also set Wallpaper in Settings. For more
information, see “Wallpaper” on page 104.
Home screen
,
Lock screen
: Choose a picture stored on your device or on an
to set the picture as wallpaper.
: Choose from pre-loaded interactive moving
: Choose from pre-loaded wallpaper images. Touch
menu, then select
, or
Home and lock screen
Set wallpaper
Set wallpaper
.
Home
.
.
Apps
Apps holds all applications installed on your device.
Applications that you download and install are also added to
Apps.
The Apps screen is like the Home screen, it consists of
panels that extend beyond the display width to provide more
space. Slide your finger horizontally across the screen to
scroll to the left or right side panels. As you scroll, the
indicator at the bottom of the display shows your current
position.
For more information about applications, see “Applications”
on page 68.
You can place shortcuts to apps on the Home screen, for
quick access to the app. For more information, see “Adding
Shortcuts from Apps” on page 32.
Apps
1. From the Home screen, touch
2. Slide your finger left or right to scroll the Apps screens.
3. Touch an icon to launch the application.
Understanding Your Device 33
.

Entering Text
DRAFT For Internal Use Only
Your device uses a virtual QWERTY keyboard for text entry.
Use the keyboard to enter letters, punctuation, numbers, and
other characters into text entry fields or applications. Access
the keyboard by touching any text entry field.
You can also use voice input to speak your inputs.
The virtual QWERTY keyboard displays at the bottom of the
screen. By default, when you rotate the device, the screen
orientation updates to display the keyboard at the bottom of
the screen.
Text Input Methods
Your device offers two text input methods, Samsung
keyboard and Google voice typing.
You can set a default text entry method in Settings. For more
information, see “Keyboards and input methods” on
page 118.
To choose a text input method at any time:
While entering text, touch and drag downward from the
top of the screen to display Notifications, then touch
Select input method
34
.
Using Samsung Keyboard
The Samsung keyboard is a custom virtual QWERTY
keyboard, featuring optional predictive text. Input characters
by tapping the on-screen keys with your finger, or use
speech recognition.
You can enable predictive text, to have the Samsung
keyboard match your key touches to common words and
displays them. Select a word from the display to insert it into
your text.
Configuring Samsung keyboard
Configure the Samsung keyboard to your preferences.
•
For more information, see
•
While entering text, touch , then select from the pop-up
menu.
“Samsung keyboard”
on page 119.

Entering Upper and Lower Case Letters
DRAFT For Internal Use Only
The default case is lower case (abc). Enter upper and lower
case alphabet letters by touching the Shift key to toggle the
case, before touching the letter key(s).
•
Touch once to switch from abc to Abc mode
•
Touch and hold to switch to ABC mode
Entering Symbols and Numbers
To enter common symbols, touch to switch to symbol
mode, then touch the corresponding key.
To enter less-common symbols, touch
touch the corresponding key.
Enter numbers by touching , then touching the number
keys.
➔ , then
Using Google Voice Typing from the Samsung
keyboard
When you enable the Voice input setting for Samsung
keyboard, you can access Google Voice Typing from the
Samsung keyboard.
For more information about enabling Voice input, see
“Samsung keyboard” on page 119.
Touch , then speak your input.
Understanding Your Device 35

Using Predictive text
DRAFT For Internal Use Only
By using Predictive text, you can have next-letter prediction
and regional error correction, which compensates for
pressing the wrong keys on the QWERTY keyboard.
Note:
Enable Predictive text in Samsung keyboard settings, to
have the Voice Input appear on the keyboard. For more
information, see “Samsung keyboard” on page 119.
While entering characters, potential word matches
display in the Predictive text area above the keyboard.
Touch a word to insert it into your text.
36
Using Google Voice Typing
Use your voice to enter text using the Google Voice typing
feature.
1. While entering text, touch and drag downward from the
top of the screen to display Notifications, then touch
Select input method ➔ Google voice typing
Listening
2. At the
the text is displayed in the text field.
prompt, speak your text. As you speak,
.
Section 3: Contacts and Accounts
DRAFT For Internal Use Only
Accounts
Your device provides the ability to synchronize information,
from a variety of accounts, including Email, Facebook,
Google, and your Samsung account. Depending on the
account, you can choose to synchronize your calendar,
contacts, and other types of content.
Contacts from your accounts appear in your device’s
Contacts.
With synchronization, you can ensure that information on
your device is updated with any information that changes in
your accounts.
Setting Up Your Accounts
Set up and manage your accounts with the Accounts and
sync settings.
For information about setting up other, non-synchronized
email accounts, see “Setting Up Email Accounts” on
page 47.
Tip:
For more information on setting up your email, visit the
Smartphone Resource Center at:
https://smartphones.verizonwireless.com
Adding an account
1. From the Home screen, touch Menu
Settings ➔ Add account
2. Select an account provider, then follow the prompts to
enter your credentials and sign in.
3. The device communicates with the provider’s server to
set up your account on the device.
.
Contacts and Accounts 37
, then touch

Managing accounts
DRAFT For Internal Use Only
1. From the Home screen, touch Menu
Settings ➔ Accounts and sync
2. Select an account, then touch a setting to enable or
disable synchronization. When enabled, a check mark
appears in the check box.
38
.
, then touch
Contacts
Use Contacts to store information for your friends, family and
colleagues, to make contacting them easy.
Creating Contacts
1. From the Home screen, touch
Create contact
2. At the
3. Touch contact fields to enter information:
Save contact to
the contact (options depend on accounts set up):
•Device
: Save to the device’s Contacts.
•Google
: Save to your Google account.
•Corporate
•
Tou c h
•
Tou c h
Name
Name prefix, First name, Middle name, Last name,
enter
Name suffix
•
Touch
Phone number
Label
button to choose a label, from
Work Fax, Home Fax, Pager, Other, Custom
add another number, touch .
.
prompt, select a save option for
: Save to your Corporate account.
Photo ID
to choose a picture to identify the contact.
to enter a name for the contact. Touch to
.
to enter a phone number, then touch the
Contacts
➔
Mobile, Home, Work
or
Callback
or
,
. To

•
DRAFT For Internal Use Only
Touch
Groups
to assign the contact to a group. For more
information about Groups, see
•
Touch
Add another field
Phonetic Name, Organization, Email, IM, Address, Notes
Nickname, Website, Events
4. When you finish entering information, touch
“Groups”
on page 44.
to add more fields, including
, or
Relationship
.
Save
,
.
Updating Contacts
Make changes to update an existing contact.
Contacts
Edit
.
from the
1. From the Home screen, touch
2. Touch a contact to view its information, then touch
Edit
.
– or –
Touch and hold a contact, then select
menu.
3. Continue entering contact information. For more
information, see “Creating Contacts” on page 38.
Choosing Contacts to Display
1. From the Home screen, touch
Menu
2. To uch
•
Choose
•
Choose an account to only display contacts from that account.
•
Choose
, then touch
All contacts
Customized list
Contacts to display
to show all contacts.
to select contact types to display.
Contacts Settings
1. From the Home screen, touch
Menu
2. To uch
•
Select
least one stored phone number.
•
Touch
•
Touch
•
Touch
contacts by Bluetooth contacts. For more information about
sending contacts, see
page 42.
, then touch
Only contacts with phones
List by
to sort contacts by first or last name.
Display contacts by
Send contact
Settings
to show contacts with at
to list contacts by first or last name.
to set your preference for transferring
“Sending Namecards (vCards)”
Contacts and Accounts 39
Contacts
Contacts
:
.
:
.
on

Other Contacts Options
DRAFT For Internal Use Only
1. From the Home screen, touch
2. Touch a contact to display it, then touch
•History
: View interactions with this contact.
•Edit
: Modify contact information. For more information, see
“Updating Contacts”
•Delete
: Erase the contact record.
• Join contact/Separate contact
one. For information, see
• Mark as default
(such as IM or email address). Defaults are the contact method
used when referencing a contact. You can also set a default by
touching and holding on a contact field.
• Share namecard via
see
“Sending Namecards (vCards)”
• Print namecard
compatible Samsung Bluetooth-enabled printer.
on page 39.
“Joining Contacts”
: Set a default phone number or other field
: Send the namecard. For information,
: Print the namecard via Bluetooth to a
Contacts
.
Menu
:
: Manage multiple contacts as
on page 40.
on page 42.
My Local Profile
My local profile is your own contact record, listed under ME
in Contacts. You can send My local profile as a vCard via
Bluetooth or as an attachment.
40
Creating My Local Profile
1. From the Home screen, touch
2. Tou ch
Sending My Local Profile
You can send your profile as a vCard via Bluetooth to other
Bluetooth devices, or as an attachment.
1. From the Home screen, touch
2. Touch your profile to display your contact information.
3. Tou ch
4. Choose a sending method, then follow the prompts to
Set up profile
contact fields.
Contacts” on page 38.
send the profile.
, then enter your information
For more information, see “Creating
Menu
, then touch
Contacts
.
Contacts
.
Share namecard via
in the
.
Joining Contacts
Your device can synchronize with multiple accounts,
including Google, Corporate, and other providers, plus social
networking sites like Facebook. When you synchronize
contacts from these accounts with your device, you may
have multiple contacts for one person.

Joining contact records allows you to see all the contact’s
DRAFT For Internal Use Only
numbers and addresses together. Joining also helps you
keep your contacts updated, because any changes to
information in the respective accounts is automatically
updated the next time you synchronize with the account.
Joining contacts
1. From the Home screen, touch
2. Touch and hold on a contact, then select
3. Select a contact to join to the selected contact.
Contacts
Join contact
.
.
Separating contacts
1. From the Home screen, touch
2. Touch a contact to display its information.
3. Under the
contacts are joined to this one. Touch the
field to display joined contacts.
4. Touch next to a contact to remove it from the
displayed contact.
Connection
heading, icons show how many
Contacts and Accounts 41
Contacts
.
Connection

Exporting and Importing Contacts
DRAFT For Internal Use Only
You can export your contact list to and from USB storage
(your device’s memory), or an installed memory card.
Contacts are exported and imported as a special VCF file, and
contacts are sent as vCards.
Contacts
1. From the Home screen, touch
Menu
2. Touch
3. Select an option, then follow the prompts to complete
the operation:
• Import from USB storage
device memory.
• Export to USB storage
• Import from SD card
card.
• Export to SD card
• Send namecard via
information, see
page 42.
42
, then touch
: Copy contacts to an installed memory card.
“Sending Namecards (vCards)”
Import/Export
: Copy contacts that are saved in
: Copy contacts to device memory.
: Copy contacts from an installed memory
: Share contacts as vCards. For more
.
.
on
Sending Namecards (vCards)
You can send a contact namecard as a vCards via Bluetooth
to other Bluetooth devices, or as an attachment via Gmail or
Email.
Important!
Not all Bluetooth devices will accept contacts, and
not all devices support transfers of multiple
contacts. Check the target device’s documentation.
Contacts
➔
.
Send
1. From the Home screen, touch
Menu
2. Tou ch
namecard via
3. Touch contacts to mark them for sending, or touch
Select all
the check box for marked contacts.
4. Tou ch
Done
then follow the prompts to send the namecard:
• Bluetooth
“Bluetooth”
see
•Email
“Email”
, then touch
.
to mark all contacts. A check mark appears in
. At the prompt, choose a sending method,
: For more information about sending via Bluetooth,
on page 84.
: For more information about sending email, see
on page 47.
Import/Export
•Gmail
DRAFT For Internal Use Only
: For more information about sending Gmail, see
“Composing and Sending Gmail”
• Wi-Fi Direct
see see
: For more information about using Wi-Fi Direct,
“Wi-Fi Direct”
on page 82.
on page 50.
Backing Up Contacts
Use Backup Assistant Plus to save a copy of your Contacts to
a secure web site.
For more information, see “Backup Assistant+” on page 72.
Contacts
1. From the Home screen, touch
Menu
2. To uch
3. Follow the prompts to log in to your Backup Assistant
account.
, then touch
Backup
Contacts and Accounts 43
.
.

Favorites
DRAFT For Internal Use Only
Mark contacts with a star to identify them as Favorites.
Favorites display on the Favorites tab in Contacts, and are
indicated by the .
Creating Favorites
1. From the Home screen, touch
2. Touch and hold on a contact, then select
favorites
from the pop-up menu.
– or –
Touch a contact to display it, then touch at the top
right of the screen.
44
Contacts
Add to
.
Groups
Assign contacts to Groups to make searching for contacts
faster. Your device comes with pre-loaded groups you can
use to add your contacts, or you can create new groups.
Accessing Groups
From the Home screen, touch
Groups
.
Creating a New Group
1. From the Home screen, touch
Groups
.
Menu
➔
New
2. Tou ch
•
Touch
Group name
•
Touch
Add member
3. Touch to save the new group.
Editing a Group
1. From the Home screen, touch
Groups
.
2. Touch a Group to display it.
3. Tou ch
the group. For more information, see “Creating a New
Group” on page 44.
Menu
, then enter information:
to enter a Group Name.
to select members from Contacts.
➔
Edit
, then update information for
Contacts
Contacts
Contacts
➔
➔
➔

Deleting a Group
+
DRAFT For Internal Use Only
1. From the Home screen, touch
Groups
.
Menu
2. Touch
3. Touch a group to mark it for deletion, or touch
to mark all groups. When selected, a check mark
appears in the check box. You cannot delete preloaded groups.
4. Touch
Delete
group members
, then touch
, then choose
.
Contacts
Delete
.
Group only
or
Group and
➔
Select all
Adding Contacts to a Group
1. From the Home screen, touch
Groups
.
Group
2. Touc h a
member
3. Touch contact(s) to mark them for addition, or touch
Select all
mark appears in the check box.
4. To uch
Removing Contacts from a Group
1. From the Home screen, touch
2. Touc h a
3. To uch
4. Touch contact(s) to mark them for removal, or touch
Select all
mark appears in the check box.
5. To uch
to display it, then touch
.
to mark all contacts. When selected, a check
Done
to add the selected contact(s).
Group
to display it.
Menu
, then touch
to mark all contacts. When selected, a check
Done
to remove the selected contact(s).
Contacts and Accounts 45
Contacts
Contacts
Remove member
➔
Add
➔
.
Groups
.
Sending an Email to Group Members
DRAFT For Internal Use Only
Create a new email message, addressed to the group’s
members.
Contacts
➔
Groups
1. From the Home screen, touch
Group
2. Touch a
3. Touch
4. Touch contacts to mark them as recipients for the new
message, then touch
5. The new message opens, with the marked contacts as
recipients. Continue creating the message, as desired.
For more information, see “Composing and Sending
Email” on page 49.
46
to display it.
Menu
, then touch
Done
Send email
.
.
.
Section 4: Messaging
DRAFT For Internal Use Only
Types of Messages
Your device supports these types of messages:
•
: Send and receive email from your email accounts,
including Corporate mail.
•
Gmail
: Send and receive Gmail from your Google account.
•
Google Talk
•
Messenger
Note:
: Chat with other Google Talk users.
: Chat with other Google+ Messager users.
Messaging service availability depends on your network
and service plan. Compatible Device required. Consult
Verizon Wireless for more information.
Email
Send and receive email using popular email services.
Setting Up Email Accounts
You can configure Email for most accounts in just a few
steps.
1. From the Home screen, select
Email
.
2. The first time you set up an email account, select your
email provider.
– or –
For subsequent accounts, touch
➔
, then select your email provider.
3. Follow the prompts to set up your email account.
Note:
For more information on setting up your email, visit the
Smartphone Resource Center at:
https://smartphones.verizonwireless.com
Apps
➔
Menu ➔
Messaging 47
Settings

Deleting Email Accounts
DRAFT For Internal Use Only
1. From the Home screen, select
Email
.
Menu
2. Touch
3. Select email account(s) for deletion, then touch
DELETE
➔ Settings
.
➔ .
Apps
➔
Syncing Email Accounts
Syncing refreshes your device with the account’s servers.
When you set up an email account, you can choose whether
the account syncs in the background, or manually.
From the Home screen, select
Email
➔
Sync
.
48
Apps
➔
Email Settings
Use settings to configure handling of your email.
Note:
Available settings depend on the email provider.
1. From the Home screen, select
Email
.
Menu
2. Tou ch
options:
• Display after deleting message
after you delete a message.
• Message preview line
text to display in the preview screen.
•Email title
• Confirm deletions
confirm when you delete messages.
• Quick responses
insert into emails.
3. Touch an account to configure specific settings.
Available options depend on the account.
➔ Settings
: Choose the number of lines of email
: Choose how emails are titled in the preview screen.
: When enabled, Email will prompt you to
: View and manage text phrases that you can
Apps
➔ General preferences
: Choose the screen to display
➔
for

Composing and Sending Email
DRAFT For Internal Use Only
1. From the Home screen, select
Email
.
2. If you have multiple accounts set up, choose an
account from the menu at the top of the screen.
COMPOSE
3. Touch
recipients and the email text.
4. While composing a message, use these options:
•
Touch Menu for options. Available options depend on the
type of email account.
•
Touch Attach
options depend on the type of email account.
5. Touch
, then touch fields to enter
to add a file to the message. Available
Send
to send the message.
Apps
➔
Gmail
Send and receive emails via Gmail, Google’s web-based
email.
From the Home screen, select
Gmail
.
Setting Up Your Gmail Account
The first time you launch Gmail, your device will prompt you
to set up your Google account, if you haven’t already set it
up. If you set up your Google account on your device, Gmail
is set up automatically
1. From the Home screen, select
Gmail
.
2. Follow the prompts to sign in, or create a new account.
3. The device communicates with the Google server to set
up your account and synchronize your email.
Note:
You can use more than one Google account on your
device. To add another account, use the
Accounts
option.
Apps
➔
Apps
➔
Menu
Messaging 49
➔

Refreshing Your Gmail Account
DRAFT For Internal Use Only
Syncing refreshes your device with the account’s servers.
When you set up an email account, you can choose whether
the account syncs in the background, or manually.
From the Home screen, select
Gmail ➔
Sync
.
Apps
➔
Gmail Settings
Use settings to configure your Gmail preferences.
Apps
1. From the Home screen, select
Gmail
.
2. Touch
Menu ➔ Settings
for options.
➔
Composing and Sending Gmail
1. From the Home screen, select
Gmail
.
Compose
2. Touch
message. While composing, touch
options.
3. To send the message, touch
50
, then touch fields to compose the
Apps
Send
.
➔
Menu
for
Google Talk
Chat with other Google Talk users.
Note:
Talk requires that you have a Google account set up on
your device. For more information, see “Setting Up Your
Accounts” on page 37. If you set up your Google
account, you are automatically logged in.
From the Home screen, select
Apps
➔
Tal k
.

Section 5: Applications
DRAFT For Internal Use Only
Managing Applications
Apps displays all applications installed on your device,
including apps you download and install.
You can change the way apps appear on the screen, uninstall
apps you’ve downloaded, and share apps with friends. When
you install new apps, new screens are added to hold them.
Tip:
You can place shortcuts to apps on the Home screen, for
quick access to the application. For more information, see
“Shortcuts” on page 32.
Downloading and Installing Apps
Find new apps to download and install on your device:
•
Play Store
page 74.
•
page 75.
S Suggest
: For more information, see
: For more information, see
“Play Store”
“S Suggest”
on
on
Uninstalling Apps
You can uninstall apps you download and install. Pre-loaded
apps cannot be uninstalled.
Apps
1. From the Home screen, touch
Menu
2. To uch
3. Apps that can be uninstalled show on their icon.
Touch , then follow the prompts to uninstall the
app. Pre-loaded apps cannot be uninstalled.
➔ Uninstall
.
.
Applications 51

Customizing the Apps Screens
DRAFT For Internal Use Only
Choosing a view
By default, app icons appear in Grid view. You can change
the view to list view.
1. From the Home screen, touch
2. Touch Menu
3. Choose an option:
• Customizable Grid
touch and hold on apps to move them from screen to screen.
• Alphabetical grid
• Alphabetical list
Apps screen options
1. From the Home screen, touch
2. Touch Menu
•Play Store
apps to download.
•Edit
: Touch and hold an app icon for these options:
–
Drag it to a new location.
–
Drag it to to create a new folder to contain the icon.
–
Drag it to to create a new apps screen and place the icon
on it.
52
, then touch View type
: The default view, which allows you to
: Icons are arranged in a grid, in A-Z order.
: Icons display in a list, sorted from A-Z.
for options:
: Launch Google™ Play Store, to browse for new
Apps.
.
Apps.
–
Drag it to to launch Application manager to view information
about the app. For more information, see
manager”
–
Drag to (if available) to remove the icon. The trashcan is
only available for apps you’ve installed. Pre-loaded apps cannot
be removed.
•
Create folder: Create a new folder to contain apps.
• Uninstall
device. Preloaded apps cannot be uninstalled.
• Downloaded applications
downloaded.
•View type
• Share apps
pre-loaded apps) to share via Bluetooth, Email, Gmail,
Google+, S Note, or Wi-Fi Direct.
• Hide applications/Show hidden applications
whether app icons are visible in Apps. Hiding an icon does not
remove the app from your device.
on page 108.
: Remove an app that you downloaded from your
: Display all apps you’ve
: Configure the apps screen.
: Select apps you’ve downloaded (not available for
“Application
: Control

AllShare Play
DRAFT For Internal Use Only
Use AllShare Play to stream photos, music, and videos from
web storage, or between your device and other DLNA (Digital
Living Network Alliance) certified devices.
•
Visit: www.allshareplay.com for more information.
•
For more information about DLNA certified products, visit:
www.dlna.org/home
You must be signed in to your Samsung account to use
AllShare Play. For more information, see “Your Samsung
Account” on page 10.
Note:
AllShare Play uses Wi-Fi to communicate with other
devices. Before launching AllShare Play, connect to the
same Wi-Fi network as the device you want to stream
with. For more information, see “Wi-Fi” on page 80.
Apps
1. From the Home screen, touch
AllShare Play
2. The first time you launch AllShare Play, read the user
agreement and follow the prompts to continue.
3. If you are not already signed in to your Samsung
account, touch
.
Sign in
and follow the prompts.
➔
4. Touc h
•Registered Storage
• Registered Devices
• Setting up web services
• Auto Upload photos from mobile
• Video quality settings
•Lock AllShare Play
• Language
• About
•Contact Us
Menu
for options:
: Add a Web storage location, required to
use AllShare Play.
: Choose the source of streaming images
and videos. Defaults to your device; use the main screen to add
more external devices.
: Set up external Web services such
as Facebook, Twitter, YouTube, etc.
: Set up automatic upload of
images from your device to storage locations specified within
the Web storage list.
: Configure video quality for streamed
video content.
: Restrict access to AllShare Play by
requiring the Samsung account password. Touch
AllShare Play
an email account set up on your device).
to enable or disable locking.
: Select a display language.
: Display application information.
: Contact the AllShare team via a email (if you have
Applications 53
Locking

Setting Up Web Storage
DRAFT For Internal Use Only
SugarSync is an optional Web storage service, offering up to
5GB of storage space, to store your files and share them in
the “cloud”.
Note:
If you are using another Web storage service, log into
that service first before using AllShare Play.
Apps
1. From the Home screen, touch
AllShare Play
2. Touch , then touch media to share.
3. Sign in to your SugarSync account, or set up a new
account by touching
Follow the prompts to complete sign-in.
4. After signing in, the Web storage icon or name appears
in the Web storage area of the main screen.
54
.
Sign up
➔
➔
SugarSync Sign Up
.
Sharing Media with a Target Device
Important!
Make sure all communicating devices are
connected to the same Wi-Fi.
1. Launch AllShare on the target device (such as an
Internet TV, Samsung Tablet, etc.).
2. From the Home screen, tap ➔
3. Select your device name from the
4. Touch a category tab (Pictures, Music, Movies, Files, or
Info), then select file(s).
•
Touch and hold to select multiple files.
•
Files in web storage show .
•
Selected files show a check-mark.
5. Touch to begin streaming the selected files.
6. On the target device, select Allow continue. While
2
sharing, displays in the Status bar to indicate your
device is the media source.
AllShare Play
Devices
list.
.

Amazon
DRAFT For Internal Use Only
Shop with Amazon.
From the Home screen, touch
Amazon
.
Apps
➔
Amazon Kindle
Use the Amazon KindleTM application to download books for
reading, right on your device.
Note:
You must be registered with Amazon to use the Kindle
application. At the prompt, enter your Amazon account
credentials.
From the Home screen, touch
Amazon Kindle
.
Apps
➔
Amazon MP3
Shop for music with Amazon.
From the Home screen, touch
Amazon MP3
Note:
Airtime or download charges may apply when using
Apps.
.
Apps
➔
Audible
Download digital audio books and listen on your device.
From the Home screen, touch
Audible
.
Apps
➔
Calculator
Use your device’s Calculator to perform mathematical
calculations.
From the Home screen, touch
Calculator
.
Apps
➔
Applications 55
Calendar
DRAFT For Internal Use Only
Record events and appointments to manage your schedule.
Tip:
A Calendar widget is available in Widgets. For more
information about placing widgets on the Home screen,
see “Widgets” on page 31.
From the Home screen, touch
Calendar
.
Apps
➔
Sending Events
Send events as vCalendar files to other Bluetooth devices, as
message attachments, or via Wi-Fi Direct.
Apps
1. From the Home screen, touch
Calendar
.
2. Touch an event to display its details.
Menu
3. Touch
prompts to select a sharing method and share the
event.
56
, then touch Share via
➔
, then follow the
Camera
Use the Camera to take pictures and record video.
Sharing your photos and videos
Your device supports Share Shot, an exciting feature for
sharing your photos and videos with your friends and family.
Use Share Shot to automatically share your photos and
videos with other Share Shot devices via Wi-Fi Direct.
Important!
Do not take photos of people without their
permission.
Do not take photos in places where cameras are
not allowed.
Do not take photos in places where you may
interfere with another person’s privacy.
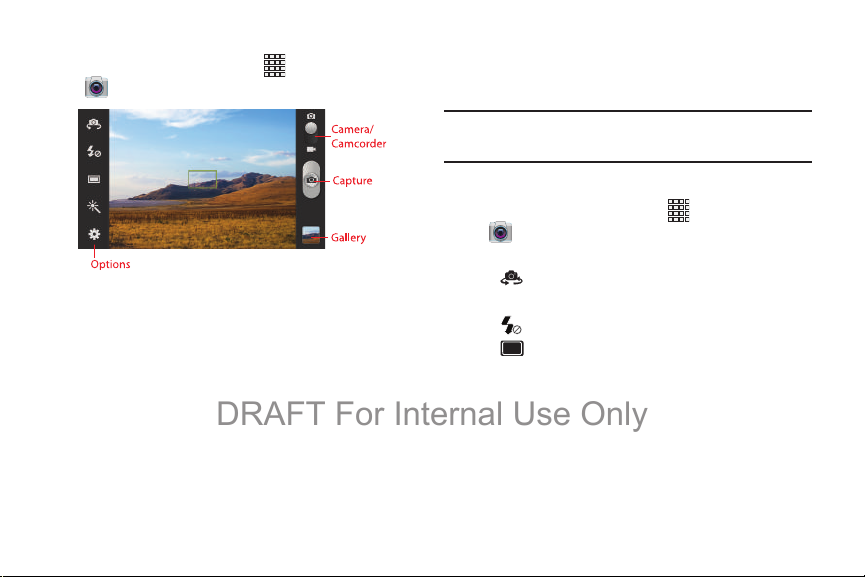
Taking Pictures
DRAFT For Internal Use Only
1. From the Home screen, touch
Camera
.
2. Using the display as a viewfinder, compose your
picture by aiming the lens at the subject. You can
rotate the device to any position, and the screen
controls rotate to make taking pictures easy.
3. As you compose a picture, the Camera automatically
focuses the shot (the focus bracket turns green), or:
•
Touch the screen to focus on the area you touched.
•
To zoom, touch the screen with two fingers and move your
fingers together to zoom in, or apart to zoom out, or press the
Volume Key.
Apps
➔
•
Configure other options. For more information, see
Options”
on page 57.
4. To uch
Tip:
Capture
to take a picture.
After taking a picture, touch
Gallery. For more information, see “Gallery” on page 63.
Gallery
to view the picture in
Picture Options
1. From the Home screen, touch
Camera
.
2. Use these options to configure the camera:
• Self portrait
front camera, for self-portraits.
• Flash
• Shooting mode
Some modes are not available for Self-portraits.
–
Single shot
–
Best photo:
best to save.
–
Best face
face, based on open eyes, smile, movement, etc.
: Switch between the back camera and the
: Choose Off, On, or Auto flash.
: Choose an automatic shooting mode.
: Take a single photo.
Take 8 pictures automatically, then choose the
: Take 5 pictures, then select the best image of each
Apps
➔
Applications 57
“Picture

–
DRAFT For Internal Use Only
Face detection
subject’s face to zoom in and focus on their face.
–
Panorama
use the on-screen guideline to move the viewfinder and take the
next 7 shots automatically.
–
Share shot
Wi-Fi Direct. For more information, see
on page 61.
–
HDR
increase image detail.
–
Buddy photo share
recognizes faces from Contacts, so you can easily share the
picture with your friends.
–
Beauty
effect.
–
Smile shot
face. If a smile is detected, the picture is taken automatically.
–
Low light
• Effects
• Settings
58
: While composing the picture, double-tap a
: Touch the Camera button to take a picture, then
: Share the pictures you take, with other devices via
“Using Share Shot”
: Take pictures in HDR (High Dynamic Range) mode to
: When you take a picture, the Camera
: Adjust the contrast to create a smooth facial feature
: Touch the Camera button to focus on the subject’s
: Adjust exposure for low light conditions.
: Choose an effect to apply to pictures.
–
Edit shortcuts
Touch and drag shortcuts between the toolbar and the list.
–
Burst shot
time you touch Capture.
–
Self-portrait
front Camera.
–
Flash
–
Shooting mode
–
Effects
–
Scene mode
you’re taking.
–
Exposure value
–
Focus mode
–
Timer
and taking a picture.
–
Resolution
–
White balance
–
ISO
–
Metering
–
Outdoor visibility
outside.
: Choose shortcuts to appear on the toolbar.
: When On, Camera takes multiple pictures each
: When On, the Camera takes pictures with the
: Choose the default flash mode.
: Choose the default mode for taking pictures.
: Apply an effect to pictures.
: Choose a mode to match the kind of pictures
: Set the default brightness level.
: Set the default focus mode.
: Set a delay to wait between touching the Camera button
: Choose a size for the image.
: Choose a setting for the light source.
: Choose a setting for imaging sensitivity.
: Select a method for measuring light.
: Adjusts the screen for improved viewing

–
DRAFT For Internal Use Only
Auto contrast
–
Guidelines
composition.
–
Anti-Shake
movement.
–
GPS Tag
picture’s details.
–
Contextual filename
part of the filename, if GPS Tag is On.
–
Take photos using voice
by speaking words such as “Capture”, “Shoot”, “Smile”, or
“Cheese”.
–
Save as flipped
image of the screen display.
–
Image quality
–
Storage
choose the default save location for new pictures to device
memory or the memory card.
–
Reset
: Allow automatic light/dark adjustment.
: Enable or disable an on-screen grid to aid in photo
: When enabled, minimizes the effect of camera
: When On, GPS location information is saved in the
: When On, the location is included as
: When On, you can capture pictures
: When On, pictures are saved as a mirror-
: Choose a quality level for pictures you take.
: If an optional memory card (not included) is installed,
: Set all Camera settings to the defaults.
Recording Videos
Use the Camera to record video.
Important!
Do not take videos of people without their
permission.
Do not take videos in places where cameras are
not allowed.
Do not take videos in places where you may
interfere with another person’s privacy.
1. From the Home screen, touch
Camera
➔
Camera/Camcorder
Apps
➔
.
Applications 59

2. Using the display as a viewfinder, compose your shot
DRAFT For Internal Use Only
by aiming the lens at the subject. You can rotate the
device to any position, and the screen controls rotate to
make recording easy.
3. As you compose a shot, the Camera automatically
focuses the shot (the focus bracket turns green), or you
can:
•
Touch the screen to focus on the area you touched.
•
To zoom, touch the screen with two fingers and move your
fingers together to zoom in, or apart to zoom out, or press the
Volume Key.
•
Configure options. For more information, see
on page 60.
Options”
4. To start recording, touch
•
Touch to capture a still shot. This feature is not available
when the Anti-shake option is enabled.
•
Touch the screen to focus on the area you touched.
•
Touch the
Stop
button.
Tip:
After recording video, touch
Gallery. For more information, see “Gallery” on page 63.
60
Record
Gallery
“Video
. During recording:
to review the video in
Video Options
Configure the camcorder.
1. From the Home screen, touch
Camera
➔
Mode
.
2. Use these options to configure the camera:
• Self recording
• Flash
• Recording mode
–
Normal
–
Limit for MMS
as a message attachment.
–
Slow motion/Fast motion
• Effects
• Settings
–
Edit shortcuts
Touch and drag shortcuts between the toolbar and the list.
–
Self-recording
Camera.
–
Flash
: Choose the default flash mode.
–
Recording mode
–
Effects
: Record video with the front lens.
: Choose Off or On.
: Choose a recording mode, from:
: Record a video of any length.
: Restrict the length of the video so it can be sent
: Choose a frame speed.
: Choose an effect to apply to videos.
:
: Choose shortcuts to appear on the toolbar.
: When On, the Camera records with the front
: Choose the default recording mode.
: Apply an effect to videos.
Apps
➔

–
DRAFT For Internal Use Only
Exposure value
–
Timer
starting recording.
–
Resolution
–
White balance
–
Outdoor visibility
outside.
–
Guidelines
composition.
–
Anti-Shake
movement.
–
GPS Tag
video’s details.
–
Contextual filename
part of the filename, if GPS Tag is On.
–
Save as flipped
image of the screen display.
–
Video quality
–
Storage
optional memory card is installed.
–
Reset
: Set the default brightness level.
: Set a delay to wait between touching Record and
: Choose a size for the image.
: Choose a setting for the light source.
: Adjusts the screen for improved viewing
: Enable or disable an on-screen grid to aid in photo
: When enabled, minimizes the effect of camera
: When On, GPS location information is saved in the
: When On, the location is included as
: When On, pictures are saved as a mirror-
: Choose a quality setting for videos.
: Choose the default save location for videos, if an
: Set all settings to the defaults.
Sharing Pictures and Video
Using Share Shot
Set up a connection with other Wi-Fi Direct devices, then
take pictures to share them in real-time.
1. Turn on Wi-Fi Direct. For more information, see
“Turning Wi-Fi Direct On or Off” on page 82.
2. Enable Share Shot shooting mode in Camera:
•
From the Home screen, touch
•
Touch
Settings ➔
•
Touch , then select devices to share your pictures with.
3. Take photos. For more information, see “Taking
Pictures” on page 57. The photos you take while in
Share Shot mode are shared automatically with
connected devices, and your device displays an alert in
the Status bar and Notifications.
Apps
➔
Shooting mode ➔
Applications 61
Camera
Share shot
.
.

Clock
DRAFT For Internal Use Only
The Clock application includes these features:
•
Alarm
: Create alarms to go off once, or to repeat.
•
World clock
•
Stopwatch
•
Timer
•
Desk clock
viewing.
62
: Display the time and date in any time zone.
: Record lap times.
: Measure elapsed time.
: Display the date and time in large format, for easy
From the Home screen, touch
Clock
.
Apps
➔
Color
Use Color for Facebook to instantly capture and share live
video broadcasts and photos with friends on Facebook. With
Color, you can share everyday moments LIVE, as they
happen.
For more information about Color, visit:
From the Home screen, touch
Color
.
www.color.com
Apps
➔
Contacts
Use Contacts to store information for your friends, family and
colleagues, to make contacting them easy.
For more information, see “Contacts” on page 38.
From the Home screen, touch
Contacts
.
Apps
➔
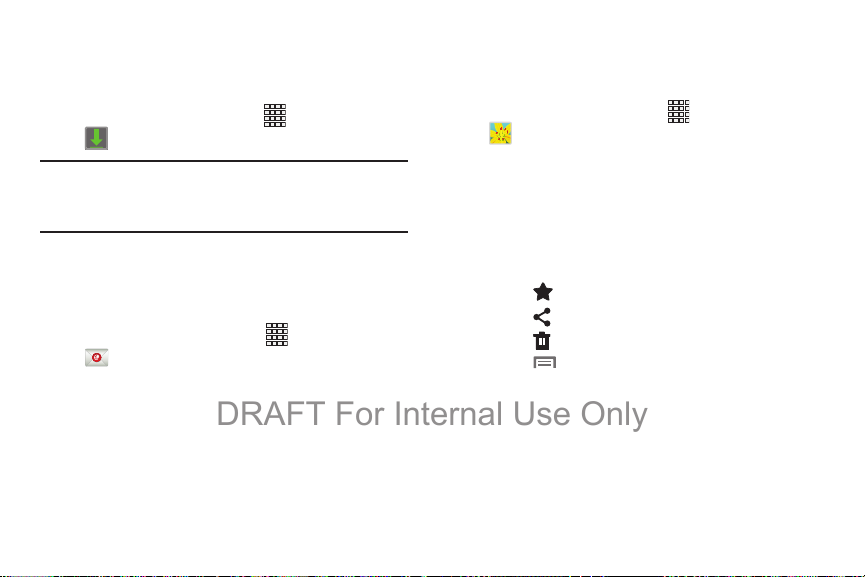
Downloads
DRAFT For Internal Use Only
View and manage files and other items you download to your
device.
From the Home screen, touch
Downloads
Note:
Applications you download in Google Play™ Store are
managed in Play Store, and will not appear in
Downloads.
.
Apps
➔
Send and receive email using popular email services.
For more information, see “Email” on page 47.
From the Home screen, select
Email
.
Apps
➔
Gallery
Use Gallery to view, capture, and manage pictures and
videos.
1. From the Home screen, touch
Gallery
.
2. Use these options:
•
To zoom in, place two fingers on the screen and move them,
closer together to zoom in or out, or apart to zoom out. You can
also double-tap to zoom all the way in or out. Touch and drag
your finger on the screen to move the picture around on the
screen.
•
Tou c h
Favorites
to mark the picture as a favorite.
•
Tou c h
Share via
to send the picture.
•
Tou c h
Delete
to erase the picture.
•
Touch Menu
–
Slideshow
–
Face tag
you can touch to add tag information.
–
Tag buddy
add to pictures, from Weather, Location, Person, and/or Date.
for options:
: Create a slideshow to view all pictures and videos.
: When enabled, identifies faces with a yellow box, so
: Turn automatic tags On or Off, and choose tags to
Apps
➔
Applications 63

–
DRAFT For Internal Use Only
Add photo note
notes are saved to the pictures on your device, but are not
included when you share the picture.
–
Copy to clipboard
–
Rotate left/Rotate right
–
Crop
–
Edit
: Launch Paper Artist to modify the picture.
–
Set as
–
Buddy photo share
the picture.
–
Print
printer.
–
Rename
–
Scan for nearby devices
sharing (available when Wi-Fi is turned On).
–
Details
64
: Add a note to the “back” of a photo. Photo
: Create a copy, to paste into other apps.
: Change the picture’s orientation.
: Change the picture’s size.
: Assign the picture as a Contact photo, or as wallpaper.
: Send the picture to the people tagged in
: Print the picture via Wi-Fi to a compatible Samsung
: Change the picture’s filename.
: Search for nearby Wi-Fi devices for
: View information about the picture.
Setting a Picture as a Contact Photo
Set a picture as a contact’s photo.
Apps
1. From the Home screen, touch
Gallery
.
2. Touch a category, then touch a picture to select it.
3. Touch
4. Select a contact, or create a new contact, with the
selected picture as the contact’s photo.
Menu ➔ Set as ➔ Contact photo
➔
.
Setting a Picture as Wallpaper
Set a picture as the wallpaper for the Home and Lock
screens.
Apps
1. From the Home screen, touch
Gallery
.
2. Touch a category, then touch a picture to select it.
3. Touch
4. Select an option, from Home and lock screens, Home
screen wallpaper, or Lock screen wallpaper. Use the
crop tool to edit the picture, then touch
Menu ➔ Set as
.
➔
Done
.

Sharing pictures and video
DRAFT For Internal Use Only
You can share pictures and videos via Email, Bluetooth, or
popular sharing services.
Apps
Share
➔
.
1. From the Home screen, touch
Gallery
.
2. Touch an album to display thumbnails, then select
items for sharing:
•
To select an entire album, touch Menu ➔ while viewing
categories, then touch the category to select all pictures in the
category.
•
To select multiple pictures or videos from a category, touch
Menu while viewing the thumbnails. Touch thumbnails to
mark them for sharing, then touch
3. Touch an option, then follow the prompts.
Gmail
Send and receive emails via Gmail, Google’s web-based
email.
For more information, see “Gmail” on page 49.
From the Home screen, touch
Gmail
.
Apps
➔
Use Google to search the Web.
Apps
1. From the Home screen, touch
Google Search
2. Enter search criteria. Search results display
automatically. Touch a search result to display it in a
browser window.
Tip:
You can also access Google Search from the Google
widget on the Home screen.
.
➔
Applications 65

Google+
DRAFT For Internal Use Only
Google+ makes messaging and sharing with your friends a
lot easier. Set up Circles of friends, visit the Stream for
updates from your Circles, use Messenger, or use Instant
Upload to automatically upload photos and videos from your
device to your private album on Google+.
.
www.google.com/+
Apps
➔
For more information, visit:
From the Home screen, touch
Google+
66
Group Cast
While viewing documents, pictures, videos, and music, you
can share them in real-time with your friends.
Note:
Target devices must be connected to the same Wi-Fi
network as your device.
Apps
1. From the Home screen, touch
Group Cast
2. If you’re not already connected to Wi-Fi, touch to
access Wi-Fi settings.
3. Under
the prompts to select media to share.
4. Enter a PIN code. Target devices will need to enter this
PIN to join your Group Cast.
5. You can now interact with the screen on your device.
Target devices will instantaneously display changes.
.
Start
, choose a media type to share, then follow
➔

Help
DRAFT For Internal Use Only
Get information about using your device, including videos,
useful tips, and a user manual.
From the Home screen, touch
– or –
From the Home screen, touch
Help
.
Apps ➔
Help
.
IMDB
Search for information, view, rate movies, TV titles,
celebrities, actors, actresses, directors and other crew
members.
From the Home screen, touch
Apps
➔
IMDB
.
Internet
Your device is equipped with a full HTML Browser, which
allows you to access the internet.
From the Home screen, touch
– or –
From the Home screen, touch
Internet
.
Internet
Apps
.
➔
Kies Air
It’s time to share wirelessly. Kies Air makes it easy to
manage content saved on your device via your desktop or
mobile browser using Wi-Fi technology. Without any need for
cables, you can easily play and transfer media files, manage
data, and more.
For more information, visit:
From the Home screen, touch
Kies Air
www. samsung.com/us/kies
.
Apps
➔
Applications 67
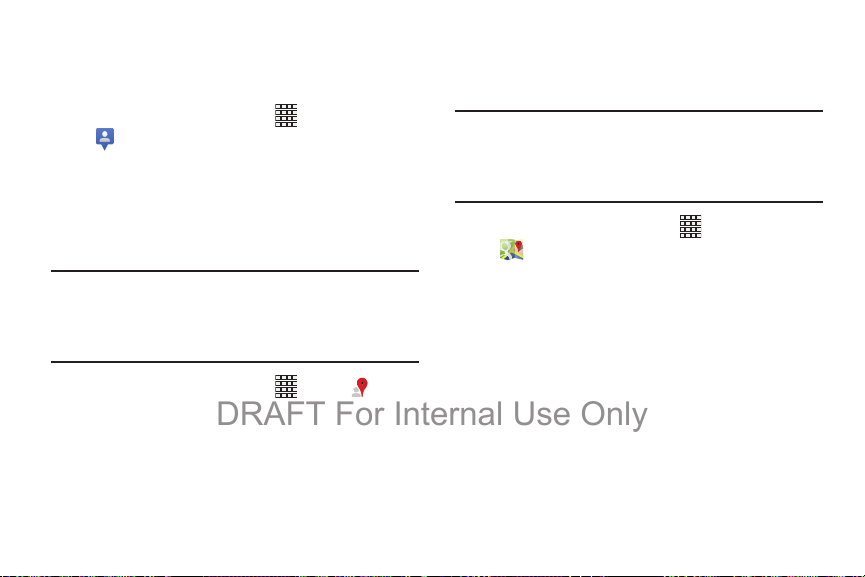
Latitude
DRAFT For Internal Use Only
Use Google Latitude to locate your friends on a map, and
share or hide your location.
From the Home screen, touch
Latitude
.
Apps
➔
Local
Google Places is now Google Local, to use your location to
help you find destinations, such as restaurants, bars, hotels,
attractions, ATMs and gas stations, or you can enter a
location.
Note:
You must enable location services to use Local, and
some features require Standalone or Google location
services. For more information, see “Location services”
on page 121.
From the Home screen, touch
68
Apps ➔
Local
.
Maps
Use Google Maps to find your current location, plus get
directions and other location-based information.
Note:
You must enable location services to use Maps, and
some features require Standalone or Google location
services. For more information, see “Location services”
on page 109.
From the Home screen, touch
Maps
.
Apps
➔

Media Hub
DRAFT For Internal Use Only
Samsung Media Hub is your one stop for the hottest movie
and TV content. Preview, rent, or buy blockbuster hits as well
as classic movies and TV shows.
For more information, visit:
http://www.samsung.com/us/mediahub/
Note:
Renting or purchasing content in Media Hub requires a
Samsung account.
Apps
1. From the Home screen, select
Media Hub
.
2. Browse content, then follow the prompts to buy or rent.
You must have a Samsung account to rent or buy
media.
➔
Messenger
Google+ Messenger lets you chat and coordinate with any of
your friends, all at the same time.
For more information, visit:
From the Home screen, touch
Messenger
www.google.com/+
.
Apps
➔
Mobile Hotspot
Use Mobile Hotspot to share your device’s mobile internet
connection with up to 10 devices, using your device as the
mobile hotspot.
For more information, see “Mobile Hotspot” on page 83.
From the Home screen, touch
Mobile Hotspot
.
Apps
➔
Music Hub
Music Hub is all the music you want in one integrated mobile
and web service. Upload your music collection to the cloud,
and access our entire catalog of millions of songs. Enjoy
personal and genre radio and discover new music every day
with customized recommendations.
For more information, visit:
From the Home screen, touch
Music Hub
www.musichub.com
.
Apps
➔
Applications 69

Music Player
DRAFT For Internal Use Only
Music Player plays songs stored on your device or an
installed memory card.
1. From the Home screen, select
Music Player
2. Music Player scans for songs stored in device memory,
or on an optional installed memory card (not included),
and displays your songs on the
Artists, Music Square, Folders
tabs.
3. Touch a song to begin playback. During playback, use
the sound and playlist controls:
• Volume
then touch and drag on the scale to set volume, or press the
Volume Key on the side of the device to adjust playback
volume. If you have motion settings turned on, place the device
screen-down to mute playback.
• Shuffle
When disabled, songs play in the order they appear in List view.
• Repeat
songs, or disable repeat mode.
70
.
: Touch to activate on-screen volume control,
: When enabled, songs play in random order.
: Touch to repeat the current song, repeat all
Apps
➔
All, Playlists, Albums
, and
Backup+ Music
,
• List / Now Playing
view of songs. Touch
title and details.
•
Touch
to choose an effect for music playback.
•
Touch to advance to the next song. Touch and hold
to scan forward through the current song.
•
Touch to go back to the previous song. Touch and hold
to scan backward through the current song.
•
Touch to pause playback. Touch to resume playback.
: Touch
Now Playing
to display the current song
Creating a Playlist
1. From the Home screen, select
Music Player ➔ Playlists
2. Touch
for the playlist.
3. Tou ch
the playlist.
Menu ➔ Create Playlist
OK
, then touch Add music to choose music for
.
List
to switch to a list
Apps
➔
, then enter a name
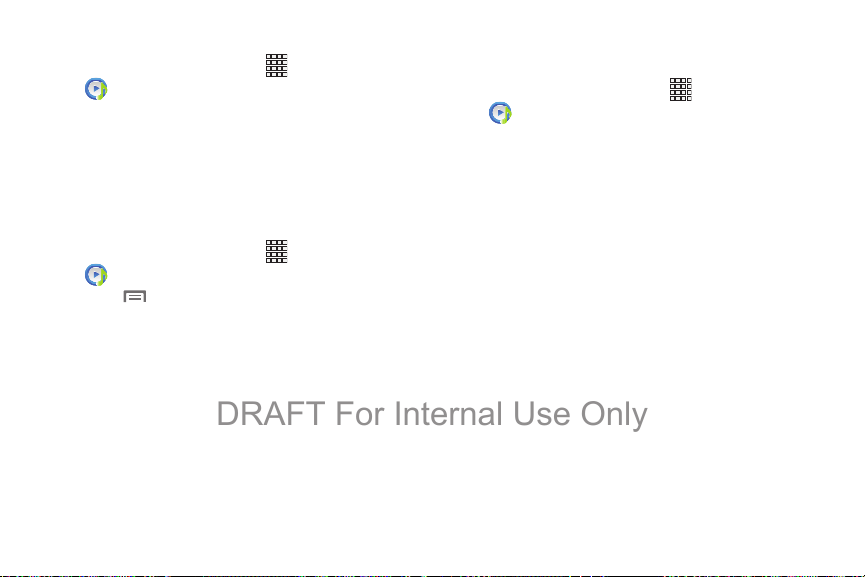
Adding a song to a playlist
DRAFT For Internal Use Only
1. From the Home screen, select
Music Player
2. Touch and hold on a song, then choose
from the pop-up menu.
3. Touch a playlist to add the selected song to it, or touch
Create new playlist
selected song to it.
.
to create a new playlist and add the
Apps
➔
Add to playlist
Adding multiple songs to a playlist
1. From the Home screen, select
Music Player
2. Touch
3. Touch songs to select them, or touch
Done
touch
4. Select a playlist, or touch
a new playlist.
.
Menu ➔ Add to playlist
.
Apps
➔
.
Select all
Create new playlist
, then
to create
Setting a Song as a Ringtone
You can set a song as an alarm tone.
1. From the Home screen, select
Music Player
2. Touch and hold on a song, then touch
choose from these options:
• Alarm tone
alarm, or for an existing alarm.
.
: Set the song as the alarm ringtone for a new
Apps
➔
Set as
and
Applications 71
My Files
DRAFT For Internal Use Only
Find, view and manage files stored on an installed memory
card. If the file is associated with an application on your
device, you can launch the file in the application.
Apps
1. From the Home screen, touch
My Files
.
2. Tap a folder and swipe your finger on the screen to
browse files.
3. Touch a file to open it (if the file is associated with an
application).
4. While browsing files, use these controls:
•
Touch Up
•
Touch Home
•
Touch
72
to go back up to a higher directory.
to go back to the root directory.
Menu
for options.
➔
My Verizon Mobile
View details and manage your Verizon Wireless account.
Note:
No airtime or minute charges apply when accessing My
Verizon Mobile.
From the Home screen, touch
My Verizon Mobile
.
Apps
➔
Navigation
Use Google Navigation to search for locations, and get turnby-turn directions.
Note:
You must enable location services to use Navigation,
and some features require Standalone or Google
location services. For more information, see “Location
services” on page 109.
From the Home screen, touch
Navigation
.
Apps
➔
NFL Mobile
DRAFT For Internal Use Only
Play the popular game on your device.
From the Home screen, touch
NFL Mobile
.
Apps
➔
Paper Artist
Create your own artwork, or import a picture from Gallery to
add special touches.
From the Home screen, touch
Paper Artist
.
Apps
➔
Play Books
Google Books is now Google Play™ Books. Discovering your
favorite books and authors has never been easier. With
Google Play Books, you can shop the world's largest
selection of ebooks and read them anywhere you like - on a
tablet, phone, ereader, or the Web. You’ll need to have a
Google account set up on your device to download books.
From the Home screen, touch
Play Books
.
Apps
➔
Play Magazines
Subscribe to your favorite magazines, and have them
available to ready on your device any time, in any place.
From the Home screen, touch
Play Magazines
.
Apps
➔
Applications 73

Play Movies & TV
DRAFT For Internal Use Only
With Google Play™ Movies & TV, you can rent thousands of
different movies, to watch instantly, or download for offline
viewing later. You’ll need to have a Google account set up on
your device to download movies.
From the Home screen, touch
Play Movies & TV
.
Apps
➔
Play Music
With Google Play™ Music, you can play music you’ve
downloaded, and music you copied from your computer.
You’ll need to have a Google account set up on your device to
download music.
From the Home screen, touch
Play Music
74
.
Apps
➔
Play Store
Android Market is now Google Play™ Store, where all your
favorite books, movies, apps, and games are all in one place
that’s accessible from the Web and your Android device.
You’ll need to have a Google account set up on your device to
download a new application.
From the Home screen, select
Play Store
.
Apps
➔
Polaris Office
Manage Microsoft Office documents, and PDF files, online or
offline.
From the Home screen, touch
Polaris Office.
Apps
➔

S Note
DRAFT For Internal Use Only
Record ideas instantly and freely with memos containing
text, pictures, handwritten notes or drawings, and voice
recordings.
From the Home screen, select
S Note
.
Tip:
To uch
Menu ➔ Tut or ia l
to learn more about S Note.
Apps
➔
S Suggest
S Suggest presents recommendations for popular
applications you can install on your device.
From the Home screen, select
S Suggest
.
Apps
➔
S Voice
Use S Voice to speak commands to perform operations on
your device, and to speak criteria for searches and other
operations. Just speak naturally, and S Voice understands
what you’re looking for. use the power of S Voice to find
everything from directions to trivia answers to the current
weather forecast.
Apps
1. From the Home screen, select
S Voice
.
2. Say “Hi Galaxy”, or touch to wake up
S Voice, then speak a command or question.
Touch for a list of commands, then touch a
command to see examples.
3. Touc h
your preferences.
Tip:
You can launch S Voice from most unlocked screens by
pressing the
Menu ➔ Settings
Home Key
to configure settings to
twice.
➔
Applications 75

Settings
DRAFT For Internal Use Only
Configure your device to your preferences.
For more information, see “Settings” on page 91.
From the Home screen, touch
Settings
.
Apps
➔
Setup Wizard
Use the Setup wizard to quickly configure your device.
From the Home screen, touch
Setup wizard
76
.
Apps
➔
Talk
Chat with other Google Talk users.
Note:
Talk requires a Google account. For more information,
see “Setting Up Your Accounts” on page 37. When you
set up your Google account on your device, you are
automatically logged in.
From the Home screen, select
Apps
➔
Tal k
.
Video Player
DRAFT For Internal Use Only
Use Video Player to view and manage videos stored on an
installed memory card, or shop for new videos.
1. From the Home screen, touch
Video player
2. Video Player scans for videos stored in device memory,
or on an optional installed memory card, and displays
your videos on the
3. Touch a video to play it.
4. During playback, use these controls (you may need to
touch the screen to display the controls):
• Popup Video
floats on the Home screen, so you can multitask while watching
the video.
• Screen capture
• Volume
touch and drag on the scale to set volume, or press the Volume
Key on the side of the device to adjust playback volume. If you
have motion settings turned On and the Turn over to mute/
pause setting enabled, turn the device screen-down to mute
playback.
.
Thumbnails, List
: Touch to display the video in a window that
: Touch to capture a still from the video.
: Touch to activate on-screen volume control, then
Apps
, and
➔
Folders
tabs.
• Full screen
mode, to use the entire display.
•
Touch to advance to the next song. Touch and hold
to scan forward through the current song.
•
Touch to go back to the previous song. Touch and hold
to scan backward through the current song.
•
Touch to pause playback. Touch to resume playback.
5. While playing a video, touch Menu
: Switch to viewing the video in full screen
for options.
Viewdini
Viewdini is an innovative video discovery portal that makes it
simple to search, browse, and access movies, television
shows, and free web video on mobile devices.
For more information, visit
From the Home screen, touch
Viewdini
http://mobile.vzw.com/viewdini
.
Apps
➔
Applications 77
Voice Recorder
DRAFT For Internal Use Only
Record your voice or other sounds, and share recordings via
Bluetooth, or Gmail.
From the Home screen, touch
Voice Recorder
.
Apps
➔
Voice S earch
Search the Web by speaking your search criteria.
From the Home screen, touch
Voice Search
.
Apps
➔
VPN Client
Easily configure connections to a VPN (Virtual Private
Network).
From the Home screen, touch
VPN Client
.
78
Apps
➔
VZ Navigator
Use VZ Navigator® to find, share and navigate to millions of
locations, avoid traffic and drive or walk with ease.
Note:
VZ Navigator requires service activation. Contact Verizon
Wireless for more information.
From the Home screen, touch
VZ Navigator
– or –
From a Home screen, touch the
shortcut
.
.
Apps
➔
VZ Navigator
YouTube
DRAFT For Internal Use Only
View and upload YouTube videos, right from your device.
From the Home screen, select
You Tub e
.
Apps
➔
Zappos
Shop with Zappos.
From the Home screen, select
Zappos
.
Apps
➔
Applications 79

Section 6: Connections
DRAFT For Internal Use Only
Wi-Fi
Wi-Fi is a wireless networking technology that provides
access to local area networks.
Wi-Fi communication requires access to an existing Wi-Fi
network. Wi-Fi networks can be Open (unsecured), or
Secured (requiring you to provide login credentials).
Your device supports the 802.11 a/b/g/n Wi-Fi protocols.
Configuring Wi-Fi Settings
Configure your device’s Wi-Fi settings. For more information,
see “Wi-Fi Settings” on page 92.
80
Turning Wi-Fi On or Off
Turn your device’s Wi-Fi service on or off. When you turn WiFi service on, your device automatically searches for nearby
available Wi-Fi networks.
Tip:
When you turn Wi-Fi service on, your device automatically
searches for available networks and displays them.
You can also turn Wi-Fi On or Off from Settings.
1. From the Home screen, sweep your finger downward
to display Notifications.
Wi-Fi Off
2. If Wi-Fi is not already on, touch
Wi-Fi.
– or –
Wireless network available
Tou ch
Wi-Fi
settings, then touch
.
to turn on
to launch Wi-Fi

Scanning and Connecting to a Wi-Fi Network
DRAFT For Internal Use Only
When you turn on Wi-Fi, your device searches for available
Wi-Fi connections, then displays them.
1. From the Home screen, sweep your finger downward
to display Notifications.
Wi-Fi Off
2. If Wi-Fi is not already on, touch
Wi-Fi.
– or –
Wireless network available
Touch
Wi-Fi
settings, then touch
3. When your device completes a scan, touch a Wi-Fi
network to connect. If the Wi-Fi network is open, you
will be automatically connected. If the Wi-Fi network is
secured, enter the password at the prompt to connect.
.
to turn on
to launch Wi-Fi
Adding a Wi-Fi Network Manually
1. From the Home screen, sweep your finger downward
to display Notifications.
2. If Wi-Fi is not already on, touch
Wi-Fi.
– or –
Wireless network available
To uch
settings, then touch
3. On the pop-up Wi-Fi settings screen, touch
(below the scanned networks), then enter
Network
these fields:
• Network Name (SSID)
•Security
: Select the type of security used by the Wi-Fi network.
•Password
4. To uch
Connect
network now, or
future use.
Wi-Fi
: Enter the name of the Wi-Fi network.
: If the network is secured, enter the password.
to save the settings and connect to the
Save
to save the network settings for
Wi-Fi Off
to turn on
to launch Wi-Fi
.
Connections 81
Add

Wi-Fi Direct
DRAFT For Internal Use Only
Wi-Fi Direct is a standard that allows devices to connect to
each other directly via Wi-Fi, without a Wi-Fi network or
hotspot, and without having to set up the connection. This
type of connection is commonly called peer-to-peer.
For example, your device can use Wi-Fi Direct to share
photos, contacts and other content with other Wi-Fi Direct
devices. Many of the apps on your device provide options for
Menu
sharing via Wi-Fi Direct under
.
Turning Wi-Fi Direct On or Off
1. From the Home screen, touch Menu
Settings ➔ More settings
2. Touch
82
Wi-Fi Direct
Off.
.
to turn Wi-Fi Direct On or
, then select
Connecting to Wi-Fi Direct Devices
1. First, enable Wi-Fi Direct on your device. From the
Home screen, touch
More settings
2. Enable Wi-Fi Direct on the other device(s). Consult the
other device’s documentation for more information.
3. On your device, touch
device(s).
4. In the scanned list, touch a device to connect with it, or
touch
all devices support multi-connect).
5. Follow the prompts on both devices to complete the
connection.
, then touch
Multi-connect
Menu
, then select Settings
Wi-Fi Direct
Wi-Fi Direct
to connect to multiple devices (not
.
to scan for the other
➔

Mobile Hotspot
DRAFT For Internal Use Only
Use Mobile Hotspot to share your device’s internet
connection with a PC or other device through Wi-Fi, using
your device as the mobile hotspot.
Note:
Mobile Hotspot may require a subscription to Mobile
Hotspot/Mobile Broadband Connect service. Contact
Verizon Wireless for more information.
Mobile Hotspot consumes battery power and uses data
service. While the Mobile Hotspot is active, your device’s
applications will use the Mobile Hotspot data allowance.
Configuring Mobile Hotspot Settings
Configure your device’s Mobile Hotspot settings, including
your device’s name and password, and set the visibility of
your device’s Wi-Fi hotspot.
For more information, see “Configuring Mobile Hotspot” on
page 98.
Turning Mobile Hotspot On or Off
Activate your device’s Mobile Hotspot application to allow
other devices to use your device’s internet connection.
Apps
1. From the Home screen, select
Mobile Hotspot
2. To uch
Tip:
Mobile Hotspot
Off.
By default, your device’s mobile hotspot has no security
applied, and any device can connect. For more
information about configuring your mobile hotspot, see
“Configuring Mobile Hotspot” on page 98.
.
to turn the hotspot On or
➔
Connections 83
Connecting a Device via Mobile Hotspot
DRAFT For Internal Use Only
Use the other device’s Wi-Fi control to connect to your
device’s Mobile Hotspot.
1. Turn on Mobile Hotspot on your device. For more
information, see “Turning Mobile Hotspot On or Off” on
page 83.
2. Activate Wi-Fi on the device, using the device’s Wi-Fi
control.
3. Scan for Wi-Fi hotspots, and select your device from
the list. To find your device’s name, see “Configuring
Mobile Hotspot” on page 98.
4. At the prompt, enter your device’s Mobile Hotspot
password. By default, the password is your device’s
telephone number. For more information, see
“Configuring Mobile Hotspot” on page 98.
84
Bluetooth
Bluetooth is a short-range wireless communications
technology for exchanging information over a distance of
about 30 feet. You don’t need to line up the devices to send
information with Bluetooth. If the devices are in range, you
can exchange information between them, even if they are in
different rooms.
Your device can use Bluetooth to share photos, contacts and
other content with other Bluetooth devices. Many of the apps
on your device provide options for sharing via Bluetooth
Menu
under
Configuring Bluetooth Settings
Configure your device’s Bluetooth settings. For more
information, see “Bluetooth settings” on page 95.
Note:
Bluetooth profiles are specifications for services
supported by individual devices. For a list of profiles your
device supports, see “Bluetooth profiles” on page 94.
.

Turning Bluetooth On or Off
DRAFT For Internal Use Only
1. From the Home screen, touch Menu
Settings
.
Bluetooth
2. Touch
Tip:
You can also turn Bluetooth On or Off on Notifications.
From almost any unlocked screen, sweep your finger
down from the Status bar to display Notifications.
to turn Bluetooth On or Off.
, then select
Pairing with a Bluetooth Device
Search for a Bluetooth device and pair with it, to exchange
information between your device and the target device.
After pairing, your device and the target device will recognize
each other and exchange information without a passcode or
PIN.
Note:
When paired, the
the Status Bar. If you receive a new request for pairing
while paired with a Bluetooth headset, a new Bluetooth
icon displays at the left of the Status bar and
Notifications displays the pairing request.
Bluetooth paired
icon displays in
1. From the Home screen, touch
Settings ➔ Bluetooth
2. To uch
3. Activate the target device’s discoverable mode.
4. To uch
5. From the list of scanned devices, touch the target
Bluetooth
Scan
device, then follow the prompts to complete the
pairing:
•
If the target device requires a PIN, enter a PIN for the target
device and touch
target device.
•
If the device allows automatic or smart pairing, your device will
attempt to pair with the device automatically. Follow the
prompts on your device and the target device to complete the
pairing.
.
to turn Bluetooth On.
.
OK
. When prompted, enter the PIN on the
Menu
, then select
Connections 85

VPN
DRAFT For Internal Use Only
You can use your device’s VPN (Virtual Private Network)
feature to connect to VPNs.
Configuring VPN Settings
Configure your device’s VPN settings. For more information,
see “Nearby devices” on page 100.
Note:
You must enable at least Pattern security before setting
up a VPN. If you have not yet enabled security, you’ll be
prompted to do so the first time you launch VPN
settings.
Adding a VPN
1. From the Home screen, touch Menu
Settings ➔ More settings ➔ VPN
2. Tou ch
86
Add VPN network
VPN. Available settings depend on the type of VPN.
to set up a connection to a
.
, then select
Tet h ering
Use Tethering to share your device’s internet connection with
a computer that connects to your device via USB cable, or by
Bluetooth.
Note:
Tou ch
Help
under Tethering settings to view information
about tethering, and for links to more information.
USB tethering
Use USB tethering to share your device’s network connection
with a computer that connects to your device via USB cable.
1. From the Home screen, touch
Settings ➔ More settings ➔ Tet he ri ng
2. Connect the other device to your device via USB cable.
3. Tou ch
USB tethering
to turn tethering On or Off.
Menu
.
, then select
Bluetooth tethering
DRAFT For Internal Use Only
Before starting, pair your computer with your device, then
configure your computer to obtain its network connection via
Bluetooth.
1. From the Home screen, touch
Settings ➔ More settings ➔ Tet he ri ng
2. Connect the other device to your device via USB cable.
3. Touch
Important!
Bluetooth tethering
Tethering consumes battery power and increases
your data usage. Roaming while using tethering
will incur extra data charges.
Menu
, then select
.
to turn tethering On or Off.
Nearby devices
Share files with nearby devices using DLNA (Digital Living
Network Alliance) standards, over Wi-Fi.
To share with nearby devices, you must connect to a Wi-Fi
network. The devices you wish to share files with must also
be connected to the same Wi-Fi network and must support
DLNA.
Important!
Turning File sharing On or Off
Use care when enabling file sharing for nearby
devices. When enabled, other devices can access
data on your device.
1. From the Home screen, touch Menu
Settings ➔ More settings ➔ Nearby Devices
2. To uch
File sharing
to turn sharing On or Off.
Connections 87
, then select
.
Configuring File Sharing
DRAFT For Internal Use Only
1. From the Home screen, touch Menu
Settings ➔ More settings ➔ Nearby Devices
Advanced
2. Under
is shared from your device:
• Shared contents
Videos, Photos
• Device name
• Access control
content, from
• Allowed devices list
connect to your device.
• Not-allowed devices list
from connecting to your device.
•Download to
from USB storage (device memory) or SD card.
• Upload from other devices
files from other devices, from
Always reject
88
, touch options to control how content
: Choose the type of content to share, from
, or
Music
.
: View or modify your device’s name.
: Choose whether other devices access your
Allow all
or
Only allowed devices
: View and manage devices allowed to
: View and manage devices restricted
: Choose a location to save downloaded content,
: Choose how to handle incoming
Always accept, Always ask
.
, then select
.
.
, or
Connecting to a Computer
Connect your device to a computer to transfer data between
your device and the computer. Use the USB cable that comes
with your device, or use one of the pre-loaded apps on your
device to connect wirelessly.
Transferring Data
Connect your device to a computer, via USB cable, to transfer
data as a Media device using MTP (Media Transfer Protocol),
or as a Camera using PTP (Photo Transfer Protocol).
1. Attach your device to the computer with a USB data
cable. Your device recognizes the connection as the
last connection method you used, and displays a
connection
2. From the Home screen, sweep your finger downward
to display Notifications, then touch the alert.
3. Select a connection method:
• Media device (MTP)
•Camera (PTP)
alert in the Status bar and Notifications.
: Transfer media files with Windows, or
using Android file transfer on a Mac (see
filetransfer
).
: Transfer photos using camera software, and
transfer files to computers that do not support MTP.
www.android.com/
4. On your computer, choose a method for accessing your
DRAFT For Internal Use Only
device. Available options depend on the programs
installed on your computer.
5. Transfer files to the memory card. When finished, you
can disconnect the USB cable.
Kies air
Manage content saved on your device via your desktop or
mobile browser using Wi-Fi technology. The pre-loaded Kies
air app connects via Wi-Fi to the Kies application, which you
can install on your computer.
For more information, visit:
Note:
To sync your device to a PC, it is highly recommended
that you install Samsung Kies, which is available at
http://www.samsung.com/kies
Note:
If you are a Windows XP user, ensure that you have
Windows XP Service Pack 3 or higher installed on your
computer. Also, ensure that you have Samsung Kies 2.0
or Windows Media Player 10 or higher installed on your
computer.
www. samsung.com/us/kies
(for Windows/Mac).
Memory Card
Your device supports removable microSD™ or microSDHC™
memory cards of up to 64GB capacity, for storage of music,
pictures, videos, and other files.
By default, files that you download, or that you create with
your device, such as pictures and videos you capture with
Camera, are stored to your device’s memory. For more
storage capacity, you can set the memory card as the
primary storage location for apps with the app’s options.
For more information about viewing memory usage for the
memory card, see “SD card” on page 107.
Installing and Removing a Memory Card
For more information about installing and removing a
memory card, see “Memory Card” on page 12.
Important!
To prevent damage to data stored on the memory
card, unmount the card before removing it from the
device.
Connections 89
Mounting and Unmounting a Memory Card
DRAFT For Internal Use Only
Mounting a memory card establishes the connection
between your device and the card, to prepare for saving files
to the memory card. In most cases, the device mounts the
card automatically when you install it, and displays the
memory card status on Notifications.
Before removing the card, use the Mount/Unmount setting to
unmount, it to prevent damage to data stored on the card.
Menu
1. From the Home screen, touch
Settings ➔ Storage
2. Touch
90
Unmount SD card
.
, then follow the prompts.
, then select
Formatting a Memory Card
Use the Format SD card setting to remove all data from an
installed memory card.
Important!
Data cannot be recovered after formatting.
1. From the Home screen, touch
Settings ➔ Storage
2. Tou ch
Format SD card
confirm the deletion of data from the card.
.
, then follow the prompts to
Menu
, then select

Section 7: Settings
DRAFT For Internal Use Only
Accessing Settings
From the Home screen
Tou ch
– or –
Touch
From Notifications
Touch and drag down from the top of the screen to
display notifications, then touch .
Apps ➔
Menu
, then select
Settings
Settings
.
.
Wireless and networks
Airplane mode
When airplane mode is enabled, all your device’s wireless
connections are disabled, and you cannot connect to
networks. While in airplane mode, you can use other features
of your device, such as playing music, watching videos, or
other applications.
Apps
1. From the Home screen, touch
Settings
.
2. To uch
Note:
Airplane mode
mode.
Airplane mode can also be controlled from Notifications,
and from Device options when you press and hold the
Power/Lock Key
to enable or disable airplane
.
➔
Settings 91
Device
DRAFT For Internal Use Only
Wi-Fi
Set up and manage your device’s connections to Wi-Fi
networks.
For more information about using Wi-Fi, see “Wi-Fi” on
page 80.
Turning Wi-Fi On or Off
Turn your device’s Wi-Fi service on or off. When you turn WiFi service on, your device automatically searches for
available Wi-Fi networks.
Tip:
You can also turn Wi-Fi On or Off from Notifications.
Apps
1. From the Home screen, touch
Settings
.
Wi-Fi
2. Touch
92
to turn Wi-Fi On or Off.
➔
Wi-Fi Settings
Set up and manage wireless access points.
1. From the Home screen, touch
Settings ➔ Wi-Fi
2. Tou ch
3. Touch settings to configure:
Wi-Fi
turned on to configure settings.
•Notify me
•Add Wi-Fi Network
•Scan
• Wi-Fi Direct
: When enabled, your device notifies you of Wi-Fi
networks when you launch a high data-usage application.
more information, see
Manually”
: Search for available Wi-Fi networks.
.
to turn Wi-Fi On. Wi-Fi must be
: Connect to a new Wi-Fi network. For
“Adding a Wi-Fi Network
on page 81.
: Configure Wi-Fi Direct.
Apps
➔
Other Wi-Fi settings
DRAFT For Internal Use Only
1. From the Home screen, touch
Settings ➔ Wi-Fi
2. Touch
• Advanced:
–
Auto-connect
connect to known Wi-Fi networks when you launch a high datausage application, even if Wi-Fi is turned off. A known
Wi-Fi network is one that you previously added.
–
Keep Wi-Fi on during sleep
Wi-Fi to mobile data for data communications, when the device
goes to sleep (when the backlight goes out). This setting can
affect your data usage, and the behavior of devices you connect
to your device, such as when tethering or using Mobile Hotspot.
–
Check for Internet service
check for Wi-Fi Internet service when connected to a Wi-Fi
access point.
–
MAC address
address, needed for connecting to some secured networks.
–
IP address:
.
Menu
for additional settings:
: When enabled, your device will automatically
: (Not configurable) View your device’s MAC
(Not configurable) View your device’s IP address.
Apps
➔
: Specify when to switch from
: When enabled, your device will
• Manage networks
networks. Touch a network to connect to it, or to forget or
modify its settings.
• WPS push button
Protected Setup) router or equipment.
• WPS PIN entry
PIN-secured connection to a Wi-Fi router.
: View and manage your saved Wi-Fi
: Set up a connection to a WPS (Wi-Fi
: View the PIN used by your device to set up a
Settings 93

Wi-Fi Direct
DRAFT For Internal Use Only
Wi-Fi Direct allows devices to connect to each other directly
via Wi-Fi, without a Wi-Fi network or hotspot, and without
having to set up the connection. For example, your device
can use Wi-Fi Direct to share photos, contacts and other
content with other Wi-Fi Direct devices.
For more information, see “Wi-Fi Direct” on page 82.
Apps
1. From the Home screen, touch
Settings ➔ Wi-Fi.
2. Touch
3. After scanning for devices, select a device, then follow
94
Wi-Fi Direct
device automatically scans for nearby Wi-Fi Direct
devices, or you can touch
the prompts to complete the connection.
– or –
Multi-connect
Touch
that support multi-connect. Touch
available multi-connect devices, then select the
devices and follow the prompts to complete the
connection.
at the bottom of the screen. Your
Scan
to create a connection to devices
➔
to start scanning.
Scan
to search for
Bluetooth
Your device supports Bluetooth® 4.0.
Bluetooth profiles
Bluetooth profiles are specifications for services supported
by individual devices. Profiles improve the ability of different
devices to work together. Your device supports these
Bluetooth profiles:
•
Headset
: HSP v1.2 profile supports use of compatible Bluetooth
headsets for mono voice.
•
Handsfree
: HFP v1.5 profile supports Bluetooth headsets, and
may also support other compatible Bluetooth devices with
speakerphone capabilities.
•
Serial Port
•
Stereo
AVDTP 1.2 profiles support delivery of stereo audio to compatible
Bluetooth devices.
•
Object Exchange
of contact name cards (vCard 2.1) and calendar events
(vCalendar) between devices. PBAP v1.2 supports exchange of
Phone Book Objects.
: SPP profile supports connections as a serial port.
: A2DP v1.2, AVRCP v1.3, GAVDP 1.0, AVCTP 1.3 and
: OPP v1.0 profile allows sending and receiving
 Loading...