

Page 1

SCH-i830 Series
Global Quadband Pocket PC
Phone
User Guide
Please read this manual before operating your
phone, and keep it for future reference.
YI05.(1.2)_WB_101305_F4
Page 2

YI05.(1.2)_WB_101305_F4
Page 3

Intellectual Property
All Intellectual Property, as defined below, owned by or which is
otherwise the property of Samsung or its respective suppliers
relating to the SAMSUNG Phone, including but not limited to,
accessories, parts, or software relating there to (the “Phone
System”), is proprietary to Samsung and protected under federal
laws, state laws, and international treaty provisions. Intellectual
Property includes, but is not limited to, inventions (patentable or
unpatentable), patents, trade secrets, copyrights, software,
computer programs, and related documentation and other works
of authorship. You may not infringe or otherwise violate the rights
secured by the Intellectual Property. Moreover, you agree that you
will not (and will not attempt to) modify, prepare derivative works
of, reverse engineer, decompile, disassemble, or otherwise attempt
to create source code from the software. No title to or ownership in
the Intellectual Property is transferred to you. All applicable rights
of the Intellectual Property shall remain with SAMSUNG and its
suppliers.
Samsung Telecommunications America, L.P.
Headquarters: Customer Care Center:
1301 E. Lookout Drive 1000 Klein St.
Richardson, TX 75082 Plano, TX 75074
Tel: 972.761.7000 Toll Free Tel: 1.888.987.HELP (4357)
Fax: 972.761.7001 Fax: 972.801.6065
Internet Address: http://www.samsungusa.com
©
2005 Samsung Telecommunications America, L.P. is a registered
trademark of Samsung Electronics America, Inc. and its related
entities.
Page 4

Disclaimer of Warranties; Exclusion of Liability
EXCEPT AS SET FORTH IN THE EXPRESS WARRANTY
CONTAINED ON THE WARRANTY PAGE ENCLOSED WITH
THE PRODUCT, THE PURCHASER TAKES THE PRODUCT
"AS IS", AND SAMSUNG MAKES NO EXPRESS OR IMPLIED
WARRANTY OF ANY KIND WHATSOEVER WITH RESPECT
TO THE PRODUCT, INCLUDING BUT NOT LIMITED TO THE
MERCHANTABILITY OF THE PRODUCT OR ITS FITNESS
FOR ANY PARTICULAR PURPOSE OR USE; THE DESIGN,
CONDITION OR QUALITY OF THE PRODUCT; THE
PERFORMANCE OF THE PRODUCT; THE WORKMANSHIP
OF THE PRODUCT OR THE COMPONENTS CONTAINED
THEREIN; OR COMPLIANCE OF THE PRODUCT WITH THE
REQUIREMENTS OF ANY LAW, RULE, SPECIFICATION OR
CONTRACT PERTAINING THERETO. NOTHING
CONTAINED IN THE INSTRUCTION MANUAL SHALL BE
CONSTRUED TO CREATE AN EXPRESS OR IMPLIED
WARRANTY OF ANY KIND WHATSOEVER WITH RESPECT
TO THE PRODUCT. IN ADDITION, SAMSUNG SHALL NOT
BE LIABLE FOR ANY DAMAGES OF ANY KIND RESULTING
FROM THE PURCHASE OR USE OF THE PRODUCT OR
ARISING FROM THE BREACH OF THE EXPRESS
WARRANTY, INCLUDING INCIDENTAL, SPECIAL OR
CONSEQUENTIAL DAMAGES, OR LOSS OF ANTICIPATED
PROFITS OR BENEFITS.
Openwave® is a registered Trademark of Openwave, Inc.
®
RSA
is a registered Trademark RSA Security, Inc.
TM
technology is incorporated under license from SRS labs,
WOW
Inc.
SRS WOW, and symbol are trademarks of SRS Labs, Inc.
VoiceSignal is a trademark and the VoiceSignal logo is a
registered trademark of VoiceSignal Technologies, Inc.
Page 5

Microsoft, ActiveSync, MSN, Outlook, Windows, the Windows
logo, and Windows Media are either registered trademarks or
trademarks of Microsoft Corporation in the United States and/or
other countries.
Bluetooth is a trademark owned by its proprietor and used by
Samsung Telecommunications America, Inc. under license.
Printed in Korea
Page 6

Page 7

Table of Contents
Section 1: Getting Started ............................... 11
Activating Your Phone ....................................................12
Setting Up Your Voicemail ..............................................12
Understanding this User Manual ..................................... 14
Section 2: Understanding Your Phone ............ 15
Features of Your Phone .................................................. 16
Front View of Your Phone ...............................................17
Key Functions ................................................................17
Closed View of Your Phone ............................................. 20
Key Functions ................................................................20
Command Keys ..............................................................21
Locking Your Pocket PC .................................................23
Display Icons ..................................................................25
Intalling Your SIM Card ................................................... 27
Battery ...........................................................................28
Section 3: Call Functions ................................. 33
Making a Call ................................................................. 34
Phone Modes ................................................................. 35
Answering a Call ............................................................37
Using the Speakerphone ................................................37
Display Your Phone Number ...........................................38
Call History .....................................................................38
Roaming ........................................................................41
TTY ................................................................................42
VoiceSignal ....................................................................42
Section 4: Menu Navigation ............................ 49
Navigating Your PDA ......................................................50
Menu Types ...................................................................50
Launcher ........................................................................52
Table of Contents
Table of Contents 7
Page 8

Task Manager ................................................................58
Section 5: Entering Text ..................................61
Built-in QWERTY Keypad ................................................62
Selecting Text Input Mode ..............................................62
Word Completion ............................................................65
Text Entering Options .....................................................65
Tab l e o f Cont e n t s
Section 6: Contacts .......................................... 67
Understanding Your Contacts ..........................................68
Adding Notes to Contacts ...............................................72
Speed Dial Contacts .......................................................73
SIM Manager (GSM Mode) ..............................................73
Section 7: Messaging ...................................... 77
Types of Messages .........................................................78
Messaging .....................................................................78
Text Messages ...............................................................81
About E-mail Setup ........................................................85
E-mail using Outlook ......................................................85
E-mail using an ISP ........................................................87
Section 8: Changing Your Settings .................89
i830 Settings ..................................................................90
Buttons Settings .............................................................90
Sound Settings ...............................................................92
Password Setting ...........................................................98
Phone Settings (CDMA) ...................................................99
Phone Settings (GSM) ...................................................105
Section 9: Personal Digital Assistant ............ 115
Your Personal Digital Assistant .....................................116
Picsel Browser .............................................................116
Microsoft Pocket Applications .......................................120
Dormant Mode .............................................................130
Windows Media Player® ..............................................131
8
Page 9

Sprite Backup Utility ..................................................... 133
Application Management .............................................. 134
Memory Adjustments ...................................................135
Section 10: Personal Organizer ..................... 137
Today Screen ...............................................................138
Calendar ......................................................................140
Tasks List ....................................................................144
New Command ............................................................148
Notes ...........................................................................148
Alarm ...........................................................................151
Calculator ....................................................................151
ActiveSync® ................................................................152
Install ActiveSync .........................................................153
Section 11: Network Services ....................... 155
Call Forwarding ............................................................156
Three-way Calling ........................................................ 156
Call Waiting .................................................................. 157
Caller ID .......................................................................157
Section 12: Bluetooth® Services .................. 159
About Bluetooth Wireless Technology ........................... 160
Bluetooth Service Profiles .............................................160
Bluetooth Modes .......................................................... 161
Bluetooth Bonds ........................................................... 163
Bluetooth Hands-free Device ........................................165
Bluetooth OBEX FTP ..................................................... 166
Bluetooth Virtual Serial Port .......................................... 168
ActiveSync via Bluetooth Wireless Technology ..............169
Using Bluetooth Keyboard ............................................170
Section 13: Accessories and Games ............. 171
Accessories ..................................................................172
Remote Control ............................................................ 172
Ringtone Manager ........................................................ 177
Table of Contents 9
Table of Contents
Page 10

Beam ...........................................................................181
SD I/O Expansion Slot ...................................................182
Games ..........................................................................184
Section 14: Health and Safety Information ...187
Health and Safety Information .......................................188
Consumer Information on Wireless Phones ...................190
Tab l e o f Cont e n t s
Road Safety ..................................................................200
Operating Environment .................................................202
Using Your Phone Near Other Electronic Devices ..........202
Potentially Explosive Environments ...............................204
Emergency Calls ...........................................................205
FCC Notice and Cautions ..............................................206
Other Important Safety Information ...............................207
Product Performance ....................................................207
Availability of Various Features/Ring Tones ...................209
Battery Standby and Talk Time .....................................209
Battery Precautions ......................................................209
Care and Maintenance ..................................................211
Section 15: Warranty Information .................213
Standard Limited Warranty ...........................................214
Index ..............................................................221
10
Page 11

Section 1: Getting Started
Topics Covered
• Activating your phone
• Setting Up Voicemail
• Understanding this User Manual
This section allows you to start using your phone by
activating your service, setting up your voice mail, and
getting an understanding of how this manual is put
together. For more information contact your service
provider.
Section 1
Section 1: Getting Started 11
Page 12

Activating Your Phone
If you have upgraded your phone to the i830 from an
existing Verizon Wireless phone, you will need to call
Verizon Wireless to have it activated and move your
existing mobile number to your new Samsung i830 Global
phone.
If you are a new Verizon Wireless customer and the
mobile number assigned to the phone is new, simply
insert the SIM card and dial *228 to program your phone.
If you have any questions, please call Verizon Wireless.
To activate your phone, follow these steps:
Section 1
1. Visit a Verizon Wireless Store and have your phone
activated, or visit www.verizonwireless.com and place
your cursor on the MY ACCOUNT tab available on the
home page.
2. When the drop-down menu displays, select ACTIVATE
PHONE to display instructions needed to activate your
phone online.
3. After gathering the required materials, select the
Activate New Phone link and follow the online
directions to complete the activation process.
Setting Up Your Voicemail
All unanswered calls to your Samsung i830 are sent to
voicemail, even if your device is turned off. Therefore,
you’ll want to set up your voicemail and personal
greeting as soon as you activate your i830. Your service
provider has assigned your voicemail number to the
key.
12
Page 13
Setting Up Your Voicemail
Set up Voicemail (CDMA)
1. Press , located on the bottom front of the phone,
to display the phone screen.
2. Tap and hold to dial the voicemail system.
Note: Use of the key is reserved for speed dialing voicemail. To dial
voicemail without using speed dial, simply dial your own phone number
and when the system answers, enter your password and press .
3. When the system answers, enter your password and
then tap .
4. Follow the prompts to setup your voicemail.
Set up Voicemail
Voice mail setup (GSM mode)
1. In standby mode, press and hold , a “+” displays.
2. Press again, then enter your own mobile number
to dial voice mail.
3. Press to interrupt the greeting.
4. Follow the prompts in the new user tutorial to setup your
mailbox.
Check Voicemail (CDMA Mode)
1. Tap the alert icon at the top of the screen.
Note: The alert icon is displayed when more than one alert is available.
2. Tap the voice mail icon . You can also tap and hold
to speed dial voicemail.
Section 1: Getting Started 13
Section 1
Page 14

3. Tap the Voice Mail button to connect.
4. When the voicemail system connects, enter your
password and then tap .
5. Press to listen to your messages.
Check Voicemail (GSM Mode)
1. In standby mode, press and hold the soft key or
dial + and your own mobile number to dial
voicemail. After Connecting a recorded message
prompts you to press if you have a mailbox on the
system. You will then be prompted to enter your 10 digit
mobile phone number.
Section 1
2. Enter your 10 digit mobile phone number.
3. When you hear the voice greeting, press , enter
your password, and follow the recorded prompts.
Understanding this User Manual
The chapters of this guide generally follow the same order
as the menus and sub menus in your phone. A robust
index for quick reference to most features begins on page
221.
Also included in this manual is important safety
information that you should know before using your
phone. Most of this information is near the back of this
guide, beginning on page 187.
14
Page 15

Section 2: Understanding Your Phone
Topics Covered
• Features of Your Phone
• Front View of Your Phone
• Closed View of Your Phone
• Key Features and Command Keys
• Locking Your Samsung SCH-i830
• Display Icons
• Installing Your SIM Card
• Battery
This section outlines many key features of your phone. It
also describes the display icons, frequently used
command keys, your display, and how to install your
battery.
Section 2: Understanding Your Phone 15
Section 2
Page 16

Features of Your Phone
Congratulations on your purchase of the Samsung
SCH-i830. The i830 uses the Microsoft Windows Mobile™
2003 software for Pocket PC Phone Edition, which
supports thousands of applications. Using ActiveSync®,
you can keep your PC and i830 synchronized at all times.
The features listed below are just a sample of what your
SCH-i830 has to offer. You should read this guide to
understand the many features that this phone supports
and keep it handy for reference.
Key Features of the SCH-i830
•
Large 240x320 pixel, 65k color TFT screen
• Wireless Internet Capability
• 1X/EVDO/GSM/GPRS Capability
• Global Positioning System (GPS)
• Windows Mobile™ 2003 Software for Pocket PC Phone Edition,
2nd Edition
• 2-Way Text Messaging
Section 2
• Email Message Service
• Secure Digital Expansion Slot (SD I/O)
• Advanced Speech Recognition Technology
• Voice Memo
• Built-in Bluetooth Wireless Technology
• LED (Green: System, Red: Phone, Blue: Bluetooth, Purple:
Battery Charging)
• GSM/GPRS-International standard for cellular communication
16
Page 17
• Integrated QWERTY Keyboard
Front View of Your Phone
Front View of Your Phone
Section 2
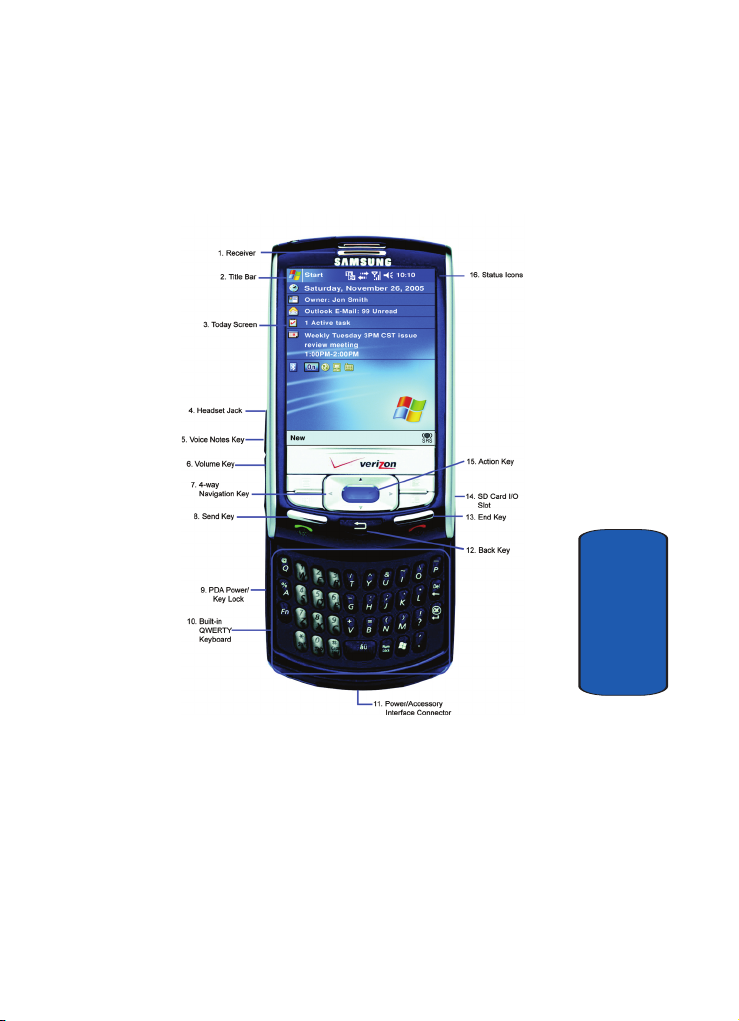
Key Functions
1. Receiver: The receiver allows you to hear the other caller
when using your phone.
Section 2: Understanding Your Phone 17
Page 18

Section 2
2. Title Bar: The Title bar at the top of the screen displays
the active program, wireless status, and current time,
and allows you to close screens. Use the Start menu to
select a program.
3. Today Screen: This screen displays all the information
needed to operate your phone.
4. Headset Jack: Built-in stereo headset jack.
5. Voice Notes Key: This key launches the voice notes
option which allows you to record voice notes and save
them on your phone.
6. Volume Key: Allows you to adjust the ringer volume in
standby mode (with the slider open) or adjust the voice
volume during a call. To mute the ringer during an
incoming call, press the volume key up or down.
7. 4-Way Navigation Key: This key allows you to scroll
through the phone menu options.
8. Send Key: This key is used to initiate your calls or to
activate your phone feature.
9. PDA Power/Key Lock: Use to turn your PDA device on
and off or lock your built-in keyboard.
10. Built-in QWERTY Keyboard: Use these keys to enter
numbers, letters, and characters.
11. Power/Accessory Interface Connector: Used to plug in
the charging accessories and also connect any available
accessory cables to your phone.
12. Back Key: Cancels the current function, or if in a menu,
this key steps back through previous menus.
18
Page 19

Key Functions
13. End Key: Ends a call. Press and hold this key for a few
seconds to turns the radio On or Off. When you receive
an incoming call, press to mute the ringer and send the
call to voicemail.
14. SD Card I/O Slot: This I/O expansion slot allows you to
insert an SD memory card to add additional memory and
storage capacity.
15. Action Key: Pressing when navigating through a menu
selects the highlighted choice in the menu.
16. Status Icons: These icons indicate, current signal
strength, and the availability of many other features and
functions of your phone.
Section 2
Section 2: Understanding Your Phone 19
Page 20
Closed View of Your Phone
Section 2
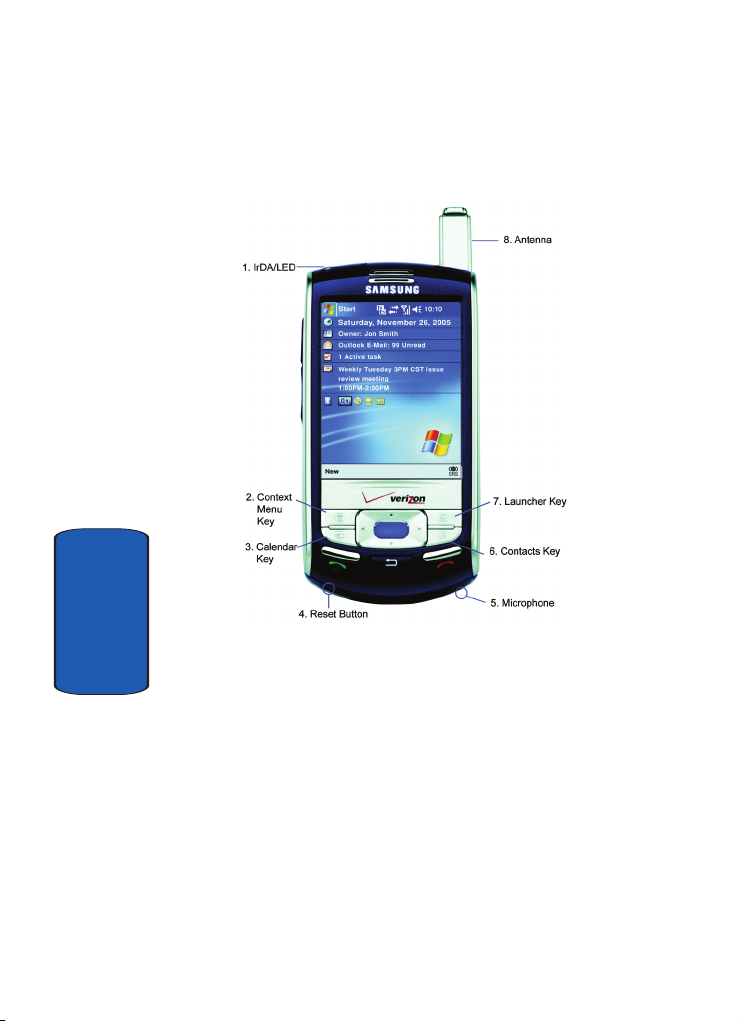
Key Functions
1. IrDA/LED: Used to exchange data and information
2. Context Menu Key: Launches menus or other option
between your phone and another device using infrared
signaling. Also indicates when certain features are active
on your phone such as Bluetooth wireless technology.
screens for the currently highlighted choice on your
display.
20
Page 21

Command Keys
3. Calendar Key: Launches your Calendar feature when
selected.
4. Reset Button: Resets your phone and ends all
applications currently running.
5. Microphone: The Microphone allows other callers to hear
you clearly when you speak to them.
6. Contacts Key: Launches your Contacts feature when
selected.
7. Launcher Key: Displays the Launcher menu when
selected.
8. Antenna: Your phone’s built-in antenna.
Command Keys
Powering On
To power up the i830, press the key down until the
backlight comes on. The PDA Power key is located on the
lower left side of your phone.
Note: If you push the PDA Power key to its upper position, you will lock all
keys, except for Send/End/Volume, which work during calls. Set the key in
its center position to unlock.
Follow the steps on the display screen to calibrate the
device. To turn your phone off, press and hold until
the backlight turns off.
Your Pocket PC’s Keypad
The keys of the i830 are functionally divided into three
groups. The Navigation keys, Alpha-numeric keypad,
and Hot keys.
Section 2: Understanding Your Phone 21
Section 2
Page 22
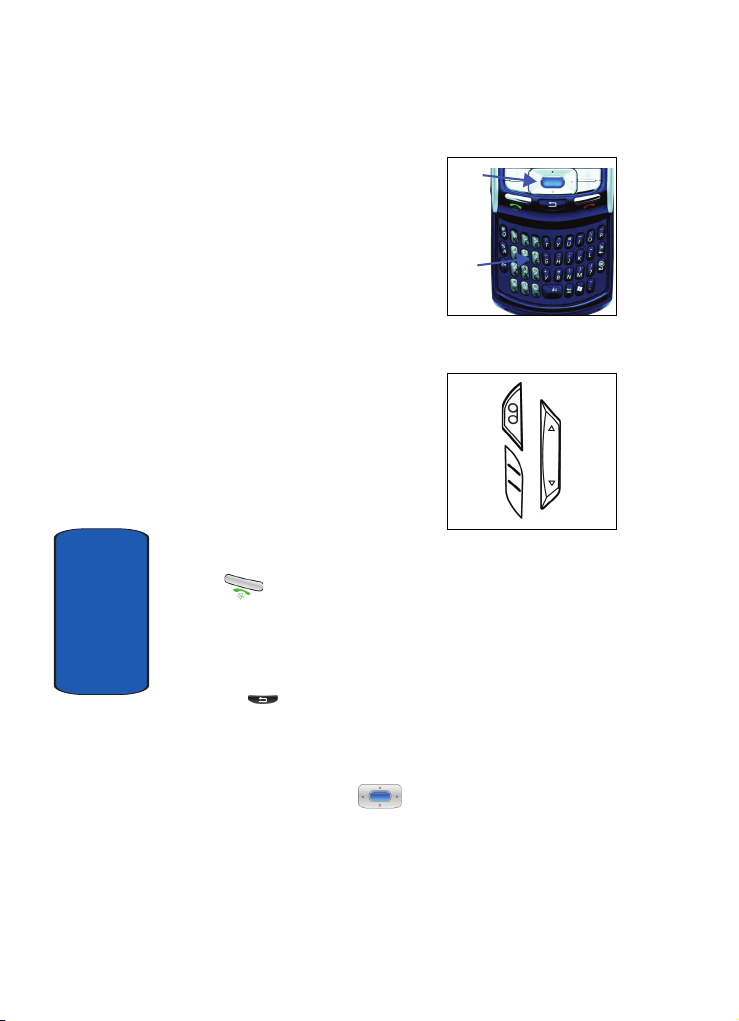
1. 4-Way Navigation Key:
Access and scroll through
menus and lists, confirm
changes that you’ve entered,
and interact with menus that
appear in the display.
2. Built-in QWERTY Keyboard:
Enter text, numbers, and
symbols.
3. Hot keys: Located on both
sides of the SCH-i830 Pocket
PC. Used to launch
applications, increase
volume, power the SCH-i830
Pocket PC on and off, and
more.
1.
2.
3.
Send Key
Press at the Today screen to display the phone
screen, or to dial a call after you have entered a telephone
number.
Section 2
Back Key
Press the key to close the current menu and return to
a previous menu or screen. The Back key also cancels
some functions like composing a message or exiting
Launcher.
Navigation/Action Key
Use any of the four directional arrows on the Navigation/
Action key to scroll through and highlight items, menus,
22
Page 23
Locking Your Pocket PC
and programs in a list or on the Internet. Once an item,
link, or menu is highlighted, press the action key to
perform the function related to the selection.
Voice Notes Key
Briefly press the Voice Notes Key to record or display
any recordings that you have made. You have the option
of recording a new memo or playing a stored memo.
When your memo list displays, either highlight the
recording you want and tap to play the memo, or
simply tap and speak clearly into the your phone’s
microphone to record a new memo.
Volume Keys
Press and release the up or down volume keys to adjust
audio volume for any screen.
Note: The volume can only be adjusted when the screen is active.
Locking Your Pocket PC
When you lock your phone, it requires a password to
return to normal operation. When a password is set up,
the phone can be locked immediately or configured to
lock when the screen blanks out.
Lock the i830
1. Tap Start located in the upper left corner of the screen.
2. Tap Settings. The Personal tab is highlighted.
3. Tap Password.
4. Tap the check box next to Prompt if device unused for.
Section 2: Understanding Your Phone 23
Section 2
Page 24

5. Tap the drop down arrow to select the amount of unused
time before you are prompted for a password.
6. Select one of the following options:
• Simple 4 digit
• Strong alphanumeric
7. Tap the Password box and enter the password you
want.
8. Tap , then tap Ye s to confirm.
Unlock the i830
To unlock your phone:
1. Tap Start located in the upper left corner of the screen.
2. Tap Settings. The Personal tab is highlighted.
3. Tap Password.
4. Tap your password on the keypad. If you enter the
correct password, you’re returned to the Password
screen.
5. Tap the box to the left of Prompt if device unused for to
Section 2
remove the check mark.
6. Tap , then tap Ye s to confirm.
Password Hint
Use the Hint feature to provide a password hint in case
you forget your password.
1. At the Password screen, tap the Hint tab.
2. Enter a hint for your password in the dialogue box.
3. Tap to save your settings and exit.
24
Page 25
Display Icons
Note: The password hint you set will only appear after four consecutive
incorrect password entries.
Display Icons
Various icons appear in your Pocket PC’s displays or Title
Bar during operation. The following table lists these icons
as well as their descriptions.
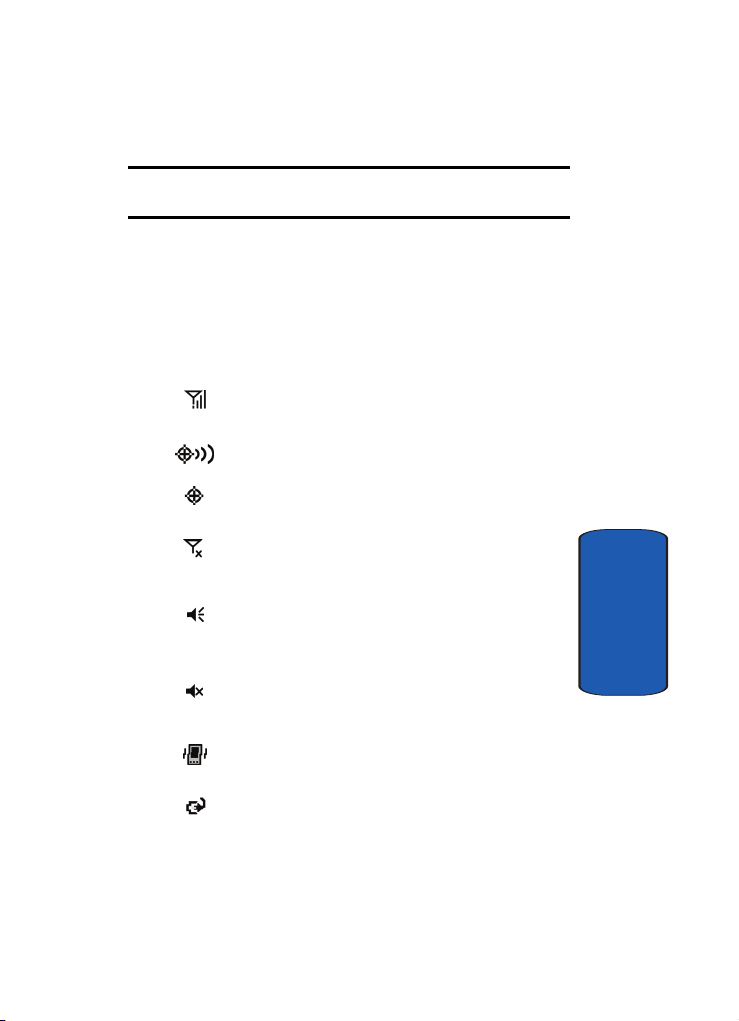
IconDefinition
Indicates signal strength. More bars mean better
signal.
Indicates GPS is on for location.
Indicates GPS for 911 is active.
Indicates your device is in Flight mode and your
cellular radio is turned off (i.e. the phone is turned Off
but the PDA is On).
Indicates the system speaker for the selected profile is
set to On.
Section 2
Indicates the
set to Off.
Indicates the ringer for the selected profile is set to
Vibrate.
Indicates your Pocket PC is charging.
system speaker
Section 2: Understanding Your Phone 25
for the selected profile is
Page 26
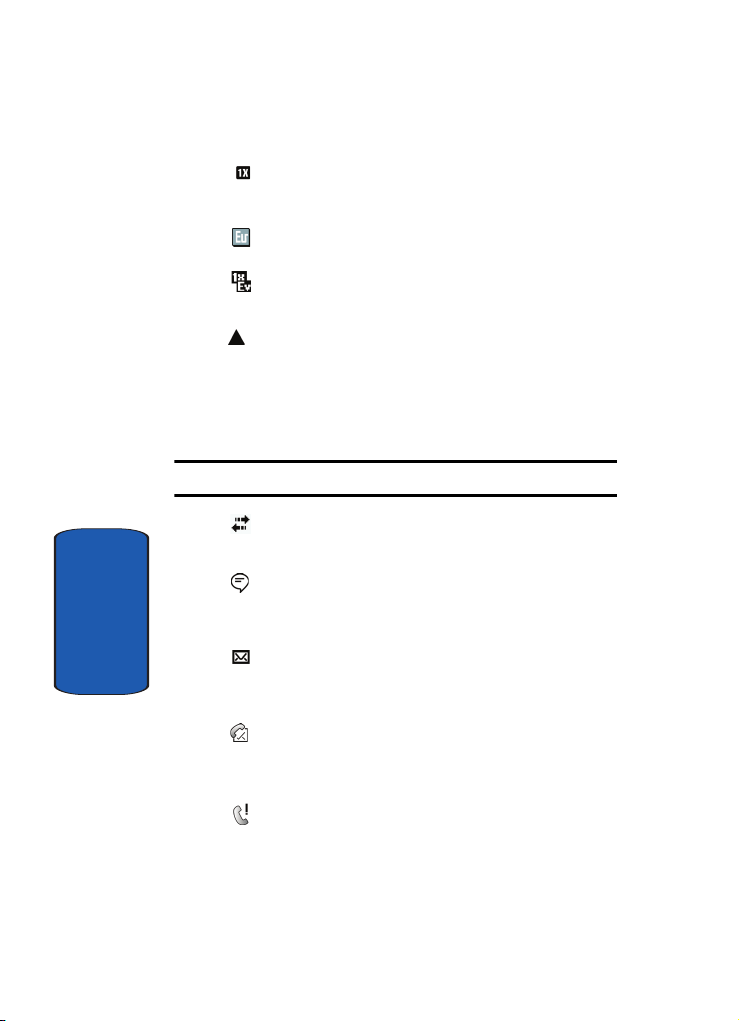
Indicates the 1xRTT high speed data transfer protocol is
supported.
Ev-Do protocol: Indicates your phone has high speed
data services, for video streaming and downloads.
1X EV-DO(icon): Indicates your phone is hybrid (1X and
EV-DO) mode.
Your phone is outside your home area. While roaming,
another wireless provider may be handling your call.
The service rate for the call may be higher than those
made from within your home area. Please refer to
Verizon Wireless for roaming rates. .
Note: The roaming indicator may not work in GSM networks.
Indicates ActiveSync or a Data Session is currently in
use.
Indicates two or more message icons are being
displayed, your battery charge is low, or you have
missed a call.
Section 2
Indicates you have a new text message. If you tap this
icon, a window is displayed that allows you to access
the Inbox.
Indicates you have a new voicemail message. If you tap
this icon a window is displayed that allows you to listen
to new voicemail messages.
Indicates you have a missed call. If you tap the icon a
window is displayed indicating the number of calls
missed. It also gives you the ability to view the missed
call information.
26
Page 27
Intalling Your SIM Card
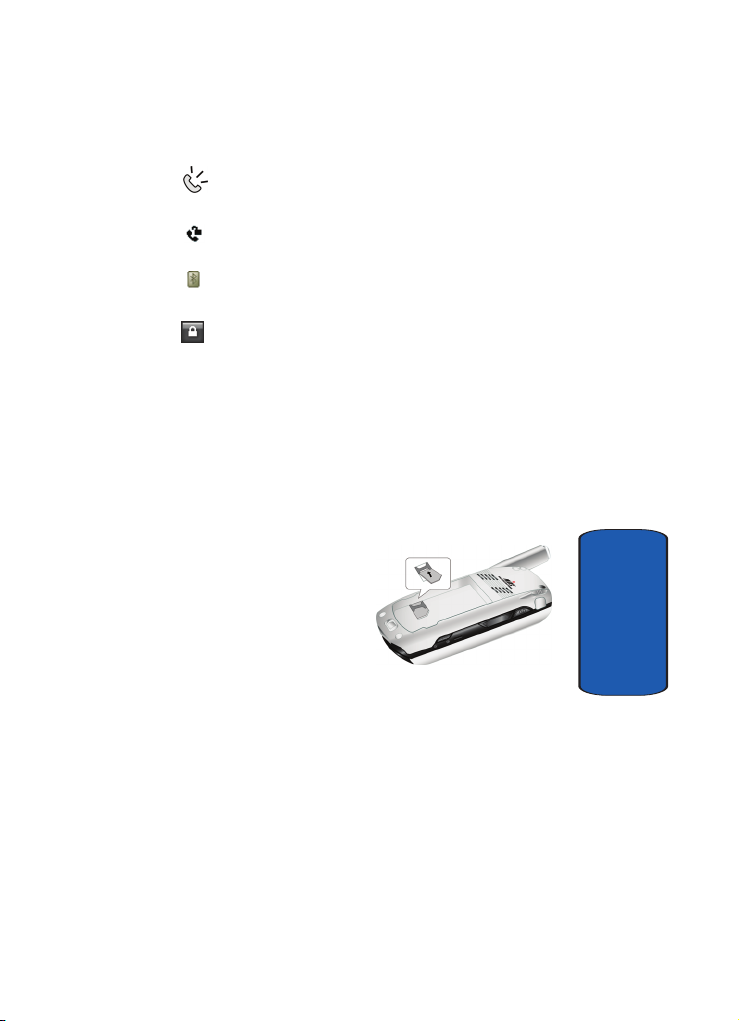
Indicates your Pocket PC is in Speakerphone mode.
Indicates that Voice Privacy is available.
Indicates the status of the Bluetooth radio, either On or
Off..
Indicates the key is locked.
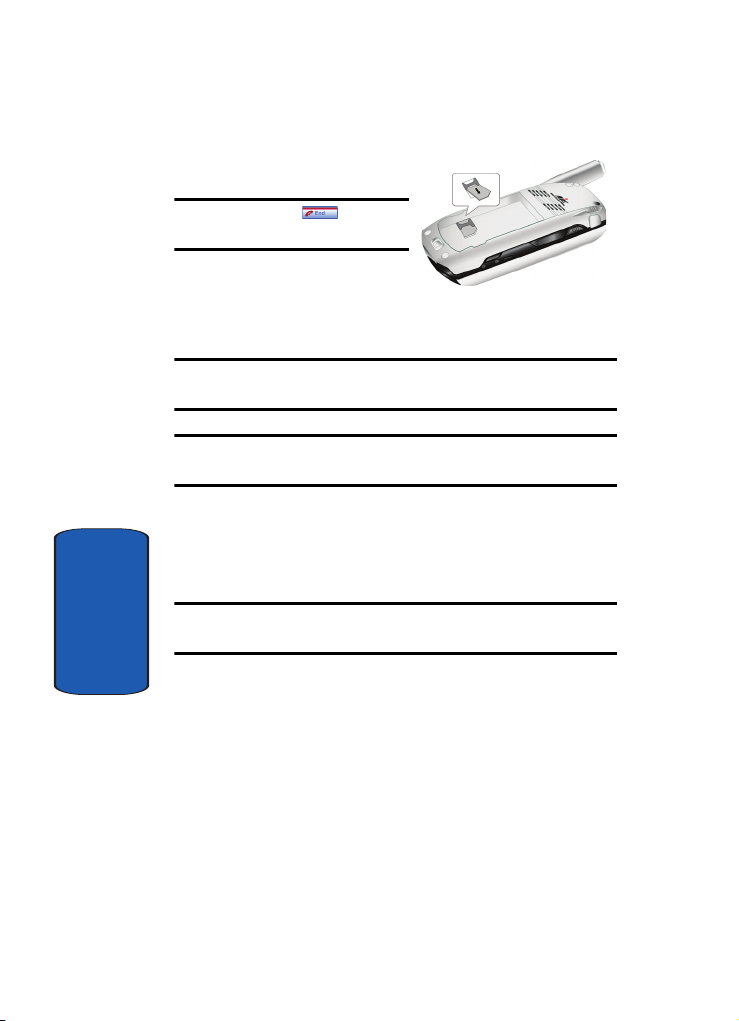
Intalling Your SIM Card
Before you can use the GSM features in your phone, you’ll
need to install a SIM card. SIM cards are provided by
Verizon Wireless.
1. With the battery
removed from the
phone, insert the SIM
card face down into the
slot provided.
2. Slide the SIM card as far
as possible to the right,
beneath the SIM card
retaining brackets.
3. Once the card is secured
in the SIM slot, install
the battery as outlined in the following section, then turn
the phone on.
Section 2
Section 2: Understanding Your Phone 27
Page 28
Remove the SIM card
Note: Press and hold to turn
off the phone (if on).
1. Remove the battery.
2. Slide the SIM card to
the left, then lift to remove.
Important: Please handle the SIM card on its sides. Avoid touching the
circuits as this may cause damage to the SIM.
Important: Verizon Wireless has provided a unique SIM card to be used
with your SCH-i830.
Battery
The i830 comes with a standard rechargeable battery,
power accessory, and headset.
Note: The battery for the i830 can be charged before it is fully drained
without causing damage.
Section 2
Install the Battery
1. Place the battery on the back of the phone, making sure
the plastic tabs are aligned with the corresponding holes
in the phone.
28
Page 29
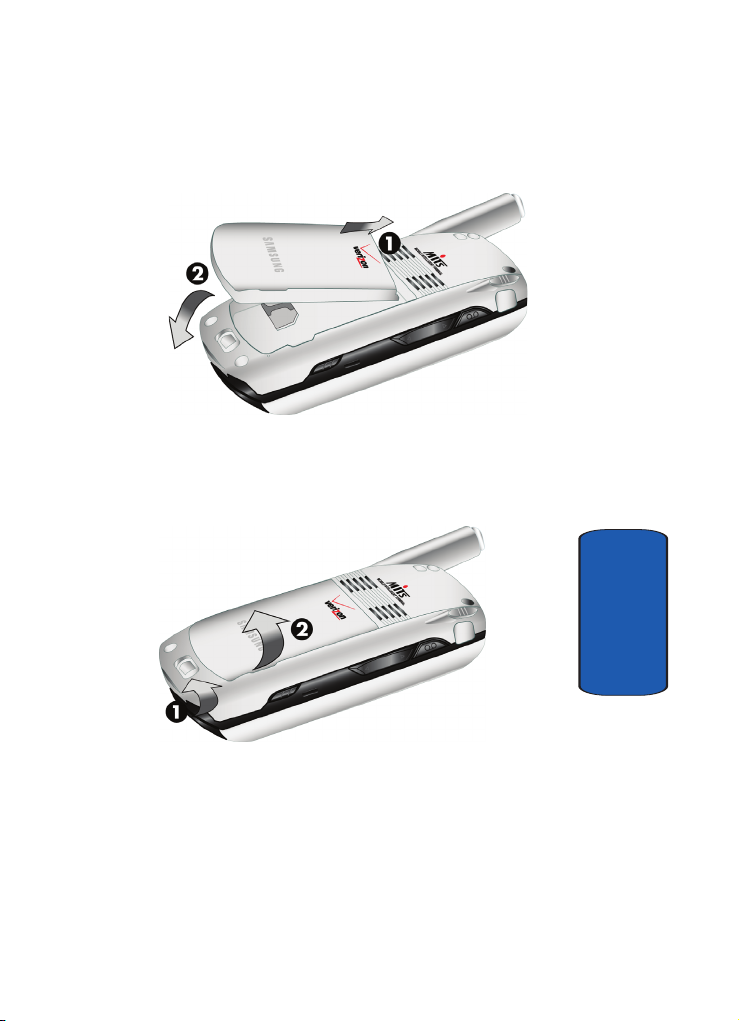
2. Gently push the battery up until it snaps into place.
Remove the Battery
1. Slide the battery release latch to the left.
2. Lift the battery up and to the left to remove.
Battery
Section 2
Section 2: Understanding Your Phone 29
Page 30

Charge the Battery
Note: The i830 comes with a rechargeable battery. Fully charge this
battery before using your phone.
Your phone is powered by a rechargeable standard
Li-ion battery. Only use Samsung-approved charging
devices and batteries. Samsung accessories are designed
to maximize battery life. Using other accessories may
invalidate your warranty and may cause damage.
Checking Battery Charge
Keeping track of the battery’s charge is important. If the
battery level becomes too low, your phone automatically
shuts down and you could lose important data. For a
quick check of your phone’s battery level, tap the time
located in the upper right corner of the screen. A battery
icon is displayed in the Time and Next Appointment
window.
To perform a battery check using the drop down menu:
1. Tap Start located in the upper left corner of the screen.
Section 2
2. Tap Settings.
3. Tap the System tab at the bottom of the screen.
4. Tap Power.
Battery Capacity
When the battery becomes low, a warning window
displays and the backlight turns off.
30
Page 31

Battery
Note: Long backlight settings, searching for service, vibrate mode and
browser use affect the battery’s talk and standby times.
There is also an internal backup battery that saves all
settings in the phone if the regular battery is discharged.
An internal backup battery needs an initial charge of 24
hours.
The internal battery maintains data for about four hours.
Perform ActiveSync operations or a backup utility
frequently to avoid loosing any information in case the
battery is fully discharged. For more information see
"ActiveSync®" on page 152.
Section 2
Section 2: Understanding Your Phone 31
Page 32

Section 2
32
Page 33

Section 3: Call Functions
Topics Covered
• Making a Call
• Phone Modes
• Answering a Call
• Using the Speakerphone
• Your Phone Number
•Call Log
•Roaming
• TTY
• VoiceSignal
This section describes how to make or answer calls. It also
includes the features and functionality associated with
using your phone, as well as explaining the voice
command feature built into your Samsung SCH-i830.
Section 3: Call Functions 33
Section 3
Page 34

Making a Call
There are several ways to make calls on your new i830.
You can use speed dial, voice dial, call history, or simply
enter the desired number and tap .
Note: Keys, such as , are referred to as “soft” keys because they
are not part of the hardware. Soft keys are touch-sensitive keys, appear in
your display, and change function according to the feature being used.
Place a Call Using Soft Keys
1. Set the PDA Power key to its middle position.
2. With the slider down, tap Start, then select Phone from
the drop down menu or Press the key to access
the dialer.
3. Tap the desired number using the stylus. If you make a
mistake while dialing, tap . If you tap and hold
, all digits are cleared and you can start over.
Note: Always use the stylus when touching the screen to avoid scratching
or damage caused by other instruments.
4. Tap . The number is dialed.
Dialing Emergency Numbers
You can dial any of the numbers 911, *911, or #911 to place
an emergency call.
If your phone is in Verizon CDMA mode, dial 911, *911, or
#911, then press .
Section 3
If your phone is in Int’l GSM mode, dial 911, then press
.
34
Page 35

Phone Modes
Note: If you dial 112 or 999 while in Int’l (GSM) mode, your phone dials the
emergency number immediately (no prompt).
Placing GSM International Calls
Call the U.S. from another country
1. In standby mode, press and hold to display the
“+” symbol. The “+” symbol automatically inserts the
exit code for the country from which you are calling.
2. Press to insert the U.S. country code, then enter
the area code and number.
3. Press . The number is dialed.
Calling Internationally from another country (GSM Only)
1. In standby mode, press and hold to display the
“+” symbol. The “+” symbol automatically inserts the
exit code for the country from which you are calling.
2. Enter the country code of the person you are calling.
3. Enter the area code, without the leading zero, followed
by the number of the person you are calling. Please note
there are some exceptions for leaving out the leading
zero such as Italy, Finland and Spain.
Phone Modes
Your phone is capable of operating in a number of
countries on both CDMA (Code Division Multiple
Access) and GSM (Global Systems for Mobile) networks.
While in the United States or on other CDMA roaming
networks, use your phone in Verizon (CDMA) mode. Use
your phone in Int’l (GSM) mode while in countries
Section 3
Section 3: Call Functions 35
Page 36

serviced by GSM network. For a complete list of countries,
please visit
Note: When your phone is in Verizon (CDMA) mode, it does not necessarily
mean that you are on the Verizon Wireless Network. You may roam on
certain other carriers’ CDMA networks domestically and internationally
when your phone is in Verizon (CDMA) mode. For more information, see
www.verizonwireless.com.
www.verizonwireless.com.
1. With the slider down, tap Start and tap Settings.
2. The Personal tab is highlighted. Tap Service Mode. The
following options appear in the display.
• Int’l GSM
• VZW CDMA
3. Tap desired mode of operation, then press OK. A
dialogue box appears in the display asking if you wish to
reset modes.
4. Typ e Ye s to confirm and press OK. Tap Cancel to return
to the previous screen.
5. If you pressed OK, the phone restarts and powers up in
the selected mode of operation.
Place a Call Using the Keypad
1. Extend the slider up, then enter the number using the
keypad.
2. Press . The number is dialed.
One-handed Dialing
One handed dialing allows you to make a call while using
Section 3
just one hand. To make a call:
1. Press the Contacts button.
36
Page 37

Answering a Call
2. Use the up or down navigation key to select the contact
entry you want to dial, then press .
Note: If you press and hold the OK/Navigation key down, letters are
displayed that will automatically display the first entry beginning with that
letter.
3. Use the up or down navigation key to select the number
you want to dial, then press to display the
number in the phone screen.
4. Press again to dial the number.
Answering a Call
Make sure that the phone is turned on.
■ When you receive an incoming call, the Phone Incoming
screen is displayed. Tap Answer or the soft key,
press the Send key to answer the call, or tap Ignore
to let the call go to voicemail.
Note: When you receive a call, you can silence the ringer by pressing the
volume key on the side of your phone.
Using the Speakerphone
The speakerphone allows you to speak to others without
the need to hold the phone to your ear.
1. While in a call, press and hold to activate the
speakerphone. The speakerphone icon appears in
the top of the screen.
2. To deactivate the speakerphone, press and hold
again.
Section 3: Call Functions 37
Section 3
Page 38

Display Your Phone Number
1. Tap Start, then select Phone from the drop down menu.
2. Tap Tools, then select Options.
3. The Settings screen displays with your phone number at
the top of the screen.
4. Tap to exit.
Call History
When a call is received, made, or missed a record of the
call is saved with all the available information in Call
History. The Call History logs are:
• All Calls - Displays all calls, missed, outgoing, incoming and by
caller.
• Missed - Displays any missed calls.
• Outgoing - Displays all outgoing calls made from your phone.
• Incoming - Displays all the incoming comes that were
answered.
• By Caller - Allows you to select an entry from the contacts and
then displays any call information related to the contact.
If you tap the entry, the time, date, and duration of the call
appears in the display.
To access the Call History menu, follow these steps:
1. Tap Start located in the upper left corner of the screen.
2. Tap Phone from the drop down menu.
3. Tap to display the Call History menu.
Section 3
Place a Call Using Call History
1. From the phone screen, tap .
38
Page 39

Call History
2. Tap the drop down arrow in the upper left corner and
select the desired call log list.
3. Tap the phone icon located to the left of the entry to
make a call.
4. When finished, tap .
Call History Options
Call log options allows you to view the call times for all
calls and recent calls. You can also set the amount of time
to keep call log items before they are deleted. To access the
call log options:
1. From the phone screen, tap .
2. Tap Tools and select Call Timers.
3. Tap the drop down arrow under Delete call history
items older than and select the option you want.
4. Tap to exit.
Create a Contact Using Call History
1. From the phone screen, tap .
2. Tap the drop down arrow in the upper left corner and
select the desired call history list.
3. Tap and hold on the desired entry. Select Save to
Contacts from the menu.
4. Enter the contact information.
5. When finished, tap .
Section 3
Deleting Call History Entries
To delete call history entries:
Section 3: Call Functions 39
Page 40

1. From the phone screen, tap .
2. Tap the drop down arrow and select the desired call
history list you want.
3. To delete a call from the list, tap and hold the entry you
want to delete, then tap Delete from the pop-up menu.
4. Tap Yes to confirm the deletion, then tap to exit.
5. To delete all calls in the call list, tap Tools and select
Delete all calls.
6. Tap Yes to confirm the deletion.
7. Tap to exit and return to the phone screen.
Note: To delete all call history entries, select All Calls.
Send Message using Call History
Text messages can be sent to other users that support SMS
capabilities.
Note: Contact your service provider for more information on SMS
messaging services.
To send a new text message from a call history entry:
1. From the phone screen, tap .
2. Tap the drop down arrow and select the desired call log
list.
3. Tap and hold on the desired entry. Select Send Text
Message from the menu.
Section 3
4. Enter the subject and message, and tap Send when
finished.
40
Page 41

Roaming
Roaming
What is Roaming
Your phone can roam on other digital networks. Roaming
occurs when you travel outside a pre-designated
coverage area. The roaming icon appears on when in
roaming is active, and extra charges may apply when
making or receiving a call.
Note: Some features may be unavailable while roaming. Roaming also
consumes additional power from the battery requiring more frequent
charges.
Roaming Options
The following roaming options are available:
• Home only - Your phone is available for normal operation only in
the designated coverage area.
• Automatic-A - The preferred roaming list is used to acquire
service. If no preferred systems are found, any digital “A”
system is acquired.
• Automatic-B - The preferred roaming list is used to acquire
service. If no preferred systems are found, any digital “B”
system is acquired.
Note: Contact your service provider for information regarding preferred
systems.
To change your Roaming option, follow these steps:
1. Tap Start, then select Phone from the drop down menu.
2. Tap Tools, then select Options. The Settings screen is
displayed.
Section 3: Call Functions 41
Section 3
Page 42

3. Tap the Service tab, then select the Roaming option you
want from the drop down menu.
TTY
Your i830 is fully TTY compatible, and it allows you to
connect TTY equipment to the phone’s headset jack.
However, before you can use a TTY device, you need to
enable TTY functions using these steps:
1. Tap , , , , .
2. Choose from the following options:
• TTY On
• TTY Off
3. Tap your selection and tap Save to exit and return to the
Phone screen.
Note: If TTY is enabled, you can attach Telecommunucation Devices for the
Deaf to the handset.
VoiceSignal
VoiceSignal is advanced speech recognition software that
can be used to activate a wide-variety of functions on your
Pocket PC. VoiceSignal software automatically voice
activates all numbers in your Contacts for voice dialing or
searching, and no pre-recording or training is needed.
VoiceSignal commands allow you to dial numbers,
lookup contact information, and open applications using
your voice. Simply say a command at the prompt to open
your contacts, launcher, the Picsel Browser, and more.
Section 3
1. Tap Start, then select Programs from the drop down
42
Page 43

VoiceSignal
menu. Tap VoiceSignal.
2. After a brief pause, “Say a Command” appears in the
display and is announced through the speaker.
3. After the phone beeps, say the name of the command
that you want to perform. The VoiceSignal commands
are:
• Call: Lets you dial a phone number by saying a name saved in
your contact list or by saying the digits in the telephone
number.
• Lookup: Lets you retrieve contact information for any entry in
your contacts list.
• Open: This provides you with one-step access to many of your
phone’s applications such as Calendar.
The following sections provide more information about
the VoiceSignal commands.
Call a Name or Number
The Call command lets you dial a person by saying the
name you’ve stored for that person in your contact list or
by saying the telephone number’s digits, even if you have
not saved the number in contacts.
Voice Dialing Tips
• Voice dialing works best in quieter environments.
• When pronouncing a name or number, speak at a normal
speed, and there is no need to pause between digits.
• The phone recognizes the digits one, two, three, four, five, six,
seven, eight, nine, zero, and oh (zero). It doesn’t recognize
numbers such as “one eight hundred” for “1-800.” Instead,
say “one eight zero zero,” or “one eight oh oh.”
Section 3
Section 3: Call Functions 43
Page 44

• The phone recognizes only valid seven or ten-digit North
American phone numbers, optionally preceded by the digit “1.”
• If you are experiencing frequent problems with Voice Dial
recognizing your commands, try adapting it to your voice,
which greatly improves its accuracy. See "Adapting Digits" on
page 45 for more information.
Dialing a Name
1. Tap Start, then select Programs from the drop down
menu. Tap VoiceSignal.
“Say a Command” appears in the display and is
announced through the speaker.
2. Say “Call.”
The phone prompts, “Say the name or number.”
3. Say the full name of the person you want to call, exactly
as it is entered in your Phonebook.
The phone may display one or more names on the
screen and prompts “Did you say?”
4. To confirm the name you spoke, wait for the beep and
then say “Yes” or choose the correct name from the
choice list using your navigation key.
Note: If the name that you pronounced has more than one associated
number, the phone displays the different locations (such as “home” or
“work”) and prompts you, “Which number?” In this case, pronounce the
location that you want to call. The phone dials the number.
Section 3
5. The phone repeats what you said and then prompts,
“Connecting” and dials the number.
44
Page 45

VoiceSignal
Digit Dialing
1. Tap Start, then select Programs from the drop down
menu. Tap VoiceSignal.
“Say a Command” appears in the display and is
announced through the speaker.
2. Say “Call.”
The phone prompts, “Say the name or number.”
3. Pronounce the number naturally and clearly.
The phone may display one or more names on the
screen and prompts “Did you say?”
4. To confirm the number you spoke, wait for the beep and
then say “Yes” or choose the correct name from the
choice list using your navigation key.
5. The phone dials the number.
Adapting Digits
Voice dialing works well for most people without special
adaptation. However, people with strong accents or
unique voice characteristics may receive better results
after adapting the system to match their voices.
Note: You should adapt Digit Dial only if the system is frequently unable to
recognize your speech. After you adapt Digit Dial, your phone is
customized to your voice, and your voice only. Others will not be able to
use it unless they reset the phone to factory defaults.
Adaptation involves recording several digit sequences to
adapt the system to the unique properties of your voice.
The adaptation process takes about three minutes.
Section 3
Section 3: Call Functions 45
Page 46

Tips for Adapting Digit Dial
• Adapt digits in a quiet place.
• Make sure you wait for the beep before starting to speak.
• Speak clearly, and say each digit distinctly.
• If you make a mistake while recording a sequence of digits, or if
there is an unexpected noise that spoils the recording, rerecord that sequence.
• Only adapt digits if you regularly have problems with digit
dialing. Once adapted, digit dialing will not work as well for
other people using your phone.
Adapt Digit Dial to Your Voice
1. Tap Start, then select Programs from the drop down
menu. Tap VoiceSignal.
2. Tap Settings.
3. Tap Digit Dialing.
4. Tap Adapt Digits.
5. Read the description until you are comfortable to
proceed, then tap OK.
Your phone displays the first digit sequence and “Please
say” plays through the speaker followed by the four
digits appearing in the display.
6. Wait for the beep and repeat the digits using your normal
tone of voice.
7. After a moment, the phone plays back the recording and
prompts “Did the recording sound ok?” If the recording
Section 3
was good, say “Yes.” If you need to re-record, say “No.”
46
Page 47

VoiceSignal
If you say “No,” the phone prompts you to pronounce the
digits again. Wait for the beep and then re-record.
Repeat this step until you’re satisfied with the recording.
8. After confirming that a recording sounds ok, repeat the
recording process with the next set of digits until all
sequences have been completed.
9. After the final sequence, the phone prompts “Adaptation
complete.”
Reset Digit Dial Adaptation
This option erases an adaptation and resets Digit Dial to
its original state.
1. Tap Start, then select Programs from the drop down
menu. Tap VoiceSignal.
2. Tap Settings.
Note: Reset Digits is only available if you have adapted digit dial for your
voice.
3. Tap Digit Dialing. Tap Reset Digits.
4. When the confirmation screen displays, tap OK to
proceed, or tap Back to cancel.
5. If you tap OK, then the message “Digit Adaptation
Reset” displays.
Looking up Contacts
Use the Lookup command to look up contact information
for any person stored in your Contacts list.
1. Tap Start, then select Programs from the drop down
Section 3: Call Functions 47
Section 3
Page 48

menu. Tap VoiceSignal.
The phone prompts, “Say a command.”
2. Say “Lookup” followed by the name of a person in your
Contacts list.
After you say a name, you may be prompted, “Did you
say?” followed by the first of up to three names. To
confirm a name, wait for the beep and then say “Yes.”
If there is no match found, the phone responds with
“Sorry, no match found.”
Opening Applications
The Open command allows you to open an application or
to quickly access several menus on your phone.
1. Tap Start, then select Programs from the drop down
menu. Tap VoiceSignal.
The phone prompts, “Say a Command.”
2. Say “Open” followed by the application or menu item you
want.
For example, say, “Open Contacts.” The Contacts screen
is displayed.
Note: To see a list of applications or menu items, say “Open” but do not
specify a destination. Your phone displays available options and prompts
“Please Choose.” Say “Next Menu” to scroll through other available
choices applications and menu choices.
Section 3
48
Page 49

Section 4: Menu Navigation
Topics Covered
• Navigating your PDA
• Menu Types
• Launcher
• Task Manager
This section explains the menu navigation for your
phone. It also includes a description of the Launcher and
Task Manager applications included with your Samsung
SCH-i830.
Section 4
Section 4: Menu Navigation 49
Page 50

Navigating Your PDA
Your i830 provides the power of a personal computer
with exceptional portability and integration. Unlocking
its power begins with customizing the i830 so that it
becomes an extension of your desktop or laptop
Section 4
computer.
The i830 is powered by Windows Mobile 2003 Software
for Pocket PC Phone Edition, providing the power and
familiarity of Microsoft Windows. Pocket versions of
popular Microsoft applications such as Word, Excel,
Windows Media Player® and Outlook® eliminate the
need to learn new software.
Menu Types
There are two menus available in the i830 menu options.
They include the following:
• Start Menu
• New Menu
The Start menu contains links
to all the applications and
settings information, similar
to a Windows based PC
system. To access the Start
menu, simply use the stylus to
tap in the upper left corner of
the screen on the word Start.
A menu list is displayed, and
from this pull down type
menu, all other applications
and settings can be accessed.
50
Page 51

The New menu options
allow you to configure what
is displayed when you tap
on the New menu located in
the bottom left corner of the
screen.
Both the Start and New
menus can be modified to
display some or all of their
options. To access and
change these menus, follow
the steps below.
Start Menu
1. Tap Start located in the upper left corner of the screen.
2. Tap Settings, then tap the Personal tab.
3. Tap t h e Menus icon. The Start Menu tab displays.
4. Check the items that you want displayed in the Start
menu. Items that are not checked are displayed in the
Programs menu.
5. Press to save your settings and exit.
New Menu
1. Tap Start located in the upper left corner of the screen.
2. Tap Settings, then tap the Personal tab.
3. Tap t h e Menus icon, then tap the New Menu tab.
4. Check the items that you want to be displayed in the
New menu.
5. Press to save your settings and exit.
Menu Types
Section 4
Section 4: Menu Navigation 51
Page 52

Launcher
The Launcher application is a
task and file launcher with
great additional features.
Programs, games, utilities,
Section 4
and files can all be launched
from customized pop-up
windows using your stylus or
function keys located on your
i830.
Opening Launcher
You can open the Launcher
application two ways. Either press the key on the
i830, or follow the steps below to access the application
using menu selection.
1. Tap Start located in the upper left corner of the screen.
2. Tap Programs.
3. Tap Launcher. The Launcher pop-up window displays.
Launcher Groups
When you open the Launcher application, a Group
window displays. Your phone has the following default
pop-up windows for the Launcher application:
• MITs
• Mobile Office
• Utilities
• Games
• Control Panel
52
Page 53

Launcher
Except for the Control Panel window, each pop-up can be
changed to delete or include programs or features in your
phone that you use often or want to group specifically
group together. Additionally, you can add new groups
and customize their windows also.
To display a group or to change from one group to
another, follow these steps:
1. Press to open the Launcher application. The last
active group used by the application displays.
2. To change to a different group, tap to display the
group before, or tap to display the group after the
currently displayed pop up window.
3. You can also tap the title bar the current pop-up window
to display a drop down that lists all groups, and then
select the group you want from the list.
4. After your selection, the program or function you chose is
displayed and the Launcher window closes.
Launcher Configuration
You can customize each pop-up window available in the
Launcher application. You can add your own user
defined pop-up lists or move functions and features
between the groups that are already defined.
To display the Launcher Configuration console, follow
these steps:
1. Press to open the Launcher application. The last
active group used by the application displays.
2. Tap located at the bottom of the Launcher
window.
Section 4
Section 4: Menu Navigation 53
Page 54

Adding and Deleting Launcher Groups
To add a group that displays as a pop-up window when
Launcher opens, follow these steps.
1. Press to open the Launcher application. The last
Section 4
active group used by the application displays.
2. Tap located at the bottom of the Launcher
window.
3. Highlight any group in the Group panel on the
configuration screen.
4. Tap New, then enter the name of the new group. The
name you choose can have a maximum of 25 characters.
5. Tap OK. The name of the new group displays in the
Group panel at the bottom of the list.
Note: To move a group either up or down in the list, highlight the Group
name and then tap either Up or Down buttons in the Group panel.
To delete a group that displays as a pop-up window when
Launcher opens, follow these steps.
1. Press to open the Launcher application. The last
active group used by the application displays.
2. Tap located at the bottom of the Launcher
window.
3. Tap the group you wish to edit. Members of the group are
displayed in the lower portion of the screen.
4. Highlight the members of the group to delete and tap the
Delete key.
54
Page 55

Launcher
Note: You must delete all members of a group before deleting the group.
5. Highlight the group you want to delete in the Group
panel on the configuration screen.
6. Tap Delete. A confirmation window displays.
7. Tap Yes . The group is deleted and the configuration
screen displays.
Adding and Deleting Functions in a Group
The functions and the features that display in a group
pop-up window when Launcher opens can be moved
between groups or deleted from an existing group, or you
can add functions, applications, or features that you use to
any group you create.
Group must already be defined or added before you can
move applications to them. If you need information about
adding a group to Launcher, see the section above
“Adding and Deleting Launcher Groups.”
Once a group is setup in Launcher, you can follow these
steps to add an application or other function to the pop-up
window.
1. Press to open the Launcher application. The last
active group used by the application displays.
2. Tap located at the bottom of the Launcher
window.
3. Highlight the group you want to add a function to in the
Group panel on the configuration screen.
Section 4
Section 4: Menu Navigation 55
Page 56

The name of the group that you highlight appears above
the lower panel on the configuration screen, as well as
any applications or other functions already stored in the
group.
Section 4
4. To add a new application or other feature to the group,
tap New.
The Select a Program screen displays and is similar to
the File Manager function. Use the menu tree to navigate
to the folder that contains the application or feature you
want add.
Once you select the folder that contains the target
function, a list of programs or link files display in the
bottom portion of the Select a Program screen.
Note: If you select a folder that does not contain either executable or link
files (i.e., .exe or .lnk), then the bottom pane of the screen remains empty.
5. Select the program or link you want, then tap . The
Edit display name screen displays with the default
name of the program in the Name field.
6. Change the name of your selection, if desired, and tap
OK. The Configuration screen displays and the
application, folder, or feature you selected appears in the
list.
7. Repeat Steps 4 through 6 until you have added all of the
features you want in the group, then tap . The Today
screen displays and last active Launcher window
displays.
56
Page 57

Launcher
8. To view the group you made change to, navigate to the
group window you want. For information on selecting a
different group in Launcher, see "Launcher Groups" on
page 52.
To delete a function from a group in Launcher, follow
these steps.
1. Press to open the Launcher application. The last
active group used by the application displays.
2. Tap located at the bottom of the Launcher
window.
3. Highlight the group you want to delete a function from in
the Group panel on the configuration screen.
The name of the group you highlight appears above the
lower panel on the configuration screen, as well as any
applications or other functions already stored in the
group.
4. To delete an application or other function associated with
the group, highlight the function you want to delete, then
tap Delete. A confirmation screen displays.
5. Tap Yes to confirm. The Configuration screen displays
and the function you deleted is removed from the group.
Section 4
Note: Deleting an application or function from a group in Launcher does
not delete the feature from your Pocket PC. You are removing a shortcut in
Launcher and not deleting the program from your Pocket PC.
Moving Functions Between Groups
To move an application or another function from one
group to another, follow these steps.
Section 4: Menu Navigation 57
Page 58

1. Press to open the Launcher application. The last
active group used by the application displays.
2. Tap located at the bottom of the Launcher
window.
Section 4
3. Highlight the group in the Group panel that contains the
application or function you want to move.
The name of the group you highlight appears above the
lower panel on the configuration screen, as well as any
applications or other functions already stored in the
group.
4. Highlight the application or other function you want to
move, and then tap Move. The Move to group screen
displays.
5. Highlight the group where you want to move the
application or function you selected, then tap . The
Configuration screen displays and the application or
function is moved.
Task Manager
The Task Manager is an application that shows the
programs that you are currently running as icons so you
can quickly select or close them.
To open the Task Manager, follow these steps:
1. Press and hold the Launcher key. The Task
Manager bar displays.
2. Use the right or left navigation keys to highlight the
program you want.
58
Page 59

Task Manager
3. Tap to select the program and display it on your
screen.
Section 4
Section 4: Menu Navigation 59
Page 60

Section 4
60
Page 61

Section 5: Entering Text
Topics Covered
• Built-in QWERTY Keyboard
• Selecting Text Input Mode
• Word Completion
• Text Entering Options
This section outlines how to select the desired text input
mode when entering characters into your Samsung SCHi830. This section also describes the predictive text entry
system that reduces the amount of key strokes associated
with entering text.
Section 5
Section 5: Entering Text 61
Page 62

Built-in QWERTY Keypad
Your i830 has a built-in standard typing keypad,
commonly called QWERTY, which can be accessed when
you extend the slide to it up position. Using this keypad,
you can type letters, punctuation, numbers, and other
special characters into text entry fields or other
applications available on your Pocket PC.
Selecting Text Input Mode
There are five different character input methods
available. They are:
Section 5
• Built-in QWERTY keyboard
• Block Recognizer
• Keyboard
• Letter Recognizer
• Tra ns cr ib er
Each of these methods allow you to input alphanumeric
characters and symbols into the i830. In addition to the
input methods, there is Word Completion and other
options associated with the input selected.
To access the Input settings:
1. Tap Start located in the upper left corner of the screen.
2. Tap Settings.
3. Tap the Personal tab.
4. Tap the Input icon.
62
Page 63

Selecting Text Input Mode
Block Recognizer
This input method uses the traditional writing area box
split in the middle. The left side is us ed to write letters and
the right side is for number entry. Symbols and common
functions are located in other smaller boxes located to the
right of the writing box area. There are no options
associated with this type of input method.
Keyboard
This input method displays an on-screen keyboard that
can be used to input characters by tapping the screen
using the stylus. The keyboard entry method has the
following options:
• Large keys
• Small keys
• Use gestures for the following keys
To select larger or smaller keys, simply tap the button next
to the desired option.
The gestures feature allows you to replace keys used on
the keyboard for space, backspace, shift+key, and enter
by drawing a gesture or motion. The large key option
must be selected for this option to be available.
Letter Recognizer
This option allows you to enter text using your own
handwriting. The screen is divided into three different
areas. A capital letter area, small letter area, and a number
area. Characters are entered by printing letters in each
area. The character is then analyzed and typed on the
Section 5
Section 5: Entering Text 63
Page 64

screen automatically. The following options are
associated with this method:
• Quick stroke
• Right to left crossbar
• Allow accented characters
Transcriber
The transcriber option is similar to the letter recognizer,
except instead of entering characters into a designated
area, you can enter entire words and sentences using your
own handwriting. Transcriber supports both printing
and cursive writing styles and then automatically types
the information on the screen. The following general
Section 5
options are associated with this method:
• Sound On - Turns the sound On or Off.
• Show into screen - Displays the help or introduction screen
whenever the transcriber option is selected.
• Show icon bar - Displays the icon bar.
• Inking Color - Allows you to select the color and size of the
stroke line.
There are also some transcriber recognizer options. They
are:
• Add space after - Automatically adds a space after each writing.
• Separate letters mode
• Speed of recognition vs. Quality - Determines the speed at
which the writing sample is analyzed. The faster the setting the
less likely to get all words correct. Better quality is achieved
with longer processing.
64
Page 65

Word Completion
• Recognition start time - Allows you to set the time of recognition
between new writings.
Word Completion
Word completion settings determine if words
automatically display after entering a defined number of
characters on the screen. The following options are
available:
• Suggest words when entering text
• Suggest after entering (1-7) letter(s).
• Suggest (1-4) word(s).
• Add a space after suggested word.
• Replace text as you type.
To access the Word Completion settings:
1. Tap Start located in the upper left corner of the screen.
2. Tap Settings.
3. Tap t h e Personal tab, and then tap the Input icon.
4. Tap Word Completion tab.
5. Select the number of letters or words by tapping the drop
down arrow associated with each option.
6. Tap to save and exit.
Section 5
Text Entering Options
Note: The options settings only apply when writing or recording is
supported.
In the options tab, you can select:
Section 5: Entering Text 65
Page 66

• Voice recording format
• Default zoom level for writing
• Default zoom level for typing
• Capitalize first letter of sentence
• Scroll upon reaching the last line
To access the Options settings:
1. Tap Start located in the upper left corner of the screen.
2. Tap Settings.
3. Tap the Personal tab, and then tap the Input icon.
4. Tap the Options tab.
Section 5
5. Select or tap the drop down arrow associated with each
option.
6. Tap to save and exit.
66
Page 67

Section 6: Contacts
Topics Covered
• Understanding Your Contacts
• Adding Notes to Contacts
• Speed Dialing Contacts
• SIM Manager
This section describes how to manage your daily contacts
by storing someone’s name and number in your
phonebook. These entries can then be sorted by name,
entry, or group.
Section 6
Section 6: Contacts 67
Page 68

Understanding Your Contacts
The Contacts feature is used to save important
information regarding your friends, colleagues, or
business acquaintances. The contacts screen allows you to
save the person’s:
• Name
• Job Title
• Department
• Company
• Work Telephone, Fax &
Address
• E-mail
• Mobile Telephone
• Web page
• Office Location
• Home Telephone & Address
• Categories
Section 6
• Other Addresses
• Pager
• Car Telephone
• Home Fax
• Work2 & Home2 Telephone
• Radio Telephone
• E-mail2 & E-mail3
• Assistant
68
• Assistant Telephone
• Birthday
• Anniversary
• Spouse
• Children
Page 69

Understanding Your Contacts
In addition to the information available in contacts, you
can also record or write a note associated with the contact.
All of this information can be synchronized with a PC or
Laptop using the Microsoft ActiveSync application. See
"ActiveSync®" on page 152 for more information.
Add a New Contact
1. Tap Start located in the upper left corner of the screen
and select Contacts.
Note: You can also press the Contacts button located in the front on
the lower right corner of the i830.
2. Tap New.
3. Enter the desired information in the spaces provided.
When finished, tap .
Find a Contact
To locate a specific contact, you can use the find feature.
Find allows you to enter the fi rst few letters of the contact
entry and then have the results displayed on the screen.
The Find box is located in the upper right corner of the
contact screen. To find a contact:
1. Press to open Contacts.
2. Tap t h e Find a name box and enter the first few letters
of the desired entry.
3. Tap the entry from the list of possible matches to view
the summary screen
4. If the entry is not the one your looking for, tap to
return to the list of possible matches.
Section 6
Section 6: Contacts 69
Page 70

Edit a Contact
1. Press to open Contacts.
2. Locate the desired contact using find or scrolling through
the contact list with the navigation key.
3. Tap the desired contact to view the summary screen.
4. Tap Edit.
5. Change or update the desired information.
6. Tap to save and exit.
Delete a Contact
To delete a contact:
1. Press to open Contacts.
2. Use the navigation key to highlight the contact you want
to delete.
3. Tap Tools and select Delete Contact.
4. Tap Yes to confirm the deletion.
Make a Call from Contacts
Section 6
To make a call from the contacts screen:
1. Press to open Contacts.
2. Tap the desired contact from the list.
3. From the summary screen, tap the phone number.
4. The call is dialed automatically. To end the call, tap the
End button on the Phone Connected screen.
Note: If you tapped Hide, you can display the phone main screen by
tapping the signal strength icon in the top right of the screen.
70
Page 71

Understanding Your Contacts
Beam a Contact via IR
Your i830 is equipped with an infrared port (IR) which
allows you to send and receive information wirelessly
between two IR Pocket PC devices. To beam a contact:
1. Press to open Contacts.
2. Tap the desired contact from the list to view the
summary screen.
3. Tap Tools and select Beam Contacts.
4. Align the ports between the two devices.
5. When the contact has been successfully transferred, tap
to exit.
Beam Contacts via IR without Confirmation
You can send and receive many contacts via IR without a
confirmation message. To beam many contacts at once,
follow these steps:
1. For the device that will receive the contacts, tap Start
and then select Settings.
2. Tap Connections and select Beam.
3. Tap Receive all incoming beams, which sets the
device to Beam Receive mode.
4. For the device sending the contact information, press
the Contact button to open Contacts.
5. Select the contacts from the list by dragging your pointer
across the entries you want.
6. Tap Tools and select Beam Contacts.
Section 6
Section 6: Contacts 71
Page 72

7. Align the IR ports between the two devices.
8. When the contacts have been successfully transferred,
tap to exit.
Adding Notes to Contacts
Notes allow you to record or write a note that is attached
and saved with the contact entry. When you view the
summary screen on the contact, you can view or listen to
any notes that are associated with the contact.
Adding a Note
1. Press to open Contacts.
2. Tap the desired contact from the list.
3. Tap the Notes tab.
4. To record a note, tap record icon located in the
command bar. Tap to begin the voice recording.
Tap when finished.
5. To write a note, tap the pen icon and enter the note
using the desired entry method.
Section 6
6. To exit and save, tap .
Deleting a Note
To delete a note:
1. Press to open Contacts.
2. Tap the desired contact from the list.
3. Tap the Notes tab.
4. Tap Edit and select Select All.
72
Page 73

Speed Dial Contacts
5. Tap Edit and select Clear.
6. To exit and save, tap .
Speed Dial Contacts
Speed dial can be used to the dial contacts that you talk to
the most. Speed dial allows you to press either one or two
keys to dial to the contact. Memory locations 2-99 are
available for speed dialing. To speed dial:
1. Tap Start located in the upper left corner of the screen.
2. Tap Phone, and then tap .
3. Tap New in the bottom left corner of the screen.
4. Tap the contact that you want to add to Speed Dial.
5. Tap the up or down arrows next to Location to select the
desired memory location.
6. Tap to save.
7. To exit the contact summary screen, tap again.
SIM Manager (GSM Mode)
The SIM Manger allows the input and editing of
information into you Phone Book, SMS Inbox, and the
display of your own number and any additional numbers
you save. There are two ways to access the SIM Managerfrom the Programs menu option or while in Contacts then
tapping the Tools tab.
SIM PhoneBook
To access the SIM PhoneBook use the following
procedures.
1. Tap Start located in the upper left corner of the screen
Section 6: Contacts 73
Section 6
Page 74

and select Contacts.
2. Tap Tools located on the bottom of the screen.
3. Tap SIM Manager the SIM PhoneBook displays.
Add a PhoneBook Entry
1. Tap Start located in the upper left corner of the screen
and select Contacts.
2. Tap Tools located on the bottom of the screen.
3. Tap SIM Manager the SIM PhoneBook displays.
4. Tap New located in the lower left corner of the screen.
5. Enter the Name, Phone Number, and Index number to
be associated with this entry. Tap .
Move or Copy to Contacts
To m o v e o r c o p y y o u r SIM Phone Book entry to Contacts,
use the following steps:
1. Tap Start located in the upper left corner of the screen
and select Contacts.
2. Tap Tools located on the bottom of the screen.
Section 6
3. Tap SIM Manager the SIM PhoneBook displays.
4. Place a checkmark next to the entry you wish to move or
copy. Tap Tools. Highlight Copy to Contacts or Move
to Contacts.
5. Tap OK or Cancel. A SIM Manager pop-up displays, tap
OK to complete move or copy.
Note: The SIM PhoneBook provides 3-default fields (Name, Phone Number,
and Index). This information is stored on your SIM card to provide
information mobility. When PhoneBook entries are moved or copied to
74
Page 75

SIM Manager (GSM Mode)
Contacts, all input fields are available for entry, however this information is
not stored on the SIM card.
Delete SIM PhoneBook Entry
To delete a Phone Book entry from the SIM Phone Book,
use the following steps:
1. Tap Start located in the upper left corner of the screen
and select Contacts.
2. Tap Tools located on the bottom of the screen.
3. Tap SIM Manager the SIM PhoneBook displays.
4. Place a checkmark next to the entry you wish to delete.
Tap Tools. Highlight Delete.
5. A SIM Manager pop-up displays, tap Ye s to delete or No
to cancel.
Delete All SIM PhoneBook Entry
To delete all SIM PhoneBook entries, use the following
steps:
1. Tap Start located in the upper left corner of the screen
and select Contacts.
2. Tap Tools located on the bottom of the screen.
3. Tap SIM Manager the SIM PhoneBook displays.
4. Tap Tools and tap Select All. Tap Tools. Highlight
Delete.
5. A SIM Manager pop-up displays, tap Ye s to delete or No
to cancel.
Section 6
Section 6: Contacts 75
Page 76

SIM SMS
SIM SMS stores up to 15 sent or received SMS messages on
the SIM card. For text messaging procedures, see "Create
and Send a Text Message" on page 81.
SIM Own Number
The SIM Own Number option provides the ability to store
phone numbers that are used with this SIM card. If you
have more than one phone that uses the same SIM card,
this information may be stored here.
Section 6
76
Page 77

Section 7: Messaging
Topics Covered
• Types of Messages
• Messaging Inbox
• Text Messages
• About E-mail Setup
• E-mail Using Outlook
• E-mail Using ISP
This section discusses the types of messages you can send
and receive, how to set up your phone to work with email,
and how to send email messages using different types of
connections.
Section 7: Messaging 77
Section 7
Page 78

Types of Messages
The i830 is capable of sending E-mail and text messages.
S e n d t e x t m e s s a g e s b y s i m p l y entering the phone number
of the recipient when creating a new message.
Messaging
All incoming messages arrive and are stored in the Inbox
until deleted. If memory is full, new messages are
rejected, so you should delete older messages to free up
space for new messages. The Inbox has three sub menus
at the bottom of the screen labeled, which are New, Tools,
and Accounts. The following sections cover each of these
sub menus in more detail.
New
Use the New sub menu to compose and send a new E-mail
or text message. Send a text message by entering the
phone number of the message recipient in the To field, or
send an E-mail by entering their E-mail address.
Whichever method you use to send a message (E-mail or
text), you’ll need to set up an account, which is discussed
later in this section.
Note: Text messages can only be sent to compatible phones and devices.
To compose a new message, follow these steps:
1. Tap Start, then tap Messaging.
2. Tap New at the bottom of the screen.
Section 7
3. Tap the To field, then enter the E-mail address or phone
number of your recipient.
78
Page 79

Messaging
4. Tap t h e Subj field, then enter a subject for your
message.
5. Below the Subj field is a large box. Tap your stylus in this
area, then begin composing your message using the
preferred method of text entry.
Note: Tap the up arrow next to the keyboard symbol at the bottom right of
the screen to choose your method of text entry.
6. Once you’ve finished composing your message, tap
Send, which is located next to the To and Subj fields.
Tools
The Tools sub menu allows you to view your message
folders, empty deleted items from your Deleted Items
folder, edit My Text Messages (pre-composed messages),
check the status of messages, and set options such as reply
format and others.
1. Tap Start, then tap Messaging.
2. Tap Tools at the bottom of the screen. A pop-up menu
appears in the display with the options listed below:
• Manage Folders: Allows you to create, rename, or delete a
folder.
• Empty Deleted Items: Empty any messages in your
Deleted Items folder.
• Edit My Text: Edit any of the canned (pre-composed)
messages that came with your phone.
• Status: Check the status of messages.
• Options: Set options such as reply format and more.
Section 7
Section 7: Messaging 79
Page 80

3. Tap on any of the options to open the folder and perform
the functions listed in the previous table or to view the
folder’s contents.
Accounts
Set up accounts for each method that you want to use for
sending messages. Accounts are necessary for sending
text and E-mail messages, whether using your ISP or
ActiveSync.
1. Tap Start, then tap Messaging.
2. Tap Accounts at the bottom of the screen. A pop-up
menu appears in the display with the options listed
below:
Note: The Clear ActiveSync or Clear SMS options do not display together
but depend on the type of session selected.
• Connect: Connect to your service provider.
• Clear Text Messages: Clear scheduled SMS sessions.
• New Account: Set up a new account for sending messages.
• Accounts: View your current accounts, or set up a new
account.
• Text Messages: Select the SMS account for sending
messages.
• Outlook E-Mail: Select the Outlook account for sending
messages.
3. Tap on the options you want and then perform the
functions listed or view the folder’s contents.
Section 7
80
Page 81

Text Messages
Text Messages
You can send and receive text messages with other users
that have SMS (Short Message Service) capability. Text
messaging, or SMS messaging, can be sent from one
device to another by addressing a message to the
recipient's phone number.
Create and Send a Text Message
1. Tap Start, then tap Messaging.
2. Tap New.
3. Enter the phone number(s) of up to ten recipient(s) in the
To field. Place a semicolon between numbers, if there is
more than one.
Note: If you are in GSM mode, please refer to the "Placing GSM
International Calls" on page 35.
Note: To select a number from contacts, tap at the bottom of the
screen and select from your list of contacts.
4. Tap t h e Subj field and enter a title for the message.
5. Tap the message area and enter a message using the
desired method of input. When finished, tap the double
drop down arrows to the right of the Subj field.
6. Tap the drop down arrow next to Account and make
sure that Tex t M e s s a g e s is selected.
7. If you would like a delivery confirmation, then tap Tools
and select Options. Tap the check box next to Request
message delivery notification.
Section 7
Section 7: Messaging 81
Page 82

8. Tap Send to send the message.
Note: There is a 160-character limit for text messages. The limit applies to
messages sent using Text Messaging only. If you send a text message with
more than 160 characters, the message truncates after the first 160
characters. Remaining characters are sent in separate messages until all
characters have been sent. Charges apply in accordance with the sender's
and the recipient's calling plans.
My Text Messages
My Text Messages consist of 9 pre-composed text
messages that you can use quickly to send replies without
having to type a message. The default messages are:
• Yes .
• No.
• Thanks.
• Please call my mobile.
• Please call my assistant.
• I’ll be right there.
• I’m running late.
• I’ll get back to you.
• I love my Pocket PC!
Using My Text Messages
1. Create a new text message.
2. Tap My Text and select the desired message from the
list.
Section 7
3. Tap Send to send the message.
82
Page 83

Text Messages
Cancel a Message
■ From the new message screen, tap Edit and select Cancel
Message.
Message Tools
Several message features are available under Tools when
sending a Text message.
• Spell Check: Spell check your message.
• Check Names: Check contacts for the name of the recipient.
• Edit My Text: Edit the pre-composed text messages or create
your own unique messages.
• Language: Select the character set used for your message.
• Options: Select the checkbox to request a message delivery
notification for this message.
Spell Check a Message
1. Create a new text message.
2. Tap Tools and select Spell Check.
3. When the spell check is finished, tap .
4. Tap Send to send the message.
Check Names
1. Create a new text message.
2. Tap Tools and select Check Names.
3. Tap to return to your message.
Section 7
Section 7: Messaging 83
Page 84

Edit My Text Messages
To edit My Text Messages, follow these steps:
1. Open a text message.
2. Tap Tools and select Edit My Text.
3. Select the message that you want to edit.
4. Delete the old message from the box and enter a new
message.
5. Tap to save and exit.
Text Message Folders
There are five message folders in the Text directory. The
folders and their functions are similar to the folders in the
ActiveSync directory, except for Outbox. In ActiveSync,
E-mail is stored in the Outbox until you perform an
ActiveSync with your PC. In Text Messages, new
messages are stored in the Outbox folder until message
sending is complete. The following is a list of Text folders
and their function.
• Deleted Items: Deleted messages are sent to the Deleted Items
folder. Once messages are removed from the Deleted Items
folder, they are permanently erased.
• Drafts: Drafts contain all SMS messages that were not
completed and saved to be sent at a later date.
• Inbox: All incoming SMS messages arrive and are stored in the
Inbox until deleted. If memory is full, new messages are
rejected. Delete older messages to free up space for incoming
messages.
Section 7
• Outbox: When you send a message, it is stored in the Outbox
message sending is complete.
84
Page 85

About E-mail Setup
• Sent Items: Sent Items keeps a record of all sent messages
from your device.
Access Text Message Folders
1. Tap Start, and then select Messaging.
2. Tap Accounts and then select Text Messages.
3. At the top of your screen is an arrow for a drop-down
menu. Tap this arrow to display a menu tree that lists the
folders for Outlook E-Mail, Text Messages, and any other
accounts you have created.
4. Expand the folders for Text Messages by tapping the +
sign next to Text Messages. Select Inbox to display its
contents.
Note: Tap any of the folders within any of the account trees to view the
folder’s contents.
About E-mail Setup
E-mail can be sent and received using ActiveSync, or you
can also configure the i830 to send E-mail using an ISP
account.
Note: For wireless sync E-mail, refer to Wireless Sync on the
Companion CD included in your Gift Box.
E-mail using Outlook
Install ActiveSync on your PC and set up a Standard
Partnership, so you can send/receive E-mail. See "Setup
a Partnership" on page 153. E-mail is composed off-line
Section 7: Messaging 85
Section 7
Page 86

and is sent to the intended recipient(s) the next time you
perform ActiveSync.
1. Tap Start, and then select Messaging.
2. Tap New and enter the E-mail address in the To field.
3. Tap the Subj field and enter a subject.
4. Tap anywhere in the message body field and enter the
content of your E-mail.
5. When you’re finished, tap Send. When you synchronize
your i830 with your PC, the message is sent through your
PC’s E-mail client.
Outlook Message Folders
There are five message folders in the Outlook directory.
Each folder and its related function is listed below:
• Deleted Items: Deleted E-mail is sent to the Deleted Items
folder. Once E-mail are removed from the Deleted Items folder,
they are permanently erased.
• Drafts: Drafts contain all E-mail messages that were not
completed and saved to be sent at a later date.
• Inbox: All incoming E-mail arrives and is stored in the Inbox
until deleted. If memory is full, new messages are rejected.
Delete older messages to free up space for incoming
messages.
• Outbox: When you send an E-mail, it is stored in the Outbox
until you ActiveSync with your PC.
• Sent Items: Sent Items keeps a record of all sent E-mail from
your device. This option must be set by using the Tools/
Options/Message tab. Place a check in the “Keep copy of sent
Section 7
mail in Sent folder” box.
86
Page 87

E-mail using an ISP
Access Outlook Message Folders
1. Tap Start in the upper left corner of the screen, then tap
Messaging.
2. Tap the drop down arrow next to Inbox. A directory of
folders for Outlook and Text messages appears in the
display.
3. Tap t h e + sign to the left of Outlook to display the
Outlook folder hierarchy (if necessary).
4. Tap any of the folders in the Outlook directory to view the
folder’s contents.
E-mail using an ISP
If you’ve configured the i830 to send E-mail using an
Internet Service Provider (ISP), you can send E-mail
directly from the i830 without connecting to your PC
through ActiveSync.
Setup an ISP
Before you can send E-mail directly, you’ll need to
configure the i830 to work through an existing account
with an Internet Service Provider (ISP) or your network at
work. To configure the i830 to work with an ISP:
1. Tap Start, and the select Settings.
2. Tap t h e Connections tab.
3. Tap t h e Connections icon, and select Add a new
modem connection.
4. Enter a name of the connection, and select Cellular Line
under Select a modem, then tap Next.
5. Enter the dial-up number for your ISP, then tap Next.
Section 7: Messaging 87
Section 7
Page 88

6. Enter the User name and Password for your account.
7. Tap Domain and enter the domain name for your
account.
8. Tap Finish.
Section 7
88
Page 89

Section 8: Changing Your Settings
Topics Covered
• i830 Settings
• Button Settings
• Sound Settings
• Password Settings
• Phone Settings (CDMA)
• Phone Settings (GSM)
This section explains how to either set or change many of
the settings available on your Samsung SCH-i830.
Section 8
Section 8: Changing Your Settings 89
Page 90

i830 Settings
The Settings menus for your i830 allow you to configure
or change how many of your phone’s features or
functions appear or work. Some of the settings on these
menus are associated with shortcuts or hotkeys on your
Section 8
phone and can be quickly accessed for your convenience.
For example, the Today Screen has shortcuts for Owner
Information and Bluetooth connections, while the
Launcher Application, accessed by pressing the
key, displays shortcuts for Power and Screen settings.
Accordingly, some Settings available on the Personal,
System, and Connections tabs are discussed features are
presented in this manual.
Settings that are not easily associated with other
applications or features of your phone are discussed here.
They are not listed in a specific order; however, some
settings are grouped with topics that include them.
If you don’t see a setting that you are looking for discussed
here, check the Index that begins on page 221, for a
complete listing of all settings for your phone.
Buttons Settings
The Buttons setting allows you to assign your favorite
programs to your phone’s hardware buttons:
1. Tap Start located in the upper left corner of the screen.
2. Tap Settings, the Personal tab is highlighted.
3. Tap the Buttons icon.
90
Page 91

Buttons Settings
4. Tap the Button assignment drop down box for each of
the buttons listed below.
5. Tap to save and exit Buttons settings.
Button Assignments
There are four default button settings.
The buttons include:
Button 1 Record
Button 2 Calender
Button 3 Contacts
Button 4 <Context Menu>
The following functions can be assigned to the buttons
above:
• Context Menu
• Input Panel
• None
• OK/Close
• Rotate Screen
• Scroll Down
• Scroll Left
• Scroll Right
• Scroll Up
• Start Menu
• Tod ay
• ActiveSync
• Calculator
• Calendar
• Contacts
• Downloads
• File Explorer
• Find
Section 8
Section 8: Changing Your Settings 91
Page 92

Section 8
• Help
• Internet Explorer
• Jawbreaker
• Launcher
• Messaging
• MSN Messenger
• Notes
• OBEX FTP
• Phone
• Picsel Browser
• Pictures
• Pocket Word
• Record
• Remote Control
• Ringtone Manager
• Solitaire
• Sprite Backup
• Tas ks
• Terminal Services Client
• VoiceSignal
• Windows Media
• World Clock
• Pocket Excel
Sound Settings
PDA/Phone Ringer Volume
You can set the volume for both PDA notifications and
phone volume. To adjust these volumes, follow these
steps:
1. Tap the icon located at
the top of your screen. A
menu displays with sliders to
adjust both the PDA and
phone ringer volumes.
92
Page 93

Sound Settings
2. Using the stylus, tap the desired level on the slider
located under Volume. The left slider controls the PDA
volume and the right slider controls the ringer volume.
3. Tap the icon again to exit.
Note: You can also press and hold the slider tab and move it back and
forth along the slider using the stylus.
WOW XT Audio Processing
WOW™ significantly enhances the quality of mono and
stereo audio, creating improved dynamics and bass
performance in your i830 internal speakers or optional
headphones when attached. WOW provides a panoramic
three-dimensional audio image that extends the sound in
both the horizontal and vertical planes well beyond the
speakers or headphones themselves. These enriching
effects are especially noticeable on digitally compressed
audio formats such as MP3 and WMA.
WOW is comprised of SRS®, TruBass® and Focus®
technologies, and adds the following features to your
audio listening experience.
• SRS - the leading 3D sound technology in the world, which
restores the spatial information that is masked by traditional
recording and playback techniques.
• TruBass - SRS technology that enhances bass performance by
utilizing psychoacoustic techniques to restore the perception of
low frequency tones, delivering deep rich bass to your i830
internal speakers or optional headphones.
Section 8
Section 8: Changing Your Settings 93
Page 94

• Focus - Elevates the sound image field to create the perception
of image height. When used in combination with SRS 3D, it
delivers an enlarged sound image while improving the clarity in
the high frequencies in your audio.
To enable WOW XT audio processing or to change the
Section 8
settings for this feature, follow these steps:
1. Tap Start located in the upper left corner of the screen.
2. Tap Settings.
3. Tap the System tab.
4. Tap WOW XT Settings.
5. To enable WOW processing, tap the icon. When
enabled, this icon is red and the other settings can be
changed.
6. Select the Sound EQ mode from Normal, Classic, Jazz,
Rock, Pop, Dance, or Custom.
7. Using the stylus, tap the desired level for each effect you
want to change. You can set:
• SRS 3D Effect – This setting influences the width processing
performed on the audio signal. As you increase this effect, you
should perceive an increasing distance or separation between
the left and right channels.
• SRS Focus – This setting influences the brightness or amount
of treble in the audio signal. Increasing this setting enhances
vocals and dialog.
• SRS TruBass – This setting influences the amount of TruBass
processing performed on your audio signal.
94
Page 95

Sound Settings
Note: The Sound EQ setting value has changed to allow better sound
effects when an earjack is used. Since buffering is used, changes that are
made using this menu are real time. There can be as much as a one
second delay before you hear a change in the audio you are listening to.
8. To restore the default values, tap the Reset button at the
top of the screen.
9. Tap to ex i t .
CarKit Volume
The CarKit Volume determines the volume settings for
voice and PDA ringers when your i830 is attached to the
optional hands-free kit installed in a vehicle.
Volume settings range from Silent to Loud. To set each
option for the optional CarKit, follow these steps:
1. Tap Start located in the upper left corner of the screen.
2. Tap Settings.
3. Tap t h e System tab.
4. Tap CarKit Volume.
5. Using the stylus, tap the desired level on the slider for
each of the volume settings available.
6. Tap to save your settings and exit.
Section 8
Sounds and Notifications
The Sounds and Notifications settings allows you to select
the actions for which you hear sounds and to customize
how you notified when different events occur.
Section 8: Changing Your Settings 95
Page 96

To view the sounds and notifications screen, follow these
steps:
1. Tap Start located in the upper left corner of the screen.
2. Tap Settings.
Section 8
3. Tap the Personal tab.
4. Tap Sounds & Notifications.
5. Select the check boxes for the events, programs, or
notifications you want to enable on the Sounds tab.
Note: When you enable a sound, your i830 plays tones to notify you that an
event has occurred. See "Event Notifications" below for a complete list of
events for which you can select sounds.
6. Tap to exit.
Event Notifications
Event sounds can be set for each of the following events:
• ActiveSync: Begin sync
• ActiveSync: End sync
• Connection disconnected
• Connection established
• Messaging: New e-mail message
• Messaging: New text message
• MSN Messenger: Contact online
• MSN Messenger: New message
• Phone: Incoming call
• Phone: Missed call
96
Page 97

Sound Settings
• Phone: Voice mail
• Reminders
To set an alert for an event, follow these steps:
1. Tap Start.
2. Tap Settings.
3. Tap t h e Personal tab.
4. Tap Sounds & Notifications.
5. Tap t h e Notifications tab.
6. Select the event from the drop down menu.
7. Tap e i t h er Play sound or Vibrate.
Note: Use the Phone settings to change the ring type and tone settings of
your phone.
8. Tap the check box next to Play sound to designate a
notification sound for that event.
9. Tap to ex i t .
Turn Phone Volume Off
You can turn the ringer off, or you can select one of the
other Ring tone options, such as Vibrate, Vibrate and ring,
or Vibrate then ring.
1. Tap Start located in the upper left corner of the screen.
2. Tap Settings, then tap the Personal tab.
3. Tap Phone.
4. Tap the drop down arrow next to Ring type and select
one of the Vibrate options or select None.
Section 8
Section 8: Changing Your Settings 97
Page 98

5. Tap to exit.
Password Setting
The password option allows you to enable or disable a
password. The available settings are:
Section 8
• Simple 4 digit - Allows you to set a four digit password using
the on-screen keypad.
• Strong alphanumeric - Allows you to enter a password that
contains letters, numbers, or both.
When a password is configured, there is a “prompt if
device unused” option that allows a length of time range
from 0 minute - 24 hours. When this option is set, you can
continue to use the i830 until the screen turns off due to
inactivity. If the device is inactive for a greater amount of
time than specified in this setting, a password must be
entered when you turn the device back on.
To set the password:
1. Tap Start located in the upper left corner of the screen.
2. Tap Settings.
3. Tap the Personal tab at the bottom of the display.
4. Tap the Password.
5. Tap the check box next to Prompt if device unused for.
6. Use the drop-down menu to select the amount of time
before you are prompted for a password when the i830
is idle.
7. Select either Simple 4 digit password or Strong
alphanumeric password, depending on your preference.
98
Page 99

Phone Settings (CDMA)
8. Enter a 4 digit password or alphanumeric password in
the text box next Password.
9. Tap . You’re prompted to confirm the password
change. Tap Ye s to confirm or No to return to the
Settings-Personal screen.
Phone Settings (CDMA)
Phone options are divided into the following tabs:
• Phone - Allows you to configure a voicemail phone number.
View your existing phone number. Select the desired sounds
associated with the phone. Set notification for when Voice
privacy is unavailable.
• Option - Allows you to set Call Control options, Auto Answer
mode, and set how the Time is updated.
• Alert - Allows you to turn on or off the Minute beep, Connect
tone, and Disconnect tone.
• Service - Allows you to set the Data Mode and Roaming
Options. Select the GPS setting and your Voice Privacy level.
• Security - Allows you to restore the factory default settings for
your phone. Set Emergency Call numbers.
• SMS - Allows you to configure the SMS CallBack Number.
Phone Tab
These options allow you to configure several different
settings that are specific to the phone including:
• Changing the Voicemail Dialup Number
• System Sounds
• Keypad Tones
• Voice Privacy Notification
Section 8
Section 8: Changing Your Settings 99
Page 100

Voicemail Settings
1. Tap Start located in the upper left corner of the screen.
2. Tap Settings, the Personal tab is displayed.
3. Tap the Phone icon.
Section 8
4. The number to call your voicemail is displayed in the
Voicemail box. To change the number, tap the box and
enter the number you want.
Note: This number is automatically setup when you receive your phone.
You will probably not need to change it unless otherwise instructed by your
carrier.
Phone Ringer Options
You can select several different phone ringer sounds for
the i830. You can also change the ring type and its tone, as
well as set an alert for when voice privacy is not available.
To access these settings:
1. Tap Start located in the upper left corner of the screen.
2. Tap Settings, the Personal tab is displayed.
3. Tap the Phone icon. The Phone screen displays.
4. Tap the Ring type drop down arrow and select the ring
type you want.
5. Tap the Ring tone drop down arrow and select the ringer
sound you want.
Note: To hear the ring tone, use the player controls located to the right of
the Ring tone drop down box. Tap the arrow to play the tone, tap the square
to stop.
100
 Loading...