

Page 1

Level
7.
Disassembly and assembly Instructions
7-1.
Repair
2
7-1-1.
1
Disassembly
Unscrew6points at the REAR case
DIsassemble the REAR as below
2
sequence
Be careful not to make scratch and molding damage!
1)
3
Disassemble the PBA. Be careful with hooks.
Be careful not to make scratch and molding damage!
1)
Separate the PBA from the FRONT
4
Be careful not to make scratch and molding damage!
1)
SAMSUNG Proprietary-Contents may change without notice
This Document can not be used without Samsung's authorization
Be careful not to make scratch and molding damage!
1)
7-1
Page 2
Level2Repair
7.
5
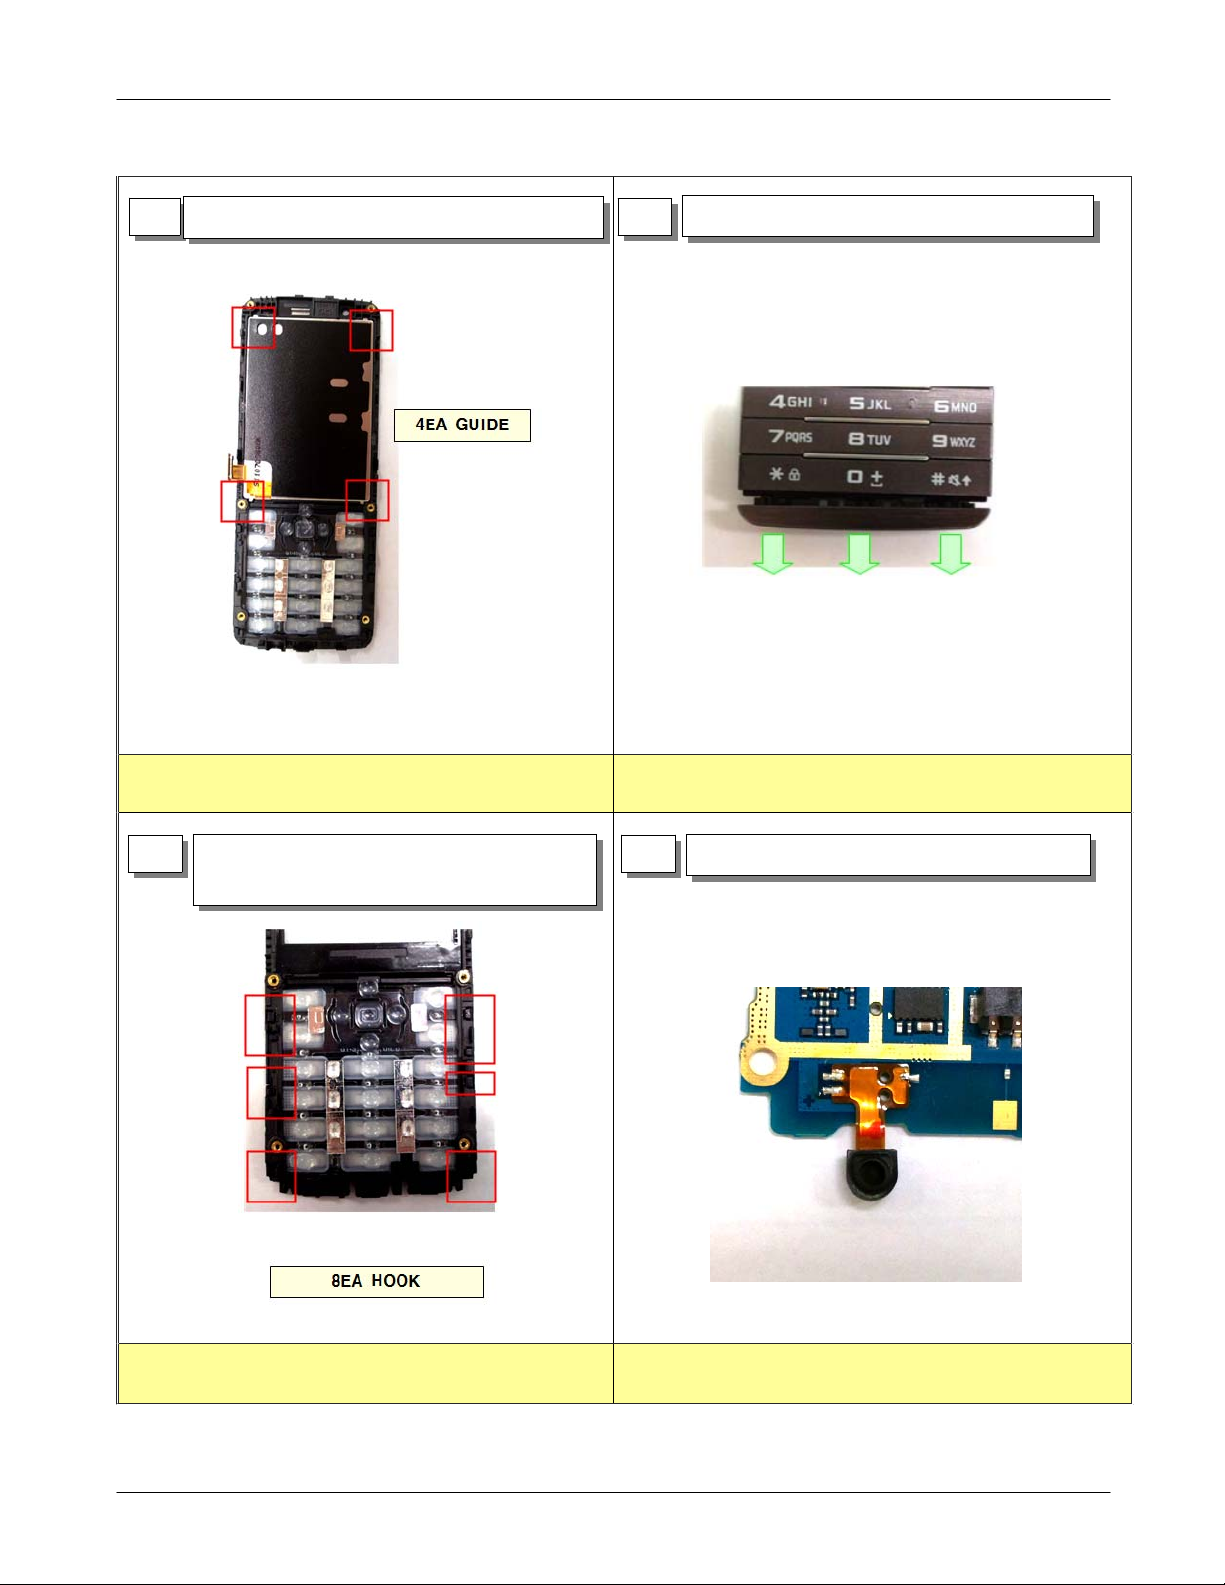
Disassemble the LCD Module.
Be careful not to make scratch and molding damage!
1)
Be careful not to damage LCD FPCB and LCD
3)
Disassemble the Keypad Deco
6
Be careful not to make scratch and molding damage!
1)
7
Disassemble the Keypad. Be careful with
hooks.
Be careful not to make scratch and molding damage!
1)
8
Disassemble the MIC
Be careful not to make scratch and molding damage!
1)
careful not to damage MIC FPCB
2) Be
7-2
SAMSUNG Proprietary-Contents may change without notice
This Document can not be used without Samsung's authorization
Page 3

Level2Repair
7.
9
Disassemble the Receiver
Be careful not to make scratch and molding damage!
1)
Be careful not to damage Receiver FPCB
3)
Unscrew2points at the Shield Can.
10
Disassemble the SHIELD CAN
Be careful not to make scratch and molding damage!
1)
11
Disassemble the
Camera, Flash,
5M
Cif Camera(GT-S5610K)
Be careful not to make scratch and molding damage!
1)
12
7-3
SAMSUNG Proprietary-Contents may change without notice
This Document can not be used without Samsung's authorization
Page 4

Level2Repair
7.
7-1-2.
1
assemble
Soldering3points of MIC FPCB pad with
PBA
Soldering2points of RECEIVER FPCB pad
2
with PBA
Be careful not to make scratch and molding damage!
1)
3
Screw2points at the SHIELD CAN.
Assemble the SHIELD CAN
Be careful not to make scratch and molding damage!
1)
4
Assemble the
S5610K)
Camera, Cif Camera(GT-
5M
Be careful not to make scratch and molding damage!
1)
Torque
2)-
Size:M1.4*L2.5
-
: 1.0 ~ 1.2
kgf.cm
SAMSUNG Proprietary-Contents may change without notice
This Document can not be used without Samsung's authorization
Be careful not to make scratch and molding damage!
1)
7-4
Page 5

Level2Repair
7.
5
Assemble the Flash.
Be careful not to make scratch and molding damage!
1)
6
INSERT KEYPAD to FRONT.
Be careful not to make scratch and molding damage!
1)
7 8
INSERT SPEAKER, MOTOR to REAR.
Be careful not to make scratch and molding damage!
1)
INSERT POGO PIN, Assemble the Antenna.
Be careful not to make scratch and molding damage!
1)
7-5
SAMSUNG Proprietary-Contents may change without notice
This Document can not be used without Samsung's authorization
Page 6

Level2Repair
7.
9
INSERT PBA TO FRONT.
10
COMBINE REAR FROM TOP TO BOTTOM.
Be careful not to make scratch and molding damage!
1)
11
Screw6points at the REAR case.
Be careful not to make scratch and molding damage!
1)
Torque
2) Size:M1.4*L3.5
-
: 1.0 ~ 1.2
kgf.cm
Be careful not to make scratch and molding damage!
1)
12
7-6
SAMSUNG Proprietary-Contents may change without notice
This Document can not be used without Samsung's authorization
 Loading...