

Page 1
Disassembly and Assembly Instructions
11.
11-1.
1)
Disassembly
12
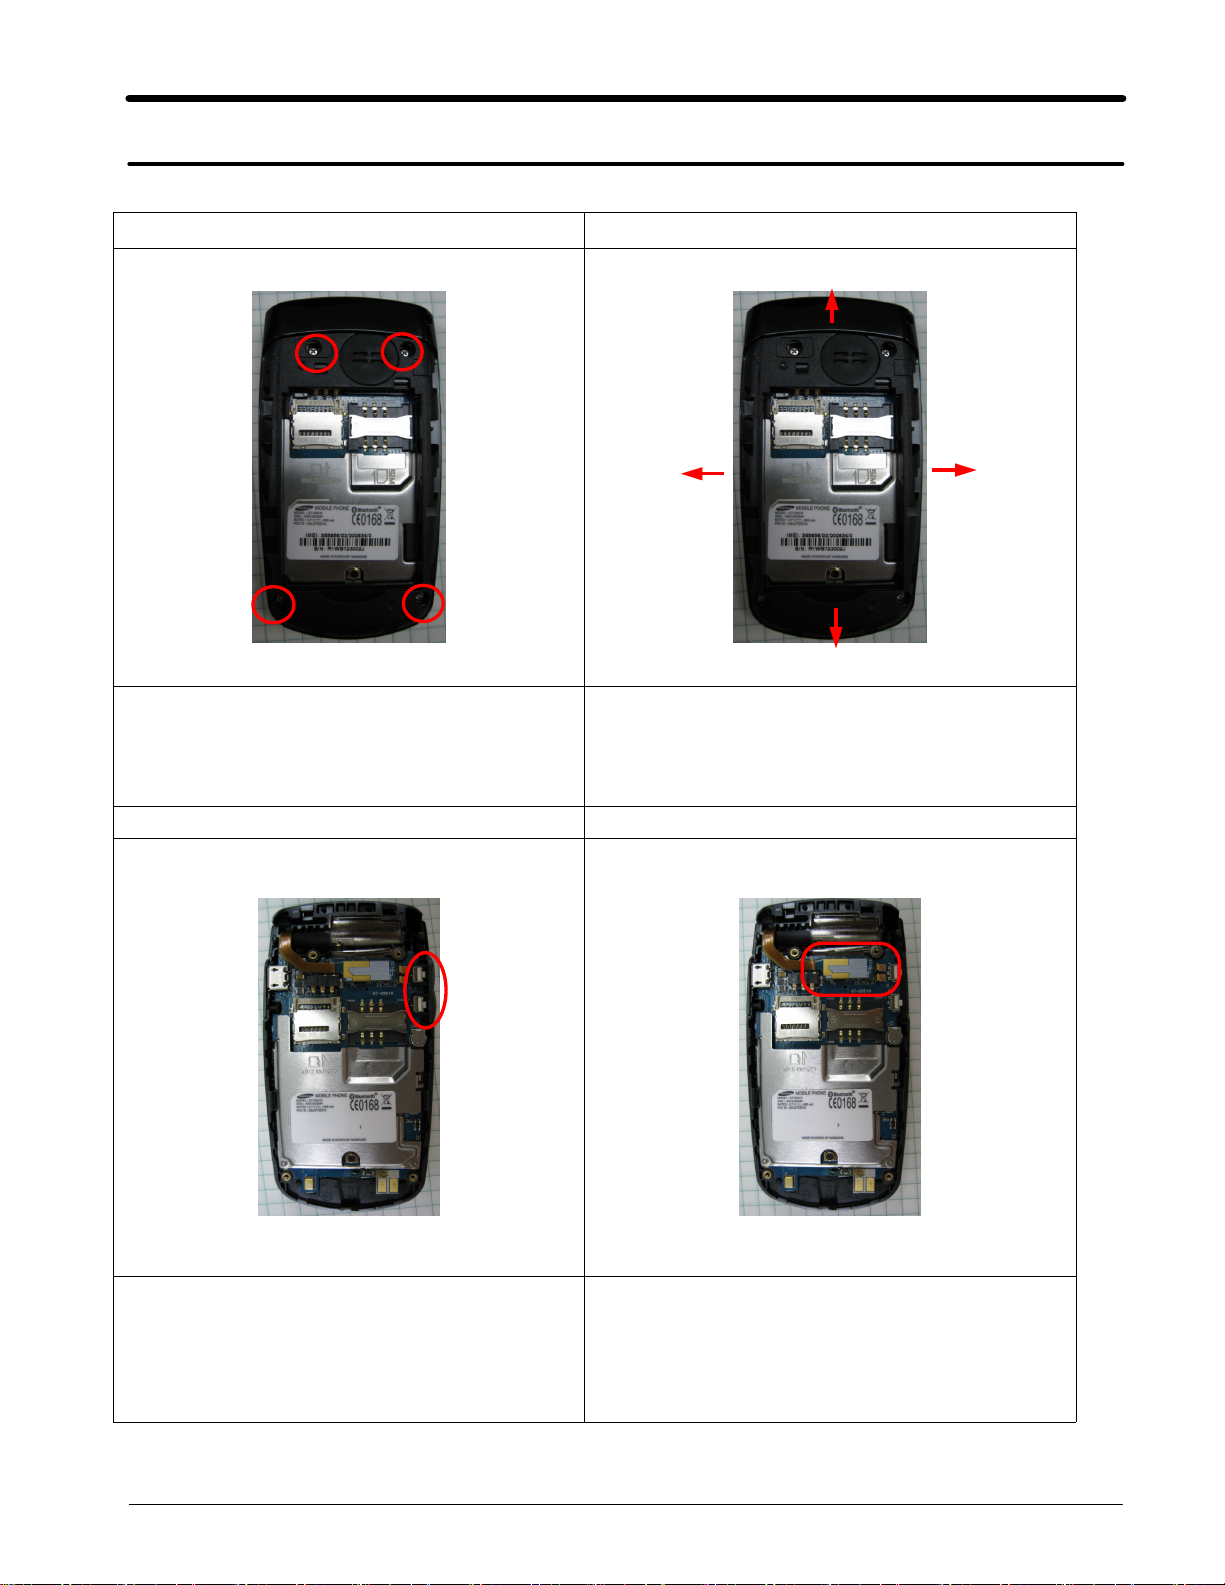
Unscrew4points of the Rear.
④
②
③
1) Put up the upper side of the REAR with
decomposition tool or hand, then disassemble
the Rear
①→②→③→④
①
34
Remove the Volume Key from board.
1)
Detach the LCD FPCB connector from board
1)
using the Finger.
Caution
※
Not to scratch or damage the Slide FPCB.
1)
11-1
SAMSUNG Proprietary-Contents may change without notice
This Document can not be used without Samsung's authorization
Page 2
Exploded View and Parts List
56
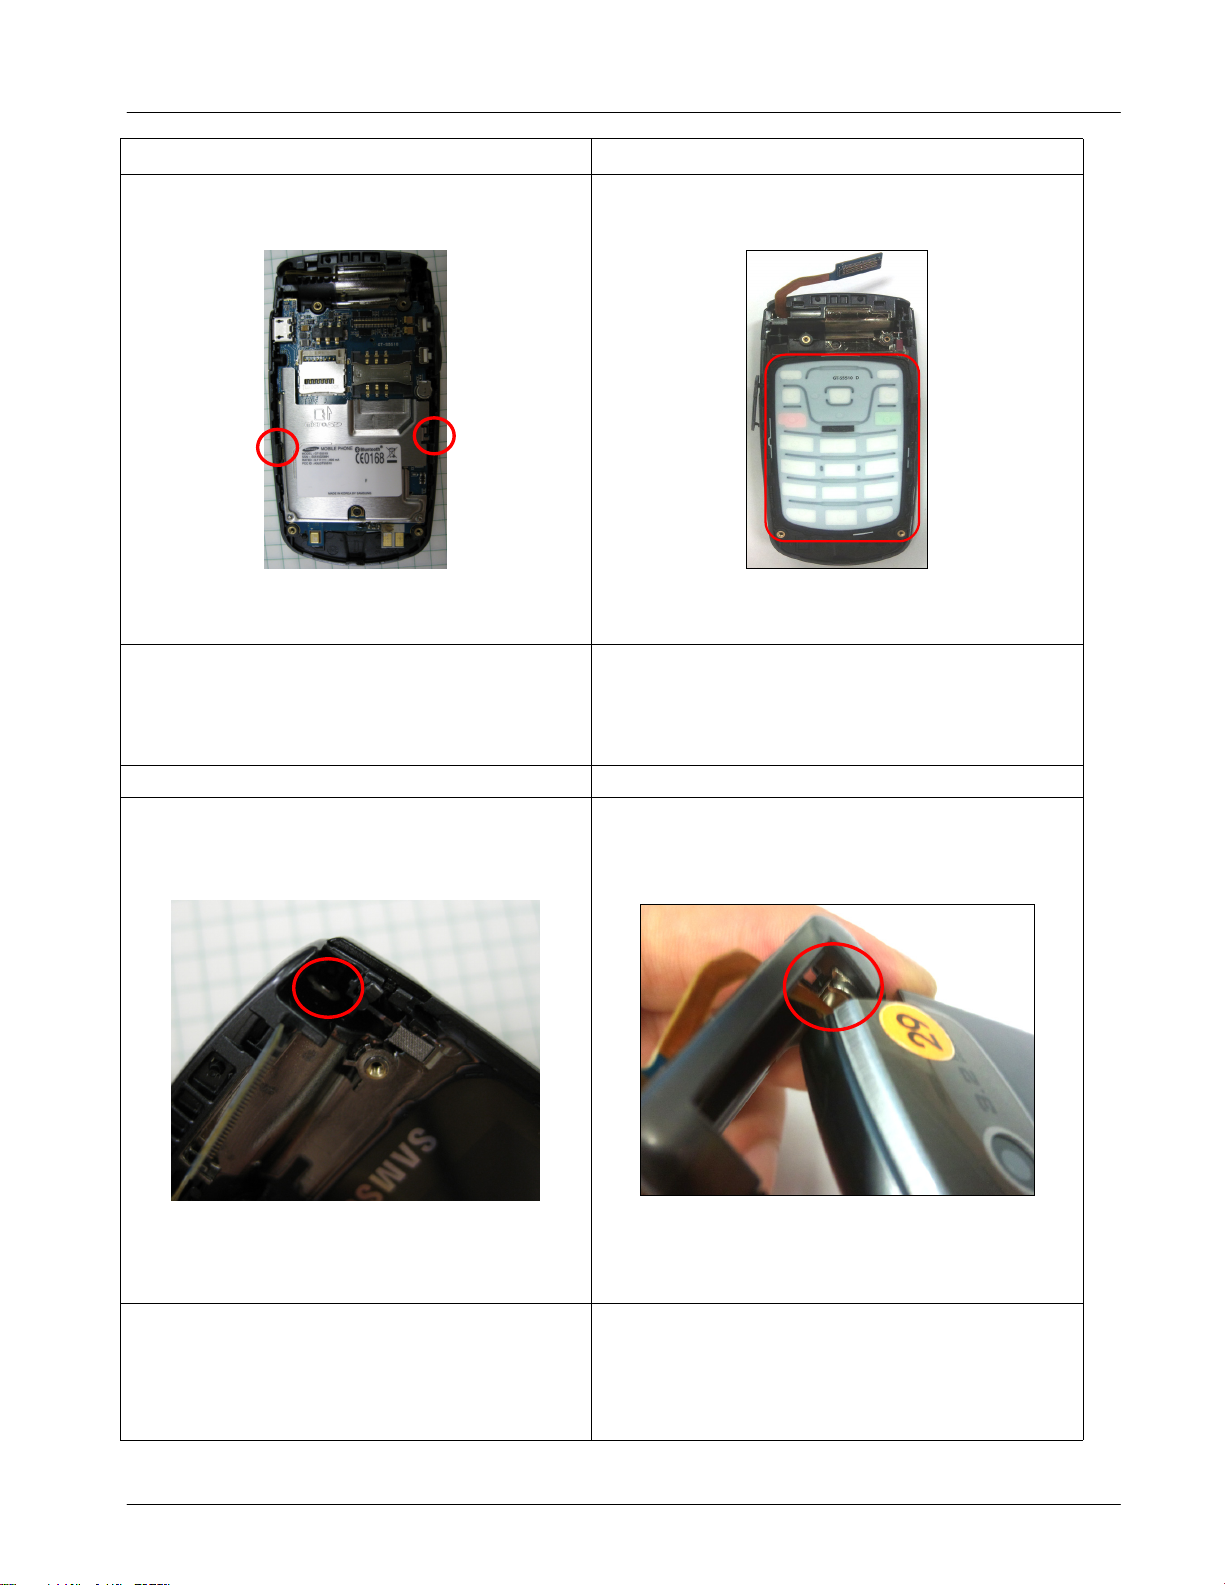
Push the Point to front then detach the
2)
board from front
Detach the KEYPAD.
1)
78
Detach Front From LCD A'ssy.
1)
Push that point with round tweezers.
1)
SAMSUNG Proprietary-Contents may change without notice
This Document can not be used without Samsung's authorization
Caution
※
Not to scratch or damage the Slide FPCB.
1)
11-2
Page 3
Exploded View and Parts List
910
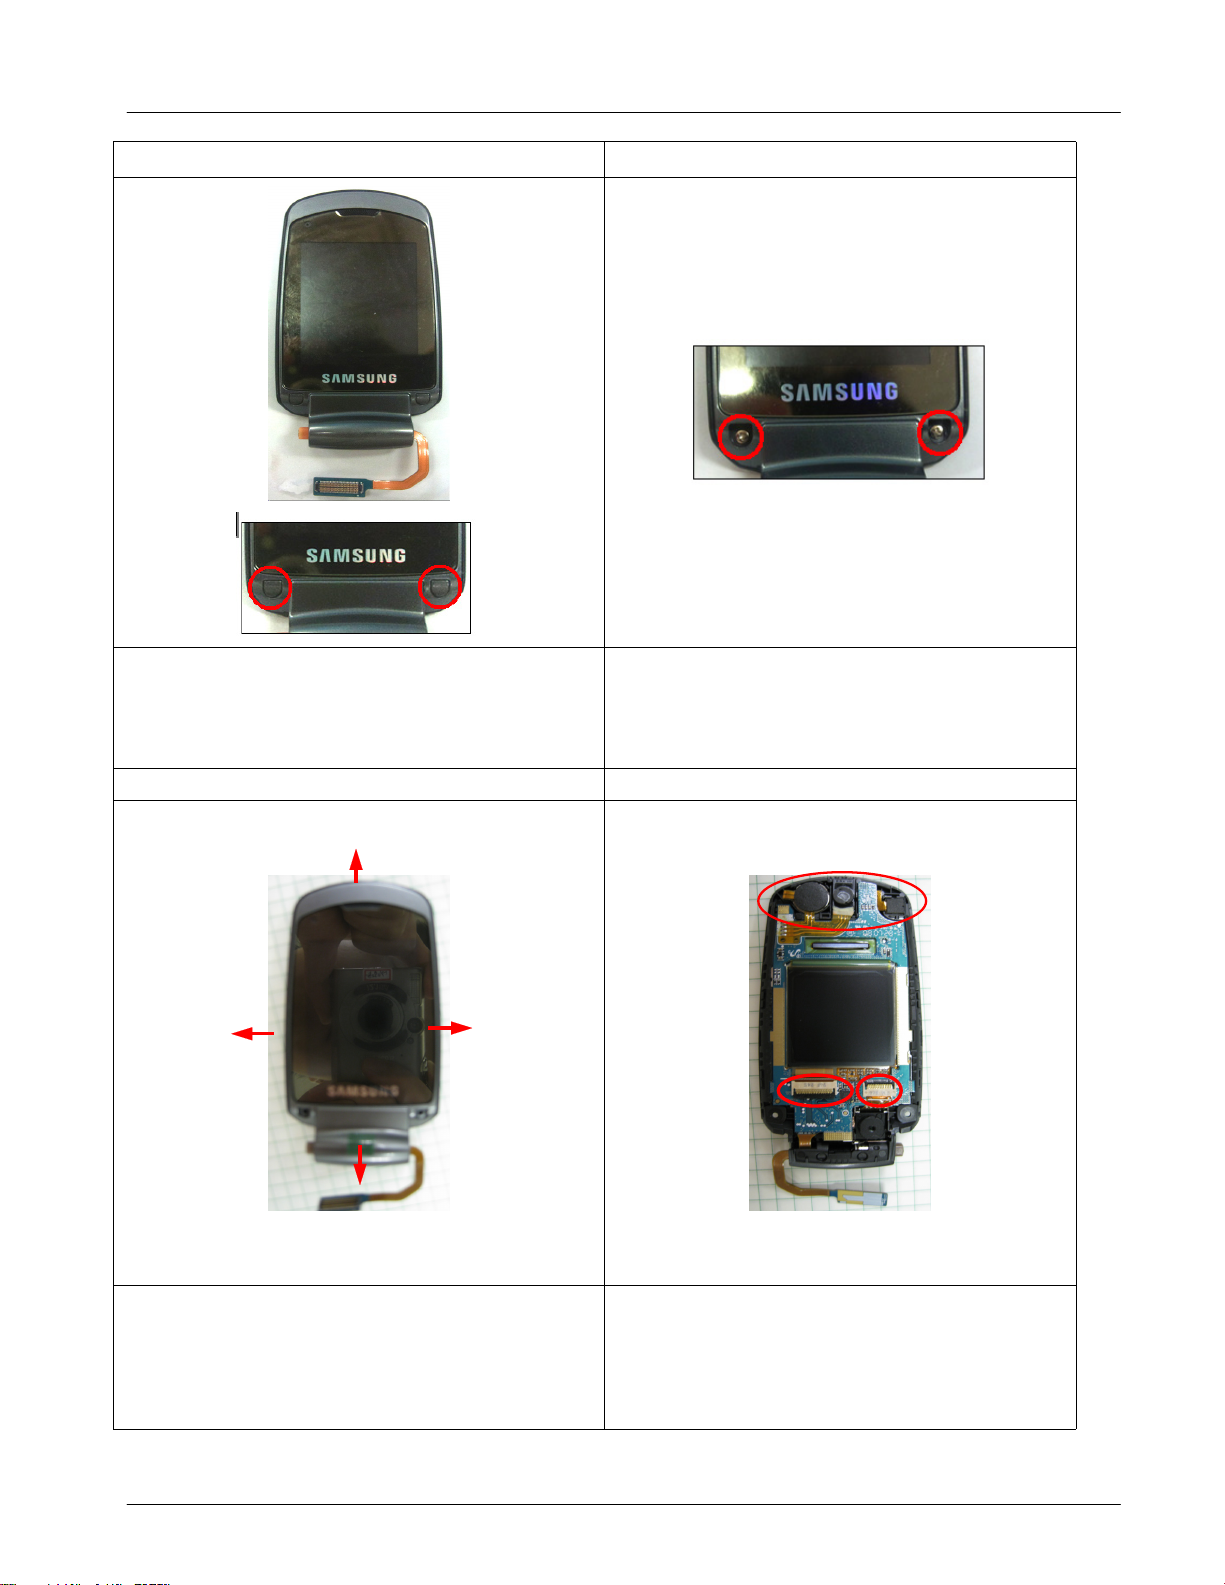
Detach Screw CAP.
1)
②
Unscrew2points of the Lower
1)
11 12
④
①
③
1) Put up the upper side of the Lower with
decomposition tool or hand, then disassemble
the Rear
①→②→③→④
SAMSUNG Proprietary-Contents may change without notice
This Document can not be used without Samsung's authorization
Deatch3M, Receiver, Motor Ass'y and CIF
1)
Caution
※
Be care of CIF/3M Camera, Receiver, Motor
1)
Ass'ywhen it deatch
11-3
Page 4

12 10
Exploded View and Parts List
Detach the Main Windoe from the Lower
1)
Detach the Main LCD From the Lower
1)
11-4
SAMSUNG Proprietary-Contents may change without notice
This Document can not be used without Samsung's authorization
Page 5

Exploded View and Parts List
Assembly
11-2
12
1) Place the LCD module on the Lower. 1)
34
Attach the Main Windowr
Connect3M, Receiver&Motor Ass'y and CIF,
1)
FPCB Contocon.
SAMSUNG Proprietary-Contents may change without notice
This Document can not be used without Samsung's authorization
1) Screw the 2 points for assembly.(Torque:1.2KgfㆍCm )
2) Place the Screw CAP.
11-5
Page 6

Exploded View and Parts List
56
Attach Front to the LCD A'ssy.
1)
Caution
※
Not to scratch or damage the Slide FPCB.
1)
78
Push that point with round tweezers
1)
Attach the KEYPAD to the Front.
1)
SAMSUNG Proprietary-Contents may change without notice
This Document can not be used without Samsung's authorization
Place the Main PBA on the Front.
1)
Attatch the Volume Key on board
2)
11-6
Page 7

Exploded View and Parts List
910
Place the Rear on the Main PBA.
1) 1)
Screw the4points.
2)
(Torque:1.2KgfㆍCm )
Place the battery on the Rear.
1)
Place the battery cover on the Rear.
2)
11-7
SAMSUNG Proprietary-Contents may change without notice
This Document can not be used without Samsung's authorization
 Loading...