

Page 1
Level
7.
Disassembly and Assembly Instructions
7-1.
Repair
2
7-1-1.
1)
rear and scratch.
2)
Disassembly
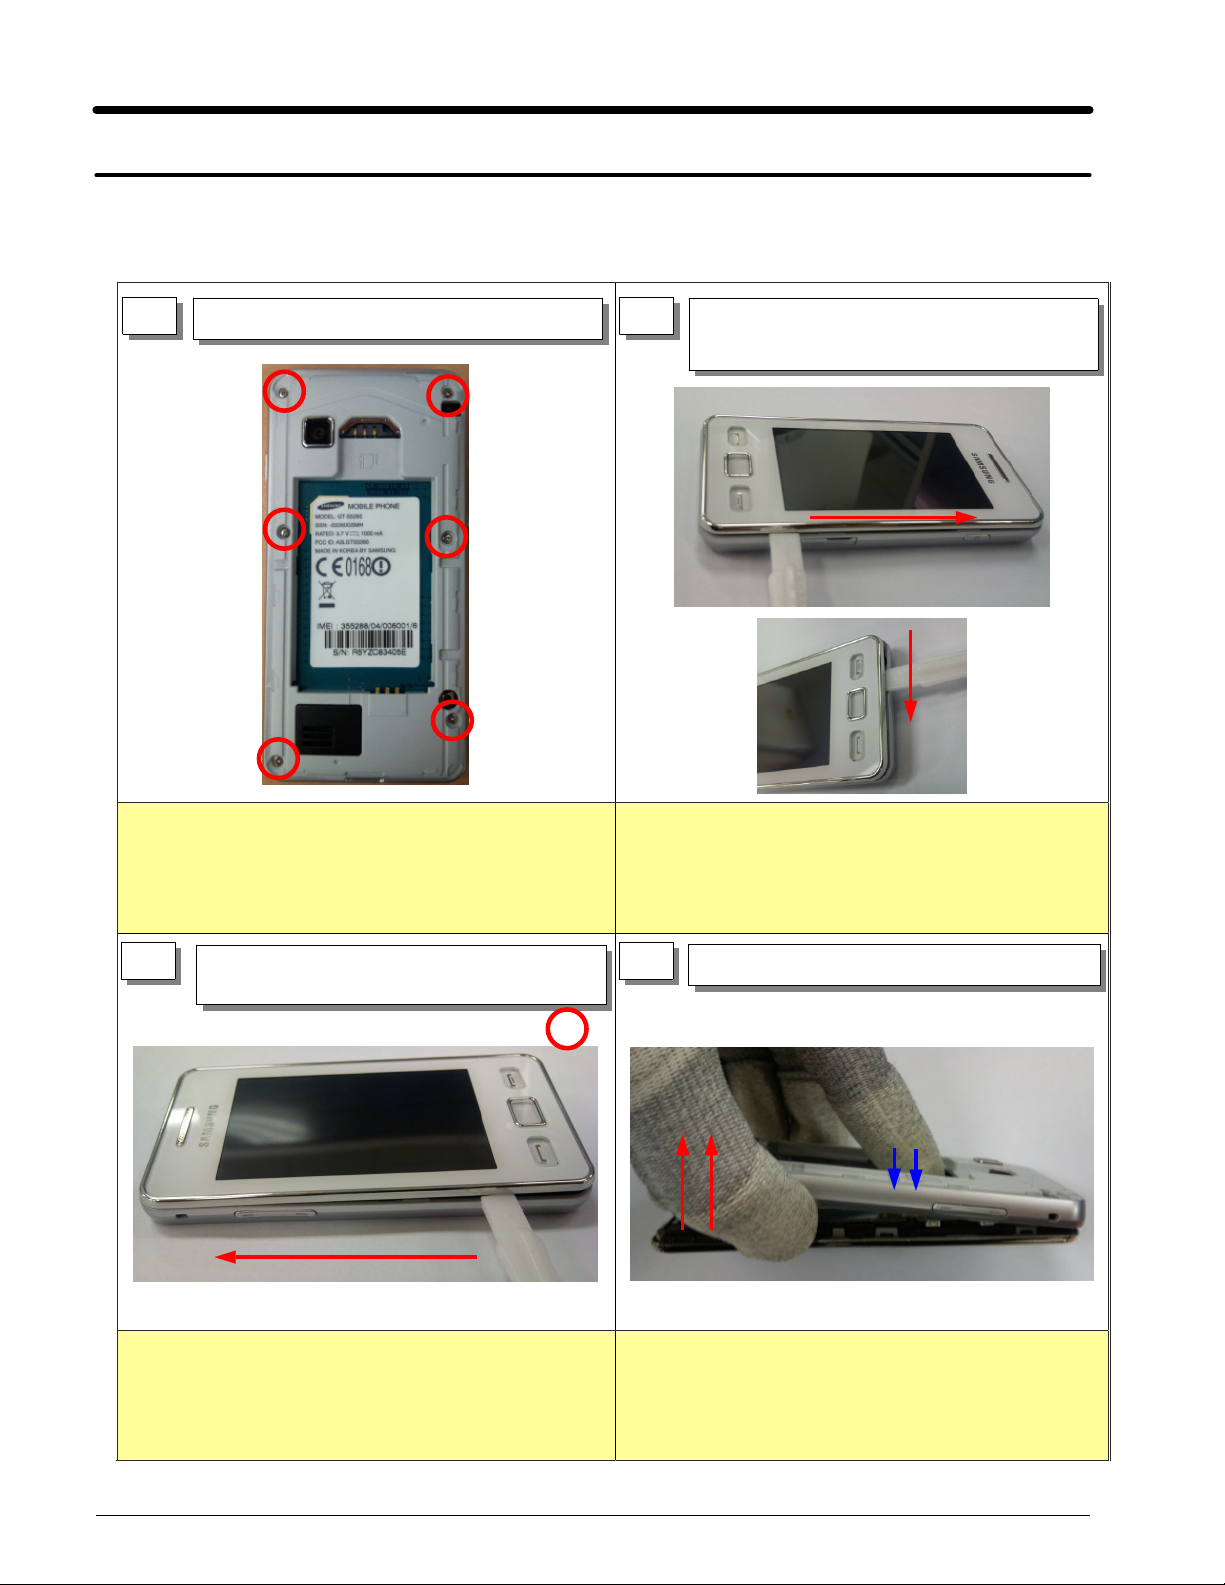
1
When you disassemble screw, be careful crack of
Screw size
TORQUE
disassemble Screw6point from Rear
1)
: 1.4 * 3.5 (6001-002083)
:1.0~1.2
Kgf·cm
2
When using disassemble tool, be careful crack of
1)
rear and scratch.
Start side line and then bottom line using
1)
disassemble tool.
3 4
When using disassemble tool, be careful crack of rear
1)
and scratch.
Next step, opposite side of rear using
1)
disassemble tool.
SAMSUNG Proprietary-Contents may change without notice
This Document can not be used without Samsung's authorization
Take rear from set.
1)
be careful crack of rear and scratch.
1)
7-1
Page 2
Level2Repair
7.
5 6
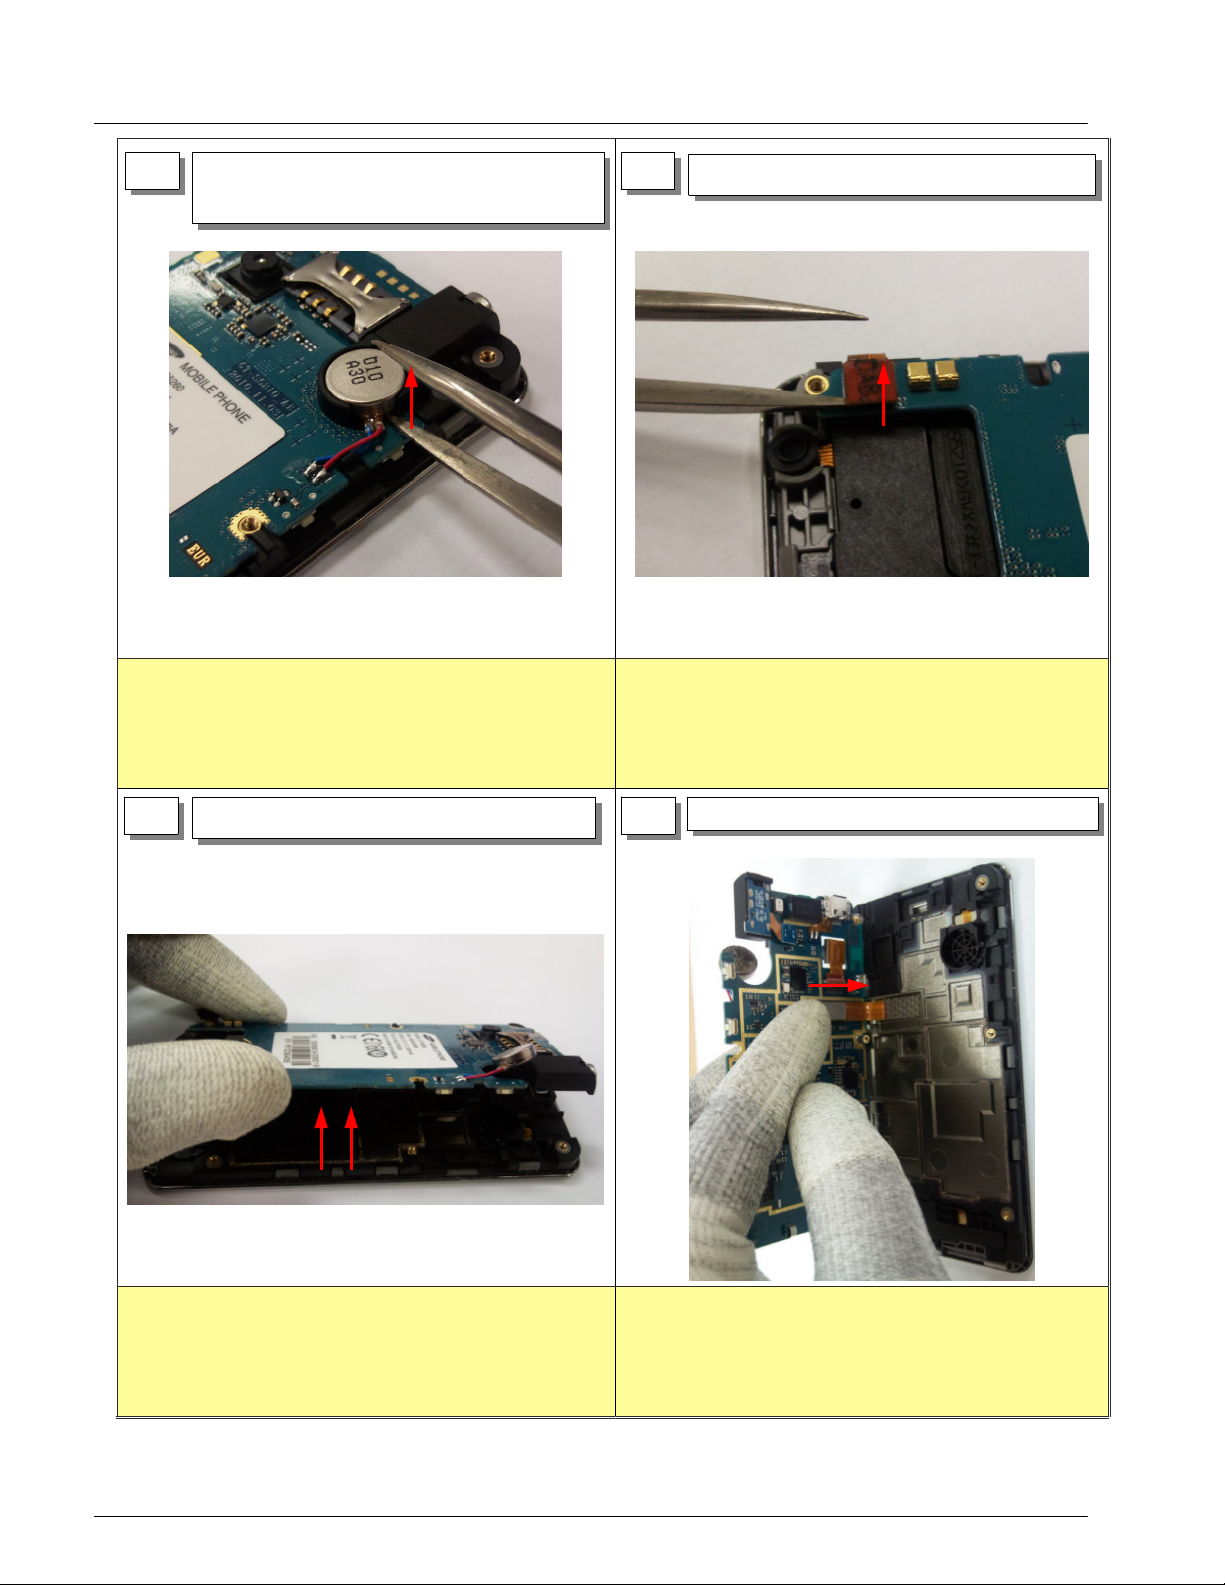
First, take off motor from bracket using
1)
tweezers
Be careful not to damage MOTOR WIRE.
1)
Take off KEY Connector from PBA
1)
Be careful not to damage connector and FPCB.
1)
7 8
Be careful not to damage LCD FPCB.
1)
Lift PCB from right side of PBA
1)
Disconnect LCD connector.
1)
Be careful not to damage components around
1)
connector.
7-2
SAMSUNG Proprietary-Contents may change without notice
This Document can not be used without Samsung's authorization
Page 3

Level2Repair
7.
9 10
Be careful not to damage FPCB.
1)
Take off PBA from Front ass'y
1)
Take off KEY Connector from Front ass'y
1)
using tweezers.
Be careful not to damage connector and FPCB.
1)
Take off KEYPAD from Front.
1)
11 12
Take off KEY PAD easily if overturn FRONT.
1)
Take off LCD BRACKET from frint.
1)
Be careful not to damage LCD FPCB.
1)
7-3
SAMSUNG Proprietary-Contents may change without notice
This Document can not be used without Samsung's authorization
Page 4

Level2Repair
7.
13 14
Diconnect TSP Connector를and take off
1)
FPCB using tweezers.
When using tweezers, be careful not to damage
1)
components around FPCB.
Take off LCD from FRONT.
1)
When disassembling, be careful not to damage LCD.
1)
15
Be careful not to inflow dust into LCD and TSP
1)
Disassembling completed
1)
WINDOW.
7-4
SAMSUNG Proprietary-Contents may change without notice
This Document can not be used without Samsung's authorization
Page 5

Level2Repair
7.
7-1-2.
Assembly
1 2
Before put LCD on FRONT, keep eyes
1)
dust on the front.
Put LCD on the FRONT from upper line.
1)
Keep eyes dust on the front.
1)
3
Be careful not to damage FPCB.
1)
follow guideline.
2)
Connect TSP FPCB and LCD
1)
CONNECTOR.
Be careful dust and damage of components.
1)
4
Be careful not to damage FPCB.
1)
During assembling HOOK with BRACKET, Be careful
2)
not to damage Bracket.
Insert LCD FPCB into hole of BRACKET
1)
and then assemble front hook and bracket.
7-5
SAMSUNG Proprietary-Contents may change without notice
This Document can not be used without Samsung's authorization
Page 6

Level2Repair
7.
5
Put KEY PAD on the Front Ass'y
1) Be care not to put KEY PAD on the front wrong
position and scratch.
6
Put KEY BRACKET on KEYPAD.
1)
1) First, put on right side of KEY Bracket and push
left side of KEY Bracket along the Z axis.
7
Connect LCD FPCB and PBA
1)
CONNECTOR
Assemble FRONT ASS'Y and PBA.
2)
1) Be careful not to damage FPCB and components around
PBA.
8
Put MOTOR on the PCB and connect KEY
1)
Connector..
1) Be careful not to damage MOTOR WIRE and FPCB
7-6
SAMSUNG Proprietary-Contents may change without notice
This Document can not be used without Samsung's authorization
Page 7

Level2Repair
7.
9 10
1) When assembling, be careful dust inflow, components
damage, scratch.
Assembling REAR CASE from upper side.
1)
Insert6point screw.
1)
1) When assembling, be careful dust inflow,
components damage, scratch.
2) Screw size : 1.4 * 3.5 (6001-002083)
TORQUE : 1.0~1.2 Kgf·cm
11
1) Keep eyes on SET scratch, key click tension, screw
status.
Assembling completed
1)
7-7
SAMSUNG Proprietary-Contents may change without notice
This Document can not be used without Samsung's authorization
 Loading...