

Page 1
13
3. Disassembling the freezer compartment
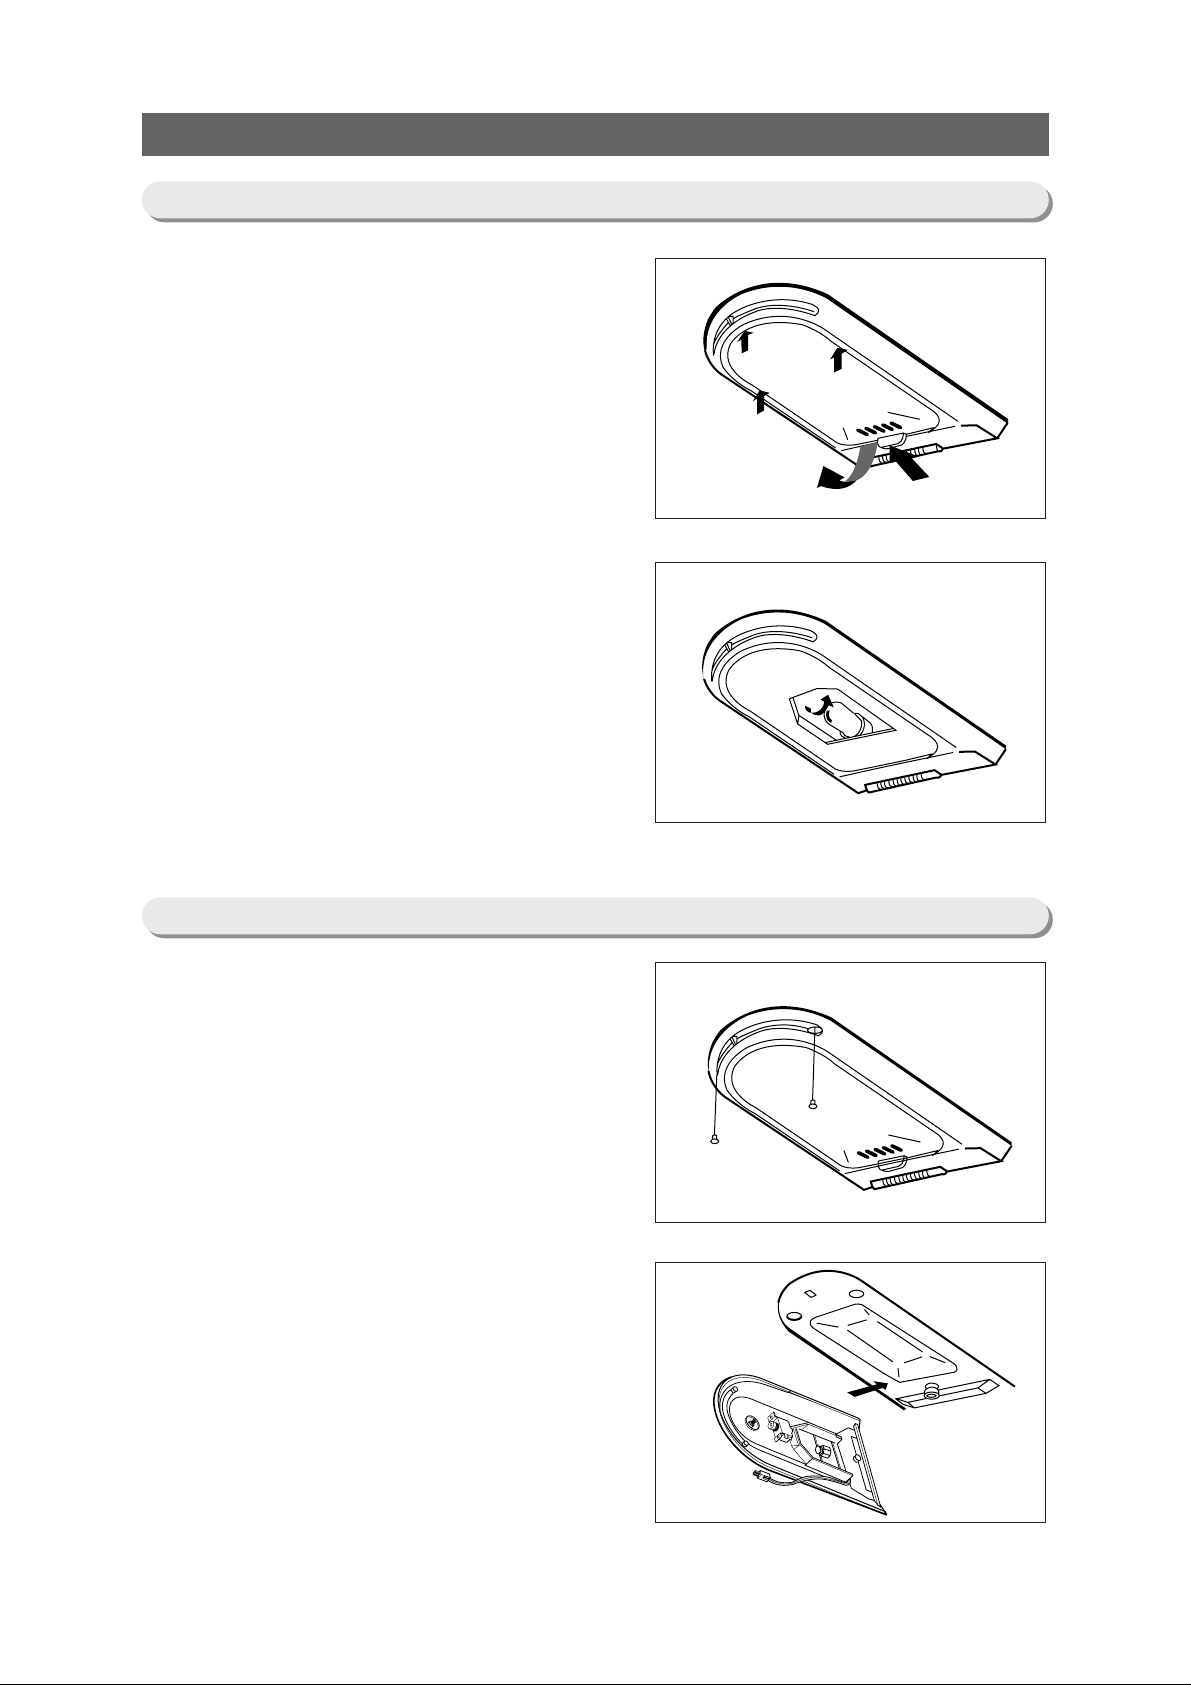
3-1. Replacing light bulb in the freezer compartment
3-2. Disassembling temperature control and the cooling system
1. Push the knob on the light cover as shown (①) and
remove the cover downward(➁).
2. Replace the bulb (Before replacing, check the voltage
and current of the bulb. Use rated bulbs only.)
1. Before disassembling, first remove all shelves and food
from the freezer compartment .
2. Remove two screws on the front end of the bulb cover.
3. Remove wire terminals of the temperature control and the
light bulb.
Page 2

14
4. Unscrew the cap screws using a driver(–) or an appropriate tool, remove two screws on the cooling system cover,
then disengage five mounting hooks.
5. Disassemble the wire housing on the upper right corner
of the cooling system cover.
6. Remove two screws on the cover.
(Caution : Keep screws or foreign substances entering from
the cold air passage because it could cause malfunctioning of the temperature control.)
7. Holding the cooling system upper cover, remove the
cover by pulling it down and then lifting it up.
8. Specifications for cooling system assembly.
Cold air passage in the
fresh food compartment
Weld zone
Temperature fuse
Defrost heaterThermal fuse
45
o
(Reduce noise caused by the flow of refrigerant)
FOAM-PE
(Improve cooling
system efficiency)
Bimetal thermo
(sensor)
❶
❷
Page 3

15
3-3. Disassembling fresh food compartment
1
2
1. Remove the super fresh compartment cover and its shelf.
• Lift up the cover, push the cover (as shown) until the
mounting hook (①) disengages, then disengage the other
mounting hook (➁) and pull out the cover.
• Pull the shelf forward until it stops, then lift it up and pull it
out.
2. Remove the shelves from the fresh food compartment.
• First remove food from the compartment. With shelf front
raised slightly, pull it forward to disengage.
3. Disengage the hooks on the lamp cover of the damper
cover.
4. Replace the bulb.
(Before replacing, check the voltage and current of the
bulb. Use rated bulbs only.)
Page 4

16
5. Remove the two screws holding the damper cover in
place.
6. Pull the lower part of the damper cover together with the
insulation material as
shown to disengage the hooks.
7. Disconnect wire connection on the right side of the
damper cover.
8. Specifications for damper insulation assembly EPS.
Sponge (To reduce on the temperature
sensor of the fresh food compartment)
 Loading...