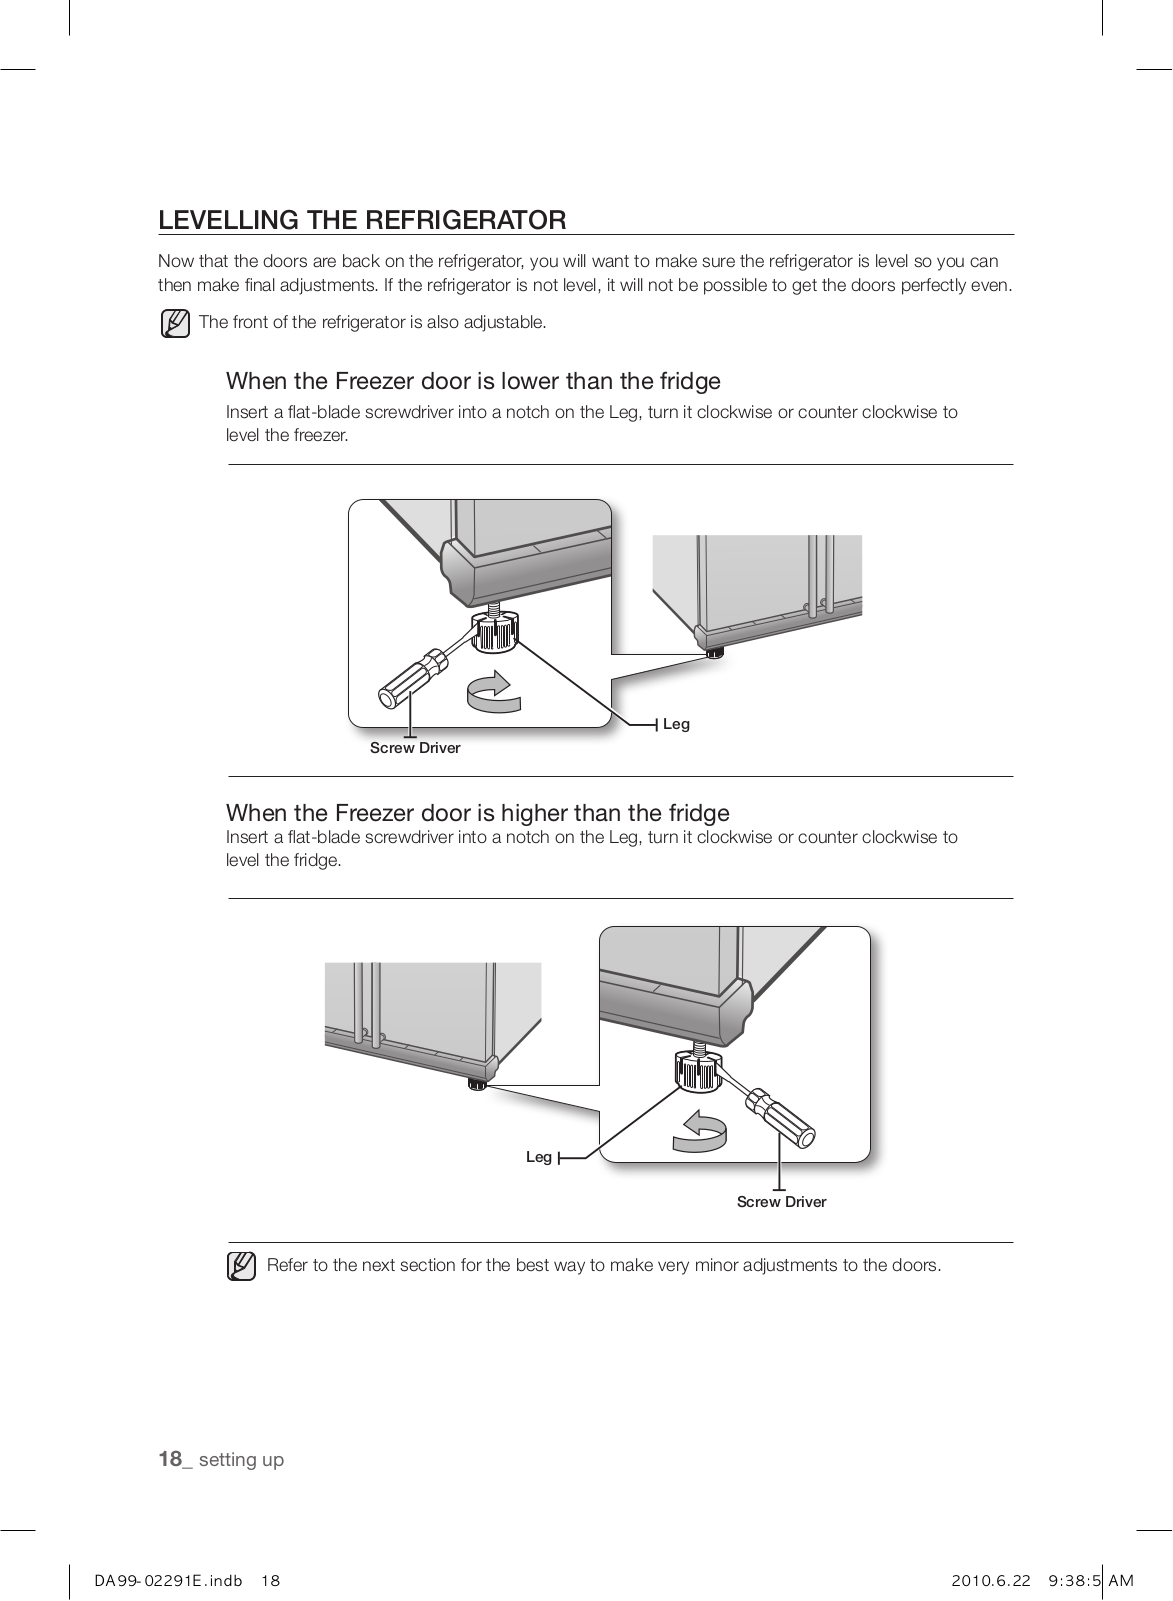
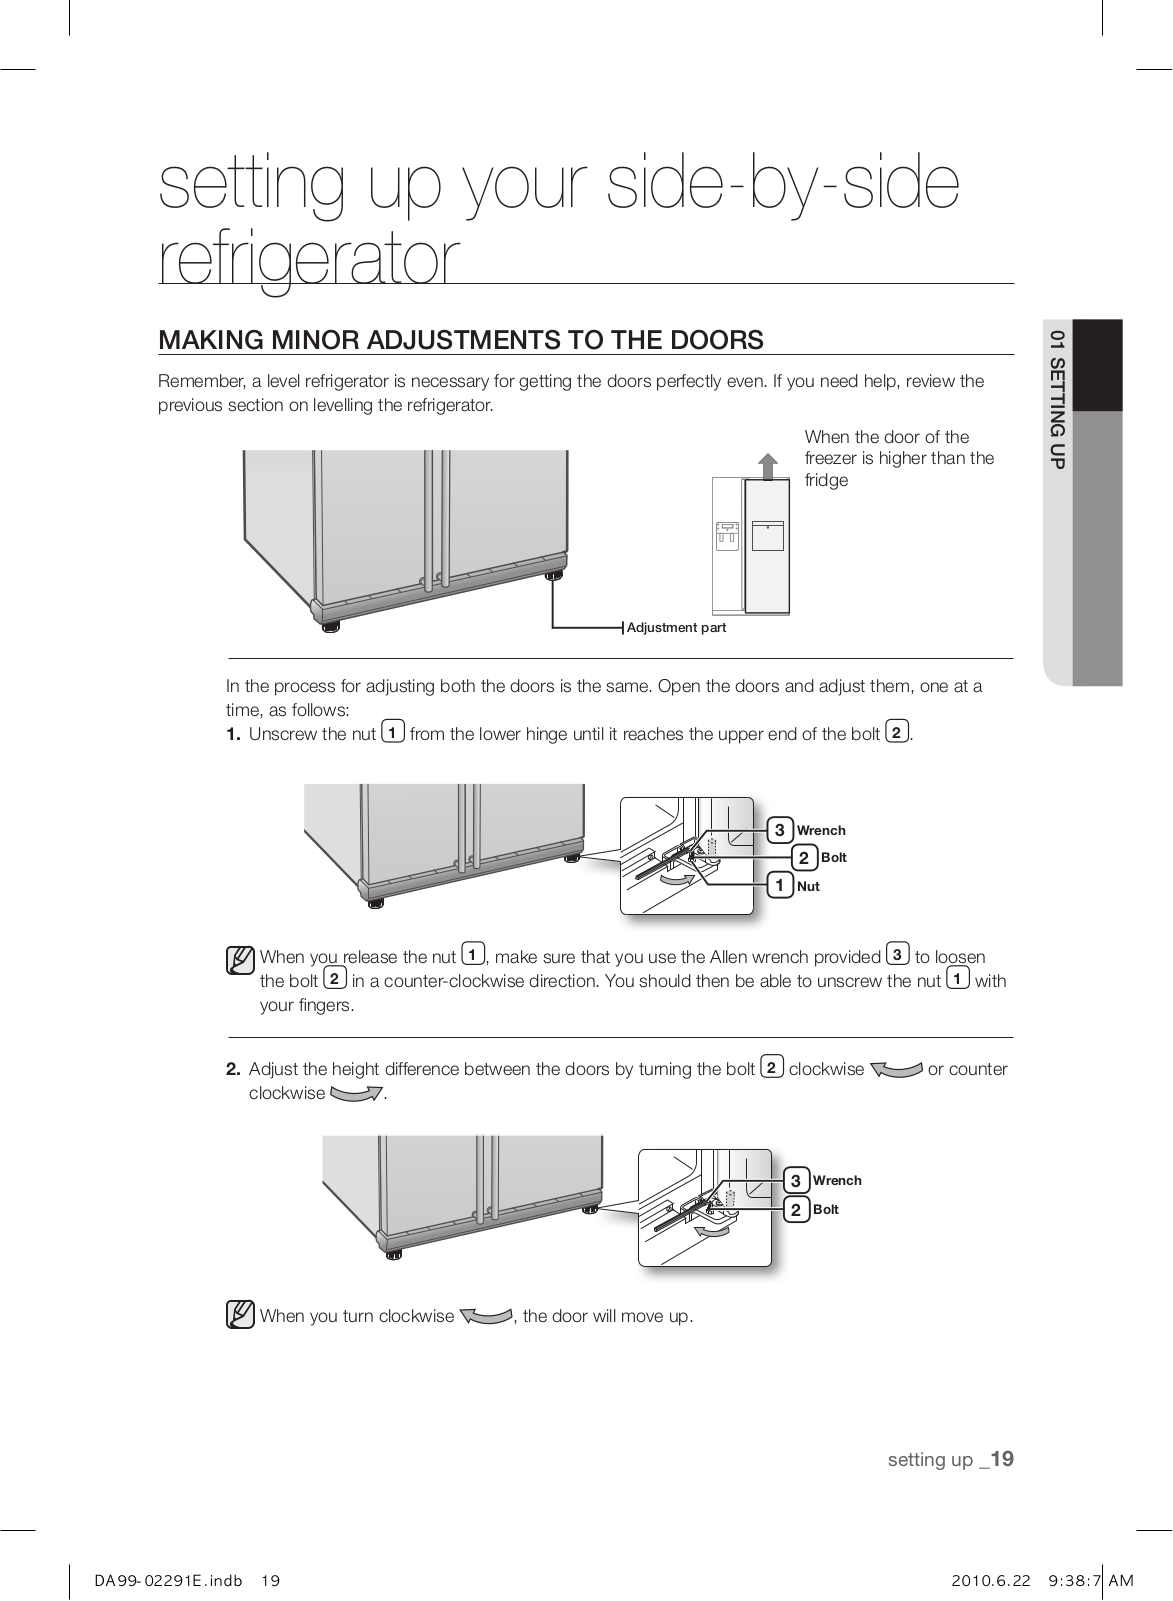
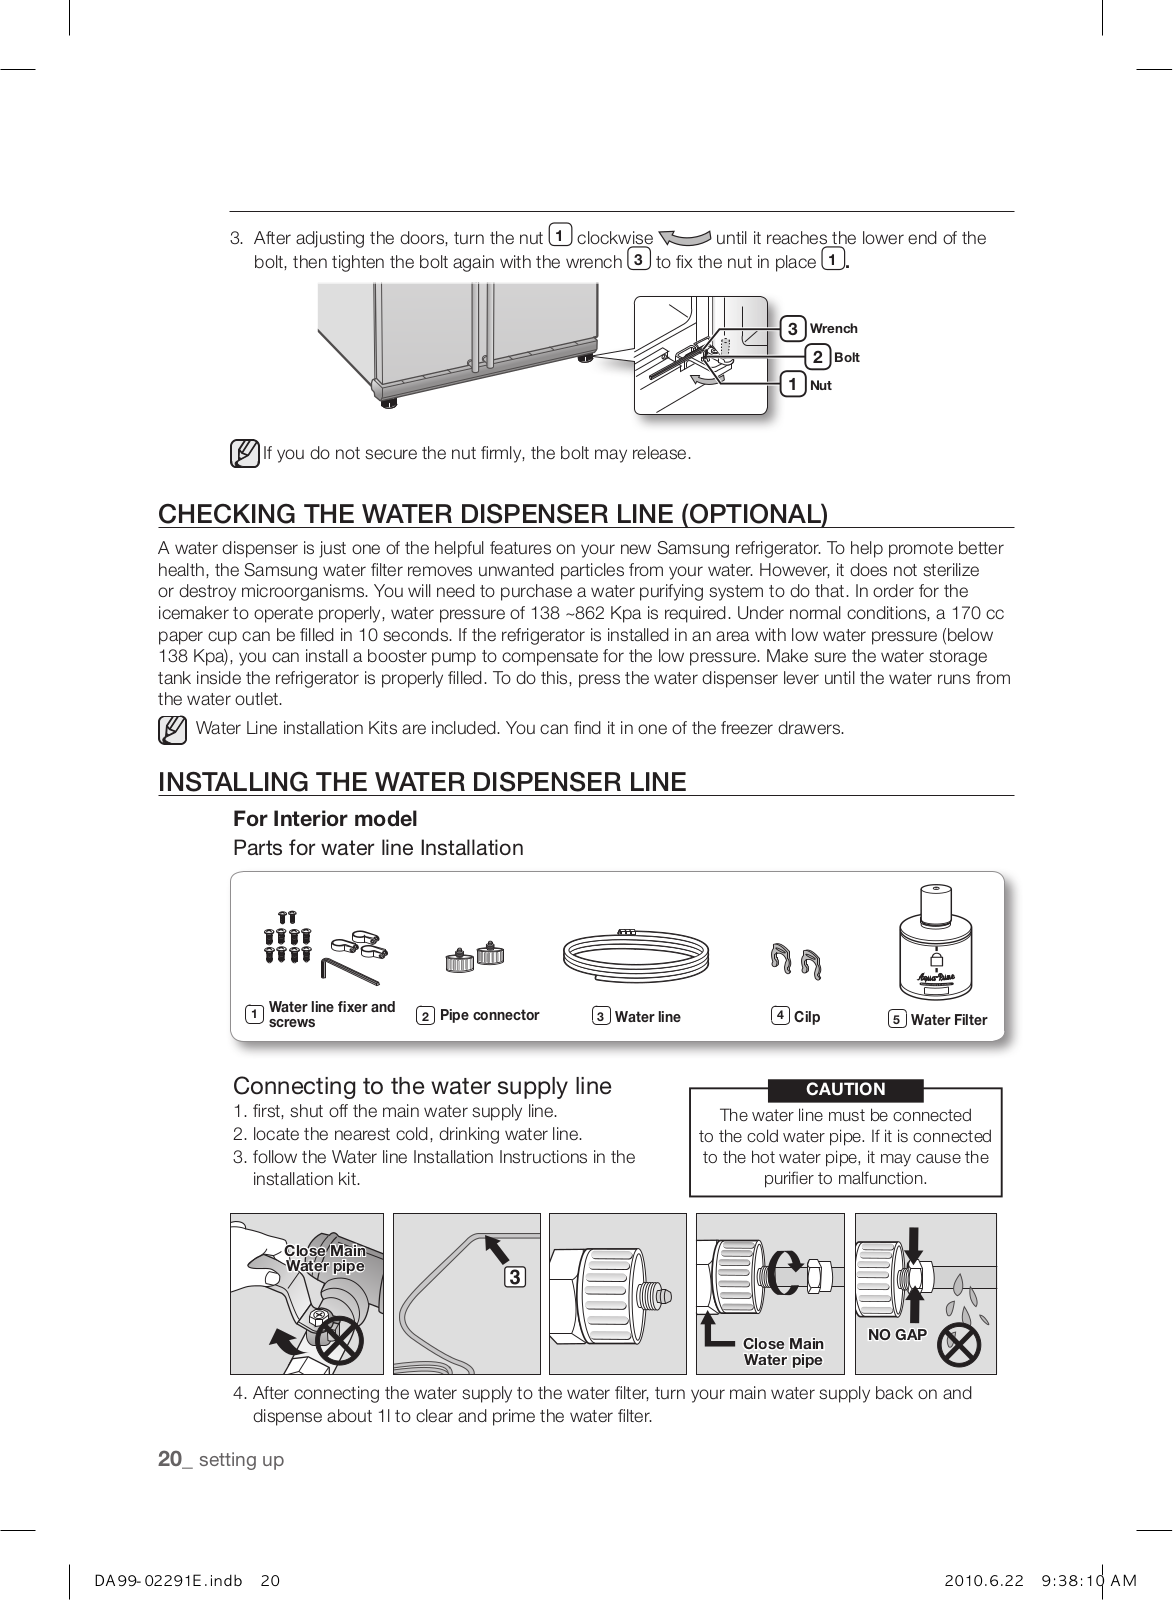
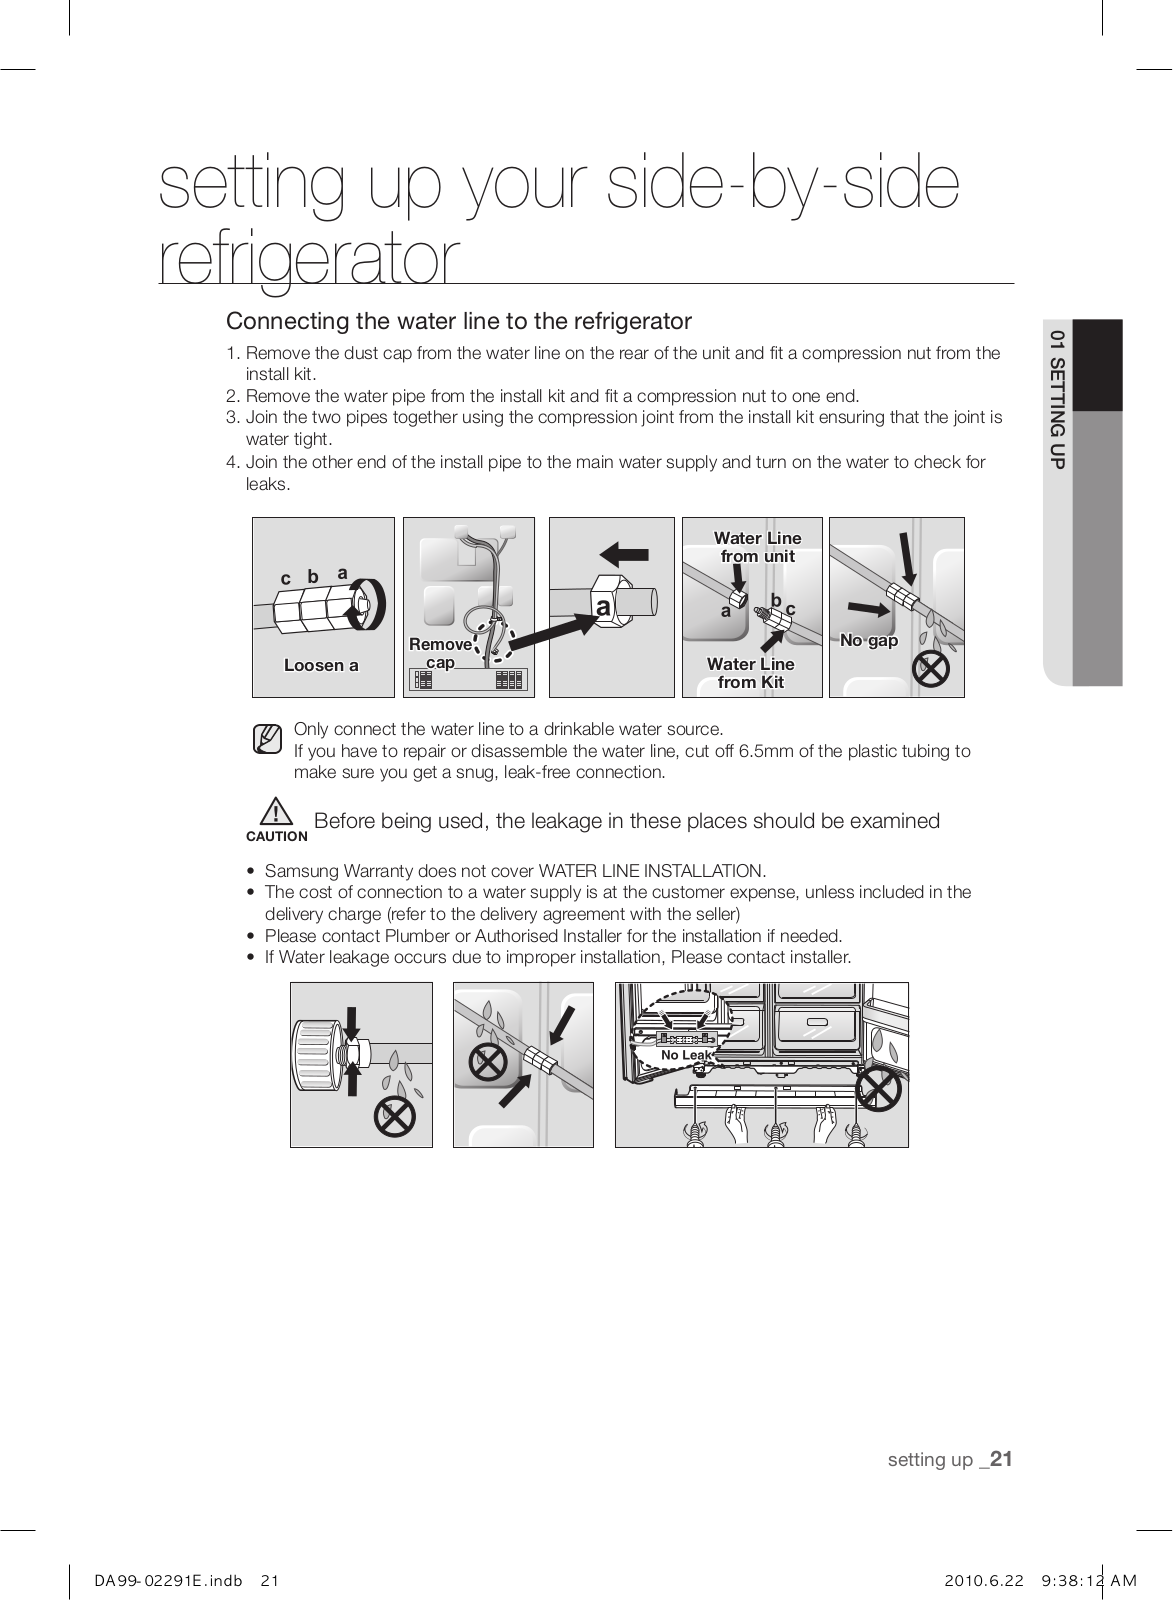
How it Works
Log In / Sign Up
Buy Points
How it Works
FAQ
Contact Us
Questions and Suggestions
Users
Samsung
Loading...
R
RSH5SHMH
4
RSH5SHSW
4
RSH5SLBG
RSH5SLBG1
RSH5SLMR
2
RSH5STPN
2
RSH5STRS
3
RSH5STTS
RSH5TEPN
4
RSH5TERS
7
RSH5UASW
4
RSH5UBBP
3
RSH5UBMH
3
RSH5UBTS
3
RSH5UEPN
5
RSH5UESW
RSH5UTBP
4
RSH5UTPN
13
RSH5UTRS
14
RSH5UTTS
3
RSH5YXNA
RSH5ZEMH
2
RSH5ZEPN
4
RSH5ZERS
6
RSH5ZESW
2
RSH5ZETS
2
RSH5ZL2A
RSH5ZLBG
RSH5ZLBG1
RSH5ZLMR
2
RSH5ZLMR1
RSH72NBP
RSH72NMH
RSH72NRS
RSH7GNBC
RSH7GNSP
2
RSH7PNBP
2
RSH7PNPN
13
RSH7PNRS
11
RSH7PNSW
3
RSH7UNBP
10
RSH7UNMH
3
RSH7UNPN
RSH7UNRS
6
RSH7UNSW
2
RSH7UNTS
RSH7UUPN
2
RSH7ZNBP
4
RSH7ZNMH
3
RSH7ZNPN
RSH7ZNRS
20
RSJ1FEBP
2
RSJ1FEPS
RSJ1FERS
3
RSJ1FESV
2
RSJ1FUMH
RSJ1FUPS
RSJ1FURS
RSJ1FUSV
RSJ1JEMH
2
RSJ1KEBP
5
RSJ1KEMH
4
RSJ1KEPS
3
RSJ1KERS
18
RSJ1KESV
5
RSJ1KSSV
RSJ1KUPS
RSJ1KURS
RSJ1KURS1
RSJ1PUMH
2
RSJ1PUPS
2
RSJ1PURS
2
RSJ1PUSV
2
RSJ1ZEMH
2
RSJ1ZEPS
2
RSJ1ZERS
11
RSJ1ZESV
2
RT14MBSS
RT14MCSS1
RT16MAAS
RT16MBAS
RT16MBSS
RT16MCSS
RT18M6213SG
3
RT18M6213SG/AA-00
RT18M6213SG/AA-01
RT18M6213SR
4
RT18M6213SR/AA-00
RT18M6213SR/AA-01
RT-2-ASRSW
2
RT-2-BSRSW
2
RT-30
2
RT-37
3
RT 38 K 5400S9
3
RT-44NMS
2
RT 45 EASM
6
RT 53 EATG
2
RT 54 ZBMT
2
RT 58 ZANB
2
RT 62 VATG
2
Loading...
Loading...
Nothing found
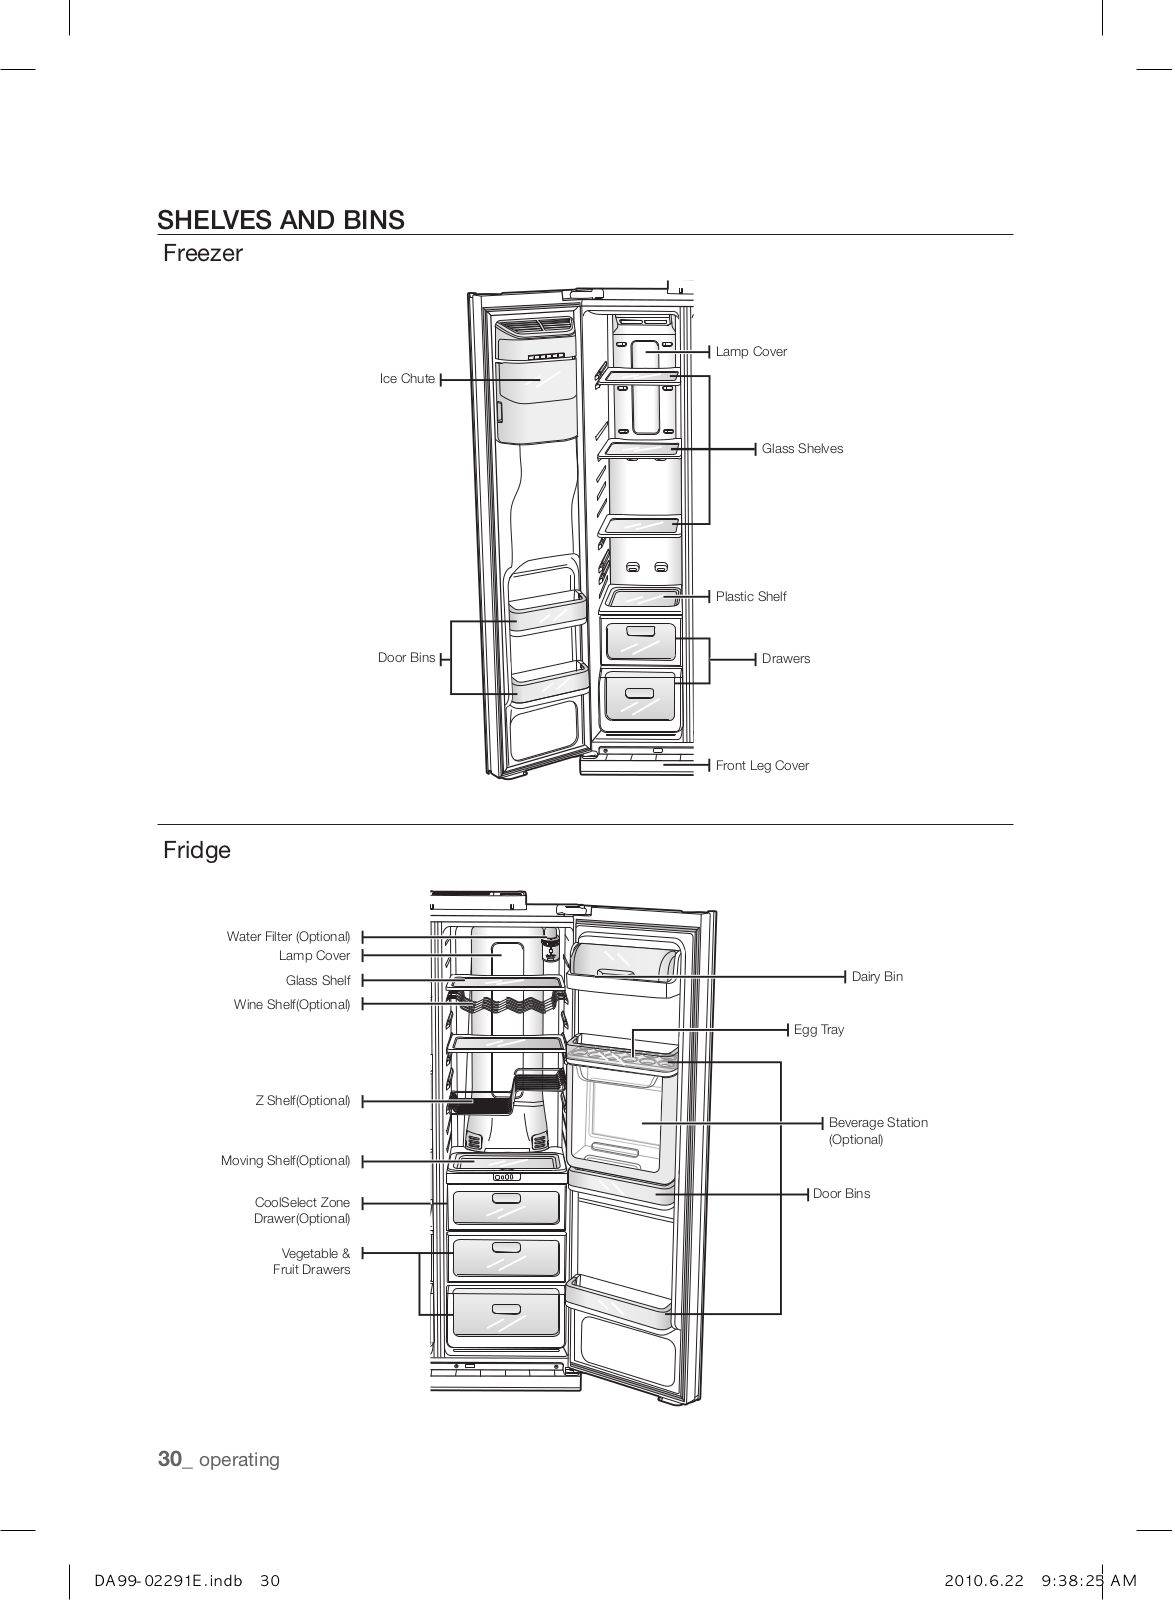
RSH7ZNRS
Operating Instructions
32 pgs
2.12 Mb
0
QUICK GUIDE
2 pgs
97.59 Kb
0
User Manual
24 pgs
1.9 Mb
0
User Manual
24 pgs
4.2 Mb
0
User Manual
2 pgs
1.36 Mb
0
User Manual
6 pgs
244.96 Kb
0
User Manual
1 pgs
924.56 Kb
0
User Manual
192 pgs
12.9 Mb
0
Quick Manual
2 pgs
1.13 Mb
0
User Manual
216 pgs
13.57 Mb
0
User Manual [cz]
42 pgs
5.33 Mb
0
User Manual [de]
44 pgs
5.66 Mb
0
User Manual [de]
2 pgs
117.47 Kb
0
User Manual [el]
46 pgs
6.02 Mb
0
User Manual [el]
24 pgs
4.35 Mb
0
User Manual [fr]
42 pgs
5.59 Mb
0
User Manual [hu]
44 pgs
5.43 Mb
0
User Manual [nl]
42 pgs
5.73 Mb
0
User Manual [pl]
212 pgs
24.79 Mb
0
User Manual [ru]
72 pgs
5.73 Mb
0
User Manual [sk]
42 pgs
5.72 Mb
0
User Manual [sk]
24 pgs
4.21 Mb
0
Table of contents
Loading...
Samsung RSH7ZNRS User Manual [pl]
...
Samsung User Manual [pl]
Download
Specifications and Main Features
Frequently Asked Questions
User Manual
Download
Loading...
+
182
hidden pages
Unhide
You need points to download manuals.
1 point = 1 manual.
You can buy points or you can get point for every manual you upload.
Buy points
Upload your manuals
 Loading...