How it Works
Log In / Sign Up
Buy Points
How it Works
FAQ
Contact Us
Questions and Suggestions
Users
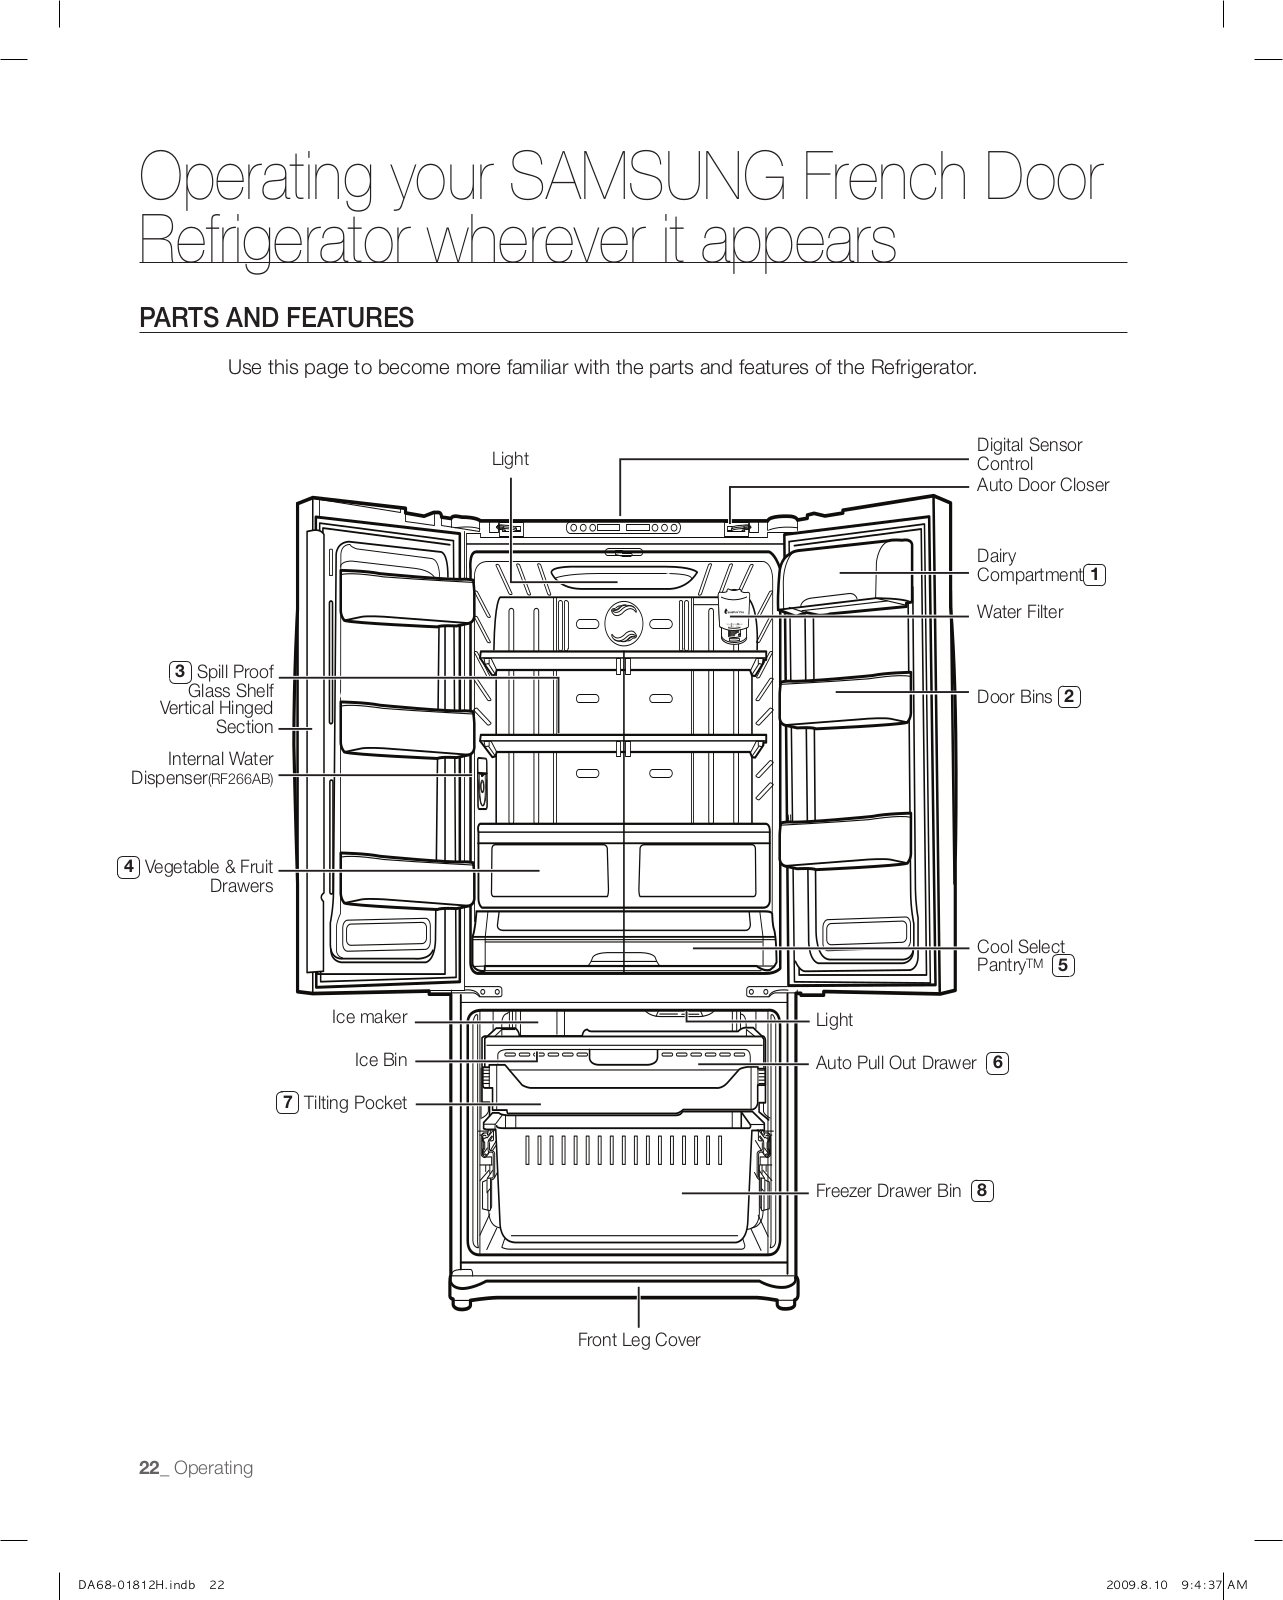
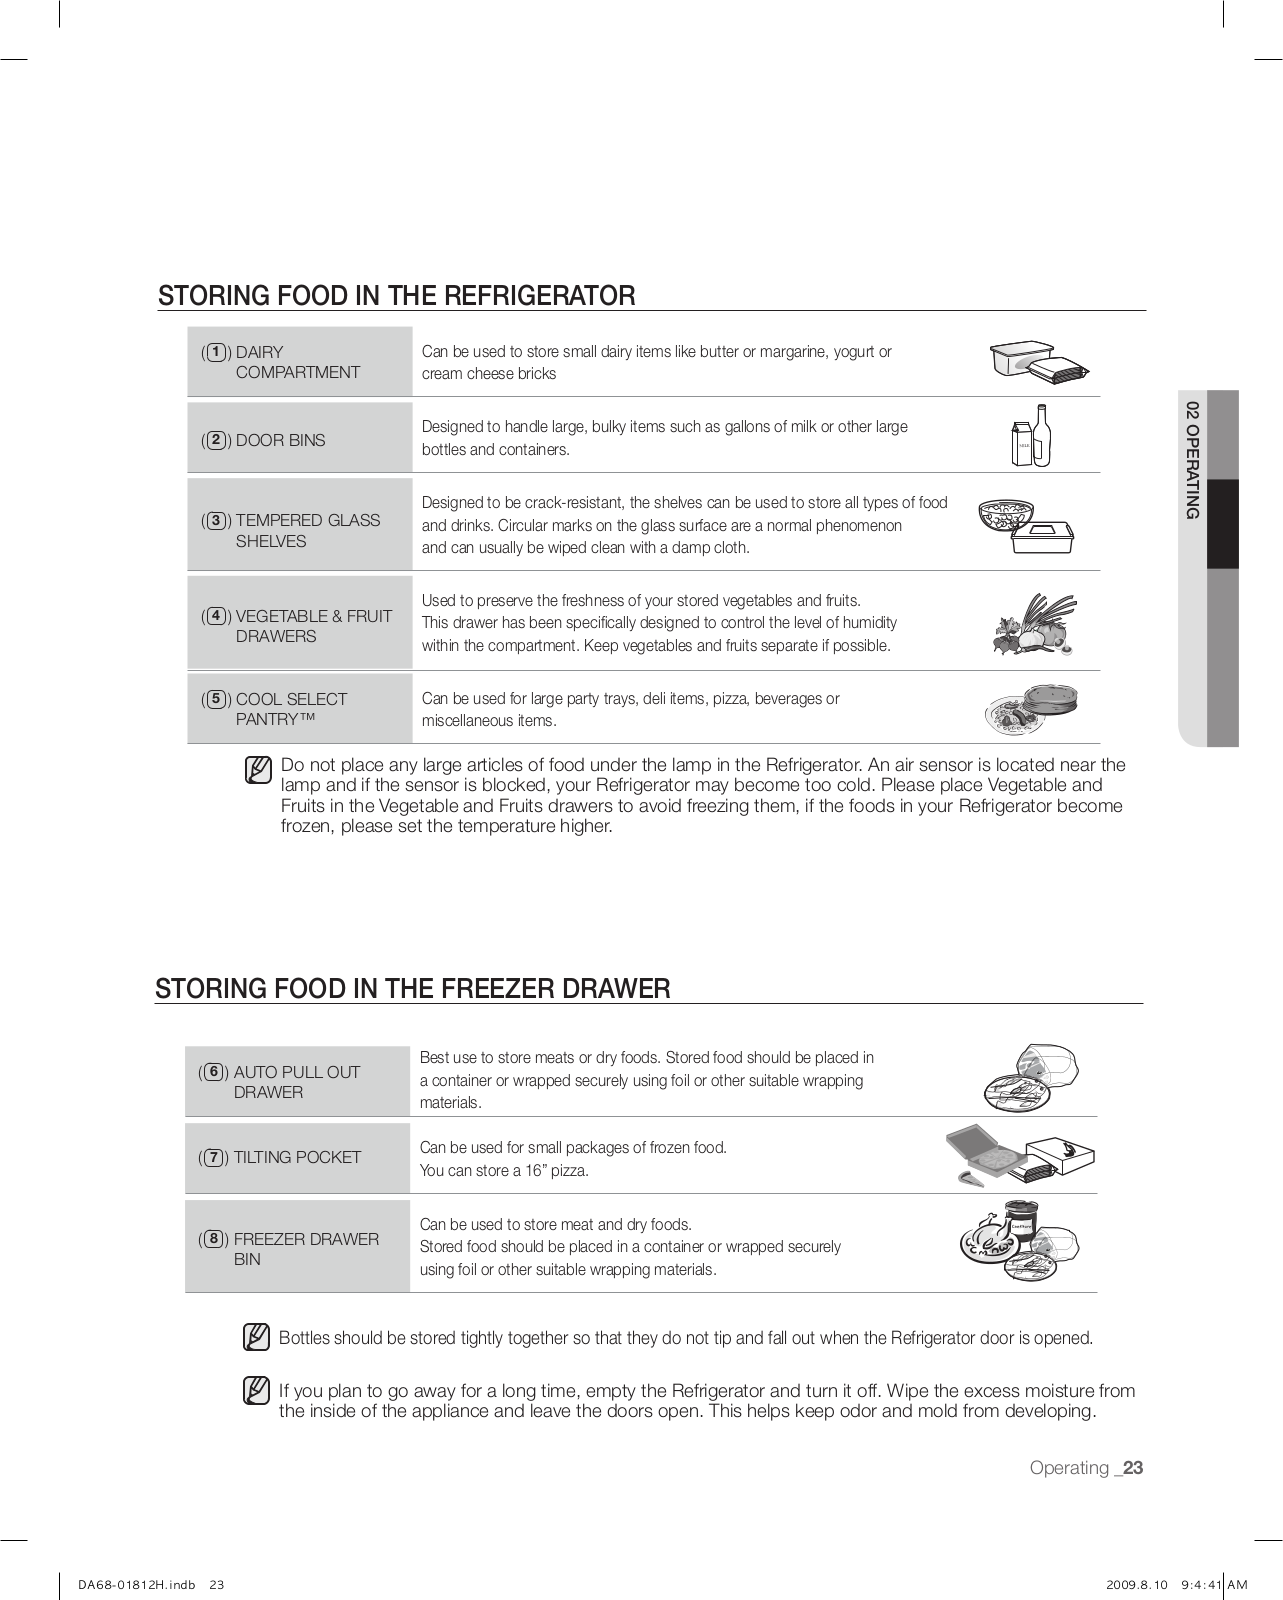
SAMSUNG
Loading...
R
RF265
RF265AA
2
RF265AABP
2
RF265AABP/XAA
2
RF265AABP/XAA-00
RF265AARS
4
RF265AARS/XAA-00
RF265AASH
2
RF265AASH/XAA
RF265AASH/XAA-00
RF265AAWP
2
RF265AAWP/XAA
RF265AAWP/XAA-00
RF265AA**/XAA
RF265AB
10
RF265ABBP
4
RF265ABBP/XAA
5
RF265ABBP/XAA-00
RF265ABPN
5
RF265ABPN/XAA
4
RF265ABPN/XAA-00
RF265ABRS
RF265ABWP
6
RF265ABWP/XAA
5
RF265ABWP/XAA-00
RF265AB**/XAA
RF265ACPN/XAA
RF265ACWP/XAA
2
RF265AC**/XAA
RF265ADPN
RF265A Series
RF265BEAESG
2
RF265BEAESG/AA-00
RF265BEAESR
2
RF265BEAESR/AA-00
RF266
5
RF266AA
3
RF266AABP
RF266AABP/XAA
2
RF266AABP/XAA-00
RF266AARS
RF266AARS/XAA
2
RF266AARS/XAA-00
RF266AASH
3
RF266AASH/XAA
2
RF266AASH/XAA-00
RF266AAWP
RF266AAWP/XAA
2
RF266AAWP/XAA-00
RF266AB
8
RF266ABBP
3
RF266ABBP/XAA
6
RF266ABBP/XAA-00
RF266ABPN
4
RF266ABPN/XAA
6
RF266ABRS
2
RF266ABRS/XAA
6
RF266ABRS/XAA-00
RF266ABWP
2
RF266ABWP/XAA
6
RF266ACPN-XAA
RF266ADBP/XAA-00
RF266ADPN/XAA-00
RF266ADRS/XAA-00
RF266ADWP/XAA-00
RF266AE
2
RF266AEBP
2
RF266AEBP/XAA-00
RF266AEPN
5
RF266AEPN-XAA
RF266AEPN/XAA-00
RF266AEPN/XAA-01
RF266AERS
4
RF266AERS/XAA-00
RF266AERS/XAA-01
RF266AEWP
3
RF266AEWP/XAA-00
RF266AFBP
RF266AFRS
RF266AZBP/XAA-00
RF266AZPN/XAA-00
RF266AZRS/XAA-00
RF266AZWP/XAA-00
RF267
4
RF267AA
RF267AABP
3
RF267AABP/XAA
2
RF267AABP/XAA-00
RF267AABWP
RF267AARS
3
RF267AARS/XAA
2
RF267AARS/XAA-00
RF267AA SERIES
RF267AASH
RF267AASH/XAA
RF267AASH/XAA-00
RF267AAWP
3
RF267AAWP/XAA
2
RF267AAWP/XAA-00
RF267AB
5
Loading...
Loading...
Nothing found
RF266ABBP
User Manual
76 pgs
12.96 Mb
0
User Manual
36 pgs
6.66 Mb
0
Service Manual
126 pgs
23.82 Mb
0
Table of contents
Loading...
SAMSUNG RF266ABBP User Manual
...
SAMSUNG User Manual
Download
Specifications and Main Features
Frequently Asked Questions
User Manual
Download
Loading...
+
53
hidden pages
Unhide
You need points to download manuals.
1 point = 1 manual.
You can buy points or you can get point for every manual you upload.
Buy points
Upload your manuals
 Loading...