

- This Document can not be used without Samsung's authorization -
4. Assembly and Disassembly
Item Picture Description
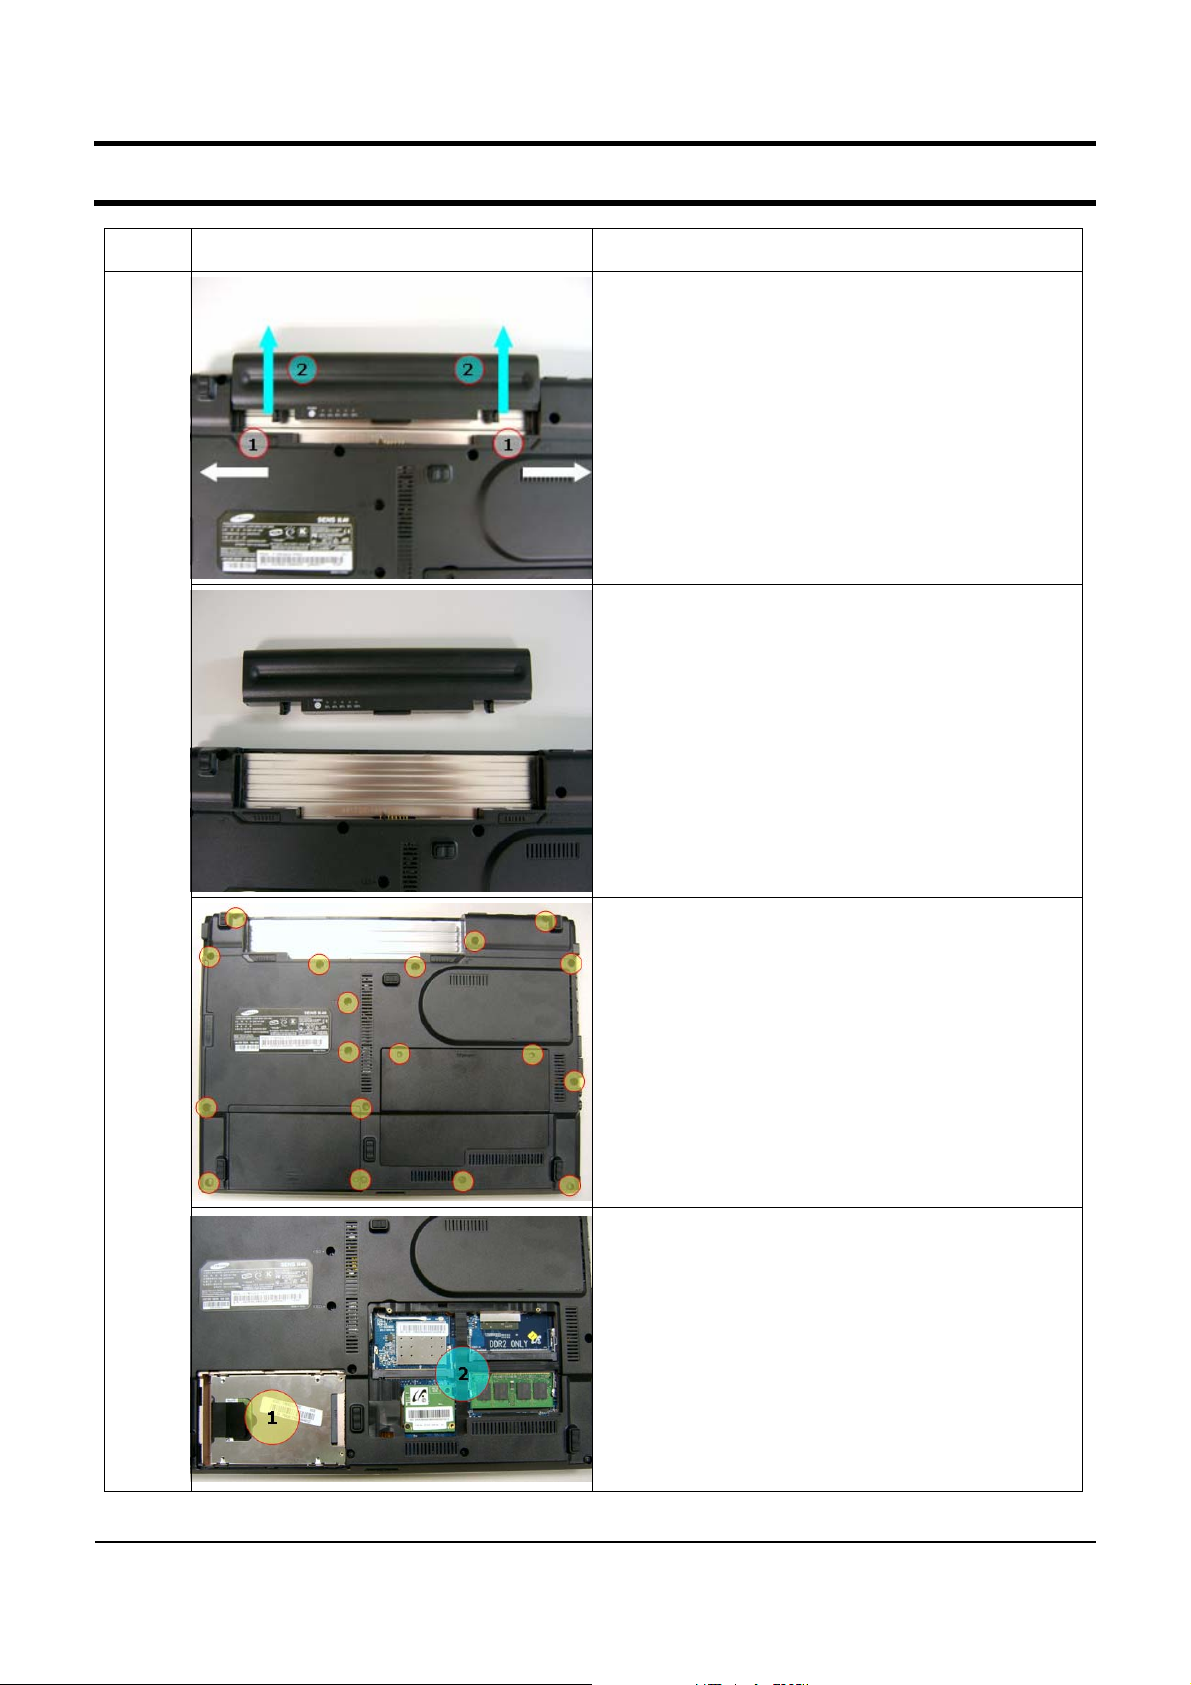
1. AC Adapter & Battery must be disassembled
before disassembling System.
2. Move Knob like Point 1 and separate
Battery like Point 2.
Main
System
3. Battery will be disassembled when push
Battery to the upper side.
4. Remove Bottom Screw
-M2.6L8:14pcs
- M2 L7 : 2pcs
- M2 L4 : 2pcs
*Caution
Just loose Memory Door Screw, because they
can not be removed.
5. Remove HDD DOOR
6. Remove MEMORY DOOR
4-1

- This Document can not be used without Samsung's authorization -
4. Assembly and Disassembly
Item Picture Description
7. Push HDD to Arrow mark side gripping
handle to remove HDD.
*Caution
Be careful when push the HDD to the rear
side.
HDD must be removed before turning upside
down the system.
Main
System
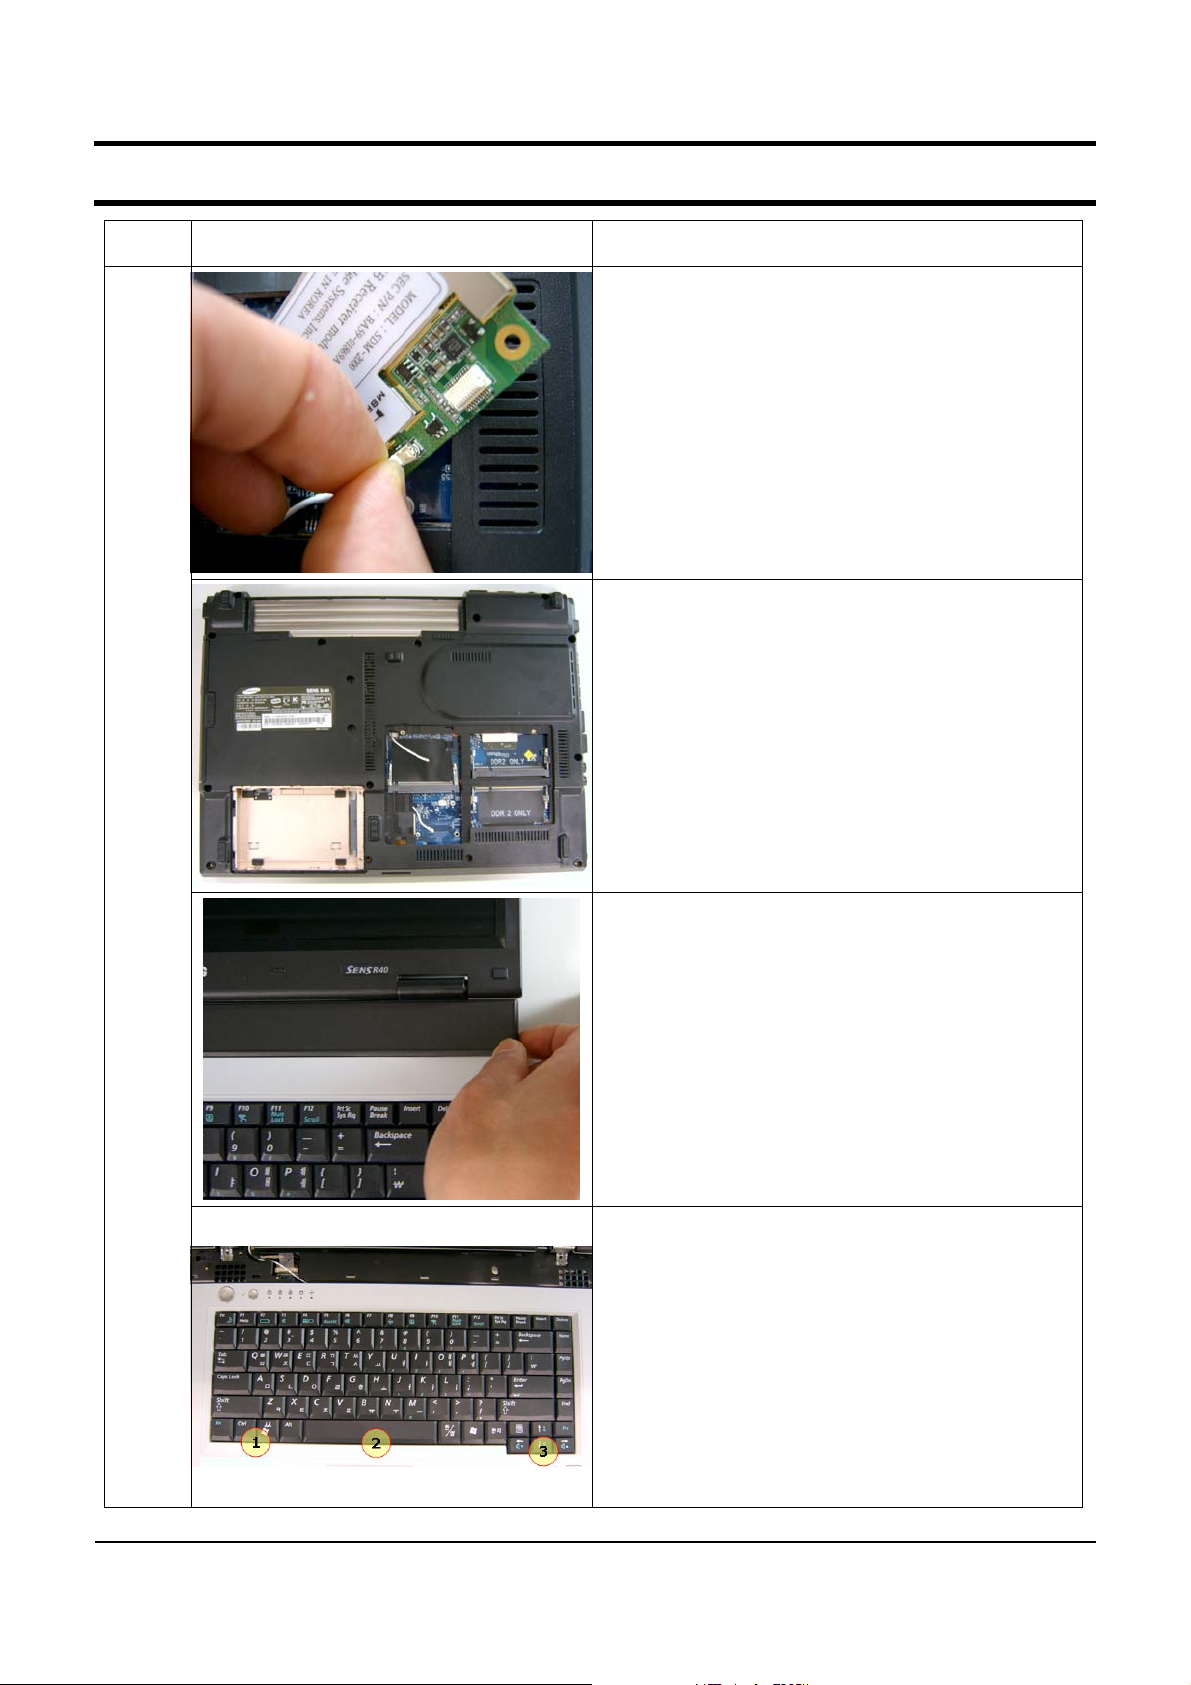
8. Remove Wireless LAN Card after
disassembling Wireless LAN Antenna
*Caution
Firenze2 have just one Wireless LAN Antenna
9. Lift up Memory by doing like Point 1, and
pull out the Memory from Socket.
10. Lift up DMB module from Point 1 after
remove 2 DMB Screws.
-M2L4:2pcs
*Caution
Just turn upside down the DMB Module to
disassemble Antenna. Don't lift up highly.
4-2
- This Document can not be used without Samsung's authorization -
4. Assembly and Disassembly
Item Picture Description
11. Disassemble DMB Antenna and remove
DMB Module completely.
12. Bottom view after remove HDD, Wireless
LAN, Memory, DMB Module.
Main
System
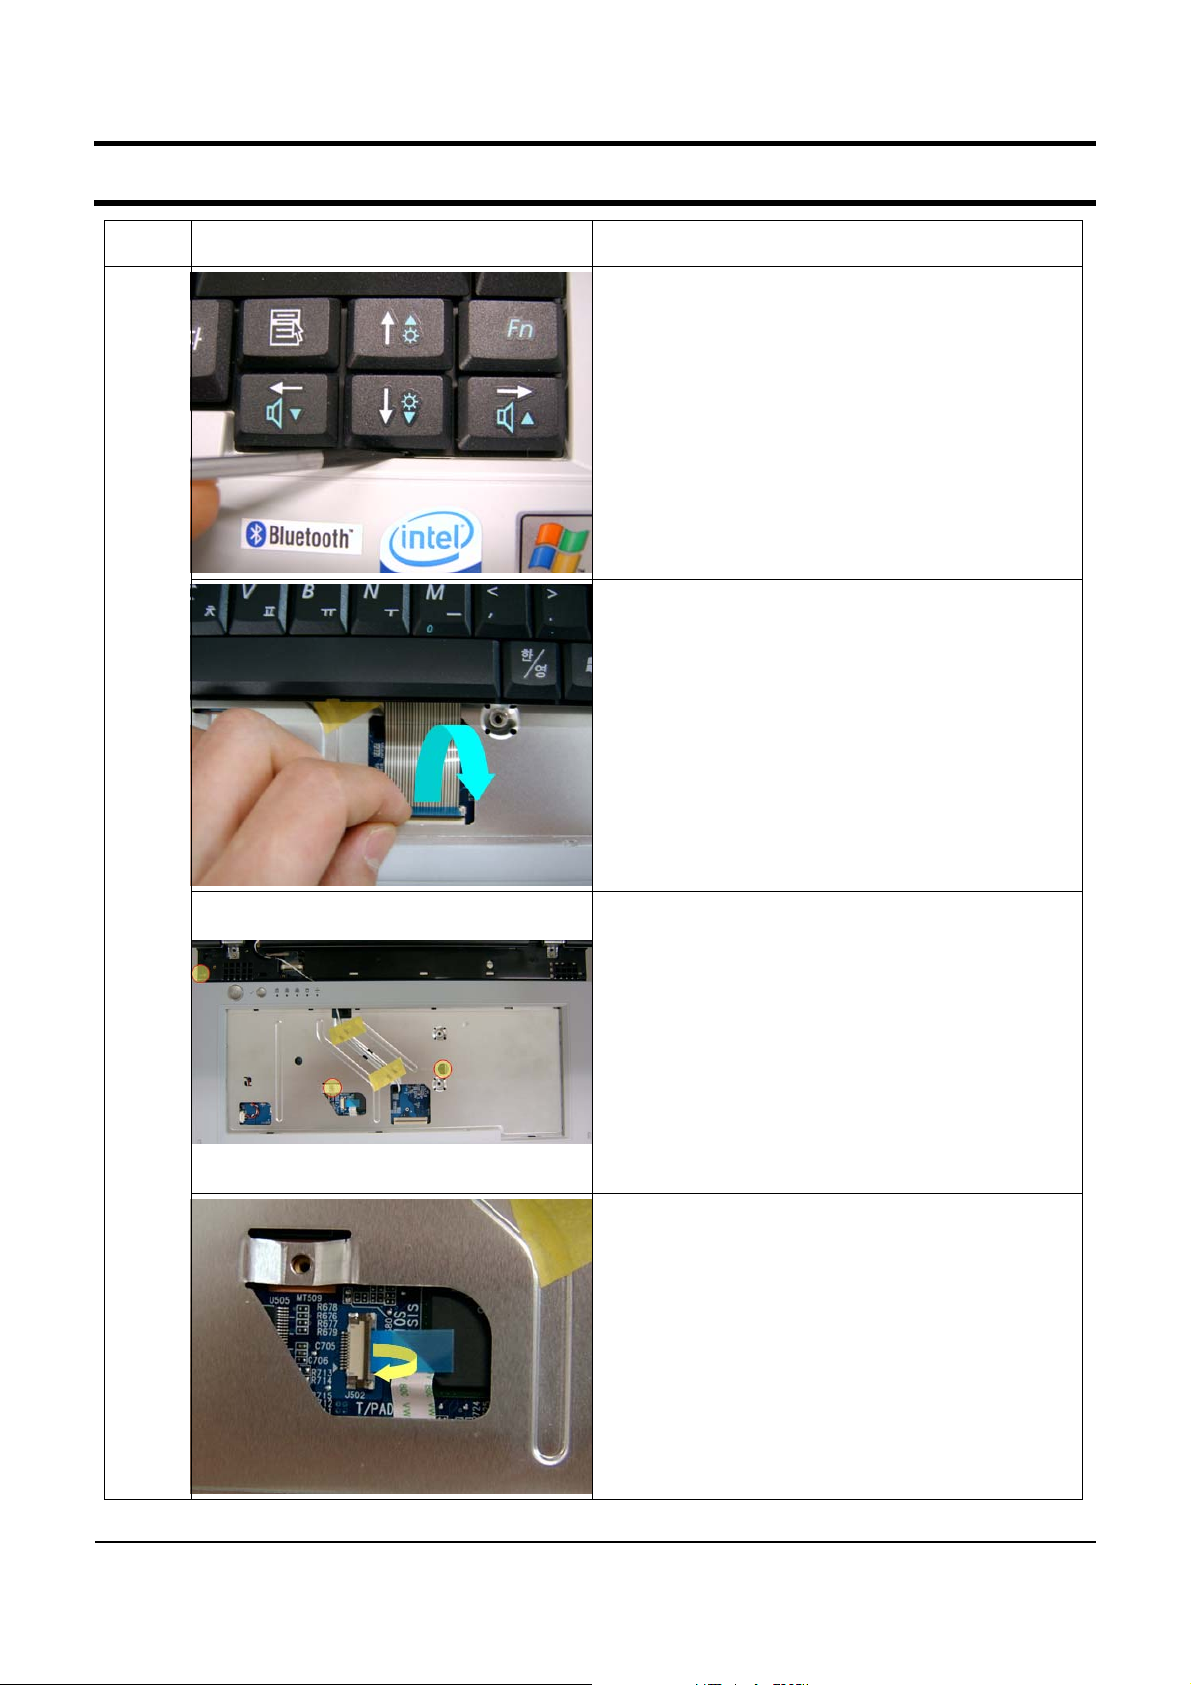
13. Lift up Top cover from right side.
*Caution
Lift up Top cover after fully openning the lid.
15. Disassemble 3 Hooks by sequence of 1, 2,
3inthepicturetoremoveKEYBOARD
4-3
- This Document can not be used without Samsung's authorization -
4. Assembly and Disassembly
Item Picture Description
16. Use tweezers, wooden cutter, '-' driver to
disassemble Keyboard.
*Caution
1. Be careful of injury and scratch of Top
surface when use instruments.
2. Don't lift up Keyboard highly.
17. Lift up FPC Connector cover like a picture
and disassemble Keyboard FPC.
Main
System
*Caution
Don't lift up FPC Connector cover highly.
That may cause Connector crash.
18. Remove 3 screws to disassemble Top.
-M2L4:1pcs
-M2L6:2pcs
19. Disassemble Touchpad FFC after lifting up
FPC Connector cover.
*Caution
Don't lift up FPC Connector cover highly.
That may cause Connector crash.
4-4
- This Document can not be used without Samsung's authorization -
4. Assembly and Disassembly
Item Picture Description
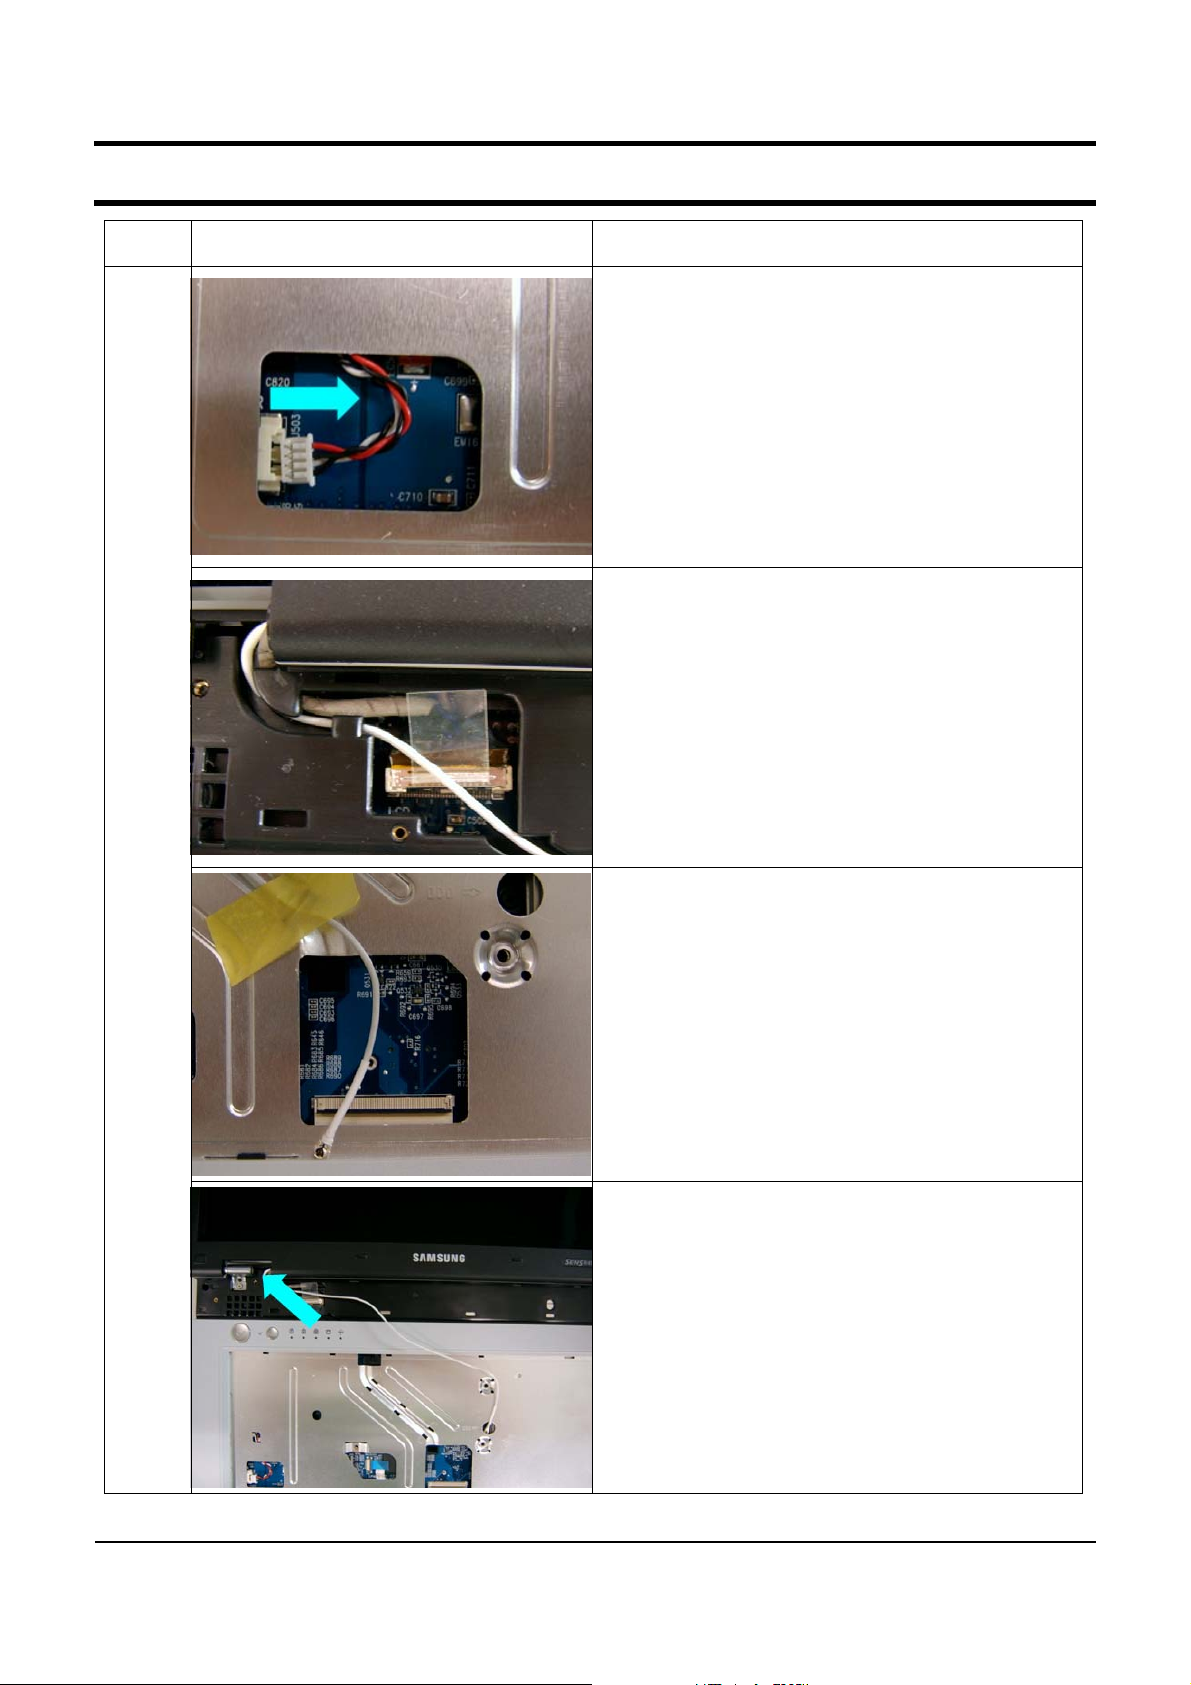
20. Disassemble Speaker Cable by pulling out
the connector like a picture.
21. Disassemble LCD Cable by lifting up
transparent handle.
Main
System
*Caution
If lift up Top without disconnection of LCD
Cable, that may cause LCD connector crash.
22. Pull out the Wireless LAN Antenna from
bottom side carefully.
23. Pull out the Wireless LAN Antenna like a
picture carefully.
4-5
 Loading...