

Samsung NP900X4D-A03US, NP900X4CA03US, NP900X4D-A01US, NP900X4D-A06US, NP900X4DA04US User Manual
...
1
2
3
4
5
User Guide
Getting Started
Using the Computer
Settings and Upgrade
Backup/Restoration
Appendix
Contents
Start
1
Chapter 1
Getting Started
Contents
Chapter 1. Getting Started
3 Tips
4 Before You Start
7 Safety Precautions
22 Proper Posture During Computer Use
25 Overview
31 Turning the Computer On and O
Chapter 2. Using the Computer
34 Keyboard
37 Touchpad
42 External-type CD drive (ODD, To be purchased)
44 Multi Card Slot (Optional)
47 Connecting an External Display Device
53 Connecting an External Digital Device
54 Adjusting the Volume
56 Wired Network
59 Wireless Network (Optional)
62 Using the TPM Security Device (Optional)
71 Software Launcher (Optional)
Chapter 3. Settings and Upgrade
73 LCD Brightness Control
74 Easy Settings (Optional)
75 BIOS Setup
77 Setting a Boot Password
80 Changing the Boot Priority
81 Battery
Chapter 4. Backup/Restore
86 Samsung Recovery Solution (Optional)
Chapter 5. Appendix
99 Q&A
100 Important Safety Information
102 Replacement Parts and Accessories
104 Regulatory Compliance Statements
120 WEEE Symbol Information
121 TCO Certi ed
122 Product Speci cations
124 Glossary
128 Index
Tips 3
Before You Start 4
Safety Precautions 7
Proper Posture During Computer Use 22
Overview 25
Turning the Computer On and O 31
Chapter 1.
Getting Started

3
Chapter 1
Getting Started
3
Tips
Tip
Chapter 1.
Getting Started
The computer is not turning on or does not respond
and displays a blank screen.
Restore the computer using Samsung Recovery Solution.
1. Turn the computer on and press the F4 key when the
booting screen (SAMSUNG logo) appears.
2. The computer will boot up in restore mode after a short
while and Samsung Recovery Solution appears.
3. When the start menu screen appears, click Restore.
Pressing Fn + shortcut keys (F1~F12) simultaneously
does not work.
Press Fn Lock key rst, and then press shortcut keys
(F1~F12) while Fn Lock ON appears.
Install Easy Settings.
I want to restore the computer to the state when it was
purchased.
If you use the Samsung Recovery Solution function, you can
easily and quickly restore the computer to a previous state
even if you do not have a separate OS recovery DVD or
recovery CD.
I cannot boot up into DOS using a USB device.
To boot up into DOS using a USB device, enter the BIOS
Setup, select the Advanced menu and set the Fast BIOS
Mode item to Disabled.
I want to connect an external monitor, TV or projector.
Connect the display device and the computer with the
monitor and repeatedly press the F4 key while holding
down the Fn key.
When I turn the computer on for the rst time after
purchasing it, the computer does not turn on.
To turn the computer on for the rst time, you have to
connect the AC adapter and then press the power button.
The power from the internal battery of the computer is cut
when you purchase the computer for safety purposes.
How can I extend the battery usage time?
The battery usage time may be shortened if you recharge
the battery before it is completely discharged.
To resolve this problem, enter the BIOS Setup and select
Boot > Smart Battery Calibration to discharge the battery
completely and then recharge the battery.
Q
A
Q
A
Q
A
Q
A
Q
A1
Q
A
Q
A
For detailed information on a function, refer to
the corresponding section of the User Manual.
A2

4
Chapter 1
Getting Started
Before You Start
Before reading the User Guide, rst check the following
information.
Optional items, some devices and software referred to in •
the User Guide may not be provided and/or changed by
upgrade.
Note that the computer environment referred in the User
Guide may not be the same as your own environment.
The pictures used for the cover and the main body in the •
User Manual are those of the representative model of each
series and may di er from the actual appearance of the
product.
This guide decribes procedures for using both the mouse •
and the touchpad.
This manual has been written for the Windows 7 operating •
system. The descriptions and gures may di er depending
on the installed operating system.
The User guide supplied with this computer may vary •
depending on your model.
Using the software
The software described in the main text can be launched •
using the following menu path.
- Start > All Programs
- Start > All Programs > Samsung
- For some programs, you can launch them by selecting
Start > All Programs > Samsung > Software Launcher.
When the programs are not installed, select • Samsung
Recovery Solution > System Software to install the
programs. (Only for models supplied with Samsung
Recovery Solution)
5
Chapter 1
Getting Started
Before You Start
Safety Precaution Notations
Icon Notation Description
Warning
Failure to follow instructions marked with
this symbol, may cause personal injury
and or fatality.
Caution
Failure to follow instructions marked with
this symbol, may cause slight injury to
yourself or damage your property.
Text Notations
Icon Notation Description
Caution
Content included in this section includes
information required about the function.
Note
Content included in this section includes
helpful information to use the function.
Copyright
© 2012 Samsung Electronics Co., Ltd.
Samsung Electronics Co., Ltd. owns the copyright of this manual.
No part of this manual may be reproduced or transmitted in any
form or by any means, electronic or mechanical, without the
consent of Samsung Electronics Co., Ltd.
The information in this document is subject to change without
notice due to improving the performance of the product.
Samsung Electronics shall not be liable for any data loss. Please
take care to avoid losing any important data and backup your data
to prevent any such data loss.
Precautions for Operating System Support
If a problem occurs because of the reinstallation of other
operating systems(OS) or a previous version of a OS pre-installed
on this computer, or a software that does not support the OS, the
company will not provide technical support, a replacement or
refund, and if our service engineer visits you due to this problem,
a service charge will be applied.

6
Chapter 1
Getting Started
Before You Start
About the Product Capacity Representation
Standard
About the capacity representation of the storage
The capacity of the storage device (HDD, SSD) of the manufacturer
is calculated assuming that 1KB=1,000 Bytes.
However, the operating system (Windows) calculates the storage
device capacity assuming that 1KB=1,024 Bytes, and therefore the
capacity representation of the HDD in Windows is smaller than the
actual capacity due to the dierence in capacity calculation.
(E.g. For a 80GB HDD, Windows represents the capacity as 74.5GB,
80x1,000x1,000x1,0 00 byte/(1,024x1,024x1,024)by te = 74.505GB)
In addition, the capacity representation in Windows may be even
smaller because some programs such as Recovery Solution may
reside in a hidden area of the HDD.
About Memory Capacity Representation
The memory capacity reported in Windows is less than the actual
capacity of memory.
This is because BIOS or a video adapter uses a portion of memory
or claims it for further use.
(E.g. For 1GB(=1,024MB) memory installed, Windows may report
the capacity as 1,022MB or less)

7
Chapter 1
Getting Started
Installation Related
Do not install the product in places exposed
to humidity such as a bathrooms.
There is a danger of electric shock. Use the
product within the operating conditions
speci ed in the Manufacturers User Guide.
Keep the plastic bags out of the reach of
children.
There is a danger of su ocation.
Safety Precautions
Keep a distance of 15cm or more between
the computer and the wall and do not place
any objects between them.
This may increase the internal temperature of
the computer and may cause an injury.
Do not install the computer on a slant or a
place prone to vibrations, or avoid using the
computer in that location for a long time.
This increases the risk that a malfunction or
damage to the product will occur.
Avoid exposing any part of your body to the
heat from the computer vent or AC adapter
for a long time when the computer is on.
Exposing a part of your body close to the heat
from the vent or AC adapter for long periods of
time may cause a burn.
Avoid blocking the vent at the bottom or
side of the computer when using it on a bed
or cushion.
If the vent is blocked, there is a danger of
damaging the computer or overheating the
inside of the computer.
For your security and to prevent damage, please read the
following safety instructions carefully.
Since this is commonly applied to Samsung Computers,
some pictures may di er from actual products.
Warning
Failure to follow instructions marked with this symbol may
cause personal injury and even fatality.
Ver 3.1
8
Chapter 1
Getting Started
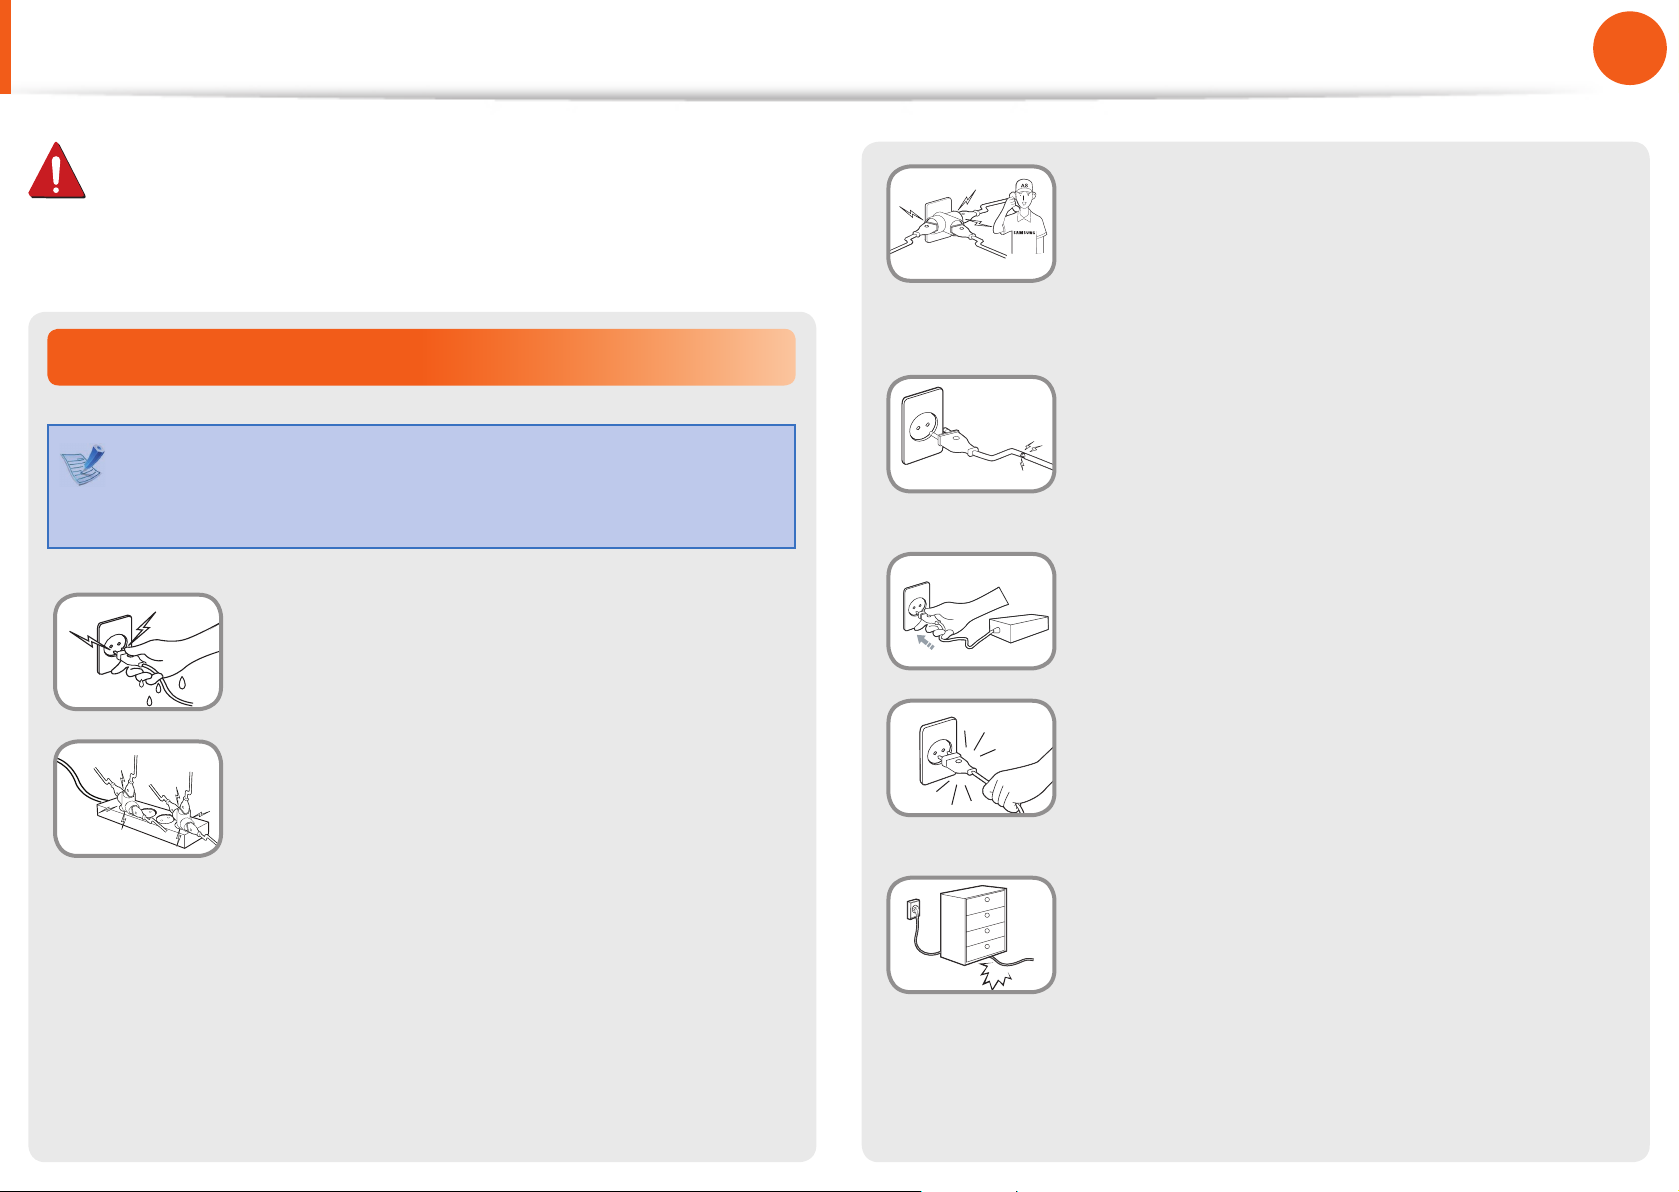
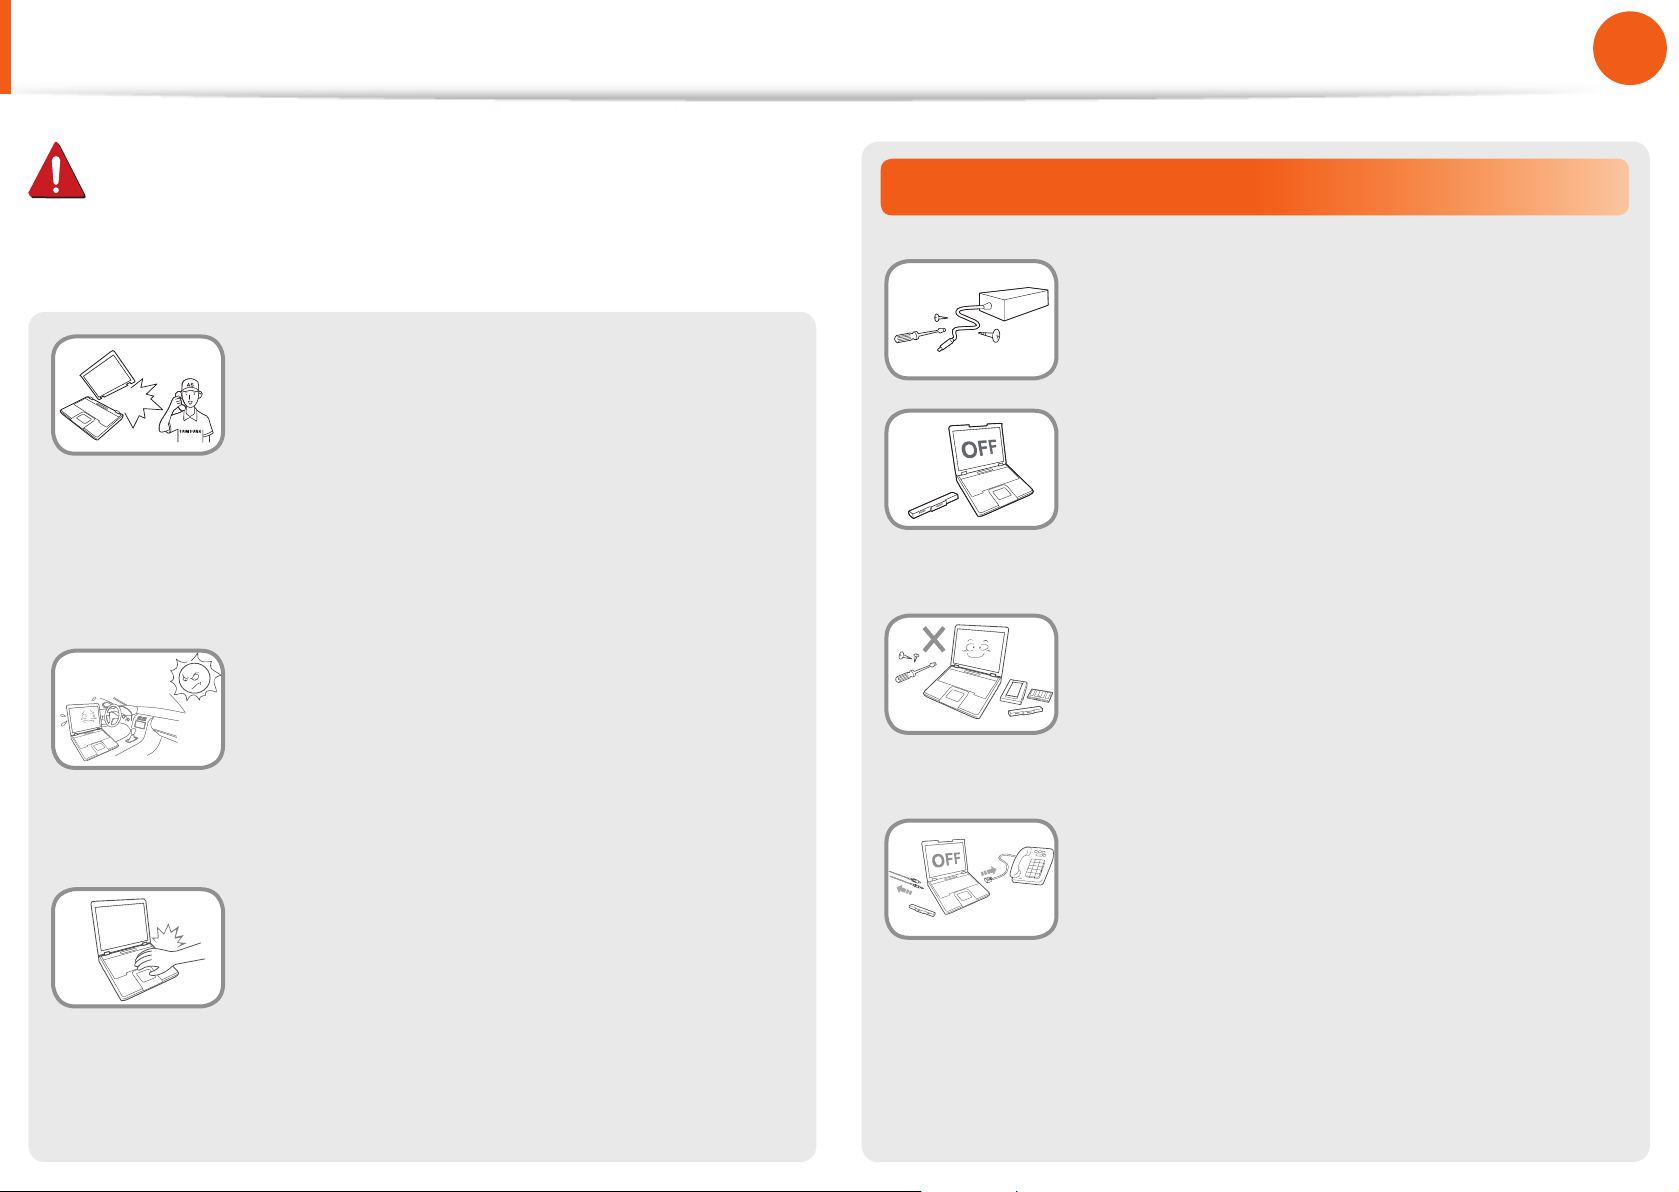
If the power cord or power outlet makes a
noise, disconnect the power cord from the
wall outlet and contact a service center.
There is a danger of electric shock or re
hazard.
Do not use a damaged or loose main plug or
power cord or power outlet.
There is a danger of electric shock or re
hazard.
Plug the power cord rmly into the power
outlet and AC adapter.
Failure to do so may cause re hazard.
Do not unplug the power cord by pulling
the cable only.
If the cord is damaged, it may cause electric
shock.
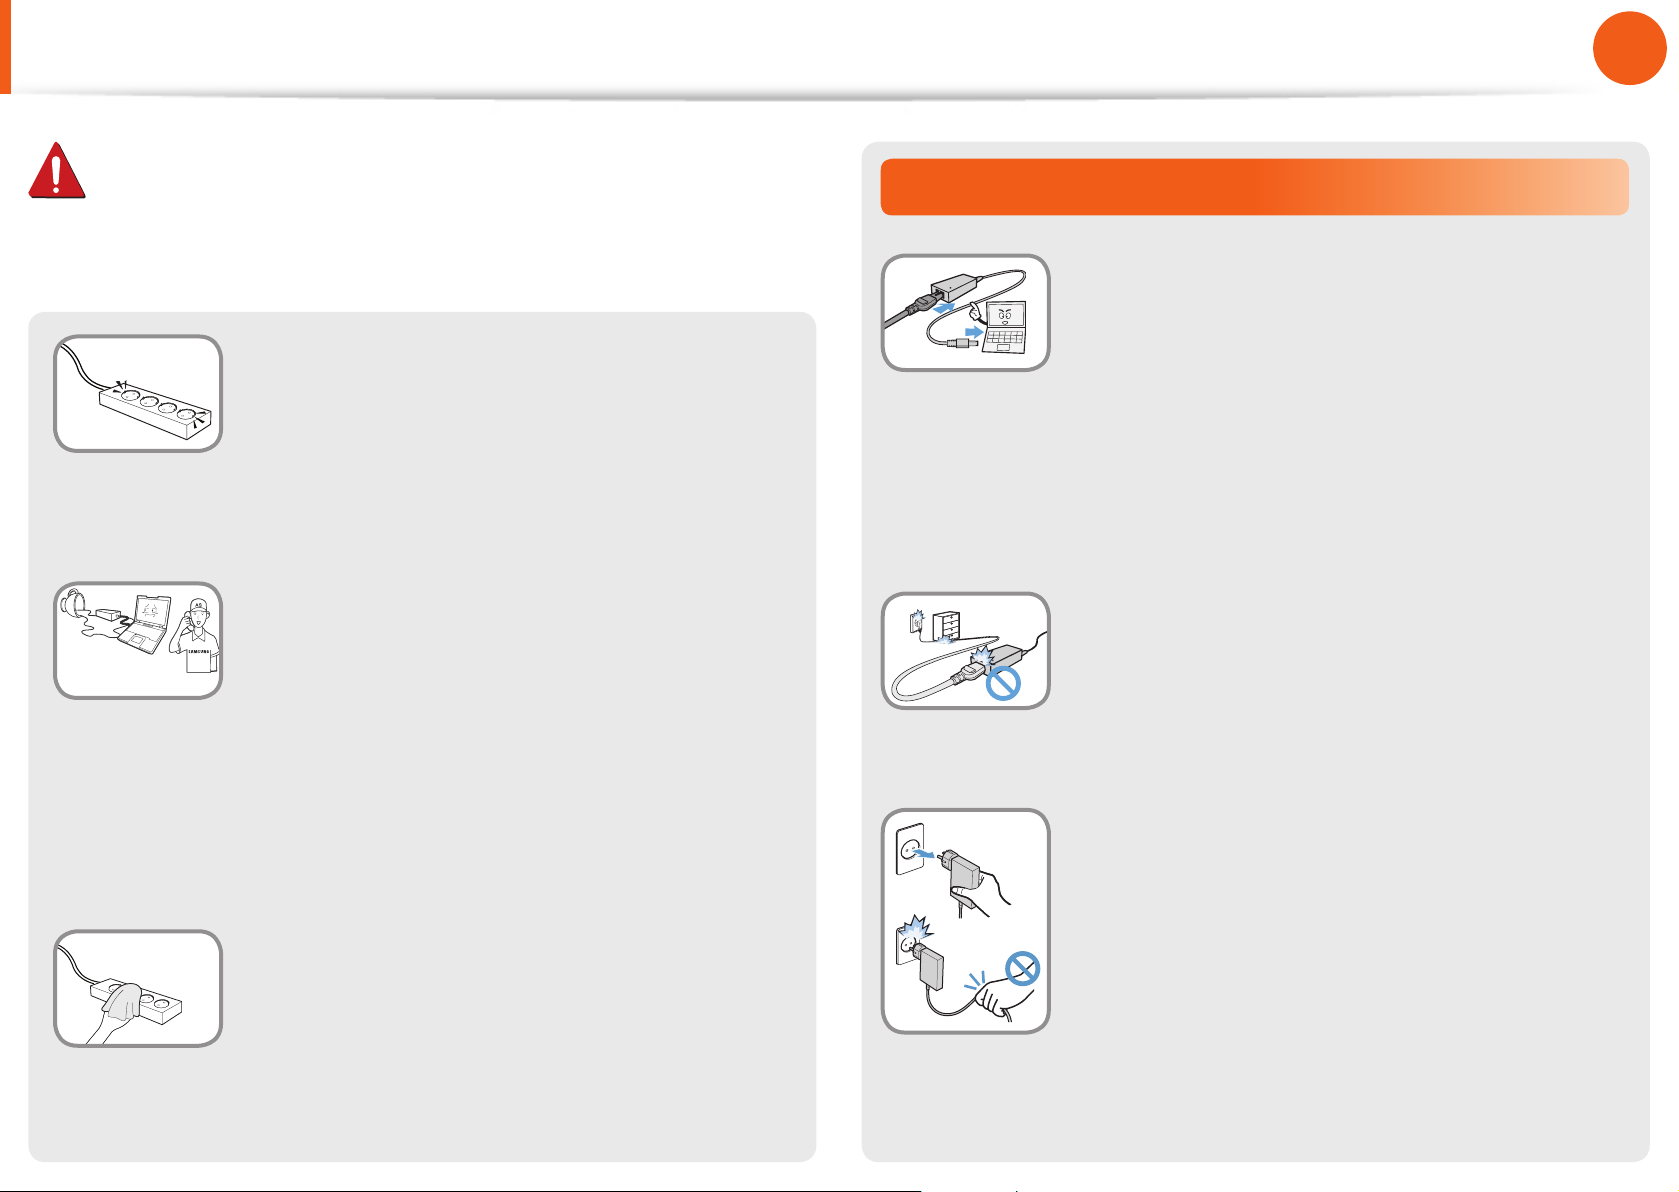
Do not bend the power cord excessively or
do not place a heavy object over the power
cord. It is especially important to keep the
power cord out of reach of infants and pets.
If the cord is damaged, it may cause electric
shock or re.
Power Related
The power plug and wall outlet gures may di er
depending on the country speci cations and the product
model.
Do not touch the main plug or power cord
with wet hands.
There is a danger of electric shock.
Do not exceed the standard capacity
(voltage/current) of a multiplug or power
outlet extension when using it for the
product.
There is a danger of electric shock or re
hazard.
Safety Precautions
Warning
Failure to follow instructions marked with this symbol may
cause personal injury and even fatality.
9
Chapter 1
Getting Started
Safety Precautions
Warning
Failure to follow instructions marked with this symbol may
cause personal injury and even fatality.
Connect the power cord to an outlet or
multiple power plug (extended cable) with
a ground terminal.
Failure to do so may result in electric shock.
When the power supply is ungrounded, the
current may leak resulting in electric shock.
If water or another substance enters
the power input jack, AC adapter or the
computer, disconnect the power cord and
contact the service center.
If the notebook computer has an external
type (removable) battery, separate the
battery also.
Damage to the device within the computer
may cause electric shock or re hazard.
Keep the power cord or outlet clean so that
they are not covered with dust.
Failure to do so may result in re.
AC Adapter Usage Precautions
Connect the power cord to the AC adapter
rmly.
Otherwise, there is a danger of re due to an
incomplete contact.
Use only the AC adapter supplied with the
product.
Using another adapter may cause the screen to
icker.
Do not place heavy objects or step onto
the power cord or AC adapter to avoid
damaging the power cord or AC adapter.
If the cord is damaged, there is a danger of
electric shock or re.
Unplug the wall-mount AC adapter (adapter
and plug integrated type) from the wall
outlet while holding the body and pulling it
in the direction of the arrow.
If you unplug the adapter by holding and
pulling the cable, the adaptor may be damaged
and an electric shock, explosive sound or spark
may occur as a result.

10
Chapter 1
Getting Started
Safety Precautions
Warning
Failure to follow instructions marked with this symbol may
cause personal injury and even fatality.
Battery Usage Related
Please charge the battery fully before using the
computer for the rst time.
Keep the battery out of the reach of infants
and pets, as they could put the battery into
their mouths.
There is a danger of electric shock or choking.
Use an authorized battery and AC adapter
only.
Please use an authorized battery and adapter
approved by Samsung Electronics.
Unauthorized batteries and adapters may not
meet the proper safety requirements and may
cause problems or malfunctions and result in
an explosion or re.
Do not use the computer in a badly
ventilated location such as on bedding, on a
pillow or cushion, etc, and do not use it in a
location such as room with oor heating as
it may cause the computer to overheat.
Take care that the computer vents (on the side
or the bottom) are not blocked especially in
these environments. If the vents are blocked,
the computer may overheat and it may cause a
computer problem, or even an explosion.
Do not use the computer in a humid
location such as a bathroom or sauna.
Please use the computer within the
recommended temperature and humidity
range (10~32ºC, 20~80% RH).
Do not close the LCD panel and put the
computer into your bag to move it when it
is still turned on.
If you put the computer into your bag without
turning it o, the computer may overheat and
there is a danger of re. Shut the computer
down properly before moving it.
11
Chapter 1
Getting Started
Safety Precautions
Warning
Failure to follow instructions marked with this symbol may
cause personal injury and even fatality.
Never heat the product(or battery) or put
the product(or battery) into a re. Do not
put or use the product(or battery) in a hot
location such as a sauna, inside a vehicle
exposed to the heat, and so on.
There is a danger of an explosion or re.
Take care not to allow metal objects such as
a key or clip to touch the battery terminal
(metal parts).
If a metal object touches the battery terminals,
it may cause excessive current ow and it may
damage the battery, or result in a re.
If liquid leaks out of the product(or battery)
or there is a funny smell coming from
the product(or battery), remove the the
product(or battery) the computer and
contact a service center.
There is a danger of an explosion or re.
To use the computer safely, replace a dead
battery with a new, authorized battery.
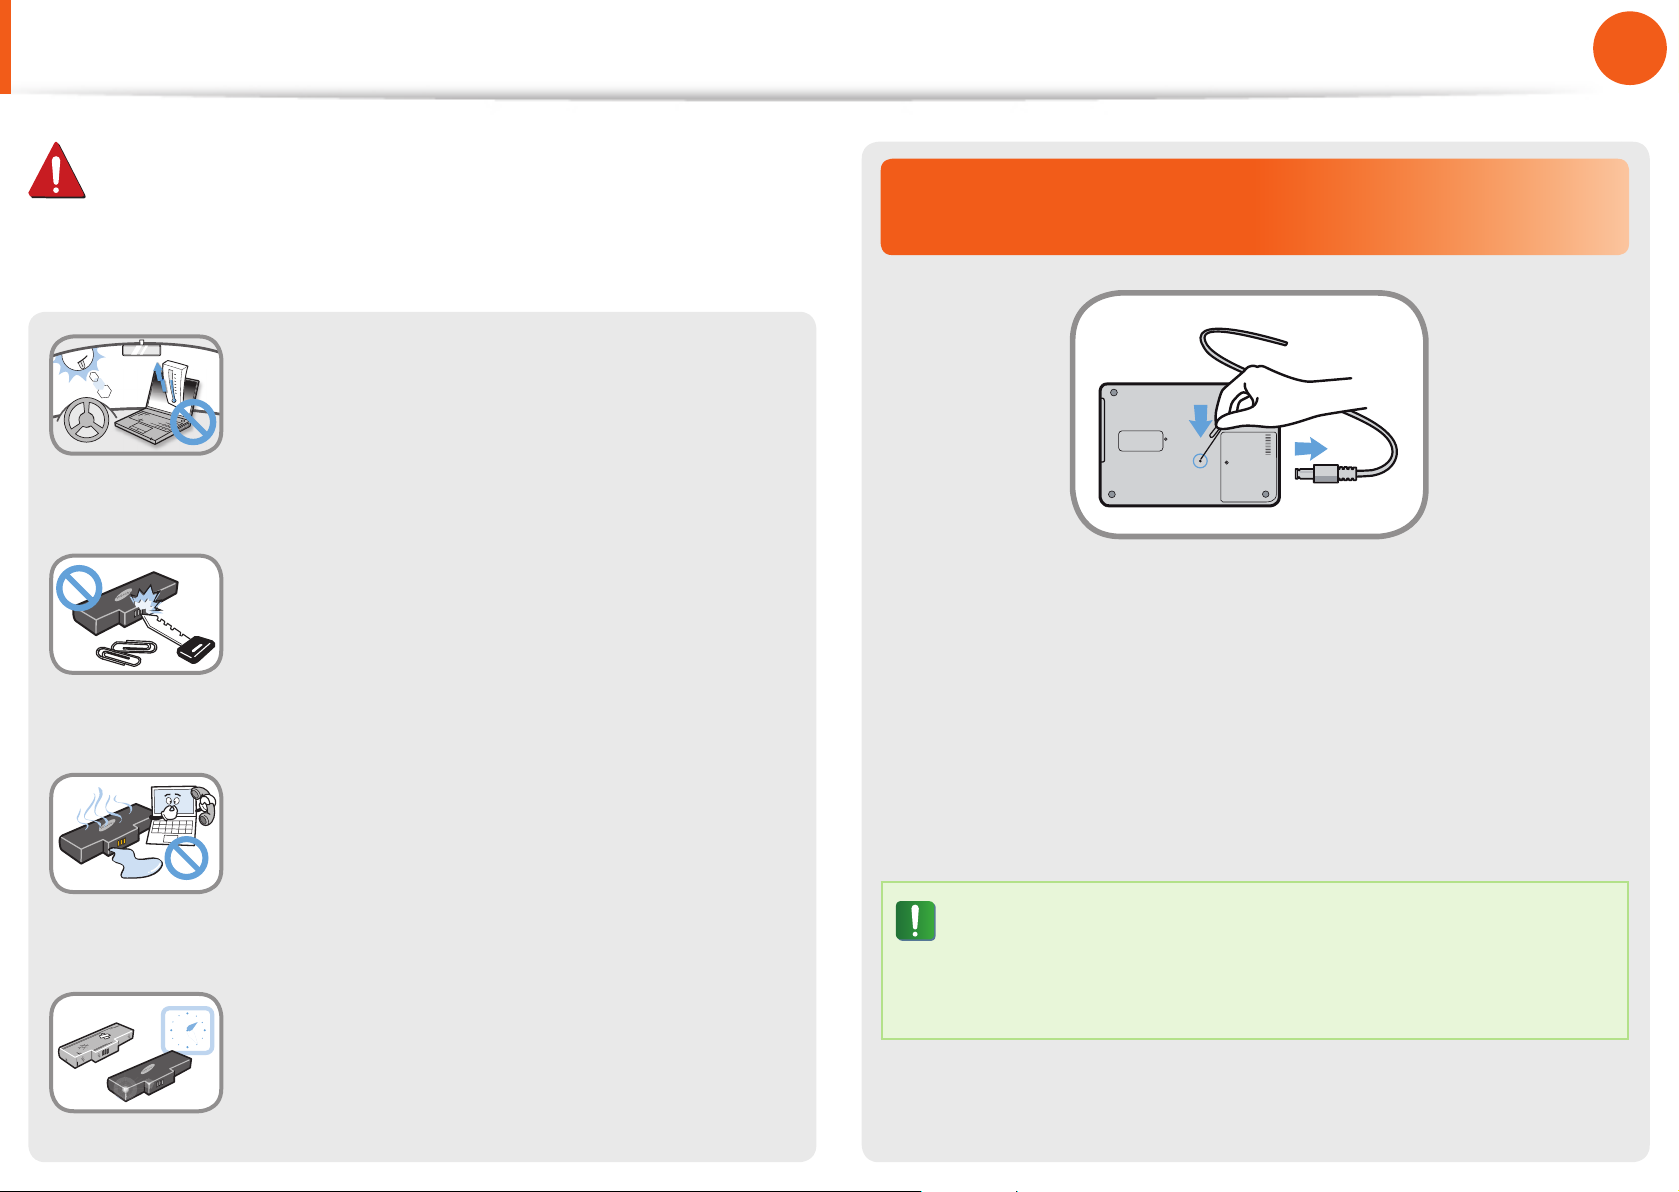
Cutting the power to the internal battery
(for corresponding models only.)
For products with built-in batteries, customers cannot remove •
the battery.
In the case of ooding, lightning or explosions, you can cut •
the battery power by inserting an object such as a paper clip
into the [Emergency Hole] at the bottom of the computer.
Disconnect the AC adapter and insert an object such as a •
paper clip into the hole at the bottom of the computer to cut
the battery power.
In the case of ooding, lightning or explosions, cut
the battery power, do not reconnect the AC adapter,
and immediately contact Samsung Electronics so that
the appropriate countermeasures can be taken.
12
Chapter 1
Getting Started
Safety Precautions
Warning
Failure to follow instructions marked with this symbol may
cause personal injury and even fatality.
Thereafter, if you connect the AC adapter, the battery power •
will be supplied again.
Do not cut the battery power under normal •
conditions.
This may result in data loss or a product •
malfunction.
The location of the Emergency Hole may di er depending
on the model.
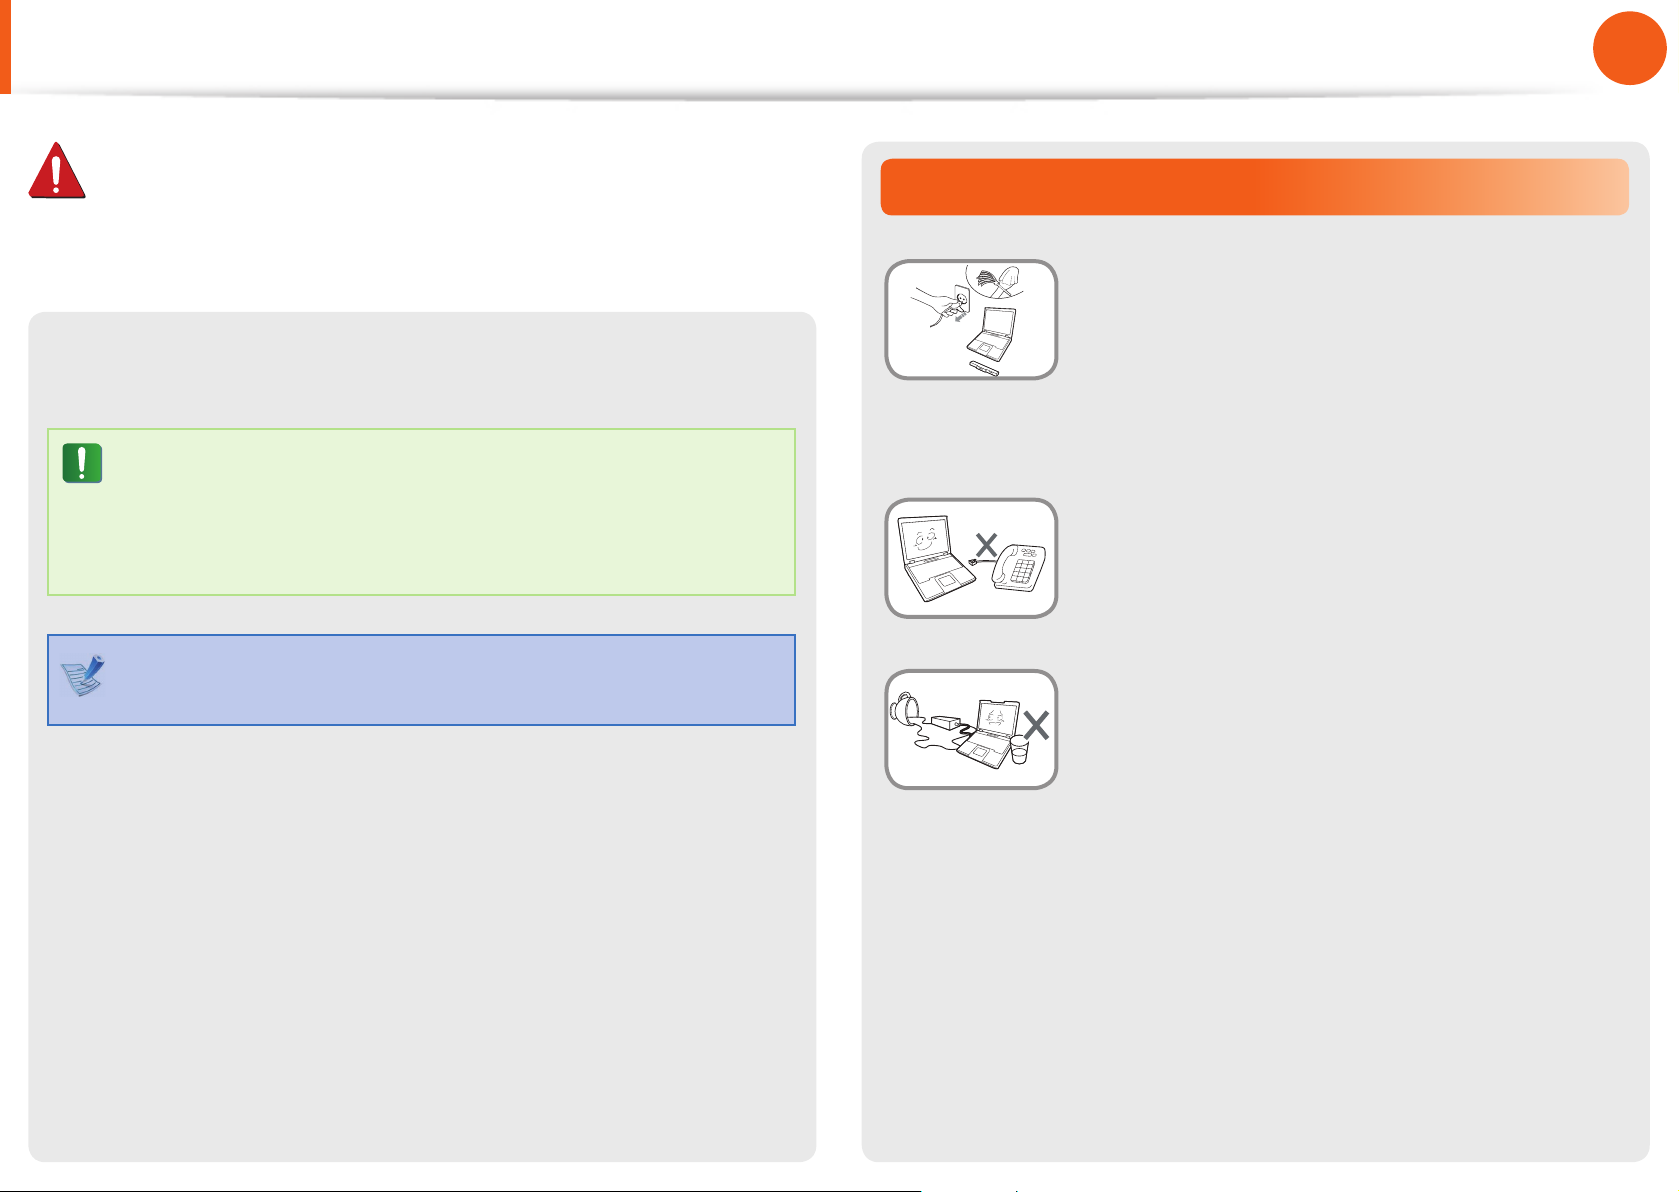
Usage Related
Disconnect all cables connected to the
computer before cleaning it. If your
notebook is external & removable battery
type, remove the external battery.
There is a danger of electric shock or damage
to the product.
Do not connect a phone line connected to a
digital phone to the modem.
There is a danger of a electric shock, re or
damage to the product.
Do not place any container lled with water or
chemicals over or near the computer.
If water or chemicals enter the computer, this
may cause re or electric shock.
13
Chapter 1
Getting Started
Safety Precautions
Warning
Failure to follow instructions marked with this symbol may
cause personal injury and even fatality.
If the computer is broken or dropped,
disconnect the power cord and contact a
service center for a safety check.
If the notebook computer has an external
type (removable) battery, separate the
battery also.
Using a broken computer may cause electric
shock or re hazard.
Avoid direct sunlight when the computer
is in an air-tight location such as inside a
vehicle.
There is a danger of a re hazard. The computer
may overheat and also present opportunity to
thieves.
Do not use your notebook PC for long
periods of time while any part of your
body is making direct contact with it. The
temperature of the product may increase
during normal operation.
Upgrade Related
Never disassemble the power supply or AC
adapter.
There is a danger of electric shock.
When removing the RTC (Real Time Clock)
battery, keep it out of the reach of children
as they could touch and/or swallow it.
There is a danger of choking. If a child has
swallowed it, contact a doctor immediately.
Use only authorized parts (multiplug, battery and memory) and never
disassemble parts.
There is a danger of damaging the product,
electric shock or re hazard.
Shut down the computer and disconnect
all cables before disassembling the
computer. If there is a modem, disconnect
the phone line. If your notebook is external
& removable battery type, remove the
external battery.
Failure to do so, may cause electric shock.
This may result in harming or burning your skin.
14
Chapter 1
Getting Started
Safety Precautions
Warning
Failure to follow instructions marked with this symbol may
cause personal injury and even fatality.
Security and Movement Related
Follow the instructions for the relevant
location (e.g. airplane, hospital, etc.) when
using a wireless communication device
(wireless LAN, Bluetooth, etc.).
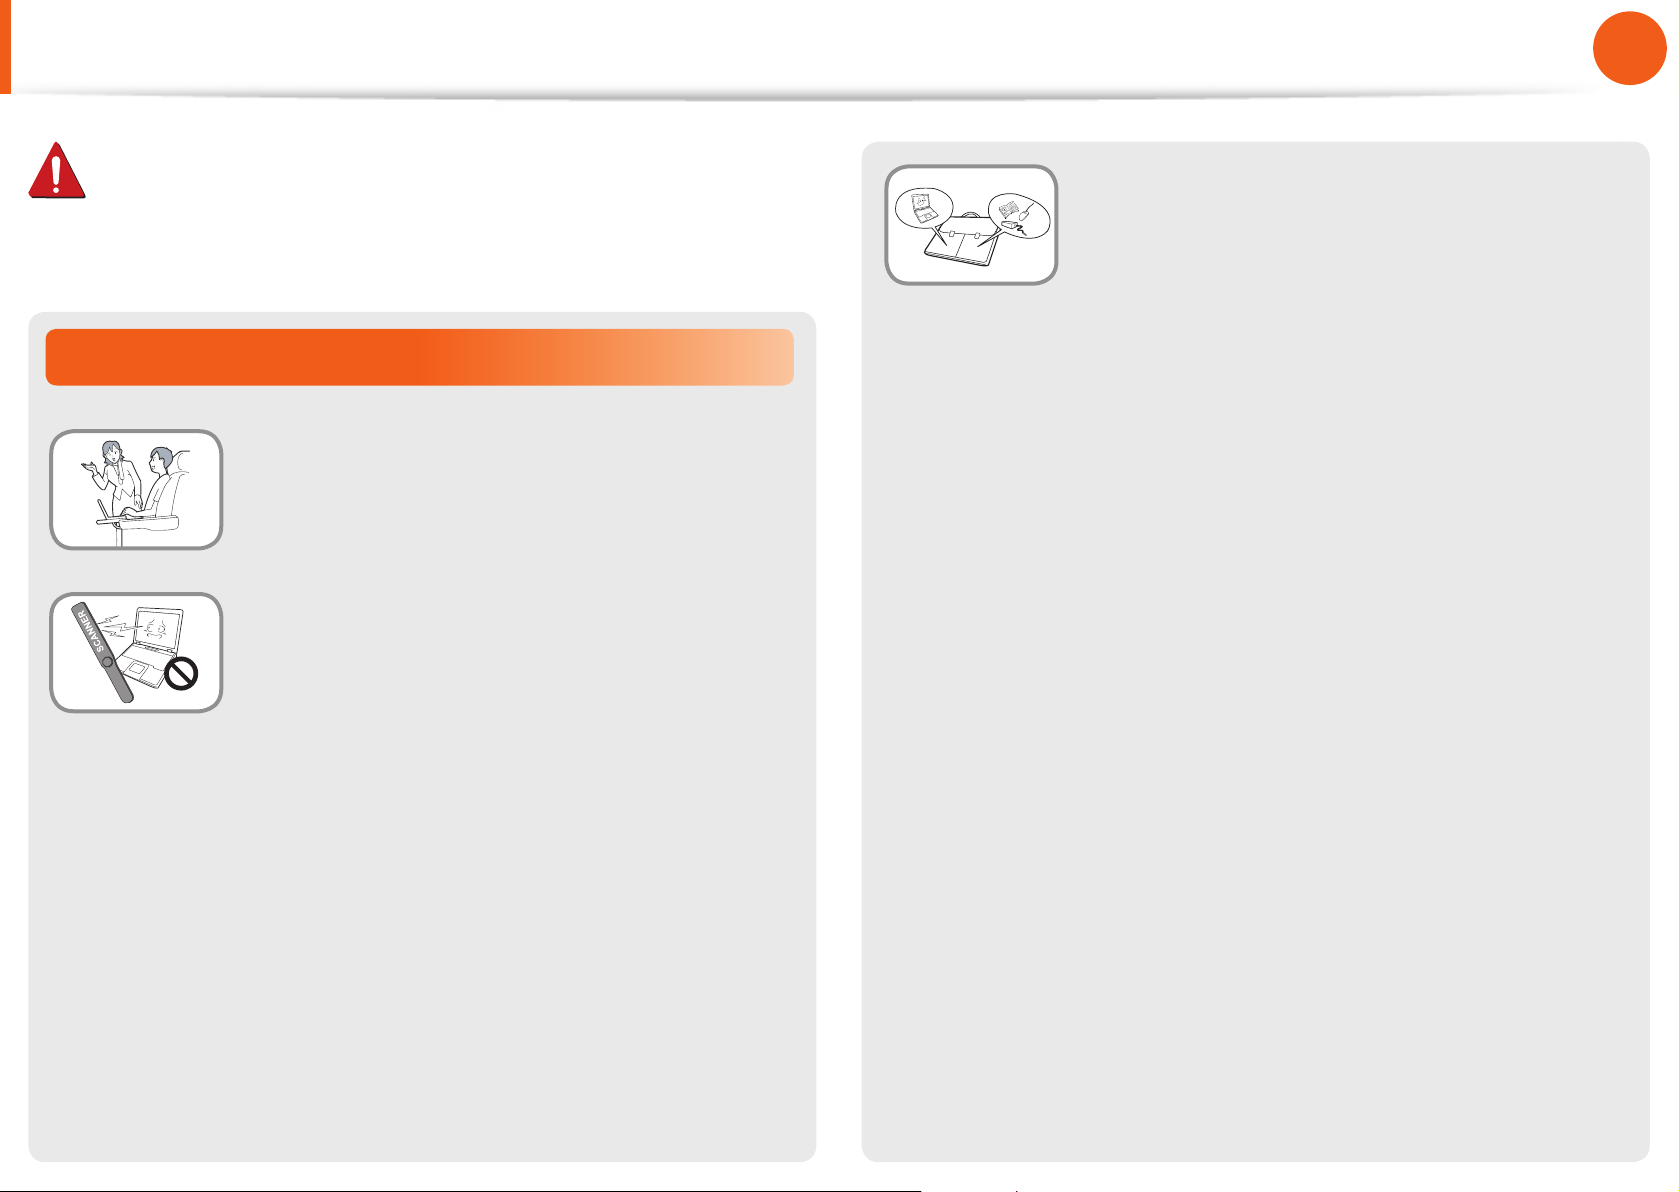
Avoid exposing a drive to magnetic elds.
Security devices with magnetic elds include airport walk-through devices and security wands.
When carrying the notebook computer
with other items, such as the adapter,
mouse, books etc, take care not to press
anything against the notebook computer.
If a heavy object is pressed against the
notebook computer, a white spot or stain may
appear on the LCD. Therefore, take care not to
apply any pressure to the notebook.
In this case, place the notebook computer in
a separate compartment away from the other
objects.
The airport security devices that check carry-on luggage, such as conveyor belts, use
x-rays instead of magnetism and will not
damage a drive.

15
Chapter 1
Getting Started
Safety Precautions
Caution
Failure to follow instructions marked with this symbol may
cause slight injury or damage to the product.
Installation Related
Do not block the ports (holes), vents, etc. of the product and
do not insert objects.
Damage to a component within the computer may cause electric
shock or re.
When using the computer with it lying on its side, place it so
that the vents face upwards.
Failure to do so, may cause the internal temperature of the
computer to rise and the computer to malfunction or halt.
Do not place a heavy object over the product.
This may cause a problem with the computer. In addition, the
object may fall and cause injury, or damage the computer.
Battery Usage Related
Dispose of worn-out batteries properly.
There is a danger of re or explosion.•
The battery disposal method may dier depending on •
your country and region. Dispose of the used battery in an
appropriate way.
Do not throw or disassemble the battery and do not put it
into water.
This may cause an injury, re or explosion.
Use only a battery authorized by Samsung Electronics.
Failure to do so may cause an explosion.
Avoid contact with metal objects such as car keys or clips
when keeping or carrying a battery.
Contact with a metal may cause excessive current and a high
temperature and may damage the battery or cause a re.
Charge the battery according to the instructions in the manual.
Failure to do so, may cause an explosion or re from damage to
the product.
Do not heat the product(or battery) or expose it to heat (e.g.
inside a vehicle during the summer).
There is a danger of explosion or re.

16
Chapter 1
Getting Started
Safety Precautions
Caution
Failure to follow instructions marked with this symbol may
cause slight injury or damage to the product.
Usage Related
Do not place a candle, light cigar, etc. over or on the product.
There is a danger of re.
Use a wall outlet or multi-plug with a grounding part.
Failure to do so may cause electric shock hazard.
Make sure to have the product tested by a safety service
engineer after repairing the product.
Authorized Samsung Repair Centers will carry out safety checks
after a repair. Using a repaired product without testing it for
safety may cause an electric shock or re.
Connect only permitted devices to the connectors or ports
of the computer.
Failure to do so, may cause electric shock and re.
Close the LCD panel only after checking if the notebook
computer is turned o.
The temperature may rise and it may cause overheating and
deformation of the product.
Do not press the Eject Button while the Floppy Disk/CD-ROM
drive is in operation.
You might lose data and the disk might be suddenly ejected and
could cause an injury.
Take care not to drop the product while using it.
This may cause personal injury or loss of data.
Do not touch the antenna with electricity facility such as the
power outlet.
In case of lightning, immediately turn the system o,
disconnect the power cord from the wall outlet and phone
line from modem. Do not use a modem or phone.
There is a danger of electric shock or re.
Do not use your computer and AC-Adapter on your lap or
soft surfaces.
If the computer temperature increases, there is a danger of
burning yourself.
There is a danger of electric shock.
When handling computer parts, follow the instructions on
the manual supplied with the parts.
Failure to do so, may cause damage to the product.

17
Chapter 1
Getting Started
Safety Precautions
Caution
Failure to follow instructions marked with this symbol may
cause slight injury or damage to the product.
If the computer emits smoke, or there is a burning smell,
disconnect the power plug from the wall outlet and contact
a service center immediately. If your notebook is external &
removable battery type, remove the external battery.
There is a danger of re.
Do not use a damaged or modied CD/Floppy Disk.
There is a danger of damaging the product or personal injury.
Do not insert your ngers into the PC Card Slot.
There is a danger of injury or electric shock.
Use recommended computer cleansing solution when
cleaning the product and only use the computer when it is
completely dried.
Do not place your face close to the Optical Disk Drive tray
when it is operating.
There is a danger of injury due to an abrupt ejection.
Check CDs for cracks and damage prior to use.
It may damage the disc and cause disorder of device and injury of
user.
Failure to do so may cause electric shock or re.
Emergency disk eject method using paperclip should not
be used while the disk is in motion. Make sure to use the
emergency disk eject method only when the Optical Disk
Drive has stopped.
There is a danger of injury.

18
Chapter 1
Getting Started
Safety Precautions
Caution
Failure to follow instructions marked with this symbol may
cause slight injury or damage to the product.
Upgrade Related
Take care when touching the product or parts.
The device may be damaged or you may be injured.
Take care not to throw or drop a computer part or device.
This may cause injury or damage to the product.
Make sure to close the computer cover before connecting
the power after a reassembly.
There is a danger of electric shock if your body touches an
internal part.
Security and Movement Related
When moving the product, turn the power o and separate
all connected cables rst.
The product might be damaged or users may trip over the cables.
For long periods of not using the notebook computer,
discharge the battery and preserve as it is detached.
(For external & removable battery type)
The battery will be preserved at its best condition.
Do not operate or watch the computer while driving a
vehicle.
There is a danger of a trac accident. Please concentrate on
driving.
Use parts authorized by Samsung Electronics only.
Failure to do so, may cause re or damage the product.
Never disassemble or repair the product by yourself.
There is a danger of electric shock or re.
To connect a device that is not manufactured or authorized
by Samsung Electronics, enquire at your service center
before connecting the device.
There is a danger of damaging the product.

19
Chapter 1
Getting Started
Safety Precautions
Caution
Failure to follow instructions marked with this symbol may
cause slight injury or damage to the product.
Cautions on Preventing Data Loss
(Hard Disk Management)
Take care not to damage the data on a hard disk drive.
A hard disk drive is so sensitive to external impact that an •
external impact may cause loss of data on the surface of the
disk.
Take extra care, because moving the computer or an impact •
on the computer when it is turned on may damage the data of
the hard disk drive.
The company is not liable for any loss of data on the hard disk •
drive.
Causes that may damage the data of a hard disk drive and
the hard disk drive itself.
The data may be lost when an external impact is applied to the •
disk while disassembling or assembling the computer.
The data may be lost when the computer is turned o or reset •
by a power failure while the hard disk drive is operating.
The data may be lost and irrecoverable due to a computer virus •
infection.
The data may be lost if the power is turned o while running a •
program.
Sudden impact or movement to the computer while the hard •
disk drive is operating, may cause les to be corrupted or bad
sectors on the hard disk.
To prevent data loss due to damage to the hard disk drive,
please backup your data frequently.
20
Chapter 1
Getting Started
Safety Precautions
Using the power supply in an airplane
Since the power outlet type di ers depending on the type of
airplane, connect the power appropriately.
Since the representative gures of the power plug and
the auto adapter are used, they may di er from the actual
parts.
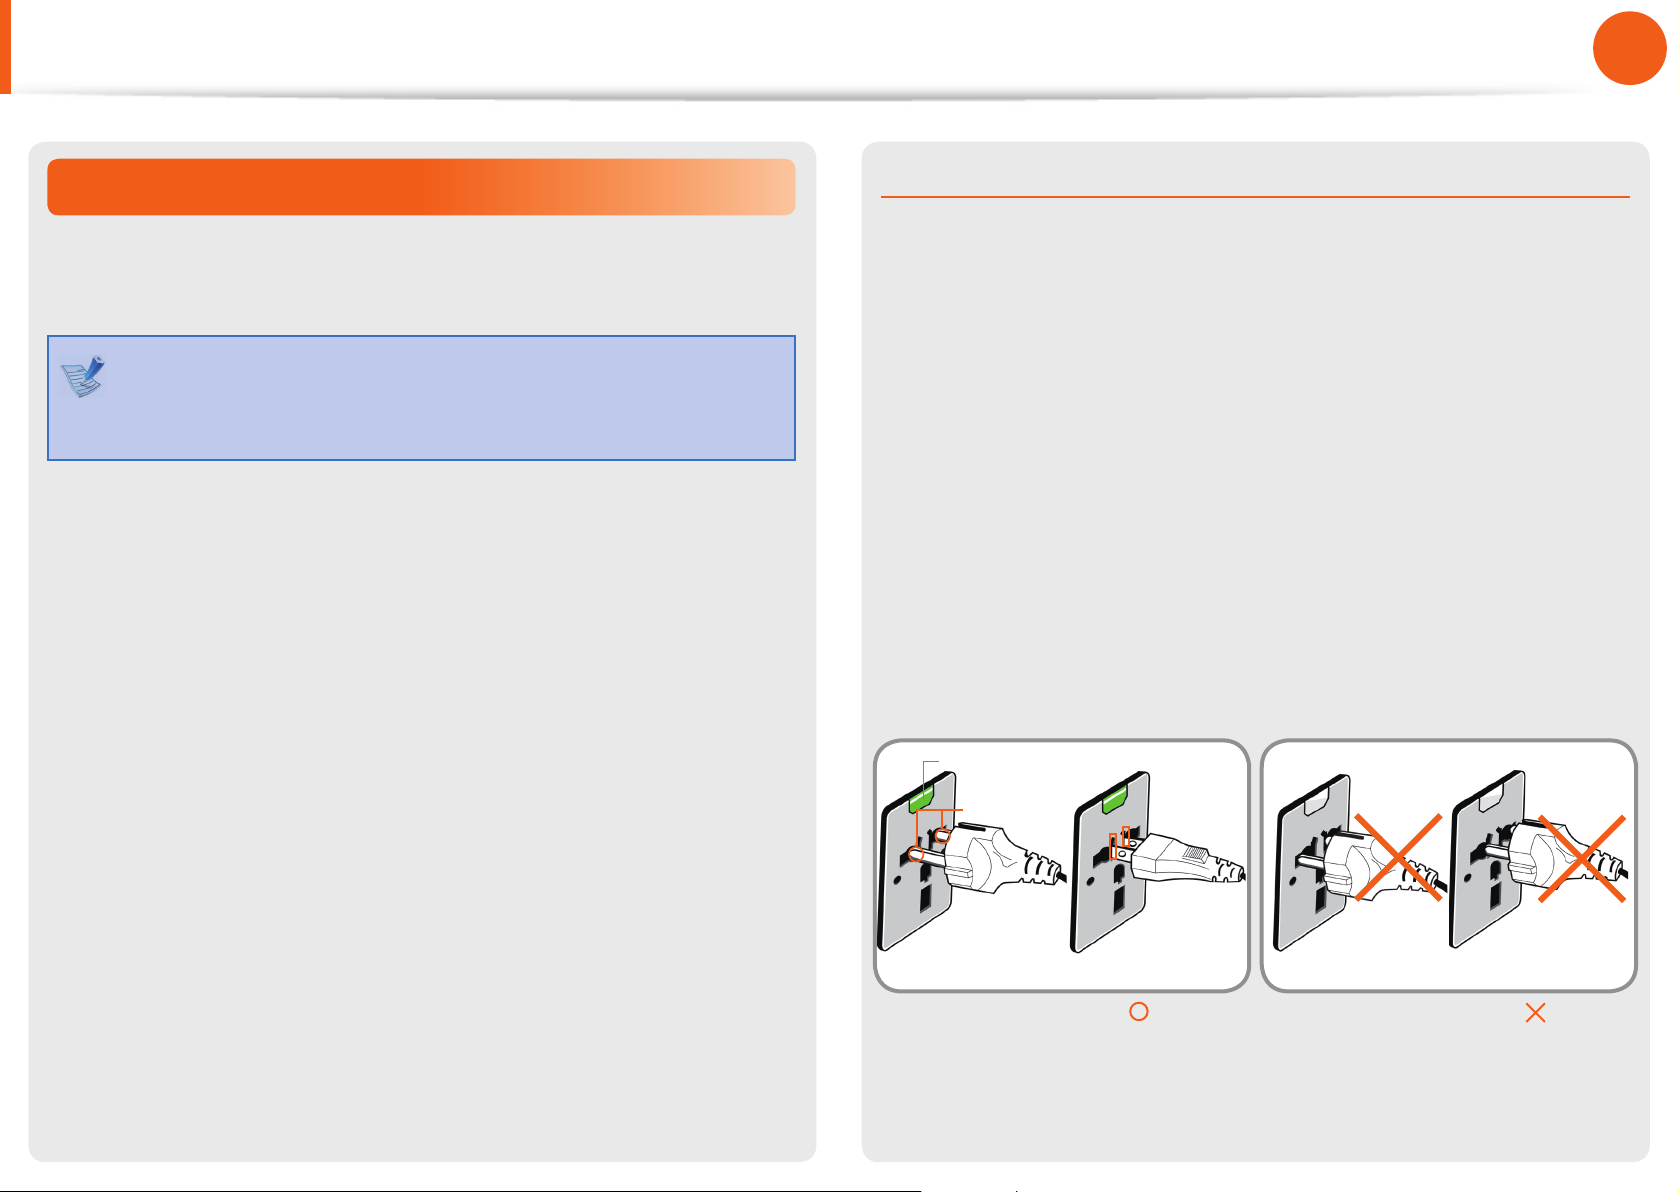
When using the AC power plug
Connect the power plug pins perpendicular into the center of the
power outlet.
If the plug pins are not inserted into the center of the holes, the •
plug pins are only inserted up to half their length. In this case,
reconnect the power plug.
You have to insert the power plug into the outlet when the •
power indicator (LED) of the power outlet is lit green. If the
power is connected properly, the power indicator (LED)
remains green.
Otherwise, the power indicator (LED) is turned o . In this case,
unplug the power, check if the power indicator (LED) is green,
and then reconnect the power plug.
Wrong Example
Good Example
220V Power Plug 110V Power Plug
Center
Holes
Power Indicator (LED)
21
Chapter 1
Getting Started
Safety Precautions
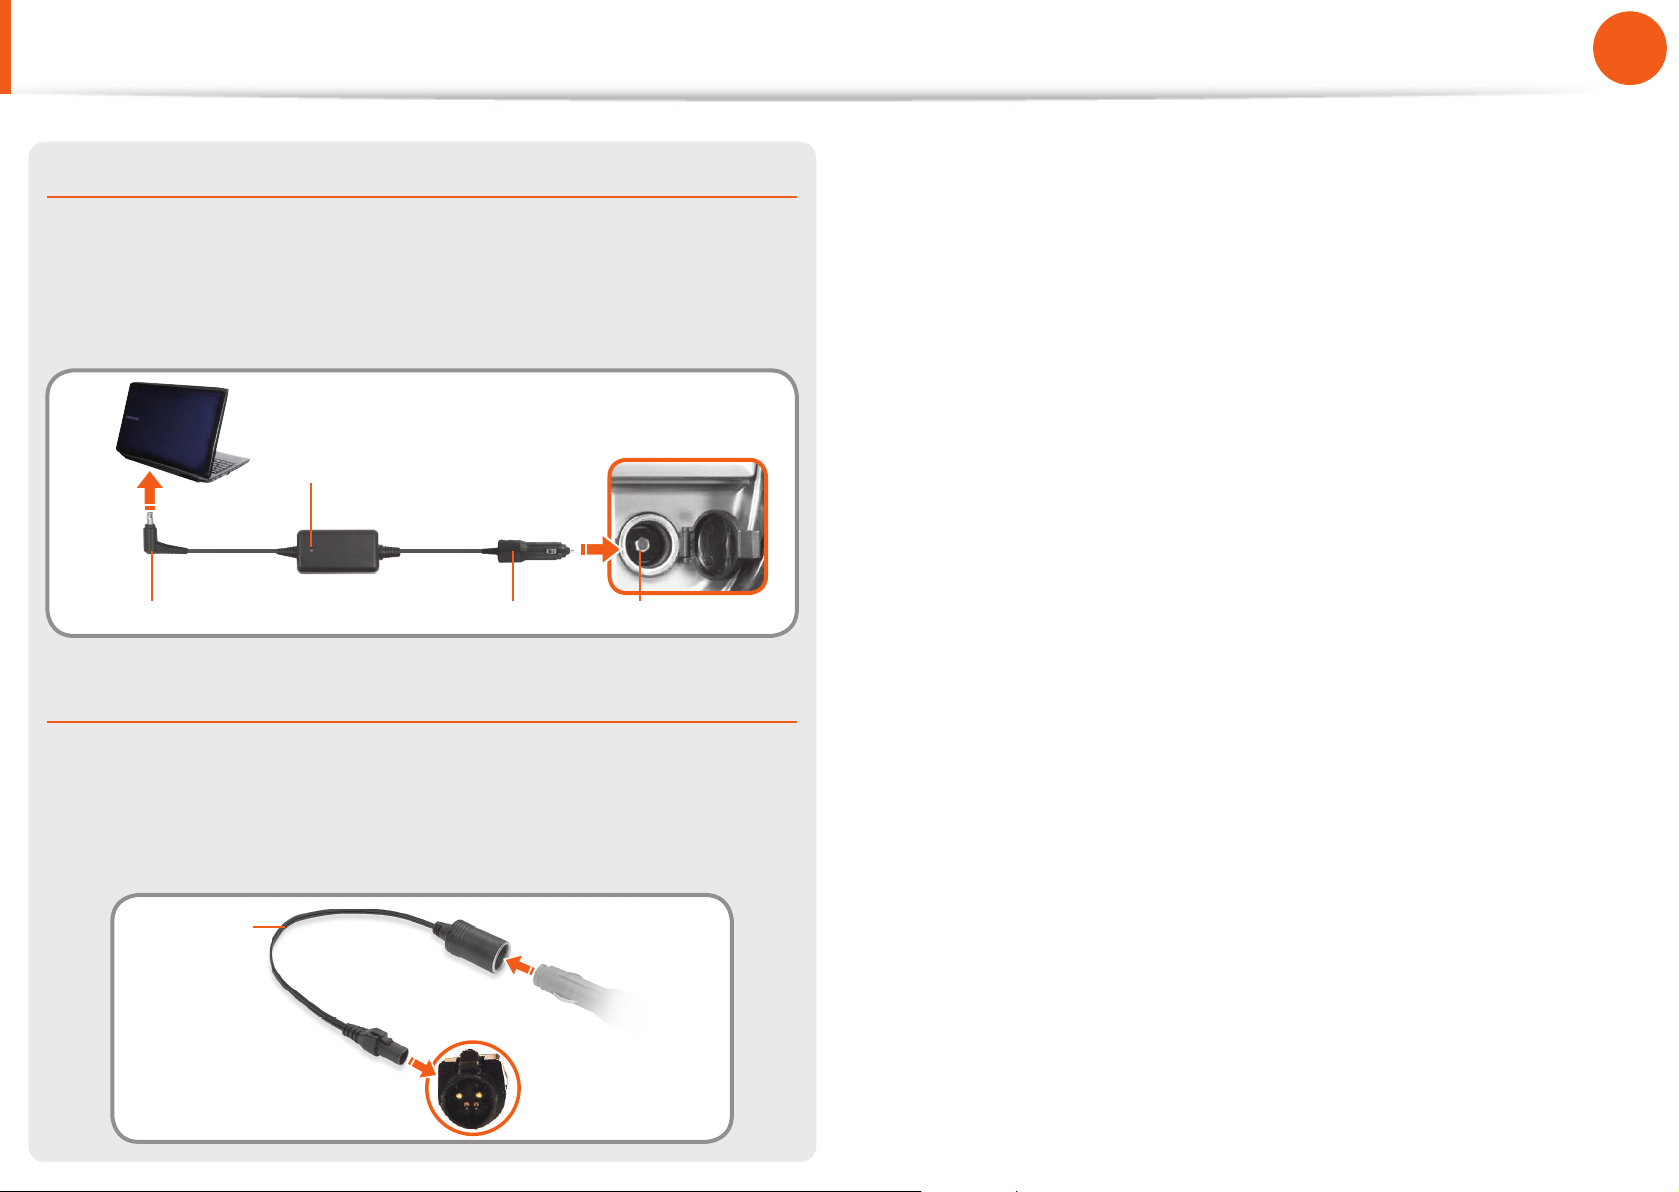
When using the auto adapter
When the cigar socket is provided, you have to use the auto
adapter (optional). Insert the cigar plug of the auto adapter into
the cigar socket and connect the DC plug of the auto adapter to
the power input port of the computer.
Auto Adapter
In- ight Cigar SocketCigar PlugDC Plug
When using the Airplane Charging Converter
Depending on the airplane, you have to use the auto adapter
and charging converter. Connect the airplane charging converter
(optional) to the auto adapter (optional) and then insert the
airplane power input jack into the power outlet.
Charging
Converter
1
Connect this end to
the auto adapter.
Connect the airplane power
input jack to the power
outlet of the airplane.
2
22
Chapter 1
Getting Started
Proper Posture During Computer Use
Maintaining a proper posture during computer use is very
important to prevent physical harm.
The following instructions are about maintaining a proper posture
during computer use developed through human engineering.
Please read and follow them carefully when using the computer.
Otherwise, the probability of (RSI: Repetitive Strain Injury) from
repeated operations may increase and serious physical harm may
be caused.
The instructions in this manual have been prepared so that •
they can be applied within the coverage of general users.
If the user is not included in the coverage, the •
recommendation is to be applied according to the user’s
needs.
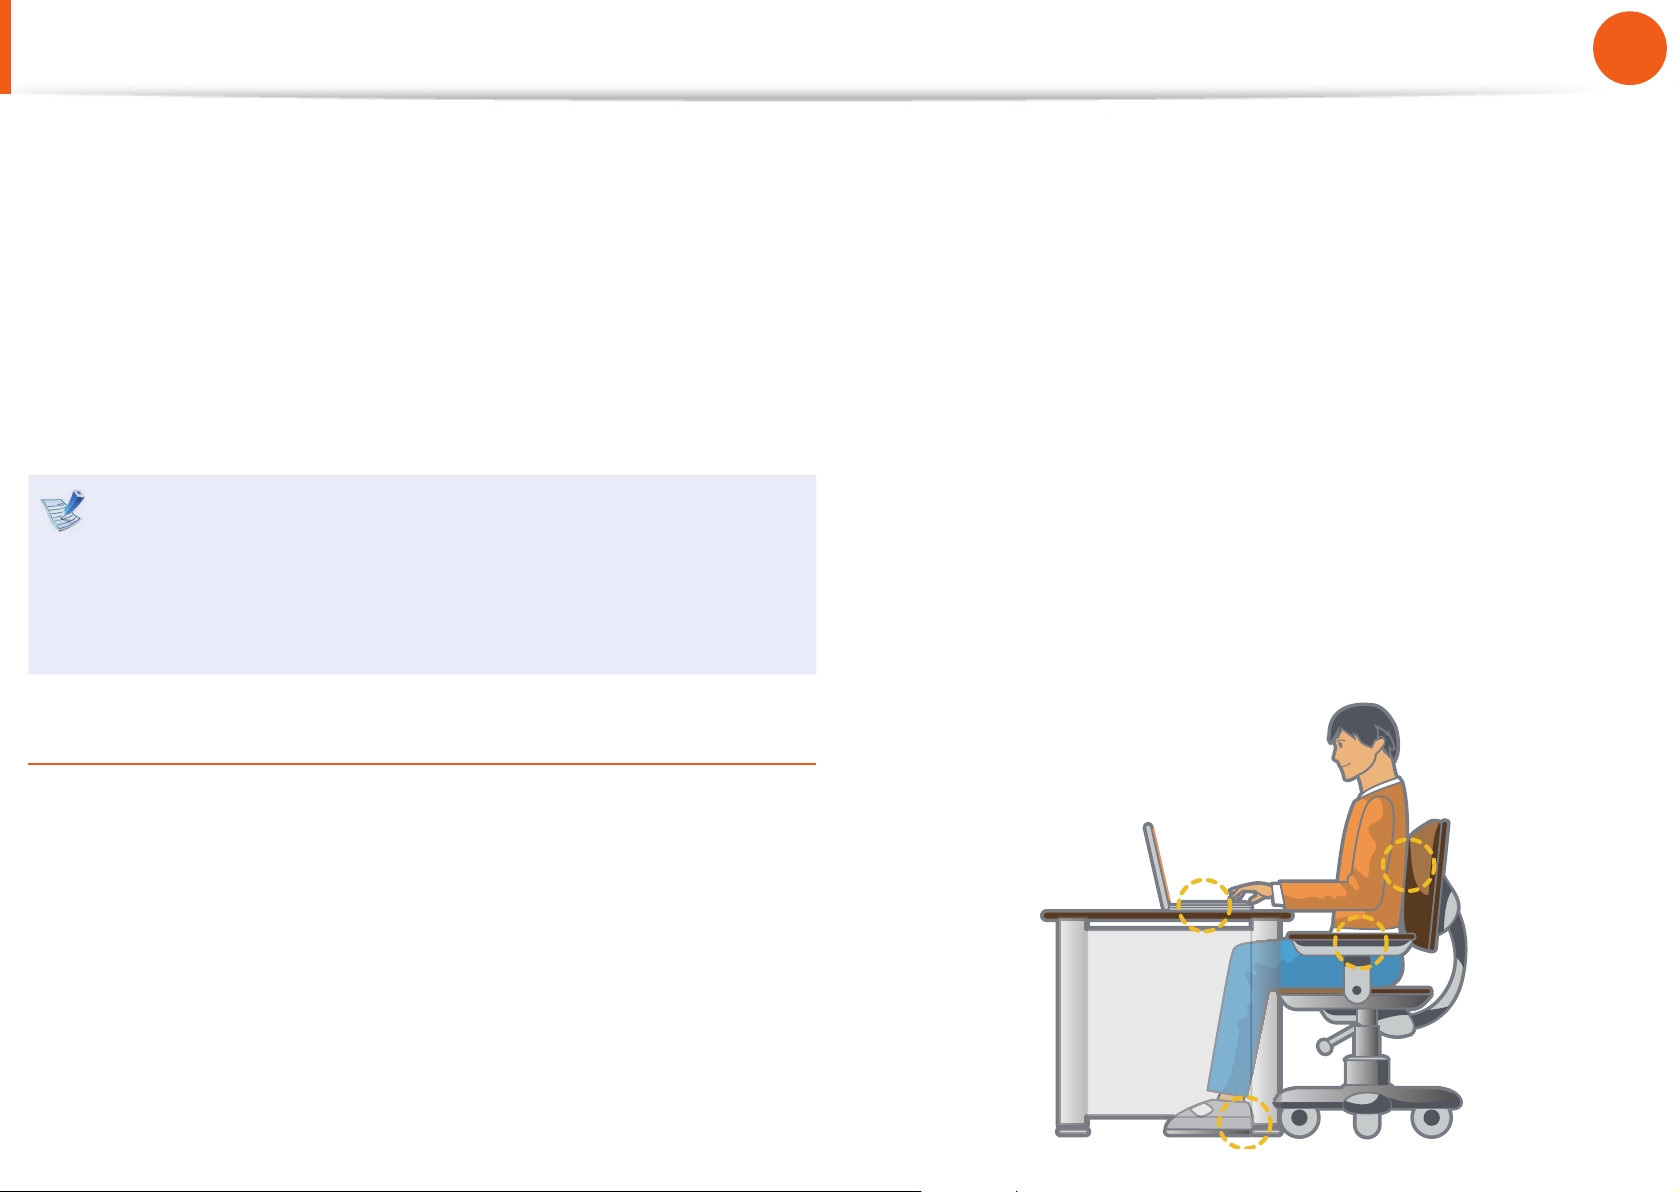
Proper Posture
Adjust the heights of desks and chairs appropriate to your
height.
The heights are to be adjusted so that your arm forms a right
angle when you place your hand over the keyboard while sitting
down on a chair.
Adjust the height of chair so that your heel is comfortably placed
on the oor.
Do not use the computer while you are lying down, but only •
while you are sitting down.
Do not use the computer on your lap. If the computer •
temperature increases, there is a danger of burning yourself.
Work while keeping your waist straight.•
Use a chair with a comfortable back.•
Keep the center of your leg weight not on the chair but on •
your feet when you are sitting on a chair.
To use the computer while talking over the telephone, use a •
headset. Using the computer with the phone on your shoulder
is bad for posture.
Keep frequently used items within a comfortable work range •
(where you can reach them with your hands).
23
Chapter 1
Getting Started
Proper Posture During Computer Use
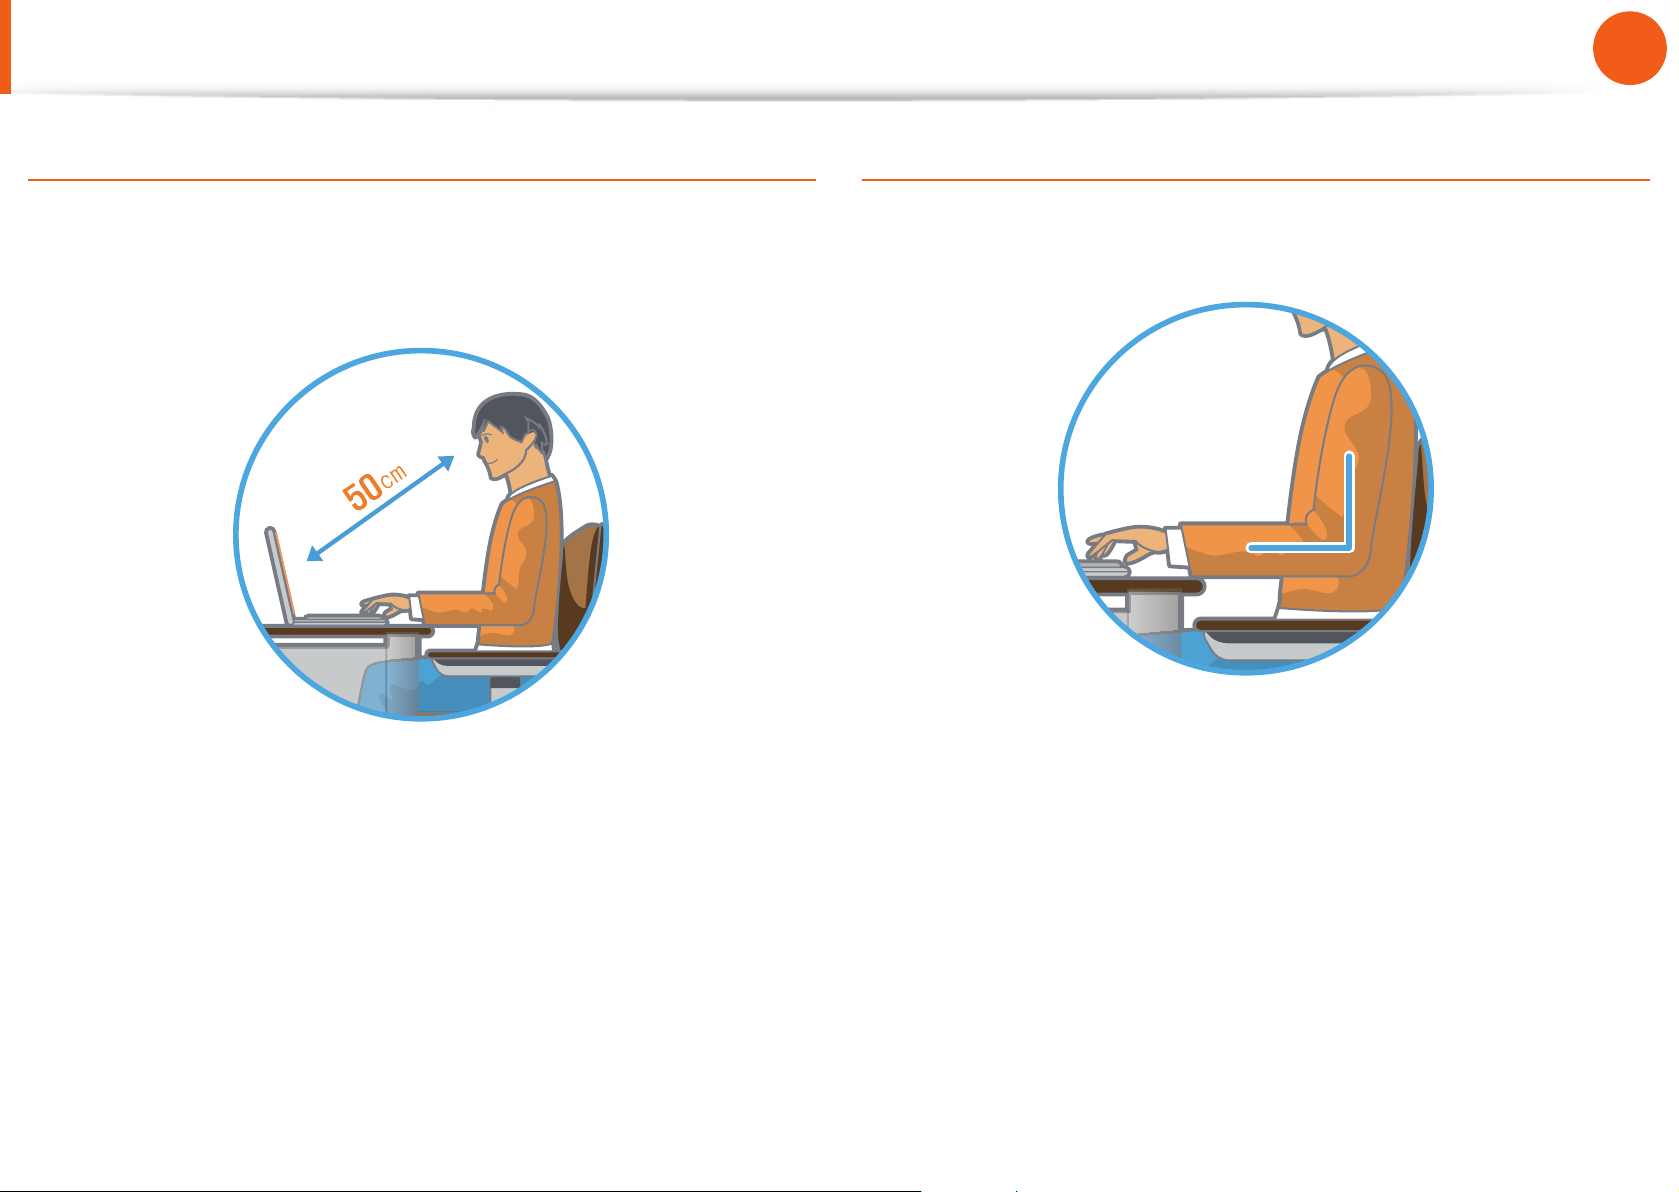
Eye Position
Keep the monitor or LCD away from your eyes by at least
50cm.
Adjust the height of the monitor and the LCD screen so that its •
top height is equal to or lower than your eyes.
Avoid setting the monitor and LCD excessively bright.•
Keep the monitor and LCD screen clean.•
If you wear glasses, clean them before using the computer.•
When entering contents printed on a paper into the computer, •
use a static paper holder so that the height of the paper is
almost equal to that of the monitor.
Hand Position
Keep your arm at a right angle as shown by the gure.
Keep the line from your elbow to your hand straight.•
Do not place your palm over the keyboard while typing.•
Do not hold the mouse with excessive force.•
Do not press the keyboard, touchpad or mouse with excessive •
force.
It is recommended connecting an external keyboard and •
mouse when using the computer for long periods of time.
24
Chapter 1
Getting Started
Proper Posture During Computer Use
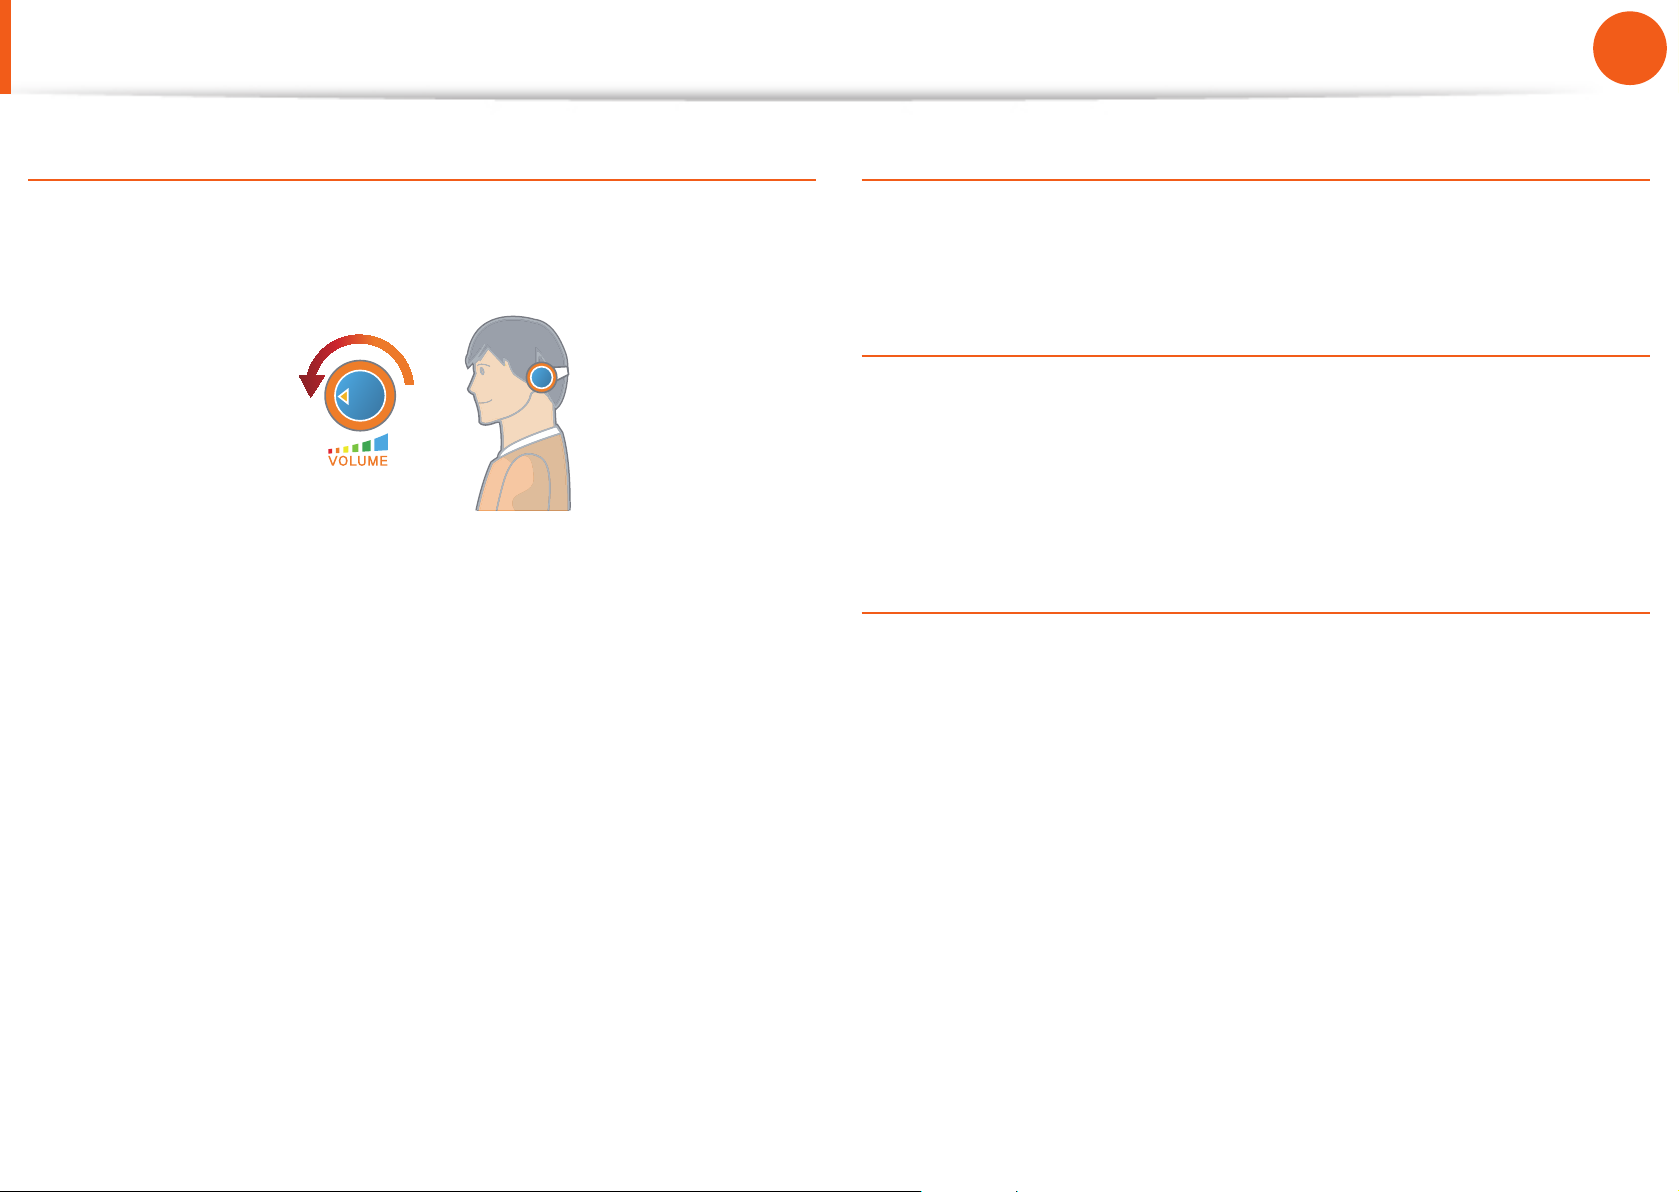
Volume Control (Headphones and Speakers)
Check your volume rst to listen to music.
Check your
volume!
Check if the volume is too loud before using headphones.•
It is not recommended using headphones for long periods of •
time.
Any deviation from the equalizer default setting could cause •
hearing impairment.
The default setting can be changed through software and •
driver updates without your intervention. Please check the
equalizer default setting before rst usage.
Use Time (Break Time)
Take a break for 10 minutes or more after a 50-minute period •
when working for more than one hour.
Illumination
Do not use the computer in dark locations. The illumination •
level for computer use must be as bright so for reading a book.
Indirect illumination is recommended. Use a curtain to prevent •
re ection on the LCD screen.
Operation Condition
Do not use the computer in hot and humid locations.•
Use the computer within the allowed temperature and •
humidity range speci ed in the User Guide.
25
Chapter 1
Getting Started
Overview
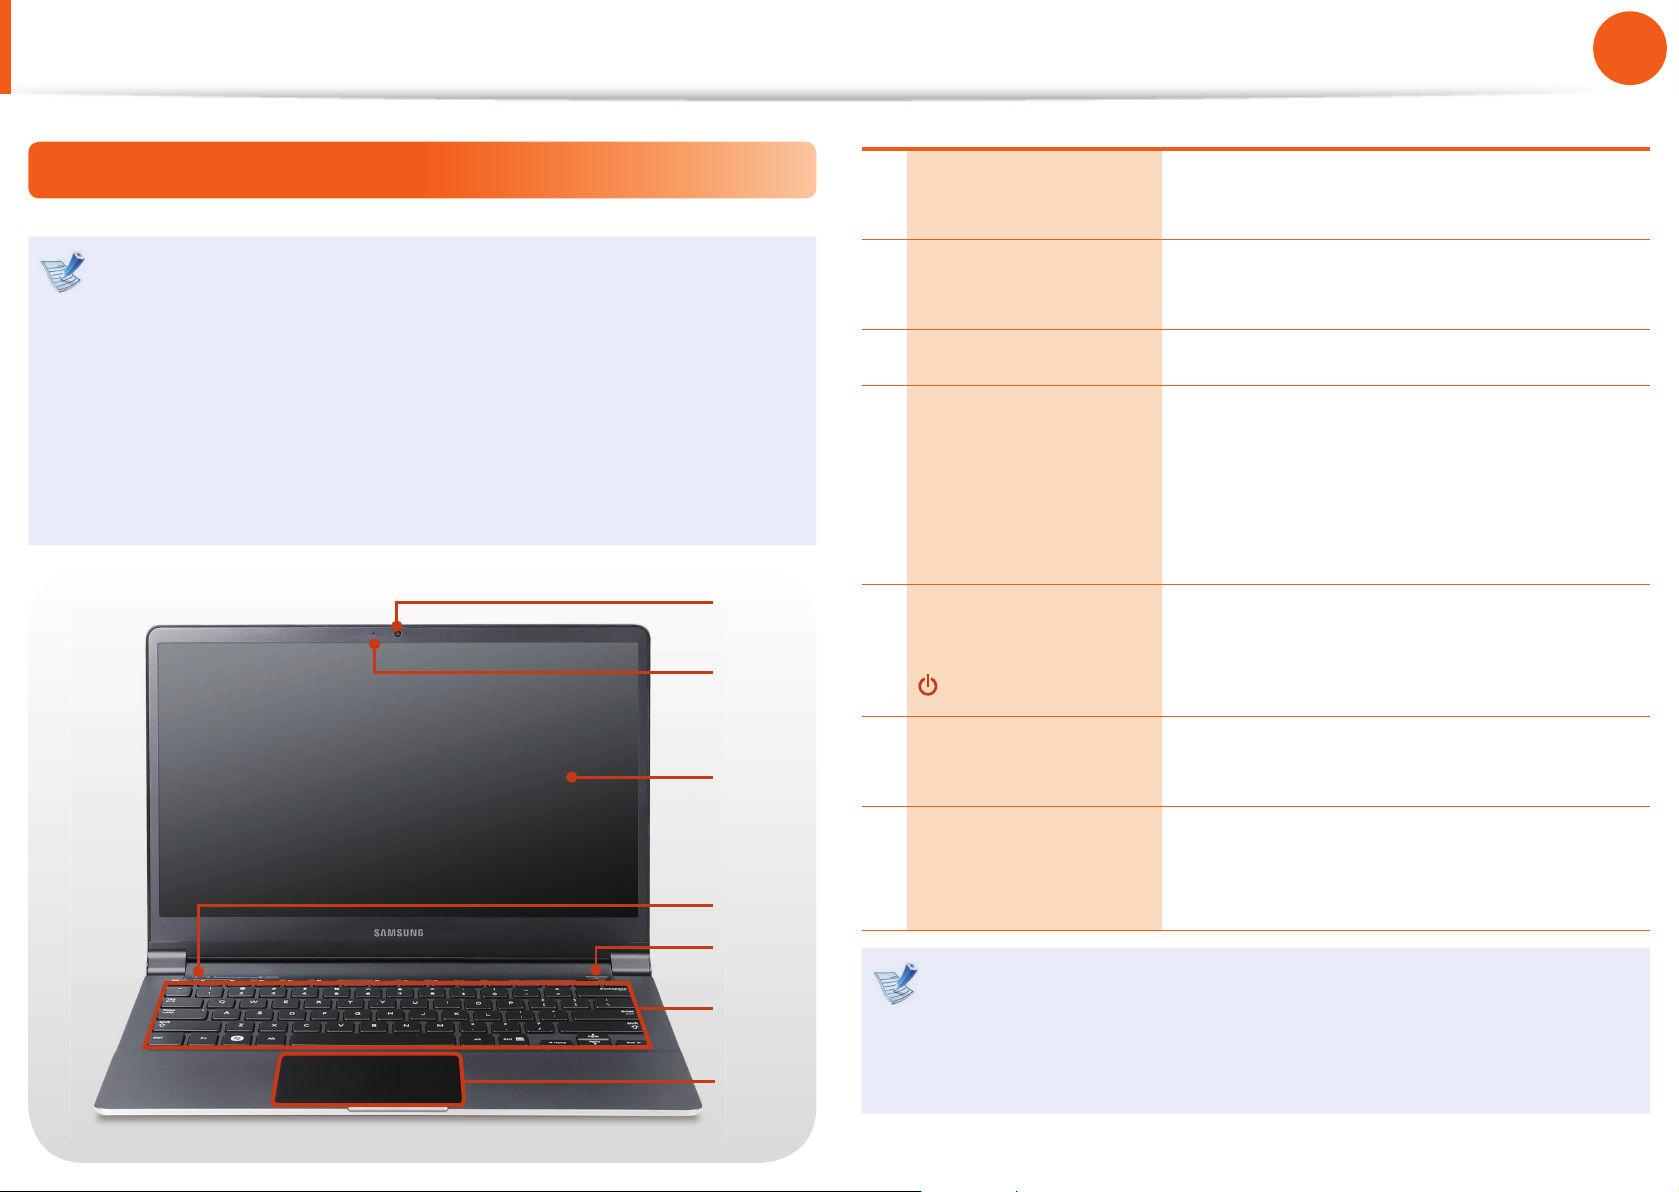
Front View
The pictures used for the cover and the main body in the •
User Manual are those of the representative model of each
series. Therefore the colors and appearance of the pictures
may di er from the actual appearance of the product
depending on the model.
The actual color and appearance of the computer may •
di er from the pictures used in this guide.
This may not be supported for some devices.•
1
4
2
3
5
6
7
1 Camera (Optional)
Using this camera, you can take still
pictures and record video.
2
Camera operating
indicator
This indicates the camera operating
status.
3 LCD The screen images are displayed here.
4
Status indicators
and sensors
(Optional)
Shows the operating status of the
computer.
The corresponding operating LED is
lit when the corresponding function
operates.
5
Power Button /
Power Button LED
Turns the computer on and o .
When the computer is on, the power
button LED is lit.
6 Keyboard
A device to enter data by pressing the
keys.
7
Touchp ad/
Touchpad Buttons
The touchpad and touchpad buttons
provide functions similar to the mouse
ball and buttons.
Using the camera, web cam (Optional)
Using the Cyberlink YouCam program (optional), you can
take pictures or record video by using the computer’s built-in
camera by adding the balloon talk or frame e ect.
26
Chapter 1
Getting Started
Overview
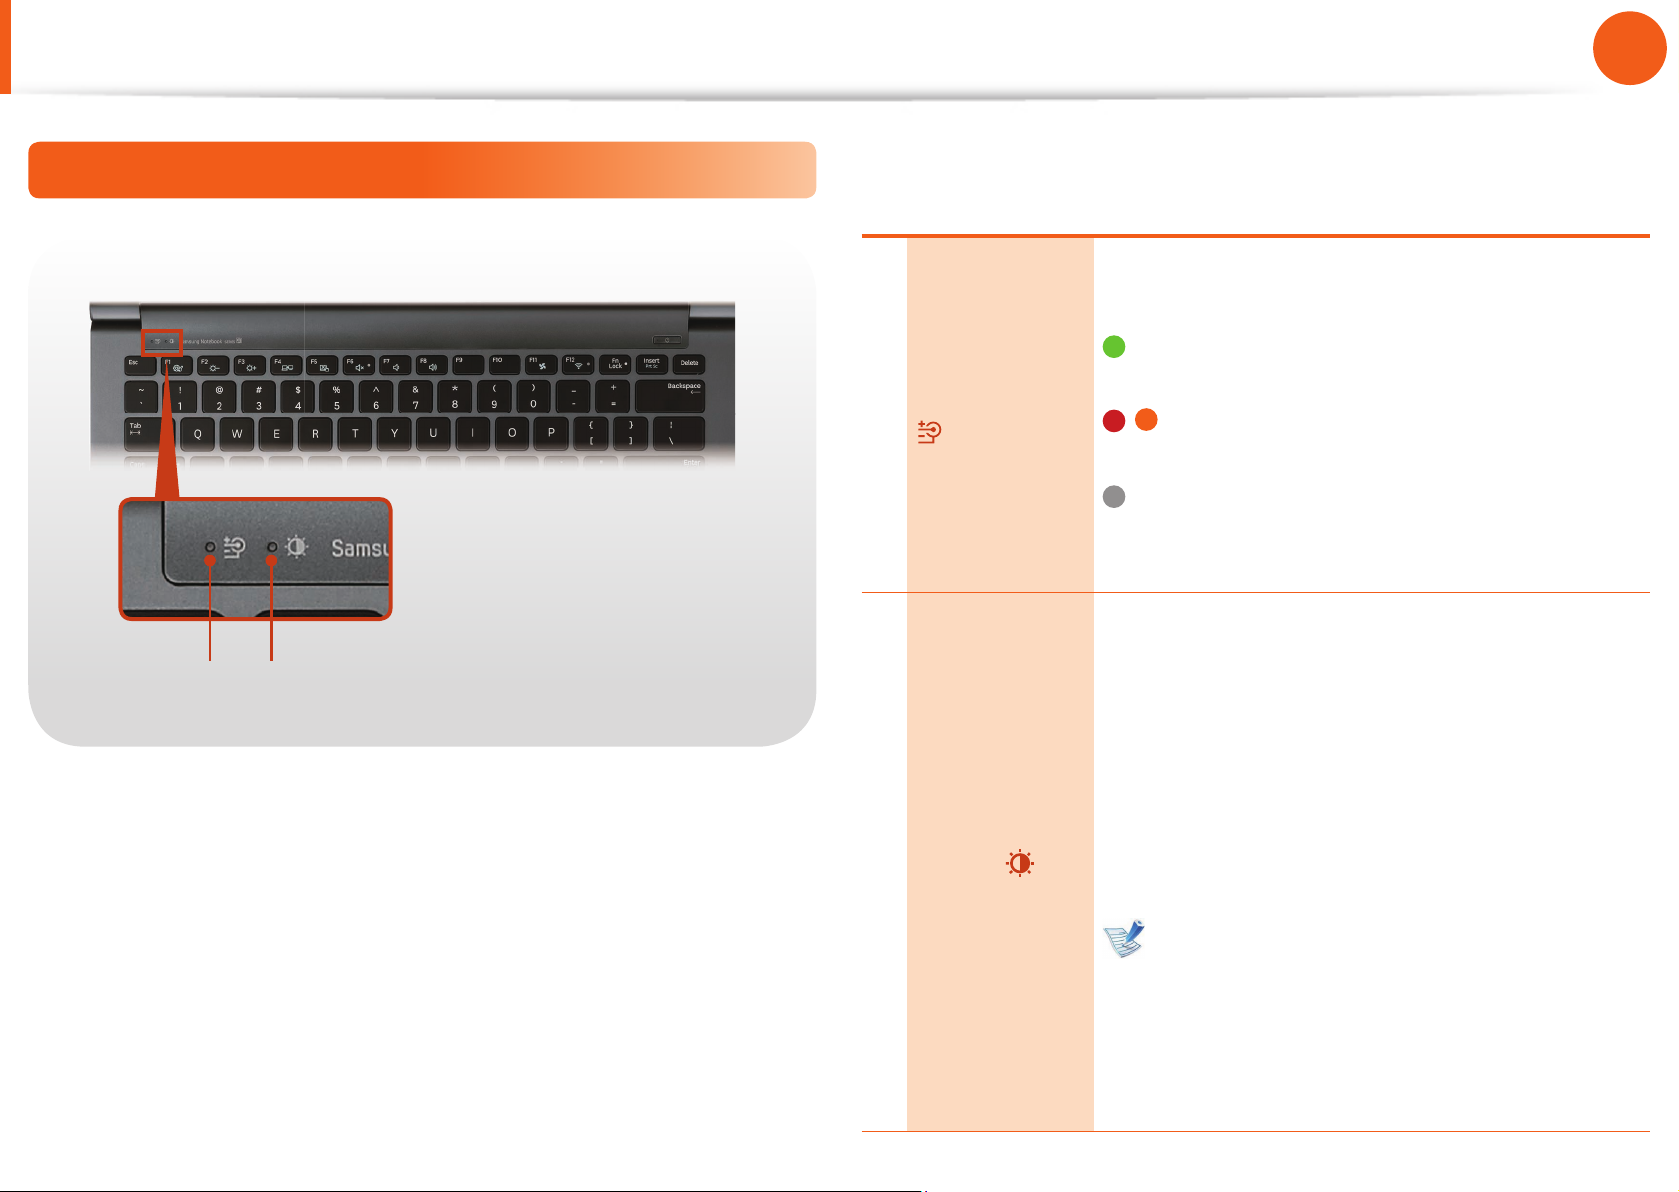
Status indicators and sensors (Optional)
1 2
1
Charge Status
This shows the power source and the battery
charge status.
Green: When the battery is fully charged or
the battery is not installed.
/ Red or orange: When the battery is being
charged.
O : When the computer is running on
battery power without being connected to
AC adapter.
2
Illumination
Sensor
(Optional)
This sensor detects the ambient illumination of
the PC.
If the ambient illumination becomes dark,
the LCD becomes dimmer and the keyboard
backlight is lit.
On the contrary, if the ambient illumination
becomes brighter, the LCD becomes brighter
and the keyboard backlight is turned o .
Turning the illumination sensor on or o
Select Easy Settings > Display > Screen
Brightness and select or unselect the Use
the auto brightness control depending
on the ambient illumination option to
turn the illumination sensor on or o .

27
Chapter 1
Getting Started
Overview
Right View
►
For 13.3 inch models
51 32 4
1
Multi Card Slot
A card slot supports multi cards.
2
Microphone
You can use the built-in microphone.
3
Monitor Port
A port used to connect a monitor, TV or
projector supporting a 15pin D-SUB interface.
You can connect a VGA adapter
(optional).
4
Ear-set / headset
Jack
This is the jack for connecting an ear-set or
headset.
5
USB Port
You can connect USB devices to the USB port
such as a keyboard/mouse, digital camera,
etc.
►
For 15 inch models
1 32
1
Multi Card Slot
A card slot supports multi cards.
2
Monitor Port
A port used to connect a monitor, TV or
projector supporting a 15pin D-SUB interface.
You can connect a VGA adapter
(optional).
3
USB 3.0 Port
You can connect USB devices to the USB port
such as a keyboard/mouse, digital camera,
etc.
The USB 3.0 feature is optimized for
Windows 7. For Windows XP, the USB
3.0 feature may be restricted.
28
Chapter 1
Getting Started
Overview
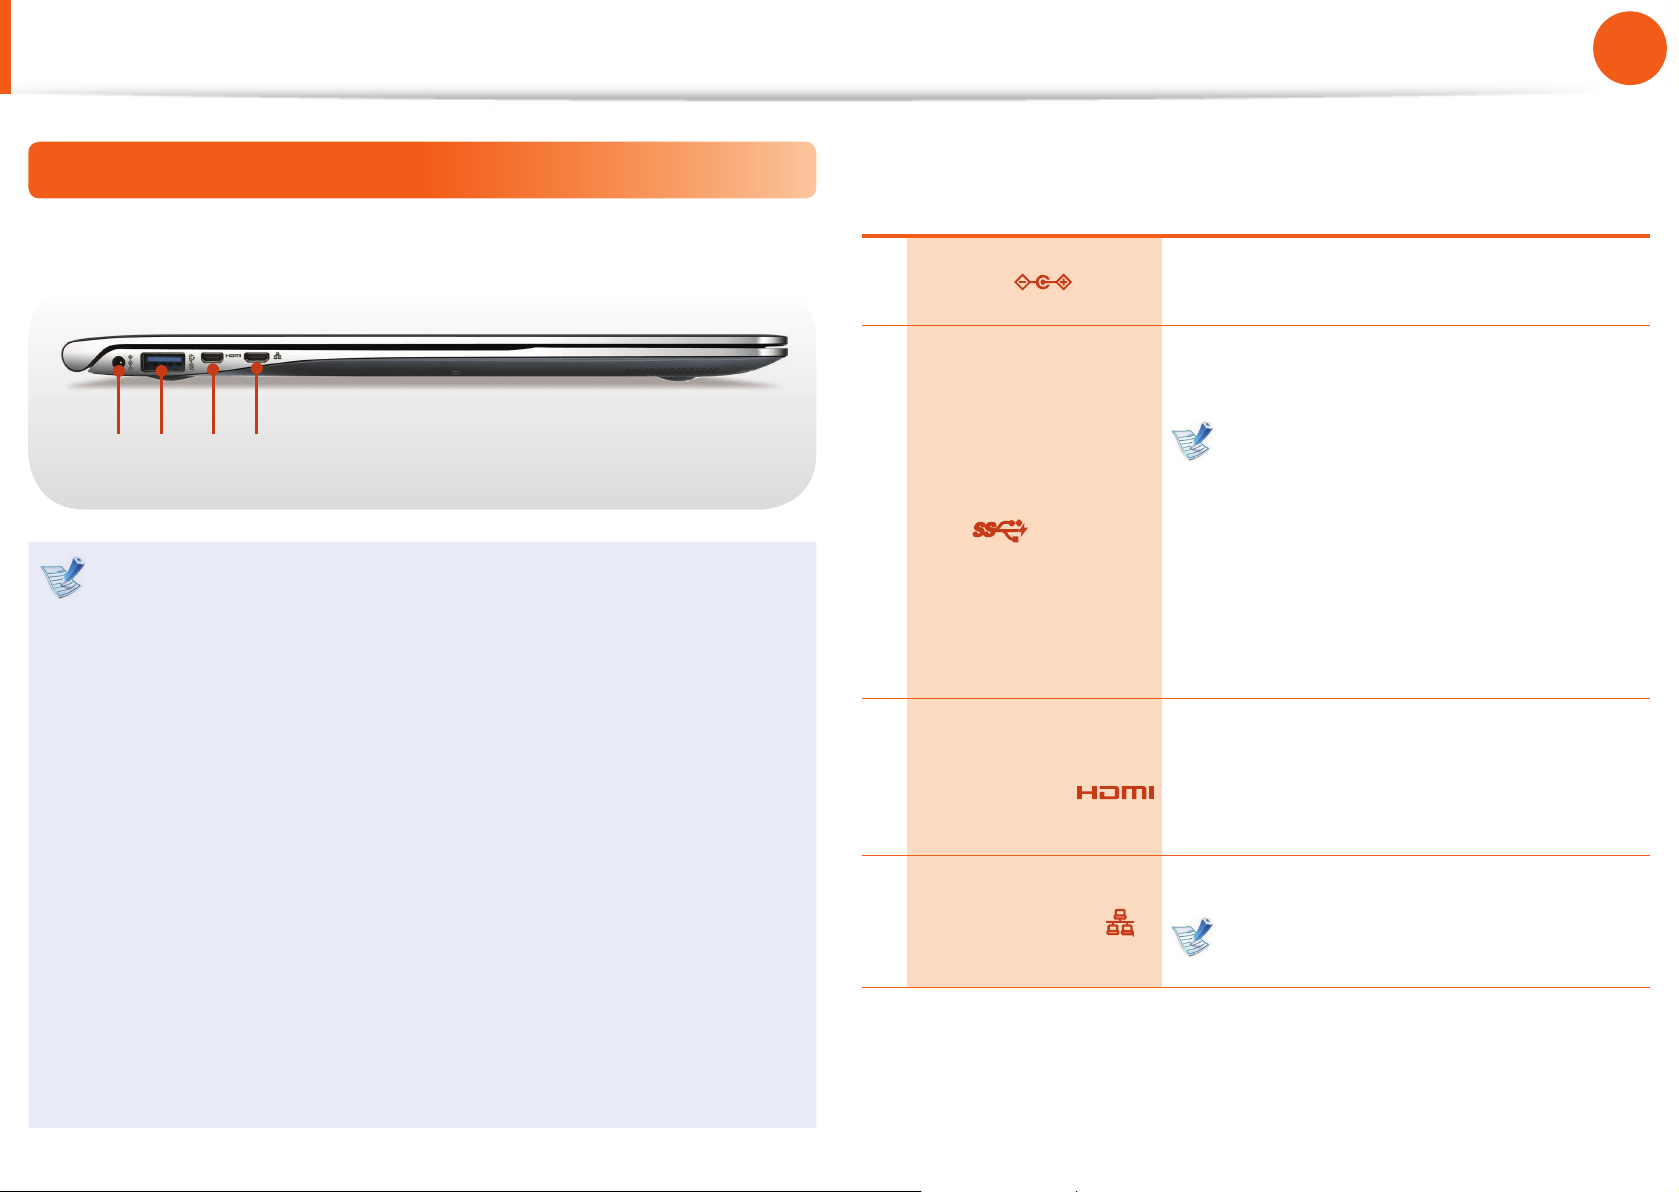
Left View
►
For 13.3 inch models
41 2 3
What is a chargeable USB port?
USB device accessing and charging functions are •
supported.
The USB charging function is supported regardless of •
whether the power is turned on or o .
Charging a device through a chargeable USB port may take •
longer than general charging.
Using the Chargeable USB function when the computer is •
running on battery power reduces the battery usage time.
The user cannot evaluate the charging status of the USB •
device from the computer.
This may not be supported for some USB devices.•
You can turn the Chargeable USB function • ON/OFF by
selecting the Easy Settings > General > USB Charging
option. (Optional)
1 DC Jack
A jack to connect the AC adapter that
supplies power to the computer.
2
Chargeable USB 3.0
Port
This is a chargeable USB port that can be
used to connect and charge a USB device.
When the AC adapter is connected, it
may be inconvenient to use the USB
port. In this case, purchase and use
a USB 3.0 extension cable or use the
USB ports on the right side.
The USB 3.0 feature is optimized for
Windows 7. For Windows XP, the
USB 3.0 feature may be restricted.
3
Micro Digital
Video / Audio Port
(Micro HDMI)
(Optional)
This is the port for a micro HDMI.
You can enjoy digital video and audio by
connecting the computer to a TV.
4 Wired LAN Port
Connect the Ethernet cable to this port.
You can use wired LAN by using the
LAN adapter (Optional).

29
Chapter 1
Getting Started
Overview
Left View
►
For 15 inch models
4 5 61 2 3
What is a chargeable USB port?
USB device accessing and charging functions are •
supported.
The USB charging function is supported regardless of •
whether the power is turned on or o .
Charging a device through a chargeable USB port may take •
longer than general charging.
Using the Chargeable USB function when the computer is •
running on battery power reduces the battery usage time.
The user cannot evaluate the charging status of the USB •
device from the computer.
This may not be supported for some USB devices.•
You can turn the Chargeable USB function • ON/OFF by
selecting the Easy Settings > General > USB Charging
option. (Optional)
1 DC Jack
A jack to connect the AC adapter that
supplies power to the computer.
2
Chargeable USB 2.0
Port
This is a chargeable USB port that can be
used to connect and charge a USB device.
When the AC adapter is connected, it
may be inconvenient to use the USB
port.
In this case, purchase and use a USB
extension cable or use the USB ports
on the right side.
3
Ear-set / headset
Jack
This is the jack for connecting an ear-set
or headset.
4
Micro Digital
Video / Audio Port
(Micro HDMI)
(Optional)
This is the port for a micro HDMI.
You can enjoy digital video and audio by
connecting the computer to a TV.
5 Wired LAN Port
Connect the Ethernet cable to this port.
You can use wired LAN by using the
LAN adapter (Optional).
6 Microphone
You can use the built-in microphone.
 Loading...