

Page 1
Samsung Data Migration v.3.0
Introduction and Installation Guide
2015.09 (Rev 3.0.)
Page 2
Legal Disclaimer
SAMSUNG ELECTRONICS RESERVES THE RIGHT TO CHANGE PRODUCTS,
INFORMATION AND SPECIFICATIONS WITHOUT NOTICE.
Products and specifications discussed herein are for reference purposes only.
All information discussed herein is provided on an “AS IS” basis, without
warranties of any kind. This document and all information discussed herein
remain the sole and exclusive property of Samsung Electronics. No license of
any patent, copyright, mask work, trademark or any other intellectual property
right is granted by one party to the other party under this document, by
implication, estoppels or otherwise. Samsung products are not intended for use
in life support, critical care, medical, safety equipment, or similar applications
where product failure could result in loss of life or personal or physical harm, or
any military or defense application, or any governmental procurement to which
special terms or provisions may apply. For updates or additional information
about Samsung products, contact your nearest Samsung office.
Copyright © 2015
This material is copyrighted by Samsung Electronics. Any unauthorized
reproductions, use or disclosure of this material, or any part thereof, is strictly
prohibited and is a violation under copyright law.
Trademarks & Service Marks
The Samsung Logo is the trademark of Samsung Electronics. Adobe is a
trademark and Adobe Acrobat is a registered trademark of Adobe Systems
Incorporated. All other company and product names may be trademarks of the
respective companies with which they are associated.
2
Page 3
Introduction
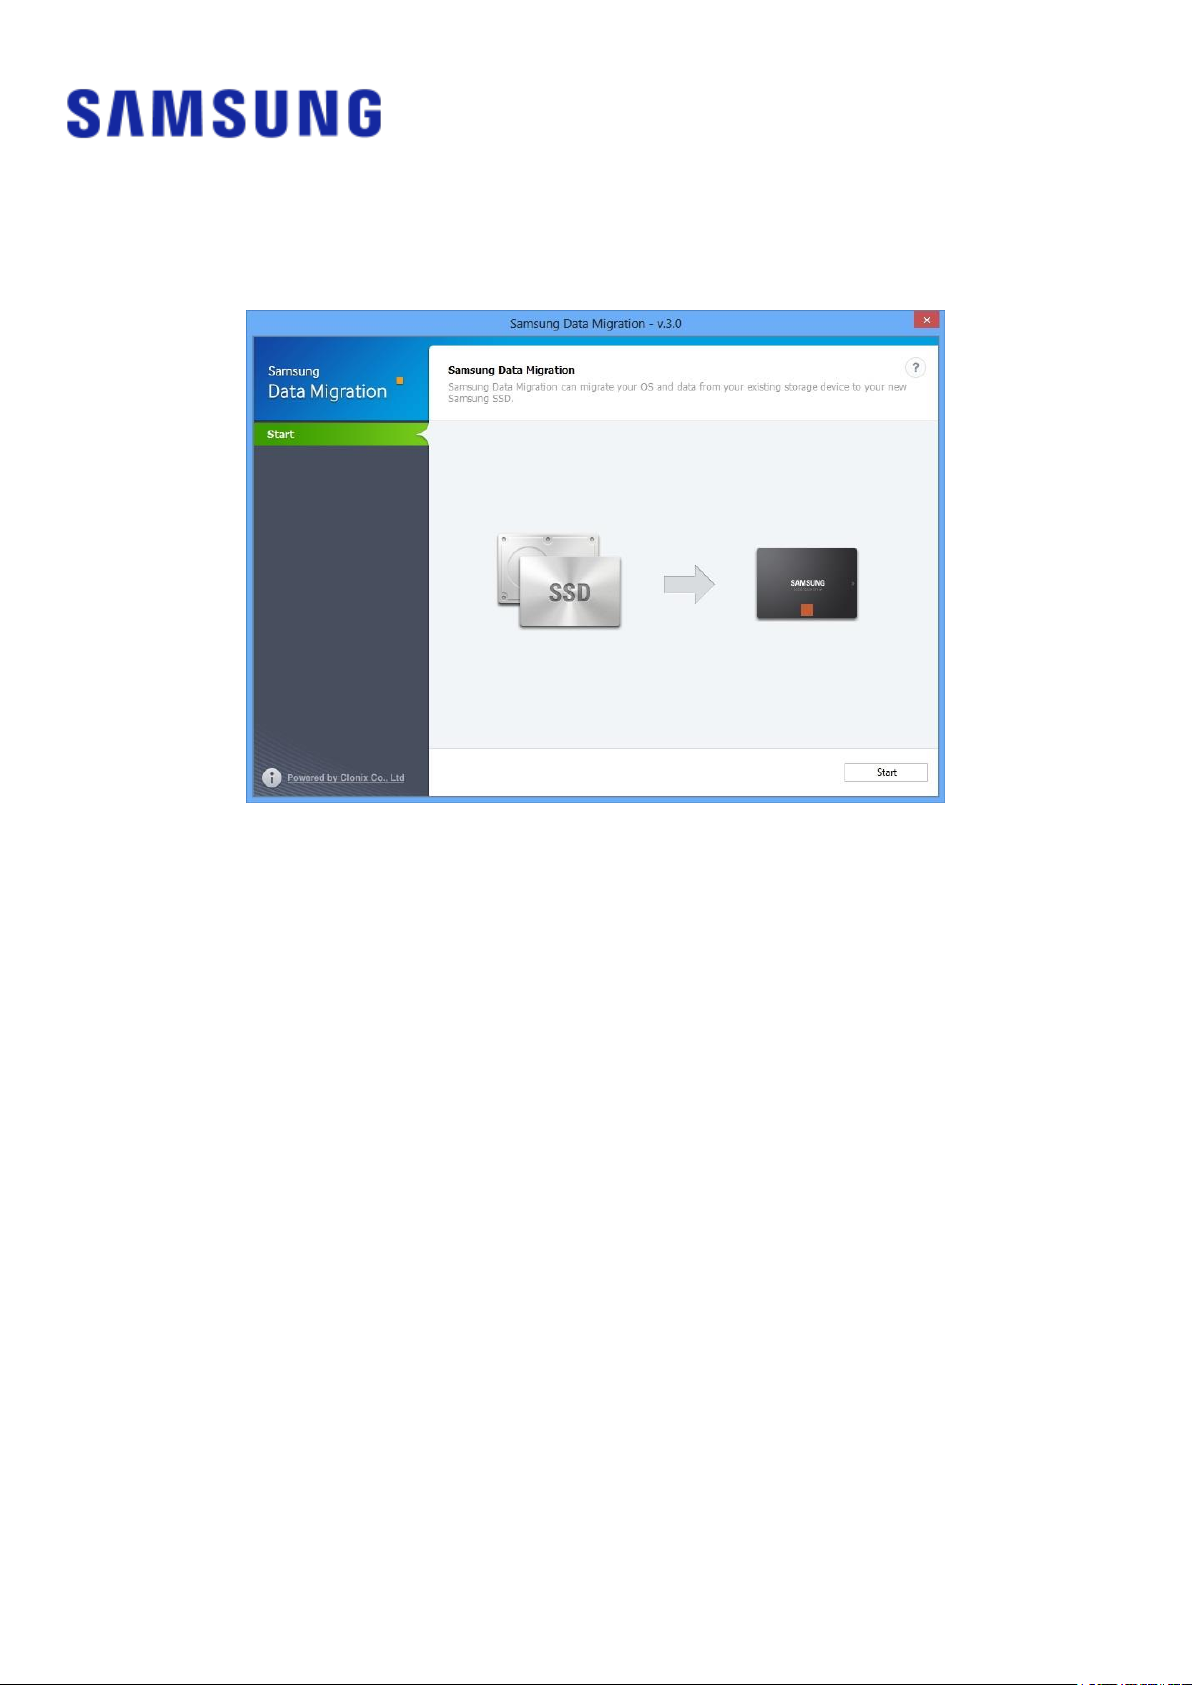
The Samsung Data Migration software is designed to help users quickly, easily,
and safely migrate all of their data – including their current operating system,
application software, and user data – from their existing storage device (e.g.
HDD) to their new Samsung SSD.
Samsung Data Migration software is developed and distributed exclusively for
owners of Samsung Solid State Drives (SSDs).
Precautions
1. When cloning the content of the source drive (e.g. HDD), all data on the
Target Disk (Samsung SSD) will be deleted and is impossible to recover.
Therefore, if you have stored any data that you would like to keep on the
Target Disk, please back it up in advance.
※ This software is not a data backup solution.
2. Samsung Electronics assumes no responsibility for any loss of data that may
occur on the Target Disk in the course of using this software and will not be
held liable for data recovery services. Even if the migration process fails, data
contained on the Source Disk is not affected.
Improvements
1. Windows 10 support
2. Option to exclude selected files from cloning
3. Cloning compatibility improvements
3
Page 4
System Requirements
Component
Requirement
Operating System
Windows XP SP2 (32-bit)
Windows Vista (32/64-bit)
Windows 7 (32/64-bit)
Windows 8 (32/64-bit)
Windows 8.1 (32/64-bit)
Windows 10 (32/64-bit)
PC Memory (RAM)
1 GB or more
Disk Space
Minimum 30 MB required for installation
Supported Partition Types
MBR, GPT
Supported Languages
English
Source Disk
The Source Disk (HDD or SSD) must contain the
operating system installation
Target Disk
The Target Disk must be one of the following:
Samsung SSD 750 EVO Series
Samsung SSD 950 PRO Series
Samsung SSD 850 EVO Series
Samsung SSD 850 PRO Series
Samsung SSD 840 EVO Series
Samsung SSD 840 Series
Samsung SSD 840 PRO Series
Samsung SSD 830 Series
Samsung SSD 470 Series
1. This software only supports the Windows operating systems listed in the User
Manual.
2. This software only supports the Samsung SSDs listed in the User Manual. OEM
storage devices provided through a computer manufacturer or supplied through
another channel are not supported.
3. This software will run only if the operating system is installed on the Source Disk. It
will not function on disks that lack an operating system installation.
4. On systems with two (2) drives or more (e.g. “C:”, “D:”, and “E:” drives) with the
operating system installed on the “C:” drive, only the first two drives will be cloned.
The “System” partition that is created during Windows installation is automatically
4
Page 5

replicated.
5. The OEM Recovery partition created by the computer manufacturer as a factory
setting will not be cloned. However, it will be automatically cloned if the
manufacturer is Samsung and SRS (Samsung Recovery Solution) 5, SRS 6, or SRS 7 is
installed. (Versions lower than SRS 5 are not supported.)
6. A difference of a few GB of data capacity between the Source and Target Disks is
normal after cloning. The software does not copy the files Windows automatically
generates to manage virtual memory (page files and hibernation files).
7. This software cannot clone encrypted disks. In order to clone an encrypted disk, you
must first remove the password from the disk.
8. If the mainboard chipset drivers are not up to date when cloning, this software may
not function properly.
9. If there are multiple operating systems installed on the PC (e.g. Windows 7 is
installed on the C drive and Windows 8 is installed on the D drive), the cloned disk
may not function properly.
10. If the Source Disk is damaged (e.g. the disk has bad sectors), the cloned disk may not
function properly.
11. When attempting to clone a disk using this software, it is recommended that you
close all other programs and free up sufficient memory before cloning.
12. If you have instant PC recovery software installed on your system, this software may
not function properly.
13. If a Source Disk is converted into a dynamic disk, the software may not function
properly.
14. The files in the user's Library folder are listed by default on the screen for selecting
files to exclude during cloning.
15. To exclude files that are not in the Library folder, you can search for them by
scanning folders. Program Files, Windows files, and Recycle Bin files are not scanned.
5
Page 6

User Guide
1. (Normal Mode) If the Source Disk is smaller than the Target Disk
STEP 1. Start migration
STEP 2. Connect Target Disk
① If the Target Disk is connected, the status of the Target Disk is displayed on the screen.
※ Connecting an mSATA product requires an additional mSATA/SATA converter (connector) and a
SATA/USB converter (connector).
6
Page 7

STEP 3. Start cloning
STEP 4. Cloning in progress
STEP 5. Cloning complete
7
Page 8

2. (Advanced Cloning) If the Source Disk is bigger than the Target Disk
STEP 1. Start migration
STEP 2. Connect Target Disk
① If the Target Disk is connected, the status of the Target Disk is displayed on the screen.
※ Connecting an mSATA product requires an additional mSATA/SATA converter (connector) and a
SATA/USB converter (connector).
8
Page 9

STEP 3. On the Disk Analysis and Cloning Settings screen, click [Next>>]
STEP 4. On the Disk Analysis Summary screen, click [Next>>]
STEP 5. Scan for files in the Library folder to exclude from cloning
9
Page 10

STEP 6. If the list of files to be excluded is displayed, go to Step 10, If the list of files to be
excluded is not displayed, go to Step 7
STEP 7. Click Browse button
STEP 8. Set a new folder to scan for files to exclude from cloning
① Select “Scan selected folders” or “Scan all folders” and click [Search].
Folder designation for scanning
Scan selected folders: Scan only the selected folders
Scan all folders: Scan all files on the disk
10
Page 11

STEP 9. Scan for files to exclude from cloning in the newly set path
STEP 10. Select files to exclude from cloning
① Continue selecting files to exclude until the text below the Browse button changes to “Ready to
clone to the Target Disk”.
11
Page 12

STEP 11. In the screen for selecting files to exclude, click [Next>>]
STEP 12. To clone everything except the selected file(s), go to Step 13.
To delete the selected file(s) and clone everything else, go to Step 14.
To save the selected file(s) to another storage device and continue cloning, go
to Step 15.
STEP 13. Cloning everything except the selected files
① Select the [Clone everything except the selected file(s)] option and then click the [Next>>] button.
12
Page 13

STEP 14. Clone after deleting the selected files
① Select the [Delete the selected file(s) and continue cloning] option and then click the [Next>>]
button.
STEP 15. Cloning after saving the selected files on another storage device
① Select the [Save the selected file(s) to another storage device and continue cloning] option.
② Select the storage device where you want to save the selected file(s).
③ Click the [Next>>] button.
13
Page 14

STEP 16. Start cloning
STEP 17. Cloning in progress
STEP 18. Cloning complete
14
Page 15

www.samsung.com/ssd, www.samsung.com/samsungssd
All brand and product names are trademarks of their respective companies.
Design and contents of this manual are subject to change without notice.
© 2015 Samsung Electronics, Co., Ltd. All rights reserved.
 Loading...