

ML2250TECH
Technical Instructions Printers OEM Info Tools 1
C
ORPORATE
LOS ANGELES, USA
US 1 800 394.9900
Int’l +1 818 837.8100
FAX 1 800 394.9910
I
nt’l +1 818 838.7047
ATLANTA, USA
US 1 877 676.4223
Int’l +1 770 516.9488
FAX 1 877 337.7976
I
nt’l +1 770 516.7794
DALLAS, USA
US 1 877 499.4989
Int’l +1 972 840.4989
F
AX 1 877 774.1750
Int’l +1 972 840.1750
MIAMI, USA
US 1 800 595.429
Int’l +1 305 594.3396
FAX 1 800 522.8640
Int’l +1 305 594.3309
NEW YORK, USA
US 1 800 431.7884
Int’l +1 631 345.0121
FAX 1 800 431.8812
Int’l +1 631345.0690
SANFORD,USA
US 1 800 786.9049
Int’l +1 919 775.4584
FAX 1 800 786.9049
Int’l +1 919 775.4584
TORONTO, CAN
CAN 1 877 848.0818
Int’l +1 905 712.9501
X 1 877 772.6773
A
F
Int’l +1 905 712.9502
G
AR
AIRES,
UENOS
B
G 0810 444.2656
AR
l +011 4583.5900
’
t
In
FAX +011 4584.3100
MELBOURNE, AUS
AUS 1 800 003. 100
Int’l +62 03 9561.8102
FAX 1 800 004.302
Int’l +62 03 9561-7751
US
A
,
Y
SYDNE
AUS 1 800 003.100
t’l +62 02 9648.2630
In
X 1800 004.302
A
F
Int’l +62 02 9548.2635
,URY
VIDEO
MONTE
URY 02 902.7206
Int’l +5982 900.8358
FAX +5982 908.3816
JOHANNESBURG, S.A.
S.A. +27 11 974.6155
FAX +27 11 974.3593
Samsung ML-2250
Samsung ML-2251N
Samsung ML-2251NP
Samsung ML-2252W
Samsung MFP soon
to be released
Dell 1600N
Photo 1
Photo 2
Photo 3
Part Number: ML-2250D5
Gram Load: 125 grams
Yield @ 5%: 5,000 pages
Resolution: 1200 dpi
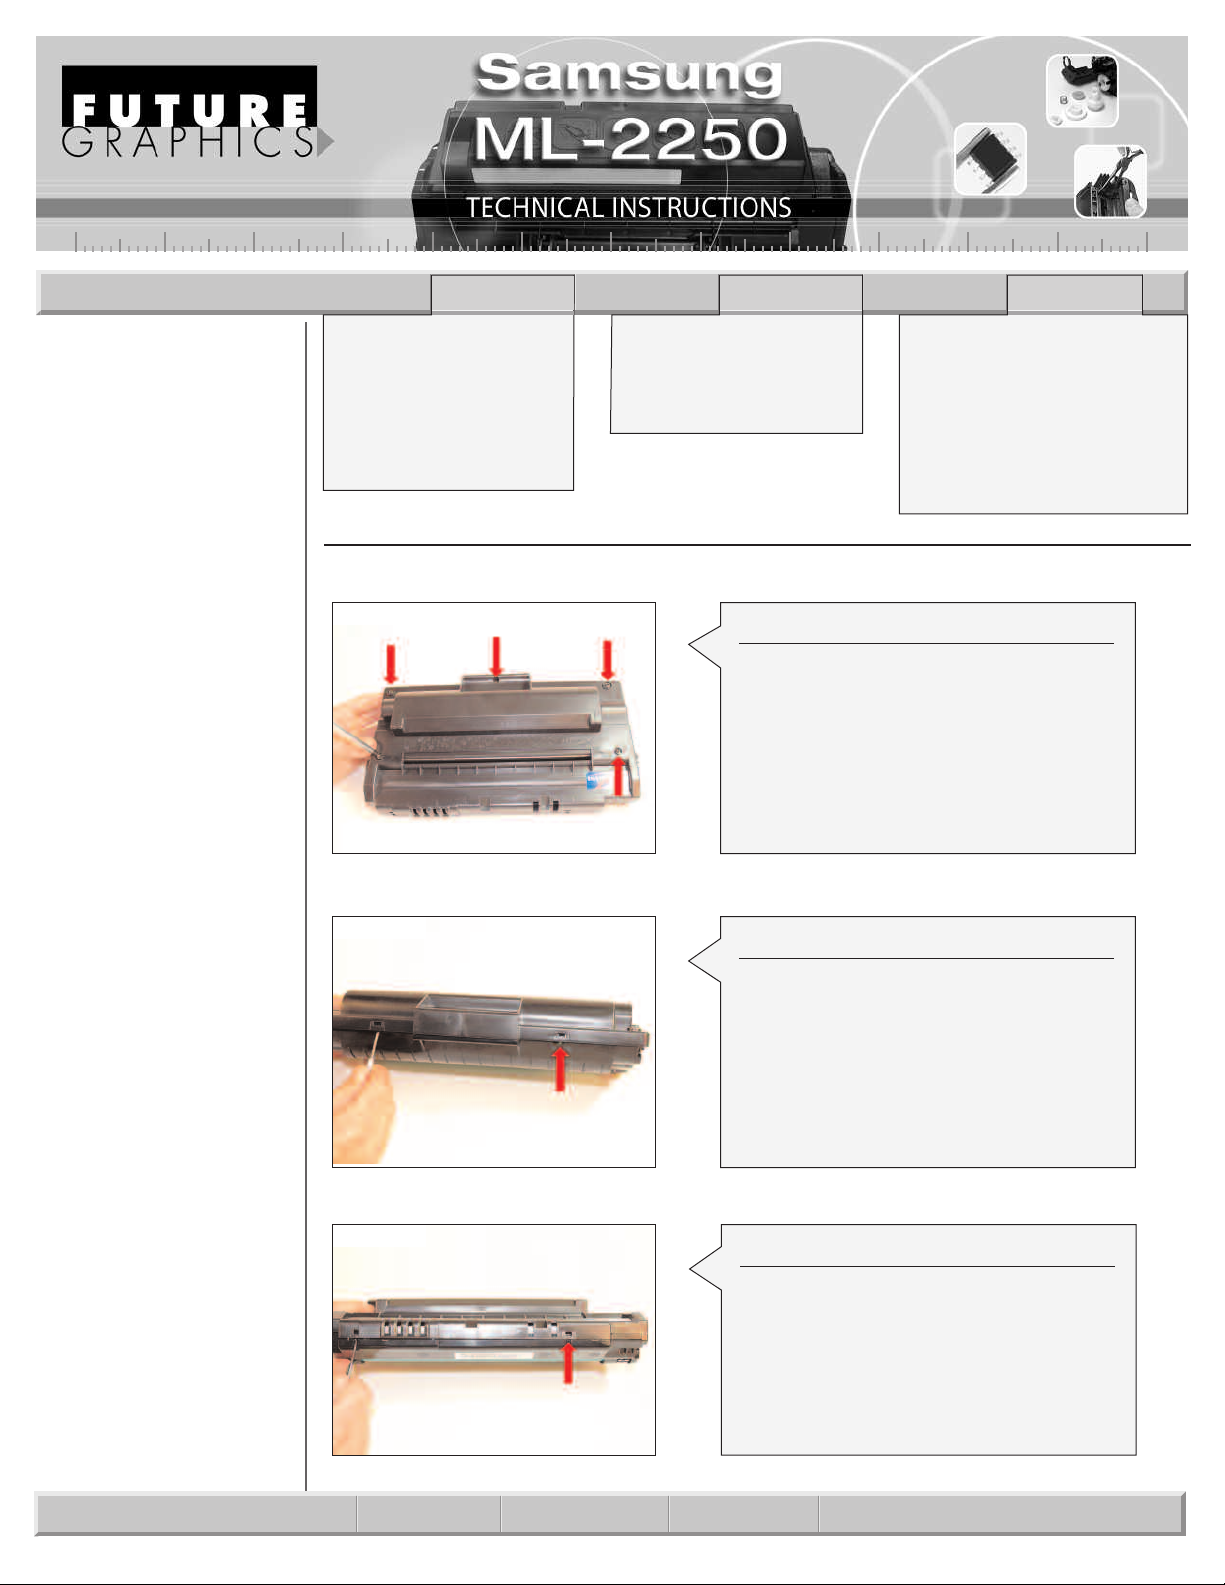
Step 1
Remove the five screws from the top of
the cartridge.
(See Photo 1)
ep 2
St
Using a small flat blade screwdriver,
release the two locking tabs located next
to the cartridge handle.
ee Photo 2)
(S
Step 3
Rotate the cartridge 180∞ release the
two locking tabs located in the front of the
cartridge.
hot
ee P
(S
Small Flat Blade Screwdriver
Philips Screwdriver
Supplies Needed:
Lint free cloth
Cotton Swab
Acetone
Toner
o 3)
E-mail: info@futuregraphicsllc.com Website: www.futuregraphicsllc.com
2 ML 2250 Technical Instructions
Notes
Photo 4
Photo 5
Photo 6
S
tep 4
Remove the top section of the cartridge.
(See Photo 4)
Step 5
Remove the two screws holding the PCR
cleaning brush.
(See Photo 5)
Step 6
Lift out the cleaning brush.
(See Photo 6)
Clean the brush carefully using dry
compressed air.
Need trust-worthy, detailed Technical
Instructions for another engine?
Visit: www.futuregraphicsllc.com
o 7
hot
P
Photo 8
Step 7
Remove the four screws holding the
contact end cap to the cartridge.
(See Photo 7)
Step 8
Slide the contact end cap away from the
cartridge.
o 8)
hot
ee P
(S
ML 2250 Technical Instructions 3
Photo 9
Photo 10
Photo 11
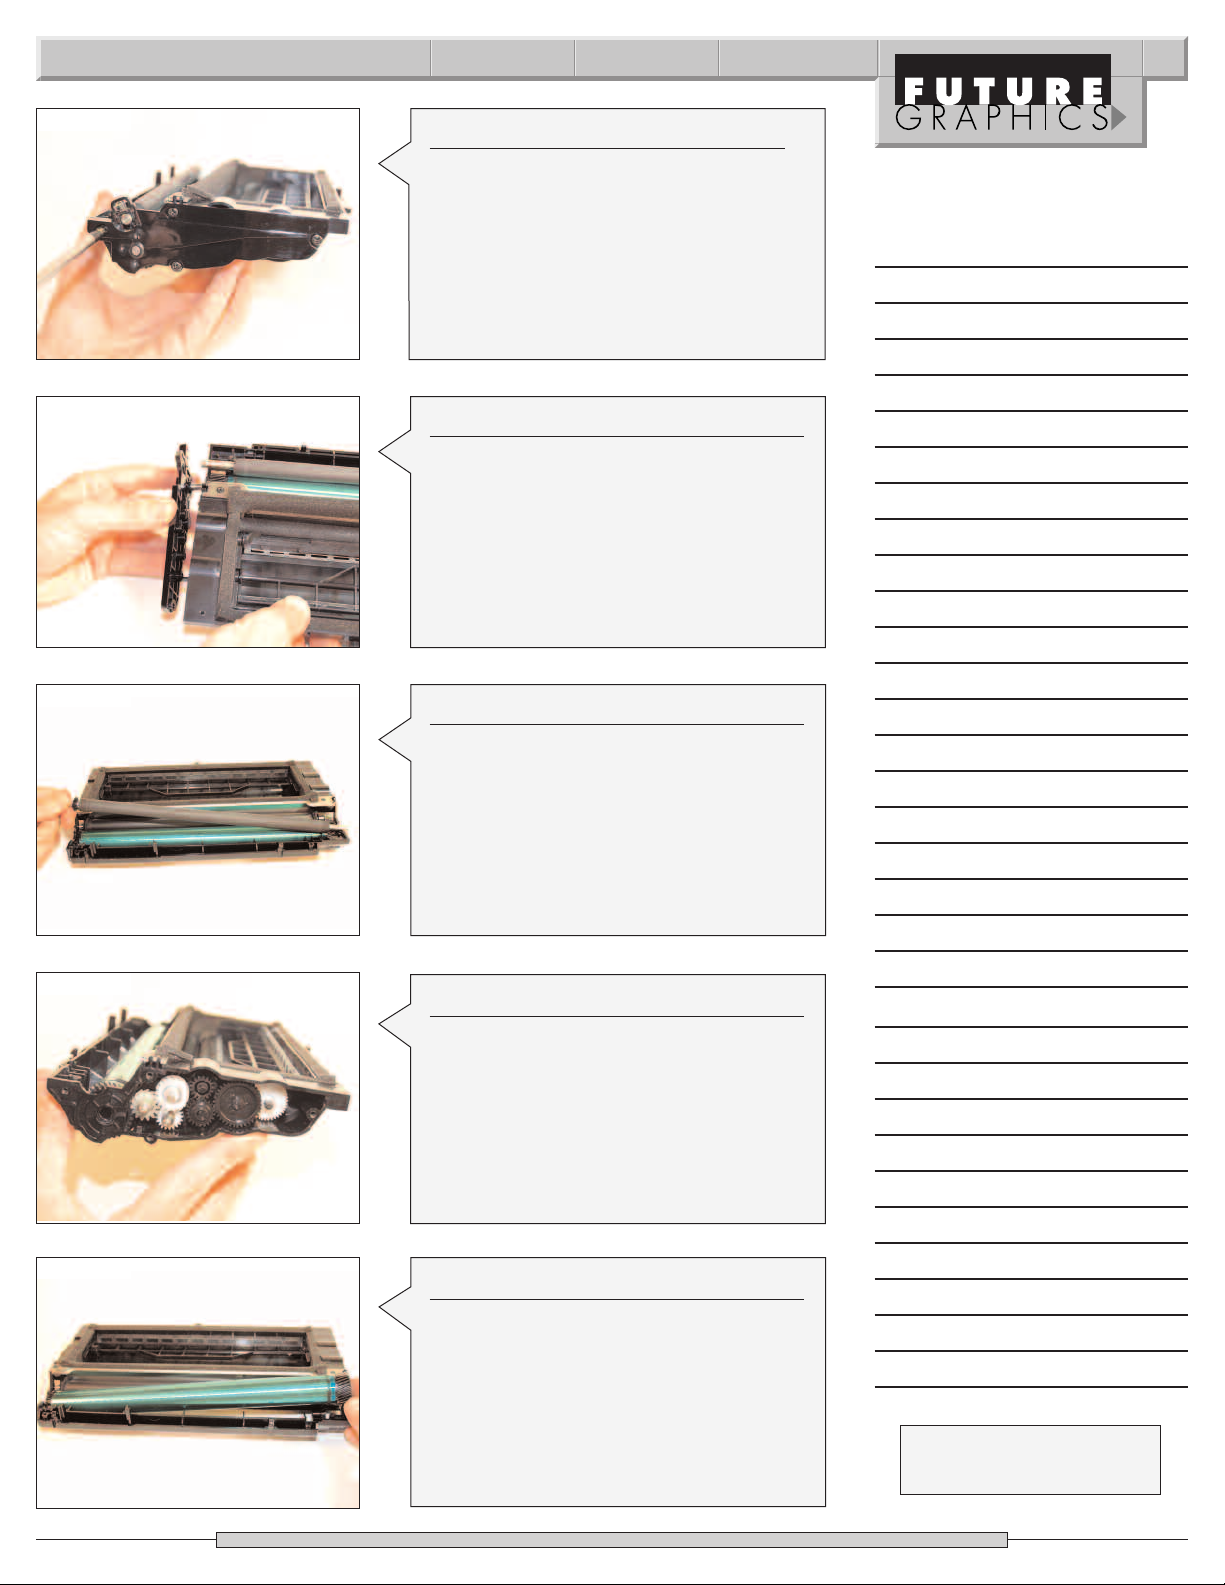
S
tep 9
Rotate the cartridge around. Remove
the four screws holding the gear assem-
ly end cap.(See Photo 9)
b
Step 10
Slide the end cap away from the cartridge.
(See Photo 10)
Step 11
Remove the PCR from the cartridge.
(See Photo 11)
Notes
o 12
hot
P
Photo 13
Step 12
Note the position of the seven gears locat-
ee Photo 12)
ed behind the end cap.
Remove the seven gears.
ep 13
St
Carefully remove the drum. (See Photo 13)
If you plan on r
a pr
otected area out of the light.
eusing the drum, place it in
(S
ust-worthy, detailed Technical
eed tr
N
Instructions for another engine?
www.futuregraphicsllc.com
isit:
V
 Loading...