

Page 1
Samsung Electronics 2-1
2. Disassembly and Reassembly
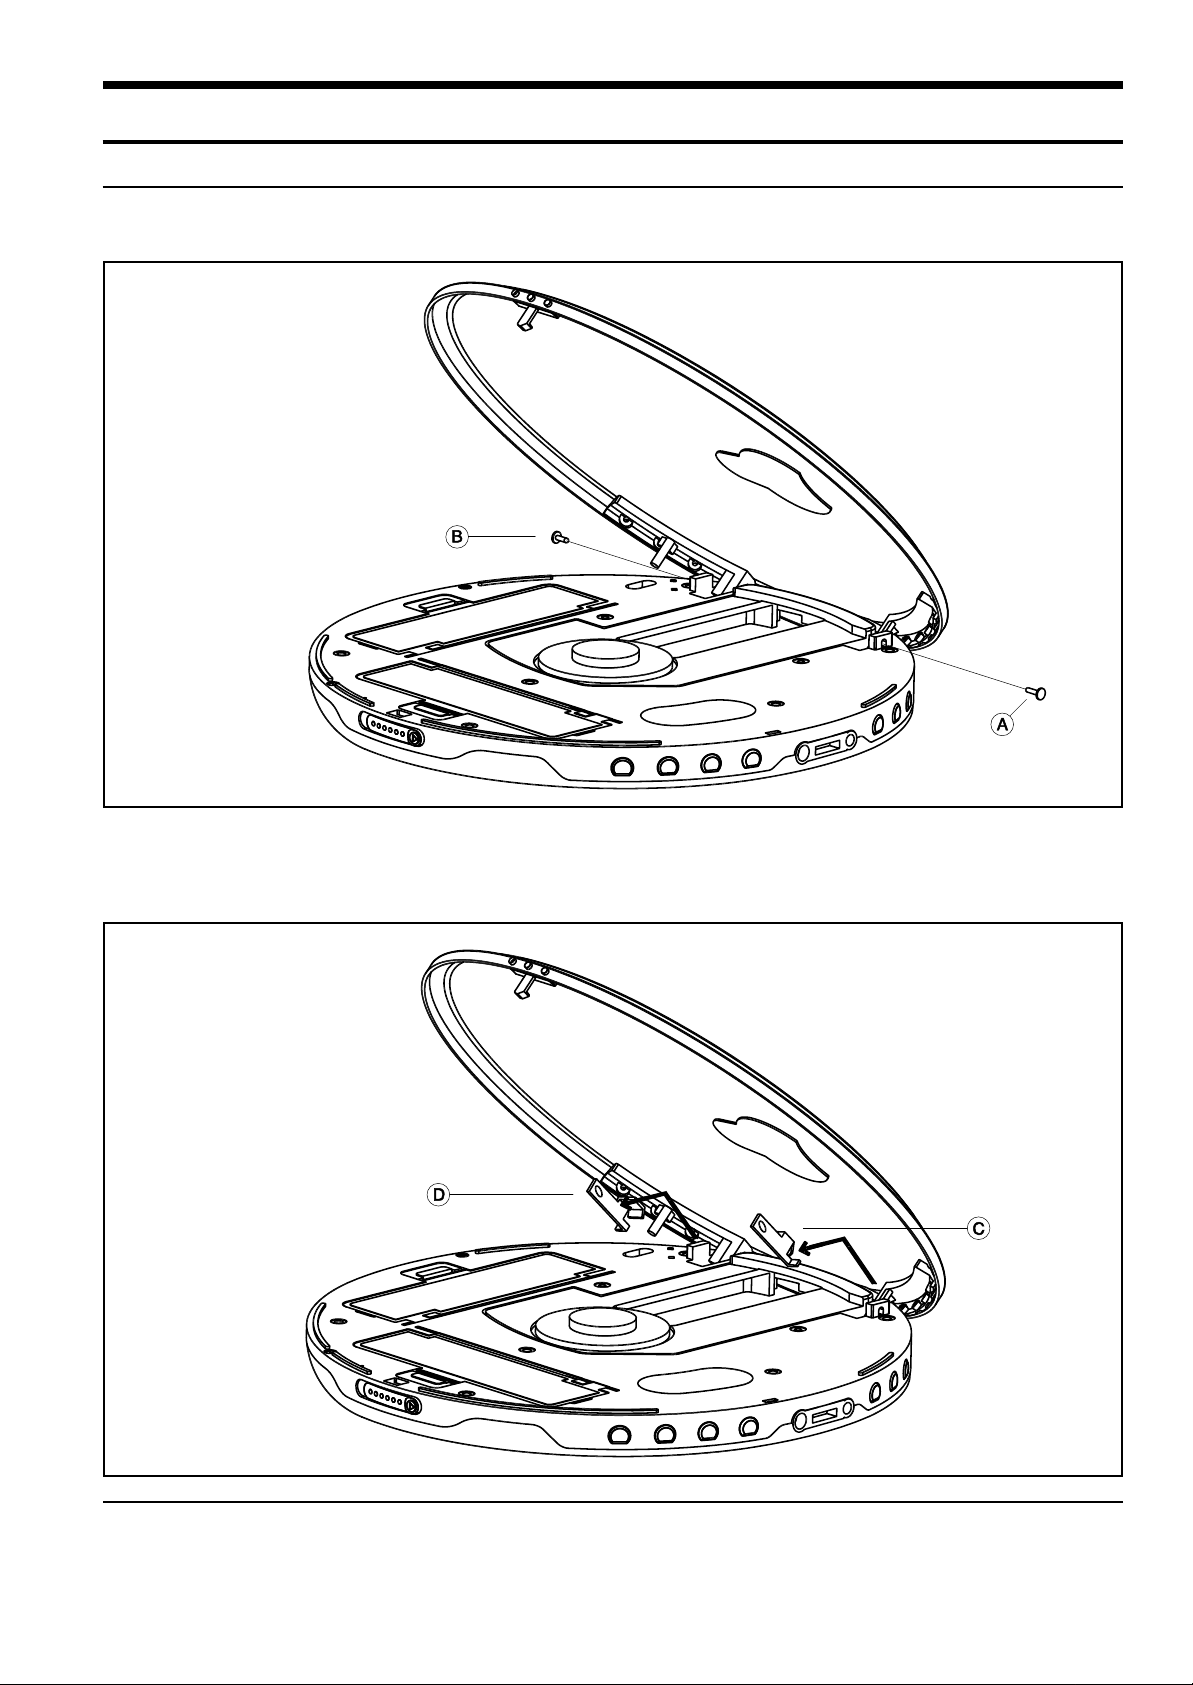
1. Unscrew the screws A and B, as shown in Figure 2-1.
2-1. Disassembly Instructions
2. Use a pair of tweezers to disassemble the bracket hinges C and D, as shown in Figure 2-2.
Tilt the hinge at a 45 degree angle to remove it.
[Figure 2-1]
[Figure 2-2]
Page 2
2-2 Samsung Electronics
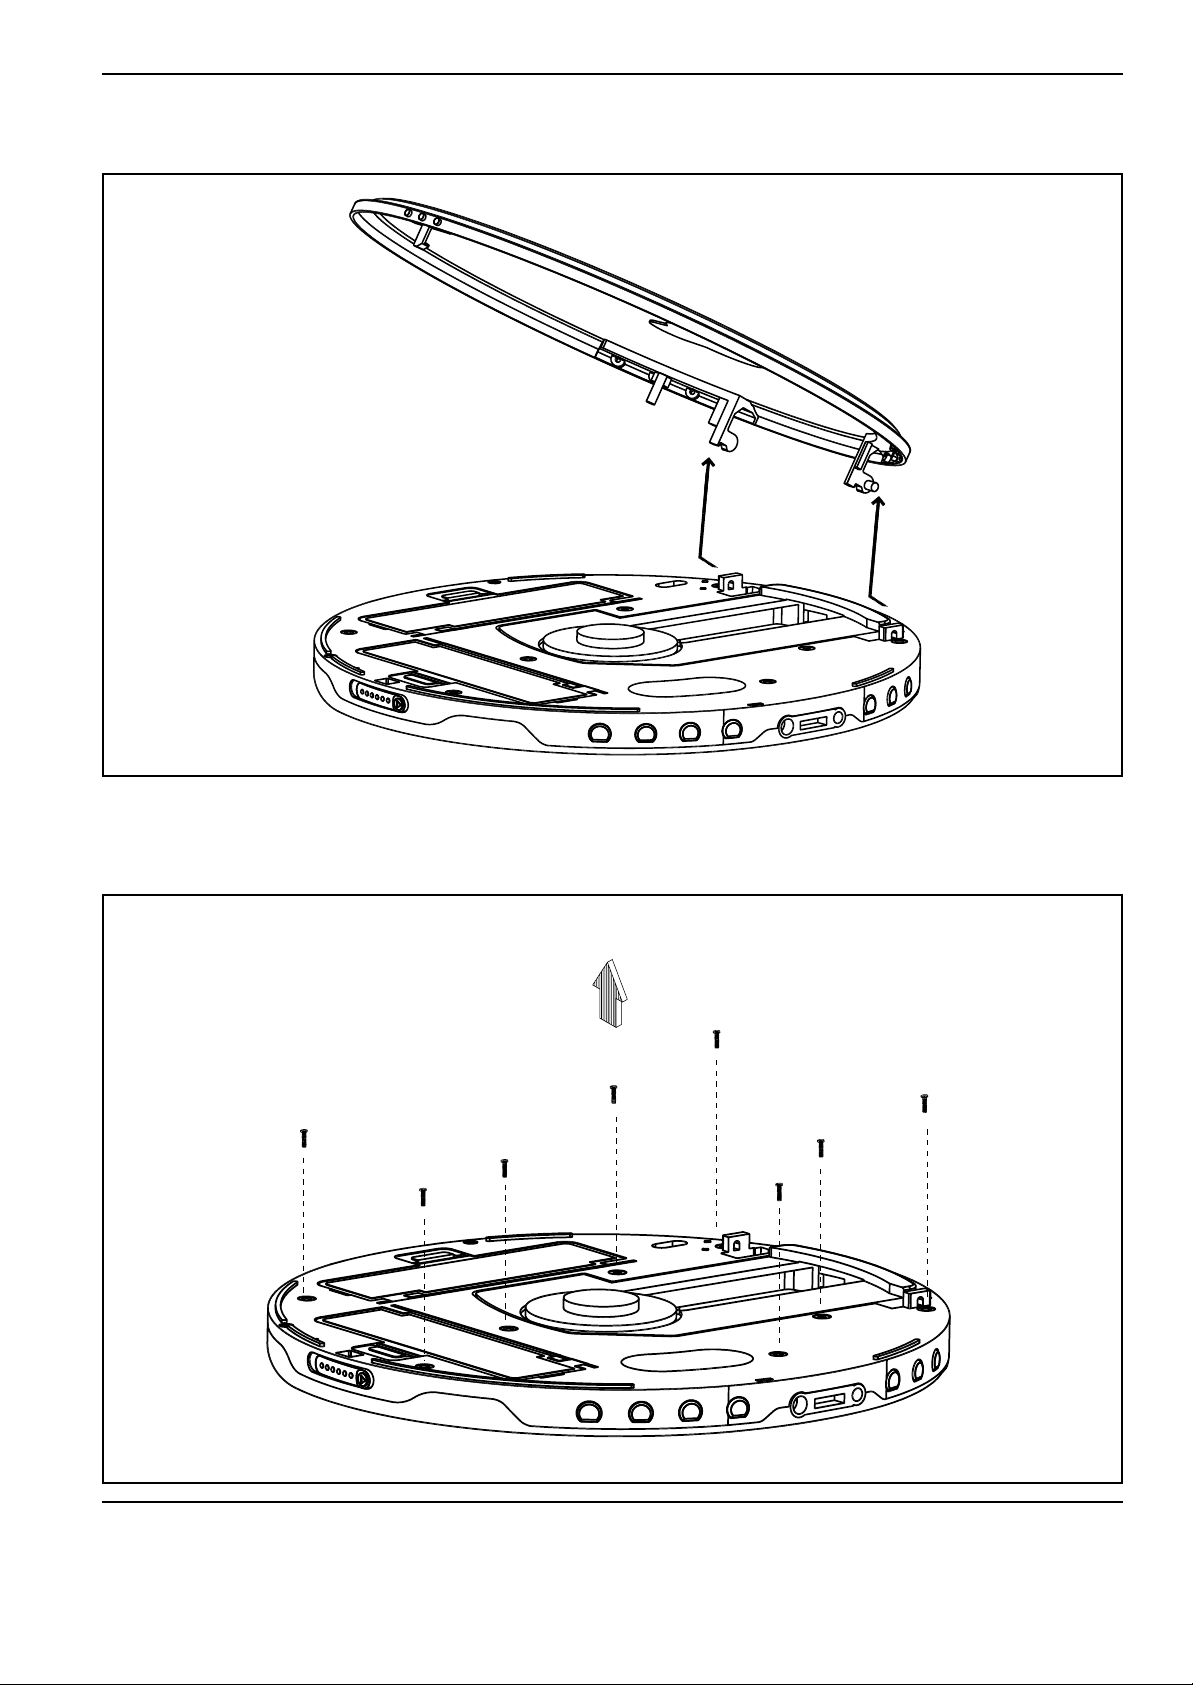
3. Grab the left and right sides of the cabinet door with one hand and pull it forward as you
remove it, as shown in Figure 2-3
4. Unscrew the eight screws to remove the cabinet middle from the cabinet bottom, as shown
in Figure 2-4.
[Figure 2-3]
[Figure 2-4]
Page 3

Samsung Electronics 2-3
1. Using the eight screws, fasten the cabinet middle to the cabinet bottom,
as shown in Figure 2-5
2-2. Reassembly Instructions
2. Grab the left and right sides of the cabinet door, align the spring part at the bottom left with
the groove, and then push the cabinet door back as you press it down to fit it into the left and
right grooves, as shown in Figure 2-6.
[Figure 2-5]
[Figure 2-6]
Page 4

2-4 Samsung Electronics
3.Tilt and insert the bracket hinge at a 45 degree angle to attach the cabinet door to the cabi-
net middle, as shown in Figure 2-7. Start with the bracket hinge C first.
This part of the assembly requires a bit of maneuvering. Please refer to the steps below.
4.Tilt the bracket hinge at a 45 degree angle and position it as shown in Figure 2-8.
[Figure 2-7]
[Figure 2-8]
Page 5

Samsung Electronics 2-5
5.With the cabinet door slightly closed, gently push in the bracket hinge with your finger, as
shown in Figure 2-9.
6.The bracket hinge is in place when it is in the position shown in Figure 2-10.
Fasten the screw through the hole, as shown in Figure 2-10.
[Figure 2-9]
[Figure 2-10]
Page 6

2-6 Samsung Electronics
7. Insert the bracket hinge D at a 45 degree angle, as shown in Figure 2-11. Repeat steps
3,4,5 and 6 to complete this part of the assembly.
Finally, fasten the screw and close the cabinet door and then open it again to make sure that
the cabinet door is correctly attached to the cabinet middle.
[Figure 2-11]
 Loading...