

Page 1
Samsung Electronics
3-1
Diassembly and Reassembly
3. Disassembly and Reassembly
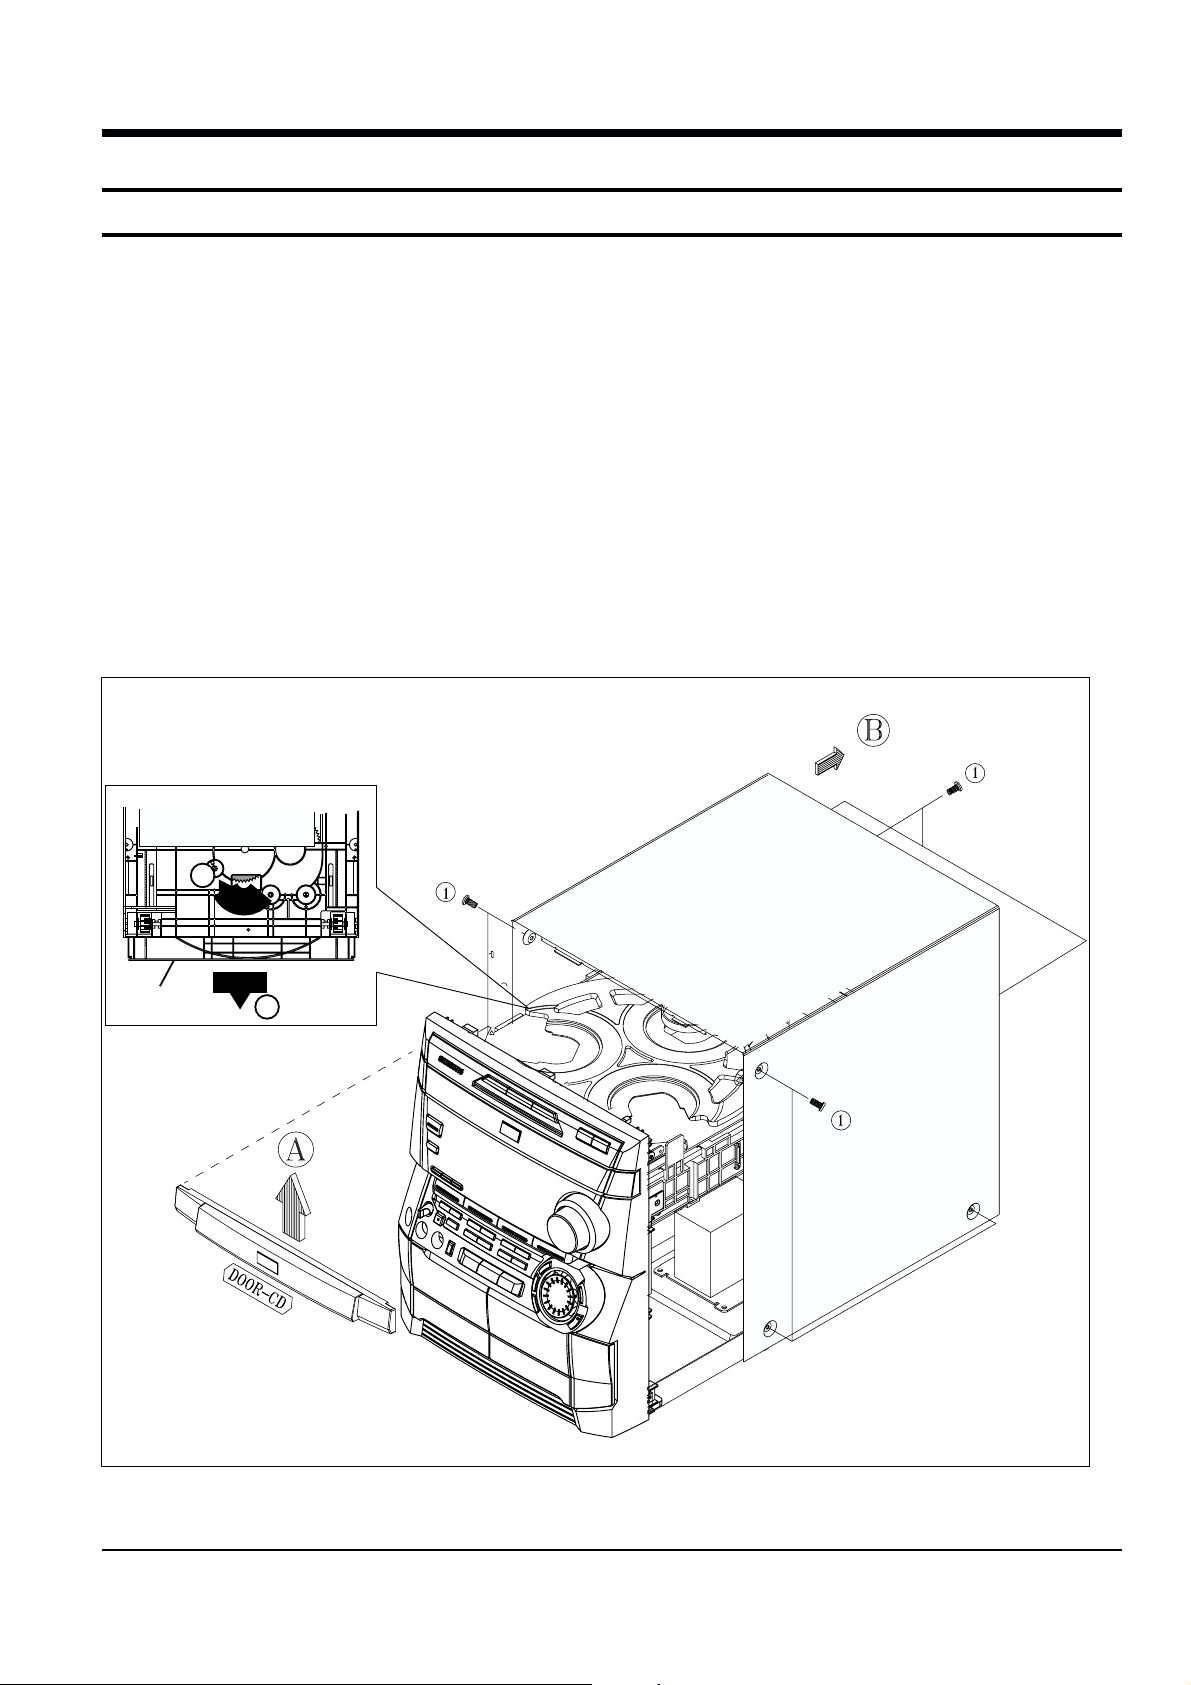
3-1 Cabinet-Top
* If power is connected ;
1. Turn power on and open the CD - TRAY ,push the Door-CD in the direction of arrow A to remove.
2. Close the CD - TRAY and turn power off, and remove the power plug(cord) from main power
3. Remove 12 screws of ! holding the Cabinet-Top in the direction of arrow B.
Lift the back of the Cabinet-Top and shade it to the rear to remove.
* If power is not connected ;
1. Remove 12 screws of ! holding the Cabinet-Top in the direction of arrow B.
Lift the back of the Cabinet-Top and shade it to the rear to remove.
2. Remove the Cabinet-Top and Turn the Gear the clockwise using the hand as shown in figure 3-1-1.
Open the Door-CD and pull the Tray in the direction of arrow @ as shown in figure 3-1-1.
TRAY
1
2
Figure 3-1
Figure 3-1-1
Page 2

Samsung Electronics
3-2
Diassembly and Reassembly
Figure 3-2
3-2 CD-Mecha, Door-CD
1. Remove 2 screws of # .
2. Lift the back of the CD-Mecha to remove.
Page 3

Samsung Electronics
3-3
Diassembly and Reassembly
3-3 Cabinet-Rear and Main PCB
1. Remove 19 screws of $.
2. Lift the Cabinet-Rear in the direction of arrow D and slide it to the rear
by releasing the hook of Cabinet-Bottom.
3. Remove 1 screws of % and slide the Main PCB to the rear to remove.
1. Remove 2 screws of ^.
2. Slide it to the front by releasing two hooks in the direction of arrow E,F on the bottom of Cabinet-Front to remove.
3. Remove 1 screws of & and slide the PRO-LOGIC PCB to the top to remove .
Figure 3-3
Figure 3-4
3-4 Cabinet-Front and Cabinet-Bottom
Page 4

Diassembly and Reassembly
3-4 Samsung Electronics
3-5-1 Disassembly
1) Remove the power cable.
2) Switch LD SW1 on deck PCB to ‘OFF’ before
removing the FPC
( Inserted into Main PCB CN6. See Fig. 1-4)
3) Disassemble the deck.
4) Disassemble the deck PCB.
3-5-2 Assembly
1) Replace the Pick-up.
2) Assemble the deck PCB.
3) Reassemble the deck.
3-5 Pick-up disassembly and reassembly
Note : If the assembly and disassembly are not done in correct sequence, the Pick-up may be damaged.
Fig. 1-4
 Loading...