

Selecting the Video Signal-Source
You can connect different cable systems to your TV, including cable without a cable box, and cable with a cable
box that descrambles some or all channels.
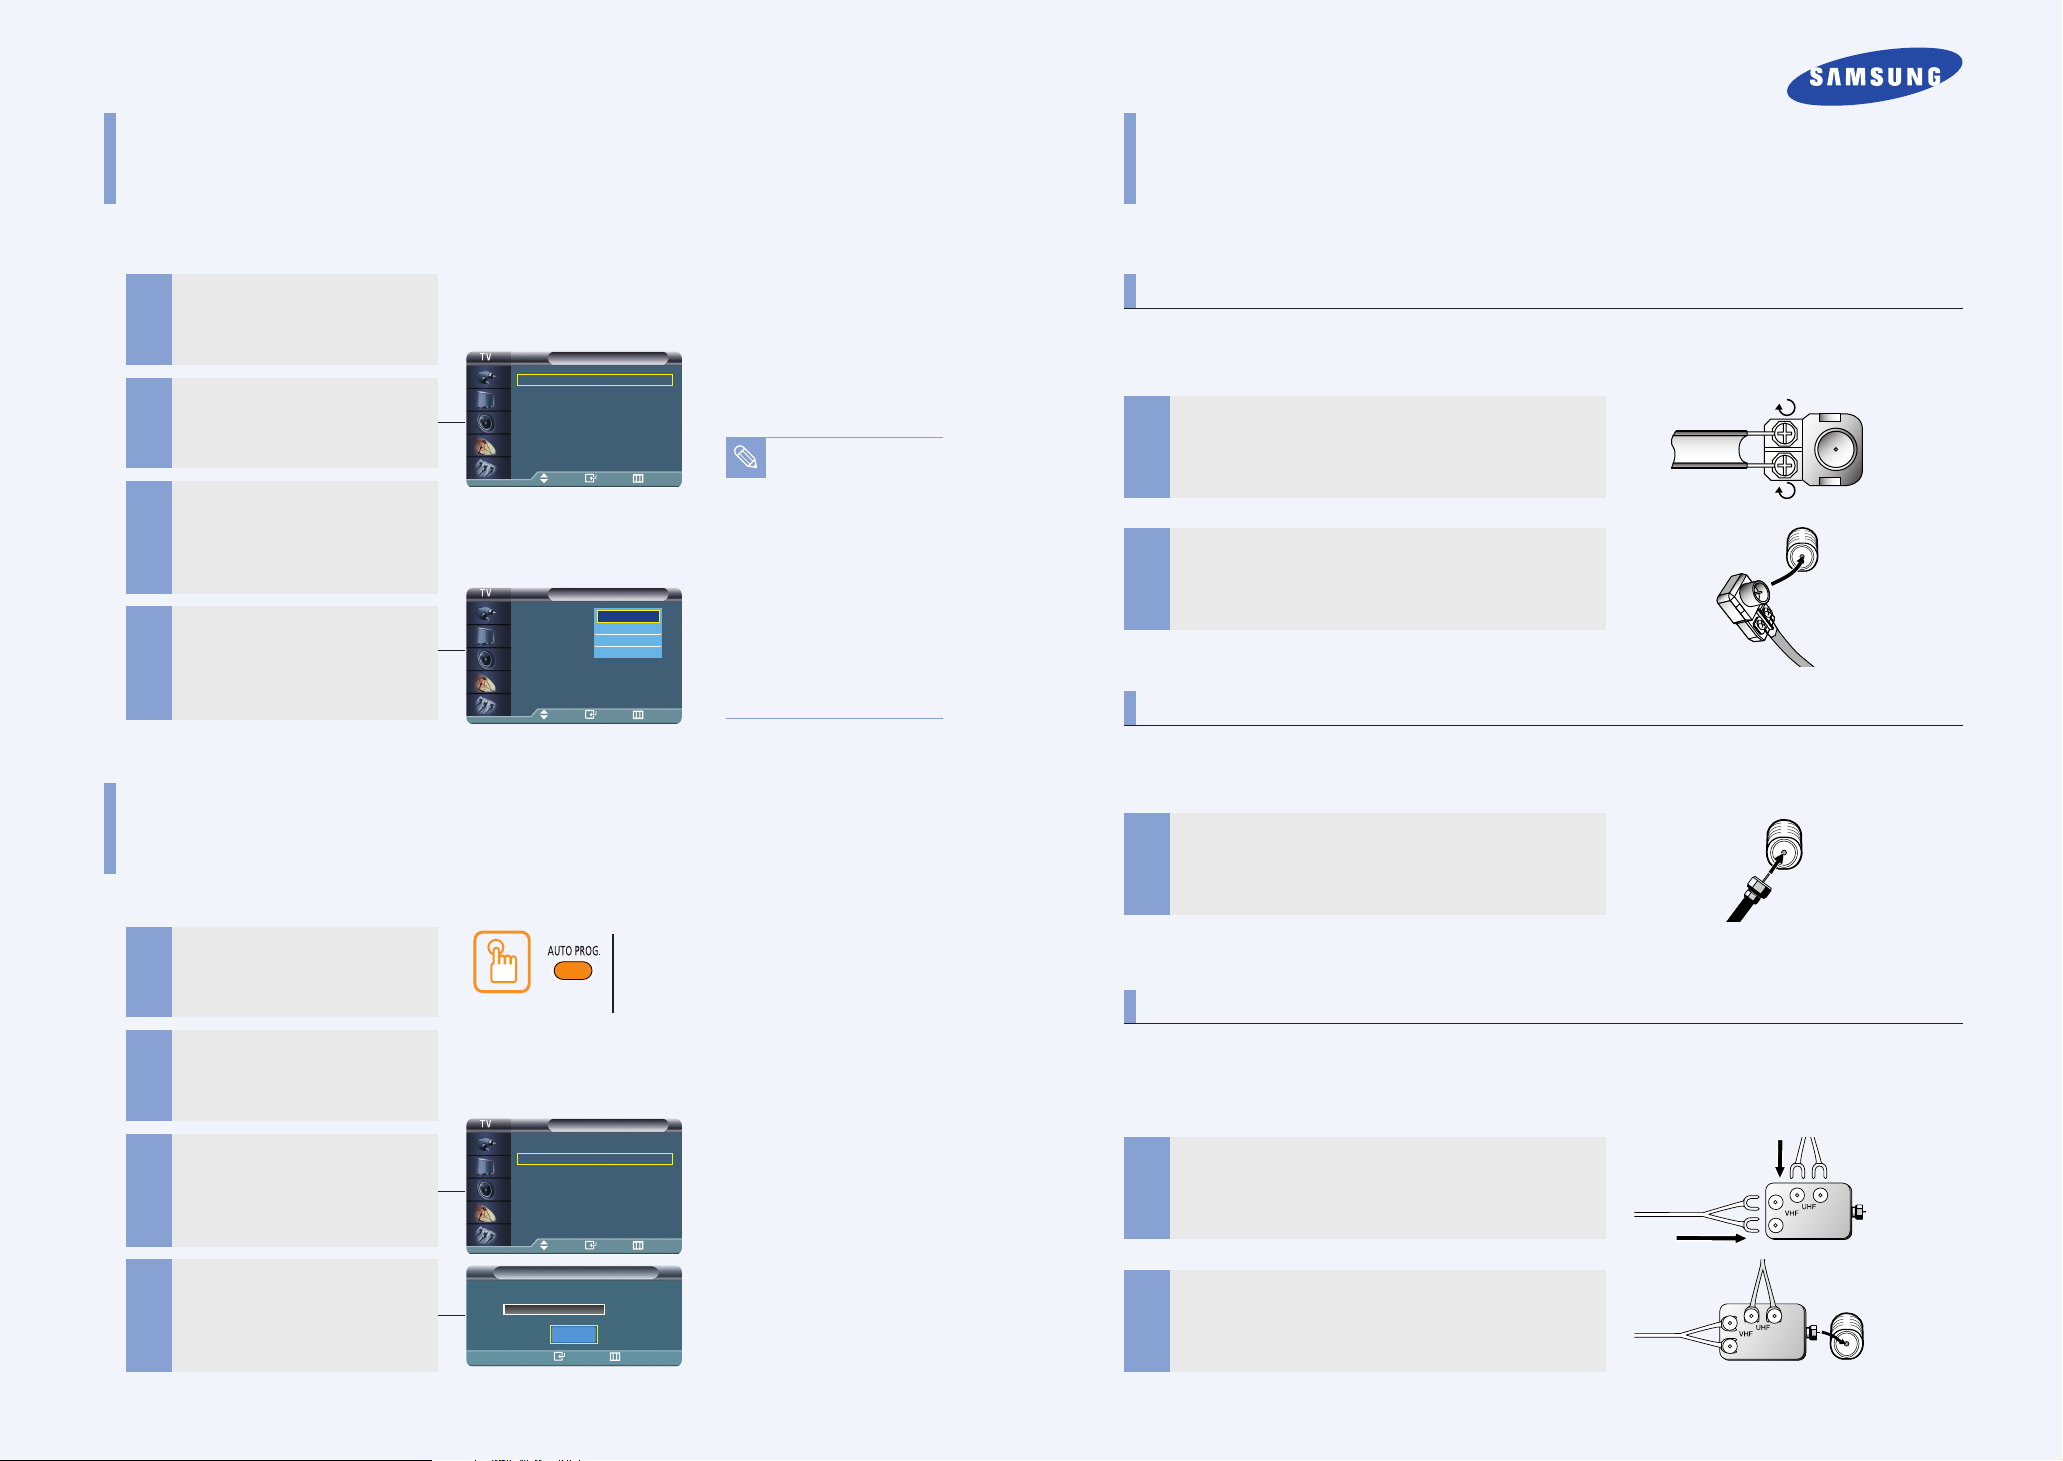
Connecting VHF/UHF
Press the [MENU] but ton.
The menu will be displayed.
1
Channel
Move Enter Return
Channel
Air
STD
HRC
IRC
Move Enter Return
STD, HRC and IRC identify various types of
Note
cable TV systems.
Contact your local cable
company to identify the
type of cable system that
exists in your particular
area.
At this point the signal
source has been selected. Proceed to “Storing
Channels Automatically”
(next page).
Press the […/†] but tons to move to
<Channel>, then press the [ENTER]
2
button.
The <Channel> menu will be displayed.
Press the […/†] but tons to move to
<Air/CATV>, then press the
[ENTER] button.
3
The signal source menu will be displayed.
Press the […/†] but tons to move to
signal source of your choice, then
4
press the [ENTER] button.
Press the [EXIT] button to finish.
Air/CATV : Air √
Auto Program √
Add/Delete √
Fine Tune √
LNA : On √
Air/CATV : Air √
Auto Program √
Add/Delete √
Fine Tune √
LNA : On
Storing Channels Automatically
The AUTO PROGRAM feature automatically stores all of the available Air/CATV channels in the memory.
Antennas with 300-ohm Flat Twin Leads
If you are using an off-air antenna (such as a roof antenna or “rabbit ears”) that has 300-ohm twin flat leads, follow
the directions below.
Place the wires from the twin leads under the screws on
the 300-75 ohm adaptor (not supplied). Use a screwdriver to
1
tighten the screws.
Plug the adaptor into the VHF/UHF terminal on the bottom of
2
the back panel.
Antennas with 75-ohm Round Leads
If you are using an off-air antenna (such as a roof antenna or “rabbit ears”) that has 300-ohm twin flat leads, follow
the directions below.
Plug the antenna lead into the VHF/UHF terminal on the bottom of the back panel.
Press the [MENU] but ton.
The menu will be displayed.
1
Press the […/†] but tons to move to
<Channel>, then press the [ENTER]
2
button.
The <Channel> menu will be displayed.
Press the […/†] but ton to move to
<Auto Program>, then press the
[ENTER] button.
3
The <Auto Program> menu will be displayed.
Press the [ENTER] button and
select <Start> to begin the Auto
4
Program function.
Press the [EXIT] button to finish.
Press the [AUTO PROG.] button while viewing a TV program.
Press the [ENTER] button, then select <Start> to
commence.
Air/CATV : Air √
Auto Program √
Add/Delete √
Fine Tune √
LNA : On √
Channel
Move Enter Return
Auto Program
Air 13
Start
Enter Return
BN68-00683C-00
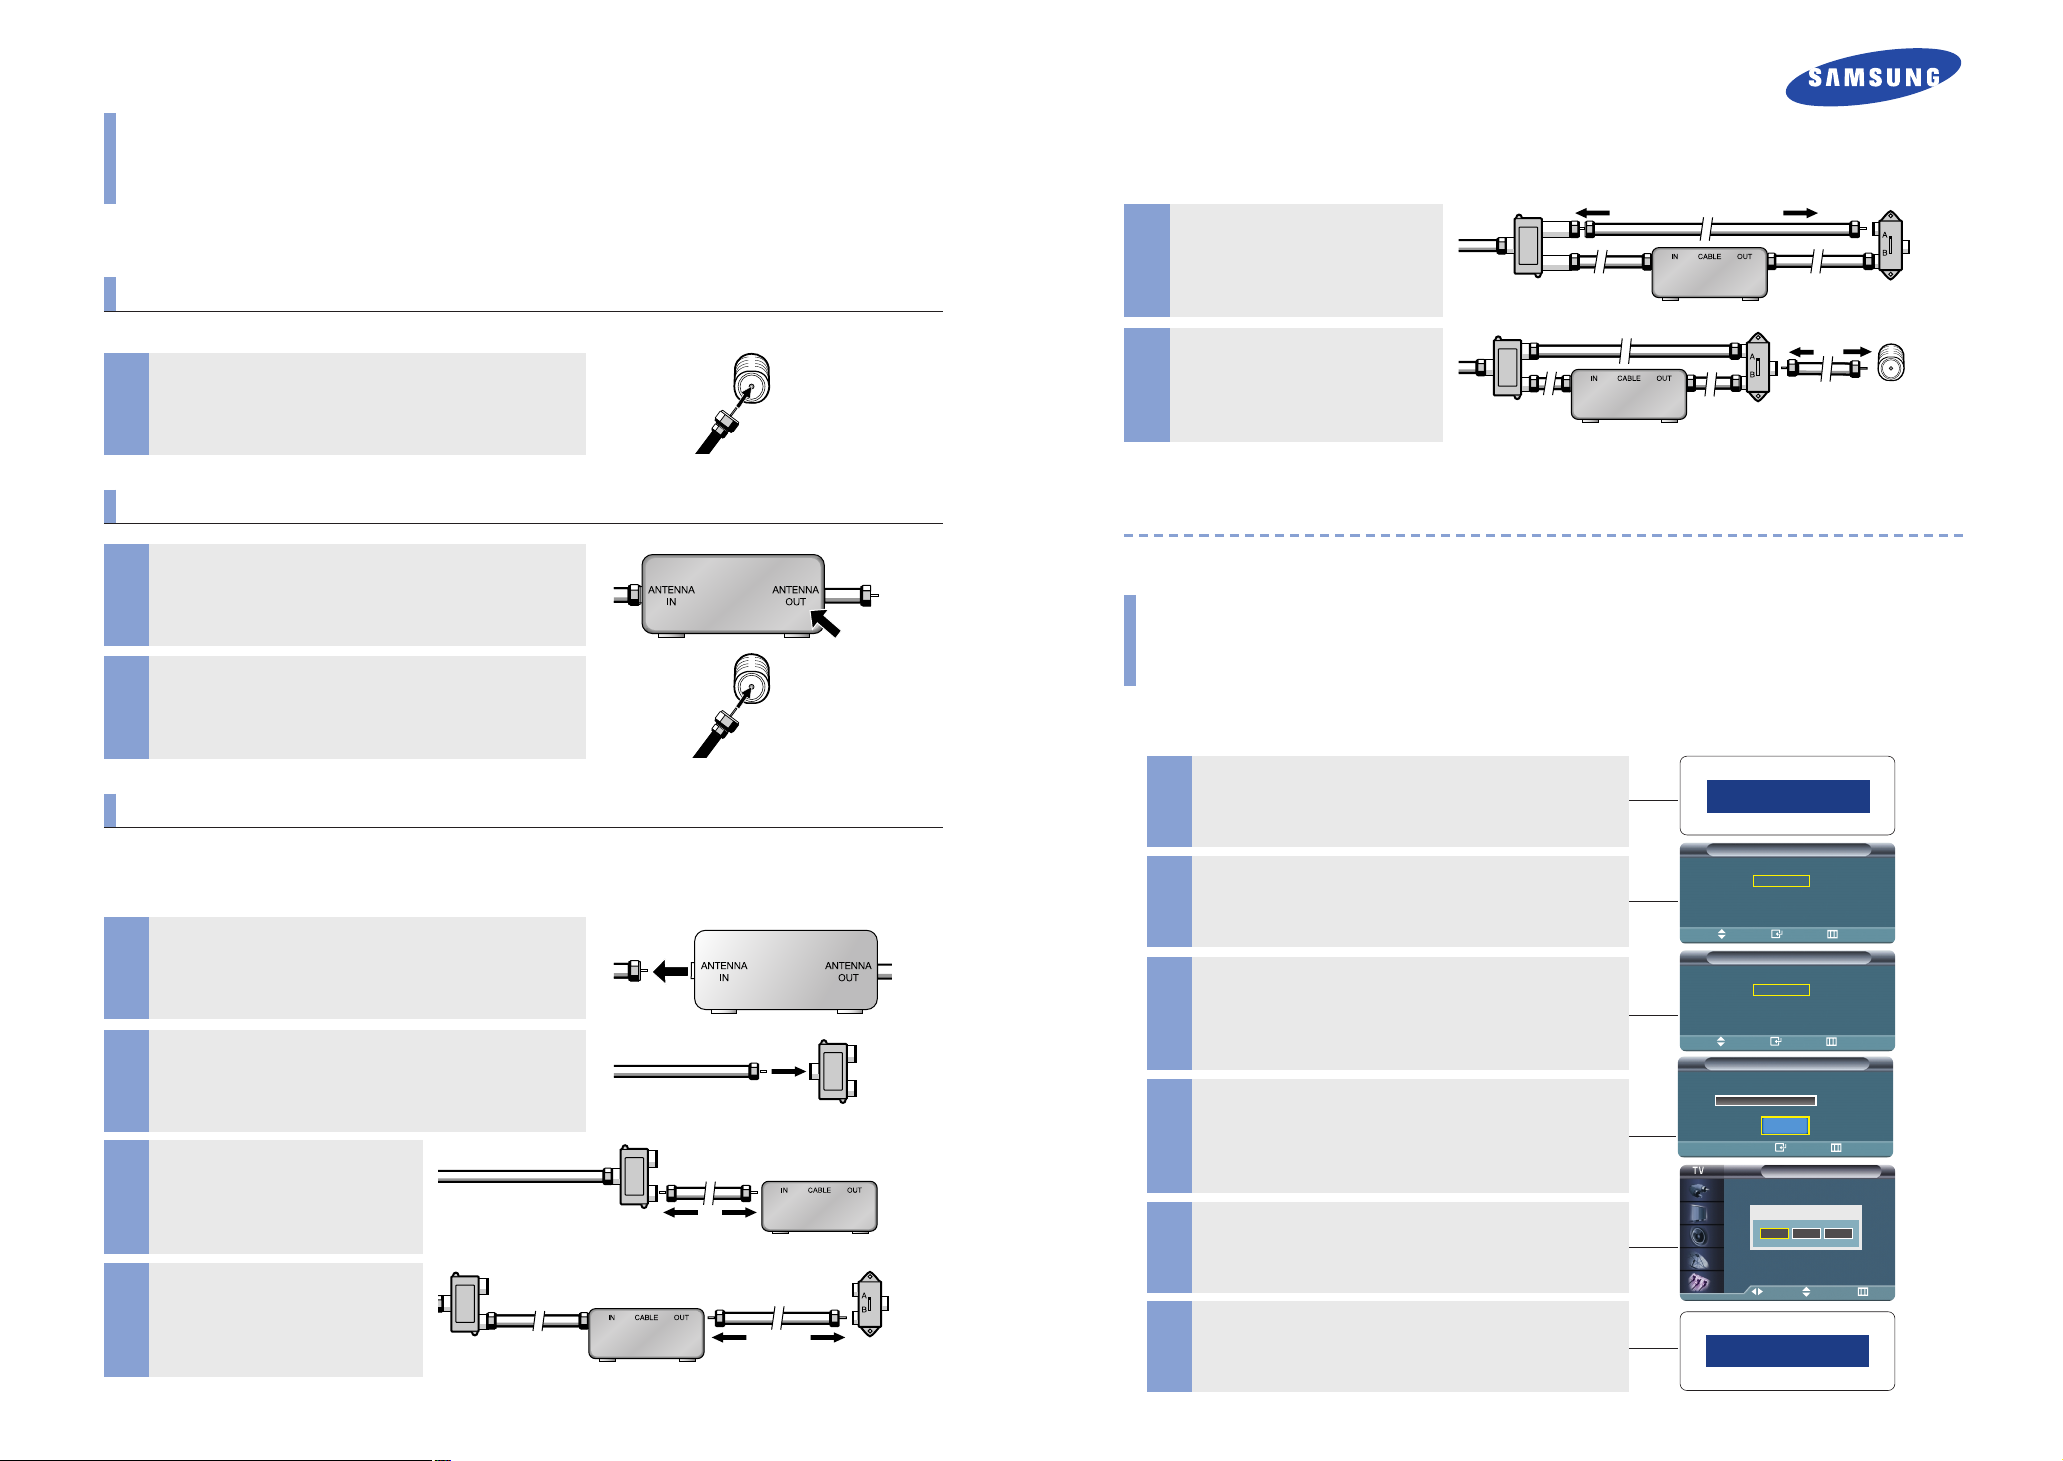
Separate VHF and UHF Antennas
If you have two separate antennas for your TV (one VHF and one UHF), you must combine the two antenna signals
before connecting the antennas to the TV. This procedure requires an optional combiner-adaptor (available at most
electronics shops).
Connect both antenna leads to the combiner.
1
Plug the combiner into the VHF/UHF terminal on the bottom
2
of the rear panel.
Connecting Cable TV
You can connect different cable systems to your TV, including cable without a cable box, and cable with a cable
box that descrambles some or all channels.
Cable without a Cable Box
If you want to connect cable, and you do not need to use a cable box:
Plug the incoming cable into the VHF/UHF antenna terminal
on back of the TV.
Connecting to a Cable Box that Descrambles All Channels
Find the cable t hat is connected to t he ANTENNA OUT ter-
1
minal on your cable box.
Connect the other end of this cable to the VHF/UHF antenna
2
terminal on the back of the TV.
Connecting to a Cable Box that Descrambles Some Channels
If your cable box descrambles only some channels (such as premium channels), follow the instructions below. You will
need a two-way splitter, an RF (A/B) switch and four lengths of coaxial cable. (These items are available at most electronics stores.)
Find and disconnect the cable that is connected to t he ANTENNA IN terminal on your cable box.
1
This terminal might be labeled “ANT IN”, “VHF IN” or simply, “IN”.
Connect this cable to a two-way split ter.
2
Connect a coaxial cable between an
OUTPUT terminal on the splitter and
3
the IN terminal on the cable box .
Connect a coaxial cable between the
ANTENNA OUT terminal on the cable
box and the B–IN terminal on the
4
RF(A/B) switch.
Incoming Cable
Split ter
Incoming Cable
Split ter
Cable Box
Split ter
Cable Box
RF(A/B)
Switch
Connect another cable bet ween the
other OUT terminal on the splitter and
the A–IN terminal on the RF (A/B)
5
switch.
Connect the last coaxial cable
between t he OUT terminal on the RF
(A/B) switch and the VHF/UHF termi-
6
nal on the rear of the TV.
After you’ve made this connection, set the A/B switch to the “A” position for normal viewing. Set the A/B switch to the
“B” position to view scrambled channels. (When you set the A/B switch to “B”, you will need to tune your TV to the
cable box’s output channel, which is usually channel 3 or 4.)
Split ter
Split ter
Cable Box
Cable Box
RF(A/B)
Switch
RF(A/B)
Switch
TV
Plug & Play Feature
When the TV is initially powered On, four basic customer settings proceed automatically and subsequently:
Setting the language, Video signal source, Auto program and Clock.
Press the [POWER] button to turn on the TV.
The message <Plug & Play> is displayed.
1
In a moment the Language menu will be displayed.
Press the […/†] but tons to move to language of your choice,
then press the [ENTER] button.
2
The signal source setup menu will be displayed after a moment.
Press the […/†] but tons to move to signal source of your
choice: <Air, STD, HRD and IRC>, then press the [ENTER]
3
button.
The <Auto Program> menu will be displayed after a moment.
Press the [ENTER] button then select <START>.
The TV will begin memorizing all of the available channels.
To stop, press the [ENTER] button again.
4
In a moment the <Clock Set> menu will be displayed.
Press the […/†/œ/√] buttons to set the current time.
5
Press the [MENU] but ton to finish.
6
Plug & Play
Language
Air/CATV
Plug & Play
English
Français
Español
Português
Move Enter Skip
Plug & Play
Air
STD
HRC
IRC
Move Enter Skip
Auto Program
Start
Hour Minute am/pm
12 00 am
Move Adjust Skip
Enjoy your watching
Air 13
Enter Skip
Clock Set
 Loading...