

Page 1
3 Disassembly and Reassembly
This section of the service manual describes the disassembly and reassembly procedures for the
LTP227W monitor.
WARNING: This monitor contains electrostatically sensitive devices. Use caution when handling
these components.
3-1 Disassembly
Cautions : 1. Disconnect the monitor from the power source before disassembly.
2. Follow these directions carefully; never use metal instruments to pry apart the cabinet.
3. R/Cover opening jig : BH81-00001A
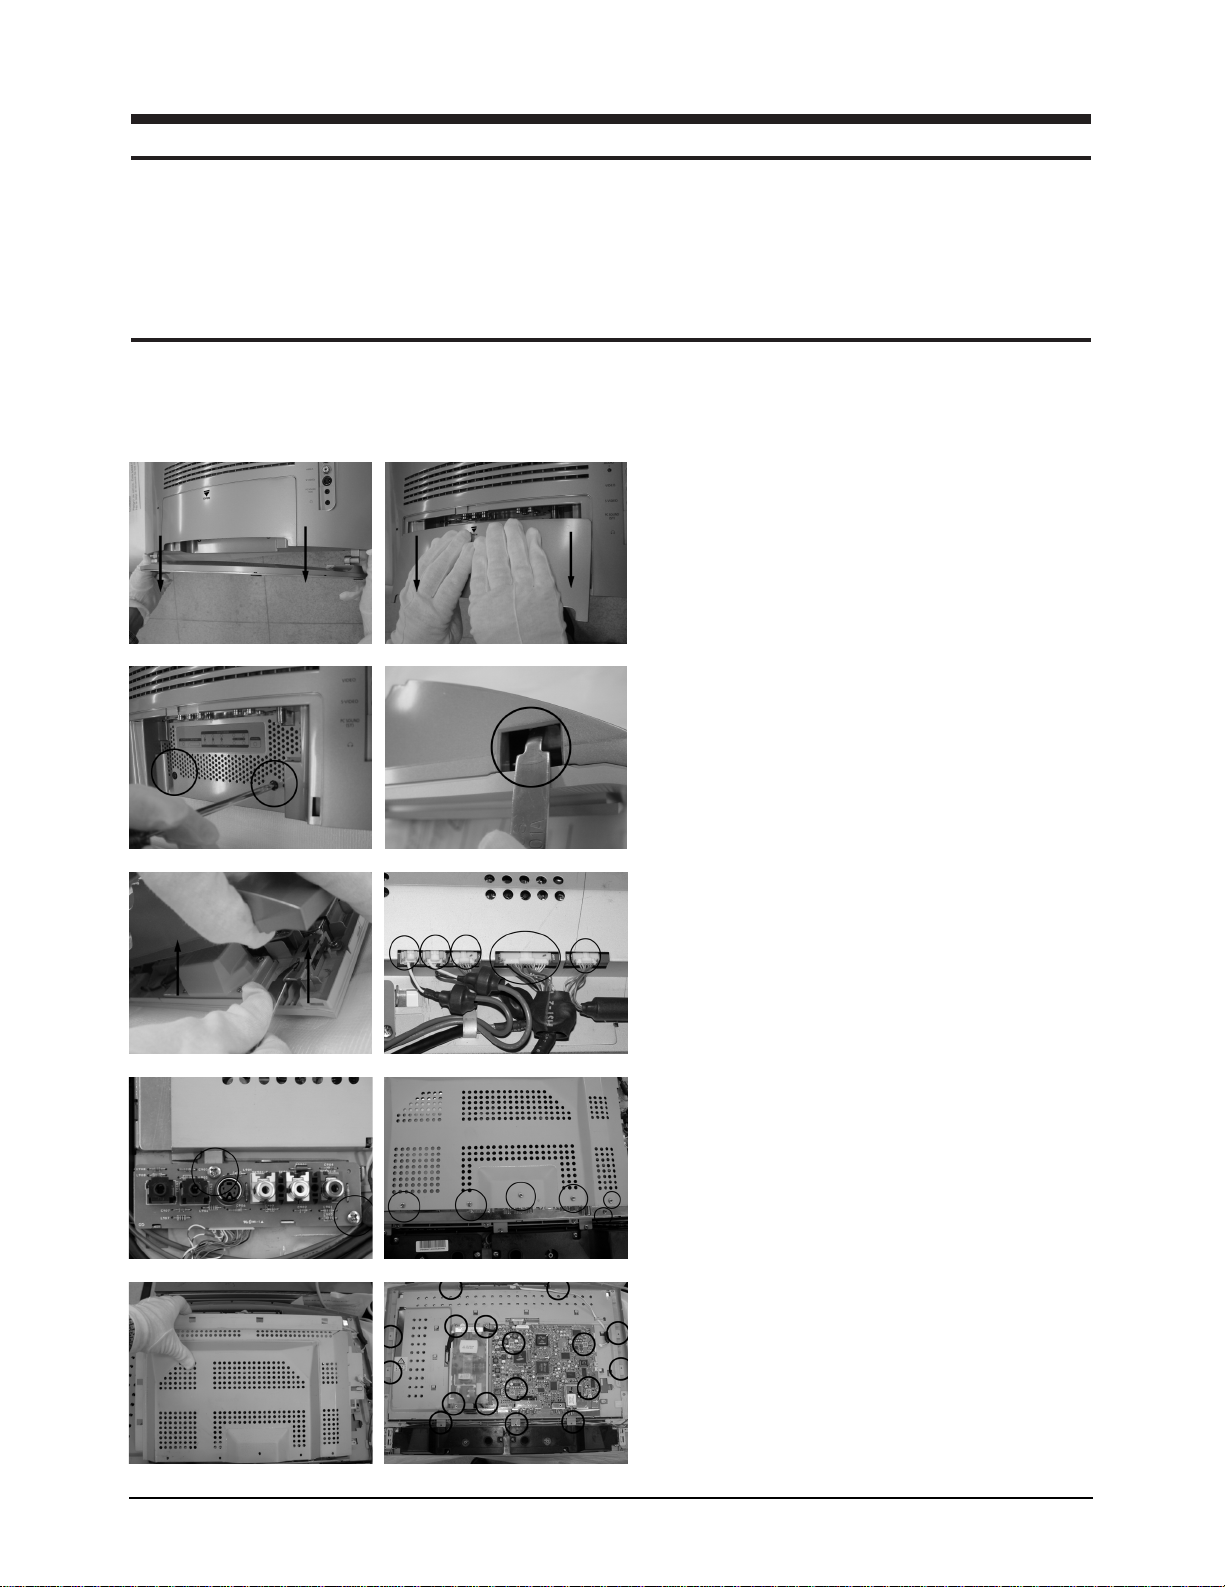
1. Loacte the monitor on the cushioned table
with face down. Remove the stand from
LCD-TV and pull the stand cover.
2. Remove 2 screws from the rear cover and
remove rear cover by using opening jig.
SPEAKER
SPEAKER
IR
A/V INPUT
FUNCTION
3. Lift up the rear cover and disconnect function
cable, A/V Input cable, IR cable and speaker
cable from the shield. (See illustrations)
4. Remove 2 screws (A/V Input Board) from the
shield. Please add a circle around the 6 screw
that connects the silver shield of the Main-PCB
to the Panel shield.(see illustrations)
5. Lift up main shield and remove 17 screws from
the set (Main Board and Panel Shield).
(see illustrations)
LTP227W 3-1
Page 2
3 Disassembly and Reassembly
3-2 Replacement Order of Lamp Assemblies
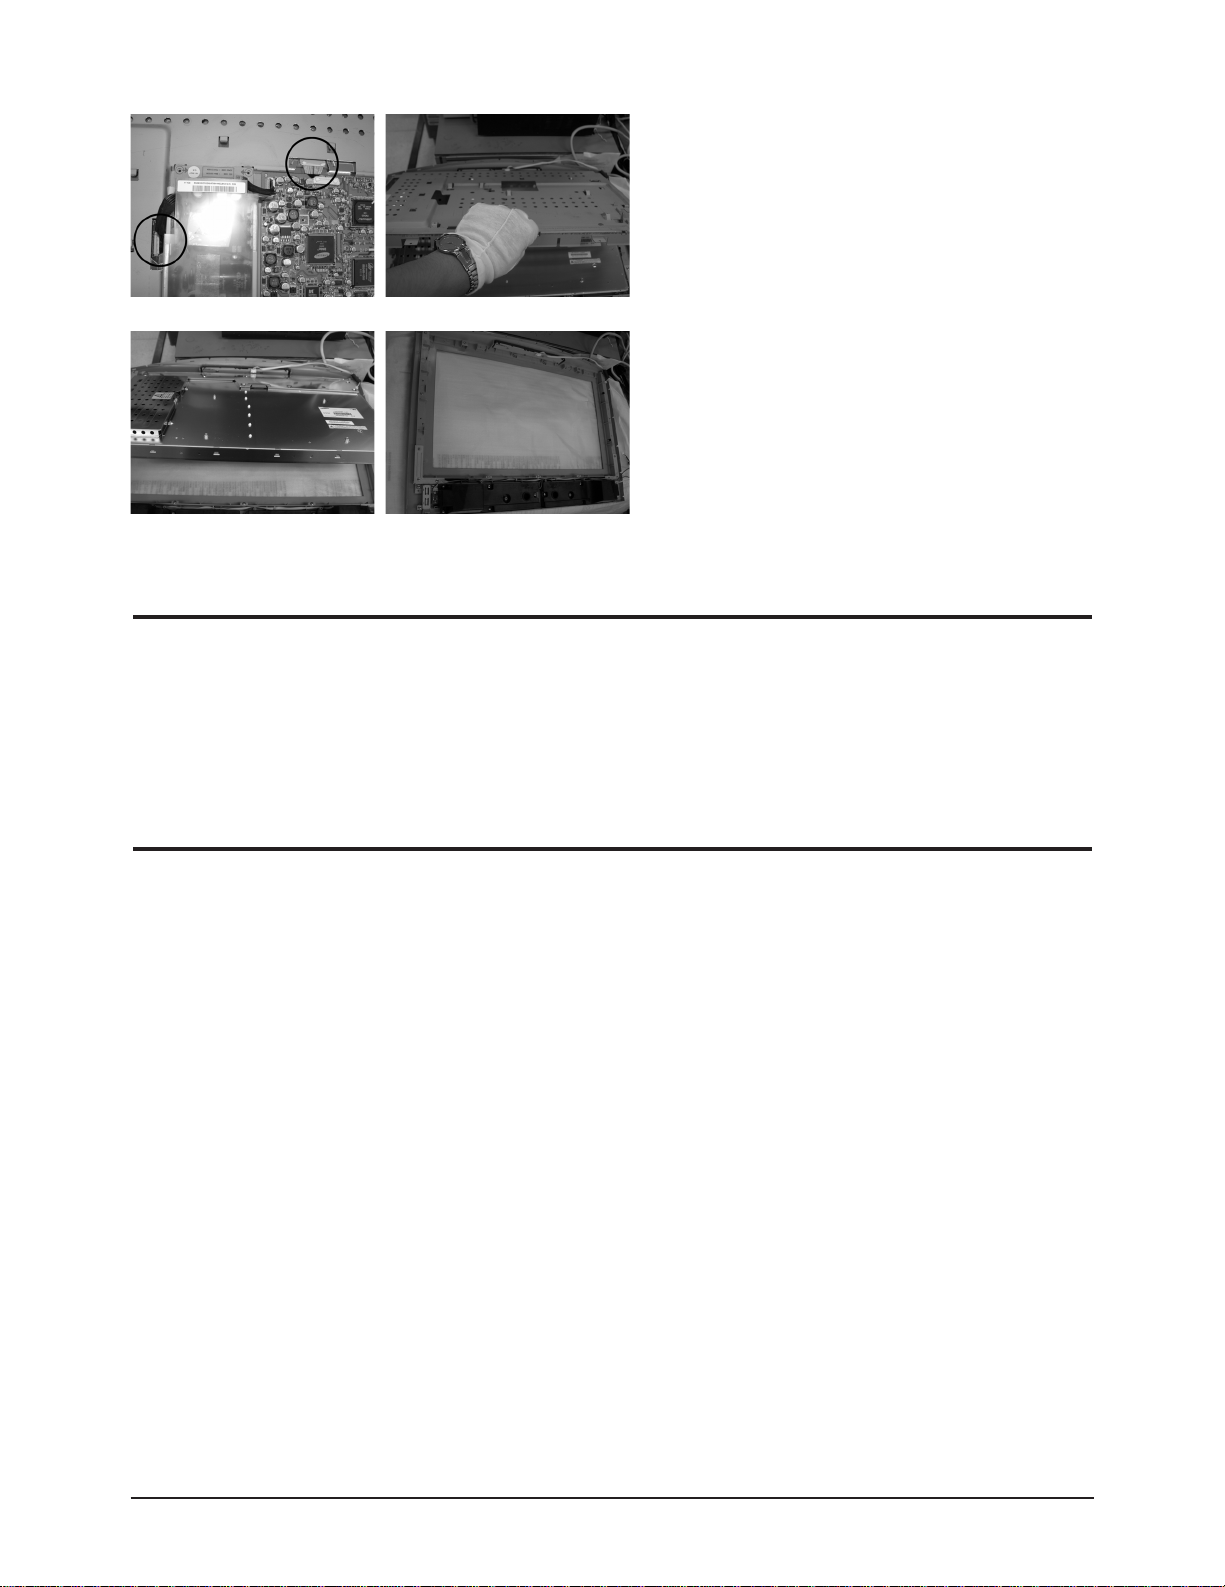
6. Disconnect cable and lift up the main board and
panel shield. (see illustrations)
7. Lift up the panel.
LCD panal may not be serviced. (Lamps are generally located at top and bottom of panel, which may be
replaced.However,for the Victoria LTA170WP_L01 panel, the lamp is firmly soldered inside of the back
panel. Therefore,servicing the lamp may cause a defective panel.Also,servicing lamp requires front glass
removal, which may cause scratch and/or foreign materials on the glass.)
3-3 Reassembly
Reassembly procedures are in the reverse order of dissasembly procedures.
3-2 LTP227W
 Loading...