


LCD TV
LS15E33C
LS17E34C
Owner’s Instructions
Before operating the unit,
please read this manual thoroughly,
and retain it for future reference.
ON-SCREEN MENUS
PC DISPLAY
PICTURE IN PICTURE (PIP)
TELETEXT
BN68-00438G-01Eng-AS15CO 6/17/03 1:48 PM Page 1

English-2
Caution
CAUTION: TO PREVENT ELECTRICAL SHOCK,
DO NOT REMOVE REAR COVER, NO USER
SERVICEABLE PARTS INSIDE. REFER SERVICING TO
QUALIFIED SERVICE PERSONNEL.
RISK OF ELECTRIC
SHOCK DO NOT OPEN
CAUTION
The lightning flash and arrow head
within the triangle is a warning
sign alerting you of “dangerous
voltage” inside the product.
The exclamation point within the
triangle is a warning sign alerting
you of important instructions
accompanying the product.
WARNING: TO PREVENT DAMAGE WHICH MAY RESULT IN FIRE OR SHOCK HAZARD,
DO NOT EXPOSE THIS APPLIANCE TO RAIN OR MOISTURE.
☛
The main voltage is indicated on the rear of your set and the frequency is 50 or 60 Hz.
Information in this document is subject to change without notice.
© 2003 Samsung Electronics Co., Ltd. All rights reserved.
Reproduction in any manner whatsoever without the written permission of Samsung Electronics Co., Ltd. is strictly forbidden.
Samsung Electronics Co., Ltd. shall not be liable for errors contained herein or for incidental or consequential damages in
connection with the furnishing, performance, or use of this material.
The
Samsung logo is the registered trademarks of Samsung Electronics Co., Ltd.; Microsoft, Windows®and Windows®NT are
registered trademark of Microsoft Corporation; VESA, DPMS and DDC are registered trademarks of Video Electronics Standard
Association. All other product names mentioned herein may be the trademarks or registered trademarks of their respective owners.
BN68-00438G-01Eng-AS15CO 6/17/03 1:48 PM Page 2

English-3
Safety Instructions
œ Do NOT expose the TV to extreme
temperature conditions or to extreme
humidity conditions.
These illustrations represent precautions concerning your TV.
œ Do NOT expose the TV to any liquids.
œ During a storm conditions (especially
when there is lightning) unplug the
TV from the mains socket and aerial.
œ Always keep the power adaptor in a
well-ventilated area.
œ Keep the power adaptor away from
any other heater. Possible fire hazard.
Do NOT expose the TV to direct
sunlight.
√
If the TV is broken, do not try to
repair it yourself. Contact qualified
service personnel.
√
Keep all power adaptors apart.
Possible fire hazard.
√
Remove and discard the plastic
cover from the power adaptor before
use. Possible fire hazard.
√
If the remote control is not used for a long
period of time, remove the batteries and
store it in a cool, dry place.
√
THIS DEVICE IS NOT FOR USE IN INDUSTRIAL ENVIRONMENTS
BN68-00438G-01Eng-AS15CO 6/17/03 1:48 PM Page 3

English-4
Contents
(continued)
◆ FOREWORD
■
Caution .......................................................................................................... 2
■
Safety Instructions .......................................................................................... 3
◆ CONNECTING AND PREPARING YOUR TV/Monitor
■
Viewing the Control Panel ............................................................................. 6
■
Viewing the Connection Panel ....................................................................... 7
-
Connecting an Aerial or Cable Television Network .................................... 8
-
Connecting DVD, VCR, or DTV Set-Top Box.............................................. 8
-
Connecting Computer................................................................................. 8
-
Connecting External A/V Devices ............................................................... 9
-
Kensington Slot ........................................................................................... 9
■
Viewing Pictures From External Sources......................................................... 10
■
Inserting the Batteries in the Remote Control.................................................. 11
■
Viewing the Remote Control (All Functions Except Teletext) .......................... 12
■
Viewing the Remote Control (Teletext Functions)........................................... 13
■
Switching On and Off .................................................................................... 14
■
Placing in Standby Mode ............................................................................... 14
■
Becoming Familiar with the Remote Control.................................................. 15
◆ SETTING THE CHANNELS
■
Storing Channels Automatically...................................................................... 16
■
Sorting the Stored Channels ........................................................................... 17
■
Storing Channels Manually............................................................................. 18
■
Giving Channels Names................................................................................. 20
■
Skipping Unwanted Channels ........................................................................ 21
■
Fine Tuning Channel Reception ..................................................................... 21
◆ USING THE VARIOUS FUNCTIONS (continued)
■
Changing the Picture Standard ....................................................................... 22
■
Adjusting the Picture Settings ......................................................................... 22
■
Selecting the Picture Format........................................................................... 23
■
Freezing the Current Picture........................................................................... 23
BN68-00438G-01Eng-AS15CO 6/17/03 1:48 PM Page 4

English-5
Contents
◆ USING THE VARIOUS FUNCTIONS
■
Changing the Sound Standard ........................................................................ 24
■
Adjusting the Sound Settings .......................................................................... 24
■
Enjoying the Dolby Sound.............................................................................. 25
■
Selecting the Sound Mode.............................................................................. 25
■
Viewing the Picture In Picture (PIP)................................................................ 26
■
Switching Off Automatically........................................................................... 27
■
Displaying Information................................................................................... 27
◆ USING THE PC FUNCTIONS
■
Setting up Your PC Softerware (Based on Windows 2000) ............................. 28
■
Adjusting the Brightness and Contrast ............................................................ 29
■
Adjusting the Image Quality........................................................................... 30
■
Changing the Image Position.......................................................................... 31
■
Adjusting the Color ........................................................................................ 32
■
Initializing the Image Settings......................................................................... 33
■
Adjusting the PC Screen Automatically .......................................................... 33
◆ USING THE TELETEXT FEATURE
■
Teletext Feature.............................................................................................. 34
■
Displaying the Teletext Information................................................................ 35
■
Selecting a Page by Number .......................................................................... 36
■
Using FLOF to Select a Page .......................................................................... 37
■
Storing Teletext Pages..................................................................................... 37
◆ RECOMMENDATIONS FOR USE
■
Troubleshooting: Before Contacting Service Personnel................................... 38
■
Power Saver ................................................................................................... 39
■
Technical and Environmental Specifications .................................................. 40
■
Display Modes ............................................................................................... 41
■
Maintenance of Your Telelvision.................................................................... 42
■
How to assemble the TV set and stand base................................................... 43
■
Installing the Wall Mount Kit.......................................................................... 44
☛
➢
Press Important Note
Symbols
BN68-00438G-01Eng-AS15CO 6/17/03 1:48 PM Page 5

English-6
Viewing the Control Panel
TV/VIDEO
Displays a menu of all of the available input sources.
(TV - Video - S-Video - Component - PC)
MENU
Opens the on-screen menu.
- VOL +
Moves the selector left or right on the OSD.
Increases or decreases the level of audio
volume and the values of the selected function.
CH
Moves the selector up or down on the OSD.
Increases or decreases the channel number.
POWER
Turns ON/OFF your set.
SPEAKER
POWER INDICATOR
Lights up when you turn the power off.
REMOTE CONTROL SENSOR
BN68-00438G-01Eng-AS15CO 6/17/03 1:48 PM Page 6
English-7
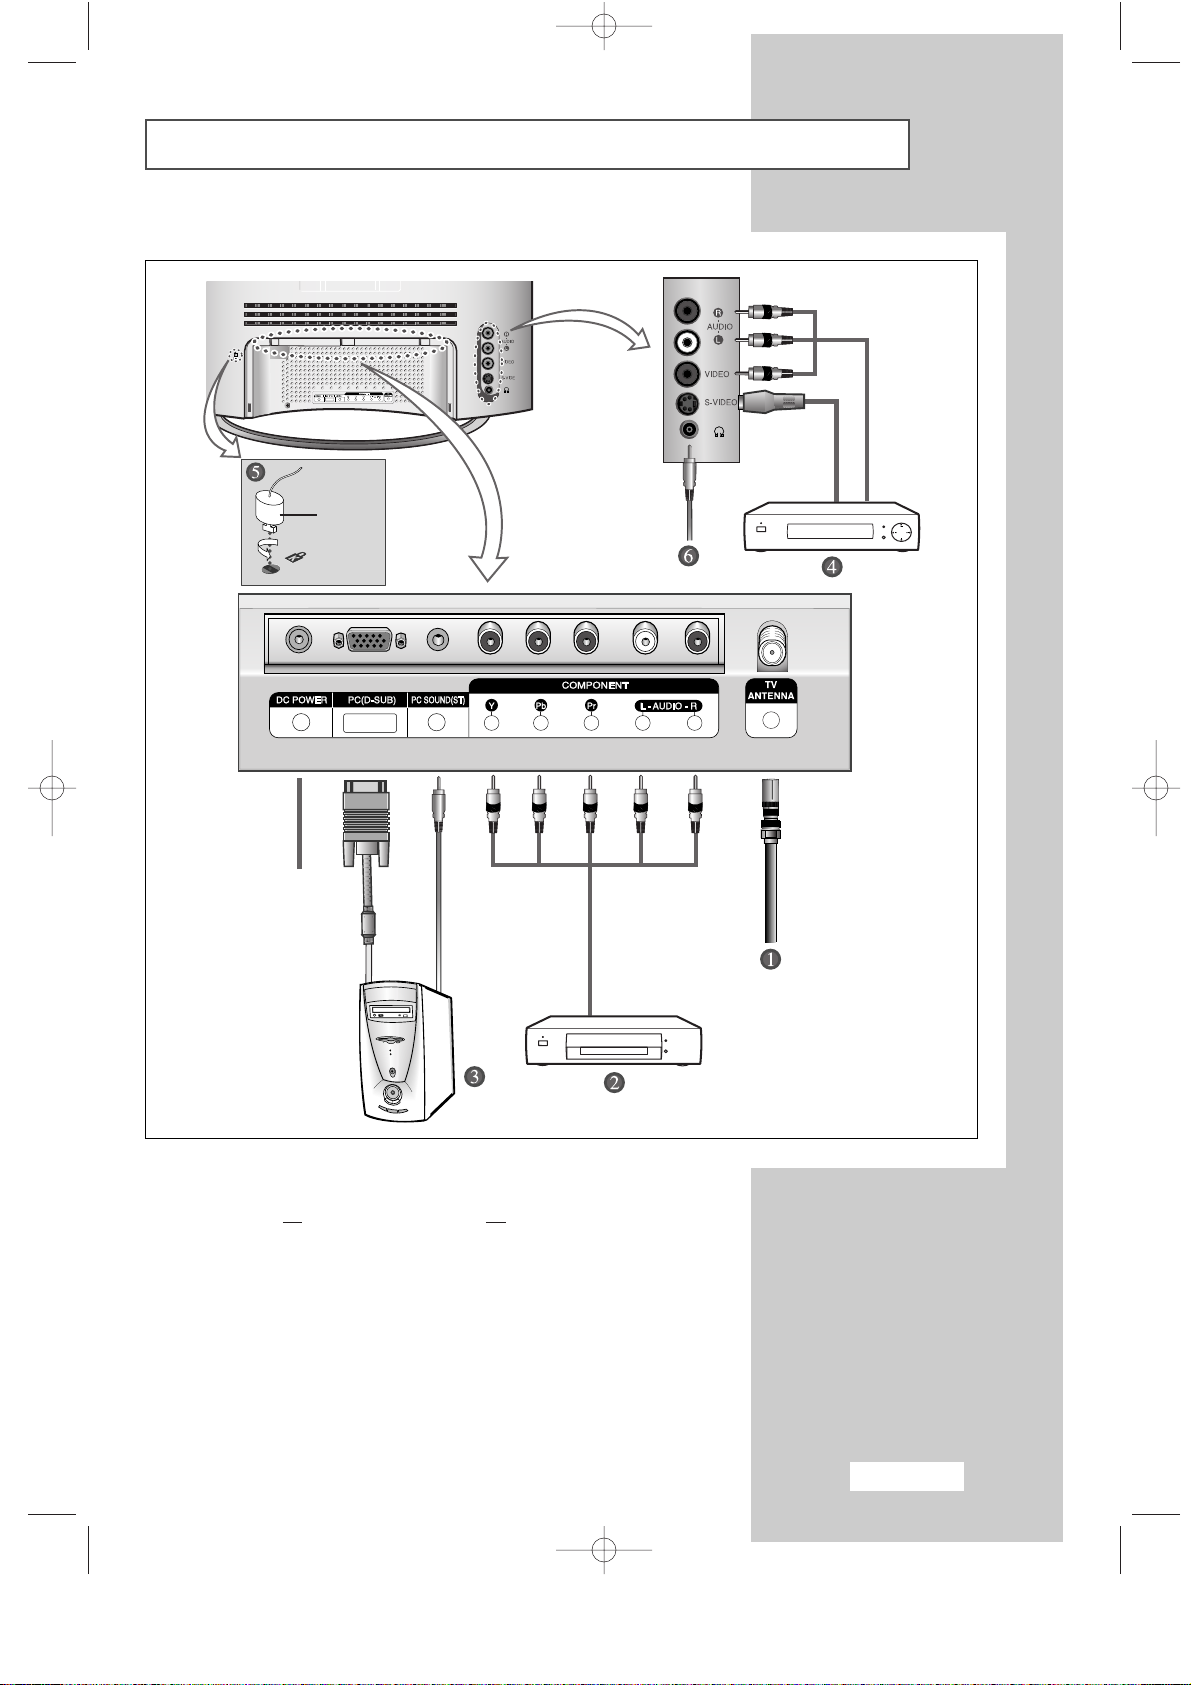
Viewing the Connection Panel (continued)
☛
Whenever you connect an audio or video system to your set,
ensure that all
elements are switched off. Refer to the
documentation supplied with your equipment for detailed
connection instructions and associated safety precautions.
Power Input
Option
BN68-00438G-01Eng-AS15CO 6/17/03 1:48 PM Page 7

English-8
Viewing the Connection Panel (continued)
Connecting an Aerial or Cable Television Network
(depending on the model)
To view television channels correctly, a signal must be received by the set from one of the following sources:
- An outdoor aerial
- A cable television network
- A satellite network
Connecting DVD, VCR or DTV Set-Top Box
- Connect the RCA Cable to “AUDIO(L)” and “AUDIO(R)” on the rear of your set and the other end to
“Audio Out” connector of the DVD, VCR, or DTV Set-Top Box.
- Connect the RCA Cable to “Y”, “Pb”, and “Pr” on the rear of your set and the other end to
“Component Out” connector of the DVD, VCR, or DTV Set-Top Box.
Connecting Computer
- Connect the 15 Pin D-SUB connector to the PC video connector.
- Connect the stereo audio cable to ”Audio (ST)” on the rear of your set and the other end to “Audio Out” of
the sound card on your computer.
➣
15 Pin D-SUB connector
Pin Separate H/V Composite H/V
1 Red (R) Red (R)
2 Green (G) Green (G)
3 Blue (B) Blue (B)
4 Grounding Grounding
5 Grounding (DDC return) Grounding (DDC return)
6 Grounding - Red (R) Grounding - Red (R)
7 Grounding - Green (G) Grounding - Green (G)
8 Grounding - Blue (B) Grounding - Blue (B)
9 No connection No connection
10 Grounding - Sync. / Self test Grounding - Sync. / Self test
11 Grounding Grounding
12 DDC - SDA (Date) DDC - SDA (Date)
13 Horizontal Sync. Horizontal/Vertical Sync.
14 Vertical Sync. Not used
15 DDC - SCL (Clock) DDC - SCL (Clock)
BN68-00438G-01Eng-AS15CO 6/17/03 1:48 PM Page 8

English-9
Viewing the Connection Panel (continued)
Connecting External A/V Devices
- Connect RCA or S-VIDEO cable to an appropriate external A/V device such as VCR, DVD, or Camcorder.
- Connect RCA audio cables to “AUDIO (L)” and “AUDIO (R)” on the rear of your set and the other ends to
corresponding audio out connectors on the A/V device.
- Headphone may be connected to the headphone output ( ) on the rear of your set.
While the headphone is connected, the sound from the built-in speakers will be disabled.
Kensington Slot
- This television has been designed to apply a burglarproof lock.
➢
Retractable Stand
Tilt the screen until you feel comfortable.
The maximum tilt angle is 10 degree to the backward direction.
Please do not tilt the television other than specified range.
Excessive force to tilt the television other than specified
range may give permanent damage to the mechanical
part of the stand.
BN68-00438G-01Eng-AS15CO 6/17/03 1:48 PM Page 9

English-10
Viewing Pictures From External Sources
Once you have connected up your various audio and video systems,
you can view the different sources by selecting the appropriate input.
1 Check that all the necessary connections have been made
(refer to pages 8 and 9 for further details).
2 Switch your set on and if necessary, press the TV/VIDEO button
repeatedly.
The input sources are displayed in the following order:
TV -VIDEO -S-VIDEO -COMPONENT-PC
BN68-00438G-01Eng-AS15CO 6/17/03 1:48 PM Page 10

English-11
Inserting the Batteries in the Remote Control
You must insert or replace the batteries in the remote control when
you:
◆
Purchase your set
◆
Find that the remote control is no longer operating
correctly
1 Remove the cover on the rear of the remote control by pressing the
symbol downwards and then pulling firmly to remove it.
2 Insert two R03, UM4, “AAA” 1.5V or equivalent batteries taking care to
respect the polarities:
◆
+
on the battery against +on the remote control
◆
-
on the battery against -on the remote control
3 Replace the cover by aligning it with the base of the remote control
and pressing it back into place.
➣
Do not mix battery types, i.e. alkaline and manganese.
BN68-00438G-01Eng-AS15CO 6/17/03 1:48 PM Page 11

English-12
Viewing the Remote Control (All Functions Except Teletext)
Numeric buttons for
direct channel access
Sound mode selection
Picture freeze
Picture size selection
Automatic switch-off
Television On/Off
Available sources selection
One/Two-digit channel selection
Previous channel
Exit from the OSD/
Picture-In-Picture Off
Temporary sound switch-off
Picture effect selection
Sound effect selection
Picture-In-Picture On/
PIP source selection
Self-adjust to the incoming
video signal
Volume decrease
Next channel
Volume increase
➣
The performance of the remote control may be affected by bright light.
Display the setting information
Select to the PC mode directly
Menu display and
change confirmation
Previous channel
PIP size selection
PIP location selection
BN68-00438G-01Eng-AS15CO 6/17/03 1:48 PM Page 12

English-13
Viewing the Remote Control (Teletext Functions)
Teletext hold
Teletext reveal
Teletext display/
mix both teletext information
and the normal broadcast
Teletext store
Teletext previous page
Teletext mode selection
(List or Flof)
Teletext cancel
Teletext next page
Programme selection by name
Teletext sub-page
Teletext size selection
Fastext topic selection
Exit from the Teletext display
BN68-00438G-01Eng-AS15CO 6/17/03 1:48 PM Page 13
English-14
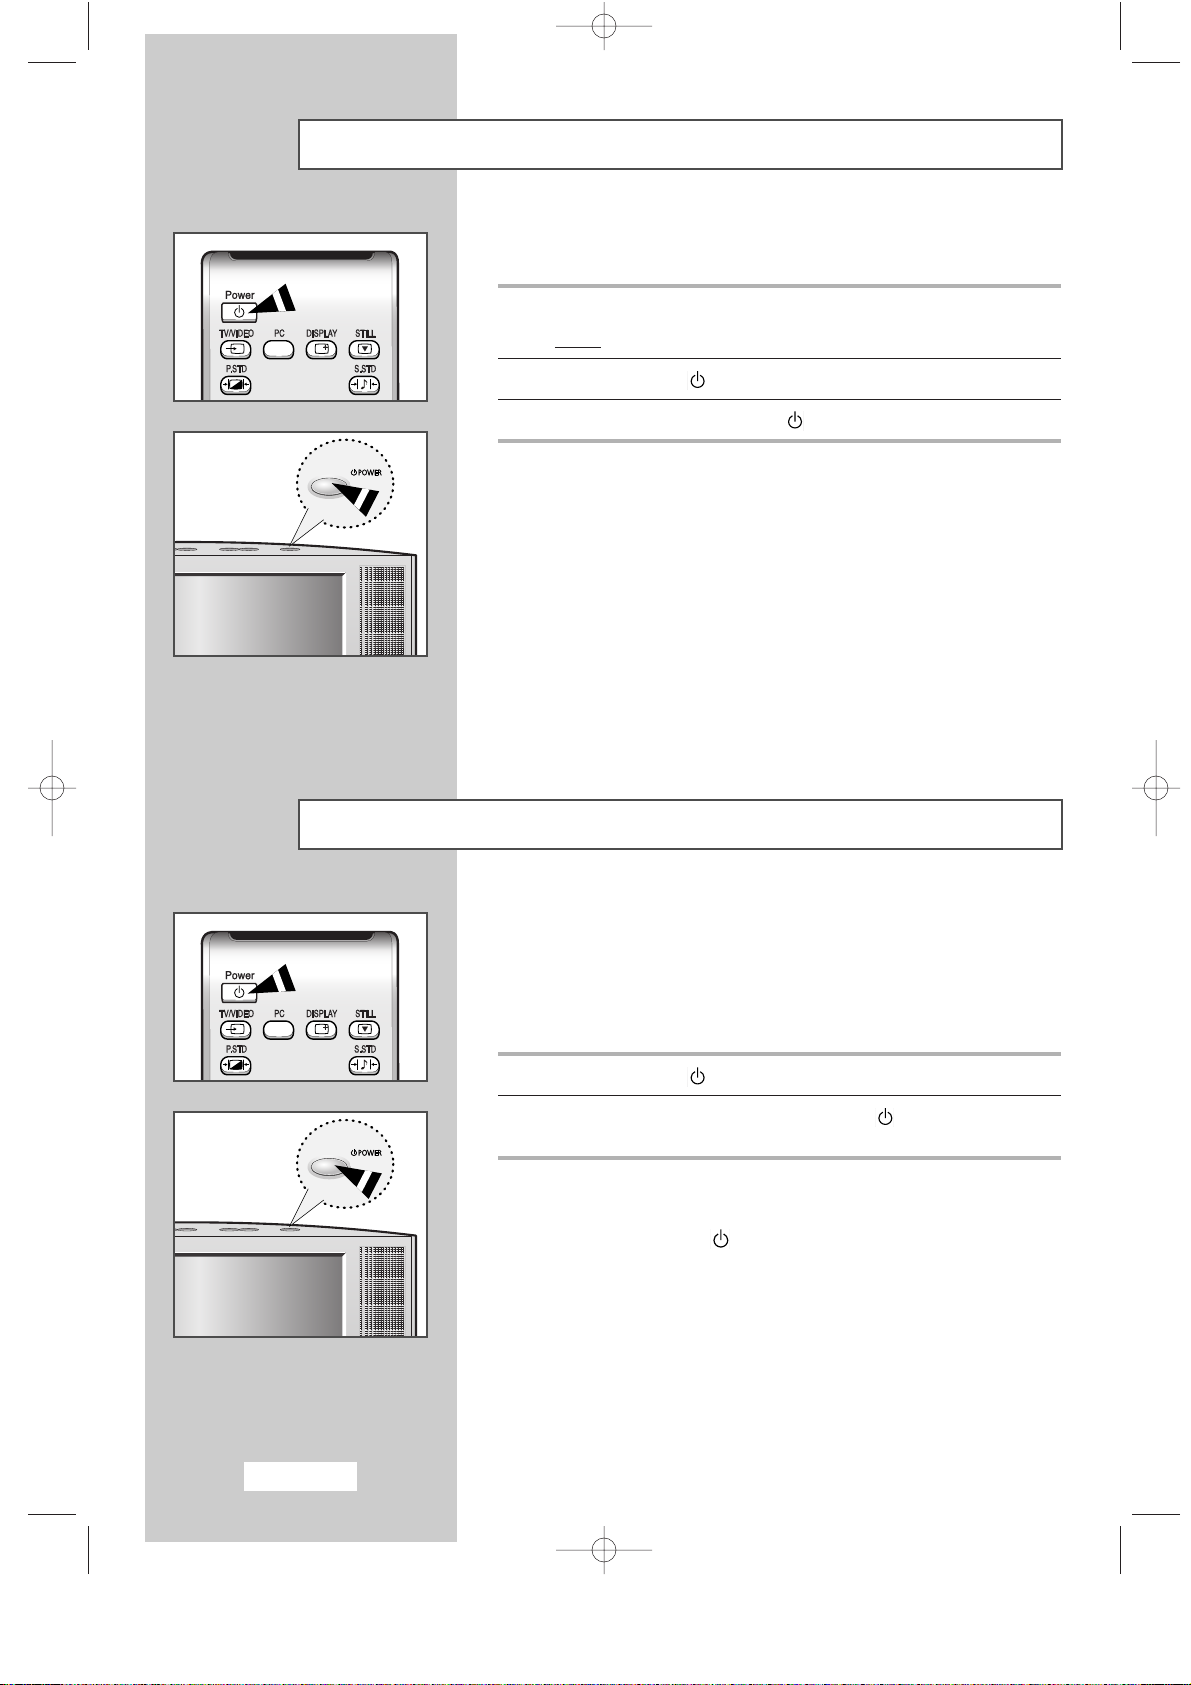
Switching On and Off
The mains lead is attached to the rear of your set.
1 Plug the mains lead into an appropriate socket.
Result
:
A Standby indicator lights off on the front panel.
2 Press the Power ( ) button to switch on.
3 To switch off, press the Power ( ) button again.
Placing in Standby Mode
Your set can be placed in Standby mode, in order to reduce the power
consumption.
The Standby mode can be useful when you wish to interrupt viewing
temporarily (during a meal, for example).
1 Press the Power ( ) button.
2 To switch back on, simply press the Power ( ) button again or a
numeric button.
➣
Do not leave your set in Standby mode for long periods of
time (when you are away on holiday, for example). Turn off
by pressing the ( ) button. It is best to unplug the set from
the mains and aerial.
BN68-00438G-01Eng-AS15CO 6/17/03 1:48 PM Page 14
 Loading...