

Page 1

Digital Photo Frame
User Manual
SPF-87H
SPF-107H
Thank you for purchasing a Samsung digital photo frame
"Safety precautions" is to protect safety of a user and to prevent property damage.
Read it carefully and use the product properly.
Page 2
2
English
Special Features
Auto Picture Off
Auto Picture On
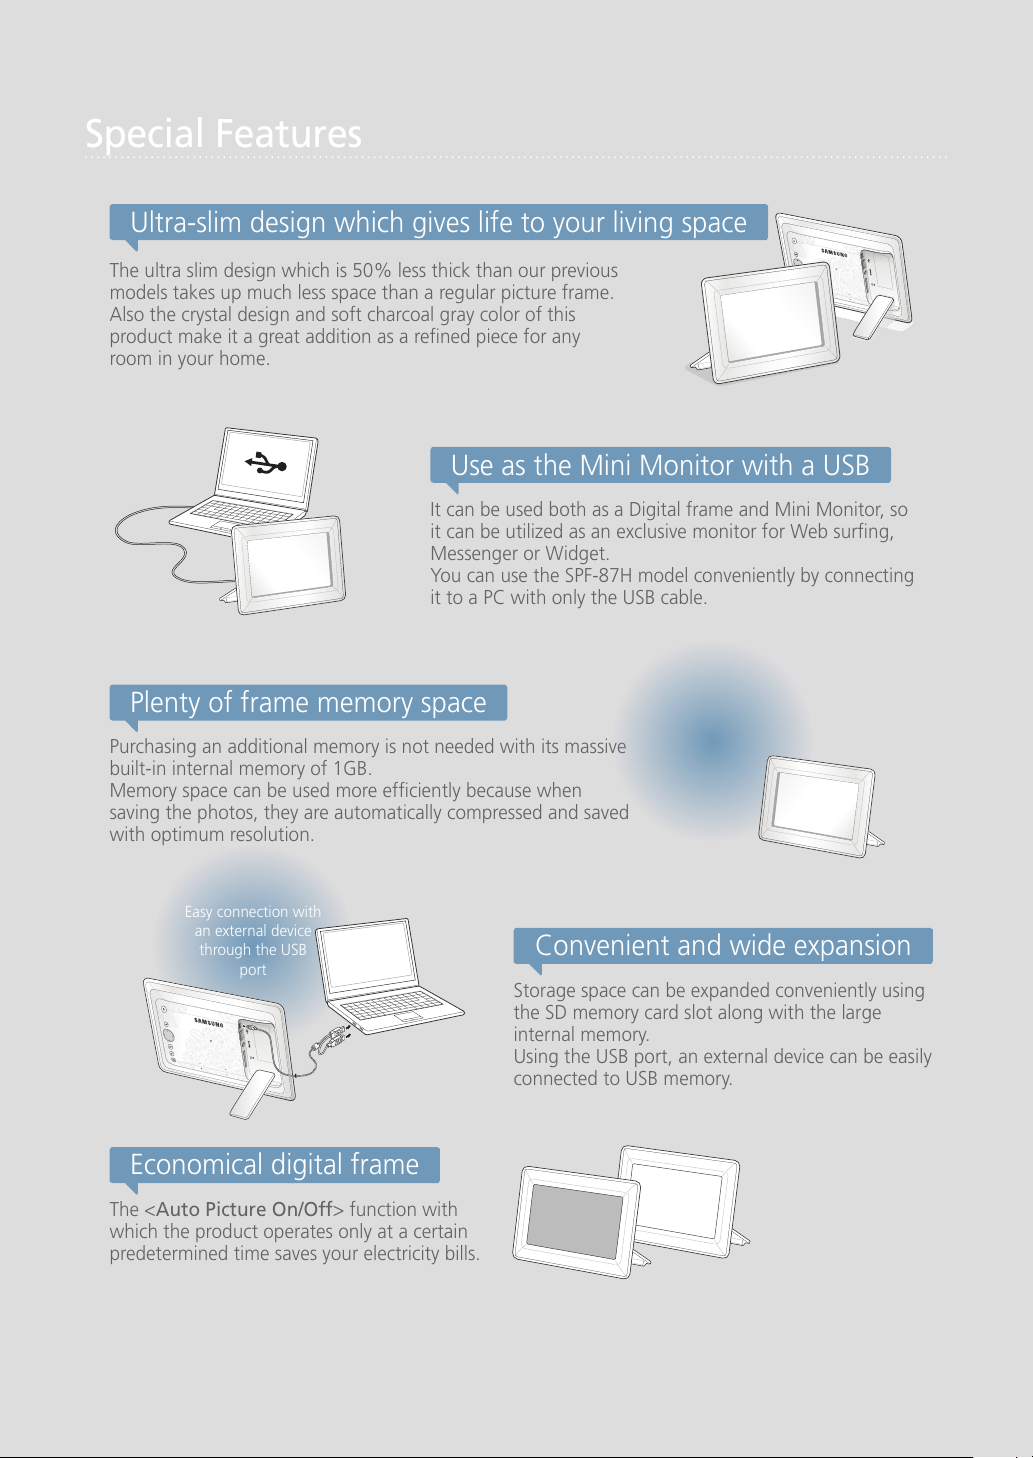
Ultra-slim design which gives life to your living space
The ultra slim design which is 50% less thick than our previous
models takes up much less space than a regular picture frame.
Also the crystal design and soft charcoal gray color of this
product make it a great addition as a refined piece for any
room in your home.
Use as the Mini Monitor with a USB
It can be used both as a Digital frame and Mini Monitor, so
it can be utilized as an exclusive monitor for Web surfing,
Messenger or Widget.
You can use the SPF-87H model conveniently by connecting
it to a PC with only the USB cable.
Plenty of frame memory space
Purchasing an additional memory is not needed with its massive
built-in internal memory of 1GB.
Memory space can be used more efficiently because when
saving the photos, they are automatically compressed and saved
with optimum resolution.
Easy connection with
an external device
through the USB
port
Convenient and wide expansion
Storage space can be expanded conveniently using
the SD memory card slot along with the large
internal memory.
Using the USB port, an external device can be easily
connected to USB memory.
Economical digital frame
The <Auto Picture On/Off> function with
which the product operates only at a certain
predetermined time saves your electricity bills.
Massive
built-in internal
memory of
1GB
Page 3

3
English
Table of Contents
Special Features ..............................................2
Table of Contents ...........................................3
Safety Instruction ............................................4
Before use
Package contents ............................................8
Name and function of each part .....................8
Setting up the frame ......................................9
Connecting the power supply .........................9
Turning on the power ...................................10
Connecting to an external memory ...............10
Connecting to a PC ......................................11
Transferring photos from the PC ...................11
Running and browsing the main menu .........12
SildeShow
SlideShow .....................................................13
Rotating / zooming photos ...........................14
Managing photos
Selecting a storage device .............................15
Copying photos ............................................16
Deleting photos ............................................18
Mini Monitor
Using as a PC screen (Mini Monitor) ..............20
Installing the Frame Manager Program ..........20
Connecting to a PC ......................................21
Photo Settings ..............................................22
Settings
Clock Settings ...............................................24
General ........................................................25
Support ........................................................26
Appendix
Checklist before requesting service ...............27
Software Upgrade ........................................29
Product Specifications ...................................30
Clock Display
Using as a clock display .................................19
ⓒ 2009 SAMSUNG ELECTRONICS CO., LTD.
It is prohibited to copy or use a part of or entire user manual without the prior consent of Samsung Electronics CO.,LTD. ·
The information in the User Manual is subject to change without prior notice for improvement. ·
Page 4
4
English
Safety Instruction
경고 주의
경고
주의
주의
경고 주의
경고
주의
The content is to protect safety of a user and to prevent property damage. Read it carefully and use the product
properly.
Warning
Attention
Failure to follow the instructions indicated by this mark may cause serious injury
or fatal wound.
Failure to follow the instructions indicated by this mark may cause personal
injury or property damage.
Power
* The following images are for your reference and may differ depending on models and countries.
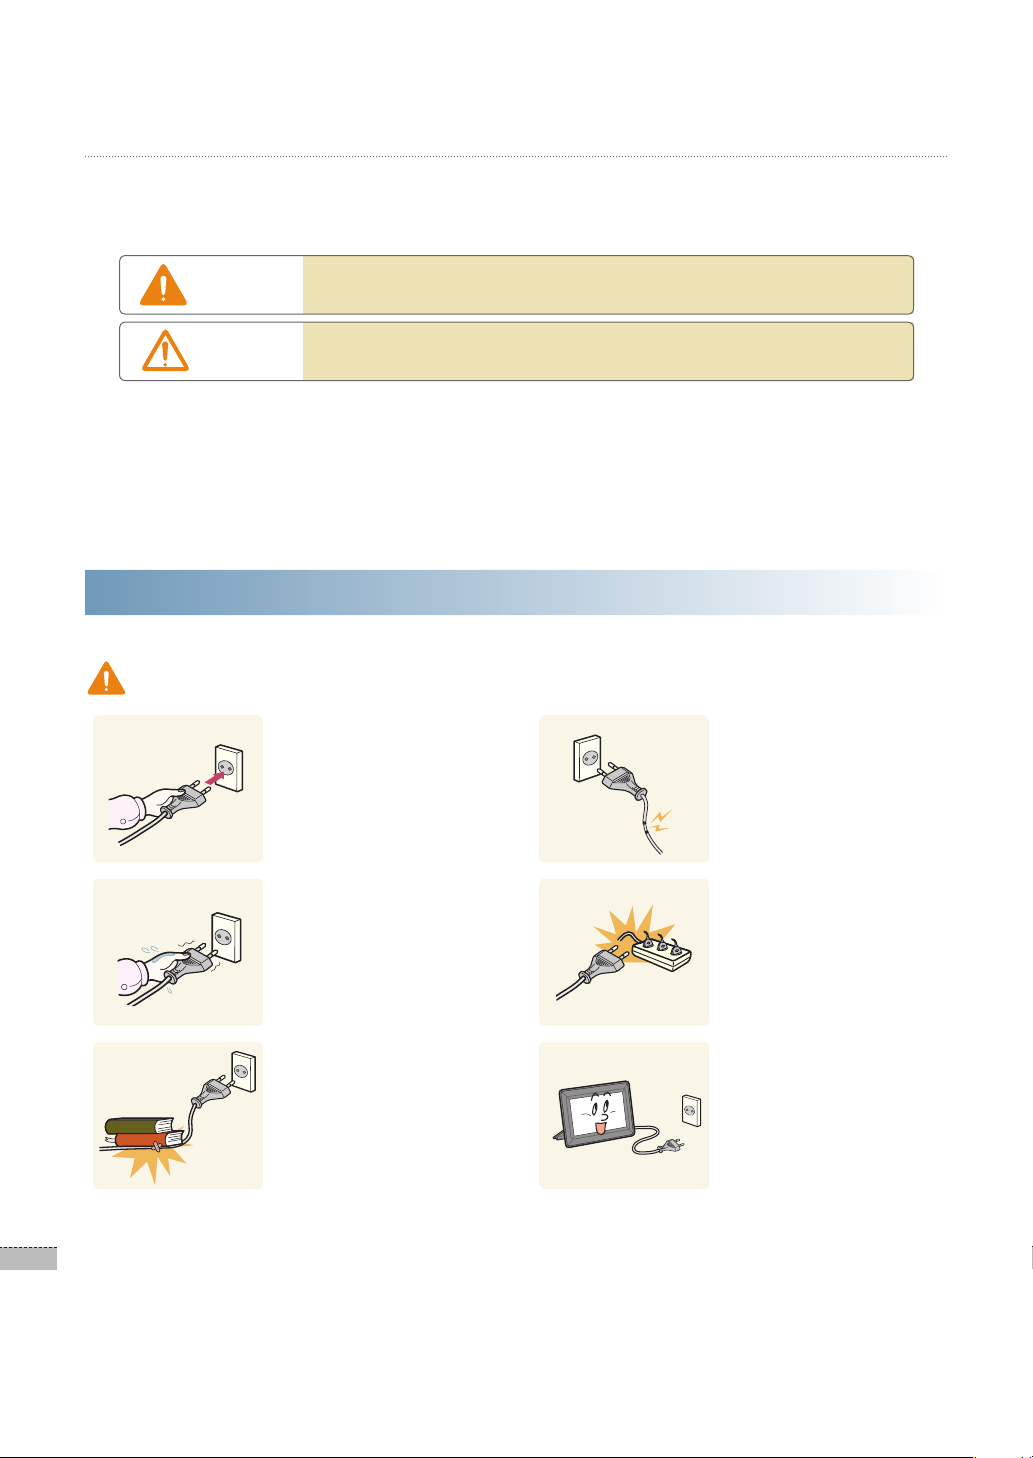
Warning
Insert the power plug
correctly until it is firmly
in place.
Failing to do so, may cause fire.
Do not use a damaged
power plug, cord or
outlet, as this may cause
electric shock or fire.
Do not touch the power
plug with wet hands, as
this may cause electric
shock.
Do not use force to pull
the power cord. Don’t
place anything heavy on
the power cord, as this
may cause electric shock
or fire.
Do not connect more
than one appliance to
a single outlet, as an
overheated outlet may
cause fire.
Make sure to turn the
power off and disconnect
the power plug from the
outlet before moving the
product. Make sure to
disconnect the connection
cables from other devices
as well.
Moving the product without
disconnecting the power cord
may damage it while moving,
and may cause electric shock
or fire.
Page 5
5
English
주의
Attention
경고 주의
경고
주의
Installation
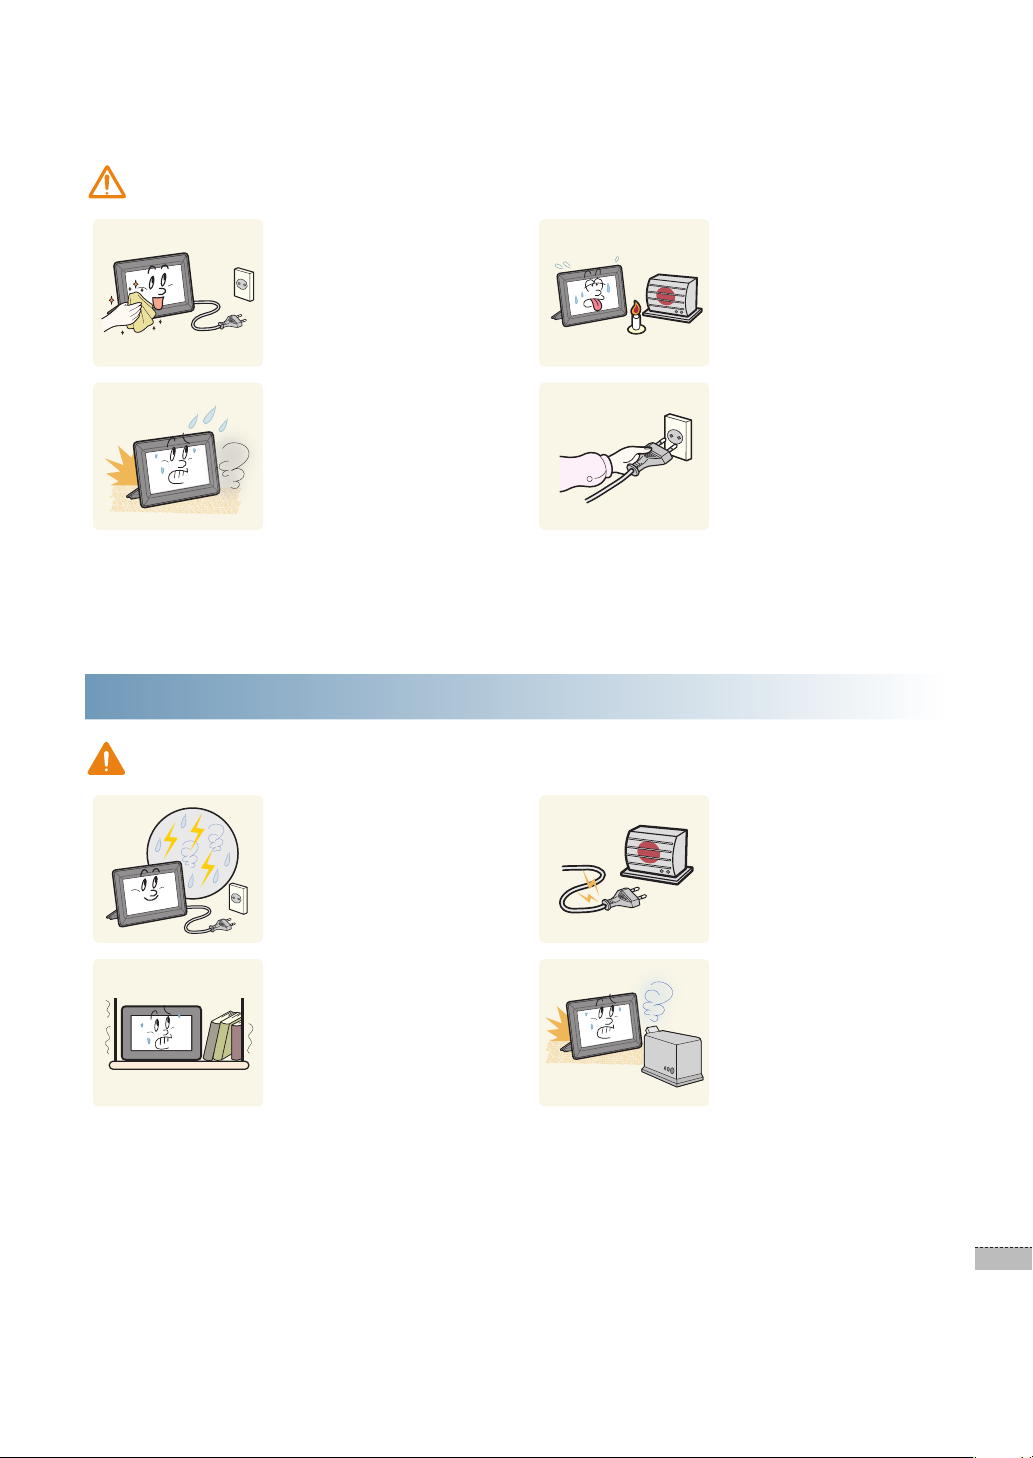
Warning
Ensure that the power
plug is disconnected
before cleaning the
product.
Failing to do so, may cause
electric shock or fire.
Keep the product away
from places exposed to
oil, smoke or moisture;
do not install inside a
vehicle.
This may cause a malfunction,
electric shock or fire.
In particular, avoid operating
the monitor near water or
outdoors where it could be
exposed to snow or rain.
Disconnect the power
plug when there is
thunder or lightning.
Failing to do so, may cause
electric shock or fire.
Do not install the
product near any heating
appliance.
There is a risk of fire.
Hold and pull out the
plug by its body when
disconnecting it from the
outlet, as pulling the plug
out by the cord may cause
it to be damaged.
Failing to do so, may cause fire,
or the product may not turn on
normally.
Do not place the power
cord near a heater, as the
power cord may melt,
causing electric shock or
fire.
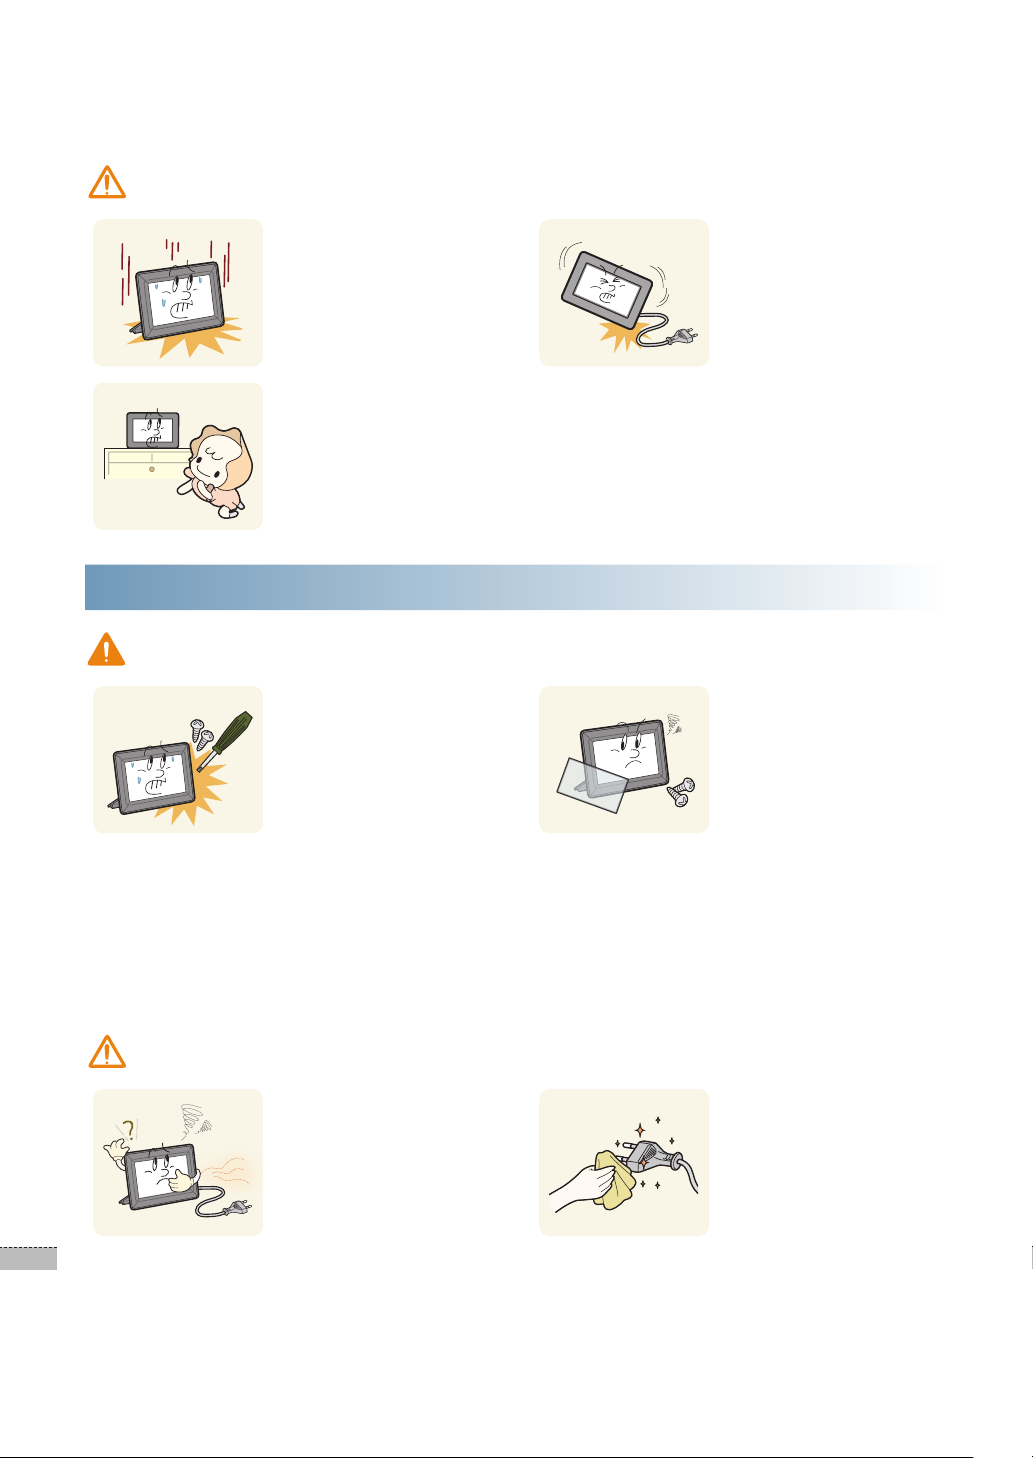
When installing the
product on a cabinet
or shelf, do not let the
front end of the product
project beyond its front
edge.
Failing to do so, may cause
the product to fall, resulting
in a product malfunction or
personal injury.
Do not install the product
in a car or a location
exposed to oil, smoke,
moisture, water, or
rainwater.
Any contact of these materials
with the product may cause
electric shock or fire.
Page 6
6
English
주의
Attention
경고 주의
경고
주의
주의
Place the product down
gently when installing it.
Failing to do so may cause
product damage or personal
injury.
Do not install the product
in a location easily
reached by children.
As the product may fall and
cause personal injury.
Using and Cleaning
Warning
Do not insert any metal
objects such as forks,
wire, or gimlets, or
flammable items such as
paper or matches into the
ports at the back of the
product, as this may cause
electric shock or fire.
If water or any foreign
substance enters the product,
make sure to turn the product
off disconnect the power plug
from the outlet, and contact a
service center.
Avoid dropping the
product when moving, as
this may cause product
damage or personal
injury.
Never disassemble, repair,
or modify the product
yourself.
If you need to repair your
product, contact a service
center. An attempt at repairing
this product may cause electric
shock or fire.
Attention
If you hear a strange
sound, smell anything
burning, or see smoke,
disconnect the power
plug immediately and
contact a service center.
Failing to disconnect the power
plug may cause electric shock
or fire.
Always remove dust and
water from the pins and
connections of the power
plug.
Failing to do so may cause
electric shock or fire.
Page 7

7
English
When cleaning the
SAMSUNG
product, first disconnect
the power plug and clean
it with a soft, dry cloth.
Do not use any chemicals such
as benzene, alcohol, thinners,
mosquito repellant, aromatic,
lubricant, detergent or wax.
When not using the
product for a long time,
make sure to disconnect
the power plug.
Heavy accumulated dust may
cause electric shock or fire.
If the product needs to be
installed in a location that
doesn’t satisfy general
conditions, make sure to
contact one of our service
engineers about the
installation as the product
may encounter serious
quality problems due to
its environment.
This refers to locations exposed
to conditions such as heavy
fine dust, chemicals, high or
low temperature, moisture,
or when the product needs to
be used continually without a
break over a long time.
If the product has been
dropped or the product
casing is damaged, turn
it off and disconnect the
power plug.
Using the product without
verifying that it has not been
damaged may cause electric
shock or fire. Please contact a
service center.
Page 8
8
English
Before use*
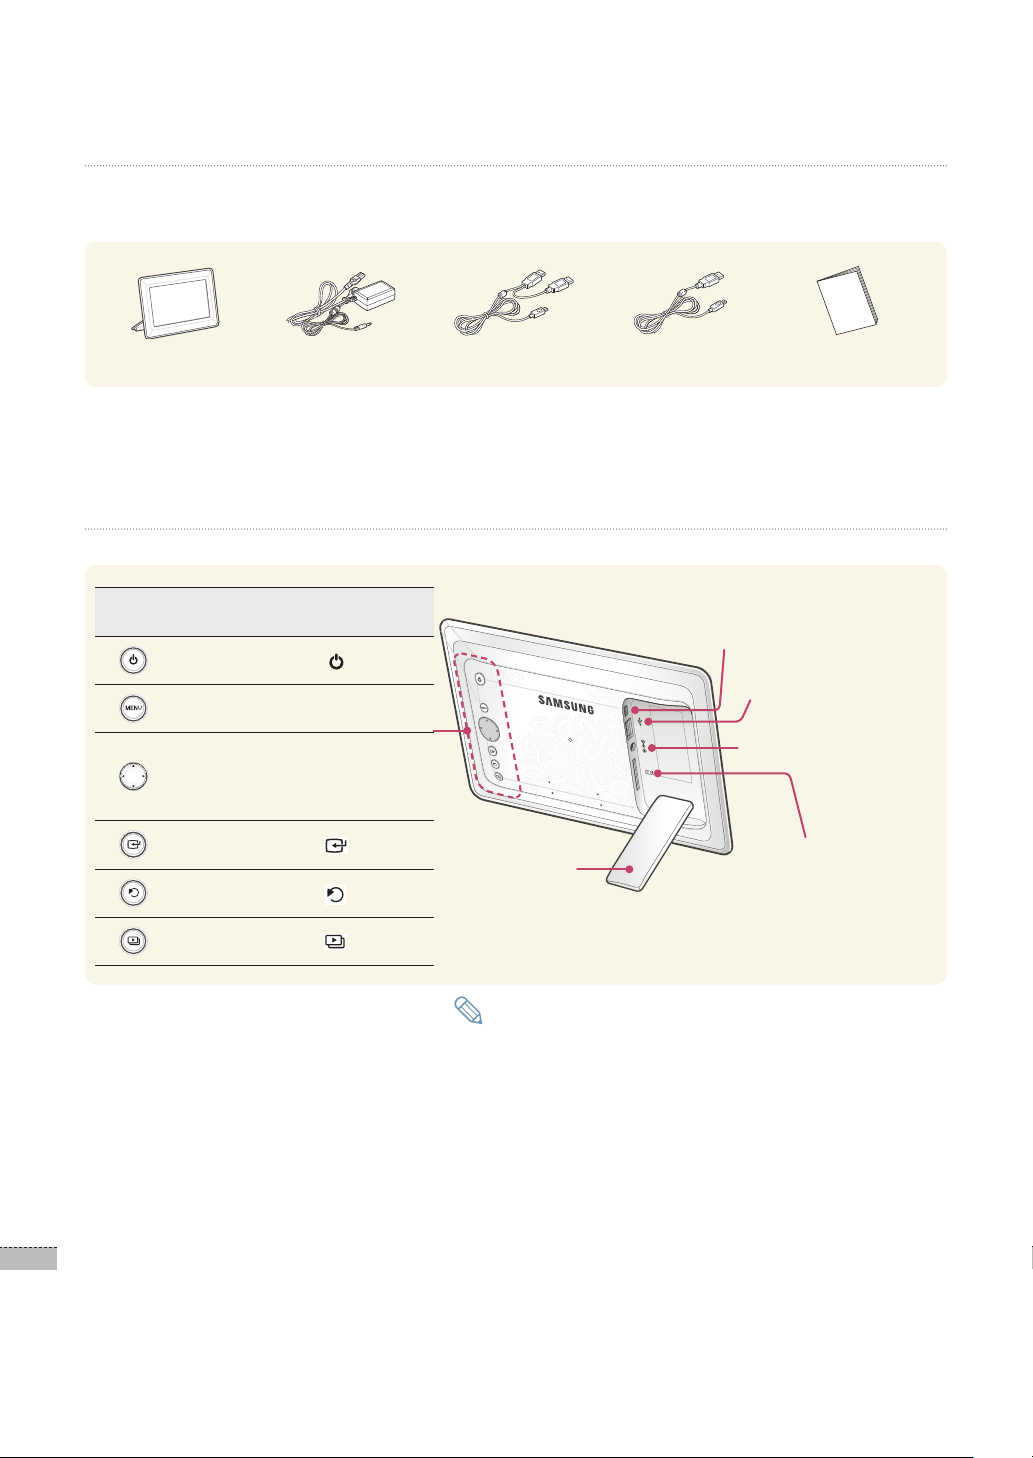
Package contents
Please check to make sure that all of the following items are included in your delivered package before using this
product.
Power cable/ adaptorPhoto frame USB cable (SPF-87H) USB cable (SPF-107H) User Manual
Name and function of each part
Button Description
Turn on/ off the
power
Start the menu [MENU]
Navigate the
menu and
options up/
down/ left/ right
Select a menu or
option
Return to the
previous stage
Start a
Slideshow
User Manual
transcription
[ ]
[▲][▼][◀][▶]
[ ]
[ ]
[ ]
USB cable connection
USB memory device
connection
Power cable connection
SD memory card slot
Stand
Note
If no buttons are pressed for 10 minutes or longer, the screen saver mode is
automatically activated (except in <View Mode>).
Page 9

9
English
Before use*
Setting up the frame
Use the frame stand in a horizontal or vertical direction according to your preference as shown in the pictures below.
Using it in a horizontal direction
Using it in a Vertical direction
Connecting the power supply
Using the provided power cable, connect the power supply to the product.
Do not apply excessive force or turn the stand
in the wrong direction during setup.
This may cause damage to the stand.
Note
The SPF-87H model can be used by connecting to a PC with just the USB
cable (along with the auxiliary power cable). However, it may not operate
properly if the PC’s power supply is unstable. In this case, connect the
power adapter
USB port
Page 10

10
English
Before use*
Turning on the power
Press the power [ ] button.
Note
When the product is turned on for the first
time after purchase, the <Quick Setup>
function will be activated. <Language>,
<View Mode>, <Slideshow Transition>,
<Clock Set> and <Startup Mode> can be
set up conveniently with <Quick Setup>.
<Quick Setup> will also be activated
when the product is turned off and on
again after selecting <Support>-<Reset>
under the <Settings> menu.
Connecting to an external memory
USB memory devices and SD memory cards can be connected.
Verify the port direction
before connecting.
Push all the way in with the write-protect
tab (LOCK) part facing down.
Note
To extract the card, push the center of the
card slightly, and when the card partially
comes out, extract it completely.
If an external memory is connected while
the power is on, a slideshow showing
photos saved on the external memory
starts right away.
* Supported capacity for each SD memory
card type
SD Maximum 2 GB
microSD Maximum 2 GB
miniSD Maximum 256 MB
SDHC Maximum 16 GB
microSDHC Maximum 8 GB
Page 11

11
English
Before use*
1
2
3
4
5
Connecting to a PC
If you connect to a PC using the provided USB cable, you can download photos onto the frame memory of the
product (➥ p.11) or use the product as the Mini Monitor (➥ p.20).
USB port
e.g.) SPF-87H
Auxiliary power port
Note
You can use the SPF-87H model by connecting it to a PC with only the ·
USB cable. However, if the picture is lost or the screen goes blank due to
power shortage, connect the additional auxiliary power cable.
You can use the SPF-107H model by connecting it to a PC with the USB ·
cable.
Transferring photos from the PC
Photos saved in your PC can be easily transferred to the Frame Memory of this product.
Connect to your PC using the USB cable.
USB
Communication
PC Connected via USB cable.
Select a function to use.
Mass Storage Mini Monitor Photo Frame
Turn on the power of the PC and product.
Press the [◀/▶] buttons to select <Mass Storage>.
It will be recognized as a removable disk. ·
Copy the photo files you want from the PC to the
recognized disk.
The recognized removable disk will be displayed with the ·
model name (SPF-87H or SPF-107H). In My Computer,
open the corresponding model’s disk and copy the
photos to the disk.
When copying is finished, press the [ ] button or
disconnect the USB cable.
Page 12

12
English
Transferring photos from the PC ¨
Note
This product comes with basic photos included on the memory. If the ·
memory is insufficient, delete the photos that come with this product.
A large file size (high resolution) photo occupies lots of the frame ·
memory and slows down the preview. In this case, in stead of copying
the photo file directly to the removable disk, save the photo file to an
external memory and then copy the file to the frame memory. The photo
can be optimally reduced to fit the photo frame and copied to the frame
memory. ➥ p.16
If the above USB connection mode selection screen doesn’t appear when ·
reconnecting after disconnection, run <Activate USB Communication>
in <General> under the <Settings> Menu. ➥ p.25
Running and browsing the main menu
Hold down [ ] for two (2) seconds or longer, or press it repeatedly until the main menu screen appears.
Menu Description Note
Photos Browse photos saved on
the frame memory or an
external memory, and/ or
start the Photos menu.
Clock Use as a Clock or
calendar
Mini Monitor Use as a PC screen
(Mini Monitor).
Settings Customize settings p.22
p.15
p.19
p.20
Frame Memory
Photos
Clock
Mini Monitor
Settings
SELECT
BACK
SLIDE
-SHOW
.
To select a desired function
Press the [▲/▼] buttons to browse a desirable function, and then press the [ ] button to select.
To return to the previous state
Press the [ ] button.
To switch to the Slideshow mode while browsing
Press the [ ] button.
Page 13

13
English
SildeShow*
1
2
3
1
2
3
4
SlideShow
All or only the selected photos of the frame memory or external memory can be enjoyed as a Slideshow.
Photos
Frame Memory ▶ FileName.JPG 19/24
MENU
ENTER
BACK
SLIDE
-SHOW
Note
You can enjoy photos more pleasantly with various
photo effects. ➥ p.22
Photos
- S e l e c t M u l t i p l e F i l e s
Frame Memory ▶ IMG12345.JPG 5/6
SlideShow
.
Copy
Delete
선택
SELECT
Reset
복귀
BACK
3 photo(s) selected.
Slideshow / Copy / Delete : Apply each action to the selected photos.
Reset : Cancel all selections.
슬라이드쇼
SLIDE
-SHOW
To play Slideshow with all photos
In the main menu screen ➥ P.12
Press the [ ] button to select <Photos>.
The screen will switch to the photo list screen. ·
When a photo is selected, press the [ ] button.
Slideshow will start from the selected photo. ·
To pause Slideshow
Pressing the [ ] button will repeat playing and
pausing Slideshow alternately.
To play Slideshow with selected photos
Press the [MENU] button on the photo list screen
Press the [▲/▼/◀/▶] buttons to select <Select
Multiple Files>, and then press the [ ] button.
Press the [▲/▼/◀/▶] and [ ] buttons to select
desired files.
The ( · ✔ ) mark will appear on a selected file.
Pressing the [ · ] button will repeat selecting and
deselecting alternately.
Press [ · ] button to deselect all the selected photos.
Press the [▶] button to select <Slideshow> , and
then press the [ ] button.
Slideshow will play only the selected photos. ·
Photo list screen
A storage device ▶ Folder name ▶ File name. jpg
Photos
SD ▶ 2009 Summer ▶ FileName.JPG 19/24
The current file number / the total number of files
MENU
ENTER
BACK
SLIDE
-SHOW
Photo file
Button guide screen
The button guide screen only displays available
buttons depending on the circumstances
Pressing any buttons on either the Slideshow or
Clock screen will display the button guide screen.
Page 14

14
English
Slideshow*
1
2
3
3
4
5
Rotating / zooming photos
You can rotate or enlarge a photo during Slideshow.
FileName.JPG
Rotate
Original
Zoom
x2
Rotate
Zoom
Setting
Home
90˚
-90˚
180˚
Original
Press the [MENU] button during the Slideshow
mode.
MENU
The Slideshow will be paused and the menu will appear. ·
Press the [▲/▼] buttons to select a desired item,
SELECT
BACK
SLIDE
-SHOW
and then press the [ ] button.
Rotate Original, 90°, -90°, 180°
Zoom x1, x2, x4
Rotating photos
.
Press the [▲/▼] buttons to select a desired item,
and then press the [ ] button.
SELECT
BACK
SLIDE
-SHOW
Photos only can be rotated when <View Mode> is in one of the following:
<Photo Only>, <Photo & Clock> and <Photo & Calendar>. ➥ p.24
The photo on the screen will be rotated to a selected ·
angle.
Note
Enlarging photos
MENU
BACK
SLIDE
-SHOW
To view the zooming menu, press the [MENU]
button
.
Press the [▲/▼] buttons to select a desired item,
and then press the [ ] button.
The photo on the screen can be enlarged by either x2 or ·
x4.
The enlarged photo can be moved to a desired location ·
using the [▲/▼/◀/▶] buttons.
Note
Photos only can be enlarged when <View Mode> is in <Photo Only> or
<Photo & Clock>. ➥ p.24
To resume Slideshow, press the [ ] button.
Page 15

15
English
1
2
3
4
1
2
3
Managing photos*
Selecting a storage device
When an external memory (SD memory card/ USB memory device) is connected, you can select a memory to play a
Slideshow from the Photos menu.
In the main menu screen ➥ p.12
Frame Memory
Photos
Clock
Mini Monitor
Settings
Photos
Frame Memory ▶ FileName.JPG 19/24
Select Storage Devic e
Select the storage devic e to browse.
Frame Memory
SD
USB
SELECT
BACK
SLIDE
-SHOW
SELECT
BACK
SLIDE
-SHOW
.
Press the [◀] button to move to <Frame
Memory>.
Press the [▲/▼] buttons to select a desired
storage device, and then press the [ ] button.
The setting will be changed to the selected storage ·
device.
To switch to the Slideshow mode, press the
[ ] button.
To select another memory from the photo list
.
Press the [MENU] button in the photo list screen
➥ p.13
Press the [▲/▼] buttons to select <Select Storage
Device>, and then press the [ ] button.
Press the [▲/▼] buttons to select a desired
storage device, and then press the [ ] button.
A photo list will appear for the selected storage device. ·
Note
If an external memory is connected, primarily the photos saved on ·
the connected external memory will be immediately played with the
Slideshow mode.
A storage device only can be selected when the corresponding storage ·
device is connected.
Page 16

16
English
Managing photos*
1
2
3
Copying photos
When an external memory (SD memory card/ USB memory device) is connected, you can copy photos from the
external memory to the frame memory or vice-versa.
Photos
Frame Memory ▶ FileName.JPG 19/24
Photos
Frame Memory ▶ FileName.JPG 19/24
FileName.jpg
Photo Size
Da t e
File Size
Home
Copy
Delete
Select Multiple File s
Select Storage Devic e
Settings
Copy
Choose a device to copy a p hoto to.
: 1920 x 1200
: 2009.1.23
: 1,245KB
SD
USB
MENU
SELECT
BACK
SLIDE
-SHOW
SELECT
BACK
SLIDE
-SHOW
To copy a photo or folder
Press the [▲/▼/◀/▶] buttons in the photo list to
select a photo or folder to copy, and then press
the [MENU] button.
The < · Photos> menu will appear.
Press the [▲/▼] buttons to select <Copy>, and
then press the [ ] button.
Press the [▲/▼] buttons to select a storage device
to which the photo will be copied, and then press
.
the [ ] button.
The photo will be copied to the selected storage device. ·
If a folder is selected, all the photos in the folder will be ·
copied.
Page 17

17
English
1
2
3
4
5
Copying photos ¨
3 photo(s) selected.
Slideshow / Copy / Delete : Apply each action to the sel ected photos.
Reset : Cancel all selections.
Photos
Frame Memory ▶ IMG12345.JPG 5/6
- S e l e c t M u l t i p l e F i l e s
SlideShow
Copy
Delete
Reset
Photos
Frame Memory ▶ FileName.JPG 19/24
Photos
Frame Memory ▶ IMG12345.JPG 5/6
3 photo(s) selected.
Slideshow / Copy / Delete : Apply each action to the sel ected photos.
Reset : Cancel all selections.
FileName.jpg
Photo Size
Da t e
File Size
Home
Copy
Delete
Select Multiple File s
Select Storage Devic e
Settings
- S e l e c t M u l t i p l e F i l e s
Choose a device to copy a p hoto to.
3 photos
Copy
: 1920 x 1200
: 2009.1.23
: 1,245KB
SD
USB
SlideShow
Copy
Delete
Reset
MENU
SELECT
BACK
SLIDE
-SHOW
SELECT
BACK
SLIDE
-SHOW
SELECT
BACK
SLIDE
-SHOW
To copy multiple files at one time
Press the [MENU] button in the photo list.
The < · Photos> menu will appear.
Press the [▲/▼] buttons to select <Select Multiple
Files>, and then press the [ ] button
Press the [▲/▼/◀/▶] buttons to select a photo to
copy , and then press the [ ] button.
The ( · ✔ ) mark will appear on a selected photo.
Pressing the [ · ] button will repeat selecting and
.
deselecting alternately.
To deselect all photos at once, press the [ · ] button.
Select multiple photos by repeating the above action. ·
Note
To select or deselect all photos in a folder, select the [ · ] image.
Pressing the [ ·
] button will repeat selecting all and deselecting all
alternately.
Press the [▶/▲/▼] buttons to select <Copy>, and
.
then press the [ ] button.
Press the [▲/▼] buttons to select a storage device
to which the photos will be copied, and then
press the [ ] button.
Note
When copied the frame memory, the photos will be reduced to optimally ·
fit the screen. To copy with an original size of photo, select <Original
size> for <Frame memory copy> in <Settings>. ➥ p.25
Before copying photos from the external memory (SD memory card / USB ·
memory device) to the frame memory, select a storage device. ➥ p.15
Photos can’t be copied if capacity of the storage device is insufficient. ·
Check available capacity of the storage device before copying.
Do not turn off the power while copying photos. This may cause damage ·
to the photos or product.
Page 18

18
English
Managing photos*
1
2
3
Deleting photos
You can delete photos in the frame memory and/ or external memory (SD memory card / USB memory device).
Photos
Frame Memory ▶ FileName.JPG 19/24
FileName.jpg
Photo Size
Da t e
File Size
Home
Copy
Delete
Select Multiple File s
Select Storage Devic e
Settings
: 1920 x 1200
: 2009.1.23
: 1,245KB
MENU
SELECT
BACK
SLIDE
-SHOW
To delete a photo or folder
Press the [▲/▼/◀/▶]buttons in the photo list to
select a photo or folder to delete, and then press
the [MENU] button.
The < · Photos> menu will appear.
Press the [▲/▼] buttons to select <Delete>, and
then press the [ ] button.
Photos
Frame Memory ▶ FileName.JPG 19/24
Delete
Do you want to delete th e photo?
Yes No
SELECT
BACK
SLIDE
-SHOW
Press the [▲/▼] buttons to select <Yes>, and then
press the [ ] button.
.
The selected photo or folder will be deleted. ·
Page 19

19
English
1
2
3
4
5
Deleting photos ¨
1
2
Frame Memory ▶ IMG12345.JPG 5/6
3 photo(s) selected.
Slideshow / Copy / Delete : Apply each action to the sel ected photos.
Reset : Cancel all selections.
Photos
Frame Memory ▶ FileName.JPG 19/24
Photos
Frame Memory ▶ IMG12345.JPG 5/6
3 photo(s) selected.
Slideshow / Copy / Delete : Apply each action to the sel ected photos.
Reset : Cancel all selections.
Photos
FileName.jpg
Photo Size
Da t e
File Size
Home
Copy
Delete
Select Multiple File s
Select Storage Devic e
Settings
- S e l e c t M u l t i p l e F i l e s
: 1920 x 1200
: 2009.1.23
: 1,245KB
SlideShow
Copy
Delete
Reset
MENU
SELECT
BACK
SLIDE
-SHOW
SELECT
BACK
SLIDE
-SHOW
To delete multiple files at one time
Press the [MENU] button in the photo list.
The < · Photos> menu will appear.
Press the [▲/▼] buttons to select <Select Multiple
Files>, and then press [ ].
Press the [▲/▼/◀/▶] buttons to select a photo to
delete, and then press [ ].
The ( · ✔ ) mark will appear on a selected photo.
Pressing the [ · ] button will repeat selecting and
.
deselecting alternately.
To deselect all the selected photos, press the [ · ] button.
Select multiple photos by repeating the above steps. ·
Press the [▶/▲/▼] buttons to select <Delete>,
and then press the [ ].
Press the [▲/▼] buttons to select <Yes>, and then
press the [ ] button.
Only the selected photos will be deleted. ·
Delete
Delete
Do you want to delete th e photo?
Do you want to delete th e photos?
3 photos
Yes No
Yes No
Copy
Delete
Reset
SELECT
BACK
SLIDE
-SHOW
.
Note
Before deleting photos from the external memory (SD memory card/ USB ·
memory device), select a storage device. ➥ p.15
Do not turn off the power while deleting photos. This may cause damage ·
to the photos or to the product.
SlideShow
Clock Display*
Using as a clock display
You can use the photo frame as a desk clock.
SELECT
BACK
SLIDE
-SHOW
.
Note
You can select a date/ time display format and a clock type in < · Clock>
under the <Settings> menu.
Leaving the power adapter disconnected for long hours may delete ·
the predetermined current time information. Keep the power adapter
connected.
Frame Memory
Photos
Clock
Mini Monitor
Settings
In the main menu screen ➥ p.12
Press the [▲/▼] buttons to select <Clock>,and then
press the [ ] button.
The clock screen will appear. ·
The current time which has been set in < · Settings>-
<Clock> will appear.
Page 20

20
English
Mini Monitor*
1
2
3
4
Using as a PC screen (Mini Monitor)
You can use the photo frame as a Mini Monitor (secondary monitor) by connecting it to your PC after installing the
Frame Manager program onto the PC.
To use the product as a Mini Monitor, you must install the Frame Manager program onto your PC.
For more information about downloading Frame Manager or using as a Mini Monitor, visit the Samsung Electronics
homepage (http://samsung.com) and search for the corresponding model name (SPF-87H or SPF-107H).
Recommended minimum OS requirements for using the fame as a Mini Monitor
OS Windows XP SP2, Vista(32bit)
USB Extended Host Controller(EHCT) for USB 2.0
RAM 256MB or higher
CPU 2.4GHz or higher
Note
The photo frame may not operate normally if the performance of your PC is lower than the recommended requirements. ·
Ensure you use Windows XP with Service Pack 2 installed. ·
It may not operate with any operating systems other than Windows XP Service Pack 2. We are not liable for any problems caused
by the user’s disregard of this instruction.
Installing the Frame Manager Program
Click to run the downloaded Frame Manager
installation file.
Click ‘Next.’
Select ‘I accept the term of the liscense
agreement.(A),’ and then click ’Next’.
Follow the on-screen instructions for installation. ·
If you reboot your computer, the installation will
be completed and the Frame Manager ( ) icon
will appear at the bottom right corner of the
screen.
Note
Before reinstalling the Frame Manager program, ensure you delete the
existing Frame Manager program and reboot the PC.
Page 21

21
English
Mini Monitor*
1
2
1
2
1
Connecting to a PC
USB
Communication
PC Connected via USB cable.
Select a function to use.
Mass Storage Mini Monitor Photo Frame
Note
You can select < · Mini Monitor> either in the main menu or in
<General>-<Activate USB Communication> under the <Settings>
menu.
If you select < · Mini Monitor> with no Frame Manager program installed,
after a short while (10 sec.), the screen will switch to the Mini Monitor
installation guide screen.
Switching to Mini Monitor or Mass Storage
Option 1. Switching on PC
Right click over the Frame Manager icon ( ) located at the bottom of your PC screen.
Select <Mass Storage> or <Mini Monitor>.
Connect the product to your PC using the
provided USB cable. ➥ p.11
The < · USB Communication> screen will appear.
Press the [◀/▶] buttons to select <Mini Monitor>,
and then press the [ ] button.
It will switch to Mini Monitor. ·
Option 2. Switching on Photo Frame
Press the [MENU] button on the photo frame.
It will switch to <Mass Storage> or < Mini Monitor>
Note
Pressing the [ · ] button will switch to the photo frame mode.
You can adjust the brightness while using Mini Monitor by pressing the [ · ▲/▼] buttons.
Note
You can only use one secondary monitor. ·
Do not use the Mini Monitor as a primary monitor. The screen may go blank. ·
Ensure you use the provided USB cable to connect to your PC. ·
Move the program used with the Mini Monitor to a primary monitor after use. ·
The Mini Monitor may not function properly with some video cards. ·
In this case, set the hardware acceleration to None.
To set the hardware acceleration to None, right-click on the Windows Desktop and proceed as follows;
Windows XP Properties ➡ Display Properties ➡ Settings ➡ Advanced ➡ Troubleshoot ➡ Hardware Acceleration ➡ None
Windows Vista Personal Settings ➡ Display Properties ➡ Advanced Settings ➡ Troubleshoot ➡ Change Settings
The Aero effect under Windows Vista is not applicable while using the photo frame as a Mini Monitor. ·
The Mini Monitor functions may not work properly if the driver of the video card is updated when Frame Manager is already ·
installed. In this case, after uninstalling, reinstall the Frame Manager program.
If you use the rotate function of the Frame Manager, the location of the currently set Mini Monitor can be changed. Even if the ·
rotate function is used, the monitor will not appear to be rotated on ‘Display Properties.’
Page 22

22
English
1
2
3
4
5
Settings*
Photo Settings
You can enjoy photos more pleasantly with various effects and settings.
Settings
Photos
Clock
General
Support
-Photos
OptionCategory
Slideshow Transition : Fade
Slideshow Speed : Normal
Slideshow Mode : All photos
Slideshow Order : Norm al
View Mode : Photo & Calendar
Aspect Ratio : Auto Fit
Portrait Photo Mode : On
Display Photo Info : On
Photo settings menu
Slideshow
Transition
Slideshow Speed
Slideshow Mode
Slideshow Order
In the main menu screen ➥ p.12
Press the [▲/▼] buttons to select <Settings>, and
then press the [ ] button.
The < · Settings> menu will appear.
Press [ ] to select <Photos>.
Press the [▲/▼] buttons to select a desired item,
and then press the [ ] button.
The sub-menu of the selected item will appear. ·
SELECT
BACK
SLIDE
-SHOW
.
Press the [▲/▼] buttons to select a desired item,
and then press the [ ] button.
The setting will be changed to the selected item. ·
Select a desired Slideshow Transition. ➥ p.23
Select from <Fast>-<Normal>-<Slow>.
A photo with a file size too large may not be played at the predetermined speed.
Note
< · All Photos>: Allows you to view all photos saved in the memory as a Slideshow.
< · Photos in folder>: Allows you to view only the photos in a selected folder as a
Slideshow.
< · One photo>: Allows you to view only one selected photo as a Slideshow.
Select between <Normal>-<Shuffle>.
View Mode
Aspect Ratio
Portrait Photo
Mode
Display Photo
Info
Select a desired View Mode. ➥ p.23
< · Original Fit>: Displays photos smaller than the screen in their original sizes and
resizes photos larger than the screen in direct proportion to the screen
size.
< · Auto Fit>: Resizes photos in direct proportion to the screen size.
< · Fit to Width>: Resizes photos to fit the width of the screen.
< · Off>: Displays photos in their original sizes.
< · On>: Automatically rotates photos that are positioned vertically horizontally (90°) to
fit the screen.
Determine whether or not to display the file name and creation date of a photo (available
only by using the PREV/ NEXT operations).
< · Off>: Displays no photo info.
< · On>: Displays the file name and the creation date of a photo.
Page 23

23
English
Photo Settings ¨
Slideshow Transition
The selected <Slideshow Transition> will be applied only when <View Mode> is in <Photo Only> or <Photo &
Note
Clock>. Only the <Fade> effect will be applied in other types of <View Mode>.
<No Effect> <Fade> <Blinds> <Cross Comb> <Mosaic>
<Checkerboard> <Dissolve> <Wipe> <Extend> <Silk>
<Corner Transition> <Wheel> <Ellipse> <Random>
View Mode
You can select various effects during the Slideshow mode by pressing the [ ] button.
Note
<Photo Only> <Photo & Clock> <Photo & Calendar> <Multiview 1> <Multiview 2>
Page 24

24
English
1
2
3
4
5
Settings*
Clock Settings
You can set the current time and also display the time in various formats and types.
Settings
Photos
Clock
General
Support
-Clock
OptionCategory
Clock Set
Date Format : DD/MM/YYYY
Time Format : 12 hours
Clock Type : Clock Only
Clock Settings Menu
Clock Set
Date Format
In the main menu screen ➥ P.12
Press the [▲/▼] buttons to select <Settings>, and
then press the [ ] button.
The < · Settings> menu will appear.
Press the [▲/▼] buttons to select <Clock>, and
then press the [ ] button.
The < · Clock> menu will appear.
SELECT
BACK
SLIDE
-SHOW
.
Press the [▲/▼] buttons to select a desired item,
and then press the [ ] button.
The sub-menu of the selected item will appear. ·
Press the [▲/▼] buttons to select a desired item,
and then press the [ ] button.
The setting will be changed to the selected item. ·
For < · Clock Set>, set the time using the [▲/▼/◀/▶]
buttons.
Set the current time.
Select a date display format.
< · YYYY/MM/DD>: Year/ Month/ Day
< · MM/DD/YYYY>: Month/ Day/ Year
< · DD/MM/YYYY>: Day/ Month/ Year
Time Format
Clock Type
Clock Type
Select a time display format.
< · 12 Hours>-<24 Hours>
Select a clock display format.
< · Clock Only>-<Clock & Calandar>
<Clock Only> <Clock & Calandar>
Page 25

25
English
1
2
3
4
5
Settings*
General
Customize the product’s general settings.
Settings
Photos
Clock
General
Support
-General
OptionCategory
Quick Setup
Language : English
Brightness : 69
Auto Picture On/Off
Startup Mode : La st Mode
Screen Saver : Slideshow
Frame Memory Copy : Resized
Activate USB Commini cation
General settings menu
Quick Setup
Language
Brightness
In the main menu screen ➥ P.12
Press the [▲/▼] buttons to select <Settings>, and
then press the [ ] button.
The < · Settings> menu will appear.
Press the [▲/▼] buttons to select <General>, and
then press the [ ] button.
The < · General> settings menu will appear.
SELECT
BACK
SLIDE
-SHOW
.
Press the [▲/▼] buttons to select a desired item,
and then press the [ ] button.
The sub-menu of the selected item will appear. ·
Press the [▲/▼] buttons to select a desired item,
and then press the [ ] button.
The setting will be changed to the selected item. ·
Conveniently customize your frequently used functions.
Set in the order of <View Mode>-<Slideshow Transition>-<Startup Mode>-
<Clock Set>.
Set the language for menu display.
Adjust the brightness of the LCD screen using a scale from 0 to 100.
Auto Picture On/Off
Set the screen to automatically turn on/off at a certain time.
Select the mode that runs when the power is turned on.
< · Home>: Displays the main menu on the screen.
Startup Mode
< · Last Mode>: Displays the last mode used on the screen.
< · Slideshow>: Starts a Slideshow.
But the passage information inside a storage device is not saved.
Note
If there’s no operation on the buttons for 10 minutes, then the product will switch
to the predetermined screen saver mode.
Screen Saver
< · Slideshow> / <Clock>
If there are no photos for Slideshow, it will work as Clock.
Note
Set the size of photos to be copied to the frame memory.
< · Original Size>: Copies a photo to the frame memory without changing the
Frame Memory Copy
original size.
< · Resized>: Copies a photo after reducing it to fit the optimum resolution of
the screen.
Select a function to use while connected to a PC with a USB cable.
Activate USB
Communication
< · Mini Monitor>: Use the frame as a Mini Monitor (secondary monitor).
< · Mass Storage>: Use as a removable disk of a PC.
< · Photo Frame>: Use as Photo Frame
Page 26

26
English
1
2
3
4
5
General ¨
Note
When the screen turned off by the Auto Picture On/Off function, pressing any button other than the [ · ] button will turn on the
screen.
When used as Mass Storage (mass storage device) or Mini Monitor by connecting to a PC with a USB cable, the screen doesn’t ·
turn off even at Off time (<Auto picture On/ Off>).
Settings*
Support
You can check contents related to the usage of the product and/ or reset menus, etc. that the user has set to the
default settings.
Settings
Photos
Clock
General
Support
-Support
OptionCategory
Upgrade Software
Reset
Product Guide
Product Information
Support Menu
Upgrade Software
Reset
In the main menu screen ➥ P.12
.
Press the [▲/▼] buttons to select <Settings>, and
then press the [ ] button.
The < · Settings> menu will appear.
SELECT
BACK
SLIDE
-SHOW
Press the [▲/▼] buttons to select <Support>, and
then press the [ ] button.
The < · Support> menu will appear.
Press the [▲/▼] buttons to select a desired item,
and then press the [ ] button.
The sub-menu of the selected item will appear. ·
Press the [▲/▼] buttons to select desired item,
and then press the [ ] button.
The setting will be changed to the selected item. ·
Upgrade software. ➥ p. 29
Set the menu options configured by the user to the default settings
(except for the time and language settings).
Product Guide
Product Information
Note
<Reset> doesn’t influence saved files.
View information on the buttons, selecting storage device and <Slideshow><View Mode>
Verify the model, firmware version, frame memory and copyright.
Page 27

27
English
Appendix*
Checklist before requesting service
If the product doesn’t operate properly, first check the following items.
If the problem still persists, contact or visit the nearest Samsung service center.
Troubles Solutions
The power won’t switch on. Ensure that the power cable is correctly connected.
Spots which look like light leaking can be seen on the
edges of the clock screen.
The time setting is wrong. The current time setting can be erased if the power adaptor is
It takes a long time for images to be displayed after the
power has been turned on.
It takes a long time to move from one image to the
next.
I can’t copy more files even when there is excess
capacity to use in the internal memory.
I’ve connected an external memory device (USB memory
device or SD memory card) but it doesn’t work.
Vertical pictures are displayed horizontally. Ensure that the <Portrait Photo Mode> option is set correctly in
Black LCD panel screens by nature can have this effect, which is not a
defect.
disconnected for a prolonged period of time.
Keep the power adaptor connected.
It is recommended to reduce the picture resolution.
You may be unable to copy files if the FAT section of the internal
memory is damaged.
Try again after formatting the internal memory.
SPF-87H can be used by connecting the power adapter instead of ·
the USB cable.
Ensure that the external memory device has been connected properly ·
or try formatting it.
Ensure that JPEG files are saved in the external memory device. ·
Abnormal picture files (0 Kbyte, broken JPEG) will not be displayed ·
on the screen.
The connected external memory device is not supported. Try another ·
storage device.
<Settings>-<Photos>.
JPEG files are not displayed. Progressively saved JPEG files or JPEG files saved as CMYK color ·
coordinates will not be displayed.
Images edited by a JPEG image editor (Photoshop, Paintshop, etc.) ·
may not be displayed normally. Edit the image on a PC, convert back
to JPEG format, save, and try again.
Some pictures are not displayed as a Slideshow. This product can accommodate a maximum of 4,000 pictures. Any
excess pictures will not be recognized and will not be displayed as a
Slideshow.
Page 28

28
English
Troubles Solutions
The picture size changes when I rotate it. The picture size changes automatically depending on the rotation angle
The picture looks stretched horizontally or vertically. Press [MENU] on the Slideshow screen. Go to <Settings>-<Photos>-
Previews are too slow. Previews may be slow for large-sized images and multiple images.
Slideshow Transition is displayed when I have saved
only one picture I want in the memory card or when I
pause the Slideshow with multiple pictures saved in the
memory card.
In what order are the pictures, which are saved in the
memory card, displayed?
The Slideshow doesn’t start automatically. Ensure that the <Startup Mode> is set to <Slideshow> in
I have set <Auto Picture On/Off> but the screen
doesn’t switch on automatically.
The pictures I copied from a USB memory or SD card
onto the internal memory have changed in resolution
and file size.
(90°, -90°) in order to display the entire image on the screen.
<Aspect Ratio> and change the setting to <Original Fit> and check
again.
The Slideshow Transition will be displayed automatically in order to
protect the panel. This is not an error.
They are arranged according to the file names. The slide show display
order is determined in the order of number, upper-case letter, and
lower-case letter.
Please note that a file name of up to only 25 characters can be
recognized.
<Settings>-<General>.
Ensure that the current time has been set correctly. ·
The screen will not switch on automatically if you have turned the ·
digital frame off by pressing [ ] when <Auto Picture On/Off> has
been set. The screen switches on automatically only if the power has
been switched off automatically at the Auto Picture Off time.
This product is designed to reduce the file size of high-resolution
pictures to fit the screen’s ideal resolution when they are copied onto
the internal memory.
If you want to disable the settings, you can change to the original size
by selecting <Settings>-<General>-<Frame Memory Copy>.
The digital frame is not recognized as a removable disk
when I connect it to a PC with the USB cable.
The SPF-87H has 2 USB connectors. You must connect the USB
connector [ ] because the digital frame will not be recognized
as a removable disk if only the auxiliary power (DC 5V) connector is
connected to a PC.
Page 29

29
English
1
2
3
4
1
2
3
4
5
6
Appendix*
Photos
Clock
General
Support
Upgrade Software
Reset
Product Guide
Product Information
Option
Category
Settings
-Support
SELECT
BACK
SLIDE
-SHOW
.
Software Upgrade
You can download and install the latest software from Samsung Electronics homepage.
While Upgrade Software is in progress, pay
attention to the following.
Do not remove the USB memory device or SD ·
card.
Do not turn off the product's power. ·
Do not press any buttons on the product. ·
Do not insert any another card. ·
Upgrade Software
Installing upgrade files now.
Do not remove the storage device.
Upgrading… 50%
Before Upgrade Software !
Prepare a USB memory device or SD card.
Download current software for the corresponding
model from Samsung Electronic Homepage.
Connect the USB memory device or SD Card to
your PC.
Copy downloaded software to the USB Memory
device or SD card.
To Upgrade Software
Connect the USB memory device or SD card with
current software to the product.
In the main menu screen ➥ p.12
Press the [▲/▼] buttons to select <Settings>, and
then press the ] button.
The < · Settings> menu will appear.
Press the [▲/▼] buttons to select <Support>, and
then press the [ ] button.
The < · Support> menu will appear.
Press the [ ] button to select <Upgrade
Software>.
The setting will be changed to the selected item. ·
Press the [▲/▼] buttons to move to an external
memory where current software is saved, and
then press the [ ] button.
Upgrade will start. ·
Note
When upgrade is finished, turn off the power and remove the USB ·
memory device or SD card, and then turn on the power again.
You can check whether or not the firmware has been updated to the ·
latest version in <Settings>-<Support>-<Product information>.
Page 30

Product Specifications
Classification Details
Model name SPF-87H SPF-107H
Panel Type 8” TFT LCD 10” TFT LCD
Resolution 800 x 480 1024 x 600
Supported format JPEG
Progressive or CMYK type pictures are not supported. ·
It can only recognize up to 4,000 photos. ·
Only a photo with a resolution less than 8000 (Horizontal) *8000 ·
(Vertical) pixel can be played.
Internal memory 1 GB
USB Host (USB 2.0) / Device (USB 2.0)
Power
supply
General Size
This device is a Class B digital apparatus.
Rating External DC power supply device (12 V)
Power consumption General : 5.3 W
Power off : Under 1 W
236.0 x 159.4 x 23.0 mm
(Width x height x depth)
Weight 500 g (1.1 lbs) 600 g (1.3 lbs)
9.3 x 6.3 x 0.9 inch
General : 5.9 W
Power off : Under 1 W
280.0 x 188.0 x 23.0 mm
11.0 x 7.4 x 0.9 inch
Note
The product design may differ according to the model, and specifications
are subject to change without prior notice for product performance
enhancement.
30
English
 Loading...