

Samsung LN40C630K1FXZA Schematic
LN40C630K1FXZA
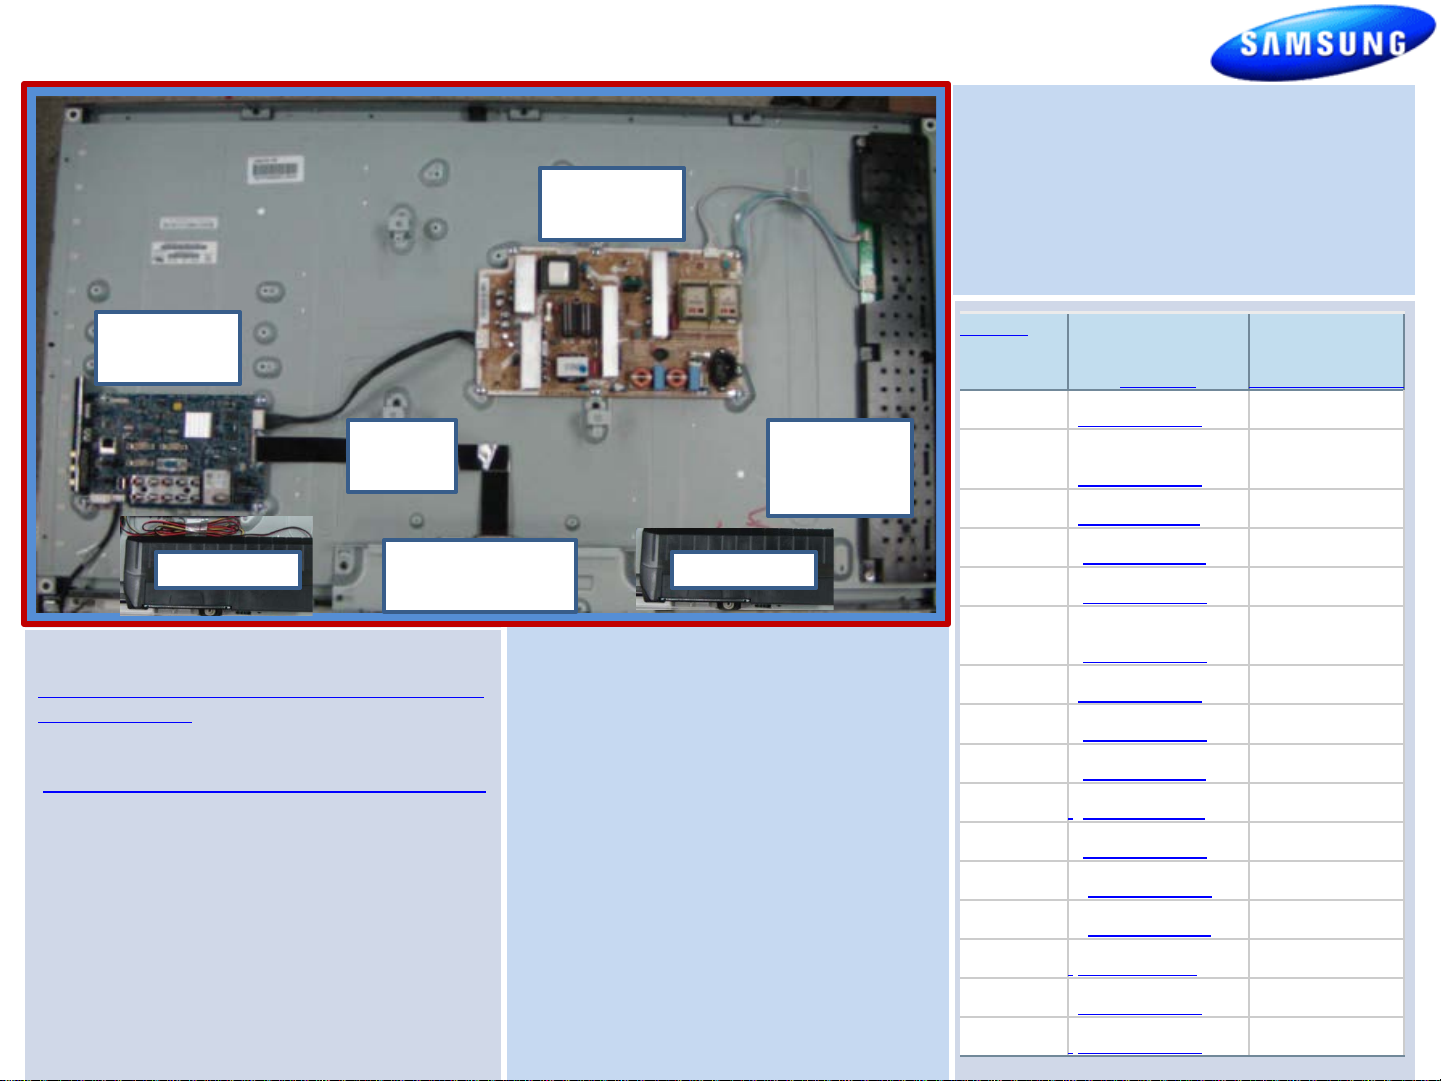
Short Description
Power
Function
Main
Panel
T
Stand
Rear
Front
Stand
Stand
Tuner
Speaker
LVDS
Power
Remote
Cleaning
Fast Track Troubleshooting Manual Rev - 1/11/12
MAIN
Include Board Assy names (as appearing in parts) and any
PCB
special labels/items (i.e. Plasma voltage label)
LVDS
CABLE
SPEAKER SPEAKER
HELP : 1-888-751-4086; 1-866-894-0637 (FE)
http://gspn3.samsungcsportal.com
PLUS ONE
http://my.plus1solutions.net/clientPortals/samsung
HOT TIPS
Power On Problems: (see page 2)
Video Problems: (see pages 3,4)
TIP: After replacing Main/Panel
picture is upside down.
Fix: Test Mode/Mirror Option/Toggle
Insert Photo of TV Board Layout
T-CON PCB
(under shield)
10/18/2010
Firmware for Valencia 128M and X4
Model . Version : 1010.0 (Valencia
128M), 1005.0 (X4) Folder Name: TVAL5AUSC & T-MSX6AUSC
Description
This firmware will prevent below
problems
. ' USB Power Overload' message pops up
even USB port is not connected
. HDMI 2 looks activated when HDMI 1
port is connected
POWER
PCB
FIRMWARE
DRIVER
BOARD
SERVICE BULLETINS
No Bulletins on GSPN as of 1/11/
t see new Option Byte Chart for
Bu
all 2010 LCD Models.
Version
Parts No
ALL
ALL
ALL
ALL
ALL
ALL
ALL
ALL
ALL
ALL
ALL
ALL
ALL
ALL
ALL
ALL
BN44-00340B
BN96-13451B
BN94-02701S
BN07-00831B
BN81-04466A
BN96-10689A
BN96-12767B
BN96-12772A
BN96-12795C
BN96-12762F
BN40-00163A
BN96-12837A
BN96-12723C
3903-000467
BN59-01041A
BN63-01798B
PCB
& IR PCB
PCB
-CON PCB
Guide Neck
Cover
Cover
Guide
Base
Cable
Cord
Cloth
12
1
LN40C630K1FXZA
Fast Track Troubleshooting Manual
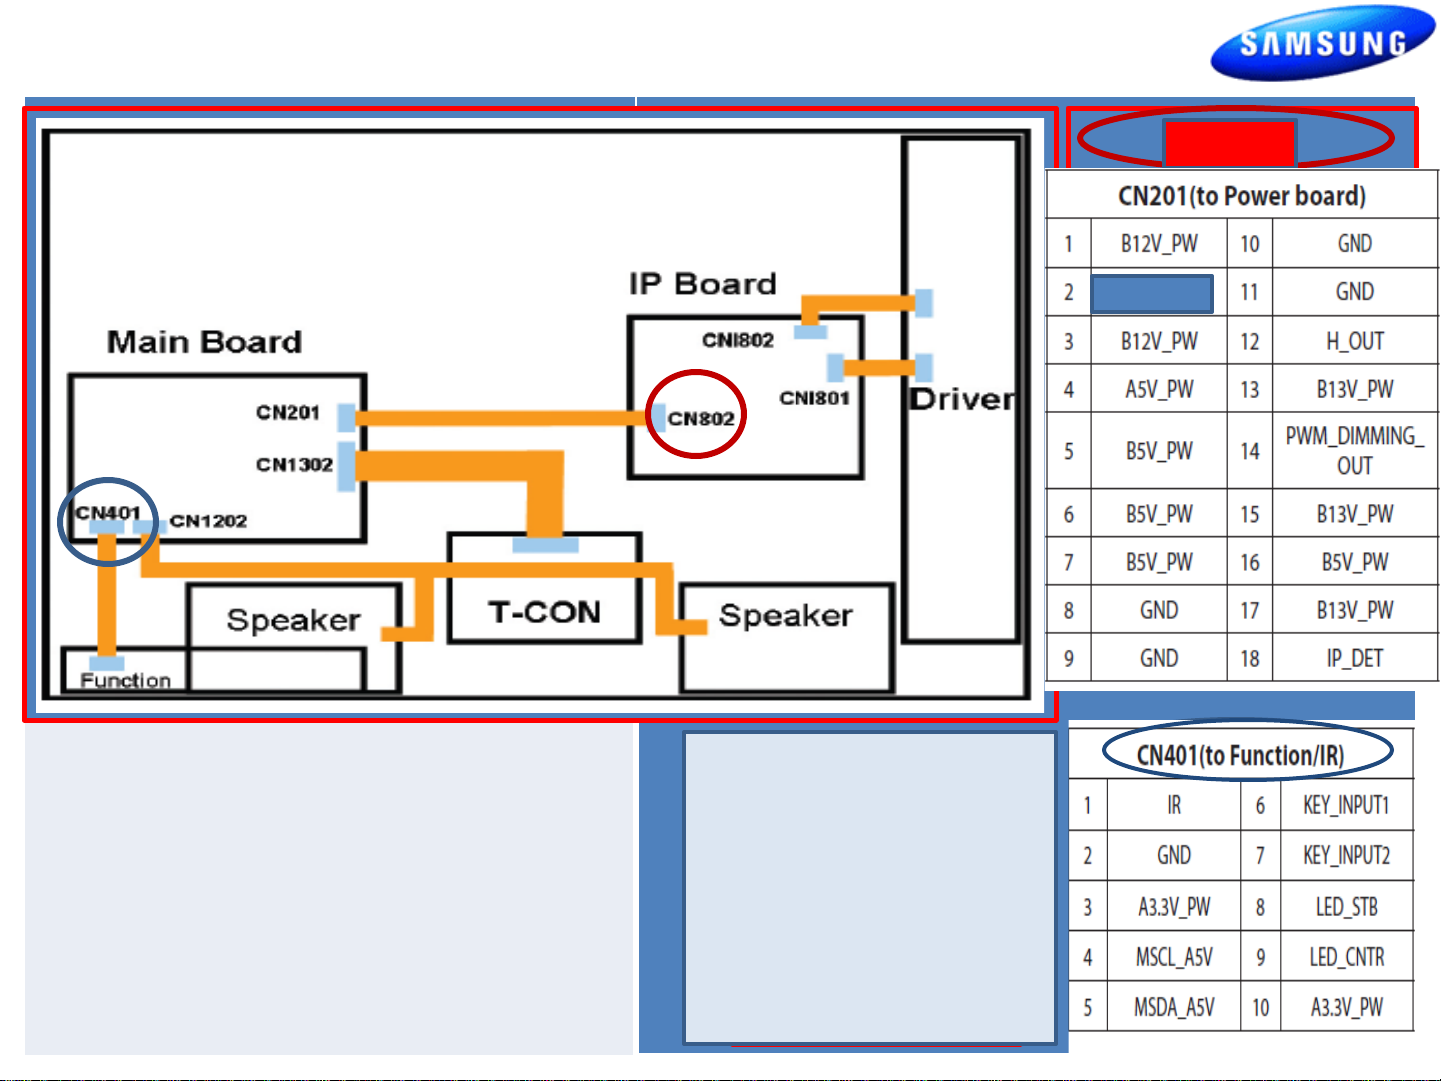
Wiring Diagram
Include Connector Numbers , References, and
Locations.
LN46C670M1FXZA
CN201
SW-P
Power On Sequence (approximate Voltages)
)
1. Standby Voltages: CN201-4 (5V)
2. Power On CN201-2 (0 – 3V )
3. Low Voltage Supplies On CN201-
1,3,5,7,13,15,17 (Volts Listed on CN802)
4. Back Light On CN201- (0-3V, delayed)
5. Back Light Confirm CN201- 18
6. Dimming Signal CN201-14 (1V–4V
approx)
To Force Backlight On
without Main Board :
1. Remove Power Cord
2. Remove CN802
3. Plug Power Cord In.
4. Backlight should be
on immediately.
2
 Loading...