How it Works
Log In / Sign Up
Buy Points
How it Works
FAQ
Contact Us
Questions and Suggestions
Users
Samsung
Loading...
L
LN19C350D1
2
LN19C350D1D
4
LN19C350D1DXZA
LN19C450
5
LN19C450E1D
7
LN19C450E1DXZA
LN19D450
3
LN19D450G1D
2
LN19D450G1DXZA
LN19D450G1DXZC
LN19R71W
LN19R81B
2
LN19R81W
2
LN20S51B
5
LN20S51BP
2
LN22A0J1D
LN22A330 - 22"" LCD TV
LN22A330J1D
2
LN22A330J1DXZA
3
LN22A450
6
LN22A450 - 22"" LCD TV
LN22A450C1
2
LN22A450C1D
6
LN22A450C1DXZA
LN22A450C1XZP
LN22A451
3
LN22A451C1D
3
LN22A451C1DXZA
LN22A650 - 22"" LCD TV
LN22A650A1D
3
LN22A650A1DXZA
3
LN22A650AD
LN22B350
8
LN22B350F2
LN22B350F2D
4
LN22B350F2DXZA
LN22B350 Series 3 350
LN22B360
6
LN22B360C5D
6
LN22B360C5DUZA
LN22B360C5DXZA
2
LN22B360C8D
2
LN22B450
2
LN22B450C4
LN22B450C8
2
LN22B460
4
LN22B460 - 21.6"" LCD TV
LN22B460B2D
4
LN22B460B2DXZA
2
LN22B50
LN22B650
6
LN22B650 - 22"" LCD TV
LN22B650T6
LN22B650T6D
3
LN22B650T6DUZA
LN22B650T6D/XZA
2
LN22C350
9
LN22C350D1
2
LN22C350D1D
3
LN22C450E1
LN22C450E1D
4
LN22C450E1DXZA
2
LN22C450E1M
2
LN22C500
LN22C500B2F
LN22C500B2FXZA
LN22D450
3
LN22D450G1F
LN23R41B
2
LN23R51B
5
LN23R51BX
LN23R71B
2
LN23R71BAX
2
LN23R71W
4
LN23R71WAX
3
LN23R81B
LN23S81BD
LN23T71B
LN26A330
3
LN26A330C
LN26A330J1
LN26A330J1D
8
LN26A330J1DXZA
4
LN26A330JD
2
LN26A450
4
LN26A450C1
LN26A450C1D
8
LN26A450C1DXZA
3
LN26A450C1H
2
LN26A450C1X
LN26A450CD
LN26B350
4
LN26B350F1
3
LN26B360
8
LN26B360 - 26"" LCD TV
LN26B360C5D
5
LN26B360C5DXZA
LN26B450
4
LN26B450C4
LN26B450C4M(HD)
Loading...
Loading...
Nothing found
LN22B650
User Manual
26 pgs
6.03 Mb
0
User Manual
66 pgs
7.57 Mb
0
User Manual
67 pgs
7.26 Mb
0
User Manual
132 pgs
26.57 Mb
0
User Manual
67 pgs
7.22 Mb
0
User Manual [pt]
59 pgs
6.94 Mb
0
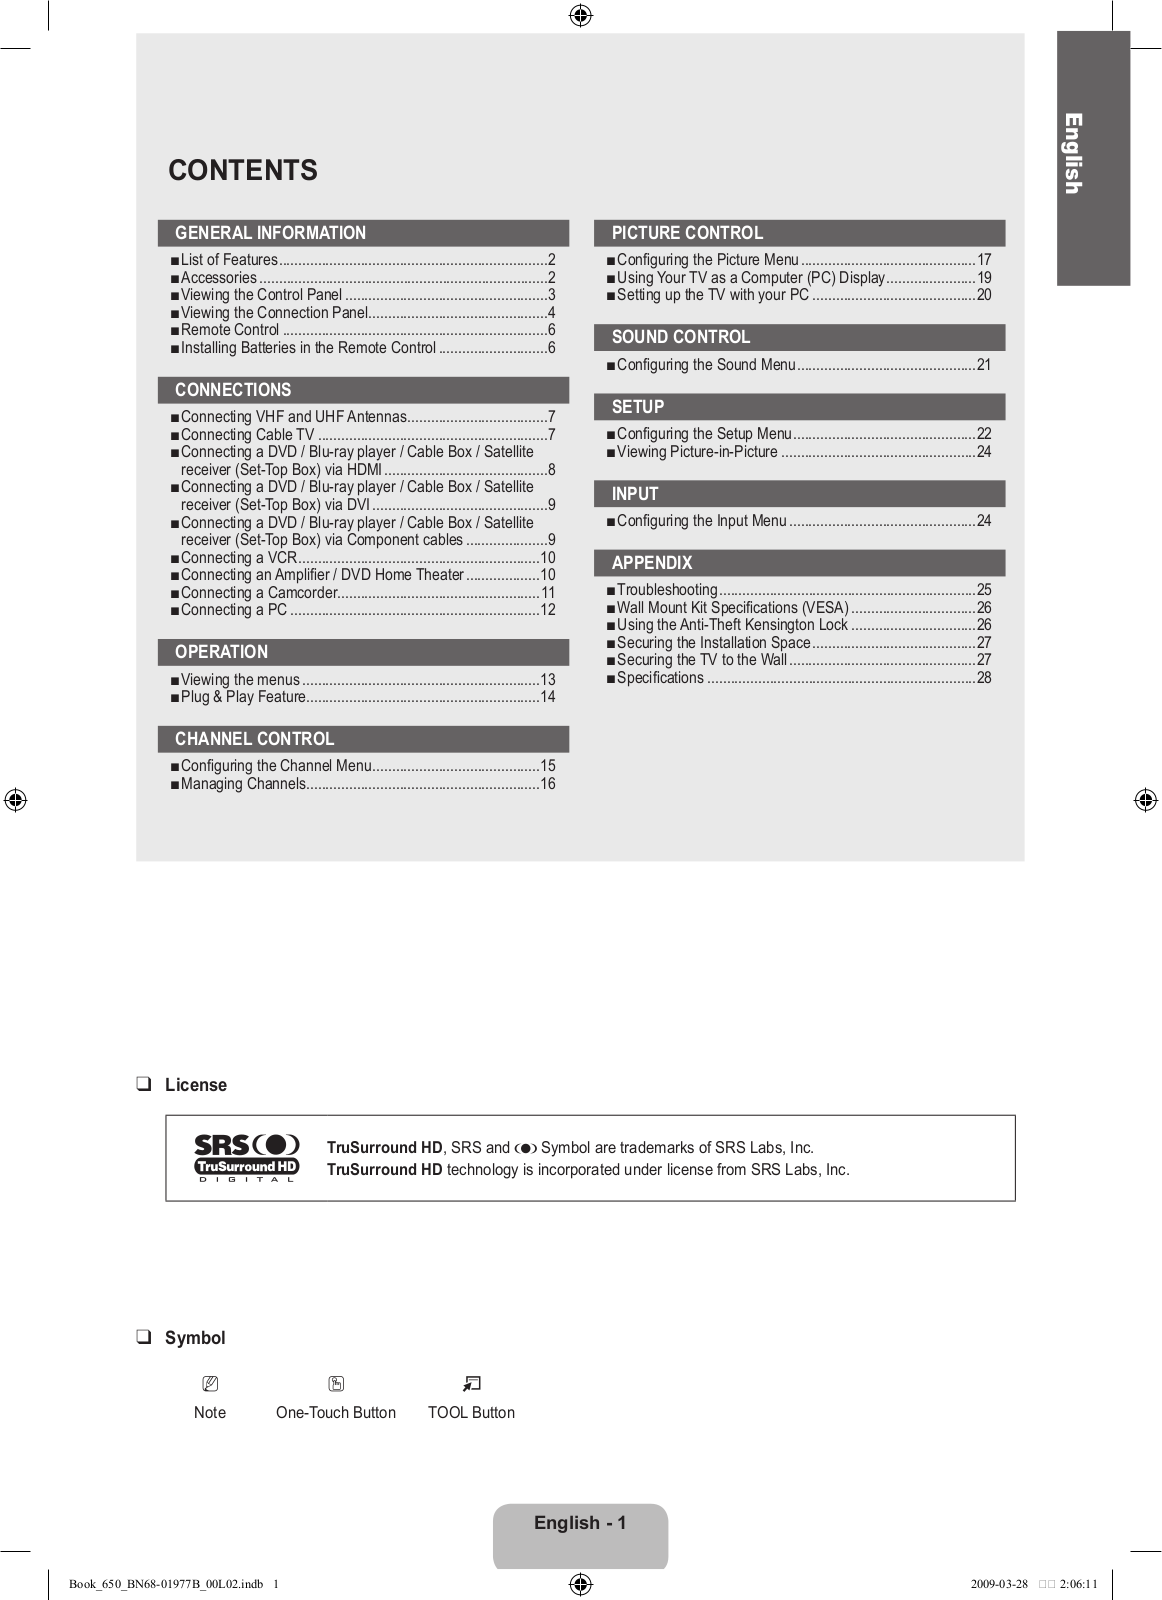
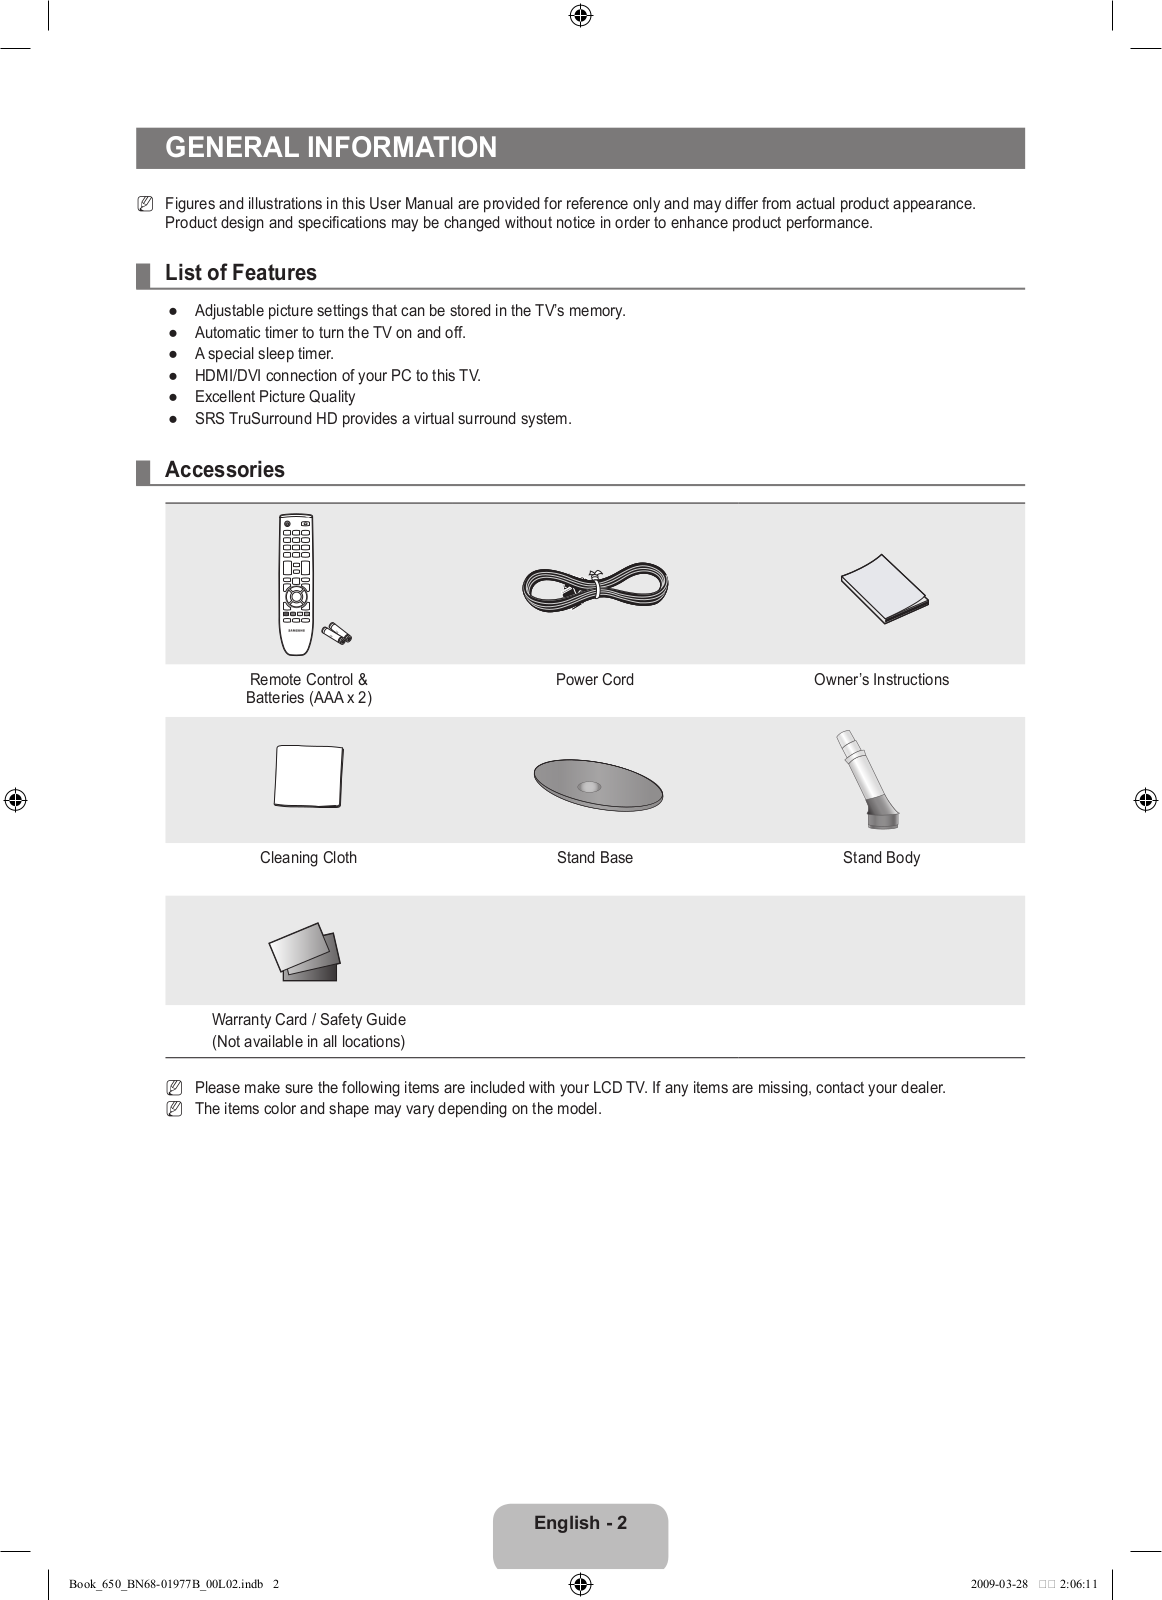
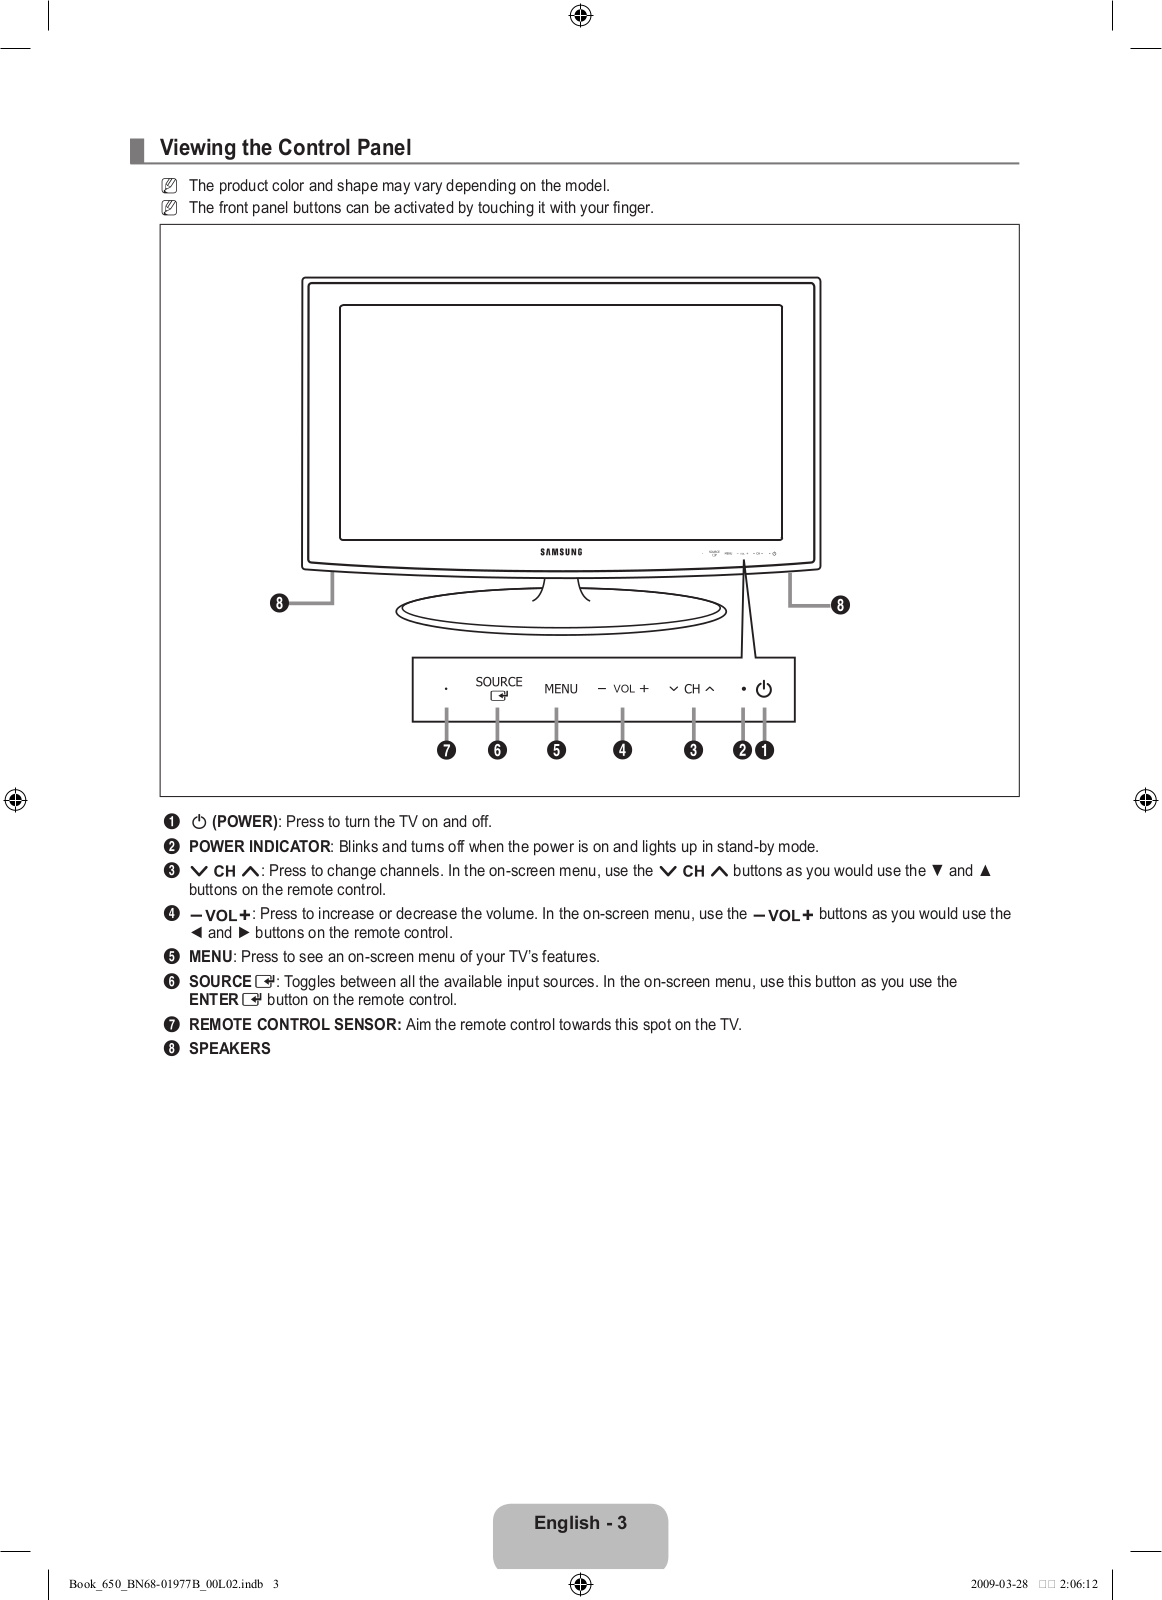
Table of contents
Loading...
Samsung LN22B650 User Manual [pt]
...
Samsung User Manual [pt]
Download
Specifications and Main Features
Frequently Asked Questions
User Manual
Download
Loading...
+
41
hidden pages
Unhide
You need points to download manuals.
1 point = 1 manual.
You can buy points or you can get point for every manual you upload.
Buy points
Upload your manuals
 Loading...