

Page 1
Contact SAMSUNG WORLDWIDE
If you have any questions or comments relating to Samsung products,
please contact the SAMSUNG customer care centre.
Country
AUSTRIA 0800-SAMSUNG (726-7864) www.samsung.com/at
BELGIUM 0032 (0)2 201 24 18 www.samsung.com/be
CZECH REPUBLIC
DENMARK 70 70 19 70 www.samsung.com/dk
EIRE 0818 717 100 www.samsung.com/ie
FINLAND 030-6227 515 www.samsung.com/
FRANCE
GERMANY 01805 - SAMSUNG (726-7864) (€ 0,14/Min) www.samsung.com
HUNGARY 06-80-SAMSUNG (726-7864) www.samsung.com
ITALIA 800-SAMSUNG (726-7864) www.samsung.com
LUXEMBURG 0035 (0)2 261 03 710 www.samsung.com/be
NETHERLANDS 0900-SAMSUNG (726-7864) (€ 0,10/Min) www.samsung.com/nl
NORWAY 815-56 480 www.samsung.com/no
POLAND
PORTUGAL 80820-SAMSUNG (726-7864) www.samsung.com/pt
SLOVAKIA 0800-SAMSUNG (726-7864) www.samsung.com/sk
SPAIN 902 10 11 30 www.samsung.com
SWEDEN 0771-400 200 www.samsung.com/se
SWITZERLAND 0800-SAMSUNG (726-7864) www.samsung.com/ch
U.K 0845 SAMSUNG (7267864) www.samsung.com
TURKEY 444 77 11 www.samsung.com
ESTONIA 800-7267 www.samsung.ee
LATVIA 800-7267 www.samsung.com/lv
LITHUANIA 8-800-77777 www.samsung.lt
KAZAHSTAN 8-10-800-500-55-500 www.samsung.kz
KYRGYZSTAN 00-800-500-55-500 RUSSIA 8-800-555-55-55 www.samsung.ru
TADJIKISTAN 8-10-800-500-55-500 UKRAINE 8-800-502-0000 www.samsung.com
UZBEKISTAN 8-10-800-500-55-500 www.samsung.uz
Customer Care Centre
844 000 844 www.samsung.com/cz
Distributor pro Českou republiku:
Samsung Zrt., česka organizační složka Vyskočilova 4, 14000 Praha 4
3260 SAMSUNG (€ 0,15/Min)
08 25 08 65 65 (€ 0,15/Min)
0 801 801 881
022-607-93-33
Web Site
www.samsung.com
www.samsung.com/pl
LCD TV
user manual
BN68-01409J-01
imagine the possibilities
Thank you for purchasing this Samsung product.
To receive more complete service, please register
your product at
www.samsung.com/global/register
Model Serial No.
Page 2

This product is only applicable to Finnish, Swedish and Danish broadcasts. Broadcasts are not supported
in other countries.
Contact SAMSUNG WORLDWIDE
If you have any questions or comments relating to Samsung products, please contact the SAMSUNG
customer care centre. (See back cover for more informations.)
Precautions When Displaying a Still Image
A still image may cause permanent damage to the TV screen.
Do not display a still image on the LCD panel for more than 2 hours as it can cause screen image
•
retention. This image retention is also known as "screen burn". To avoid such image retention, reduce the
degree of brightness and contrast of the screen when displaying a still image.
Watching the LCD TV in 4:3 format for a long period of time may leave traces of borders
•
caused by the above effect are not covered by the Warranty.
Displaying still images from Video games and PC for longer than a certain period of time may produce
•
partial after-images.
To prevent this effect, reduce the ‘brightness’ and ‘contrast’ when displaying still images.
© 2008 Samsung Electronics Co., Ltd. All rights reserved.
displayed on the left, right and center of the screen caused by the difference of light emission on
the screen. Playing a DVD or a game console may cause a similar effect to the screen. Damages
Page 3

Contents
CONNECTING AND PREPARING YOUR TV
List of Parts ........................................................ 3
Installing the Stand ............................................. 3
Installing the Wall Mount Kit ............................... 3
Viewing the Control Panel .................................. 4
Viewing the Connection Panel ........................... 5
Viewing the Remote Control ............................... 8
Installing Batteries in the Remote Control .......... 9
Switching On and Off ......................................... 9
Placing Your Television in Standby Mode........... 9
Viewing the Menus ........................................... 10
Using the TOOLS Button .................................. 10
Plug & Play ........................................................11
SETTING THE CHANNELS
Storing Channels Automatically ....................... 12
Storing Channels Manually .............................. 13
Adding / Locking Channels .............................. 14
Sorting the Stored Channels ............................ 15
Assigning Channels Names ............................. 15
Fine Tuning Channel Reception ....................... 16
SETTING THE PICTURE
Changing the Picture Standard ........................ 17
Adjusting the Custom Picture ........................... 18
Conguring Detailed Settings on the Picture ... 18
Resetting the Picture Settings to the Factory
Defaults ............................................................ 19
Conguring Picture Option ............................... 20
Viewing the Picture In Picture (PIP) ................. 22
SETTING THE SOUND
Sound Features ................................................ 23
Selecting the Sound Mode ............................... 24
Connecting Headphones (Sold separately) ..... 24
FUNCTION DESCRIPTION
Choosing Your Language ................................. 26
Setting the Light Effect
(depending on the model) ................................ 27
Melody / Entertainment / Energy Saving ......... 27
Selecting the Source ........................................ 29
Editing the Input Source Names ...................... 29
USING THE DTV FEATURE
Previewing the DTV Menu System .................. 30
Selecting the Country ....................................... 31
Updating the Channel List Automatically .......... 32
Updating the Channel List Manually ................ 33
Editing Your Favourite Channels ...................... 34
Selecting Channel List ..................................... 36
Displaying Programme Information .................. 36
Viewing the EPG (Electronic Programme Guide)
Information ....................................................... 37
Using the Scheduled List ................................. 38
Setting the Default Guide ................................. 38
Viewing All Channels and Favourite Channels 39
Adjusting the Menu Transparency .................... 39
Setting up the Parental Lock ............................ 40
Setting the Subtitle ........................................... 41
Setting the Subtitle Mode ................................. 41
Selecting the Audio Format .............................. 41
Selecting the Audio Description ....................... 42
Viewing Product Information ............................ 42
Checking the Signal Information ...................... 43
Upgrading the Software ................................... 43
Viewing Common Interface .............................. 44
Selecting the CI (Common Interface) Menu ..... 44
Resetting .......................................................... 45
Selecting the Preferred Language
(Subtitle, Audio or Teletext) .............................. 45
Preference ........................................................ 46
English
SETTING THE TIME
Setting and Displaying the Current Time .......... 25
Setting the Sleep Timer .................................... 25
Switching the Television On and Off
Automatically .................................................... 26
English - 1
Page 4

SETTING THE PC
Setting up Your PC Software
(Based on Windows XP) .................................. 47
Display Modes .................................................. 47
Setting up the TV with your PC ........................ 48
WISELINK
Using the WISELINK Function ......................... 49
Using the WISELINK Menu .............................. 50
Using the PHOTO (JPEG) List ......................... 51
Using the MP3 List ........................................... 54
Using the Setup Menu ...................................... 55
RECOMMENDATIONS FOR USE
Teletext Feature ............................................... 62
Auto Wall-Mount (Sold separately) ................... 64
Using the Anti-Theft Kensington Lock
(depending on the model) ................................ 65
Troubleshooting: Before Contacting Service
Personnel ......................................................... 66
Technical and Environmental Specications ... 67
ABOUT ANYNET
What is Anynet+? ............................................ 56
Connecting Anynet+ Devices ........................... 56
Setting Up Anynet+ .......................................... 57
Scanning and Switching between Anynet+
Devices ............................................................ 58
Recording ......................................................... 60
Listening through a Receiver ........................... 60
Check Points before Requesting Service ......... 61
+
Symbol Press Note One-Touch
English - 2
Button
Page 5
List of Parts
Please make sure the following items are included with your LCD TV.
If any items are missing, contact your dealer.
M4 X L16
Remote Control
& Batteries
(AAA x 2)
Owner’s Instructions
•
➣
Warranty card / Safety Guide / Registration Cards (Not available in all locations)
➣
The stand and stand screw may not be included depending on the model.
Power Cord Cover-Bottom
Warranty card
•
Stand Screw
X 4
Safety Guide
•
Stand Cleaning Cloth
Installing the Stand
2
1
Registration Cards
•
1. Connect your LCD TV and the stand.
Two or more people should carry the TV.
➣
Make sure to distinguish between the front and back of the stand when assembling them.
➣
2. Fasten two screws at position 1 and then fasten two screw at position 2.
Stand the product up and fasten the screws. If you fasten the screws with the LCD TV placed
➣
down, it may lean to one side.
The stand is installed for models with the screen size of 37 inch and above.
➣
Installing the Wall Mount Kit
Wall mount items (sold separately) allow you to mount
the TV on the wall.
For detailed information on installing the wall mount,
see the instructions provided with the Wall Mount items.
Contact a technician for assistance when installing the
wall mounted bracket.
Samsung Electronics is not responsible for any damage
to the product or injury to yourself or others if you elect to
install the TV on your own.
Do not install your Wall Mount Kit while your TV is
turned on. It may result in personal injury due to
electric shock.
Remove the stand and cover the bottom hole with a
➣
cap and fasten with two screws.
English - 3
Page 6
Viewing the Control Panel
8 8
4
1
2
3
5
6
7
1
2
3
4
6
7
58
8
Front Panel buttons
Touch each button to
operate.
Side Panel buttons
The product colour and shape may vary depending on the model.
➣
SOURCE
1
Toggles between all the available input sources
(TV, Ext.1, Ext.2, AV, S-Video, Component, PC,
HDMI1, HDMI2, HDMI3, DTV). In the on-screen
menu, use this button as you use the
ENTER
button on the remote control.
MENU
2
Press to see an on-screen menu of your TV’s
features.
3
Press to decrease or increase the volume. In the
on-screen menu, use the buttons as you
use the ◄ and ► buttons on the remote control.
4
Press to change channels.
In the on-screen menu, use the
buttons as you use the ▼ and ▲ buttons on
the remote control.
(Without the Remote Control, you can turn on
the TV by using the Channel buttons.)
English - 4
5
Power Indicator
Blinks and turns off when the power is on and
lights up in stand-by mode.
6
7
(Power)
Press to turn the TV on and off.
Remote Control Sensor
Aim the remote control towards this spot on
the TV.
Speakers
8
Page 7
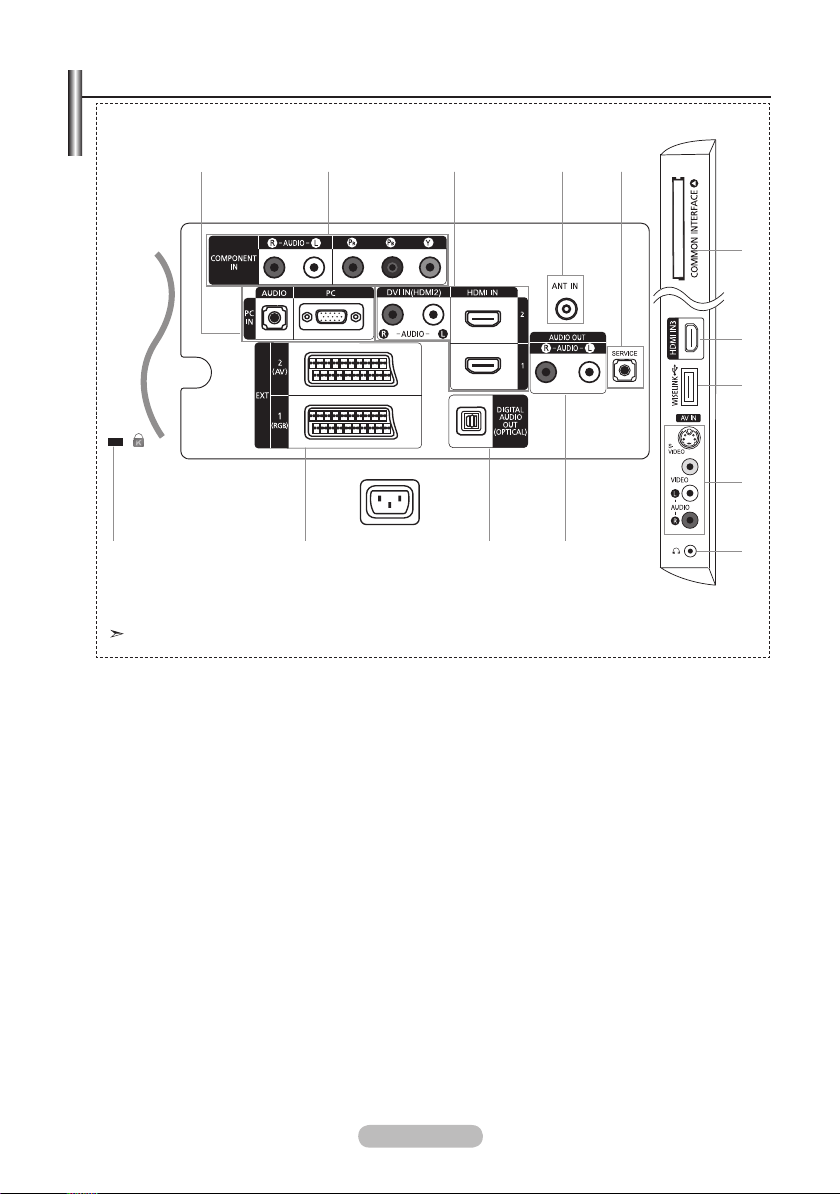
Viewing the Connection Panel
1 2 3 4 5
[Side Panel Jacks]
6
3
7
8
Power Input
The product colour and shape may vary depending on the model.
Whenever you connect an external device to your TV, make sure that power on the unit is turned off
➣
When connecting an external device, match the colour of the connection terminal to the cable.
➣
1
PC IN [PC] / [AUDIO]
Connect to the video and audio output jack on your PC.
-
2
COMPONENT IN
Connect component video cables (optional) to component connector ("PR", "PB", "Y") on the rear of
-
your set and the other ends to corresponding component video out connectors on the DTV or DVD.
If you wish to connect both the Set-Top Box and DTV (or DVD), you should connect the Set-Top Box
-
to the DTV (or DVD) and connect the DTV (or DVD) to component connector ("P
your set.
-
The PR, PB and Y connectors on your component devices (DTV or DVD) are sometimes labeled Y,
B-Y and R-Y or Y, Cb and Cr.
-
Connect RCA audio cables (optional) to "R - AUDIO - L" on the rear of your set and the other ends to
corresponding audio out connectors on the DTV or DVD.
3
HDMI IN 1, HDMI IN 2, HDMI IN 3
Supports connections between HDMI-connection-enabled AV devices (Set-Top Boxes, DVD players)
-
No additional Audio connection is needed for an HDMI to HDMI connection.
-
When using an HDMI/DVI cable connection, you must use the HDMI IN 2 jack.
-
!@#
0
R", "PB", "Y") on
9
English - 5
Page 8
What is HDMI?
➣
“High Denition Multimedia interface” allows the transmission of high denition digital video data
-
and multiple channels of digital audio.
-
The HDMI/DVI terminal supports DVI connection to an extended device with the appropriate
cable (not supplied). The difference between HDMI and DVI is that the HDMI device is smaller
in size, has the HDCP (High Bandwidth Digital Copy Protection) coding feature installed, and
supports multi - channel digital audio.
The TV may not output sound and pictures may be displayed with abnormal colour when DVD
➣
players/Cable Boxes/Satellite receivers supporting HDMI versions older than 1.3 are connected.
When connecting an older HDMI cable and there is no sound, connect the HDMI cable to the
HDMI IN 2 jack and the audio cables to the DVI IN (HDMI2) [R-AUDIO-L] jacks on the back of
the TV. If this happens, contact the company that provided the DVD player/Cable Box/Satellite
receiver to conrm the HDMI version, then request a rmware update. HDMI cables that are not
1.3 may cause annoying icker or no screen display.
DVI IN(HDMI2) [R-AUDIO-L]
DVI audio outputs for external devices.
-
➣
Supported modes for HDMI/DVI and Component
HDMI/DVI 50Hz X X X O O O O
HDMI/DVI 60Hz X O X X O O O
Component O O O O O O O
ANT IN
4
To view television channels correctly, a signal must be received by the set from one of the following
sources:
An outdoor aerial / A cable television network / A satellite network
-
5
SERVICE
Connect this to the jack on the optional wall mount bracket. This will allow you to adjust the TV viewing
angle using your remote control.
6
COMMON INTERFACE Slot
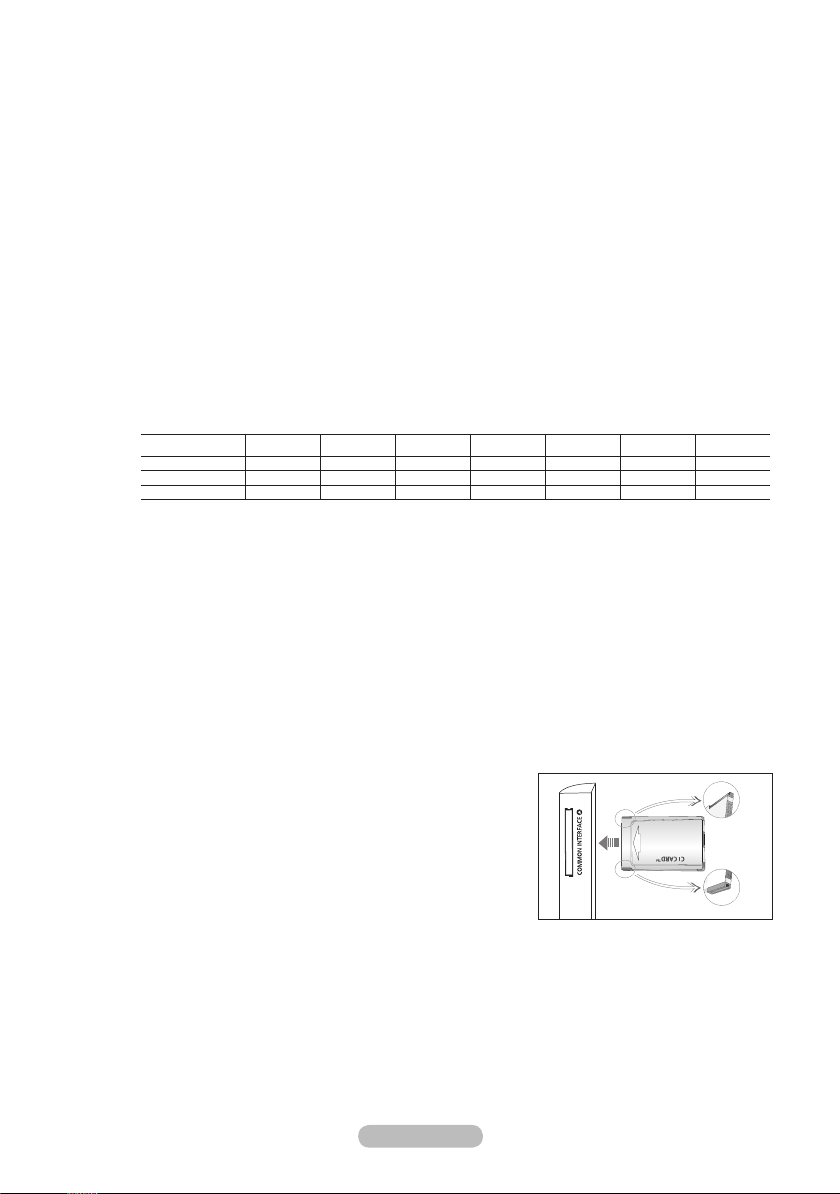
When not inserting "CI CARD" in some channels,"Scrambled Signal" is displayed on the screen.
-
The pairing information containing a telephone number, CI CARD ID, Host ID and other information
-
will be displayed in about 2~3 minutes. If an error message is displayed, please contact your service
provider.
When the channel information conguration has nished, the
-
message "Updating Completed" is displayed, indicating that
the channel list is now updated.
You must obtain a CI CARD from a local cable service
➣
provider. Remove the CI CARD by carefully pulling it out
with your hands since dropping the CI CARD may cause
damage to it.
Insert the CI-Card in the direction marked on it.
➣
The place of the COMMON INTERFACE Slot may be different depending on its model.
➣
7
WISELINK
Connect a USB mass storage device to view photo les (JPEG) and play audio les (MP3)
-
480i 480p 576i 576p 720p 1080i 1080p
English - 6
Page 9

8 S-VIDEO or VIDEO / R-AUDIO-L
Connect RCA or S-VIDEO cable to an appropriate external A/V device such as VCR, DVD or
-
Camcorder.
Connect RCA audio cables to "R-AUDIO-L" on your set and the other ends to corresponding audio
-
out connectors on the A/V device.
9
Headphones jack
Headphone may be connected to the headphone output on your set. While the head phone is
-
connected, the sound from the built-in speakers will be disabled.
0 AUDIO OUT [R-AUDIO-L]
-
Connect RCA audio cables to AUDIO OUT [R-AUDIO-L] on the rear of your set and the other ends to
corresponding audio in connectors on the Amplier or DVD Home Theatre.
! DIGITAL AUDIO OUT (OPTICAL)
-
Connect to a Digital Audio Component.
When the HDMI IN jacks are connected, the DIGITAL AUDIO OUT (OPTICAL) jack on the TV
➣
outputs 2 channel audio only. If you want to hear 5.1 channel audio, connect the Optical jack on
the DVD player or Cable/Satellite Box directly to an Amplier or Home Theater, not the TV.
@
EXT 1, EXT 2
Connector
EXT 1 O O O Only TV or DTV output is available.
EXT 2 O O Output you can choose.
Inputs or outputs for external devices, such as VCR, DVD, video game device or video disc players.
-
#
Kensington Lock (depending on the model)
The Kensington lock (optional) is a device used to physically x the system when used in a public
-
Video Audio (L/R) RGB Video + Audio (L/R)
Input Output
place.
If you want to use a locking device, contact the dealer where you purchased the TV.
-
The location of the kensington lock may be different depending on its model.
-
English - 7
Page 10
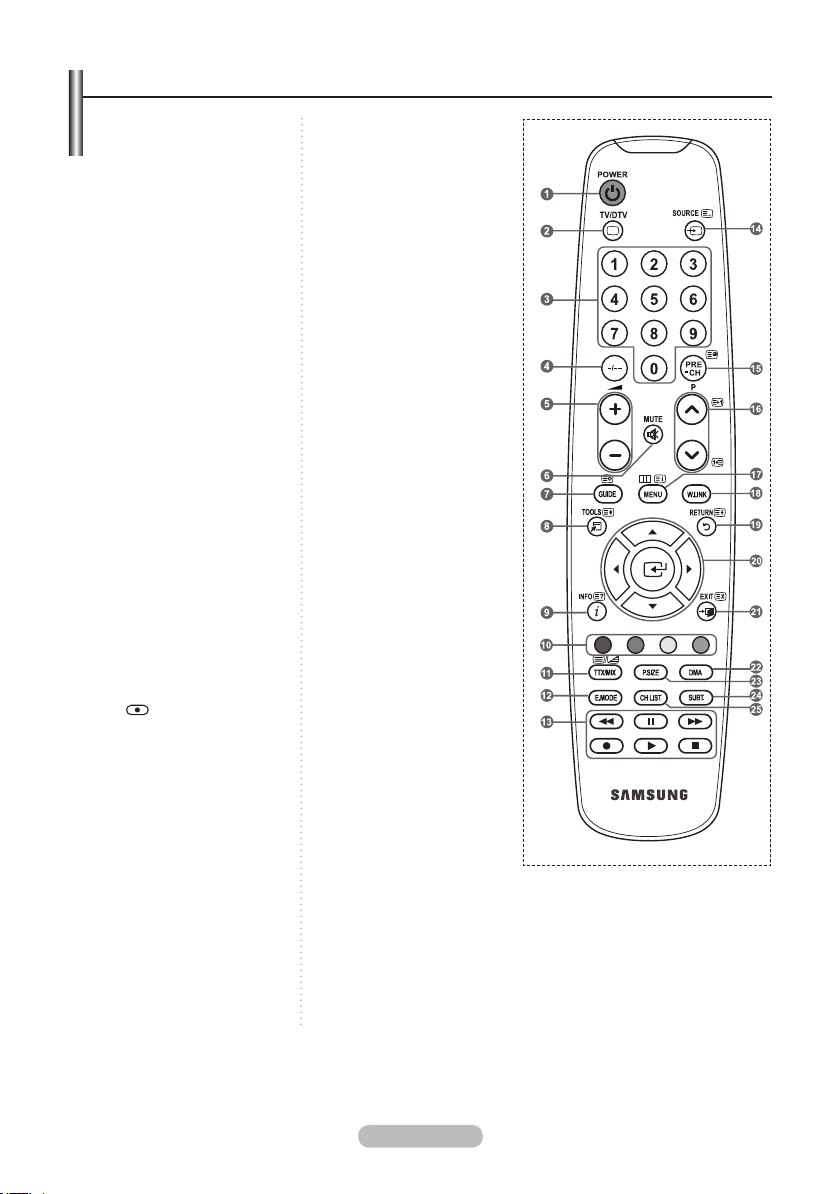
Viewing the Remote Control
1 Television Standby button
2 Selects the TV and DTV
mode directly
3 Number buttons for directNumber buttons for direct
channel access
4
One/Two-digit channel
selection
5
+: Volume increase
-: Volume decrease
6
Temporary sound switch-Temporary sound switch-
off
7
Electronic Program GuideElectronic Program Guide
(EPG) display
8
Use to quickly selectUse to quickly select
frequently used functions.
9
Use to see information onUse to see information on
the current broadcast
0
Colour buttons :Colour buttons :
Use these buttons in
the Channel list and
WISELINK, etc.
@
Press to select the optionalPress to select the optional
display and sound modes
for sports, cinema and
games.
#
Use these buttons in theUse these buttons in the
DMA, WISELINK, and
Anynet+.
( : This remote can be
used to control recording
on Samsung recorders
with the Anynet+ feature)
$
Available source selectionAvailable source selection
% Previous channel
^
P<: Next channel
P>: Previous channel
&
Displays the main on-Displays the main on-
screen menu
*
This function enables youThis function enables you
to view and play photo
and music files from an
external device.
(
Returns to the previousReturns to the previous
menu
Control the cursor in theControl the cursor in the
)
menu
a
Exit the on-screen menuExit the on-screen menu
b
Use this when connecting
a SAMSUNG DMA
(Digital Media Adapter)
device through an HDMI
interface and switching
to DMA mode. (The DMA
button is optional.) For
more information on the
operating procedures,
refer to the user manual
of the DMA. This button
is available when
“Anynet+(HDMI-CEC)" is
“On” (see page 57)
c
Picture size selectionPicture size selection
d
Digital subtitle displayDigital subtitle display
e
It display "Channel List"It display "Channel List"
on the screen.
Teletext Functions
2 Exit from the teletext display
7 Teletext store
8 Teletext size selection
9 Teletext reveal
0 Fastext topic selection
! Alternately select Teletext,
Double, or Mix.
$ Teletext mode selection
(LIST/FLOF)
% Teletext sub page
^ P<: Teletext next page
P>: Teletext previous page
& Teletext index
( Teletext hold
a Teletext cancel
The performance of the remote control may be affected by bright light.
➣
English - 8
Page 11
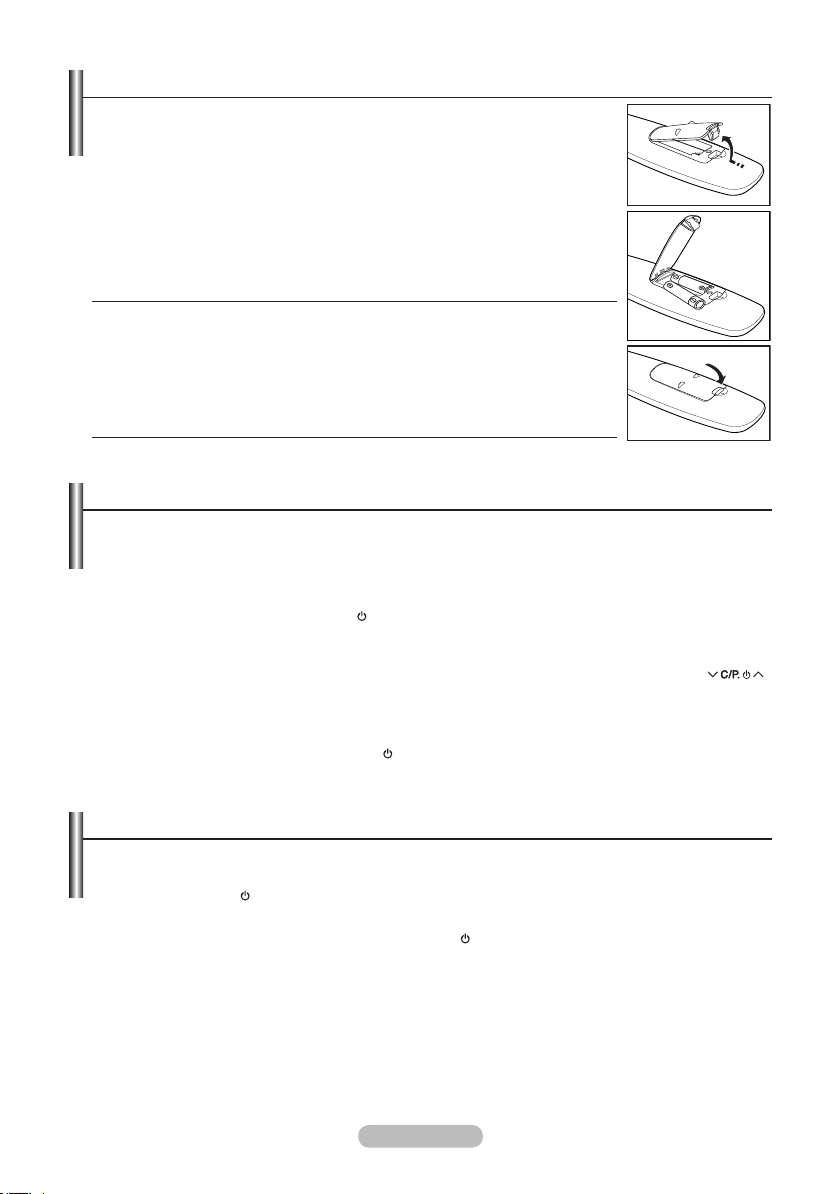
Installing Batteries in the Remote Control
1. Lift the cover at the back of the remote control upward as shown in the
gure.
2.
Install two AAA size batteries.
Make sure to match the "+" and "–" ends of the batteries with the
➣
diagram inside the compartment.
3. Replace the cover.
➣
Remove the batteries and store them in a cool, dry place if you won’t be
using the remote control for a long time.
➣
If the remote control doesn’t work, check the following:
1. Is the TV power on?
2. Are the plus and minus ends of the batteries reversed?
3. Are the batteries drained?
4. Is there a power outage, or is the power cord unplugged?
5. Is there a special uorescent light or neon sign nearby?
Switching On and Off
The mains lead is attached to the rear of your set.
1. Plug the mains lead into an appropriate socket.
The standby indicator lights up
➣
2. Press the P button
You also can press the POWER button or the TV/DTV button on the remote control to turn
➣
the TV on.
The programme that you were watching last is reselected automatically.
➣
3. Press the numeric button (0~9) or channel up/down (</>) button on the remote control or
button
on your set.
When you switch the set on for the very rst time, you will be asked to choose language in which the
➣
menus are to be displayed.
4. To switch your set off, press the POWER button again.
on your set.
on your set.
Placing Your Television in Standby Mode
Your set can be placed in standby mode in order to reduce the power consumption. The standby
mode can be useful when you wish to interrupt viewing temporarily (during a meal, for example).
Press the POWER button on the remote control.
1.
The screen is turned off and a red standby indicator appears on your set.
➣
2.
To switch your set back on, simply press the POWER , numeric buttons (0~9), TV/DTV button or
channel up/down (</>) button again.
Do not leave your set in standby mode for long periods of time (when you are away on holiday, for
➣
example).
It is best to unplug the set from the mains and aerial.
English - 9
Page 12
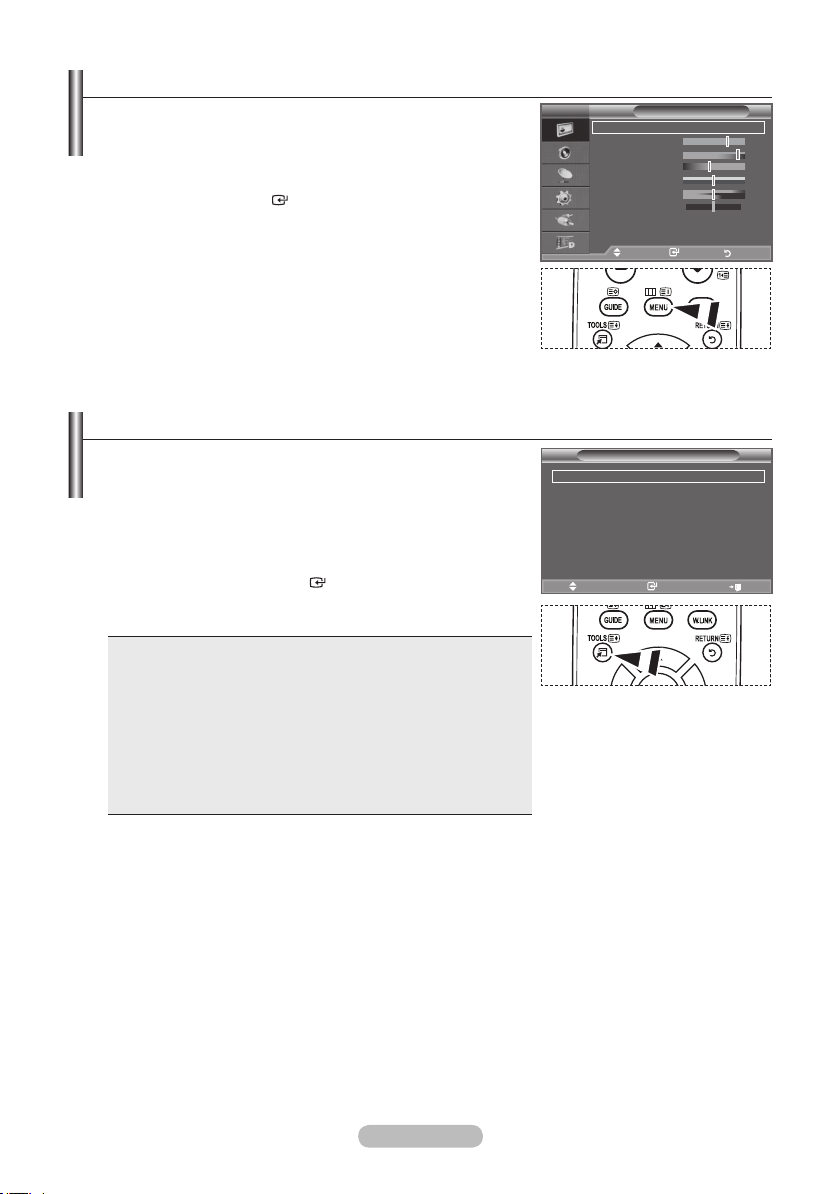
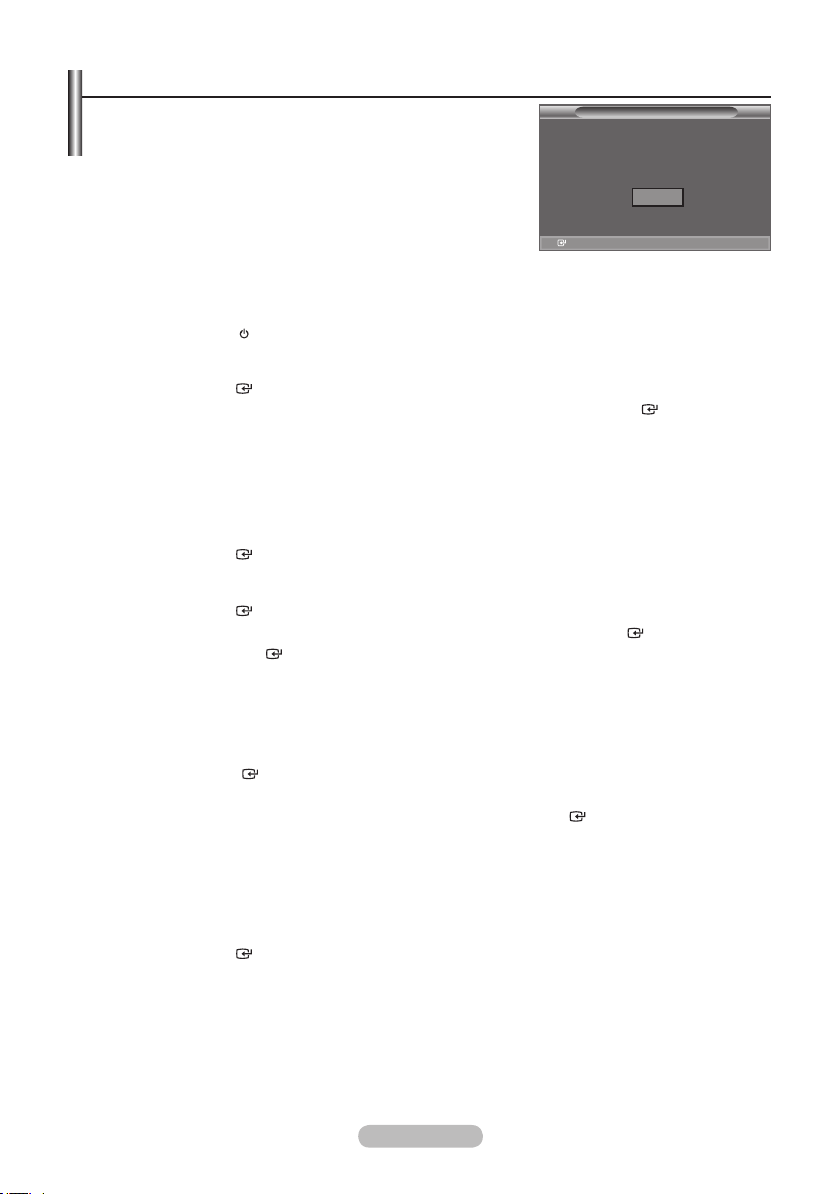
Viewing the Menus
1. With the power on, press the MENU button.
The main menu appears on the screen. The menu’ s left side has
icons: Picture, Sound, Channel, Setup, Input, Digital Menu.
2.
Press the ▲ or ▼ button to select one of the icons.
Then press the
ENTER
button to access the icon’s sub-menu.
3. Press the EXIT button to exit.
The on-screen menus disappear from the screen after about
➣
one minute.
Using the TOOLS Button
You can use the TOOLS button to select your frequently
used functions quickly and easily. The “Tools” menu change
depending on which external input mode you are viewing.
Press the TOOLS button.
1.
The “Tools” menu will appear.
2.
Press the ▲ or ▼ button to select a menu.
3. Press the ▲/▼/◄/►/
use the selected items. For a more detailed description of each
function, refer to the corresponding page.
Anynet+ (HDMI-CEC), see page 57
♦
Picture Mode, see page 17
♦
Sound Mode, see page 23
♦
Sleep Timer, see page 25
♦
SRS TS XT, see page 23
♦
Energy Saving, see page 28
♦
Dual l-ll, see page 24
♦
PIP, see page 22
♦
Auto Adjustment, see page 48
♦
ENTER
buttons to display, change, or
TV
Mode : Standard
Backlight 7
Contrast 95
Brightness 45
Sharpness 50
Colour 50
Tint G50 R50
Detailed Settings
sMore
Move Enter Return
Anynet+ (HDMI-CEC)
Picture Mode : Standard
Sound Mode : Custom
Sleep Timer : Off
SRS TS XT : Off
Energy Saving : Off
Dual l-ll : Mono
Move Enter Exit
Picture
Tools
English - 10
Page 13
Plug & Play
When the TV is initially powered on, several basic settings
proceed automatically and subsequently. The following
settings are available.
Any functions related to Digital TV (DVB) will only work in
➣
countries or areas where DVB-T (MPEG2) digital terrestrial
signals are broadcasted. Please conrm with your local dealer
if you can receive DVB-T signals. Although this TV set follows
the DVB-T specication, maintaining compatibility with the future
coming DVB-T digital terrestrial broadcasts is not guaranteed.
Several functions may not be available in some countries.
This product is only applicable to Finnish, Swedish and Danish broadcasts. Broadcasts are not
➣
supported in other countries.
1.
Press the POWER button on the remote control.
The message "Start Plug & Play" is displayed with "OK" selected.
2.
Select the appropriate language by pressing the ▲ or ▼ button.
Press the
3. Press the ◄ or ► button to select “Store Demo” or “Home Use”, then the
➣
➣
➣
4. The message "Check antenna input." is displayed with "OK" selected.
Press the
➣
5. Select the appropriate country by pressing the▲ or ▼ button.
Press the
6. The “Auto Store” menu is displayed with the “Start” selected. Press the ENTER button.
➣
➣
7.
The DTV channel scan menu appears.
♦
♦
♦
➣
➣
➣
8. Press the
Select the "Month", "Day", "Year", "Hour", or "Minute" by pressing the
Set the "Month", "Day", "Year", "Hour", or "Minute" by pressing the
➣
ENTER
We recommend setting the TV to "Home Use" mode for the best picture in your home
environment.
"Store Demo" mode is only intended for use in retail environments.
If the unit is accidentally set to “Store Demo” mode and you want to return to “Home Use”
(Standard): Press the Volume button on the TV. When the volume OSD is displayed, press and
hold the MENU button on the TV for 5 seconds.
ENTER
Please check that the antenna cable is connected correctly.
ENTER
Press the ENTER button at any time to interrupt the memorization process.
The channel search will start and end automatically.
If the country is set to "Others"
"Clock Set" screen appears when searching for the analog channel is finished.
If the country is set to “Finland”
Press the
If the country is set to “Sweden”, or “Denmark”
Press the ▲ or ▼ button to select “Cable” or “Aerial”. Press the
Aerial: scanning for aerial services
Cable: scanning for cable services
For detailed descriptions about DTV channel update, refer to page 32 of this manual.
If the DTV channel is updated, the Source in the source list of the Input menu is automatically changed
to DTV.
After all the available channels are stored, the “Clock Set” menu appears.
ENTER
You can also set the “Month”, “Day”, “Year”, “Hour” and "Minute" by pressing the number buttons
on the remote control.
button to conrm your choice.
button.
button to conrm your choice.
ENTER
button to select “Start”.
button.
ENTER
◄
▲
Plug & Play
Start Plug & Play.
Enter
ENTER
button.
or ► button.
or ▼ button.
OK
button.
English - 11
Page 14
9. Press the
When you have nished, press the
➣
ENTER
Even if the
button to conrm your setting. The message “Enjoy your viewing” is displayed.
ENTER
ENTER
button is not pressed, the message will automatically disappear after
button.
several seconds.
Language: Select your language.
♦
Country: Select your country.
♦
Auto Store: Automatically scans for and stores channels available in the local area.
♦
Clock Set: Sets the current time for the TV clock.
♦
If you want to reset this feature...
1. Press the MENU button to display the menu.
Press the ▲ or ▼ button to select "Setup", then press the
ENTER
2. Press the
button.
ENTER
button again, to select "Plug & Play".
For further details on setting up options, refer to the page 11.
The “Plug & Play” feature is only available in the TV mode.
➣
Storing Channels Automatically
-
Storing Channels Manually
-
TV
Plug & Play
Language : English
Time
Light Effect :
Auto Wall-Mount
Melody : Off
Entertainment : Off
Energy Saving : Off
PIP
Move Enter Return
Start Plug & Play.
Enter Return
TV
Country : Finland
Auto Store
Manual Store
Channel Manager
Sort
Name
Fine Tune
Move Enter Return
Setup
In Watching TV
Plug & Play
OK
Enter Return
Channel
Storing Channels Automatically
You can scan for the frequency ranges available to you (and availability depends on your country).
Automatically allocated programme numbers may not correspond to actual or desired programme
numbers. However, you can sort numbers manually and clear any channels you do not wish to
watch.
Press the MENU button to display the menu.
1.
Press the ▲ or ▼ button to select "Channel", then press the
2. Press the
ENTER
button to select "Country".
3. Select the appropriate country by pressing the ▲ or ▼ button.
Press the
➣
ENTER
button to conrm your choice.
Even though you have changed the country setting in this menu, the country setting for DTV is not
changed. (Refer to page 31)
4. Press the ▲ or ▼ button to select "Auto Store", then press the
5. Press the
➣
➣
ENTER
button.
The TV will begin memorizing all of the available channels.
Press the
ENTER
button at any time to interrupt the memorization process and return to the
"Channel" menu.
6. After all the available channels are stored, the "Sort" menu appears. (refer to page 15)
English - 12
ENTER
ENTER
button.
button.
Page 15
Storing Channels Manually
Not available in DTV or external input mode.
➣
You can store television channels, including those received via
cable networks.
When storing channels manually, you can choose:
♦ Whether or not to store each of the channels found.
♦ The programme number of each stored channel which you wish
TV
Country : Finland
Auto Store
Manual Store
Channel Manager
Sort
Name
Fine Tune
to identify.
1.
Press the MENU button to display the menu.
Press the ▲ or ▼ button to select "Channel", then press the
ENTER
button.
2. Press the ▲ or ▼ button to select "Manual Store", then press
the
ENTER
button.
3. Select the required option by pressing the ▲ or ▼ button, then
press the
ENTER
button.
Move Enter Return
Move Enter Return
TV
Programme : P 2
Colour System : Auto
Sound System : BG
Channel : C 3
Search : 77 MHz
Store : ?
4. When you are satised with your setting, press the
ENTER
5. Press the EXIT button to exit.
Programme (Programme number to be assigned to a channel)
♦
-
➣
Colour System: Auto/PAL/SECAM/NTSC4.43
♦
-
Sound System: BG/DK/I/L
♦
-
♦
Channel (When you know the number of the channel to be stored)
-
-
➣
➣
Search (When you do not know the channel numbers)
♦
-
-
button.
Move Enter Return
Press the ▲ or ▼ button until you nd the correct number.
You can also select the channel number directly by pressing the numeric buttons (0~9).
Press the ▲ or ▼ button to select the required colour standard.
Press the ▲ or ▼ button to select the required sound standard.
Press the ▲ or ▼ button to select C (Air channel) or S (Cable channel).
Press the ► button, then press the ▲ or ▼ button to select the required number.
You can also select the channel number directly by pressing the numeric buttons (0~9).
If there is abnormal sound or no sound, re-select the sound standard required.
Press the ▲ or ▼ button to start the search.
The tuner scans the frequency range until the rst channel or the channel that you selected is
received on the screen.
Store (When you store the channel and associated programme number)
♦
Set to "OK" by pressing the
-
➣
Channel mode
-
P (Programme mode): When completing tuning, the broadcasting stations in your area have been
ENTER
button.
assigned to position numbers from P00 to P99. You can select a channel by entering the position
number in this mode.
-
C (Air channel mode): You can select a channel by entering the assigned number to each air
broadcasting station in this mode.
-
S (Cable channel mode): You can select a channel by entering the assigned number for each cable
channel in this mode.
Channel
Manual Store
English - 13
Page 16
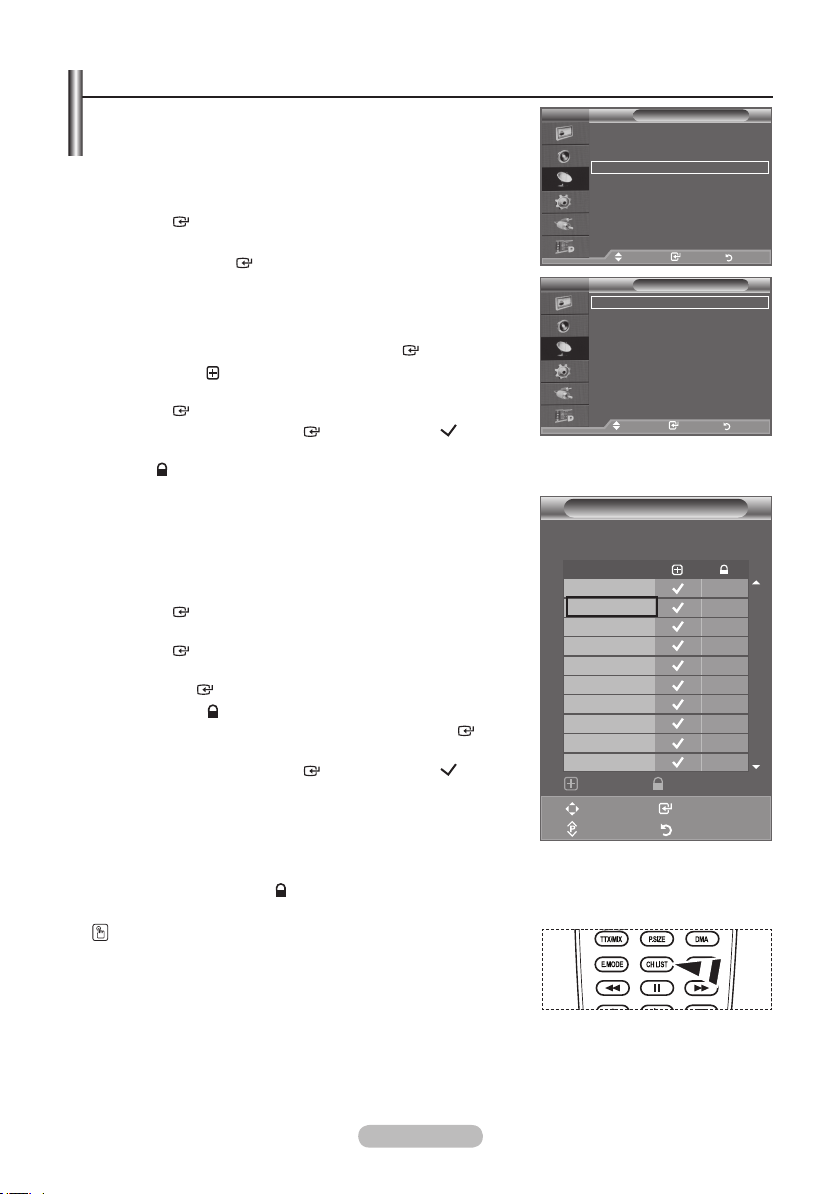
Adding / Locking Channels
Not available in DTV or external input mode.
➣
Using the Channel Manager, you can conveniently lock or add
channels.
Press the MENU button to display the menu.
1.
Press the ▲ or ▼ button to select "Channel", then press the
ENTER
2. Press the ▲ or ▼ button to select "Channel Manager", then
press the
♦ Adding channels
Using the Channel List, you can add channels.
3. Select Channel List by pressing the
4. Move to the ( ) eld by pressing the ▲, ▼, ◄ or ►
button, select a channel to be added, and press the
ENTER
➣
➣
button.
ENTER
button.
ENTER
button.
button to add the channel.
If you press the
ENTER
button again, the ( ) symbol
next to the channel disappears and the channel is not added.
“
” is active when "Child Lock" is selected to "On".
TV
Country : Finland
Auto Store
Manual Store
Channel Manager
Sort
Name
Fine Tune
Move Enter Return
TV
Channel List
Child Lock : Off
Move Enter Return
Channel
Channel Manager
♦ Locking channels
This feature allows you to prevent unauthorized users, such as
children, from watching unsuitable programmes by muting out
video and audio.
5. Press the ▲ or ▼ button to select "Child Lock", then press the
ENTER
button.
6. Select "On" by pressing the ▲ or ▼ button, then press the
ENTER
button.
7. Press the ▲ or ▼ button to select "Channel List", then press
the
ENTER
button.
8. Move to the ( ) eld by pressing the ▲, ▼, ◄ or ► button,
select a channel to be locked, and press the
ENTER
button.
If you press the
➣
ENTER
button again, the ( ) symbol
next to the channel disappears and the channel lock is
cancelled.
➣
A blue screen is displayed when "Child Lock" is activated.
9. Press the EXIT button to exit.
Select "On" or "Off" in "Child Lock" to easily turn the channels
➣
which selected on "
" to be active or inactive.
You can select these options by simply pressing the CH LIST
button on the remote control
Channel List
P 1 C3
1 / 10
Prog.
0 C-1 C3
2 BBC 1
3 C74
4 C75
5 C76
6 S3
7 S4
8 S6
9 S7
Add Lock
Move Enter
Page Return
English - 14
Page 17
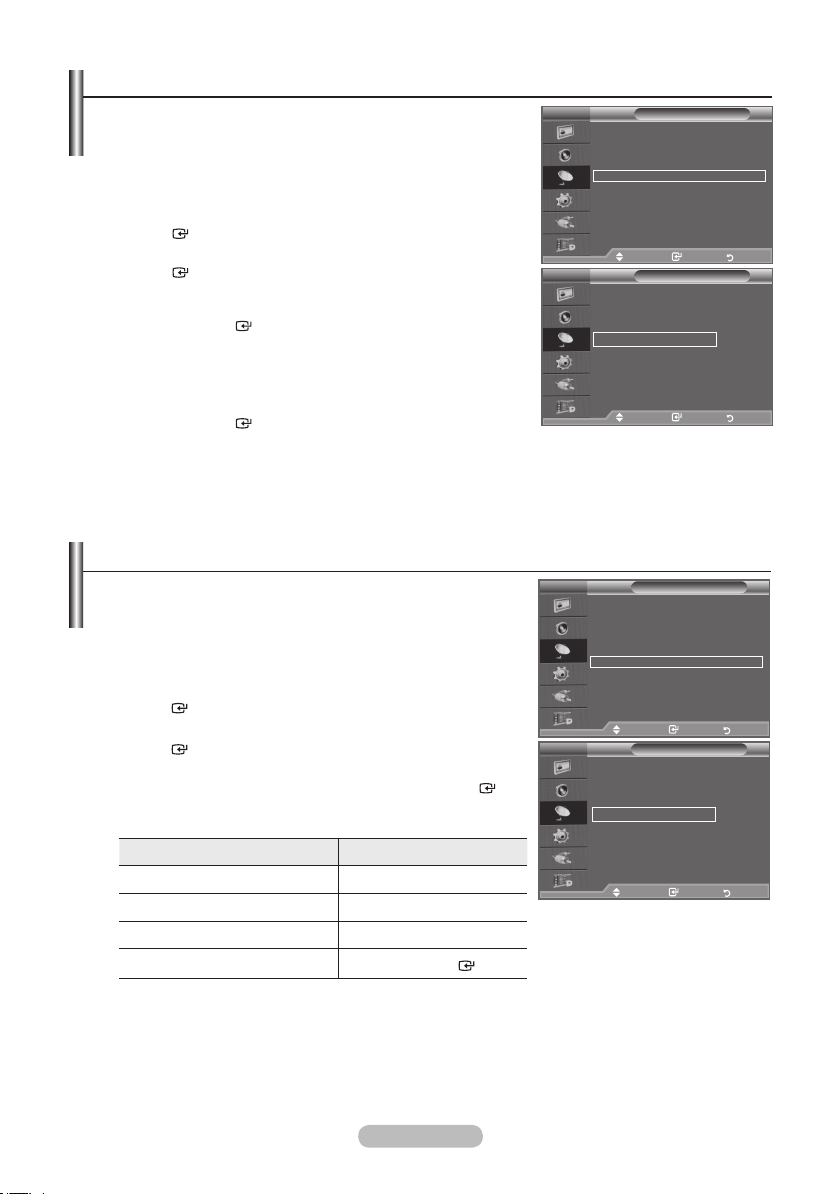
Sorting the Stored Channels
This operation allows you to change the programme numbers
of the stored channels.
This operation may be necessary after using the auto store.
Not available in DTV or external input mode.
➣
Press the MENU button to display the menu.
1.
Press the ▲ or ▼ button to select "Channel", then press the
ENTER
button.
2. Press the ▲ or ▼ button to select "Sort", then press the
ENTER
button.
3. Select the channel number that you wish to change by pressing
the ▲ or ▼ button.
Press the ENTER button.
The selected channel number and name are moved to right
➣
side.
4. Select the number of the programme to which the channel is to
be moved by pressing the ▲ or ▼ button.
5. Press the ENTER button. The channel is moved to its new
position and all other channels are shifted accordingly.
6. Repeat steps 3 to 5 for another channel to be sorted.
7. Press the EXIT button to exit.
TV
Country : Finland
Auto Store
Manual Store
Channel Manager
Sort
Name
Fine Tune
Move Enter Return
TV
Prog. Ch. Name
0 C--
1 C23
2 C16
3 C3
4 S1
s
Move Enter Return
Assigning Channels Names
Channel names will be assigned automatically when channel
information is broadcast. These names can be changed,
allowing you to assign new names.
➣
Not available in DTV or external input mode.
Press the MENU button to display the menu.
1.
Press the ▲ or ▼ button to select "Channel", then press the
ENTER
button.
2. Press the ▲ or ▼ button to select "Name", then press the
ENTER
button.
3. If necessary, select the channel to be assigned to a new
name by pressing the ▲ or ▼ button. Press the
ENTER
button
The selection bar is displayed around the name box.
➣
4.
To... Then...
Select a letter, number or symbol Press the ▲ or ▼ button
Move on the next letter Press the ► button
Move back the previous letter Press the ◄ button
Conrm the name
➣
The following characters are available: Letters of the alphabet (A~Z) / Numbers (0~9) / Special
Press the
ENTER
button
characters (+, -, *, /, space)
5. Repeat steps 3 to 4 for each channel to be assigned to a new name.
6. Press the EXIT button to exit.
TV
Country : Finland
Auto Store
Manual Store
Channel Manager
Sort
Name
Fine Tune
Move Enter Return
TV
Prog. Ch. Name
0 C-- -----
1 C23 -----
2 C16 ----3 C3 ----4 S1 ---- s
Move Enter Return
Channel
Sort
Channel
Name
English - 15
Page 18
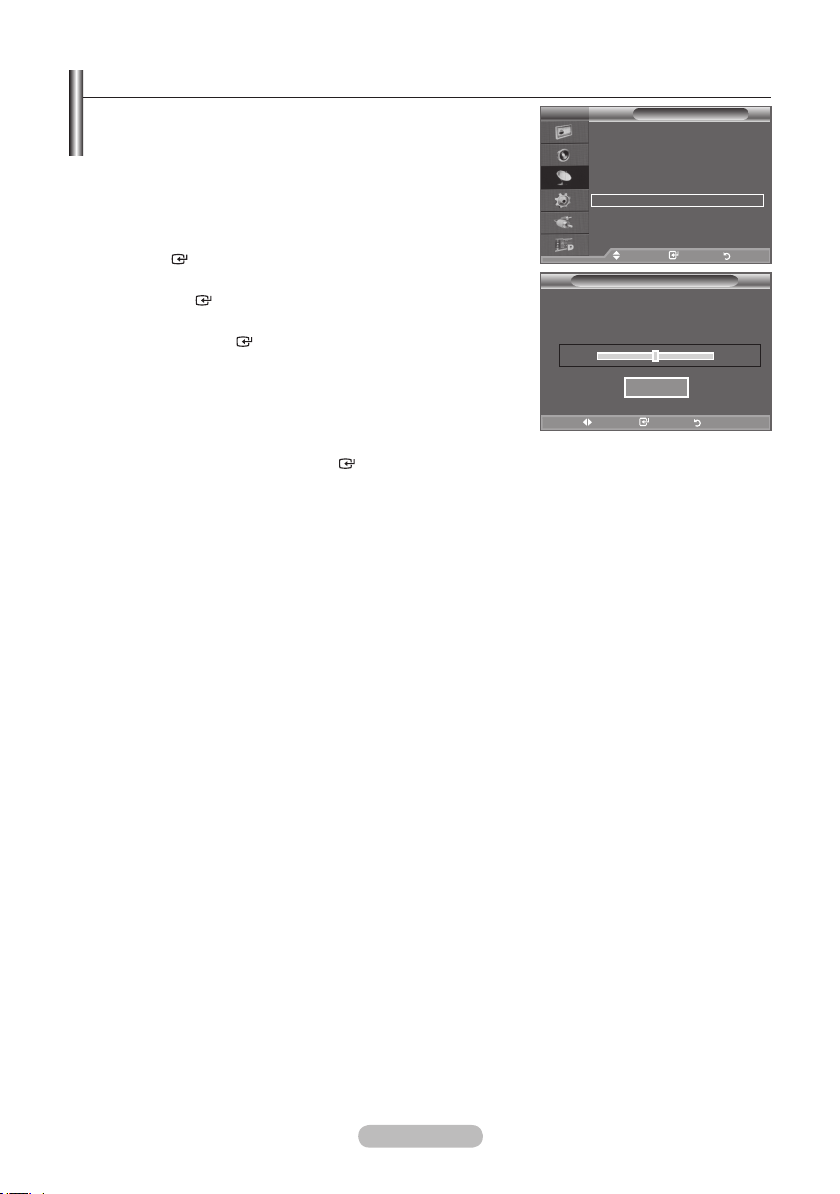
Fine Tuning Channel Reception
Use fine tuning to manually adjust a particular channel for
optimal reception.
➣
Not available in DTV or external input mode.
Use the number buttons to directly select the channel that
1.
you want to ne tune.
2.
Press the MENU button to display the menu.
Press the ▲ or ▼ button to select "Channel", then press the
ENTER
3. Press the ▲ or ▼ button to select "Fine Tune", then press
the
4. Press the ◄ or ► button to adjust the ne tuning.
Press the
5. Press the EXIT button to exit.
➣
Fine tuned channels that have been saved are marked with
an asterisk "*" on the right-hand side of the channel number
in the channel banner. And the channel number turns red.
➣
To reset the ne-tuning, select "Reset" by pressing the ▲ or ▼
button and then press the
ENTER
button.
button.
ENTER
button.
ENTER
button.
TV
Country : Finland
Auto Store
Manual Store
Channel Manager
Sort
Name
Fine Tune
Move Enter Return
P 1
Adjust Save Return
Channel
Fine Tune
Reset
0
English - 16
Page 19
Changing the Picture Standard
You can select the type of picture which best corresponds to
your viewing requirements.
1.
Press the MENU button to display the menu.
Press the
2. Press the
3. Press the ▲ or ▼ button to select the desired picture effect.
Press the
4. Press the EXIT button to exit.
♦
♦
♦
The Picture mode must be adjusted separately for each input
➣
source.
Easy Setting
1.
Press the TOOLS button on the remote control.
2.
Press the ▲ or ▼ button to select “Picture Mode”.
3. Press the ◄ or ► button to select the desired picture mode.
4. Press the EXIT or TOOLS button to exit.
ENTER
ENTER
ENTER
button, to select "Picture".
button again, to select "Mode".
button.
Dynamic: Selects the picture for high-definition in a bright
room.
Standard: Selects the picture for optimum display in a
normal environment.
Movie: Selects the picture for comfortable display in a dark
room.
TV
Mode : Standard
Backlight 7
Contrast 95
Brightness 45
Sharpness 50
Colour 50
Tint G50 R50
Detailed Settings
sMore
Move Enter Return
TV
Mode : Standard
Backlight 7
Contrast 95
Brightness 45
Sharpness 50
Colour 50
Tint G50 R50
Detailed Settings
sMore
Move Enter Return
Anynet+ (HDMI-CEC)
Picture Mode ◄ Standard ►
Sound Mode : Custom
Sleep Timer : Off
SRS TS XT : Off
Energy Saving : Off
Dual l-ll : Mono
Move Adjust Exit
Tools
Picture
Picture
Dynamic
Standard
Movie
English - 17
Page 20
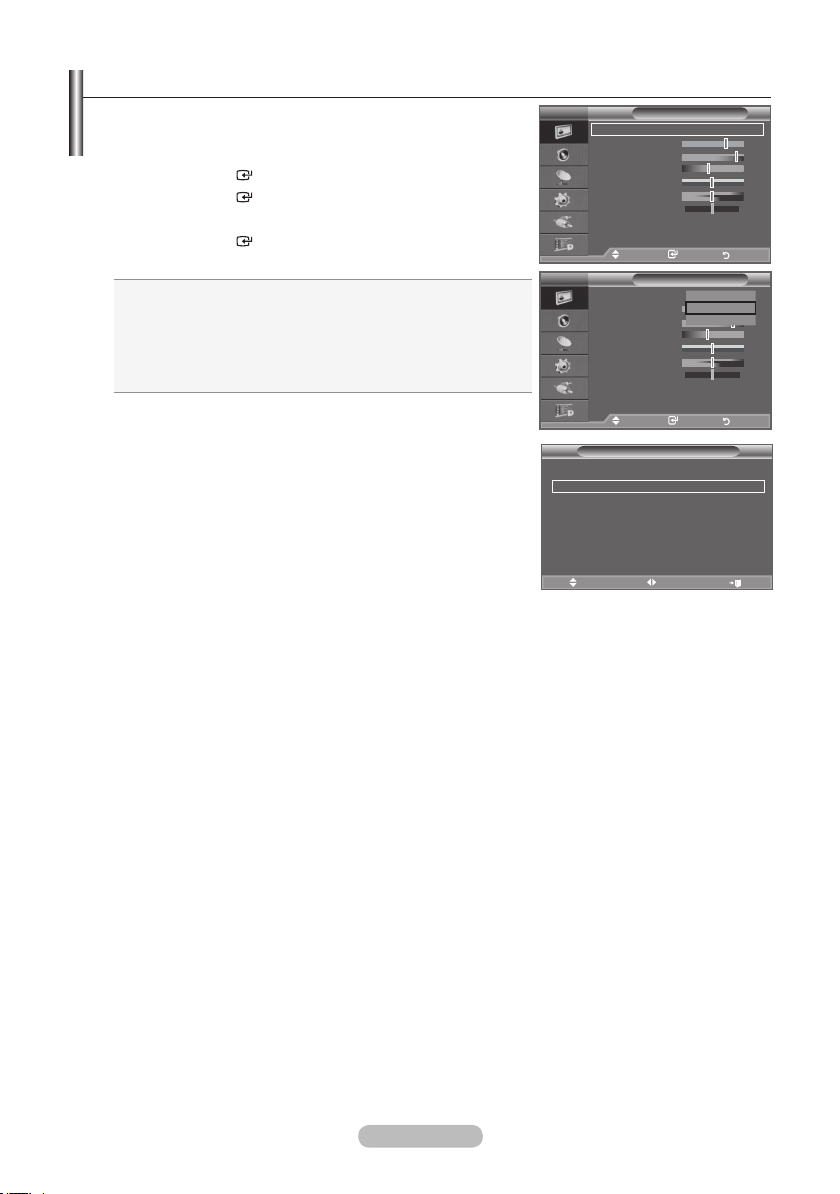
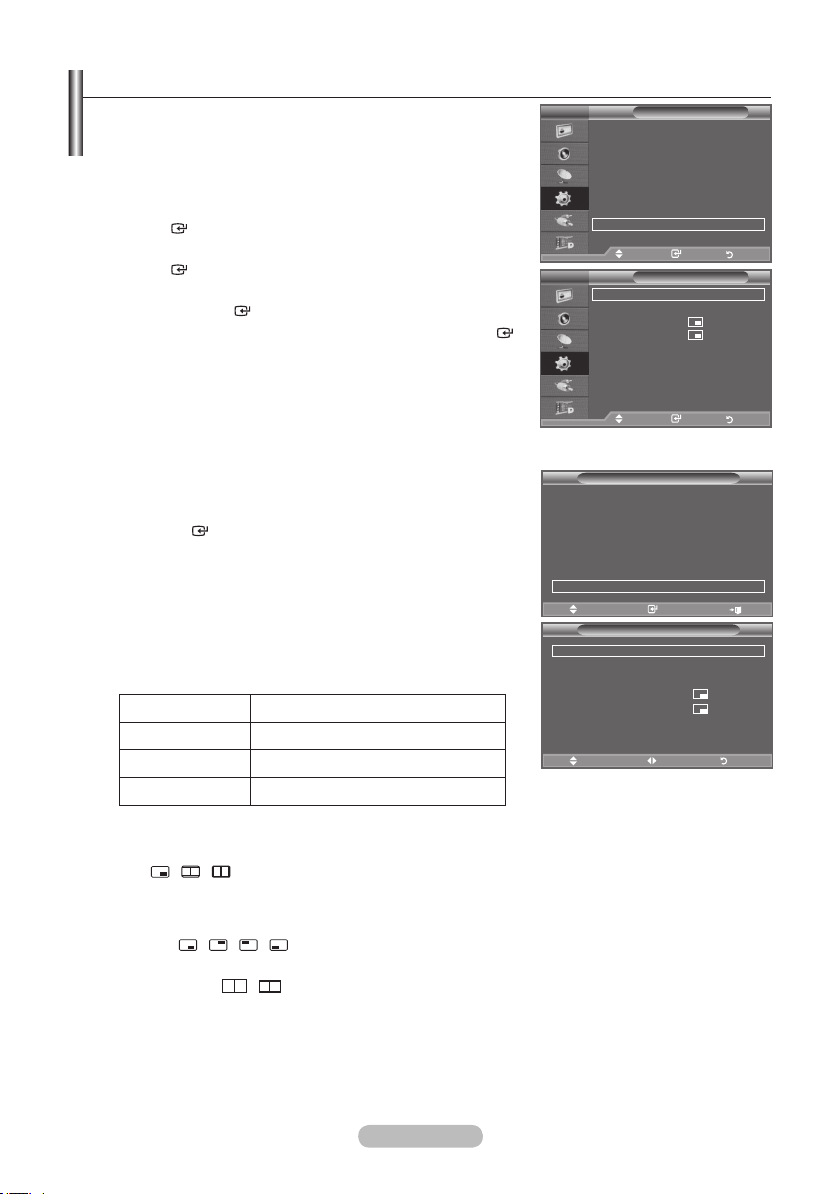
Adjusting the Custom Picture
Your set has several settings which allow you to control picture
quality.
1.
To select the desired picture effect, follow the
"Changing the Picture Standard" instructions number 1 to 3.
2. Press the ▲ or ▼ button to select a particular item. Press the
ENTER
button.
3. Press the ◄ or ► button to decrease or increase the value of a
particular item. Press the
ENTER
button.
4. Press the EXIT button to exit.
Backlight: Adjusts the screen brightness by adjusting the LCD
♦
backlight brightness. (0~10)
Contrast: Adjusts the lightness and darkness between objects
♦
and the background.
Brightness: Adjusts the brightness of the whole screen.
♦
Sharpness: Adjusts the outline of objects to either sharpen them
♦
or make them more dull.
Colour: Adjusts the colours, making them lighter or darker.
♦
Tint: Adjusts the colour of objects, making them more red or
♦
green for a more natural look.
The adjusted values are stored according to the selected Picture mode.
➣
In PC mode, you can only make changes to "Backlight”, “Contrast" and “Brightness”.
➣
In Analogue TV, Ext., AV, S-Video modes of the PAL system, you cannot use the "Tint" Function.
➣
You can return to the factory defaults picture settings by selecting the "Reset".
➣
(Refer to "Resetting the Picture Settings to the Factory Defaults" on page 19)
➣
The energy consumed during use can be significantly reduced if the level of brightness of the picture
is reduced, and that this will reduce the overall running cost.
TV
Mode : Standard
Backlight 7
Contrast 95
Brightness 45
Sharpness 50
Colour 50
Tint G50 R50
Detailed Settings
sMore
Move Enter Return
▲
Backlight
▼
Move Adjust Return
Picture
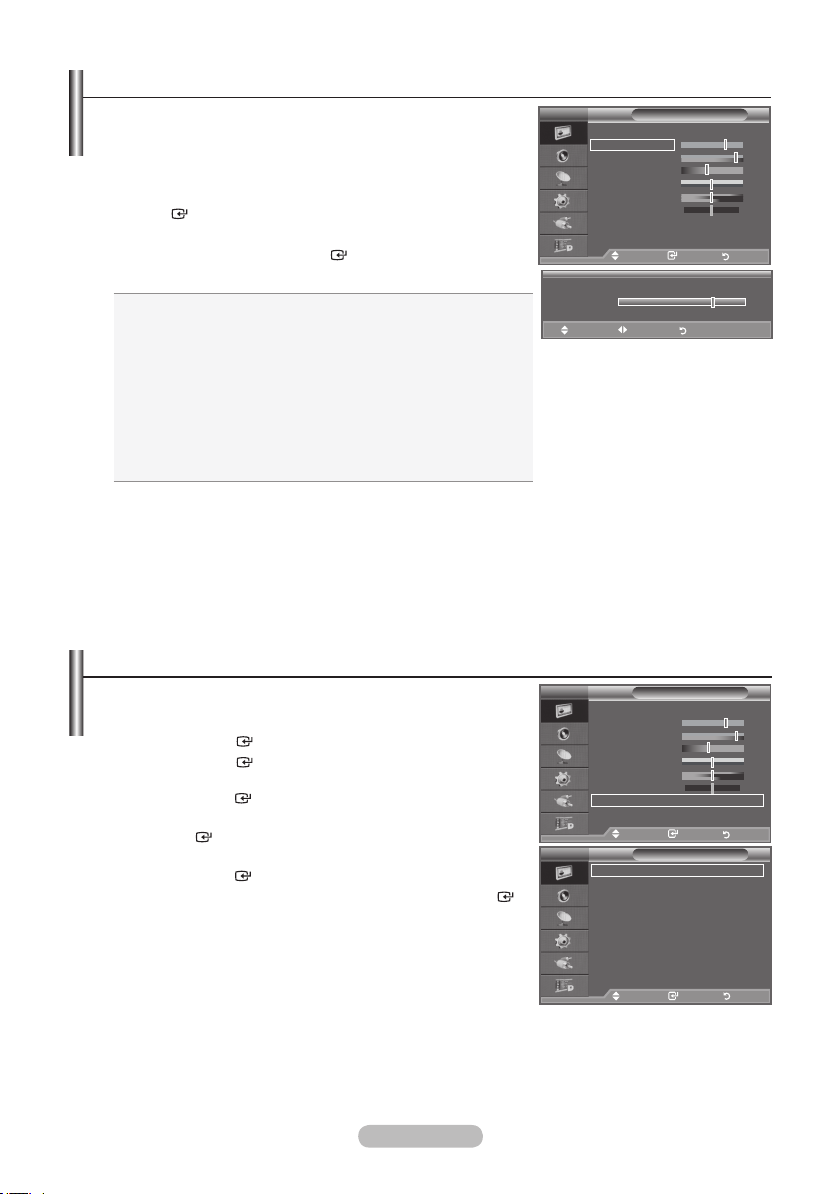
Conguring Detailed Settings on the Picture
You can set detailed picture settings.
1. Press the MENU button to display the menu.
Press the
2. Press the
ENTER
ENTER
button, to select "Picture".
button to select “Mode”.
Press the ▲ or ▼ button to select “Standard” or “Movie”, then
press the
ENTER
button.
3. Press the ▲ or ▼ button to select "Detailed Settings", then press
the
ENTER
button.
4. Select the required option by pressing the ▲ or ▼ button, then
press the
5. When you are satised with your setting, press the
ENTER
button.
ENTER
button.
6. Press the EXIT button to exit.
"Detailed Settings" is available in "Standard" or "Movie" mode.
➣
➣
In PC mode, you can only make changes to “Dynamic Contrast”,
“Gamma” and “White Balance” from among the “Detailed
Settings” items.
Black Adjust: Off/Low/Medium/High
♦
You can directly select the black level on the screen to adjust the screen depth.
Dynamic Contrast: Off/Low/Medium/High
♦
You can adjust the screen contrast so that the optimal contrast is provided.
TV
Mode : Standard
Backlight 7
Contrast 95
Brightness 45
Sharpness 50
Colour 50
Tint G50 R50
Detailed Settings
sMore
Move Enter Return
TV
Black Adjust : Off
Dynamic Contrast
Gamma : 0
Colour Space : Custom
White Balance
Flesh Tone : 0
Edge Enhancement
xvYCC
Move Enter Return
Picture
Detailed Settings
: Medium
: On
: Off
7
English - 18
Page 21
Gamma: -3 ~ +3
♦
You can adjust the Primary Colour (Red, Green, Blue) Intensity.
Press the ◄ or ► button until you reach the optimal setting.
Colour Space: Auto/Native/Custom
♦
Colour space is a Colour matrix composed of “Red”, “Green” and “Blue” Colours.
Select your favourite Colour space to experience the most natural Colour.
♦ Auto: Auto Color Space automatically adjusts to the most natural color tone based on program
sources.
♦ Native: Native Color Space offers deep and rich color tone.
♦ Custom: Adjusts the color range to suit your preference.
Customizing the Colour Space
➣
Colour: Red/Green/Blue/Yellow/Cyan/Magenta
Adjusts the Colour range to suit your preference.
“Colour” is available when “Colour Space” is set to “Custom”.
Press the ▲ or ▼ button to select “Red”, “Green”, “Blue”, “Yellow”, “Cyan” or “Magenta”.
Press the
ENTER button.
Red/Green/Blue: In “Colour”, you can adjust the RGB values for the selected colour.
Press the ▲ or ▼ button to select "Red", "Green" or "Blue" to change it.
Press the
ENTER button.
Press the ◄ or ► button to decrease or increase the value of a particular item. Press the
ENTER button.
Reset: Resets the colour space to the default values.
White Balance: R-Offset/G-Offset/B-Offset/R-Gain/G-Gain/B-Gain/Reset
♦
You can adjust the colour temperature for more natural picture colours.
R-Offset/G-Offset/B-Offset/R-Gain/G-Gain/B-Gain: Changing the adjustment value will refresh the
adjusted screen.
Select the required option by pressing the ▲ or ▼ button, then press the
ENTER
button.
Press the ◄ or ► button until you reach the optimal setting.
Reset: The previously adjusted white balance will be reset to the factory defaults.
♦
Flesh Tone: -15 ~ +15
You can emphasize the pink 'flesh tone' in the picture.
Press the ◄ or ► button until you reach the optimal setting.
Changing the adjustment value will refresh the adjusted screen.
➣
♦
Edge Enhancement: Off/On
You can emphasize object boundaries in the picture.
♦
xvYCC: Off/On
Setting the xvYCC mode to On increases detail and colour space when watching movies from an
external device (ie. DVD player) connected to the HDMI or Component IN jacks. You must set the
Picture Mode to Movie to enjoy this feature.
Only available in "HDMI" and "Component" on "Movie" mode.
➣
If xvYCC function is active, PIP cannot be selected.
➣
Resetting the Picture Settings to the Factory Defaults
You can return to the factory defaults picture settings.
To select the desired picture effect, follow the "Changing the
1.
Picture Standard" instructions number 1 to 3 (On page 17).
2.
Press the ▲ or ▼ button to select "Reset", then press the
ENTER
button.
3. Press the ▲ or ▼ button to select "OK" or "Cancel".
Press the
ENTER
button.
4. Press the EXIT button to exit.
The "Reset" will be set for each "Picture" mode.
➣
English - 19
TV
More
Picture Options
Reset : OK
Move Enter Return
Picture
OK
Cancel
Page 22
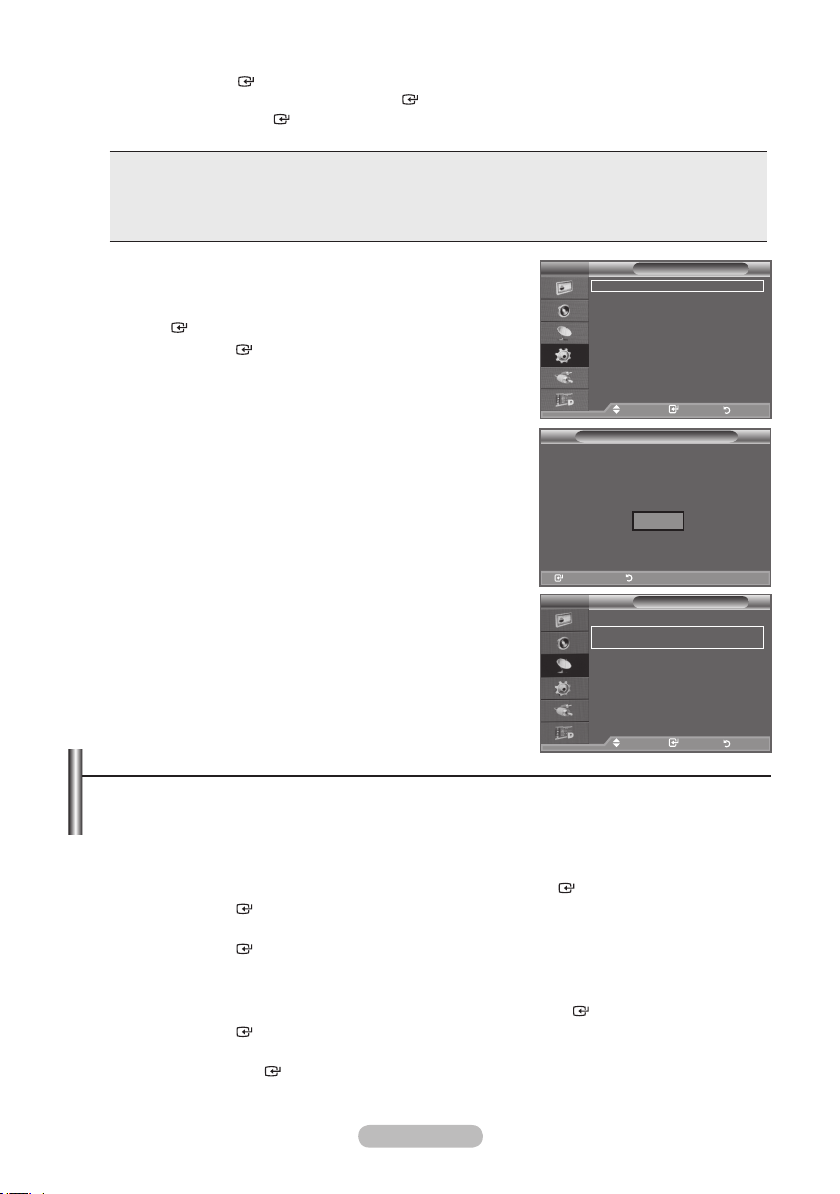
Conguring Picture Option
1. Press the MENU button to display the menu.
Press the
ENTER
button, to select "Picture".
2. Press the ▲ or ▼ button to select "Picture Options", then press
the
ENTER
button.
TV
More
Picture Options
Reset : OK
3. Select the required option by pressing the ▲ or ▼ button, then
press the
4. When you are satised with your setting, press the
button.
5. Press the EXIT button to exit.
➣
Colour Tone: Cool2/Cool1/Normal/Warm1/Warm2
♦
You can select the most comfortable colour tone to your eyes.
➣
➣
Size: Auto Wide/16:9/Wide Zoom/Zoom/4:3/Just Scan
♦
ENTER
In PC mode, you can only make changes to the “Colour
Tone” and “Size” from among the items in “Picture Options”.
The adjusted values are stored according to the selected
"Picture" mode.
button.
ENTER
Move Enter Return
TV
Colour Tone : Normal
Size
Screen Mode : 16:9
Digital NR : Auto
DNIe
HDMI Black Level
Movie Plus
Blue Only Mode
Move Enter Return
“Warm1” or “Warm2” is only activated when the picture mode is "Movie".
You can select the picture size which best corresponds to your viewing requirements.
Auto Wide: Automatically adjusts the picture size to the "16:9" aspect ratio.
♦
♦
16:9: Adjusts the picture size to 16:9 appropriate for DVDs or wide broadcasting.
♦
Wide Zoom: Magnify the size of the picture more than 4:3.
♦
Zoom: Magnifies the 16:9 wide picture (in the vertical direction) to fit the screen size.
♦
4:3: This is the default setting for a video movie or normal broadcasting.
♦
Just Scan: Use the function to see the full image without any cutoff when HDMI (720p/1080i/
1080p) or Component (1080i/1080p) signals are input.
"Auto Wide" function is available only in "TV", "DTV", "Ext.1", "Ext.2", "AV", and "S-Video" mode.
➣
In PC Mode, only "16:9" and "4:3" mode can be adjusted.
➣
Settings can be adjusted and stored for each external device you have connected to an input of
➣
the TV.
Temporary image retention may occur when viewing a static image on the set for more than two
➣
hours.
"Wide Zoom": Move the screen up/down using the ▲ or ▼ button after selecting the
➣
pressing the ► or ENTER button.
"Zoom": Select by pressing the ◄ or ►button. Use the ▲ or ▼ button to move the picture up
➣
and down. After selecting , use the ▲ or ▼ button to magnify or reduce the picture size in the
vertical direction.
When Double (
➣
After selecting “Just Scan” in HDMI (1080i/1080p) or Component (1080i/1080p) mode:
➣
, ) mode has been set in PIP, the Picture Size cannot be set.
Select by pressing the ◄ or ►button. Use the ▲, ▼, ◄ or ► button to move the picture.
Reset: Press the ◄ or ► button to select “Reset”, then press the ENTER button.
You can initialize the setting.
If you use the “Just Scan” function with HDMI 720p input, 1 line will be cut at the top, bottom, left
➣
and right as in the overscan function.
Picture
Picture Options
: Auto Wide
: Off
: Normal
: Low
: Off
by
You can select these options by simply pressing the P.SIZE
button on the remote control.
English - 20
Page 23

Screen Mode: 16:9/Wide Zoom/Zoom/4:3
♦
When setting the picture size to "Auto Wide" in a 16:9 wide TV, you can determine the picture size you
want to see the 4:3 WSS (Wide Screen Service) image or nothing. Each individual European country
requires different picture size so this function is intended for users to select it.
16:9: Sets the picture to 16:9 wide mode.
♦
Wide Zoom: Magnify the size of the picture more than 4:3.
♦
Zoom: Magnify the size of the picture vertically on screen.
♦
♦
4:3: Sets the picture to 4:3 normal mode.
This function is available in "Auto Wide" mode.
➣
This function is not available in "PC", "Component" or "HDMI" mode.
➣
Digital NR: Off/Low/Medium/High/Auto
♦
If the broadcast signal received by your TV is weak, you can activate the Digital Noise Reduction
feature to help reduce any static and ghosting that may appear on the screen.
When the signal is weak, select one of the other options until the best picture is displayed.
➣
♦
DNIe: Off/ Demo/On
This TV includes the DNIe function so as to provide a high visual quality. If you set DNIe to on, you can
view the screen with the DNIe feature activated. If you set the DNIe to Demo, you can view the applied
DNIe and normal pictures on the screen, for demonstration purposes. Using this function, you can view
the difference in the visual quality.
DNIe™ (Digital Natural Image engine)
➣
This feature brings you more detailed image with 3D noise reduction, detail enhancement,
contrast enhancement and white enhancement. New image compensation Algorithm gives
brighter, clearer, more detailed image to you.
eyes.
This function is not available in "Movie" and "Standard" mode.
➣
HDMI Black Level: Normal/Low
♦
You can directly select the black level on the screen to adjust the screen depth.
This function is active only when the external input connects to HDMI(RGB signals).
➣
Movie Plus: Off/Low/Medium/High/Demo
♦
You can view more natural skin and clear text even in fast moving scenes.
Use this function when watching movies.
➣
This function is not available in “Wide Zoom” and “Zoom” modes.
➣
This function is not available when "PIP" is set to "On".
➣
It is not supported in HDMI 1080p/24Hz, 25Hz, 30Hz mode.
➣
Blue Only Mode: Off/On
♦
This function is for AV device measurement experts. This function displays the blue signal only by
removing the red and green signals from the video signal so as to provide a Blue Filter effect that is
used to adjust the Colour and Tint of video equipment such as DVD players, Home Theaters, etc.
Using this function, you can adjust the Colour and Tint to preferred values appropriate to the signal
level of each video device using the Red/Green/Blue/ Cyan/Magenta/Yellow Colour Bar Patterns,
without using an additional Blue Filter.
➣
“Blue Only Mode” is available when the picture mode is set to “Movie” or “Standard”.
DNIe™ technology will t every signal into your
English - 21
Page 24
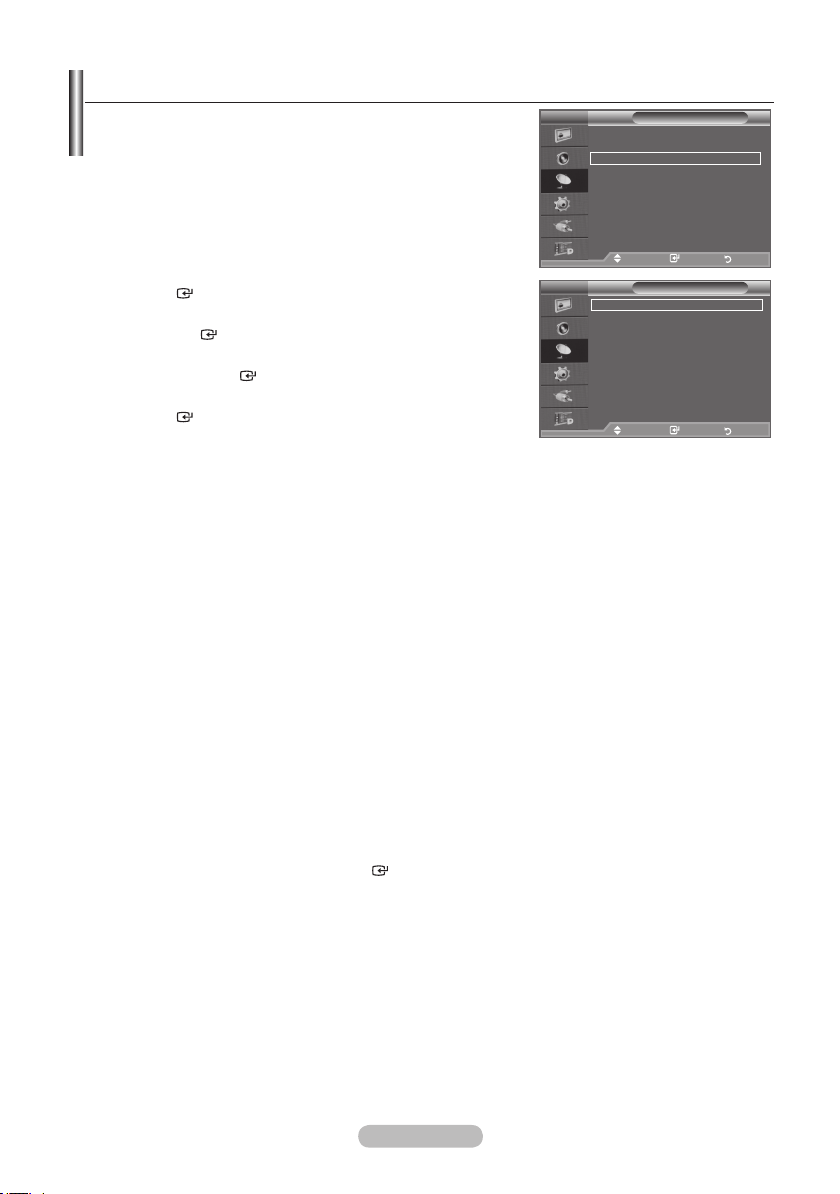
Viewing the Picture In Picture (PIP)
You can display a sub picture within the main picture of set
programme or video input. In this way, you can watch the
picture of set programme or video input from any connected
equipment while watching the main picture.
Press the MENU button to display the menu.
1.
Press the ▲ or ▼ button to select "Setup", then press the
ENTER
2. Press the▲ or ▼ button to select "PIP", then press the
ENTER
3. Select the required option by pressing the ▲ or ▼ button, then
press the
4. When you are satisfied with your setting, press the
button.
5. Press the EXIT button to exit.
You may notice that the picture in the PIP window becomes
➣
slightly unnatural when you use the main screen to view a game
or karaoke.
button.
button.
ENTER
button.
ENTER
TV
Plug & Play
Language : English
Time
Light Effect :
Auto Wall-Mount
Melody : Off
Entertainment : Off
Energy Saving : Off
PIP
Move Enter Return
Mode : Custom
TV
Equalizer
PIP : On
SRS TS XT : Off
Source : TV
Auto Volume : Off
Size :
Internal Mute : Off
Position :
Reset
Programme : P 1
Move Enter Return
Move Enter Return
Setup
In Watching TV
PIP
Easy Setting
1. Press the
2.
Press the ▲ or ▼ button to select “PIP”, then press the
ENTER
3. Press the ▲ or ▼ button to select a particular item.
4. Press the ◄ or ► button to select the required option.
5. Press the EXIT or TOOLS button to exit.
♦
PIP: On/Off
You can activate or deactivate the PIP function.
Main picture Sub picture
TOOLS button on the remote control.
button.
Anynet+ (HDMI-CEC)
Picture Mode : Standard
Sound Mode : Custom
Sleep Timer : Off
SRS TS XT : Off
Energy Saving : Off
PIP
Move Enter Exit
PIP : ◄ On ►
Source : TV
Programme : P 1
Size :
Position :
Component TV, Ext.1, Ext.2, AV, DTV
HDMI 1, 2, 3 TV, Ext.1, Ext.2, AV, DTV
Move Adjust Return
PC TV, Ext.1, Ext.2, AV, DTV
Source
♦
You can select a source of the sub-picture.
Size:
♦
/ /
You can select a size of the sub-picture.
If main picture is in "HDMI" mode, "Size" is available.
➣
Position:
♦
/ / /
You can select a position of the sub-picture.
➣
♦
Programme
In Double (
, ) mode, "Position" cannot be selected.
You can select a channel of the sub-picture only when the "Source" is set to "TV" or "DTV".
Tools
PIP
English - 22
Page 25
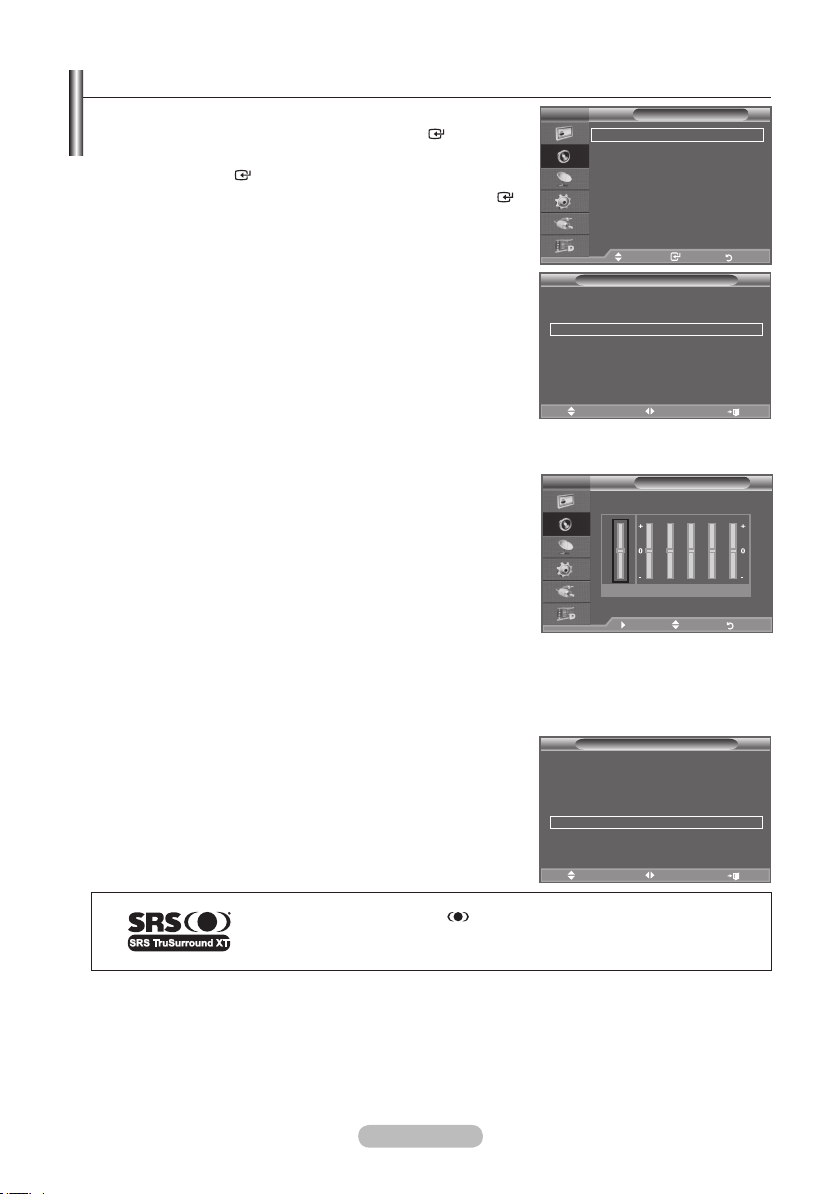
Sound Features
1. Press the MENU button to display the menu. Press the ▲ or ▼
button to select "Sound", then press the
2. Select the required option by pressing the ▲ or ▼ button, then
press the
ENTER
button.
3. When you are satised with your setting, press the
button.
4. Press the EXIT button to exit.
♦
Mode: Standard/Music/Movie/Speech/Custom
You can select the type of special sound effect to be used when
watching a given broadcast.
Easy Setting
1. Press the
2.
Press the ▲ or ▼ button to select "Sound Mode".
TOOLS button on the remote control.
3. Press the ◄ or ► button to select the desired sound mode.
4. Press the EXIT or TOOLS button to exit.
ENTER
button.
ENTER
TV
TV
Mode : Custom
Equalizer
SRS TS XT : Off
Auto Volume : Off
TV Speaker : On
Sound Select : Main
Move Enter Return
Anynet+ (HDMI-CEC)
Picture Mode : Standard
Sound Mode ◄ Custom ►
Sleep Timer : Off
SRS TS XT : Off
Energy Saving : Off
Dual l-ll : Mono
Move Adjust Exit
Sound
Tools
Equalizer: Balance/100Hz/300Hz/1kHz/3kHz/10kHz
♦
The sound settings can be adjusted to suit your personal
preferences.
If you make any changes to these settings, the sound mode
➣
is automatically switched to "Custom".
TV
R
L
Balance 100Hz 300Hz 1kHz 3kHz 10kHz
Equalizer
Move Adjust Return
SRS TS XT: Off/On
♦
TruSurround XT is a patented SRS technology that solves the problem of playing 5.1 multichannel
content over two speakers. TruSurround delivers a compelling, virtual surround sound experience
through any two-speaker playback system, including internal television speakers. It is fully compatible
with all multichannel formats.
Easy Setting
1. Press the
2.
Press the ▲ or ▼ button to select “SRS TS XT”.
TOOLS button on the remote control.
3. Press the ◄ or ► button to select the "Off" or "On".
4. Press the EXIT or TOOLS button to exit.
Anynet+ (HDMI-CEC)
Picture Mode : Standard
Sound Mode : Custom
Sleep Timer : Off
SRS TS XT ◄ Off ►
Energy Saving : Off
Dual l-ll : Mono
Move Adjust Exit
Tools
TruSurround XT, SRS and Symbol are trademarks of SRS Labs, Inc.
TruSurround XT technology is incorporated under license from SRS Labs,
Inc.
♦
Auto Volume: Off/On
Each broadcasting station has its own signal conditions, and so it is not easy to adjust the volume
every time the channel is changed. This feature lets you automatically adjust the volume of the
desired channel by lowering the sound output when the modulation signal is high or by raising the
sound output when the modulation signal is low.
English - 23
Page 26
TV Speaker: Off/On
♦
If you want to hear the sound through separate speakers, cancel the internal amplifier.
The
➣
➣
+, - and MUTE buttons do not operate when the "TV Speaker" is set to "Off".
When “TV Speaker” is set to “Off”, you can operate only “Sound Select” (in PIP mode) in Sound
menu.
♦
Sound Select: Main/Sub
When the PIP feature is activated, you can listen to the sound of the sub (PIP) picture.
− Main: Used to listen to the sound of the main picture.
− Sub: Used to listen to the sound of the sub picture.
Manufactured under license from Dolby Laboratories. Dolby and the
double-D symbol are trademarks of Dolby Laboratories.
Selecting the Sound Mode
You can set the sound mode in the "Tools" menu.
When you set to "Dual I-II", the current sound mode is displayed
on the screen.
Press the TOOLS button on the remote control.
1.
2.
Press the ▲ or ▼ button to select “Dual I-II".
3. Press the ◄ or ► button to select required option.
4. Press the
Stereo
NICAM
Stereo
If the stereo signal is weak and an automatic switching occurs, then switch to the Mono.
➣
This function is only activated in stereo sound signal. It is deactivated in mono sound signal.
➣
This function is only available in Analogue TV mode.
➣
A2
ENTER
button.
Audio Type Dual
Mono MONO
Stereo STEREO
Dual DUAL
Mono MONO
Stereo MONO
Dual
MONO
↔
1 ↔
↔
↔
DUAL
1/2
MONO
DUAL
2
STEREO
DUAL
1
2
Default
Automatic
change
DUAL 1
Automatic
change
DUAL 1
Anynet+ (HDMI-CEC)
Picture Mode : Standard
Sound Mode : Custom
Sleep Timer : Off
SRS TS XT : Off
Energy Saving : Off
Dual l-ll ◄ Mono ►
Move Adjust Exit
Tools
Connecting Headphones (Sold separately)
You can connect a set of headphones to your set if you wish to
watch a TV programme without disturbing the other people in the
room.
➣
When you insert the head set jack into the corresponding port, you
can operate only "Auto Volume" and "Sound Select"(in PIP mode) in
Sound menu.
➣
Prolonged use of headphones at a high volume may damage your
hearing.
➣
You will not receive sound from the speakers when you connect headphones to the system.
➣
The headphone volume and TV volume are adjusted differently.
English - 24
TV Side Panel
Page 27
Setting and Displaying the Current Time
You can set the TV’s clock so that the current time is
displayed when you press the INFO button. You must also set
the time if you wish to use the automatic On/Off timers.
Press the MENU button to display the menu.
1.
Press the ▲ or ▼ button to select "Setup", then press the
ENTER
button.
2. Press the ▲ or ▼ button to select "Time", then press the
ENTER
3. Press the
4.
To... Press the....
Move to "Month", "Day", "Year", "Hour"
or "Minute"
Set the "Month", "Day", "Year", "Hour"
or "Minute"
Conrm the setting
button.
ENTER
button to select "Clock Set".
◄ or ► button.
▲ or ▼ button.
ENTER
button
5. Press the EXIT button to exit.
The current time will appear every time you press the INFO button.
➣
➣
You can also set "Year", "Month", "Day", "Hour" and "Minute" by pressing the number buttons on the
remote control.
➣
If you disconnect the power cord, you have to set the clock again.
Mode : Custom
TV
Equalizer
Plug & Play
SRS TS XT : Off
Language : English
Auto Volume : Off
Time
Internal Mute : Off
Light Effect :
Reset
Auto Wall-Mount
Melody : Off
Entertainment : Off
Energy Saving : Off
PIP
Move Enter Return
Move Enter Return
TV
Move Adjust Return
Clock Set
Month
p
01
q
Hour00Minute
00
Setup
In Watching TV
Day
01
Setting the Sleep Timer
You can select a time period of between 30 and 180 minutes
after which the television automatically switches to standby
mode.
Press the MENU button to display the menu.
1.
Press the ▲ or ▼ button to select "Setup", then press the
ENTER
button.
2. Press the ▲ or ▼ button to select "Time", then press the
ENTER
button.
3. Press the ▲ or ▼ button to select "Sleep Timer", then press
the
ENTER
button.
4. Press the ▲ or ▼ button repeatedly until the desired time
appears (Off, 30, 60, 90, 120, 150, 180).
Press the
ENTER
button.
5. Press the EXIT button to exit.
The TV automatically switches to standby mode when the
➣
timer reaches 0.
Easy Setting
1.
Press the TOOLS button on the remote control.
2.
Press the ▲ or ▼ button to select “Sleep Timer”.
3. Press the ◄ or ► button to select the minute.
4. Press the EXIT or TOOLS button to exit.
Mode : Custom
TV
Equalizer
Plug & Play
SRS TS XT : Off
Language : English
Auto Volume : Off
Time
Internal Mute : Off
Light Effect :
Reset
Auto Wall-Mount
Melody : Off
Entertainment : Off
Energy Saving : Off
PIP
Move Enter Return
TV
Clock Set : 00:00
Sleep Timer :
Timer 1 :
Timer 2 :
Timer 3 :
Move Enter Return
Anynet+ (HDMI-CEC)
Picture Mode : Standard
Sound Mode : Custom
Sleep Timer ◄ Off ►
SRS TS XT : Off
Energy Saving : Off
Dual l-ll : Mono
Move Adjust Exit
Setup
In Watching TV
Move Enter Return
Time
Tools
Off
120
150
180
Year
2008
30
60
90
English - 25
Page 28
Switching the Television On and Off Automatically
:
:
Once
00
00
Setup
In Watching TV
Timer 1
Off
Off
1. Press the MENU button to display the menu.
Press the ▲ or ▼ button to select "Setup", then press the
ENTER
button.
2. Press the ▲ or ▼ button to select "Time", then press the
ENTER
button.
3. Press the ▲ or ▼ button to select "Timer 1", "Timer 2",
"Timer 3", then press the
ENTER
button.
Three different On/Off Timer Settings can be made.
You must set the clock first.
➣
4. Press the ◄ or ► button to select the required item below.
Press the ▲ or ▼ button to adjust to the setting satised.
On Time : Select hour, minute and "On"/"Off".
♦
(To activate timer with the setting satised, set to "On".)
♦
Off Time : Select hour, minute and "On"/"Off".
(To activate timer with the setting satised, set to "On".)
Volume : Select the desired turn on volume level.
♦
Repeat : Select "Once", "Everyday", "Mon~Fri", "Mon~Sat" or "Sat~Sun".
♦
You can set the hour and minute directly by pressing the number buttons on the remote control.
➣
Auto Power Off
➣
TV
Plug & Play
Language : English
Time
Light Effect :
Auto Wall-Mount
Melody : Off
Entertainment : Off
Energy Saving : Off
PIP
Move Enter Return
TV
On Time
5
00
6
Off Time
00
Volume
10
Repeat
► Move Adjust Return
When you set the timer On, the TV will eventually turn off, if no controls are operated for 3 hours
after the TV was turned on by timer. This function is only available in timer On mode and prevents
overheating, which may occur if a TV is on for too long time.
Choosing Your Language
When you start using your set for the first time, you must
select the language which will be used for displaying menus
and indications.
Press the MENU button to display the on-screen menu.
1.
Press the ▲ or ▼ button to select "Setup", then press the
ENTER
button.
2. Press the ▲ or ▼ button to select "Language", then press
the
ENTER
button.
3. Select a particular language by pressing the ▲ or ▼ button
repeatedly.
Press the
ENTER
button.
4. Press the EXIT button to exit.
TV
Plug & Play
Language : English
Time
Light Effect :
Auto Wall-Mount
Melody : Off
Entertainment : Off
Energy Saving : Off
PIP
Move Enter Return
Setup
In Watching TV
English - 26
Page 29
Setting the Light Effect (depending on the model)
You can turn on/off the LED on the front of TV according to the
situation. Use it for saving power or when the LED dazzles your
eyes.
Press the MENU button to display the on-screen menu.
1.
Press the ▲ or ▼ button to select "Setup", then press the
ENTER
button.
2. Press the ▲ or ▼ button to select "Light Effect", then press the
ENTER
button.
3. Press the ▲ or ▼ button to select "Off", "In Standby", "In
Watching TV" or "Always".
Press the
➣
ENTER
Off: LED will not come on.
♦
In Standby: Turns the LED on in standby mode.
♦
♦
In Watching TV: Turns the LED on while watching TV.
♦
Always: LED is always on.
button.
Set the "Light Effect" to "Off" to reduce the power
consumption.
4. Press the EXIT button to exit.
Mode : Custom
TV
Equalizer
Plug & Play
SRS TS XT : Off
Language : English
Auto Volume : Off
Time
Internal Mute : Off
Light Effect :
Reset
Auto Wall-Mount
Melody : Off
Entertainment : Off
Energy Saving : Off
PIP
Move Enter Return
Move Enter Return
Melody / Entertainment / Energy Saving
Mode : Custom
1. Press the MENU button to display the menu.
Press the ▲ or ▼ button to select "Setup", then press the
ENTER button.
2.
Select the required option by pressing the ▲ or ▼ button, then
press the ENTER button.
3. When you are satised with your setting, press the ENTER
button.
4. Press the EXIT button to exit.
TV
Equalizer
Plug & Play
SRS TS XT : Off
Language : English
Auto Volume : Off
Time
Internal Mute : Off
Light Effect :
Reset
Auto Wall-Mount
Melody : Off
Entertainment : Off
Energy Saving : Off
PIP
Move Enter Return
Move Enter Return
Setup
In Watching TV
LED
Setup
In Watching TV
Melody: Off/Low/Medium/High
♦
The TV power on/off melody sound can be adjusted.
The Melody does not play
➣
− When no sound is output from the TV because the MUTE button has been pressed.
− When no sound is output from the TV because the - (Volume) button has been pressed.
− When the TV is turned off by the Sleep Timer function.
English - 27
Page 30
Entertainment: Off/Sports/Cinema/Game
♦
The “Entertainment” mode enables you to select the optimal display and sound for sports, cinema
and games.
− Off: Switch the "Entertainment" function off.
− Sports: Provides the optimal picture and sound quality for sports. You can enjoy more thrilling
− Cinema: Provides the optimal picture and sound quality for cinema. You can experience a richer
− Game: Provides the optimal picture and sound quality for games. This mode accelerates the
➣
➣
➣
You can press the E.MODE button on the remote control
Energy Saving: Off/Low/Medium/High/Auto
♦
colour and sound.
picture and enhanced sound.
playing speed when using an external game console connected to the TV.
If you set any of the three “Entertainment” modes to On, the settings will be locked and can not be
adjusted. If you want to make Picture and Sound mode adjustments, the “Entertainment” mode
must be turned off.
The “Entertainment” settings are saved for each input source.
If you set any of the three “Entertainment” modes to On, the “SRS TS XT” function becomes
unavailable.
repeatedly to change the “Entertainment” setting.
This feature adjusts the screen brightness depending on the surrounding lighting conditions.
− Off: Turns off the energy saving function.
− Low: Sets the TV to low energy saving mode.
− Medium: Sets the TV to medium energy saving mode.
− High: Sets the TV to high energy saving mode.
− Auto: Automatically adjusts the brightness of the TV screen in accordance with the scenes.
Easy Setting
1. Press the
2.
Press the ▲ or ▼ button to select “Energy Saving”.
TOOLS button on the remote control.
3. Press the ◄ or ► button to select the "Off", "Low", "Medium",
"High" or "Auto".
4. Press the EXIT or TOOLS button to exit.
Anynet+ (HDMI-CEC)
Picture Mode : Standard
Sound Mode : Custom
Sleep Timer : Off
SRS TS XT : Off
Energy Saving ◄ Off ►
Dual l-ll : Mono
Move Adjust Exit
Tools
English - 28
Page 31

Selecting the Source
You can select among external sources connected to your TV’s
input jacks.
Press the MENU button to display the menu.
1.
Press the ▲ or ▼ button to select "Input", then press the
ENTER button.
2. Press the ENTER button again, to select "Source List".
When no external device is connected to your set, only "TV",
➣
"Ext.1", "Ext.2", "DTV" are activated in the "Source List".
"AV", "S-Video", "Component", "PC", "HDMI1",
"HDMI2","HDMI3" are activated only when they are
connected to your set.
3. Select the required device by pressing the ▲ or ▼ button.
Press the ENTER button.
Press the SOURCE button on the remote control to toggle
between all the available source.
TV mode can be selected by pressing the TV/DTV button,
number buttons(0~9), and the P</> button on the
remote control.
Mode : Custom
TV
Equalizer
Source List : TV
SRS TS XT : Off
Edit Name
Auto Volume : Off
Anynet+(HDMI-CEC)
Internal Mute : Off
WISELINK
Reset
Move Enter Return
Move Enter Return
Mode : Custom
TV
Equalizer
TV
SRS TS XT : Off
Ext.1 : ----
Auto Volume : Off
Ext.2 : ----
Internal Mute : Off
AV : ----
Reset
S-Video : ---Component : ---PC : ----
sMore
Source List
Move Enter Return
Move Enter Return
Input
Editing the Input Source Names
Name the device connected to the input jacks to make your
input source selection easier.
Press the MENU button to display the menu.
1.
Press the ▲ or ▼ button to select "Input", then press the
ENTER button.
2. Press the ▲ or ▼ button to select "Edit Name", then press the
ENTER button.
3. Press the ▲ or ▼ button to select the device that you wish to
edit.
Press the ENTER button.
4. Press the ▲ or ▼ button to select the required device.
Press the
5. Press the EXIT button to exit.
➣
ENTER button.
When a PC with a resolution of 1920 x 1080@60Hz is
connected to the HDMI IN 2 port, you should set the
"HDMI2" mode to "PC" in the "Edit Name" of the "Input"
mode.
English - 29
Mode : Custom
TV
Equalizer
Source List : TV
SRS TS XT : Off
Edit Name
Auto Volume : Off
Anynet+(HDMI-CEC)
Internal Mute : Off
WISELINK
Reset
Move Enter Return
Move Enter Return
Mode : Custom
TV
Equalizer
Ext.1 : ----
SRS TS XT : Off
Ext.2 : ----
Auto Volume : Off
AV : ----
Internal Mute : Off
S-Video : ----
Reset
Component : ----
PC : ----
HDMI1 : ----
HDMI2 : ---HDMI3 : ----
Edit Name
Move Enter Return
Move Enter Return
Input
Satellite STB
AV Receiver
----
VCR
DVD
Cable STB
PVR STB
s
Page 32

Previewing the DTV Menu System
♦ This product is only applicable to Finnish, Swedish and Danish
broadcasts. Broadcasts are not supported in other countries.
Available in DTV mode. Preset to the DTV mode by using the
♦
TV/DTV button on your remote control. To help you navigate
around the on-screen menu system and adjust the various
settings available, refer to the following illustration.
Press the MENU button to display the menu.
Press the ▲ or ▼ button to select "Digital Menu", then press the
ENTER button.
Guide
Now & Next Guide
Full Guide
Scheduled List
Default Guide
Now/Next, Full Guide
Digital Channel
Country
Auto Store
Manual Store
Edit Favourite Channels
Channel List
All, Favourites, Default
Setup
Menu Transparency
High, Medium, Low, Opaque
Change PIN
Parental Lock
Subtitle
Subtitle Mode
Audio Format
Audio Description
Common Interface
System
Off, On
Normal, Hard of hearing
PCM, Dolby Digital
Audio Description Off, On
Volume
Application Info, CI Menu
Product Information
Signal Information
Software Upgrade
Reset
Language
Audio Language
Subtitle Language
Teletext Language
Preference
Primary Audio Language
Secondary Audio Language
Primary Subtitle Language
Secondary Subtitle Language
Primary Teletext Language
Secondary Teletext Language (depending on the country)
TV
Guide
Digital Channel
Setup
Language
DTV
Now & Next Guide
Full Guide
Scheduled List
Default Guide : Full Guide
DTV
Country :Finland
Auto Store
Manual Store
Edit Favourite Channels
Channel List
DTV
Menu Transparency
Change PIN
Parental Lock
Subtitle : Off
Subtitle Mode
s
DTV
Audio Language
Subtitle Language
Teletext Language
Preference
Digital Menu
Move Enter Return
Guide
Move Enter Return
Channel
Move Enter Return
Setup
: Medium
Move Enter Return
Language
Move Enter Return
The sub-items of the CI Menu may vary depending on the CAM model.
➣
English - 30
Page 33

Selecting the Country
1. Press the MENU button to display the menu.
Press the ▲ or ▼ button to select "Digital Menu", then press
the
ENTER button.
2. Press the
press the
▲ or ▼
button to select "Digital Channel", then
ENTER button.
DTV
Country :Finland
Auto Store
Manual Store
Edit Favourite Channels
Channel List
3. Press the ENTER button again, to select "Country".
4. Select the appropriate country by pressing the ▲ or ▼ button.
Press the
➣
ENTER
button to conrm your choice.
Even though you have changed the country setting in
Move Enter Return
this menu, the country setting for Analogue TV is not
changed.(Refer to page 11)
5. Enter a PIN(Personal ID number) by pressing the number buttons on the remote control.
➣
The “Auto Store” menu appears.
➣
If you change the “Country”, all previous settings will be reset.
Channel
English - 31
Page 34

Updating the Channel List Automatically
You can update the channel list when the broadcaster adds new Services or if you move the
TV to a new location.
1. Press the MENU button to display the menu.
Press the ▲ or ▼ button to select "Digital Menu", then press the ENTER button.
2. Press the
3. Press the ▲ or ▼ button to select “Auto Store”, then press the ENTER button.
4. The update procedures differ depending on the selected “Country”. Update the channel list by
selecting an appropriate option.
When
♦
Press the ▲ or ▼ button to select “Auto”, “Cable” or “Aerial”.
Press the ENTER button.
Press the ENTER button to select “Start”.
➣
• Cable: Scans cable channels.
• Aerial: Scans aerial channels.
➣
➣
➣
♦
When the “Country” was set to “Sweden”, or “Denmark”
Press the ▲ or ▼ button to select “Cable” or “Aerial”.
Press the ENTER button.
▲ or ▼
button to select "Digital Channel", then press the ENTER button.
the “Country” was set to “Finland”
• Auto: Scans channels automatically.
This product cannot scan both cable and aerial channels
at the same time.
When it has nished, the number of scanned services
will be displayed.
The existing favourite channel list will not be deleted
when the channel list is updated.
DTV
Auto
Cable
Aerial
Move Enter Return
DTV
Scanning for aerial digital services...
Services found: 0 Channel: 5
DTV
Cable
Aerial
Auto Store
Choose system to scan
Auto Store
Stop
Enter Return
Auto Store
Choose system to scan
0%
When selecting “Cable”:
- Frequency
: Displays the frequency for the channel.
(Differs in each country)
- Modulation: Displays available modulation values.
- Symbol rate: Displays available symbol rates.
- Network ID: Displays the network identication code.
Press the red button to start the scan for digital services.
When it has nished, channels are updated in the channel
list.
When selecting “Aerial”:
Press the
ENTER button to select “Start”.
5. Press the EXIT button to exit.
If the signal status is poor, the “No Service found! Check
➣
the aerial connection” message is displayed.
English - 32
Move Enter Return
DTV
Frequency
Modulation
Symbol rate
Network ID
Search
Enter freq. Move Return
DTV
Services found: 0 Channel: -
Enter Return
Auto Store
143000
64QAM
6875
100
Auto Store
Start
KHz
kS/s
0%
Page 35

Updating the Channel List Manually
You can specify the channel for a fast channel search.
1. Press the MENU button to display the menu.
Press the ▲ or ▼ button to select "Digital Menu", then press the
2. Press the
3. Press the
▲ or ▼
button to select "Digital Channel", then press the ENTER button.
▲ or ▼
button to select "Manual Store", then press the ENTER button.
4. The update procedures differ depending on the selected “Country”.
Update the channel list by selecting the appropriate option.
ENTER button.
♦
When
the “Country” was set to “Finland”
Press the ▲ or ▼ button to select “Cable” or “Aerial”, then
press the
ENTER button.
When selecting “Cable”:
- Frequency
: Displays the frequency for the channel. (Differs
in each country)
- Modulation: Displays available modulation values.
- Symbol rate: Displays available symbol rates.
Press the red button to start the scan for digital services.
When it has finished, channels are updated in the channel
list.
When selecting “Aerial”:
- Channel
: Channel “21” to “69” in sequence are displayed
(depending on the country)
- Frequency
: The frequency available in the Channel group
is displayed.
Bandwidth: The available bandwidths are 8 MHz.
Press the red button to start the scan for digital services.
When it has finished, channels are updated in the channel
list.
♦
When the “Country” was set to “Sweden”, or “Denmark”
- Channel: Channel “21” to “69” in sequence are displayed
(depending on the country)
- Frequency
: The frequency available in the Channel group
is displayed.
Bandwidth: The available bandwidths are 8 MHz.
Press the red button to start the scan for digital services.
When it has nished, channels are updated in the channel
list.
DTV
Cable
Aerial
DTV
DTV
Channel
DTV
Channel
Manual Store
Choose system to scan
Move Enter Return
Manual Store
Frequency
Modulation
Symbol rate
Search
Enter freq. Move Return
Manual Store
Frequency Bandwidth
▲
5
177500
▼
Search
Adjust Move Return
Manual Store
Frequency Bandwidth
▲
5
177500
▼
Search
Adjust Move Return
143000
64QAM
6875
KHz MHz
7
KHz MHz
7
KHz
kS/s
5. When it has nished, the number of scanned services will be displayed.
6. Press the EXIT button to exit.
English - 33
Page 36

Editing Your Favourite Channels
You can edit your favourite channels using the four colour
buttons.
1. Press the MENU button to display the menu.
Press the ▲ or ▼ button to select "Digital Menu", then press the
ENTER button.
2. Press the ▲ or ▼ button to select "
the ENTER button.
3. Press the ▲ or ▼ button to select "Edit Favourite Channels",
then press the ENTER button.
4. Press the red button to display all currently stored channels.
5. Press the ▲ or ▼ button to select a channel you want.
Press the ENTER button.
A "" icon is shown next to the selected channel and the
➣
channel will be added to the favourite channel list.
➣
•
To undo, press the
•
Select All: Select all channels currently displayed.
•
Select None: Deselect all selected channels.
•
Preview: Displays (a) currently selected channel(s).
The Favourite Channels settings have been completed.
➣
ENTER button again.
6. Press the EXIT button to exit.
♦ Add
You can use this function when one or more favourite channels
have been selected.
1. Press the MENU button to display the menu.
Press the ▲ or ▼ button to select "Digital Menu", then press the
ENTER button.
2. Press the ▲ or ▼ button to select "
the ENTER button.
3. Press the ▲ or ▼ button to select "Edit Favourite Channels",
then press the ENTER button.
4. Press the red button in the "Edit Favourite Channels" menu.
To add more channels, refer to the step 5 on the previous
description.
5.
If you want to check the channel to be stored, press RETURN
button.
Press the
➣
EXIT button to exit.
• To add all channels to the favourite channel list, press theTo add all channels to the favourite channel list, press the
red button.
• To remove all channels, press the green button.To remove all channels, press the green button.
• Preview : Displays (a) currently selected channel(s).
• Press thePress the CH LIST button to display the favourite channel
manager.
Digital Channel
Digital Channel
", then press
", then press
DTV
DTV
DTV
DTV
Edit Favourite Channels
(no channels)
Move Enter Return
Add Channels
Return
Edit Favourite Channels
5
2 BBC TWO
5 Five
7 BBC THREE
15 abc1
16 QVC
6
Move Enter Return
Select All Select None Preview
Move Select Return
Edit Favourite Channels
2 BBC TWO ★
7 BBC THREE ★
15 abc1 ★
Move Enter Return
Add
Move Return
Edit Favourite Channels
5
2 BBC TWO ★
5 Five
7 BBC THREE ★
15 abc1 ★
16 QVC
6
Move Enter Return
Select All Select None Preview
Move Select Return
Renumber
Preview Delete
English - 34
Page 37

♦ Renumber (depending on the country)
1. Press the MENU button to display the menu.
Press the ▲ or ▼ button to select "Digital Menu", then press the
ENTER button.
2. Press the ▲ or ▼ button to select "
Digital Channel
", then press
the ENTER button.
3. Press the ▲ or ▼ button to select "Edit Favourite Channels",
then press the ENTER button.
4. Select the required channel using the ▲ or ▼ button.
5. Press the green button.
The space for entering the number is a blank.
➣
6. Enter the new channel number. Press ENTER button to store
or RETURN button to cancel.
Press the ◄ button to delete an entered digit.
➣
If you enter a number already assigned to another channel,
➣
the number is assigned to the selected channel and the
previous number assigned to the selected channel is
assigned to the other channel.
That is, the two numbers are exchanged.
➣
The Favourite Channels are automatically sorted in
ascending order of channel numbers.
7. Press the EXIT button to exit.
DTV
Edit Favourite Channels
2
BBC TWO ★
BBC THREE ★
-- 15 abc1 ★
Move Enter Return
Edit Return Conrm
♦ Preview
1. In the "Edit Favourite Channels" menu, select the channel to be
previewed by pressing the ▲ or ▼ button.
2. Press the yellow button.
The selected channel is displayed on the screen.
➣
♦ Delete
1. In the "Edit Favourite Channels" menu, select the channel to be
deleted from the favourite channels list by pressing the
▲ or ▼ button.
2. Press the blue button.
The selected channel and number will be deleted.
➣
➣
To add a deleted channel back in to the favourite channel
list, see "Add" on page 34.
English - 35
DTV
DTV
Edit Favourite Channels
BBC TWO ★
2
7 BBC THREE ★
15 abc1 ★
Add
Move Return
Edit Favourite Channels
2 BBC TWO ★
7 BBC THREE ★
Add
Move Return
Renumber
Preview Delete
Renumber
Preview Delete
Page 38

Selecting Channel List
You can exclude the channels you have chosen from the
channels you have scanned.When you scan through the
stored channels, those you have chosen to skip are not
displayed. All channels that you do not specifically choose to
skip are displayed during scanning.
1. Press the MENU button to display the menu.
Press the ▲ or ▼ button to select "Digital Menu", then press
the ENTER button.
2. Press the ▲ or ▼ button to select "
Digital Channel
", then
Test Card M' v2.0
1 Test Card M' v2.0
3 Vida003b
4 Vida004b
5 vida005b
6 vida006b
15 Ch 15
16 QVC
17 UKTV Gold
Previous Page Next/Page Favourites TV
press the ENTER button.
3. Press the ▲ or ▼ button to select "Channel List".
Press the ENTER button.
4.
Press the ▲ or ▼ button to select "All", "Favourites" or "Default".
Press the ENTER button.
5. Press the yellow button to toggle between your favourite channels
It can be displayed simply by
pressing the CH LIST button.
and all channels.
Your favourite channels are only displayed if they were
➣
previously set in the "Editing Your Favourite Channels" menu
(refer to page 34).
6. Press the red or green button to display the previous or next channel List page.
7. Press the ▲ or ▼ button to select a channel to be tuned.
Press the ENTER button.
The channel number, name and an icon are displayed in the top left corner while changing the
➣
channel. The channel number and name are displayed if the channel is one of the all channels,
and a icon if the channel is one of the favourite channels.
8. Press the blue button to toggle between your "TV", "Radio", "Data/Other" and "All".
9. Press the CH LIST button to exit from the channel List.
Channel List
23 bid-up.tv
25 TCM
26 UKTV Style
27 Discovery
28 DiscoveryH&L
15 Cartoon Nwk
33 Boomerang
55 Ttext Holidays
Move Watch Return
All Channels-All
60 Television X
70 BBC Radio 1
72 BBC Radio 2
73 BBC Radio 3
74 BBC Radio 4
84 heat
91 MOJO
800 ARD-MHP-Data
6 More
1/2
Displaying Programme Information
While viewing a channel, additional information about the current programme may be displayed.
1. While viewing a programme, press the INFO button.
The programme information is displayed.
➣
2. To exit from banner information, press the INFO button.
The information is displayed:
➣
− Parental Rating
− Video Type: SD, HD, Radio
− Audio Type: Mono, Stereo, Dual, Dolby Digital
− Existence of Teletext or DVB Subtitle
− Audio Language
English - 36
1 AFDO,16:9
AFDO 16:9
No Block
SD
Stereo
Subtitle
English
Exit
14:30 Sat 1 Sep
AII Channels
14:30~14:33
Contains video with AFD O; coded frame
is 16:9
Move Enter Return
A
Page 39

Viewing the EPG (Electronic Programme Guide) Information
The EPG (Electronic Programme Guide) information is provided
by the broadcasters. Programme entries may appear blank or
out of date as a result of the information broadcast on a given
channel. The display will dynamically update as soon as new
information becomes available.
♦ Now & Next Guide
For the six channels indicated in the left-hand column,
displays the Current programme and the Next programme
information.
♦ Full Guide
Displays the programme information as time ordered One
hour segments. Two hours of programme information is
displayed which may be scrolled forwards or backwards in
time.
1. Press the MENU button to display the menu.
Press the ▲ or ▼ button to select "Digital Menu", then press the
ENTER button.
2. Press the ENTER button, to select "Guide".
3. Press the ▲ or ▼ button to select "Now & Next Guide" or
"Full Guide".
Press the ENTER button.
You can also display the guide menu simply by pressing
➣
the GUIDE button.
4.
To... Then...
Watch a programme in the EPG list
If the next programme is selected, it is scheduled with the clock icon
displayed. If the
cancelled with the clock icon gone. For details about scheduling
programmes, refer to the next page.
View programme information
Toggle between the "Now & Next
Guide" or "Full Guide"
Display the "Favourites" and the "All
Channels" list
Scrolls backwards quickly (24 hours). • Press the yellow button repeatedly.
Scrolls forward quickly (24 hours). • Press the blue button repeatedly.
Exit the guide • Press the
ENTER button is pressed again, the scheduling is
• Select a programme by pressing
the ▲, ▼, ◄, ► button.
ENTER button.
• Press the
• Select a programme of your choice by
pressing the ▲, ▼, ◄, ► button.
• Press the INFO button when the
programme of your choice is
highlighted.
• Press the red button repeatedly.
• Press the green button repeatedly.
EXIT button.
All Channels
Watch
Watch
Now/Next Favourites -24Hours +24Hours Exit
Now & Next Guide
Full Guide
13:28 Wed 16 Feb
13:28 Wed 16 Feb
INFO
27 Discovery
Extreme Machines: Armoured Cars
Now Next
Full Guide Favourites Exit
27 Discovery
Extreme Machines: Armoured Cars
13:00 14:00Today
INFO
➣
The programme title is on the upper part of the screen center. Please click on INFO button for
the detailed information. Channel Number, Running Time, Status Bar, Parental Level, Video Quality
Information(HD/SD), Sound Modes, Subtitle or Teletext, Languages of Subtitle or Teletext, and
brief summary of the highlighted programme are included on the detailed information. "..." will be
appeared if the summary is long.
➣
Six channels are displayed. To scroll between channels, move to a channel using the ▲ or ▼ button.
To display page by page, use the P
<
or P> button.
English - 37
Page 40

Using the Scheduled List
If you make a scheduled viewing list of programs you may like to
see, the channel will be automatically switched to the scheduled
programme at the scheduled time even if you are watching another
programme.
1. Press the MENU button to display the menu.
Press the ▲ or ▼ button to select "Digital Menu", then press the
ENTER button.
2. Press the ENTER button, to select "Guide".
3. Press the ▲ or ▼ button to select "Scheduled List", then press
the ENTER button.
4. Press the red button.
The channel will be switched to the scheduled programme.
5. Press the ENTER button to select an item and adjust with the
▲ or ▼ button .
You can also set hour and minute by pressing the number
➣
buttons on the remote control.
•
Channel: Set the channel.
•
Time: Set the time.
•
Date: Set Year, Month and Day.
•
Frequency: Set the frequency.
6. After setting the schedule, Press the red button.
7. Press the EXIT button to exit.
•
➣
Save: Save the adjusted schedule.
•
Cancel: Cancel the adjusted schedule.
•
Add Programme: Add a new schedule.
•
Edit: Readjust the selected schedule.
•
Delete: Delete the selected schedule.
("Once", "Daily", or "Weekly")
DTV
(No programmes)
Add Programme
Return
DTV
Tuesday 22 Apr 15:30 ~ 16:00 Once
801 RaiTre
Add Programme Edit Delete
Move Return
DTV
Channel
Time
Date
Frequency
Save Cancel
Adjust Move Return
Scheduled List
Scheduled List
Scheduled List
802 RaiUno
15 : 20 to -- : --
Tue 22 Apr 2007
Once
Setting the Default Guide
You can preset the default guide style.
1. Press the MENU button to display the menu.
Press the ▲ or ▼ button to select "Digital Menu", then press the
ENTER button.
2. Press the ENTER button, to select "Guide".
3. Press the ▲ or ▼ button to select "Default Guide", then press
the ENTER button.
4. Select "Now/Next" or "Full Guide" using the ▲ or ▼ button,
and press the ENTER button.
5. Press the EXIT button to exit.
English - 38
DTV
Now & Next Guide
Full Guide
Scheduled List
Default Guide : Full Guide
Guide
Now/Next
Full Guide
Move Enter Return
Move Enter Return
You can select these options
by simply pressing the GUIDE
button on the remote control.
Page 41

Viewing All Channels and Favourite Channels
In the EPG menu, you can display all channels or favourite
channels.
Press the MENU button to display the menu.
1.
Press the ▲ or ▼ button to select "Digital Menu", then press the
ENTER button.
2. Press the ENTER button again, to select "Guide".
3. Select the your required guide ("Now & Next Guide" or "Full
All Channels
Guide") by pressing the ▲ or ▼ button.
4. Press the ENTER button.
5. Press the green button.
All the channel lists and the Favourite Channel lists will be
toggled.
Watch
6. Select a programme of your choice by pressing the ▲, ▼, ◄, or
► button.
7. Press the INFO button to display information about the
highlighted programme.
8. When the Edit Favourite Channels list has not been set up:
•
"The favourites list is empty.
Would you like to choose your favourites now?" message is
Today
displayed.
•
Select "Yes".
The "Edit Favourite Channels" menu is displayed.
If you select "No", all channels will remain unchanged.
• To edit the favourite channels, refer to page 34 for moreTo edit the favourite channels, refer to page 34 for more
Watch
Now/Next Favourites -24Hours +24Hours Exit
details.
9 . Press the EXIT button to exit.
All Channels" is the list of channels that have been scanned by the channel list update.
➣
"
All channels are displayed in the all channel mode.
Favourites" (favourite channels) is the list of channels that has been set in the "Edit Favourite Channels"
➣
"
menu (refer to page 34).
Now & Next Guide
27 Discovery
Extreme Machines: Armoured Cars
Now Next
Full Guide Favourites Exit
27 Discovery
Extreme Machines: Armoured Cars
The favourites list is empty.
Would you like to choose your
favourites now?
Yes No
Full Guide
13:28 Wed 16 Feb
INFO
13:28 Wed 16 Feb
INFO
Adjusting the Menu Transparency
You can set the Transparency of the menu.
Press the MENU button to display the menu.
1.
Press the ▲ or ▼ button to select "Digital Menu", then press the
ENTER button.
2. Press the ▲ or ▼ button to select "Setup", then press the
ENTER button.
3. Press the ▲ or ▼ button to select "Menu Transparency" then
press the ENTER button.
4. Select the required option ("High", "Medium", "Low", or
"Opaque") by pressing the ▲ or ▼ button, and press the
ENTER button to change the setting.
5. Press the EXIT button to exit.
English - 39
DTV
Menu Transparency
Change PIN
Parental Lock
Subtitle : On
Subtitle Mode
s
Move Enter Return
Setup
: Medium
High
Medium
Low
Opaque
Page 42

Setting up the Parental Lock
This feature allows you to prevent unauthorized users, such
as children, from watching unsuitable programmes by a 4-digit
PIN (Personal Identification Number) code that is defined by
the user. The on-screen menu will instruct you to assign a PIN
code (you can change it later, if necessary).
1. Press the MENU button to display the menu.
Press the ▲ or ▼ button to select "Digital Menu", then press the
ENTER button.
2. Press the ▲ or ▼ button to select "Setup", then press
the ENTER button.
3. Press the ▲ or ▼ button to select "Parental Lock.", then
press the ENTER button.
4.
The "Enter PIN" is displayed.
5. Enter your current 4-digit PIN code by using the numeric
buttons (0~9).
The default PIN code for a new TV set is 0000.
➣
➣
If you enter an invalid PIN code,the "Invalid PIN code.
Please try again." message is displayed.
6. Press the ENTER button.
7. Press the ▲ or ▼ button to select the age rating you want to
lock out.
Press the ENTER button.
♦ Change PIN
1. Press the MENU button to display the menu.
Press the ▲ or ▼ button to select "Digital Menu", then press the
ENTER button.
2. Press the ▲ or ▼ button to select "Setup", then press
the ENTER button.
3. Press the ▲ or ▼ button to select "Change PIN", then
press the ENTER button.
➣
The "Enter PIN" is displayed.
4. Enter your current 4-digit PIN code by using the numeric
buttons (0~9).
➣
The “Enter New PIN” is displayed.
5. Enter your new PIN code by using the numeric buttons (0~9)
The "Conrm New PIN" is displayed.
➣
6. Re-enter your new PIN code to conrm by using the numeric
buttons (0~9).
The Your PIN code has been changed successfully message
➣
is displayed.
7. Press the ENTER button.
8. Press the EXIT button to exit.
If you forget the PIN code, press the remote control buttons in the following sequence, which
➣
resets the PIN to 0-0-0-0: POWER (Off), MUTE, 8, 2, 4, POWER (On).
DTV
Menu Transparency
Change PIN
Parental Lock
Subtitle : Off
Subtitle Mode
s
DTV
Enter PIN
DTV
Parental Rating: No Block
DTV
Menu Transparency
Change PIN
Parental Lock
Subtitle : Off
Subtitle Mode
s
DTV
Confirm New PIN
Your PIN code has been changed successfully.
Setup
: Medium
Move Enter Return
Move Enter Return
Parental Lock
Enter PIN Return
Parental Lock
▲
No Block
No Block
3
4
5
6
7
Setup
: Medium
Change PIN
OK
▼
Move Enter Return
Move Enter Return
Move Enter Return
Move Enter Return
Enter PIN Return
English - 40
Page 43

Setting the Subtitle
You can activate and deactivate the subtitles.
1. Press the MENU button to display the menu.
Press the ▲ or ▼ button to select "Digital Menu", then press the
ENTER button.
2. Press the ▲ or ▼ button to select "Setup", then press the
ENTER button.
3. Press the ▲ or ▼ button to select "Subtitle ", then press the
ENTER button.
4. Select "On" by pressing the ▲ or ▼ button. Press the ENTER
button.
5. Press the EXIT button to exit.
You can select these options simply by pressing the
SUBT. button on the remote control.
DTV
Menu Transparency
Change PIN
Parental Lock
Subtitle : On
Subtitle Mode : Normal
s
Move Enter Return
Move Enter Return
Setup
: Medium
Off
On
Setting the Subtitle Mode
Use this menu to set the Subtitle Mode. "Normal" under the
menu is the basic subtitle and "Hard of hearing" is the subtitle
for a hearing-impaired person.
1. Press the MENU button to display the menu.
Press the ▲ or ▼ button to select "Digital Menu", then press the
ENTER button.
2. Press the ▲ or ▼ button to select "Setup", then press the
ENTER button.
3. Press the ▲ or ▼ button to select "Subtitle Mode", then press
the ENTER button.
4. Press the ▲ or ▼ button to select "Normal" or "Hard of hearing". Press the ENTER button.
5. Press the EXIT button to exit.
If the programme you are watching does not support the "Hard of hearing" function, "Normal"
➣
automatically activates even though "Hard of hearing" mode is selected.
DTV
Menu Transparency
Change PIN
Parental Lock
Subtitle : On
Subtitle Mode : Normal
s
Move Enter Return
Move Enter Return
Setup
: Medium
Normal
Hard of hearing
Selecting the Audio Format
You can only hear Dolby Digital sound through the audio
receiver connected through an optical cable. You can only hear
PCM sound through the main speaker.
When sound is emitted from both the main speaker and the
audio receiver, a sound echo may occur due to the decoding
speed difference between the main speaker and the audio
receiver. In this case, use the internal mute function.
1. Press the MENU button to display the menu.
Press the ▲ or ▼ button to select "Digital Menu", then press the
ENTER button.
2. Press the ▲ or ▼ button to select "Setup", then press the ENTER button.
3. Press the ▲ or ▼ button to select "Audio Format", then press the ENTER button.
4. Press the ▲ or ▼ button to select "PCM" or "Dolby Digital". Press the ENTER button.
5. Press the EXIT button to exit.
The Audio Format appears according to the broadcasting signal.
➣
Dolby digital sound is only available when the TV is connected with an external speaker using an
optical cable.
English - 41
DTV
Audio Format : PCM
Audio Description
Common Interfece
System
Move Enter Return
Setup
Page 44

Selecting the Audio Description
This is an auxiliary audio function that provides an additional
audio track for visually challenged persons. This function
handles the Audio Stream for the AD (Audio Description),
when it is sent along with the Main audio from the broadcaster.
Users can turn the Audio Description On or Off and control the
volume.
1. Press the MENU button to display the menu.
Press the ▲ or ▼ button to select "Digital Menu", then press the
ENTER button.
2. Press the ▲ or ▼ button to select "Setup", then press the
ENTER button.
3. Press the ▲ or ▼ button to select "Audio Description", then
press the ENTER button.
4. Press the ▲ or ▼ button to select "On", then press the
ENTER button.
5. Press the ▲ or ▼ button to select "Volume", then press the
ENTER button.
"Volume" is active when "Audio Description" is set to "On".
➣
6. Press the ◄ or ► button until you reach the optimal setting.
Press the ENTER button.
7. Press the EXIT button to exit.
DTV
DTV
Audio Format : PCM
Audio Description
Common Interfece
System
Move Enter Return
DTV
DTV
Audio Description
Audio Description
Volume
Move Enter Return
Audio Description
Audio Description
Volume
Move Enter Return
Setup
: On
Off
On
: On
100
100
Viewing Product Information
You can view your product information. For service or repair,
please contact a Samsung approved dealer.
1.
Press the MENU button to display the menu.
Press the ▲ or ▼ button to select "Digital Menu", then press the
ENTER button.
2.
Press the ▲ or ▼ button to select "Setup", then press the
ENTER button.
3. Press the
the ENTER button.
4. Press the ENTER button again, to select "Product
Information".
➣
5. Press the EXIT button to exit.
▲ or ▼
button to select "System", then press
The Product Information menu is selected.
- Software Version, Firmware Version
English - 42
DTV
Product Information
Software Version: T-PERLDEUC-0010
Firmware Version: T-EMMA2DEUB-0105
Return
Page 45

Checking the Signal Information
You can get information about the signal status.
1. Press the MENU button to display the menu.
Press the ▲ or ▼ button to select "Digital Menu", then press the
ENTER button.
2.
Press the ▲ or ▼ button to select "Setup", then press the
ENTER button.
3. Press the ▲ or ▼ button to select "System", then press the
ENTER button.
4. Press the ▲ or ▼ button to select "Signal Information", then press the ENTER button.
5. Press the EXIT button to exit.
If the signal status is poor, the "No signal." message is displayed.
➣
DTV
Signal Information
Service: ?
Service ID:0000
Multiplex: ? (TSID 0000, ONID 0000)
Network: ? (ID 0000)
Bit error level: 10
Signal Strength: 0
Move Enter Return
Return
Upgrading the Software
To keep your product up-to-date with new Digital Television
features then software upgrades are periodically broadcast as
part of the normal Television signal.
It will automatically detect these signals and display the
software upgrade banner. You are given the option to install the
upgrade.
1. Press the MENU button to display the menu.
Press the ▲ or ▼ button to select "Digital Menu", then press the
ENTER button.
2. Press the ▲ or ▼ button to select "Setup", then press the
ENTER button.
3. Press the ▲ or ▼ button to select "System", then press the
ENTER button.
4. Press the ▲ or ▼ button to select "Software Upgrade",
then press the
5.
Press the
ENTER button.
▲ or ▼
button to select “Software Information”,
“Manual Upgrade” or “Standby Mode upgrade”.
Press the ENTER button.
♦ Software Information
Press the ENTER button, then the current software version is shown. To display the software
version information, press the ENTER button again.
To switch to an alternative version, press the red button.
Press the blue button to reset, activate the upgrade and restart.
♦
Manual Upgrade
Press the ENTER button to search for new software from the currently broadcasting channels.
♦ Standby Mode Upgrade: On / Off
Press the ENTER button. To continue software upgrade with master power on, Select On
by pressing the ▲ or ▼ button. 45 minutes after entering standby mode, a manual upgrade is
automatically conducted. Since the power of the unit is turned on internally, the screen may be on
slightly for the LCD product. This phenomenon may continue for more than 1 hour until the software
upgrade is completed.
6. Press the EXIT button to exit.
DTV
Product Information
Signal Information
Software Upgrade
Reset
DTV
Software Information
Manual Upgrade
Standby Mode upgrade : On
System
Move Enter Return
Software Upgrade
Move Enter Return
English - 43
Page 46

Viewing Common Interface
This contains information on CAM inserted in the CI slot and
displays it.
1. Press the MENU button to display the menu.
Press the ▲ or ▼ button to select "Digital Menu", then press the
ENTER button.
2. Press the ▲ or ▼ button to select "Setup", then press the
ENTER button.
3. Press the ▲ or ▼ button to select "Common Interface", then
press the ENTER button.
4. Press the ENTER button to display the information for
your application.
5. Press the EXIT button to exit.
The Application Info inserting is about the CI CARD.
➣
You can install the CAM anytime whether the TV is ON or
OFF.
1. Purchase the CI CAM module by visiting your nearest dealer
or by phone.
2. Insert the CI CARD into the CAM in the direction of the
arrow until it fits.
3. Insert the CAM with the CI CARD installed into the common
interface slot.
(Insert the CAM in the direction of the arrow, right up to the
end so that it is parallel with the slot.)
4. Check if you can see a picture on a scrambled signal channel.
DTV
Type : CA
Manufacturer : Channel Plus
Info : Top Up TV
Return
Application Info
Selecting the CI (Common Interface) Menu
This enables the user to select from the CAM-provided menu.
1. Press the MENU button to display the menu.
Press the ▲ or ▼ button to select "Digital Menu", then press the
ENTER button.
2. Press the ▲ or ▼ button to select "Setup", then press the
ENTER button.
3. Press the ▲ or ▼ button to select "Common Interface",
then press the ENTER button.
Main menu
Module informa tion
Smart card inf ormation
Language
Software Downl oad
Press OK to select, or Exit to quit
Move Enter Exit
4. Select to "CI Menu" by pressing the ▲ or ▼ button, and press the
ENTER button.
5. Select the required option by pressing the ▲ or ▼ button, and press the ENTER button.
6. Press the EXIT button to exit.
Select the CI Menu based on the menu PC Card.
➣
CI Menu
English - 44
Page 47

Resetting
You can reset the values stored to the factory default values.
The Reset operation deletes all channel information and
➣
user preferences returning all values to their default factory
state.
1.
Press the MENU button to display the menu.
Press the ▲ or ▼ button to select "Digital Menu", then press the
ENTER button.
2. Press the ▲ or ▼ button to select "Setup", then press the
ENTER button.
3. Press the
▲ or ▼
button to select "System", then press
the ENTER button.
4. Press the
▲ or ▼
button to select "Reset", then press the
ENTER button.
5. The "Enter PIN" screen will appear.
6. Enter your current 4-digit PIN code by using the numeric
buttons (0~9).
The warning message is displayed. All values will be reset
➣
by pressing the coloured buttons (red, green, yellow, and
blue) in turn.
7. Press the EXIT button to exit.
DTV
Enter PIN
DTV
WARNING: All channel settings and user
preferences will be lost and returned to the factory
defaults. It is recommended that a reset is performed
only when serious problems are experienced.
Reset
Enter PIN Return
Reset
Return
Selecting the Preferred Language (Subtitle, Audio or Teletext)
You can change the default value for subtitle, audio teletext
languages.
Displays the language information for the incoming stream.
1. Press the MENU button to display the menu.
Press the ▲ or ▼ button to select "Digital Menu", then press the
ENTER button.
2. Press the ▲ or ▼ button to select "Language", then press
the ENTER button.
3.
Press the
▲ or ▼
button to select "Audio Language",
"Subtitle Language" or "Teletext Language".
Press the ENTER button.
4. Select a particular language by pressing the ▲ or ▼ button
repeatedly.
Press the ENTER button.
English is the default in cases where the selected
➣
language is unavailable in the broadcast.
5. Press the EXIT button to exit.
While viewing a programme, the subtitle can be selected
➣
While viewing a programme, audio languages can be
selected.
DTV
Audio Language
Subtitle Language
Teletext Language
Preference
Move Enter Return
DTV
Audio Language
Subtitle Language
Teletext Language
Preference
Move Enter Return
DTV
Audio Language
Subtitle Language
Teletext Language
Preference
Language
Language
Language
English - 45
Move Enter Return
Page 48

Preference
This menu consists of 6 sub-menus:
Primary Audio Language, Secondary Audio Language, Primary
Subtitle Language, Secondary Subtitle Language, Primary
Teletext Language, Secondary Teletext Language.
Using this feature, users can select one of the languages.
The language selected here is the default when the user selects a
channel.
♦ Press the ▲ or ▼ button to select required menu (Primary
Audio Language, Secondary Audio Language, Primary Subtitle
Language, Secondary Subtitle Language, Primary Teletext Language, Secondary Teletext Language),
then press the ENTER button. The options of the selected menu are displayed.
♦ Select the appropriate language by pressing the ▲ or ▼ button.
Press the ENTER button to confirm your choice.
If you change the language setting, the Subtitle Language, Audio Language, and the Teletext
➣
Language of the Language menu (refer to page 45) are automatically changed to the selected
language.
The Subtitle Language, Audio Language, and the Teletext Language of the Language menu show a
➣
list of languages supported by the current channel and the selection is highlighted. If you change this
language setting, the new selection is only valid for the current channel. The changed setting does not
change the setting of the Primary Subtitle Language, Primary Audio Language, or the Primary Teletext
Language of the Preference menu.
DTV
Audio Language
Subtitle Language
Teletext Language
Preference
Move Enter Return
Move Enter Return
Language
English - 46
Page 49

Setting up Your PC Software (Based on Windows XP)
The Windows display-settings for a typical computer are shown below. The
actual screens on your PC may be different depending upon your particular
version of Windows and your particular video card. Even if your actual screens
look different, the same, basic set-up information will apply in almost all cases.
(If not, contact your computer manufacturer or Samsung Dealer.)
1.
First, click on "Control Panel" on the Windows start menu.
2. When the control panel window appears, click on "Appearance and Themes"
and a display dialog-box will appear.
3. When the control panel window appears, click on "Display" and a display
dialog-box will appear.
4. Navigate to the "Settings" tab on the display dialog-box.
The correct size setting (resolution): Optimum- 1920 X 1080
If a vertical-frequency option exists on your display settings dialog box, the correct value is
"60" or "60 Hz". Otherwise, just click "OK" and exit the dialog box.
Display Modes
Both screen position and size will vary depending on the type of PC monitor and its resolution. The
resolutions in the table are recommended.
D-Sub Input
➣
Mode Resolution
IBM
VESA
CVT 1920 x 1080RB 66.587 59.934 138.500 + / -
➣
HDMI/DVI Input
Mode Resolution
VESA
CEA 1920 x 1080p 67.500 60.000 148.500 + / +
➣
When using an HDMI/DVI cable connection, you must use the HDMI IN 2 jack.
➣
The interlace mode is not supported.
➣
The set might operate abnormally if a non-standard video format is selected.
➣
Separate and Composite modes are supported. SOG is not supported.
➣
Too long or low quality VGA cable can cause picture noise at high resolution modes
640 x 350
720 x 400
640 x 480
640 x 480
640 x 480
800 x 600
800 x 600
800 x 600
1024 x 768
1024 x 768
1024 x 768
1280 x 1024
1280 x 1024
1360 x 768
1600 x 1200
640 x 480
800 x 600
1024 x 768
1280 x 1024
1360 x 768
1600 x 1200
Horizontal
Frequency (kHz)
31.469
31.469
31.469
37.861
37.500
37.879
48.077
46.875
48.363
56.476
60.023
63.981
79.976
47.712
75.000
Horizontal
Frequency (kHz)
31.469
37.879
48.363
63.981
47.712
75.000
(1920x1080 or 1600x1200).
Vertical
Frequency (Hz)
70.086
70.087
59.940
72.809
75.000
60.317
72.188
75.000
60.004
70.069
75.029
60.020
75.025
60.015
60.000
Vertical
Frequency (Hz)
59.940
60.317
60.004
60.020
60.015
60.000
Pixel Clock
Frequency (MHz)
25.175
28.322
25.175
31.500
31.500
40.000
50.000
49.500
65.000
75.000
78.750
108.000
135.000
85.500
162.000
Pixel Clock
Frequency (MHz)
25.175
40.000
65.000
108.000
85.500
162.000
Sync Polarity
(H/V)
+ / -
- / +
- / -
- / -
- / + / +
+ / +
+ / +
- / -
- / + / +
+ / +
+ / +
+ / +
+ / +
Sync Polarity
(H/V)
- / + / +
- / + / +
+ / +
+ / +
English - 47
Page 50

Setting up the TV with your PC
Press the SOURCE button to select PC mode.
➣
1. Press the MENU button to display the menu.
Press the ENTER button, to select "Picture".
2. Select the required option by pressing the ▲ or ▼ button,
then press the ENTER button.
3. When you are satised with your setting, press the ENTER
button.
4. Press the EXIT button to exit.
Auto Adjustment
♦
Auto adjustment allows the PC screen of set to self-adjust to
the incoming PC video signal. The values of fine, coarse and
position are adjusted automatically.
TV
Mode : Standard
Backlight 7
Contrast 95
Brightness 45
Sharpness 50
Auto Adjustment
Screen Adjustment
Detailed Settings
sMore
Move Enter Return
Auto Adjustment in progress
Picture
Please wait.
Easy Setting
1. Press the
2.
Press the ▲ or ▼ button to select “Auto Adjustment”, then
TOOLS button on the remote control.
press the ENTER button.
Screen Adjustment:
♦
Coarse/Fine
The purpose of picture quality adjustment is to remove or reduce
picture noise. If the noise is not removed by Fine-tuning alone,
then adjust the frequency as best as possible (coarse) and Finetune again. After the noise has been reduced,
readjust the picture so that it is aligned on the center of screen.
Press the ▲ or ▼ button to select "Coarse" or "Fine", then press
the
ENTER button.
Press the ◄ or ► button to adjust the screen quality.
Press the
ENTER button.
Position
Adjust the PC’s screen positioning if it does not fit the TV screen.
Press the ▲ or ▼ button to adjusting the Vertical-Position.
Press the ◄ or ► button to adjust the Horizontal-Position.
Press the
ENTER button.
Image Reset
You can replace all image settings with the factory default
values.
Anynet+ (HDMI-CEC)
Picture Mode : Standard
Sound Mode : Custom
Sleep Timer : Off
SRS TS XT : Off
Energy Saving : Off
PIP
Auto Adjustment
Move Enter Exit
TV
TV
TV
Tools
Screen Adjustment
Coarse 50
Fine 93
Position
Image Reset
Move Enter Return
Position
Move Enter Return
Screen Adjustment
Coarse 50
Fine 93
Position
Image Reset
English - 48
Move Enter Return
Page 51

Using the WISELINK Function
This function enables you to view and listen to photo (JPEG)
and audio les (MP3) saved on a USB Mass Storage Class
(MSC) device.
Press the POWER button on the remote control or
Connect a USB device containing JPEG and/or MP3 les to the
WISELINK jack (USB jack) on the side of the TV.
If you enter the WISELINK mode with no USB device
connected the message “There is no device connected” will
appear. In this case, insert the USB device, exit the screen by
pressing the W.LINK button on the remote control and enter
the WISELINK screen again.
Only alphanumeric characters must be used as a folder name or filename (photo, music).
The file system only supports FAT16/32 (The NTFS file system is not supported)
Certain types of USB Digital camera and audio devices may not be compatible with this TV.
Wiselink only supports the USB Mass Storage Class device (MSC). MSC is a Mass Storage Class
Bulk-Only Transport device. Examples of MSC are Thumb drives and Flash Card Readers (Both USB
HDD and HUB are not supported.)
Before connecting your device to the TV, please back up your files to prevent them from damage or loss
of data.SAMSUNG is not responsible for any data file damage or data loss.
Please connect directly to the USB port of your TV. If you are using a separate cable connection, there
may be a USB Compatibility problem.
Only MP3 and JPEG file formats are supported.
The Wiselink mp3 format only supports music files with a high sampling frequency (32 kHz, 44.1 kHz,
or 48 kHz).
We recommend the sequential jpeg format.
Do not disconnect the USB device while it is loading.
MTP (Media Transfer Protocol) is not supported.
The playing duration of an mp3 file may be displayed as ‘00:00:00’ if its playing time information is not
found at the start of the file.
The higher the resolution of the image, the longer it takes to display on the screen.
The Photo or Music List displays up to 300 folders or files.
Loading may take some time depending on the size of the file.
your set
.
TV Side Panel
USB Drive
English - 49
Page 52

Using the WISELINK Menu
1. Press the MENU button. Press the ▲ or ▼ button to select
“Input”, then press the ENTER button.
2. Press the ▲ or ▼ button to select “WISELINK”, then press the
ENTER button.
3. Press the ▲ or ▼ button to select the corresponding USB
Memory Device, then press the ENTER button.
The "WISELINK" menu differs depending on the USB
➣
Memory Device connected to TV.
Some devices may not be supported due to compatibility
➣
problems.
TV
Source List : TV ►
Edit Name ►
Anynet+ (HDMI-CEC)
WISELINK
Move Enter Return
STORAGE DEVICE
STORAGE DEVICE
STORAGE DEVICE
STORAGE DEVICE
Move Enter Exit
Input
SUM
4. Press the ◄ or ► button to move to an icon, then press the
ENTER button.
➣
To exit WISELINK mode, press the W.LINK button on the
remote control.
Photo Music Setup
Press the W.LINK button on the remote control to display a
WISELINK menu.
Using the Remote Control Button in WISELINK Menu
Button Operations
▲/ ▼/ ◄/ ► Move the cursor and select an item.
ENTER
Select the currently selected item.
Play the Slide Show or MP3 file.
Pause the Slide Show or MP3 file.
RETURN Return to the previous menu.
INFO Run various functions from the Photo and Music menus.
Stop the current slide show or MP3 file.
Page Up or Down (file list item)
EXIT Stop the current function and return to the previous high-level menu.
Photo
SUM
861MB/994MBFree
Move Enter Return
English - 50
Page 53

Using the PHOTO (JPEG) List
This menu shows JPEG les and folders saved on an USB memory
device.
1. Complete Steps 1 to 3 of “Using the WISELINK Menu”.
(Refer to page 50)
2.
Press the ◄ or ► button to move to “Photo”, then press the
ENTER button. The saved le information is displayed as a
folder or le.
3. Press the ▲, ▼, ◄ and ► buttons to select a le.
• Pressing the ENTER button over a photo icon shows the
currently selected photo in full screen.
• Pressing the ENTER button over a folder icon shows the
JPEG les included in the folder.
Photo
580*440
47KB
Jun 1,2008
3/23
To exit WISELINK mode, press the W.LINK button on the
remote control.
➣
Moving to a photo may take a few seconds to load the le.
At this point, the
icon will appear at the top left
SUM
895MB/993MB
of the screen.
➣
It takes time to show JPEG les as Thumbnail images.
➣
This menu only shows les whose le extension is jpg. Files of other formats such as bmp or tif
will not be displayed.
➣
The les are displayed on a page. 15 thumbnail photos are displayed per page.
The thumbnails are numbered from left to right and from top to bottom, from 1 to 15.
➣
Certain types of USB Digital camera and audio devices may not be compatible with this TV.
➣
Folders are displayed rst and they are followed by all JPEG les in the current folder
➣
➣
The folders and JPEG les appear in the order of the time they were saved to the USB memory
device.
If the photo is displayed in full screen, you can zoom in and out or rotate the photo on the screen.
➣
While a full screen is displayed, ◄ or ► button will let you see another photo image in the same
➣
folder.
Press the
➣
➣
Photos without EXIF information may not be displayed as thumbnail images in the PHOTO LIST
button when a Photo icon is selected to start a Slide Show.
depending on the picture quality and resolution.
Photo
SUM
861MB/994MBFree
Photo Music Setup
Move Enter Return
Upper Folder
Forder1
Photo 0001 Photo 0001 None
File 4 File 5 File 6 File 7 File 8
File 9 File 10 File 11 File 12 File 13
Select
Move Enter Option Return
1/10 Page
f
.
Viewing a Slide Show
4. Press the INFO button to display the option("Start Slide Show",
"Select All").
5. Press the ▲ or ▼ button to select “Start Slide Show” then
press the ENTER button.
➣
During the slide show, les are displayed in order from the
currently shown le.
MP3 les can be automatically played during the Slide
➣
Show if the Default Background Music is set to On. To
enable this function, MP3 les and other photo les must
be located in the same folder on the USB Memory Device.
6. Press the INFO button during the slide show to set the
following options ("Slide Show Speed", "Background Music",
"Background Music Setting", "List"). Press the ▲ or ▼ button
to select the option, then press the ENTER button.
• After setting the option press the ENTER button to make a
change.
English - 51
Photo
580*440
47KB
Jun 1,2008
3/23
Start Slide Show
895MB/993MB
Select All
Exit
Slide Show Speed Nomal►
Background Music
On ►
Background Music Setting
List
Exit
Upper Folder
Forder1
Photo 0001 Photo 0001 None
File 4 File 5 File 6 File 7 File 8
File 9 File 10 File 11 File 12 File 13
Move Enter Option Return
Select
1/10 Page
Page 54

Using the Menu in the Photo List
Start Slide Show:
You can start a Slide Show.
Photo
580*440
Select All:
Select all the les in the folder.
47KB
Jun 1,2008
3/23
Deselect all:
Deselect all the les in the folder.
Using the Menu during a Slide Show
Start Slide Show
895MB/993MB
Select All
Deselect all
Exit
Slide Show Speed:
Select to control the slide show speed.
Press the ▲ or ▼ button to select the required option
("Fast", "Normal", Slow), then press the
Background Music:
ENTER button.
Slide Show Speed Nomal
Background Music
Background Music Setting
List
Exit
Select to choose whether you want to play an MP3 le during a slide
show.
Press the ▲ or ▼ button to select the required option("On", "Off"),
then press the
ENTER button.
Upper Folder
Forder1
File 4 File 5 File 6 File 7 File 8
File 9 File 10 File 11 File 12 File 13
On ►
Select
Nomal
Fast
Slow
Move Enter Option Return
1/10 Page
Photo 0001 Photo 0001 None
Slide Show Speed Nomal►
Background Music Setting:
While the slide show is in progress, MP3 les and folders under the
Background Music
Background Music Setting
List
Exit
same directory are displayed.
Press the ▲ or ▼ button to select a music le, then press the yellow
button.
The (
) mark appears to the left of the selected music.
Repeat the above operation to select multiple music les.
Press the
➣
ENTER button.
If you turn Off the Background Music, even if the Background
Music Settings have been set up, the background music will not
Off
On
On
Background Music Setting
Choose file for background music
Upper Folder
01-001
02-002
03-003
04-004
05-005
◄◄ 1/1 Page ►►
Select
Move Enter Return
be played.
Photo
580*440
47KB
List:
The le information is displayed as a folder or JPEG le.
To exit WISELINK mode, press the W.LINK button on the remote
control.
➣
When selecting a photo le, the photo le information is
Jun 1,2008
3/23
Upper Folder
File 4 File 5 File 6 File 7 File 8
SUM
895MB/993MB
File 9 File 10 File 11 File 12 File 13
Select
Forder1
Photo 0001 Photo 0001 None
Move Enter Option Return
displayed on the left side of the TV screen, such as the resolution, the date modied and the order of
the le in the current directory (e.g. 10th out of 15).
: Folder icon
: Photo icon
: Move to the previous
folder stage icon
English - 52
Such as the resolution
File Size
Date modified
Order of the file in the
current directory
Photo
580*440
47KB
Jun 1,2008
3/23
1/10 Page
Page 55

Using the Option Menu
1.
Complete Steps 1 to 3 of “Using the WISELINK Menu”.
(Refer to page 50)
2.
Press the ◄ or ► button to move to “Photo”, then press the
ENTER button. The saved le information is displayed as a
folder or le.
3. Press the ▲, ▼, ◄ and ► button to select a le, then press
the ENTER button. Pressing the button over a photo
Start Slide Show
Zoom X1
Rotate 0
List
Exit
►
►
thumbnail displays the photo in full screen.
4. Press the INFO button to display the option("Start Slide Show" , "Zoom", "Rotate", "List")
Start Slide Show:
Press the ▲ or ▼ button to select “Start Slide Show”, then press the
•
ENTER button. You can start
a Slide Show.
Zoom:
Press the ▲ or ▼ button to select “Zoom”, then press the
•
ENTER button.
•
Select the required option by pressing the ▲ or ▼ button, then
press the ENTER button. (X1, X2, X4)
To pan up/down/left/right in the zoomed-in photo, press the
➣
INFO button to exit option menu, then press the ▲, ▼, ◄ and
► buttons.
➣
"Start Slide Show" or "Rotate" is disabled when the "Zoom"
option is selected.
" x1 " : Restore a photo to its original size.
➣
" x2 " : Zoom-in to a photo x2.
" x4" : Zoom-in to a photo x4.
/ / / : Move the zoomed-in photo up/down/right/left.
Rotate:
• Press the ▲ or ▼ button to select “Rotate”, then press the
ENTER button.
• Select the required option by pressing the ▲ or ▼ button, then
press the ENTER button. (0°,
➣
The rotated le is not saved.
➣
"Start Slide Show" or "Zoom" is disabled when the “Rotate”
90°
, 180°, 270°)
option is selected.
"
0°
" : This rotates a photo to its original position
➣
"
90°
" : This rotates a photo by 90 degrees
180°
" : This rotates a photo by 180 degrees
"
270°
" : This rotates a photo by 270 degrees
"
X 1
Start Slide Show
Zoom X1
Rotate 0
List
Exit
0°
Start Slide Show
Zoom X1
Rotate 0
List
Exit
x 1
►
x 2
x 4
►
0
90
180
270
English - 53
Page 56

Using the MP3 List
This menu shows MP3 les from among the les saved on a USB
memory device.
1. Complete Steps 1 to 3 of “Using the WISELINK Menu”.
(Refer to page 50)
2.
Press the ◄ or ► button to move to “Music”, then press the
ENTER button. The saved le information is displayed as a
folder or le.
3. Press the ▲ or ▼ button to move to an icon, then press the
ENTER button.
Pressing the ENTER button over a musical note icon
•
immediately plays the music le.
Pressing the
•
music les included in the folder.
To select a le on the next page, press the
•
to move to the next page.
4. To select all les or a le, press the INFO button to display the
Music menus. Press the
“Repeat Music” or “Select All”.
To exit WISELINK mode, press the W.LINK button on the
remote control.
The folders and MP3 les appear in the order of the time they
➣
were saved to the USB memory device.
ENTER button over a folder icon shows the
or button
ENTER button to select “Play”,
Play
Repeat Music Off
Select All
Exit
Music
SUM
861MB/994MBFree
Photo Music Setup
Move Enter Return
Music
5MB
Jun 1,2008
3/23
006-006
Upper Folder
Folder 1
001-001
002-002
003-003
004-004
005-005
006-006
007-007
►
Select Move Enter Option Return
008-008
: Folder icon
: Music icon
1/10 Page
00:04:00
00:04:01
00:04:28
00:04:12
00:05:39
00:04:30
00:04:30
00:03:54
00:05:25
Using the Option Menu
Play:
: Move to the previous
folder stage icon
Select to play MP3 files.
Press the
➣
Press the button to exit Play mode.
➣
This menu only shows les with the MP3 le extension. Files with other le extensions are not
➣
button while playing an MP3 le to pause the le.
displayed,even if they are saved on the same USB device.
The selected le is displayed on the top with its playing time.
➣
To adjust the music volume, press the VOL
➣
sound, press the
If the sound is odd when playing MP3 les, exit WISELINK mode and adjust the "Equalizer" and
➣
MUTE button on the remote control.
+, VOL - button on the remote control. To mute the
"SRS TS XT" in the Sound menu. (An over-modulated MP3 le may cause a sound problem.)
Repeat Music:
Select to repeatedly play MP3 les in the current folder.
You can select On or Off.
Select All:
Select all the les in the folder.
Deselect all:
Deselect all the les in the folder.
Music function information icon
: When all music les in the folder (or the selected le) are repeated. “Repeat Music” is “On”.
: When all music les in the folder (or the selected le) are played once. “Repeat Music” is “Off”.
/
When pressing the
/
button on the remote control while music is playing.
:
: When pressing the button on the remote control when music is stopped.
English - 54
Page 57

Using the Setup Menu
Setup displays the user settings of the WISELINK menu.
1. Complete Steps 1 to 3 of “Using the WISELINK Menu”.
(Refer to page 50)
2.
Press the ◄ or ► button to move to “Setup”, then press the ENTER button.
3. Press the ▲ or ▼ button to select an item you want, then press the ENTER button. (“Slide Show
Speed”, “Background Music”, “Background Music Setting”, “Repeat Music”, “Screen Saver”)
4. Press the ▲ or ▼ button to select the option, then press the ENTER button.
To exit WISELINK mode, press the W.LINK button on the remote control.
Slide Show Speed:
Select to control the slide show speed. You can select “Fast”,
“Normal” or “Slow”.
Background Music :
Select to determine whether to play an MP3 file during a slide show.
You can select Music “On” or Music “Off”.
Background Music Setting:
While a slide show is in progress, use the "Background Music
Setup" to select a music file to listen to. Select an MP3 file as the
background music.
Repeat Music :
Select to determine whether to repeat playing the music when all
MP3 files in the current folder have been played.
Slide Show Speed Normal
Setup
Background Music On ►
Background Music Setting
Repeat Music Off ►
Screen Saver 1min. ►
Slide Show Speed Normal ►
Setup
Background Music On
Background Music Setting
Repeat Music Off ►
Screen Saver 1min. ►
Background Music Setting
Choose file for background music
Upper Folder
01-001
02-002
03-003
04-004
05-005
Select
Slide Show Speed Normal ►
Setup
Background Music On ►
Background Music Setting
Repeat Music Off
Screen Saver 1min. ►
◄◄ 1/1 Page ►►
Fast
Normal
Slow
Move Enter Return
Off
On
Move Enter Return
Move Enter Return
Off
On
Screen Saver:
Select to set the waiting time before the screen saver appears.
The screensaver will appear when no button is pressed for 1, 5 or
10 minutes.
English - 55
Slide Show Speed Normal ►
Setup
Background Music On ►
Background Music Setting
Repeat Music Off ►
Screen Saver 1min.
Move Enter Return
1min.
5min.
10min.
Move Enter Return
Page 58

What is Anynet+?
SERSE
R
Anynet+ is an AV network system that enables an easy-to-use AV interface for users by controlling
all connected AV devices through the Anynet+ menu when Samsung Electronics AV devices are
connected.
Connecting Anynet+ Devices
The Anynet+ system supports AV devices supporting Anynet+ only.
Check if there is an Anynet+ mark on the AV device to be connected to the TV.
To directly connect to TV
TV
Anynet+ Device 1 Anynet+ Device 2 Anynet+ Device 3
Connect the [HDMI 1],
[HDMI 2] or [HDMI 3] jack on
the TV and the HDMI OUT jack
of the corresponding Anynet+
device using the HDMI cable.
HDMI 1.3 Cable
HDMI 1.3 Cable
HDMI 1.3 Cable
To connect to Home Theater
1. Connect the [HDMI 1],
TV
Anynet+ Device 1 Anynet+ Device 2
[HDMI 2] or [HDMI 3]
jack on the TV and the
HDMI OUT jack of the
corresponding Anynet+
device using the HDMI
cable.
2.
HDMI 1.3 Cable
Home Theatre
HDMI 1.3 Cable
Anynet+ Device 3
Connect the HDMI IN jack
of the home theatre and
the HDMI OUT jack of the
corresponding Anynet+
device using the HDMI
cable.
Optical Cable
HDMI 1.3 Cable
HDMI 1.3 Cable
Connect only the optical cable between [Digital Audio Out (Optical)] on your TV and Digital Audio
➣
Input on the receiver.
Connect only one receiver.
➣
You can listen to 5.1 channel sound through the home theatre’s speakers. Otherwise, you can only
➣
listen to 2 channel stereo sound in other cases. Make sure to connect the Digital Audio IN (Optical) of
the home theatre and the TV correctly to listen to TV sound through the home theatre. However, you
cannot listen to sound from the BD recorder that is sent to the home theatre via the TV in 5.1 channel
sound because the TV outputs only 2 channel stereo sound. Please see the manual for the home
theatre.
You can connect an Anynet+ device using the HDMI 1.3 cable. Some HDMI cables may not support
➣
Anynet+ functions.
Anynet+ works when the AV device supporting Anynet+ is in the Standby or On status.
➣
Anynet+ supports up to 8 AV devices in total.
➣
English - 56
Page 59

Setting Up Anynet+
The following settings are to use Anynet+ functions.
Using the Anynet+ Function
Press The TOOLS button. Then Press the ENTER button to
1.
select "Anynet+(HDMI-CEC)".
Press the ▲ or ▼ button to select "Setup", then press the
ENTER button.
2. Press the ENTER button to select "Anynet+ (HDMI-CEC)",
then press the ENTER button.
3. Press the ▲ or ▼ button to select "On", then press the
ENTER button.
The "Anynet+ (HDMI-CEC)" function is enabled.
➣
If you select "Off", "Anynet+ (HDMI-CEC)" is disabled.
➣
When the "Anynet+ (HDMI-CEC)" function is disabled, all the
➣
Anynet+ related operations are deactivated.
Anynet+ (HDMI-CEC)
Picture Mode : Standard
Sound Mode : Custom
Sleep Timer : Off
SRS TS XT : Off
Energy Saving : Off
Dual l-ll : Mono
Move Enter Exit
TV P9
View TV
Select Device
Record
Menu on Device
Device Operation
Receiver :Off
Setup
Move Enter
Return
Anynet+ (HDMI-CEC)
Auto Turn Off
Searching Connections
Move Enter Return
Tools
Setup
: Off
: Off
Off
On
Turning an Anynet+ Device Off Automatically when the TV is Turned Off
1. Press the ▲ or ▼ button to select "Auto Turn Off", then press
the ENTER button.
2. Press the ▲ or ▼ button to select "Yes", then press the
ENTER button.
The Auto turn off function is enabled.
➣
If you select "No", the Auto turn off function is cancelled.
➣
Press the EXIT button to exit.
The Select Device setting of the TV remote control is to be set
➣
Anynet+ (HDMI-CEC)
Auto Turn Off
Searching Connections
Move Enter Return
Setup
: On
: Off
to TV to use the Anynet+ function.
If you set "Auto Turn Off" to "Yes", connected external devices are also turned off when the TV is
➣
turned off. However, if the device is recording, it may not be turned off.
English - 57
No
Yes
Page 60

Scanning and Switching between Anynet+ Devices
1. Press the TOOLS button.
Then press the
ENTER button to select "Anynet+(HDMI-
CEC)".
2.
Press the ▲ or ▼ button to select "Select Device", then press
the ENTER button.
3. Press the ▲ or ▼ button to select to a particular device and
press the ENTER button. It is switched to the selected device.
4. If you cannot nd a device you want, press the ▲ or ▼ button to
select "Setup", then press the ENTER button.
5. Press the ▲ or ▼ button to select "Searching Connections",
then press the ENTER button.
The message "Conguring Anynet+ connection..." is displayed.
When searching devices completes, the connected devices are
listed in the Anynet+ menu.
Switching to the selected devices may take up to 2 minutes.
➣
You cannot cancel the operation during the switching
operation.
➣
The time required to scan for devices is determined by the number of connected devices.
➣
When the device scan is complete, the number of found devices is not displayed.
➣
Although the TV automatically scans devices when it is turned on using the POWER button, devices
connected when the TV is on or under a specic circumstance are not displayed in the device list.
Therefore select "Searching Connections" menu to search devices.
➣
If you have selected external input mode by pressing the SOURCE button, you cannot use the
Anynet+ function. Make sure to switch to an Anynet+ device by using the
TV P9
View TV
Select Device
Record
Menu on Device
Device Operation
Receiver :Off
Setup
Move Enter
Return
Setup
Anynet+ (HDMI-CEC)
Auto Turn Off
Searching Connections
Move Enter Return
: On
: Yes
TOOLS button.
English - 58
Page 61

Anynet+ Menu
The Anynet+ menu changes depending on the type and status of the Anynet+ devices connected
to the TV.
Anynet+ Menu Description
View TV Switches from Anynet+ to TV broadcast mode.
Select Device Your TV connects to the corresponding device.
Record Starts a recording. (This menu works only for a device supporting
Menu on Device Shows the menu of the connected device.
Device Operation Shows the play control menu of the connected device.
Receiver Sound is output through the receiver.
Setup You can set the environment for using Anynet+.
TV Remote Control Buttons Available in Anynet+ Mode
Device Type Operating Status Available Buttons
Anynet+ Device
Device with built-in Tuner
Audio Device When Receiver is activated
➣
The Anynet+ function only works when the remote control is set to TV.
➣
The
➣
You cannot control Anynet+ devices using the buttons on the TV. You can control Anynet+ devices
only using the TV remote control.
The TV remote control may not work under certain conditions. In this case, re-select the Anynet+
➣
device.
The Anynet+ functions don’t operate for the products from other manufacturers.
➣
In Anynet+ mode, the colour buttons may not work properly.
➣
The
➣
button works only while in the recordable state.
, operations may differ depending on the device.
recording.)
Example. When a DVD Recorder is connected, the DVD Recorder’s
title menu appears.
Example. When a DVD Recorder is connected, the play control
menu of the DVD Recorder appears.
After switching to the
device, when the menu of
the corresponding device is
displayed on the screen.
After switching to the device,
while playing a file
After switching to the device,
when you are watching a TV
programme
Numeric buttons
▲/▼/◄/►/
Colour buttons
EXIT button
</>
P
VOL
MUTE button
ENTER buttons
(Backward search)/
(Forward search)/
(Stop)/ (Play)/
(Pause)
button
+/-
button
English - 59
Page 62

Recording
You can make a recording of a TV programme using a recorder.
Press the button.
Recording begins. (Only when the Anynet+ enabled recording device is connected.)
The current TV programme is recorded in the Watching TV status. If you are watching video from
➣
another device, the video from the device is recorded.
You can also record the source streams by selecting Record after pressing the
➣
Before recording, check whether the antenna jack is properly connected to the recording device.
➣
For the antenna connection to the recording device, refer to its user manual.
TOOLS button.
Listening through a Receiver
You can listen to sound through a receiver instead of the TV speaker.
1. Press the TOOLS button. Then Press the ENTER button to
select "Anynet+(HDMI-CEC)".
Press the ▲ or ▼ button to select "Receiver", then press the
ENTER button.
2. Press the ◄ or ► button to select to "On", then press the
ENTER button.
Now you can listen to sound through the receiver.
3. Press the EXIT button to exit.
➣
When the receiver is set to On, you can listen to the TV sound
through the 2-channel receiver.
If the receiver is exclusively for a home theatre only
➣
(supporting audio only), it may not appear in the device list.
Only when you have connected the optical jack of the TV and the receiver properly, does Receiver
➣
work.
In case of a content with copyright problem, listening through the receiver may not properly operate.
➣
If there is a power interruption to the TV when the “Receiver” is set to “On” (by disconnecting the
➣
power cord or a power failure), the “TV Speaker” may be set to “Off” when you turn the
(see page 24)
TV P9
View TV
Select Device
Record
Menu on Device
Device Operation
Receiver :Off
Setup
Move Enter
Return
TV on again.
English - 60
Page 63

Check Points before Requesting Service
Symptom Solution
Anynet+ does not
work.
I want to start
Anynet+.
I want to exit Anynet+.
The Configuring
Anynet+ connection
message appears on
the screen.
The Anynet+ device
does not play.
The connected device
is not displayed.
The TV programme
cannot be recorded.
The TV sound is not
output through the
receiver.
■ Check if the device is an Anynet+ device. The Anynet+ system supports Anynet+
devices only.
■ Connect only one receiver.
■ Check if the Anynet+ device power cord is properly connected.
■ Check the Anynet+ device’s Video/Audio/HDMI 1.3 cable connections.
■ Check whether Anynet+ (HDMI-CEC) is set to On in the Anynet+ setup menu.
■ Check whether the TV remote control is in TV mode.
■ Check whether it is Anynet+ exclusive remote control.
■ Anynet+ doesn’t work at a certain condition. (Searching channels, Operating
WISELINK, Plug & Play, etc.)
■ When connecting or removing the HDMI 1.3 cable, please make sure to search
devices again or restart your TV.
■ Check if the Anynet+ Function of Anynet+ device is set on.
■ Check if the Anynet+ device is properly connected to the TV and check if the
Anynet+ (HDMI-CEC) is set to On in the Anynet+ Setup menu.
■ Press the TV/DTV button on the TV remote control to switch to TV. Then press
TOOLS button to show the Anynet+ menu and select a menu you want.
the
■ Select View TV in Anynet+ menu.
■ Press the SOURCE button on the TV remote control and select a device other
than Anynet+ devices.
■ Press any of P / , PRE-CH, and such to change to the TV mode. (Note that
the channel button operates only when a tuner-embedded Anynet+ device is not
connected.)
■ You cannot use the remote control when you are configuring Anynet+ or
switching to a view mode.
■ Use the remote control when the Anynet+ setting or switching to view mode is
complete.
You cannot use the play function when Plug & Play is in progress.
■ Check whether or not the device supports Anynet+ functions.
■ Check whether or not the HDMI 1.3 cable is properly connected.
■ Check whether Anynet+ (HDMI-CEC) is set to On in the Anynet+ setup menu.
■ Search Anynet+ devices again.
■ You can connect an Anynet+ device using the HDMI 1.3 cable only. Some HDMI
cables may not support Anynet+ functions.
■ If it is terminated by an abnormal situation such as disconnecting the HDMI 1.3
cable or power cord or a power failure, please repeat the device scan.
Check whether the antenna jack on the recording device is properly connected.
Connect the optical cable between TV and the receiver.
English - 61
Page 64

Teletext Feature
Most television stations provide written information services via Teletext. The index page of
the teletext service gives you information on how to use the service. In addition, you can select
various options to suit your requirements by using the remote control buttons.
➣
For teletext information to be displayed correctly, channel reception must be stable. Otherwise,
information may be missing or some pages may not be displayed.
1. (exit)
Exit from the teletext display
2
6 (index)
Used to display the index (contents) page at any time while you
are viewing teletext.
3
8 (store)
Used to store the teletext pages.
4
4 (size)
Press to display the double-size letters in the upper half of the
screen. For lower half of the screen, press it again. To display
normal screen, press it once again.
5
5 (reveal)
Used to display the hidden text (answers to quiz games, for
example). To display normal screen, press it again.
6
/ (teletext on/mix)
Press to activate teletext mode after selecting the channel
providing the teletext service. Press it twice to overlap the teletext
with the current broadcasting screen.
7
0 (mode)
Press to select the teletext mode (LIST/FLOF). If you press it
in the LIST mode, it switches into the List save mode. In the
List save mode, you can save teletext page into list using the
8(store) button.
8
1 (sub-page)
Used to display the available sub-page.
9
2 (page up)
Used to display the next teletext page.
0
3 (page down)
Used to display the previous teletext page.
!
9 (hold)
Used to hold the display on a given page if the selected page is
linked with several secondary pages which follow on automatically.
To resume, press it again.
@
7 (cancel)
Used to display the broadcast when searching for a page.
#
Colour buttons (red/green/yellow/blue)
If the FASTEXT system is used by a broadcasting company, the different topics covered on a teletext
page are colour-coded and can be selected by pressing the coloured buttons. Press one of them
corresponding to the required. The page is displayed with other coloured information that can be
selected in the same way. To display the previous or next page, press the corresponding coloured
button.
1
2
3
4
5
6
7
8
9
0
!
@
#
➣
You can change teletext pages by pressing the numeric buttons on
the remote control.
English - 62
Page 65

The teletext pages are organized according to six categories:
Part Contents
A
B
C
D
E
F
Teletext information is often divided between several pages
➣
displayed in sequence, which can be accessed by:
Entering the page number
Selecting a title in a list
Selecting a coloured heading (FASTEXT system)
Press the TV/DTV button to exit from the teletext display.
➣
Selected page number.
Broadcasting channel identity.
Current page number or search indications.
Date and time.
Text.
Status information.
FASTEXT information.
English - 63
Page 66

Auto Wall-Mount (Sold separately)
Once the auto wall mount is installed, your TV’s position can be easily adjusted.
TV Rear Panel
SERVICE Cable (Not supplied)
Entering the menu
1. Press the ▲, ▼, ◄ or ► button on your remote control.
The Auto Wall-Mount screen is displayed.
➣
If the Auto Wall-Mount screen is not displayed when
➣
clicking on a direction button while watching your TV, use
the menu to display that screen.
• Press the MENU butt on to display the menu.
Press the ▲ or ▼ button to select “Setup”, then press the
ENTER button.
• Press the ▲ or ▼ button to select “Auto Wall-Mount”, then
press the ENTER button.
Remembering the Position
2. Adjust to the desired position using the ▲,▼,◄,► buttons.
If you press an arrow button when no OSD is displayed on
➣
the TV screen, the Adjustment screen appears.
Press the INFO button to reset. Press the ◄ or ► button to
➣
select “Yes”, then press the
ENTER button.
The position is initialized to the default setting.
3. Press the blue button.
Press the ▲ and ▼ buttons to select a save mode from either
Position 1, Position 2 or Position 3 in order to save the current
position.
To not save the current position, press the
➣
When selecting a save mode, you cannot use the Colour
➣
RETURN button.
buttons.
4. Press the ENTER button to save.
➣
When Position1 is selected, the message "Current position
saved as Position1" is displayed.
5. Press the ENTER button.
➣
The saved Position appears on the left side of the OSD.
Auto Wall-Mount
TV
Plug & Play
Language : English
Time
Light Effect :
Auto Wall-Mount
Melody : Off
Entertainment : Off
Energy Saving : Off
PIP
Move Enter Return
Auto Wall-Mount
Position 1 2 3
Adjust Save Center
Select a mode to Save.
Move Enter Return
Position1
Position2
Position3
Save
Setup
In Watching TV
INFO
English - 64
Page 67

Moving to the remembered position
1. Complete Step 1 of “Entering the menu”.
2. Pressing a Colour (Red, Green, Yellow) button moves the auto
wall mount to the saved position.
You can move the wall mount to one of the 3 pre-set
➣
positions by pressing the Red (Position 1),
Green (Position 2) or Yellow (Position 3) buttons.
If you adjust the position after moving to a pre-set position,
➣
the position display will disappear.
For installation, refer to the Installation Manual provided with the wall mount.
➣
For product installation and the installation and moving of the wall mount, make sure to consult a
➣
specialized installation company.
This installation manual is to be used when attaching the wall mount to a wall. When attaching to
➣
other building materials, please contact your nearest dealer.
The auto wall mount will not work when Anynet+ and WISELINK are operating.
➣
37, 40 and 46 inch models are not compatible with the old electrically powered wall mount model
➣
(WMN5090A*).
Position1
Auto Wall-Mount
Position 1 2 3
Adjust Save Center
INFO
Using the Anti-Theft Kensington Lock (depending on the model)
The Kensington lock is a device used to physically x the system when using it in a public
place. The appearance and locking method may differ from the illustration depending on the
manufacturer. Refer to the manual provided with the Kensington lock for proper use. The locking
device has to be purchased separately.
1.
Insert the locking device into the Kensington slot
on the LCD TV (Figure 1), and turn it in the locking
direction (Figure 2).
2.
Connect the Kensington lock cable.
3. Fix the Kensington lock to a desk or a heavy
stationary object.
The place of the Kensington Lock may be different
➣
depending on its model.
English - 65
Cable
Figure 2
Figure 1
<Optional>
Page 68

Troubleshooting: Before Contacting Service Personnel
No sound or picture
Normal picture but no sound
Screen is black and power
indicator light blinks steadily
No picture or black and white
picture
Sound and picture
interference
Blurred or snowy picture,
distorted sound
Remote control malfunctions
"Check signal cable."
message is displayed
On PC mode, "Not
Supported Mode." message
is displayed
The damaged picture
appears in the corner of the
screen
The "Resets all settings to
the default values" message
appears.
The TFT LCD panel uses a panel consisting of sub pixels (6 220 800) which require sophisticated
technology to produce. However, there may be few bright or dark pixels on the screen. These pixels will
have no impact on the performance of the product.
Check that the mains lead has been connected to a wall socket.
♦
Check that you have pressed the
♦
Check the picture contrast and brightness settings.
♦
Check the volume.
♦
Check the volume.
♦
Check whether the
♦
Check if "TV Speaker" is on
♦
On your computer check; Power, Signal Cable.
♦
The TV is using its power management system.
♦
Move the computer’s mouse or press any key on the keyboard.
♦
Adjust the colour settings.
♦
Check that the broadcast system selected is correct.
♦
Try to identify the electrical appliance that is affecting the set and move it
♦
further away.
♦
Plug your set into a different mains socket.
Check the direction, location and connections of your aerial.
♦
This interference is often due to the use of an indoor aerial.
Replace the remote control batteries.
♦
Clean the upper edge of the remote control (transmission window).
♦
Check the battery terminals.
♦
Check that the signal cable is rmly connected to the PC or video sources.
♦
Check that the PC or video sources are turned on.
♦
Check the maximum resolution and the frequency of the video adaptor.
♦
Compare these values with the data in the Display Modes.
♦
If "Just Scan" is selected in some external devices, the damaged picture
may appear in the corner of the screen. This symptom is caused by
external devices, not TV.
This appears when you press and hold the
product settings are reset to the factory defaults.
MUTE button has been pressed on the remote control.
button on your set.
EXIT button for a while. The
English - 66
Page 69

Technical and Environmental Specications
Model Name
Screen Size (Diagonal)
PC Resolution
Sound
Output
Dimensions (WxDxH)
Body
With stand
Weight
With stand
Environmental
Considerations
Operating Temperature
Operating Humidity
Storage Temperature
Storage Humidity
Stand Swivel
(Left / Right)
Model Name
Screen Size (Diagonal)
PC Resolution
Sound
Output
Dimensions (WxDxH)
Body
With stand
Weight
With stand
Environmental
Considerations
Operating Temperature
Operating Humidity
Storage Temperature
Storage Humidity
Stand Swivel
(Left / Right)
LE32A556 LE37A556 LE40A556
32 inch 37 inch 40 inch
1920 x 1080 @ 60 Hz 1920 x 1080 @ 60 Hz 1920 x 1080 @ 60 Hz
10 W X 2 10 W X 2 10 W X 2
865 x 79 x 500 mm
865 x 220 x 561 mm
14 kg
LE46A556 LE52A556
46 inch 52 inch
1920 x 1080 @ 60 Hz 1920 x 1080 @ 60 Hz
10 W X 2 10 W X 2
1186 x 111 x 686 mm
1186 X 260 X 749 mm
27 kg
984 x 87 x 572 mm
984 x 240 x 637 mm
18 kg
10 °C to 40 °C (50 °F to 104 °F)
10 % to 80 %, non-condensing
-20 °C to 45 °C (-4 °F to 113 °F)
5 % to 95 %, non-condensing
-20˚ ~ 20˚
1330 x 120 x 779 mm
1330 X 291 X 842 mm
10 °C to 40 °C (50 °F to 104 °F)
10 % to 80 %, non-condensing
-20 °C to 45 °C (-4 °F to 113 °F)
5 % to 95 %, non-condensing
-20˚ ~ 20˚
1058 x 91 x 608 mm
1058 X 240 X 672 mm
19 kg
33 kg
English - 67
Page 70

Model Name
Screen Size (Diagonal)
PC Resolution
Sound
Output
Dimensions (WxDxH)
Body
With stand
Weight
With stand
Environmental
Considerations
Operating Temperature
Operating Humidity
Storage Temperature
Storage Humidity
Stand Swivel
(Left / Right)
LE32A557 LE37A557 LE40A557
32 inch 37 inch 40 inch
1920 x 1080 @ 60 Hz 1920 x 1080 @ 60 Hz 1920 x 1080 @ 60 Hz
10 W X 2 10 W X 2 10 W X 2
801 X 88 X 526 mm
801 X 252 X 574 mm
13 kg
918 X 92 X 608 mm
918 X 300 X 650 mm
18 kg
997 X 92 X 641 mm
997 X 300 X 686 mm
21 kg
10 °C to 40 °C (50 °F to 104 °F)
10 % to 80 %, non-condensing
-20 °C to 45 °C (-4 °F to 113 °F)
5 % to 95 %, non-condensing
-20˚ ~ 20˚
Model Name
Screen Size (Diagonal)
PC Resolution
Sound
Output
Dimensions (WxDxH)
Body
With stand
Weight
With stand
Environmental
Considerations
Operating Temperature
Operating Humidity
Storage Temperature
Storage Humidity
Stand Swivel
(Left / Right)
LE46A557 LE52A557
46 inch 52 inch
1920 x 1080 @ 60 Hz 1920 x 1080 @ 60 Hz
10 W X 2 10 W X 2
1127 X 100 X 716 mm
1127 X 280 X 767 mm
28 kg
1269 X 109 X 806 mm
1269 X 326 X 857 mm
32 kg
10 °C to 40 °C (50 °F to 104 °F)
10 % to 80 %, non-condensing
-20 °C to 45 °C (-4 °F to 113 °F)
5 % to 95 %, non-condensing
-20˚ ~ 20˚
English - 68
Page 71

Model Name
Screen Size (Diagonal)
PC Resolution
Sound
Output
Dimensions (WxDxH)
Body
With stand
Weight
With stand
Environmental
Considerations
Operating Temperature
Operating Humidity
Storage Temperature
Storage Humidity
Stand Swivel
(Left / Right)
LE32A558 LE37A558 LE40A558
32 inch 37 inch 40 inch
1920 x 1080 @ 60 Hz 1920 x 1080 @ 60 Hz 1920 x 1080 @ 60 Hz
10 W X 2 10 W X 2 10 W X 2
801 X 88 X 514 mm
801 X 252 X 574 mm
13 kg
918 X 92 X 592 mm
918 X 300 X 650 mm
18 kg
997 X 92 X 628 mm
997 X 300 X 686 mm
21 kg
10 °C to 40 °C (50 °F to 104 °F)
10 % to 80 %, non-condensing
-20 °C to 45 °C (-4 °F to 113 °F)
5 % to 95 %, non-condensing
-20˚ ~ 20˚
Model Name
Screen Size (Diagonal)
PC Resolution
Sound
Output
Dimensions (WxDxH)
Body
With stand
Weight
With stand
Environmental
Considerations
Operating Temperature
Operating Humidity
Storage Temperature
Storage Humidity
Stand Swivel
(Left / Right)
LE46A558 LE52A558
46 inch 52 inch
1920 x 1080 @ 60 Hz 1920 x 1080 @ 60 Hz
10 W X 2 10 W X 2
1127 X 100 X 700 mm
1127 X 280 X 767 mm
28 kg
1269 X 109 X 791 mm
1269 X 326 X 857 mm
32 kg
10 °C to 40 °C (50 °F to 104 °F)
10 % to 80 %, non-condensing
-20 °C to 45 °C (-4 °F to 113 °F)
5 % to 95 %, non-condensing
-20˚ ~ 20˚
English - 69
Page 72

Model Name
Screen Size (Diagonal)
PC Resolution
Sound
Output
Dimensions (WxDxH)
Body
With stand
Weight
With stand
Environmental
Considerations
Operating Temperature
Operating Humidity
Storage Temperature
Storage Humidity
Stand Swivel
(Left / Right)
LE32A559 LE37A559 LE40A559
32 inch 37 inch 40 inch
1920 x 1080 @ 60 Hz 1920 x 1080 @ 60 Hz 1920 x 1080 @ 60 Hz
10 W X 2 10 W X 2 10 W X 2
801 X 88 X 524 mm
801 X 252 X 574 mm
13 kg
918 X 92 X 601 mm
918 X 300 X 650 mm
18 kg
10 °C to 40 °C (50 °F to 104 °F)
10 % to 80 %, non-condensing
-20 °C to 45 °C (-4 °F to 113 °F)
5 % to 95 %, non-condensing
-20˚ ~ 20˚
997 X 92 X 638 mm
997 X 300 X 686 mm
21 kg
Model Name
Screen Size (Diagonal)
PC Resolution
Sound
Output
Dimensions (WxDxH)
Body
With stand
Weight
With stand
Environmental
Considerations
Operating Temperature
Operating Humidity
Storage Temperature
Storage Humidity
Stand Swivel
(Left / Right)
Design and specifications are subject to change without prior notice.
➣
This device is a Class B digital apparatus.
➣
For the power supply and Power Consumption, refer to the label attached to the product.
➣
LE46A559 LE52A559
46 inch 52 inch
1920 x 1080 @ 60 Hz 1920 x 1080 @ 60 Hz
10 W X 2 10 W X 2
1127 X 100 X 710 mm
1127 X 280 X 767 mm
28 kg
10 °C to 40 °C (50 °F to 104 °F)
10 % to 80 %, non-condensing
-20 °C to 45 °C (-4 °F to 113 °F)
5 % to 95 %, non-condensing
-20˚ ~ 20˚
1269 X 109 X 800 mm
1269 X 326 X 857 mm
32 kg
English - 70
Page 73

Den här produkten kan endast användas för finska, svenska och danska sändningar. Sändningar stöds inte i
andra länder.
Kontakta SAMSUNG
Om du har några frågor eller synpunkter om Samsungs produkter, är du välkommen att kontakta
Samsung Support. (Se bakre omslaget för ytterligare information).
Att tänka på vid visning av stillbild
Stillbilden kan orsaka permanenta skador på bildskärmen.
• Visa inte en stillbild på skärmen i mer än två timmar, eftersom det kan leda till att bilden ligger
kvar på skärmen.
Att bilden på skärmen behålls kallas även “bildskärmsbränning”.
Du kan undvika att bilden behålls genom att minska på ljusstyrkan och kontrasten på bildskärmen
när du visar stillbilder.
• Användning av LCD TV:n i 4:3-format under en längre tid kan lämna spår av kanterna
Skador som orsakas av det som beskrivs ovan täcks inte av garantin.
• Visning av stillbilder från tv-spel och datorer längre stunder kan skapa delvisa efterbilder.
För att förhindra detta ska du minska på ljusstyrka och kontrast vid visning av stillbilder.
© 2008 Samsung Electronics Co., Ltd. All rights reserved.
till vänster, höger och mitt på skärmen vilket orsakas av skillnaden i ljusstrålning i skärmen. Uppspelning av en DVD eller tv-spel kan orsaka samma effekter på skärmen.
Page 74

Innehåll
ANSLUTA OCH FÖRBEREDA TV-APPARATEN
Lista över delar ................................................... 3
Installera stativet ................................................ 3
Installera väggfästessatsen ................................ 3
Visa kontrollpanelen ........................................... 4
Visa anslutningspanel ........................................ 5
Översikt av fjärrkontrollen .................................. 8
Installering av batterier i fjärrkontrollen .............. 9
Slå på och stänga av .......................................... 9
Sätta tv:n i vänteläge .......................................... 9
Visa menyerna ................................................. 10
Använda knappen Verktyg ............................... 10
Plug & Play ........................................................11
STÄLLA IN KANALER
Lagra kanaler automatiskt ................................ 12
Lagra kanaler manuellt ..................................... 13
Lägga till / låsa kanaler .................................... 14
Sortera de lagrade kanalerna ........................... 15
Namnge kanaler ............................................... 15
Fininställning av kanalmottagningen ................ 16
STÄLLA IN BILDEN
Ändra bildstandard ........................................... 17
Justera Egna bildinställningar .......................... 18
Kongurera ninställningar för bilden ............... 18
Återställa bildinställningarna till
fabriksstandard ................................................. 19
Kongurera bildalternativ ................................. 20
Visa bild-i-bild (BIB) .......................................... 22
STÄLLA IN LJUDET
Ändra ljudinställningarna .................................. 23
Välja ljudläge .................................................... 24
Ansluta hörlurar (Säljs separat) ........................ 24
BESKRIVNING AV FUNKTIONER
Välja språk ....................................................... 26
Justera ljusinställningarna
(beroende på modell) ....................................... 27
Melodi / Underhållning / Energispar ................ 27
Välja källa ......................................................... 29
Redigera ingångskällornas namn ..................... 29
ANVÄNDA DTV-FUNKTIONEN
Förhandsvisa DTV-menysystemet ................... 30
Välja Land ........................................................ 31
Uppdatera kanallistan automatiskt ................... 32
Uppdatera kanallistan manuellt ........................ 33
Ändra dina favoritkanaler ................................. 34
Välja kanallista ................................................. 36
Visa programinformation .................................. 36
Visa Elektronisk programguide ......................... 37
Använda Schemalagda .................................... 38
Ställa in Standardguide .................................... 38
Visa Alla kanaler och Favoritkanalerna ............ 39
Ställa in menytransparens ................................ 39
Ställa in Barnlås ............................................... 40
Ställa in undertexter ......................................... 41
Ställa in läge för undertexter ............................ 41
Välja ljudformat ................................................ 41
Välja ljudbeskrivning ........................................ 42
Visa produktinformation .................................... 42
Kontrollera signalinformation ............................ 43
Uppgradera programvaran ............................... 43
Visa Common Interface .................................... 44
Välja AG-meny (Common Interface) ................ 44
Återställa .......................................................... 45
Välja önskat språk ............................................ 45
Inställning ......................................................... 46
Svenska
STÄLLA IN TIDEN
Ställa in och visa aktuell tid .............................. 25
Ställa in sovtimern ............................................ 25
Slå på och stänga av TV:n automatiskt ............ 26
Svenska - 1
Svenska - 1
Page 75

ANVÄNDA TEXT-TV-FUNKTIONEN
Installera programvaran
(baserad på Windows XP) ............................... 47
Bildskärmslägen ............................................... 47
Installera TV:n med datorn ............................... 48
WISELINK
Använda funktionen WISELINK ....................... 49
Använda WISELINK-menyn ............................. 50
Använda PHOTO (JPEG) Lista (Fotolistan) ..... 51
Använda MP3-lista ........................................... 54
Använda Setup-menyn ..................................... 55
OM ANYNET+
Vad är Anynet+? .............................................. 56
Ansluta Anynet+-enheter .................................. 56
Installera Anynet+ ............................................. 57
Söka och växla mellan Anynet+-enheter .......... 58
Inspelning ......................................................... 60
Lyssna via mottagaren ..................................... 60
Kontroller före kontakt med service .................. 61
REKOMMENDATIONER FÖR ANVÄNDNING
Text-tv-funktion ................................................. 62
Justering av väggfäste (säljs separat) .............. 64
Använda Kensington-låset (stöldskydd)
(beroende på modell) ....................................... 65
Felsökning: Innan du kontaktar
servicepersonal ................................................ 66
Tekniska och miljömässiga specikationer ....... 67
Symboler Tryck Obs! Entrycksknapp
Svenska - 2
Page 76

Lista över delar
Försäkra dig om att följande delar följer med din LCD-TV.
Kontakta din återförsäljare om det saknas något.
M4 X L16
Fjärrkontroll
och batterier
(AAA x 2)
Användarhandbok
•
Garantibevis / Säkerhetsmanual / Registreringskort (inte tillgänglig på alla platser)
➣
Stativet och stativskruven kanske inte medföljer beroende på modell.
➣
Nätsladd Nedre kåpa Stativskruv X4 Stand
Garantibevis
•
Säkerhetsmanual
•
Installera stativet
2
1
Rengöringsduk
Cloth
Registreringskort
•
1. Anslut din LCD-TV och stativet.
Två eller er personer bör bära plasmabildskärmen.
➣
Se till att skilja ordentligt på stativets fram- och baksida vid montering.
➣
2. Dra åt de båda skruvarna i position 1 och dra sedan åt de båda skruvarna i position 2.
Ställ produkten i upprätt läge och dra åt skruvarna. Om du drar åt skruvarna med LCD-TV:n
➣
placerad i nedåtgående riktning kan den luta åt ena hållet.
Stativet installeras för modeller med en skärmstorlek på 37 tum eller mer.
➣
Installera väggfästessatsen
Objekt för väggmontering (säljs separat) gör det möjligt
för dig att montera TV:n på väggen.
För detaljerad information om hur du utför en
väggmontering, se de medföljande anvisningarna för
väggmontering. Kontakta en tekniker för montering av
väggfästet.
Samsung Electronics är inte ansvariga för skador på
produkten eller personlig skada på dig själv eller andra
om du väljer att montera TV:n själv.
Installera inte väggmonteringssatsen när TV:n är
påslagen. Det kan leda till personskada på grund
av elektriska stötar.
Avlägsna ställningen, täck det nedre hålet med ett
➣
lock och spänn fast med två skruvar.
Svenska - 3
Page 77

Visa kontrollpanelen
8 8
4
1
2
3
5
6
7
1
2
3
4
6
7
58 8
Knappar på frontpanelen
Rör vid knappen för
respektive funktion.
Knappar på sidopanel
Produktens färg och form kan variera beroende på modell.
➣
SOURCE
1
Visar en meny över alla tillgängliga
indatakällor (TV, Ext.1, Ext.2, AV, S-Video,
Component, PC, HDMI1, HDMI2, HDMI3 och
DTV). På skärmmenyn används den här knappen
när du använder
MENU
2
Tryck här om du vill se en skärmmeny med TV:ns
ENTER
på fjärrkontrollen.
funktioner.
3
Tryck här när du vill sänka eller höja volymen.
Använd de här knapparna i skärmmenyn
när du använder och på fjärrkontrollen.
4
Tryck här när du vill byta kanal.
Använd de här knapparna i
skärmmenyn när du använder och på
fjärrkontrollen.
(Om du inte använder fjärrkontrollen kan du
koppla på TV:n med hjälp av kanalknapparna.)
Svenska - 4
Strömindikator
5
6
7
Blinkar och stängs av när strömmen är på och
tänds i viloläge
(Ström)
Tryck här när du ska slå på och stänga av TV:
n.
Mottagare för fjärrkontrollen
Rikta fjärrkontrollen mot den här punkten på
TV:n.
Högtalare
8
Page 78

Visa anslutningspanel
1 2 3 4 5
[Uttag på sidopanel]
6
3
7
8
Strömanslutning
Produktens färg och form kan variera beroende på modell.
➣
När du vill ansluta en extern enhet till TV:n ska du kontrollera att strömmen på enheten slås av.
➣
När du ansluter till en extern enhet skall du matcha färgen på anslutningen med den på kabeln.
➣
1 PC IN [PC] / [AUDIO]
Anslut till video- och ljudutgången på datorn.
-
2 COMPONENT IN
Anslut videokablarna (tillval) till komponentanslutningen (“PR”, “PB”, “Y”) på TV:ns baksida och de andra
-
ändarna till motsvarande videoutgång på DTV:n eller DVD:n.
Om du vill ansluta både en digital-TV-box och en DTV-spelare (eller DVD-spelare) ska du ansluta digital-
-
TV-boxen till DTV-spelaren (eller DVD-spelaren) och sedan ansluta denna till komponentanslutningen
(“PR”, “PB”, “Y”) på TV:n.
PR, PB och Y-anslutningarna på komponentenheterna (DTV eller DVD) är ibland märkta Y, B-Y och R-Y eller
-
Y, Cb och Cr.
Anslut RCA-ljudkablarna (tillval) till [R - AUDIO - L] på apparatens baksida och de andra ändarna till
-
motsvarande ljudutgångar på DTV- eller DVD-spelaren.
3 HDMI IN 1, HDMI IN 2, HDMI IN 3
Stöd för anslutningar mellan HDMI-anslutningsaktiverade AV-enheter (digital-tv-boxar, DVD-spelare).
-
Ingen ytterligare ljudanslutning krävs för en HDMI till HDMI-anslutning.
-
När du använder en anslutning med HDMI/DVI -kabel måste du använda uttaget HDMI IN 2.
-
!@#
0
9
Svenska - 5
Page 79

Vad är HDMI?
➣
“High Denition Multimedia interface” gör det möjligt att överföra digital bildinformation av
-
högdenitionstyp och era kanaler med digitalt ljud.
HDMI/DVI-terminalen stöder DVI-anslutning till en extra enhet med lämplig kabel (medföljer ej).
-
Skillnaden mellan HDMI och DVI är att HDMI-enheten är mindre till storleken, har HDCP(High
Bandwidth Digital Copy Protection)-kodning och stödjer erkanals digitalt ljud.
Om en DVD-spelare/kabel-tv-box/satellitmottagare som stöder HDMI-versioner som är äldre än 1.3
➣
ansluts kan bilden och ljudet på TV:n bli förvrängt. Om du ansluter en äldre HDMI-kabel och det inte
hörs något ljud ska du ansluta HDMI-kabeln till uttaget HDMI IN 2 och ljudkablarna till uttagen DVI IN
(HDMI2) [R-AUDIO-L] på TV:ns baksida. Om detta händer ska du kontakta företaget som tillhandahåll
DVD-spelaren/kabelboxen/satellitmottagaren för att bekräfta HDMI-versionen och sedan begära en
rmware-uppdatering.
HDMI-kablar som inte är 1.3 kan orsaka störningar eller ingen bild alls.
DVI IN(HDMI2) [R-AUDIO-L]
DVI-utgångar för externa enheter.
-
Lägen som stöds för HDMI/DVI och Component
➣
HDMI/DVI 50Hz X X X O O O O
HDMI/DVI 60Hz X O X X O O O
Component O O O O O O O
4 ANT IN
För att du ska kunna visa tv-kanalerna ordentligt måste apparaten ta emot en signal från en av följande källor:
Utomhusantenn/nätverk/kabel-tv/nätverk/satellitmottagare
-
5
SERVICE
Anslut till det här uttaget till det valfria väggfästet. Den här funktionen gör det möjligt för dig att justera
-
visningsvinkeln med fjärrkontrollen.
6
Kortplats COMMON INTERFACE
Om “CI-kortet” inte sitter i visas “kodad signal” på vissa kanaler på tv-skärmen.
-
Information som bland annat omfattar ett telefonnummer,
-
CI-kortets ID, värd-ID visas i ungefär 2-3 minuter. Om ett
felmeddelande visas kontaktar du tjänsteleverantören.
När kongurationen av kanalinformationen slutförts visas
-
meddelandet “Updating Completed” (uppdateringen klar), vilket
innebär att kanallistan uppdaterats.
Du behöver ett CI-kort från en lokal kabeltjänstleverantör.
➣
Ta ut CI-kortet genom att försiktigt dra ut det för hand. Om du
tappar CI-kortet kan det skadas.
Sätt i CI-kortet i pilens riktning.
➣
Placeringen av facket COMMON INTERFACE (GEMENSAMT GRÄNSSNITT) kan variera beroende på
➣
modell.
7
WISELINK
Anslut en USB-enhet och titta på bildler (JPEG) och spela upp ljudler (MP3)
-
480i 480p 576i 576p 720p 1080i 1080p
Svenska - 6
Page 80

8 S-VIDEO eller VIDEO / R-AUDIO-L
Anslut RCA- eller S-videokabeln till lämplig extern A/V-enhet som t.ex. videobandspelare, DVD-spelare
-
eller videokamera.
Anslut RCA-ljudkablarna till “R - AUDIO - L” på apparaten och de andra ändarna till motsvarande
-
ljudutgångar på A/V-enheten.
9 Hörlursuttag
Hörlurar kan anslutas till hörlursuttaget på apparaten. När hörlurar är anslutna kopplas ljudet från de
-
inbyggda högtalarna bort.
0 AUDIO OUT[R-AUDIO-L]
Anslut RCA-ljudkablarna till AUDIO OUT [R-AUDIO-L] på apparatens baksida och de andra ändarna till
-
motsvarande ljudutgångar på förstärkaren eller DVD-hemmabioanläggningen.
!
DIGITAL AUDIO OUT (OPTICAL)
Anslut till en digital ljudkomponent.
-
När uttagen för HDMI IN är anslutna sker endast utgång till uttaget DIGITAL AUDIO OUT (OPTICAL) på
➣
TV-ut gångens 2-kanaliga ljud. Om du vill lyssna på kanalljud i formatet 5.1 ska du ansluta det optiska
uttaget på DVD-spel aren eller kabelboxen direkt till förstärkaren eller hemmabion, inte TV:n.
@ EXT 1, EXT 2
Kontakt
EXT 1 O O O Enbart TV- eller DTV-utgången är tillgänglig.
EXT 2 O O Utgång som du kan välja.
Ingångar eller utgångar för externa enheter, t.ex. videobandspelare, DVD, videospelsenheter eller video
-
Video Ljud (V/H) RGB Video + ljud (V/H)
Ingång Utgång
disc-spelare.
#
Kensington-lås (beroende på modell)
Kensingtonlåset (tillval) är en enhet som används för att fysiskt låsa systemet när det används på en
-
allmän plats.
Om du vill använda en låsenhet, kontakta återförsäljaren där du köpte TV:n.
-
Placeringen av kensingtonlåset kan variera beroende på modell.
-
Svenska - 7
Page 81

Översikt av fjärrkontrollen
1 Knappen Television
Standby
2 Väljer TV- och DTV-läge
direkt.
3 Sifferknappar för direktSifferknappar för direkt
kanalåtkomst.
4 En-/tvåkanaligt kanalval.
5 +: Volymökning.
-: Volymökning.
6 Tillfällig frånslagning avTillfällig frånslagning av
ljud.
7 Skärm för ElectronicSkärm för Electronic
Program Guide (EPG).
8 Använd för att snabbt väljaAnvänd för att snabbt välja
ofta använda funktioner.
9 Används för att visaAnvänds för att visa
information om aktuell
sändning.
0 Färgknappar:Färgknappar:
Använd de här knapparna i
kanallistan och WISELINK
etc.
@ Tryck för att väljaTryck för att välja
tillvalsdisplay och ljudlägen
för idrott, bio och spel.
# Använd de här knapparna
i lägena DMA, WISELINK
och Anynet+.
( : Den här
fjärrkontrollen kan
användas för att styra
inspelningen på Samsungspelare med funktionen
Anynet+)
$ Tillgängligt källval.Tillgängligt källval.
% Föregående kanal.
^ P<: Nästa kanal.
P>: Föregående kanal.
& Visar skärmmenyn.Visar skärmmenyn.
* Den här funktionen gör detDen här funktionen gör det
möjligt för dig att visa och
spela upp bild- och ljudfiler
från en extern enhet.
( Återgår till föregåendeÅtergår till föregående
meny.
) Kontrollerar markören iKontrollerar markören i
menyn.
a Stänger skärmmenyn.Stänger skärmmenyn.
b Använd det här alternativet
vid anslutning av en
SAMSUNG DMA (Digital
Media Adapter)-enhet
genom ett HDMI-gränssnitt
och växla till DMA-läge.
(DMA-knappen är tillval.)
För mer information om
användningsmetoder,
se bruksanvisningen för
DMA. Den här knappen är
tillgänglig när funktionen
“Anynet+ (HDMI-CEC)” är i
läget “På” (se sidan 57).
c Val av bildstorlek.Val av bildstorlek.
d Skärm för digital undertext.Skärm för digital undertext.
e Meddelandet “Kanallista”Meddelandet “Kanallista”
visas på skärmen.
Text-TV-funktioner
2 Stäng text-tv-skärmen
7 Lagring av text-tv.
8 Val av text-tv-storlek.
9 Visning av text-tv.
0 Ämnesval för Fastext.
! Alternativt väljer du text-tv,
dubbel eller mix.
$ Val av text-tv-storlek.
(LIST/FLOF)
% Undersida för text-tv.
^ P<: Nästa sida för text-tv.
P>: Nästa sida för text-tv.
& Index för text-tv.
( Text-tv, håll.
a Text-tv, avbryt.
Fjärrkontrollens funktion kan påverkas av starkt ljus.
➣
Svenska - 8
Page 82

Installering av batterier i fjärrkontrollen
1. Lyft luckan på baksidan av fjärrkontrollen uppåt, se bilden.
2. Sätt i två stycken AAA-batterier.
Kontrollera att ”+” och ”–” på batterierna stämmer med bilden inuti facket.
➣
3. Sätt tillbaka skyddet.
Om du inte ska använda fjärrkontrollen under en längre tid kan du ta ur
➣
batterierna och förvara dem på en sval och torr plats.
Kontrollera följande om fjärrkontrollen inte fungerar:
➣
1. Är TV:n påslagen?
2. Är plus- och minuspolerna på batteriet felvända?
3. Är batterierna tomma?
4. Är det strömavbrott eller är nätsladden urdragen?
5. Finns det något uorescerande ljus eller en neonskylt i närheten?
Slå på och stänga av
Nätsladden är fäst på baksidan av apparaten.
1. Sätt i nätkontakten i ett lämpligt vägguttag.
Standby-indikatorn tänds på din utrustning.
➣
2. Tryck på knappen P på utrustningen.
Du kan även trycka på knappen POWER eller TV/DTV på fjärrkontrollen för att slå på TV:n.
➣
Kanalen du senast tittade på väljs automatiskt.
➣
3. Tryck på de numeriska knapparna (0~9) eller på en kanalväljarknapp upp/ner (</>) på fjärrkontrollen
eller på knappen på apparaten.
När du slår på TV-apparaten för första gången ombeds du välja vilket språk som du vill att
➣
menyerna ska visas på.
4. Tryck på POWER -knappen igen för att stänga av tv:n.
Sätta tv:n i vänteläge
Du kan sänka effektförbrukningen genom att ställa apparaten i vänteläge. Vänteläget är användbart
när du vill stänga av tillfälligt (t.ex. under en måltid).
1. Tryck på knappen POWERP på fjärrkontrollen.
Bildskärmen släcks och en röd standby-lampa tänds på apparatens framsida.
➣
2. När du vill koppla på TV:n igen trycker du bara på POWERP, en siffra (0~9), TV/DTV eller en
kanalväljarknapp (</>).
Låt inte apparaten vara i vänteläget under en längre tid (t.ex. när du är på semester). Det bästa är
➣
att dra ur nät- och antennkontakterna.
Svenska - 9
Page 83

Visa menyerna
1. När strömmen är på trycker du på knappen MENU.
Huvudmenyn visas på skärmen. Menyns vänstra sida har ikoner:
Bild, ljud, kanal, inställningar, ingång, digital meny.
2. Tryck på knapparna ▲ eller ▼ för att välja en av ikonerna.
Tryck sedan på knappen
ENTER
för att välja undermenyn för
ikonerna.
3. Tryck på EXIT-knappen när du vill avsluta.
Skärmmenyn försvinner från skärmen efter omkring en minut.
➣
TV
Använda knappen Verktyg
Du kan använda knappen Verktyg för att välja ofta använda
funktioner snabbt och enkelt. Menyändringen “Verktyg” ändras
beroende på vilken extern ingångsskälla du visar.
1. Tryck på knappen TOOLS.
Menyn “Verktyg” visas.
2. Tryck på ▲ eller ▼ för att välja en meny.
3. Använd knapparna ▲/▼/◄/►/
ENTER
för att visa, ändra
eller använda de alternativ som har valts. För en mer detaljerad
beskrivning av varje funktion, se överensstämmande sida.
Anynet+ (HDMI-CEC), se sidan 57
♦
Bildläge, se sidan 17
♦
Ljudläge, se sidan 23
♦
Sovtimer, se sidan 25
♦
SRS TS XT, se sidan 23
♦
Energispar, se sidan 28
♦
Dubbel l-ll, se sidan 24
♦
BIB, se sidan 22
♦
Autojustering, se sidan 48
♦
Anynet+ (HDMI-CEC)
Bildläge : Standard
Ljudläge : Personlig
Sovtimer : Av
SRS TS XT : Av
Energispar : Av
Dubbel l-ll : Mono
Läge : Standard
Bakgrundsljus 7
Kontrast 95
Ljusstyrka 45
Skärpa 50
Färg 50
Ton G50 R50
Fininställningar
sMer
Flytta Öppna Tillbaka
Flytta Öppna Avsluta
Bild
Verktyg
Svenska - 10
Page 84

Plug & Play
Enter
Öppna
Plug & Play
Plug & Play
Start Plug & Play.
Starta Plug & Play
OK
ENTER
ENTER
När tv:n slås på för första gången visas era grundinställningar
automatiskt. Följande inställningar nns:
Alla funktioner som är kopplade till Digital TV (DVB) fungerar
➣
endast i länder eller områden där DVB-T (MPEG2) digitala
signaler sänds. Kontrollera hos din lokala återförsäljare om du
kan ta emot DVB-T-signaler. Trots att den här TV-skärmen följer
DVB-T-specikataionerna, garanteras inte kompatibilitet med
framtida digitala DVB-T-signaler. Flera funktioner kanske inte är
tillgängliga i vissa länder.
Den här produkten kan endast användas för nska, svenska och danska sändningar. Sändningar
➣
stöds inte i andra länder.
1. Tryck på POWER på fjärrkontrollen.
Meddelandet “Start Plug & Play.” visas med “OK” valt.
2. Välj lämpligt språk genom att trycka på eller .
Tryck på
ENTER
3. Använd knapparna ◄ eller ► för att välja “Butiksdemo” eller “Hemmabruk” och sedan
Du rekommenderas att ställa in din TV på läget “Hemmabruk” för att få bästa bild för hemmiljö.
➣
Läget “Butiksdemo” är endast avsett för användning i återförsäljarmiljö.
➣
Om enheten oavsiktligen ställs in på läget “Butiksdemo” och du vill återgå till “Hemmabruk”
➣
(Standard): Tryck på volymknappen på TV:n. När skärmmenyn för volym visas trycker du och
håller ned knappen MENU på TV:n i 5 sekunder.
4. Meddelandet “Kontr. antenningång.” visas med “OK” markerat.
Tryck på ENTER .
Kontrollera att antennkabeln är korrekt ansluten.
➣
5. Välj lämpligt land genom att trycka på eller .
Tryck på ENTER för att bekräfta ditt val.
6. Menyn ”Autolagra” visas med ”Start” markerat. Tryck på knappen ENTER .
Tryck på ENTER när som helst för att avbryta lagringsprocessen.
➣
Kanalsökningen börjar och avslutas automatiskt.
➣
7.
Skanningmenyn visas för DTV-kanaler.
♦ Om land är inställt på “Övriga”
Skärmen “Ställ klockan” visas när sökningen efter den analoga kanalen är avslutad.
♦
Om land är inställt på “Finland”
Tryck på knappen
♦
Om land är inställt på “Svenska” eller “Danmark”
Tryck på knappen ▲ eller ▼ för att välja “Kabel” eller “Antenn”. Tryck på knappen
Antenn: skanning efter luftburna tjänster
Kabel: skanning efter kabeltjänster
Detaljerad information om uppdatering av DTV-kanaler nns på sidan 32 i den här handboken.
➣
Om DTV-kanalen upppdateras, ändras källa på källistan på ingångsmenyn automatiskt till DTV.
➣
Efter att de tillgängliga kanalerna är lagrade visas menyn “Ställ klockan”.
➣
8. Tryck på ENTER .
Välj “Månad”, “Datum”, “År”, “Tim” eller “Minut” genom att trycka på eller .
Ställ in “Månad”, “Datum”, “År”, “Tim” eller “Minut” genom att trycka på eller .
Du kan ställa in “Månad”, “Datum”, “År”, “Tim” och “Minut” genom att trycka på sifferknapparna på
➣
fjärrkontrollen.
för att bekräfta ditt val.
ENTER
för att välja “Start”.
.
.
Svenska - 11
Page 85

9. Tryck på ENTER för att bekräfta inställningen. Meddelandet “Ha en trevlig stund” visas.
Tryck på ENTER -knappen när du är klar.
Även om ENTER inte är intryckt försvinner meddelandet automatiskt efter era sekunder.
➣
Språk:Välj ditt språk.
Land: Välj ditt land.
Autolagra:Skannar automatiskt och lagrar de kanaler som är tillgängliga i ditt område.
Ställ klockan:Ställer in aktuell tid för TV-klockan.
Om du vill återställa denna funktion ...
Tryck på MENU för att visa menyn.
1.
Tryck på eller för att välja “Inställning” och tryck sedan på
ENTER .
Tryck på knappen ENTER igen för att välja “Plug & Play”.
2.
Ytterligare information om inställningsalternativen nns på sidan
11.
Funktionen “Plug & Play” är endast tillgänglig i TV-läge.
➣
Lagra kanaler automatiskt
-
Lagra kanaler manuellt
-
TV
Plug & Play
Språk : Svenska
Tid
Ljuseffekt :
Auto-väggmontage
Melodi : Av
nderhållning : Av
Energispar : Av
BIB
Flytta Öppna Tillbaka
Öppna
Tillbaka
TV
Land : Finland
Autolagra
Lagra manuellt
Kanalhanteraren
Sortera
Namn
Fininst.
Flytta Öppna Tillbaka
Inställning
TV-läge på
Plug & Play
Starta Plug & Play.
OK
Kanal
Lagra kanaler automatiskt
Du kan avsöka frekvensområdena som nns tillgängliga (tillgången beror på vilket land du bor i).
Automatiskt tilldelade programnummer överensstämmer kanske inte med faktiska eller önskade
programnummer. Du kan dock sortera nummer manuellt och ta bort de kanaler du inte vill titta på.
Tryck på knappen MENU när du vill visa menyn.
1.
Tryck på ▲ eller ▼ för att välja “Kanal” och sedan på ENTER .
Tryck på knappen ENTER för att välja “Land”.
2.
Välj lämpligt land genom att trycka på ▲ eller ▼.
3.
Tryck på ENTER för att bekräfta ditt val.
Även om du har ändrat landsinställningarna i den här menyn ändras inte inställningarna för DTV.
➣
(Läs mer om detta på sidan 31.)
4. Tryck på ▲ eller ▼ för att välja “Autolagra” och sedan på ENTER .
5. Tryck på knappen ENTER .
TV:n börjar memorisera alla tillgängliga kanaler.
➣
Tryck på ENTER när som helst för att avbryta lagringsprocessen och återgå till “Kanal”-menyn.
➣
6. Efter att de tillgängliga kanalerna är lagrade visas menyn “Sortera”. (Läs mer om detta på sidan 15.)
Svenska - 12
Page 86

Lagra kanaler manuellt
Ej tillgängligt i läget DTV eller extern ingång.
➣
Du kan lagra TV-kanaler, inklusive de kanaler du tar emot från
kabelnätet.
När du lagrar kanaler manuellt kan du välja:
Vare sig du vill lagra alla kanaler som hittas eller inte.
♦
Programnumret som du vill tilldela varje lagrad kanal.
♦
1. Tryck på MENU för att visa menyn.
Tryck på eller för att välja “Kanal” och sedan på
ENTER .
2. Tryck på eller för att välja “Lagra manuellt” och sedan på
ENTER .
3. Välj önskat nummer genom att trycka på ▲ eller ▼ och tryck
sedan på ENTER .
TV
Land : Finland
Autolagra
Lagra manuellt
Kanalhanteraren
Sortera
Namn
Fininst.
Flytta Öppna Tillbaka
TV
Program : P 2
Färgsystem : Auto
Ljudsystem : BG
Kanal : C 3
Sök : 77 MHz
Lagra : ?
4. När du är klar med inställningen trycker du på ENTER .
5.
Tryck på EXIT för att avsluta.
Flytta Öppna Tillbaka
♦ Program (Programnummer som tilldelas en kanal)
− Tryck på ▲ eller ▼ tills du hittar rätt nummer.
Du kan också välja kanalnumret direkt genom att trycka på sifferknapparna (0 ~ 9).
➣
♦ Färgsystem: Auto/PAL/SECAM/NTSC4.43
− Tryck på ▲ eller ▼ för att välja önskad färgstandard.
Ljudsystem: BG/DK/I/L
♦
− Tryck på ▲ eller ▼ för att välja önskad ljudstandard.
Kanal (När du vet numret på den kanal som ska lagras)
♦
− Tryck på ▲ eller ▼ för att välja C (markkanal) eller S (kabelkanal).
− Tryck på ► och sedan på ▲ eller ▼ för att välja önskat nummer.
Du kan också välja kanalnumret direkt genom att trycka på sifferknapparna (0 ~ 9).
➣
Om du hör onormalt ljud eller om du inte hör något ljud alls väljer du ett annat ljudsystem.
➣
Sök (Om du inte känner till kanalnumren)
♦
− Starta sökningen genom att trycka på knapparna ▲ eller ▼.
− Kanalväljaren avsöker frekvensområdet tills den första kanalen eller kanalerna du valt tas
emot på skärmen.
Lagra (När du vill lagra kanalen och det tilldelade programnumret)
♦
− Ställ in på “OK” genom att trycka på ENTER .
Kanalläge
➣
− P (Programläge): När du är klar med inställningen har sändarna i ditt område tilldelats
positionsnummer från P00 till maximalt P99. Du kan välja en kanal genom att ange
positionsnumret i det här läget.
− C (markkanalläge): Du kan välja en kanal genom att ange det tilldelade numret för varje
TVsändare i detta läge.
− S (Kabelkanalläge): Du kan välja en kanal genom att ange det tilldelade numret för varje
kabelkanal i detta läge.
Kanal
Lagra manuellt
Svenska - 13
Page 87

Lägga till / låsa kanaler
Ej tillgängligt i läget DTV eller extern ingång.
➣
Med kanalhanteraren kan du enkelt låsa och lägga till kanaler.
1. Tryck på MENU för att visa menyn.
Tryck på eller för att välja “Kanal” och sedan på
ENTER .
2. Tryck på eller för att välja “Kanalhanteraren” och sedan på
ENTER .
Lägga till kanaler
♦
Via kanallistan kan du lägga till kanaler.
3. Välj Kanallista genom att trycka på ENTER .
4. Gå till fältet ( ) genom att trycka på ▲, ▼, ◄ eller ► välj en
kanal som ska läggas till och tryck sedan på ENTER för att
lägga till kanalen.
Om du trycker på ENTER igen, försvinner symbolen
➣
( ) intill kanalen och kanalen läggs inte till.
“ ” är aktiv när “Barnlås” är inställd på “På”.
➣
Låsa kanaler
♦
Den här funktionen gör att du kan förhindra obehöriga
användare, t.ex. barn, från att titta på olämpliga program genom
att stänga av video och ljud.
5. Tryck på ▲ eller ▼ för att välja “Barnlås” och sedan på
ENTER .
6. Välj “På” genom att trycka på ▲ eller ▼ och sedan på
ENTER .
7. Tryck på ▲ eller ▼ för att välja “Kanallista” och sedan på
ENTER .
8. Gå till fältet ( ) genom att trycka på ▲, ▼, ◄ eller ► välj en
kanal som ska låsas och tryck sedan på ENTER .
Om du trycker på ENTER igen, försvinner symbolen ( )
➣
intill kanalen och kanalen låses inte.
En blå bakgrund visas när barnlåset är aktiverat.
➣
9. Tryck på EXIT för att avsluta.
Välj “På” eller “Av” i “Barnlås” för att enkelt växla kanalerna
➣
som valdes till “ ” till att vara aktiva eller inaktiva.
Du kan välja dessa alternativ genom att trycka på knappen
CH LIST på fjärrkontrollen.
TV
Land : Finland
Autolagra
Lagra manuellt
Kanalhanteraren
Sortera
Namn
Fininst.
Flytta Öppna Tillbaka
TV
Kanallista
Barnlås : Av
Flytta Öppna Tillbaka
P 1 C3
Prog.
0 C-1 C3
2 BBC 1
3 C74
4 C75
5 C76
6 S3
7 S4
8 S6
9 S7
Lägg till Lås
Flytta
Sida
Kanal
Kanalhanteraren
Kanallista
Öppna
Tillbaka
1 / 10
Svenska - 14
Page 88

Sortera de lagrade kanalerna
Med den här funktionen kan du ändra programnumren på
lagrade kanaler.
Det kan vara nödvändigt när du har använt den automatiska
lagringen.
➣
Ej tillgängligt i läget DTV eller extern ingång.
1. Tryck på MENU för att visa menyn.
Tryck på eller för att välja “Kanal” och sedan på
ENTER .
2. Tryck på eller för att välja “Sortera” och sedan på
ENTER .
3. Välj kanalnumret du vill ändra genom att trycka era gånger på
knappen ▲ eller ▼.
Tryck på knappen ENTER .
➣
Numret på vald kanal och namnet yttas åt höger.
4. Välj programnumret dit vilken kanalen ska yttas genom att
trycka på knappen ▲ eller ▼.
5. Tryck på knappen ENTER . Kanalen har yttats till sin nya
position och på liknande sätt yttas även alla de andra kanalerna.
6. Upprepa steg 3 till 5 för att lagra en annan kanal.
7. Tryck på EXIT för att avsluta.
TV
Land : Finland
Autolagra
Lagra manuellt
Kanalhanteraren
Sortera
Namn
Fininst.
Flytta Öppna Tillbaka
TV
Prog. Kanal Namn
0 C--
1 C23
2 C16
3 C3
4 S1
s
Flytta Öppna Tillbaka
Namnge kanaler
Kanalerna namnges automatiskt när kanalinformation sänds.
Du kan ändra namnen.
➣
Ej tillgängligt i läget DTV eller extern ingång.
1. Tryck på MENU för att visa menyn.
Tryck på eller för att välja “Kanal” och sedan på
ENTER .
2. Tryck på eller för att välja “Namn” och sedan på
ENTER .
3. Välj vid behov en kanal att tilldela till ett nytt namn genom att
trycka på eller . Tryck på knappen ENTER .
➣
Markören visas runt namnrutan.
4.
Om du vill ... Så ...
Välja en bokstav, siffra eller
symbol
Flytta till nästa bokstav
Flytta till föregående bokstav
Bekräfta namnet
➣
Följande tecken nns: Alfabetets bokstäver (A~Z) / Siffror (0~9) / Specialtecken (+, -, *, /,
Tryck på eller
Tryck på
Tryck på
Tryck på knappen ENTER .
mellanslag)
5. Upprepa steg 3 till 4 för varje kanal som ska tilldelas till ett nytt namn.
6. Tryck på EXIT för att avsluta.
TV
Land : Finland
Autolagra
Lagra manuellt
Kanalhanteraren
Sortera
Namn
Fininst.
Flytta Öppna Tillbaka
TV
Prog. Kanal Namn
0 C-- -----
1 C23 -----
2 C16 ----3 C3 ----4 S1 ---- s
Flytta Öppna Tillbaka
Kanal
Sortera
Kanal
Namn
Svenska - 15
Page 89

Fininställning av kanalmottagningen
Använd ninställning för att manuellt justera en viss kanal för
optimal mottagning.
Ej tillgängligt i läget DTV eller extern ingång.
➣
1. Välj en kanal som du vill njustera direkt med sifferknapparna.
2. Tryck på MENU för att visa menyn.
Tryck på eller för att välja “Kanal” och sedan på
ENTER .
3. Tryck på eller för att välja “Fininst.” och sedan på
ENTER .
4. Tryck på eller för att göra ninställning.
Tryck på knappen ENTER .
5. Tryck på EXIT för att avsluta.
Fininställda kanaler som har sparats markeras med en asterisk
➣
“*” till höger om kanalnumret i kanallisten. Kanalnumret ändras
till rött.
Om du vill återställa ninställningen väljer du “Återställ” genom
➣
att trycka på knappen ▲ eller ▼ och sedan på knappen
ENTER .
TV
Land : Finland
Autolagra
Lagra manuellt
Kanalhanteraren
Sortera
Namn
Fininst.
Flytta Öppna Tillbaka
P 1
Ändra Spara Tillbaka
Kanal
Fininst.
Återställ
0
Svenska - 16
Page 90

Ändra bildstandard
Du kan välja den bildtyp som bäst motsvarar dina krav på
TV-tittandet.
1. Tryck på MENU för att visa menyn.
Tryck på knappen ENTER för att välja “Bild”.
2. Tryck på ENTER igen för att välja “Läge”.
3. Tryck på eller för att välja önskad bildeffekt. Tryck på
knappen ENTER .
4. Tryck på EXIT för att avsluta.
♦ Dynamisk: Väljer en mer högupplöst bild för ljus miljö.
♦ Standard: Väljer en optimal bildkvalitet för normal miljö.
♦ Film: Väljer en optimal bildkvalitet för mörk miljö.
Bildläget måste justeras individuellt för varje ingångskälla.
➣
TV
Läge : Standard
Bakgrundsljus 7
Kontrast 95
Ljusstyrka 45
Skärpa 50
Färg 50
Ton G50 R50
Fininställningar
sMer
Flytta Öppna Tillbaka
TV
Läge : Standard
Bakgrundsljus 7
Kontrast 95
Ljusstyrka 45
Skärpa 50
Färg 50
Ton G50 R50
Fininställningar
sMer
Flytta Öppna Tillbaka
Bild
Bild
Dynamisk
Standard
Film
Enkel inställning
1. Tryck på knappen TOOLS på fjärrkontrollen.
2. Tryck på knappen ENTER för att välja “Bildläge”.
3. Tryck på knappen ◄ eller ► för att välja önskat bildläge.
4. Tryck på EXIT eller TOOLS för att stänga.
Anynet+ (HDMI-CEC)
Bildläge ◄ Standard ►
Ljudläge : Personlig
Sovtimer : Av
SRS TS XT : Av
Energispar : Av
Dubbel l-ll : Mono
Flytta Ändra Avsluta
Verktyg
Svenska - 17
Page 91

Justera Egna bildinställningar
Denna apparat har ett antal inställningsalternativ för att ange
bildkvaliteten:
1. För att välja önskad bildeffekt följer du anvisningarna 1 till 3 i
avsnittet “Ändra bildstandard”.
2. Tryck på eller för att välja ett visst alternativ. Tryck på
knappen
ENTER
.
3. Tryck på eller för att öka eller minska värdet för ett visst
alternativ. Tryck på knappen
ENTER
.
4. Tryck på EXIT för att avsluta.
♦
Bakgrundsljus: Du kan justera skärmens ljusstyrka genom att
ställa in bakgrundsljuset för LCD-skärmen. (0~10)
♦ Kontrast: Justerar ljusstyrkan och mörkheten mellan motiv
TV
Läge : Standard
Bakgrundsljus 7
Kontrast 95
Ljusstyrka 45
Skärpa 50
Färg 50
Ton G50 R50
Fininställningar
sMer
Flytta Öppna Tillbaka
▲
Bakgrundsljus
Flytta Ändra Tillbaka
▼
och bakgrund.
♦ Ljusstyrka: Justerar hela skärmens ljusstyrka.
♦ Skärpa: Justerar motiven så att de blir skarpare eller
suddigare.
♦ Färg: Justerar färgerna så att de blir ljusare eller mörkare.
♦ Ton: Justerar färgen på objekt genom att göra dem mer röda
eller gröna för ett mer naturligt utseende.
De justerade värdena lagras enligt det valda bildläget.
➣
➣
I PC-läge kan du bara göra ändringar för “Backlight”, “Kontrast” och “Ljusstyrka”.
I lägena för analog TV, Ext., AV, S-Video på PAL-systemet, kan du inte använda funktionen ”Ton”.
➣
➣
Du kan återgå till standardinställningarna för bilden genom att trycka på “Återställ”. (Se “Återställa
bildinställningarna till fabriksstandard” på sidan 19)
➣
Energin som förbrukas under användning kan avsevärt minskas om bildens ljusstyrka minskar och
detta minskar de totala driftskostnaderna.
Bild
Kongurera ninställningar för bilden
Du kan välja den färgton som känns bekvämast.
1. Tryck på MENU för att visa menyn.
Tryck på ENTER för att välja “Bild”.
2. Tryck på knappen ENTER för att välja “Modus”. Tryck på
knappen ▲ eller ▼ för att välja “Standard” eller “Film” och tryck
sedan på knappen
ENTER
.
3. Tryck på ▲ eller ▼ för att välja “Fininställningar” och sedan på
ENTER .
4. Välj alternativ genom att trycka på eller och sedan på
ENTER .
5. När du är klar med inställningen trycker du på ENTER .
6. Tryck på EXIT för att avsluta.
“Fininställningar” är tillgängligt i lägena “Standard” och “Film”.
➣
I PC-läge kan du bara göra ändringar för “Dynamisk kontr.”,
➣
“Gamma” och “Vitbalans” bland alternativen för “Fininställningar”.
TV
Läge : Standard
Bakgrundsljus 7
Kontrast 95
Ljusstyrka 45
Skärpa 50
Färg 50
Ton G50 R50
Fininställningar
sMer
Flytta Öppna Tillbaka
TV
Fininställningar
Justering av svart
Dynamisk kontr.
Gamma : 0
Färgområde : Personlig
Vitbalans
Hudfärg : 0
Kantförbättring
xvYCC
Flytta Öppna Tillbaka
: Medium
: På
Bild
: Av
: Av
7
Justering av svart: Av/Låg/Medium/Hög
♦
Du kan direkt ange justering av svart på skärmen för att justera skärmdjupet.
Dynamisk kontr.: Av/Låg/Medium/Hög
♦
Du kan justera skärmens kontrast så att du får optimal nivå.
Svenska - 18
Page 92

Gamma: -3 ~ +3
♦
Du kan justera styrka på grundfärgerna (röd, grön, blå).
Tryck på ◄ eller ► tills du kommer till den optimala inställningen.
Farbraum: Auto/Ursprunglig/Personlig
♦
Färgområde är en färgmatrix som består av “Röd”, “Grön” och “Blå” färger.
Välj ditt färgområde för att uppleva de mest naturliga färgerna.
♦ Auto: Autofärgområdet justeras automatiskt till den mest naturliga färgtonen baserat på
programkällor.
♦ Ursprunglig: Native-färgområde ger djupa och rika färgtoner.
♦ Personlig: Justerar färgintervallet för att passa dina önskemål.
Anpassa färgområde
➣
Färg: Röd/Grön/Blå/Gul/Cyan/Magenta: Röd/Grön/Blå/Gul/Cyan/Magenta
Anpassar färgområdet för att passa dina önskemål.
“Färg” är tillgängligt när “Färgområde” är inställt på “Personlig”.
Tryck på knappen ▲ eller ▼ för att välja “Röd”, “Grön”, “Blå”, “Gul”, “Cyan” eller “Magenta”.
Tryck på knappen
ENTER
.
Röd/Grön/Blå: I “Färg” kan du justera RGB-värdena för vald färg.
Tryck på knappen ▲ eller ▼ för att välja “Röd”, “Grön” eller “Blå”.
Tryck på knappen
ENTER
.
Tryck på knappen ◄ eller ► för att öka eller minska värdet för ett av alternativen.
Tryck på knappen
ENTER
.
Återställ: Återställer färgområdet till standardvärden.
Vitbalans: R-Offset/G-Offset/B-Offset/R-Gain/G-Gain/B-Gain/Återställ
♦
Du kan justera färgtemperaturen för naturliga färger i bilderna.
R-Offset/G-Offset/B-Offset/R-Gain/G-Gain/B-Gain: Om du ändrar justeringsvärdet uppdateras den
modifierade skärmen.
Välj önskat nummer genom att trycka på ▲ eller ▼ och tryck sedan på ENTER .
Tryck på ◄ eller ► tills du kommer till den optimala inställningen.
Återställ: Den tidigare justerade vitbalansen återställs till fabriksstandard.
Hudfärg: -15 ~ +15
♦
Du kan förstärka den rosafärgade ’hudfärg’ i bilden.
Tryck på ◄ eller ► tills du kommer till den optimala inställningen.
Om du ändrar justeringsvärdet uppdateras den modierade skärmen.
➣
Kantförbättring: Av/På
♦
Du kan förstärka den rosafärgade ’hudtonen’ i bilden.
xvYCC: Av/På
♦
Genom att ställa in xvYCC-läget till På blir bilden med detaljerad och färgområdet ökar vid visning av
filmer på en extern enhet (exempelvis DVD-spelare) som är ansluten till HDMI- eller Component IN
uttagen. Du måste ställa in bildläget till Film för att kunna utnyttja den här funktionen.
Endast tillgängligt i lägena “HDMI” och “Component” för “Film”.
➣
Om funktionen xvYCC är aktiv kan inte BIB väljas.
➣
Återställa bildinställningarna till fabriksstandard
Det går att återgå till fabriksinställningarna för bilden.
1. För att välja önskad bildeffekt följer du anvisningarna 1 till 3 i
avsnittet “Ändra bildstandard”. (på sidan 17)
2. Tryck på eller för att välja “Återställ” och sedan på
ENTER .
3. Tryck på ▲ eller ▼ för att välja “OK” eller “Avbryt”. Tryck på
knappen ENTER .
4. Tryck på EXIT för att avsluta.
“Återställ” anges för varje bildläge.
➣
Svenska - 19
TV
Mer
Bildalternativ
Återställ : OK
Flytta Eingabe Tillbaka
Bild
OK
Avbryt
Page 93

Kongurera bildalternativ
1. Tryck på MENU för att visa menyn.
Tryck på ENTER för att välja “Bild”.
2. Tryck på ▲ eller ▼ för att välja “Bildalternativ” och sedan på
ENTER .
3. Välj alternativ genom att trycka på eller och sedan på
ENTER .
4. När du är klar med inställningen trycker du på ENTER .
5. Tryck på EXIT för att avsluta.
I PC-läge kan du bara göra ändringar för “Färgton” och
➣
“Storlek” bland alternativen i “Bildalternativ”.
Färgton: Sval2/Sval1/Normal/Varm1/Varm2
♦
Du kan välja den färgton som känns bekvämast.
De justerade värdena lagras enligt det valda bildläget.
➣
“Varm1” eller “Varm2” är bara aktiverat när bildläget är “Film”.
➣
Storlek: Auto Wide/16:9/Bredzoom/Zoom/4:3/Skanna
♦
Du kan välja det bildformat som stämmer bäst överens med dina krav.
Auto Wide: Justerar automatiskt bildstorleken till formatet “16:9”.
♦
16:9: Justerar bildstorleken till 16:9 som är riktigt för DVD eller bredbildssändningar.
♦
Bredzoom: Förstora bilden mer än 4:3.
♦
Zoom: Förstorar 16:9-bredbilden (i vertikal riktning) för att passa skärmstorleken.
♦
4:3: Detta är standardinställningen för en videolm eller normal sändning.
♦
Skanna: Använd funktionen för att visa hela bilden, utan beskärning, om insignalerna är HDMI
♦
(720p/1080i/1080p) eller Component (1080i/1080p).
Funktionen “Auto Wide” nns endast tillgänglig i lägena “TV”, “DTV”, “Ext.1 “, “Ext.2”, “AV” och
➣
“S-Video”.
I PC-läge kan endast “16:9” och “4:3” justeras.
➣
Inställningar kan justeras och lagras för varje extern enhet du har anslutit till en ingång för TV:n.
➣
Bilden kan tillfälligt ligga kvar om du visar en statisk bild på enheten i mer än två timmar.
➣
"Bredzoom": Flytta skärmbilden uppåt/nedåt genom att använda ▲ eller ▼ efter att du har
➣
gjort valet genom att trycka på ► eller ENTER .
"Zoom": Välj det genom att trycka på ◄ eller ►. Använd knapparna ▲ eller ▼ för att ytta
➣
bilden upp eller ner. När du gjort valet användar du knapparna ▲ eller ▼ för att förstora eller
förminska bildstorleken vertikalt.
När det dubbla läget ( , ) har ställts in för BIB, går det inte att ange bildstorlek.
➣
Efter val av “Skanna” i läget HDMI (1080i/1080p) eller Component (1080i/1080p):
➣
Välj genom att trycka på ◄ eller ►. Använd knappen ▲, ▼, ◄ eller ► för att ytta bilden.
Återställ: Tryck på knapparna ◄ eller ► för att välja “Återställ” och tryck sedan på ENTER .
Du kan initiera inställningen.
Om du använder “Skanna” med ingången HDMI 720p kommer en (1) rad att beskäras överst,
➣
underst, till vänster och till höger som i överskanningsfunktionen.
TV
Mer
Bildalternativ
Återställ : OK
Flytta Öppna Tillbaka
TV
Färgton : Normal
Storlek
Skärmläge : 16:9
Brusreducer. : Auto
DNIe
HDMI svart
Film plus
Blått läge
Bildalternativ
: Auto Wide
: Av
: Normal
: Låg
: Av
Flytta Öppna Tillbaka
Bild
Du kan välja de här alternativen genom att trycka på knappen
P.SIZE på fjärrkontrollen.
Svenska - 20
Page 94

Skärmläge: 16:9/Bredzoom/Zoom/4:3
♦
Vid inställning av bildstorleken till “Auto Wide” i läget 16:9, kan du avgöra bildstorleken du vill visa
för bilden 4:3 WSS (Wide Screen Service) eller ingenting. Varje separat land i Europa kräver olika
bildstorlek så den här funktionen är avsedd för användare som väljer den.
16:9: Ställer in bilden i läge 16:9 wide.
♦
Wide Zoom: Förstora bilden mer än 4:3.
♦
Zoom: Förstorar bilden lodrätt på bildskärmen.
♦
4:3: Ställer in bilden i läge 4:3 normal.Ställer in bilden i läge 4:3 normal.
♦
Funktionen är tillgänglig i läget “Auto Wide”.
➣
Funktionen är inte tillgänglig i lägena “PC”, “Component” och “HDMI”.
➣
Brusreducer.: Av/Låg/Medium/Hög/Auto
♦
Om sändningssignalen som din TV tar emot är för svag kan du aktivera digital bruskreduceirng för att
bidra till att minska statiska bilder och spökbilder som kan visas på skärmen.
När signalen är svag väljer du ett av alternativen tills den bästa bilden visas.
➣
DNIe: Av/Demo/På
♦
Den här TV:n är försedd med en DNIe-funktion så att du kan få högre bildkvalitet. Om du aktiverar
DNIe kan du visa bilden med DNIe-funktionen aktiverad. Om du ställer in DNIe på Demo, kan du visa
en DNIe-bild och en normal bild på skärmen i förhandsvisningssyfte. Använd den här funktionen om
du vill se skillnaden när det gäller bildkvalitet.
DNIe™ (Digital Natural Image engine)
➣
Denna funktion ger dig mer detaljerade bilder med 3D brusreducering, förbättring av detaljer,
kontrast och vithet. Ny algoritm för bildkompensation ger dig en skarpare, klarare och mer
detaljerad bild. DNIeTM-tekniken anpassar alla signaler efter din syn.
Funktionen är inte tillgänglig i lägena “Film” och “Standard”.
➣
HDMI svart: Normal/Låg
♦
Du kan direkt ange justering av svart på skärmen för att justera skärmdjupet.
Den här funktionen är endast aktiv när den externa ingången ansluter till HDMI och
➣
RGB-signalerna är ingångssignaler.
Film plus: Av/Låg/Medium/Hög/Demo
♦
Du kan visa naturligare hudton och klarare text, även i snabbt rörliga scener.
Använd den här funktionen när du tittar på lmer.
➣
Den här funktionen är inte tillgänglig i läget “Bredzoom” och “Zoom”.
➣
Den här funktionen är inte tillgänglig när “BIB” är inställt på “På”.
➣
Det stöds inte i läget HDMI 1080p/24Hz, 25Hz, 30Hz.
➣
Blått läge: Av/På
♦
Den här funktionen är för AV-enhetsmätningsexperter. Den här funktionen visar endast den blå
signalen genom att avlägsna röda och gröna signaler från videosignalen så att en blå filtereffekt
används för att justera färg och färgton för videoutrustning, exempelvis DVD-spelare, hemmabio etc.
Genom att använda den här funktionen kan du justera färg och färgton till önskade värden som är
lämpliga för signalnivån för varje videoenhet genom användning av röd/grön/blå/cyan/magenta/ gula
färgkodsmönster utan att använda ett extra blått filter.
“Blått läge” är tillgängligt när bildläget är inställt på “Film” eller “Standard”.
➣
Svenska - 21
Page 95

Visa bild-i-bild (BIB)
Du kan visa en underbild inne i huvudbilden för ett TV-program
eller en videoingång. På det här sättet kan du titta på en bild
från valfri ansluten utrustning samtidigt som du tittar på
huvudbilden.
1. Tryck på MENU för att visa menyn.
Tryck på eller för att välja “Inställning” och sedan på
ENTER .
2. Tryck på eller för att välja “BIB” och sedan på ENTER .
3. Välj önskat nummer genom att trycka på ▲ eller ▼ och tryck
sedan på ENTER .
4. När du är klar med inställningen trycker du på ENTER .
5. Tryck på EXIT för att avsluta.
➣
Du kan märka en viss onaturlighet i underbildsfönstret när du
använder huvudskärmen för att visa ett spel eller karaoke.
Enkel inställning
1. Tryck på knappen TOOLS på fjärrkontrollen.
2. Tryck på knappen ▲ eller ▼ för att välja “BIB” och tryck sedan på knappen
3. Tryck på ▲ eller ▼ för att välja ett visst alternativ.
4. Tryck på knappen ◄ eller ► för att välja önskat alternativ.
5. Tryck på EXIT eller TOOLS för att stänga.
♦ BIB: På/Av
Du kan aktivera eller avaktivera BIB-funktionen.
Huvudbild Underbild
Component TV, Ext.1, Ext.2, AV, DTV
HDMI 1, 2, 3 TV, Ext.1, Ext.2, AV, DTV
PC TV, Ext.1, Ext.2, AV, DTV
♦ Källa
Du kan välja en källa för underbilden.
♦ Storlek: / /
Du kan välja storlek för underbilden.
➣
Om huvudbilden är i läget “HDMI” är “Storlek” inte tillgängligt.
♦ Position: / / /
Du kan välja ett läge för underbilden.
➣
I dubbelläget ( , ) går det inte att välja “Position”.
♦ Program
Du går endast att välja kanal för underbilden när “Källa” är inställt på “TV” eller “DTV”.
TV
Plug & Play
Språk : Svenska
Tid
Ljuseffekt :
Auto-väggmontage
Melodi : Av
Underhållning : Av
Energispar : Av
BIB
Flytta Öppna Tillbaka
Mode : Custom
TV
Equalizer
BIB : På
SRS TS XT : Off
Källa : TV
Auto Volume : Off
Storlek :
Internal Mute : Off
Position :
Reset
Program : P 1
Move Enter Return
Flytta Öppna Tillbaka
ENTER
Anynet+ (HDMI-CEC)
Bildläge : Standard
Ljudläge : Personlig
Sovtimer : Av
SRS TS XT : Av
Energispar : Av
BIB
Flytta Öppna Avsluta
BIB : ◄ På ►
Källa : TV
Program : P 1
Storlek :
Position :
Flytta Ändra Tillbaka
Inställning
Verktyg
BIB
TV-läge på
BIB
.
Svenska - 22
Page 96

Ändra ljudinställningarna
Du kan ställa in ljudet efter dina egna önskemål.
1. Tryck på MENU för att visa menyn.
Tryck på eller för att välja “Ljud” och sedan på ENTER .
2. Välj önskat nummer genom att trycka på ▲ eller ▼ och tryck
sedan på ENTER .
3. När du är klar med inställningen trycker du på ENTER .
4. Tryck på EXIT för att avsluta.
♦ Läge: Standard/Musik/Film/Tal/Personlig
Du kan välja vilken speciell ljudeffekt som ska användas när du
ser på ett visst TV-program.
Enkel inställning
1. Tryck på knappen TOOLS på fjärrkontrollen.
2. Tryck på eller för att välja "Ljudläge".
3. Tryck på knappen ◄ eller ► för att välja önskat ljudläge.
4. Tryck på EXIT eller TOOLS för att stänga.
TV
Läge : Personlig
Equalizer
SRS TS XT : Av
Auto volym : Av
TV-högtalare : På
Ljudval : Huvudbild
Flytta Öppna Tillbaka
Anynet+ (HDMI-CEC)
Bildläge : Standard
Ljudläge ◄ Personlig ►
Sovtimer : Av
SRS TS XT : Av
Energispar : Av
Dubbel l-ll : Mono
Flytta Ändra Avsluta
Ljud
Verktyg
♦ Equalizer: Balans/100Hz/300Hz/1kHz/3kHz/10kHz
TV
Equalizer
Denna tv-apparat har ett antal inställningsalternativ för att ange
ljudkvaliteten:
Om du ändrar de här inställningarna ändras ljudstandarden
➣
H
automatiskt till “Personlig”.
V
Balans 100Hz 300Hz 1kHz 3kHz 10kHz
Flytta Ändra Tillbaka
♦ SRS TS XT: Av/På
TruSurround XT är en patenterad SRS-teknik som gör det möjligt att spela 5.1 flerkanalsinnehåll
i två högtalare. TruSurround ger en påtagbar och virtuell ljudupplevelse genom högtalarsystem
med två högtalare, inklusive inbyggda TV-högtalare. Det är helt kompatibelt med samtliga
flerkanalsformat.
Enkel inställning
1. Tryck på knappen TOOLS på fjärrkontrollen.
2. Tryck på eller för att välja “SRS TS XT”.
3. Tryck på eller för att välja “Av” eller “På”.
4. Tryck på EXIT eller TOOLS för att stänga.
Anynet+ (HDMI-CEC)
Bildläge : Standard
Ljudläge : Personlig
Sovtimer : Av
SRS TS XT ◄ Av ►
Energispar : Av
Dubbel l-ll : Mono
Verktyg
Flytta Ändra Avsluta
TruSurround XT, SRS och symbolerna är varumärken som tillhör SRS
Labs, Inc.
TruSurround XT-tekniken används under licens från SRS Labs, Inc.
♦ Auto volym: Av/På
Varje program har sina egna signalförhållanden, vilket innebär att du måste ändra volymen varje
gång du byter kanal. Med automatisk volyminställning justeras volymen automatiskt för önskad kanal
genom att sänka ljudet när modulationssignalen är hög eller höja ljudet när modulationssignalen är
låg.
Svenska - 23
Page 97

♦ TV-högtalare: Av/På
När funktionen BIB är aktiverad kan du lyssna på ljudet i den underordnade bilden.
The +, - och MUTE fungerar inte när "TV-högtalare" är inställd på Av.
➣
När “TV-högtalare” är inställt på “Av”, kan du endast använda “Ljudval” (i BIB-läge) på ljudmenyn.
➣
♦ Ljudval: Huvudbild/Underbild
När funktionen BIB är aktiverad kan du lyssna på ljudet i den underordnade bilden.
− Huvudbild: Används för att lyssna på huvudbildens ljud.
− Underbild: Används för att lyssna på den underordnade bildens ljud.
Tillverkas på licens av Dolby Laboratories. Dolby och den dubbla D-symbolen
är varumärken som tillhör Dolby Laboratories.
Välja ljudläge
Du kan ställa in ljudläget på menyn “Verktyg”.
När du ställer in “Dubbel I-II” visas det aktuella ljudläget på
skärmen.
1. Tryck på knappen TOOLS på fjärrkontrollen.
2. Tryck på eller för att välja “Dubbel I-II".
3. Tryck på knappen ◄ eller ► för att välja önskat alternativ.
Anynet+ (HDMI-CEC)
Bildläge : Standard
Ljudläge : Personlig
Sovtimer : Av
SRS TS XT : Av
Energispar : Av
Dubbel l-ll ◄ Mono ►
4. Tryck påTryck på ENTER .
Ljudtyp Dubbel 1/2 Standard
Mono Mono
A2 Stereo
NICAM Stereo
Om stereosignalen är svag och automatisk växling förekommer, byter du till Mono.
➣
Den här funktionen är endast aktiverad i stereo ljudsignal. Den är inaktiverad i mono ljudsignal.
➣
Funktionen är endast tillgänglig i analogt TV-läge.
➣
Stereo
Dual
Mono Mono
Stereo
Dual
Stereo Mono
Dubbel 1 Dubbel 2
Mono Stereo
Mono Dubbel 1
Dubbel 2
Automatisk ändring
Dubbel 1
Automatisk ändring
Dubbel 1
Verktyg
Flytta Ändra Avsluta
Ansluta hörlurar (Säljs separat)
Du kan ansluta hörlurar till tv:n om du vill titta på ett tv-program utan
att störa andra personer i samma rum.
När du sätter i ett hörlursset i motsvarande port kan du endast
➣
använda “Auto volym” och “Ljudval” (i BIB-läge) på ljudmenyn.
Långvarig användning av hörlurar på hög volym kan skada din hörsel.
➣
Du kan inte ta emot ljud från högtalarna när du ansluter hörlurarna till
➣
systemet.
Volymen i hörlurarna och TV-volymen justeras på olika sätt.
➣
Svenska - 24
TV:ns sidopanel
Page 98

Ställa in och visa aktuell tid
Du kan ställa in TV-klockan så att aktuell tid visas när du trycker
på knappen INFO. Du måste även ställa in tiden för att kunna
använda de automatiska på/av-inställningarna.
1. Tryck på MENU för att visa menyn.
Tryck på eller för att välja “Inställning” och sedan på
ENTER .
2. Tryck på eller för att välja “Tid” och sedan på ENTER .
TV
Plug & Play
Språk : Svenska
Tid
Ljuseffekt :
Auto-väggmontage
Melodi : Av
Underhållning : Av
Energispar : Av
BIB
3. Tryck på ENTER för att välja “Ställ klockan”.
4.
Om du vill ... Trycker du på ...
Gå vidare till “Månad”, “Datum”, “År”, “Tim”
Knappen eller
TV
eller “Minut”
Ställa in “Månad”, “Datum”, “År”, “Tim”
Knappen eller
eller “Minut”
Bekräfta inställningen
Knappen ENTER .
Flytta Ändra Tillbaka
5. Tryck på EXIT för att avsluta.
➣
Den aktuella tiden visas varje gång du trycker på knappen INFO.
➣
Du kan ställa in “Månad”, “Datum”, “År”, “Tim” och “Minut” genom att trycka på sifferknapparna på
fjärrkontrollen.
➣
Om du drar ur strömsladden måste du ställa klockan igen.
Inställning
TV-läge på
Flytta Öppna Tillbaka
Ställ klockan
Månad01Datum
01
Tim00Minut
00
Ställa in sovtimern
Du kan välja en tidsperiod på mellan 30 och 180 minuter innan
TV:n automatiskt ska gå över till standbyläge.
1. Tryck på MENU för att visa menyn.
Tryck på eller för att välja “Inställning” och sedan på
ENTER .
2. Tryck på eller för att välja “Tid” och sedan på ENTER .
3. Tryck på eller för att välja “Sovtimer” och sedan på
ENTER .
4. Tryck på eller era gånger tills önskad tid visas (Av, 30, 60,
90, 120, 150, 180). Tryck på knappen ENTER .
5. Tryck på EXIT för att avsluta.
TV:n går automatiskt över till viloläget när timern når 0.
➣
Enkel inställning
1. Tryck på knappen TOOLS på fjärrkontrollen.
2. Tryck på eller för att välja “Sovtimer”.
3. Tryck på knappen ◄ eller ► för att välja minut.
4. Tryck på EXIT eller TOOLS för att stänga.
TV
Plug & Play
Språk : Svenska
Tid
Ljuseffekt :
Auto-väggmontage
Melodi : Av
Underhållning : Av
Energispar : Av
BIB
TV
Ställ klockan :
Sovtimer :
Timer 1 :
Timer 2 :
Timer 3 :
Flytta Öppna Tillbaka
Anynet+ (HDMI-CEC)
Bildläge : Standard
Ljudläge : Personlig
Sovtimer ◄ Av ►
SRS TS XT : Av
Energispar : Av
Dubbel l-ll : Mono
Flytta Ändra Avsluta
Inställning
TV-läge på
Flytta Öppna Tillbaka
Tid
Verktyg
120
150
180
Av
30
60
90
År
2008
Svenska - 25
Page 99

Slå på och stänga av TV:n automatiskt
1. Tryck på MENU för att visa menyn.
Tryck på eller för att välja “Inställning” och sedan på
ENTER .
2. Tryck på eller för att välja “Tid” och sedan på ENTER .
3. Tryck på eller för att välja “Timer 1”, “Timer 2”, “Timer 3”
och sedan på ENTER .
Tre olika timerinställningar kan göras för på/av.
Ställ in klockan först!
➣
4. Tryck på ◄ eller ► för att välja önskat alternativ nedan.
Ändra inställningen genom att trycka på knappen ▲ eller ▼.
♦ Påslagningstid : Välj timme, minut och “På”/“Av”. (För att
aktivera timern med önskad inställning, ställ
in den på “På”.)
♦ Avstängningstid : Välj timme, minut och “På”/“Av”. (För att
aktivera timern med önskad inställning,
TV
Plug & Play
Språk : Svenska
Tid
Ljuseffekt :
Auto-väggmontage
Melodi : Av
Underhållning : Av
Energispar : Av
BIB
TV
Påslagningstid
Avstängningstid
Volym
Upprepa
ställ in den på “På”.)
♦ Volym : Välj önskad nivå för volymen.
♦ Upprepa : Välj “En gång”, “Alla Dagar”, “Mån-Fre”, “Mån-Lör” eller “Lör-Sön”.
Du kan ställa in timmar och minuter direkt genom att trycka på sifferknapparna på fjärrkontrollen.
➣
Auto Power Off
När timern är inställd till “På” kommer tv:n att stängas av om inga kontroller används under 3 timmar
efter det att tv:n slagits på av timern. Den här funktionen är endast tillgänglig i timerläget “På” och
förhindrar överhettning, vilket kan uppstå om TV:n är påslagen för länge.
Inställning
TV-läge på
Flytta Öppna Tillbaka
Timer 1
5
:
00
00
6
00
10
En gång
► Flytta Ändra Tillbaka
Av
:
Av
00
Välja språk
När du använder apparaten för första gången måste du
välja vilket språk som ska användas vid menyvisning och
indikeringar.
1. Tryck på MENU för att visa menyn. Tryck på eller för att
välja “Inställning” och sedan på ENTER .
2. Tryck på eller för att välja “Språk” och sedan på
ENTER .
3. Välj ett visst språk genom att trycka på eller flera gånger.
Tryck på knappen ENTER .
4. Tryck på EXIT för att avsluta.
Svenska - 26
TV
Plug & Play
Språk : Svenska
Tid
Ljuseffekt :
Auto-väggmontage
Melodi : Av
Underhållning : Av
Energispar : Av
BIB
Inställning
Flytta Öppna Tillbaka
TV-läge på
Page 100

Justera ljusinställningarna (beroende på modell)
Du kan slå av/på lampan på TV:ns framsida beroende på
situation. Du kan slå av den om du vill spara ström eller om
ljuset stör.
1. Tryck på MENU för att visa menyn. Tryck på eller för att
välja “Inställning” och sedan på ENTER .
2. Tryck på eller för att välja “Ljuseffekt” och sedan på
ENTER .
3. Tryck på knappen ▲ eller ▼ för att välja “Av”, “Standby-läge på”,
“TV-läge på” eller “På”.
Tryck på knappen ENTER .
Av: Den blå lampan är alltid av.
♦
Standby-läge på: Lampan lyser i vänteläge och stängs av
♦
när TV:n slås på.
TV-läge på: Lampan lyser när du tittar på TV och stängs
♦
av när TV:n stängs av.
På: Lysdioden är alltid på.
♦
Ställ in “Ljuseffekt” i läget “Av” för att minska strömförbrukningen.
➣
4. Tryck på EXIT för att avsluta.
Mode : Custom
TV
Equalizer
Plug & Play
SRS TS XT : Off
Språk : Svenska
Auto Volume : Off
Tid
Internal Mute : Off
Ljuseffekt :
Reset
Auto-väggmontage
Melodi : Av
Underhållning : Av
Energispar : Av
BIB
Inställning
Move Enter Return
Flytta Öppna Tillbaka
Melodi / Underhållning / Energispar
Mode : Custom
1. Tryck på MENU för att visa menyn.
Tryck på ▲ eller ▼ för att välja “Inställning” och tryck sedan på
ENTER .
2. Välj önskat nummer genom att trycka på ▲ eller ▼ och tryck
sedan på ENTER .
3. När du är klar med inställningen trycker du på ENTER .
4. Tryck på EXIT för att avsluta.
Melodi: Av/Låg/Medium/Hög
♦
TV
Equalizer
Plug & Play
SRS TS XT : Off
Språk : Svenska
Auto Volume : Off
Tid
Internal Mute : Off
Ljuseffekt :
Reset
Vägg ring
Melodi : Av
Underhållning : Av
Energispar : Av
BIB
TV:ns melodiljud kan justeras.
Melodin spelas inte
➣
− När inget ljud sänds ut från TV:n, eftersom MUTE-knappen är intryckt.
− När inget ljud sänds ut från TV:n, eftersom volymknappen - (Volym) har tryckts in.
− När TV:n slås av genom funktionen sovtimer.
Inställning
Move Enter Return
Flytta Öppna Tillbaka
TV-läge på
LED
TV-läge på
Svenska - 27
 Loading...