

Page 1
Contact SAMSUNG WORLDWIDE
If you have any questions or comments relating to Samsung products, please contact the SAMSUNG customer care centre.
Country
EIRE 0818 717 100 www.samsung.com/ie
U.K 0845 SAMSUNG (7267864) www.samsung.com/uk
Customer Care Centre
Web Site
LCD TV
user manual
BN68-01980J-01
imagine the possibilities
Thank you for purchasing this Samsung product.
To receive more complete service, please register
your product at
www.samsung.com/register
Model Serial No.
Page 2

Information on Use
2
English
Precautions When Displaying a Still Image
A still image may cause permanent damage to the TV screen.
Do not display a still image and partially still image on the LCD panel for more than 2 hours as it can cause screen
image retention. This image retention is also known as screen burn. To avoid such image retention, reduce the degree of
brightness and contrast of the screen when displaying a still image.
Displaying still images from Video games and PC for longer than a certain period of time may produce partial after-images.
To prevent this effect, reduce the ‘brightness’ and ‘contrast’ when displaying still images.
WARNINGS:
■
Image retention, commonly known as screen burn-in, can occur on most types of television if the same image is displayed continuously.
The most common causes of image retention are logos that remain stationary on the TV screen. These logos are common on many
programmes received via a Set-top Box.
To reduce this risk, avoid displaying still images for long durations and lower the brightness or contrast settings to decrease the
intensity of the picture. Extended viewing of movies and programs in aspect ratios that are different from the aspect ratio of the TV may
cause image retention. Always endeavour to avoid black borders top or bottom by using the zoom function. This will help eliminate the
black borders and fit the picture to the entire area of the screen. Using a video game console may cause image retention and is not
recommended. When using a PC input, avoid displaying still images for long durations and reduce the brightness or contrast settings to
decrease the intensity of the picture.
IMPORTANT:
■
Image retention issues are not covered by your Samsung® warranty.
Watching the LCD TV in 4:3 format for a long period of time may leave traces of borders displayed on the
left, right and centre of the screen caused by the difference of light emission on the screen.
Playing a DVD or a game console may cause a similar effect to the screen.
Damages caused by the above effect are not covered by the Warranty.
Digital TV Notice
Functionalities related to Digital TV(DVB) are only available in countries/areas where DVB-T (MPEG2 and MPEG4 AVC)
■
digital terrestrial signals are broadcasted or where you are able to access to a compatible DVB-C(MPEG2 and MPEG4
AAC) cable- TV service. Please check with your local dealer the possibility to receive DVB-T or DVB-C signal.
DVB-T is the DVB European consortium standard for the broadcast transmission of digital terrestrial television and
■
DVBC is that for the broadcast transmission of digital TV over cable. However, some differentiated features like EPG
(Electric Programme Guide), VOD (Video on Demand) and so on, are not included in this specification. So, they cannot be
workable at this moment.
Although this TV set meets the latest DVB-T and DVB-C standards, as of [August, 2008], the compatibility with future
■
DVB-T digital terrestrial and DVB-C digital cable broadcasts cannot be guaranteed.
Depending on the countries/areas where this TV set is used some cable-TV providers may charge an additional fee for
■
such a service and you may be required to agree to terms and conditions of their business.
Some Digital TV functions might be unavailable in some countries or regions and DVB-C might not work correctly with
■
some cable service providers.
For more information, please contact your local Samsung customer care centre.
■
Page 3

3
English
Trademark & Label License Notice
TruSurround HD, SRS and symbol are trademarks of SRS Labs, Inc. TruSurround HD technology is
incorporated under license from SRS Labs, Inc.
Manufactured under license from Dolby Laboratories. Dolby and the double-D symbol are trademarks of
Dolby Laboratories.
Symbol
Note
One-Touch Button
TOOL Button
Press
© 2009 Samsung Electronics Co., Ltd. All rights reserved.
Page 4

Contents
4
English
5 How to Adjust the Stand (19inch model only)
5
How to Adjust the Angle of the TV
(19inch model only
6
Installing VESA Compliant Mounting Devices
(19inch model only
6
Using the Decoration Covers
(19inch model only
7
Installing the Stand
7
Installing the Wall Mount Kit
7
Anti-Theft Kensington Lock
8
Securing the Installation Space
9
Securing the TV to the Wall
10
Accessories
10
Viewing the Control Panel
11
Viewing the Connection Panel
13
Connections
14
Installing Batteries in the Remote Control
15
Viewing the Remote Control
16 Placing Your Television in Standby Mode
16
Plug & Play Feature
17
Viewing the Display
18 Viewing the Menus
18
Channel Menu
23
Picture Menu
Getting Started
)
)
)
Basic Operation
Using the Menus
18
Country
Auto Store
19
Manual Store
Cable Search Option
20
Now & Next Guide / Full Guide /Default
Guide
21
Channel List
22
Channel Mode
Fine Tune
23
Mode
Backlight / Contrast / Brightness /
Sharpness / Colour / Tint(G/R)
Advanced Settings
24
Picture Options
25
Picture Reset
26
Auto Adjustment
Screen
27 Sound Menu
27
Mode
Equalizer
SRS TruSurround HD
Audio Language
Audio Format
Audio Description
Auto Volume
Speaker Select
28
Sound Reset
29
Setup Menu
29
Language
Time
30
Game Mode
Child Lock
Change PIN
Parental Lock
Subtitle
31
Teletext Language
Preference
Digital Text
Melody
Energy Saving
Common Interface
32
Input Menu
32
Source List
Edit Name
33
Support menu
33
Self Diagnosis
Software Upgrade
34
HD Connection Guide
Contact Samsung
Other Information
35 Teletext Feature
37
Using Your TV as a Computer (PC) Display
38
Troubleshooting: Before Contacting
Service Personne
39
Specications
Warning! Important Safety Instructions
Wiring the Mains Power Supply Plug (UK Only)
Warranty Card
l
Page 5

Getting Started
How to Adjust the Stand (19inch model only)
5
English
Place the front of the TV onto a soft cloth or cushion on a table as in Figure 1.
Align the TV bottom along the table edge.
■
1
Press on the center of the TV back. Adjust the stand as in Figure 2 while pressing the button on the back of the stand.
2
Place the TV on the table so that the TV sits safely on the table.
3
1 2
How to Adjust the Angle of the TV
(19inch model only)
When you adjust the stand, press the button on the back of the stand.
Figure 1 shows the adjustment angle (-2°~14°) when you use the LCD on its stand.
Excessive tilting can turn the LCD TV over which may cause damage.
■
1
Figure 2 shows the adjustment angle (14°~80°) when you convert the LCD from stand-based use to wall-mount.
2
Figure 3 shows the adjustment angle (0°~10°) when you mount the LCD TV to a wall.
You will hear a “Click” sound when changing the angle from 1 to 2 or 3 to 2.
■
3
Getting Started
1
Angle adjustment when using
the TV on its stand.
2
Angle adjustment when
converting from Stand to Wall
mount (1→3, 3→1)
3
Angle adjustment when LCD
TV is wall-mounted
Page 6

Installing VESA Compliant Mounting Devices
6
English
(19inch model only)
Place the TV face down on a soft cloth or cushion on a table.
1
Getting Started
Adjust the stand, pressing the button on the back of the stand.
2
Align the mounting interface pad (not supplied) with the holes in the stand bottom and secure it with the four screws that
3
come with the arm-type base, wall mount hanger or other bases (not supplied).
Button
Mounting pad
(Sold separately)
1
2
Using the Decoration Covers
(19inch model only)
When installing the TV on the wall without using the stand, insert decoration covers into the holes as described in the picture
1
1
.
After inserting the decoration covers, fasten them with 4 screws as described in the picture 2.
2
1 2
Page 7
7
English
Getting Started
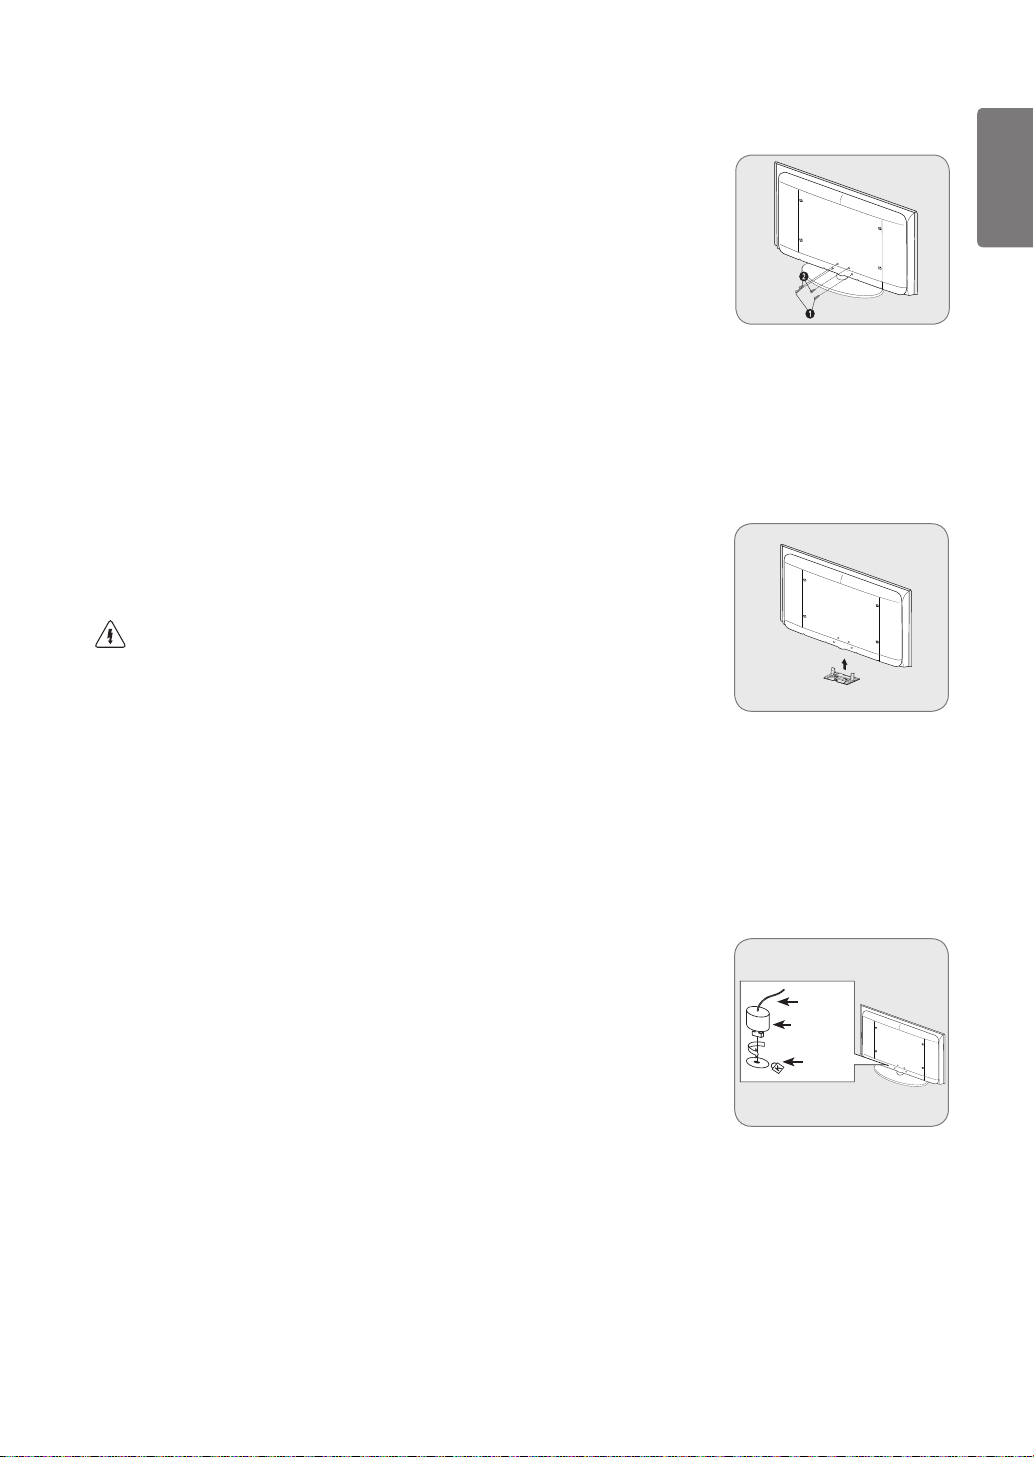
Installing the Stand
Attach your LCD TV to the stand.
Two or more people should carry the TV.
■
1
2
Make sure to distinguish between the front and back of the stand when assembling
■
them.
To make sure the TV is installed on the stand at a proper level, do not apply excess
■
downward pressure to the upper left of right sides of the TV.
Fasten two screws at position 1 and then fasten two screw at position 2.
Stand the product up and fasten the screws. If you fasten the screws with the LCD
■
TV placed down, it may lean to one side.
The stand is installed for models with the screen size of 37 inch and above.
■
Installing the Wall Mount Kit
Wall mount items (sold separately) allow you to mount the TV on the wall.
For detailed information on installing the wall mount, see the instructions provided with the Wall
Mount items. Contact a technician for assistance when installing the wall mounted bracket.
Samsung Electronics is not responsible for any damage to the product or injury to yourself or others
if you elect to install the TV on your own.
Do not install your Wall Mount Kit while your TV is turned on. It may result in personal
■
injury due to electric shock.
Remove the stand and cover the bottom hole with a cap and fasten with two screws.
■
Anti-Theft Kensington Lock
The Kensington Lock is a device used to physically fix the system when using it in a public place. The appearance and locking method
may differ from the illustration depending on the manufacturer. Refer to the manual provided with the Kensington Lock for proper use.
The locking device has to be purchased separately.
■
The location of the Kensington Lock may be different depending on its model.
■
Insert the locking device into the Kensington slot on the LCD TV (1) and turn it in the
1
locking direction (2).
Connect the Kensington Lock cable (3).
2
Fix the Kensington Lock to a desk or a heavy stationary object.
3
3
2
1
Page 8

Securing the Installation Space
8
Keep the required distances between the product and other objects (e.g. walls) to ensure proper ventilation.
English
Failing to do so may result in fire or a problem with the product due to an increase in the internal temperature of the product.
Install the product so the required distances shown in the figure are kept.
When using a stand or wall-mount, use parts provided by Samsung Electronics only.
■
If you use parts provided by another manufacturer, it may result in a problem with the product or an injury due to the
Getting Started
product falling.
If you use parts provided by another manufacturer, it may result in a problem with the product or fire due to an increase in
the internal temperature of the product due to poor ventilation.
When installing the product with a stand
■
When installing the product with a wall-mount
■
10 cm
10 cm
10 cm
10 cm
10 cm
10 cm
10 cm
Page 9

9
English
Getting Started
Securing the TV to the Wall
Caution: Pulling, pushing, or climbing on the TV may cause the TV to fall.
In particular, ensure your children do not hang over or destabilize the TV;
doing so may cause the TV to tip over, causing serious injuries or death.
Follow all safety precautions provided on the included Safety Flyer. For
added stability, install the anti-fall device for safety purposes, as follows.
To avoid the TV from falling:
Put the screws into the clamps and firmly fasten them onto the wall. Confirm that the
1
screws have been firmly installed onto the wall.
You may need additional material such as an anchor depending on the type of
■
wall.
Since the necessary clamps, screws, and string are not supplied, please
■
purchase these additionally.
Remove the screws from the centre back of the TV, put the screws into the clamps,
2
and then fasten the screws onto the TV again.
Screws may not be supplied with the product. In this case, please purchase the
■
screws of the following specifications.
Screw Specifications:
■
For a 17 ~ 29 Inch LCD TV: M4 X 15
For a 32 ~ 40 Inch LCD TV: M6 X 15
Wall
Connect the clamps fixed onto the TV and the clamps fixed onto the wall with a strong
3
string and then tie the string tightly.
Install the TV near to the wall so that it does not fall backwards.
■
It is safe to connect the string so that the clamps fixed on the wall are equal to or
■
lower than the clamps fixed on the TV.
Untie the string before moving the TV.
■
Verify all connections are properly secured. Periodically check connections for any
4
sign of fatigue for failure. If you have any doubt about the security of your connections,
contact a professional installer.
Wall
Page 10
10
English
Getting Started
Accessories
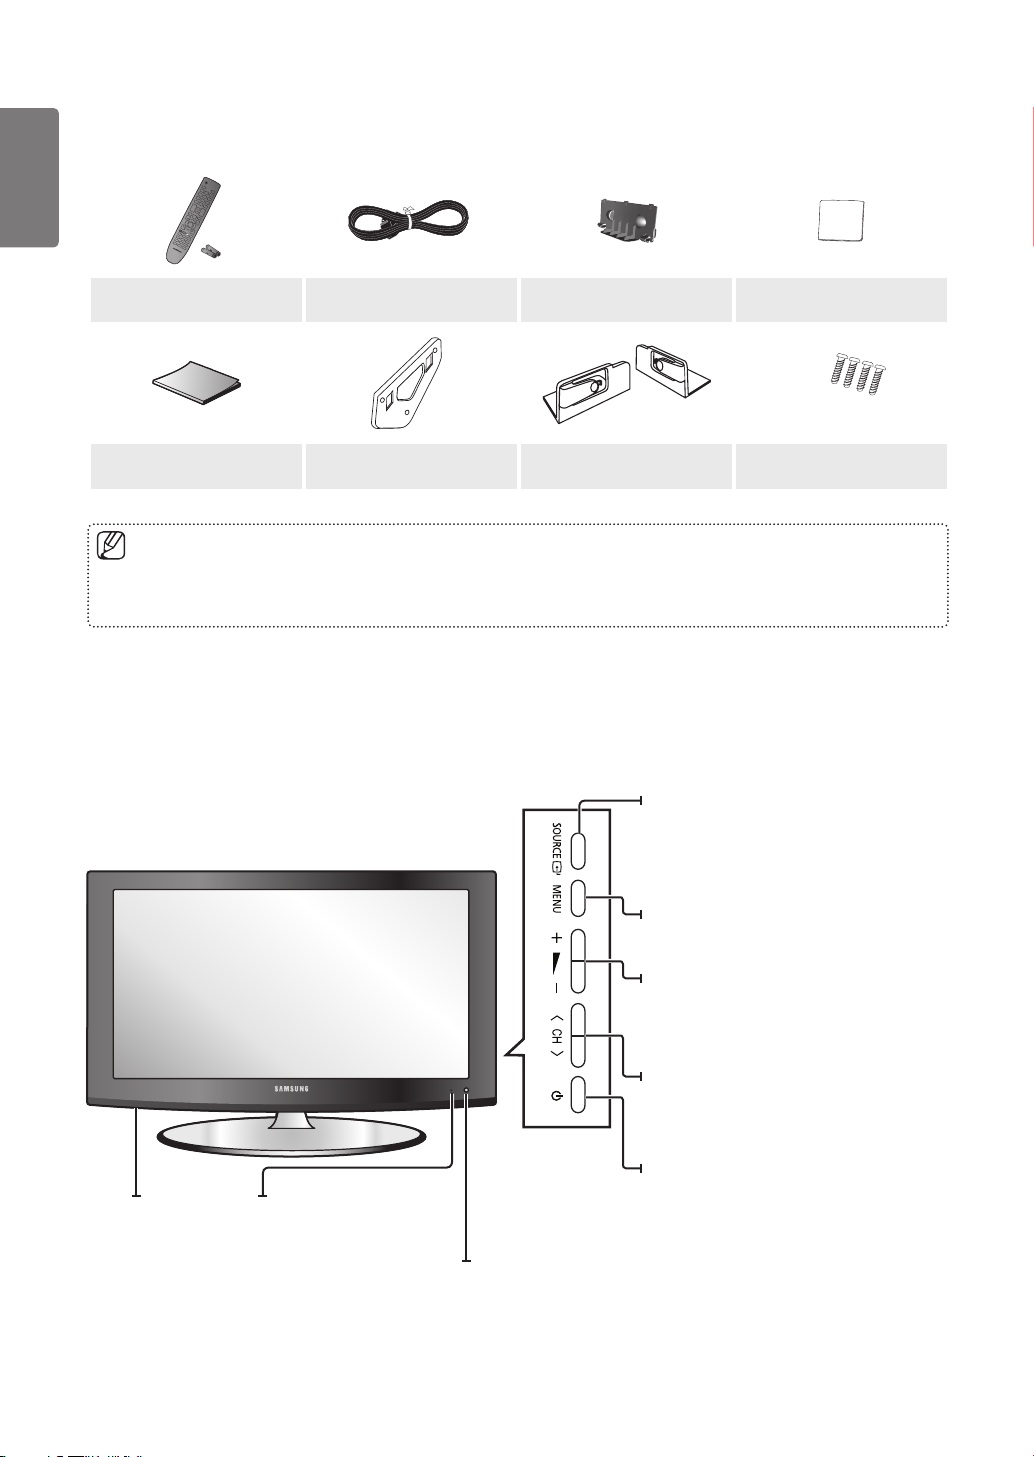
Please make sure the following items are included with your LCD TV. If any items are missing, contact your dealer.
■
Remote Control & Batteries
(AAA x 2)
User Manual
The items colour and shape may vary depending on the model.
■
Figures and illustrations in this User Manual are provided for reference only and may differ from actual product appearance.
■
Product design and specifications may be changed without notice in order to enhance product performance.
Power Cords
Wall Mount kit
(19 inch model only)
Cover-Bottom
(22 inch model only)
Decoration Cover
(19 inch model only)
Cleaning Cloth
(M4 X L16)
Stand Screw X 4
(22 inch model only)
Viewing the Control Panel
The product colour and shape may vary depending on the model.
■
The front panel buttons can be activated by touching it with your finger.
■
Toggles between all the available
input sources. In the on-screen menu,
use this button as you would use
the ENTERE button on the remote
control.
Press to see an on-screen menu of
your TV’s features.
Speakers
Aim the remote control
towards this spot on the TV.
Blinks and turns off when the
power is on and lights up in standby mode.
Press to increase or decrease the
volume. In the on-screen menu, use the
Y
◄ and ► buttons on the remote control.
Press to change channels. In the onscreen menu, use the
as you would use the ▼ and ▲ buttons
on the remote control.
Press to turn the TV on and off.
buttons as you would use the
Z
buttons
Page 11

11
English
Getting Started
Viewing the Connection Panel
6
7
1 2 3 4
890
5
The product colour and shape may vary depending on the model.
■
1
DIGITAL AUDIO OUT (OPTICAL)
Connects to a Digital Audio component such as a Home theatre receiver.
When the HDMI IN jacks are connected, the DIGITAL AUDIO OUT (OPTICAL) jack on the TV outputs 2 channel audio only.
■
If you want to hear 5.1 channel audio, connect the Optical jack on the DVD / Blu-ray player or Cable / Satellite Box directly to
an Amplifier or Home Theatre, not the TV.
2
SERVICE
Connector for software upgrades.
3
HDMI / PC IN [HDMI(DVI), AUDIO, PC]
Supports connections between HDMI-connection-enabled AV devices (Set-Top Boxes, DVD players)
■
No additional Audio connection is needed for an HDMI to HDMI connection.
■
When using an HDMI / DVI cable connection, you must use the HDMI(DVI) jack.
■
Connect to the audio output jack on your PC.
■
DVI audio outputs for external devices.
■
4
AV IN [R-AUDIO-L] / [VIDEO]
Connect RCA cable to an appropriate external A/V device such as VCR, DVD or Camcorder.
■
Connect RCA audio cables to [R-AUDIO-L] on your set and the other ends to corresponding audio out connectors on the A/V
■
device.
5
ANT IN
Connects to an antenna or cable TV system.
6
COMMON INTERFACE Slot
When not inserting ‘CI CARD’ in some channels, ‘Scrambled Signal’ is displayed on the screen.
■
The pairing information containing a telephone number, CI CARD ID, Host ID and other information will be displayed in about
■
2~3 minutes. If an error message is displayed, please contact your service provider.
When the channel information configuration has finished, the message ‘Updating Completed’ is displayed, indicating that the
■
channel list is now updated.
You must obtain a CI CARD from a local cable service provider. Remove the CI CARD by carefully pulling it out with
your hands since dropping the CI CARD may cause damage to it.
Insert the CI-Card in the direction marked on it.
The place of the COMMON INTERFACE Slot may be different depending on its model.
CAM is not supported in some countries and regions, check with your authorized dealer.
7
KENSINGTON LOCK (depending on the model)
The Kensington Lock (optional) is a device used to physically fix the system when used in a public place.
If you want to use a locking device, contact the dealer where you purchased the TV.
The location of the Kensington Lock may be different depending on its model.
■
8
Headphones jack
Headphone may be connected to the headphone output on your set. While the head phone is connected, the sound from the built-
in speakers will be disabled.
Page 12
12
English
Getting Started
9
COMPONENT IN
Connect component video cables (optional) to component connector (PR, PB, Y) on the rear of your set and the other ends to
■
corresponding component video out connectors on the DTV or DVD.
If you wish to connect both the Set-Top Box and DTV (or DVD), you should connect the Set-Top Box to the DTV (or DVD) and
■
connect the DTV (or DVD) to component connector (PR, PB, Y) on your set.
The PR, PB and Y connectors on your component devices (DTV or DVD) are sometimes labeled Y, B-Y and R-Y or Y, Cb and
■
Cr.
Connect RCA audio cables (optional) to [R-AUDIO-L] on the rear of your set and the other ends to corresponding audio out
■
connectors on the DTV or DVD.
0
EXT
Connector
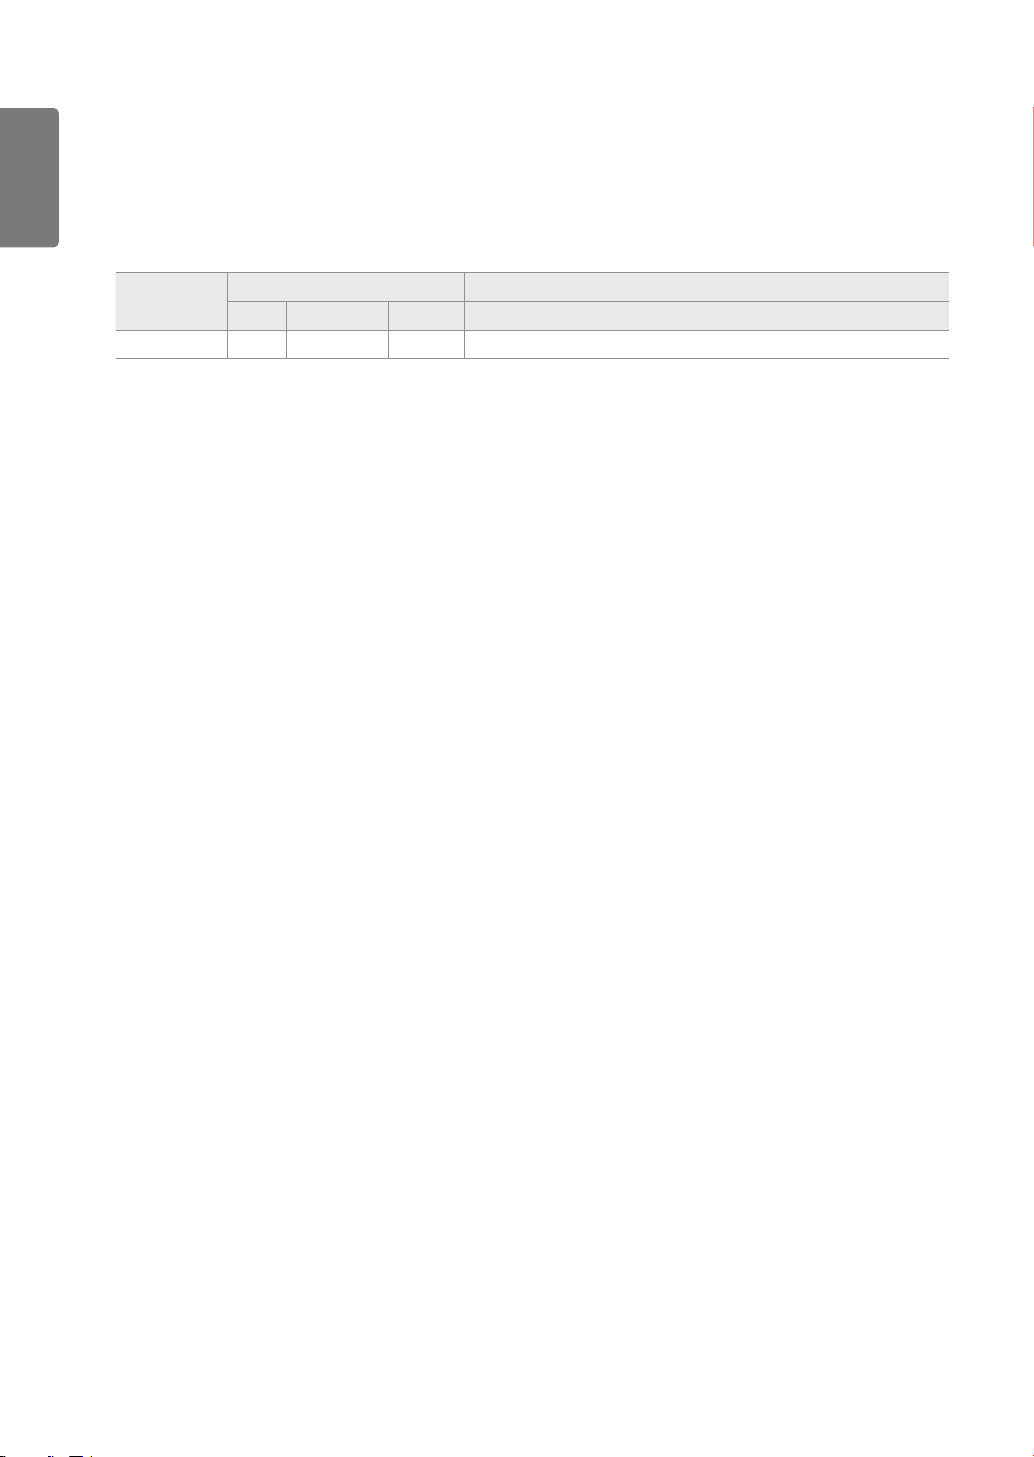
EXT O O O Only TV or DTV output is available.
Inputs or outputs for external devices, such as VCR, DVD, video game device or video disc players.
■
Video Audio (L / R) RGB Video + Audio (L / R)
Input Output
Page 13
13
English
Getting Started
Connections
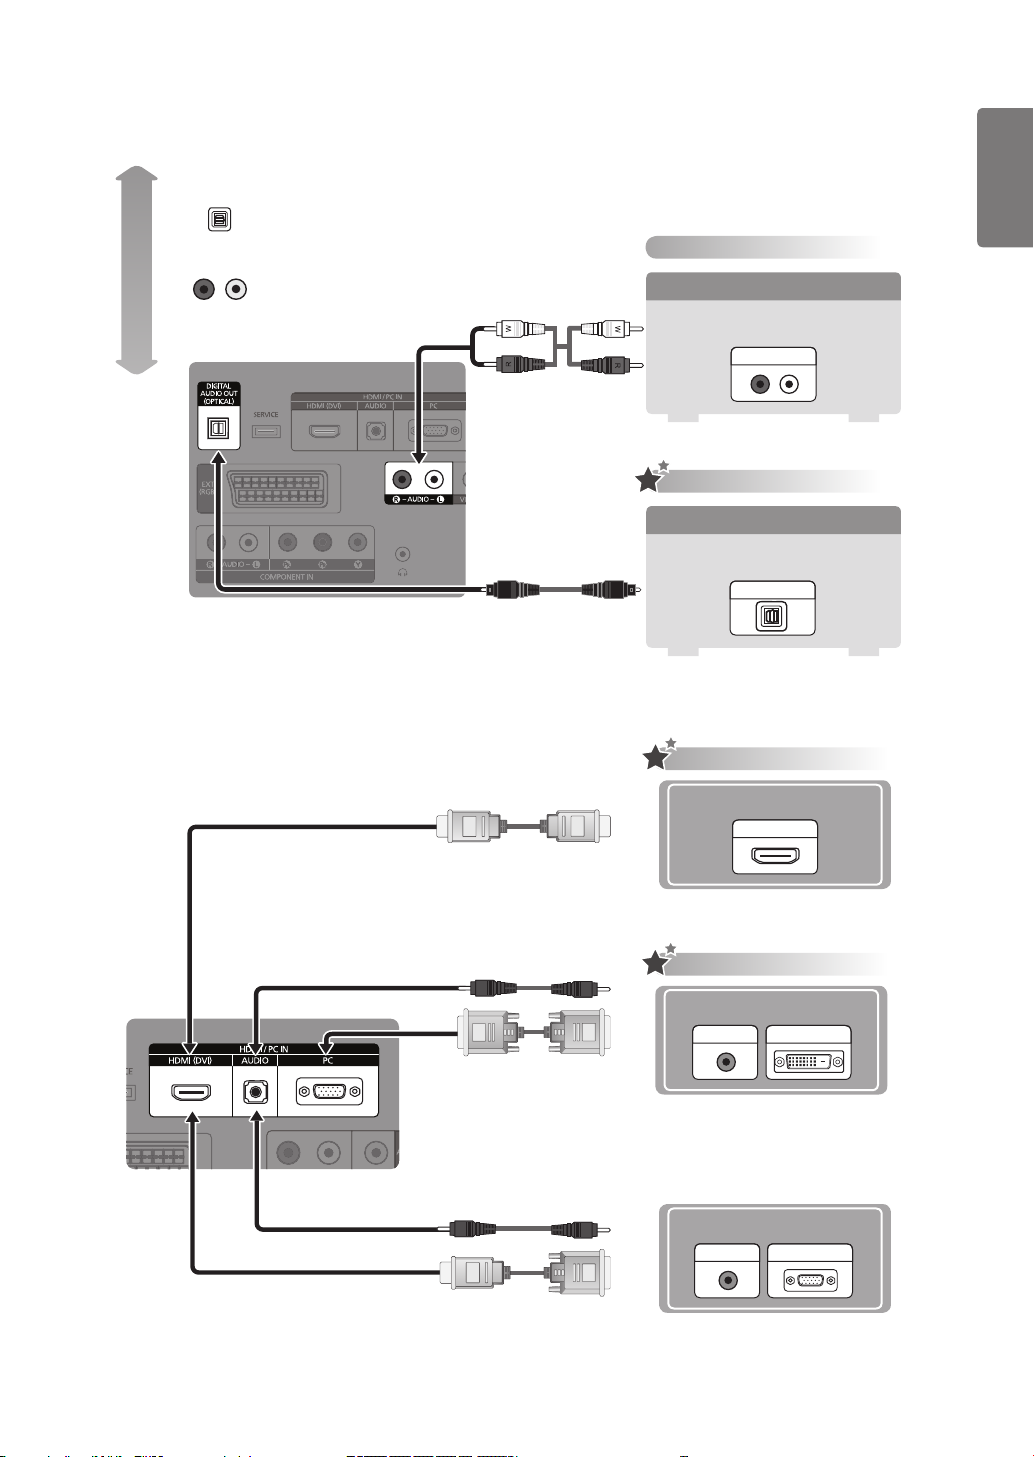
Best
OPTICAL (Digital)
AUDIO (Analog)
Normal
Analog Audio connection
Using a Audio Cable
Amplier / DVD Home Theater
AUDIO IN
Digital Audio connection
Using an Optical Cable
Digital Audio System
OPTICAL
HD connection
Using a D-Sub Cable
Using an HDMI Cable
HDMI OUT
HD connection
Using a D-Sub Cable
Using an HDMI/DVI Cable
DVI OUTAUDIO OUT
Using a D-Sub Cable
Using a D-Sub Cable
PC OUTAUDIO OUT
Page 14

14
English
Getting Started
Installing Batteries in the Remote Control
Lift the cover at the back of the remote control upward as shown in the figure.
1
Install two AAA size batteries.
Make sure to match the ‘+’ and ‘–’ ends of the batteries with the diagram inside
■
2
3
the compartment.
Replace the cover.
Remove the batteries and store them in a cool, dry place if you won’t be using
■
the remote control for a long time.
If the remote control doesn’t work, check the following:
■
Is the TV power on?
Are the plus and minus ends of the batteries reversed?
Are the batteries drained?
Is there a power outage or is the power cord unplugged?
Is there a special fluorescent light or neon sign nearby?
OPERATION
Page 15
15
English
Getting Started
Viewing the Remote Control
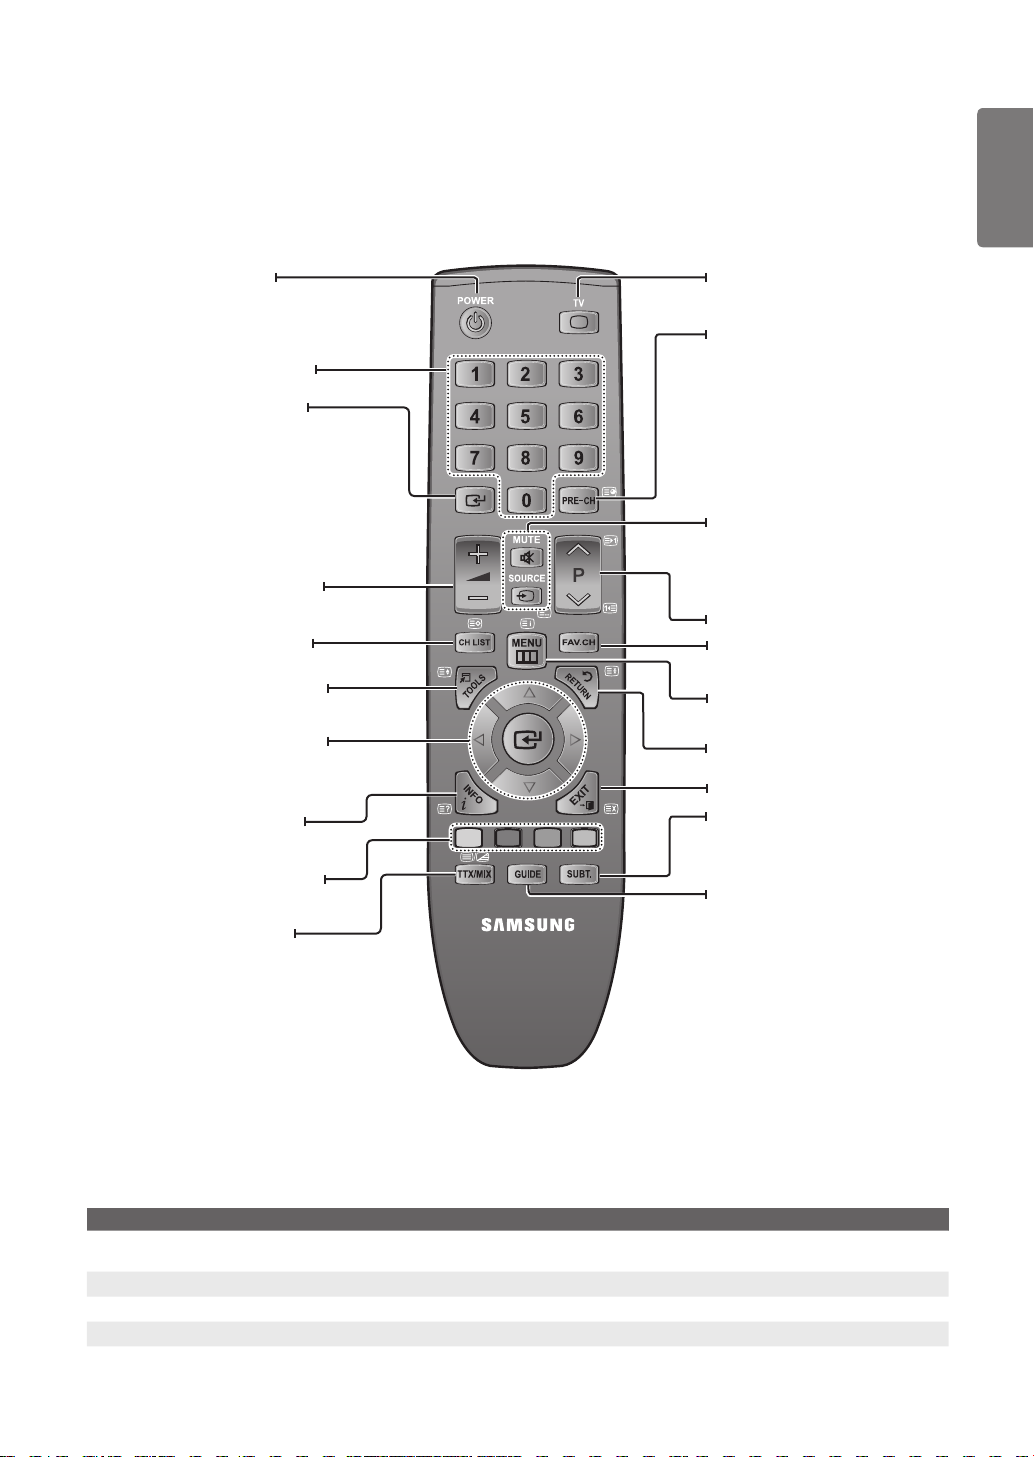
You can use the remote control up to a distance of about 23 feet from the TV.
■
The performance of the remote control may be affected by bright light.
■
The product colour and shape may vary depending on the model.
■
Turns the TV on and off.
Press to change the channel.
Performs the same function
as the ENTERE key of the
directional keys. When switching
channels with the numeric
buttons, and you press the
channel number and then the
ENTERE key, the channel is
immediately switched.
Press to increase or decrease
the volume.
Displays the Channel List on
screen. (p. 21)
Use to quickly select frequently
used functions.
Use to select on-screen menu
items and change menu values.
(p. 18)
Press to display information
on the TV screen. (p. 17)
Selects the TV mode directly.
(p. 36)
Enables you to return to the
previous channel you were
watching.
Press to temporarily cut off the
sound. (p. 33)
Press to display and select the
available video sources. (p. 32)
Press to change channels.
Press to switch to your
favourites channels. (p. 21)
Displays the main on-screen
menu. (p. 18)
Returns to the previous menu.
Press to exit the menu. (p. 18)
Displays the Digital subtitle.
(p. 30)
Use these buttons in the Channel
list menus etc.
Alternately select Teletext,
Double, or Mix. (p. 35)
0
8
4
Colour buttons Fastext
Teletext mode selection
(LIST / FLOF)
Teletext store
Teletext
size selection
topic selection
Teletext Functions (p. 35)
Teletext
5
:
1
2
reveal
Exit from the Teletext display
Teletext
sub page
Teletext
next page
Displays the Electronic
Programme Guide (EPG).
(p. 20)
Teletext previous page
3
Teletext
Teletext
Teletext
index
hold
cancel
6
9
7
Page 16
16
English
Basic Operation
Basic Operation
Placing Your Television in Standby Mode
Your set can be placed in standby mode in order to reduce the power consumption. The standby mode can be useful when
you wish to interrupt viewing temporarily (during a meal, for example).
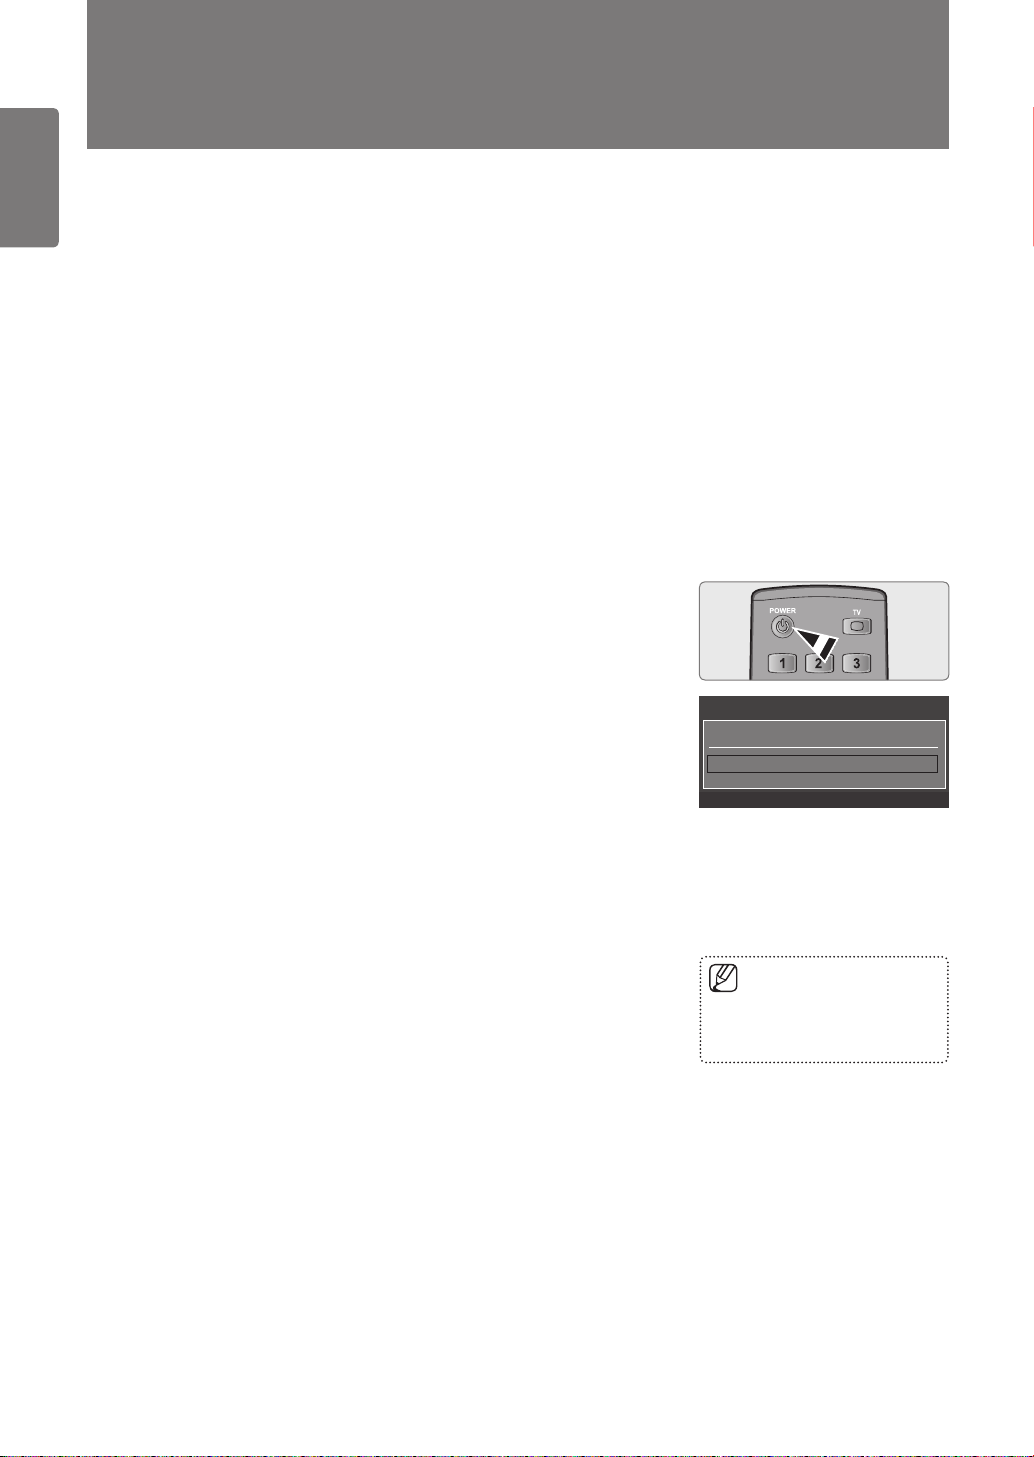
Press the POWERP button on the remote control.
The screen is turned off and a red standby indicator appears on your set.
■
1
To switch your set back on, simply press the POWERP button again.
Do not leave your set in standby mode for long periods of time (when you are
■
2
Plug & Play Feature
When the TV is initially powered on, basic settings proceed automatically and
subsequently.
1
2
3
4
5
6
7
8
9
away on holiday, for example). It is best to unplug the set from the mains and
aerial.
Press the POWER button.
You can also use the POWERP button on the TV.
■
The message You can set the menu language. is displayed.
■
Select the appropriate language by pressing the ▲ or ▼ button.
Press the ENTERE button to confirm your choice.
Press the ◄ or ► button to select Store Demo or Home Use, then the
ENTERE button.
We recommend setting the TV to Home Use mode for the best picture in your
■
home environment.
Store Demo mode is only intended for use in retail environments.
■
If the unit is accidentally set to Store Demo mode and you want to return to
■
Home Use (Standard): Press the volume button on the TV. When the volume
OSD is displayed, press and hold the MENU button on the TV for 5 seconds.
Press the ENTERE button. Select the appropriate country by pressing the ▲ or
▼ button. Press the ENTERE button to confirm your choice.
Press the ▲ or ▼ button to select Air or Cable, then press the ENTERE button.
Air: Air antenna signal.
■
Cable: Cable antenna signal.
■
Press the ▲ or ▼ button to select the channel source to memorize.
Press the ENTERE button to select Start.
When setting the antenna source to Cable, a step appears allowing you to set
■
a value for the digital channel search. For more information, refer to Channel
→ Auto Store.
Digital & Analogue: Digital and Analogue channels.
■
Digital: Digital channels.
■
Analogue: Analogue channels.
■
The channel search will start and end automatically.
■
After all the available channels are stored, the message Set the Clock Mode.
■
is displayed.
Press the ENTERE button. Press the ▲ or ▼ button to select Auto, then press
the ENTERE button.
If you select Manual, Set current date and time is displayed.
■
If you have received a digital signal, the time will be set automatically.
■
If not, select Manual to set the clock. (Refer to page 29)
The connection method to provide the best quality HD is offered.
After confirming the method, press the ENTERE button.
The message Enjoy your viewing. is displayed. When you have finished, press
the ENTERE button.
Plug & Play
You can set the menu language.
Menu Language : English ►
E
Press the ENTERE button
■
at any time to interrupt the
memorization process.
Enter
Page 17
17
English
Basic Operation
If you want to reset this feature...
Press the MENU button.
1
Press the ▲ or ▼ button to select Setup, then press the ENTERE button.
Press the ENTERE button again to select Plug & Play.
2
Enter your 4 digit PIN number.
The default PIN number of a new TV set is ‘0-0-0-0’.
■
3
If you want to change PIN number, use the Change PIN function.
■
Viewing the Display
The display identifies the current channel and the status of certain audio-video
settings.
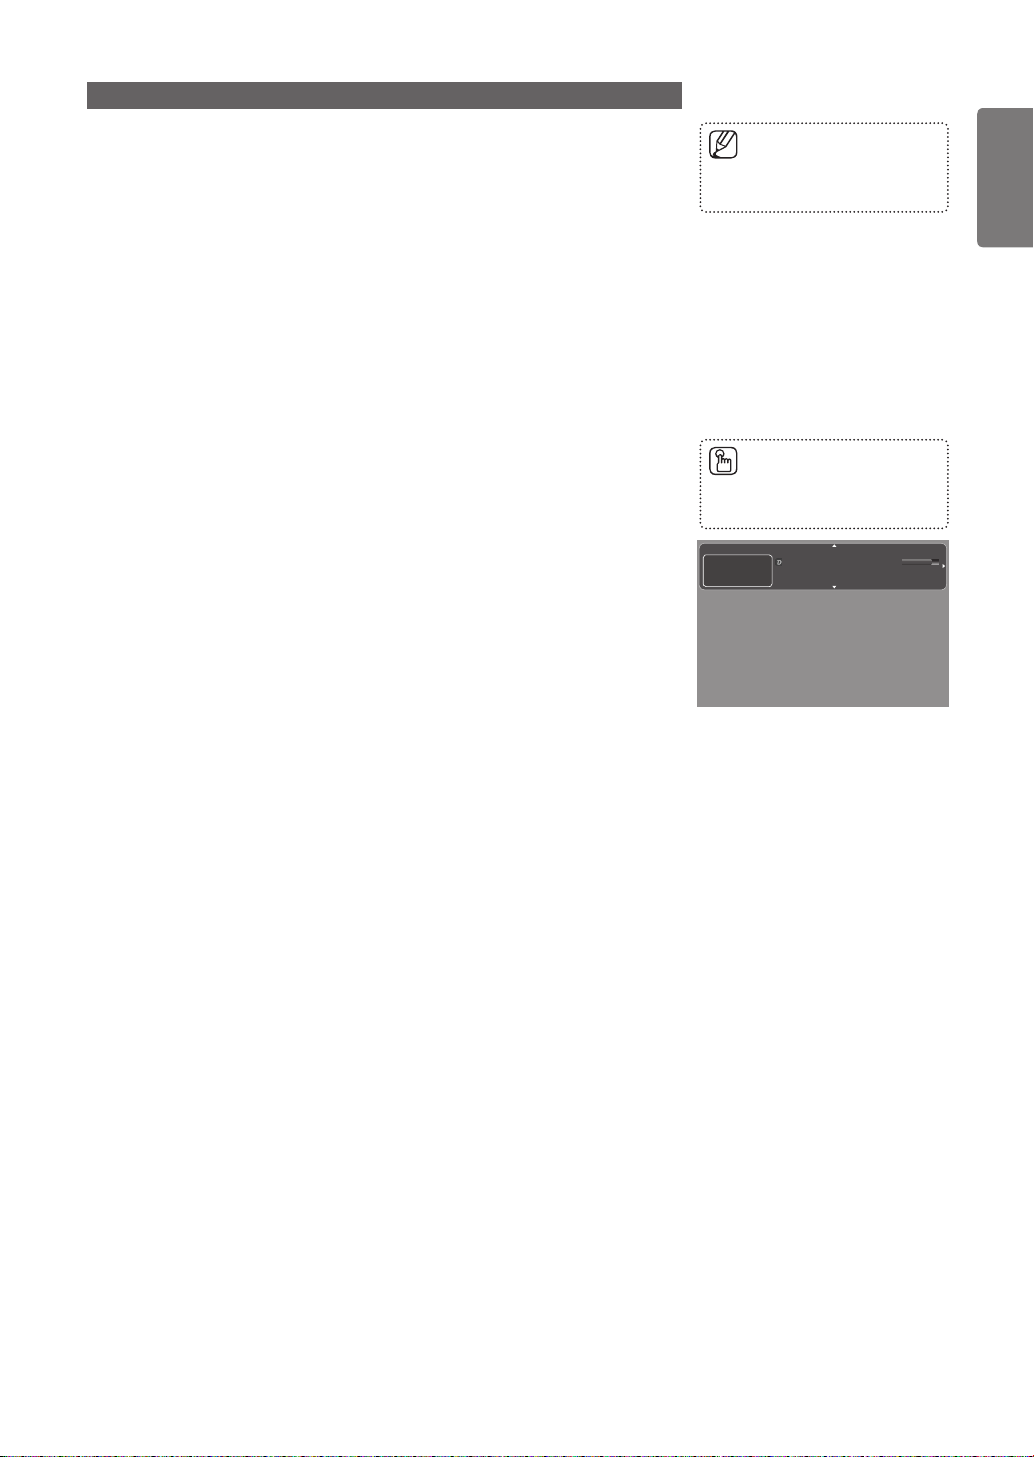
Press the INFO button on the remote control.
1
The TV will display the channel, the type of sound, and the status of certain picture
and sound settings.
Press the INFO button once more or wait approximately 10 seconds and the
■
display disappears automatically.
The Plug & Play feature is only
■
available in the TV mode.
Press the INFO button to viewing
■
the information.
abc1
DTV Air
15
18:11 Thu 6 Jan
Life On Venus Ave nue
Unclassif ied
No Detai ld Informa tion
18:00 ~ 6:00
E Watch
' Informat ion
Page 18
18
English
Using the Menus
Using the Menus
Viewing the Menus
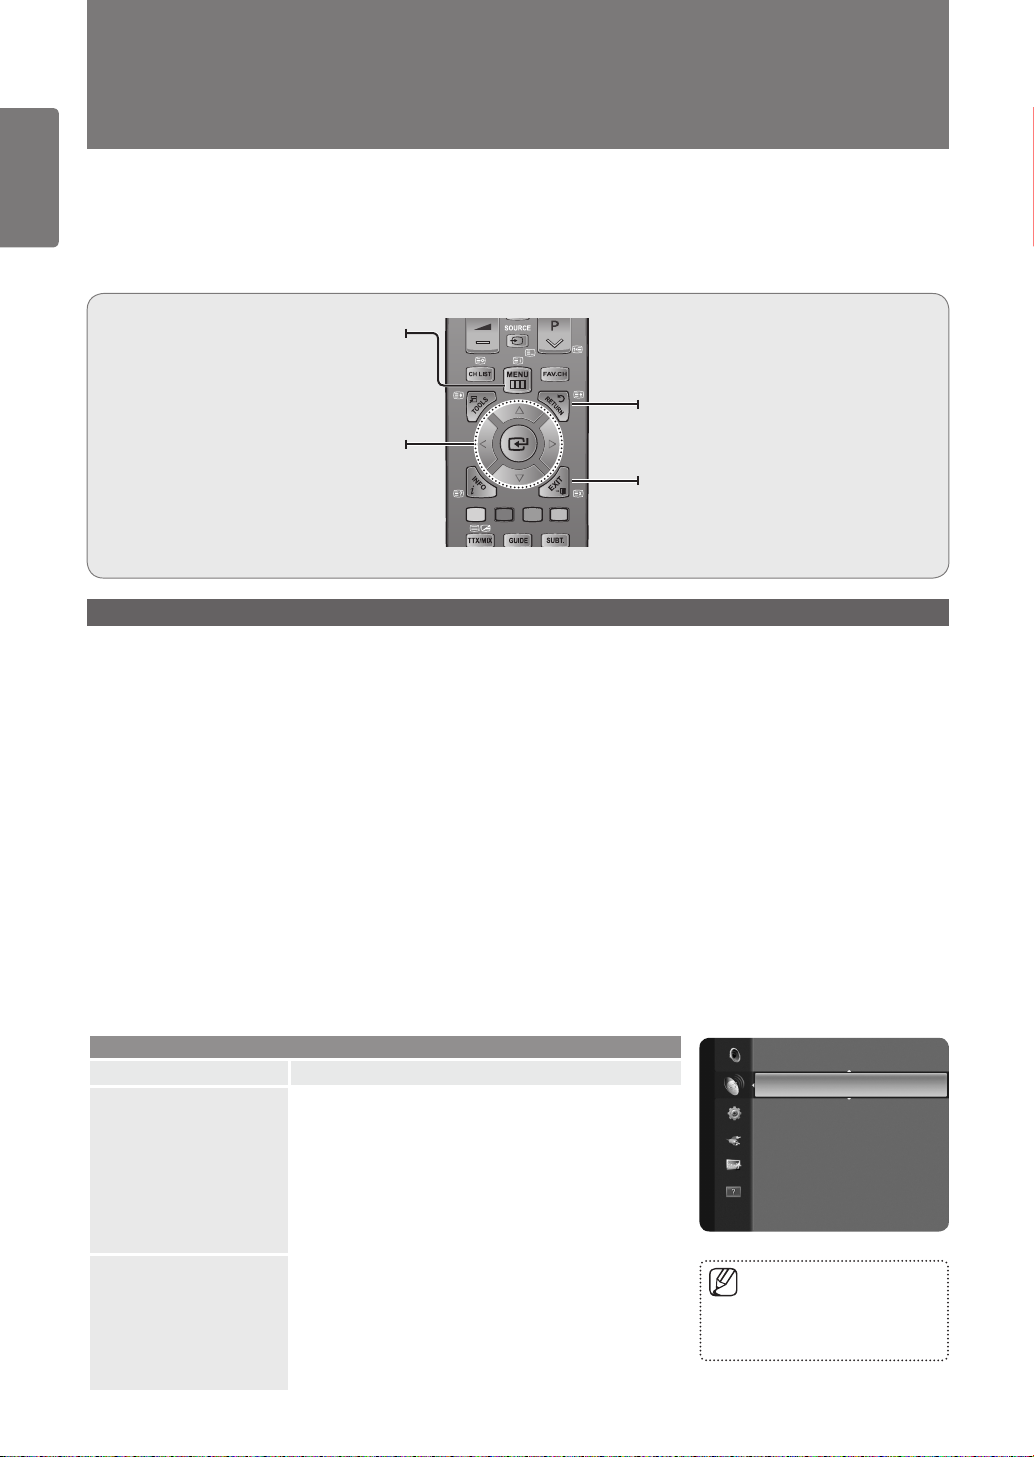
Menu provides one button access for controlling your TV. It enables you to perform a variety of tasks intuitively with a control
panel on the screen rather than a variety of remote control button presses.
Display the main on-screen menu.
ENTERE / Direction button
Move the cursor and select an item.
Select the currently selected item.
MENU button
Confirm the setting.
Operation the Menu
The access step may differ depending on the selected menu.
Press the MENU button.
The menu is displayed on the screen.
■
1
Press the ▲ or ▼ button to select one of the icons.
2
Press the ENTERE button to access the icon’s sub-menu.
Press the ▲ or ▼ button to move to items in the menu.
3
Press the ENTERE button to enter items in the menu.
Press the ▲/▼/◄/► button to change the selected items.
4
Press the RETURNR button to return to the previous menu.
Press the EXITe button to exit from the menu.
5
RETURN button
Return to the previous menu.
EXIT button
Exit the on-screen menu.
Channel Menu
Option Description
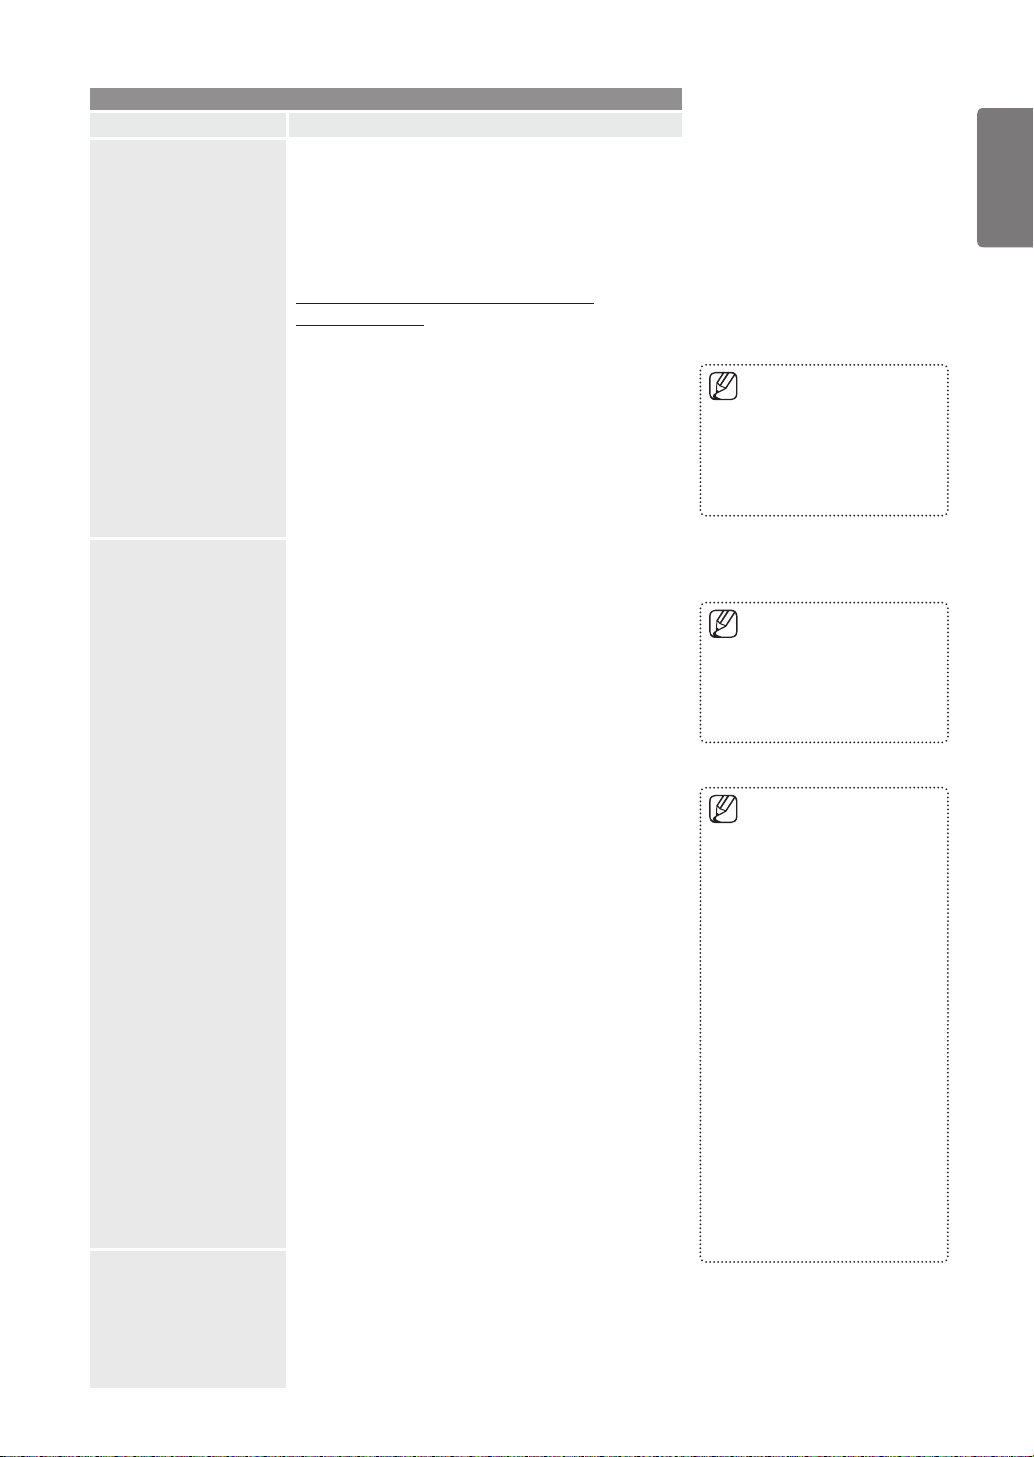
Country
Auto Store
The PIN number input screen appears.
Enter your 4 digit PIN number.
Analogue Channel
❑
You can change the country for analogue channels.
Digital Channel
❑
You can change the country for digital channels.
You can scan for the frequency ranges available to you
(and availability depends on your country).
Automatically allocated programme numbers may not
correspond to actual or desired programme numbers.
Scans for all channels with active broadcast stations and
stores them in the TV’s memory.
Channel
Channel
Country ►
Auto Store
Manual Store
Cable Search Option
Now & Next Guide
Full Guide
Default Guide : Full Guide
If a channel is locked using the
■
Child Lock function, the PIN
input window appears.
Page 19
19
English
Using the Menus
Channel
Option Description
Auto Store Air / Cable
Manual Store
❑
Antenna source to memorize.
Digital & Analogue: Digital and Analogue
■
channels.
Digital: Digital channels.
■
Analogue: Analogue channels.
■
When selecting Cable → Digital & Analogue
or Cable → Digital:
Provide a value to scan for cable channels.
Search Mode → Full / Network /Quick
■
Quick
■
Network ID: Displays the network
identification code.
Frequency: Displays the frequency
for the channel.
Modulation: Displays available
modulation values.
Symbol Rate: Displays available
symbol rates.
Scans for a channel manually and stores it in the TV’s
memory.
Digital Channel
❑
Manual store for digital channels.
Channel: Set the Channel number using the ▲, ▼ or
■
number (0~9) buttons.
Frequency: Set the frequency using the number buttons.
■
Bandwidth: Set the bandwidth using the ▲, ▼ or
■
number (0~9) buttons.
When it has finished, channels are updated in the channel
list.
If you want to stop Auto Store,
■
press the ENTERE button.
The Stop Auto Store? message
will be displayed. Select Yes by
pressing the ◄ or ► button, then
press the ENTERE button.
If a channel is locked using the
■
Child Lock function, the PIN
input window appears.
Digital Channel is only available
■
in DTV mode.
Cable Search Option
(depending on the
country)
Analogue Channel
❑
Manual store for analogue channel.
Programme (Programme number to be assigned to a
■
channel): Sets the programme number using the ▲, ▼
or number (0~9) buttons.
Colour System → Auto / PAL / SECAM / NTSC4.43:
■
Sets the colour system value using the ▲ or ▼ button.
Sound System → BG / DK / I / L: Sets the sound
■
system value using the ▲ or ▼ button.
Channel (When you know the number of the channel
■
to be stored): Press the ▲ or ▼ button to select C (Air
channel) or S (Cable channel). Press the ► button, then
press the ▲, ▼ or number (0~9) buttons to select the
required number.
You can also select the channel number directly by
pressing the number (0~9) buttons.
If there is abnormal sound or no sound, reselect
the sound standard required.
Search (When you do not know the channel numbers):
■
Press the ▲ or ▼ button to start the search. The tuner
scans the frequency range until the first channel or the
channel that you selected is received on the screen.
Store (When you store the channel and associated
■
programme number): Set to OK by pressing the
ENTERE button.
Using this function, you can manually add the channel
range to be scanned by Full Search mode of the Auto Store
function.
Freq.Start (Frequency Start): Set the start frequency
■
Freq.Stop (Frequency Stop): Set the stop frequency
■
Modulation: Displays available modulation values.
■
Symbol Rate: Displays available symbol rates.
■
Analogue Channel is only
■
available in analogue TV mode.
Channel mode
■
P (Programme mode):
When completing tuning, the
broadcasting stations in your
area have been assigned
to position numbers from
P00 to P99. You can select
a channel by entering the
position number in this
mode.
C (Air channel mode):
You can select a channel
by entering the assigned
number to each air
broadcasting station in this
mode.
S (Cable channel mode):
You can select a channel
by entering the assigned
number for each cable
channel in this mode.
Page 20
20
3
6
9
P
English
Using the Menus
Option Description
Now & Next Guide /
Full Guide /
Default Guide
Full Guide
Channel
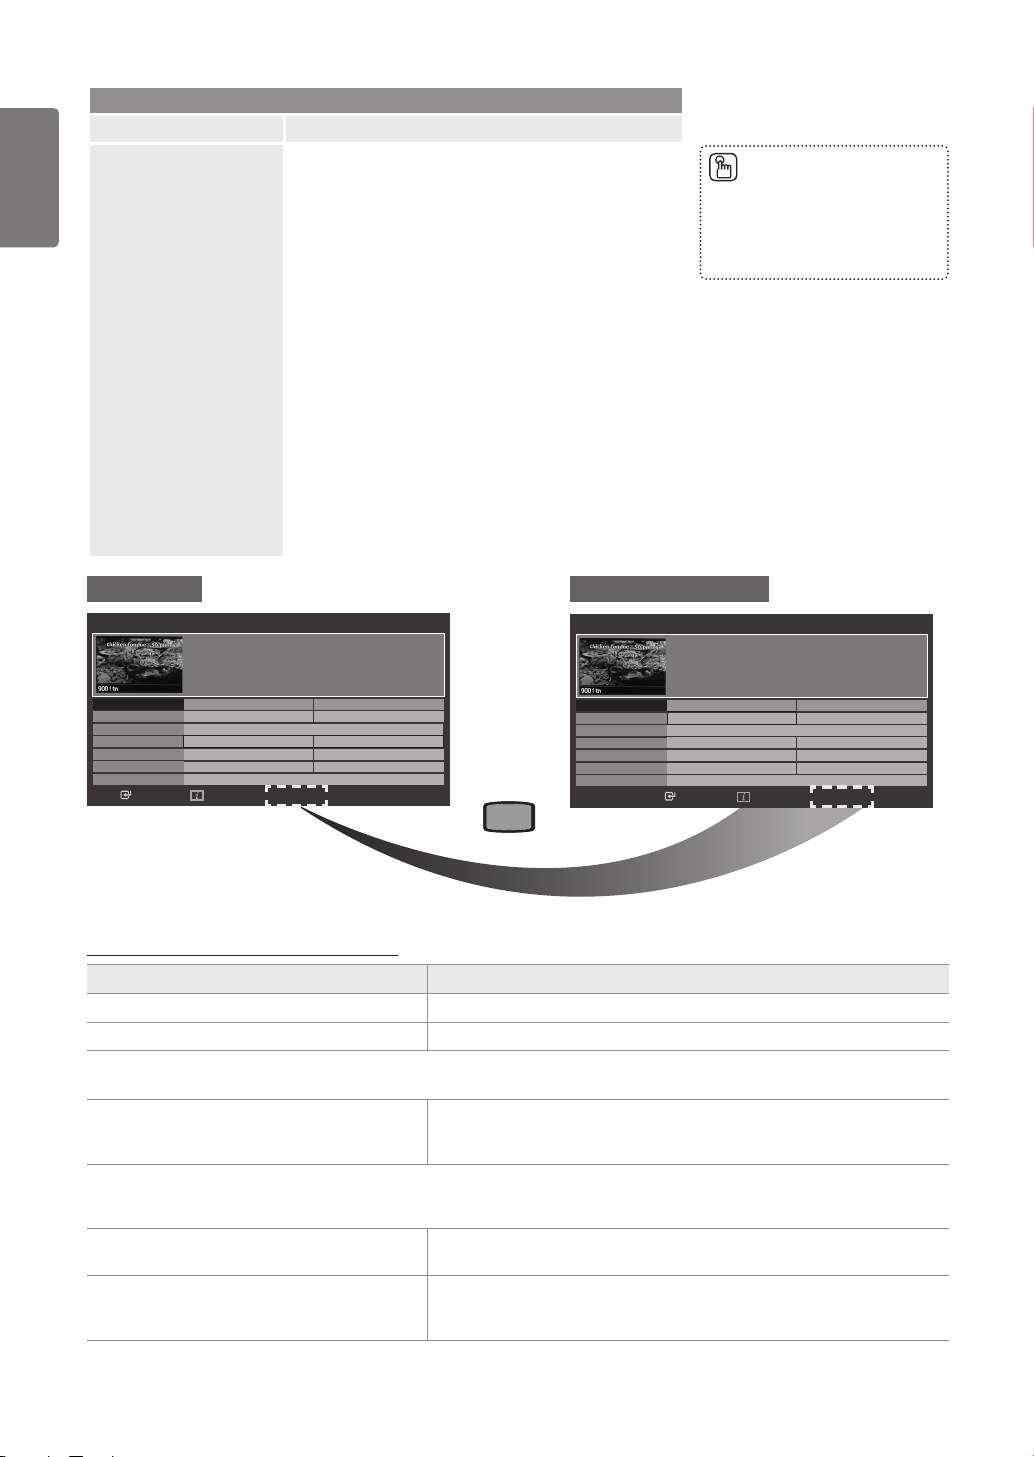
The EPG (Electronic Programme Guide) information is
provided by the broadcasters. Programme entries may
appear blank or out of date as a result of the information
broadcast on a given channel. The display will dynamically
update as soon as new information becomes available.
Now & Next Guide
❑
For the six channels indicated in the left-hand column,
displays the Current programme and the Next programme
information.
Full Guide
❑
Displays the programme information as time ordered One
hour segments. Two hours of programme information is
displayed which may be scrolled forwards or backwards in
time.
Default Guide →
❑
Now & Next Guide / Full Guide
You can decide whether to display either the Now & Next
Guide or the Full Guide when the GUIDE button on the
remote control is pressed.
Now & Next Guide
You can also display the guide
■
menu simply by pressing the
GUIDE button. (To configure
the Default Guide, refer to the
descriptions.)
Full Guide
Today 16:00 - 17:00 17:00 - 18:00
1 f tn
2 ITV Play
3 Kerrang!
4 Kiss
5 oneword
6 Smash Hits!
▼
Watch
DTV Cable 900 f tn 2:10 Tue 1 Jun
Freshmen On Campus
2:00 - 2:30
No Detailed Information
Freshmen O..
Mint Extra
Loaded
Fresh 40 with Dynamite MC
The Distillery
Smash Hits! Sunday
Street Hypn..
Information
■
Now / Next
■
No Information
No Information
Kisstory
No Information
+24 Hours
■
Exit
Now & Next Guide
1 f tn
2 ITV Play
3 Kerrang!
4 Kiss
5 oneword
6 Smash Hits!
▼
DTV Cable 900 f tn 2:10 Tue 1 Jun
Freshmen On Campus
2:00 - 2:30
No Detailed Information
Freshmen O..
Mint Extra
Loaded
Fresh 40 with Dynamite MC
The Distillery
Smash Hits! Sunday
Watch
Now Next
Street Hypn..
No Information
No Information
Kisstory
No Information
Information
■
Full Guide
■
Exit
(Red)
Using the Now & Next Guide / Full Guide
To... Then...
Watch a programme in the EPG list Select a programme by pressing the ▲, ▼, ◄, ► button.
Exit the guide Press the Blue button
If the next programme is selected, it is scheduled with the clock icon displayed. If the ENTERE button is pressed again, press the
◄, ► button to select Cancel Schedules, the scheduling is cancelled with the clock icon gone.
View programme information
Please click on INFO button for the detailed information. Channel Number, Running Time, Status Bar, Parental Level, Video Quality
Information (HD / SD), Sound Modes, Subtitle or Teletext, languages of Subtitle or Teletext and brief summary of the highlighted
programme are included on the detailed information. “...” will be appeared if the summary is long.
Toggle between the Now & Next Guide and Full
Guide
In Full Guide
Scrolls backwards quickly (24 hours).
Scrolls forwards quickly (24 hours).
Select a programme of your choice by pressing the ▲, ▼, ◄, ► button.
Then press the INFO button when the programme of your choice is highlighted.
The programme title is on the upper part of the screen centre.
Press the Red button repeatedly.
Press the Green button repeatedly.
Press the Yellow button repeatedly.
Page 21
21
English
Using the Menus
Option Description
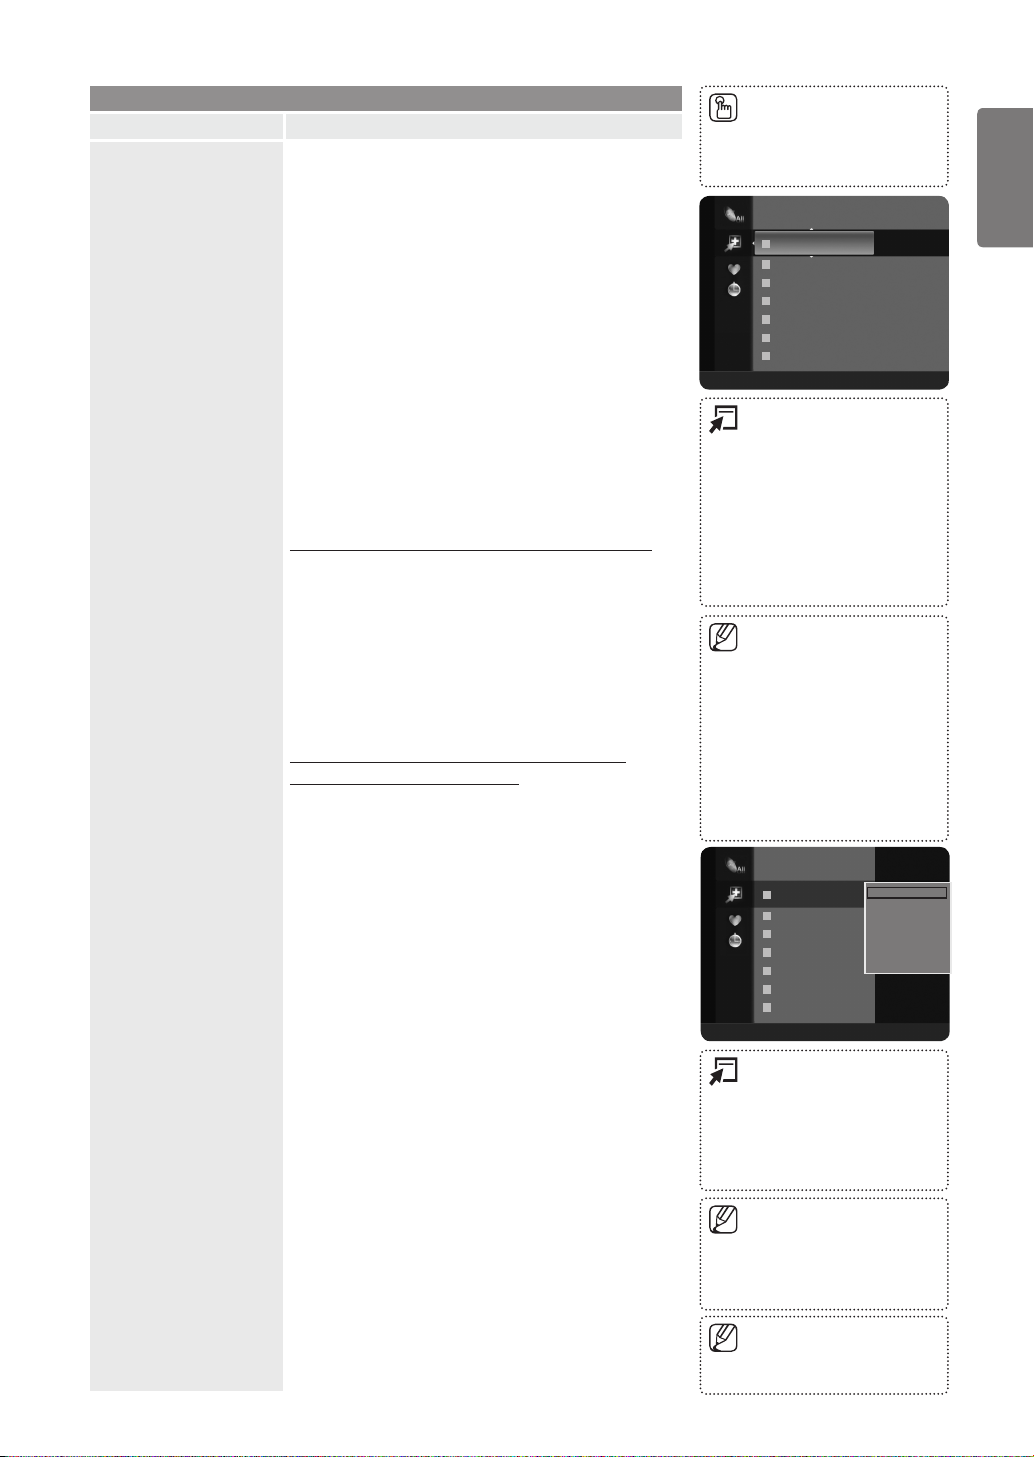
Channel List
Channel
Using this menu, you can add / delete or set favourites
channels and use the programme guide for digital
broadcasts.
All Channels
❑
Added Channels
Shows all currently available channels.
Added Channels
❑
Shows all added channels.
Favourites
❑
Shows all favourite channels.
To select the Favourites channels you have set up, press the
FAV.CH button on the remote control.
Programmed
❑
Shows all current reserved programmes.
Select a channel in the All Channels, Added Channels
or Favourites screen by pressing the ▲ / ▼ buttons, and
pressing the ENTERE button. Then you can watch the
selected channel.
Using the Colour buttons with the Channel List
Red (Channel Type): Toggle between your TV, Radio,
■
Data / Other and All.
Green (Zoom): Enlarges or shrinks a channel number.
■
Yellow (Select): Selects multiple channel lists.
■
You can perform the add/delete or add to favourites/
delete from favourites function for multiple channels at
the same time. Select the required channels and press
the Yellow button to set all the selected channels at
the same time. The c mark appears to the left of the
selected channels.
Channel List Option Menu (in All Channels /
Added Channels / Favourites)
Press the TOOLS button to use the option menu.
■
Option menu items may differ depending on the channel
■
status.
Add / Delete
❑
You can delete or add a channel to display the channels you
want.
All deleted channels will be shown on All Channels
■
menu.
You can also delete a channel to the Added Channels or
■
Favourites menu in the same manner.
Add to Favourite / Delete from Favourite
❑
You can set channels you watch frequently as favourites.
The “*” symbol will be displayed and the channel will
■
be set as a favourite.
All favourite channels will be shown on Favourites
■
menu.
Timer Viewing
❑
If you reserve a programme you want to watch, the channel
is automatically switched to the reserved channel in the
Channel List; even when you are watching another channel.
To reserve a programme, set the current time first.
(Refer to page 29)
You can set the channel, day, month, year, hour and
■
minute directly by pressing the number buttons on the
remote control.
Reserving a programme will be shown in the
■
Programmed menu.
Digital Programme Guide and Viewing Reservation:
■
When a digital channel is selected, and you press
the ► button, the Programme Guide for the channel
appears. You can reserve a programme according to the
procedures described above.
Added Channels
You can select these options by
■
simply pressing the CH LIST
button on the remote control.
824 UKTV Gold
825 UKTV style
A
1 C --
A
2 C --
A
3 ♥ C --
A
4 C --
A
5 C --
A
6 C --
A
7 C --
All
■
Channel Type ■ Zoom ■ Select T Tools
TOOLS (Tools): Displays
■
the Delete (or Add), Add to
Favourite (or Delete from
Favourite), Lock (or Unlock),
Timer Viewing, Edit Channel
Name, Edit Channel Number,
Sort, Select All, Deselect All or
Auto Store menu. (The Options
menus may differ depending on
the situation.)
Channel Status Display Icons
■
A: An Analogue channel.
c: A channel selected by
pressing the Yellow button.
*: A channel set as a
Favourite.
(: A programme currently
being broadcast.
\: A locked channel.
): A reserved programme
824 UKTV Gold
825 UKTV style
A
1 C --
A
2 C --
A
3 ♥ C --
A
4 C --
A
5 C --
A
6 C --
A
7 C --
All
■
Channel Type ■ Zoom ■ Select T Tools
Press the TOOLS button to
■
Delete
Add to Favourite
Timer Viewing
Edit Channel Name
Sort
Lock
display the Tools menu. You can
also set the add to (or delete from)
Favourite by selecting Tools →
Add to Favourite (or Delete from
Favourite).
A gray-coloured channel indicates
■
the channel has been deleted.
The Add menu only appears for
■
deleted channels.
Only memorized channels can
■
be reserved.
▼
Page 22
22
English
Getting Started
Channel
Option Description
Channel List Edit Channel Name (analogue channels only)
❑
Channels can labelled so that their call letters appear
whenever the channel is selected.
Edit Channel Number (digital channels only)
❑
You can also edit the channel number by pressing the
number buttons on the remote control.
Sort (analogue channels only)
❑
This operation allows you to change the programme
numbers of the stored channels. This operation may be
necessary after using the auto store.
Lock / Unlock
❑
You can lock a channel so that the channel cannot be
selected and viewed.
This function is available only when the Child Lock is set
■
to On. (Refer to page 30.)
The PIN number input screen appears. Enter your 4 digit
■
PIN number.
The default PIN number of a new TV set is “0-0-0-0”. You
■
can change the PIN, by selecting Change PIN from the
menu.
The “\” symbol will be displayed and the channel will be
■
locked.
Select All / Deselect All
❑
Select All: You can select all the channels in the
■
channel list.
Deselect All: You can deselect all the selected
■
channels.
Auto Store
❑
For detailed procedures on setting up options, refer to
pages 18~19.
The names of digital
■
broadcasting channels are
automatically assigned and
cannot be renamed.
You can only select Deselect
■
All when there is a selected
channel.
Channel Mode
Fine Tune
Channel List Option Menu (in Programmed))
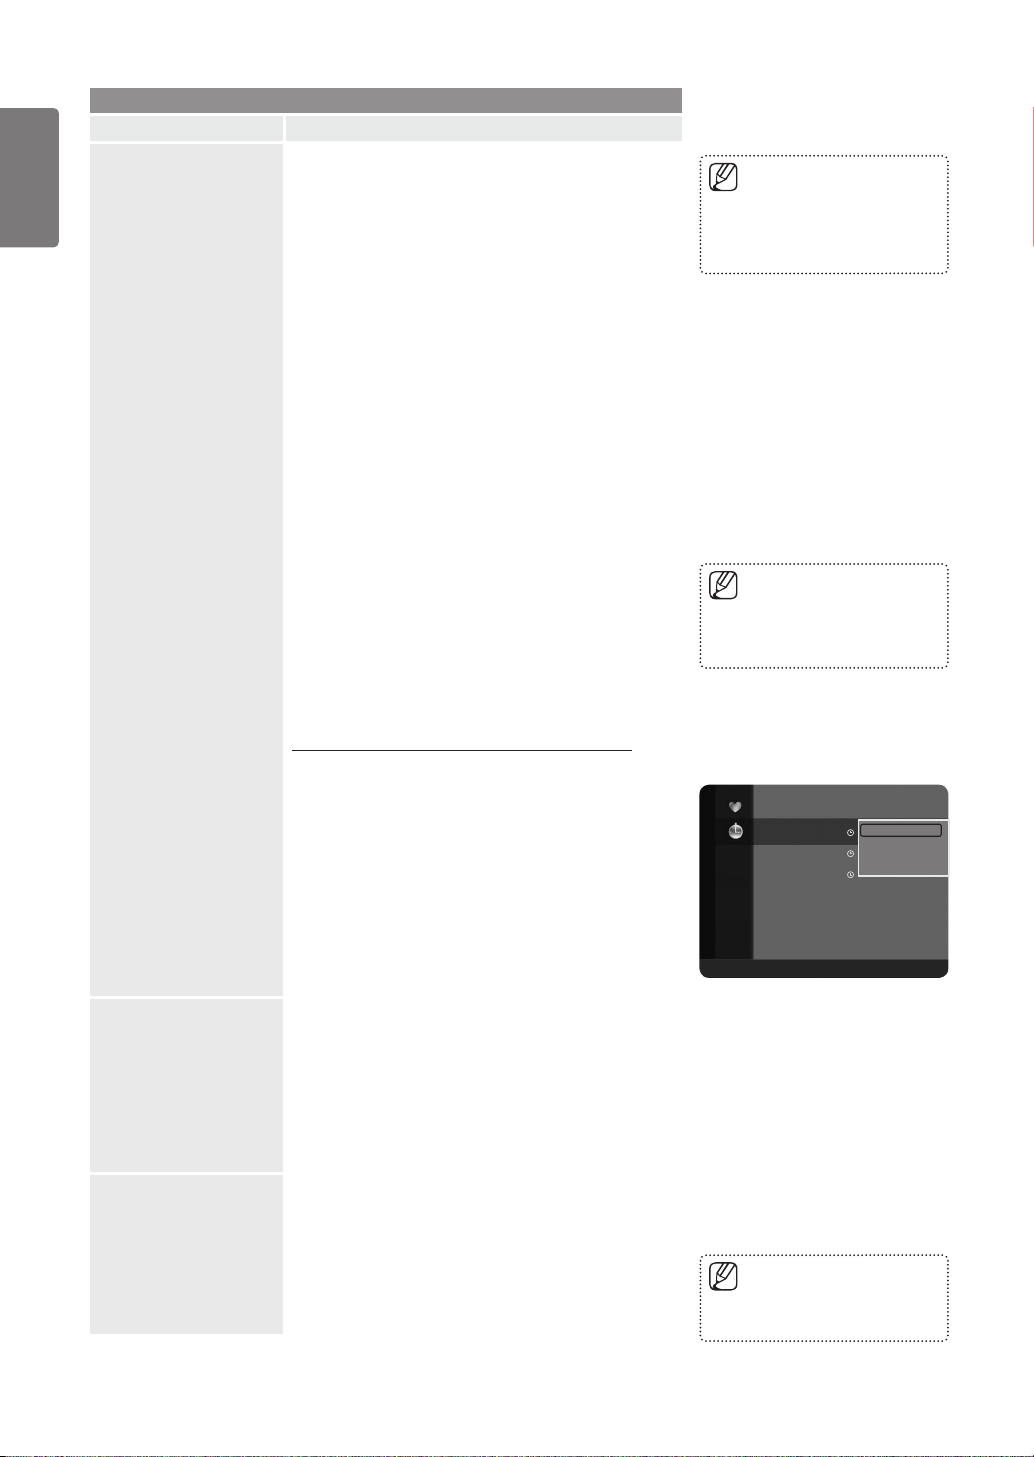
You can view, modify or delete a reservation.
Press the TOOLS button to use the option menu.
Change Info
❑
Select to change a viewing reservation.
Cancel Schedules
❑
Select to cancel a viewing reservation.
Information
❑
Select to view a viewing reservation.
(You can also change the reservation information.)
Select All
❑
Select all reserved programmes.
When press the P >/< button, Channels will be switched
within the selected channel list.
Added Ch.
❑
Channels will be switched within the memorized channel
list.
Favourite Ch.
❑
Channels will be switched within the favourite channel list.
If the reception is clear, you do not have to fine tune the
channel, as this is done automatically during the search and
store operation. If the signal is weak or distorted, you may
have to fine tune the channel manually.
Fine tuned channels that have been saved are marked
■
with an asterisk “*” on the right-hand side of the channel
number in the channel banner.
To reset the fine-tuning, select Reset by pressing the
■
▲ or ▼ button and then press the ENTERE button.
Programmed
All ■ Zoom ■ Select T Tools E Information
1 / 1 / 2009
13:59 5 TV1
18:59 2 TV3
20:59 2 TV3
Only Analogue TV channels can
■
be fine tuned.
Change Info
Quincy, M.E
Cancel Schedules
The Equalizer
Information
Select All
McMillan & Wife
Page 23
Picture Menu
Option Description
Mode
Backlight /
Contrast /
Brightness /
Sharpness /
Colour /
Tint(G/R)
Advanced Settings
Selects the type of picture settings that best correspond to
your viewing preferences or requirements. Presets a higher
brightness, contrast, and sharpness to the picture.
Dynamic
■
Recommended for use in bright room conditions.
Standard
■
Recommended for use in a normal viewing condition.
Movie
■
Corresponding to the conditions used in movie,
recommended for use in darker viewing conditions.
Your television has several setting options that allow you to
control the picture quality.
Backlight
■
Adjusts the brightness of LCD back light.
Contrast
■
Increases or decreases the brightness in white areas of the
picture. Too little contrast and the picture may seem dark;
too much contrast and the picture will lose details in white
images.
Brightness
■
Increases or decreases the overall brightness of the
picture, but best used to adjust the black level of the image.
Too little brightness and shadow detail will be lost; too much
brightness and blacks will be gray and washed out.
Sharpness
■
Increases or decreases the apparent detail in the picture.
Too little sharpness and the image might look soft. Too
much sharpness can add false edges to objects or can
make noise more noticeable.
Colour
■
Increases or decreases colour saturation levels in the
picture. Too little colour and the image will be black and
white (undersaturated); too much colour and the image will
look oversaturated and cartoonish.
Tint(G/R)
■
Changes the picture hue from reddish to a greenish
appearance.
Samsung’s new TVs allow you to make even more precise
picture settings than previous models.
Black Tone → Off / Dark / Darker / Darkest
■
Increases the picture’s shadow detail by lightening the
black level (ie changing the gamma) at low levels. This is
most commonly used for watching movies with dark scenes
to keep the picture from appearing washed out in bright
rooms.
Dynamic Contrast → Off / Low / Medium / High
■
Increases or decreases the difference between the
brightest and darkest portions of the image with changing
scenes. Shadows are more visible with dark scenes, while
contrast is enhanced with bright scenes.
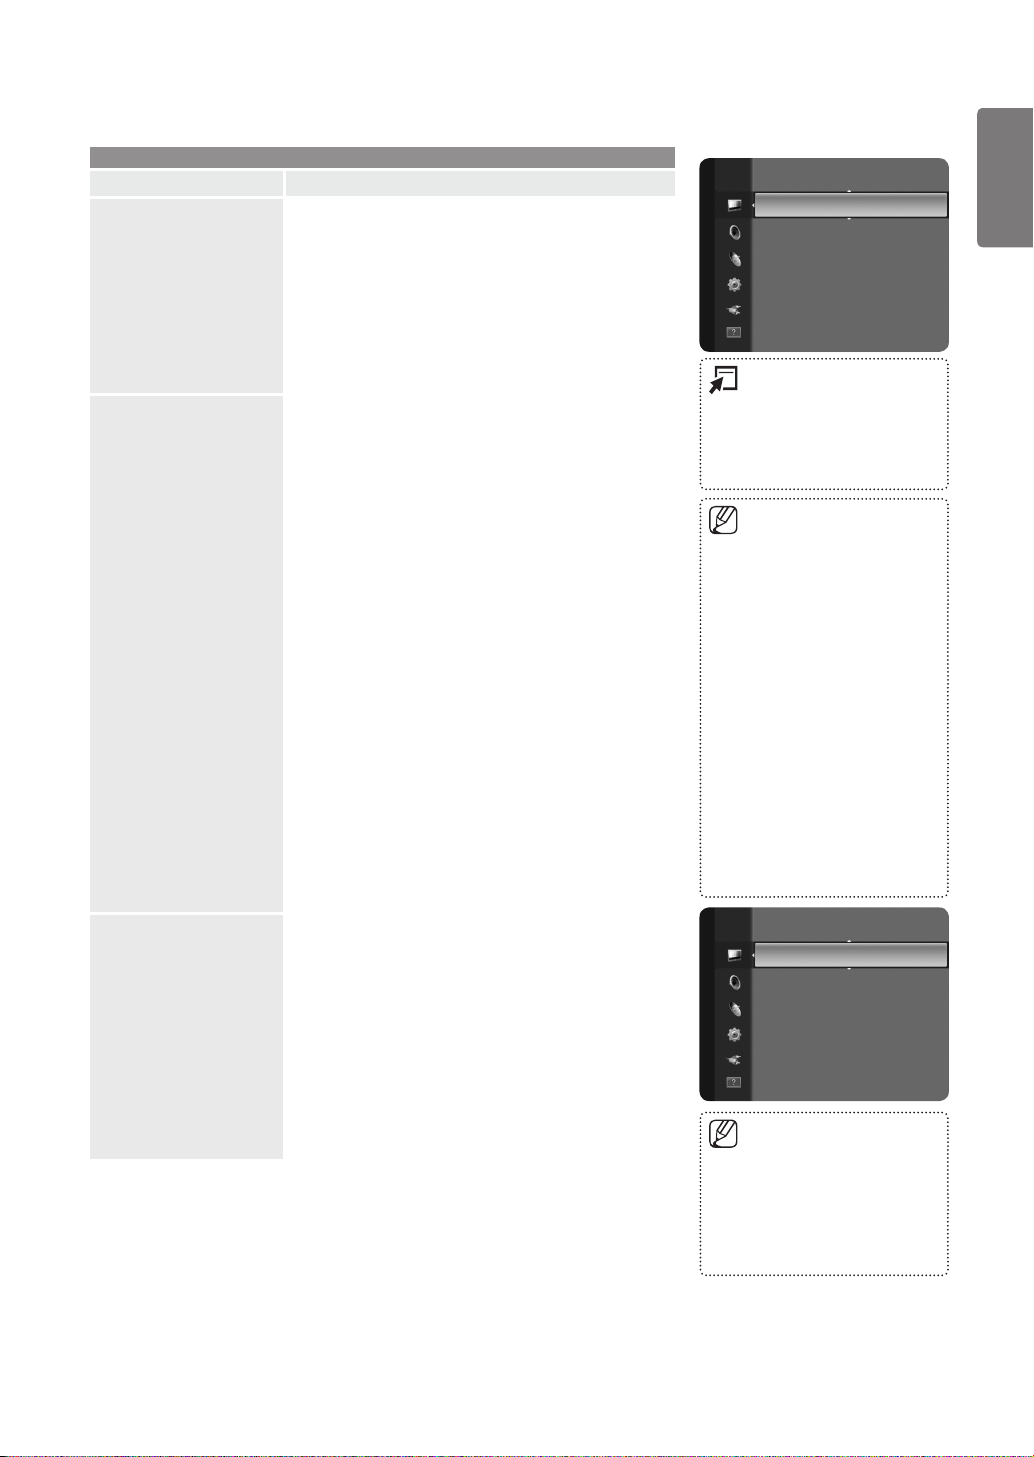
Picture
Picture
Mode : Standard ►
Backlight : 7
Contrast : 95
Brightness : 45
Sharpness : 50
Colour : 50
Tint (G / R) : G50 / R50
Press the TOOLS button to
■
display the Tools menu. You
can also set the picture mode
by selecting Tools → Picture
Mode.
Only analogue TV, Ext., AV
■
modes of the PAL system,
you cannot use the Tint(G/R)
Function.
When you make changes to
■
Backlight, Contrast, Brightness,
Sharpness, Colour or Tint(G/
R), the OSD will be adjusted
accordingly.
In PC mode, you can only make
■
changes to Backlight, Contrast
and Brightness.
Settings can be adjusted and
■
stored for each external device
you have connected to an input
of the TV.
The energy consumed during use
■
can be significantly reduced if the
brightness level of the picture is
lowered, which will reduce the
overall running cost.
Colour : 50
Tint (G / R) : G50 / R50
Picture
Advanced Settings ►
Picture Options
Picture Reset
Advanced Settings is available in
■
Standard or Movie mode.
In PC mode, you can only
■
make changes to Gamma and
White Balance from among the
Advanced Settings items.
23
English
Using the Menus
Page 24
24
English
Using the Menus
Option Description
Advanced Settings
Picture Options
Picture
Gamma
■
Changes the rate at which images ramp or fade from light
to dark. Recommended for advanced users only.
Colour Space
■
Increases or decreases the visible colour range for red,
green and blue. Recommended for advanced users only.
Auto: The TV will choose the colour range that
is closest to the range used during TV and movie
production.
Native: Displays the most enhanced, vibrant
colours possible.
White Balance
■
You can adjust the colour temperature for more natural
picture colours.
R, G, B-Offset: Fine tunes the white balance, or
colour ‘temperature’ in dark areas by changing the
individual values of R, G, B. Recommended for
advanced users only.
R, G, B-Gain: Fine tunes the white balance, or
colour ‘temperature’ in the light areas by changing
the individual values of R, G, B. Recommended for
advanced users only.
Reset: The previously adjusted white balance will
be reset to the factory defaults.
Flesh Tone
■
Adjusts the colour of flesh tones. Increasing the value
creates a more reddish picture. Decreasing the value
creates a more greenish picture.
Edge Enhancement
■
Increases or decreases the emphasis at object edges.
Colour Tone
■
Selects a preset white balance, or “colour temperature”
setting, to provide either a reddish or bluish hue, dependant
upon your personal preference.
Cool: Selects a white balance, or colour
“temperature” with a bluish hue. Skin tones may
have less warmth but whites will seem brighter.
Recommended when watching normal TV
broadcasting in a bright room.
Normal: Selects the white balance, or colour
“temperature” with a less bluish, more reddish hue.
Suitable for most viewing environments and programs.
Warm1, Warm2: Selects a redder, warmer hue
that more closely matches the setting on monitors
used in the production of TV and movie content.
Recommended when watching movie and dramatic
TV content. The lowest setting is best used for black &
white content.
Changing the adjustment value
■
will refresh the adjusted screen.
In PC mode, you can only make
■
changes to the Colour Tone and
Size from among the items in
Picture Options.
Warm1 or Warm2 is only
■
activated when the picture mode
is Movie.
Page 25
25
English
Using the Menus
Option Description
Picture Options
Picture Reset
Picture
Size
■
Changes the screen shape in terms of height and width.
Also known as Aspect Ratio.
Auto Wide: Enables the correct picture size to
match the original video signal.
16:9: Sets the picture aspect ratio to fill the screen.
Wide Zoom: Enlarges the middle part of the
picture.
Zoom: Magnifies the picture contents horizontally
and vertically.
4:3: Sets the picture aspect ratio to 4:3 with black
or gray side bars.
Screen Fit: Matches every pixel of the original
image to a pixel on the TV screen (aka 1:1 pixel
mapping) to show the entire image.
Wide Zoom: Press the ► button to select
●
Position, then press the ENTERE button.
Press the ▲ or ▼ button to move the picture up /
down. Then press the ENTERE button.
Zoom: Press the ► button to Select Position, then
●
press the ENTERE button. Press the
▲ or ▼ button to move the picture up and down.
Then press the ENTERE button. Press the ►
button to Select Size, then press the ENTERE
button. Press the ▲ or ▼ button to magnify or
reduce the picture size in the vertical direction.
Then press the ENTERE button.
After selecting Screen Fit in HDMI (1080i) or
●
Component (1080i) mode: Select Position by
pressing the ◄ or ►button. Use the ▲, ▼, ◄ or ►
button to move the picture.
Reset: Press the ◄ or ► button to select Reset,
then press the ENTERE button. You can initialize
the setting.
If you use the Screen Fit function with HDMI 720p
●
input, 1 line will be cut at the top, bottom, left and
right as in the Overscan function.
Screen Mode
■
When setting the picture size to Auto Wide in a 16:9 wide
TV, you can determine the picture size you want to see the
4:3 WSS (Wide Screen Service) image or nothing. Each
individual European country requires different picture size
so this function is intended for users to select it.
16:9: Sets the picture to 16:9 wide mode.
Wide Zoom: Magnify the size of the picture more
than 4:3.
Zoom: Magnify the size of the picture vertically on
screen.
4:3: Sets the picture to 4:3 normal mode.
Digital NR → Off / Low / Medium / High / Auto
■
Can reduce the grain effect or level of video snow seen in
images coming from poor quality sources.
HDMI Black Level → Normal / Low
■
Adjusts the black level in the picture according to the type
of signal being transmitted through HDMI.
Film Mode
■
Applies the appropriate video processing needed to
achieve the best picture quality for watching movies.
Off: Turn the Film Mode function off.
Auto: Improves the picture quality for fast motion
scenes.
Resets all picture settings to the default values.
Reset Picture Mode: Current picture values return to
■
default settings.
Press the TOOLS button to
■
display the Tools menu. You can
also set the size by selecting
Tools → Picture Size.
Depending on the input source,
■
the picture size options may vary.
The items available may differ
■
depending on the selected mode.
In PC Mode, only 16:9 and 4:3
■
mode can be adjusted.
Settings can be adjusted and
■
stored for each external device
you have connected to an input
of the TV.
Temporary image retention may
■
occur when viewing a static image
on the set for more than two
hours.
This function is available in Auto
■
Wide mode.
This function is not available in
■
PC, Component or HDMI mode.
This function is active only when
■
an external device is connected to
the TV via HDMI (RGB signals).
Film Mode is supported in TV,
■
AV, COMPONENT(480i / 1080i)
and HDMI(480i / 1080i).
Page 26
26
English
Using the Menus
Option Description
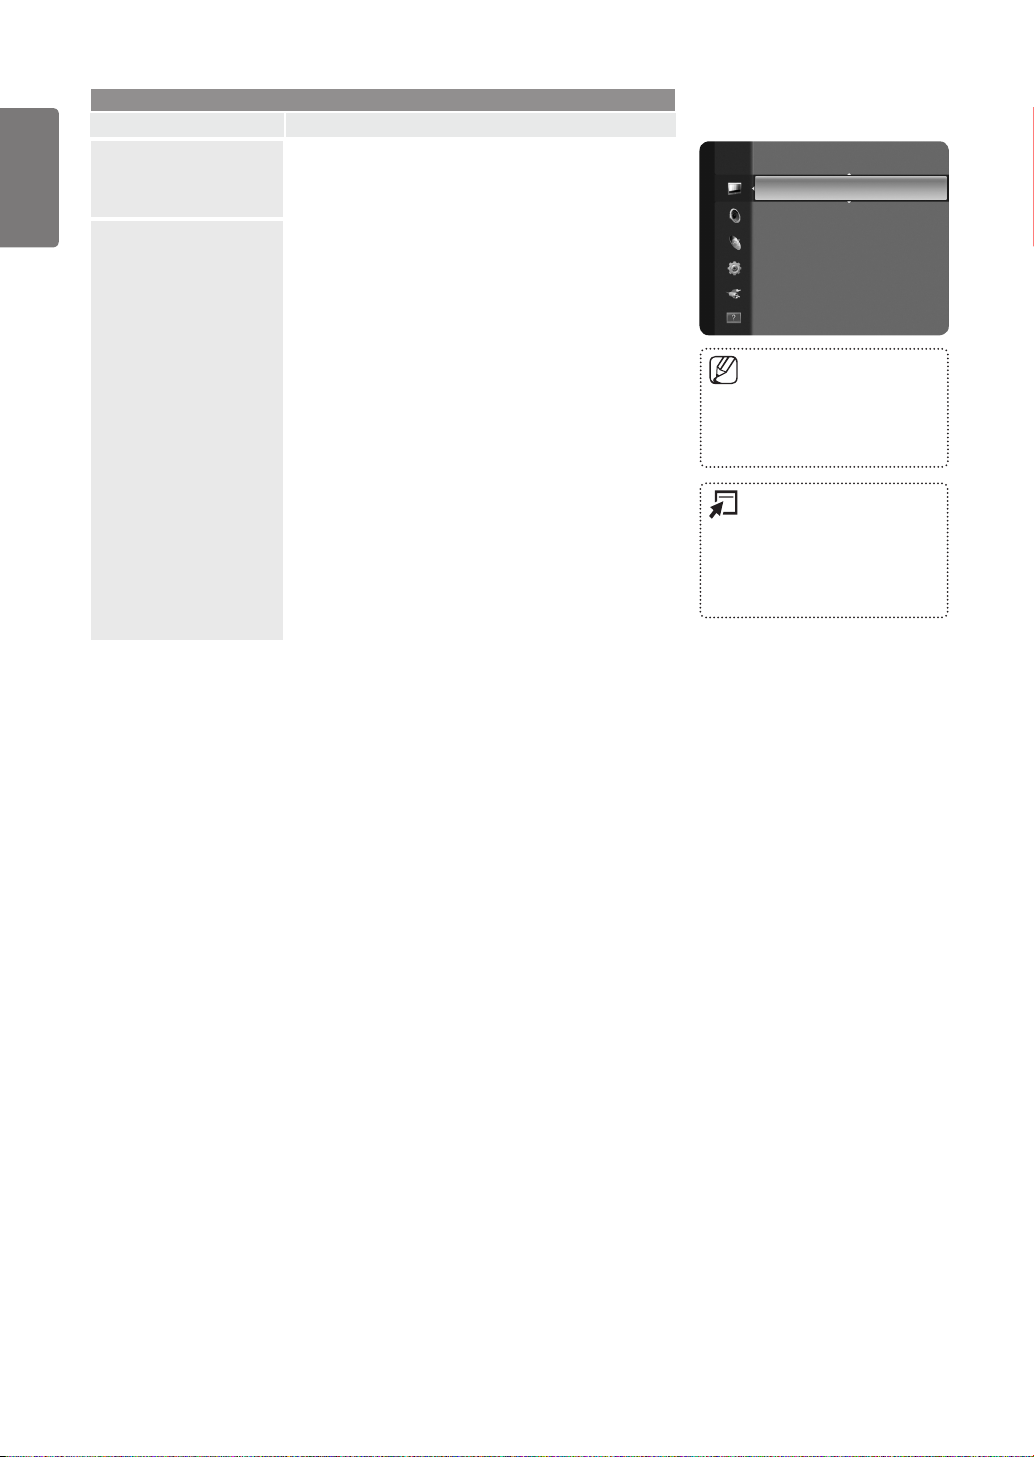
Auto Adjustment
Screen
Picture (In the PC mode)
Use the Auto Adjust function to have the TV set
automatically adjust the video signals it receives.
The function also automatically fine-tunes the settings and
adjusts the frequency values and positions.
Coarse / Fine
■
The purpose of picture quality adjustment is to remove or
reduce picture noise. If the noise is not removed by Finetuning alone, then adjust the frequency as best as possible
(Coarse) and Fine-tune again. After the noise has been
reduced, readjust the picture so that it is aligned on the
centre of screen.
PC Position
■
Adjust the PC’s screen positioning if it does not fit the TV
screen.
Press the ▲ or ▼ button to adjusting the Vertical-Position.
Press the ◄ or ► button to adjust the Horizontal-Position.
Image Reset
■
You can replace all image settings with the factory default
values.
Brightness : 45
Sharpness : 50
Picture
Auto Adjustment ►
Screen
Advanced Settings
Picture Options
Picture Reset
Preset: Press the SOURCE button
■
to select PC mode.
This function does not work in
■
DVI-HDMI mode.
Press the TOOLS button to
■
display the Tools menu. You can
also set the Auto Adjustment
by selecting Tools → Auto
Adjustment.
Page 27
27
English
Using the Menus
Sound Menu
Option Description
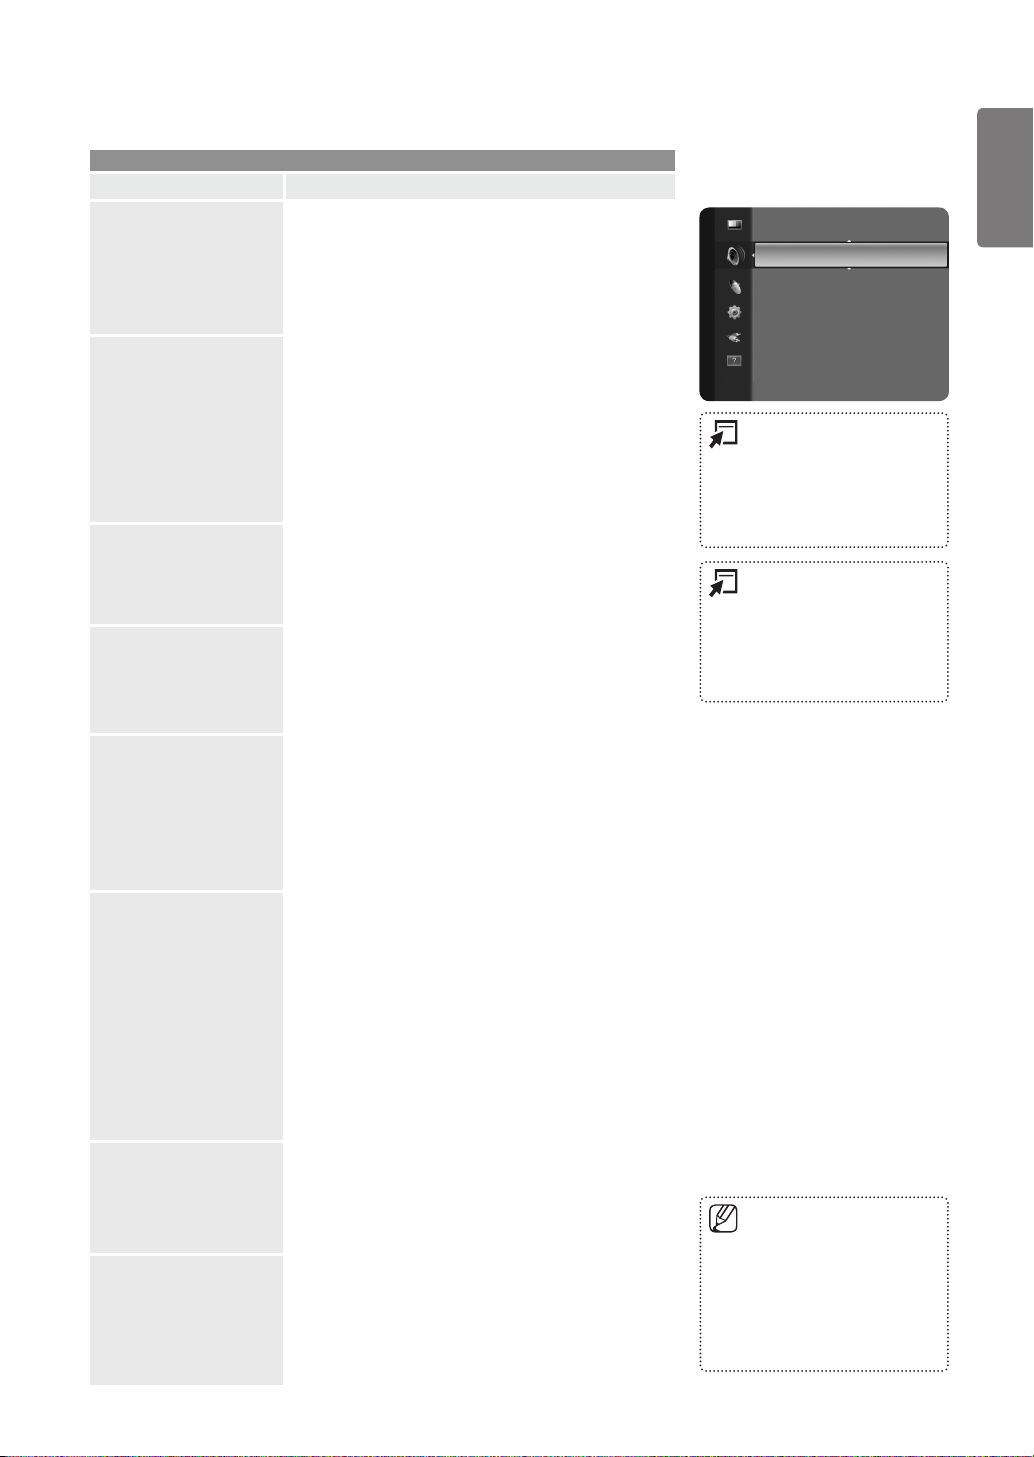
Mode
Equalizer
SRS TruSurround HD
Audio Language
(digital channels only)
Audio Format
(digital channels only)
Audio Description
(digital channels only)
Auto Volume
Speaker Select
You can select a sound mode to suit your personal
preferences.
Standard: Selects the normal sound mode.
■
Music: Emphasizes music over voices.
■
Movie: Provides the best sound for movies.
■
Clear Voice: Emphasizes voice over other sounds.
■
Custom: Recalls your customized sound settings.
■
The sound settings can be adjusted to suit your personal
preferences.
Mode: Selects the sound mode among the predefined
■
settings.
Balance L/R: Adjusts the balance between the right and
■
left speaker.
100Hz / 300Hz / 1KHz / 3KHz / 10KHz (Bandwidth
■
Adjustment): To adjust the level of different bandwidth
frequencies.
Reset: Resets the equalizer settings to the default values.
■
SRS TruSurround HD is a patented SRS technology that
solves the problem of playing 5.1 multichannel content
over two speakers. TruSurround delivers a compelling,
virtual surround sound experience through any two-speaker
playback system, including internal television speakers.
It is fully compatible with all multichannel formats.
You can change the default value for audio languages.
Displays the language information for the incoming stream.
While viewing a digital channel, this function can be
■
selected.
You can only select the language among the actual
■
languages being broadcast.
When sound is emitted from both the main speaker and
the audio receiver, a sound echo may occur due to the
decoding speed difference between the main speaker
and the audio receiver. In this case, use the TV Speaker
function.
While viewing a digital channel, this function can be
■
selected.
The Audio Format appears according to the broadcasting
■
signal.
This is an auxiliary audio function that provides an
additional audio track for visually challenged persons.
This function handles the Audio Stream for the AD (Audio
Description), when it is sent along with the Main audio from
the broadcaster. Users can turn the Audio Description On or
Off and control the volume.
Audio Description
■
Turn the audio description function on or off.
Volume
■
You can adjust the audio description volume.
While viewing a Digital channel, this function can be
■
selected.
Each broadcasting station has its own signal conditions,
and so it is not easy to adjust the volume every time the
channel is changed. This feature lets you automatically
adjust the volume of the desired channel by lowering the
sound output when the modulation signal is high or by
raising the sound output when the modulation signal is low.
When you watch TV with it connecting to a Home theatre,
turn the TV speakers off so you can listen to sound from the
Home theatre’s (external) speakers.
External Speaker: Used to listen to the sound of the
■
External (Home Theatre) Speakers.
TV Speaker: Used to listen to the sound of the TV
■
Speakers.
Sound
Volume is active when Audio Description is set
to On.
Sound
Mode : Custom ►
Equalizer
SRS TruSurround HD : Off
Audio Language : - - -
Audio Format : - - -
Audio Description
Auto Volume : Off
Press the TOOLS button to
■
display the Tools menu. You can
also configure the sound mode
by selecting Tools → Sound
Mode.
Press the TOOLS button to
■
display the Tools menu. You can
also set the SRS TruSurround
HD by selecting Tools → SRS
TS HD.
The volume buttons and MUTE
■
buttons do not operate when the
Speaker Select is set to External
Speaker.
If you select External Speaker
■
in the Speaker Select menu, the
sound settings will be limited.
Page 28
28
English
Using the Menus
Sound
Option Description
Sound Reset
You can restore the Sound settings to the factory defaults.
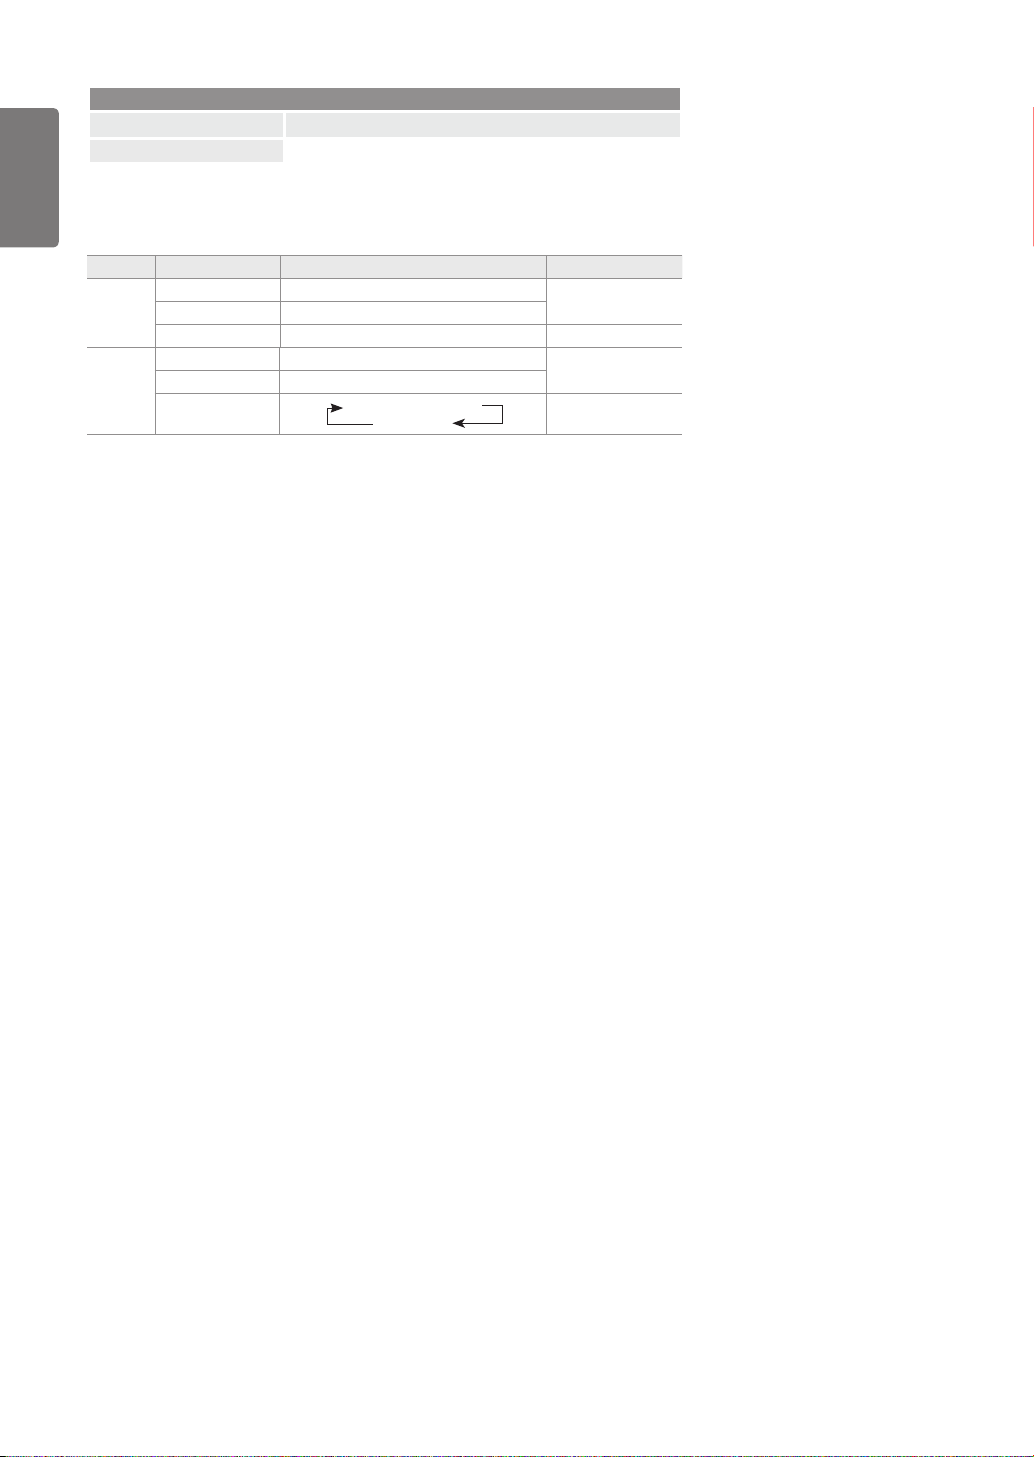
Selecting the Sound Mode
You can set the sound mode in the Tools menu. When you set to Dual l ll, the current sound
mode is displayed on the screen.
Audio Type Dual 1 / 2 Default
A2
Stereo
NICAM
Stereo
If the stereo signal is weak and an automatic switching occurs, then switch to the mono.
■
This function is only activated in stereo sound signal. It is deactivated in mono sound
■
signal.
This function is only available in TV mode.
■
Mono MONO
Stereo STEREO ↔ MONO
Dual DUAL 1 ↔ DUAL 2 DUAL 1
Mono MONO
Stereo MONO ↔ STEREO
Dual
MONO ↔ DUAL 1
DUAL 2
Automatic change
Automatic change
DUAL 1
Page 29
29
English
Using the Menus
Setup Menu
Option Description
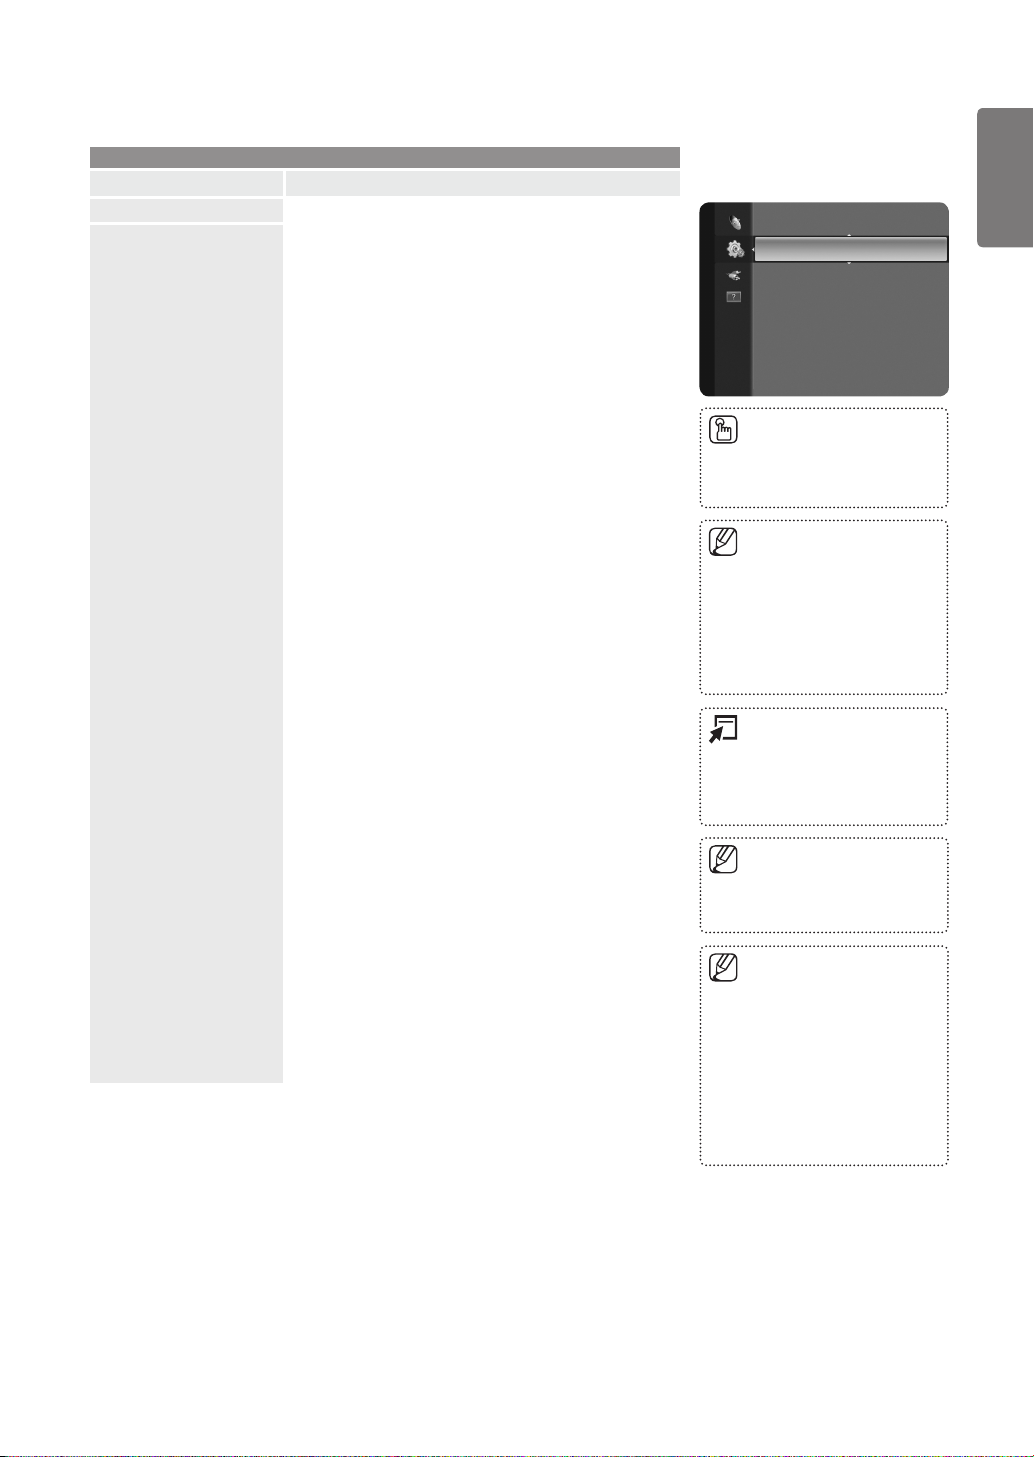
Language
Time Clock
You can set the menu language.
❑
Setting the clock is necessary in order to use the various timer
features of the TV. If you disconnect the power cord, you have
to set the clock again.
Clock Mode
■
You can set up the current time manually or automatically.
Auto: Set the current time automatically using the time
from the digital broadcast.
Manual: Set the current time to a manually specified time.
Clock Set
■
You can set the current time manually.
This function is only available when Clock Mode is set
to Manual.
You can set the day, month, year, hour and minute
directly by pressing the number buttons on the remote
control.
Sleep Timer
❑
The sleep timer automatically shuts off the TV after a preset
time (30, 60, 90, 120, 150 and 180 minutes).
The TV automatically switches to standby mode when the
■
timer reaches 0.
To cancel the Sleep Timer function, select Off.
■
Timer 1 / Timer 2 / Timer 3
❑
Three different on / off timer settings can be made.
You must set the clock first.
On Time
■
Set the hour, minute, and activate / inactivate.
(To activate timer with the setting you’ve chosen, set to
Activate.)
Off Time
■
Set the hour, minute, and activate / inactivate.
(To activate timer with the setting you’ve chosen, set to
Activate.)
Volume
■
Set the desired volume level.
Antenna
■
Select Air or Cable.
Channel
■
Select the desired channel.
Repeat
■
Select Once, Everyday, Mon~Fri, Mon~Sat, Sat~Sun or
Manual.
When Manual is selected, press the ► button to select
the desired day of the week. Press the ENTERE button
over the desired day and the c mark will appear.
Setup
Plug & Play
Setup
Language : English ►
Time
Game Mode : Off
Child Lock : On
Change PIN
Parental Lock
Subtitle
The current time will appear
■
every time you press the INFO
button.
Depending on the broadcast
■
station and signal, the auto time
may not be set correctly. If this
occurs, set the time manually.
The Antenna or cable must be
■
connected in order to set the time
automatically.
Press the TOOLS button to
■
display the Tools menu. You
can also set the sleep timer by
selecting Tools → Sleep Timer.
You can set the hour, minute and
■
channel by pressing the number
buttons on the remote control.
Auto Power Off
■
When you set the timer on, the
television will eventually turn off,
if no controls are operated for 3
hours after the TV was turned on
by the timer. This function is only
available in timer on mode and
prevents overheating, which may
occur if a TV is on for too long
time.
Page 30
30
English
Using the Menus
Option Description
Game Mode
Child Lock
Change PIN
Parental Lock
Subtitle
Setup
When connecting to a game console such as PlayStation™
or Xbox™, you can enjoy a more realistic gaming
experience by selecting game menu.
If Game Mode is On:
■
Picture mode is automatically changed to Standard
and cannot be changed.
Sound mode is automatically changed to Custom
and cannot be changed. Adjust the sound using the
equalizer.
This feature allows you to prevent unauthorized users, such
as children, from watching unsuitable programme by muting
out video and audio.
Before the setup screen appears, the PIN number input
■
screen appears. Enter your 4 digit PIN number.
The default PIN number of a new TV set is 0-0-0-0.
■
You can lock some channels in Channel List.
■
You can change your personal ID number that is required to
set up the TV.
Before the setup screen appears, the PIN number input
■
screen appears. Enter your 4 digit PIN number.
The default PIN number of a new TV set is 0-0-0-0.
■
This feature allows you to prevent unauthorized users,
such as children, from watching unsuitable programme by
a 4-digit PIN (Personal Identification Number) code that is
defined by the user.
The Parental Rating item differs depending on the
■
country.
Before the setup screen appears, the PIN number input
■
screen appears. Enter your 4 digit PIN number.
The default PIN number of a new TV set is “0-0-0-0”.
■
You can change the PIN by selecting Change PIN from
■
the menu.
When the parental ratings are set, the “\” symbol is
■
displayed.
Allow All: Press to unlock all TV ratings.
■
Block All: Press to lock all TV ratings.
■
You can activate and deactivate the subtitles. Use this
menu to set the Subtitle Mode. Normal under the menu is
the basic subtitle and Hard of hearing is the subtitle for a
hearing-impaired person.
Subtitle
■
Switches subtitles on or off.
Mode
■
Sets the subtitle mode.
Subtitle Language
■
Set the subtitle language.
If the programme you are watching does not support
the Hard of hearing function, Normal automatically
activates even though Hard of hearing mode is
selected.
English is the default in cases where the selected
language is unavailable in the broadcast.
To disconnect the game console
■
and connect another external
device, cancel game mode in the
setup menu.
If you display the TV menu in
■
Game Mode, the screen shakes
slightly.
Game Mode is not available in
■
regular TV and PC mode.
Child Lock is available only in
■
TV mode.
If you forget the PIN code, press
■
the remote control buttons in the
following sequence, which resets
the PIN to 0-0-0-0: POWER
(Off) → MUTE → 8 → 2 → 4 →
POWER (On).
You can select these options
■
simply by pressing the SUBT.
button on the remote control.
Page 31
31
English
Using the Menus
Option Description
Teletext Language
Preference
Digital Text
Melody
Energy Saving
Common Interface
Setup
You can set the Teletext language by selecting the
language type.
English is the default in cases where the selected
■
language is unavailable in the broadcast.
Primary Audio Language / Secondary Audio
■
Language / Primary Subtitle Language / Secondary
Subtitle Language / Primary Teletext Language /
Secondary Teletext Language
Using this feature, users can select one of the
languages. The language selected here is the default
when the user selects a channel.
If you change the language setting, the Subtitle
Language, Audio Language, and the Teletext Language
of the Language menu are automatically changed to the
selected language.
The Subtitle Language, Audio Language, and the
Teletext Language of the Language menu show a list
of languages supported by the current channel and the
selection is highlighted. If you change this language
setting, the new selection is only valid for the current
channel. The changed setting does not change the
setting of the Primary Subtitle Language, Primary Audio
Language, or the Primary Teletext Language of the
Preference menu.
If the programme is broadcast with digital text, this feature
is enabled.
MHEG (Multimedia and Hypermedia Information Coding
■
Experts Group)
An International standard for data encoding systems
used in multimedia and hypermedia. This is at a higher
level than the MPEG system which includes data-linking
hypermedia such as still images, character service,
animation, graphic and video files as well as multimedia
data. MHEG is user runtime interaction technology
and is being applied to various fields including VOD
(Video-On-Demand), ITV (Interactive TV), EC (Electronic
Commerce), tele-education, tele-conferencing, digital
libraries and network games.
A melody sound can be set to come on when the TV is
powered On or Off.
The Melody does not play
■
When no sound is output from the TV because the
MUTE button has been pressed.
When no sound is output from the TV because the
volume has been reduced to minimum with the
volume (-) button.
When the TV is turned off by Sleep Timer function.
This feature adjusts the brightness of the TV in order to
reduce power consumption. When watching TV at night,
set the Energy Saving mode option to High to reduce eye
fatigue as well as power consumption.
CI Menu
■
This enables the user to select from the CAM-provided
menu.
Select the CI Menu based on the menu PC Card.
Application Info.
■
This contains information on CAM inserted in the CI slot
and displays it. The Application Info inserting is about the
CI CARD. You can install the CAM anytime whether the TV
is ON or OFF.
1. Purchase the CI CAM module by visiting your nearest
dealer or by phone.
2. Insert the CI CARD into the CAM in the direction of the
arrow until it fits.
3. Insert the CAM with the CI CARD installed into the
common interface slot.
(Insert the CAM in the direction of the arrow, right up to
the end so that it is parallel with the slot.)
4. Check if you can see a picture on a scrambled signal
channel.
Press the TOOLS button to
■
display the Tools menu. You
can also set the Energy Saving
option by selecting Tools →
Energy Saving.
CAM is not supported in some
■
countries and regions, check with
your authorized dealer.
Page 32
32
English
Using the Menus
Input Menu
Option Description
Source List
Edit Name
Input
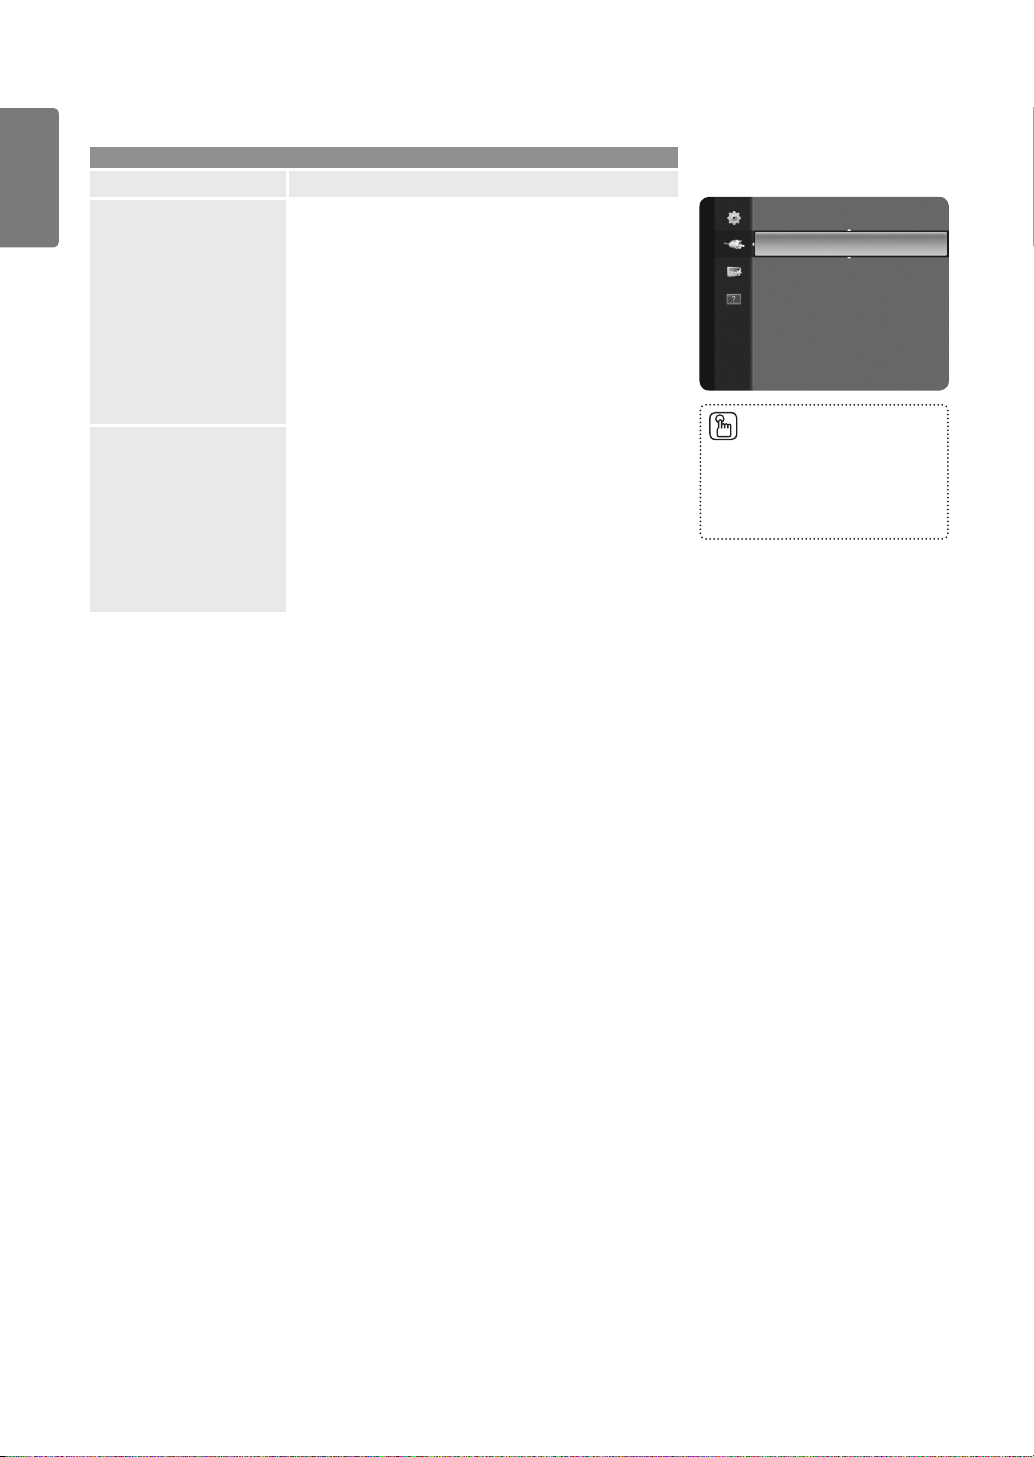
Use to select TV or other external input sources such as
DVD / Blu-ray players / Cable Box / Satellite receivers
(Set-Top Box) connected to the TV. Use to select the input
source of your choice.
TV / Ext. / AV / Component / PC / HDMI/DVI
■
You can choose only those external devices that
are connected to the TV. In the Source List,
connected inputs will be highlighted and sorted to
the top. Inputs that are not connected will be sorted
to the bottom.
TOOLS (Tools): Displays the Edit Name and
●
Information menus.
Name the device connected to the input jacks to make your
input source selection easier.
VCR / DVD / Cable STB / Satellite STB / PVR STB / AV
■
Receiver / Game / Camcorder / PC / DVI PC / DVI / TV
/ IPTV / Bluray / HD DVD / DMA
When connecting an HDMI/DVI cable to the HDMI
(DVI) port, you should set the HDMI/DVI mode
to DVI or DVI PC in the Edit Name of the Input
mode. In this case, a separate sound connection is
required.
Input
Source List
Edit Name
Press the SOURCE button on
■
the remote control to view an
external signal source. TV mode
can be selected by pressing the
TV button.
Page 33
33
English
Using the Menus
Support menu
Option Description
Picture Test
Self Diagnosis
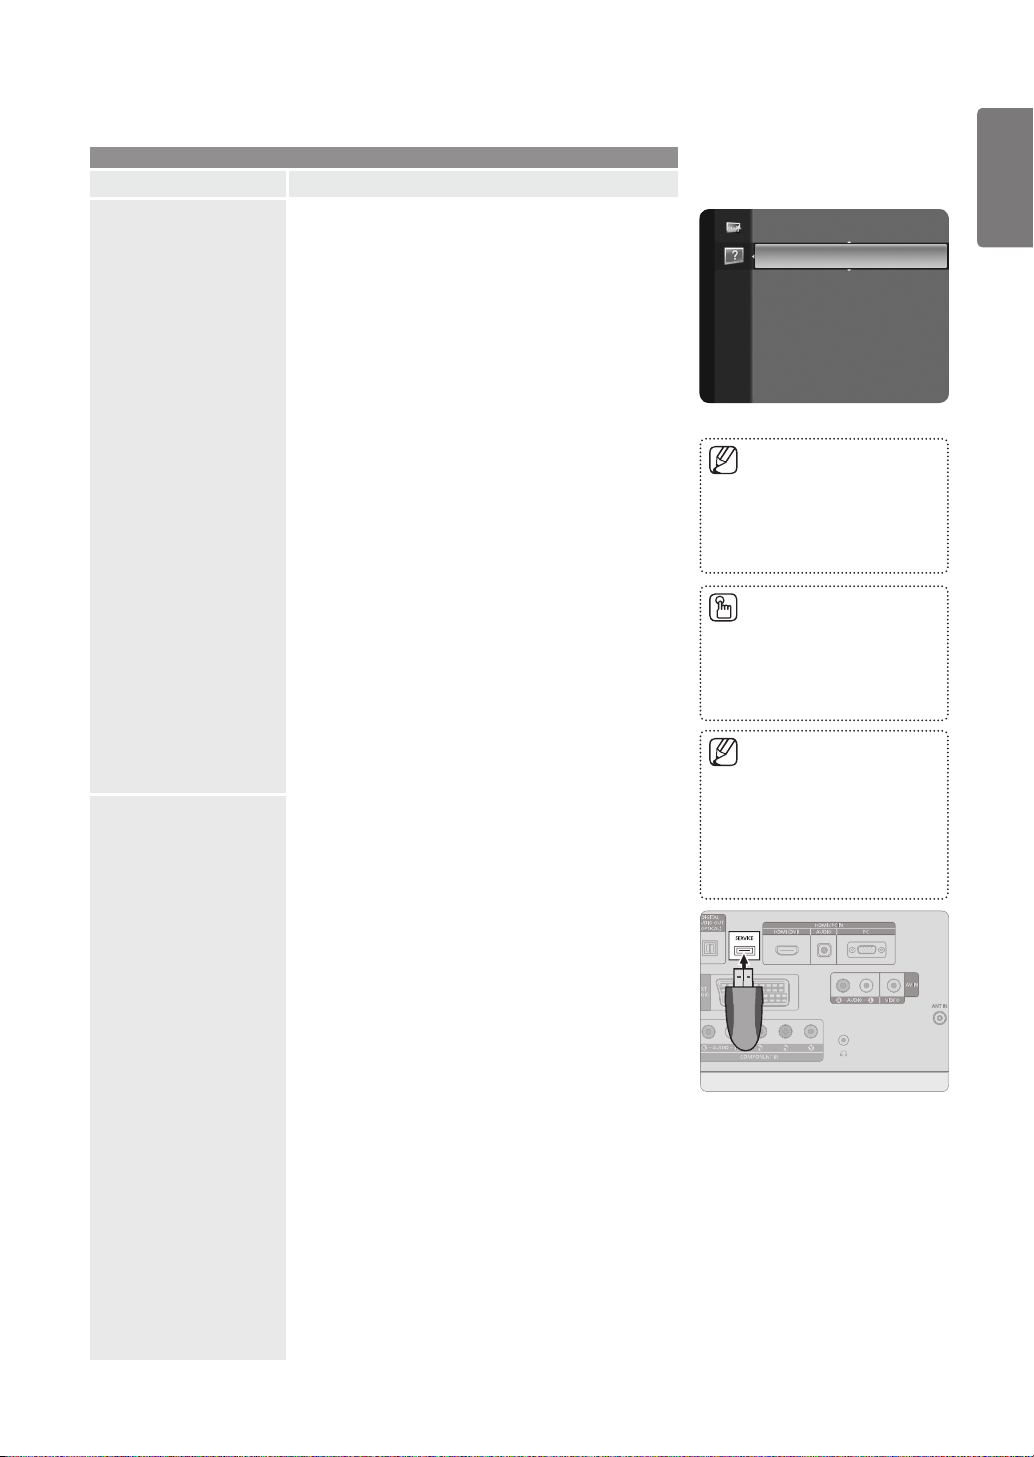
Software Upgrade
■
If you think you have a picture problem, perform the picture
test. Check the colour pattern on the screen to see if the
problem still exists.
Yes: If the test pattern does not appear or there
is noise in the test pattern, select Yes. Therefore,
contact Samsung’s call centre for assistance.
No: If the test pattern is properly displayed, select
No. There may be a problem with your external
equipment. Please check your connections. If the
problem still persists, refer to the external device’s
user manual.
Sound Test
■
If you think you have a sound problem, please perform the
sound test. You can check the sound by playing a built-in
melody sound through the TV.
‘Does the problem still exist with this sound test?’ appears
on the screen.
Yes: If during the sound test you can hear sound only
from one speaker or not at all, select Yes. Therefore,
contact Samsung’s call centre for assistance.
No: If you can hear sound from the speakers, select
No. There may be a problem with your external
equipment. Please check your connections. If the
problem still persists, refer to the external device’s
user manual.
Signal Information (digital channels only)
■
Unlike analogue channels, which can vary in reception
quality from ‘snowy’ to clear, digital (HDTV) channels have
either perfect reception quality or you will not receive them
at all. So, unlike analogue channels, you cannot fine tune
a digital channel. You can, however, adjust your antenna to
improve the reception of available digital channels.
To keep your product up-to-date with new Digital Television
features then software upgrades are periodically broadcast
as part of the normal Television signal. It will automatically
detect these signals and display the software upgrade
banner. You are given the option to install the upgrade.
By USB
■
Insert a USB drive containing the firmware upgrade
downloaded from samsung.com into the TV. Please be
careful to not disconnect the power or remove the USB
drive while upgrades are being applied. The TV will turn
off and turn on automatically after completing the firmware
upgrade. Please check the firmware version after the
upgrades are complete (the new version will have a
higher number than the older version). When software is
upgraded, video and audio settings you have made will
return to their default (factory) settings. We recommend you
write down your settings so that you can easily reset
them after the upgrade.
By Channel
■
Upgrades the software using the broadcasting signal.
Standby Mode Upgrade
■
To continue software upgrade with master power on,
select On by pressing the ▲ or ▼ button. 45 minutes after
entering standby mode, a manual upgrade is automatically
conducted. Since the power of the unit is turned on
internally, the screen may be on slightly for the LCD
product. This phenomenon may continue for more than 1
hour until the software upgrade is completed.
Alternative Software
■
To display the software version information.
Support
Support
Self Diagnosis ►
Software Upgrade
HD Connection Guide
Contact Samsung
If you hear no sound from the
■
TV’s speakers, before performing
the sound test, make sure
Speaker Select is set to TV
speaker in the Sound menu.
The melody will be heard during
■
the test even if Speaker Select
is set to External Speaker or the
sound is muted by pressing the
MUTE button.
If the signal strength meter
■
indicates that the signal is weak,
physically adjust your antenna
to increase the signal strength.
Continue to adjust the antenna
until you find the best position
with the strongest signal.
USB Drive
TV Rear Panel
Page 34

34
English
Using the Menus
Option Description
HD Connection Guide
Contact Samsung
Support
This menu presents the connection method that provides
the optimal quality for the HD TV. Refer to this information
when connecting external devices to the TV.
View this information when your TV does not work properly
or when you want to upgrade the software. You can view
the information regarding the call centre, product and
software file download method.
Page 35
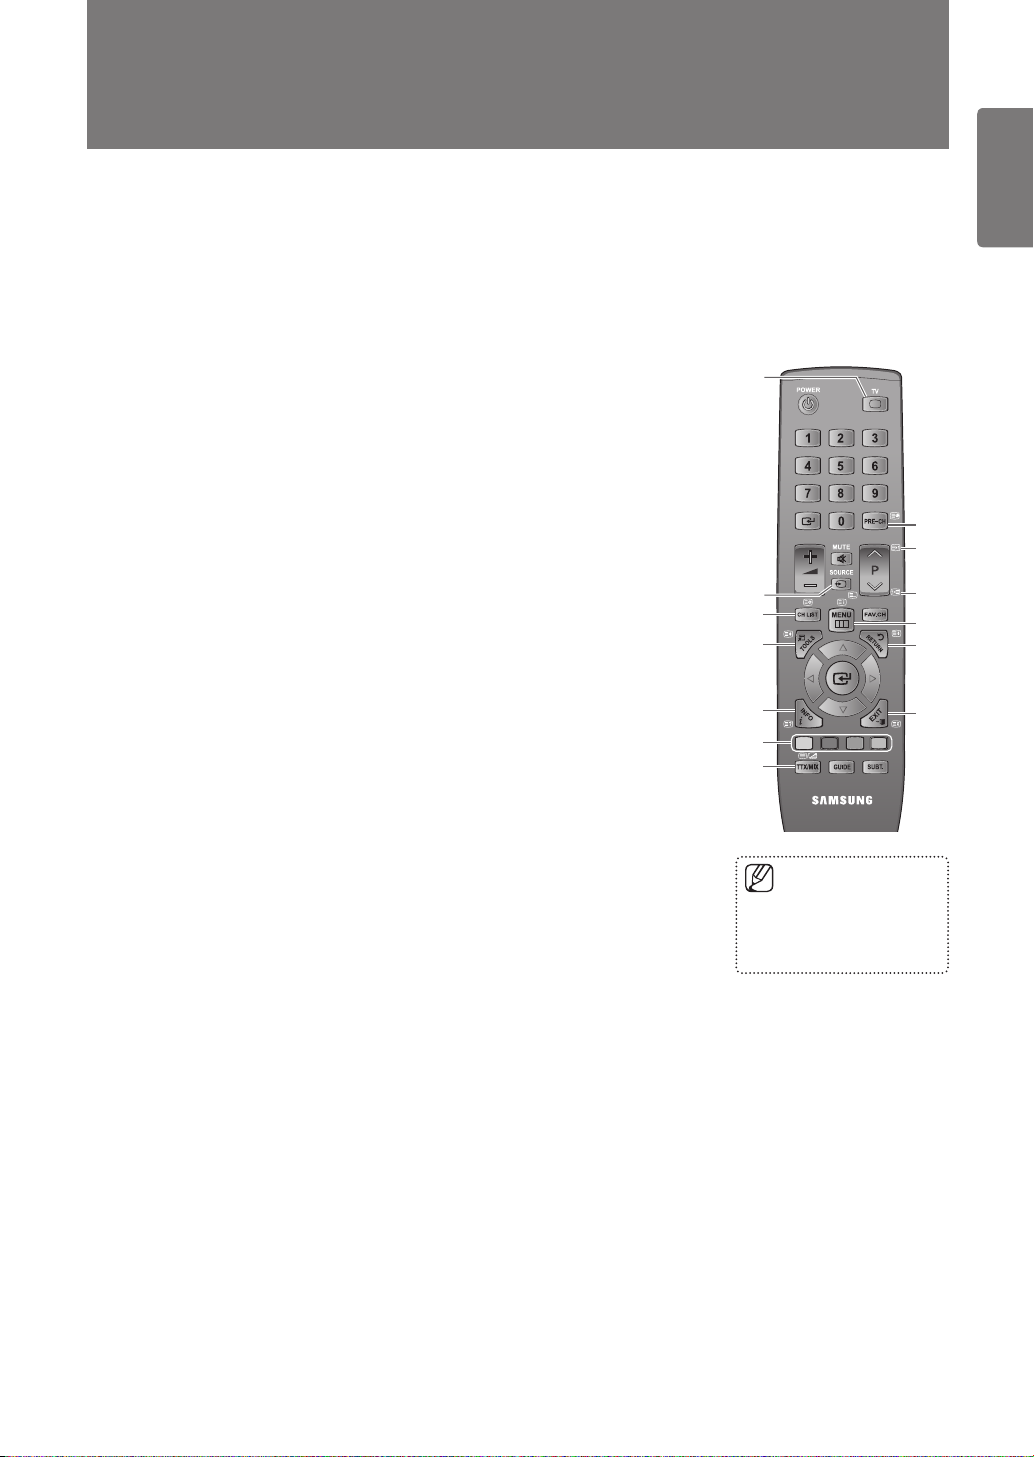
Other Information
3
4
5
6
7
2
8
9
0
@
#
!
1
Teletext Feature
35
English
Most television stations provide written information services via Teletext. The index page of the Teletext service gives you information
on how to use the service. In addition, you can select various options to suit your requirements by using the remote control buttons.
For Teletext information to be displayed correctly, channel reception must be stable. Otherwise, information may be missing or some
■
pages may not be displayed.
1 : (exit)
Exit from the Teletext display.
2 0 (mode)
Press to select the Teletext mode (LIST/ FLOF). If you press it in the LIST mode, it
switches into the List save mode. In the List save mode, you can save Teletext page into
list using the 8(store) button.
3 8 (store)
Used to store the Teletext pages.
4 4 (size)
Press to display the double-size letters in the upper half of the screen. For lower half of
the screen, press it again. To display normal screen, press it once again.
5 5 (reveal)
Used to display the hidden text (answers to quiz games, for example). To display normal
screen, press it again.
6 Colour buttons (red/green/yellow/blue)
If the FASTEXT system is used by a broadcasting company, the different topics
covered on a Teletext page are colour-coded and can be selected by pressing the
coloured buttons. Press one of them corresponding to the required. The page is
displayed with other coloured information that can be selected in the same way. To
display the previous or next page, press the corresponding coloured button.
7
/
Press to activate Teletext mode after selecting the channel providing the Teletext service.
8 1 (sub-page)
Used to display the available sub-page.
9 2 (page up)
Used to display the next Teletext page.
0 3 (page down)
Used to display the previous Teletext page.
! 6 (index)
Used to display the index (contents) page at any time while you are viewing Teletext.
@ 9 (hold)
Used to hold the display on a given page if the selected page is linked with several
# 7 (cancel)
Used to display the broadcast when searching for a page.
(Teletext on/mix)
Press it twice to overlap the Teletext with the current broadcasting screen.
secondary pages which follow on automatically. To resume, press it again.
You can change Teletext
■
pages by pressing the
numeric buttons on the
remote control.
Other Information
Page 36
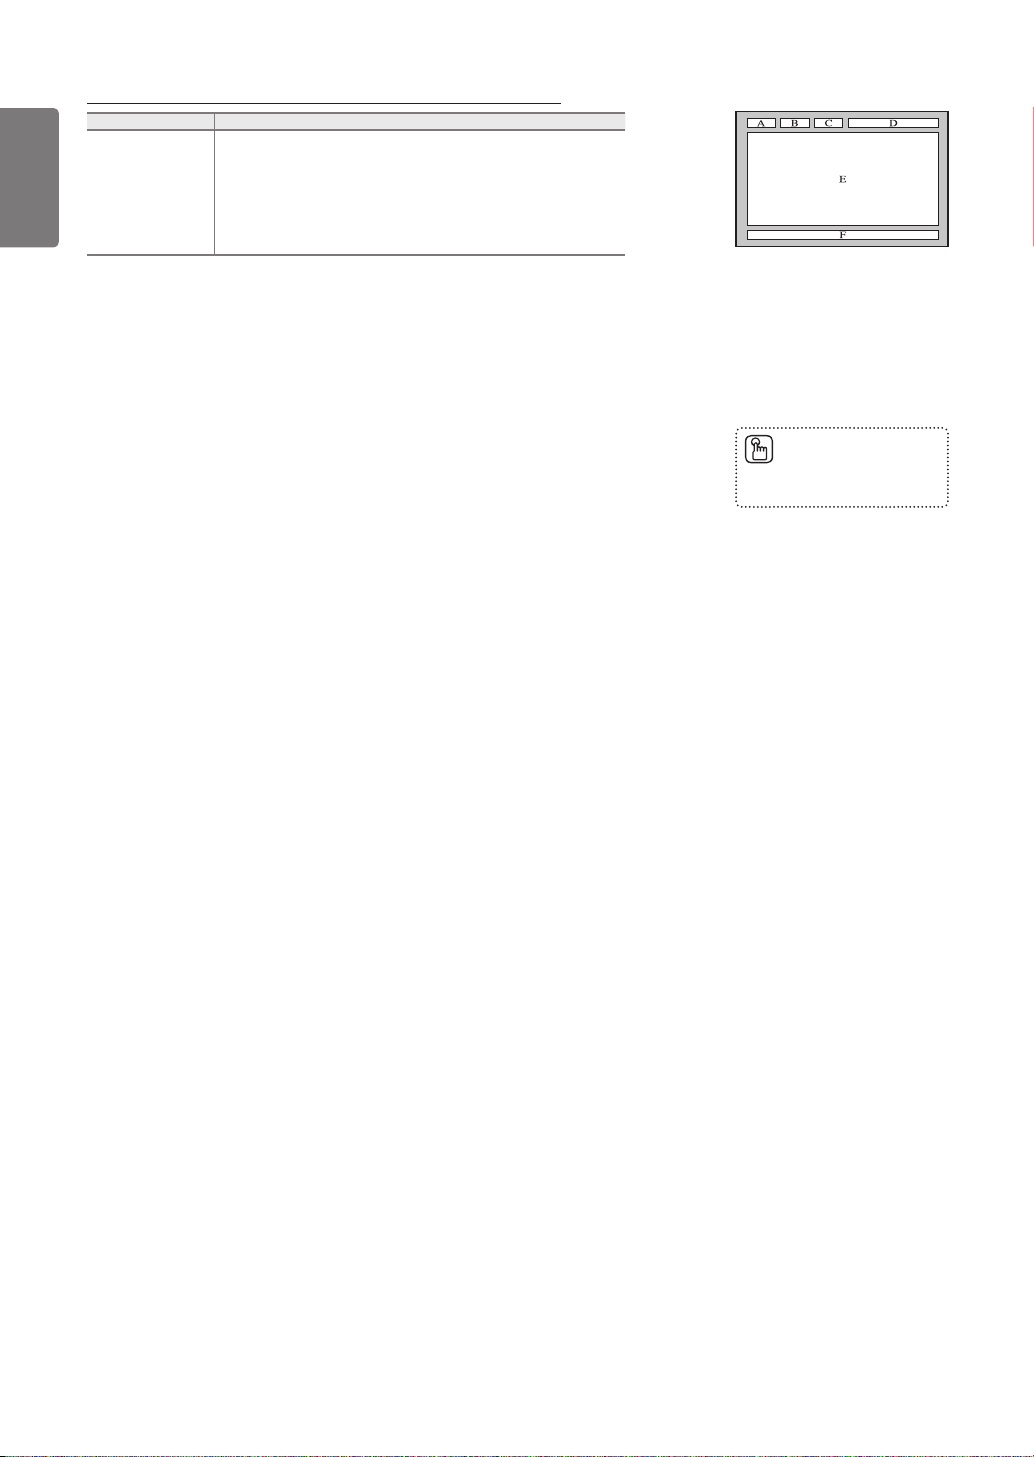
36
English
Other Information
The Teletext pages are organized according to six categories:
Part Contents
A Selected page number.
B Broadcasting channel identity.
C Current page number or search indications.
D Date and time.
E Text.
F Status information.
FASTEXT information.
Teletext information is often divided between several pages displayed in sequence, which
■
can be accessed by:
Entering the page number
Selecting a title in a list
Selecting a coloured heading (FASTEXT system)
Teletext level supported by the TV is version 2.5 which is capable of displaying additional
■
graphics or text.
Depending upon the transmission, blank side panels can occur when displaying Teletext.
■
In these cases, additional graphics or text is not transmitted.
■
Older TV’s which do not support version 2.5 are not capable of displaying any additional
■
graphics or text, regardless of the Teletext transmission.
Teletext 16:9, picture is 16:9.
■
Press the TV button to exit
■
from the Teletext display.
Page 37
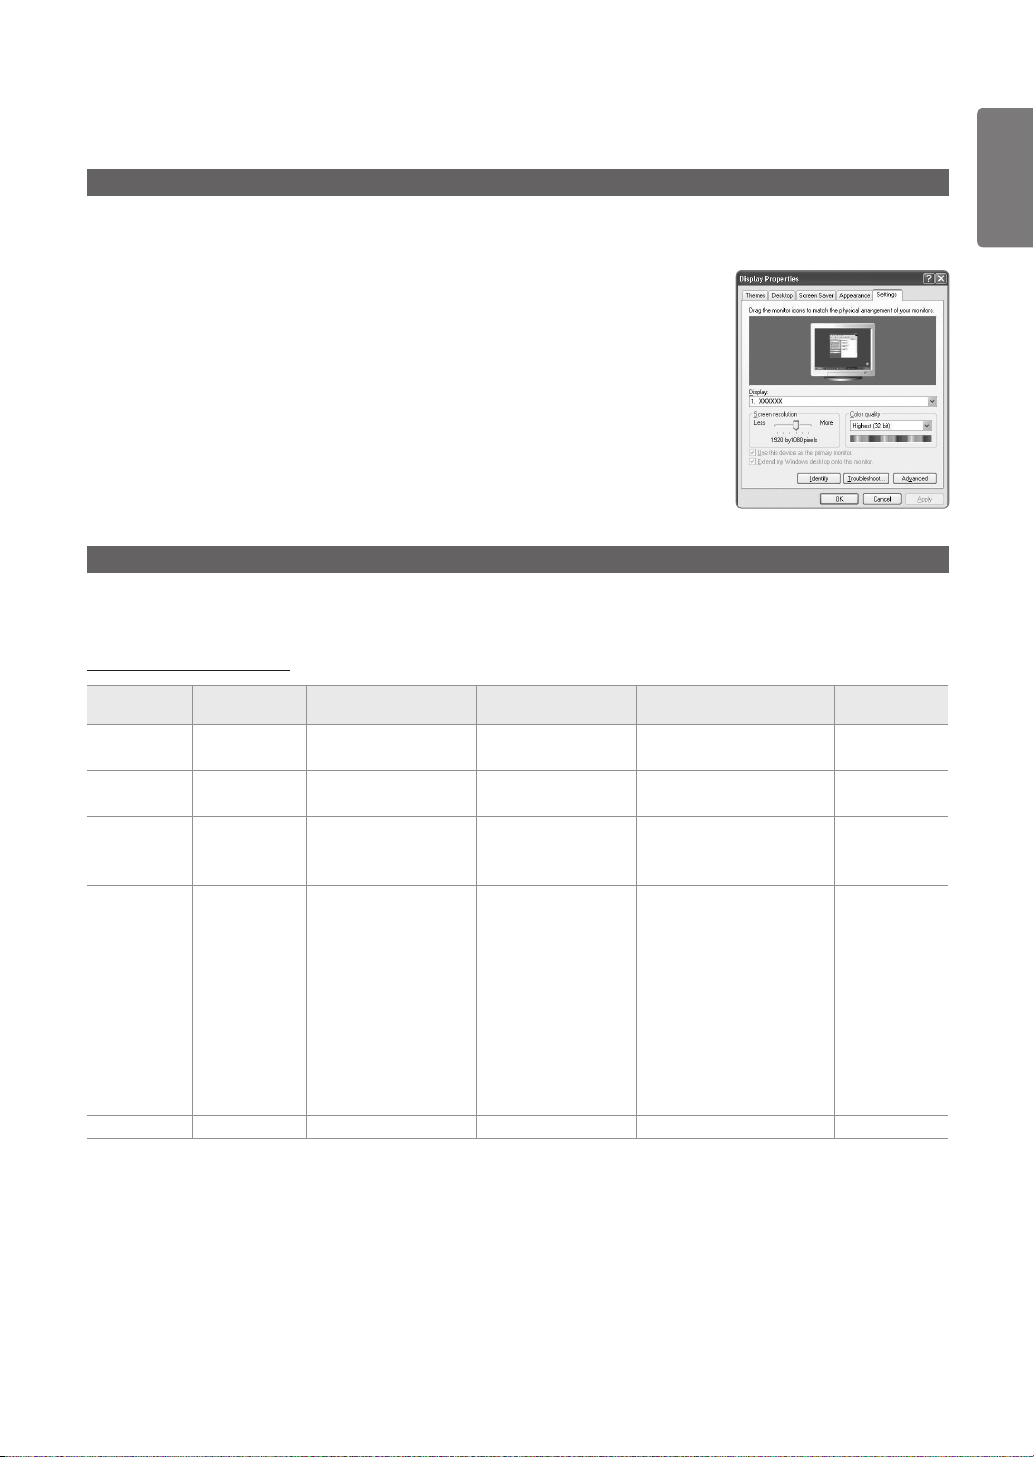
37
English
Other Information
Using Your TV as a Computer (PC) Display
Setting Up Your PC Software (Based on Windows XP)
The Windows display-settings for a typical computer are shown below. The actual screens on your PC will probably be different, depending
upon your particular version of Windows and your particular video card. However, even if your actual screens look different, the same basic
set-up information will apply in almost all cases. (If not, contact your computer manufacturer or Samsung Dealer.)
First, click on ‘Control Panel’ on the Windows start menu.
1
When the control panel window appears, click on ‘Appearance and Themes’ and a display
2
dialog-box will appear.
When the control panel window appears, click on ‘Display’ and a display dialogbox will
3
appear.
Navigate to the ‘Settings’ tab on the display dialog-box.
The correct size setting (resolution) - Optimum: 1360 X 768 pixels.
■
4
If the signal from the system equals the standard signal mode, the screen is adjusted automatically. If the signal from the system doesn’t
equal the standard signal mode, adjust the mode by referring to your videocard user guide; otherwise there may be no video. For the display
modes listed on the next page, the screen image has been optimized during manufacturing.
D-Sub and HDMI/DVI Input
If a vertical-frequency option exists on your display settings dialog box, the correct value
■
is ‘60’ or ‘60 Hz’. Otherwise, just click ‘OK’ and exit the dialog box.
Display Modes
Mode Resolution
IBM 640 x 350 31.469 70.086 25.175 +/-
720 x 400 31.469 70.087 28.322 -/+
MAC 640 x 480 35.000 66.667 30.240 -/-
832 x 624 49.726 74.551 57.284 -/-
VESA CVT 720 x 576 35.910 59.950 32.750 -/+
1280 x 720 44.772 59.855 74.500 -/+
1280 x 720 56.456 74.777 95.750 -/+
VESA DMT 640 x 480 31.469 59.940 25.175 -/-
640 x 480 37.500 75.000 31.500 -/640 x 480 37.861 72.809 31.500 -/800 x 600 37.879 60.317 40.000 +/+
800 x 600 46.875 75.000 49.500 +/+
800 x 600 48.077 72.188 50.000 +/+
1024 x 768 48.363 60.004 65.000 -/1024 x 768 56.476 70.069 75.000 -/1024 x 768 60.023 75.029 78.750 +/+
1360 x 768 47.712 60.015 85.500 +/+
VESA GTF 1280 x 720 52.500 70.000 89.040 -/+
When using an HDMI / DVI cable connection, you must use the HDMI (DVI) jack.
■
The interlace mode is not supported.
■
The set might operate abnormally if a non-standard video format is selected.
■
Separate and Composite modes are supported. SOG is not supported.
■
Horizontal Frequency
(KHz)
Vertical Frequency
(Hz)
Pixel Clock Frequency
(MHz)
Sync Polarity
(H / V)
Page 38
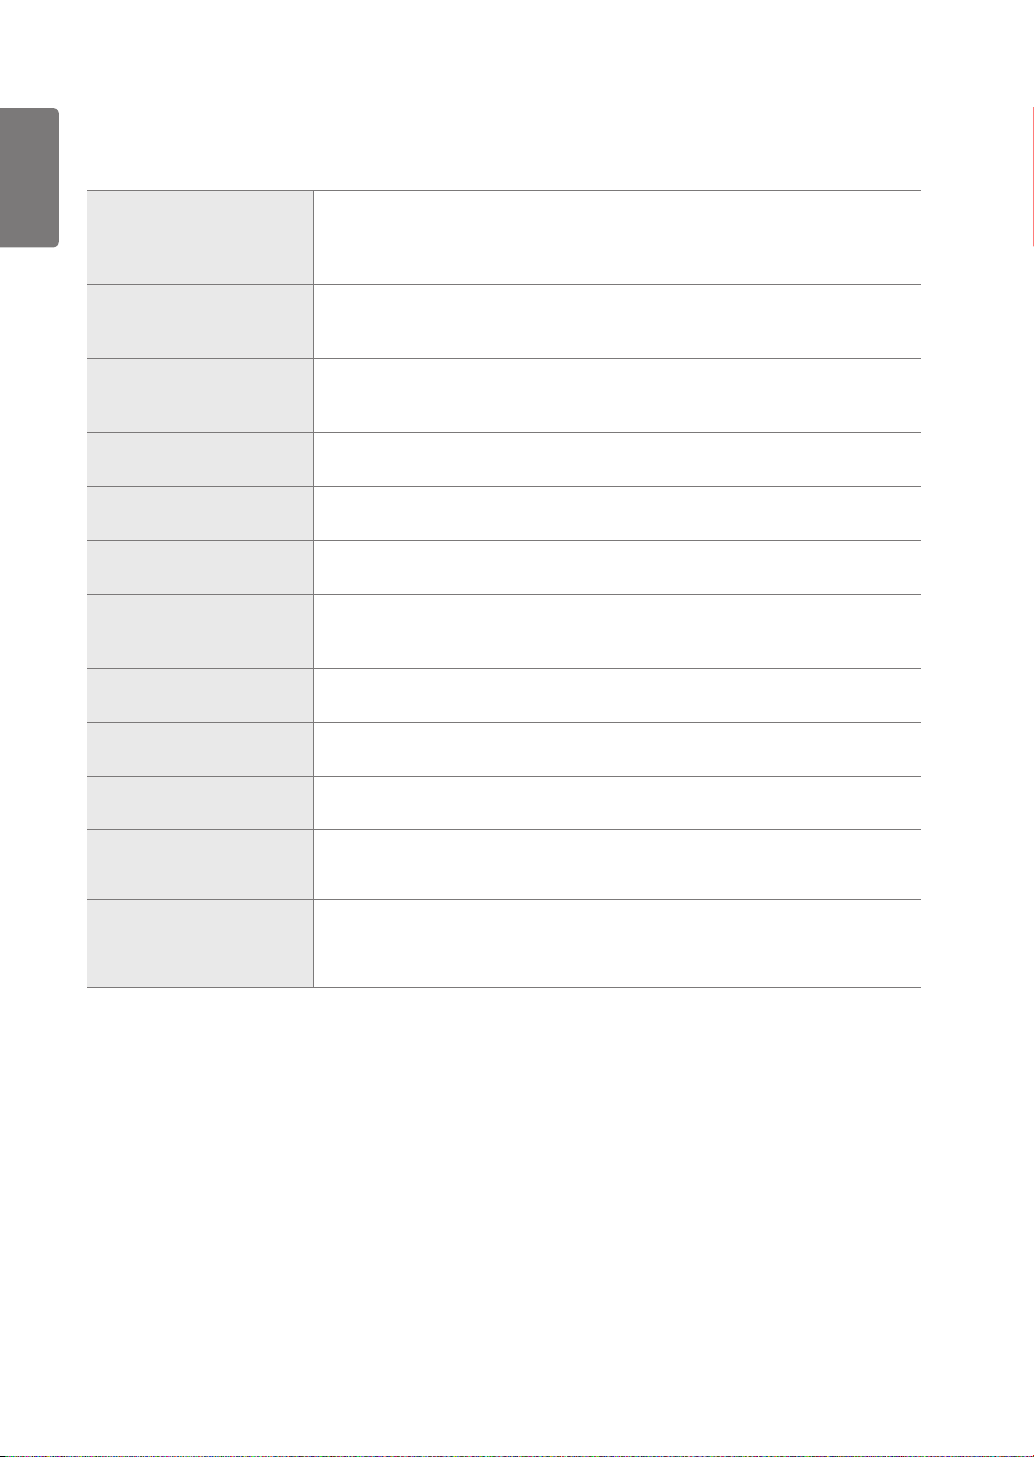
38
English
Troubleshooting: Before Contacting Service
Personnel
No sound or picture Check that the mains lead has been connected to a wall socket.
Other Information
Normal picture but no sound Check the volume.
Screen is black and power
indicator light blinks steadily
No picture or black and white
picture
Sound and picture interference Try to identify the electrical appliance that is affecting the set and move it further away.
Blurred or snowy picture,
distorted sound
Remote control malfunctions Replace the remote control batteries.
‘Check signal cable.’ message is
displayed
On PC mode, ‘Not Supported
Mode.’ message is displayed
●
Check that you have pressed the button on your set.
●
Check the picture contrast and brightness settings.
●
Check the volume.
●
●
Check whether the MUTEM button has been pressed on the remote control.
●
Check the Speaker Select settings.
●
On your computer check; Power, Signal Cable.
●
The TV is using its power management system.
●
Move the computer’s mouse or press any key on the keyboard.
●
Adjust the colour settings.
●
Check that the broadcast system selected is correct.
●
●
Plug your set into a different mains socket.
●
Check the direction, location and connections of your aerial.
●
This interference is often due to the use of an indoor aerial.
●
●
Clean the upper edge of the remote control (transmission window).
●
Check the battery terminals.
●
Check that the signal cable is rmly connected to the PC or video sources.
●
Check that the PC or video sources are turned on.
●
Check the maximum resolution and the frequency of the video adaptor.
●
Compare these values with the data in the Display Modes.
●
The damaged picture appears in
the corner of the screen
The ‘Resets all settings to
the default values.’ message
appears.
You may see small particles if
you look closely at the edge of
the bezel surrounding the TV
screen.
The TFT LCD panel uses a panel consisting of sub pixels (3 133 440) which require sophisticated technology to produce.
■
However, there may be few bright or dark pixels on the screen. These pixels will have no impact on the performance of the product.
If Screen Fit is selected in some external devices, the damaged picture may appear in
●
the corner of the screen. This symptom is caused by external devices, not TV.
This appears when you press and hold the EXIT button for a while. The product settings
●
are reset to the factory defaults.
This is part of the product’s design and is not a defect.
●
Page 39
39
English
Other Information
Specifications
Model Name LE19B450, LE19B451, LE19B541 LE22B450, LE22B451, LE22B541
Screen Size
(Diagonal) 19 inches 22 inches
Power Consumption
Standby <1W <1W
PC Resolution
(Optimum) 1360 x 768 @ 60Hz 1360 x 768 @ 60Hz
Sound
(Output) 3W x 2 3W x 2
Dimensions (WxDxH)
Body
With stand
Weight
With Stand 5 kg 7 kg
Environmental Considerations
Operating Temperature
Operating Humidity
Storage Temperature
Storage Humidity
Stand Swivel
Left / Right 0˚
477 x 65 x 327
477 x 180 x 362
558 x 75 x 384
558 x 216 x 426
10°C to 40°C (50°F to 104°F)
10% to 80%, non-condensing
-20°C to 45°C (-4°F to 113°F)
5% to 95%, non-condensing
Design and specifications are subject to change without prior notice.
■
This device is a Class B digital apparatus.
■
For the power supply and Power Consumption, refer to the label attached to the product.
■
Page 40
Warning! Important Safety Instructions
Please read the appropriate section that corresponds to the marking on your Samsung product before attempting to install the product.
CAUTION
RISK OF ELECTRIC SHOCK DO NOT OPEN
CAUTION: TO REDUCE THE RISK OF ELECTRIC SHOCK,
DO NOT REMOVE COVER (OR BACK). THERE ARE
NO USER SERVICEABLE PARTS INSIDE. REFER ALL
SERVICING TO QUALIFIED PERSONNEL.
The slots and openings in the cabinet and in the back or bottom are provided for necessary ventilation.
●
To ensure reliable operation of this apparatus, and to protect it from overheating, these slots and openings must never be
blocked or covered.
- Do not cover the slots and openings with a cloth or other materials.
- Do not block the slots and openings by placing this apparatus on a bed, sofa, rug or other similar surface.
- Do not place this apparatus in a confined space, such as a bookcase, or built-in cabinet, unless proper ventilation is provided.
Give your product 10 cm (4 inch) clearance from the wall.
Do not place this apparatus near or over a radiator or heat resistor, or where it is exposed to direct sunlight.
●
Do not place heat generating items such as candles, ashtrays, incense, flammable gas or explosive materials near the product.
●
Do not place a water containing vessel on this apparatus, as this can result in a risk of fire or electric shock.
●
Do not expose this apparatus to rain or place it near water(near a bathtub, washbowl, kitchen sink, or laundry tub, in a wet
●
basement, or near a swimming pool etc.). If this apparatus accidentally gets wet, unplug it and contact an authorized dealer
immediately. Make sure to pull out the power cord from the outlet before cleaning.
This apparatus use batteries. In your community there might be regulations that require you to dispose of these batteries properly
●
under environmental considerations. Please contact your local authorities for disposal or recycling information.
Do not overload wall outlets, extension cords or adaptors beyond their capacity, since this can result in fire or electric shock.
●
Power-supply cords should be routed so that they are not likely to be walked on or pinched by items placed upon or against them,
●
paying particular attention to cords at plug end, adaptors and the point where they exit from the appliance.
To protect this apparatus from a lightning storm, or when it is left unattended and unused for long periods of time, unplug it from the
●
wall outlet and disconnect the antenna or cable system.
This will prevent damage to the set due to lightning and power line surges.
Before connecting the AC power cord to the DC adaptor outlet, make sure the voltage designation of the DC adaptor corresponds to
●
the local electrical supply.
Never insert anything metallic into the open parts of this apparatus. Doing so many create a danger of electric shock.
●
To avoid electric shock, never touch the inside of this apparatus. Only a qualified technician should open this apparatus.
●
Make sure to plug the power cord in until it is firmly inserted. When removing the power cord, make sure to hold the power plug
●
when pulling the plug from the outlet. Do not touch the power cord with wet hands.
If this apparatus does not operate normally - in particular, if there are any unusual sounds or smells coming from it
●
unplug it immediately and contact an authorized dealer or service centre.
Be sure to pull the power plug out of the outlet if the TV is to remain unused or if you are to leave the house for an extended period
●
of time (especially when children, elderly or disabled people will be left alone in the house).
Accumulated dust can cause an electric shock, an electric leakage or a fire by causing the power cord to generate sparks and heat
or the insulation to deteriorate.
Be sure to contact an authorized service centre, when installing your set in a location with heavy dust, high or low temperatures,high
●
humidity, chemical substances and where it operates for 24 hours such as the airport, the train station etc. Failure to do so may
cause serious damage to your set.
Use only a properly grounded plug and receptacle.
●
An improper ground may cause electric shock or equipment damage. (Class l Equipment only.)
To disconnect the apparatus from the mains, the plug must be pulled out from the mains socket, therefore the mains plug shall be
●
readily operable.
Do not allow children to hang onto the product.
●
Store the accessories (battery, etc.) in a location safely out of the reach of children.
●
Do not install the product in an unstable location such as a shaky self, a slanted floor or a location exposed to vibration.
●
Do not drop or impart any shock to the product. If the product is damaged, disconnect the power cord and contact a service centre.
●
This symbol indicates that high voltage is present
inside. It is dangerous to make any kind of contact
with any internal part of this product.
This symbol alerts you that important literature
concerning operation and maintenance has been
included with this product.
WARNING - TO PREVENT THE SPREAD OF FIRE,
KEEP CANDLES OR OTHER OPEN FLAMES
AWAY FROM THIS PRODUCT AT ALL TIMES.
Page 41
Wiring the Mains Power Supply Plug (UK Only)
IMPORTANT NOTICE
The mains lead on this equipment is supplied with a moulded plug incorporating a fuse. The value of the fuse is indicated on the pin
face of the plug and, if it requires replacing, a fuse approved to BSI1362 of the same rating must be used.
Never use the plug with the fuse cover omitted if the cover is detachable. If a replacement fuse cover is required, it must be of the same
colour as the pin face of the plug. Replacement covers are available from your dealer.
If the fitted plug is not suitable for the power points in your house or the cable is not long enough to reach a power point, you should
obtain a suitabl y approved extension lead or consult your dealer for assistance. However, if there is no alternative but to cut off the
plug, remove the fuse and then safely dispose of the plug.
Do NOT connect the plug to a mains socket as there is a risk of shock hazard from the bared flexible cord.
IMPORTANT
The wires in the mains lead are coloured in accordance with the following code:
BLUE - NEUTRAL BROWN - LIVE
As these colours may not correspond to the coloured markings identifying the terminals in your plug, proceed as follows :
The wire coloured BLUE must be connected to the terminal marked with the letter N or coloured BLUE or BLACK. The wire coloured
BROWN must be connected to the terminal marked with the letter L or coloured BROWN or RED.
WARNING:
DO NOT CONNECT EITHER WIRE TO THE EARTH TERMINAL, WHICH IS MARKED WITH THE
LETTER E OR BY THE EARTH SYMBOL , OR COLOURED GREEN OR GREEN AND YELLOW.
Warranty Card
UNITED KINGDOM
This Samsung product is warranted for a period of twelve (12) months from the original date of purchase, against defective materials
and workmanship. In the event that warranty service is required, you should return the product to the retailer from whom it was
purchased. However, Samsung Authorised Dealers and Authorised Service Centres in other EC Countries will comply with the warranty
on the terms issued to purchasers in the country concerned. In case of difficulty, details of our Authorised Service Centres are available
from:
Samsung Electronics U.K. Ltd.
Customer Care Centre
PO Box 17243
Edinburgh, EH11 4YB
Tel: 0845 SAMSUNG (7267864) (UK & Northern Ireland)
WARRANTY CONDITIONS
1. The warranty is only valid if, when warranty service is required, the warranty card is fully and properly completed and is presented
with the original invoice or sales slip or confirmation, and the serial number on the product has not been defaced.
2. Samsung’s obligations are limited to the repair or, at its discretion, replacement of the product or the defective part.
3. Warranty repairs must be carried out by Authorised Samsung Dealers or Authorised Service Centres. No re-imbursement will be
made for repairs carried out by non Samsung Dealers and, any such repair work and damage to the products caused by such
repair work will not be covered by this warranty.
4. This product is not considered to be defective in materials nor workmanship by reason that it requires adaptation in order to
conform to national or local technical or safety standards in force in any Country other than the one for which the product was
originally designed and manufactured.
United Kingdom
Tel: 0818 717 100 (EIRE Only)
Fax: +44 0845 650 8080
Web : www.samsung.com
Page 42
Correct Disposal of This Product (Waste Electrical & Electronic Equipment)
(Applicable in the European Union and other European countries with separate collection systems) This marking on the product, accessories
or literature indicates that the product and its electronic accessories (e.g. charger, headset, USB cable) should not be disposed of with other
household waste at the end of their working life. To prevent possible harm to the environment or human health from uncontrolled waste
disposal, please separate these items from other types of waste and recycle them responsibly to promote the sustainable reuse of material
resources. Household users should contact either the retailer where they purchased this product, or their local government ofce, for details
of where and how they can take these items for environmentally safe recycling. Business users should contact their supplier and check the
terms and conditions of the purchase contract. This product and its electronic accessories should not be mixed with other commercial wastes
for disposal.
Les bons gestes de mise au rebut de ce produit (Déchets d’équipements électriques et électroniques)
(Applicable dans les pays de l’Union Européenne et dans d’autres pays européens pratiquant le tri sélectif)
Ce symbole sur le produit, ses accessoires ou sa documentation indique que ni le produit, ni ses accessoires électroniques usagés
(chargeur, casque audio, câble USB, etc.) ne peuvent être jetés avec les autres déchets ménagers. La mise au rebut incontrôlée des
déchets présentant des risques environnementaux et de santé publique, veuillez séparer vos produits et accessoires usagés des autres
déchets. Vous favoriserez ainsi le recyclage de la matière qui les compose dans le cadre d’un développement durable. Les particuliers sont
invités à contacter le magasin leur ayant vendu le produit ou à se renseigner auprès des autorités locales pour connaître les procédures et
les points de collecte de ces produits en vue de leur recyclage. Les entreprises et professionnels sont invités à contacter leurs fournisseurs
et à consulter les conditions de leur contrat de vente. Ce produit et ses accessoires ne peuvent être jetés avec les autres déchets
professionnels et commerciaux.
Korrekte Entsorgung von Altgeräten (Elektroschrott)
(In den Ländern der Europäischen Union und anderen europäischen Ländern mit einem separaten Sammelsystem)
Die Kennzeichnung auf dem Produkt, Zubehörteilen bzw. auf der dazugehörigen Dokumentation gibt an, dass das Produkt und Zubehörteile
(z. B. Ladegerät, Kopfhörer, USB-Kabel) nach ihrer Lebensdauer nicht zusammen mit dem normalen Haushaltsmüll entsorgt werden dürfen.
Entsorgen Sie dieses Gerät und Zubehörteile bitte getrennt von anderen Abfällen, um der Umwelt bzw. der menschlichen Gesundheit
nicht durch unkontrollierte Müllbeseitigung zu schaden. Helfen Sie mit, das Altgerät und Zubehörteile fachgerecht zu entsorgen, um die
nachhaltige Wiederverwertung von stofichen Ressourcen zu fördern. Private Nutzer wenden sich an den Händler, bei dem das Produkt
gekauft wurde, oder kontaktieren die zuständigen Behörden, um in Erfahrung zu bringen, wo Sie das Altgerät bzw. Zubehörteile für eine
umweltfreundliche Entsorgung abgeben können. Gewerbliche Nutzer wenden sich an ihren Lieferanten und gehen nach den Bedingungen
des Verkaufsvertrags vor. Dieses Produkt und elektronische Zubehörteile dürfen nicht zusammen mit anderem Gewerbemüll entsorgt
werden.
Correcte verwijdering van dit product (elektrische & elektronische afvalapparatuur)
Dit merkteken op het product, de accessoires of het informatiemateriaal duidt erop dat het product en zijn elektronische accessoires (bv.
lader, headset, USB-kabel) niet met ander huishoudelijk afval verwijderd mogen worden aan het einde van hun gebruiksduur. Om mogelijke
schade aan het milieu of de menselijke gezondheid door ongecontroleerde afvalverwijdering te voorkomen, moet u deze artikelen van
andere soorten afval scheiden en op een verantwoorde manier recyclen, zodat het duurzame hergebruik van materiaalbronnen wordt
bevorderd. Huishoudelijke gebruikers moeten contact opnemen met de winkel waar ze dit product hebben gekocht of met de gemeente
waar ze wonen om te vernemen waar en hoe ze deze artikelen milieuvriendelijk kunnen laten recyclen. Zakelijke gebruikers moeten
contact opnemen met hun leverancier en de algemene voorwaarden van de koopovereenkomst nalezen. Dit product en zijn elektronische
accessoires mogen niet met ander bedrijfsafval voor verwijdering worden gemengd.
Corretto smaltimento del prodotto (riuti elettrici ed elettronici)
(Applicabile nell’Unione Europea e in altri paesi europei con sistema di raccolta differenziata)
Il marchio riportato sul prodotto, sugli accessori o sulla documentazione indica che il prodotto e i relativi accessori elettronici (quali
caricabatterie, cufa e cavo USB) non devono essere smaltiti con altri riuti domestici al termine del ciclo di vita. Per evitare eventuali danni
all’ambiente o alla salute causati dall’inopportuno smaltimento dei riuti, si invita l’utente a separare il prodotto e i suddetti accessori da altri
tipi di riuti e di riciclarli in maniera responsabile per favorire il riutilizzo sostenibile delle risorse materiali. Gli utenti domestici sono invitati a
contattare il rivenditore presso il quale è stato acquistato il prodotto o l’ufcio locale preposto per tutte le informazioni relative alla raccolta
differenziata e al riciclaggio per questo tipo di materiali. Gli utenti aziendali sono invitati a contattare il proprio fornitore e vericare i termini
e le condizioni del contratto di acquisto. Questo prodotto e i relativi accessori elettronici non devono essere smaltiti unitamente ad altri riuti
commerciali.
Eliminación correcta de este producto (Residuos de aparatos eléctricos y electrónicos)
(Aplicable en la Unión Europea y en países europeos con sistemas de recogida selectiva de residuos)
La presencia de este símbolo en el producto, accesorios o material informativo que lo acompañan, indica que al nalizar su vida útil ni el
producto ni sus accesorios electrónicos (como el cargador, cascos, cable USB) deberán eliminarse junto con otros residuos domésticos.
Para evitar los posibles daños al medio ambiente o a la salud humana que representa la eliminación incontrolada de residuos, separe
estos productos de otros tipos de residuos y recíclelos correctamente. De esta forma se promueve la reutilización sostenible de recursos
materiales. Los usuarios particulares pueden contactar con el establecimiento donde adquirieron el producto o con las autoridades locales
pertinentes para informarse sobre cómo y dónde pueden llevarlo para que sea sometido a un reciclaje ecológico y seguro. Los usuarios
comerciales pueden contactar con su proveedor y consultar las condiciones del contrato de compra. Este producto y sus accesorios
electrónicos no deben eliminarse junto a otros residuos comerciales.
Eliminação Correcta Deste Produto (Resíduos de Equipamentos Eléctricos e Electrónicos)
Esta marca apresentada no produto, nos acessórios ou na literatura – indica que o produto e os seus acessórios electrónicos (por exemplo,
o carregador, o auricular, o cabo USB) não deverão ser eliminados juntamente com os resíduos domésticos no nal do seu período de
vida útil. Para impedir danos ao ambiente ou à saúde humana causados pela eliminação incontrolada de resíduos, deverá separar estes
equipamentos de outros tipos de resíduos e reciclá-los de forma responsável, para promover uma reutilização sustentável dos recursos
materiais. Os utilizadores domésticos deverão contactar o estabelecimento onde adquiriram este produto ou as entidades ociais locais
para obterem informações sobre onde e de que forma podem entregar estes equipamentos para permitir efectuar uma reciclagem segura
em termos ambientais. Os utilizadores prossionais deverão contactar o seu fornecedor e consultar os termos e condições do contrato de
compra. Este produto e os seus acessórios electrónicos não deverão ser misturados com outros resíduos comerciais para eliminação.
[English]
[Français]
[Deutsch]
[Nederlands]
[Italiano]
[Español]
[Português]
Page 43
Korrekt avfallshantering av produkten (elektriska och elektroniska produkter)
Denna markering på produkten, tillbehören och i manualen anger att produkten och de elektroniska tillbehören (t.ex. laddare, headset,
USB-kabel) inte bör sorteras tillsammans med annat hushållsavfall när de kasseras. Till förebyggande av skada på miljö och hälsa bör
dessa föremål hanteras separat för ändamålsenlig återvinning av beståndsdelarna. Hushållsanvändare bör kontakta den återförsäljare
som sålt produkten eller sin kommun för vidare information om var och hur produkten och tillbehören kan återvinnas på ett miljösäkert sätt.
Företagsanvändare bör kontakta leverantören samt veriera angivna villkor i köpekontraktet. Produkten och de elektroniska tillbehören bör
inte hanteras tillsammans med annat kommersiellt avfall.
Korrekt affaldsbortskaffelse af dette produkt (elektrisk & elektronisk udstyr)
Mærket på dette produkt, på tilbehør eller i den medfølgende dokumentation betyder, at produktet og elektronisk tilbehør hertil (f.eks.
oplader, hovedsæt, USB-ledning) ikke må bortskaffes sammen med almindeligt husholdningsaffald efter endt levetid. For at undgå skadelige
miljø- eller sundhedspåvirkninger på grund af ukontrolleret affaldsbortskaffelse skal ovennævnte bortskaffes særskilt fra andet affald og
indleveres behørigt til fremme for bæredygtig materialegenvinding. Forbrugere bedes kontakte forhandleren, hvor de har købt produktet,
eller kommunen for oplysning om, hvor og hvordan de kan indlevere ovennævnte med henblik på miljøforsvarlig genvinding. Virksomheder
bedes kontakte leverandøren og læse betingelserne og vilkårene i købekontrakten. Dette produkt og elektronisk tilbehør hertil bør ikke
bortskaffes sammen med andet erhvervsaffald.
Korrekt avhending av dette produktet (Avfall fra elektrisk og elektronisk utstyr)
Denne merkingen som vises på produktet, dets tilbehør eller dokumentasjon, indikerer at produktet eller det elektroniske tilbehøret (for
eksempel lader, headset, USB-kabel) ikke skal kastes sammen med annet husholdningsavfall ved slutten av levetiden. For å hindre
potensiell skade på miljøet eller helseskader grunnet ukontrollert avfallsavhending ber vi om at dette avfallet holdes adskilt fra andre
typer avfall og resirkuleres på ansvarlig måte for å fremme bærekraftig gjenbruk av materielle ressurser. Private forbrukere bør kontakte
enten forhandleren de kjøpte produktet av, eller lokale myndigheter, for detaljer om hvor og hvordan disse artiklene kan resirkuleres på
en miljøvennlig måte. Forretningsbrukere bør kontakte sin leverandør og undersøke vilkårene i kjøpskontrakten. Dette produktet og det
elektroniske tilbehøret skal ikke blandes med annet kommersielt avfall som skal kastes.
Tuotteen turvallinen hävittäminen (elektroniikka ja sähkölaitteet)
Oheinen merkintä tuotteessa, lisävarusteissa tai käyttöohjeessa merkitsee, että tuotetta tai lisävarusteina toimitettavia sähkölaitteita (esim.
laturia, kuulokkeita tai USB kaapelia) ei saa hävittää kotitalousjätteen mukana niiden käyttöiän päätyttyä. Virheellisestä jätteenkäsittelystä
ympäristölle ja terveydelle aiheutuvien haittojen välttämiseksi tuote ja lisävarusteet on eroteltava muusta jätteestä ja kierrätettävä
kestävän kehityksen mukaista uusiokäyttöä varten. Kotikäyttäjät saavat lisätietoja tuotteen ja lisävarusteiden turvallisesta kierrätyksestä
ottamalla yhteyttä tuotteen myyneeseen jälleenmyyjään tai paikalliseen ympäristöviranomaiseen. Yrityskäyttäjien tulee ottaa yhteyttä
tavarantoimittajaan ja selvittää hankintasopimuksen ehdot. Tuotetta tai sen lisävarusteita ei saa hävittää muun kaupallisen jätteen seassa.
A termék hulladékba helyezésének módszere(WEEE – Elektromos és elektronikus berendezések hulladékai)
Ez a jelzés a terméken, tartozékain vagy dokumentációján arra utal, hogy hasznos élettartama végén a terméket és elektronikus tartozékait
(pl. töltőegység, fejhallgató, USB kábel) nem szabad a háztartási hulladékkal együtt kidobni. A szabálytalan hulladékba helyezés által
okozott környezet- és egészségkárosodás megelőzése érdekében ezeket a tárgyakat különítse el a többi hulladéktól, és felelősségteljesen
gondoskodjon az újrahasznosításukról az anyagi erőforrások fenntartható újrafelhasználásának elősegítése érdekében. A háztartási
felhasználók a termék forgalmazójától vagy a helyi önkormányzati szervektől kérjenek tanácsot arra vonatkozóan, hová és hogyan vihetik
el az elhasznált termékeket a környezetvédelmi szempontból biztonságos újrahasznosítás céljából. Az üzleti felhasználók lépjenek
kapcsolatba beszállítójukkal, és vizsgálják meg az adásvételi szerződés feltételeit. Ezt a terméket és tartozékait nem szabad az egyéb
közületi hulladékkal együtt kezelni.
Prawidłowe usuwanie produktu (zużyty sprzęt elektryczny i elektroniczny)
To oznaczenie umieszczone na produkcie, akcesoriach lub dokumentacji oznacza, że po zakończeniu eksploatacji nie należy tego produktu
ani jego akcesoriów (np. ładowarki, zestawu słuchawkowego, przewodu USB) wyrzucać wraz ze zwykłymi odpadami gospodarstwa
domowego. Aby uniknąć szkodliwego wpływu na środowisko naturalne i zdrowie ludzi wskutek niekontrolowanego usuwania odpadów,
prosimy o oddzielenie tych przedmiotów od odpadów innego typu oraz o odpowiedzialny recykling i praktykowanie ponownego
wykorzystania materiałów. W celu uzyskania informacji na temat miejsca i sposobu bezpiecznego dla środowiska recyklingu tych
przedmiotów, użytkownicy w gospodarstwach domowych powinni skontaktować się z punktem sprzedaży detalicznej, w którym dokonali
zakupu produktu, lub z organem władz lokalnych. Użytkownicy w rmach powinni skontaktować się ze swoim dostawcą i sprawdzić warunki
umowy zakupu. Produktu ani jego akcesoriów nie należy usuwać razem z innymi odpadami komercyjnymi.
Σωστή Απόρριψη αυτού του Προϊόντος (Απόβλητα Ηλεκτρικού & Ηλεκτρονικού Εξοπλισμού)
(Ισχύει για την Ευρωπαϊκή Ένωση και για άλλες ευρωπαϊκές χώρες με χωριστά συστήματα συλλογής) Αυτό το σήμα που εμφανίζεται επάνω
στο προϊόν, στα εξαρτήματά του ή στα εγχειρίδια που το συνοδεύουν, υποδεικνύει ότι το προϊόν και τα ηλεκτρονικά του εξαρτήματα (π.χ.
φορτιστής, ακουστικά, καλώδιο USB) δεν θα πρέπει να ρίπτονται μαζί με τα υπόλοιπα οικιακά απορρίμματα μετά το τέλος του κύκλου ζωής
τους. Προκειμένου να αποφευχθούν ενδεχόμενες βλαβερές συνέπειες στο περιβάλλον ή την υγεία εξαιτίας της ανεξέλεγκτης διάθεσης
απορριμμάτων, σας παρακαλούμε να διαχωρίσετε αυτά τα προϊόντα από άλλους τύπους απορριμμάτων και να τα ανακυκλώσετε, ώστε
να βοηθήσετε στην βιώσιμη επαναχρησιμοποίηση των υλικών πόρων. Οι οικιακοί χρήστες θα πρέπει να έλθουν σε επικοινωνία είτε με
το κατάστημα απ’ όπου αγόρασαν αυτό το προϊόν, είτε με τις κατά τόπους υπηρεσίες, προκειμένου να πληροφορηθούν τις λεπτομέρειες
σχετικά με τον τόπο και τον τρόπο με τον οποίο μπορούν να δώσουν αυτά τα προϊόντα για ασφαλή προς το περιβάλλον ανακύκλωση.
Οι επιχειρήσεις-χρήστες θα πρέπει να έλθουν σε επαφή με τον προμηθευτή τους και να ελέγξουν τους όρους και τις προϋποθέσεις του
συμβολαίου αγοράς. Αυτό το προϊόν και τα ηλεκτρονικά του εξαρτήματα δεν θα πρέπει να αναμιγνύονται με άλλα συνηθισμένα απορρίμματα
προς διάθεση.
[Svenska]
[Dansk]
[Norsk]
[Suomi]
[Magyar]
[Polski]
[Ελληνικά]
Page 44
Правилно третиране на изделието след края на експлоатационния му живот
(Отпадъци, представляващи електрическо и електронно оборудване)(Важи за държавите на Европейския съюз и други европейски
държави със системи за разделно сметосъбиране)
Този знак, поставен върху изделието, негови принадлежности или печатни материали, означава, че продуктът и принадлежностите
(например зарядно устройство, слушалки, USB кабел) не бива да се изхвърлят заедно с другите битови отпадъци, когато изтече
експлоатационният му живот. Отделяйте тези устройства от другите видови отпадъци и ги предавайте за рециклиране. Спазвайки
това правило не излагате на опасност здравето на други хора и предпазвате околната среда от замърсяване, предизвикано от
безконтролно изхвърляне на отпадъци. Освен това, подобно отговорно поведение създава възможност за повторно (екологично
съобразно) използване на материалните ресурси. Домашните потребители трябва да се свържат с търговеца на дребно, от когото
са закупили изделието, или със съответната местна държавна агенция, за да получат подробни инструкции къде и кога могат
да занесат тези устройства за рециклиране, безопасно за околната среда. Корпоративните потребители следва да се свържат с
доставчика си и да проверят условията на договора за покупка. Това изделие и неговите електронни принадлежности не бива да се
сместват с другите отпадъци на търговското предприятие.
Správná likvidace výrobku (Elektrický a elektronický odpad)
Toto označení na výrobku, jeho příslušenství nebo dokumentaci znamená, že výrobek a jeho elektronické příslušenství (například nabíječku,
náhlavní sadu, USB kabel) je po skončení životnosti zakázáno likvidovat jako běžný komunální odpad. Možným negativním dopadům na
životní prostředí nebo lidské zdraví způsobeným nekontrolovanou likvidací zabráníte oddělením zmíněných produktů od ostatních typů
odpadu a jejich zodpovědnou recyklací za účelem udržitelného využívání druhotných surovin. Uživatelé z řad domácností by si měli od
prodejce, u něhož produkt zakoupili, nebo u příslušného městského úřadu vyžádat informace, kde a jak mohou tyto výrobky odevzdat k
bezpečné ekologické recyklaci. Podnikoví uživatelé by měli kontaktovat dodavatele a zkontrolovat všechny podmínky kupní smlouvy. Tento
výrobek a jeho elektronické příslušenství nesmí být likvidován spolu s ostatním průmyslovým odpadem.
Správna likvidácia tohoto výrobku (Elektrotechnický a elektronický odpad)
(Platné pre Európsku úniu a ostatné európske krajiny so systémom triedeného odpadu)
Toto označenie na výrobku, príslušenstve alebo v sprievodnej brožúre hovorí, že po skončení životnosti by produkt ani jeho elektronické
príslušenstvo (napr. nabíjačka, náhlavná súprava, USB kábel) nemali byť likvidované s ostatným domovým odpadom. Prípadnému
poškodeniu životného prostredia alebo ľudského zdravia môžete predísť tým, že budete tieto výrobky oddeľovať od ostatného odpadu a
vrátite ich na recykláciu. Používatelia v domácnostiach by pre podrobné informácie, ako ekologicky bezpečne naložiť s týmito výrobkami,
mali kontaktovať buď predajcu, ktorý im ich predal, alebo príslušný úrad v mieste ich bydliska. Priemyselní používatelia by mali kontaktovať
svojho dodávateľa a preveriť si podmienky kúpnej zmluvy. Tento výrobok a ani jeho elektronické príslušenstvo by nemali byť likvidované
spolu s ostatným priemyselným odpadom.
Cum se elimină corect acest produs (Deşeuri de echipamente electrice şi electronice)
(Aplicabil în ţările Uniunii Europene şi în alte ţări cu sisteme de colectare selectivă)
Acest simbol de pe produs, accesorii şi documentaţie indică faptul că produsul şi accesoriile sale electronice (încărcător, căşti, cablu USB)
nu trebuie eliminate împreună cu alte deşeuri menajere la nalul duratei lor de utilizare. Dat ind că eliminarea necontrolată a deşeurilor
poate dăuna mediului înconjurător sau sănătăţii umane, vă rugăm să separaţi aceste articole de alte tipuri de deşeuri şi să le reciclaţi în
mod responsabil, promovând astfel reutilizarea durabilă a resurselor materiale. Utilizatorii casnici trebuie să-l contacteze pe distribuitorul
care le-a vândut produsul sau să se intereseze la autorităţile locale unde şi cum pot să ducă aceste articole pentru a reciclate în mod
ecologic. Utilizatorii comerciali trebuie să-şi contacteze furnizorul şi să consulte termenii şi condiţiile din contractul de achiziţie. Acest produs
şi accesoriile sale electronice nu trebuie eliminate împreună cu alte deşeuri comerciale.
Izstrādājuma pareiza likvidēšana (Attiecas uz nolietotām elektriskām un elektroniskām ierīcēm)
(Spēkā Eiropas Savienībā un pārējās Eiropas valstīs, kas izmanto atkritumu dalītu savākšanu)
Šis uz izstrādājuma un tā piederumiem vai pievienotajā dokumentācijā izvietotais marķējums norāda, ka izstrādājumu un tā elektroniskos
piederumus (piem., uzlādes ierīci, austiņas, USB kabeli) pēc ekspluatācijas laika beigām nedrīkst likvidēt kopā ar citiem sadzīves
atkritumiem. Lai nepieļautu atkritumu nekontrolētas likvidēšanas radītu varbūtēju kaitējumu videi un cilvēku veselībai, lūdzam minētās ierīces
nošķirt no citiem atkritumiem un disciplinēti nodot pienācīgai pārstrādei, tā sekmējot materiālo resursu atkārtotu izmantošanu. Lai uzzinātu,
kur un kā minētās ierīces iespējams nodot ekoloģiski drošai pārstrādei, mājsaimniecībām jāsazinās ar izstrādājuma pārdevēju vai savu
pašvaldību. Iestādēm un uzņēmumiem jāsazinās ar izstrādājuma piegādātāju un jāiepazīstas ar pirkuma līguma nosacījumiem. Izstrādājumu
un tā elektroniskos piederumus nedrīkst nodot likvidēšanai kopā ar citiem iestāžu un uzņēmumu atkritumiem.
Tinkamas šio gaminio išmetimas (elektros ir elektroninės įrangos atliekos)
Šis ženklas, pateiktas ant gaminio, jo priedų ar dokumentacijoje, nurodo, kad gaminio ir jo elektroninių priedų (pvz., įkroviklio, ausinių,
USB kabelio) negalima išmesti kartu su kitomis buitinėmis atliekomis gaminio naudojimo laikui pasibaigus. Kad būtų išvengta galimos
nekontroliuojamo atliekų išmetimo žalos aplinkai arba žmonių sveikatai ir skatinamas aplinką tausojantis antrinių žaliavų panaudojimas,
atskirkite šiuos elementus nuo kitų rūšių atliekų ir atiduokite perdirbti. Informacijos kur ir kaip pristatyti šiuos elementus saugiai perdirbti,
privatūs vartotojai turėtų kreiptis į parduotuvę, kurioje šį gaminį pirko, arba į vietos valdžios institucijas. Verslo vartotojai turėtų kreiptis
į savo tiekėją ir peržiūrėti pirkimo sutarties sąlygas. Tvarkant atliekas, šio gaminio ir jo elektroninių priedų negalima maišyti su kitomis
pramoninėmis atliekomis.
[Български]
[Čeština]
[Slovensky]
[Română]
[Latviešu]
[Lietuvių]
Page 45

Õige viis toote kasutuselt kõrvaldamiseks (elektriliste ja elektrooniliste seadmete jäätmed)
Selline tähistus tootel või selle tarvikutel või dokumentidel näitab, et toodet ega selle elektroonilisi tarvikuid (nt laadija, peakomplekt, USBkaabel) ei tohi kasutusaja lõppemisel kõrvaldada koos muude olmejäätmetega. Selleks et vältida jäätmete kontrollimatu kõrvaldamisega
seotud võimaliku kahju tekitamist keskkonnale või inimeste tervisele ning edendada materiaalsete vahendite säästvat taaskasutust,
eraldage need esemed muudest jäätmetest ja suunake need vastutustundlikult taasringlusse. Kodukasutajad saavad teavet nende esemete
keskkonnaohutu ringlussevõtu kohta kas toote müüjalt või keskkonnaametist. Firmad peaksid võtma ühendust tarnijaga ning kontrollima
ostulepingu tingimusi ja sätteid. Toodet ega selle elektroonilisi tarvikuid ei tohi panna muude hävitamiseks mõeldud kaubandusjäätmete
hulka.
[Eesti]
Page 46
Correct disposal of batteries in this product
(Applicable in the European Union and other European countries with separate battery return systems.)
This marking on the battery, manual or packaging indicates that the batteries in this product should not be disposed of with other household
waste at the end of their working life. Where marked, the chemical symbols Hg, Cd or Pb indicate that the battery contains mercury, cadmium
or lead above the reference levels in EC Directive 2006/66. If batteries are not properly disposed of, these substances can cause harm to
human health or the environment. To protect natural resources and to promote material reuse, please separate batteries from other types of
waste and recycle them through your local, free battery return system.
Elimination des batteries de ce produit
(Applicable aux pays de l’Union européenne et aux autres pays européens dans lesquels des systèmes de collecte sélective sont mis en
place.)
Le symbole sur la batterie, le manuel ou l’emballage indique que les batteries de ce produit ne doivent pas être éliminées en n de vie avec
les autres déchets ménagers. L’indication éventuelle des symboles chimiques Hg, Cd ou Pb signie que la batterie contient des quantités de
mercure, de cadmium ou de plomb supérieures aux niveaux de référence stipulés dans la directive CE 2006/66. Si les batteries ne sont pas
correctement éliminées, ces substances peuvent porter préjudice à la santé humaine ou à l’environnement. An de protéger les ressources
naturelles et d’encourager la réutilisation du matériel, veillez à séparer les batteries des autres types de déchets et à les recycler via votre
système local de collecte gratuite des batteries.
Korrekte Entsorgung der Batterien dieses Produkts
(In den Ländern der Europäischen Union und anderen europäischen Ländern mit einem separaten Altbatterie-Rücknahmesystem)
Die Kennzeichnung auf der Batterie bzw. auf der dazugehörigen Dokumentation oder Verpackung gibt an, dass die Batterie zu diesem
Produkt nach seiner Lebensdauer nicht zusammen mit dem normalen Haushaltsmüll entsorgt werden darf. Wenn die Batterie mit den
chemischen Symbolen Hg, Cd oder Pb gekennzeichnet ist, liegt der Quecksilber-, Cadmium- oder Blei-Gehalt der Batterie über den in der
EG-Richtlinie 2006/66 festgelegten Referenzwerten. Wenn Batterien nicht ordnungsgemäß entsorgt werden, können sie der menschlichen
Gesundheit bzw. der Umwelt schaden. Bitte helfen Sie, die natürlichen Ressourcen zu schützen und die nachhaltige Wiederverwertung
von stofichen Ressourcen zu fördern, indem Sie die Batterien von anderen Abfällen getrennt über Ihr örtliches kostenloses AltbatterieRücknahmesystem entsorgen.
Correcte behandeling van een gebruikte accu uit dit product
(Van toepassing op de Europese Unie en andere Europese landen met afzonderlijke inzamelingssystemen voor accu’s en batterijen.)
Dit merkteken op de accu, handleiding of verpakking geeft aan dat de accu in dit product aan het einde van de levensduur niet samen met
ander huishoudelijk afval mag worden weggegooid. De chemische symbolen Hg, Cd of Pb geven aan dat het kwik-, cadmium- of loodgehalte
in de accu hoger is dan de referentieniveaus in de Richtlijn 2006/66/EC. Indien de gebruikte accu niet op de juiste wijze wordt behandeld,
kunnen deze stoffen schadelijk zijn voor de gezondheid van mensen of het milieu. Ter bescherming van de natuurlijke hulpbronnen en ter
bevordering van het hergebruik van materialen, verzoeken wij u afgedankte accu’s en batterijen te scheiden van andere soorten afval en
voor recycling aan te bieden bij het gratis inzamelingssysteem voor accu’s en batterijen in uw omgeving.
Corretto smaltimento delle batterie del prodotto
(Applicabile nei paesi dell’Unione Europea e in altri paesi europei con sistemi di conferimento differenziato delle batterie.)
Il marchio riportato sulla batteria o sulla sua documentazione o confezione indica che le batterie di questo prodotto non devono essere
smaltite con altri riuti domestici al termine del ciclo di vita. Dove rafgurati, i simboli chimici Hg, Cd o Pb indicano che la batteria contiene
mercurio, cadmio o piombo in quantità superiori ai livelli di riferimento della direttiva UE 2006/66. Se le batterie non vengono smaltite
correttamente, queste sostanze possono causare danni alla salute umana o all’ambiente. Per proteggere le risorse naturali e favorire il
riutilizzo dei materiali, separare le batterie dagli altri tipi di riuti e riciclarle utilizzando il sistema di conferimento gratuito previsto nella propria
area di residenza.
Eliminación correcta de las baterías de este producto
(Aplicable en la Unión Europea y en otros países europeos con sistemas de recogida selectiva de baterías.)
La presencia de esta marca en las baterías, el manual o el paquete del producto indica que cuando haya nalizado la vida útil de las
baterías no deberán eliminarse junto con otros residuos domésticos. Los símbolos químicos Hg, Cd o Pb, si aparecen, indican que la batería
contiene mercurio, cadmio o plomo en niveles superiores a los valores de referencia admitidos por la Directiva 2006/66 de la Unión Europea.
Si las baterías no se desechan convenientemente, estas sustancias podrían provocar lesiones personales o dañar el medioambiente. Para
proteger los recursos naturales y promover el reciclaje, separe las baterías de los demás residuos y recíclelas mediante el sistema de
recogida gratuito de su localidad.
Eliminação correcta das baterias existentes neste produto
(Aplicável na União Europeia e noutros países europeus com sistemas de recolha de baterias separados.)
Esta marca, apresentada na bateria, manual ou embalagem, indica que as baterias existentes neste produto não devem ser eliminadas
juntamente com os resíduos domésticos indiferenciados no nal do seu período de vida útil. Onde existentes, os símbolos químicos Hg, Cd
ou Pb indicam que a bateria contém mercúrio, cádmio ou chumbo acima dos níveis de referência indicados na Directiva CE 2006/66. Se as
baterias não forem correctamente eliminadas, estas substâncias poderão ser prejudiciais para a saúde humana ou para o meio ambiente.
Para proteger os recursos naturais e promover a reutilização dos materiais, separe as baterias dos outros tipos de resíduos e recicle-as
através do sistema gratuito de recolha local de baterias.
Ustrezno odstranjevanje baterij v tem izdelku
(Uporabno v EU in ostalih evropskih državah s sistemi ločenega odstranjevanja baterij)
Ta oznaka na bateriji, v navodilih ali na embalaži pomeni, da baterij ob izteku njihove življenjske dobe v tem izdelku ne smete odstraniti
skupaj z ostalimi gospodinjskimi odpadki. Oznake za kemijske elemente Hg, Cd ali Pb pomenijo, da baterija vsebuje živo srebro, kadmij ali
svinec v količinah, ki presegajo referenčne nivoje v direktivi EC 2006/66. Če te baterije niso ustrezno odstranjene, te snovi lahko škodujejo
zdravju ljudi oziroma okolju. Za zaščito naravnih virov in za vzpodbujanje ponovne uporabe materialov prosimo, ločite te baterije od ostalih
odpadkov in jih oddajte na predvidenih lokalnih zbirnih reciklažnih mestih.
Korrekt avfallshantering av batterierna i denna produkt
(Gäller EU och andra europeiska länder med särskild batteriåtervinning.) Denna markering på batteriet, i manualen eller på förpackningen
anger att batterierna i denna produkt inte bör slängas tillsammans med annat hushållsavfall. De kemiska symbolerna Hg, Cd eller Pb
visar i förekommande fall att batterierna innehåller kvicksilver, kadmium eller bly i mängder överstigande de gränsvärden som anges i
EU-direktivet 2006/66. Om batterierna inte slängs på ett ansvarsfullt sätt kan dessa substanser utgöra en fara för hälsa eller miljö. Hjälp till
att skydda naturresurser och bidra till materialåtervinning genom att sortera batterierna separat från annat avfall och lämna in dem på en
återvinningsstation.
[English]
[Français]
[Deutsch]
[Nederlands]
[Italiano]
[Español]
[Português]
[Slovenščina]
[Svenska]
Page 47
KKorrekt bortskaffelse af batterierne i dette produkt
(Gælder i EU og andre europæiske lande med særlige retursystemer for batterier).
Mærket på dette batteri, dokumentationen eller emballagen betyder, at batterierne i dette produkt efter endt levetid ikke må bortskaffes
sammen med andet husholdningsaffald. Mærkning med de kemiske symboler Hg, Cd eller Pb betyder, at batteriet indeholder kviksølv,
cadmium eller bly over grænseværdierne i EU-direktiv 2006/66. Hvis batterierne ikke bortskaffes korrekt, kan disse stoffer være skadelige
for menneskers helbred eller for miljøet. For at beskytte naturens ressourcer og fremme genbrug, skal batterier holdes adskilt fra andre typer
affald og genanvendes via dit lokale, gratis batteriretursystem.
Korrekt avhending av batterier i dette produkt
(Kommer til anvendelse i Den europeiske union og i andre europeiske land med separate systemer for retur av batterier.)
Denne merkingen på batteriet, håndboken eller emballasjen angir at batteriene i dette produktet ikke skal kastes sammen med annet
husholdningsavfall ved slutten av sin levetid. Der det er merket, angir de kjemiske symbolene Hg, Cd eller Pb at batteriet inneholder
kvikksølv, kadmium eller bly over referansenivåene i EF-direktiv 2006/66. Hvis batteriene ikke avhendes på riktig måte, kan disse stoffene
skade menneskers helse eller miljøet. For å beskytte naturressurser og for å fremme gjenbruk av materialer, ber vi deg adskille batterier fra
andre typer avfall og resirkulere dem ved å levere dem på din lokale, gratis mottaksstasjon.
Tuotteen paristojen oikea hävittäminen
(Koskee Euroopan Unionia ja muita Euroopan maita, joissa on erillinen paristojen palautusjärjestelmä.)
Pariston, käyttöoppaan tai pakkauksen tämä merkintä tarkoittaa, että tämän tuotteen sisältämiä paristoja ei saa hävittää muun
kotitalousjätteen seassa, kun niiden käyttöikä on päättynyt. Kemiallinen symboli Hg, Cd tai Pb ilmaisee, että paristo sisältää elohopeaa,
kadmiumia tai lyijyä ylin EU: n direktiivien 2006/66 viiterajojen. Jos paristoja ei hävitetä oikein, nämä aineet voivat vahingoittaa ihmisten
terveyttä tai ympäristöä. Suojaa luonnonvaroja ja edistä materiaalien uusiokäyttöä - erottele paristot muusta jätteestä ja toimita ne
kierrätettäväksi paikalliseen maksuttomaan paristojen palautusjärjestelmään.
A termékhez tartozó akkumulátorok megfelelő ártalmatlanítása
(Az Európai Unió területén és más, önálló akkumulátorleadó rendszerrel rendelkező európai országok területén alkalmazandó.)
Az akkumulátoron, a kézikönyvön vagy a csomagoláson szereplő jelzés arra utal, hogy hasznos élettartama végén a terméket nem
szabad egyéb háztartási hulladékkal együtt kidobni. Ahol szerepel a jelzés, a Hg, Cd vagy Pb kémiai elemjelölések arra utalnak, hogy
az akkumulátor az EK 2006/66. számú irányelvben rögzített referenciaszintet meghaladó mennyiségű higanyt, kadmiumot vagy ólmot
tartalmaz. Az akkumulátorok nem megfelelő kezelése esetén ezek az anyagok veszélyt jelenthetnek az egészségre vagy a környezetre.
A természeti erőforrások megóvása és az anyagok újrafelhasználásának ösztönzése érdekében kérjük, különítse el az akkumulátorokat a
többi hulladéktól és vigye vissza a helyi, ingyenes akkumulátorleadó helyre.
Sposób poprawnego usuwania baterii, w które wyposażony jest niniejszy produkt
(Dotyczy obszaru Unii Europejskiej oraz innych krajów europejskich posiadających oddzielne systemy zwrotu zużytych baterii.)
Niniejsze oznaczenie na baterii, instrukcji obsługi lub opakowaniu oznacza, że po upływie okresu użytkowania baterie, w które wyposażony
był dany produkt, nie mogą zostać usunięte wraz z innymi odpadami pochodzącymi z gospodarstw domowych. Przy zastosowaniu takiego
oznaczenia symbole chemiczne (Hg, Cd lub Pb) wskazują, że dana bateria zawiera rtęć, kadm lub ołów w ilości przewyższającej poziomy
odniesienia opisane w dyrektywie WE 2006/66. Jeśli baterie nie zostaną poprawnie zutylizowane, substancje te mogą powodować
zagrożenie dla zdrowia ludzkiego lub środowiska naturalnego. Aby chronić zasoby naturalne i promować ponowne wykorzystanie
materiałów, należy oddzielać baterie od innego typu odpadów i poddawać je utylizacji poprzez lokalny, bezpłatny system zwrotu baterii.
Σωστή απόρριψη των μπαταριών αυτού του προϊόντος
(Ισχύει στην Ευρωπαϊκή Ένωση και άλλες ευρωπαϊκές χώρες με συστήματα ξεχωριστής ανακύκλωσης μπαταριών.)
Αυτή η επισήμανση πάνω στη μπαταρία, το εγχειρίδιο ή τη συσκευασία υποδεικνύει ότι οι μπαταρίες αυτού του προϊόντος δεν πρέπει να
απορρίπτονται μαζί με άλλα οικιακά απορρίμματα στο τέλος του κύκλου ζωής τους. Όπου υπάρχουν, τα χημικά σύμβολα Hg, Cd ή Pb
υποδεικνύουν ότι η μπαταρία περιέχει υδράργυρο, κάδμιο ή μόλυβδο πάνω από τα επίπεδα αναφοράς της Ευρωπαϊκής Οδηγίας 2006/66.
Αν οι μπαταρίες δεν απορριφθούν σωστά, αυτές οι ουσίες ενδέχεται να προκαλέσουν βλαβερές συνέπειες στην ανθρώπινη υγεία ή το
περιβάλλον. Παρακαλούμε διαχωρίζετε τις μπαταρίες από άλλους τύπους απορριμμάτων και ανακυκλώνετέ τις μέσω του τοπικού σας,
δωρεάν συστήματος ανακύκλωσης μπαταριών, για την προστασία των φυσικών πόρων και την προώθηση της επαναχρησιμοποίησης
υλικών.
Правилно изхвърляне на батериите в този продукт
(Приложимо в Европейския съюз и други европейски държави със самостоятелни системи за връщане на батерии.)
Това обозначение върху батерията, ръководството или опаковката, показва, че батериите в този продукт не бива да се изхвърлят
с другите битови отпадъци в края на техния полезен живот. Където са маркирани, химическите символи Hg, Cd или Pb показват,
че батерията съдържа живак, кадмий или олово над контролните нива в Директива 2006/66 на ЕО. Ако батериите не се изхвърлят
правилно, тези вещества могат да предизвикат увреждане на човешкото здраве или на околната среда. За да предпазите
природните ресурси и за да съдействате за многократната употреба на материалните ресурси, моля отделяйте батериите от
другите видове отпадъчни продукти и ги рециклирайте посредством Вашата локална система за безплатно връщане на батерии.
[Dansk]
[Norsk]
[Suomi]
[Magyar]
[Polski]
[Ελληνικά]
[Български]
Page 48
Správná likvidace baterií v tomto výrobku
(Platí v Evropské unii a dalších evropských zemích s vlastními systémy zpětného odběru baterií.)
Tato značka na baterii, návodu nebo obalu znamená, že baterie v tomto výrobku nesmí být na konci své životnosti likvidovány společně s
jiným domovním odpadem. Případně vyznačené symboly chemikálií Hg, Cd nebo Pb upozorňují na to, že baterie obsahuje rtuť, kadmium
nebo olovo v množství překračujícím referenční úrovně stanovené směrnicí ES 2006/66. Pokud baterie nejsou správně zlikvidovány, mohou
tyto látky poškodit zdraví osob nebo životní prostředí. Pro ochranu přírodních zdrojů a pro podporu opakovaného využívání materiálů
oddělte, prosím, baterie od ostatních typů odpadu a nechte je recyklovat prostřednictvím místního bezplatného systému zpětného odběru
baterií.
Správna likvidácia batérií v tomto výrobku
(Aplikovateľné v krajinách Európskej únie a v ostatných európskych krajinách, v ktorých existujú systémy separovaného zberu batérií.)
Toto označenie na batérii, príručke alebo balení hovorí, že batérie v tomto výrobku by sa po skončení ich životnosti nemali likvidovať spolu
s ostatným domovým odpadom. V prípade takéhoto označenia chemické symboly Hg, Cd alebo Pb znamenajú, že batéria obsahuje ortuť,
kadmium alebo olovo v množstve presahujúcom referenčné hodnoty smernice 2006/66/ES. Pri nevhodnej likvidácii batérií môžu tieto látky
poškodiť zdravie alebo životné prostredie. Za účelom ochrany prírodných zdrojov a podpory opätovného použitia materiálu batérie likvidujte
oddelene od iných typov odpadou a recyklujte ich prostredníctvom miestneho systému bezplatného zberu batérií.
Dispoziţii privind eliminarea corectă a bateriilor acestui produs
(aplicabile în Uniunea Europeană şi în alte ţări europene cu sisteme separate de colectare a bateriilor)
Acest marcaj de pe baterie, de pe manualul de utilizare sau de pe ambalaj indică faptul că bateriile acestui produs nu trebuie eliminate
împreună cu alte deşeuri menajere la sfârşitul ciclului lor de viaţă. Dacă sunt marcate, simbolurile chimice Hg, Cd sau Pb indică faptul că
bateria conţine mercur, cadmiu sau plumb peste nivelurile de referinţă prevăzute în Directiva CE 2006/66. În cazul în care bateriile nu sunt
eliminate corespunzător, aceste substanţe pot dăunătoare pentru sănătatea omului sau pentru mediu. În vederea protejării resurselor
naturale şi a promovării refolosirii materialelor, vă rugăm să separaţi bateriile de celelalte tipuri de deşeuri şi să le reciclaţi prin intermediul
sistemului gratuit de returnare a bateriilor la nivel local.
Šī izstrādājuma bateriju pareiza utilizācija
(Piemērojama Eiropas Savienībā un citās Eiropas valstīs ar atsevišķām bateriju nodošanas sistēmām.)
Šis marķējums uz baterijas, rokasgrāmatā vai uz iepakojuma norāda, ka šī izstrādājuma bateriju pēc tās kalpošanas laika beigām nedrīkst
izmest ar citiem sadzīves atkritumiem. Ja uz baterijas ir atzīmēti ķīmiskie simboli, piem., Hg, Cd vai Pb, tie norāda, ka baterija satur
dzīvsudrabu, kadmiju vai svinu, kura saturs ir lielāks par EK Direktīvā 2006/66 minētajiem lielumiem. Ja baterijas tiek nepareizi likvidētas, šīs
vielas var radīt kaitējumu cilvēku veselībai vai videi. Lai aizsargātu dabas resursus un veicinātu materiālu otrreizēju izmantošanu, šķirojiet
baterijas atsevišķi no citiem atkritumu veidiem un nododiet tās otrreizējai pārstrādei, izmantojot bateriju vietējo bezmaksas nodošanas
sistēmu.
Tinkamas šio produkto akumuliatorių tvarkymas
(Taikoma Europos Sąjungoje ir kitose Europos šalyse, kuriose galioja atskiros akumuliatorių grąžinimo sistemos.)
Šis ženklas yra pateikiamas ant akumuliatoriaus, jo dokumentacijoje ar ant pakuotės nurodo, kad šio produkto akumuliatorių, pasibaigus
jų tarnavimo laikui, negalima išmesti kartu su kitomis buitinėmis atliekomis. Cheminiai simboliai Hg, Cd arba Pb rodo, kad akumuliatoriuje
yra gyvsidabrio, kadmio ar švino, kurio kiekis viršija normą, nurodytą ES direktyvoje 2006/66. Jei akumuliatoriai nebus tinkamai išmesti,
šios medžiagos gali sukelti žalos žmonių sveikatai ar aplinkai. Tam, kad būtų apsaugoti gamtos ištekliai ir skatinamas antrinių žaliavų
panaudojimas, pašome atskirti akumuliatorių nuo kitų rūšių atliekų ir atiduoti perdirbti vietinėje akumuliatorių grąžinimo sistemai.
Őige viis toote akude kasutusest kőrvaldamiseks
(Rakendatav Euroopa Liidus ja teistes Euroopa riikides, kus on kasutusel spetsiaalsed akude kogumissüsteemid).
Selline tähistus akul, dokumentidel vői pakendil näitab, et toote akusid ei tohi kasutusaja lőppemisel kőrvaldada koos muude
olmejäätmetega. Keemilised elemendid Hg, Cd, vői Pb näitavad, et aku elavhőbeda, kaadmiumi vői plii sisaldus on EÜ direktiivi 2006/66
sihttasemest suurem. Kui akusid ei kőrvaldata őigel viisil, vőib nende sisu pőhjustada tervise-vői keskkonnakahjustusi. Selleks, et kaitsta
loodusvarasid ja edendada materjalide taaskasutamist, eraldage akud muudest jäätmetest ja suunake need taaskasutusse kohaliku, tasuta
teenusena pakutava akude tagastussüsteemi abil.
[Čeština]
[Slovensky]
[Română]
[Lietuvių]
[Lietuvių]
[Eesti]
 Loading...