How it Works
Log In / Sign Up
Buy Points
How it Works
FAQ
Contact Us
Questions and Suggestions
Users
Samsung
Loading...
L
LCD 24B
5
LCD 24Bi
2
LCD Flat Panel TV W17M24C
LCDM0601CA01HQ-WW
LCDM0707CA01HQ-WW
LCD MONITOR
2
LCD MONITOR 275TPLUS
LCD TV
43
LCD TV 5
LCD TV all models
LCD TV LE22S8
LCD TV LE26A346
LCD TV LE26R41BD
LCD TV LE26R52BD
LCD TV LE26R53BD
LCD TV LE32MM8
LCD TV’s
LCOTR14
LCOTR14N
LCOTR16
LCOTR16N
LD173AP
LD173BP
LD173DP
LD190
LD190G
5
LD190N
4
LD190N - LCD Monitor 1360X768 5MS Analog
2
LD220
3
LD220G
LD220HD
3
LD220Z
LD40
LDO19CS
2
LDO19WS
LE-15S51
LE-15S51 BP
9
LE-19 D451G3W
LE-19R86
LE-19R86BD
8
LE-20S52 B
4
LE-20S52 BP
3
LE-20S81
LE-20S81 Black
LE-22
LE-22B350
3
LE-22B450
9
LE-22B450C4
LE-22B451
4
LE-22C450E1W
6
LE-22 D451
3
LE-22D451G3W
LE-22 S81
3
LE-22 S81 Black
LE-22S86BD
3
LE-26A451C1
3
LE-26B450C4
LE-26B457
LE-26D451G3W
LE-26R81B
5
LE-26S86B
LE-32A558P3F
4
LE-32A756R1F
7
LE-32A759
LE-32B450
10
LE-32 B450C4
LE-32 B530P7
LE-32 B550A5
LE-32 B653T5
LE-32 C454
LE-32 C530
9
LE-32D400
3
LE-32D451G3W
LE-32 M51
LE-32M51BS
3
LE-32 M71
LE-32 M87
LE-32 N71
LE-32 R31
LE-32R41
LE-32R41B
12
LE-32 R51
LE-32 R71
2
LE-32R71W
6
LE-32 R72
LE-32 R81
LE-32R81B
5
LE-32 S71
LE-32 S81
LE-32 T51
LE**A45*C
LE**C450
LE*R73BD series
LE*R74BD series
LE*R86BD series
LE*R87BD series
LE*S73BD series
LE*S74BD series
LE*S86BD series
LE*S87BD series
Loading...
Loading...
Nothing found
LE-20S52 B
User Manual
66 pgs
6.31 Mb
0
User Manual
57 pgs
6.38 Mb
0
User Manual [ru]
66 pgs
5.41 Mb
0
User Manual [uk]
59 pgs
5.83 Mb
0
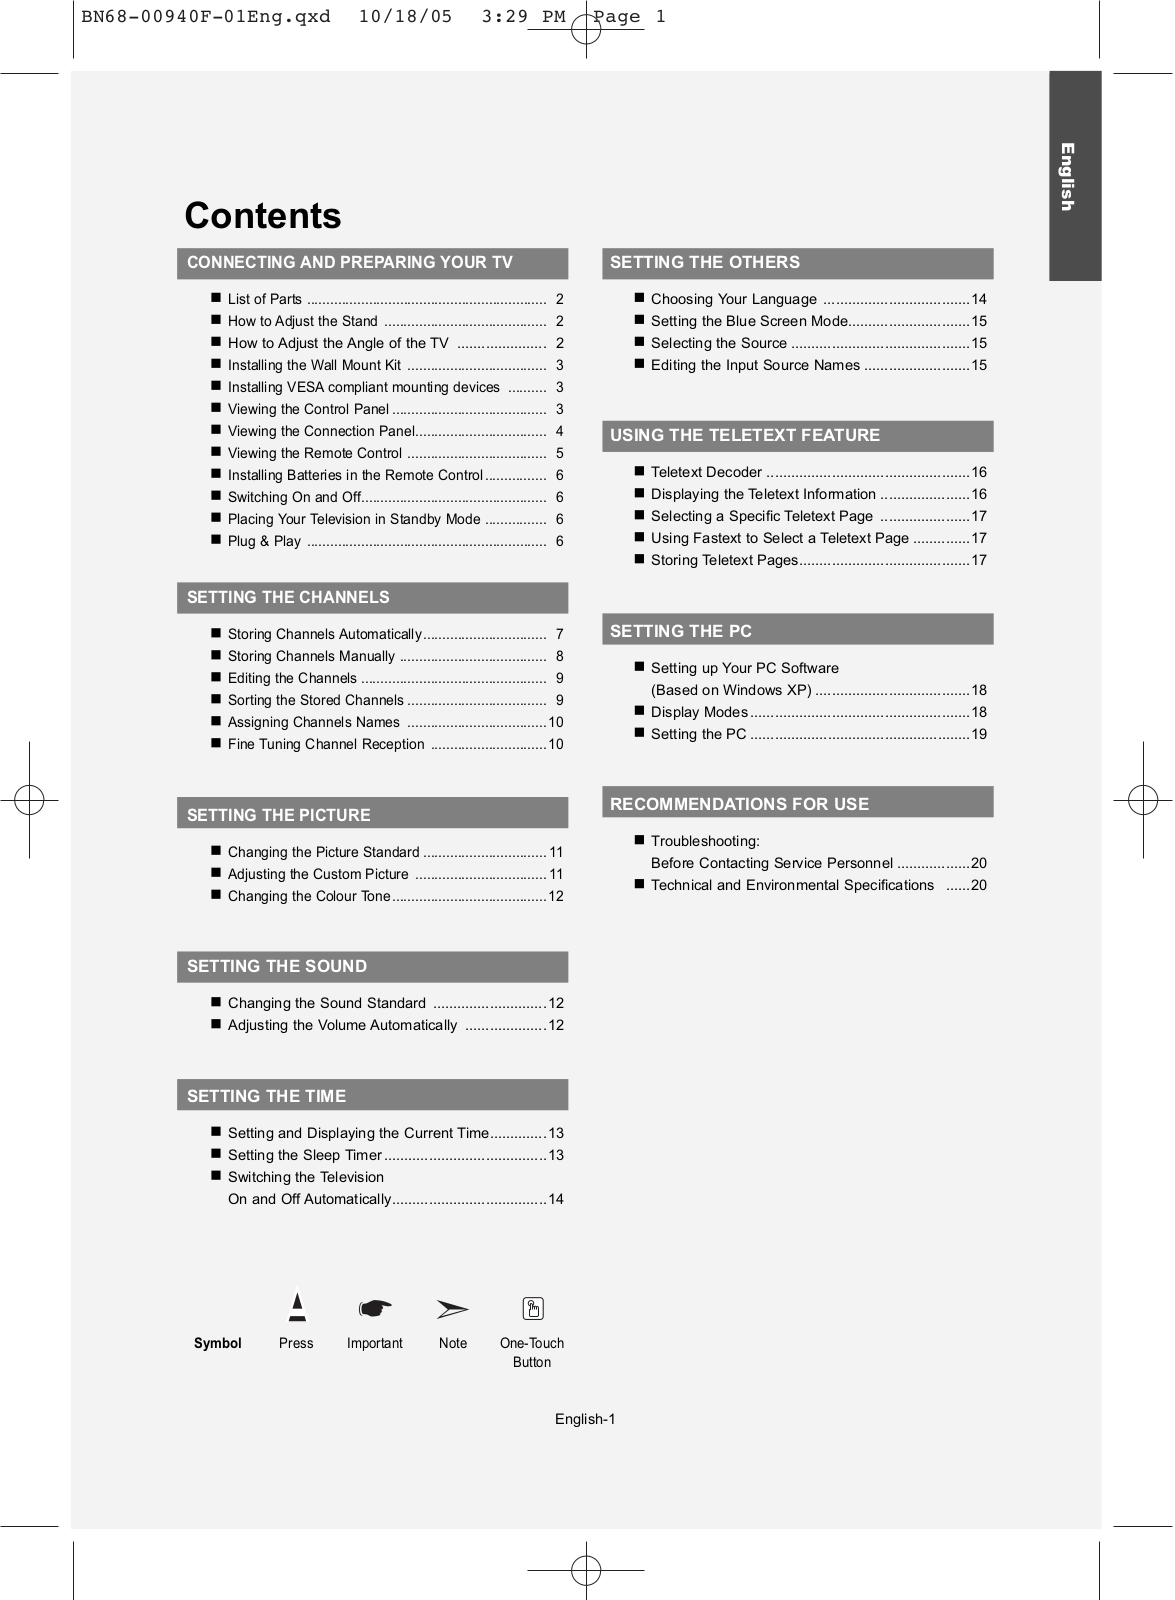
Table of contents
Loading...
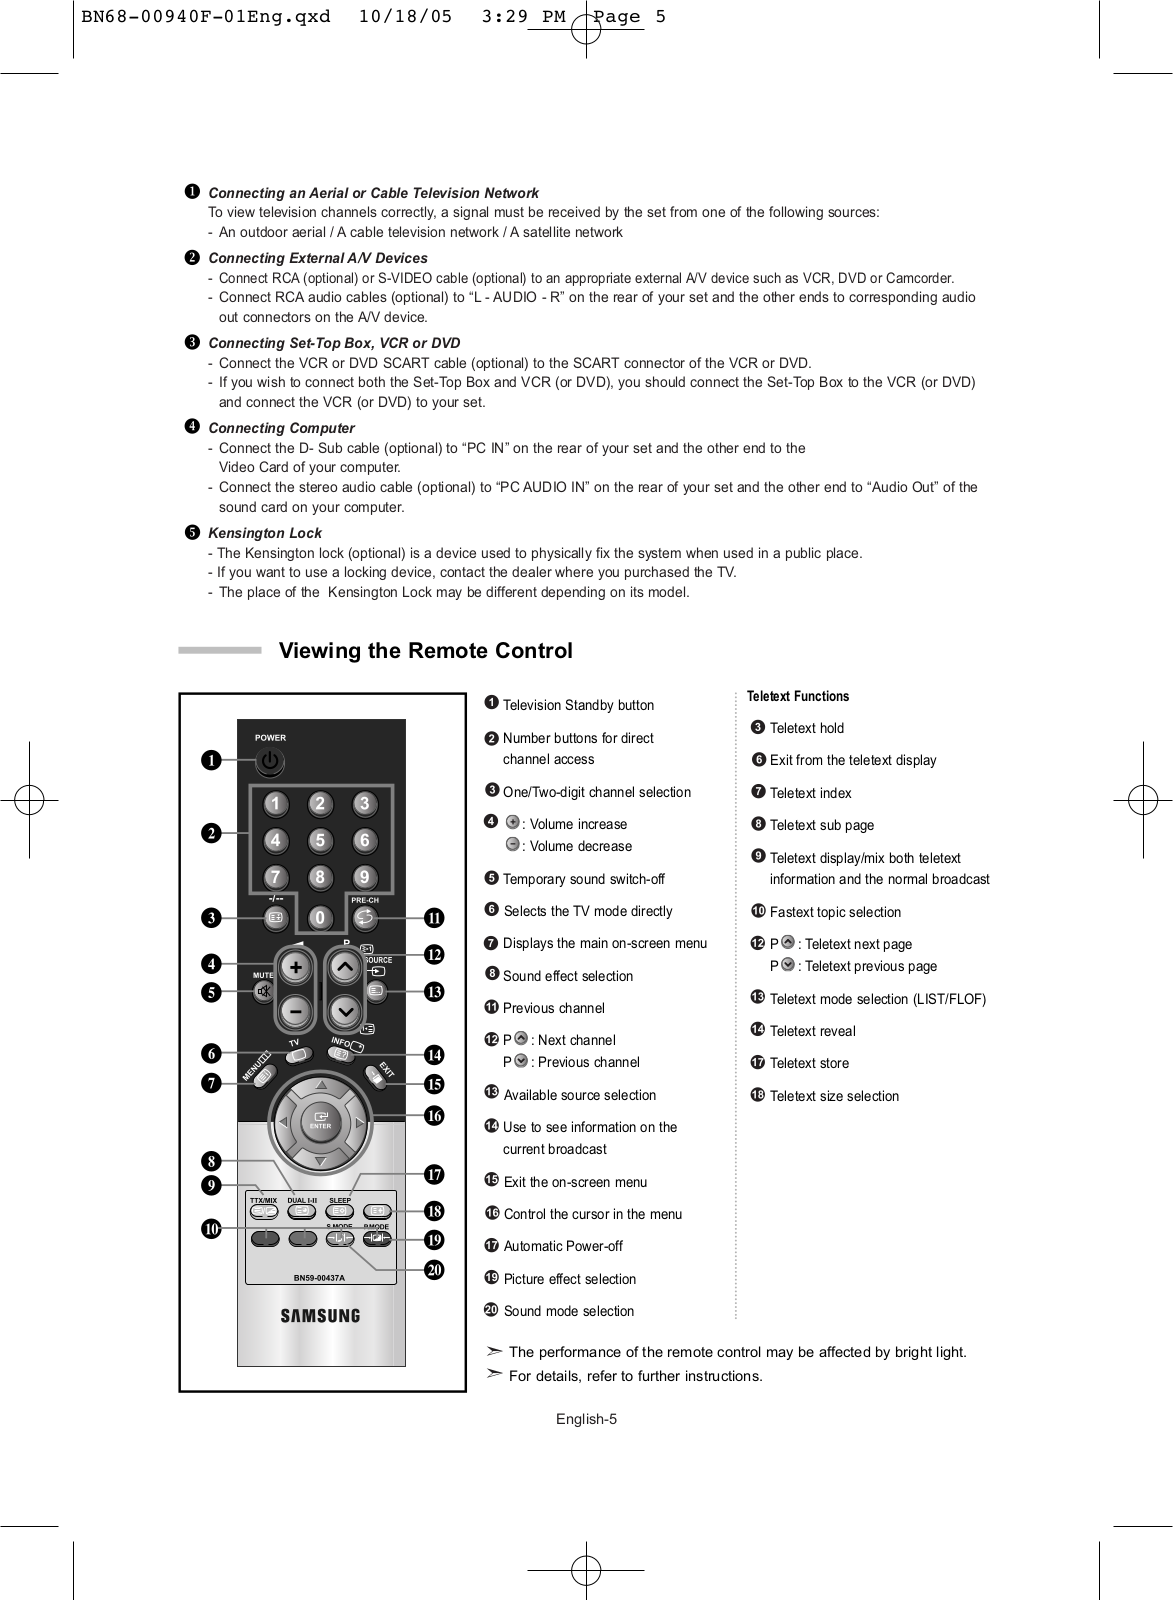
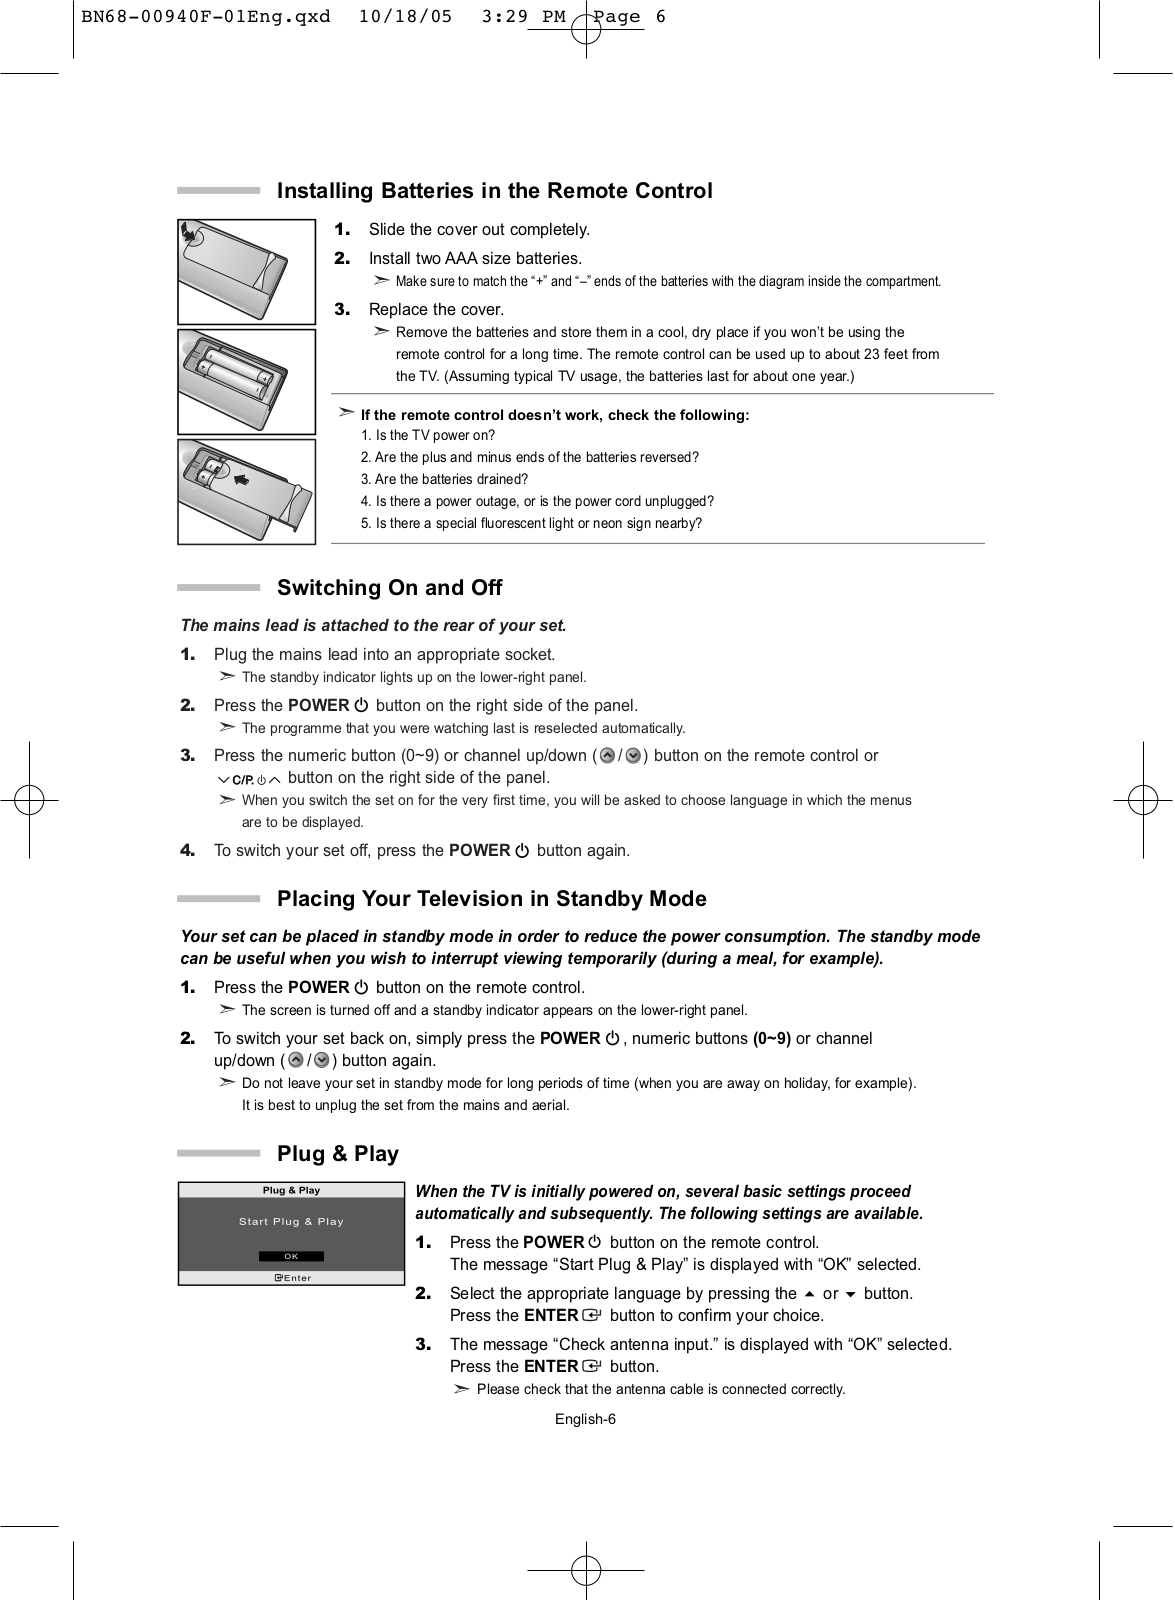
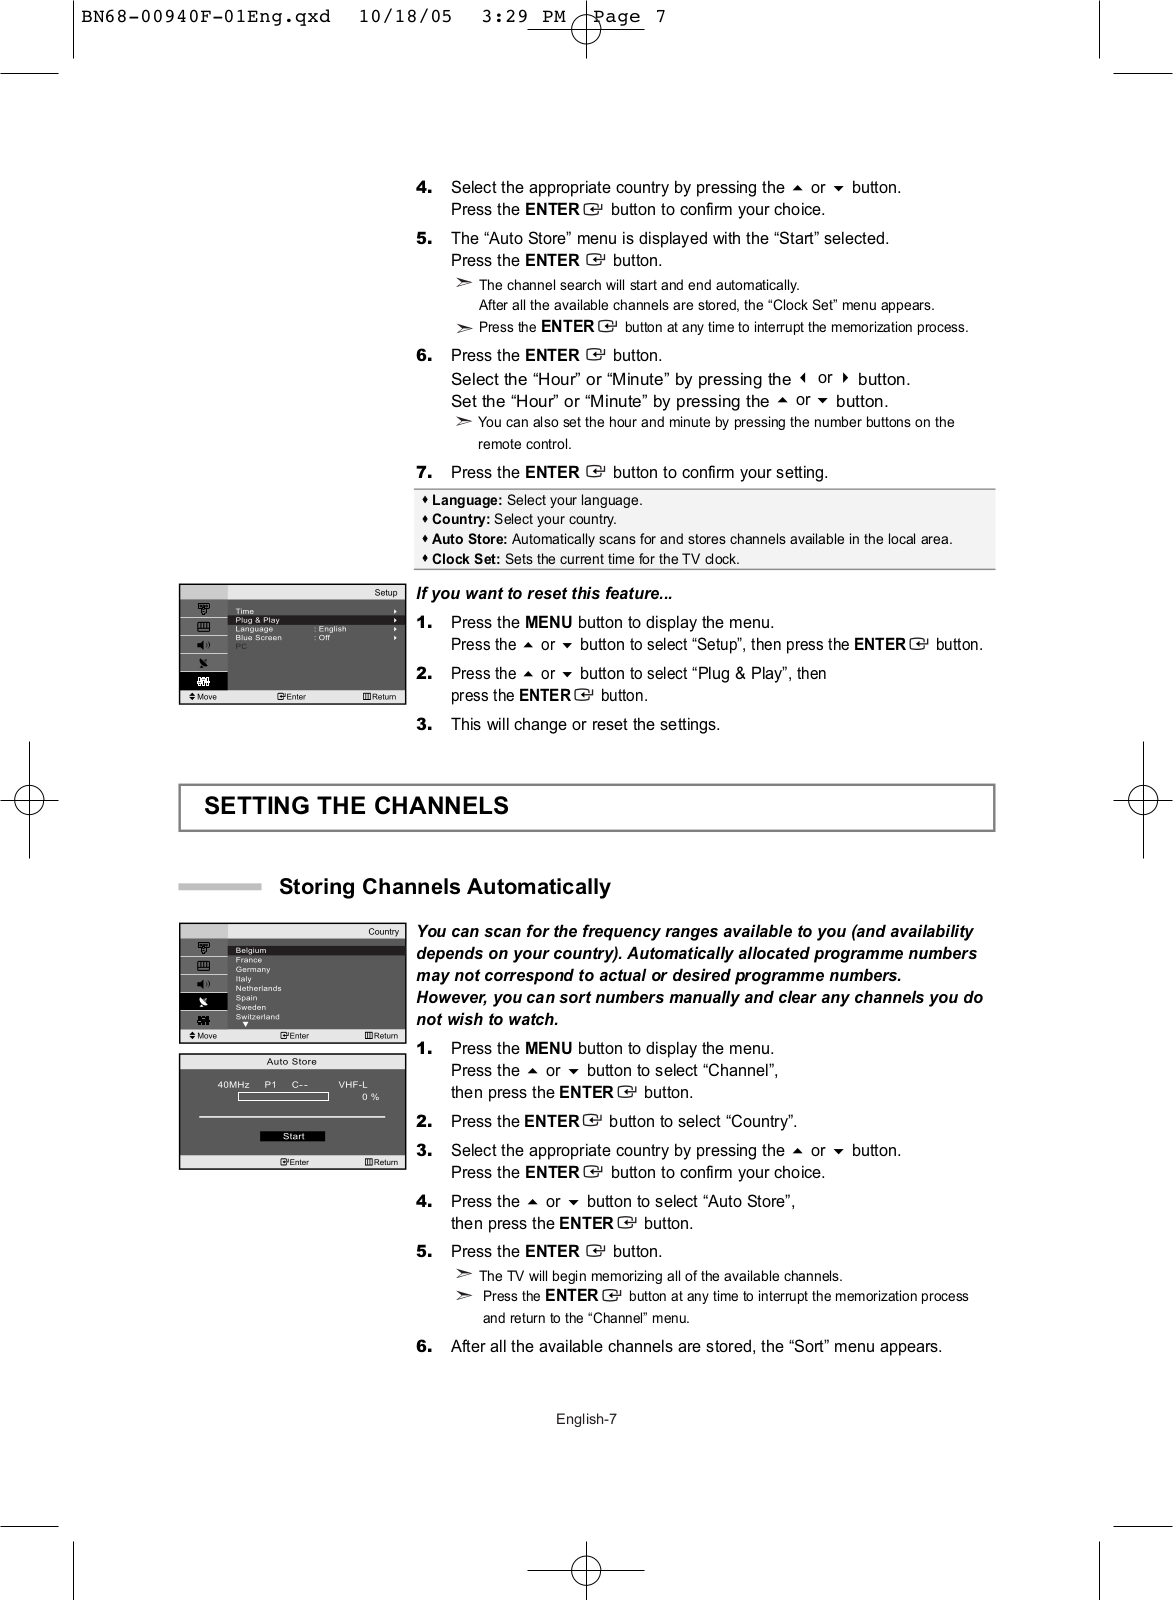
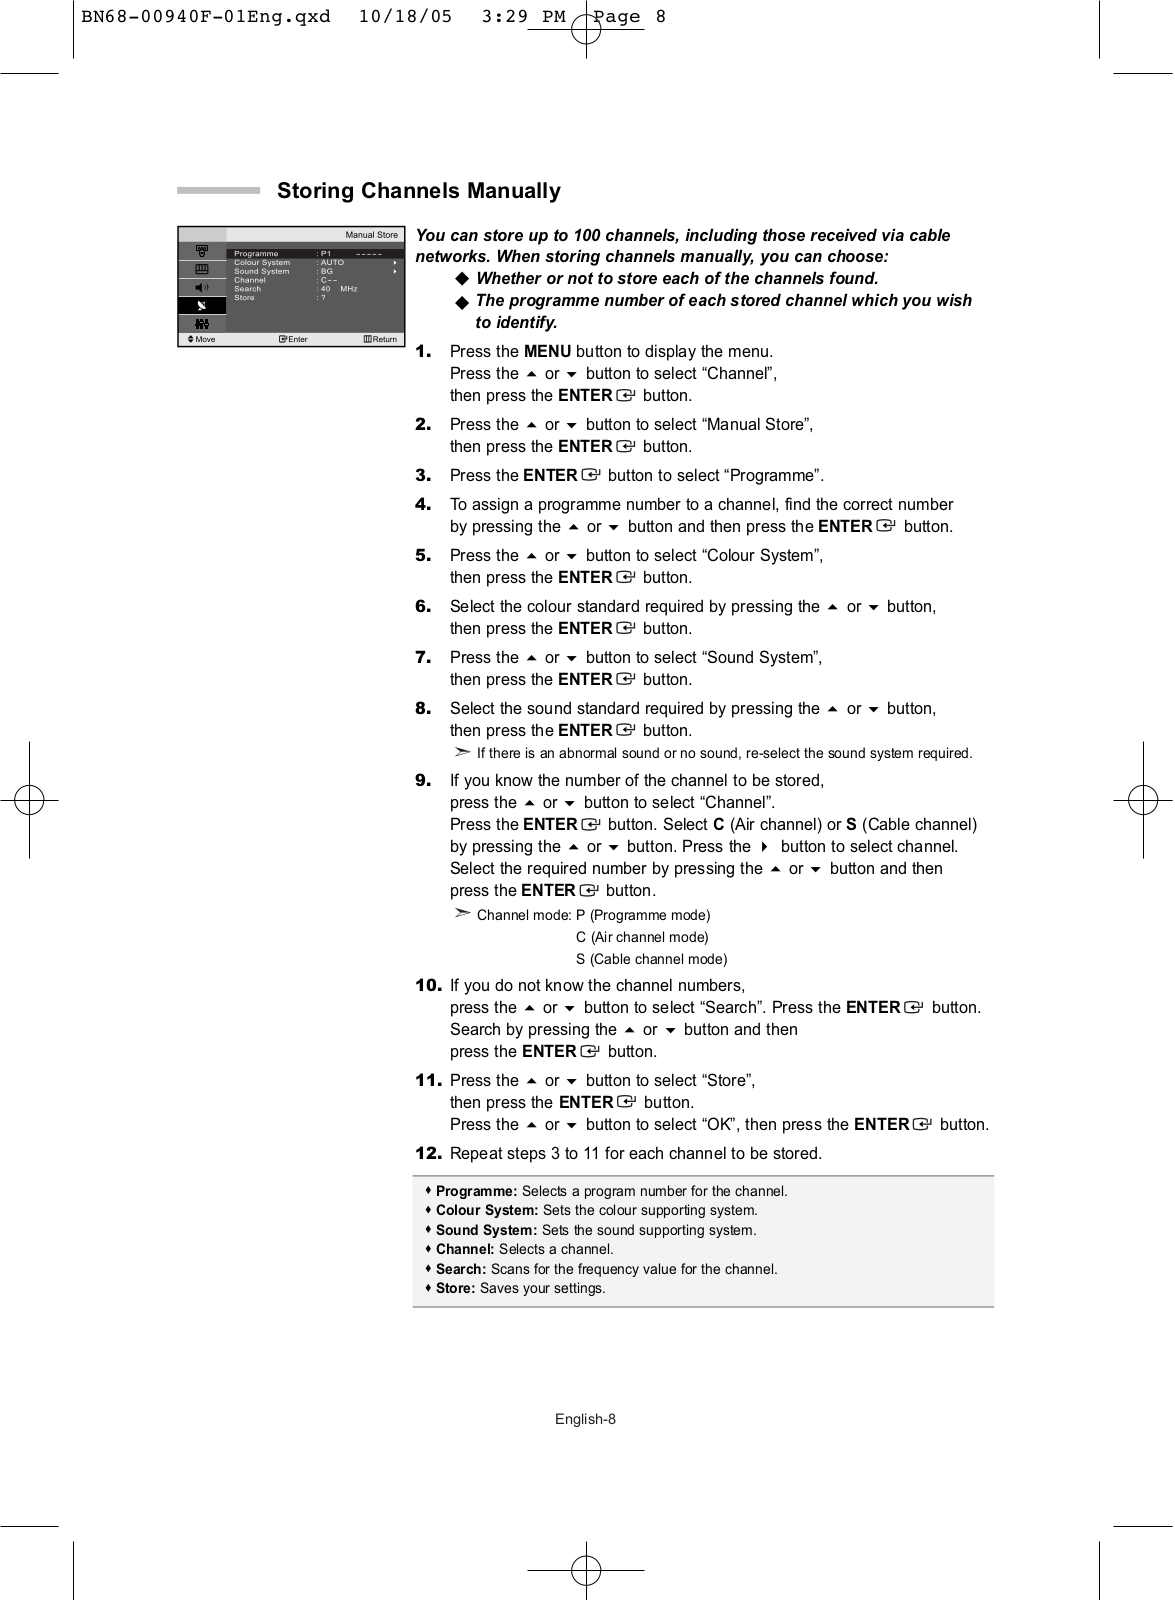
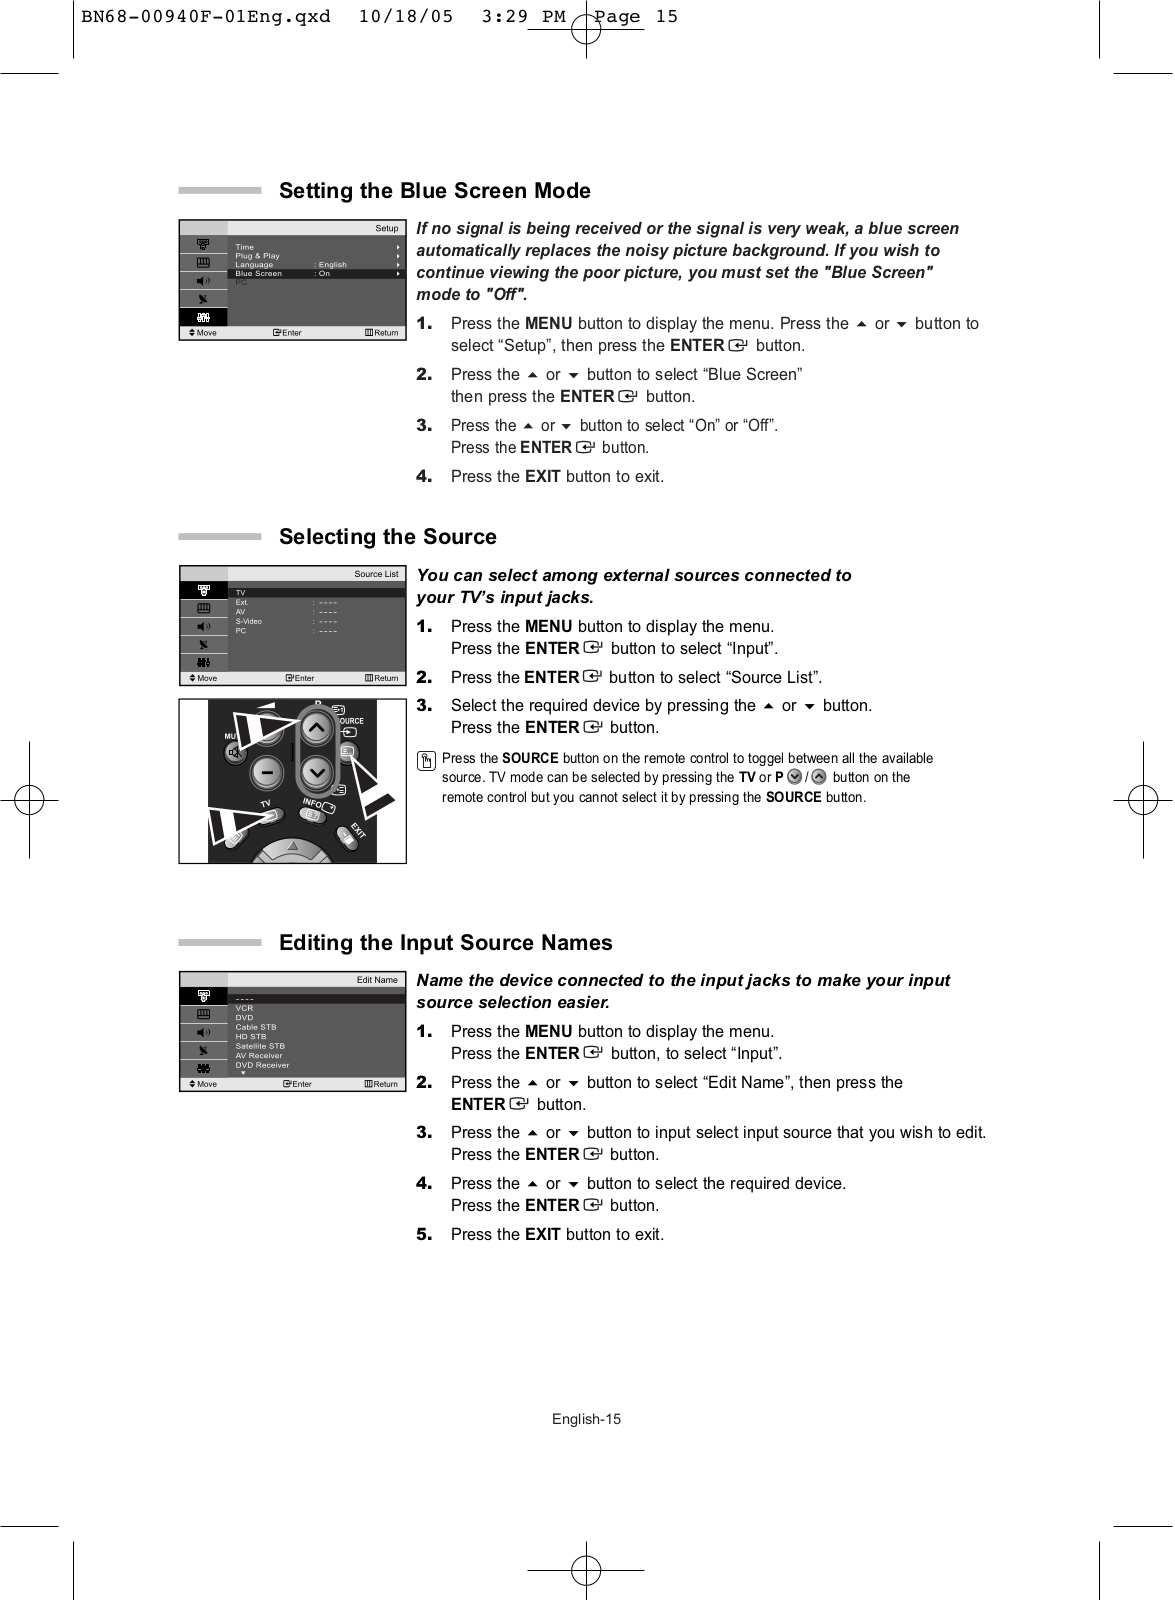
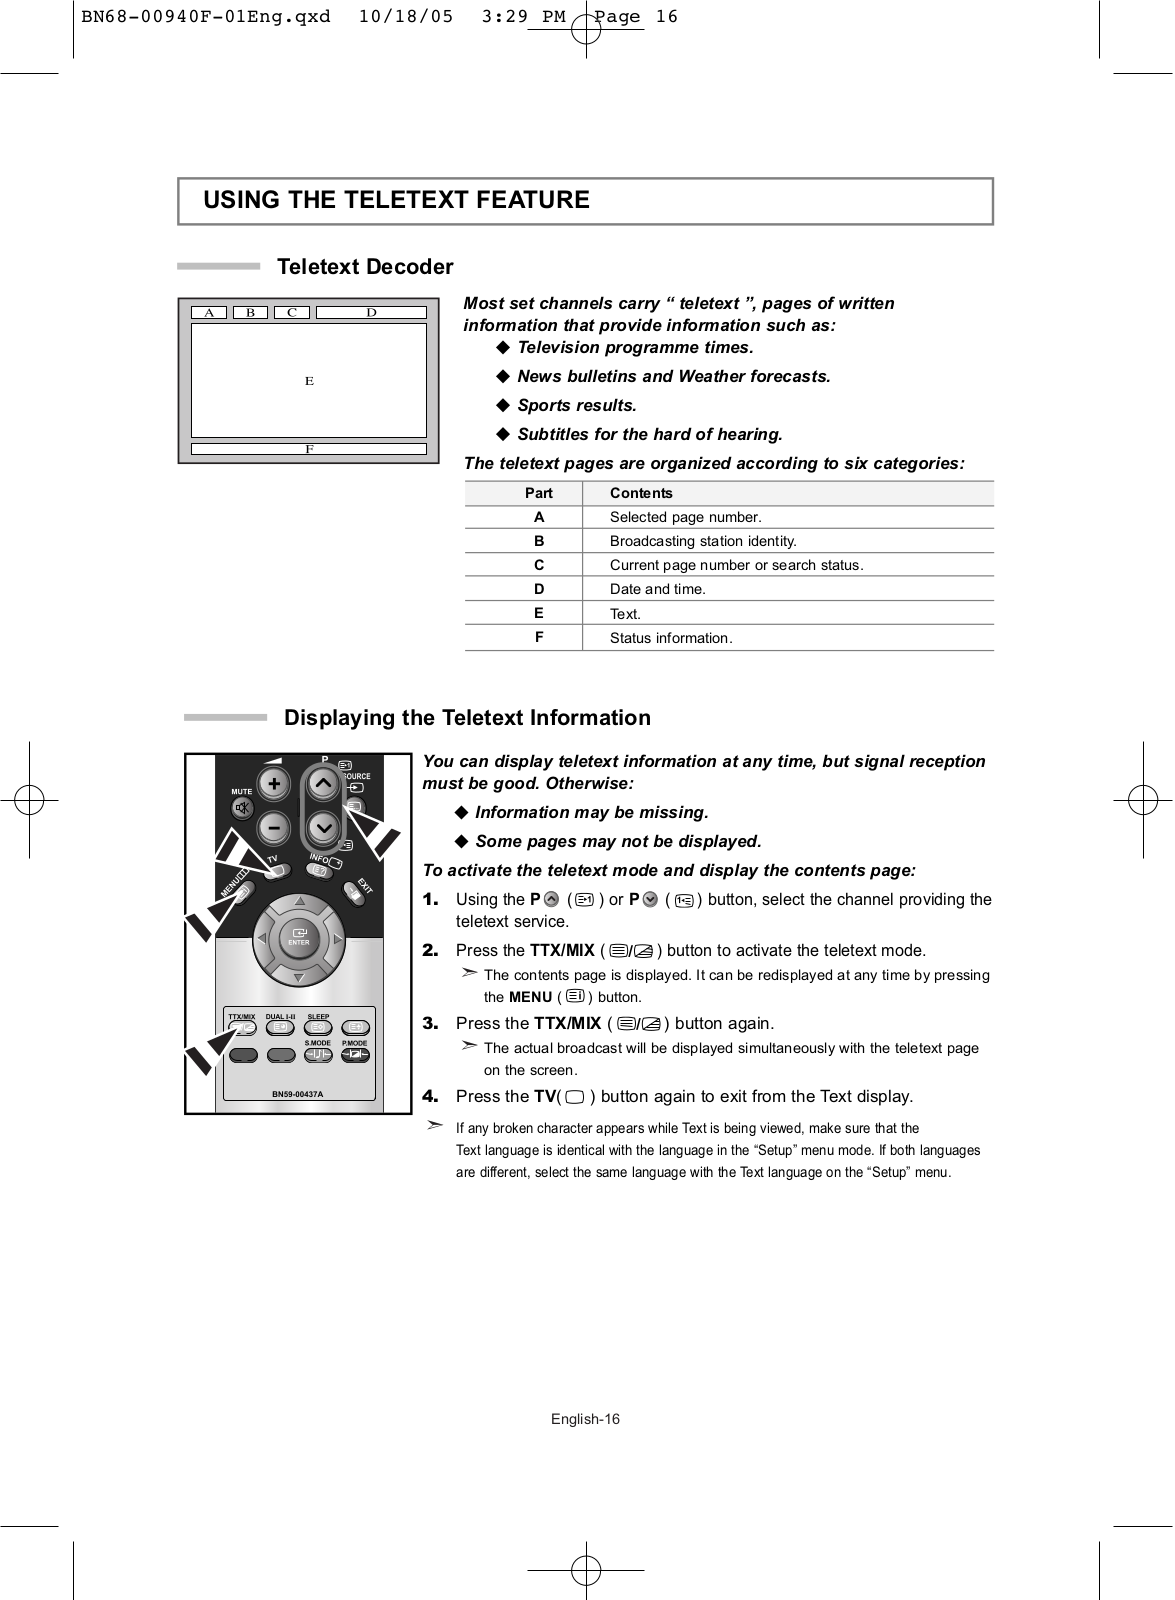
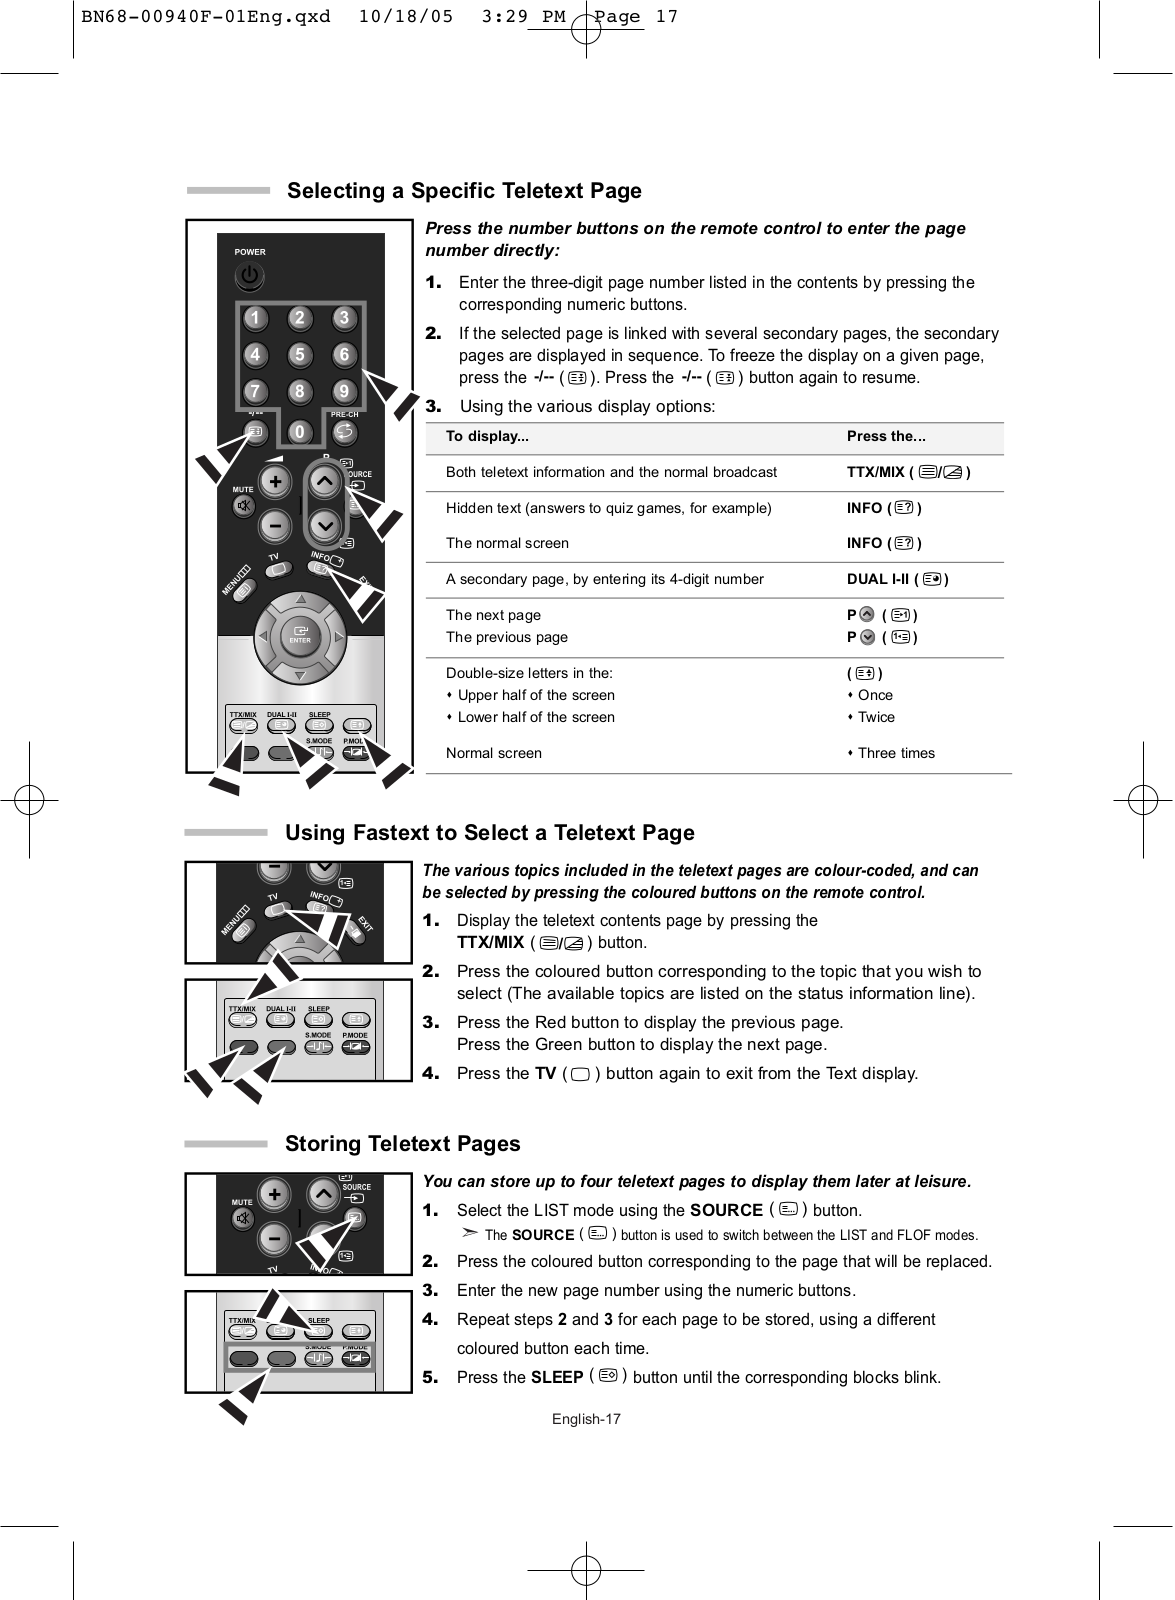
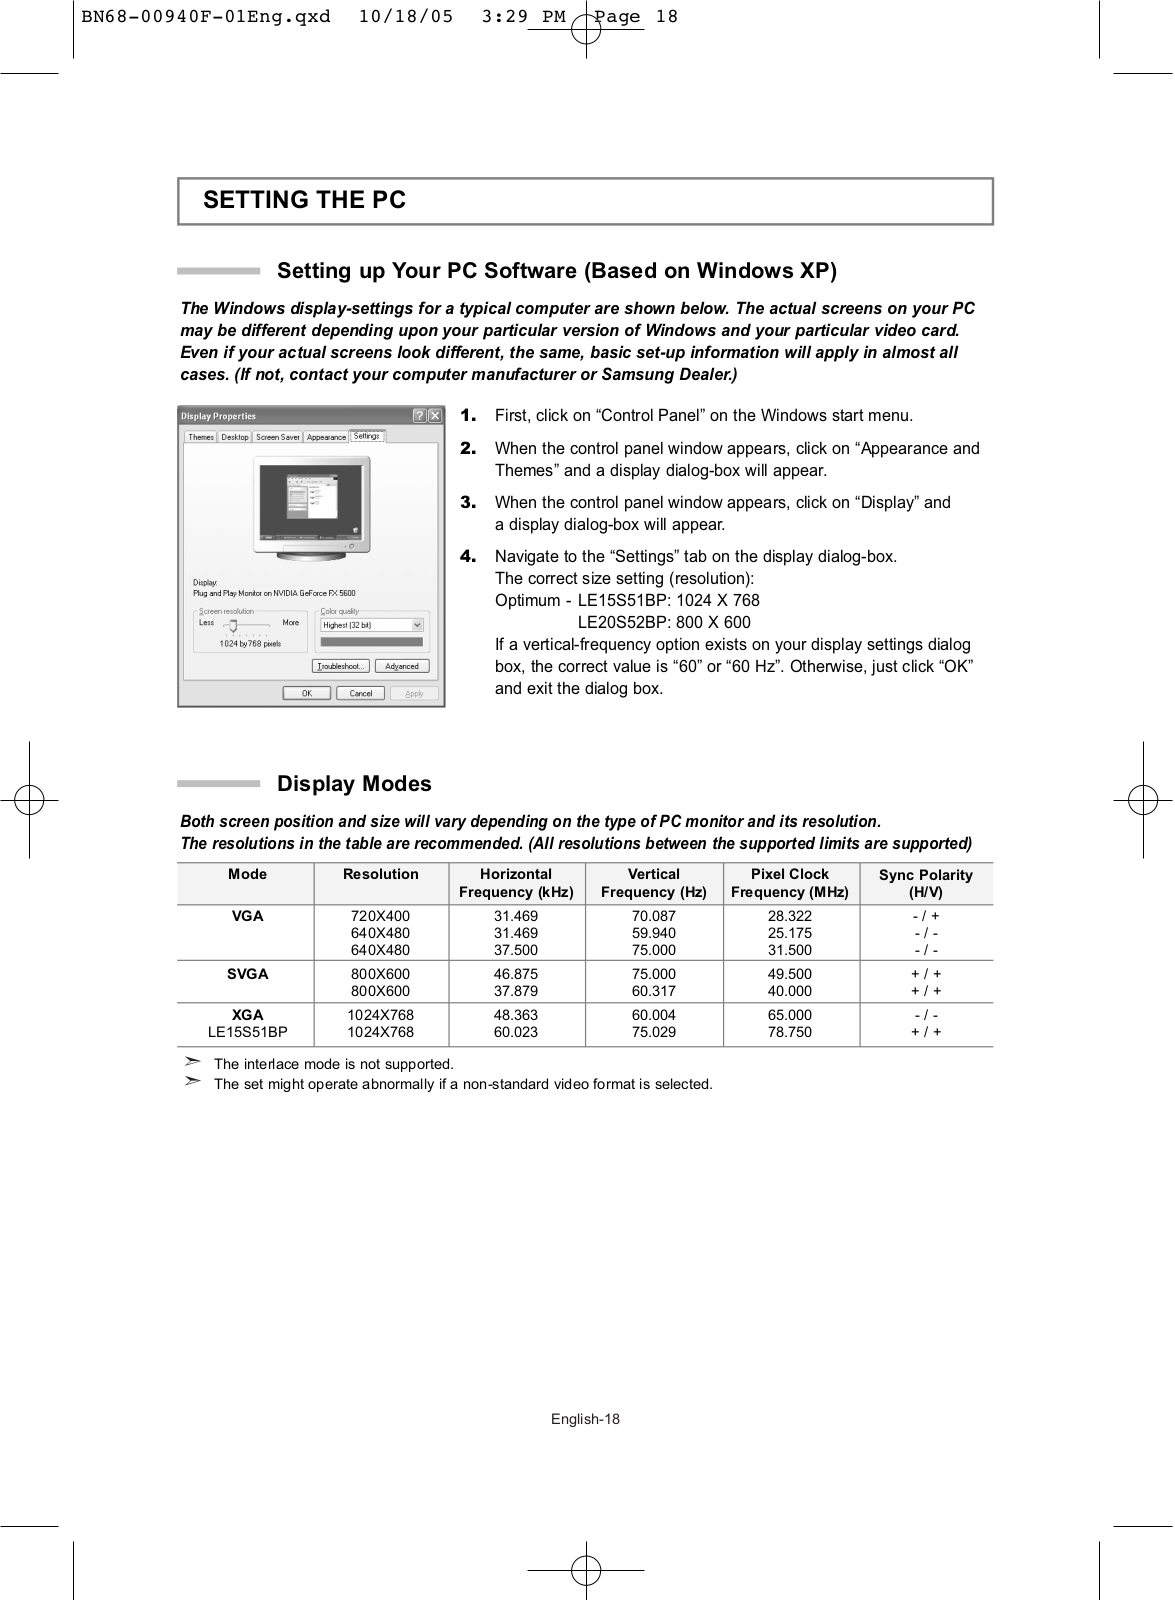
Samsung LE-20S52 B User Manual
...
Samsung User Manual
Download
Specifications and Main Features
Frequently Asked Questions
User Manual
Download
Loading...
+
46
hidden pages
Unhide
You need points to download manuals.
1 point = 1 manual.
You can buy points or you can get point for every manual you upload.
Buy points
Upload your manuals
 Loading...