

Page 1

HOTEL
User Guide
Page 2

Publication Information
Samsung Business Communications reserves the right without prior notice
to revise information in this publication for any reason.
Samsung Business Communications also reserves the right without prior
notice to make changes in design or components of equipment as engineering and manufacturing may warrant.
Disclaimer
Samsung Business Communications is not responsible for errors or problems arising from users not programming or operating their Samsung systems as described in this manual.
Copyright 2004
Samsung Business Communications
All rights reserved. No part of this manual may be reproduced in any form
or by any means - graphic, electronic or mechanical, including recording,
taping, photocopying or information retrieval systems - without express written permission of the publisher of this material.
Part Number: 13181 Version 2.0
Page 3
EU Declaration of Conformity (RTTE)
Samsung Electronics Co., Ltd.
259 Gongdan-Dong, Gumi-City Kyungbuk, Korea, 730-030
(factory name, address)
declare under our sole responsibility that the product
Digital Keyphone System "DCS"
to which this declaration relates is in conformity with
RTTE Directive 1999/5/EC ( Annex II )
Low Voltage Directive 73/23/EEC
EMC Directive 89/336/EEC:92/31/EEC
By application of the following standards
EN61000-3-3:1995, EN61000-4-2:1995 Inc. A1:1998, EN61000-4-3:1996 Inc. A1:1998
.........................................................................................
EN55022 : 1998 Inc A1: 2000*
.........................................................................................
EN61000-4-4:1995, EN61000-4-5:1995, EN61000-4-6:1996, EN61000-4-8:1993
.........................................................................................
EN61000-4-11:1994, AS/NZS3548:1995
.........................................................................................
EN61000-3-2:1995 Inc. A1/A2:1998
.........................................................................................
EN60950 ; 1992+A1+A2+A3+A4+A11
.........................................................................................
.........................................................................................
(Manufacturer)
Samsung Electronics Co., Ltd
259, Gongdan-Dong, Gumi-City
Kyungbuk, Korea, 730-030
Tae-eok Jang / General Manager
................................................. .................................................................................
(place and date of issue) (name and signature of authorized person)
(Representative in the EU)
Samsung Electronics Euro QA Lab.
Blackbushe Business Park
Saxony Way, Yateley, Hampshire
GU46 6GG, UK
In-Seop Lee / Manager
................................................. ...............................................................................
(place and date of issue) (name and signature of authorized person)
2001-04-03
2001-03-31
TE Jang
IS Lee
Page 4
EU Declaration of Conformity (RTTE)
Samsung Electronics Co., Ltd.
259 Gongdan-Dong, Gumi-City Kyungbuk, Korea, 730-030
(factory name, address)
declare under our sole responsibility that the product
Digital Keyphone System "DCS Compact II"
to which this declaration relates is in conformity with
RTTE Directive 1999/5/EC ( Annex II )
Low Voltage Directive 73/23/EEC
EMC Directive 89/336/EEC:92/31/EEC
By application of the following standards
EN61000-3-3:1995, EN61000-4-2:1995 Inc. A1:1998, EN61000-4-3:1996 Inc. A1:1998
.........................................................................................
EN55022 : 1998 Inc A1: 2000*
.........................................................................................
EN61000-4-4:1995, EN61000-4-5:1995, EN61000-4-6:1996, EN61000-4-8:1993
.........................................................................................
EN61000-4-11:1994, AS/NZS3548:1995
.........................................................................................
EN61000-3-2:1995 Inc. A1/A2:1998
.........................................................................................
EN60950 ; 1992+A1+A2+A3+A4+A11
.........................................................................................
.........................................................................................
(Manufacturer)
Samsung Electronics Co., Ltd
259, Gongdan-Dong, Gumi-City
Kyungbuk, Korea, 730-030
Tae-eok Jang / General Manager
................................................. .................................................................................
(place and date of issue) (name and signature of authorized person)
(Representative in the EU)
Samsung Electronics Euro QA Lab.
Blackbushe Business Park
Saxony Way, Yateley, Hampshire
GU46 6GG, UK
In-Seop Lee / Manager
................................................. ...............................................................................
(place and date of issue) (name and signature of authorized person)
2001-04-03
2001-03-31
TE Jang
IS Lee
Page 5
EU Declaration of Conformity (RTTE)
Samsung Electronics Co., Ltd.
259 Gongdan-Dong, Gumi-City Kyungbuk, Korea, 730-030
(factory name, address)
declare under our sole responsibility that the product
Digital Keyphone System "iDCS500"
to which this declaration relates is in conformity with
RTTE Directive 1999/5/EC ( Annex II )
Low Voltage Directive 73/23/EEC
EMC Directive 89/336/EEC:92/31/EEC
By application of the following standards
EMC: EN55022 : 1998, EN61000-3-2:1995 Inc A1/A2:1998 + A14:2000*,
.........................................................................................
RTTE : TBR4: November 1995 incorporating TBR4/A1: December 1997
.........................................................................................
EN61000-3-3:1995, EN61000-4-2:1995 98, EN61000-4-3:1996,
.........................................................................................
EN61000-4-4:1995, EN61000-4-5:1995, EN61000-4-6:1996,
.........................................................................................
LVD: EN60950: 2000 (IEC 60950, Third Edition, 1999)
.........................................................................................
EN61000-4-11:1994, AS/NZS3548:1995
.........................................................................................
.........................................................................................
(Manufacturer)
Samsung Electronics Co., Ltd
259, Gongdan-Dong, Gumi-City
Kyungbuk, Korea, 730-030
Tae-eok Jang / General Manager
................................................. .................................................................................
(place and date of issue) (name and signature of authorized person)
(Representative in the EU)
Samsung Electronics Euro QA Lab.
Blackbushe Business Park
Saxony Way, Yateley, Hampshire
GU46 6GG, UK
In-Seop Lee / Manager
................................................. ...............................................................................
(place and date of issue) (name and signature of authorized person)
2002-04-18
2002-04-19
TE Jang
IS Lee
Page 6

Hotel User Guide Contents
CONTENTS
Ê Introduction to Hotel .................................................1
About the Hotel Application ......................................1
What is Covered in this Guide..................................1
Who Should Read this Guide ...................................2
What You Need to Know ..........................................2
Ë Basic Administration.................................................4
Overview of Administration ......................................4
Checking In a Guest.................................................8
Checking Out a Guest..............................................11
Billing a Guest Room................................................12
Credit a Room or Phone Bill.....................................16
Setting & Cancelling a Wake-up Call
for a Guest................................................................18
Setting a ‘Message Waiting Indication,’
’Camp-On’ or ‘Callback’ on an Extension ................23
Answering a ‘Message Waiting Indication’
on an Extension ........................................................25
Setting a Room On Hold ..........................................27
Room Status: Viewing & Changing ..........................28
Remote Billing for Phone Calls ................................31
Booth Option for Phone Calls...................................32
Displaying a Call Cost or Timer................................34
Separating Phone Charges ......................................35
Printing a Room Bill ..................................................36
Staff Location............................................................37
Ì Using the HOTEL Key................................................39
HOTEL Key on Administrator’s Keyphone................39
HOTEL Key on Extension (Guest) Keyphone...........45
i
Page 7

Hotel User Guide Contents
ii
Í Printing a PMS Report ..............................................46
Î Invoices and Status Reports...................................47
Room Invoice............................................................47
Room Status Reports ...............................................48
Ï Troubleshooting.........................................................49
Page 8

Hotel User Guide Introduction
Ê INTRODUCTION TO HOTEL
ABOUT THE HOTEL APPLICATION
Hotel software is intended for use by hotels and similar establishments which operate a Samsung DCS, DCS Compact II or iDCS
keyphone system. The software is managed through display keyphones and allows the manager and front desk staff to check guests
in and out, enter items for billing, check the status of rooms, and
carry out other tasks that are a routine part of daily administration.
Your Hotel system will already have been set up to operate in the
most appropriate way for your establishment. If you need to make
any changes to the system configuration, refer to the Samsung Hotel
Installation & Programming Manual.
WHAT IS COVERED IN THIS GUIDE
Section 1 is this introduction to the Hotel application.
Section 2 takes you through the procedures required to perform
day-to-day administration including checking in a guest, checking
out a guest, adding billing items to guests’ bills, adding credit payments, setting wake up calls, printing bills, and so on. The proc e-
dures require you to have access to one or more Administrator’s
display keyphones on which Hotel features have been programmed.
Simple key presses allow you to perform all of the functions required
for Hotel administration.
Section 3 explains how to use the special HOTEL key programmed
on the keyphone. This can be used for checking in, checking out,
changing room status and printing status reports.
Section 4 shows you how to print a Property Management System
(PMS) activity report and describes its contents.
1
Page 9

Hotel User Guide Introduction
2
Section 5 provides examples of bills (invoices) and status reports
that you can print.
Section 6 lists some of the more common problems that you may
encounter while using the Hotel application, and explains how to
deal with them.
WHO SHOULD READ THIS GUIDE
The guide should be read by all managers and staff members who
are responsible for processing guest and room information on a daily
basis.
For a technical discussion of the Hotel system, refer to the Samsung
Hotel Installation & Programming Manual.
WHAT YOU NEED TO KNOW
n STAFF CODES AND FEATURE CODES
Access to Hotel features can be protected by passcodes (staff
codes) for security. It is important that the system manager makes
sure each member of staff is allocated their own 4-digit passcode, if
these are required. The manager should also ensure that staff
members are aware of:
• the relevant Hotel feature codes they may need when using keyphones for administration.
• the passcode required to delete item charges from room bills.
Your system installer should have provided you with this information.
Page 10

Hotel User Guide Introduction
n ADD-ON MODULES
You may have one or more add-on modules
(AOMs) attached to your Administrator’s keyphone(s). These AOMs provide additional
keys for programming Hotel features and for
assigning to rooms / extensions (DSS keys)
to allow you to quickly check room status
and staff locations.
A single AOM may have 14, 48 or 64 keys.
The number of AOMs you need, therefore,
depends on the number of rooms you have.
Typical AOM
n PRESSING THE WRONG KEY
If you enter an invalid value or code during administration, the display will inform you and change to allow you to enter a valid
value/code, or to begin the entry sequence again.
n PROBLEMS
If you have any problems while using the keyphone system, refer to
section 6,
Troubleshooting, or contact your system manager.
3
Page 11

Hotel User Guide Basic Administration
Ë BASIC ADMINISTRATION
OVERVIEW OF ADMINISTRATION
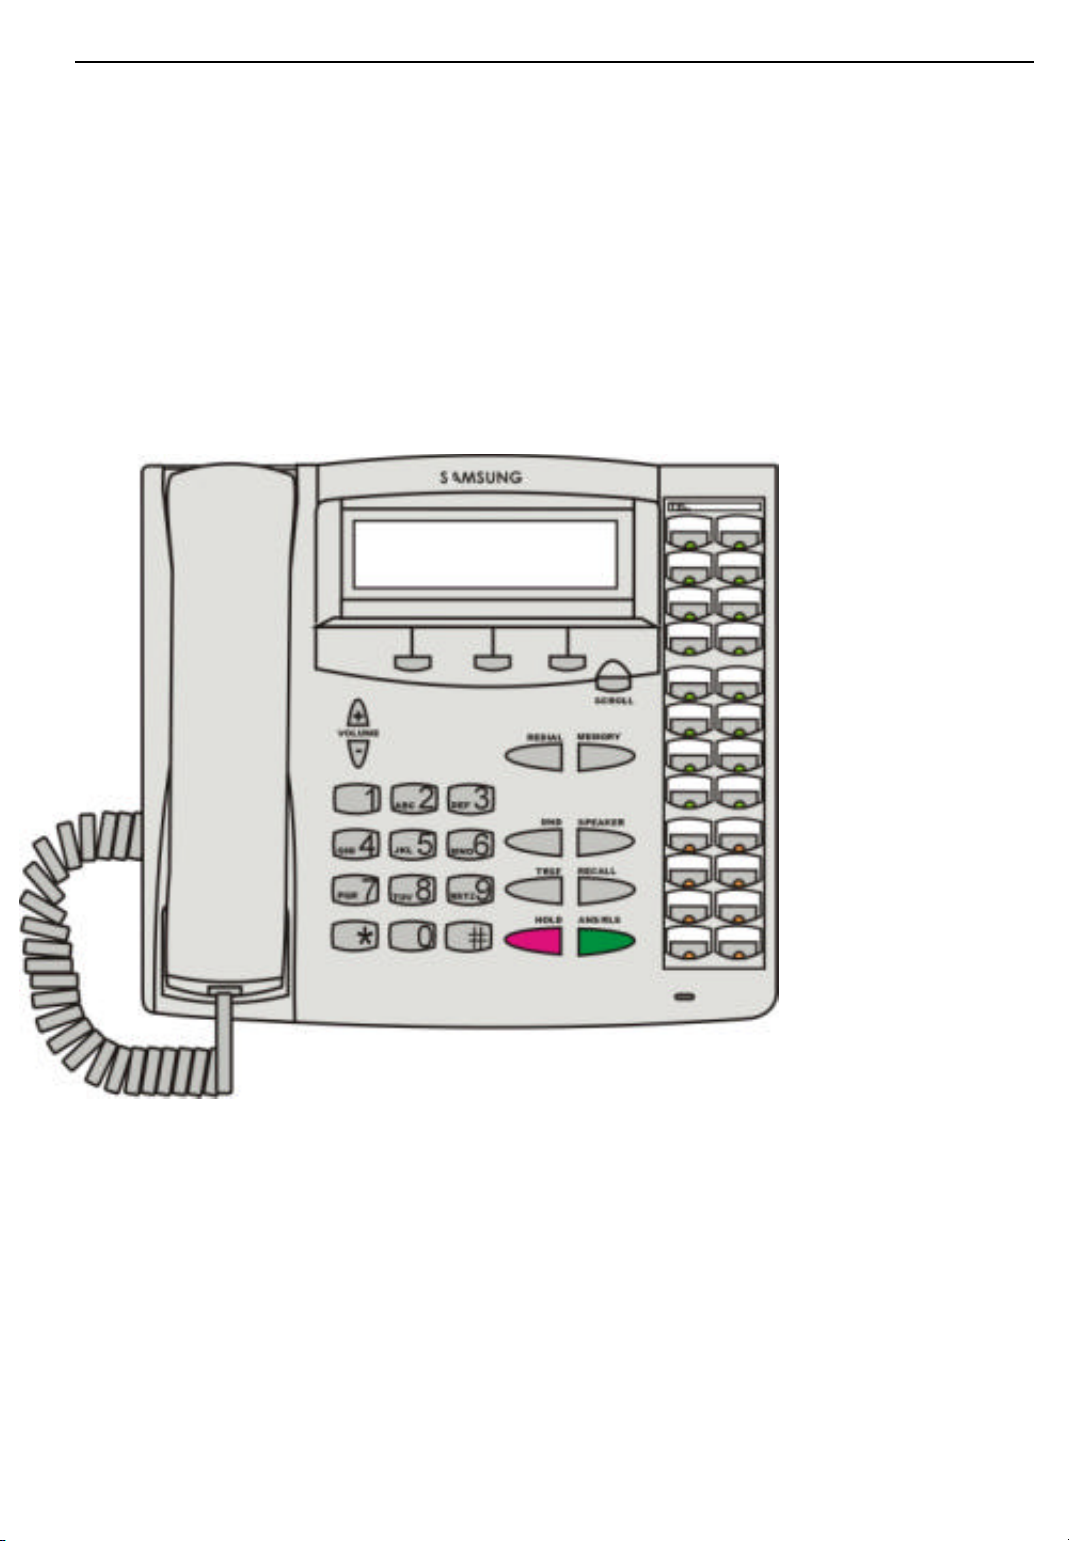
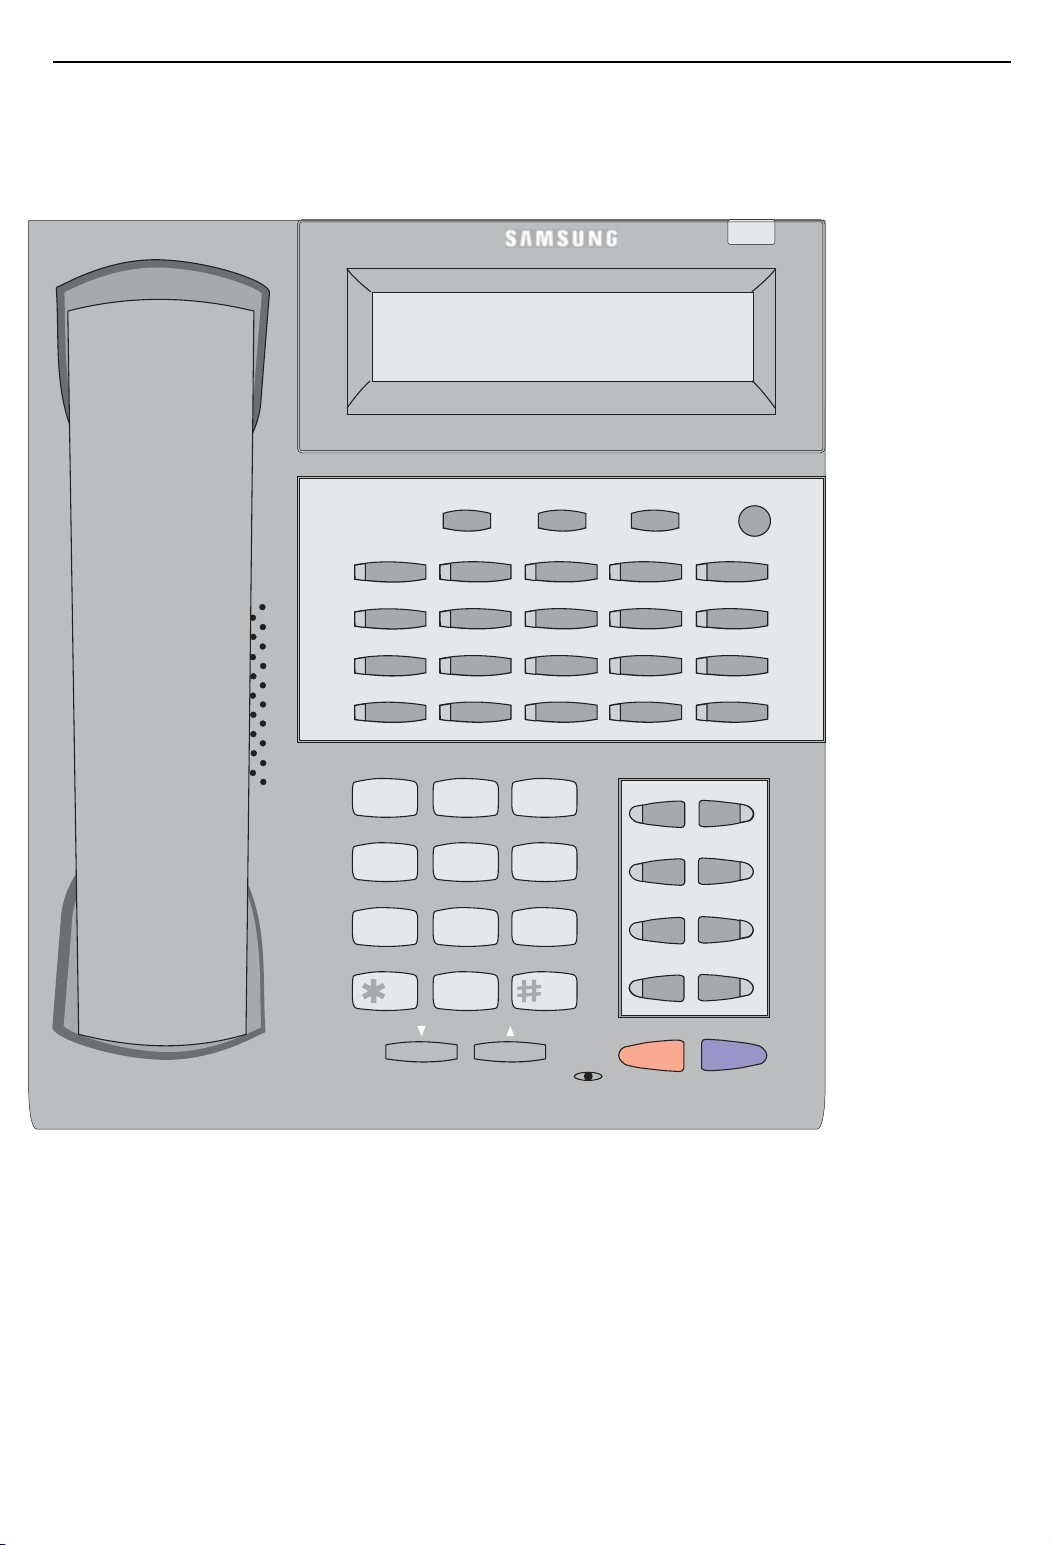
Administration is carried out using the Administrator’s display keyphone. This will normally be a Samsung DCS (Euro) keyphone
Figure 2-1) or an iDCS series keyphone (Figure 2- 2). The feature
(
keys should be marked clearly. Some functions (such as setting the
cleaning/maintenance status of rooms) can be carried out from other
keyphones not designated as Administrator’s keyphones—such as
guest-room phones —provided the appropriate feature access codes
have been set up in the system.
n USING THE KEYPHONE KEYS
This guide assumes that the Administrator’s keyphone has been
programmed with the following Hotel features assigned to keys:
BILL Add or delete service charges to or from guest rooms
BOOTH Enable/Disable booth phone (iDCS systems only)
CHIN Check in a guest
CHOUT Check out a guest, print bills and put a room on hold
CREDIT Credit a guest’s room or phone bill
HOTEL Check or set the current status of a room (occupied,
needs cleaning, etc), check a guest in or out, or print a
phone bill
RB Remote billing
RSV Room status view (requires one or more AOMs)
SLOCAT Staff location (requires one or more AOMs) (iDCS sys-
tems only)
WAKEUP Set a wake-up call for a room
XCHIN Express check in for a guest
Other keys may be assigned miscellaneous system features, such
as CALL, MESSAGE, and so on. To use these other features, refer to
the Samsung Keyset User Guide provided with your phone.
4
Page 12
Hotel User Guide Basic Administration
Enter Room
Used to select
VOLUME KEYS
n SELECTING KEYPHONE DISPLAY OPTIONS
As you work through the keyphone LCD displays, options are selected by pressing the key on the keyphone—called a soft key—
directly below the option shown in the display. There are three soft
keys.
32-CHARACTER DISPLAY
NUMBER:
SOFT KEYS
options in the
display
PROGRAMMABLE KEYS
Set up for required Hotel features (CHIN, CHOUT,
HOTEL, etc) as well as normal keyphone functions
(e.g. CA LL, MESSAGE, etc)
Figure 2-1: DCS (Euro) Administrator’s Keyphone
(Version shown is 24B)
5
Page 13
Hotel User Guide Basic Administration
32-CHARACTER DISPLAY
Enter Room
NUMBER:
iDCS 28D
Call 1 Call 2 Message
1
4 GHI
7PQRS
2
8 TUV
0OPER
Volume
ABC
5 JKL
3 DEF
6 MNO
9WXYZ
Memory Redial
Transfer Speaker
HOLD
ANS/RLS
Scroll
SOFT KEYS
Used to select
options in the
display
VOLUME KEYS
PROGRAMMABLE KEYS
Set up for required Hotel features (CHIN, CHOUT, HOTEL, etc) as well
as normal keyphone functions (e.g. Call, Transfer, Speaker, etc)
Figure 2-2: iDCS Series Administrator’s Keyphone
(Version shown is 28D)
6
Page 14
Hotel User Guide Basic Administration
n THE HOTEL KEY
The HOTEL key provides access to some Hotel features (such as
checking in, checking out and room status) which can be accessed
using other programmed keys. However, because the HOTEL key
has much wider applications, it is described separately (see section
3, Using the HOTEL Key).
n INVOICE ITEM CODES AND COSTS
Keep to hand a list of the item codes and costs that are likely to be
required when checking in guests and entering billing information.
(See the following example.) Make sure this list is available to all
staff.
Example
Your system installer could set up the system like this:
Item Code
Double (room) 02
Twin (room) 03
Single (room) 04
Breakfast 05
Lunch 06
Dinner 07
Bar 08
Laundry service 09
Gym 10
Papers 11
Costs for each item are entered when you check a guest in and subsequently add items to room bills.
See your system installer for a complete list of the codes and costs
applicable to your system.
7
Page 15
Hotel User Guide Basic Administration
CHECKING IN A GUEST
Guests are checked in using either the CHIN (Check In) key or
XCHIN (Express Check In) key.
NOTE: To use the HOTEL key to check guests in, see section 3,
Key. You need to use the HOTEL key if the guest specifically requests a smoking or
non-smoking room, for example.
Using the HOTEL
Use XCHIN for quick check in (to enter room number and room
cost only).
Use CHIN to enter cash deposits (pre-payments for rooms
and/or phones) and guest names. If you enter cash deposits,
these will be subtracted from the total charges billed to the room
when the guest checks out.
TIP: If you want to quickly check which rooms are available for checking in, you can
use the RSV key(s). See Room Status: Viewing and Changing.
PROCEDURE
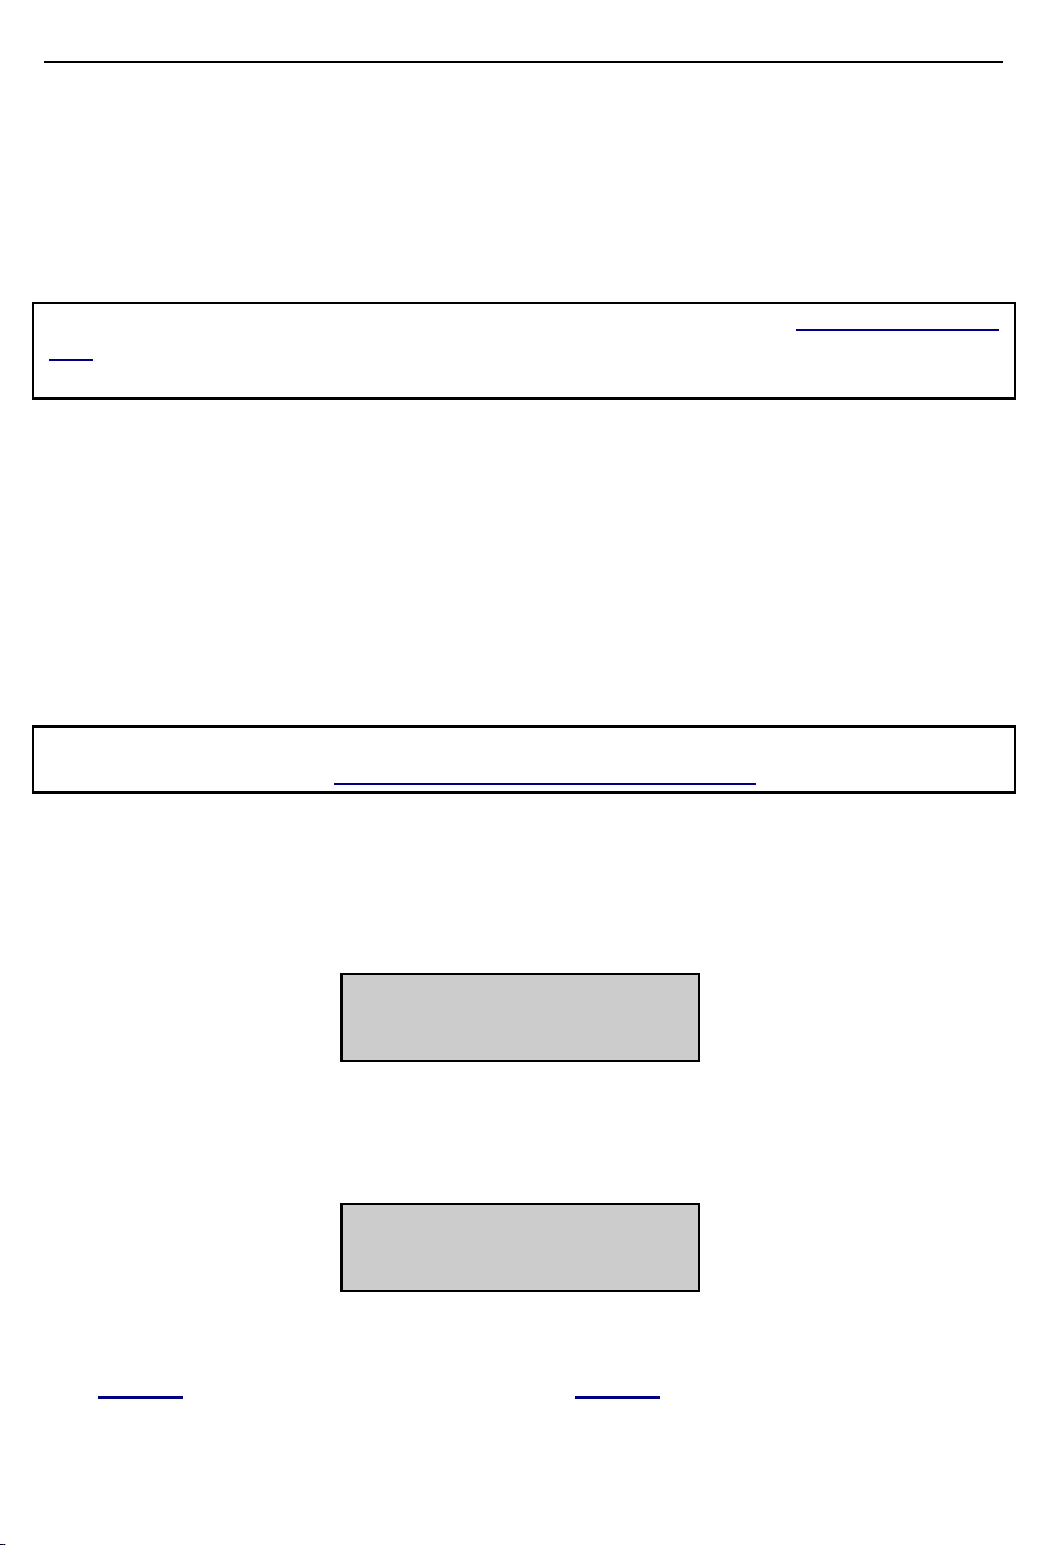
1. Press the CHIN or XCHIN key. Display shows:
Enter Room
NUMBER:
2. Enter the room number (or press the dedicated DSS key, if avail-
able). If a staff code is required, the display shows:
Enter Staff Code
If no staff code is required, you see the screen display shown in
step 3, and you should proceed to step 4.
8
Page 16
Hotel User Guide Basic Administration
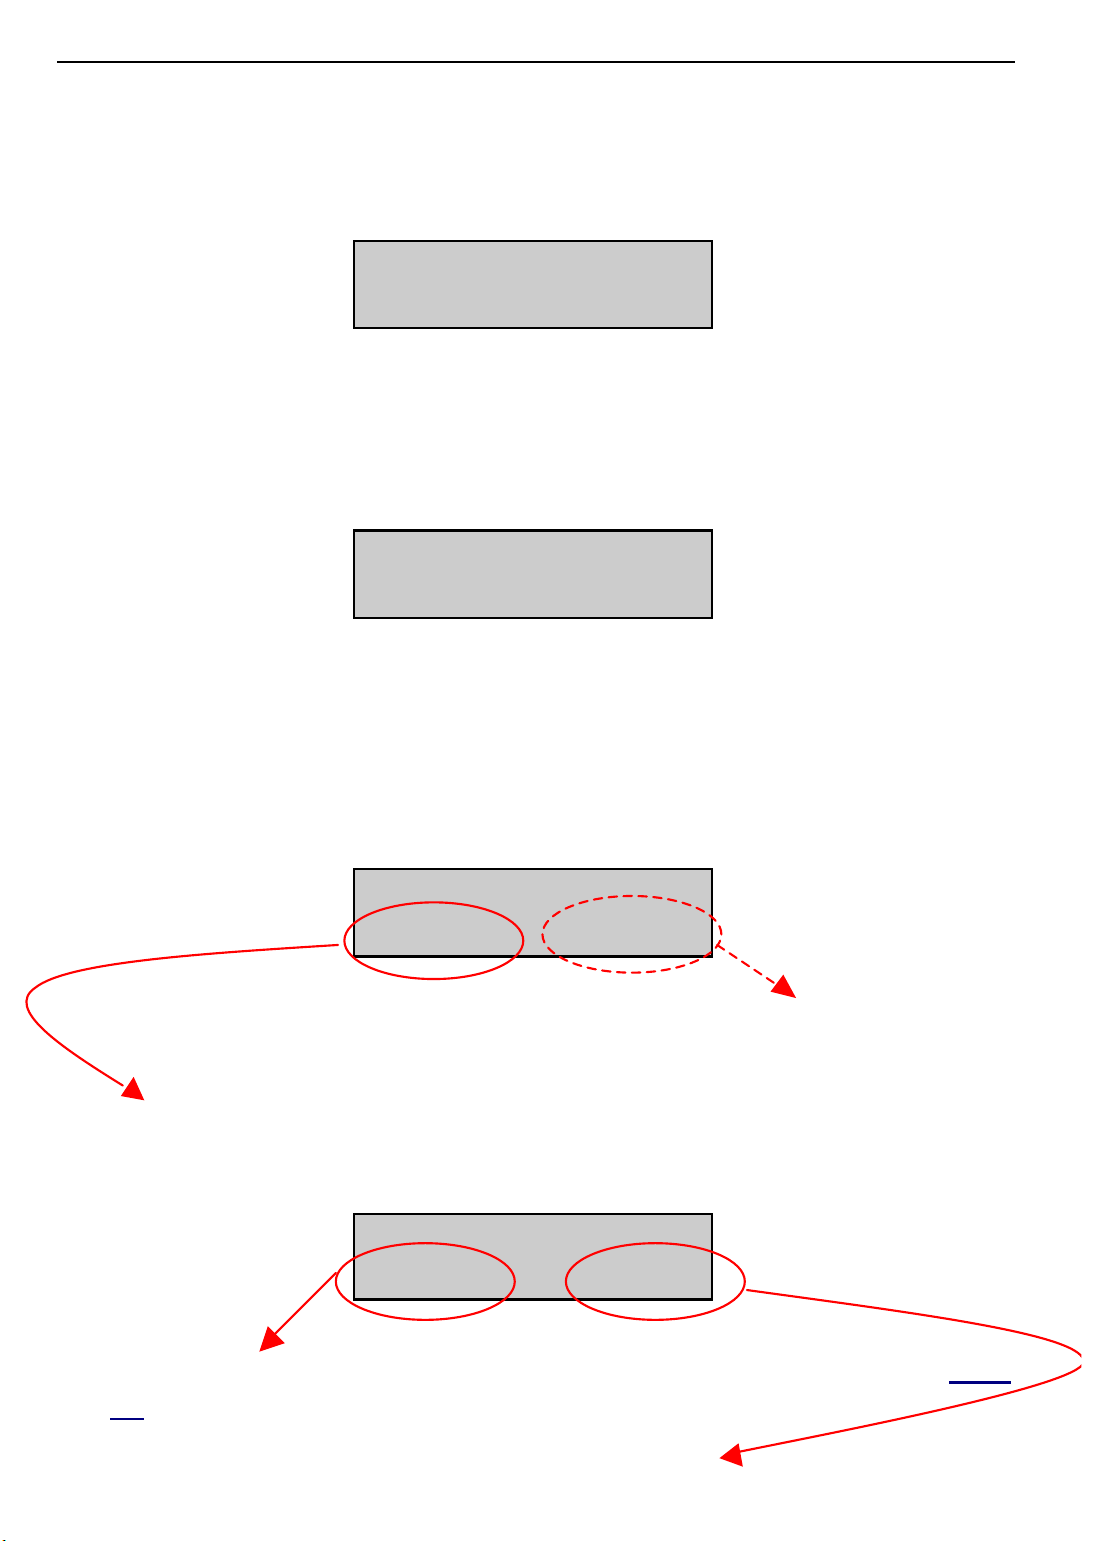
3. Enter your 4-digit staff code. The code is not displayed; instead
you see ‘QQQQ’ in the display. (If you enter an incorrect code,
you return to this display to re-enter the code.) Display shows:
Enter Item Code
4. Enter the item code for the room. For example, this might be 02
for a ‘Double’. (If the code you enter is not valid, you return to
step 1 to begin again.) Display shows:
Enter Item Cost
:XXX.XX
5. Enter the item (room) cost (e.g. £20.00 is entered as 020.00).
If you selected the Express Check In option (XCHIN), the
procedure is now complete. Otherwise, you see the following
display.
RM:XXX :XXX.XX
ACCEPT CHANGE
If you want to change your item cost entry, select CHANGE at this
display and re-enter the cost.
If the entry is correct, select ACCEPT to enter the cost. Display
shows:
Check In Room
CREDIT CASH
6. If there is no cash deposit to enter, select CREDIT and go to
10.
step
OR
To enter a cash deposit, select CASH.
9
Page 17
Hotel User Guide Basic Administration
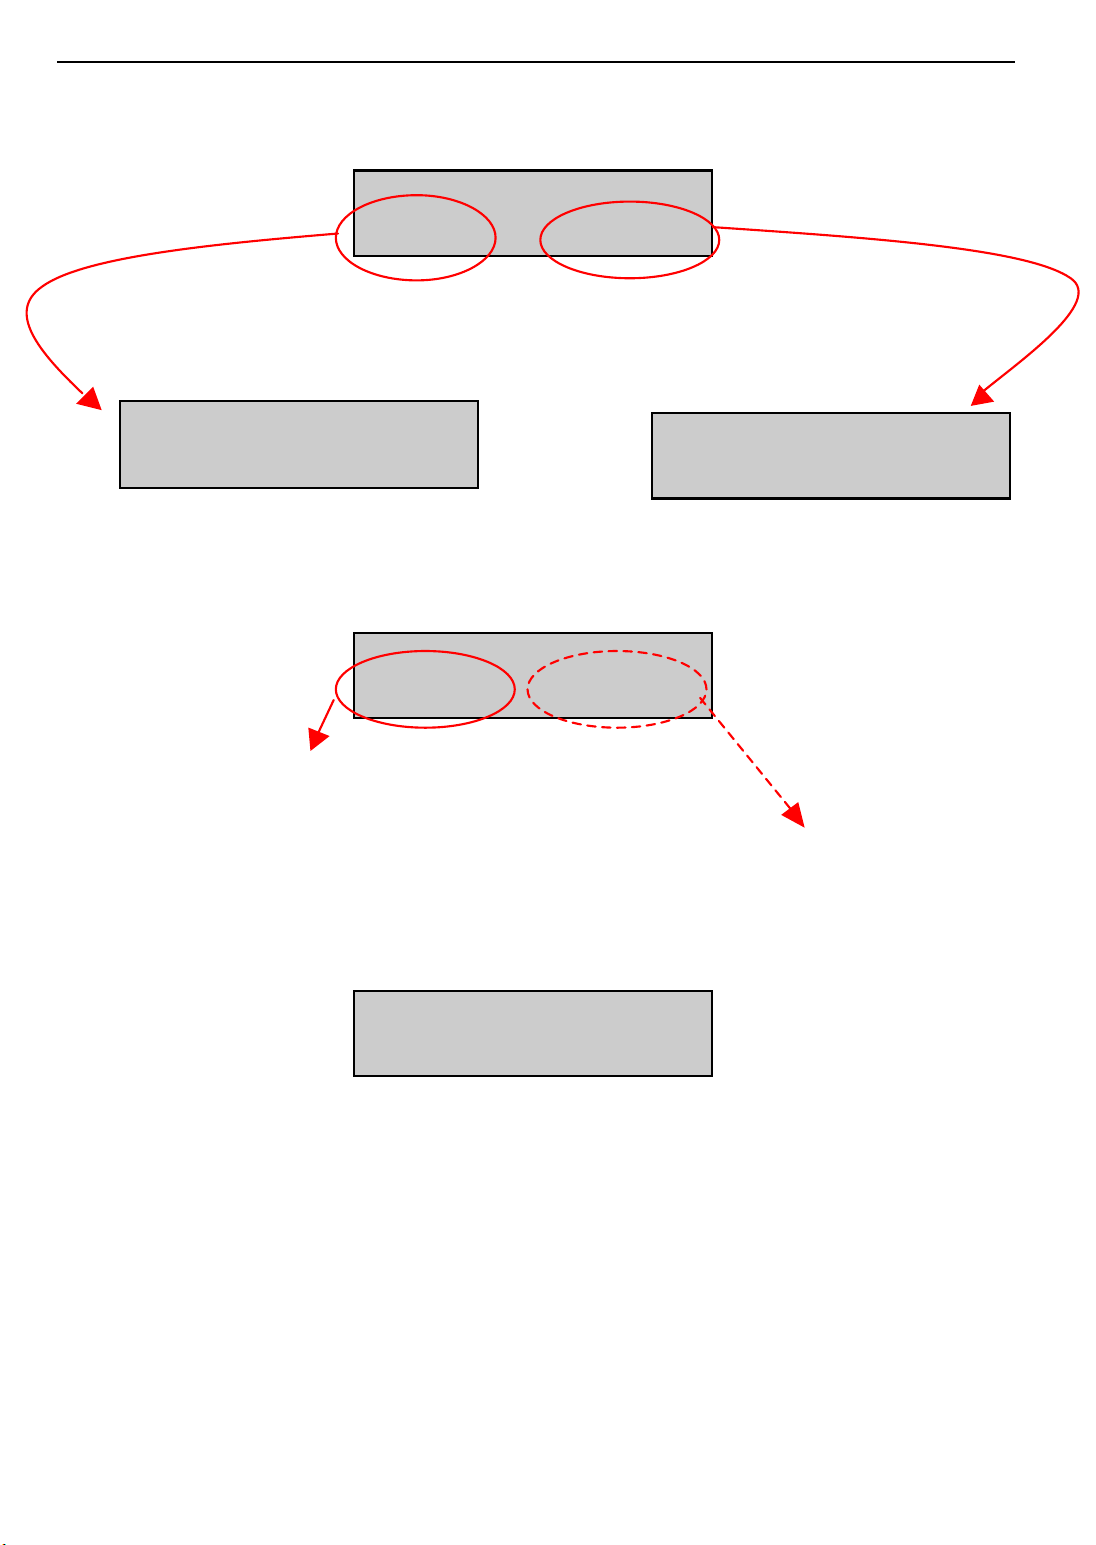
Display shows:
Cash Deposit
ROOM PHONE
7. Select if the deposit is for the room or phone. You will see one of
the following displays.
Credit Room
:000.00
Credit Phone
:000.00
8. Enter the deposit value (e.g. £20.00 is entered as 020.00). Display shows:
RM:XXX :XXX.XX
ACCEPT CHANGE
9. To enter the value, select ACCEPT.
OR
If you want to change the value, select CHANGE and enter a new
value.
Display shows:
NAME:
EXIT PRINT
10. Enter the guest name using the dial keypad. Use the letters
printed on the keys (2=ABC, 3=DEF, etc). For example, to get
the letter “E”, press key ‘3’ twice; for “C” press ‘2’ three times,
and so on. After each letter, press the right soft key to move the
cursor to the next position.
Select either EXIT to complete the check-in procedure or PRINT
to print a bill for one night showing the room cost and deposit.
If
you select PRINT the LCD returns to a normal display after a
short delay.
10
Page 18
Hotel User Guide Basic Administration
CHECKING OUT A GUEST
Guests are checked out using the CHOUT (Check Out) key. The
CHOUT key can also be used to put a room on hold (see
Setting a
Room On Hold).
NOTE: To use the HOTEL key to check guests out, see section 3,
Key.
Using the HOTEL
PROCEDURE
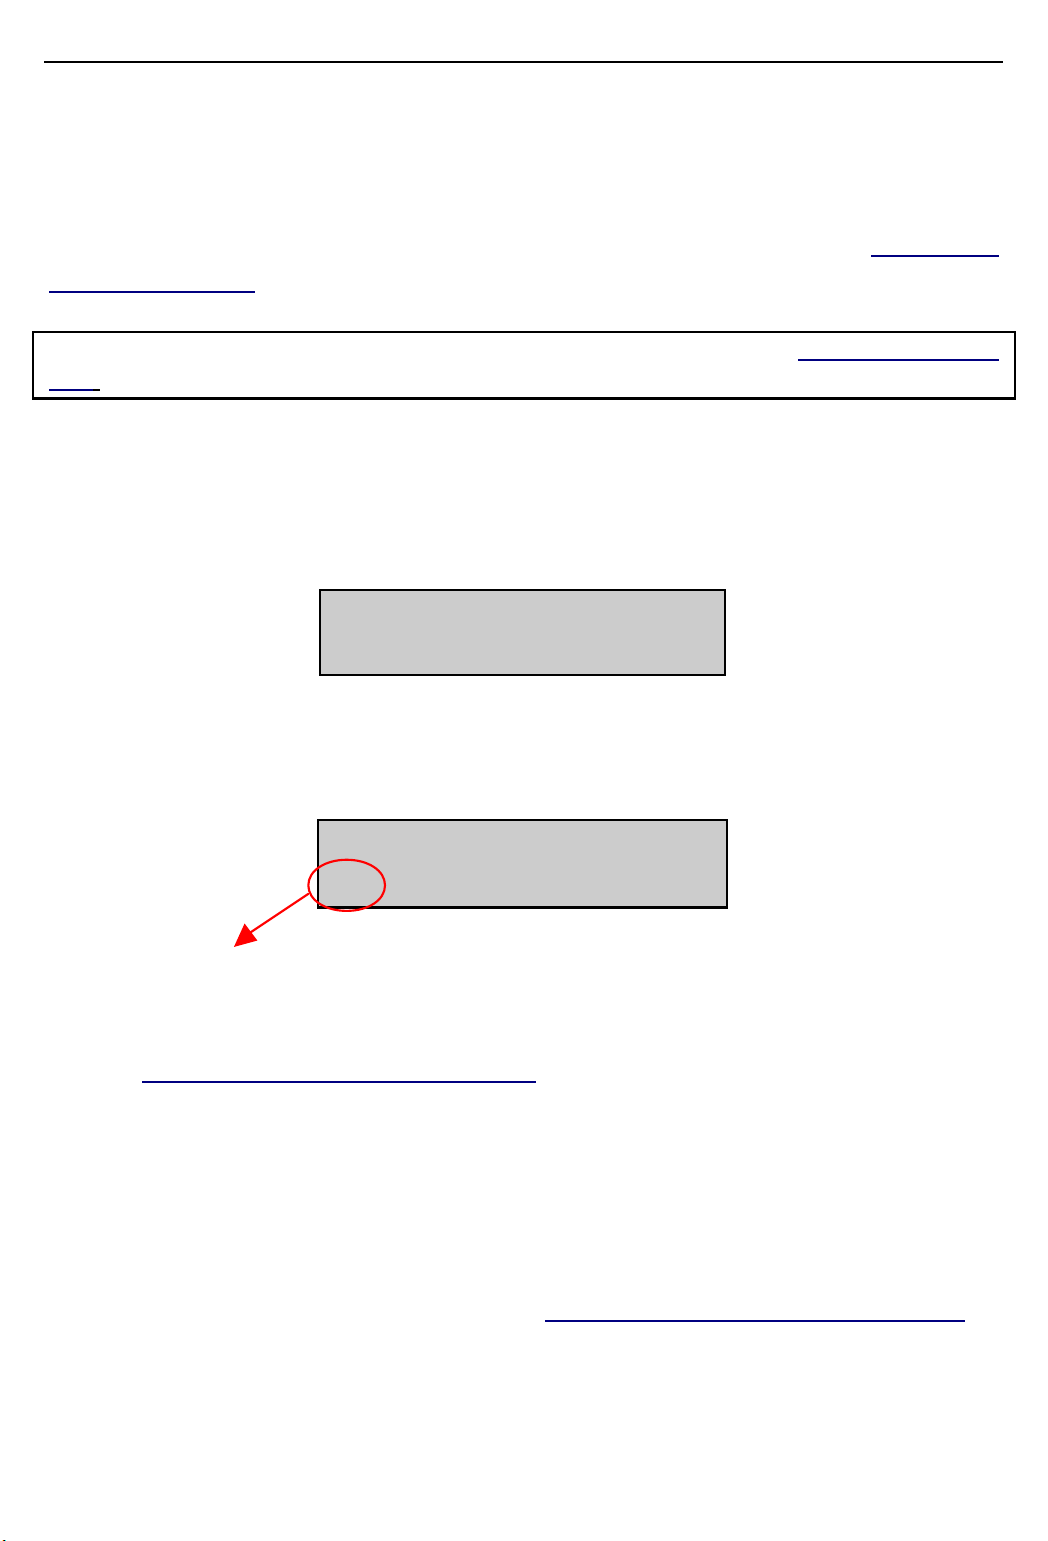
1. Press the CHOUT key. Display shows:
Enter Room
NUMBER:
2. Enter the room number (or press the dedicated DSS key, if available). Display shows:
Check Out Room
YES HOLD PRINT
3. Select YES.
Checkout will be completed with a printout of the room bill (see section 5,
ing records for the room are set to zero. The room status is set to
‘Needs Cleaning’ unless the system is programmed for automatic
cleaning.
4. Press the SPEAKER key to exit.
NOTE: For a description of status ‘flags’ see
Invoices and Status Reports, for an example printout). All bill-
Room Status: Viewing and Changing.
11
Page 19
Hotel User Guide Basic Administration
BILLING A GUEST ROOM
To enter an item and an item cost, and have it added to the bill for a
room, use the BILL key. The currency value you enter here will
automatically have any tax(es) applied where appropriate. For example, in the UK, VAT is applied.
You can also delete a previously billed item.
n ADDING AN ITEM TO A BILL
PROCEDURE
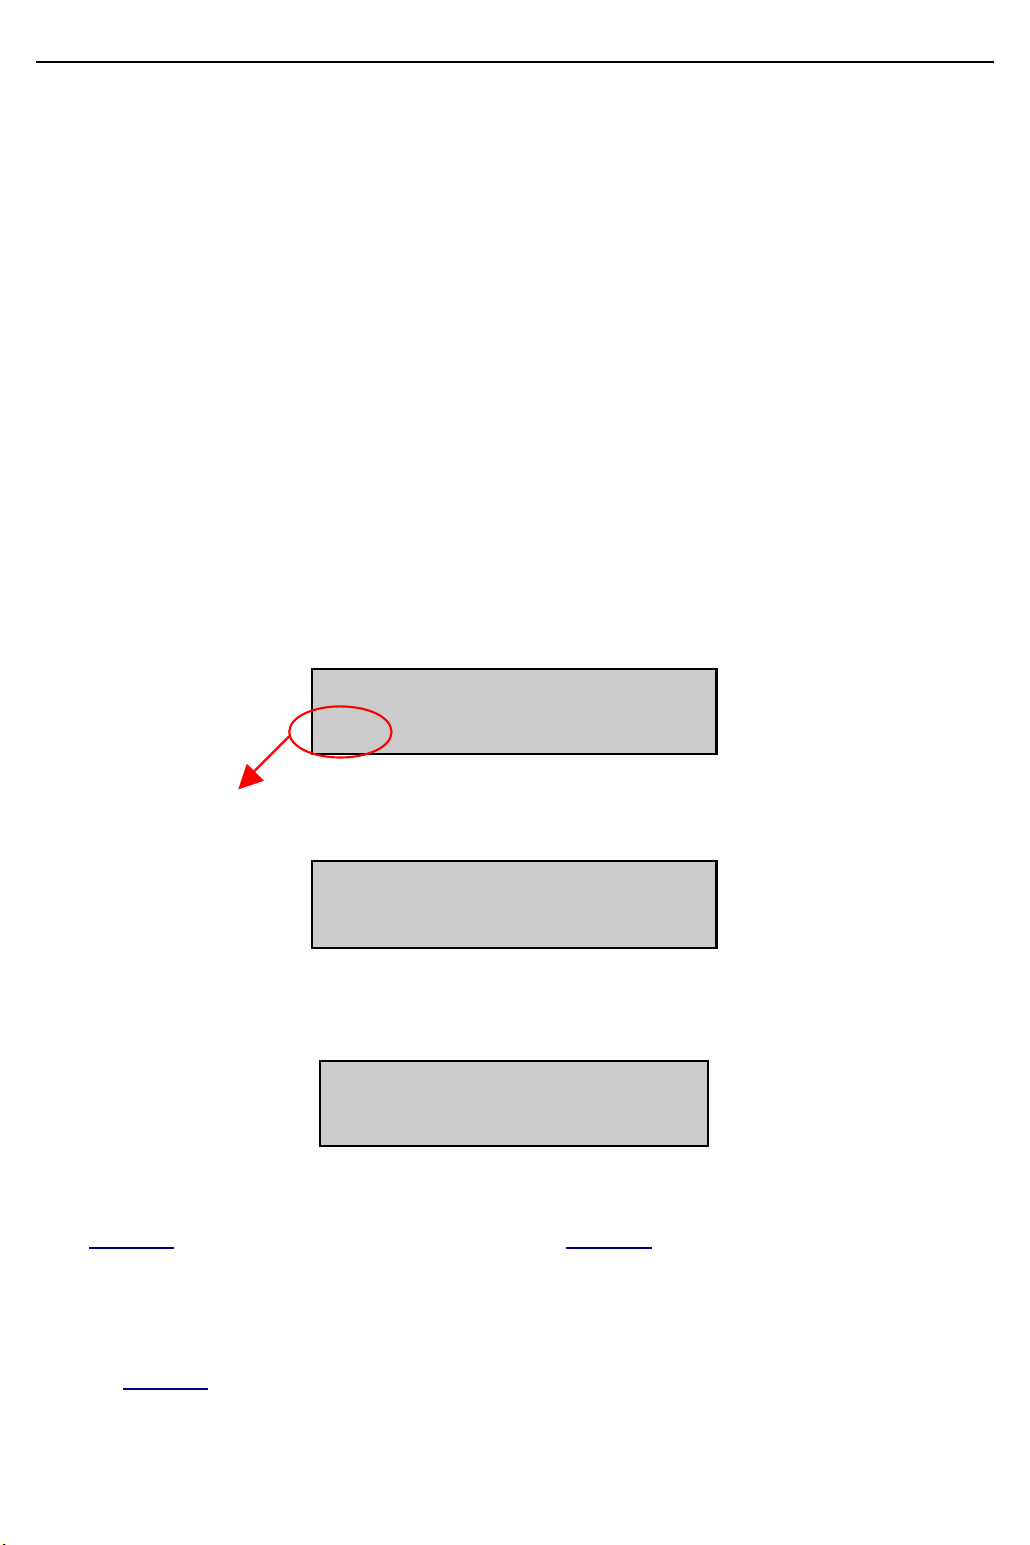
1. Press the BILL key. Display shows:
Service Charge
ADD DELETE
2. Select ADD. Display shows:
Enter Room
NUMBER:
3. Enter the room number. Display shows:
Enter Staff Code
If no staff code is required, you see the screen display shown in
step 4, and you should proceed to step 5.
4. Enter your staff code. The code is not displayed; instead you see
‘QQQQ’ in the display. (If you enter an incorrect code, you return
step 1 to begin again.) Display shows:
to
12
Page 20
Hotel User Guide Basic Administration
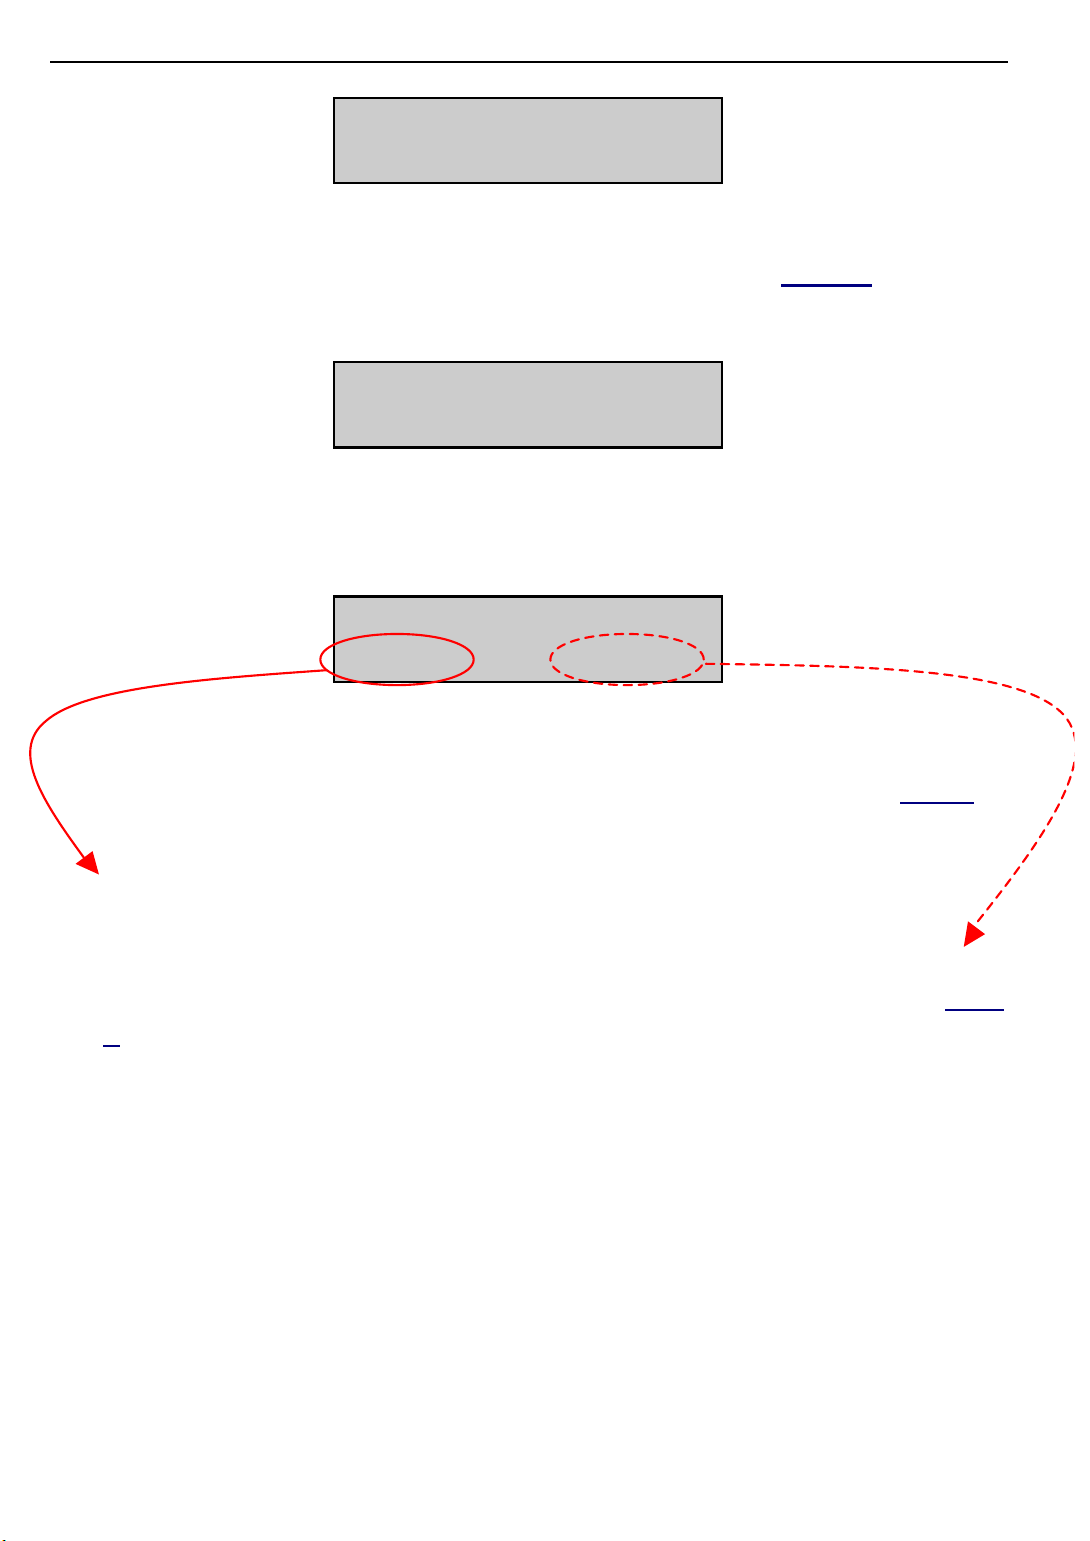
Enter Item Code
5. Enter the item code. For example, this might be 08 for ‘Bar’. (If
the code you enter is not valid, you return to
step 1 to begin
again.) Display shows:
Enter Item Cost
:XXX.XX
6. Enter the item cost (e.g. £20.00 is entered as 02000). Display
shows*:
RM:XXX :XXX.XX
ACCEPT CHANGE
* If a deposit was entered during the check-in procedure for this guest and the
amount entered here for the item cost exceeds the deposit amount, the message “D eposit Exceeded” appears on the display and you return to
add/delete the item cost.
step 1 to
Select ACCEPT to enter the item cost. The display returns to nor-
mal.
OR
If you want to change your entry, select CHANGE to return to
step
3.
n DELETING AN ITEM FROM A BILL
To delete an item from a bill you will need the special ‘delete’ passcode. If you don’t know the passcode, ask your system manager.
13
Page 21
Hotel User Guide Basic Administration
PROCEDURE
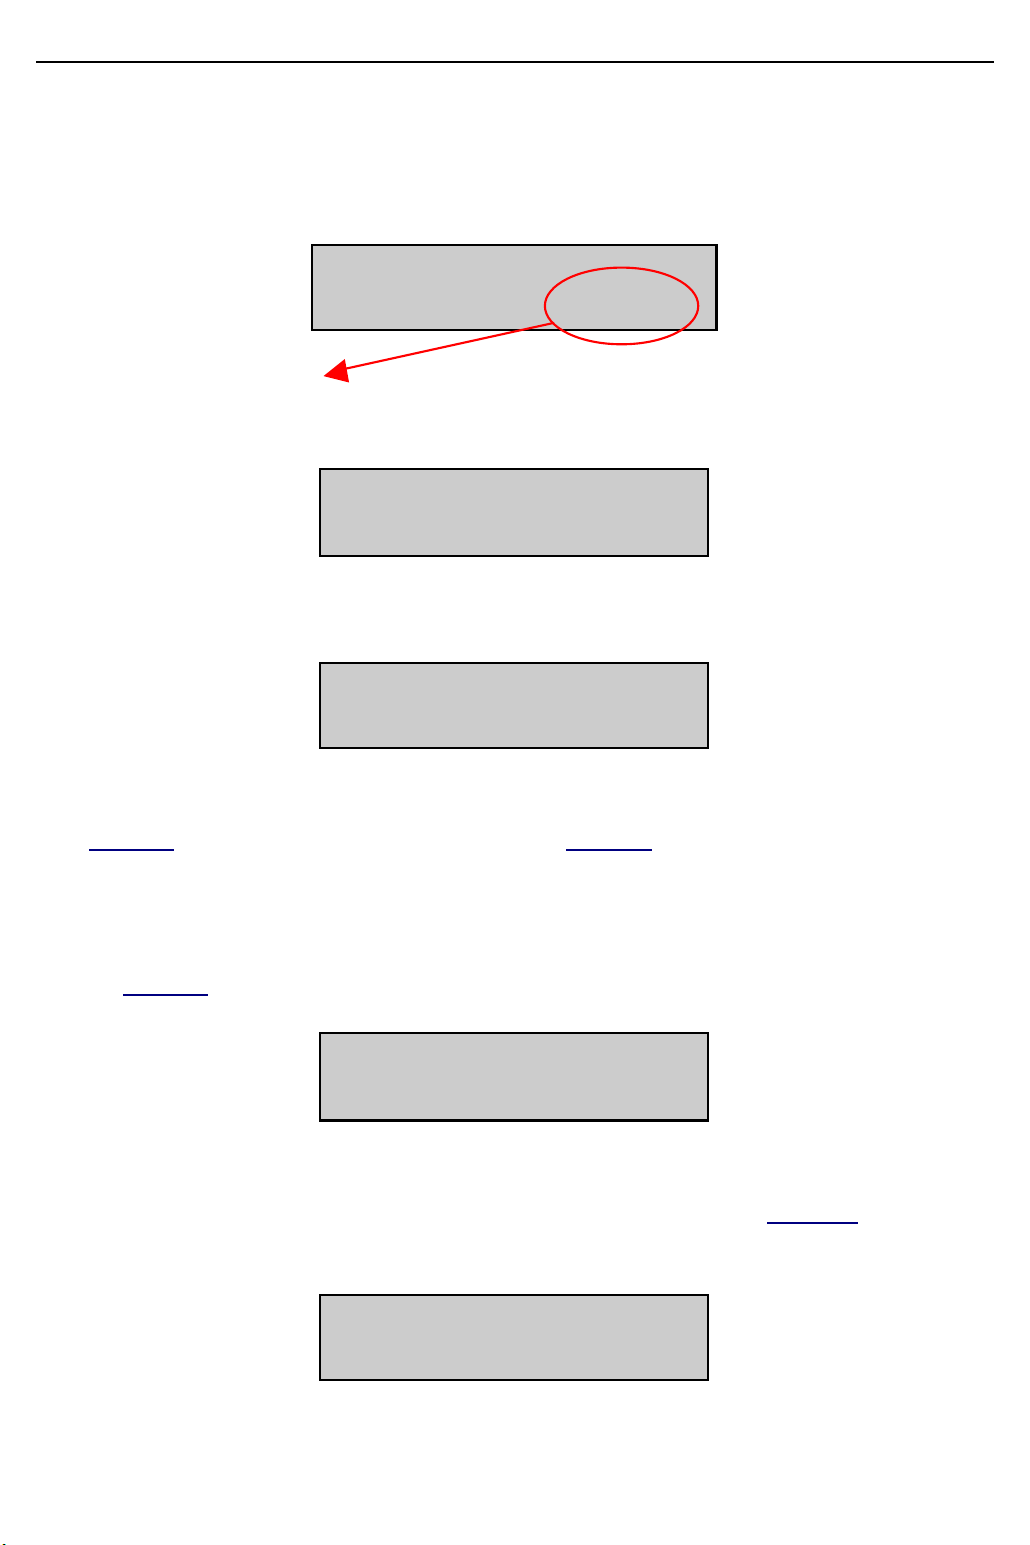
1. Press the BILL key. Display shows:
Service Charge No.
ADD DELETE
2. Select DELETE. Display shows:
Enter Room
NUMBER:
3. Enter the room number. Display shows:
Enter Staff Code
If no staff code is required, you see the screen display shown in
step 4, and you should proceed to step 5.
4. Enter your staff code. The code is not displayed; instead you see
‘QQQQ’ in the display. (If you enter an incorrect code, you return
to step 1 to begin again.) You then see this display:
Enter Item Code
5. Enter the item code. For example, this might be 08 for ‘Bar’. (If
the code you enter is not valid, you return to
step 1 to begin
again.) Display shows:
14
Enter Item Cost
:XXX.XX
Page 22
Hotel User Guide Basic Administration
6. Enter the item cost (e.g. £20.00 is entered as 02000). Display
shows:
RM:XXX :XXX.XX
ACCEPT CHANGE
If you want to change your entry, select CHANGE to return to
3 and enter the room number again.
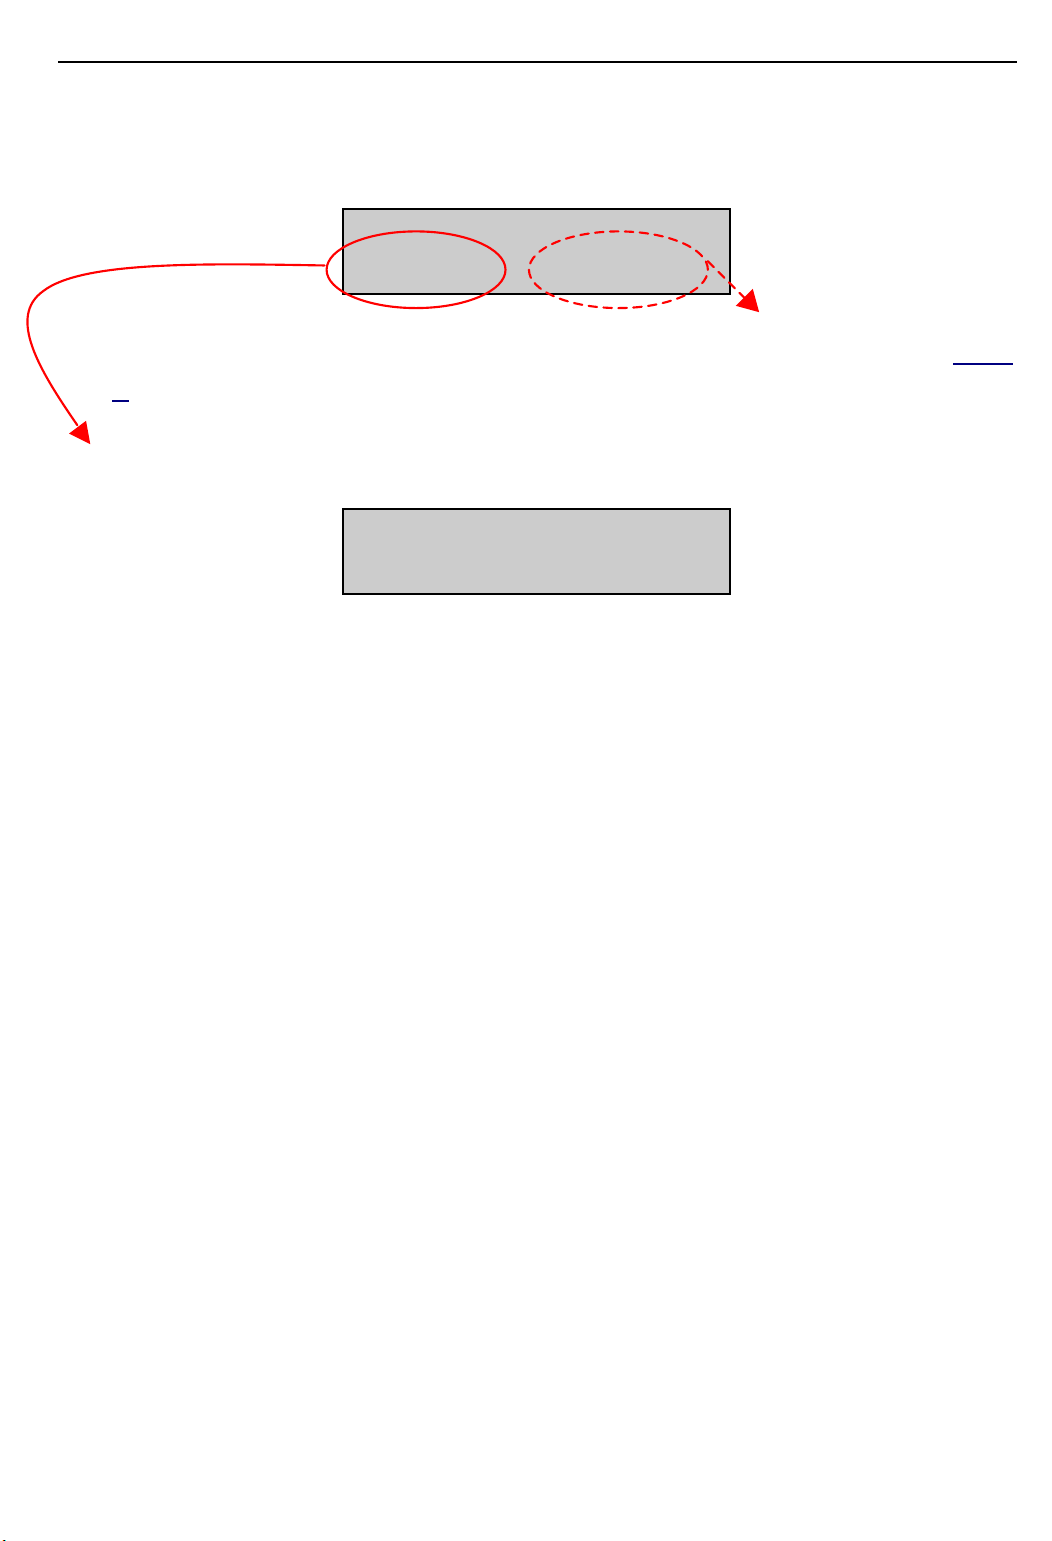
7. Select ACCEPT to delete the item. Display shows:
step
Enter passcode
8. Enter the ‘delete’ passcode (four digits) that allows you to delete
item charges. The passcode is not displayed; instead you see
‘QQQQ’ in the display.
The charge is deleted and the display returns to normal.
When the final invoice is printed at checkout time, or you print a list
of charges for the room, the deleted item will be displayed as a
negative (–) value.
15
Page 23
Hotel User Guide Basic Administration
CREDIT A ROOM OR PHONE BILL
You can credit a guest’s room or phone bill if the guest makes a deposit when checking in, or subsequently makes a cash payment to
offset some of the charges already incurred. A deposit can be entered during the check-in procedure (described above). If you want
to increase the amount of credit, use the CREDIT key.
PROCEDURE
1. Press the CREDIT key. Display shows:
Enter Room
NUMBER:
2. Enter the room number. Display shows:
Enter Staff Code
If no staff code is required, you see the screen display shown in
step 3, and you should proceed to step 4.
3. Enter your staff code. (If you enter an incorrect code, you return
to enter the code again.) The code is not displayed; instead you
see ‘QQQQ’ in the display. You then see:
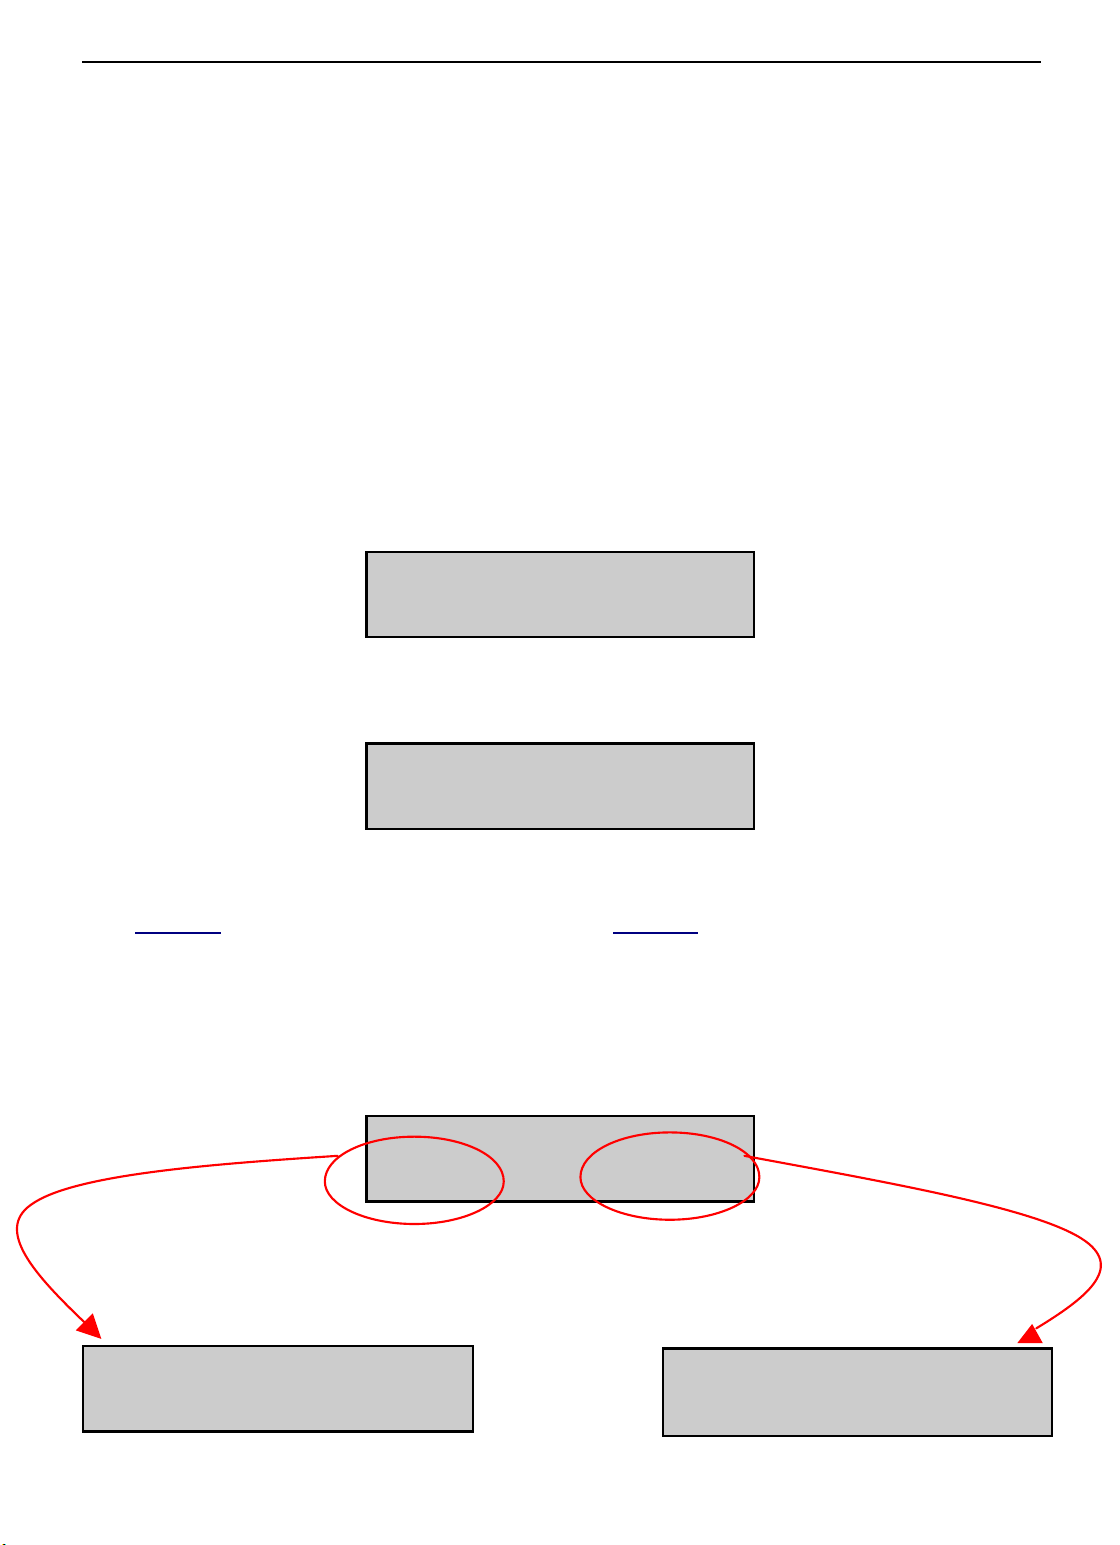
Add Credit to
ROOM PHONE
4. Select if the credit is for the room or phone. You will see one of
the following displays.
Credit Room XXX
:000.00
16
Credit Phone XXX
:000.00
Page 24
Hotel User Guide Basic Administration
5. Enter the credit value (e.g. £20.00 is entered as 02000). Display
shows:
RM:XXX :XXX.XX
ACCEPT CHANGE
6. Select ACCEPT to enter the value in the system. The display re-
turns to normal.
OR
If you want to change the value, select CHANGE to enter the
value again (
step 5).
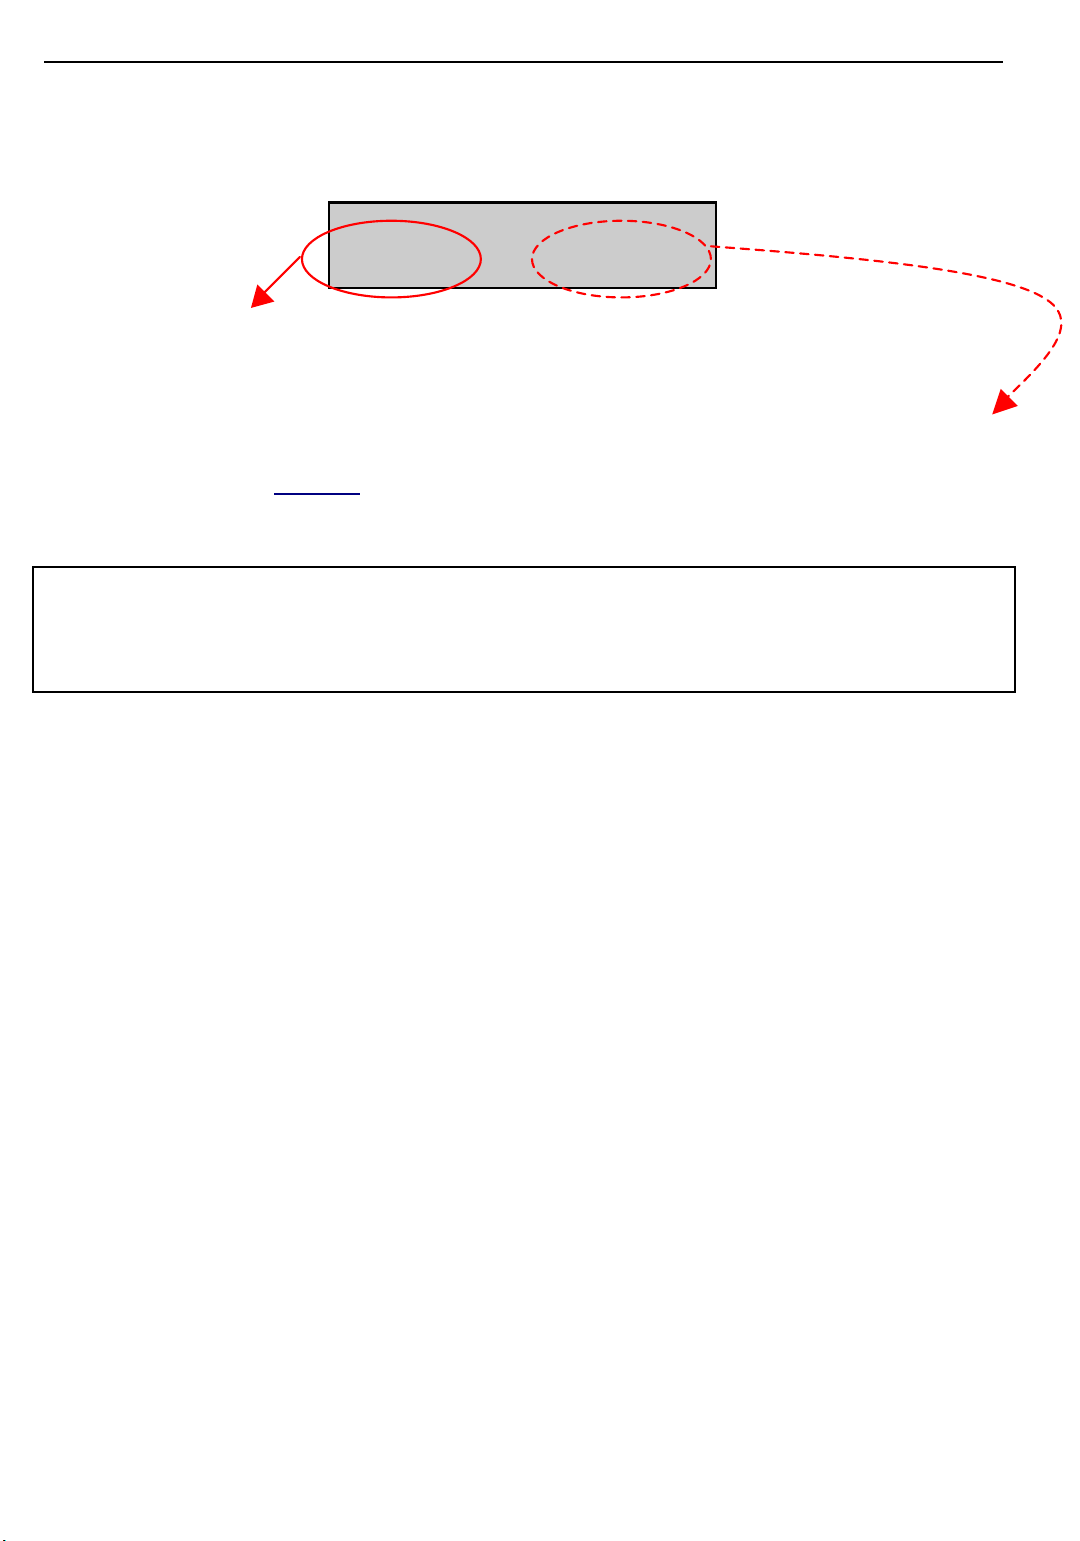
NoTE: If a cash credit is made for a phone bill, the system will warn the guest when
the ‘credit expiration warning threshold’ has been reached (the guest hears three
beeps while making a call). When the credit limit is reached, any call in progress will
be dropped and no more calls can be made.
17
Page 25
Hotel User Guide Basic Administration
SETTING AND CANCELLING A WAKEUP CALL FOR A GUEST
The WAKEUP key allows you to enter a wake-up (alarm) call for a
guest room, or cancel a previously set alarm call. Guests may be allowed to set their own alarm calls from extensions.
Alarms are set as either “once only” or “daily” alarms. This feature
also allows you to print out a list of alarm calls set since the guest
was checked in.
n SETTING A WAKE-UP CALL
Using the Administrator’s Keyphone
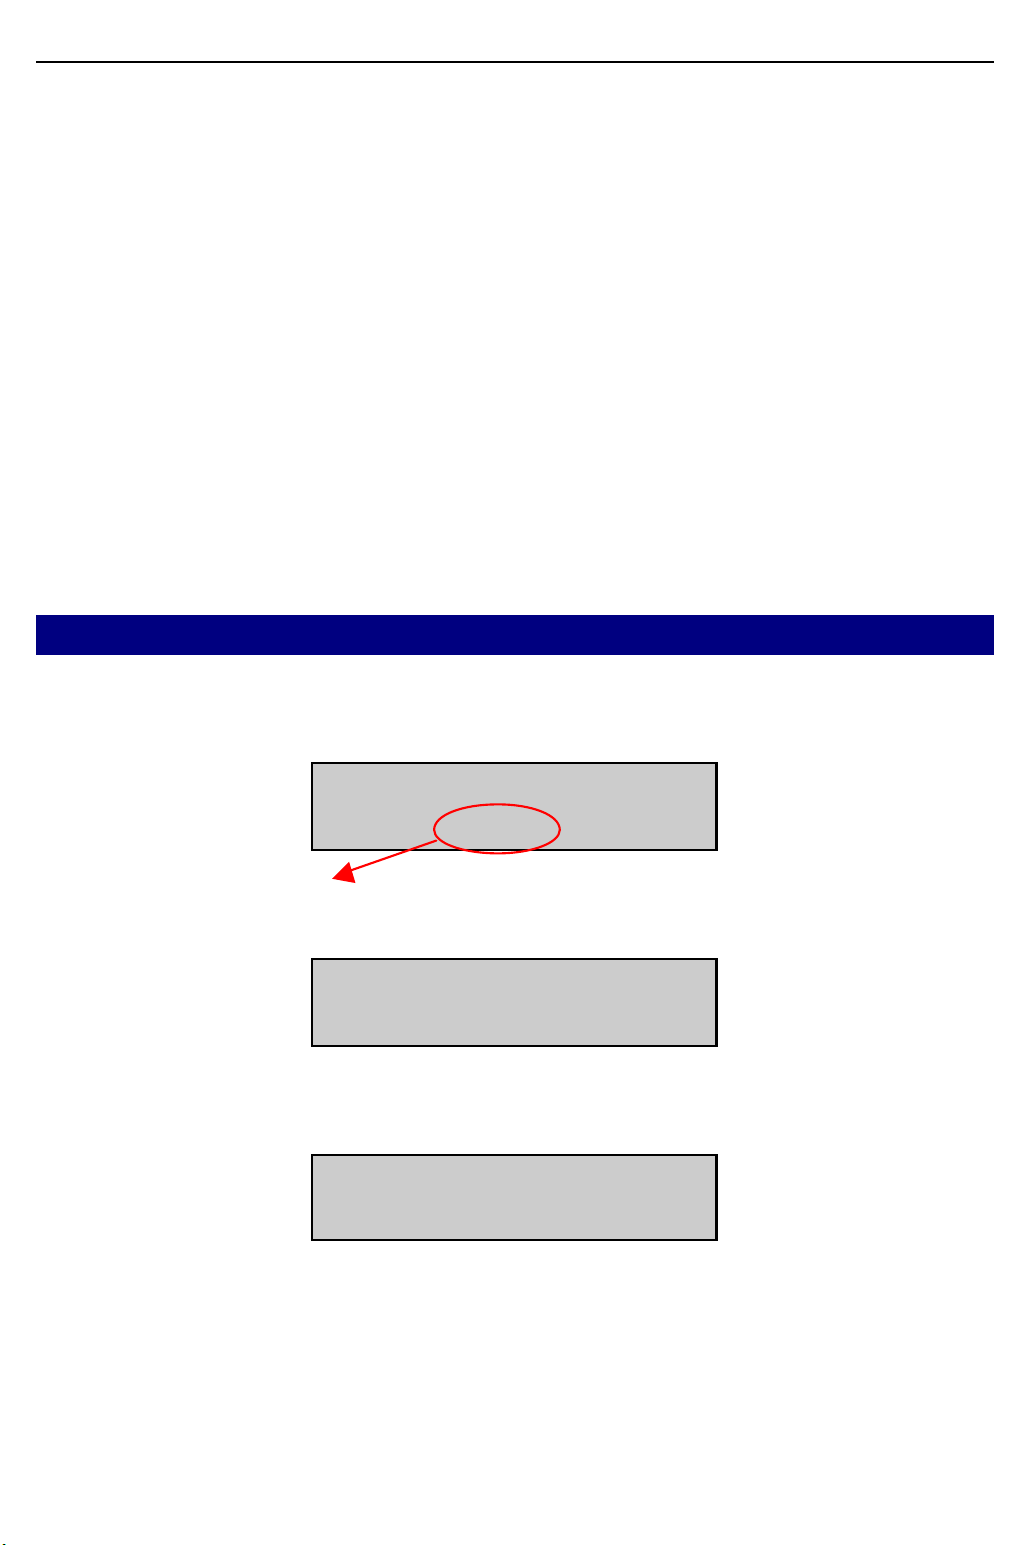
1. Press the WAKEUP key. Display shows:
Wake Up Call
PRINT SET CANCEL
2. Select SET. Display shows:
Enter Room
NUMBER:
3. Enter the room number. Display shows:
Enter Wake Time
HHMM
4. Enter the alarm time in 24-hour format (HHMM). For example,
8.30am is entered as 0830, and 2.30pm is entered as 1430.
NOTE: To set alarm for 12 o’clock midnight, enter “2400”, not “0000”.
18
Page 26

Hotel User Guide Basic Administration
Display shows:
Enter Wake Time
TODAY DAILY
5. Select if this is a “once only” (TODAY) alarm, or is to be set for
each day the guest is in occupation (DAILY). Display shows:
XXX Wake: HH:MM
YES CLEAR EXIT
6. Select YES to set the alarm time you entered.
If you don’t want to enter this time, select CLEAR (the display re-
turns to normal).
7. Select EXIT to exit.
Using a Standard Telephone (Guest Room)
You can set a “once only” alarm at this phone.
1. Lift the handset and dial 18.
2. Enter the alarm time in 24-hour format (e.g. 0730 for 7.30am,
1430 for 2.30pm) and wait for the confirmation tone.
NOTE: To set alarm for 12 o’clock midnight, enter “2400”, not “0000”.
3. Replace the handset.
Using an Extension Keyphone with Display
Up to three alarms can be set using a display keyphone, each as a
“once only” or “daily” alarm. (To set a single “once only” alarm, you
can follow the instructions for the standard telephone, above.)
19
Page 27
Hotel User Guide Basic Administration
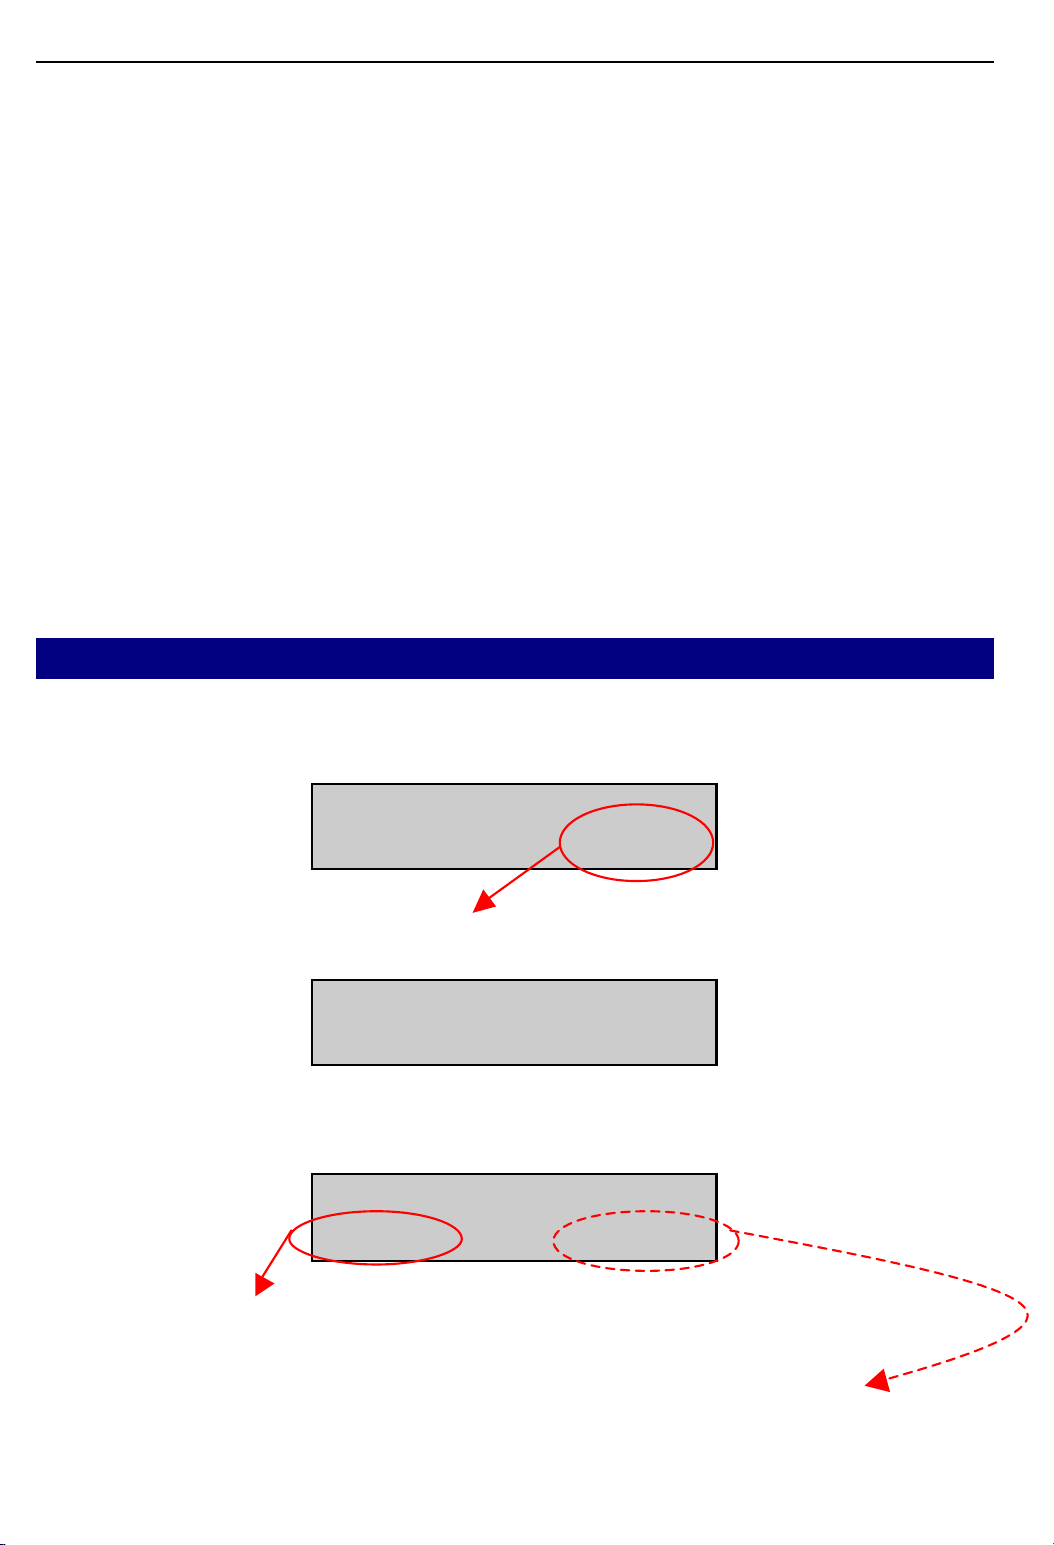
1. Press the TRSF (or Transfer) key and dial 112.
2. Press 1, 2 or 3 for the alarm number.
3. Enter the time you want the alarm to ring as HHMM using a 24-
hour clock (e.g. 1330 is 1.30pm).
NOTE: To set alarm for 12 o’clock midnight, enter “2400”, not “0000”.
4. Press 1 (TODAY) or 2 (DAILY) to select the alarm type.
5. Press the TRSF (or Transfer) key to save alarm setting and exit
OR
Press the right soft key to move the cursor and repeat the procedure for the next alarm (step 2 onwards).
n CANCELLING A WAKE-UP CALL
Using the Administrator’s Keyphone
1. Press the WAKEUP key. Display shows:
Wake Up Call
PRINT SET CANCEL
2. Select CANCEL. Display shows:
Enter Room
NUMBER:
3. Enter the room number. Display shows:
Room:XXX Wakeup
CANCEL EXIT
4. Select CANCEL to cancel the alarm call and then select EXIT to
exit
OR
Select EXIT to exit without cancelling.
20
Page 28
Hotel User Guide Basic Administration
Using a Standard Telephone (Guest Room)
1. Lift the handset and dial 18.
2. Dial 0000.
3. Replace the handset.
Using an Extension Keyphone with Display
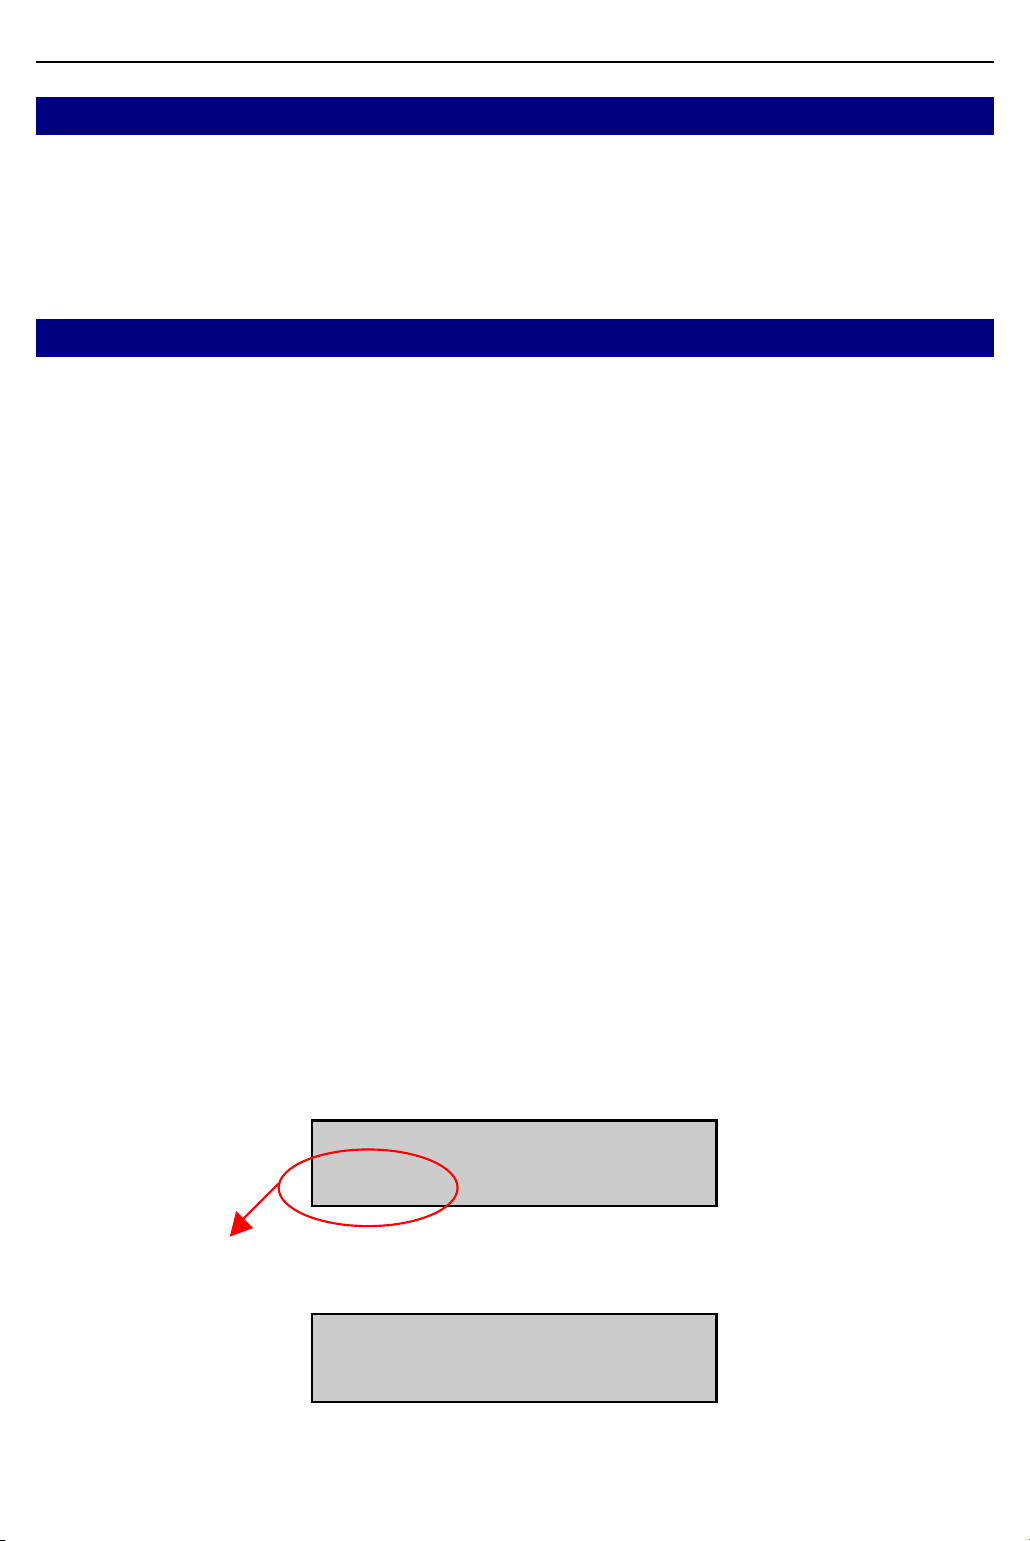
1. Press the TRSF (or Transfer) key and dial 112.
2. Press 1, 2 or 3 for the alarm number.
3. Move the cursor to the TODAY or DAILY field using the right soft
key.
4. Press 0 for NOTSET.
5. Press the TRSF (or Transfer) key to cancel the alarm and exit
OR
Press the right soft key to move the cursor and repeat the procedure for the next alarm (step 2 onwards).
n PRINTING A LIST OF WAKE-UP CALLS
This provides a list of alarm calls set for a room since check-in. This
is useful if a guest queries whether an alarm call was actually set
when requested.
PROCEDURE
1. Press the WAKEUP key. Display shows:
Wake Up Call
PRINT SET CANCEL
2. Select PRINT. Display shows:
Enter Room
NUMBER:
21
Page 29
Hotel User Guide Basic Administration
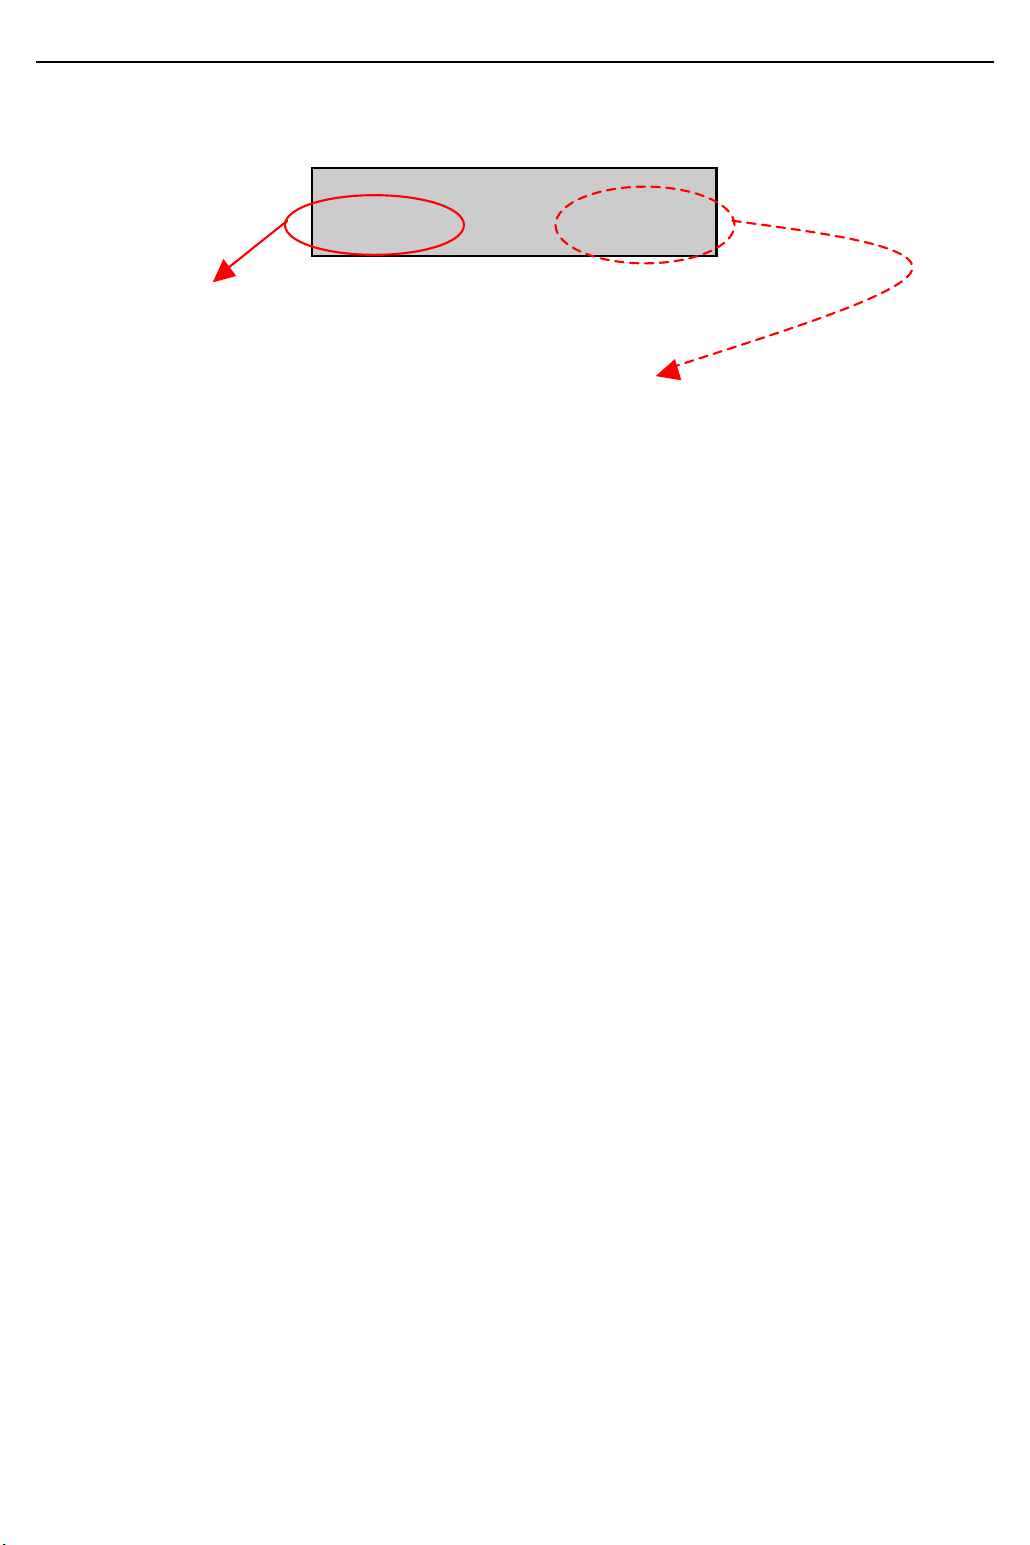
3. Enter the room number. Display shows:
Room:XXX Wakeup
PRINT EXIT
4. Select PRINT to print and then select EXIT to exit.
OR
Select EXIT to exit without printing.
22
Page 30
Hotel User Guide Basic Administration
SETTING A “MESSAGE WAITING
INDICATION”, “CAMP-ON” OR “CALL-
BACK” ON A GUEST PHONE
If you ring an extension from the Administrator’s phone with a message, and the extension does not answer or is busy, it is possible to
leave an indication that you have a message waiting for that extension. Alternatively, you can set a ‘callback’ or a ‘camp on’.
• A message waiting indication alerts the extension user that you
are trying to contact them. A message key LED or special light on
the extension will flash* or a special ‘message waiting tone’ is
heard when the extension handset is lifted.
• A callback means that the extension will automatically ring you
back when it is free.
• A camp-on means your call will continue to ring at the busy ex-
tension until it is answered.
* The use of a flashing message light is an optional feature avail able with
selected telephones. Check with the system manager or installer whether
this option has been installed.
PROCEDURE
The procedure to follow depends on whether the extension is busy
or does not answer.
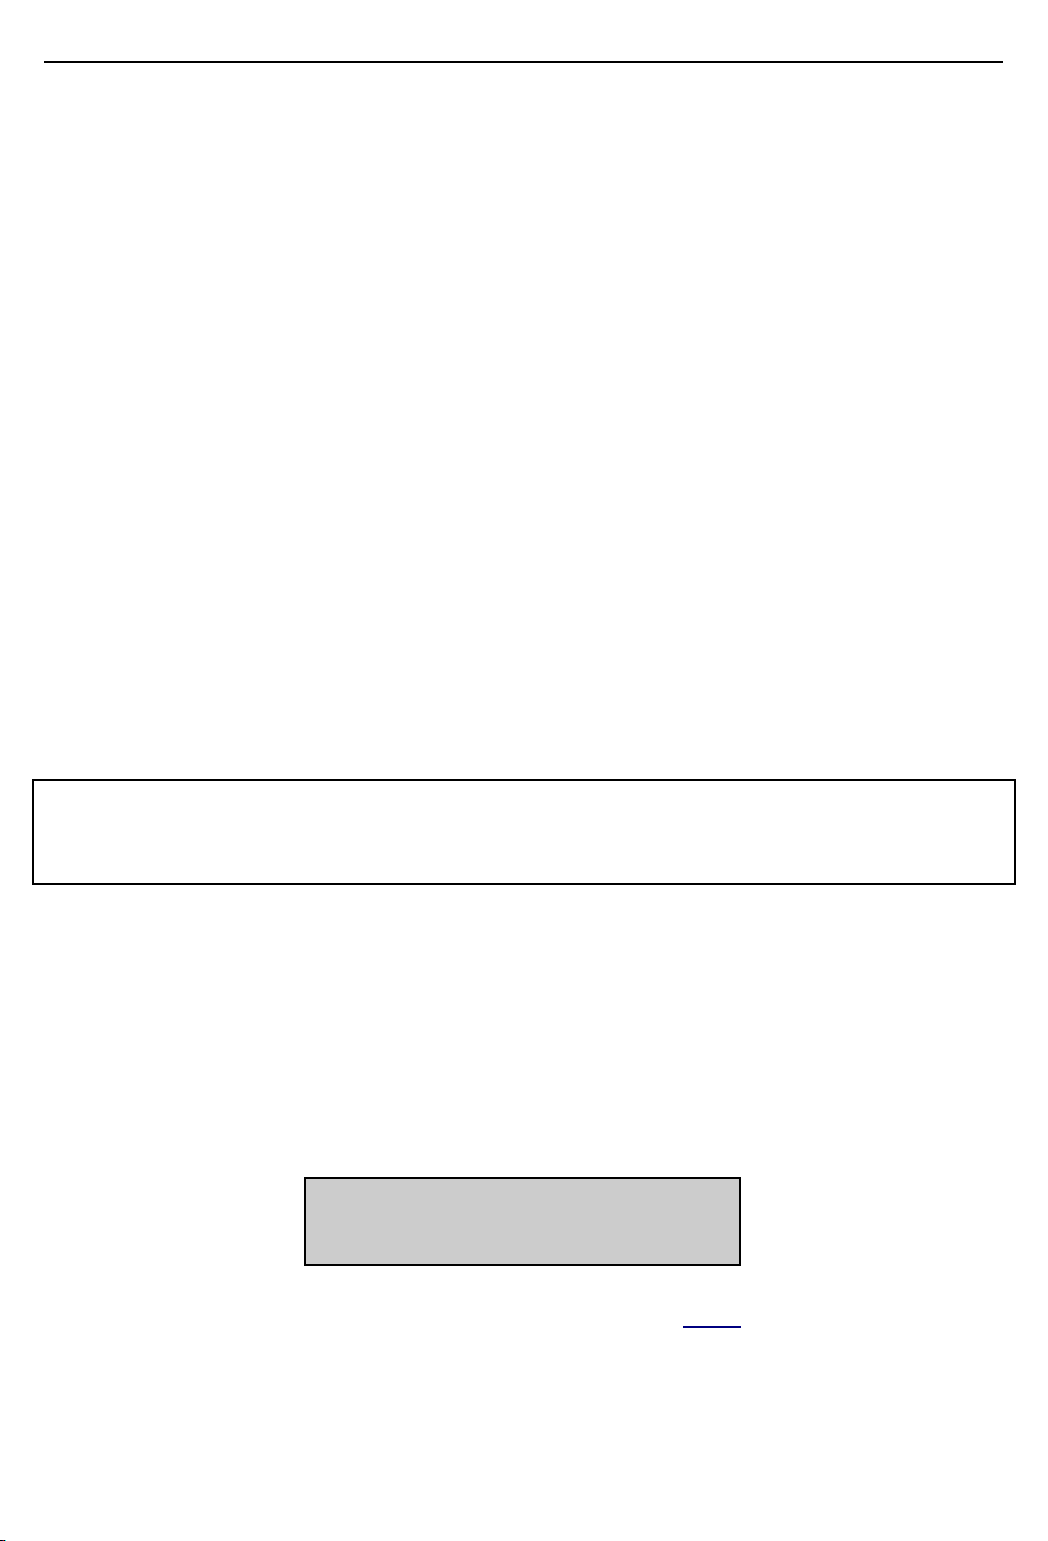
• If the extension is busy, the display shows:
XXX:Busy
CBK MSG CAMPÜ
(If you see a “camp-on” display instead, refer to the
Select one of the following options (that is, press the appropriate
soft key):
NOTE, below.)
23
Page 31
Hotel User Guide Basic Administration
CBK—Set a callback. The extension will automatically ring you
back when it finishes its current call (if busy) or after it makes
another call. Hang up after selecting this option.
MSG—Leave a message waiting indication on the extension. (Al-
ternatively, press the MSG or Message key on your phone.)
Hang up after selecting this option.
CAMP—Camp on to (keep ringing) the extension. If you camp on,
the display gives you the option to select a callback or leave a
message waiting indication on the extension if you decide not to
wait any longer:
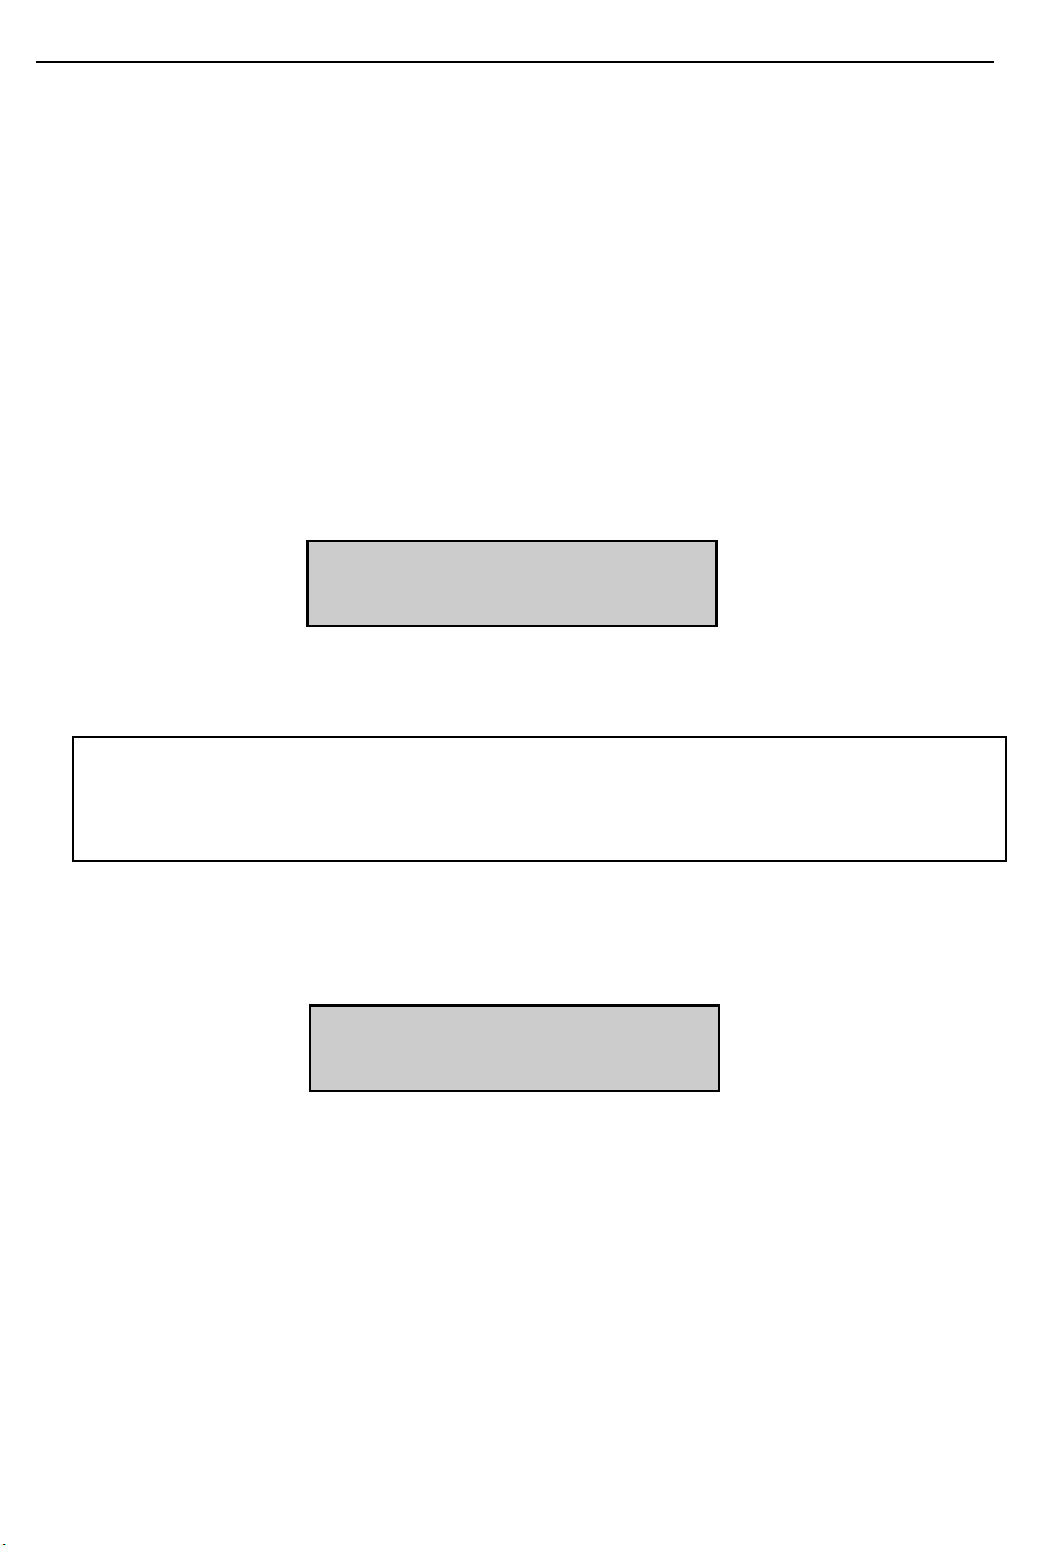
camp on to XXX
CBK MSG
If you don’t make a selection, the extension keeps ringing.
NOTE: An iDCS system allows your phone to be set for automatic camp-on. If
this is the case, when you dial a busy number, you will see the display above
and your call will keep ringing until answered. At any time during ringing, you
can select CBK or MSG.
• If the extension rings but does not answer, the display
shows:
XXX:Ringing
CBK MSG
Select one of the following (that is, press the appropriate soft
key):
CBK—Set a callback. The called extension will automatically ring
you back the next time it is used. Hang up after selecting this option.
MSG—Leave a ‘message waiting’ indication on the extension.
(Alternatively, press the MSG or Message key on your phone.)
Hang up after selecting this option.
24
Page 32
Hotel User Guide Basic Administration
ANSWERING A “MESSAGE WAITING
INDICATION” ON AN EXTENSION
If a message waiting indication is set on an extension, a message
indicator light (or Message key) flashes, or a ‘message waiting’
tone—distinct from the normal dialling tone—is heard. How you answer depends on whether you are using a display keyphone or a
standard telephone.
Using a Display Keyphone
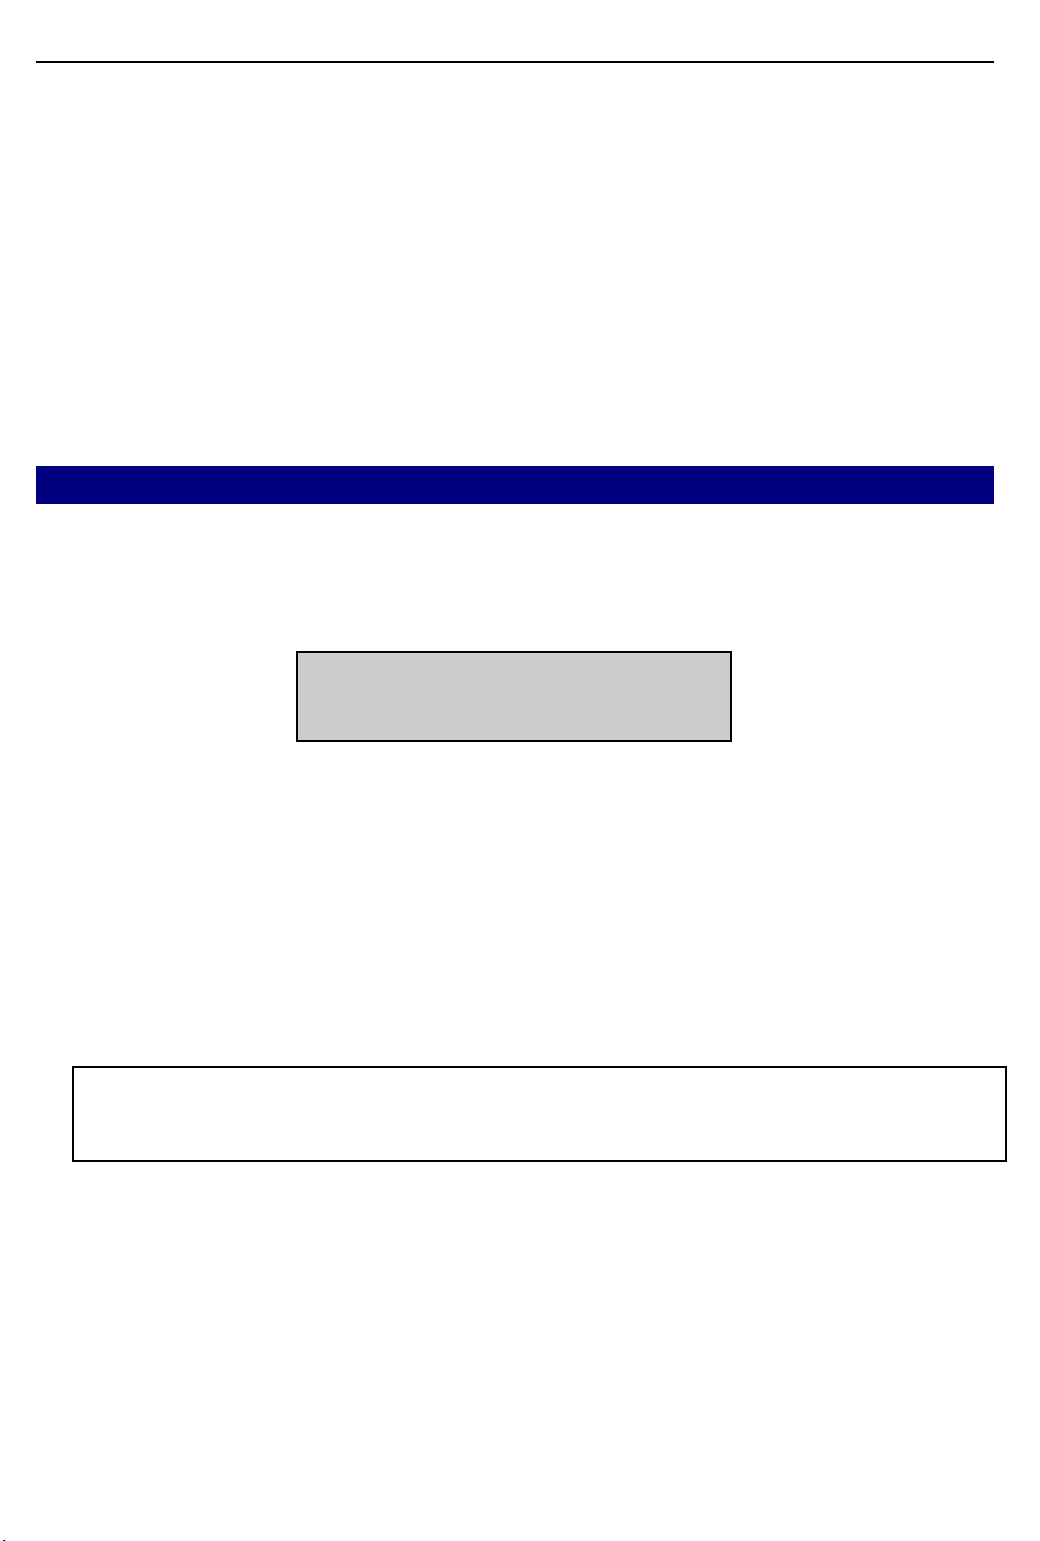
1. Press the flashing Message key. The display shows who left the
message indication (extension “XXX”):
message frm XXX
REPLY CLEAR NEXT
Select one of the following (that is, press the appropriate soft
key):
REPLY—Rings extension XXX. If the extension is busy or does
not answer, you can set a callback (select CBK from the display)
or leave a message waiting indication (select MSG from the display). Your Message key continues to flash.
NOTE: Setting a callback means that XXX will automatically call you back when
it becomes free. Setting a message waiting indication means that XXX is made
aware that you are trying to contact them.
CLEAR—Clears the message waiting indication without ringing
the extension (your Message key stops flashing).
NEXT—Allows you to see if any other extension has left a mes-
sage. This returns you to the display above to make your selections again.
25
Page 33

Hotel User Guide Basic Administration
Using a Standard Telephone
Either a ‘message waiting’ light flashes (if fitted on the phone) or you
hear the message waiting indication tone—which is distinct from the
normal dialling tone—when you lift the handset.
• Lift the handset and dial 43.
The extension that left the message waiting indication will ring. If
there is no answer, replace the handset and try again later.
If more than one extension has left a message waiting indication,
your message light will continue to flash or the next time you lift the
handset you will hear the message tone again. When you dial 43
you will ring the next extension in the message queue. The message
waiting indication remains until all messages left for you have been
answered.
26
Page 34
Hotel User Guide Basic Administration
SETTING A ROOM ON HOLD
An occupied room can be put on hold if it is required that no further
automatic charges are made to this room. For example, a guest may
request a checkout later than the programmed checkout time and
does not wish to be charged for an extra day.
NOTE: To use the HOTEL key for setting a room on hold, see section 3,
HOTEL Key.
Using the
PROCEDURE
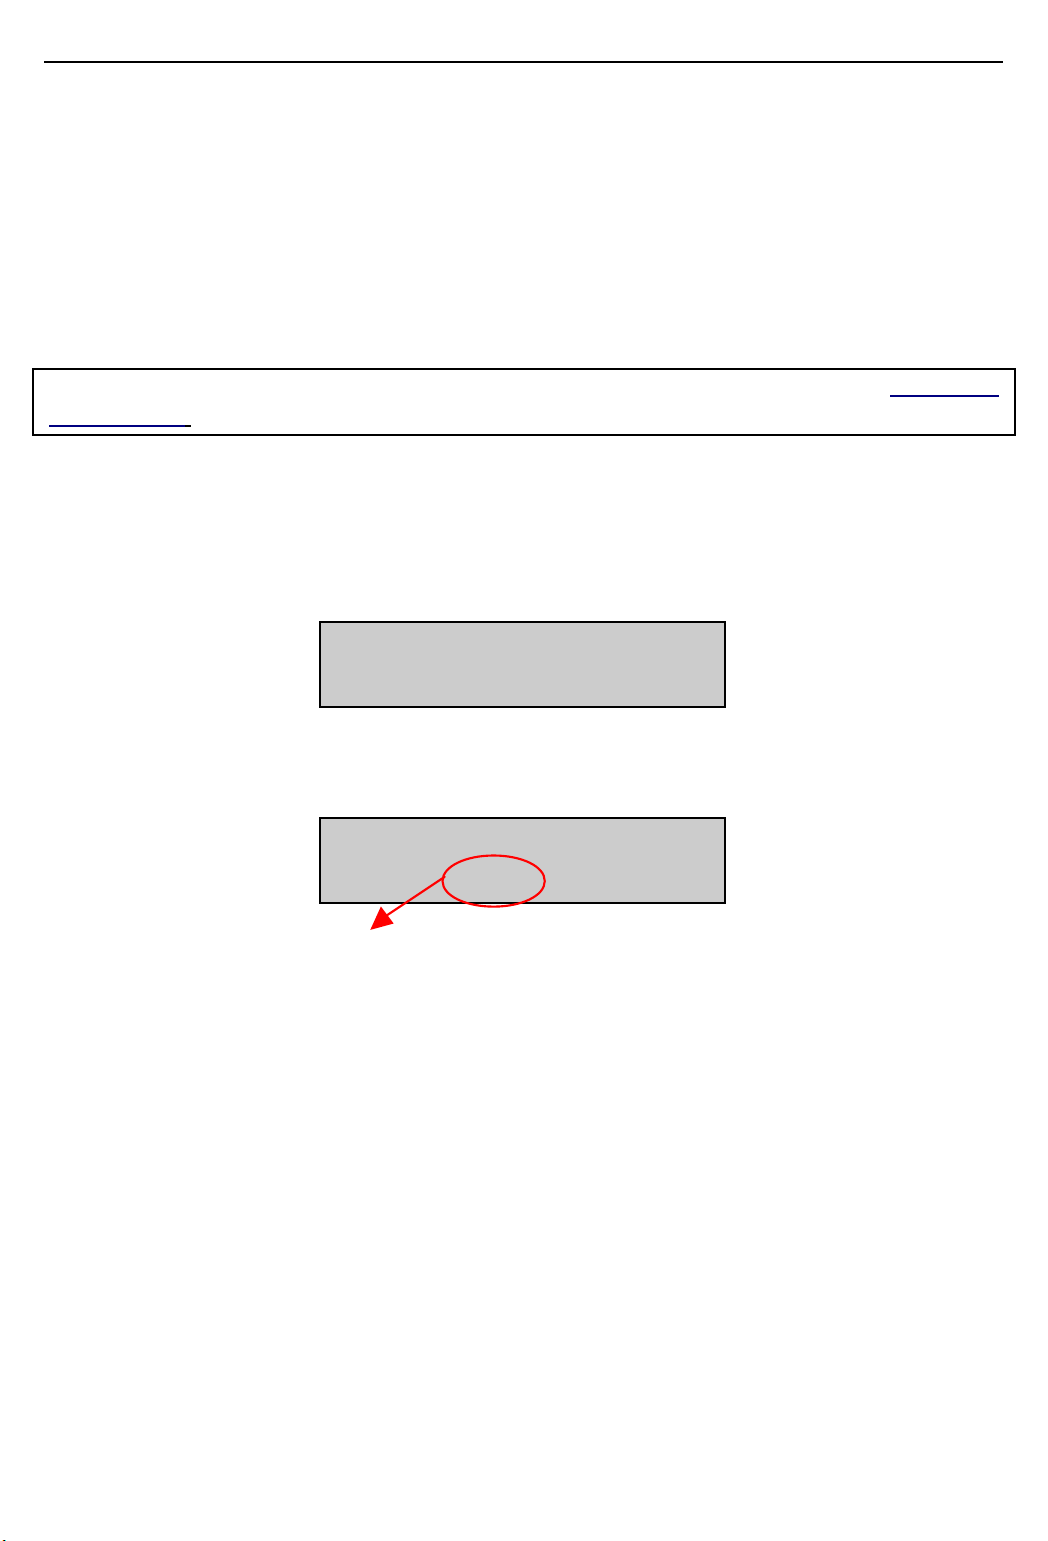
1. Press the CHOUT (Check Out) key. Display shows:
Enter Room
NUMBER:
2. Enter the room number. Display shows:
Check Out Room
YES HOLD PRINT
3. Select HOLD. The status flag is set to ‘on hold’ and will not in-
crease the room bill at the programmed checkout time.
4. Press the SPEAKER key to exit the procedure.
27
Page 35
Hotel User Guide Basic Administration
ROOM STATUS: VIEWING AND
CHANGING
The status of a room shows whether the room:
• is available for checking in;
• is occupied;
• is on hold;
• is clean or needs cleaning;
• needs repairs or has had repairs carried out.
The status of a room is indicated by a status ‘flag’: a value set automatically by the system which changes when guests are checked in
and out and rooms are cleaned or repaired. The flags are set as follows:
Value Status
0 Room available
1 Room occupied
2 Room needs cleaning
3 Room needs maintenance
4 Room is on hold
NOTE: A guest-room can also be set as a ‘smoking’ or a ‘no smoking’ room. This
can only be changed by reprogramming the system, as described in the Samsung
Hotel Installation & Programming Manual.
• A guest can only be checked in to a room if it is set as ‘Avail-
able’. When the check-in procedure is complete, the room status
automatically changes to ‘Occupied’.
• At a specified time each day, the ‘Needs Cleaning’ flag for the
room is automatically set by a system timer. The ‘Needs Cleaning’ flag may also be automatically set when a guest is checked
out, depending on system programming. A room cannot be
checked in again until the room status shows the room is clean.
28
Page 36
Hotel User Guide Basic Administration
• If a room requires maintenance, this can also be entered into the
system. Again, the room cannot be checked in to until maintenance has been carried out.
n VIEWING THE STATUS OF ROOMS (RSV)
To view the status of rooms, your keyphone must have one or more
Room Status View (RSV) keys. Each room also requires a dedicated
key programmed on one or more add-on-modules (AOMs) depending on the number of rooms .
NOTE: To view and change the status of rooms using the HOTEL key, see section 3,
Using the HOTEL Key.
PROCEDURE
• If you have a single RSV key on your phone
Press the RSV key and then press the number 0–4 for the status you
require (
see table, above).
For example, if you press RSV followed by 1, all the keys assigned
to occupied rooms will light.
• If you have keys marked ‘RSV0’–‘RSV4’ on your phone
Press the relevant RSV0–RSV4 key. For example, if you press RSV1,
all the keys assigned to occupied rooms will light.
n CHANGING THE STATUS OF A ROOM
Using the Administrator’s Keyphone
Use the HOTEL key to view and change room status from the Admin-
istrator’s phone. See section 3,
Using the HOTEL Key.
29
Page 37
Hotel User Guide Basic Administration
Using a Standard Telephone
It is convenient to allow cleaning and maintenance staff to be able to
set and change the room ‘cleaning/maintenance’ status when they
have inspected, cleaned or repaired a room. To do this, a HOTEL
key with restricted feature access can be assigned to room exten-
sions if they are display keyphones (see section 3,
).
Key
However, since most guest rooms are likely to have standard telephones, the procedure described below requires that a HOTEL ac-
cess code be programmed which can be dialled from the extension,
allowing staff to enter the required ‘activity’ code.
Ask your manager if you don’t know the HOTEL code. (Enter the
code here: ) You may also need your staff code.
Using the HOTEL
PROCEDURE
1. Lift the handset and dial the HOTEL code.
2. Enter your staff code (if requested).
3. Enter the activity code number. It is one of the following:
Code Activity
0 Room needs cleaning
1 Room cleaned
2 Room needs maintenance
3 Room repaired
4. Hang up when you hear the ‘confirm’ tone.
If a room is flagged with ‘0’ or ‘2’, it cannot be checked in to until ‘1’
or ‘3’ is entered to indicate the required activity is complete. Setting
the flag to ‘1’ or ‘3’ sets the room back to its previous status (‘Available’ or ‘Occupied’).
30
Page 38
Hotel User Guide Basic Administration
REMOTE BILLING FOR PHONE CALLS
It is possible for a guest to make a phone call from a phone exten-
sion other than their own (e.g. a phone in the lobby) and have the
call charged to their phone bill. The phone must be able to dial the
Administrator’s phone to request this service.
This is similar to the Booth option described later.
PROCEDURE
A guest calls the Administrator’s keyphone to request that an outside
call be billed to their room.
1. Answer the call and press the RB key. Display shows:
Enter Room
NUMBER:
2. Enter the room number. If the room is unoccupied, you receive
an error message saying ‘the room is empty’. If so, press the
TRSF (or Transfer) key to return to the caller.
3. If the room is occupied, display shows:
Call Billed to
ROOM XXX:
4. Press 9 and hang up to transfer the dial tone to the caller
OR
Dial the outside number requested and hang up to transfer the
ringing tone to the caller.
31
Page 39
Hotel User Guide Basic Administration
BOOTH OPTION FOR PHONE CALLS
Like remote billing (above), the Booth option allows guests to make
external calls from another phone and have the cost charged to their
room number. In this case, a phone is ‘enabled’ as a booth phone
and all subsequent calls are charged to the room number requesting
the service.
PROCEDURE
A guest requests the use of a booth phone and to have the call
costs charged to their room. On the Administrator’s phone:
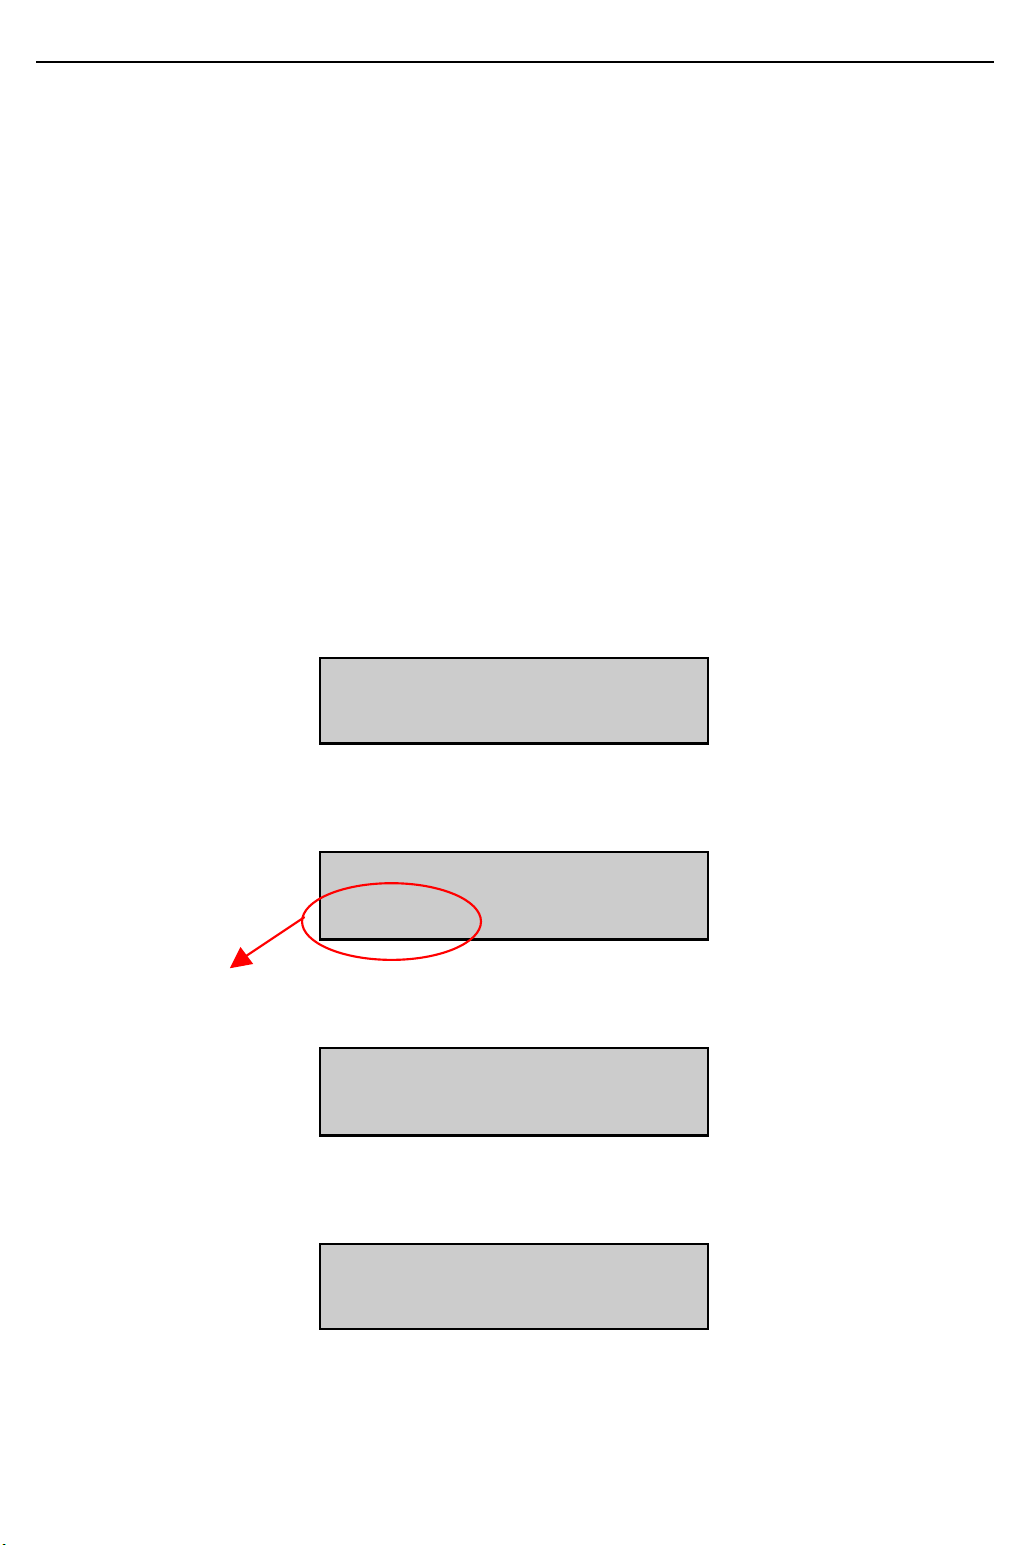
1. Press the BOOTH key. Display shows:
Enter booth
number:
2. Enter the booth phone number (e.g. 200). Display shows:
[200]BOOTH:DIS
ENABLE DISABLE
3. Select ENABLE. Display shows:
Enter Room
NUMBER:
4. Enter the room number (e.g. 101). Display shows:
CHARGE TO ROOM
[101] OK
5. Select OK to confirm the charge to the room.
32
Page 40

Hotel User Guide Basic Administration
The phone enabled as a booth phone should be disabled when all
calls are completed by following steps 1 and 2 above and selecting
DISABLE.
33
Page 41

Hotel User Guide Basic Administration
DISPLAYING A CALL COST OR TIMER
This feature is provided to allow a display keyphone to show the cost
or duration of a call. The real-time call cost, or the elapsed call
time—depending on what is selected for the keyphone during system setup—is displayed in the top right of the keyphone display
while a call is in progress. It is useful, for example, if a guest re-
quests to make a call from the front desk (Administrator’s) keyphone.
This feature is automatically activated when a call is made if it is
programmed into the system. Refer to MMC 110 (Call Cost option)
in the Samsung Hotel Programming & Installation Manual.
34
Page 42
Hotel User Guide Basic Administration
SEPARATING PHONE CHARGES
This option allows you to print a guest’s phone charges separately
from other room charges. It is also possible to delete these call
charges from the final room invoice. For example, many guests staying for business purposes may wish to pay for personal calls separately from items on their room bill. These call charges would not
then appear on the final bill.
PROCEDURE
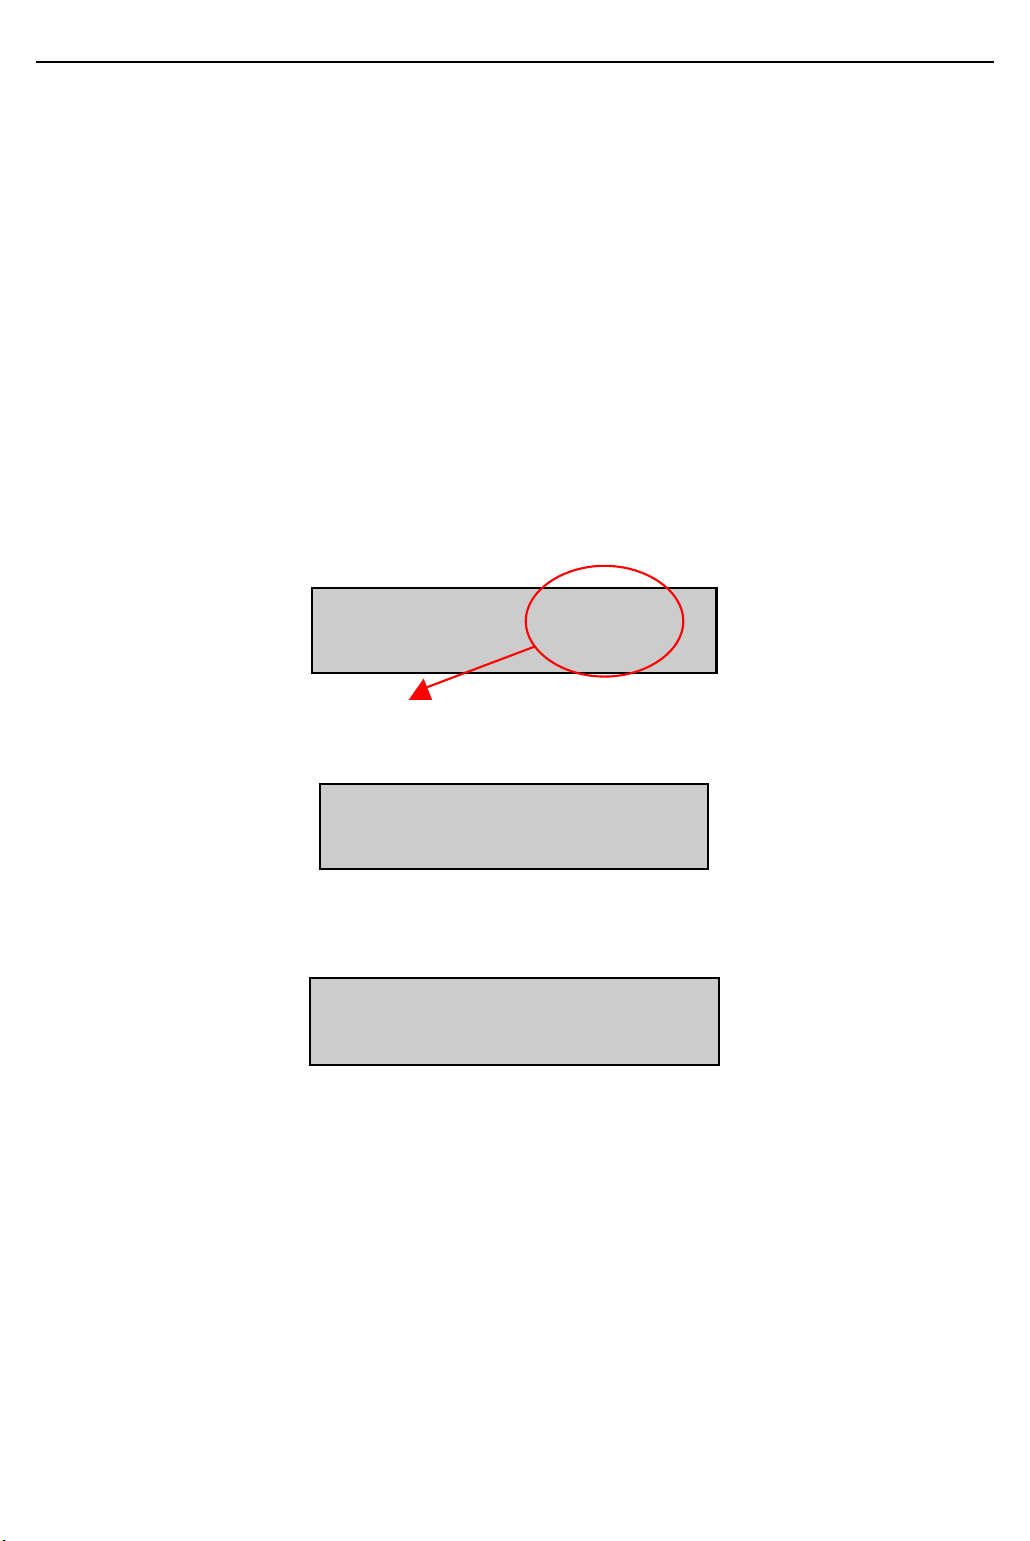
1. Press the HOTEL key. Display shows:
Room Check Phone
Stat Out Bill
2. Select the Phone Bill option. Display shows:
Enter Room
NUMBER:
3. Enter the room number. Display shows:
Print Phone Bill
&SAVE EXIT &CLR
4. Select the required option (that is, press the appropriate soft key):
&SAVE—To print the phone bill and save the total charges. Then
select EXIT to exit. These charges will be printed on the final
room bill.
&CLR—To print the phone bill and clear the total charges. Then
select EXIT to exit. These charges will not be printed on the final
room bill.
EXIT—To exit without printing the bill.
35
Page 43
Hotel User Guide Basic Administration
PRINTING A ROOM BILL
A room bill is automatically printed when a guest is checked out of a
room. (See
a printout of a room bill using the CHOUT (Check Out) key without
checking out the guest.
Checking Out a Guest.) However, it is possible to obtain
PROCEDURE
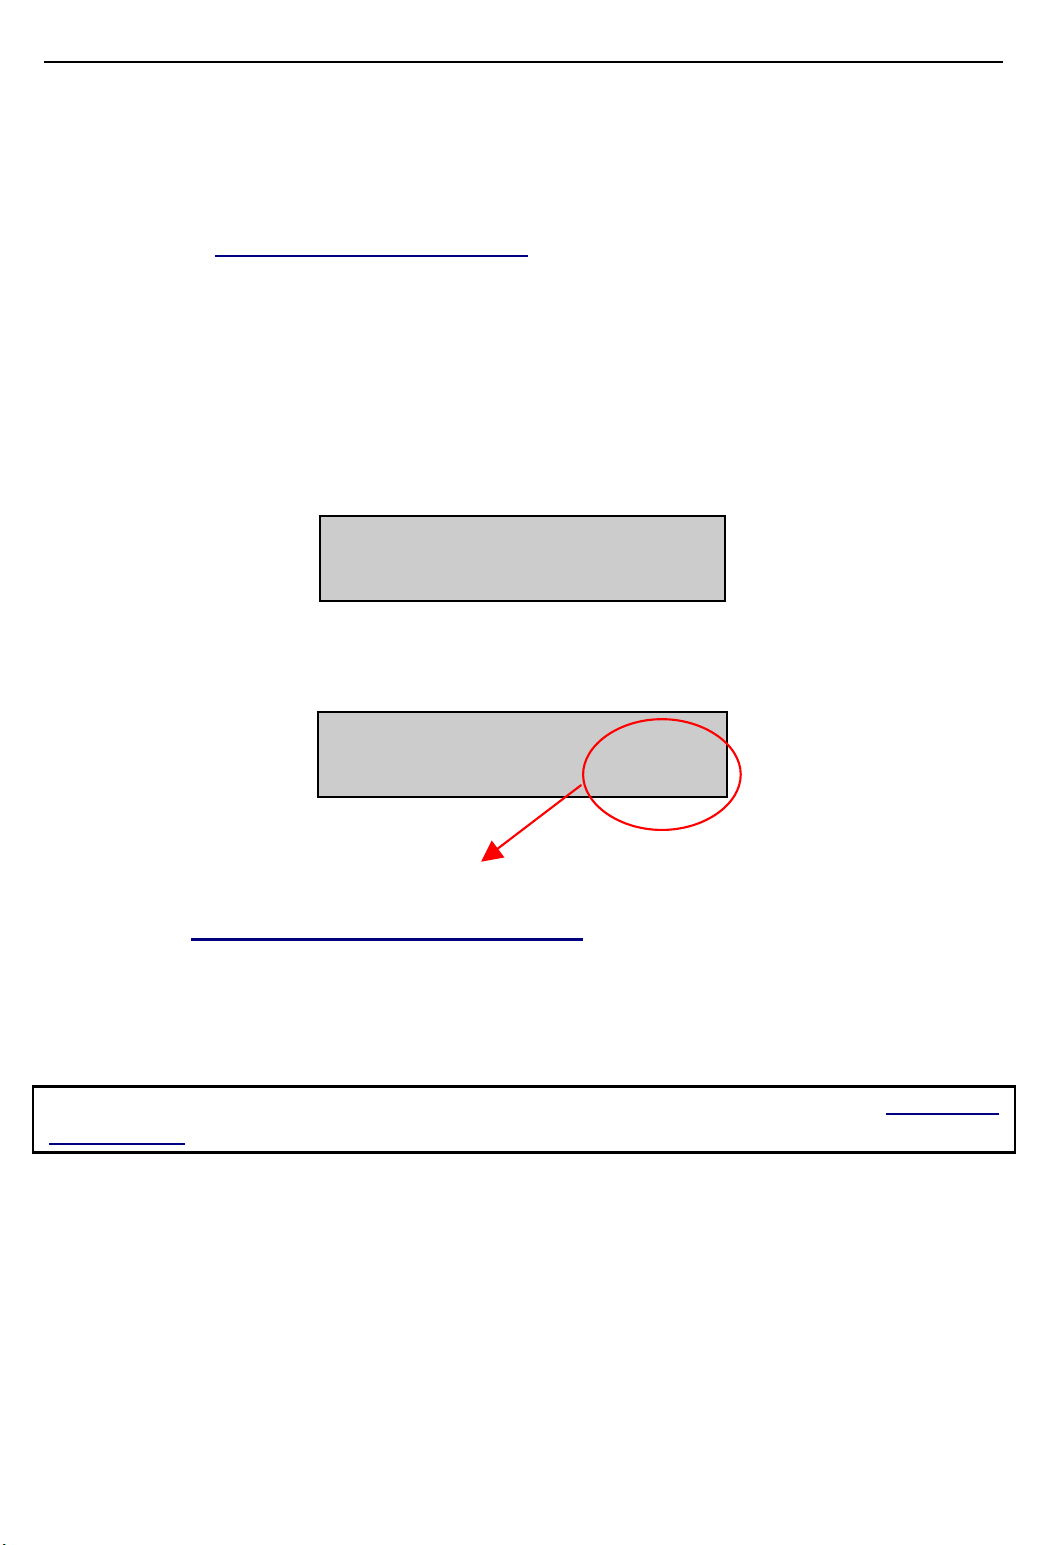
1. Press the CHOUT key. Display shows:
Enter Room
NUMBER:
2. Enter the room number. Display shows:
Check Out Room
YES HOLD PRINT
3. Select PRINT to print the room bill. An example is shown in sec-
tion 5, Invoices and Status Reports.
Charges will continue to accrue on the room bill until the room is
checked out.
NOTE: It is possible to do this using the HOTEL key (see section 3,
HOTEL Key).
Using the
36
Page 44

Hotel User Guide Basic Administration
STAFF LOCATION
This feature allows you to quickly see in which rooms staff members
are located. To work correctly:
• you need a special SLOCAT key programmed on the Administra-
tor’s phone;
• the Administrator’s phone requires a dedicated key for each
room, and you may therefore need more than one add-on module (AOM) depending on the number of rooms;
• each guest-room phone should have a programmed SLOCAT
key, or an SLOCAT access code should be programmed in the
system;
• staff will require their own codes in order to register their location
using guest-room phones.
If you have a programmed SLOCAT access code, enter it here:
Registering Your Location via the Guest-Room Phone
1. Press the SLOCAT key
OR
Enter the SLOCAT access code (see above).
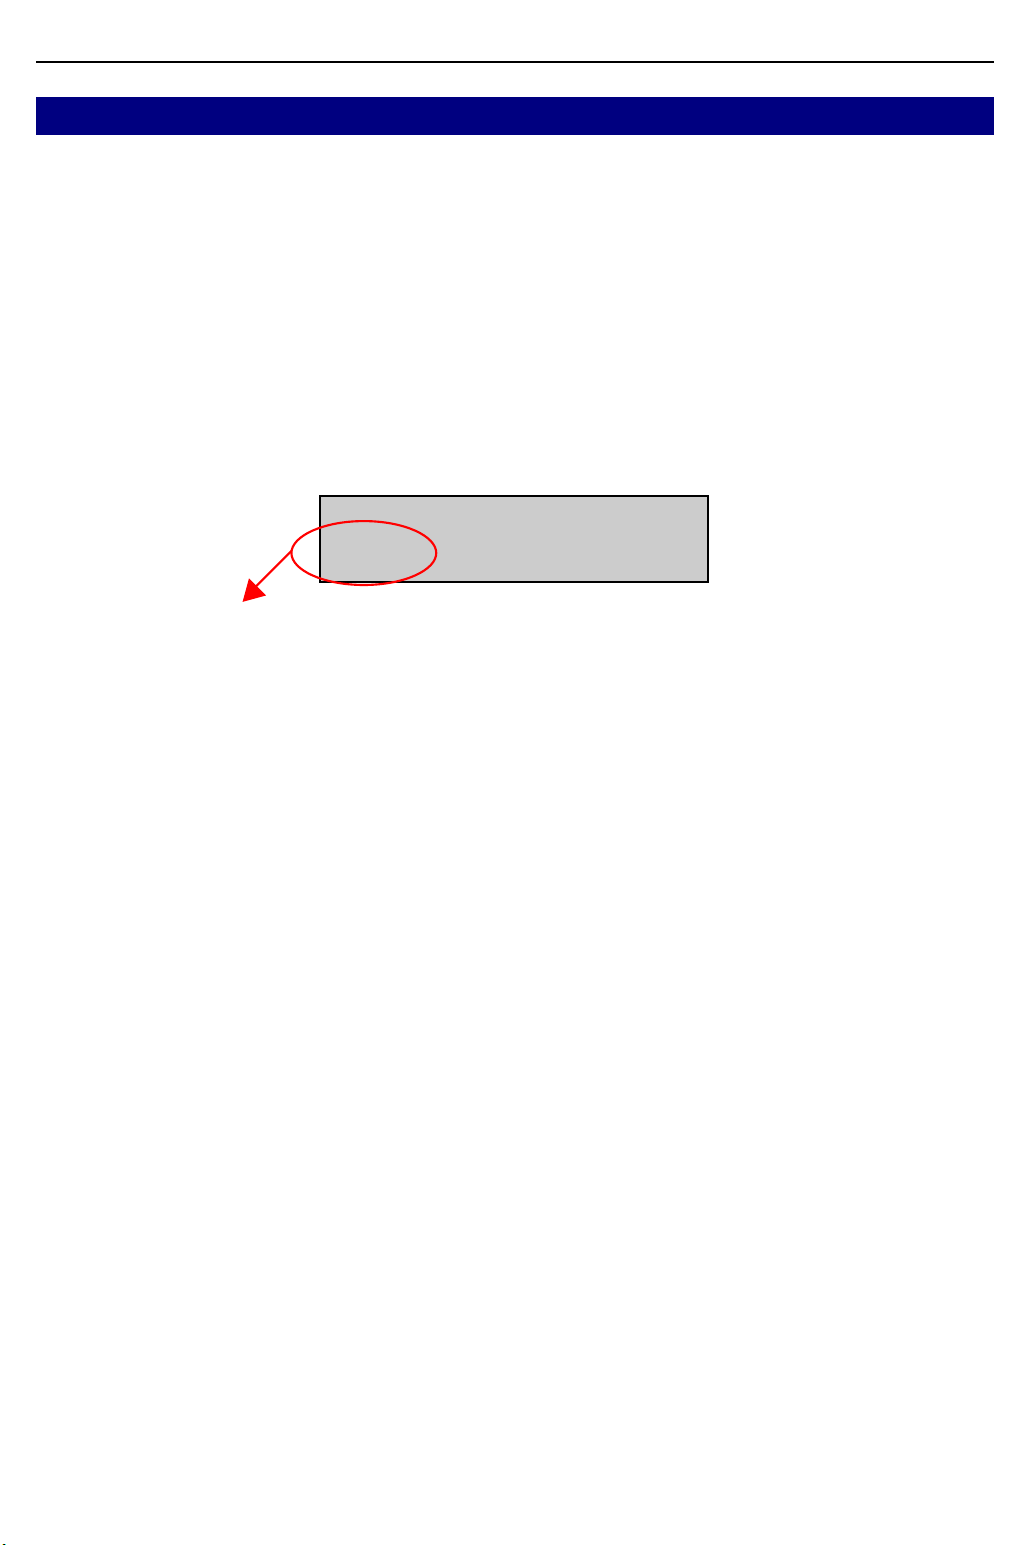
Display shows:
Enter Staff Code
2. Enter your 4-digit staff code. You will hear a confirmation tone
and the display returns to normal.
37
Page 45
Hotel User Guide Basic Administration
Checking Location of Staff via the Administrator’s Phone
Provided staff members have registered their locations as described
above, you can quickly check in which rooms they are located.
1. Press the SLOCAT key
OR
Enter the SLOCAT access code (see above).
Display shows:
Staff Locate
SHOW CLEAR EXIT
2. Select SHOW.
All programmed keys for rooms in which staff members are located will light.
3. To exit the display and turn off key LEDs, press EXIT.
OR
To clear registered locations and exit, press CLEAR then EXIT.
If you clear locations, they will not display again until members register again from guest-room phones.
Note: A staff member may register in each room as they move between rooms.
Only the most current location will display on the system.
38
Page 46

Hotel User Guide Using the HOTEL Key
Ì USING THE HOTEL KEY
A HOTEL key can be programmed on any Administrator’s keyphone,
or on a guest or meeting room extension provided with a display
keyphone. It is des igned to be flexible so that while it performs its
own unique functions, it also performs the functions of some other
dedicated keys described in section 2, Basic Administration. How it
works depends on the type of keyphone to which it is assigned.
HOTEL KEY ON ADMINISTRATOR’S
KEYPHONE
The HOTEL key programmed on the Administrator’s keyphone has
these main functions:
• Setting and changing room status
• Checking in
• Checking out
• Printing phone bills
• Printing status reports
When you press the HOTEL key, you see the main display:
Room Check Phone
Stat Out Bill
The function of each option is:
• Room Stat — view/change room status; check in guest; check
out guest; print status reports.
• Check Out — check out guest; put room on hold; print room bill.
• Phone Bill — print phone bill (and special billing option).
39
Page 47
Hotel User Guide Using the HOTEL Key
n ROOM STATUS OPTION
The Room Status option allows you to:
• view and change the status of rooms,
• print room status information, and
• check guests in and out.
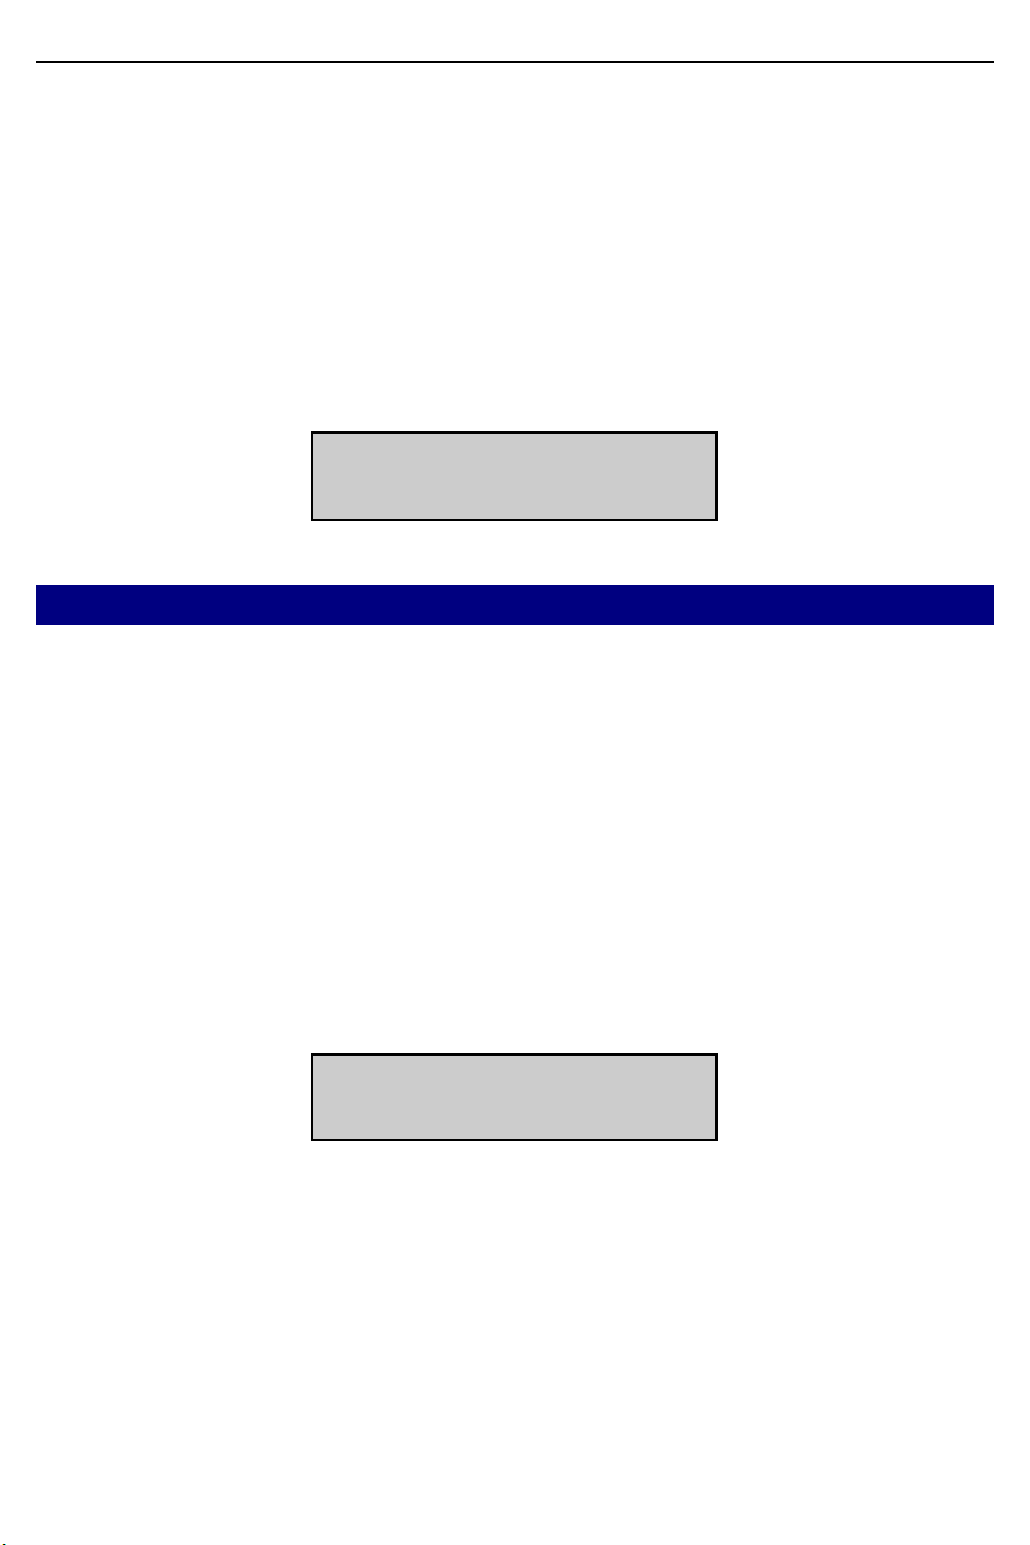
From the main display, select the Room Stat option. Display shows:
Enter Room:
AVAIL RPT OCCUP
View & Change a Room’s Status
Enter a room number. The status of the room is shown. It is one of
the following:
Available Cleaned
Occupied Repaired
Needs Cleaning Hold & Need Clean
Needs Maintenance Hold & Need Maint
Hold
For example:
Enter Room:220
NEEDS CLEANING
The display will return to normal after a short delay, or you can press
the SPEAKER key to exit.
Changing the Room Status
You cannot use this option to change an “occupied” room to an
“available” room, or vice versa. Rooms must be checked in and out
in the normal way. However, you can change other status information.
40
Page 48
Hotel User Guide Using the HOTEL Key
1. Press the right soft key to move the cursor (the underline character) to the status line (e.g. under NEEDS CLEANING).
2. Press the VOLUME Up (+ or V) or Down (– or W) key to display
the required status (e.g. CLEANED).
3. Press the right soft key to set the new status.
The display will return to normal after a short delay, or you can press
the SPEAKER key to exit.
View ‘Available’ Rooms
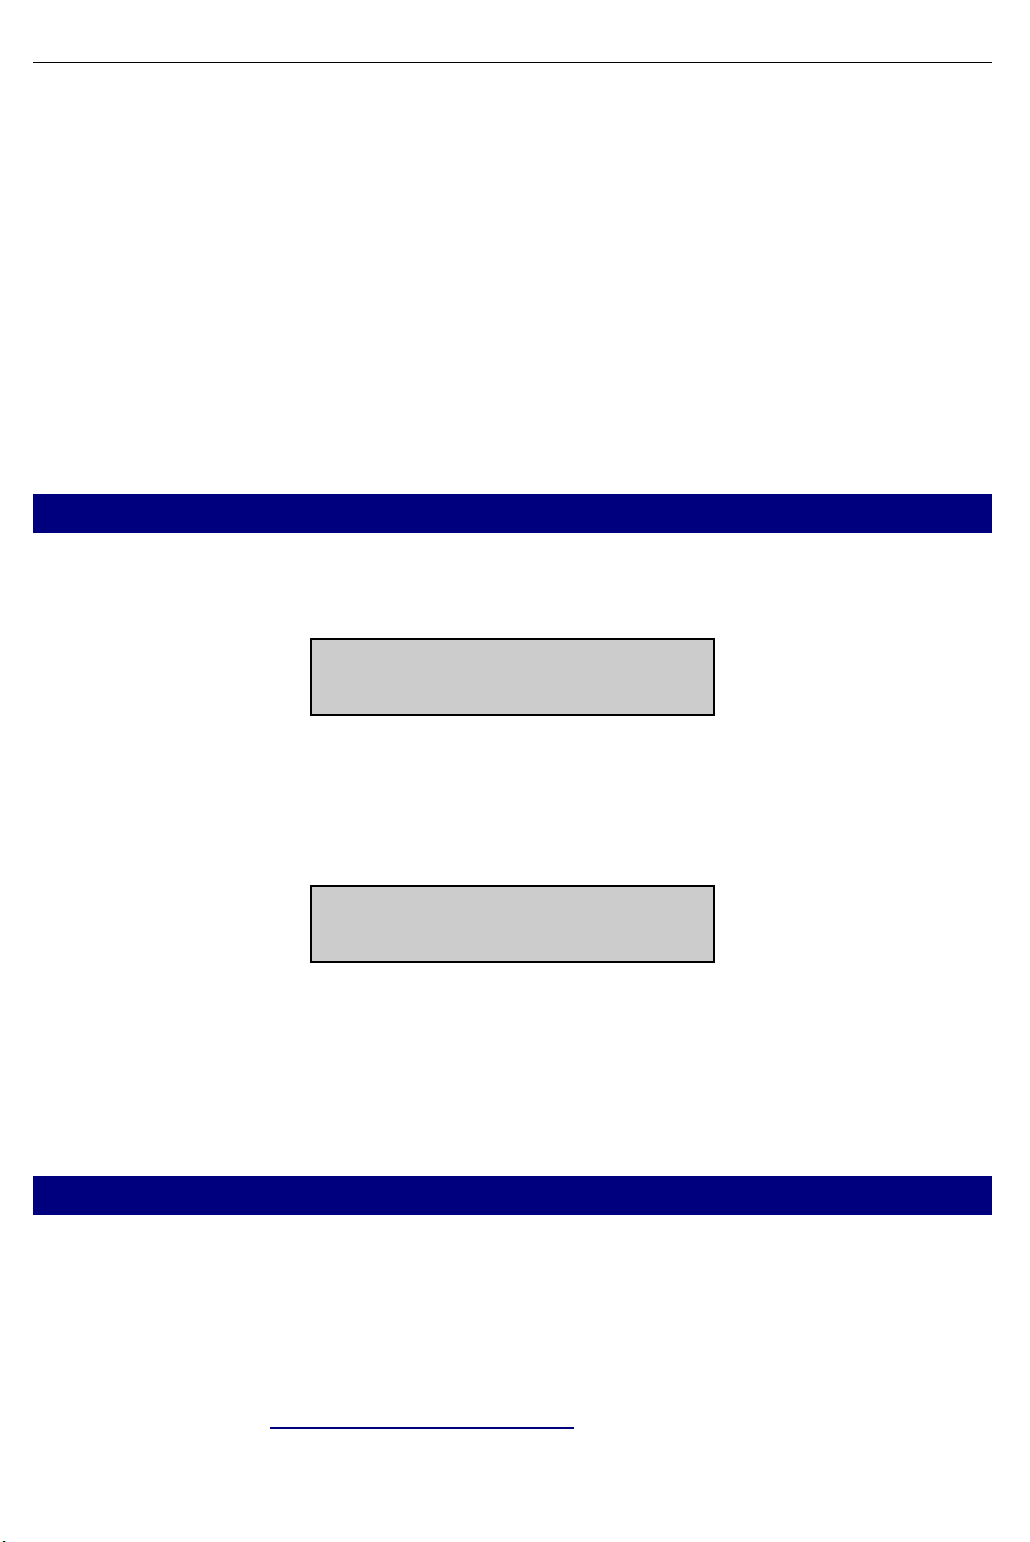
1. Select the AVAIL option. Display shows:
Smoking Room?
YES NO
2. Select YES for smoking rooms, or NO for non-smoking rooms.
Display shows:
XXX
CHECK IN EXIT
The keyphone displays the lowest numbered available room of the
type requested. To view other available rooms, press the VOLUME
Up or Down key. If no rooms are available, “None” is displayed. You
can also check in a room (see below).
Check In a Room
When you view the availability of a room with the AVAIL option, you
can use the display to check in the room.
Select the
Now follow the
wards) described in section 2, Basic Administration.
CHECK IN option and enter your staff code if requested.
Checking In a Guest procedure (from step 4 on-
41
Page 49
Hotel User Guide Using the HOTEL Key
View ‘Occupied’ Rooms
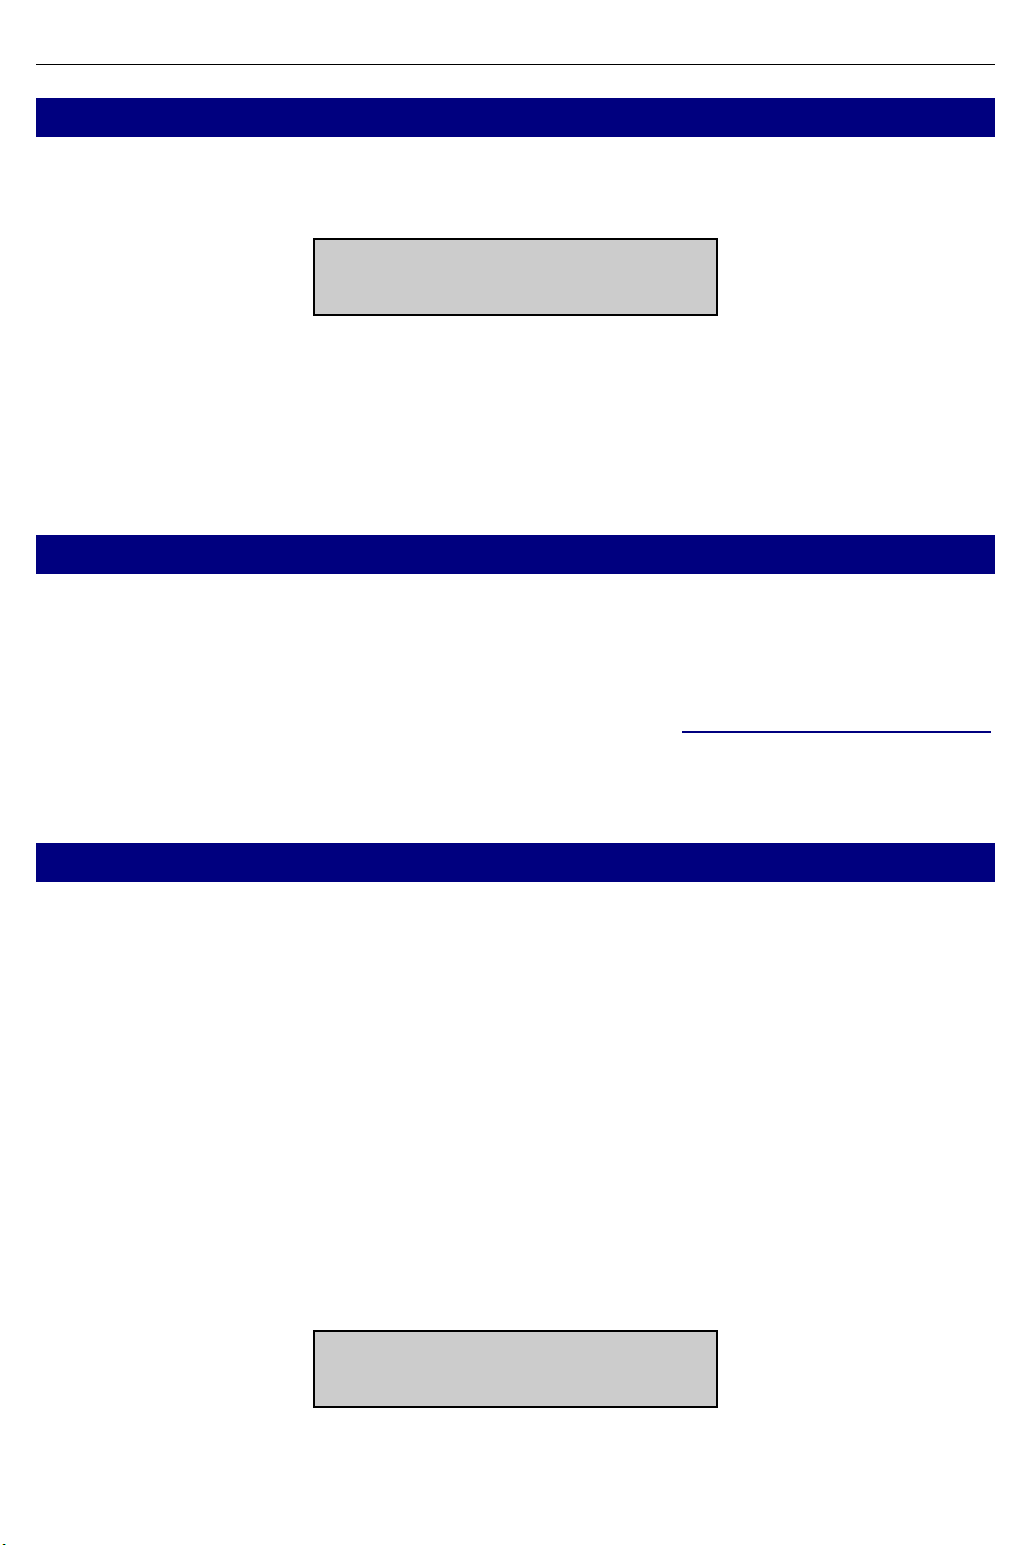
Select the OCCUP option. Display shows:
XXX: Occupied
CHECK OUT EXIT
The keyphone displays the lowest numbered occupied room. To
view other occupied rooms, press the VOLUME Up (+ or V) or Down
(– or W) key. Press EXIT to exit the display. You can also check out
a room (see below).
Check Out a Room
If a room is displayed as ‘occupied’ with the OCCUP option, the display allows you to check the room out.
Select the CHECK OUT option. Now follow the
procedure (from step 3 onwards) described in section 2, Basic Ad-
ministration.
Checking Out a Guest
Print Room Status Reports
You can obtain printed reports at any time showing room status information. Reports are available for:
CLEAN All rooms needing cleaning
MAINT All rooms needing maintenance
AVAIL All available rooms
OCCUP All occupied rooms
HOLD All rooms on hold
ALL All rooms
1. Select the RPT option. Display shows:
Print Report
CLEAN MAINT£
42
Page 50
Hotel User Guide Using the HOTEL Key
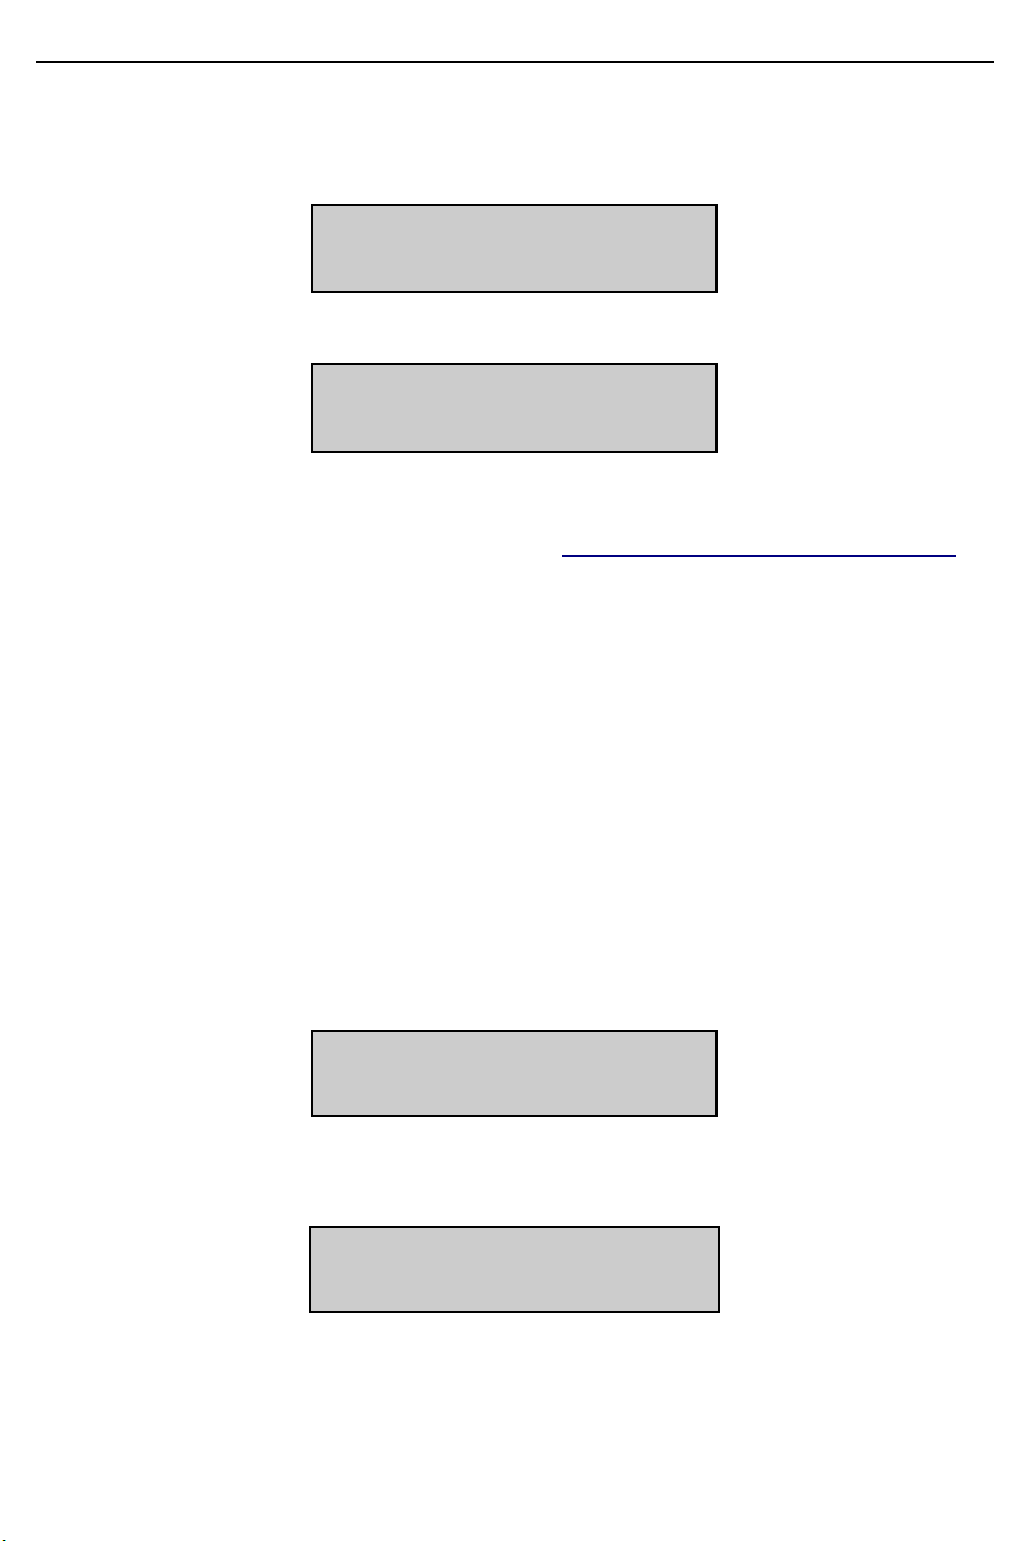
The arrow symbol (Ô) means that more options are available.
Use the SCROLL key to view the remaining options. You see:
Print Report
AVAIL OCCUPÔ
followed by
Print Report
HOLD ALL EXIT
2. Select the option for which you want to print a report. (An exam-
ple printout is shown in section 5, Invoices and Status Reports.)
3. Press EXIT to exit the display. (If necessary, use the SCROLL
key to find the EXIT option.)
n CHECK OUT OPTION
This option allows you to check out a room, put a room on hold, or
print a room bill.
1. From the main display, select the Check Out option. Display
shows:
Enter Room
NUMBER:
2. Enter the room number. Display shows:
Check Out Room
YES HOLD PRINT
43
Page 51

Hotel User Guide Using the HOTEL Key
Check Out a Room
Select YES. Checkout will be completed with a printout of the room
bill (see section 5,
Invoices and Status Reports). All billing records
for the room are set to zero. The room status is set to ‘Needs Cleaning’ unless the system is programmed for automatic cleaning.
Set a Room On Hold
Select HOLD. The room status is set to ‘On Hold’ and the room
charges are not incremented until the status flag is changed again.
Print a Room Bill
Select PRINT to print out the room bill without checking out the room.
The room remains in ‘Occupied’ status and charges continue to accrue on the bill.
n PHONE BILL OPTION
This option prints phone bills for selected rooms. A further option allows you to print a phone bill if requested by a guest, and then delete the charges from the room bill. This is useful if the guest wishes
to pay for phone calls separately from the room bill.
1. From the main display, select the Phone Bill option. You see:
Print Phone Bill
&SAVE EXIT &CLR
2. Select the required option (press the appropriate soft key):
&SAVE—To print the phone bill and save total charges. These
charges are printed on the final room bill.
&CLR—To print the phone bill and clear total charges. These
charges are not printed on the final room bill.
EXIT—To exit the procedure.
44
Page 52
Hotel User Guide Using the HOTEL Key
HOTEL KEY ON EXTENSION (GUEST)
KEYPHONE
If a HOTEL key is programmed on a display keyphone in a guest or
meeting room, it is used to set cleaning/maintenance status flags
only . It cannot be used for other HOTEL key features as on the Ad-
ministrator’s keyphone.
NOTE: Standard telephones are normally used for guest rooms. Therefore, special
dialling codes can be used for setting status flags (for details, see section 2, Basic
Administration).
1. Press the HOTEL key. Display shows:
Enter Staff Code
2. Enter your 4-digit staff code. (If you enter an incorrect code, you
return to step 1 to start again.) The code is not displayed; instead
you see ‘QQQQ’ in the display followed by:
Enter Code:
3. Enter the appropriate code (0–3), as follows:
0 Room needs cleaning
1 Room cleaned
2 Room needs maintenance
3 Room repaired
The display returns to normal after a short delay.
If ‘0’ or ‘2’ is entered, a room cannot be checked in until cleaning or
maintenance is carried out and either ‘1’ or ‘3’ is entered to indicate
that the required activity is com plete. If ‘1’ or ‘3’ is entered, a room returns to its original status of ‘Available’ or ‘Occupied’.
45
Page 53
Hotel User Guide Printing a PMS Report
46
Í PRINTING A PMS REPORT
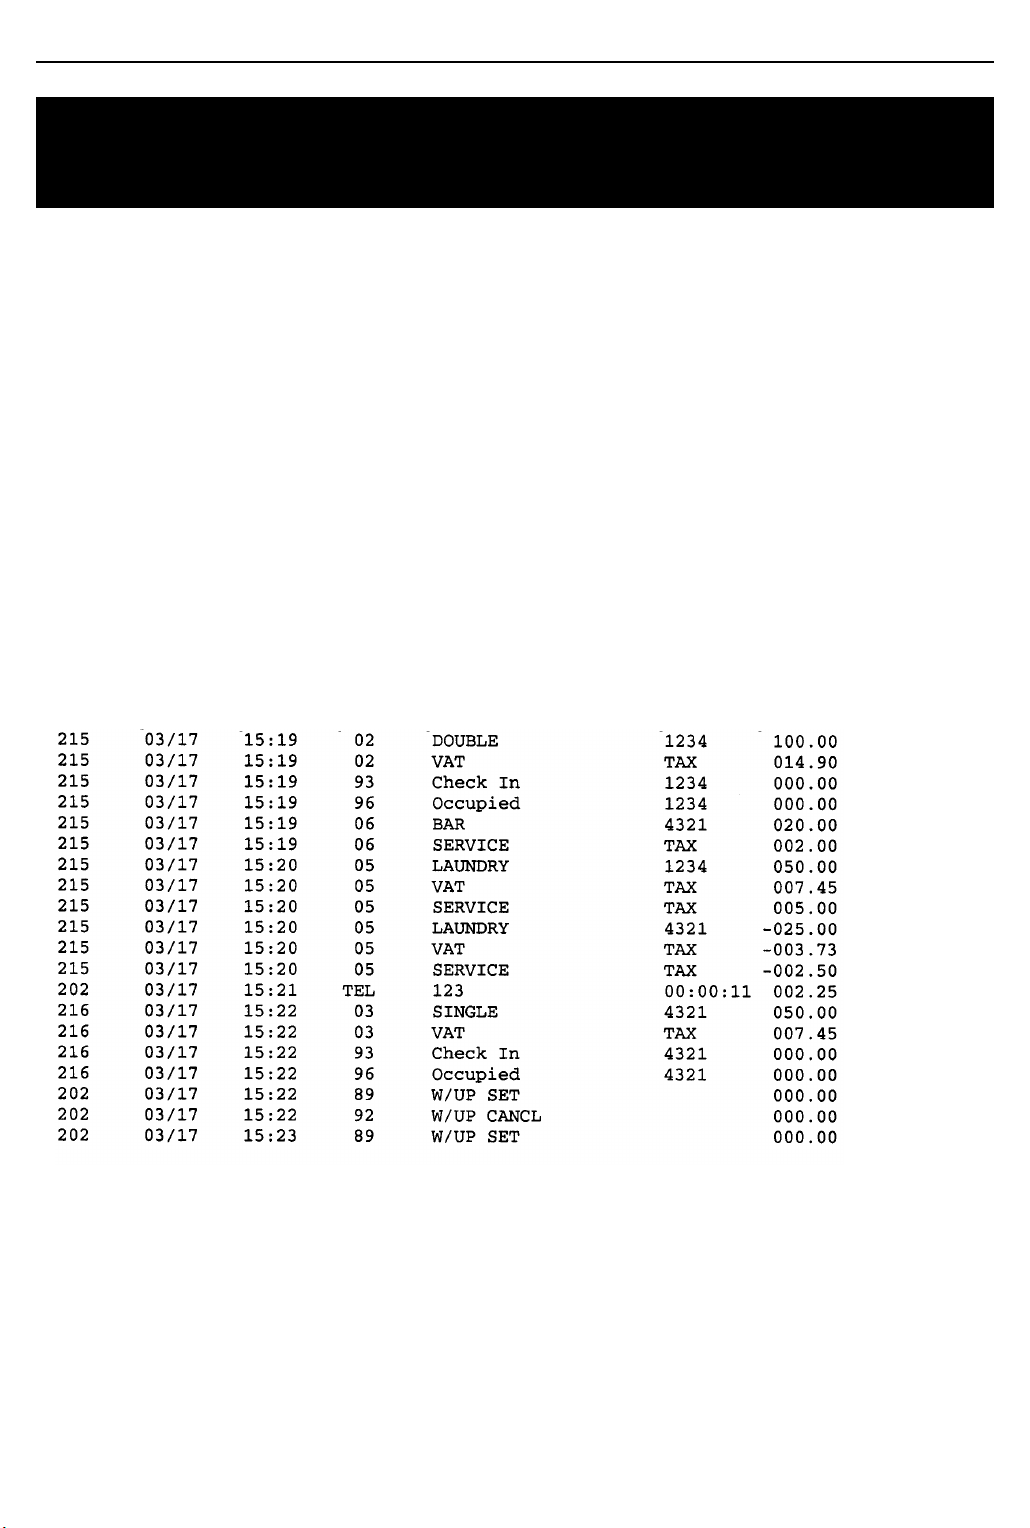
The PMS (Property Management System) report shows all activities
logged in the system. This includes all the individual actions carried
out for each room such as items added/deleted, bills printed, status
flags set/changed, and so on.
If the printer port is configured to log PMS information you will see a
printout formatted to show the following details for each logged activity. (See the Samsung Hotel Installation & Programming Manual for
details of configuring the printer port.)
Room No./Date/Time/Item No. /Description/Details/Cost
For example:
The ‘Details’ column provides more information on an item. For example, TAX if the item is VAT; the staff code of the person entering
the item (if the use of staff codes is programmed in the system); the
length of the phone call if the item is TEL; and so on.
Page 54
Hotel User Guide Invoices & Status Reports
Î INVOICES AND STATUS
REPORTS
This section shows examples of the types of bills (invoices) and
status reports you can print using Hotel software. The printer port
must be configured for HM REPT for invoicing and status report print-
ing. See the Samsung Hotel Installation & Programming Manual for
details of configuring the printer port and for setting printer options to
suit your printer and paper type.
n ROOM INVOICE
A room invoice is automatically printed when you check a guest out
of a room. You can also select to print a bill, without checking out the
room, using the CHOUT key (see section 2,
the HOTEL key (see section 3,
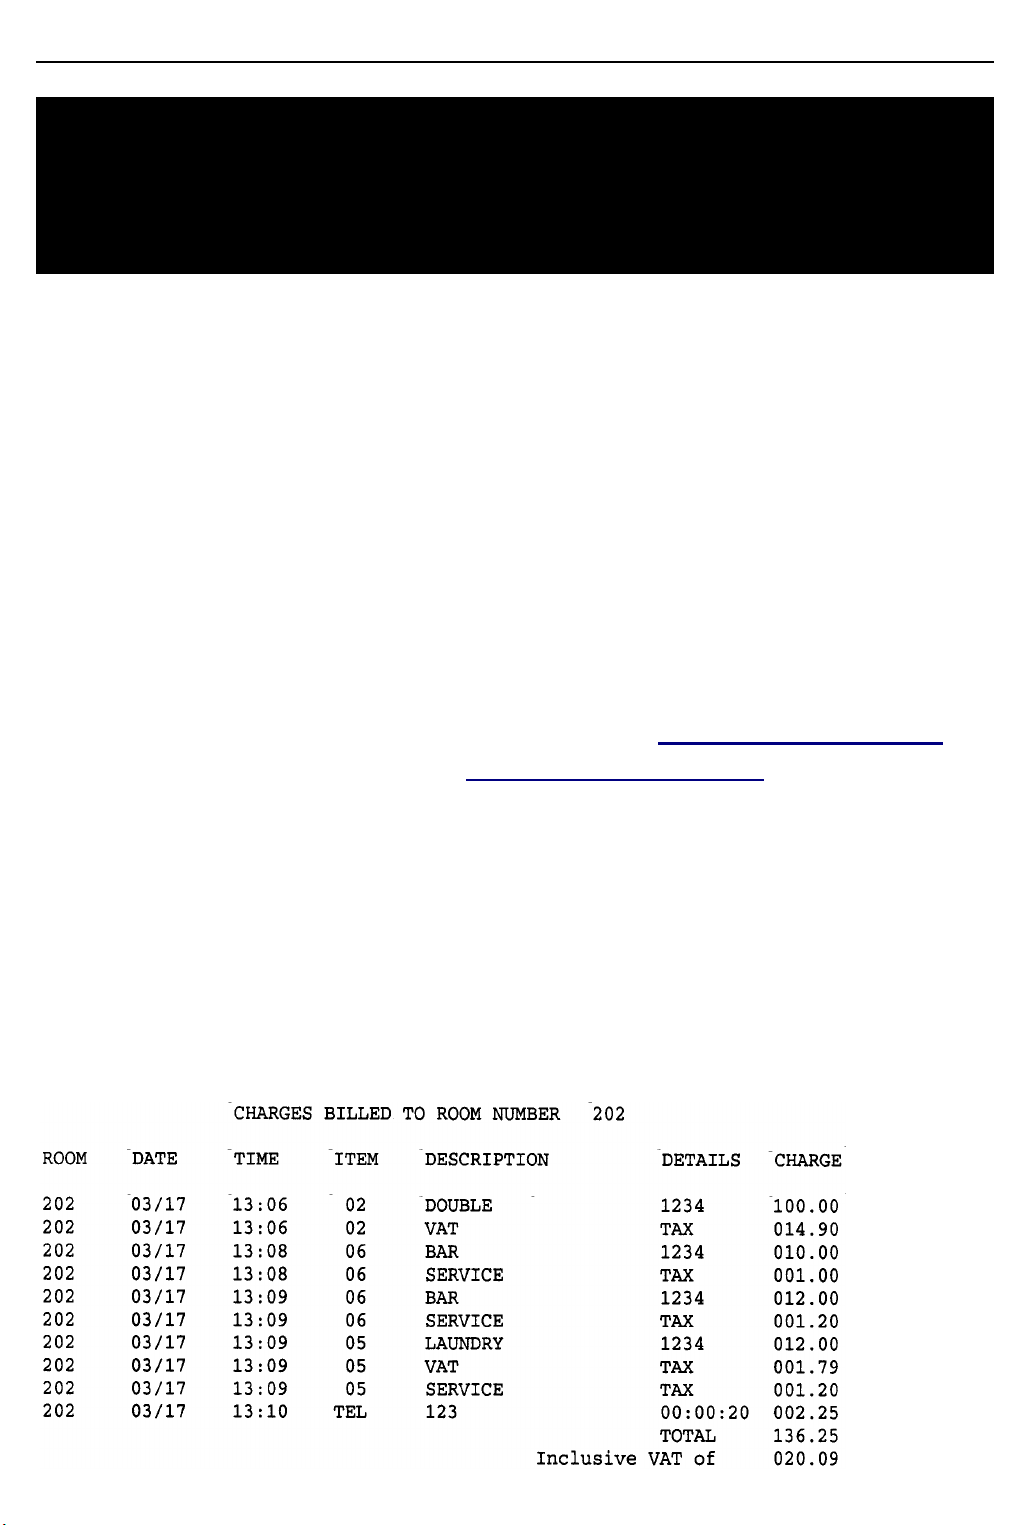
The room bill shows the following information for each billing item
entered:
Room No./Date/Time/Item (Code)/Description/Details/ Charge
A “Total” line and an “Inclusive VAT of” line are also printed. For example:
Using the HOTEL Key).
Basic Administration) or
47
Page 55
Hotel User Guide Invoices & Status Reports
48
The ‘Details’ column provides more information on an item. For example, TAX if the item is VAT; the staff code of the person entering
the item (if the use of staff codes is programmed in the system); the
length of the phone call if the item is TEL; and so on.
Any items deleted using the BILL option will be displayed as a negative (–) value.
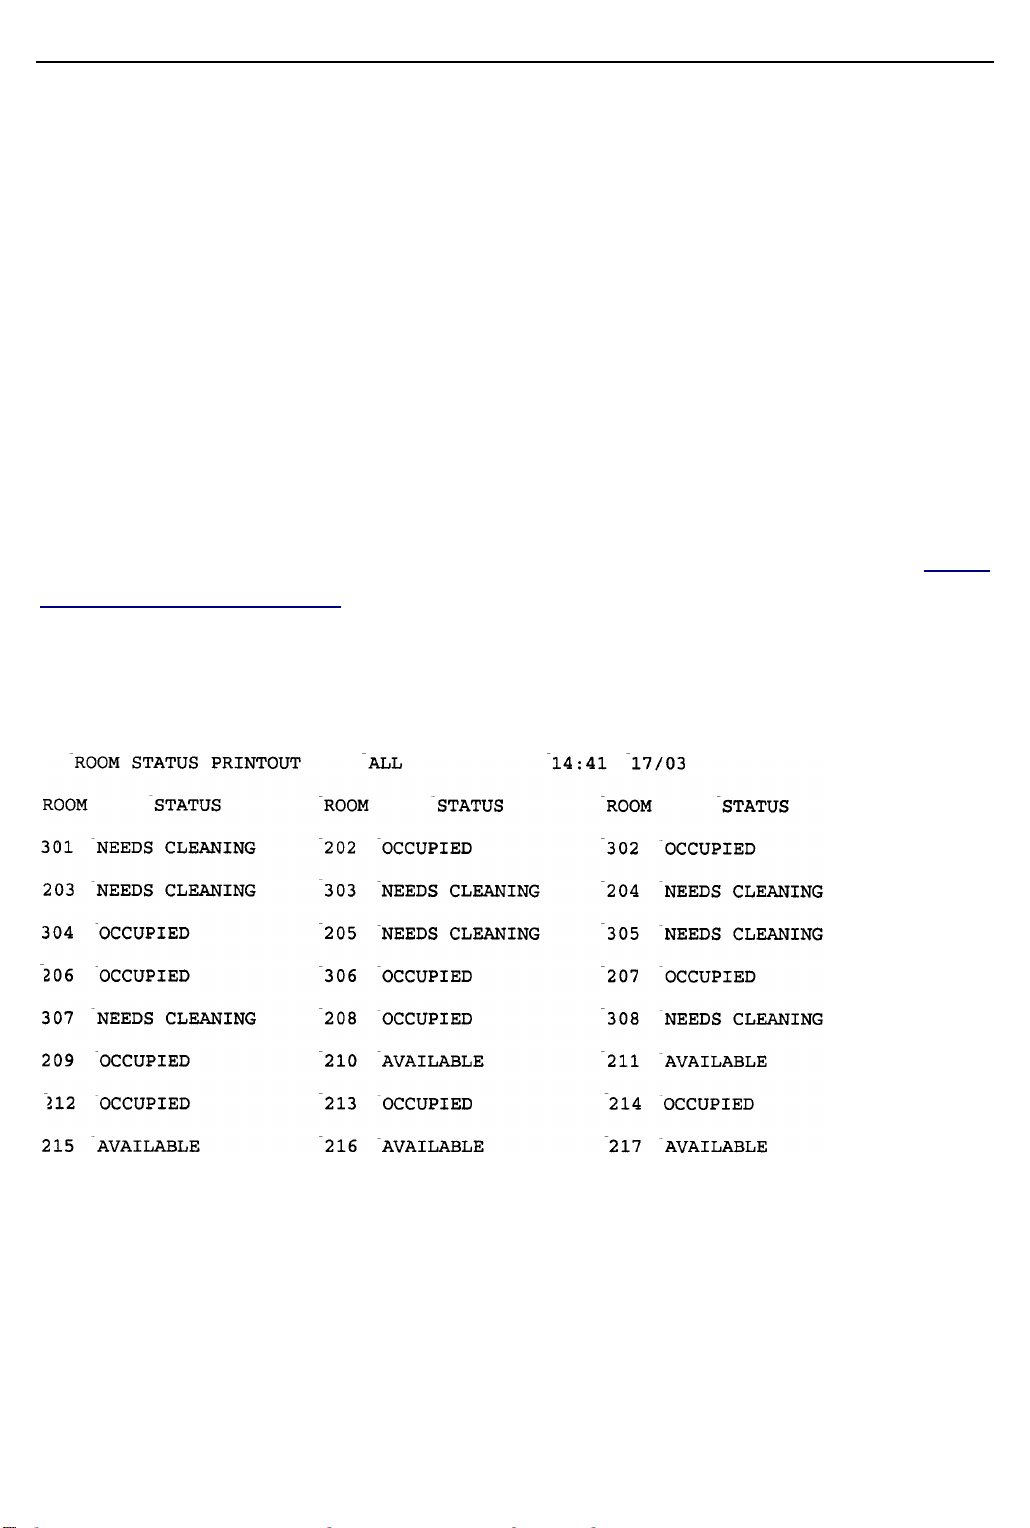
n ROOM STATUS REPORTS
Using the HOTEL key, you can obtain a printout of all rooms flagged
with a particular status, or showing the status of all rooms. See Print
Room Status Reports in section 3, Using the HOTEL Key, for details.
For example, you might select to print the status of all rooms (option
ALL). You would see a printout in this format:
Page 56

Hotel User Guide Troubleshooting
Ï TROUBLESHOOTING
When entering information via keyphones you may encounter an error message or the system may appear to ignore your entry. The
most common problems, and their likely solutions, are listed below.
If the problem persists, check with your system manager, who may
need to seek advice from the system installer/dealer.
“Access Denied” Message
If you dial an extension and see this message on your display, it
means that your keyphone is denied from ringing that extension by
the system. If you require access to this extension from your keyphone, ask your system manager who will need to program the system to allow this.
“Invalid Number” Message
This indicates that you have entered a number not recognised by the
system, or which is already reserved by the system for other uses.
For example, make sure you enter a valid room number, staff code
or item code. In some cases you may re-enter the correct code; in
others you may need to start the entry sequence from the beginning.
You Cannot Check In a Room
If you cannot check in a room, you normally see a message saying
“Not Available.” Check its status. This can be done using the HOTEL
key or the RSV key(s). The room may already be occupied. Alternatively, if it has been checked out, the ‘needs cleaning’ or ‘needs
maintenance’ flag has not been manually changed to indicate that
the room is again available for checking in.
See Room Status: Viewing and Changing in section 2, Basic Ad-
ministration, or see section 3, Using the HOTEL Key.
49
Page 57
Hotel User Guide Troubleshooting
50
Other Error Messages
The following messages may appear at the keyphone(s) designated
as the ‘Warning Destination’ in MMC 753. They require the attention
of the system manager or installer.
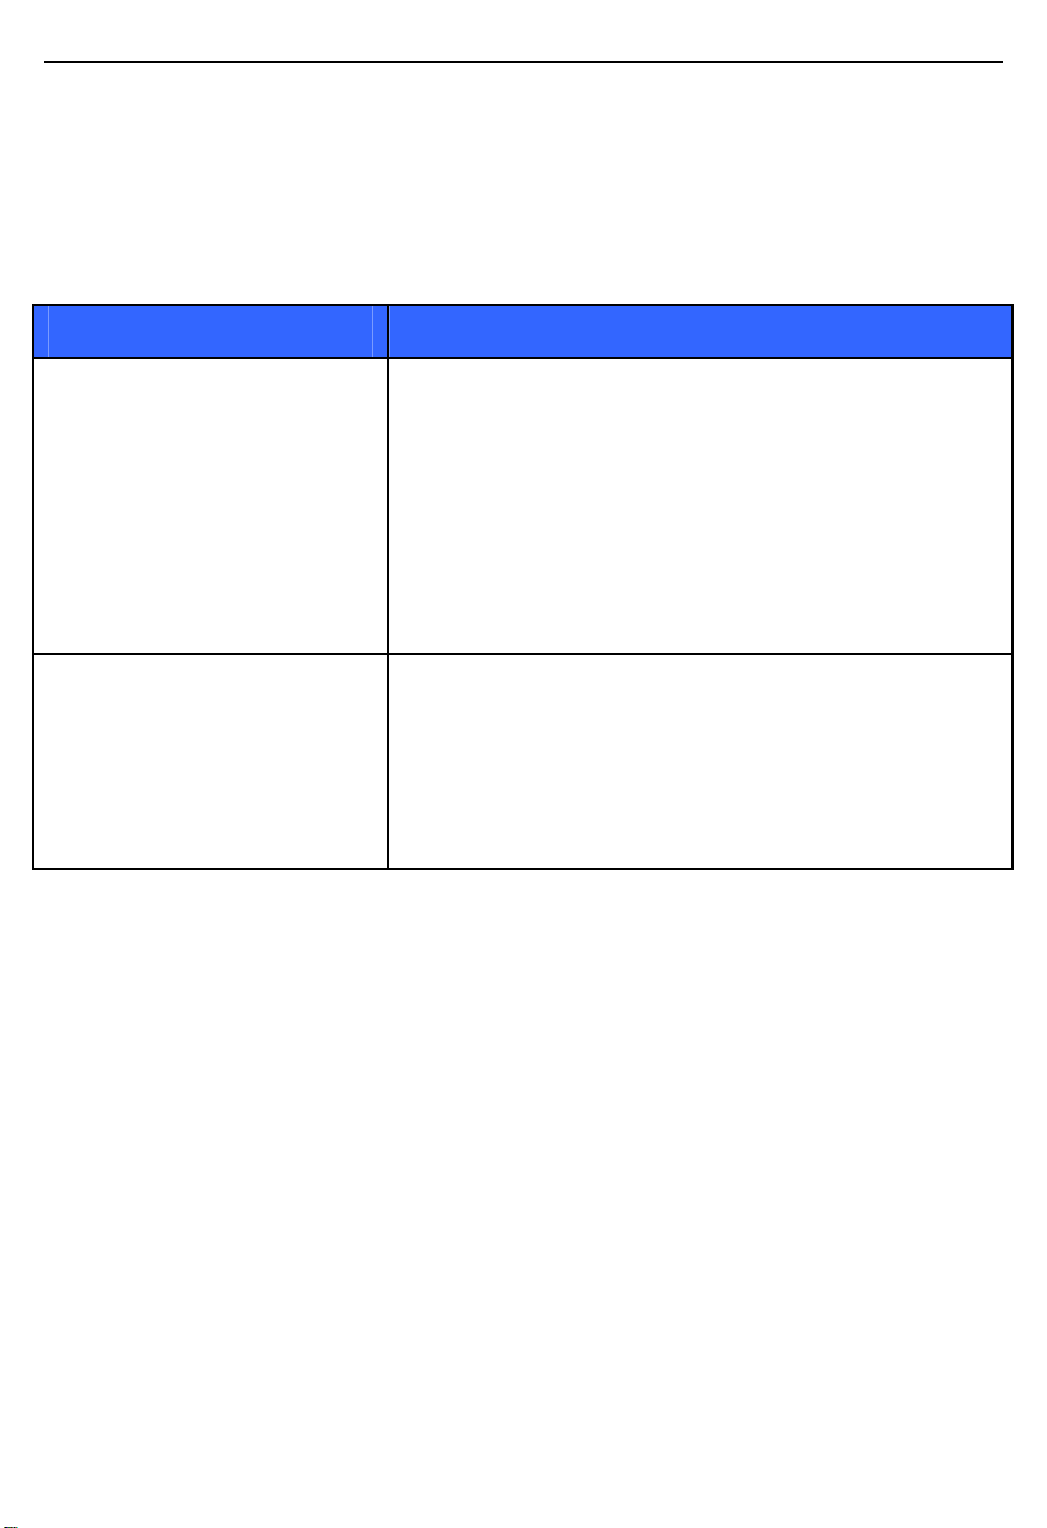
Message Meaning & Action Required
WARNING !! VM
ALARM
SMDR INFORMATION !!
BUFFER FULL !!
The system is provided with an emergency
destination for calls destined for Voice Mail
(VM), if the VM card is removed or the VM system is off-line. In addition, any calls that are
forwarded to VM will not forward; they will re-
main ringing at the “fwd from” station until answered.
This occurs when the system’s SMDR data
buffer is not big enough to save any more Ho-
tel information.
Check out all guest rooms immediately.
Page 58

Samsung Business Communications
Brookside Business Park, Greengate, Middleton, Manchester M24 1GS
 Loading...