

Samsung Galaxy Trend Plus, GT-S7580 Schematics Direy

7.
7-1.
Level
2
Disassembly
Repair
1
Caution
※
Be care of scratch and molding damage.
1)
Torque
(
Unscrew the8points.
1)
1.1 ± 0.1
kgf.cm)
2
※
Be care of scratch and molding damage.
1)
Disassemble the REAR CASE like
1)
below picture.
Lift the REAR CASE from down-side
2)
Caution
3
※
Be care of scratch and clips damaged.
1)
Torque
(
Unscrew the1point from the board.
1)
Caution
1.1 ± 0.1
kgf.cm)
7-1
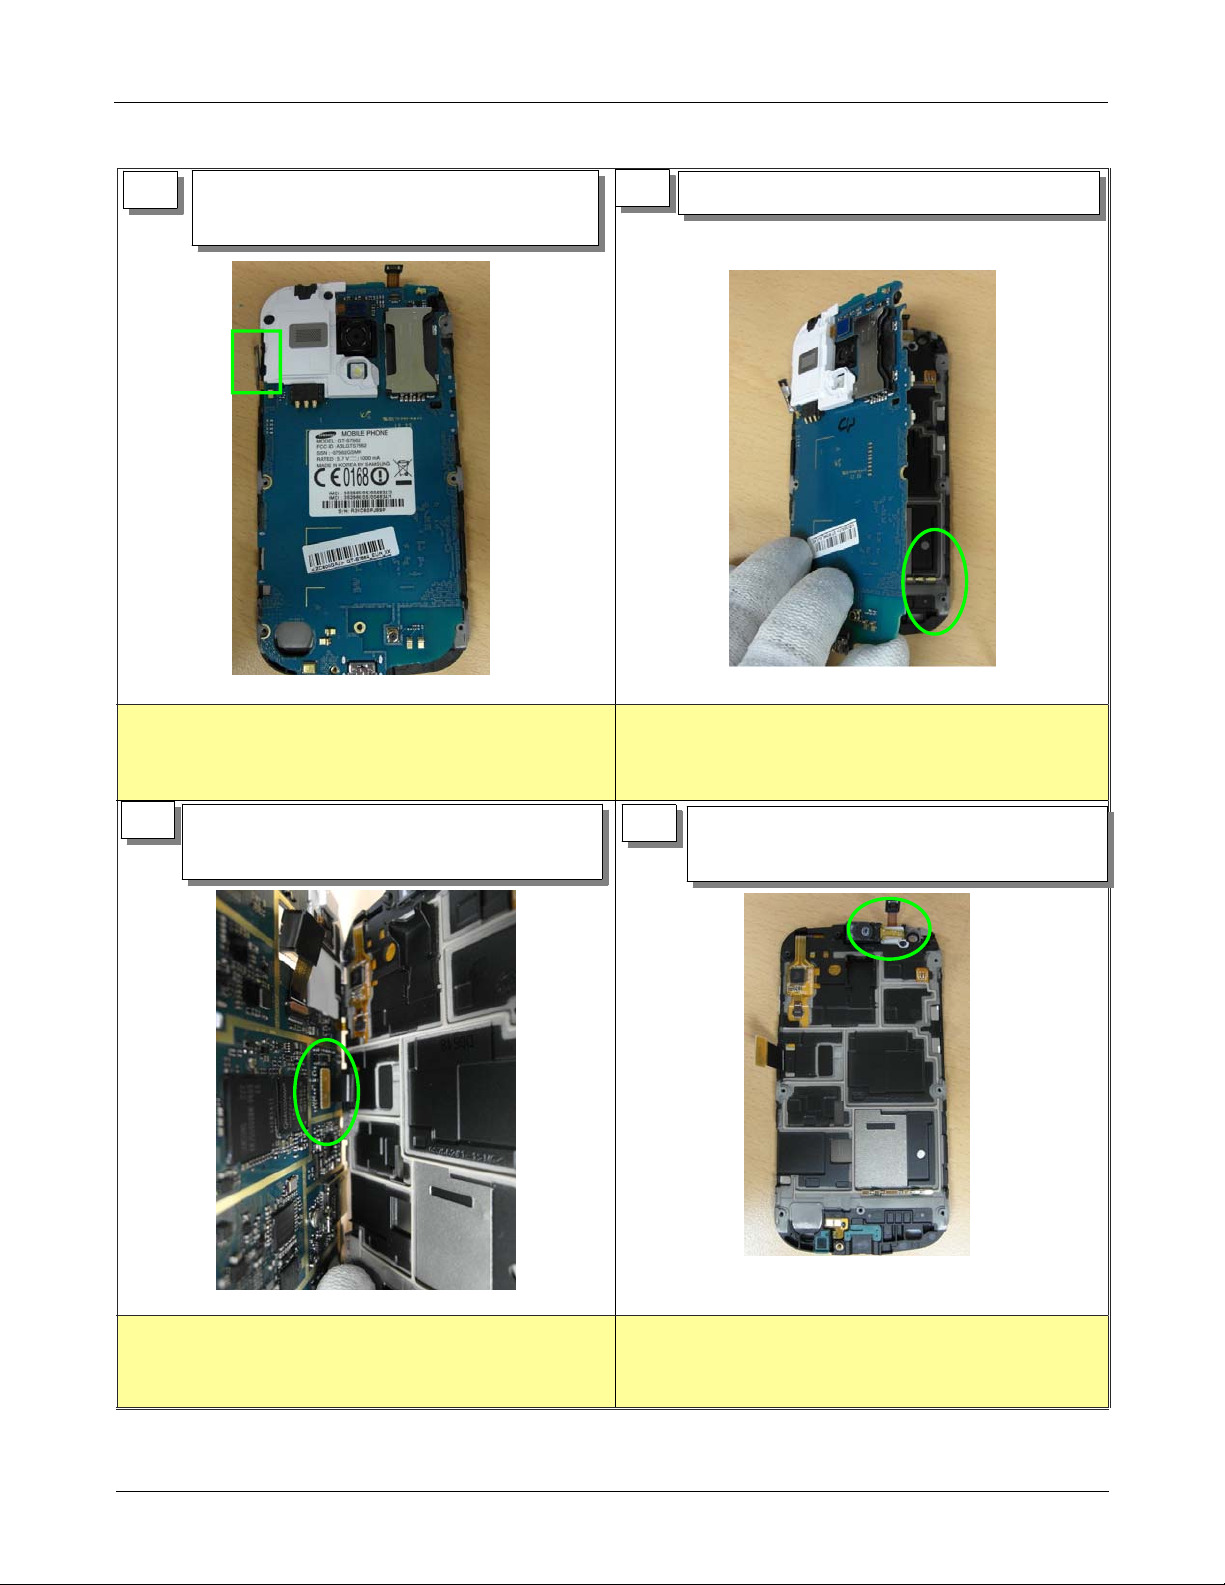
4
Caution
※
Be care of scratch and molding damage.
1)
Be care of damage to the FPCB.
2)
Detach RCV module FPCB Connector
1)
from the board.
Confidential and proprietary-the contents in this service guide subject to change without prior notice.
Distribution, transmission, or infringement of any content or data from this document without Samsung’swritten authorization is strictly prohibited.
Level2Repair
5
Detach the Power Key FPCB from
1)
the board.
Caution
※
Be care of scratch and molding damage.
1)
Be care of damage to the FPCB.
2)
6
1) Detach the PBA from the board.
Caution
※
Be care of scratch and molding damage.
1)
Be care of damage to the PCB.
2)
7
Detach the Front Ass'y FPCB Connector
1)
from the front.
Caution
※
Be care of damage to the LCD FPCB.
1)
8
※
1)
Caution
2)
Unscrew the1point from the board
1)
Detach the RCV Module from the board.
2)
Be care of scratch and molding damage.
Be care of damage to the PCB.
7-2
Confidential and proprietary-the contents in this service guide subject to change without prior notice.
Distribution, transmission, or infringement of any content or data from this document without Samsung’swritten authorization is strictly prohibited.
 Loading...