

Samsung GT-S5830 Disassembly & Reassembly

Level
7.
Disassembly
7-1.
Repair
2
1
(
Be care of scratch and molding damage.
1)
Unscrew the7points.
1)
Caution
2
(
Be care of scratch and molding damage.
1)
Disassemble the REAR CASE like
1)
below picture.
Lift the REAR CASE from below.
Caution
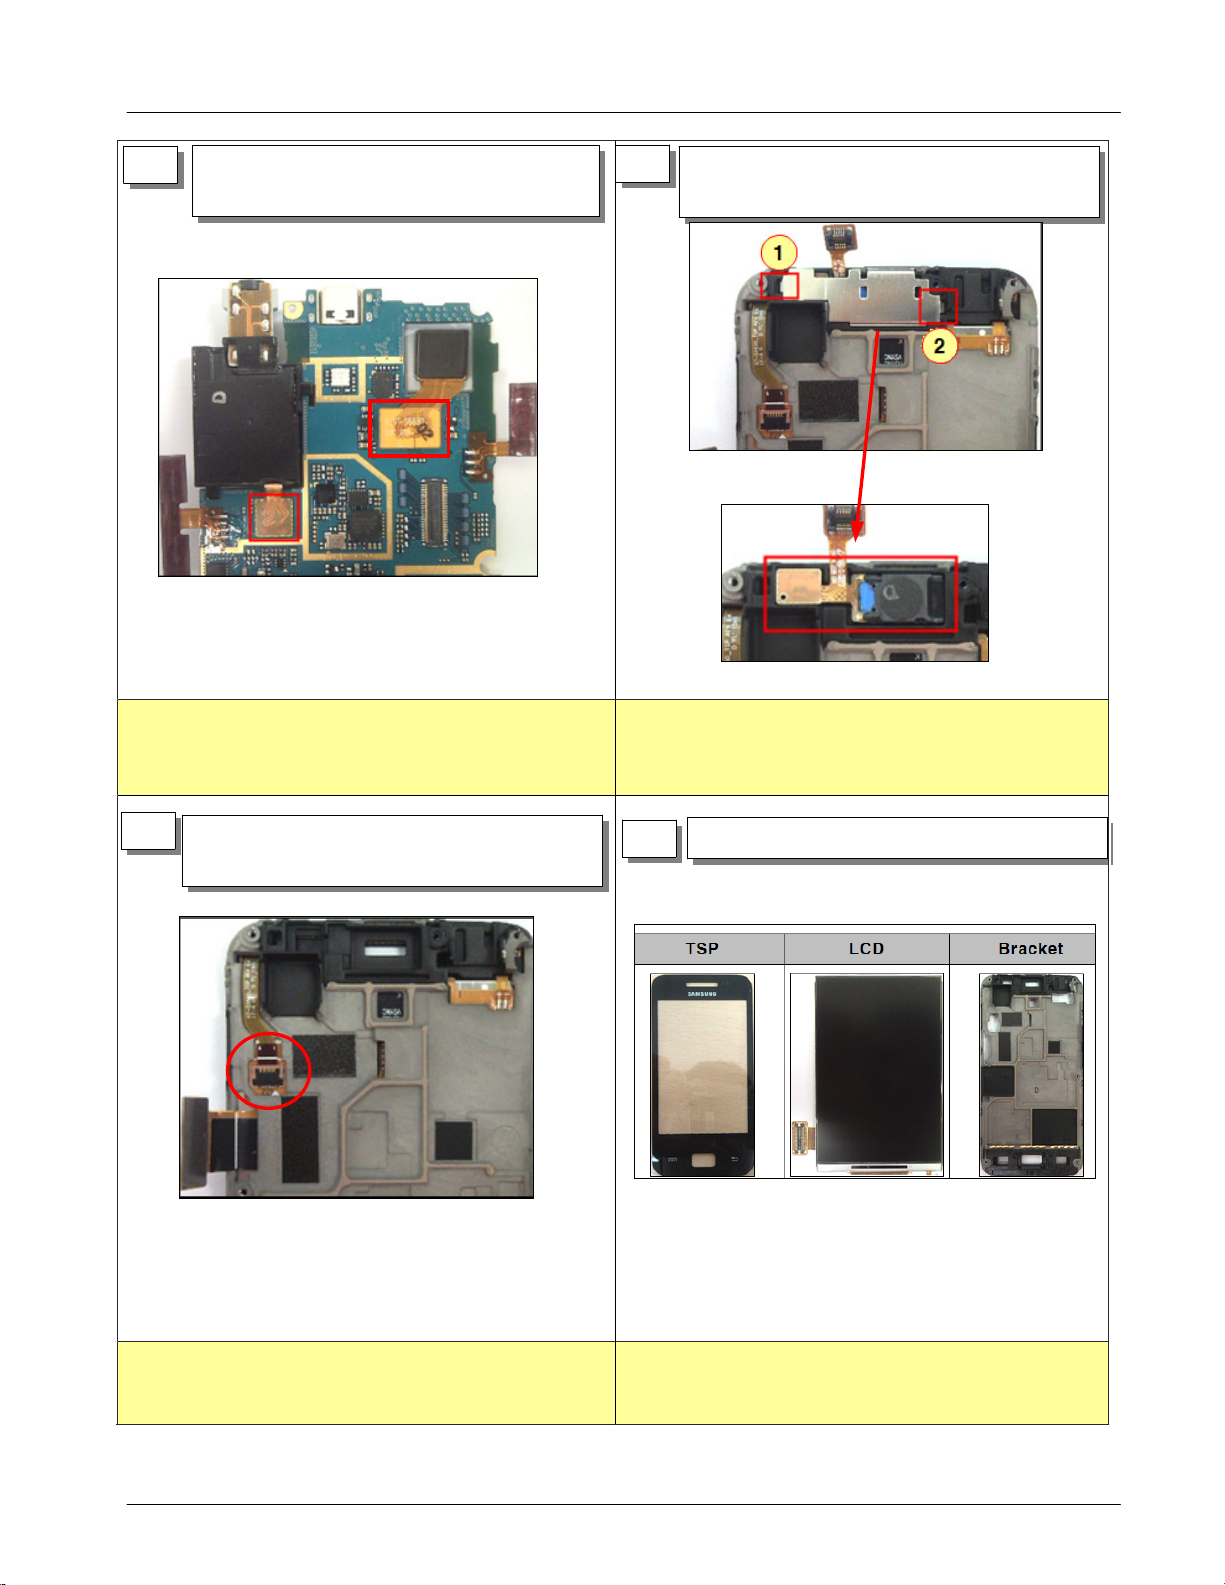
Detach the2KEY FPCB
1)
3
Separate the LCD connector.
2)
Lift the MIC FPCB
3)
Caution
(
Be care of scratch and molding damage.
1)
Be care of damage to the FPCB.
2)
.
4
Caution
(
Be care of scratch and molding damage.
1)
Be care of damage to the FPCB.
2)
Separate the LCD connector.
1)
7-1
SAMSUNG Proprietary-Contents may change without notice
This Document can not be used without Samsung's authorization
Level2Repair
7.
5
(
1)
2)
Separate the EARJACK connector and
1)
CAMERA connector from PBA.
Caution
Be care of damage to the EARJACK Module.
Be care of damage to the CAMERA.
6
(
Be care of damage to RCV.
1)
Disassemble the SUS and RCV from
1)
BRACKET.
Caution
7
1)
Open the TSP connector then separate TSP
1)
from BRACKET.
Be care of damage to the TSP FPCB.
Remove LCD from BRACKET.
1)
8
Be care of scratch and molding damage.
1)
Be care of damage to the TSP&LCD.
2)
7-2
SAMSUNG Proprietary-Contents may change without notice
This Document can not be used without Samsung's authorization
 Loading...