

Samsung GT-S5350 Disassembly & Reassembly
7.
7-1.
Level
Dissambly
Repair
2
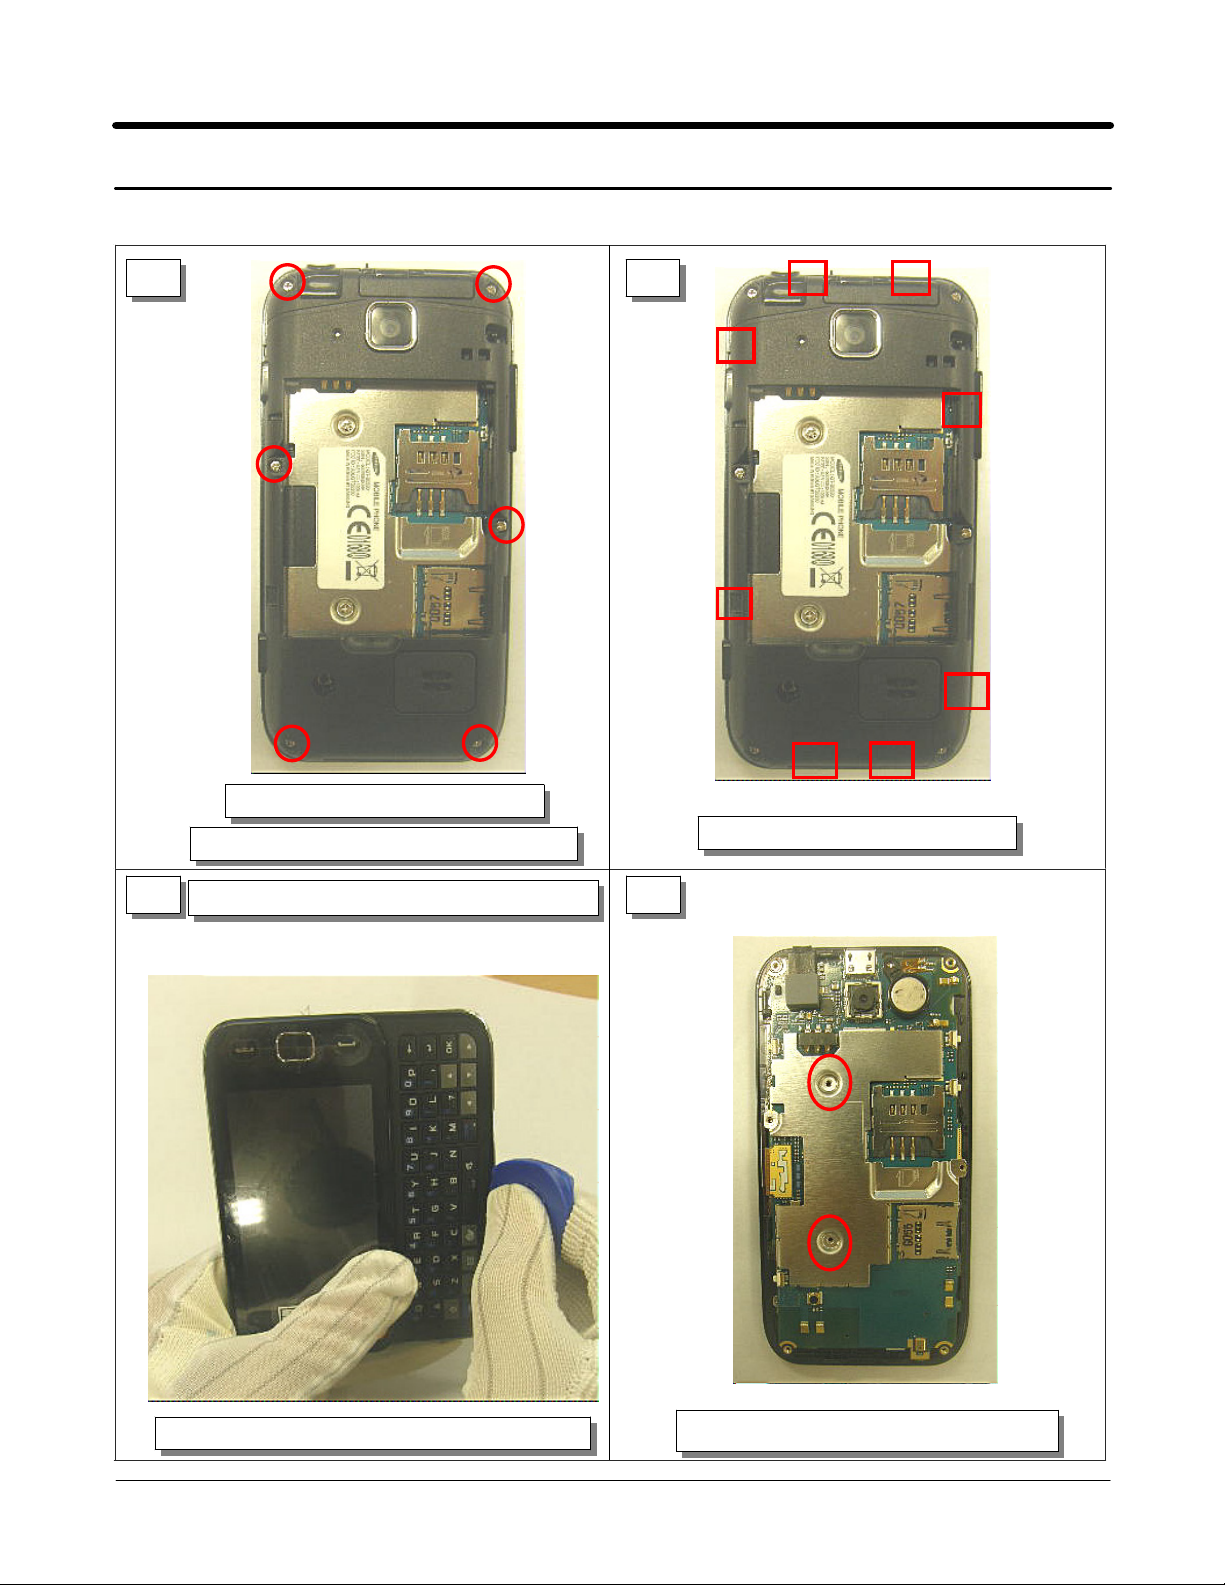
1
Release screws at6point.
DO NOT MAKE SCRATCH ON REAR.
2
Disjoint HOOK8POINT at REAR
3 4
Disjoint using decomposition tool at rear side.
DO NOT MAKE SCRATCH ON REAR.
7-1
SAMSUNG Proprietary-Contents may change without notice
This Document can not be used without Samsung's authorization
Release screws at2point.
Level2Repair
7.
5 6
1
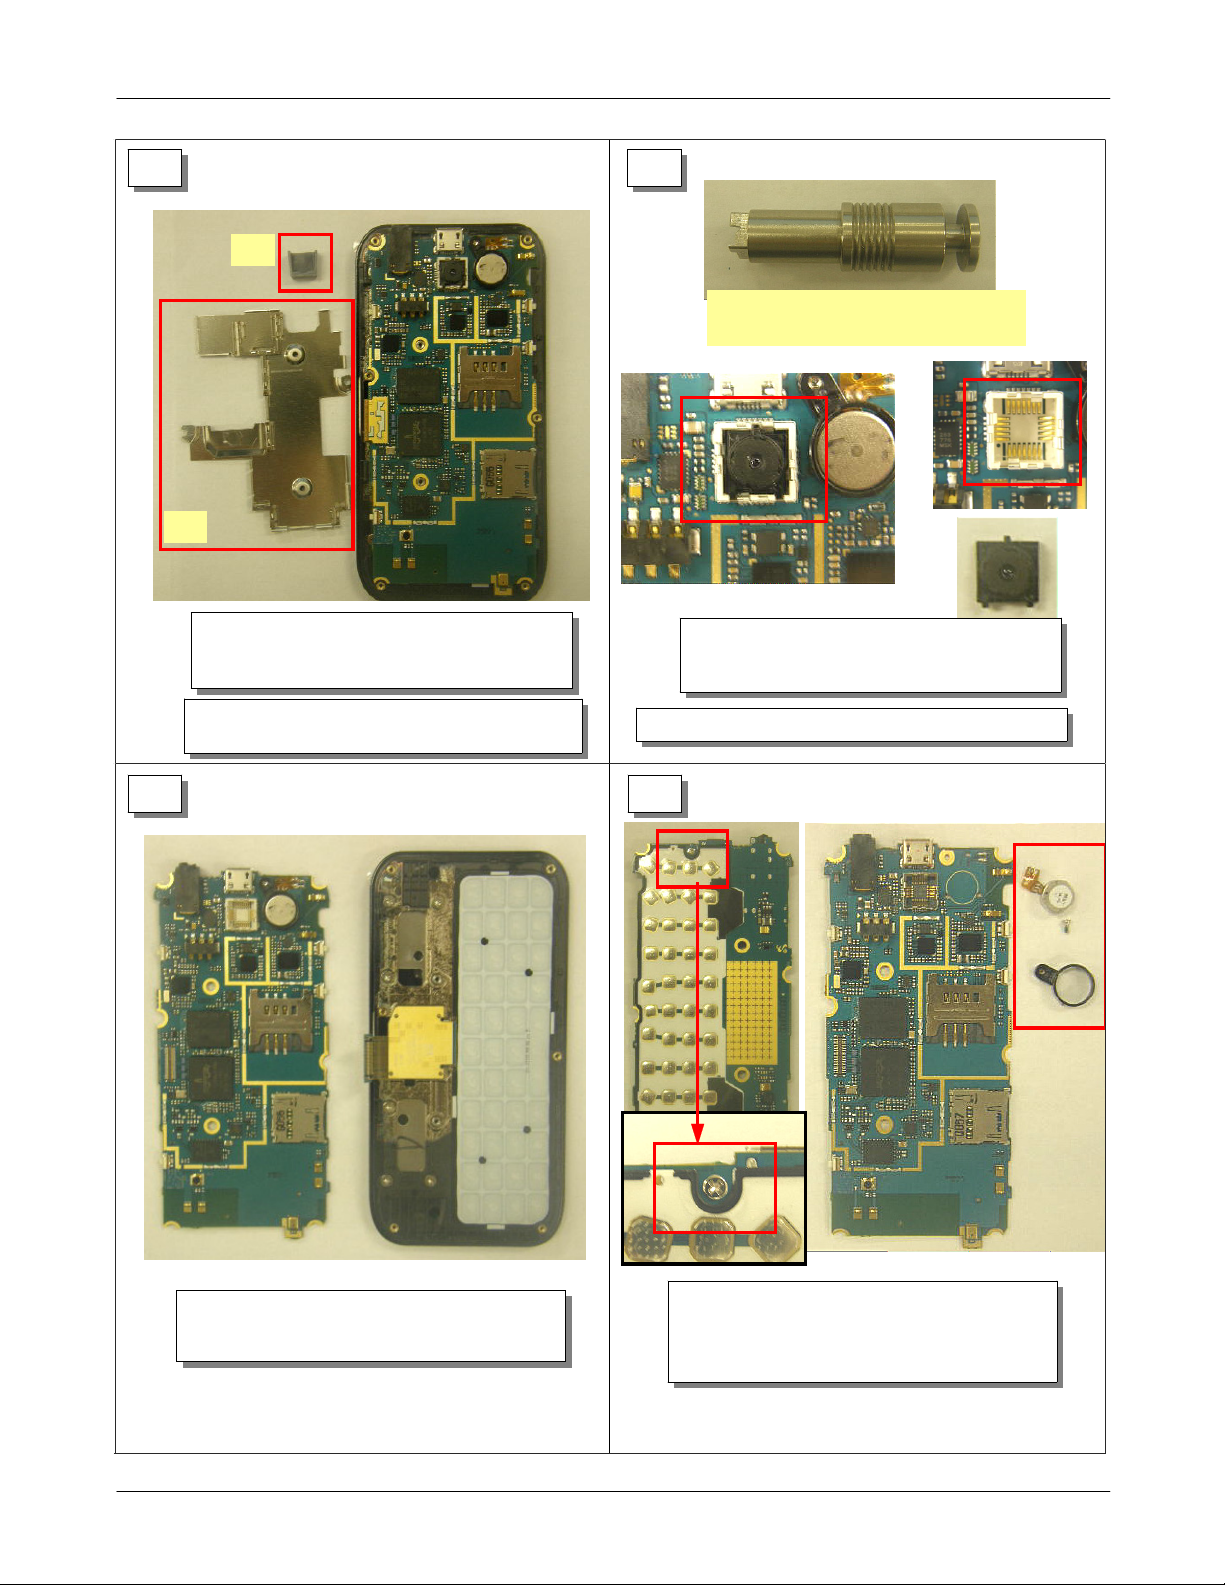
2
Camera decomposition tool
IMK Code
: 2318420200
Separate
1)
Separate Shield can
2)
Do Not touch the IC and Don't damage
ON PBA.
7 8
mm rubber at PBA
3.5
Separate Camera at PBA
1)
Useadecomposition tool
Be careful not to damage camera and socket
DisassembleaPBA from Front ass'y
Refer to the picture)
(
SAMSUNG Proprietary-Contents may change without notice
This Document can not be used without Samsung's authorization
7-2
Release screws at1point.
Disassembleamotor&bracket from PBA
Refer to the picture)
(
9 10
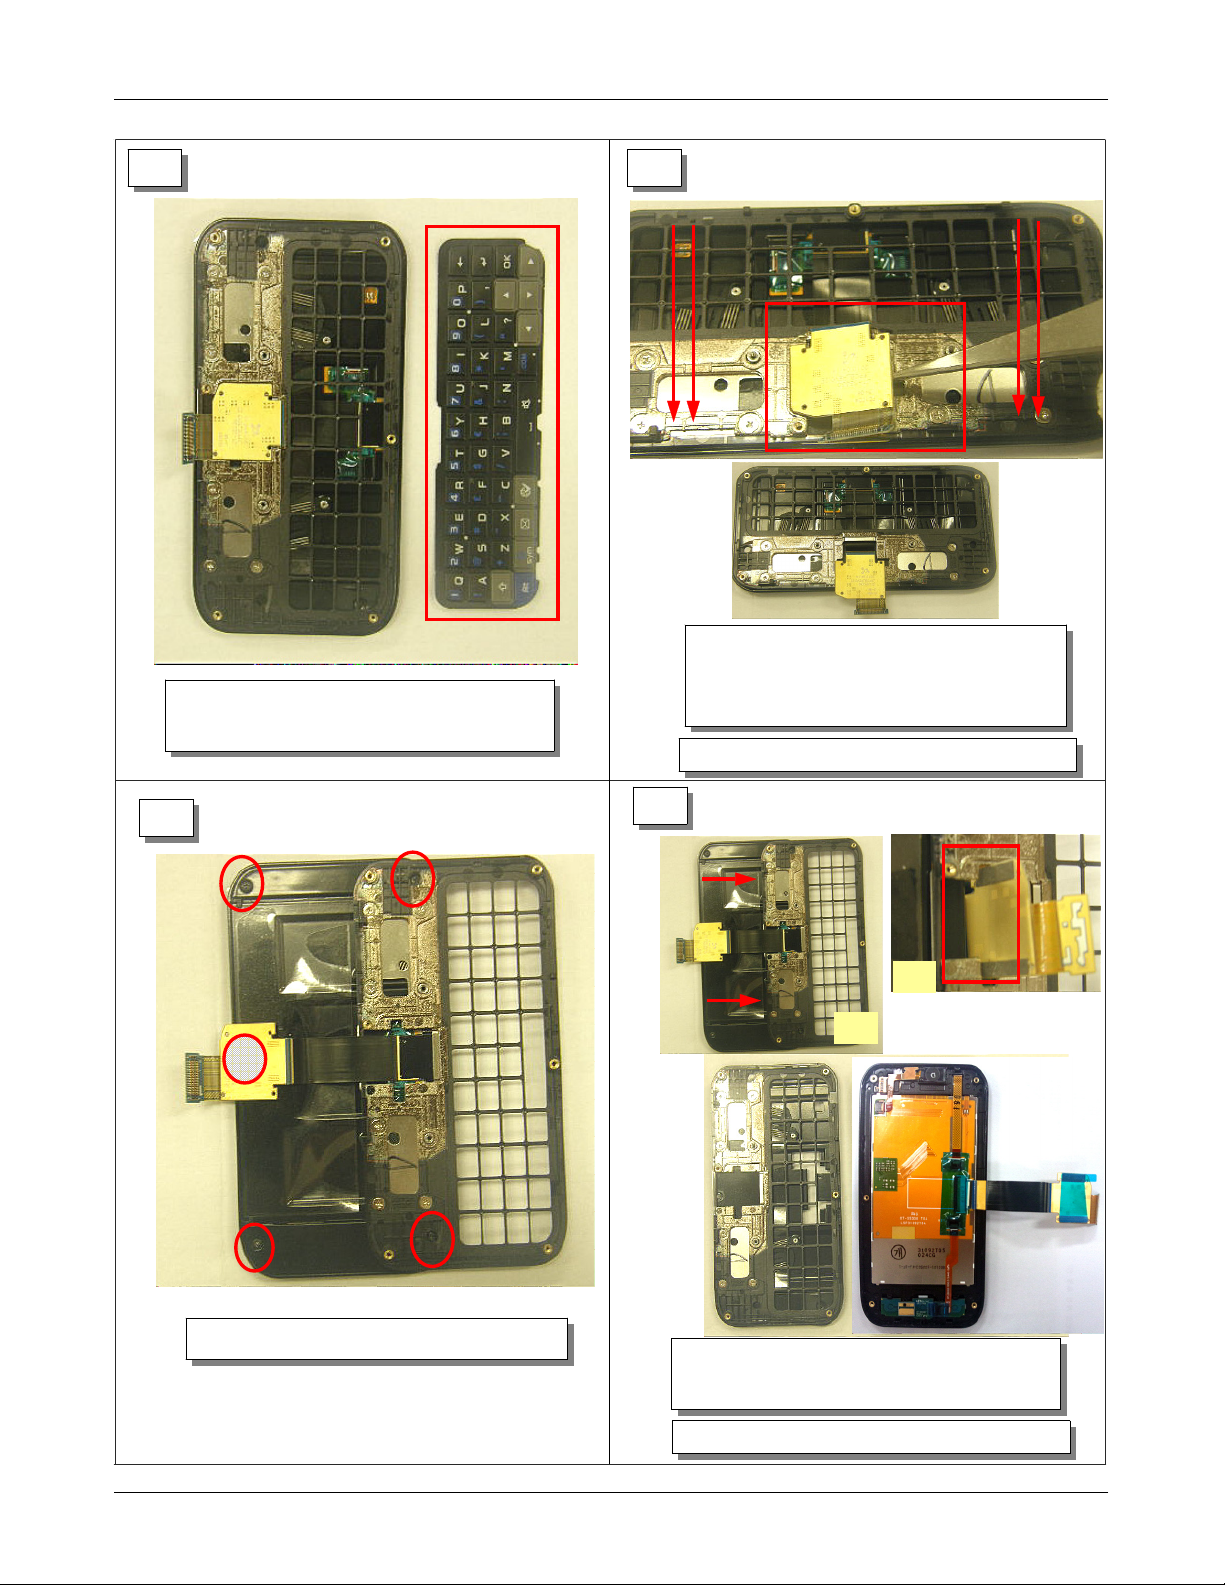
Disassembleakeypad from Front ass'y
Refer to the picture)
(
Level2Repair
7.
Separate Slide FPCB connector from
1)
Front Ass'y at slide down status
Refer to the picture.)
(
Be careful not to damage slide FPCB
11
Release screws at5point.
12
1
DisassembleaLower from Front ass'y
Refer to the picture)
(
2
Be careful not to damage slide FPCB
7-3
SAMSUNG Proprietary-Contents may change without notice
This Document can not be used without Samsung's authorization
 Loading...