

samsung GT-N5100 Disassembly and Assembly
Level
7.
Disassembly and Assembly Instructions
7-1.
Repair
2
7-1-1.
1)
Disassembly
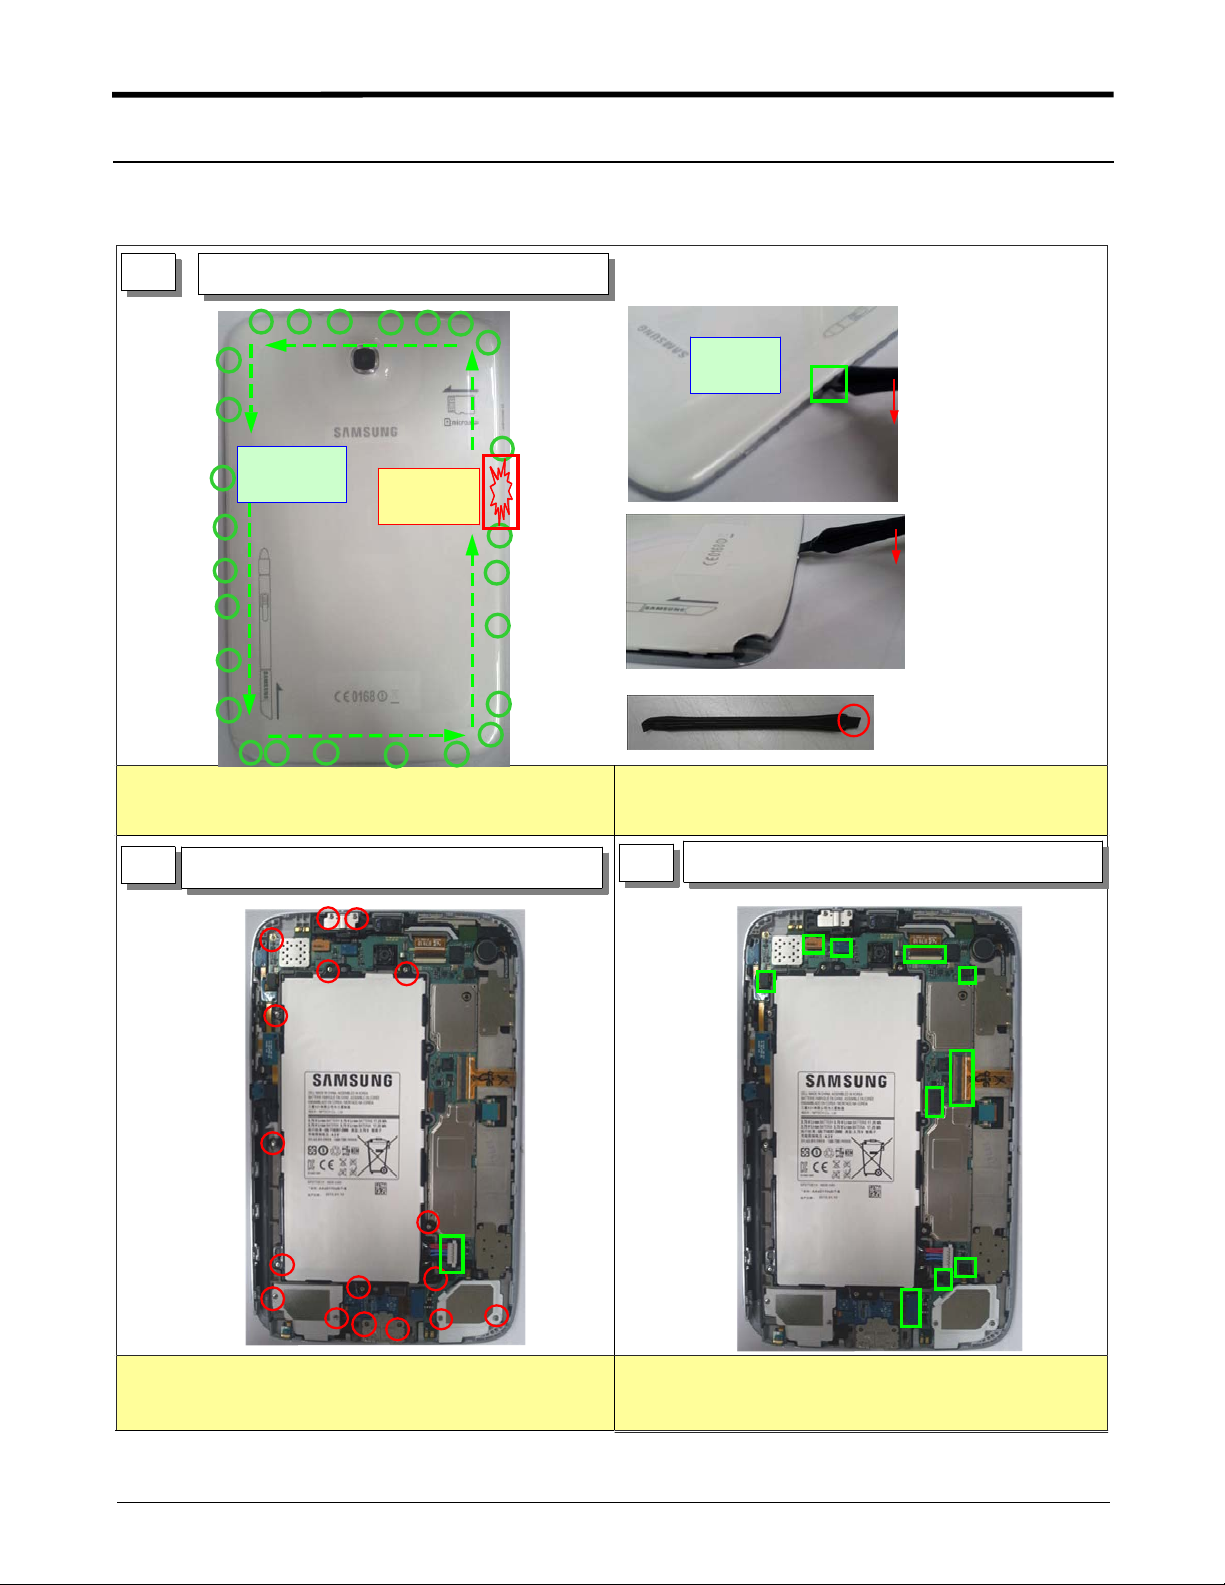
1
Disjoint Hook at REAR // Disassemble REAR
START
(IR RED)
Be careful not to make scratch and molding damage!
Be careful
TSP FPCB
START
(IR RED)
Use flat point of disassembly jig
1)
2
Disassemble SCREW
Disassemble SCREW(17point)
1)
Detach Battery connector
2)
Disassemble FPCB
3
Hold up Main PBA from bottom.
1)
Be careful nottoscratch FPCB
2)
7-1
Confidential and proprietary-the contents in this service guide subject to change without prior notice.
Distribution, transmission, or infringement of any content or data from this document without Samsung’swritten authorization is strictly prohibited.
Level2Repair
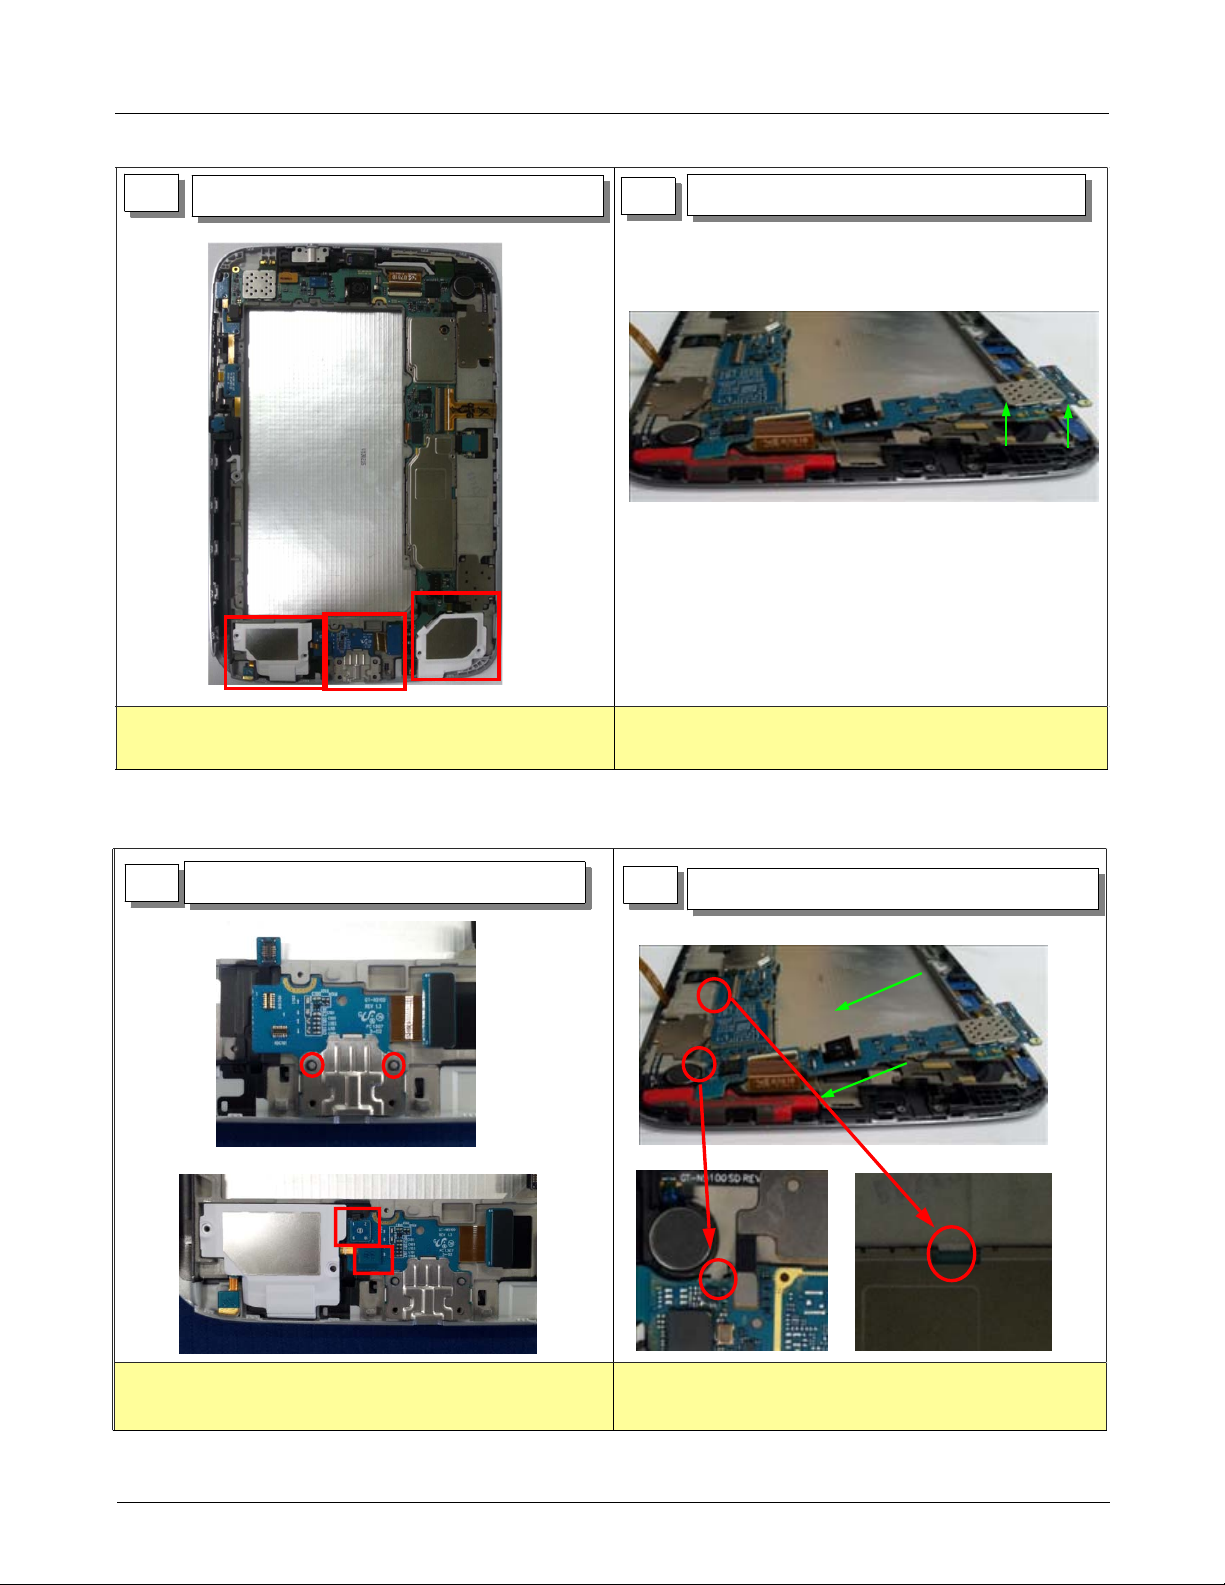
4
Disassemble SPK(L),(R), IF PCB
1)
2)
Disassemble PBA
5
Hold up Main PBA from FRONT.
Be careful nottoscratch FPCB
7-1-2.
1)
Assembly
Assemble IF PCB/SPK on FRONT.
1
Assemble IF PCB and SPK on Front.
2
Assemble PBA
Assemble PBA on Front Ass'y
1)
Check Front hook.
2)
7-2
Confidential and proprietary-the contents in this service guide subject to change without prior notice.
Distribution, transmission, or infringement of any content or data from this document without Samsung’swritten authorization is strictly prohibited.
 Loading...