

Samsung GT-i9200 Service Manual
7.
Level
Repair
2
7-1. D
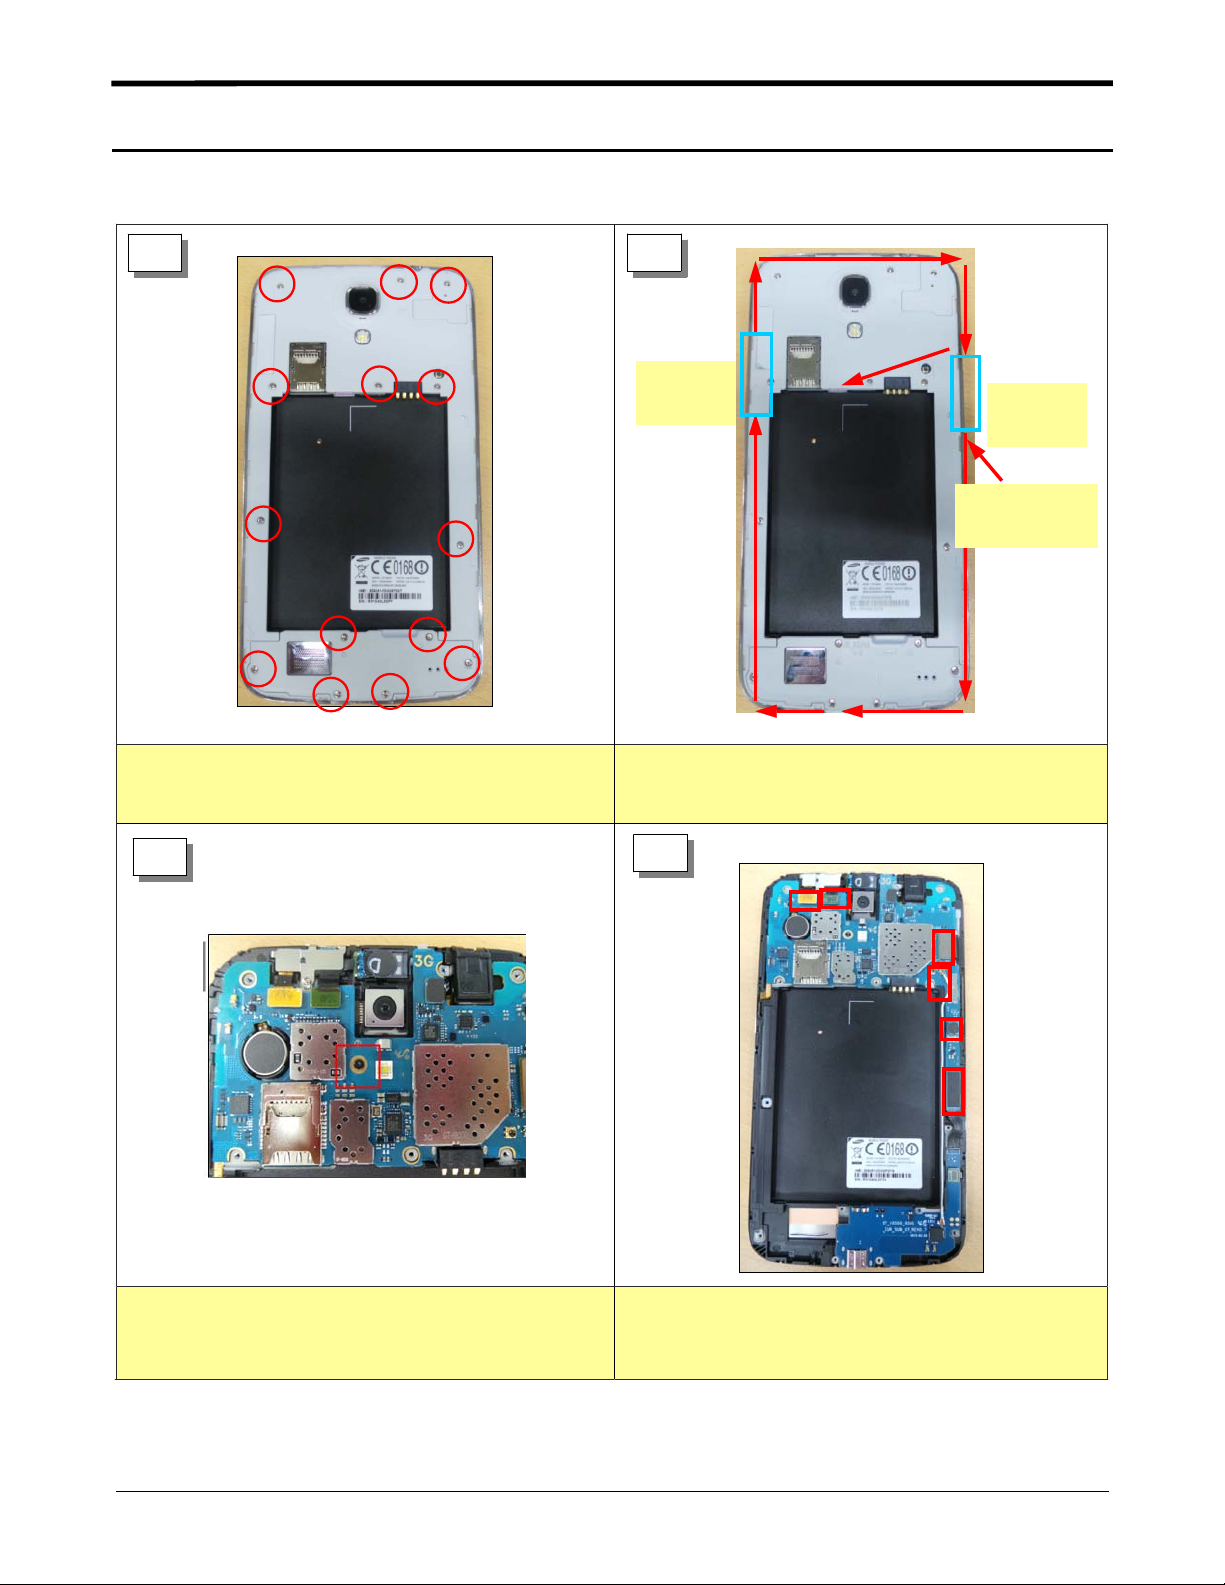
1) Loosen 14 Point Screws. Caution scratch
isassembling
1 2
Torque : 1.0 ~ 1.2 Kgf·cm
Power
key
1) Disassembly Rear using side gap between vol key
and rear case.
Volume
key
Disassemble
start point
3
1) Disassembly 1point PBA Screw .
4
1) disassembly 5ea connector and disassembly coxial
cable.
7-1
Confidential and proprietary-the contents in this service guide subject to change without prior notice.
Distribution, transmission, or infringement of any content or data from this document without Samsung’swritten authorization is strictly prohibited.
Level2Repair
Assembling
7-2.
1
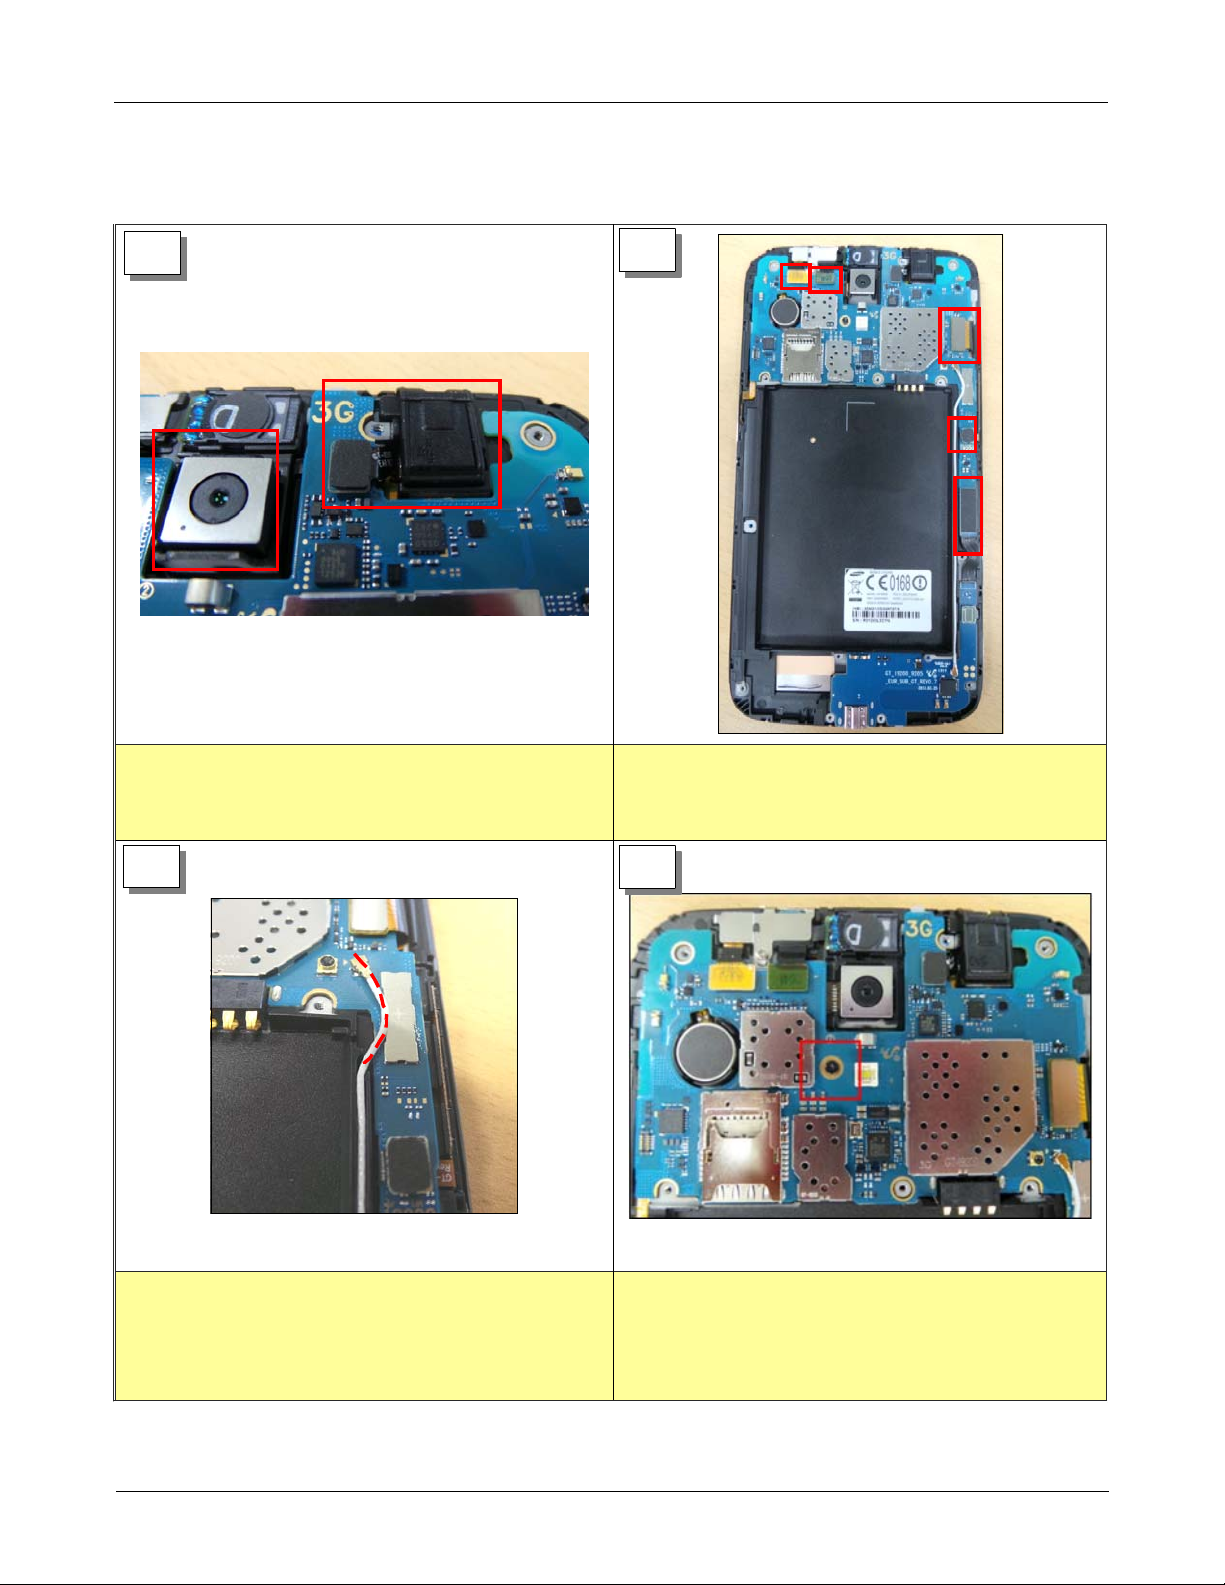
1) First Assembley Mega Camera & 3.5 Ear-Jack
2
1) LCD Module Connector, Sensor Module Connector,
VGA Modulle Connector, Vol Key Connector, SUB PBA
Connector.
3
Assembly Coxial Cable Connector like picture(U Type)
4
1) Assembly 1 point PBA Screw
Torque : 1.0 ~ 1.2 Kgf·cm
7-2
Confidential and proprietary-the contents in this service guide subject to change without prior notice.
Distribution, transmission, or infringement of any content or data from this document without Samsung’swritten authorization is strictly prohibited.
 Loading...