


Some of the contents in this manual may differ from your device depending on the software of the
device or your service provider.
World Wide Web
http://www.samsungmobile.com
English (EU). 05/2009. Rev. 1.0
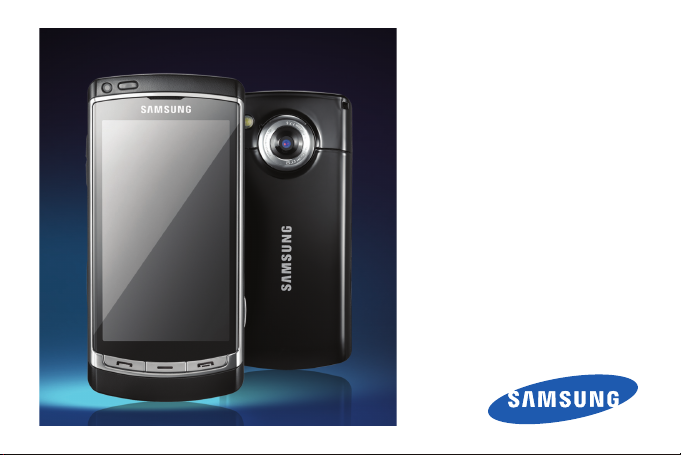
I8910
user manual

Read me first!
using this
manual
ii
When you need information, instructions, and
tips to learn more about your device, you have
several options available:
• Help System (on your device) - your device
includes Help, which you can access by
selecting Tools → Help. You can also select
Options → Help from most menus. This
embedded, searchable help system explains
how to use various programs and features.
• user manual (online) - on the Samsung
website, you will find the user manual in
Adobe Acrobat (.pdf) format. You can either
view the guide online or download and print
the file for your convenience. The user
manual contains advanced usage tips and
more details about particular functions of
your device. To view the file, you must have
Adobe Reader or Adobe Acrobat installedyou can download Adobe Reader free from
Adobe's website (www.adobe.com).
• quick start guide (printed) - this quick start
guide has been specially designed to guide
you through the functions and features of
your device. It contains basic information
about your device and features and tips for
assembling the device. For any topics not
covered in this guide, please refer to the
embedded help as described above.
Instructional icons
Before you start, familiarise yourself with the
icons you will see in this manual:
Warning
—situations that could cause
injury to yourself or others
Caution
—situations that could cause
damage to your device or other
equipment
Note
—notes, usage tips, or additional
information
X
Refer to
—pages with related
information; for example:
(represents "see page 12")
→
Followed by
—the order of options or
menus you must select to perform a
step; for example: In Menu mode,
select
Messaging → New message
[]
(represents
New message
Square brackets
Messaging
)
example: [ ] (represents the End/
Power key).
X
p. 12
, followed by
—device keys; for
using this manual
iii
Copyrights and trademarks
Rights to all technologies and products that
comprise this device are the property of their
respective owners:
using this manual
• This product includes software
licensed from Symbian Ltd.
© 1998-2009. Symbian and
Symbian OS are trademarks of
Symbian Ltd.
• Java™ is a trademark of Sun Microsystems,
Inc.
•Bluetooth
• Windows Media Player
iv
®
is a registered trademark of the
Bluetooth SIG, Inc. worldwide.
Bluetooth QD ID: B015049
®
is a registered
trademark of Microsoft Corporation.
•Wi-Fi®, the Wi-Fi CERTIFIED logo, and the
Wi-Fi logo are registered trademarks of the
Wi-Fi Alliance.
®
•DivX
is a registered
trademark of DivX, Inc., and is
used under licence.

ABOUT DIVX VIDEO
DivX® is a digital video format created by DivX,
Inc. This is an official DivX Certified device that
plays DivX video. Visit www.divx.com for more
information and software tools to convert your
files into DivX video. Devices certified to play
®
DivX
video at the Mobile Theater profile: DivX
Certified to play DivX
®
video up to 640x480,
including premium content.
ABOUT DIVX VIDEO-ON-DEMAND
This DivX Certified® device must be registered
in order to play DivX Video-on-Demand (VOD)
content. To generate the registration code,
locate the DivX VOD section in the device setup
menu. Go to vod.divx.com with this code to
complete the registration process and learn
more about DivX VOD.
using this manual
v

contents
Depending on your region or service provider,
default applications on your device may vary.
vi
communication ........................................ 2
Messages ................................................... 2
Log ........................................................... 13
media ...................................................... 16
Gallery ...................................................... 16
MediaBrowser .......................................... 17
Communities ............................................ 17
Radio ........................................................ 18
®
RealPlayer
Video player .............................................. 20
Recorder .................................................. 20
PC Studio ................................................. 20
.............................................. 19
personal productivity ............................. 22
Contacts .................................................. 22
Calendar ................................................... 24
Quickoffice
Adobe
Notes ....................................................... 26
®
............................................. 25
®
PDF ............................................ 26
web ......................................................... 28
Browse a web page ................................. 29
Change browser settings .......................... 29

Add a bookmark ....................................... 30
Use a bookmark ....................................... 31
Download files from the web ..................... 31
Use RSS reader ........................................ 32
connectivity ............................................ 33
Access points ........................................... 33
Wireless LAN (WLAN) ............................... 34
Bluetooth .................................................. 35
USB .......................................................... 37
Connected home ...................................... 39
RoadSync ................................................. 40
additional programs ............................... 42
Calculator ................................................. 42
Clock ........................................................ 42
Converter ................................................. 43
GPS data .................................................. 44
Landmarks ............................................... 46
Smart reader ............................................ 46
Dictionary ................................................. 47
Print OTG ................................................. 47
Compass .................................................. 48
Qik ............................................................ 49
Podcasts .................................................. 50
Samsung LBS .......................................... 51
Smart search ............................................ 51
Mobile social networking services ............. 52
managers ............................................... 53
File manager ............................................. 53
Application manager ................................. 56
Zip ............................................................ 57
Connection manager ................................ 57
settings ................................................... 58
Personal settings ...................................... 58
Phone settings ......................................... 59
Application manager ................................. 61
Calling settings ......................................... 61
Connectivity settings ................................. 62
troubleshooting ........................................ a
index ......................................................... e
contents
vii

communication
Your device allows you to send and receive many
types of messages over cellular networks
2
and the internet.
Messages
Learn to use messaging functions. For
instructions on entering text, see the quick start
guide.
Message folders
When you open Messaging, you will see the
New message function and a list of folders:
• Inbox: received messaging, except email
and cell broadcast messages
• Mailbox: received email messages; when
you create a mailbox, the name you specify
will appear here; your service provider’s email
account will appear here
• Sent: recent sent messages
• Drafts: messages you have not yet sent
• Outbox: temporary storage for messages
waiting to be sent

• Delivery reports: delivery reports of text and
multimedia messages; you must request a
delivery report in the message options
before sending
• My folders: message templates and saved
messages
• Messages sent via the Bluetooth wireless
feature are not saved in the Drafts or Sent
folder.
• You may not receive a delivery report for a
multimedia message if you send it to an
email address.
Inbox icons
In the Inbox, you may see the following icons
next to your messages:
Icon Description
Unread text message
Multimedia message notification
Icon Description
Unread multimedia message
Unread smart message
Unread service message
Data received via a Bluetooth
connection
Unknown message type
Outbox status
When you are outside your service area or have
no connection to the network or email server,
your messages will remain in the Outbox folder
until you re-establish a connection. The Outbox
status explains why a message is being held in
the Outbox folder:
• Sending: the device is connecting and the
message will be sent immediately
communication
3

• Waiting: the message is in cue behind
another message and will be sent as soon
as possible
• Resend at (time): the message has failed to
send and will be sent at the specified time
• Deferred: the message has been
scheduled to send at a later time
communication
• Failed: the device has attempted to send
the message multiple times, but has failed
Text messages
For instructions on sending and viewing text
messages, see the quick start guide.
Text messages longer than 160 characters
will be sent as two or more messages and
may result in additional charges.
4
Retrieve messages from a SIM or USIM
card
If you have text messages stored on a SIM or
USIM card, you must copy them to the device
before you can view them.
1. In Menu mode, select Messaging →
Options → SIM messages.
2. Select a message → Options → Copy →
Inbox or My folders.
You can now view the messages from the
folder on your device.
Multimedia messages
Before you can send multimedia messages,
you must define an access point.
Set an access point
Your service provider may supply access point
settings via a smart message. To automatically
set an access point using a smart message,
see "Save smart message data or settings to
your device."
X
p. 12
To manually set an access point,
1. In Menu mode, select Settings →
Connectivity → Destinations →
Multimedia msg.
2. Select Options → New access point.
3. Set access point options according to the
instructions provided by your service
provider.
Send a multimedia message
1. In Menu mode, select Messaging → New
message.
2. Select the recipient field.
To select a contact, select .
3. Enter a phone number and select .
4. Select the text input field.
5. Enter your message text and select .
6. Select → a media type → a media file.
7. Select to send the message.
Edit a multimedia message
You can edit your multimedia message before
sending it:
• To add fields to the message header, select
Options → Message header fields → a
field type → OK
• To change the message layout, select
Options → Place text last or Place text
first
• To remove an item, select Options →
Remove → an item
You can add images, sounds, or videos to
slides; however, you can only add one type
of media type per slide.
View a multimedia message
1. In Menu mode, select Messaging →
Inbox.
2. Select a message.
communication
5
Listen to voice mail
If your voice mail number is preset by your
service provider, you can touch and hold 1 to
access your voice mail from the dialling screen.
If the voice mail number is not preset or if you
need to change the voice mail number,
1. In Menu mode, select Tools → Call
communication
mailbox.
2. If you change the voice mail number, select
Options → Change number.
3. Select the input field.
4. Enter the voice mail number provided by
your service provider and select .
5. Select OK.
You can now access your voice mail by
touching and holding 1 from the dialling screen.
6
Email messages
Before you send or receive email messages,
you must create a mailbox.
Create a mailbox
1. In Menu mode, select Messaging →
Options → Settings → E-mail.
2. Select Mailboxes.
3. Select Options → New mailbox.
4. Select Start to start the mailbox setup
wizard and follow the on-screen
instructions.
The new mailbox will automatically appear in
Messaging. To change the current mailbox,
return to email settings and switch the Mailbox
in use to another mailbox.
If you use the POP3 protocol, the mailbox will
not update automatically when you are
online. You must disconnect and then
reconnect to view new messages.

Send an email message
1. In Menu mode, select Messaging → an
email account → .
2. Select the recipient field.
To select a contact, select .
3. Enter an email address and select .
4. Select the subject input field.
5. Enter a subject and select .
6. Select the text input field.
7. Enter your message text and select .
8. Select → a media type → a media file.
9. Select to send the message.
If you are offline or outside your service area,
the message will be held in the Outbox folder
until you are online and in your service area.
View an email message
When you open a mailbox, you can view
previously retrieved emails offline or connect to
the email server to view new messages. After
you retrieve email messages, you can view
them offline.
To view new messages online,
1. In Menu mode, select Messaging → your
mailbox.
2. Select Options → Connect.
3. Select Options → Retrieve e-mail → New
or All.
To view new messages offline,
1. Repeat steps 1-3 above.
2. Select Options → Disconnect.
communication
7
View or save email attachments
Email attachments may contain viruses that
can damage your device. To protect your
device, open attachments only if you trust
the sender.
To view an attachment,
communication
1. From an open email message, select
Options → Attachments.
2. Select an attachment.
The attachment opens with the
corresponding application.
To save an attachment,
1. From an open email message, select
Options → Attachments.
2. Scroll to the attachment and select
Options → Save.
8
Delete an email message
You can delete email messages from your
device only or from both your device and the
mail server.
To delete a message from your device only,
1. In Menu mode, select Messaging → your
mailbox.
2. Scroll to an email and select Options →
Delete → Phone only.
The email header will remain in your mailbox
until you delete the message from the mail
server.
To delete a message from both your device and
the mail server,
1. In Menu mode, select Messaging → your
mailbox.
2. Scroll to an email and select Options →
Delete → Phone and server.

If you are offline, messages will be deleted
from the server the next time you connect. If
you are using the POP3 protocol, deleted
messages are removed when you close the
mailbox connection.
Instant messages
You can send and receive instant messages
(IM) if your service provider supports this
feature. Before you can send or receive instant
messages, you must set up a server.
This menu may be unavailable depending on
your region or service provider.
Set up a server
1. In Menu mode, select Tools → IM.
2. A prompt asks if you want to define a
server. Select Yes (If the prompt does not
appear, select Options → Settings →
Servers → Options → New server).
3. Set the server options according to
instructions provided by your service
provider.
Log in to the IM server
1. In Menu mode, select Tools → IM.
2. If the device does not attempt to log in
automatically, select Options → Log in.
3. Enter your user ID and password, and then
select OK.
4. Select Yes to log in automatically when you
select IM again.
5. Select your ID and change the way you
appear to other IM contacts (if necessary).
6. To log out, select Options → Log out.
Start a conversation
1. In Menu mode, select Tools → IM →
Conversations.
2. Select Options → New conversation →
Enter user ID.
3. Enter a user ID and select OK.
4. Enter your message and select Options →
Send.
5. To end the conversation, select Options →
End conversation.
communication
9

Accept an invitation
When you receive an invitation, select
Conversations → the invitation → Options →
Join.
Add IM contacts
You can save IM contact information by
communication
selecting Options → Add to IM contacts
during a conversation. You can also add
information in IM Contacts by selecting
Options → New IM contact.
When you view your IM contacts, you may see
the following icons:
Icon Description
the contact is online
the contact is offline
the contact is blocked
If you see no icon next to a contact’s name, the
contact is unknown.
10
Audio messages
You can send audio messages with voice
memos or sound clips. To record a voice
memo or sound clip, see "Recorder."
Send an audio message
1. In Menu mode, select Messaging →
Options → Create message → Audio
message.
2. To insert an existing sound clip, select
Options → Insert sound clip → From
Gallery → a sound clip.
3. To record and insert a new sound clip,
select to begin the recording. When you
are finished recording, select Stop.
4. Select to send the message.
X
p. 20

Cell broadcast messages
If your service provider supports this function,
you can subscribe to cell broadcasts that
provide automatic notifications or news
updates. To learn about available cell
broadcasts, contact your service provider.
Add a cell broadcast topic
1. In Menu mode, select Messaging →
Options → Cell broadcast.
2. Select Options → Topic → Add manually.
3. Enter the topic name and number, and then
select OK.
Subscribe to a cell broadcast
1. In Menu mode, select Messaging →
Options → Cell broadcast.
2. Scroll to a topic and select Options →
Subscribe.
Your device will now receive new
messages automatically.
3. To cancel a subscription, select Options →
Cancel subscription.
Some connection settings may block cell
broadcasts. Contact your service provider
for the appropriate connection settings.
View a cell broadcast topic
1. In Menu mode, select Messaging →
Options → Cell broadcast.
2. Select a topic folder.
3. Select a topic.
Set automatic notification of new cell
broadcast messages
1. In Menu mode, select Messaging →
Options → Cell broadcast.
2. Scroll to a topic and select Options →
Hotmark.
3. To stop automatic notifications, select
Options → Remove hotmark.
communication
11

Smart messages
Your device can receive many kinds of smart
messages, including business cards,
ringtones, calendar events, browser
bookmarks, and settings. Your service provider
may send smart messages that you can use to
load settings into your device.
communication
Save smart message data or settings to
your device
1. In Menu mode, select Messaging →
Inbox.
2. Select a message.
3. Select Options and save the data or
settings according to the smart message
type.
You may also receive an email notification,
which tells you how many new emails are in
your remote mailbox.
12
Service messages
You may receive service messages from your
service provider that are deleted automatically
when they expire. You can view service
messages from the Inbox (you may have to
download the message from the service
provider). Contact your service provider for
more information about service messages.
Push email
Using RoadSync, you can receive emails that
are transferred from your email server to your
device. For more information, see “RoadSync”
X
p. 40

Log
Learn to view log information about calls,
packet data, and other communication events.
Recent calls
You can view and erase logs of recently missed
calls, received calls, or dialled numbers.
View recent call logs
To view recently missed calls, received calls, or
dialled numbers,
1. In Menu mode, select Tools → Log →
Recent calls.
2. Select a call type.
To call a number from a call log, scroll to the
number and press [ ].
Erase recent call logs
You can erase all recent call logs at once, erase
a single call log, or delete a single number from
a log.
To erase all recent call logs,
1. In Menu mode, select Tools → Log →
Recent calls.
2. Select Options → Clear recent calls.
3. Select Yes to confirm.
To erase a single call log,
1. In Menu mode, select Tools → Log →
Recent calls → a call type.
2. Select Options → Clear list.
3. Select Yes to confirm.
To erase a single number from a log,
1. In Menu mode, select Tools → Log →
Recent calls → a call type.
2. Scroll to a number and select Options →
Delete.
3. Select Yes to confirm.
communication
13

Call duration
To view the durations of your last call, dialled
number, received call, or all calls, in Menu
mode, select Tools → Log → Call duration.
Packet data
To view the amount of sent or received packet
communication
data, in Menu mode, select Tools → Log →
Packet data.
Communication log
You can view communication details and filter
logs with the communication log.
View the communication log
1. In Menu mode, select Tools → Log.
2. Select to switch to the communication
log.
Some events, such as a text message split
into multiple parts, will appear as one
communication event.
14
Filter log events
1. In Menu mode, select Tools → Log.
2. Select to switch to the communication
log.
3. Select Options → Filter.
4. Select a filter type.
Erase the communication log
To permanently erase all of the log contents,
1. In Menu mode, select Tools → Log.
2. Select to switch to the communication
log.
3. Select Options → Clear log.
4. Select Yes to confirm.
Log duration
You can change the length of time that
communication events are stored in the logs.
After that time, events are automatically erased
to free up memory.
To set a log duration,
1. In Menu mode, select Tools → Log.
2. Select Options → Settings.
3. Select Log duration.
4. Select a duration.
If you select
events will be stored in the log.
No log
, no communication
communication
15

media
Gallery
You can manage all your media files from
Gallery.
Learn to use the media applications on your device:
Gallery, MediaBrowser, Communities, Radio,
RealPlayer, Video player, Recorder, and PC studio.
16
Open a media file
1. In Menu mode, select Gallery.
Your media files are automatically organised
by file type.
2. Select a media folder → a media file.
Copy or move a file
1. In Menu mode, select Gallery.
2. Select a media folder → a media file.
3. Select Options → Organise → Copy or
Move.
You cannot move or copy files protected by
licences.

Edit images
1. In Menu mode, select Gallery → Images &
videos → an image.
2. Select Options → Edit.
3. Select Options → Add effect → an option.
MediaBrowser
You can view and categorise photos and
videos.
1. In Menu mode, select Media →
MediaBrowser.
2. Rotate the phone anti-clockwise to
landscape view.
3. Select → a view mode to change the
view mode.
4. Scroll left or right to view photos.
Tilt the device to the left or right. Photos will
scroll left or right automatically.
Communities
With Communities, you can upload photos and
videos to your favourite websites and blogs,
and get the latest updates from them.
This is available only if supported by your
service provider or region.
Create a new destination
1. In Menu mode, select Applications →
Communities.
2. Select Yes to set preferred lists.
3. Select Accept (if necessary).
4. Select Options → Settings → Preferred
lists.
5. Select websites and blogs and select
Save.
media
17
 Loading...