

Samsung GPS NAVSOON 385 User Manual

1
User Manual
NavSoon 385
Dear valued customer,
Thank you for purchasing our portable GPS navigation device
NavSoon 385. To obtain the best performance and safety, please read
this manual carefully and thoroughly before operating. And please
keep this manual for future reference.

2
Contents
Contents..................................................................................................................................................................... 2
Important Precaution................................................................................................................................................ 3
Function Features.....................................................................................................................................................4
Preparation before Use............................................................................................................................................ 6
Charge Battery.................................................................................................................................................. 6
Battery Use Status............................................................................................................................................ 6
Use of Car Charger........................................................................................................................................... 6
Power Switch..................................................................................................................................................... 7
Wake and Sleep................................................................................................................................................ 7
Touch-Screen Pen ............................................................................................................................................ 7
Use of SD/MMC Memory Card....................................................................................................................... 8
Port Definition............................................................................................................................................................ 9
Keypad Function......................................................................................................................................................11
System Operation Instructions.............................................................................................................................. 12
System Main Interface.................................................................................................................................... 12
Navigation........................................................................................................................................................ 12
Music................................................................................................................................................................. 13
Function Features................................................................................................................................... 13
Interface Operation................................................................................................................................. 13
Photo................................................................................................................................................................. 15
Function Features................................................................................................................................... 15
Operation Steps....................................................................................................................................... 15
E-Book.............................................................................................................................................................. 16
Function Features................................................................................................................................... 16
Operation Steps....................................................................................................................................... 16
Video................................................................................................................................................................. 18
Function Features................................................................................................................................... 18
Operation Steps....................................................................................................................................... 18
System.............................................................................................................................................................. 20
Function Features................................................................................................................................... 20
Operation Steps....................................................................................................................................... 20
Appendix................................................................................................................................................................... 25
Trouble Shooting............................................................................................................................................. 25
Q&A................................................................................................................................................................... 26
Care and Maintenance................................................................................................................................... 27
Technical Specifications................................................................................................................................. 28

3
Important Precaution
Do not shake or knock the equipment, otherwise data damage and loss may occur so that files can‘t
be played normally.
Do not place the equipment indirect sunlight or expose to high temperature. Otherwise the battery
or the body may become too hot so as to cause failure or danger.
Do not expose the equipment to dampness or rain. If water enters the equipment or it is dampened
failure can occur, and it may not be repairable.
Do not disassemble the equipment by yourself.
Do not expose the equipment to sand or dust.
Do not use the equipment near the places where radio waves or radiation is produced, otherwise,
the equipment will not work normally.
Insert the plug completely into the socket to prevent electrical shock.
Make sure all cables are connected to the equipment safely and neatly for fear that the equipment
should be damaged due to incorrectly installedcable.
Do not use force to press LCD screen and do not expose LCD screen to the sun because it can
cause failure. Clean the screen surface and remove dust with soft cloth.
Send equipment that fails to a qualified person for repairing.
Frequently backup the data on the SD/MMC into your computer so as to prevent data loss.
Pay attention to the compatibility of multimedia files because the equipment can only play the file
systems conforming to equipment design regulations.
Do not play copyrighted material without permission.
Do not connect any metal objects to the charger or the input port of the unit other than the proper
equipment; otherwise, it will cause equipment failure.
Do not place equipment near heater.
Place the equipment on a flat platform. Do not place on carpet, pillow or rug and turn it on because
this will make working temperature of the equipment too high and may cause equipment damage.
Do remove SD card when the system is reading or writing to the memory card; otherwise it will
damage and lose the data in the memory card and maybe cause a system malfunction.
Do not shut off the power supply while the equipment is navigating or playing movies, music and
pictures.
Do not place the battery or charge it somewhere too hot or too cold; otherwise, it will affect the
performance of the battery.
Conform to relevant laws and regulations when discarding old battery because a mistake in
disposing a battery could cause an explosion.
Place the charging equipment or battery out of reach of children.
Be careful when using the equipment because violent crash or fall will affect or damage its
performance.
Do not use earphone with too high volume for long periods because it can affect hearing and even
damage your permanent hearing.
Do not keep the volume of the external loudspeaker too high for long because long use can lead to
distortion at the loudspeaker.
Repetitive movements can cause the discomfort of the hands, arms, shoulders, neck or other parts
of the body when you are watching videos.

4
Function Features
GPS Navigation
Navigation system is the system that, via GPS satellite signal receiver, positions the mobile object
properly and displays it on the navigation e-map. After the user sets the destination, the system can
automatically calculate an optimal route and gives out voice hint automatically during traveling so that
it can help the user to reach the destination safely and quickly. Via this system, you can search
various kinds of life information.
Note: 1. Please confirm the map document SD memory card is inserted into the SD slot, and
the power source is connected or the battery still has power.
2. The system starts to seek the satellite signal automatically, and starts to locate the
procedure. After the GPS positioning completes, the screen can display the GPS
satellite state diagram, the related information will also appear completely.
Positioning
Uses high-sensitivity reception antenna, all-weather real-time signal reception, fast positioning.
E-Map
Using professional and authentic electronic map lets you travel at will. After entering the
navigation system, please follow the on-screen icons and instructions of the E-map for proper
operation and excellent performance.
Route Plan
Provides the route Plan between the start and the destination, and has these functions to set the
sites to you will pass by and the sites to be avoided etc.
Voice Hint:
Humanized route plan function, friendly human voice hints and automatic route name voice hint
during travel ensure fast and precise arrival to yourdestination.
Voice hint at crossing or entrance or exit
Voice hint at elevated highway or motorway
Voice hint of destination approached to or site passed by
Voice hint at any time.
Automatic Error Correction
The system may help you to design your travel route automatically, if you have gone astray due to
carelessness or inability to follow planned route, it can tell you that you have gone astray, and will help
you to redesign the travel route, thus ensuring your fast arrival to the correct destination, without
detour.
Facility Consultation
The system can, in accordance with the set search radius and from nearest to distant, display the

5
information about your “Points Of Interest” so that you can find gas station; restaurant; fast-food
restaurant; coffee shop; parking lot; convenience store; pub/hotel, etc nearby.
Display Setting
Daytime and night two map display styles; Ordinary Travel Pattern, Turn or Crossing Map
Amplification Pattern, Motorway Travel Pattern and Motorway Exit Pattern etc available, so you can
know where you are during driving.
Music
Supports WMA9, MP3 and WAV audio modes, supports amplifier, FM radio, and earphone play
modes; supports play in order, random play, cycling play.
Photo
Supports JPG, BMP, GIF format, may support up to 280x960 pixel JPG picture; may zoom in and
out at will, may choose and automatically play all pictures under the same folder.
E-Book
Support TXT format so that you can read your favorite books any time anywhere.
Video
Supports WMV, ASF and AVI format MP4 play, 320 x 240 pixels, high resolution, real color,
visually friendly, adjustableplay progress, pause, full-screen video play.

6
Preparation before Use
Charge Battery
Insert the charger into the marked 5 volt port of the equipment and plug it into power socket.
During charge, the Battery Indicator Light, which is below the Power On Light, will turn red when
the charge starts, and will turn green when the battery is fully charged. .
After battery is fully charged, please disconnect the charger and the equipment and unplug of
the charger from the power socket.
Battery Use Status
The icon on LCD screen can display the use status of the battery. Charge level is displayed in
vertical bars, it indicates the power capacity of the battery, the more bars, the more power; when the
power is insufficient, the system will display warning icon. When this happens, please plug the
charger to charge the equipment so as to ensure that the system won’t be turned off due to power
shortage. When charging, the Charging icon is displayed on the upper right corner, indicating the
equipment is being charged.
Note: 1. If the equipment is not used for a long time, please disconnect the charger from the
equipment so as to avoid long operation of the charging component of the equipment
which will lower its service life.
2. When the system displays the “Low power” warning box, please charge the equipment
immediately so as to prevent the system from automatically shutting off and losing data. In
order to avoid fire or burn, do not disassemble, puncture, and bump the battery or throw it
into fire or water for the battery can burst, explode or release dangerous chemicals.
3. Do not expose the equipment to direct sunlight; do not place it in high temperature.
Prevent the equipment from getting too hot and causing failures or dangers.
Use of Car Charger
Please attach the mounting bracket of the equipment into the proper position in the car and
adjust the position until the observation angle is proper.
Mount the equipment to the bracket firmly, and then connect the car charger to the power to
charge the equipment continuously,so as to avoid the equipment shutting off automatically because
of low power during use.

7
Note: 1. Do insert the equipment into the car charger after the car is started so as to prevent the
surge current resulting from the immediate starting of the car from impacting and
damaging the equipment.
2. When using car fixing bracket, please note the proper position for it. Do not place the
equipment in the position that can block driver’s view.
Do not put it in a position that possibly blocks driver’s view.
Do not place the equipment at will without being fixed.
Do not fix where the safety airbag is located.
Do not put it in the expansion area of the safety airbag.
Power Switch
The power is controlled by the battery switch “ ”at the bottom of the equipment. Slide it
to ON to turn on, and OFF to turn off.
Wake and Sleep
The “Wake” function of this equipment is controlled by the power key “ ” on the top of the
equipment, then press this power key to let the equipment “
state, low power can maintain this state.
Sleep”. When the system enters “Sleep”
Hand-writing Pen
Click Choice
Click the symbols on the screen with the pen point to choose the desired item and enter the
corresponding function. When the e-map is being displayed, click the sign or road on the e-map to
display the building name or road name related.
Drag
In the e-map interface, touch the screen with the pen point and drag the touched item to the
desired direction to find the terrestrial reference directly.
Note: The use of standard pen can easily scratch the LCD screen. So, please use the supplied
touch-screen pen to touch the screen, rather than other sharp objects.
8
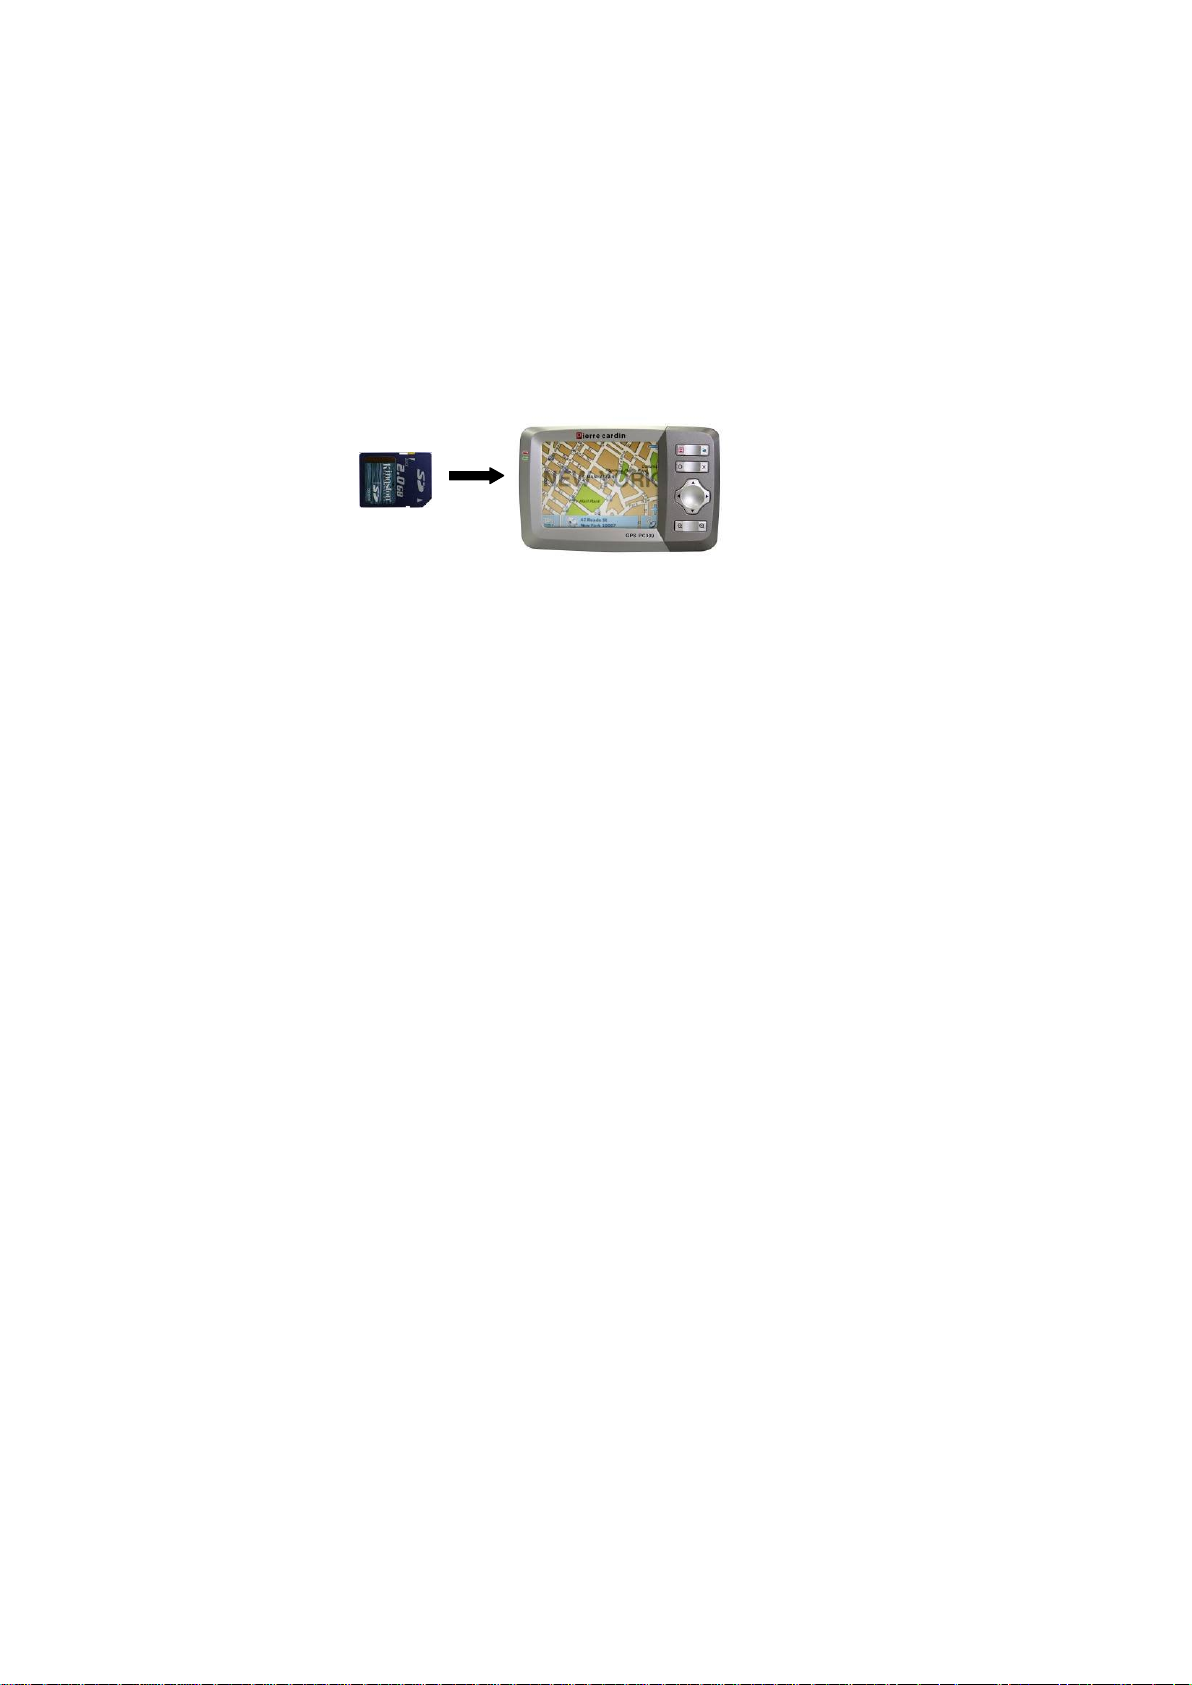
Use of SD/MMC Memory Card
This equipment has an SD/ MMC memory card slot. You can use SD/MMC card for
expansion. If the navigation function does not work, please check whether the SD/MMC card is
properly inserted into the slot.
Please refer to the following figures for inserting memory card. Place the card in the side of
equipment and insert it into the slot with the metal contact downward.
9
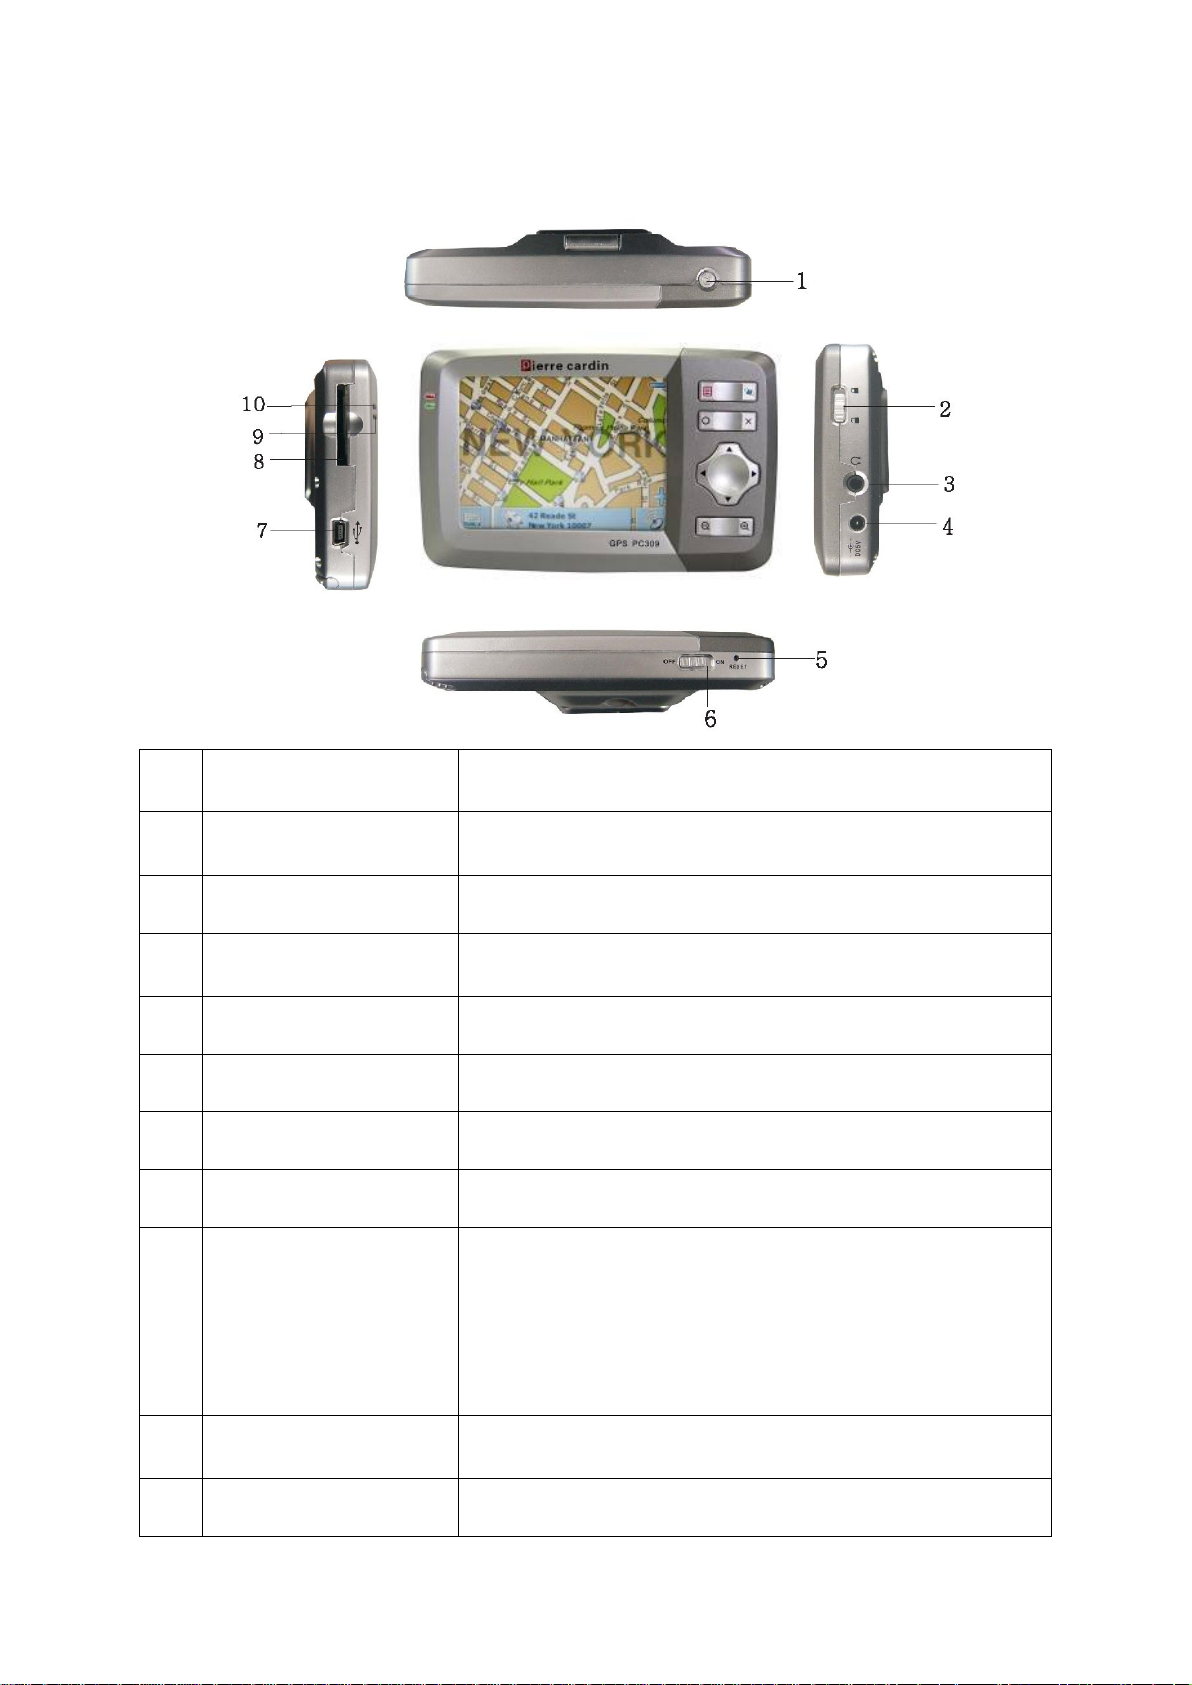
Port Definition
and maps needed by the GPS section of the system.
Working Indicator
No. NAME FUNCTION
1 Power key
2 Lock switch Lock or unlock board keys.
3 Earphone port
4 5 volt DC IN port Connecting with portable/car changer to charge the Player
5 Reset Resetting the Player.
6 Battery switch Turn right is on, turn left is off.
7 USB Socket Using USB cable to connect this device to your PC
8 SD/MMC card slot
9 Charging indicator
Opening the Player/let the system enter the dormant state,
reduces power usage. Battery will last longer.
Output tonic train signaling to earphone, when connecting
the exterior earphone to use.
The memory card contains the needed Navigation program
Please DO NOT remove while in use. [Note] If you remove
the memory card carelessly, incorrect information and faulty
programming can occur. Please insert the memory card
before activating the system.
Display charging state, red LED display, Red LED shows
system charging, Green LED shows full charge.
10
Display light is green
 Loading...