

ENGLISH
FADE
S.SHOW
BLC
MEMORY
TAPE
DELETE
REC
P
LAY
OFF
Using the CAMCORDER - Advance Recording
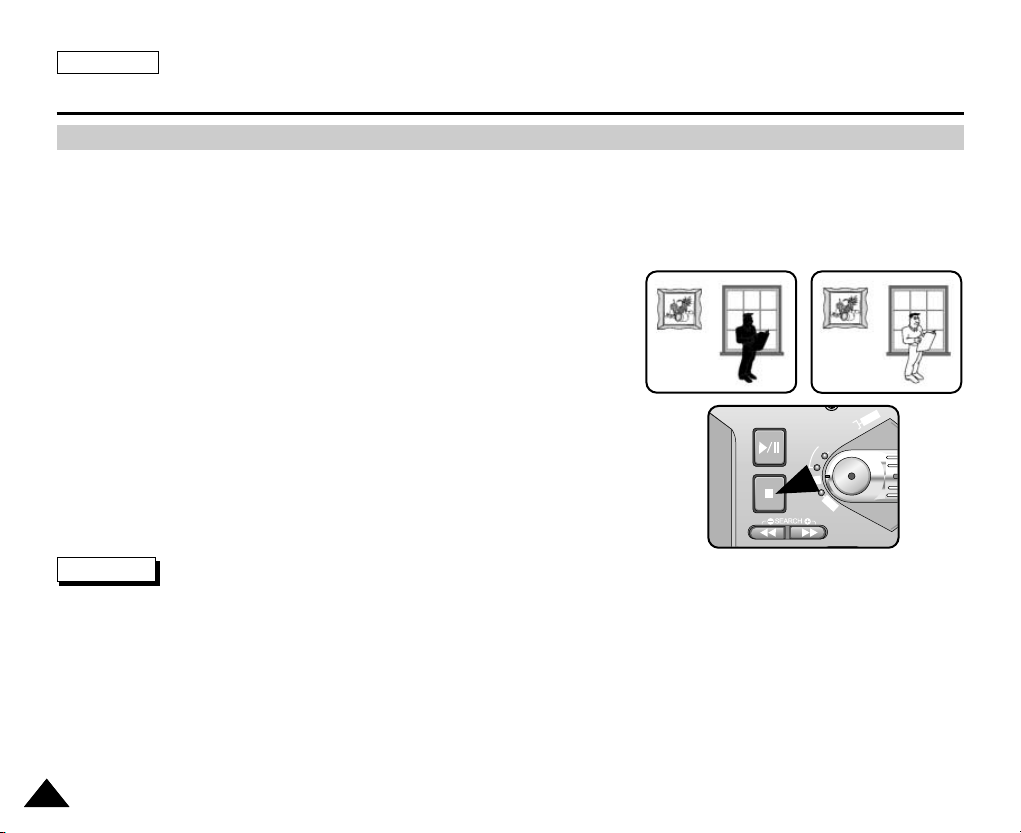
BLC (Back Light Compensation)
✤ BLC works in CAMCORDER mode only.
✤ Back lighting exists when the subject is darker than the background. For Example:
■
The subject is in front of a window.
■
The person to be recorded is wearing white or shiny clothes and
is placed against a bright background; the person’s face is too dark to
distinguish his/her features.
■
The subject is outdoors and the background is overcast.
■
The light sources are too bright.
■
The subject is against a snowy background.
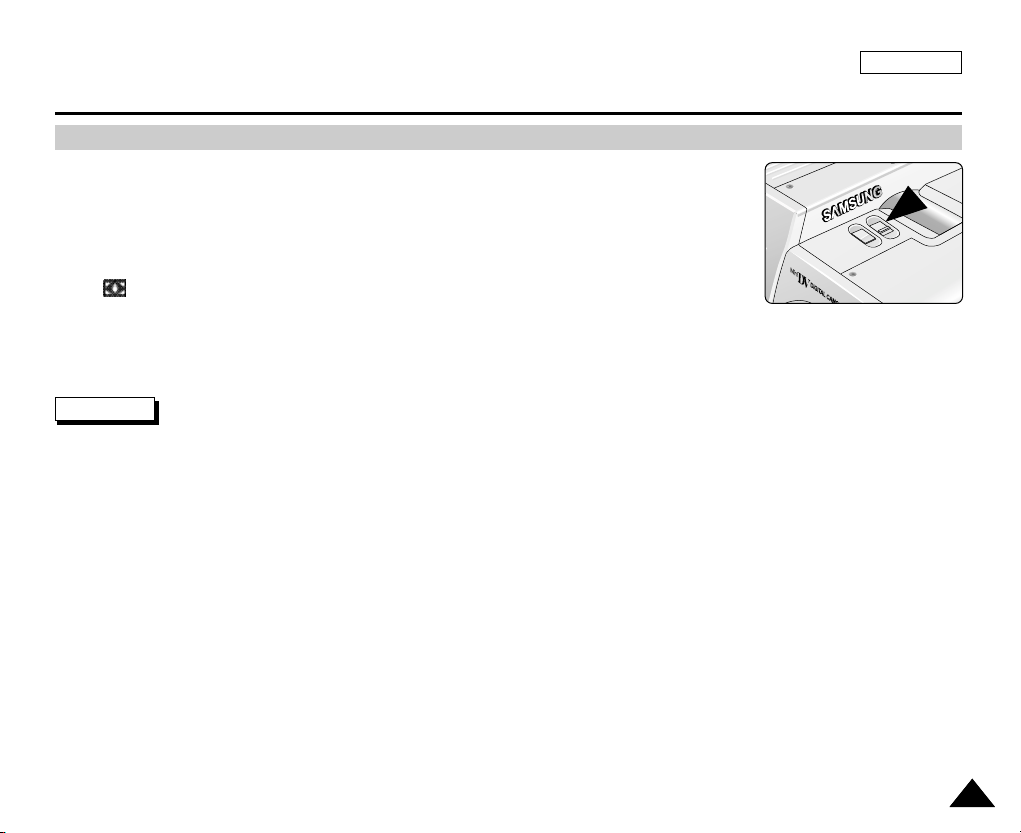
1. Set the device to CAMCORDER.
2. Set the power switch to RECORD mode.
3. Press the BLC(STOP) button.
■
Normal - BLC - Normal
■
BLC enhances the subject.
Notes
■
While setting NITE PIX to ON, the BLC function does not work.
■
The BLC function will not operate in EASY mode.
* BLC on* BLC off
7070

Using the CAMCORDER - Advance Recording
FADE
S.SHOW
BLC
M
E
M
O
R
Y
TAPE
PLAY
O
F
F
FADE
S.SHOW
BLC
M
E
M
O
R
Y
TAPE
PLAY
O
F
F
FADE
S.SHOW
BLC
M
E
M
O
R
Y
TAPE
PLAY
O
F
F
FADE
S.SHOW
BLC
M
E
M
O
R
Y
TAPE
PLAY
O
F
F
Fade In and Out
✤ The FADE function works in CAMCORDER and CAMERA modes.
✤ You can give your recordings a professional look by using
special effects such as fading in at the beginning of a
sequence or fading out at the end of a sequence.
➔
➔
STBY
0:00:00
ENGLISH
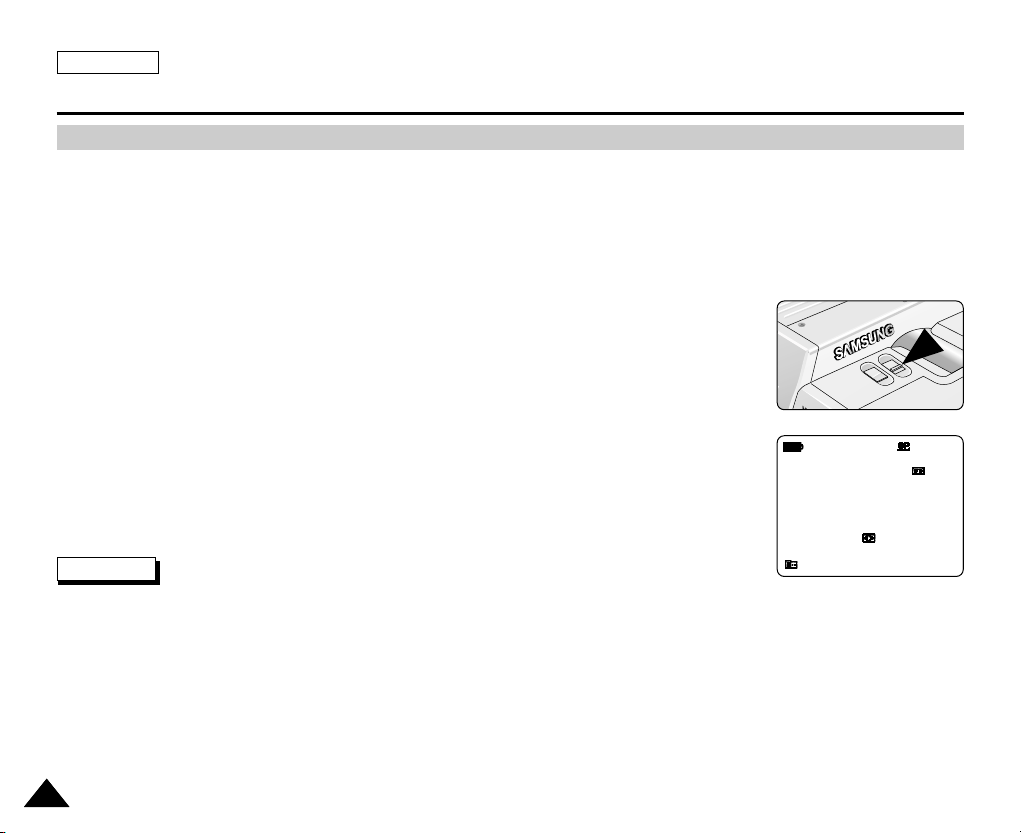
To Start Recording
1. Before recording, hold down the FADE button.
The picture and sound gradually disappear (Fade Out).
2. Press the START/STOP button and at the same time release
the FADE button. Recording starts and the picture and
sound gradually appear (Fade In).
To Stop Recording (Using FADE IN / FADE OUT)
3. When you wish to stop recording, hold down the
FADE button. The picture and sound gradually
disappear (fade out).
4. When the picture has disappeared,
press the START/STOP button to stop recording.
a. FADE OUT (Approx. 4 seconds)
b. FADE IN (Approx. 4 seconds)
REC
0:00:15
➔
➔
REC
0:00:15
➔
➔
STBY
0:00:20
➔
➔
Press the FADE button a. FADE OUT Gradual disappearance
Gradual appearance b. FADE IN Release the FADE button
7171
ENGLISH
PHOTO
REW/RPS
A.DUB STOP SELF TIMER
SLOW
PLAY FF/FPS
STILL ZERO MEM.
FADE
S.SHOW
BLC
M
E
M
O
R
Y
TAPE
DELETE
R
E
C
P
L
A
Y
O
FF
Using the CAMCORDER - Advance Recording
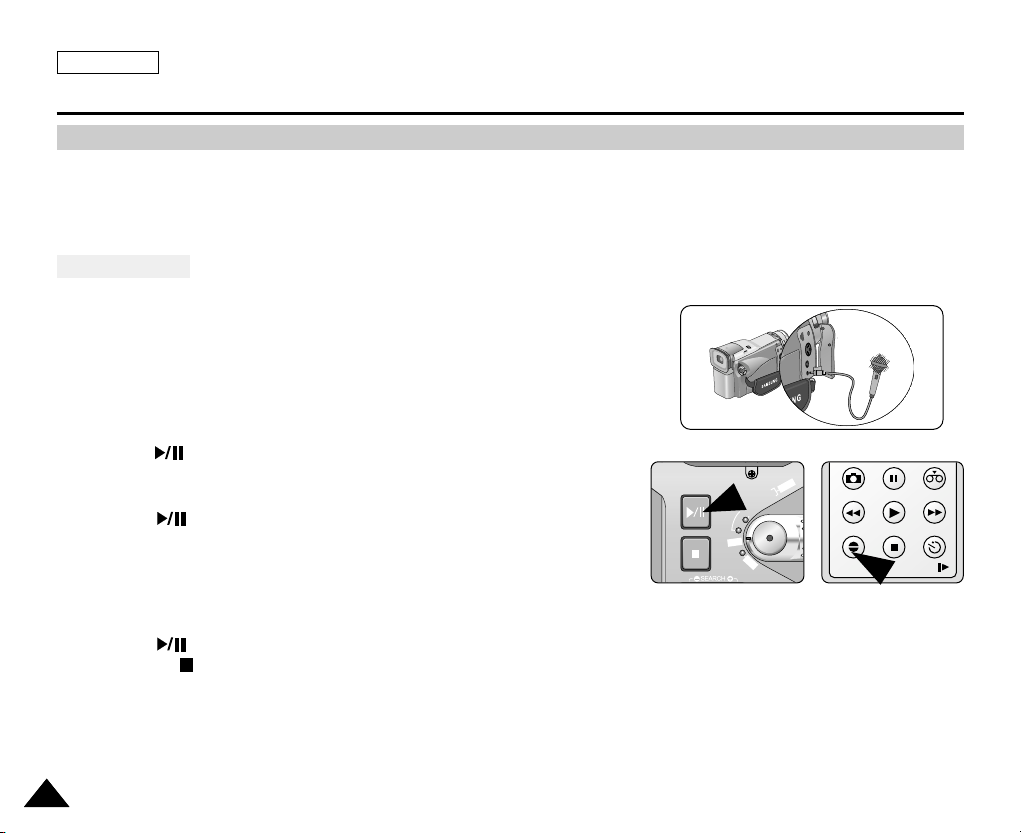
Audio Dubbing (SCD5000 only)
✤ The AUDIO DUBBING function only works in PLAYER Mode.
✤ You can add sound to the original sound on a pre-recorded tape, recorded in SP mode with 12bit sound.
✤ Use the internal and external microphones or other audio equipment.
✤ The original sound will not be erased.
Dubbing Sound
1. Set the device to CAMCORDER.
■
If you want to use an external microphone, connect the microphone to
the external MIC input jack on the camcorder.
2. Set the power switch to PLAYER mode.
■
If you want to use an external microphone, connect the microphone to the
external MIC input jack on the camcorder.
3. Press the (PLAY/STILL) button and find the timeframe of the scene to
be dubbed.
4. Press the (PLAY/STILL) button to pause the scene.
5. Press the A.DUB button on the Remote Control.
■
A.DUB will be displayed on the LCD.
■
The camcorder is in a ready-to-dub state for dubbing.
6. Press the (PLAY/STILL) button to start dubbing.
■
Press the (STOP) button to stop the dubbing.
7272
Using the CAMCORDER - Advance Recording
TAPE PLAY MODE
AUDIO SELECT
PLAY SET
SOUND[1]
SOUND[2]
MIX [1+2]
CAMCORDER SET
RECORD SET
PLAY SET
TAPE PLAY MODE
TAPE PLAY MODE
INITIAL
RECORD SET
PLAY SET
CAMCORDER
CAMERA
MEMORY
VIEWER
TAPE PLAY MODE
CAMCORDER SET
PLAY SET
PB DSE SELECT
PHOTO SEARCH
PHOTO COPY
AUDIO SELECT
SOUND1
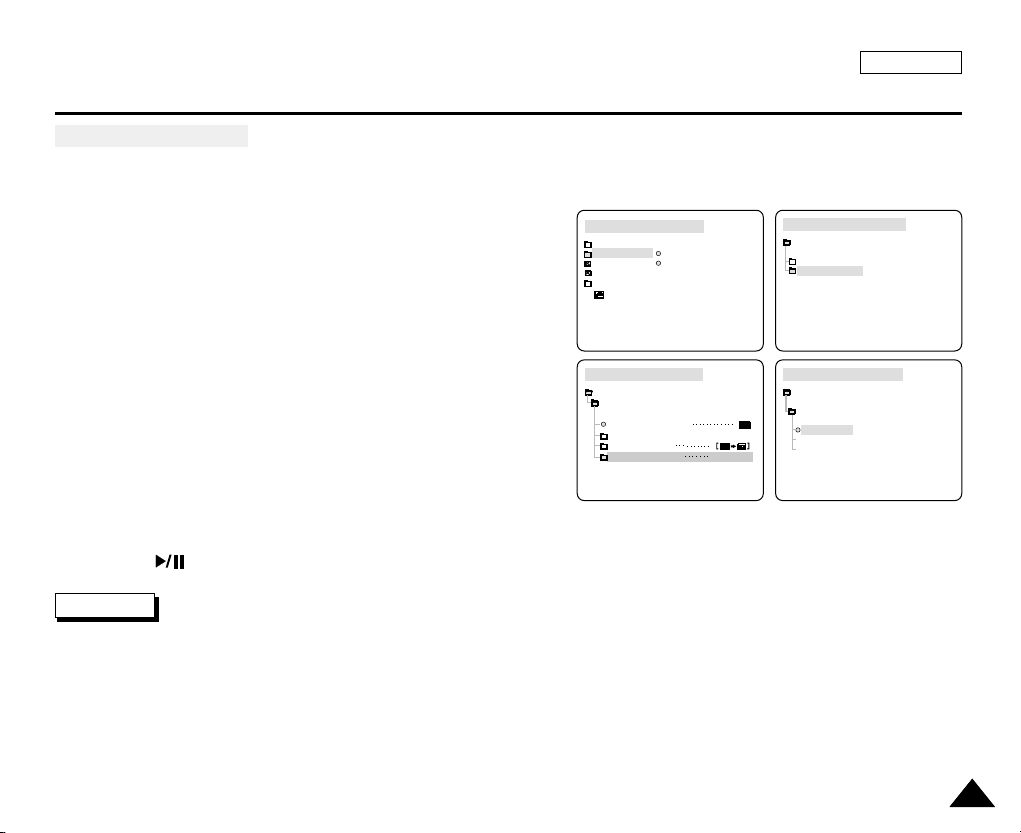
Dubbed Audio Playback
1. Insert the dubbed tape and press the MENU button.
2. Turn the MENU DIAL to highlight CAMCORDER.
3. Press the MENU DIAL to enter the sub-menu.
4. Select PLAY SET and press the MENU DIAL.
5. Use the MENU DIAL to select AUDIO SELECT from the sub-menu.
6. Press the MENU DIAL to enter the sub-menu.
7. Using the MENU DIAL, select the AUDIO playback channel.
■
Press the MENU DIAL to confirm the audio playback channel.
- SOUND1 : play the original sound.
- SOUND2 : play the dubbed sound.
- MIX(1+2) : play back with SOUND1 and 2 equally mixed.
8. To exit, press the MENU button.
9. Press the (PLAY/STILL) button to playback the dubbed tape.
Note
When you playback added sound (SOUND2 or MIX mode), you may experience some loss of sound quality.
ENGLISH
7373
ENGLISH
TAPE PLAY MODE
INITIAL
RECORD SET
PLAY SET
CAMCORDER
CAMERA
MEMORY
VIEWER
CAMCORDER SET
RECORD SET
PLAY SET
TAPE PLAY MODE
TAPE PLAY MODE
CAMCORDER SET
PLAY SET
PB DSE SELECT
PHOTO SEARCH
PHOTO COPY
AUDIO SELECT
SOUND1
Using the CAMCORDER - Advance Recording
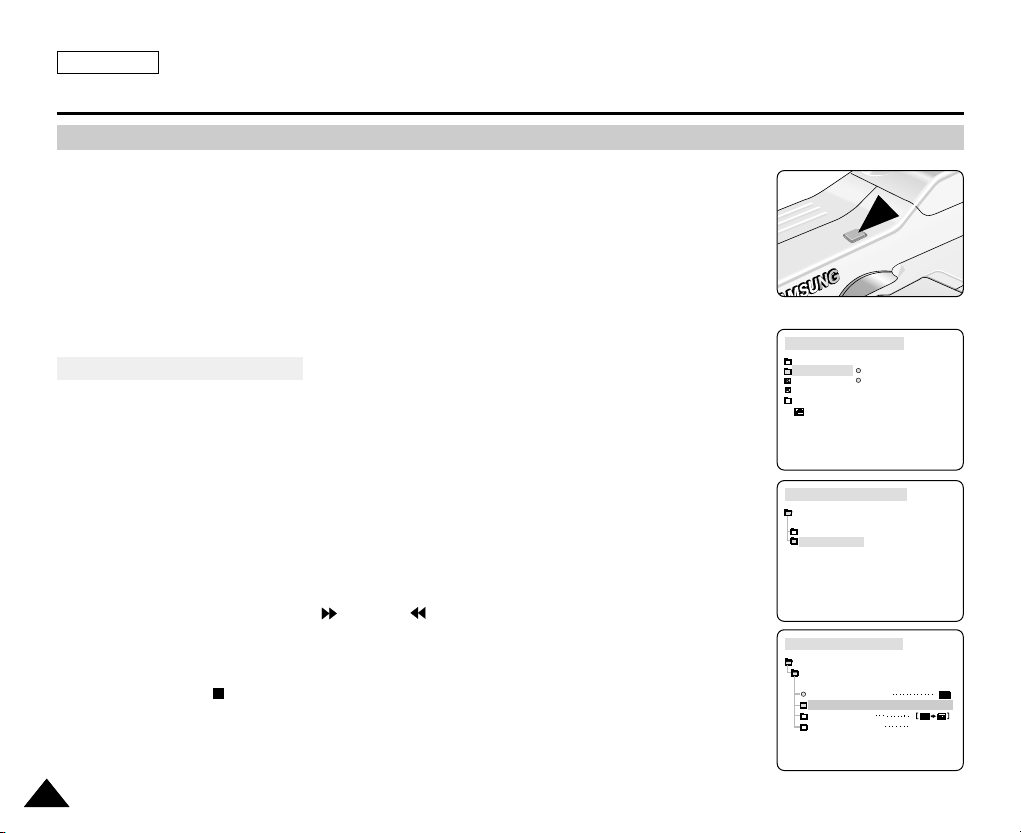
PHOTO Image Recording
1. Press the PHOTO button and hold it.
■
The still picture appears on the LCD monitor.
■
If you do not wish to record, release the button.
2. Release the PHOTO button and press the PHOTO button again in 2 seconds.
■
The still picture is recorded for about 6~7 seconds.
3. After the PHOTO has been recorded, the camcorder returns to STBY mode.
Searching for a PHOTO Picture
✤ The PHOTO SEARCH works in PLAYER and M.PLAY mode only.
■
1.
Press the MENU button.
■
The MENU list will appear.
2. Turn the MENU DIAL to highlight CAMCORDER and press the MENU DIAL.
3. Select PLAY SET and press the MENU DIAL to enter the sub-menu.
4. Select PHOTO SEARCH from the sub-menu and press the MENU DIAL.
5. Search for the PHOTO using the (FF) and (REW) buttons.
■
The PHOTO search process appears on the LCD while you are searching.
■
After completing the search, the camcorder displays the still image.
6. To exit, press the (STOP) button.
7474
Using the CAMCORDER - Advance Recording
NITE PIX (0 Lux Recording)
✤ The NITE PIX function works in CAMCORDER mode only.
✤ The NITE PIX function enables you to record a subject in darkness.
1. Set the device to CAMCORDER and set the Power Switch to RECORD mode.
2. Slide the NITE PIX switch to ON.
■
(NITE PIX indicator) appears on the LCD monitor.
■
The infrared(invisible rays) light is turned on automatically.
3. To cancel the NITE PIX function, slide the NITE PIX switch to OFF.
Notes
■
The maximum recording distance using the infrared light is about 3 m (about 10 feet).
■
If you use the NITE PIX function in normal recording situations (ex. outdoors by day),
the recorded picture may be tinted green.
■
While in NITE PIX mode, certain functions are not available, such as White Balance, Program AE, DSE, BLC.
ENGLISH
7575
ENGLISH
POWER NITE PIX
P
0 : 0 0 : 0 0
5 5 min
1 2 : 0 0 AM
O C T. 1 0 , 2 0 0 3
STBY
Using the CAMCORDER - Advance Recording
POWER NITE PIX
✤ The NITE PIX function works in CAMCORDER mode only.
✤ The POWER NITE PIX function can record a subject more brightly in darkness than the NITE PIX function.
✤ POWER NITE PIX is displayed for three seconds on the LCD if you press the SLOW SHUTTER button when the NITE PIX
switch is turned on.
✤ When you work in POWER NITE PIX mode, the POWER NITE PIX icon appears on the LCD continuously.
1. Set the device to CAMCORDER and set the power switch to RECORD mode.
2. Turn on the NITE PIX switch, and then press the SLOW SHUTTER button.
3. Press the SLOW SHUTTER button to set the shutter speed. The SLOW SHUTTER function
enables you to record a subject more brightly.
4. When using POWER NITE PIX the image takes on a slow motion like effect.
5. To cancel the POWER NITE PIX function, press the SLOW SHUTTER button until it is set to
“ OFF ” and then turn off the NITE PIX switch.
Notes
■
The maximum recording distance using the infrared light is about 3 m (about 10 feet).
■
If you use the POWER NITE PIX function in normal recording situations (ex. outdoors by day), the recorded picture may
contain unnatural colors.
■
In POWER NITE PIX mode, certain functions are not available, such as White Balance, Program AE, DSE, BLC.
■
When the subject is too bright, it is better to press the SLOW SHUTTER button (1/8 ➝ 1/30) so that you can record in better
quality.
7676
ENGLISH
Using the CAMCORDER - Advance Recording
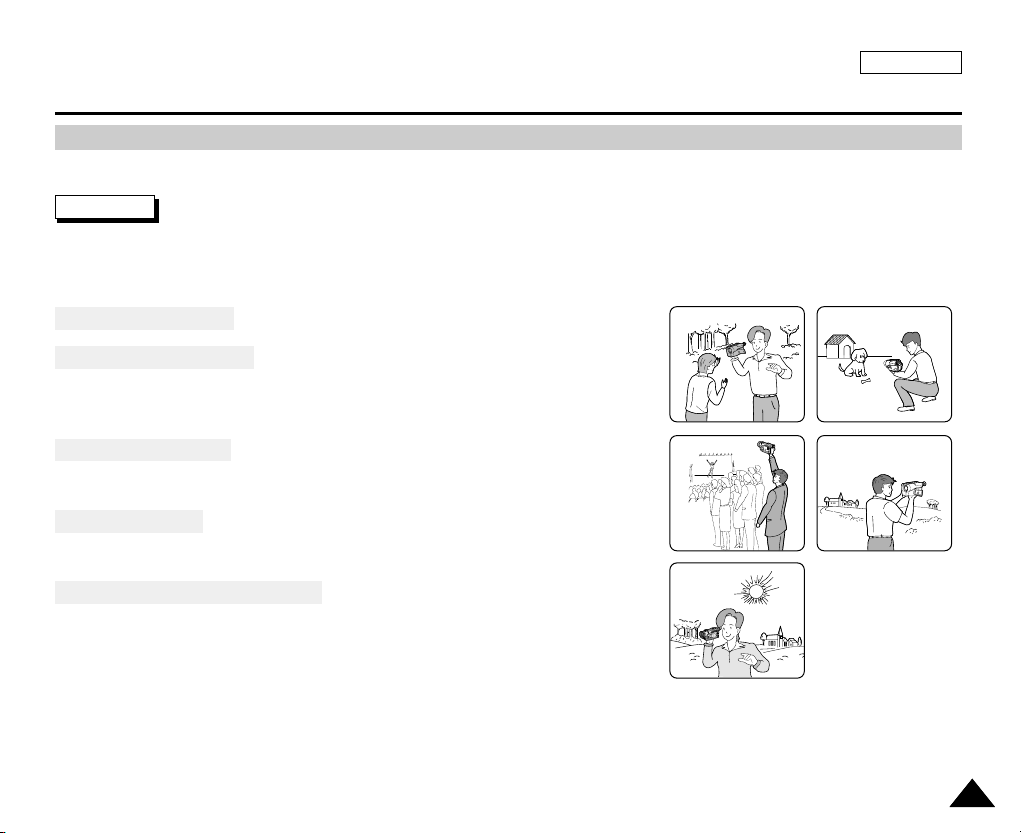
Various Recording Techniques
✤ In some situations different recording techniques may be required for more dramatic results.
Note
Please rotate the LCD screen carefully as excessive rotation may cause damage to the inside of the hinge that connects the
LCD screen to the Camcorder.
1. General Recording.
2. Downward recording.
Recording while viewing the LCD screen from above.
3. Upward Recording.
Recording while viewing the LCD screen from below.
4. Self recording.
Recording while viewing the LCD screen from the front.
5. Recording with the Viewfinder.
■
In circumstances where it is difficult to use the LCD monitor,
the viewfinder can be used as a convenient alternative.
1 2
3
5
4
7777
ENGLISH
Playback
Tape Playback
✤ The playback function works in PLAYER mode only.
Playback on the LCD
✤ It is practical to view a tape using the LCD when in a car or outdoors.
Playback on a TV Monitor
✤ To play back a tape, the television must have a compatible color system.
✤ We recommend that you use the AC Power Adapter as the power source for the camcorder.
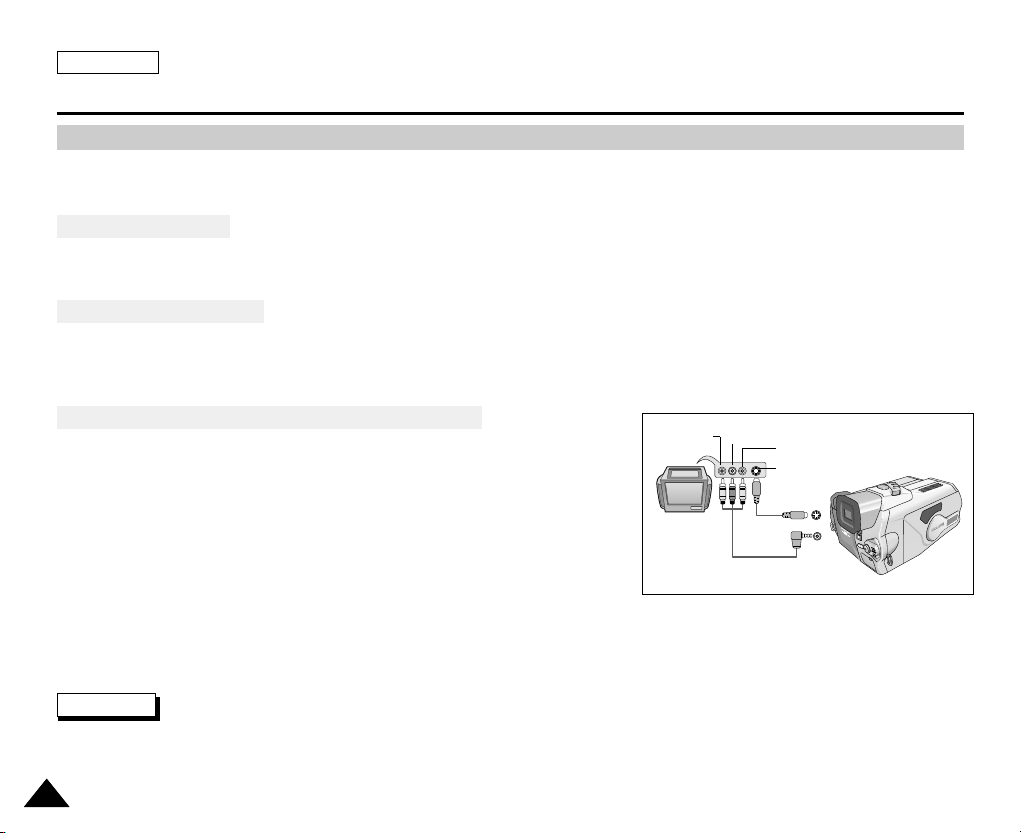
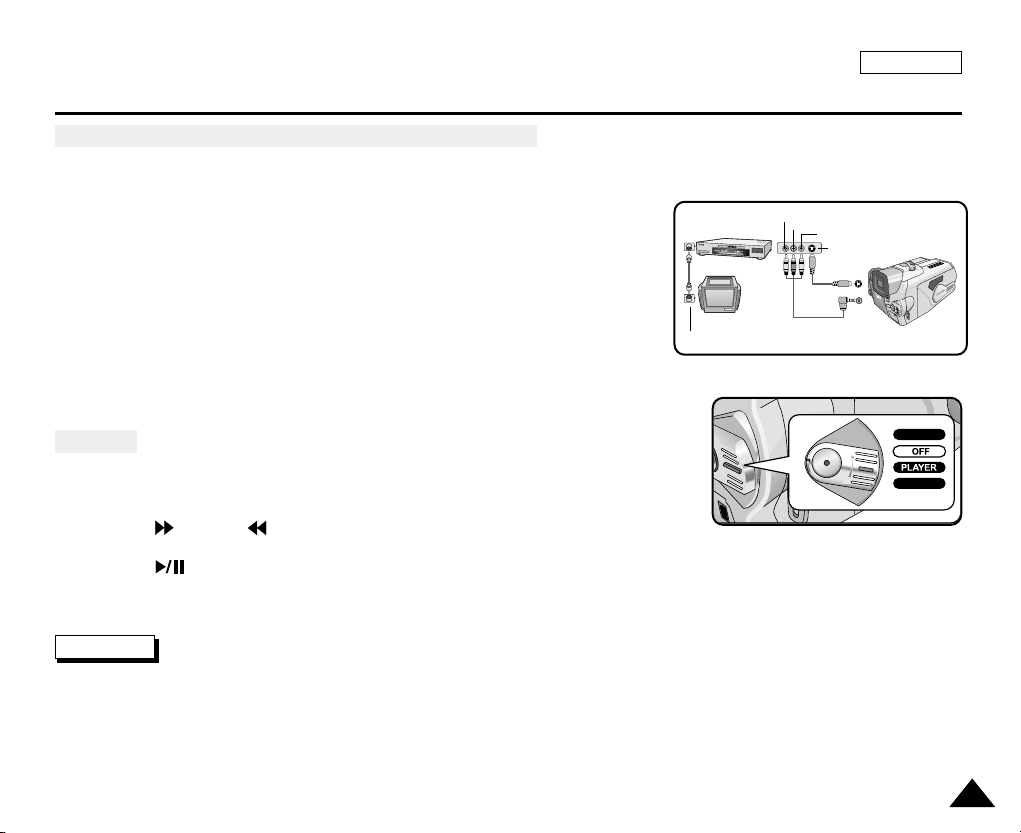
Connecting to a TV which has Audio/Video Input Jacks
1. Connect the camcorder to the TV with the Audio/Video cable.
■
The Yellow plug : Video
■
The White plug : Audio(L)
■
The Red plug : Audio(R) - STEREO only
- If you connect to a monaural TV or VCR, connect the Yellow plug
TV
Video input-
Yellow
Audio input
(left)-White
Audio input
(right)-Red
S-VIDEO input
S-VIDEO
A/V
(Video) to the video input of the TV or VCR and the White plug (Audio
L) to the audio input of the TV or VCR.
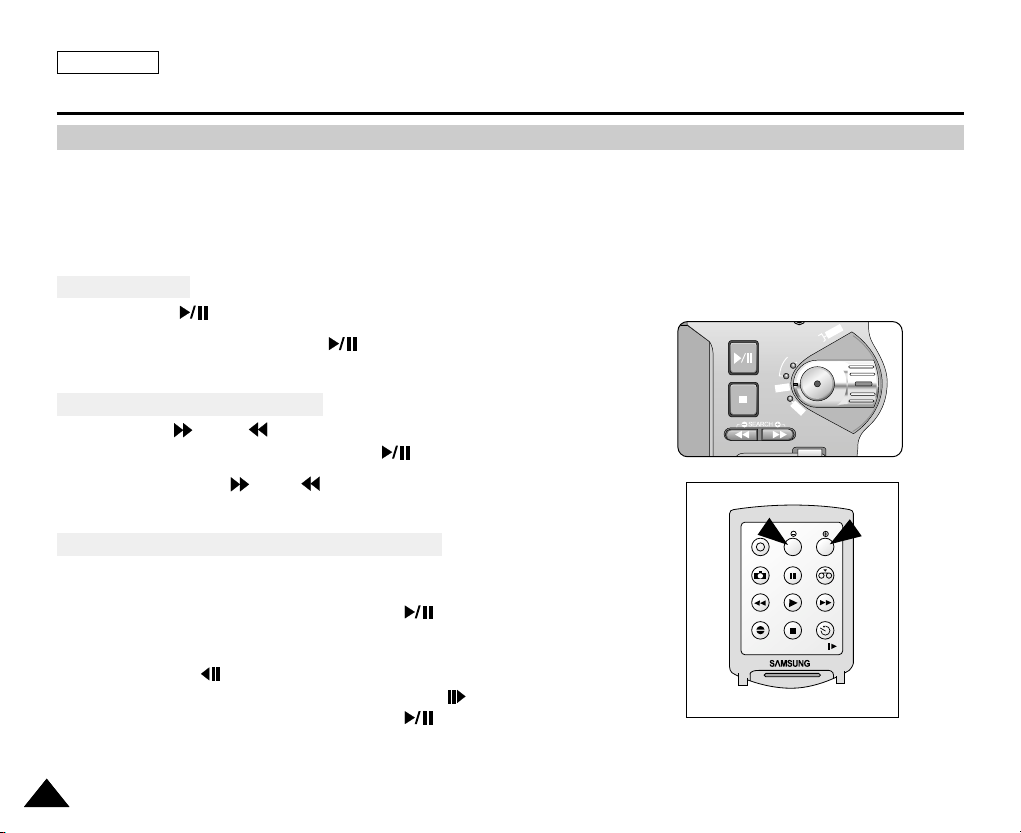
2. Set the device to CAMCORDER.
3. Set the power switch to PLAYER mode.
4. Turn the TV on and set the TV/VIDEO selector on the TV to VIDEO.
■
Refer to the TV or VCR User's Manual.
5. Play the tape.
Notes
■
You may use a S-VIDEO cable (not supplied) to obtain better quality pictures if you have a S-VIDEO connector on your TV.
■
Even if you use a S-VIDEO cable, you need to connect an audio cable.
■
If you connect the cable to the A/V Jack, you will not hear sound from the speakers.
7878
Camcorder
Playback
RECORD
M.PLAY
Connecting to a TV which has No Audio and Video Input Jacks
✤ You can connect your camcorder to a TV through a VCR.
ENGLISH
1. Connect the camcorder to the VCR with the Audio/Video cable.
■
The Yellow plug : Video
■
The White plug : Audio(L)
■
The Red plug : Audio(R) - STEREO only
2. Connect the TV to the VCR.
3. Set the device to CAMCORDER.
4. Set the power switch to PLAYER mode.
5. Turn on both the TV and VCR.
■
Set the input selector on the VCR to LINE.
■
Select the channel reserved for your VCR on the TV set.
6. Play the tape.
Playback
✤ You can play the recorded tape in PLAYER mode.
1. Connect a power source and set the device to CAMCORDER.
2. Set the power switch to PLAYER mode.
3. Using the (FF) and (REW) buttons, find the first position
you wish to play back.
4. Press the (PLAY/STILL) button.
■
The images you recorded will appear on the TV after a few seconds.
■
If a tape reaches its end while being played back, the tape will rewind automatically.
Note
■
The playback mode (SP/LP) is selected automatically.
ANTENNA
VCR
VIDEO
AUDIO(L)
AUDIO(R)
S-VIDEO
S-VIDEO
TV
A/V
CAMCORDER
7979
ENGLISH
FADE
S.SHOW
BLC
REV FWD
M
E
M
O
R
Y
TAPE
DELETE
R
E
C
P
L
A
Y
O
FF
Playback
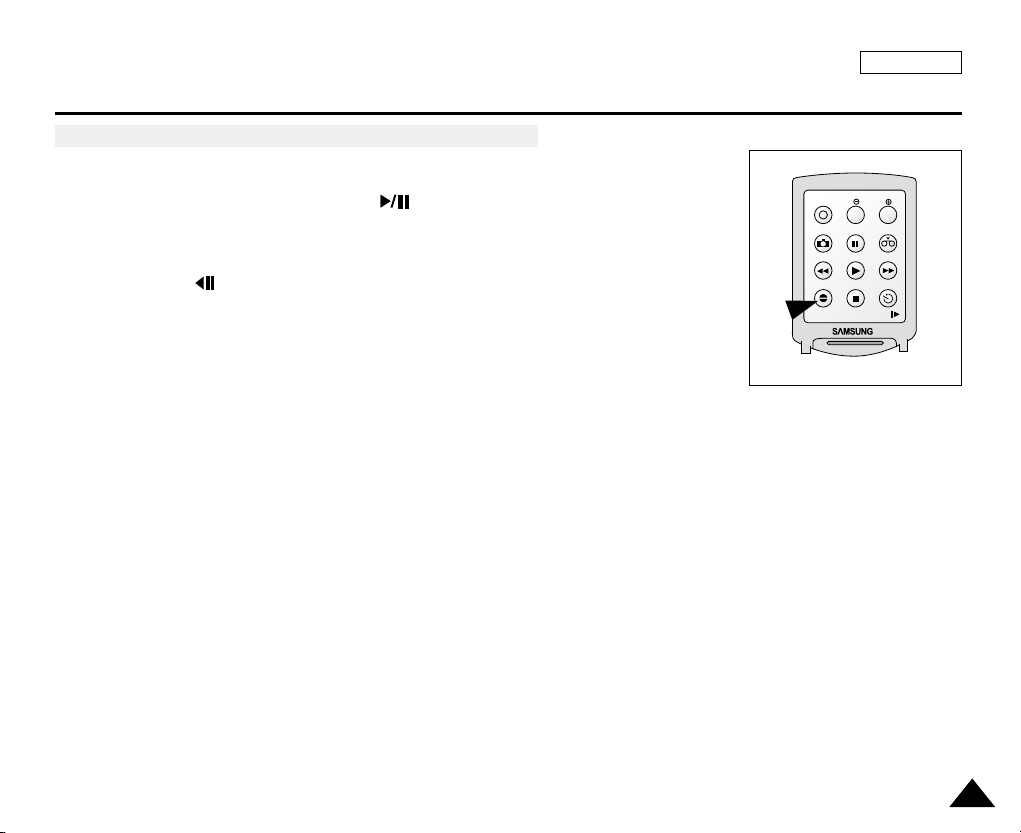
Various Functions while in PLAYER Mode
✤ The PLAY/STILL, STOP, FF, REW buttons are located on the camcorder and the Remote Control.
✤ The F.ADV(Frame advance), SLOW buttons are located on the Remote Control only.(SCD5000 only)
✤ To prevent tape and head-drum wear, your camcorder will automatically stop if it is left in STILL or SLOW modes for more
than 5 minutes.
Playback Pause
✤ Press the (PLAY/STILL) button during Playback.
✤ To resume playback, press the (PLAY/STILL) button again.
Picture Search - Forward/Reverse
✤ Press the (FF) or (REW) buttons once during Playback or while in Still mode.
To resume normal playback, press the (PLAY/STILL) button.
✤ Keep pressing the (FF) or (REW) buttons during Playback or while in Still mode.
To resume normal playback, release the button.
START/STOP
Slow Playback - Forward/Reverse (SCD5000 only)
✤ Forward Slow Playback
■
Press the SLOW button on the remote control during Playback.
■
To resume normal playback, press the (PLAY/STILL) button.
✤ Reverse Slow Playback
■
Press the (_) button during Forward Slow Play back.
■
To resume forward slow playback, press the (+) button.
■
To resume normal playback, press the (PLAY/STILL) button.
8080
F.ADV
TW
PHOTO
STILL ZERO MEM.
REW/RPS
PLAY FF/FPS
A.DUB STOP SELF TIMER
SLOW
Playback
START/STOP
PHOTO
REW/RPS
A.DUB STOP SELF TIMER
SLOW
PLAY FF/FPS
STILL ZERO MEM.
F.ADV
TW
Frame Advance - To Play back Frame by Frame (SCD5000 only)
●
Press the F.ADV button on the Remote Control while in Still mode.
The F.ADV function works only in Still mode.
●
To resume normal playback, press the (PLAY/STILL) button.
✤ Forward Frame Advance
■
Press the F.ADV button on the remote control while in Still mode.
✤ Reverse Frame Advance
■
Press (_) the button on the remote control to change the direction of the
F.ADV mode.
■
Press the F.ADV button on the remote control.
ENGLISH
8181

ENGLISH
Playback
ZERO MEMORY(SCD5000 only)
✤ The MEMORY function works in both CAMERA and PLAYER modes.
✤ You can mark a point on a tape that you want to return to following playback.
1. Press the ZERO MEMORY button on the remote control during playback or while recording at the point you wish to return to.
■
The time code is changed to a tape counter that is set to Zero Memory with the 0:00:00(Zero Memory Indicator)
■
If you want to cancel the Zero Memory function, press the ZERO MEMORY button again.
2. Finding the Zero Position.
■
When you have finished playback, fast forward or rewind the tape.
- The tape stops automatically when it reaches the Zero Position.
■
When you have finished recording, press the power switch on the PLAYER and press the (REW) button.
- The tape stops automatically when it reaches the zero position.
M
3. The tape counter with the (Zero Memory Indicator) disappears from the display and the tape counter is
M
changed back to time code.
Notes
■
In the following situations, ZERO MEMORY mode may be canceled automatically:
- At the end of the section marked with the ZERO MEMORY function.
- When the tape is ejected.
- When you remove the battery pack or power supply.
■
The Zero Memory may not function correctly when there is a break between recordings on the tape.
8282

ENGLISH
TAPE PLAY MODE
INITIAL
RECORD SET
PLAY SET
CAMCORDER
CAMERA
MEMORY
VIEWER
CAMCORDER SET
RECORD SET
PLAY SET
TAPE PLAY MODE
TAPE PLAY MODE
CAMCORDER SET
PLAY SET
PB DSE SELECT
PHOTO SEARCH
PHOTO COPY
AUDIO SELECT
SOUND1
TAPE PLAY MODE
PB DSE SELECT
PLAY SET
OFF
MIRROR
MOSAIC
Playback
PB DSE (Playback Digital Special Effects)
✤ The PB DSE function works in PLAYER mode.
✤ The PB DSE function enables you to apply a Digital Special Effect (DSE) to the tape during playback or to a still image.
1. Set the device to CAMCORDER and set the Power Switch to
PLAYER mode
2. Playback a tape.
3. Press the MENU button and turn the MENU DIAL to highlight
CAMCORDER.
4. Press the MENU DIAL to enter the sub-menu.
5. Select PLAY SET and press the MENU DIAL.
6. Select PB DSE SELECT from the sub-menu and press the MENU
DIAL.
7. Select a PB DSE item (OFF, Mirror, Mosaic) from the sub-menu and
press the MENU DIAL.
8. To exit, press the MENU button.
9. To cancel the PB DSE function, set the PB DSE to OFF or press the STOP button.
Notes
■
You cannot apply the PB DSE function to the pictures which are being input from an external video source.
■
Once you modify an image using the PB DSE function, it cannot be imported to your PC from the camcorder’s DV jack.
8383
ENGLISH
Playback
PB ZOOM
✤ The PB ZOOM function works in PLAYER and M.PLAY mode.
✤ The PB ZOOM function enables you to magnify the playback or still image.
■
PLAYER mode : 1.2 - 8.0X
■
M.PLAY mode : 1.2 - 5.0X
1. Press the PB ZOOM button while in Playback mode or in Playback Still mode
2. The image is magnified starting from the center of image. Four arrows appear which
allow you to move the image in the four directions shown.
3. You can zoom in from 1.2x to 8.0x useing the zoom lever.
4. You can move the image in the arrow directions using the MENU DIAL.
5. You can change the arrow direction(vertical, horizontal) by pressing the MENU DIAL.
6. To cancel the PB ZOOM function, press the PB ZOOM or STOP button.
Notes
■
You cannot apply the PB ZOOM function to pictures which are being input
from an external video source.
■
The PB ZOOM images cannot be imported to your PC from the camcorder’s DV jack.
8484

ENGLISH
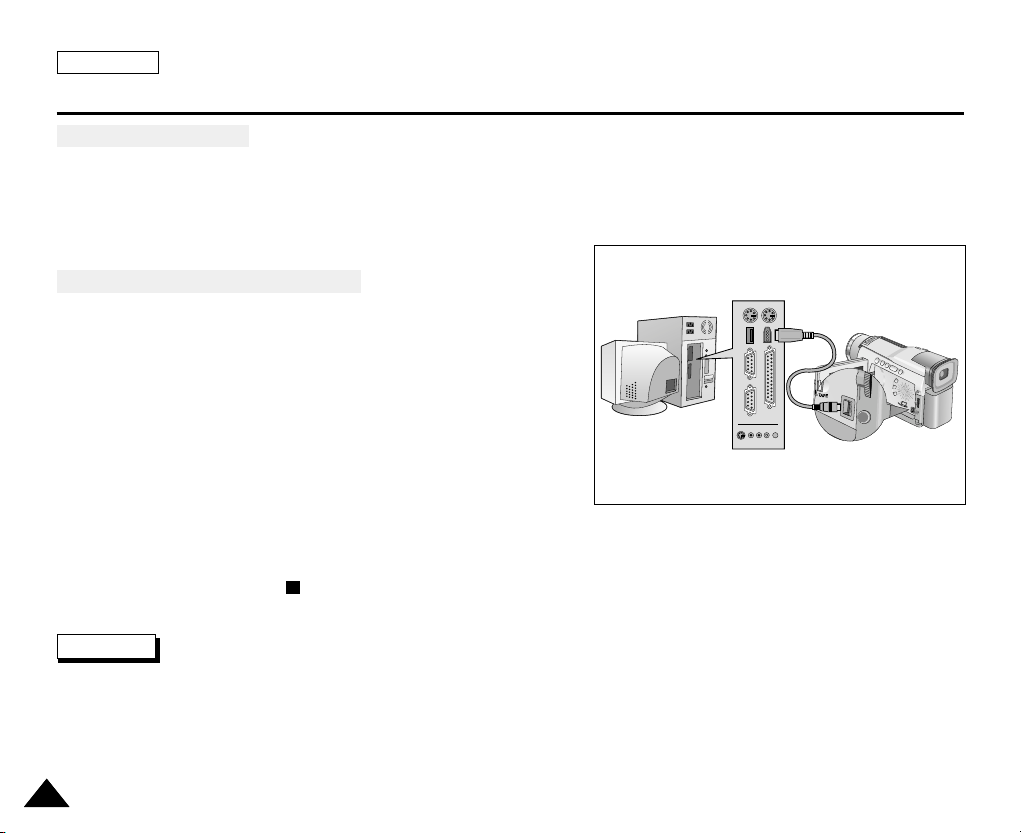
IEEE 1394 Data Transfer
Transferring Using IEEE1394 (i.LINK)-DV Standard Data Connections
Connecting to a DV Device
✤ Connecting with Other DV Standard Products.
■
A standard DV connection is quite simple.
If a product has a DV port, you can transfer data by connecting to the DV port using the correct cable.
!!! Please be careful since there are two types of DV ports, (4pin & 6pin). This camcorder has a 4pin terminal.
✤ With a digital connection, video and audio signals are transmitted in digital format, allowing high quality images
to be transferred.
Connecting to a PC
✤ If you want to transmit data to a PC, you must install an IEEE 1394 add-on card onto the PC. (not supplied)
✤ The frame rate recorded for video capturing is dependent on the capacity of the PC.
Notes
■
When you transmit data from the camcorder to another DV device, some functions may not work.
If this occurs, please reconnect the DV cable or turn the power OFF and ON again.
■
When you transmit data from the camcorder to the PC, the PC function button is not available in M.PLAY mode.
8585
ENGLISH
V
.
L
I
G
H
T
D
I
S
P
L
A
Y
P
B
Z
O
O
M
IEEE 1394 Data Transfer
●
System Requirements
■
CPU : Intel®(or compatible) Pentium III™ 450Mhz or faster.
■
Operating System : Windows®98SE, ME, XP, Mac OS (9.1~OS X)
■
Main Memory : More than 64 MB RAM
■
IEEE1394 Add-On Card or Built In IEEE1394 Card
Recording with a DV Connection Cable
1. Set the device to CAMCORDER and set the power switch to PLAYER mode.
2. Connect the DV cable (not supplied) from the DV IN/OUT port of
the camcorder to the DV IN/OUT port of the other DV device.
■
Make sure that DV IN appears on the screen.
3. Press the START/STOP button to begin REC PAUSE mode.
■
PAUSE is displayed on the OSD.
4. Start playback on the other DV device while you monitor the picture.
5. Press the START/STOP button to start recording.
■
If you want to pause the recording, press the START/STOP button again.
6. To stop recording, press the (STOP) button.
Note
When using this camcorder as a recorder, the pictures that appear on the monitor may seem uneven,
however recorded pictures will not be affected.
8686

Using the CAMERA
TM
TM
MEMORY STICK (SCD5000 only)
✤ The Memory Stick (SCD5000 only) stores and manages still images recorded by the camera.
Memory Stick Functions
✤ Record Still Images
✤ View Still Images
■
Single(View Frame by Frame)
■
Slide Show
✤ Protect Images Against Accidental Erasure
✤ Delete Images Recorded on the Card
✤ Add text to Still Images
✤ Formatting the Card
Note
■
You can use most of the camera's functions when recording to the Memory Stick.
■
appears on the screen while recording to the Memory Stick.
■
While recording or loading an image, do not eject or insert the Memory Stick.
- Inserting or ejecting a Memory Stick while recording or loading an image can cause data damage.
■
If you want to save all images on the Memory Stick, set the write protect tab on the Memory Stick to LOCK.
(SCD24 only)
ENGLISH
Terminal
Protection
tab
■
"Memory Stick" and are trademarks of Sony Corporation.
■
All other product names mentioned herein are the trademarks or registered trademarks of their respective companies.
Furthermore, "
TM
" and "®" will not be mentioned in each case in this manual.
8787
ENGLISH
Using the CAMERA
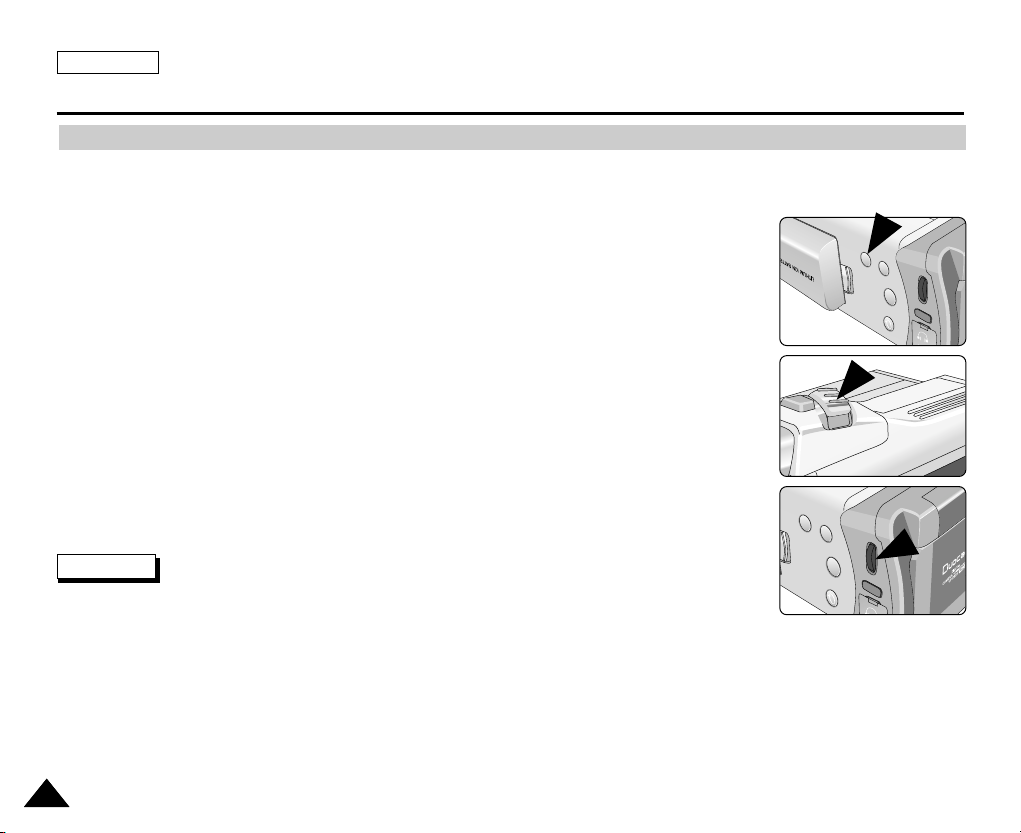
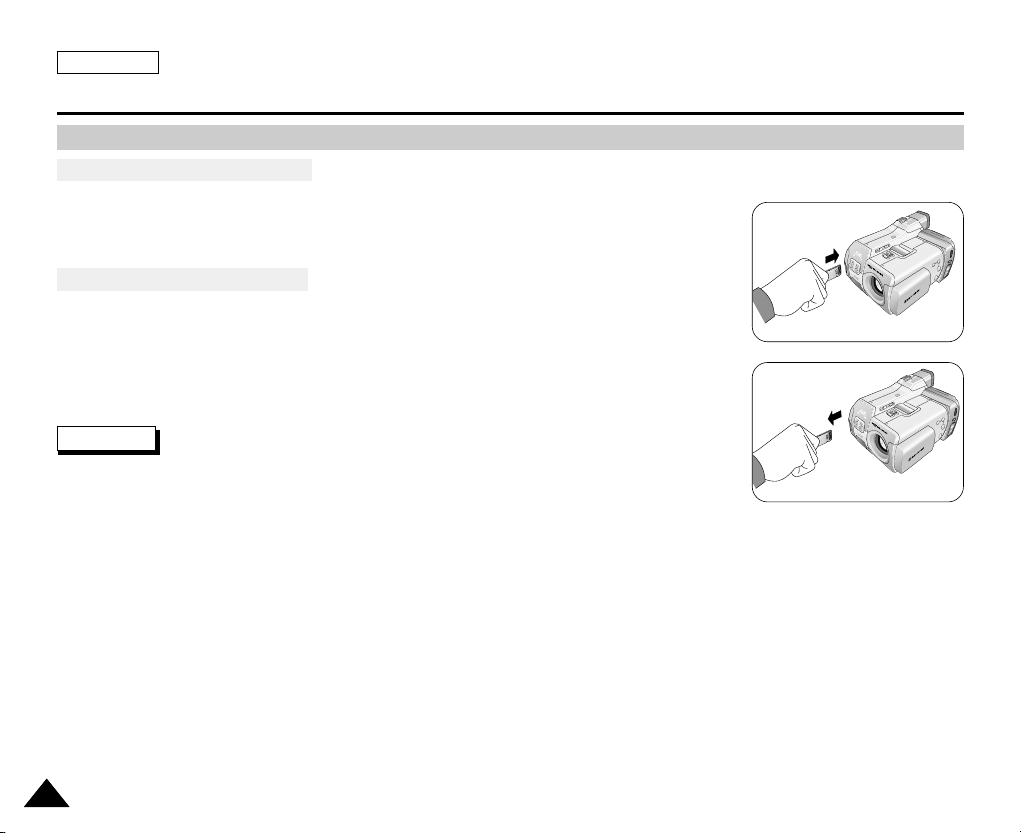
Inserting and Ejecting the Memory Stick
●
Inserting the Memory Stick
1. Turn the Power switch to OFF.
2. Insert the Memory Stick into the CARD slot in the direction of the arrow.
●
Ejecting the Memory Stick
1. Turn the Power switch to OFF.
2. Push the Memory Stick, and it will automatically come out of the camcorder.
3. Pull out the Memory Stick.
Note
■
If you set the camcorder to M.PLAY mode, the last recorded still image appears.
- If there are no recorded images on the Memory Stick, "NO STORED IMAGE!" will appear
on the screen.
■
Do not turn the power off while recording, loading, erasing or formatting.
■
Please turn the power off before you insert or eject the Memory Stick, otherwise.
you may lose data on the Memory Stick.
■
Do not allow metal substances to come in contact with the terminals of the Card.
■
Do not bend the Card.
■
After pulling the card out from the camcorder, please keep the Memory Stick in a soft case to prevent electrostatic shock.
■
The content stored on the Memory Stick may be changed or lost as a result of misuse, static electricity, electric noise or repair.
Save important images separately.
■
Samsung is not responsible for data loss due to misuse.
8888
Using the CAMERA
DCIM
100 SSDVC
DCAM 0001
DCAM 0002
101SSDVC
.
.
.
.
File number
Folder number
000-0000
*MEM/P
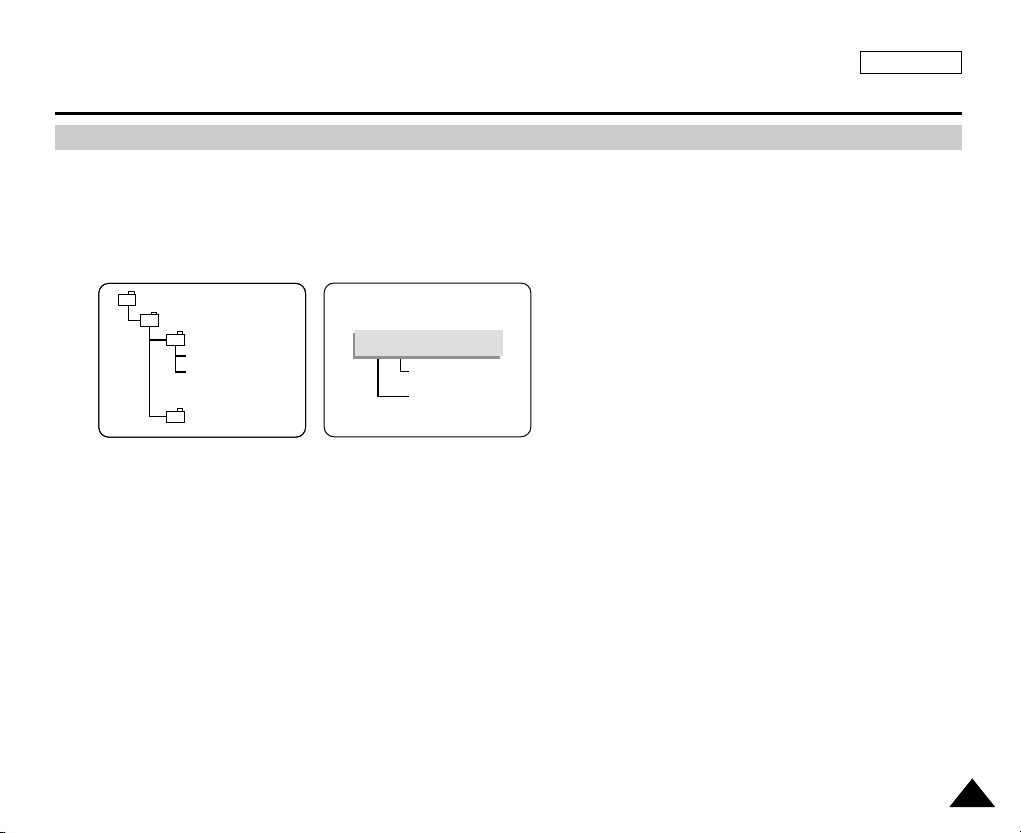
Structure of the Folders and Files on the Memory Stick
✤ The still images that you recorded are saved in JPEG file format on the card.
✤ Each file has a file number and all files are assigned to a folder.
■
A file number from DCAM0001 to DCAM9999 is sequentially assigned to each recorded image.
■
Each folder is numbered from 100SSDVC to 999SSDVC and recorded on the CARD.
ENGLISH
8989
 Loading...