

Page 1
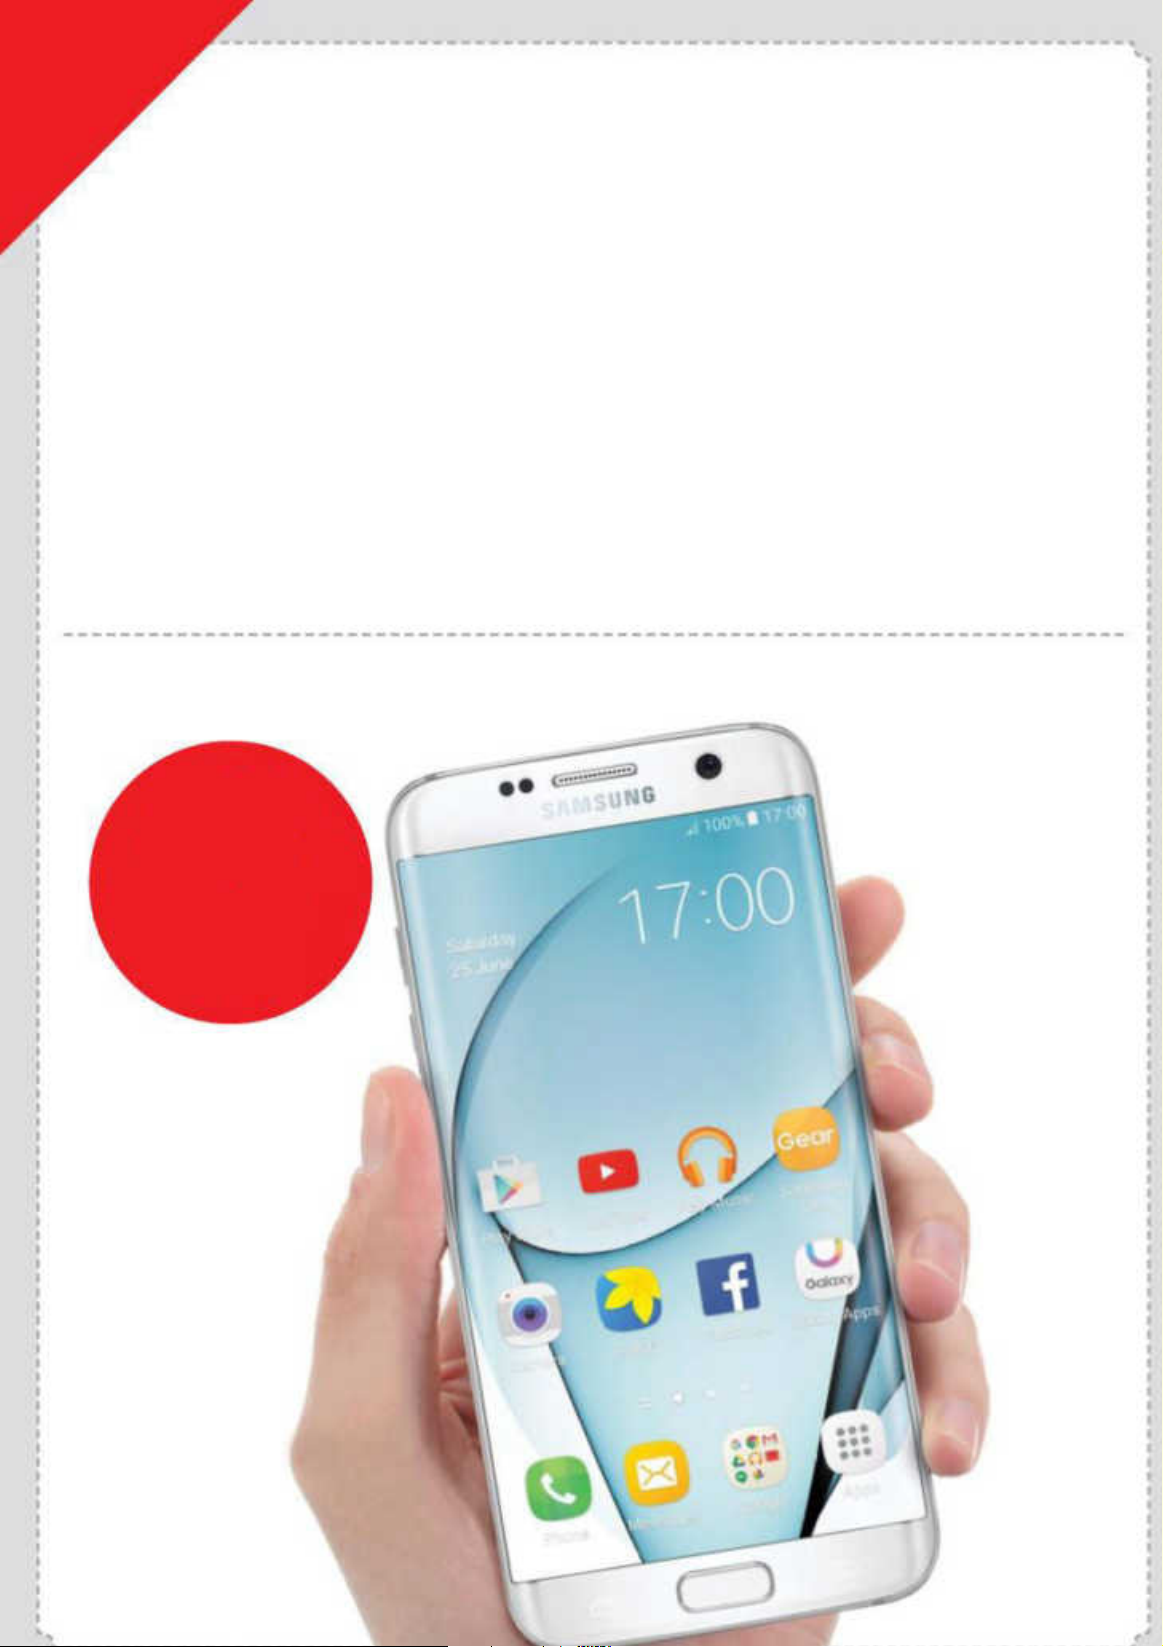
NEW
Samsung
Galaxy
The Complete Manual
The independent handbook for Galaxy users
For Tab,
Note, S6 &
S7
Page 2

Page 3
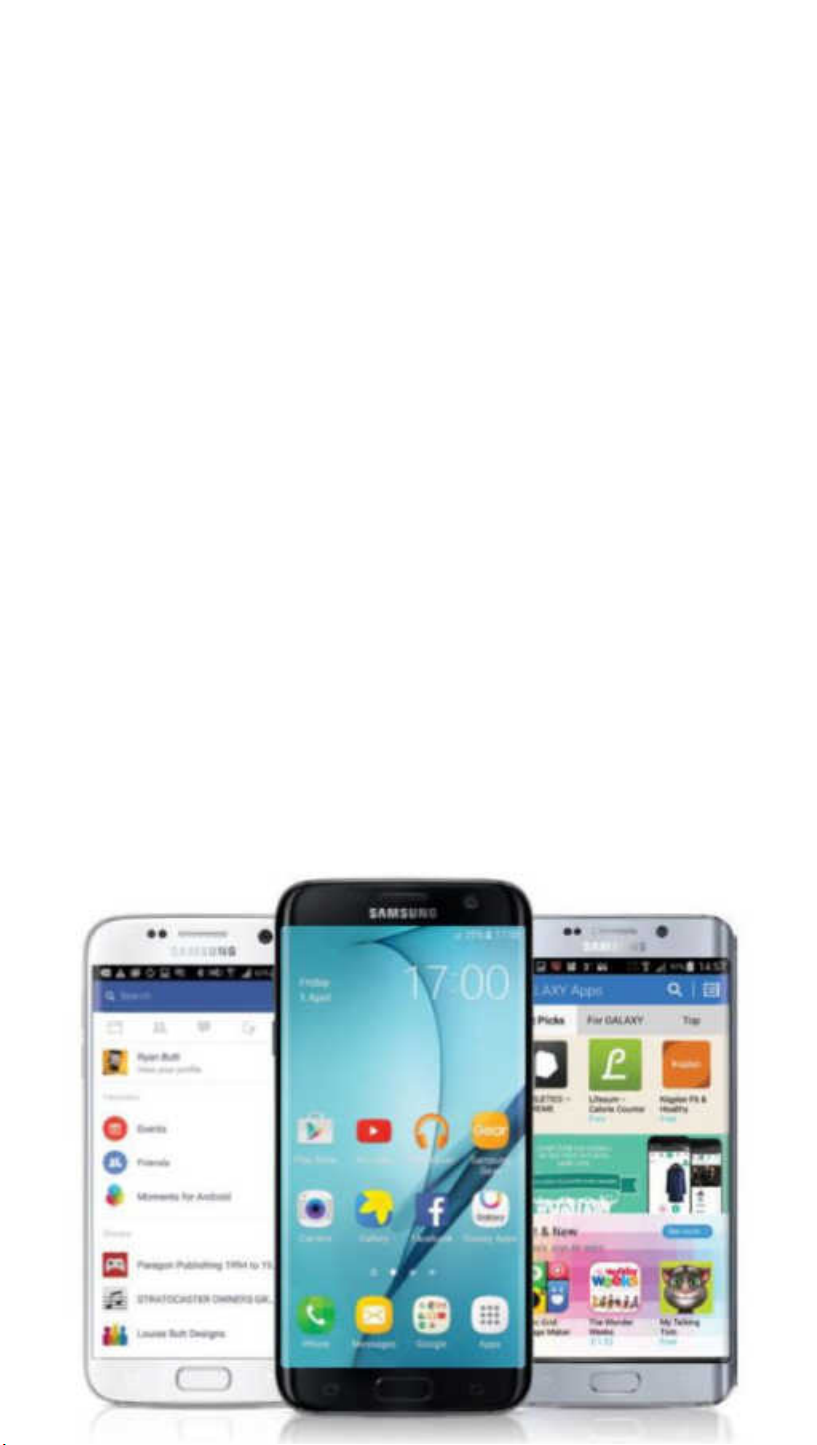
Welcome to
Samsung
Galaxy
The Complete Manual
Samsung’s Galaxy range of Android devices continues
to set the bar when it comes to mobile innovation.
Whether it’s the S7, S6 Edge+, Tab A or Note, each Galaxy
combines superb hardware with a range of fantastic built-
in software. In this revised edition of Samsung Galaxy The
Complete Manual, we take you through everything you
need to know to get the most from your Galaxy. From
how to make use of your device’s camera, to how to
connect to an Android Wear device, read on to get started
on your way to becoming a Galaxy expert.
Page 4

Page 5

Samsung
Galaxy
The Complete Manual
Imagine Publishing Ltd
Richmond House
33 Richmond Hill
Bournemouth
Dorset BH2 6EZ
+44 (0) 1202 58620 0
Website: www.imagine-publishing.co.uk
Facebook: www.facebook.com/ImagineBookazines
Twi tter: @Books_Imagine
Publishing Director
Aaron Asadi
Head of Design
Ross Andrews
Editor in Chief
Jon White
Production Editor
Sanne de Boer
Senior Art Editor
Greg Whitaker
Assistant Designer
Sophie Ward
Photographer
James Sheppard
William Gibbons, 26 Planetary Road, Willenhall, West Midlands, WV13 3XT
Distributed in the UK, Eire & the Rest of the World by
Marketforce, 5 Churchill Place, Canary Wharf, London, E14 5HU
Tel 0203 148 3300, www.marketforce.co.uk
Gordon & Gotch Australia Pty Ltd, 26 Rodborough Road, Frenchs Forest, NSW 2086, Australia
Tel +61 2 9972 8800, www.gordongotch.com.au
The publisher cannot accept responsibility for any unsolicited material lost or damaged in the post. All text and layout is
the copyright of Imagine Publishing Ltd. Nothing in this bookazine may be reproduced in whole or part without the written
permission of the publisher. All copyrights are recognised and used specifically for the purpose of criticism and review.
Although the bookazine has endeavoured to ensure all information is correct at time of print, prices and availability
may change. This bookazine is fully independent and not affiliated in any way with the companies mentioned herein.
Samsung products are trademarks of Samsung Electronic Co. Ltd
Samsung is a trademark of Samsung in the United States & other countries
Samsung Galaxy The Complete Manual Twelfth Edition © 2016 Imagine Publishing Ltd
Printed by
Distributed in Australia by
Disclaimer
ISBN 9781785463358
Page 6
Contents
What you can nd inside the bookazine
Getting started The apps
8 Introducing the
Samsung Galax y
14 Setting up your
Samsung Galaxy
18 The first steps
Home screen and gestures
32 Settings, part 1
Network
connections
34 Settings, part 2
Personalise your
Samsung Galaxy
38 Settings, part 3
Change the
device settings
42 Android Wear
Connect to your
Wear device
44 Google Play
Download apps
and media
50 Galaxy Apps
Find discounts
and collections
54 Phone
Make a regular
phone call
58 Contacts
Store people’s
contact details
62 Messaging
Send SMS and
MMS messages
66 Hangouts
Keep in touch
with Google
68 Email
Access multiple
email accounts
72 Internet
Browse the
World Wide Web
76 Camera
Take photos
anywhere
80 Gallery
View images
and videos
82 Story Album
Display your
favourite photos
22 How to use your
Samsung Galaxy
30 Applications
A guide to the native apps
S7, S6 Edge+, Tab, Note,
Alpha: there really is a
Galaxy device for every
Android user out there
6
Page 7
me
Bec
o
l
a
a Ga
er in
mast
minut
84 Kindle for
Samsung
Read books
88 Music Player
Listen to tunes
on the go
xy
es
92 Video Player
Watch HD videos
on your device
96 Kids Mode
Tailor your
device for kids
98 Group Play
Play and share
across devices
102 C h r o m e c a s t
Stream videos
from your device
104 Maps
Use turn-by-turn
navigation
108 Google Drive
Store your files
on the cloud
110 Google Now
Stay up to date
with Google
112 S Note
Write and draw
notes by hand
114 S Planner
Keep track of
dates and tasks
116 S Voice
Control apps
with your voice
118 S Health
Get fit
and healthy
12 2 S Translator
Converse abroad
with your Galaxy
124 Facebook
Update your
status and more
Cast your favourite videos to the big screen
Track your calorie intake and BPM
12 6 Twitter
Tweet wherever
you are
7
Page 8
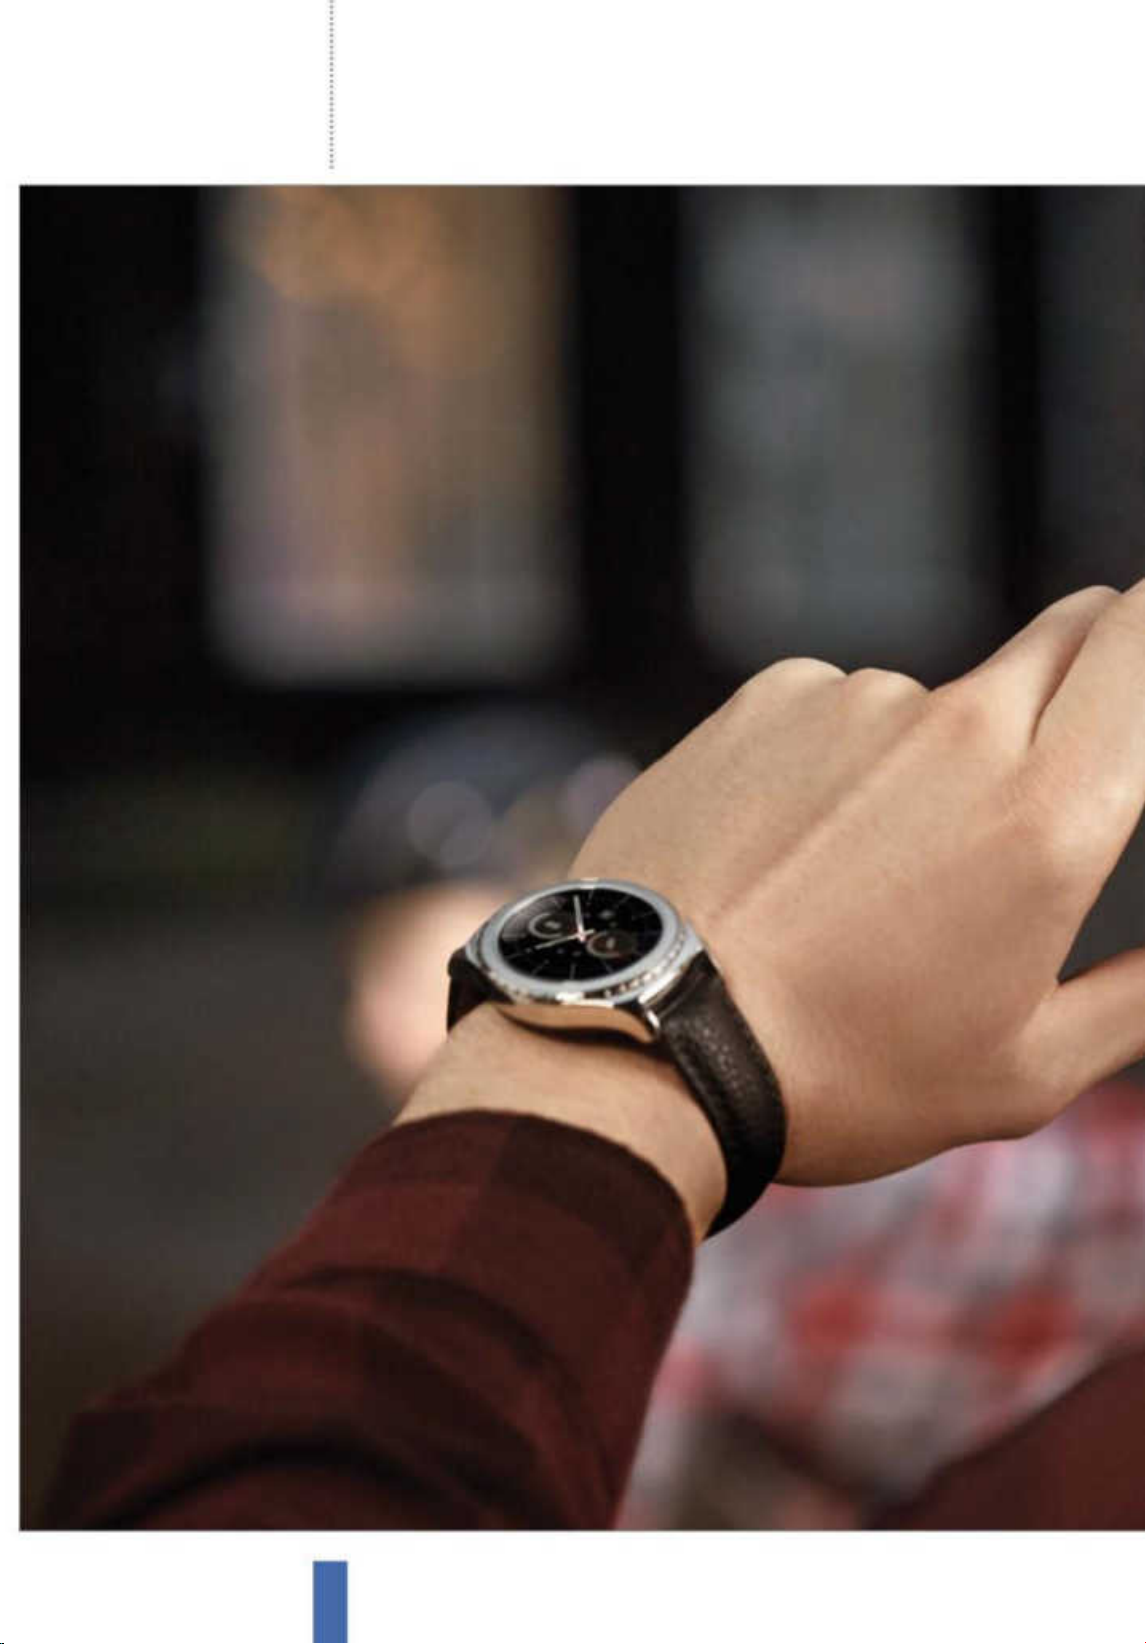
Getting started Introducing the Samsung Galaxy
Introducing the
Samsung Galaxy
Just got a Samsung Galaxy device? Then discover how hard
it can work on your behalf
Smartphones and tablets could be considered something of a beauty and
the beast of the modern age. They are certainly beautiful to look at, many
boasting sleek and stylish designs that are comfortable to hold and jawdropping in terms of design. And the sheer amount of functionality that
is crammed into their compact units is nothing short of incredible.
However, with such astounding wonder comes the beastly
downside that we simply can’t stop staring at them – they
are just so distracting! If you read on, we’ll outline exactly
why you’ll nd it hard to put your Galaxy device down.
Whether it’s because of the look and feel of your
smartphone or tablet, the intuitive operating
system or the huge number of apps you
can download and install, before too
long you’ll be hooked.
8
Page 9
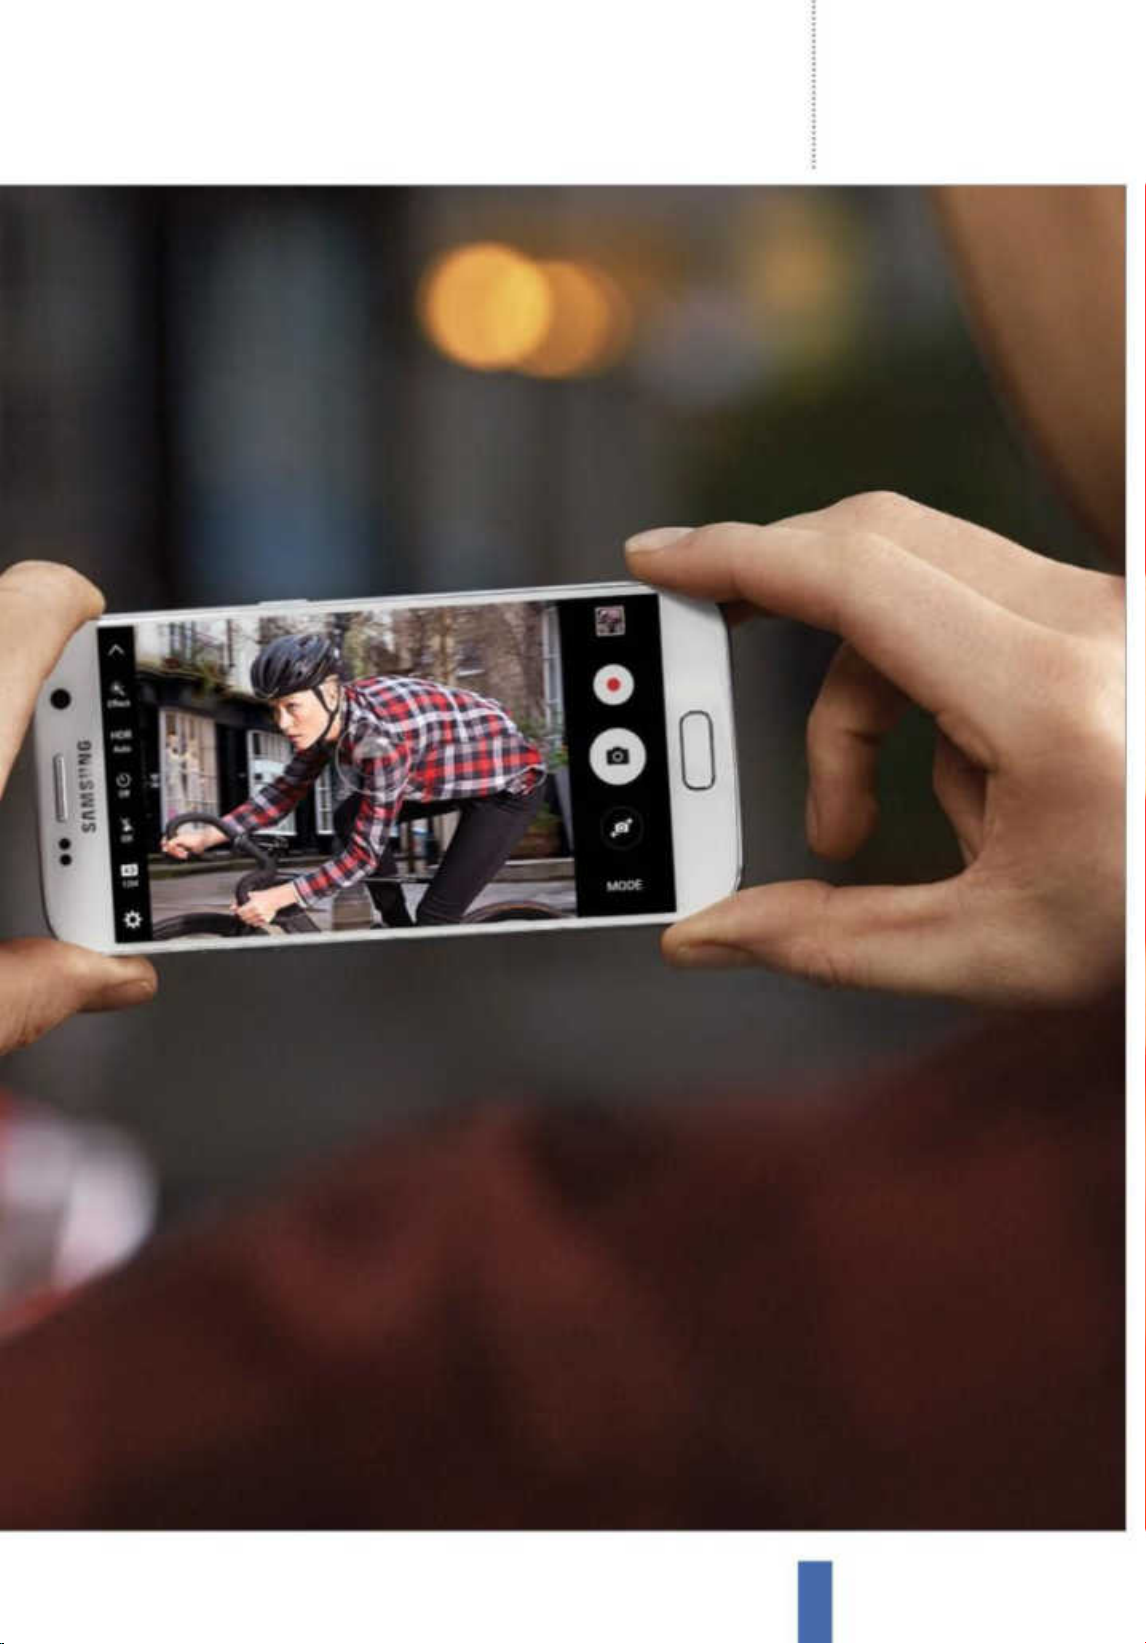
Getting startedIntroducing the Samsung Galaxy
“We’ll outline exactly why
you’ll nd it hard to put your
Galaxy device down”
9
Page 10
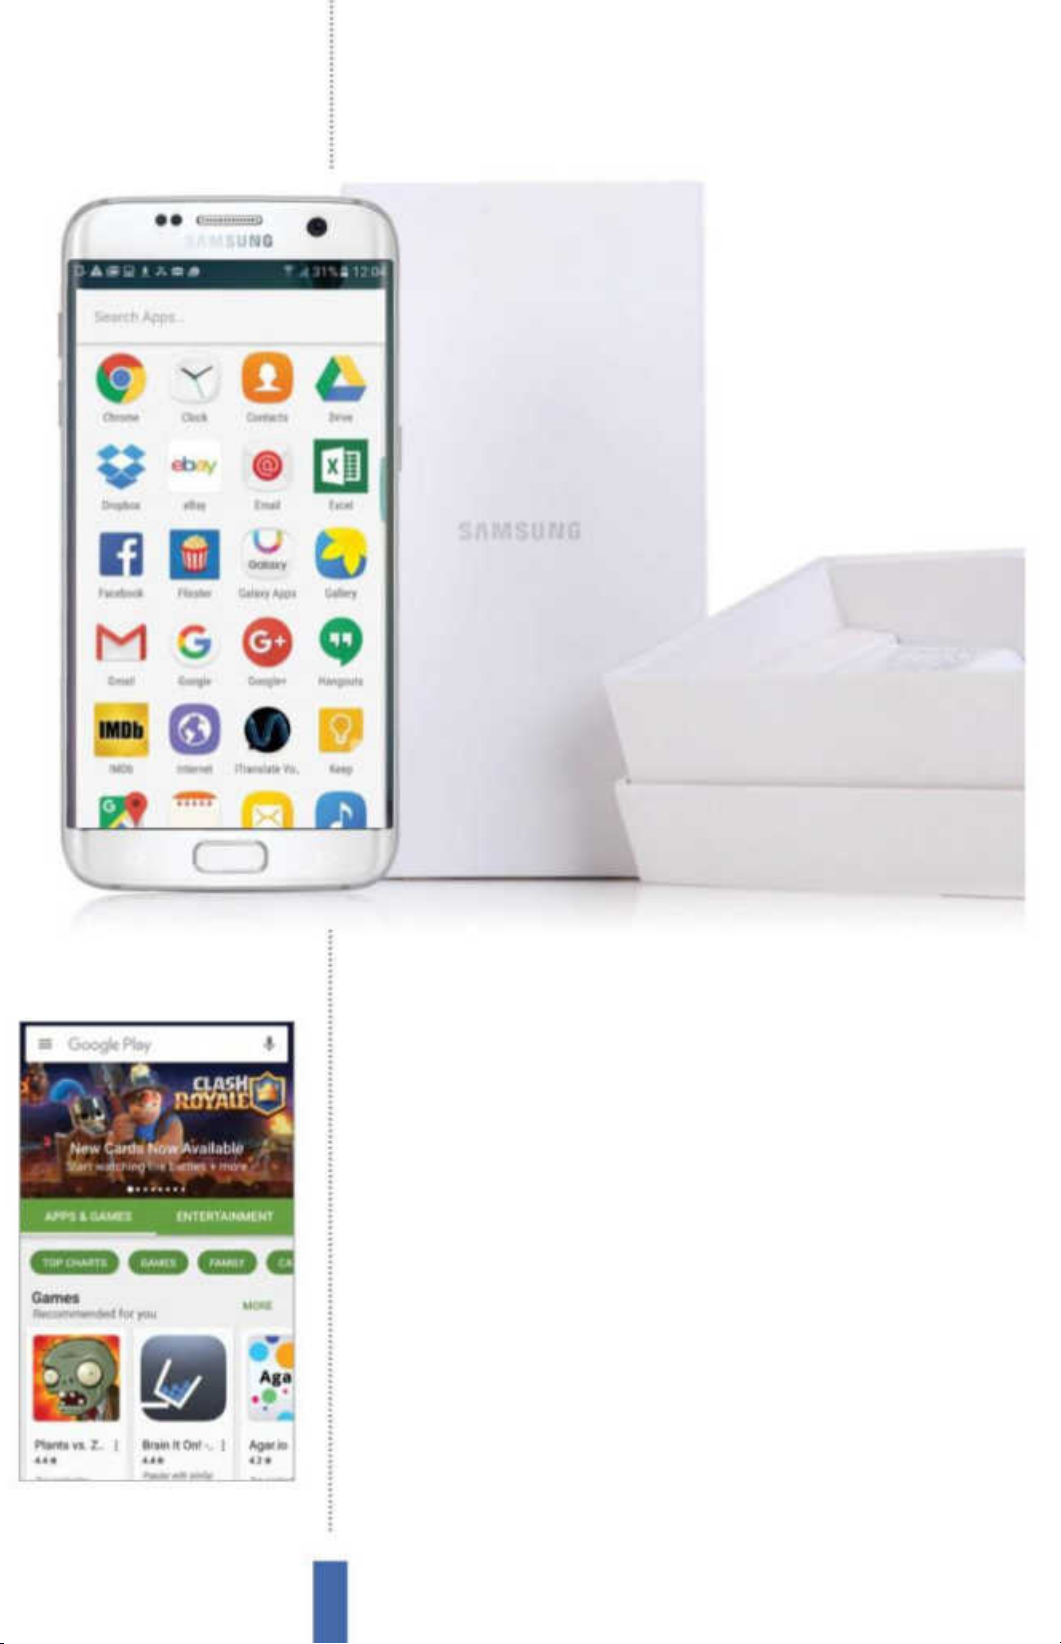
Getting started Introducing the Samsung Galaxy
Fig 1 The Google Play Store is your first port
of call for the latest and greatest apps
Hardware
Galaxy devices are versatile micro-computers that are capable of
managing every aspect of your life – and there’s a model to suit
everyone. The Samsung Galaxy S7 is poised to take over as the
company’s agship device, boasting exquisite design, an ultraresponsive interface, an impeccably sharp display and lightningquick charging to keep it all topped up. The S7, along with the S6
Edge, also runs the latest Android operating system, which crams
even more functionality into your device. But while older models of
Galaxy smartphones may be limited to the version of the Android
OS they can run, they still boast a range of great features to make
communicating and managing your life as e ortless as possible.
If you prefer a bigger screen to work remotely or enjoy a lm then
the Galaxy Tab range is perfect. The dimensions of these devices
vary, and include a 10.5-inch screen down to a smaller, but no less
staggering 8.4-inch display. Finally there is the Galaxy Note range,
which is geared towards working. The Galaxy Note Edge even has a
curved screen, the ‘edge’ of which displays all of your noti cations.
10
Page 11
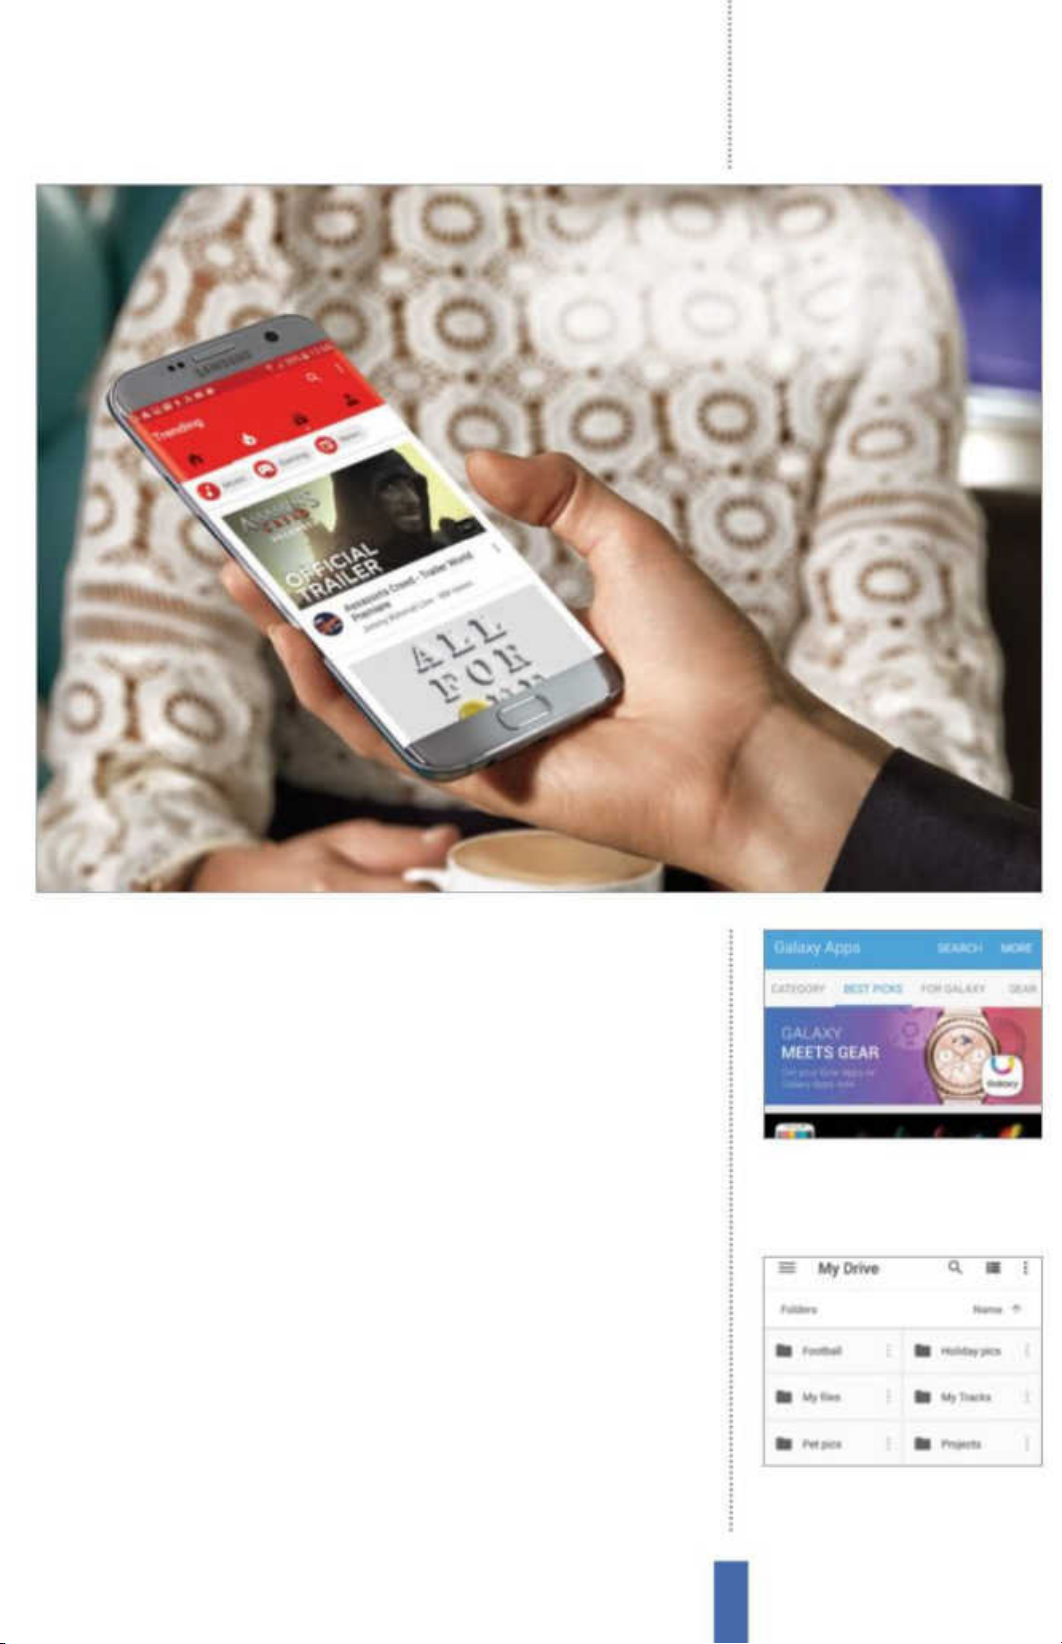
Getting startedIntroducing the Samsung Galaxy
“A stable of favourite
apps come pre-installed
on all Galaxy devices”
OS/Apps
As we have already mentioned, Galaxy devices run on Google’s
Android operating system, which provides a wide range of apps
and functions instantly. A stable of favourite apps that come preinstalled on your device include the Chrome web browser, Gmail,
Maps and Google’s media suite – Play Music, Play Movies & TV, Play
Newsstand and Play Games. Then, of course, there is the Play Store
app, which is your rst port of call for all of the latest and greatest
Android apps (as well as music, movies, books and games). Galaxy
devices are also well provided for by Samsung too. TouchWiz is
Samsung’s own user interface that makes controlling Galaxy devices
easier by providing shortcuts to your everyday tasks – and it is
layered over the top of the Android interface with the two working
in perfect unison. You will also nd the Galaxy Apps service preinstalled on your Galaxy device, which provides instant access to
Samsung’s own app store. Though not as expansive or varied as
the Google Play Store, this is still a great place to come for Galaxyexclusive apps that may not come pre-installed on your device.
Fig 2 The Galaxy Apps store is the place
to go for apps to get the most out of your
Samsung device
Fig 3 Google Drive comes pre-installed on
your device and allows you to store your
important files in the cloud
11
Page 12
Getting started Introducing the Samsung Galaxy
Essential Galaxy
downloads
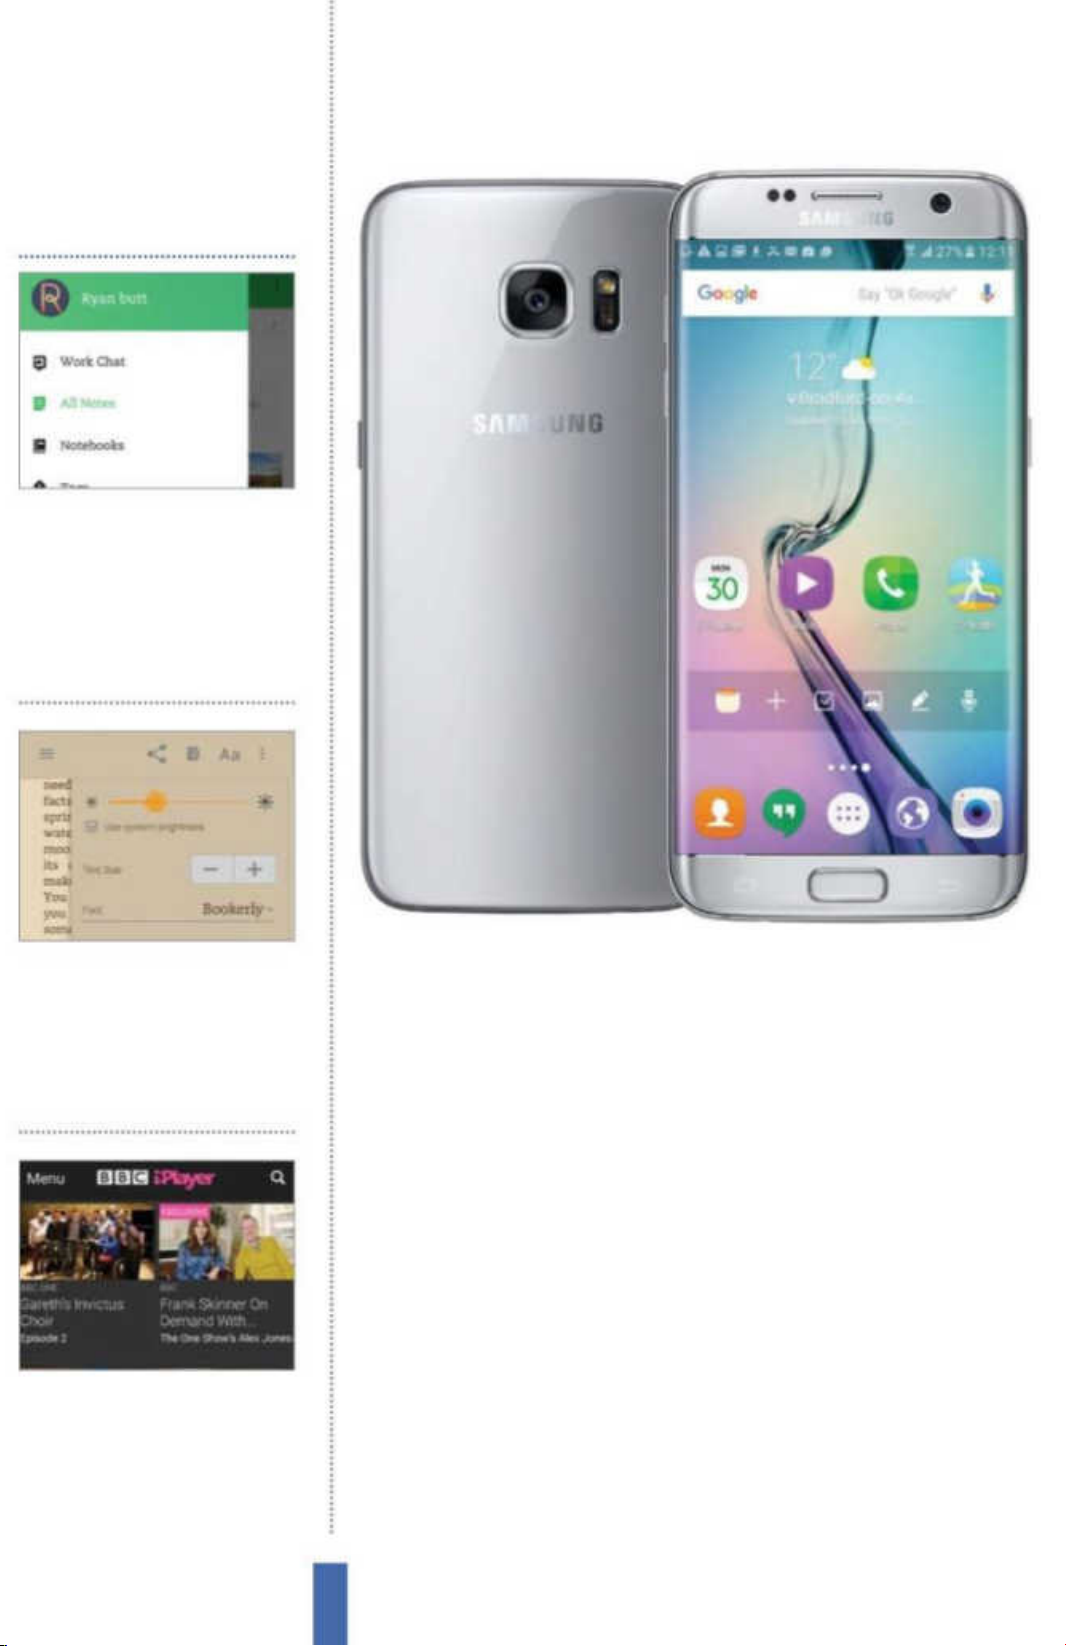
Evernote This brilliant app makes
it hard to forget anything as you
can create quick and easy typed,
handwritten, voice or photo
notes whenever you need to.
Everything you create is synced
and updated on all your devices.
Kindle Reading on your Galaxy
has never been easier thanks
to Kindle’s online store, where
you can download ebooks
to read instantly, and a set of
customisable display options.
BBC iPlayer With a decent Wi-Fi
connection you can stream or
download the latest BBC TV
shows to enjoy when you want.
This is just one of many quality
streaming services available.
Functions
As well as being infernal distractions, smartphones and tablets
provide many positive uses to help you manage all aspects of your
life. If you require your Galaxy device to work remotely then you’ll
nd a wide range of apps available for word processing, creating
and editing spreadsheets and putting together presentations – and
everything can be saved and synced to select cloud computing
apps, such as Drive and Dropbox, to ensure everyone concerned
is working from the same document. If you just want to relax
then you can, of course, use your device to play the latest movies
downloaded or streamed from places such as Google Play Movies
& TV and Net ix, or use it to enjoy a wide range of games, many of
which give the specialist console devices a run for their money.
Your Galaxy device can also be used to keep t and stay in shape.
Not only are there apps to help you monitor your daily exercise and
calorie intake, apps like YouTube also provide instant access to keep t videos. Whatever you need or want from your Galaxy device,
you’ll soon discover that, as the saying goes, “there’s an app for that!”
12
Page 13
Galaxy accessories
Getting startedIntroducing the Samsung Galaxy
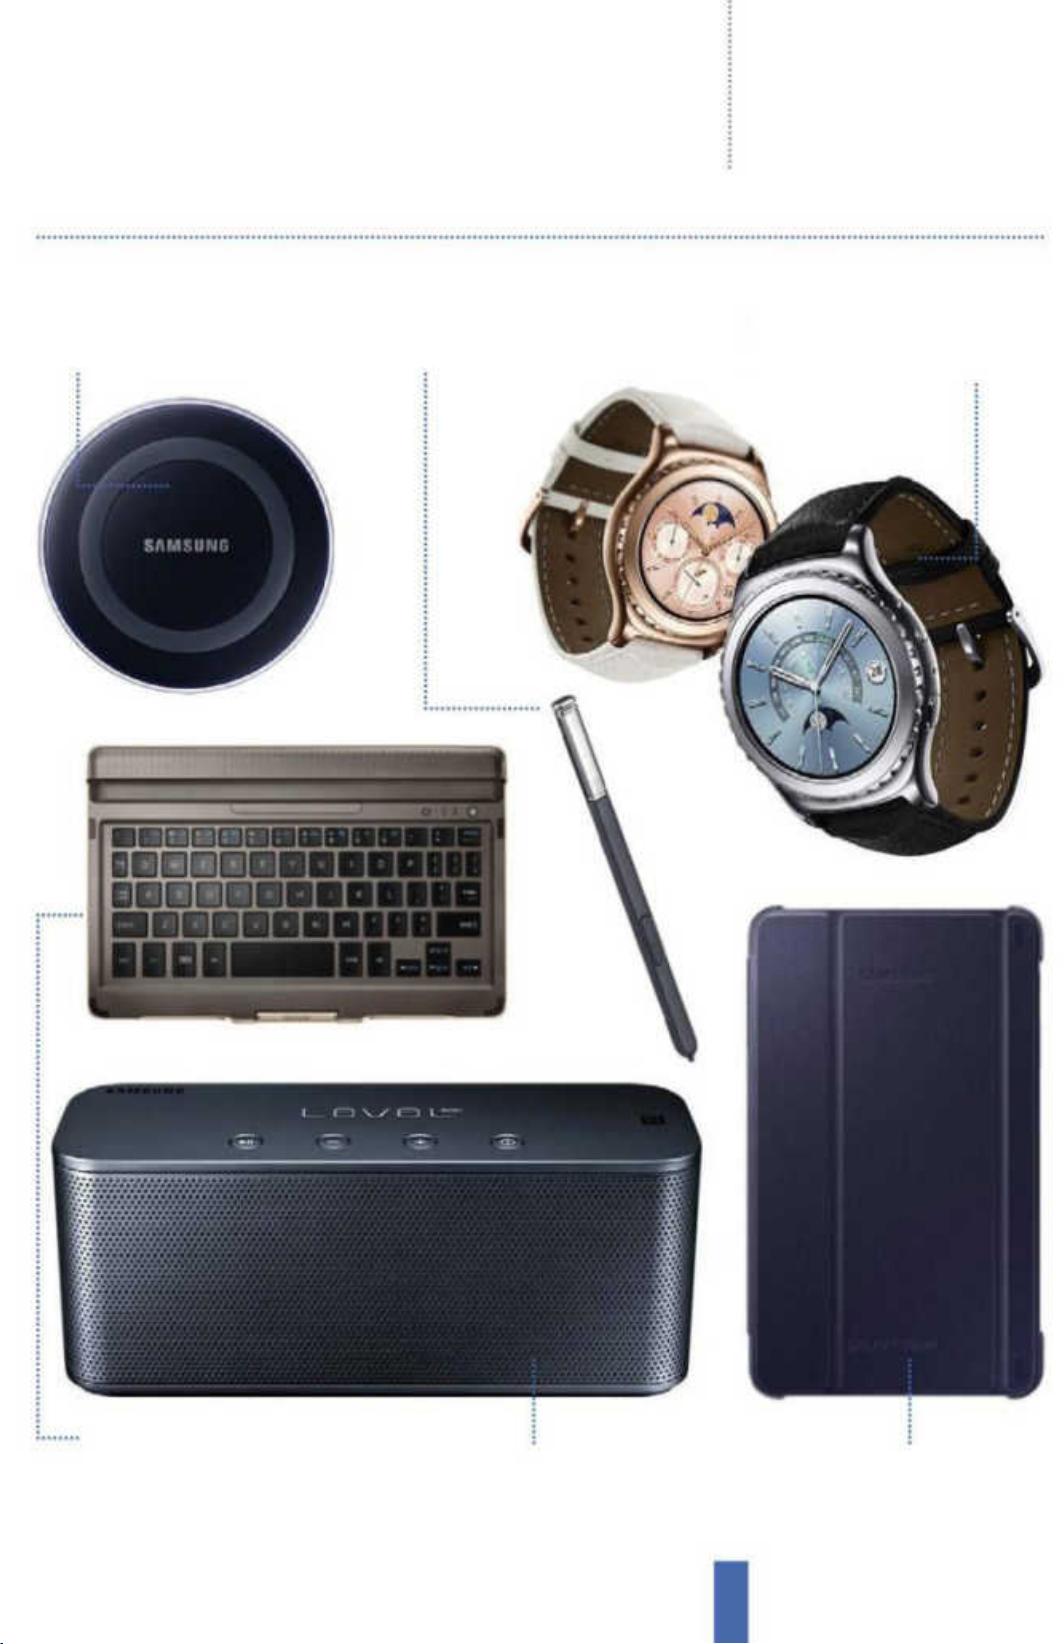
Wireless charging pad
If there is a curse of the modern mobile age the n
it is the amount of charging leads hanging out
of our walls. This device lest you charge up your
Galax y devices simp ly by placing them on top.
Galaxy Note S Pen
This sle ek and stylish stylus is designed f or use
with the Note 4 or Note Edge device, although it
can also come in handy for navigating fiddly l ittle
smartphone keypads without removing your gloves.
Samsung Gear S2 Classic
This classic-looking watch gives you the
freedom to enjoy a smart mobile experience
without having to have your phone in
hand. You can m ake and receive calls, check
direc tions, monito r your fitness and more.
Galaxy Tab S Bluetooth Keyboard
The touch-screen interface has never been
ideall y suited to typing, but wit h a wireless
keyboard such as this one you can touch-typ e
with confidence that all of your button presses
will be acknowledged.
LEVEL Box mini wireless speaker
As smar tphones and t ablets can be used
to store all of your digital music and m ovie
collec tions, investing in a wirel ess speaker to
blast them out is definitely worth considering.
Book cover
As your Galaxy device is undoubtedly
worth a lot of money, it ma kes good sense
to protect it with a de cent cover that can
absorb the shock s and scratches that come
as a result of dropping your device.
13
Page 14
Getting started Setting up your Samsung Galaxy
Setting up your
Samsung Galaxy
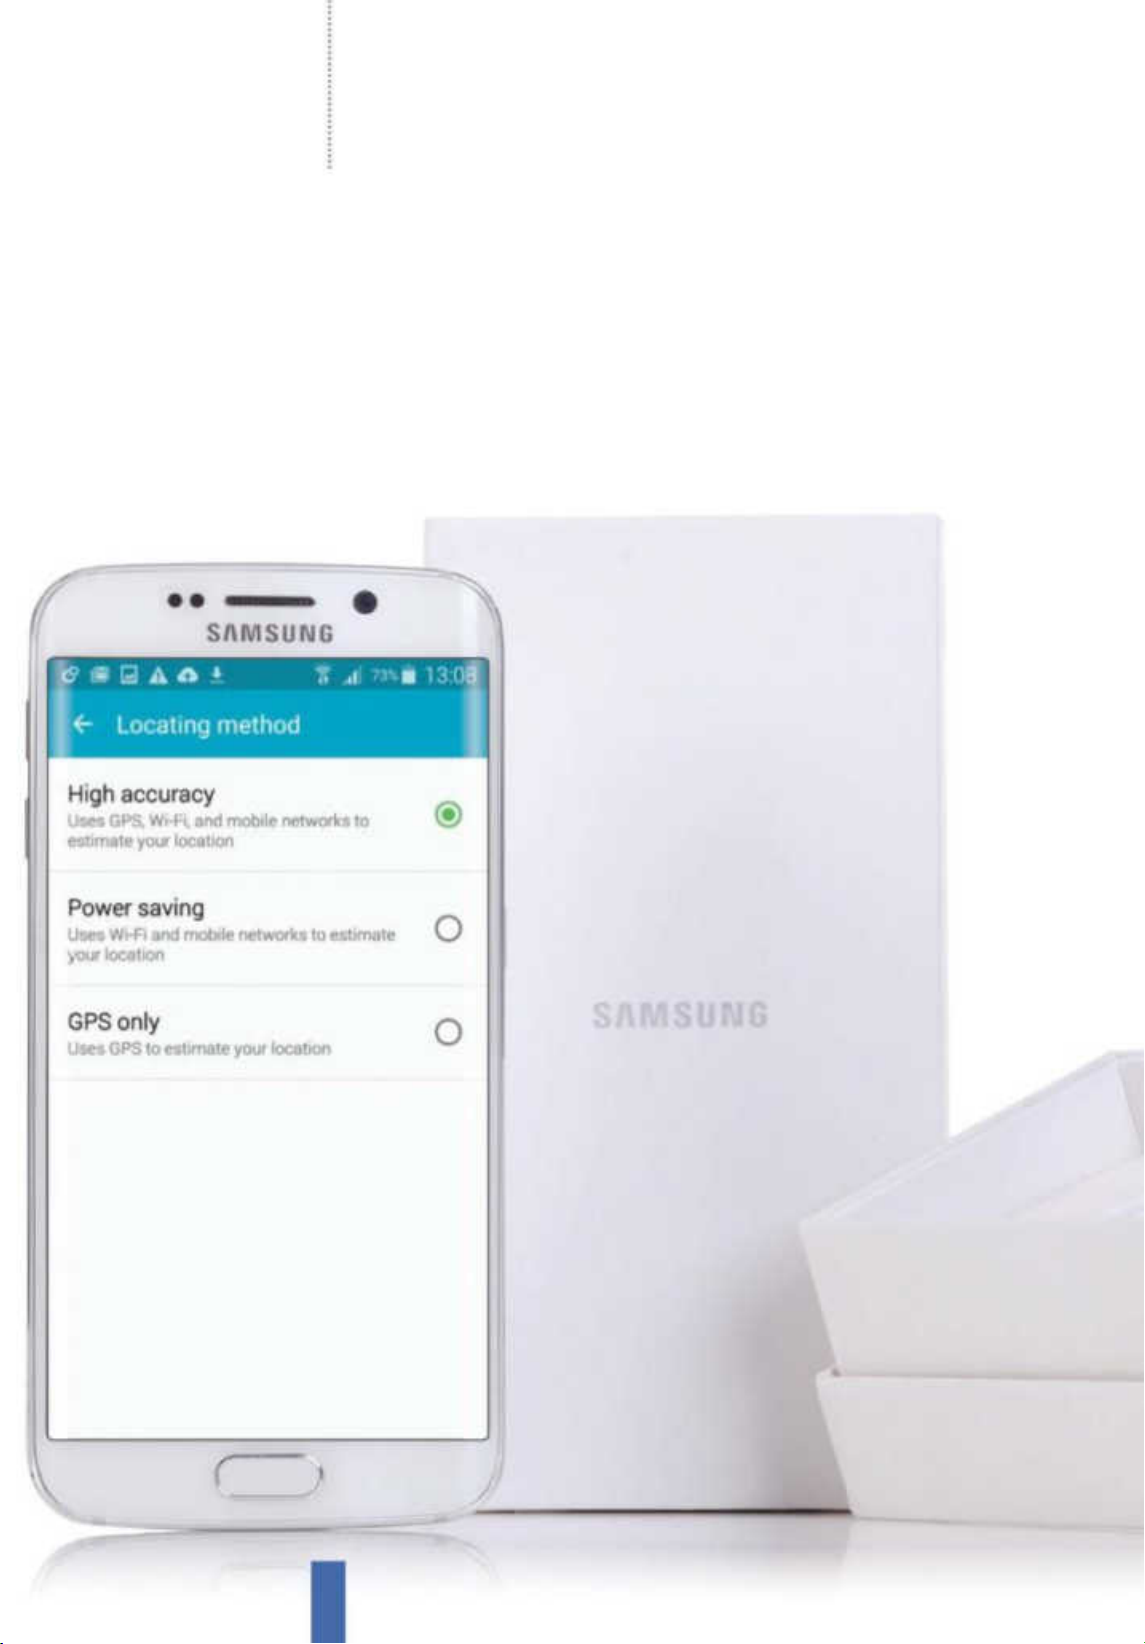
The rst few minutes you have with your Galaxy device will be spent
setting it up. Invest time in this for an enjoyable and productive future
14
Page 15
1
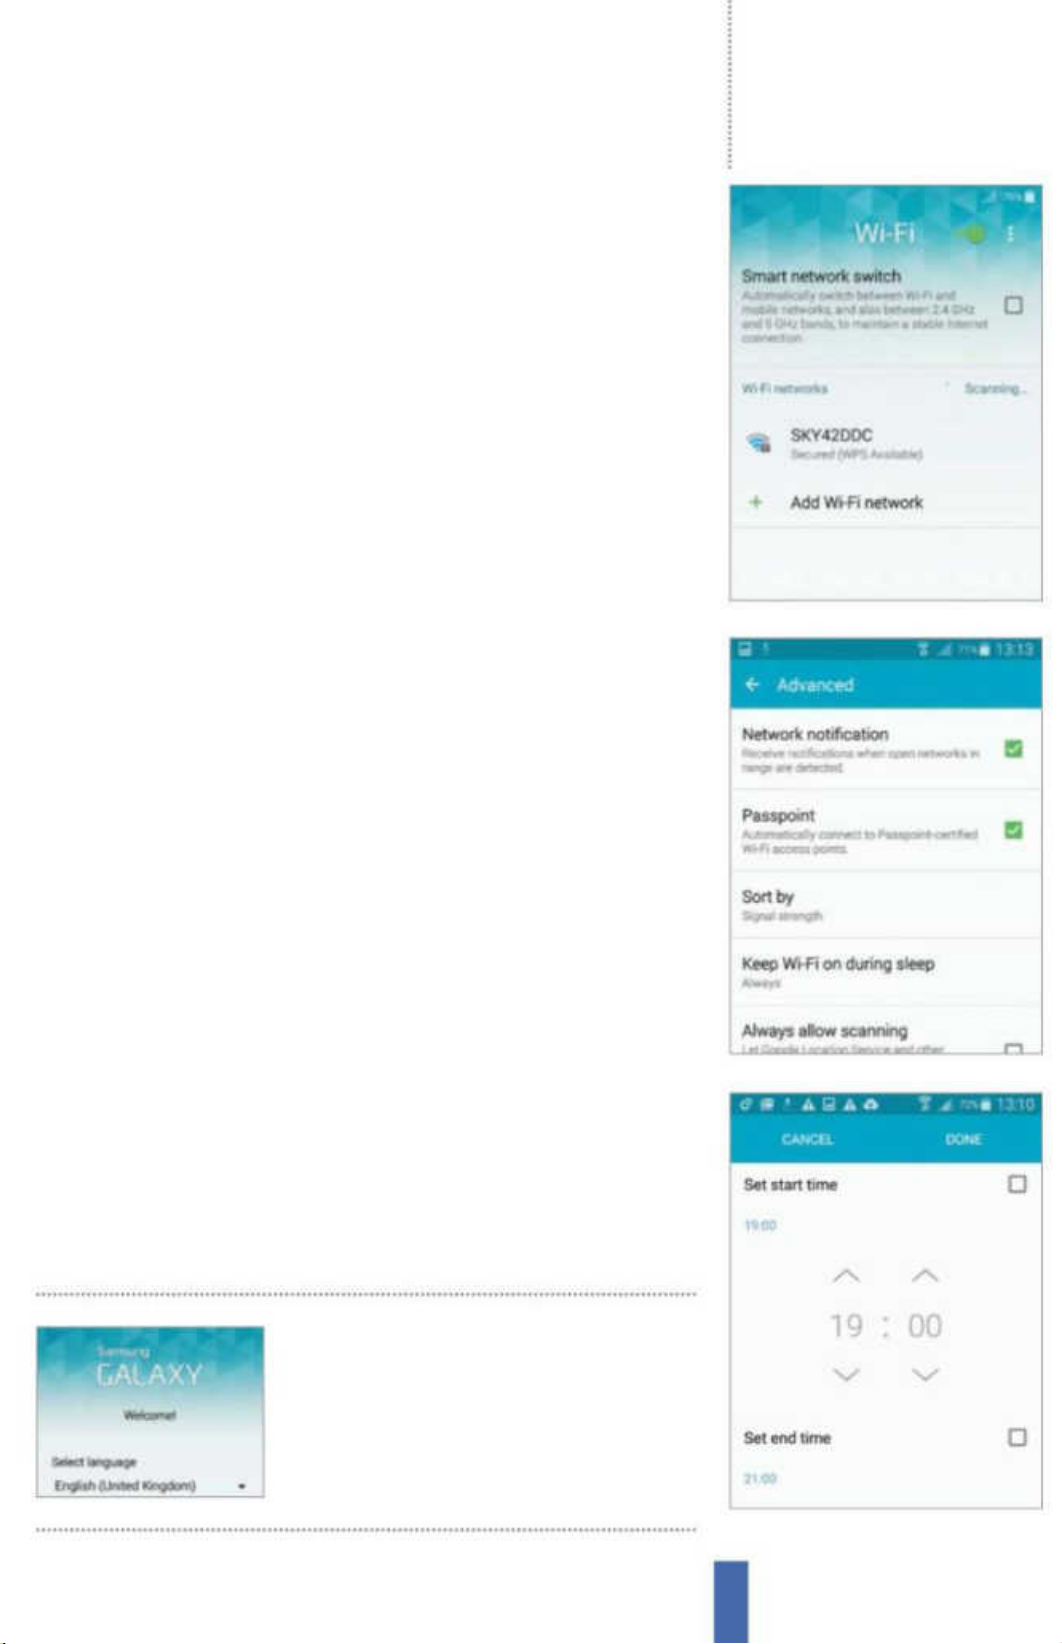
Language When you take your new Samsung Galaxy device out of its box
and have fully charged its battery, you will be ready to start using it. There is a
setup procedure to go through first, however. Your first task is to tell your new
Samsung what your language is. It should be set to English (United Kingdom)
but you can tap the language bar to see more options if you need to change it.
2 Add Wi-Fi Next, select a Wi-Fi network. Your Galaxy device will then scan the
surrounding area and show you all of the available networks that there are in
the immediate vicinity. Depending on where you are, there could be quite a lot
of them! You can identify your own network by its name – in order to log on,
simply tap the name.
3 Enter password You will need to enter the password for your Wi-Fi network.
Type this in using the keyboard – remember, you can long-press characters
that sit on the top row of the keyboard to get to the numbers or just tap the
bottom-left icon. Check Show password to double-check that you are entering
it correctly, then select Connect when you are ready (Fig 1).
Getting startedSetting up your Samsung Galaxy
Fig 1 Enter your Wi-Fi access code
4 Connecting the Wi-Fi Having entered your password, wait for the next screen
to appear. After a few seconds, you will see that you have been connected to
your chosen Wi-Fi network. Even after doing this, all of the other networks that
you could originally see will still be visible, meaning that it is easy for you to go
back at any time and change networks.
5 Advanced options Tap on the Advanced option and you will then be able
to set up some more Wi-Fi preferences, such as being notified when an open
network is available and keeping Wi-Fi on when the handset is in sleep mode.
You can also set up a timer to automatically connect to and disconnect from
Wi-Fi networks on a regular basis (Fig 2).
6 Set Wi-Fi timer If you turn the timer on with its slider button then tap the Wi-Fi
timer text; you will go into a screen where you can set the starting and ending
time for your Wi-Fi connection. This can be useful if, for example, you want to
keep the handset on overnight, but save power by having Wi-Fi turned off. If
you set this, tap Done at the top-right when you are finished (Fig 3).
Fig 2 Do more with your Wi-Fi
When setting up your
device you will be guided
through the initial setup
process to make life easier
Fig 3 Set up a sleep timer for your Wi-Fi
15
Page 16
Getting started Setting up your Samsung Galaxy
Fig 4 Create a Samsung account
7
Date and time The next settings you change are for the date and time. You
can set these manually or get your network to set them automatically. In
most cases the latter will be perfectly fine. You can also select your time zone
– although the network time settings should automatically do this for you.
Regardless, you can always come and change this information later on.
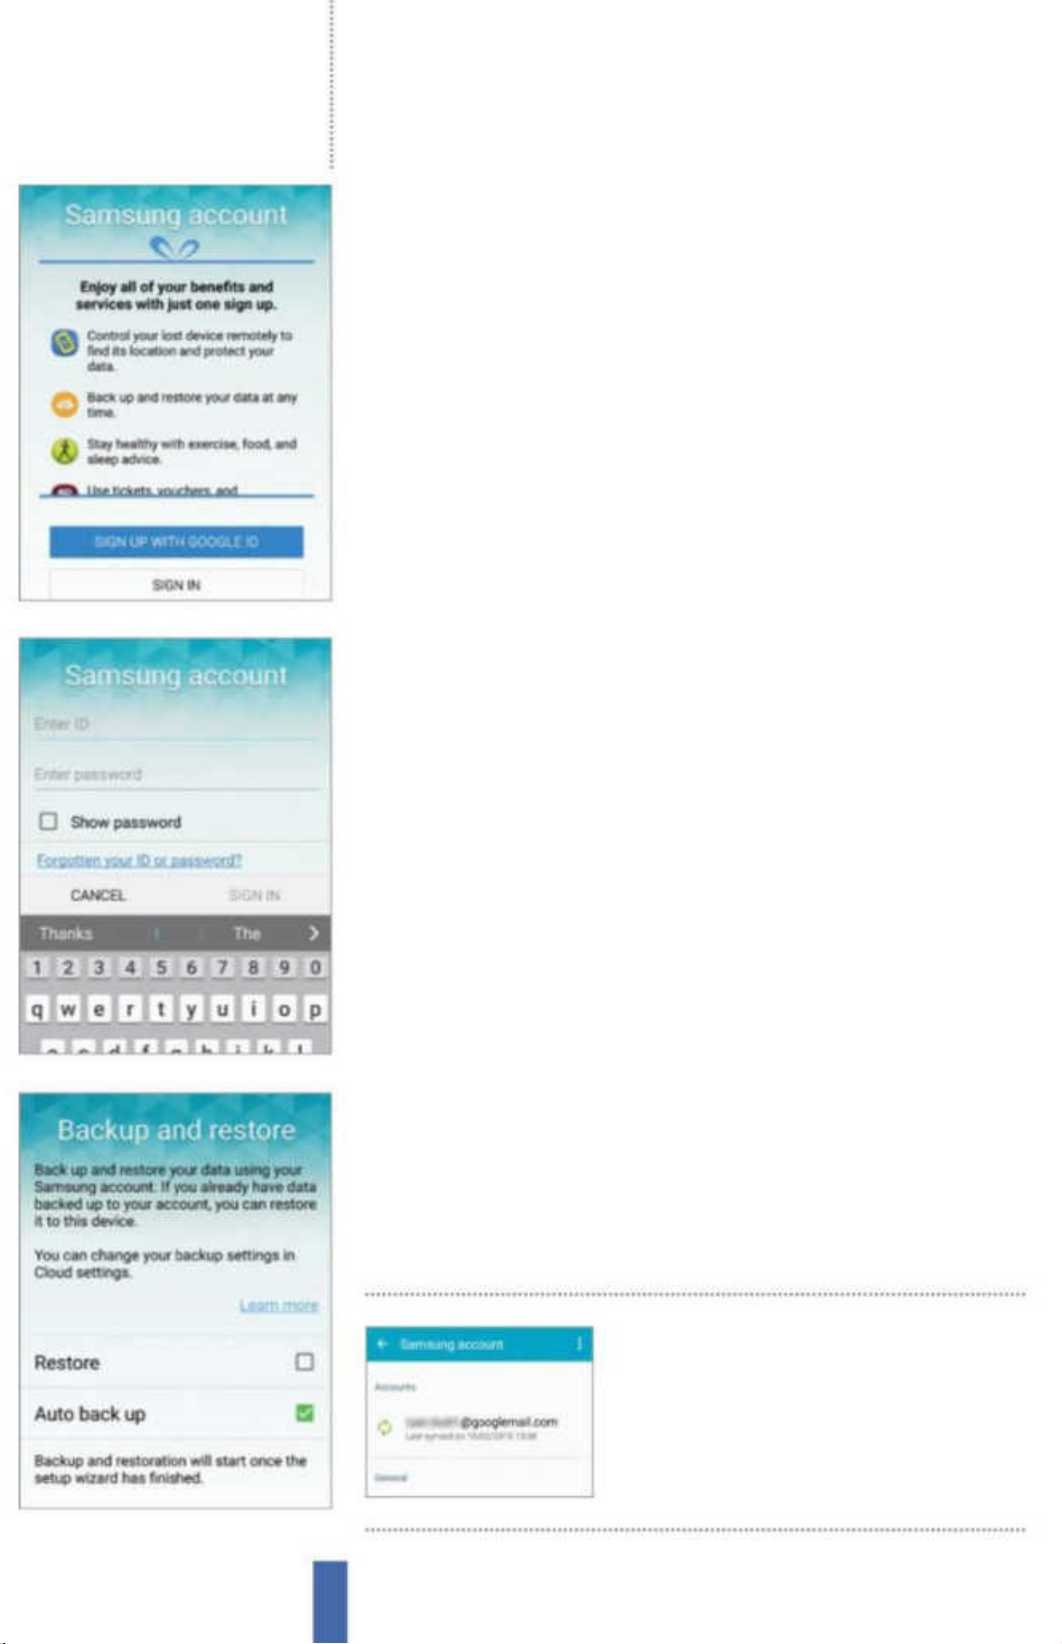
8 Samsung Account Next, you can set up your Samsung account. Samsung
lets you access a range of services, including Find My Mobile, which helps you
locate a lost phone and even lock it so that if anyone else finds it they can’t
access your data. You can skip this and do it later if you like, but it is a good idea
to do it sooner rather than later (Fig 4).
9 Create an account After agreeing to the terms and conditions of this account
with a tap in the box that appears on the next screen and a tap of the Agree
button, you are ready to set up your account. You will need to enter some
details first, however, like an email address and password. Note down what you
have chosen somewhere safe. You’ll get an email to verify your account (Fig 5).
Fig 5 Add contact info to your account
10 Backup and restore You can set up your Samsung account so that it will back
up call logs, SMS and MMS messages, settings and other data (Fig 6). If you
ever need to do a reset and have already made this backup beforehand, you
can choose to restore the information to your Galaxy device when you come
to this part of the installation process.
11 Google account Next, you will be asked to set up a Google account. You
will need one of these to access Google Play and download apps. You’ll get a
Gmail email address as part of the process too, which gives you access to lots of
useful stuff through the Google website. If you don’t already have an account,
answer No to ‘Are you a Google user?’ and then select Get an account.
12 Type in details Enter your real first and last names and then press the forward-
facing arrow on the right side of the screen to move on to the next menu.
There will be a short wait while your Galaxy device processes the information
about your name. After this is finished, it will ask you to select an email address
for your Google Mail address.
Fig 6 Keep all your data safe
Your Samsung account
can help you nd a lost
or stolen Galaxy, and can
even be used to disable it
16
Page 17
13
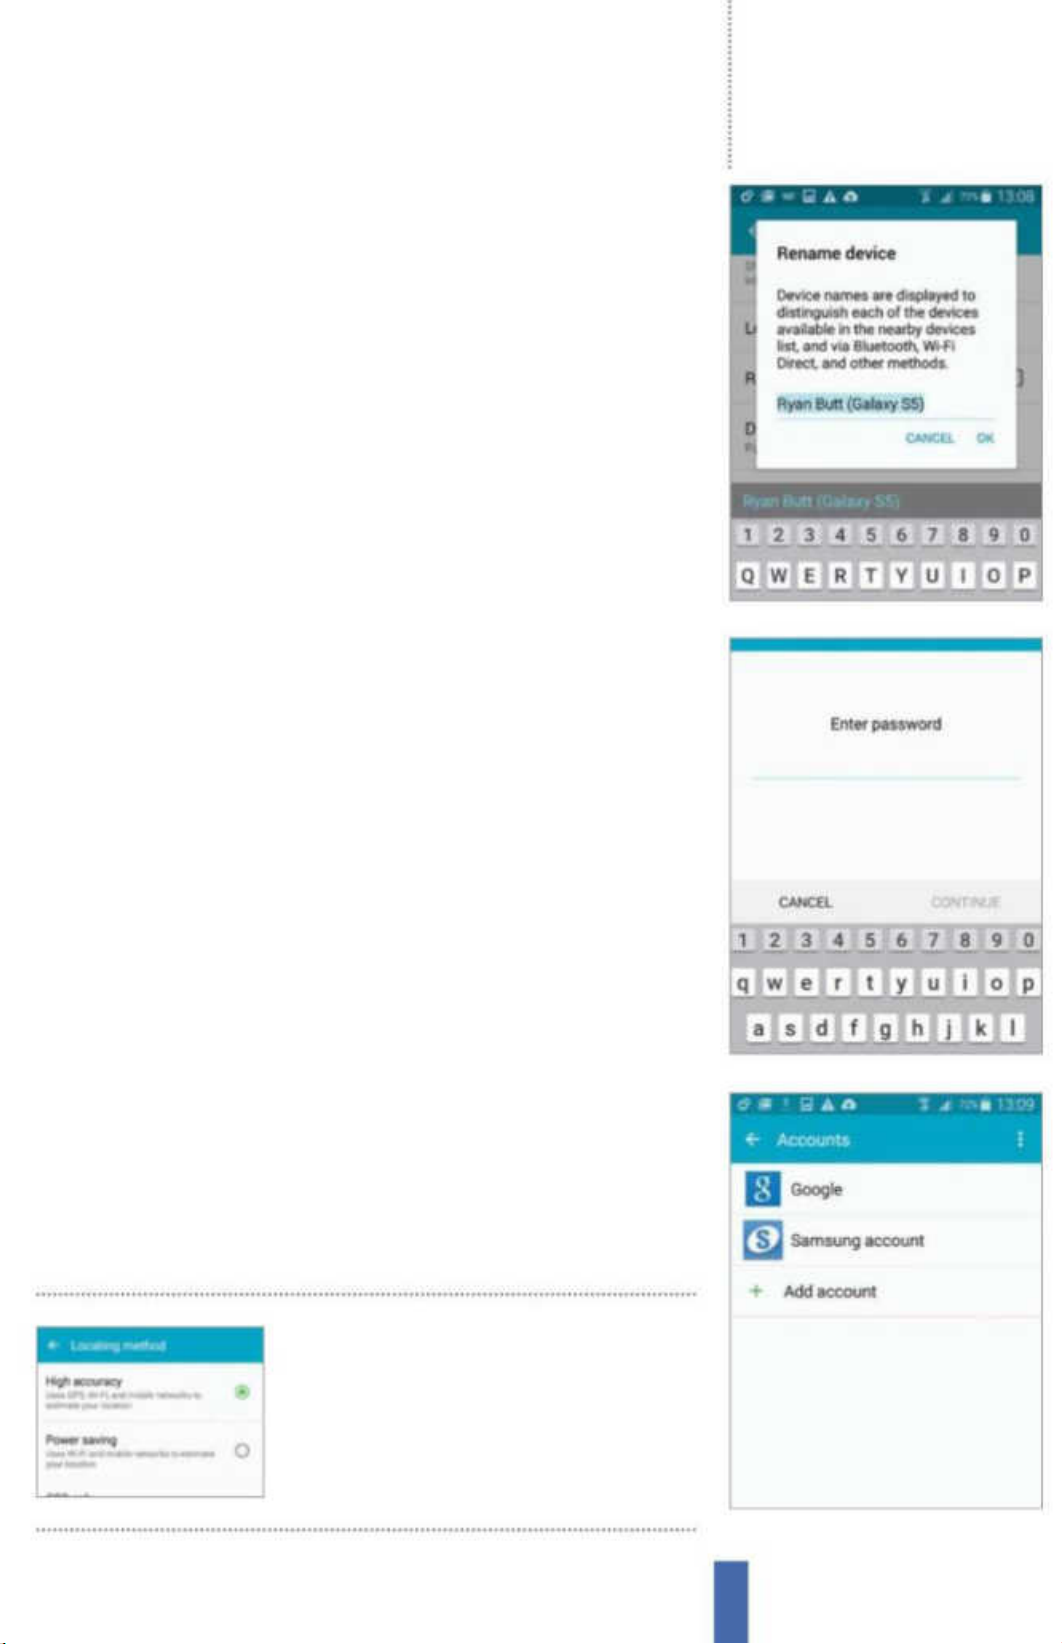
Try again You might find that the name you want to use has already been
taken, and thus decide to try a new name instead. You can get Google to
suggest some alternatives based on your first choice, or simply keep trying
different choices until one that suits you appears by entering them and
pressing Try again (Fig 7).
14 Password Next, you will need to enter a password for your Google account.
When the option is made available, you will have to enter this twice in order
to ensure that you have typed precisely what you want the first time round –
make sure you choose something secure and memorable. After doing this, tap
the forward-facing arrow on the right of the screen (Fig 8).
15 Security question Next, you need to enter a security question to help you
recover your account if you ever lose your password. There are various choices
on offer. Tap the down arrow by ‘choose a security question’ and then enter
the answer. Add an email address to use for this process, too – not the Google
Mail one you are creating.
Getting startedSetting up your Samsung Galaxy
Fig 7 Google can suggest names
16 Other Google services You can elect to join other Google services at this
point – for example, Google Messenger and Circles – by joining Google+.
Alternatively, you can choose to skip this step for now and complete it at a later
date instead. If you decide to join now, all you need to do is select Join Now
and the process will be complete (Fig 9).
17 Set your profile Your Google+ profile is set up with just your name to
begin with. Next time you log in to Google+ you will be able to add more
information to your profile, like a photo. For now, though, all you need to
do is finish the setup, including turning on web history and entering an
authentication code and your credit card details for Google Play.
18 Finishing off A final few screens finish off the process, including setting
up the use of Google Location for location-based services and configuring
a Dropbox account. Sign in now if you have an account, or wait and set an
account up later if you prefer to do that instead. Then, all you have to do is tap
Finish and you are good to go.
Fig 8 Select a strong password
Google can use your
location to help it deliver
better and even more
accurate information
Fig 9 Join Google+ for more services
17
Page 18
Getting started The first steps
Learn the home screen
Here we show you around your Samsung Galaxy’s home screen and
noti cations bar, then teach you the interaction gestures to use
Common icons
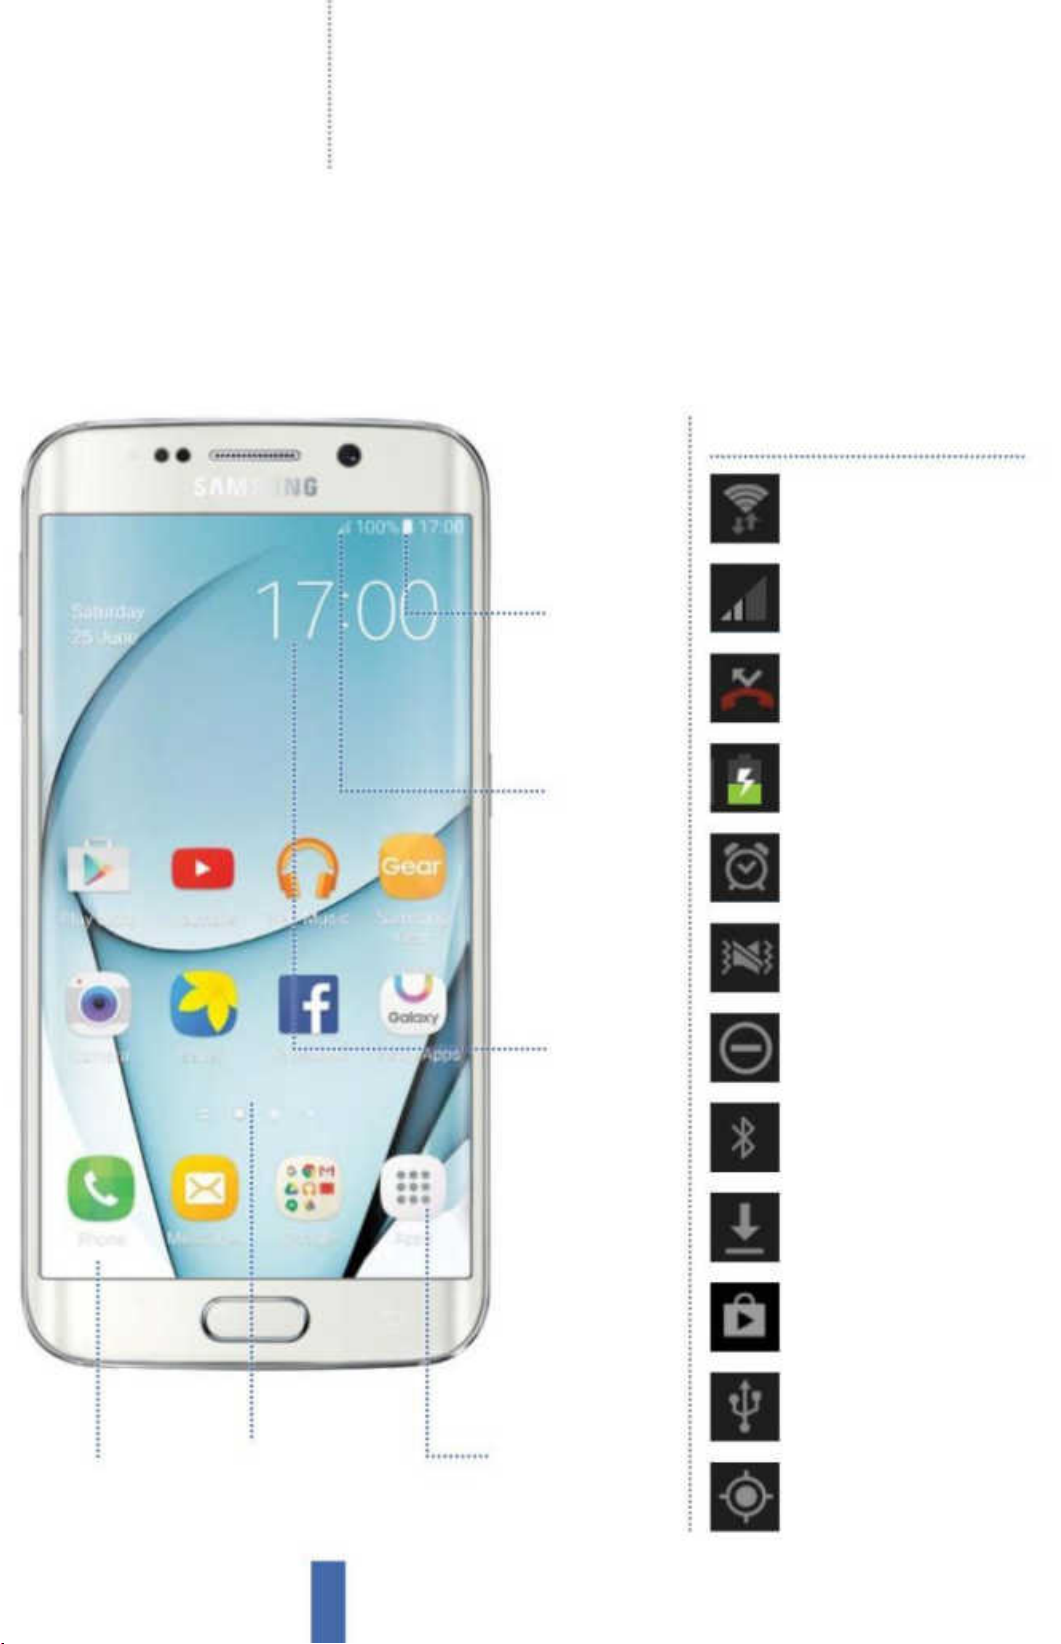
Wi-Fi signal
This icon shows your Wi -Fi signal
strength (the top ba rs) and whether
the connection is active (the arrows)
3G/4G connection
Here you c an see your mobile phone
Battery
Battery level
is indicated
here, an d a
lightning bolt
icon show s if it
is charging
signal, its strength, and whether it is
currently in operation
Missed call
You have a missed call. You can pull
the noti fications bar down to see
more inf ormation and re turn the call
Wi-Fi
You can see if
you’ve got an
active Wi-Fi
connection by
checking the
tiny upload
and download
arrows just
beneath the
signal strength
Time
The time
shows in the
very top-right
corner of the
home screen
Battery (charging)
Your battery charge level is indicated
and a white icon within shows if it is
currently charging
Alarm
If you’ve got one or more alarms set
then the alarm icon will be present in
the notifications bar
Silent/vibrate
If you have your device se t to silent or
vibrate mode then an icon will show
to indicate this
Blocking mode
Blocking mode stops you receiving
unwanted calls and notif ications.
When it is activate you’ll see this icon
Bluetooth
Blueto oth gives you access to short
range wireless communications with
other devices such as speakers
Downloads
When you are downloading apps and
updates this icon will b e displayed
throughout the process
Google Play updates
When there are updates on Google
Play this icon lets you kn ow so that
you can go and download them
Dock
Put your favourite
apps in the Dock and
they’ll be available on
every home screen
Wallpaper
Wallpaper sits behind the
icons. You can change this
with a tap and hold of the
home screen
18
Apps
Each application can
be placed on a home
screen and identified
by its uni que icon
USB connection
When your Galaxy device is
connec ted to a PC via USB this icon
will be shown in the not ifications bar
GPS active
This icon shows you that the GPS
function is active and currently
locked onto your position
Page 19
Hand gestures
on your Galaxy
Getting startedThe first steps
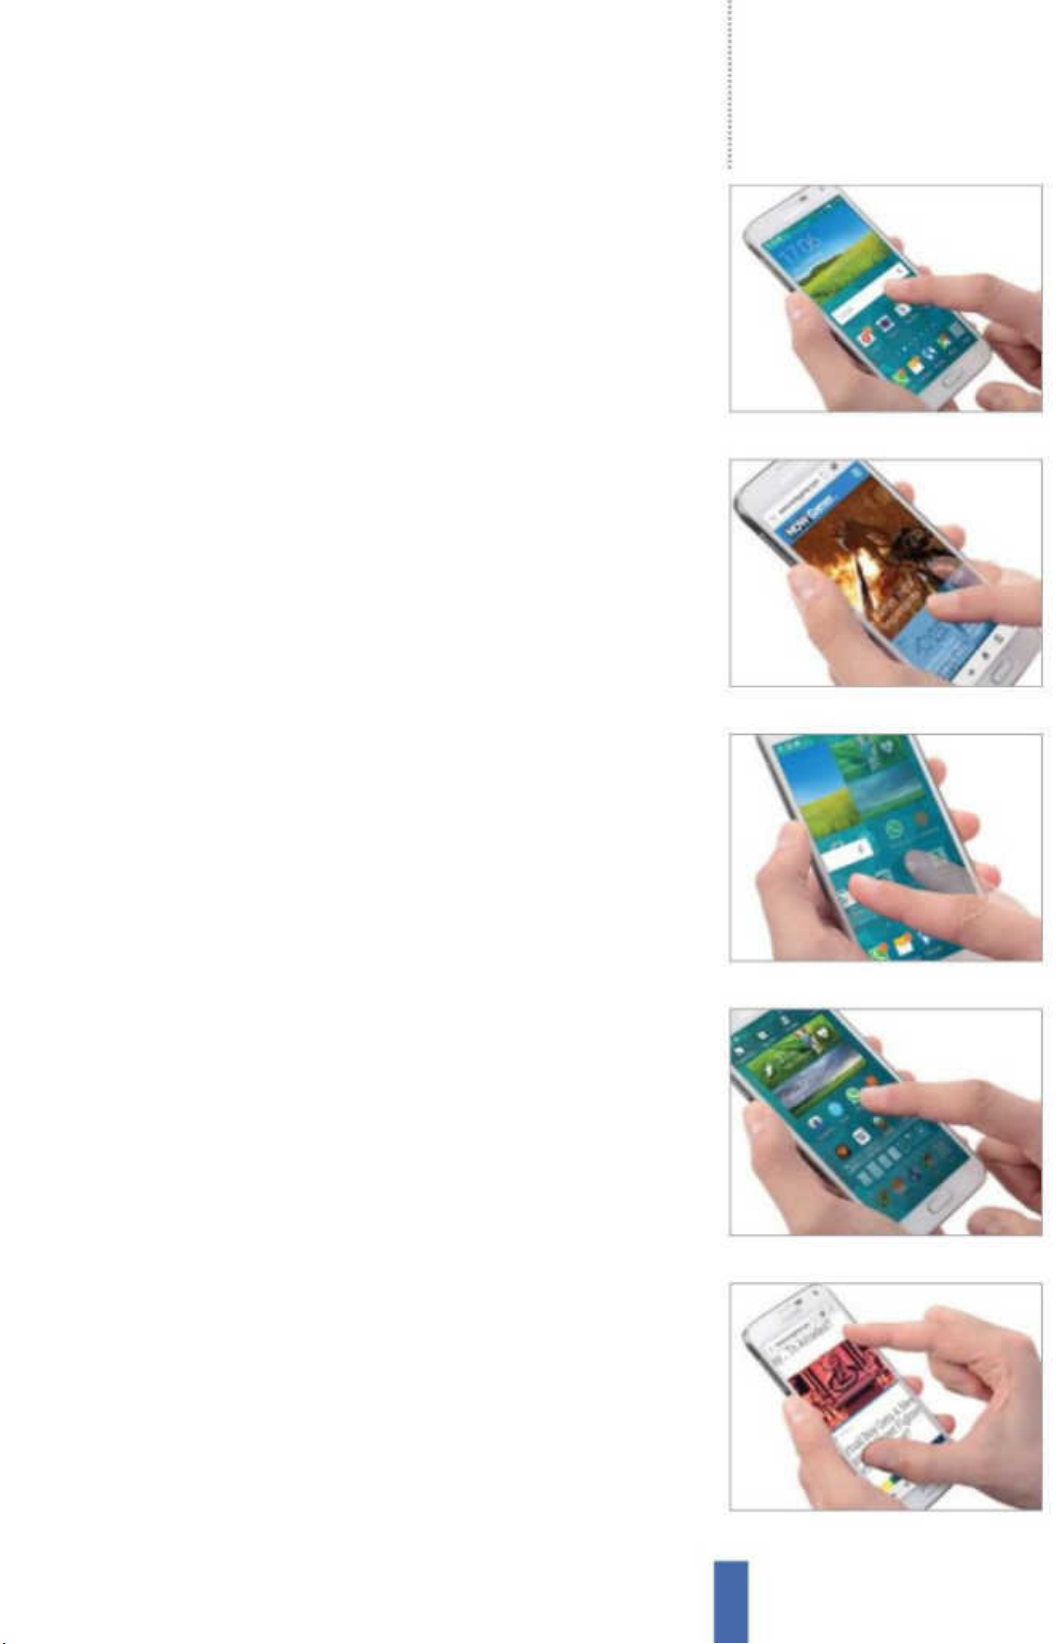
There are many ways in which you can interact with
your Galaxy’s touchscreen interface…
1 Tap When you want something to happen with your Galaxy you generally have
to touch the screen, and arguably the most basic of all the gestures is the tap
(Fig 1). You tap to open an application, make a menu selection, activate a link in
a web page, open an image or music track, and lots more too. Just press your
finger down in the required spot and the device will recognise it.
2 Scroll When there’s more information than you can see on a single screen,
you have to scroll up and down to get to it. Hold a finger on the screen, move
it vertically and the screen moves (Fig 2). You might scroll horizontally too – to
move around image files or web pages, for example – but you will use the
vertical scroll to glance through emails, settings screens, news feeds and more.
3 Swipe The swipe is a neat little gesture that’s the counterpart of the scroll (Fig
3). We don’t really call it a scroll, though, because devices like to use this gesture
to quickly flick between adjacent screens, whether they’re home screens on
your device or pages inside an application. Just tap and slide to try it.
Fig 1 Simply tap the screen to select things
Fig 2 Tap and hold to scroll up and down
Fig 3 Pull your finger across the screen
4 Drag (long-press) As well as tapping the screen to make things happen, you
can also long-press. This means putting your finger on something and holding
it down, and often allows you to drag your selected item around (Fig 4). You’ll
most likely use the long-press to move icons around, dragging them between
different home screens or to the trash icon to remove them from home screens,
or inside the app drawer to put them on home screens in the first place.
5 Pinch The pinch gesture is a really clever one. You’ll use it to zoom out and
make text or an image smaller. Simply put two fingers on the screen quite a way
apart from each other when you have an image or web page showing on the
screen, and then pull them towards each other to make what you are viewing
smaller. Use it alongside the spread gesture for even more control.
6 Spread The spread gesture is best used with the pinch. Use it to zoom in and
make text or an image larger. Put two fingers on the screen close to each other
when there’s an image or web page showing, then push them away from each
other to make what you are viewing larger (Fig 5). Before you know it, the hand
gestures that you use to operate your Galaxy will become second nature.
Fig 4 Press and hold for a long-press
Fig 5 Reverse the pinch to zoom in
19
Page 20
Getting started The first steps
Smart gestures
on your Galaxy
Fig 1 Simply lift the handset to call
Fig 2 Vibrations remind you of alerts
Fig 3 Quickly scale a long list
As well as having the standard Android gestures,
Samsung Galaxy devices have a few of their own…
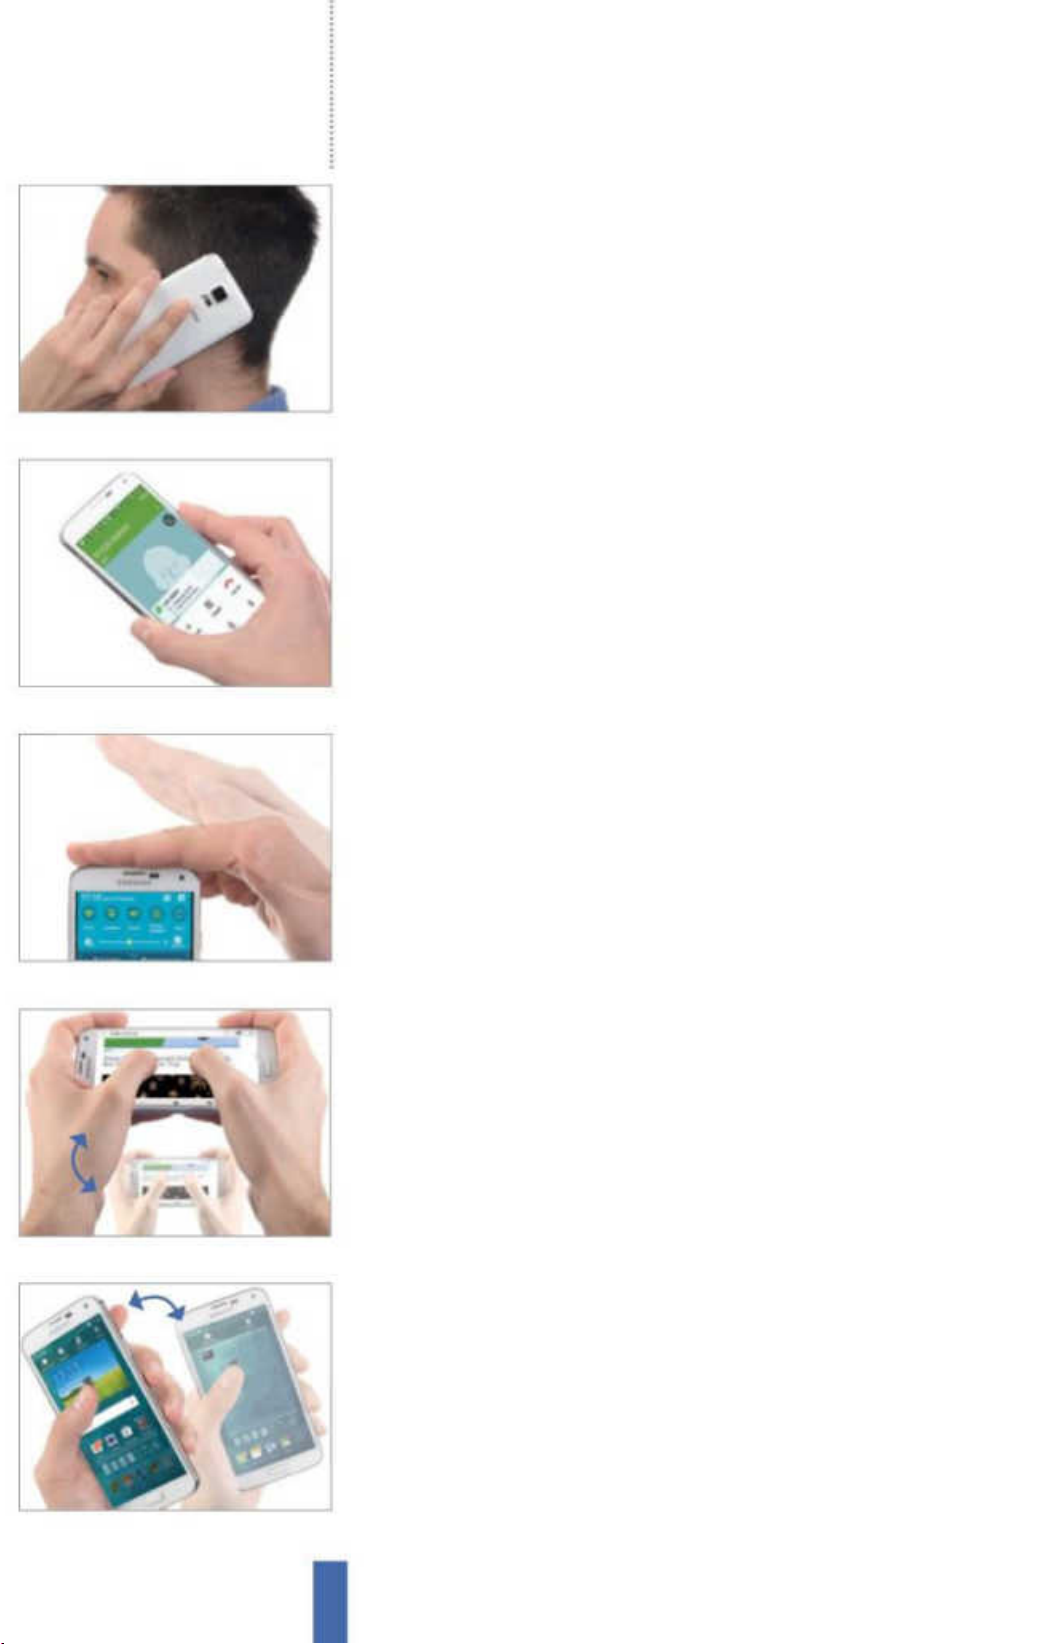
1 Direct call If a contact’s details, such as their call log entry or a text message, are
visible on the screen then the mere act of raising your Galaxy to your ear will be
enough to call them. (Fig 1) You won’t need to tap at the screen at all to identify
them to the handset – it just knows what you want it to do. This makes calling a
quick and easy process that requires minimum effort on your part.
2 Smart alert Missing a call or message can be irritating, and you don’t always
glance at the screen to see the information that tells you something has been
missed. You can use smart alerts to get your Galaxy to vibrate when you pick it
up if there’s a missed call or message, so that you know you need to check. This
can be a life-saver if you happen to miss something important (Fig 2).
3 Double tap to top Sometimes you’re working your way through a long list.
Perhaps you’re looking through your contacts to find someone, or rooting
through old emails or reading a particularly long email message. Simply tap
twice on the top of your Galaxy to go straight to the top of the list (Fig 3). This
can save you seconds by enabling you to skip having to scroll back up again.
Fig 4 Bring the device in to zoom
Fig 5 Move apps around easily
4 Tilt to zoom Pinch to zoom is a well known Android gesture that’s used on
all handsets, but the Galaxy goes one better and lets you tilt the whole device
to zoom. If you put two fingertips (or both thumbs) on the screen and tilt the
handset away from you then it will zoom out of what’s currently showing on the
screen, and if you tilt it closer to you then it will zoom in (Fig 4).
5 Pan to move icon If you want to move icons to a different home screen, as a
way of reorganising your shortcuts, you can drag one to the screen edge on any
Android handset (Fig 5). With a Galaxy you can also hold the icon down with a
fingertip and then pan your handset left and right to move it around (imagine
the edge of your device is a hinge). It’s a very cool system that works very well.
6 Pan to browse images If you are currently viewing a large image on your
device that runs over the edges of the visible screen area, you may want to
pan around to see more of it. To do this, you can simply hold a fingertip on
the screen and then move the entire handset up, down, left and right to pan
around the image, as though you were holding a window onto it.
20
Page 21
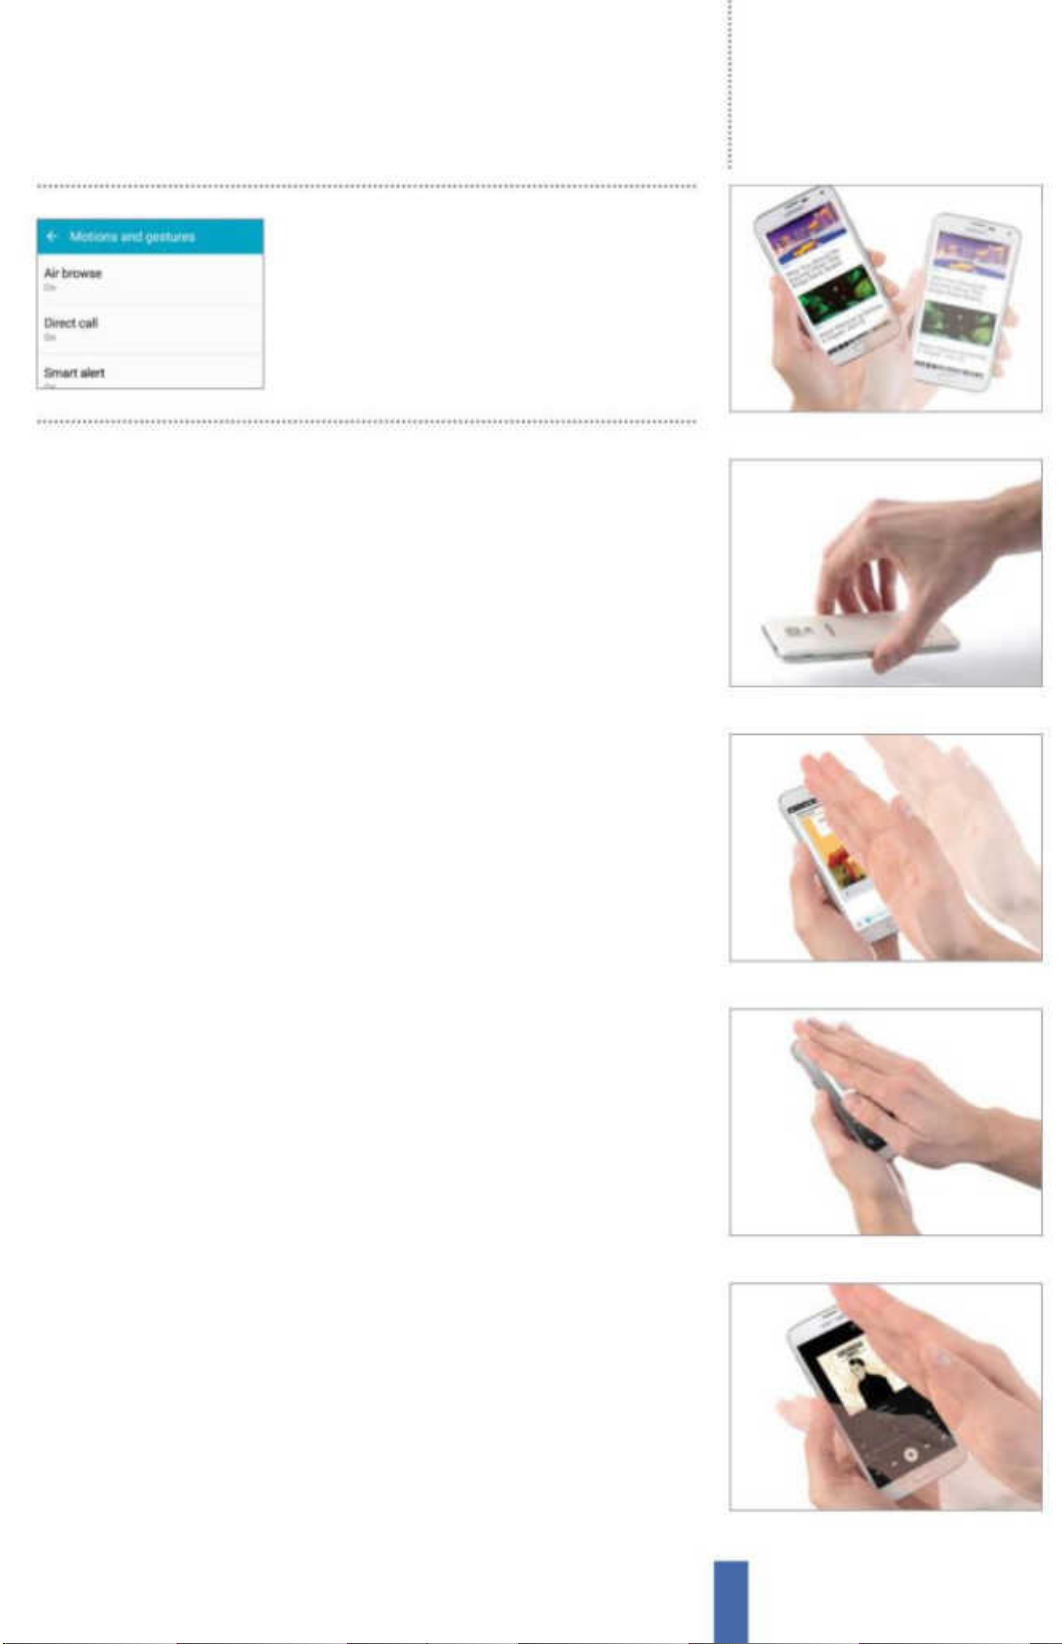
Use the Motion settings
on your device to turn
these di erent gestures
and settings on and o
Shake to update There are lots of apps that update their content regularly.
7
Email, news apps and the Samsung weather widget are a few examples. You
can force updates of these apps by interacting with the refresh buttons, but
the Galaxy also lets you update by just shaking it (Fig 6). No finger prodding
necessary here, just shake the device to stay up to date with the latest apps.
Getting startedThe first steps
Fig 6 Refresh with a wrist-flick
8 Turn over to mute/pause Sometimes an incoming call comes along just at
the wrong time, or an alarm sounds and it is inconvenient. You might want
the simplest possible way of silencing these intrusions, or of shutting off music
playback for a while. Well, the simplest way is to turn your Galaxy face down
(Fig 7). That’s right, just flip it over to mute all unwelcome distractions.
9 Palm swipe to capture screen There is a key combination that lets you save
an image of whatever your device is currently displaying – hold down the
Power and Home buttons together. However, you can also do it by sweeping
the edge of your hand from one side of your Galaxy to the other (Fig 8). It’s
neater, faster and is far easier than using any button combinations.
10 Palm touch to mute/pause If you are watching a video or listening to music
and you want it to just stop for a few minutes, you could pick your Galaxy up
and hit the pause button. There’s a simple gesture that can do the job too,
though. If you put your whole palm on the screen, your device will be silenced
(Fig 9). Ideal for when you don’t want to be disturbed.
11 Smart scroll (S5/S4 only) If you want to work your way through an email or
a document and don’t fancy using the basic finger gestures to scroll, then you
can achieve the same thing by just tilting your Galaxy S5/S4 back and forth
and letting the page slide up and down. It’s an immersive way to browse
through your content, but the feature was discarded for the S6 onwards.
Fig 7 Flip for silence
Fig 8 Take screenshots in seconds
Fig 9 Cover it up to mute or pause
12 Air gesture (S5/S4 only) You don’t even have to touch the Galaxy S5/S4
in order to use gestures. The new Air Gesture controls allow owners of this
flagship device to wave their hand in front of their screen to skip between
music tracks or queued videos, answer incoming calls and more (Fig 10). It’s
handset control with the very lightest of touches.
Fig 10 Wave your hand to control
21
Page 22
Getting started How to use your Galaxy
How to use your Galaxy
Now you know how to interact with your device, it’s time to start using it
When you get your new Galaxy up and
running you’re going to want to start making
the most of it right away. There are a few tips
about using the hardware and the software
that will get you o to a running start.
One of the great things about the Galaxy is
how easy it is to access key features and work
with apps. Here we’re going to run through a
few things that will help you get started and
use some of the main functions like Wi-Fi and
GPS, as well as how to start customising the
layout of your home screens.
“One of the great
things about the
Galaxy is how easy it is
to access features and apps”
Page 23
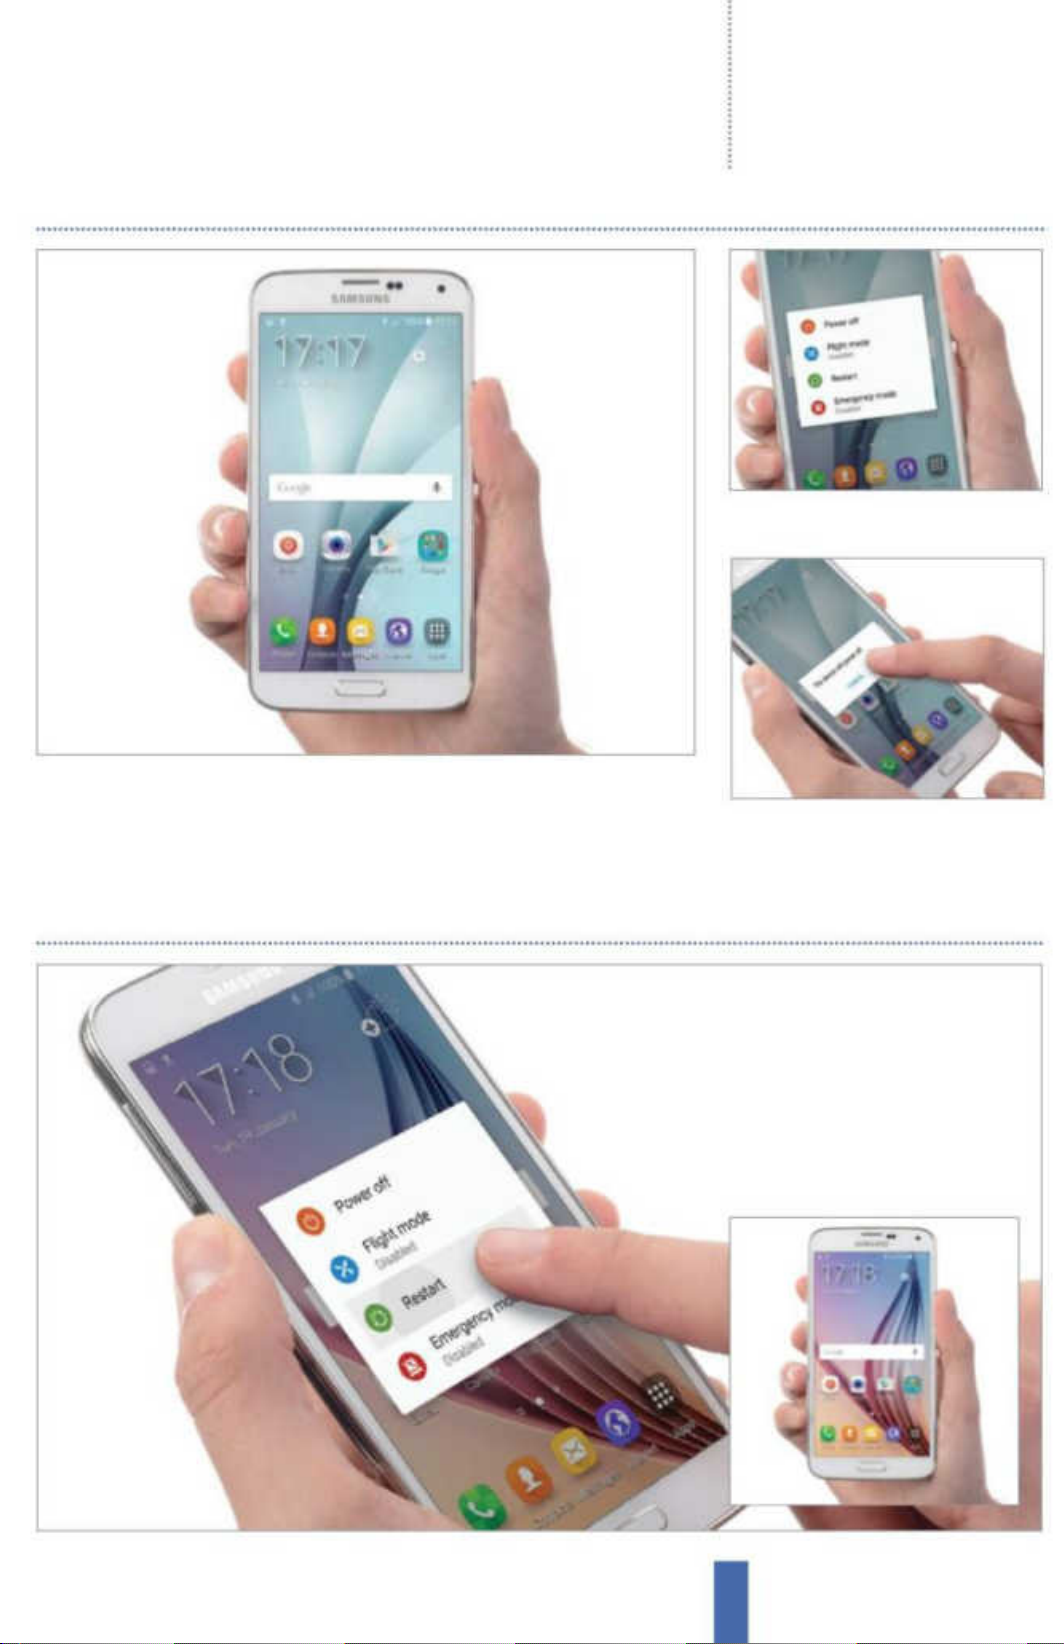
Switch your device on and off
Getting startedHow to use your Galaxy
2 Power options Hold the button
down to see more power options.
1 Switch on The on/off button will most likely be on the top or the right long
edge of your device. Give it a gentle press to switch your Galaxy on. If you aren’t
using it for long periods of time then you might consider turning it off again.
Restart or lock your device
3 Power off Simply tap Power off at
the top of the list to shut down.
1 Restart your Galaxy Hold the
power button down for a second.
Select Restart from the power
options to reboot your device.
2 Lock your Galaxy Give the power
button a quick press to turn the
screen off and lock your Galaxy.
23
Page 24
Getting started How to use your Galaxy
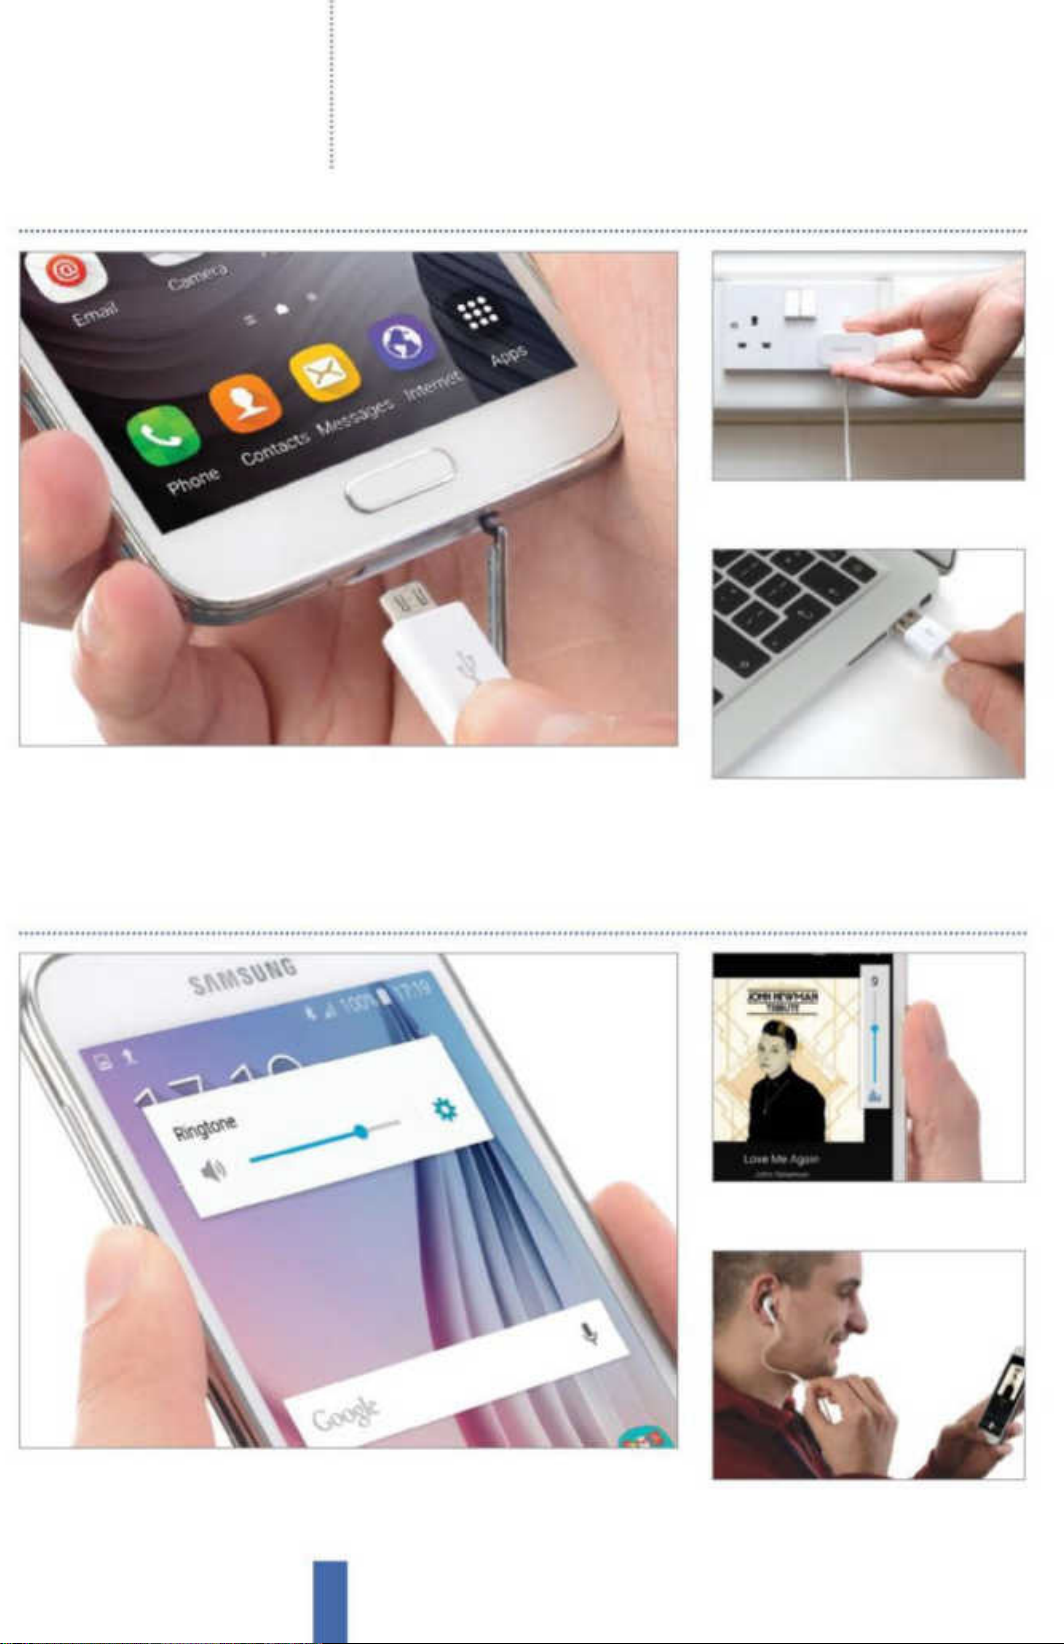
Recharge your Galaxy device
2 Adaptor Put the other end into the
adaptor that came with your Galaxy.
1 Charging up Your Galaxy is charged via Micro USB. The charge port will
probably be on the bottom edge, though it might be on one of the sides. Grab
your Micro USB cable and insert the smaller end into the charge port.
Change the volume
3 Computers You can charge up by
plugging into a computer instead.
2 Volume in apps Some apps also
have an on-screen volume slider.
1 The volume keys You can change the volume of audio on your Galaxy using
the Volume ‘rocker’ button that’s usually found on the left long edge. Pressing
the top end raises the volume while pressing the bottom end lowers it.
24
3 Earphone controls You can also use
your Samsung earphones’ controls.
Page 25
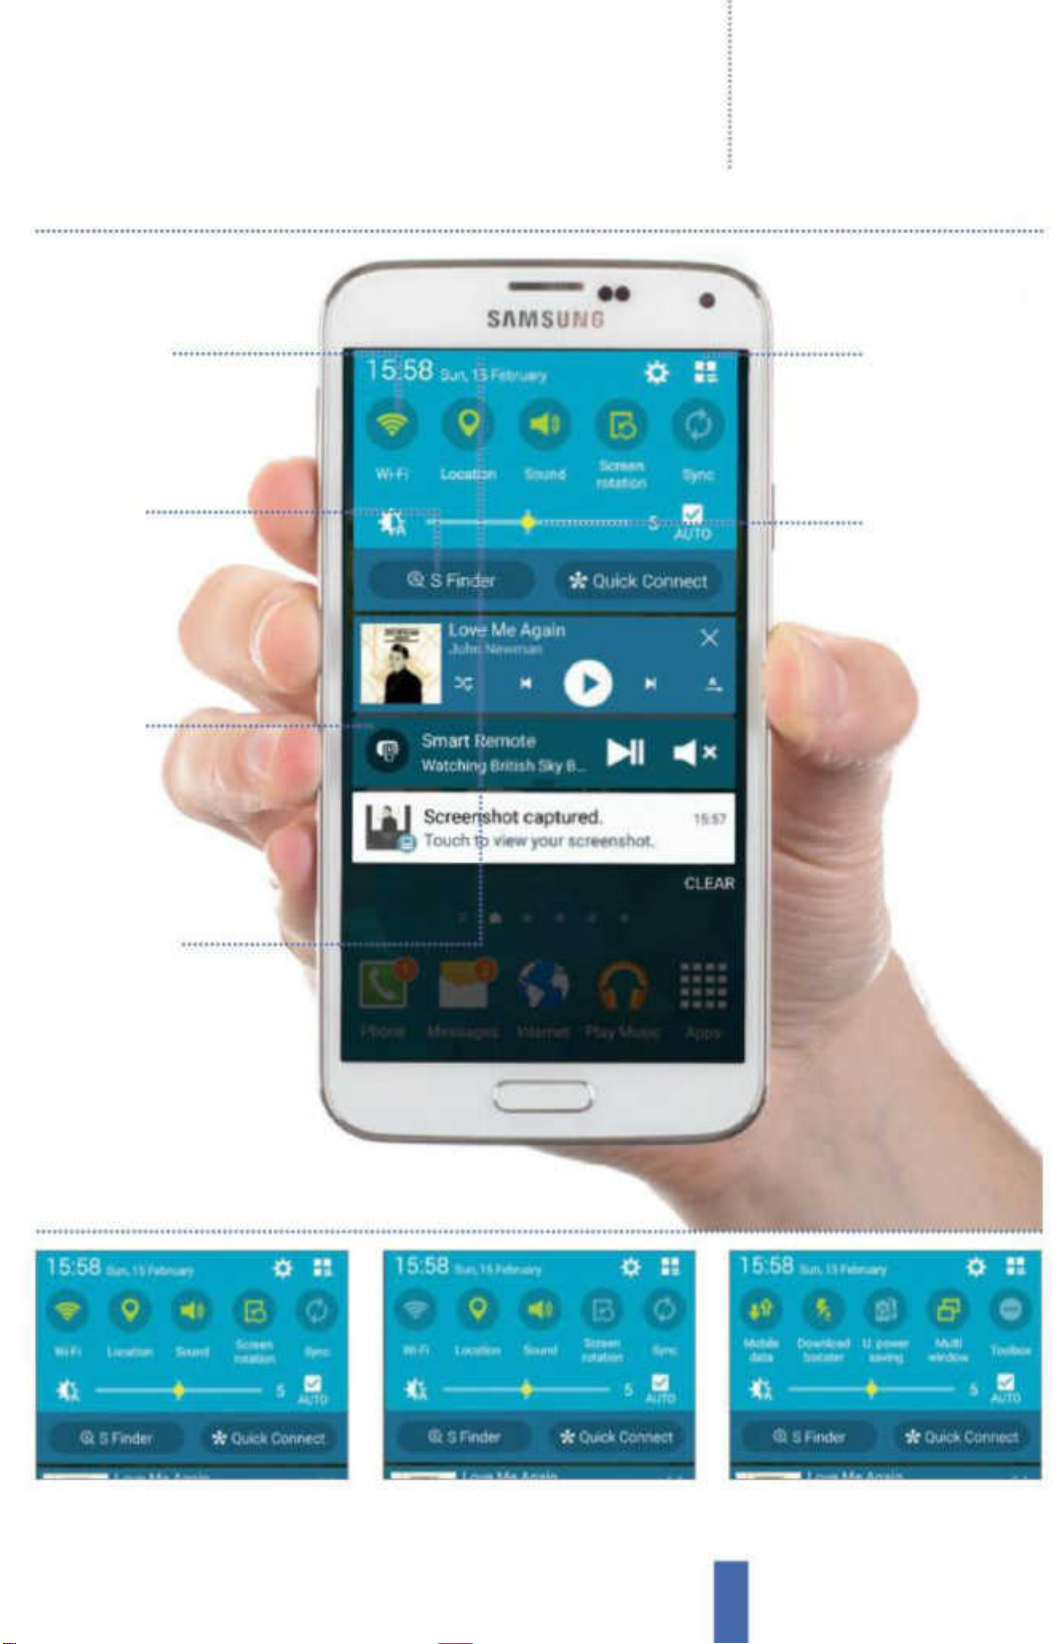
Using the notifications area
Getting startedHow to use your Galaxy
Quick settings
Icons at th e top of the
screen let you make
quick adjustments to the
settings and feature
Find things
Tap on S Finder and tap
in keywords to quickly
find things stored on your
Galaxy device
Third-party
apps
Some apps you
install on your
device, such as
Dropbox, will
also use the
notifications area
Tile icon
To display all quick
settings tap the to p-right
tile icon. Tap on the
buttons to access the
apps or turn on or off
Screen
brightness
You can manually
adjust the brightness
of the screen here or
tap Auto
Reveal the area
To see your not ifications
area in fu ll, drag the top
bar (conta ining the time)
down from any screen
Access the Settings toggles
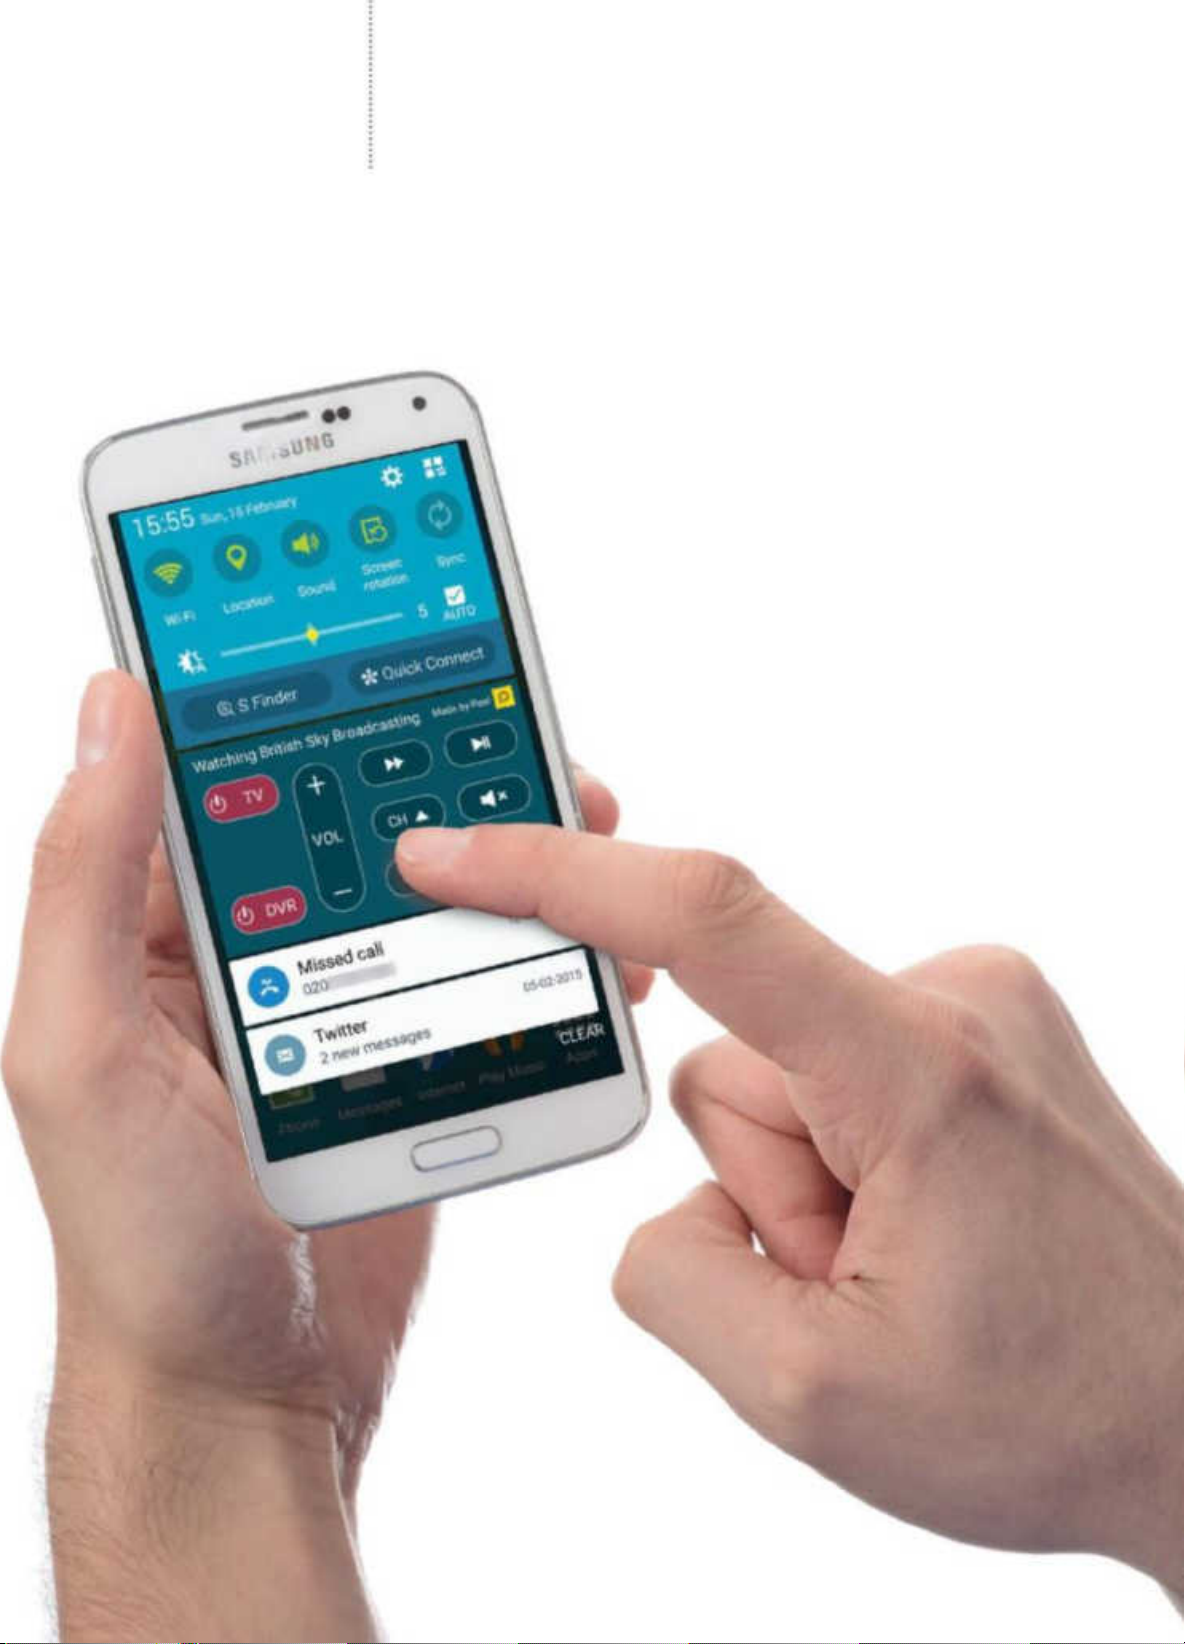
1 Quick access Drag the notifications
bar down to see the whole area.
2 Tap to use Tap on buttons such as
Wi-Fi and GPS to turn them on or off.
3 More settings Swipe to the left to
see even more settings toggles.
25
Page 26
Getting started How to use your Galaxy
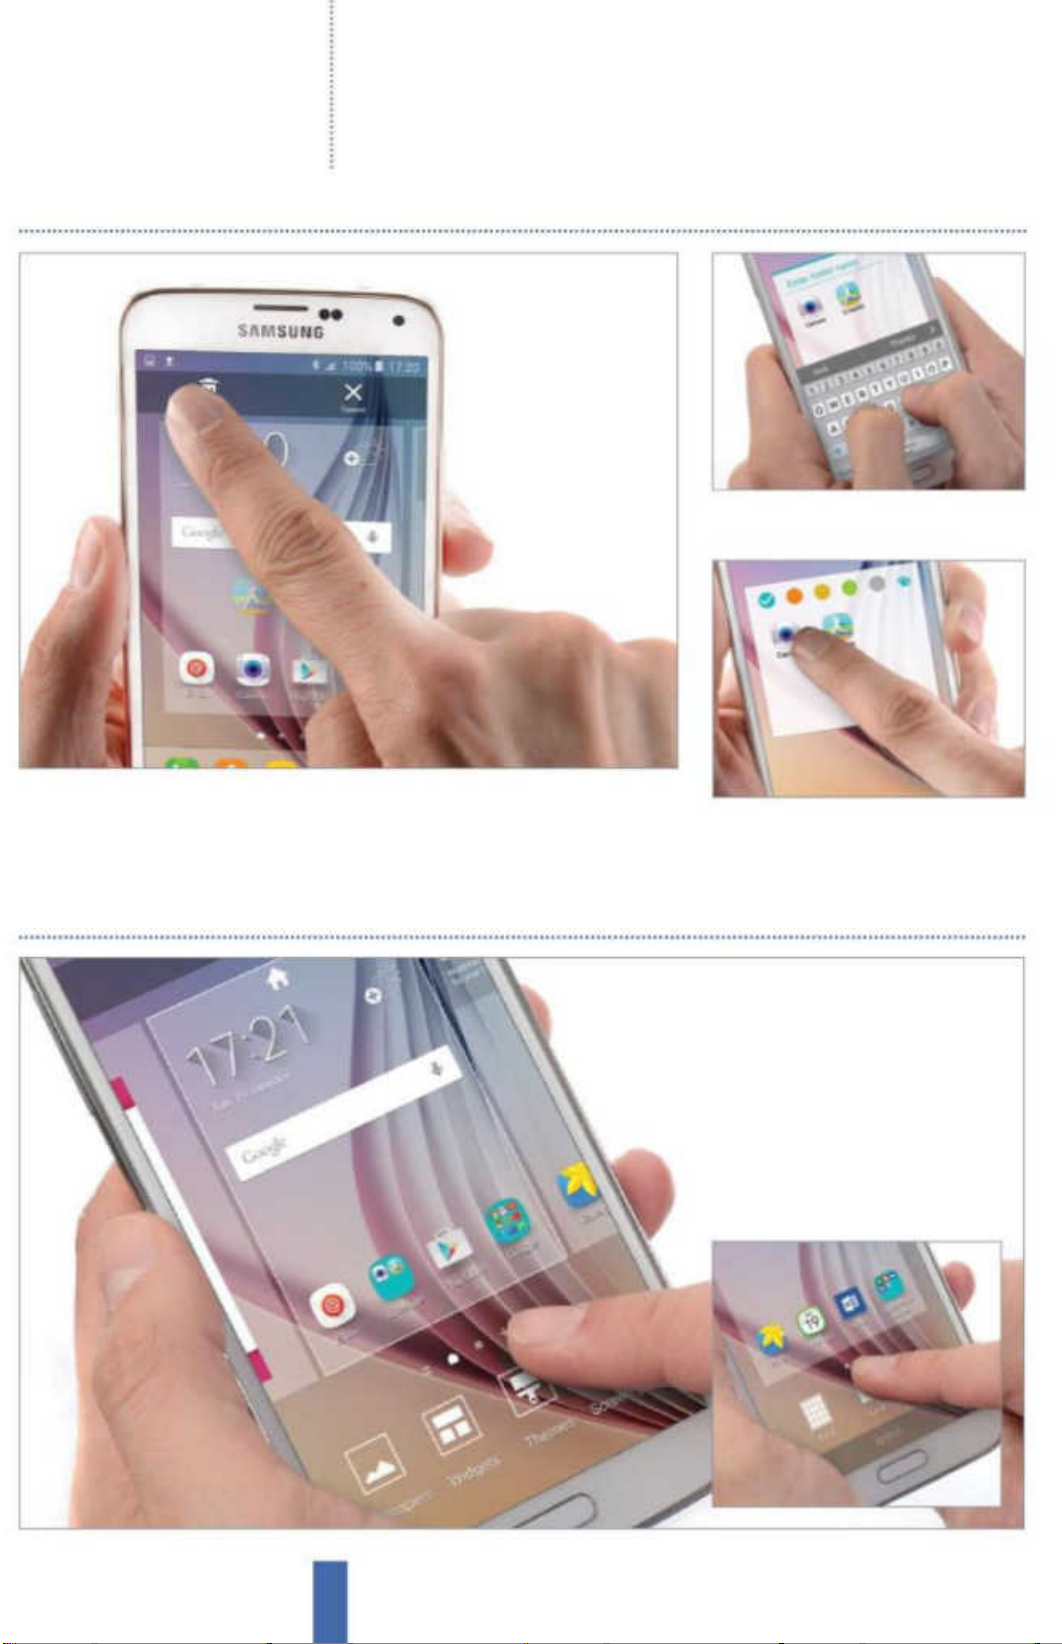
Organise apps with folders
2 Name it You’ll be asked to give the
new folder a name, so type away.
1 Drag the app You can put apps into folders by dragging them onto the Create
Folder icon that appears at the top of screen when you ‘pick one up’, or onto
existing folders. This will help you to keep your home screens nice and tidy.
Customise the dock
3 Change it Tap a folder to open it,
and tap on its name to change it.
1 Drag out of the dock
Tap and hold an app in your dock
and then drag it up to Remove.
2 Drag into the dock
Choose an app on your home
screen and drag it into the dock.
26
Page 27
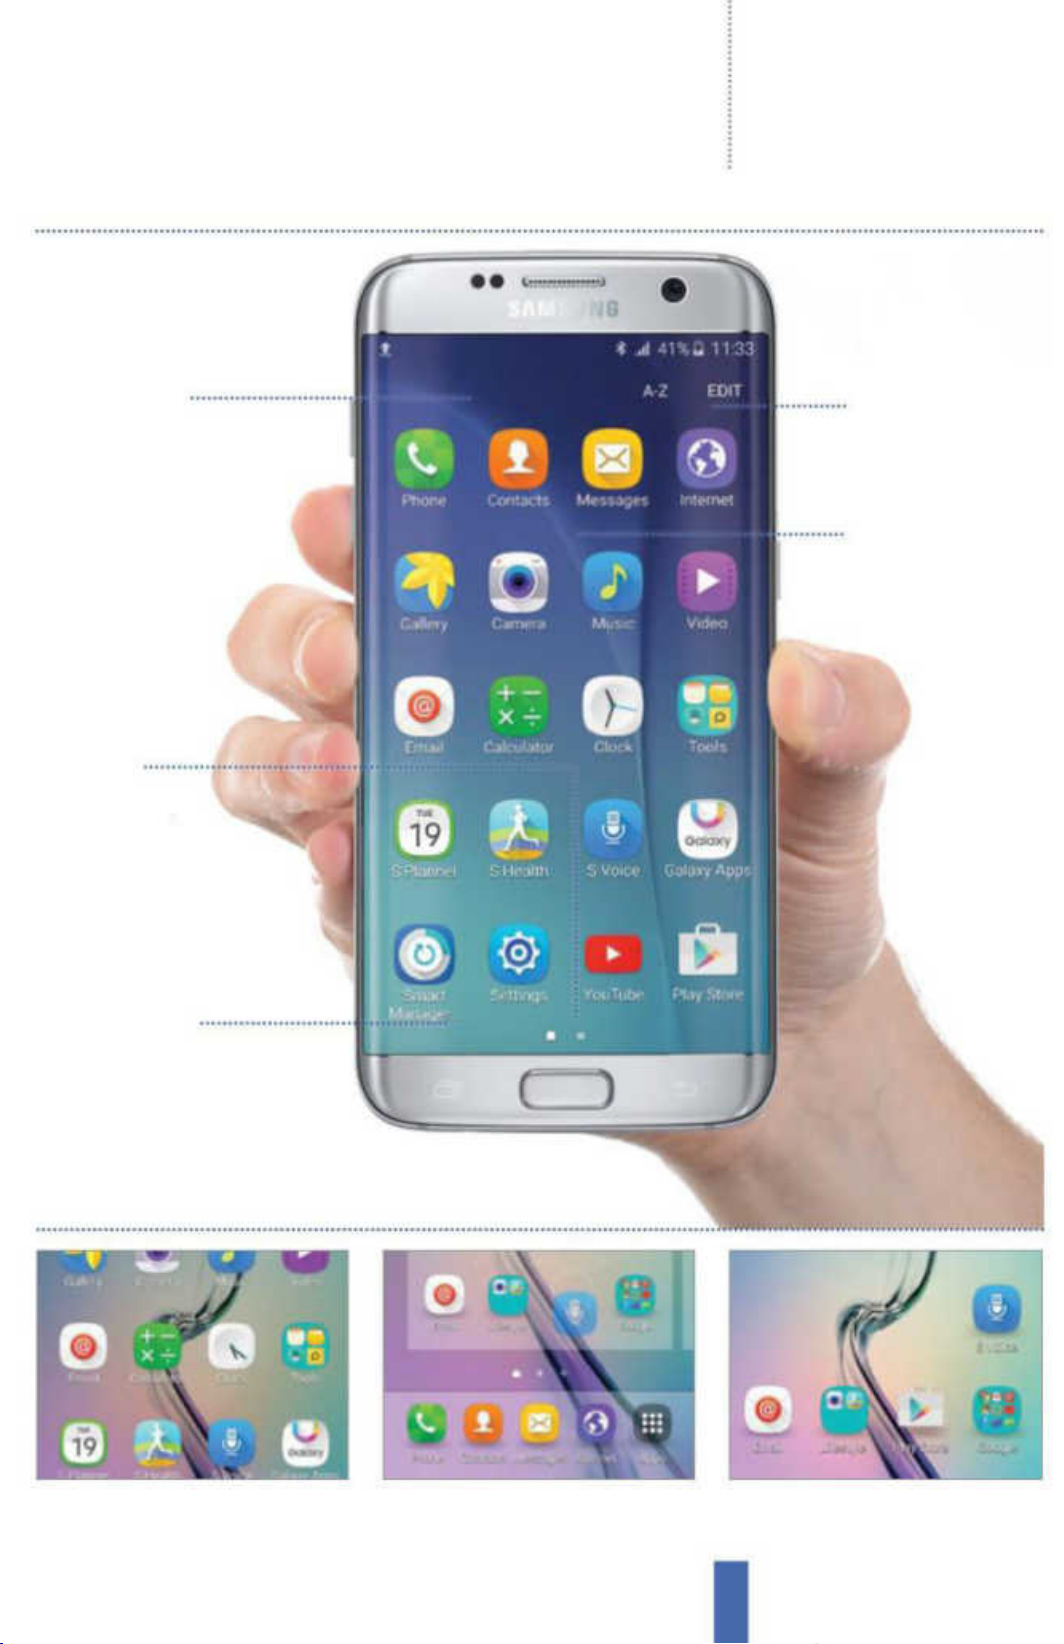
Inside the App Drawer
Getting startedHow to use your Galaxy
Adding widgets
Press and hold on a home
screen to bring up options
to add widgets relating to
your apps
Navigation
You can use the se
dots to qu ickly move
between App Drawer
pages
Menu options
Tap here to create folders,
uninstall/disable apps and
much more
All the apps
All the apps
installed on your
device can be
found here
Open the Drawer
To get here, just tap the
Apps icon in your Dock
Add apps to home screens
1 Find your app Go to the app
drawer and locate the app you want.
2 Select it Tap and hold the app and
it’ll overlay onto the home screen.
3 Drop it Now just take your finger off
the app to drop it into place.
27
Page 28
Getting started How to use your Galaxy
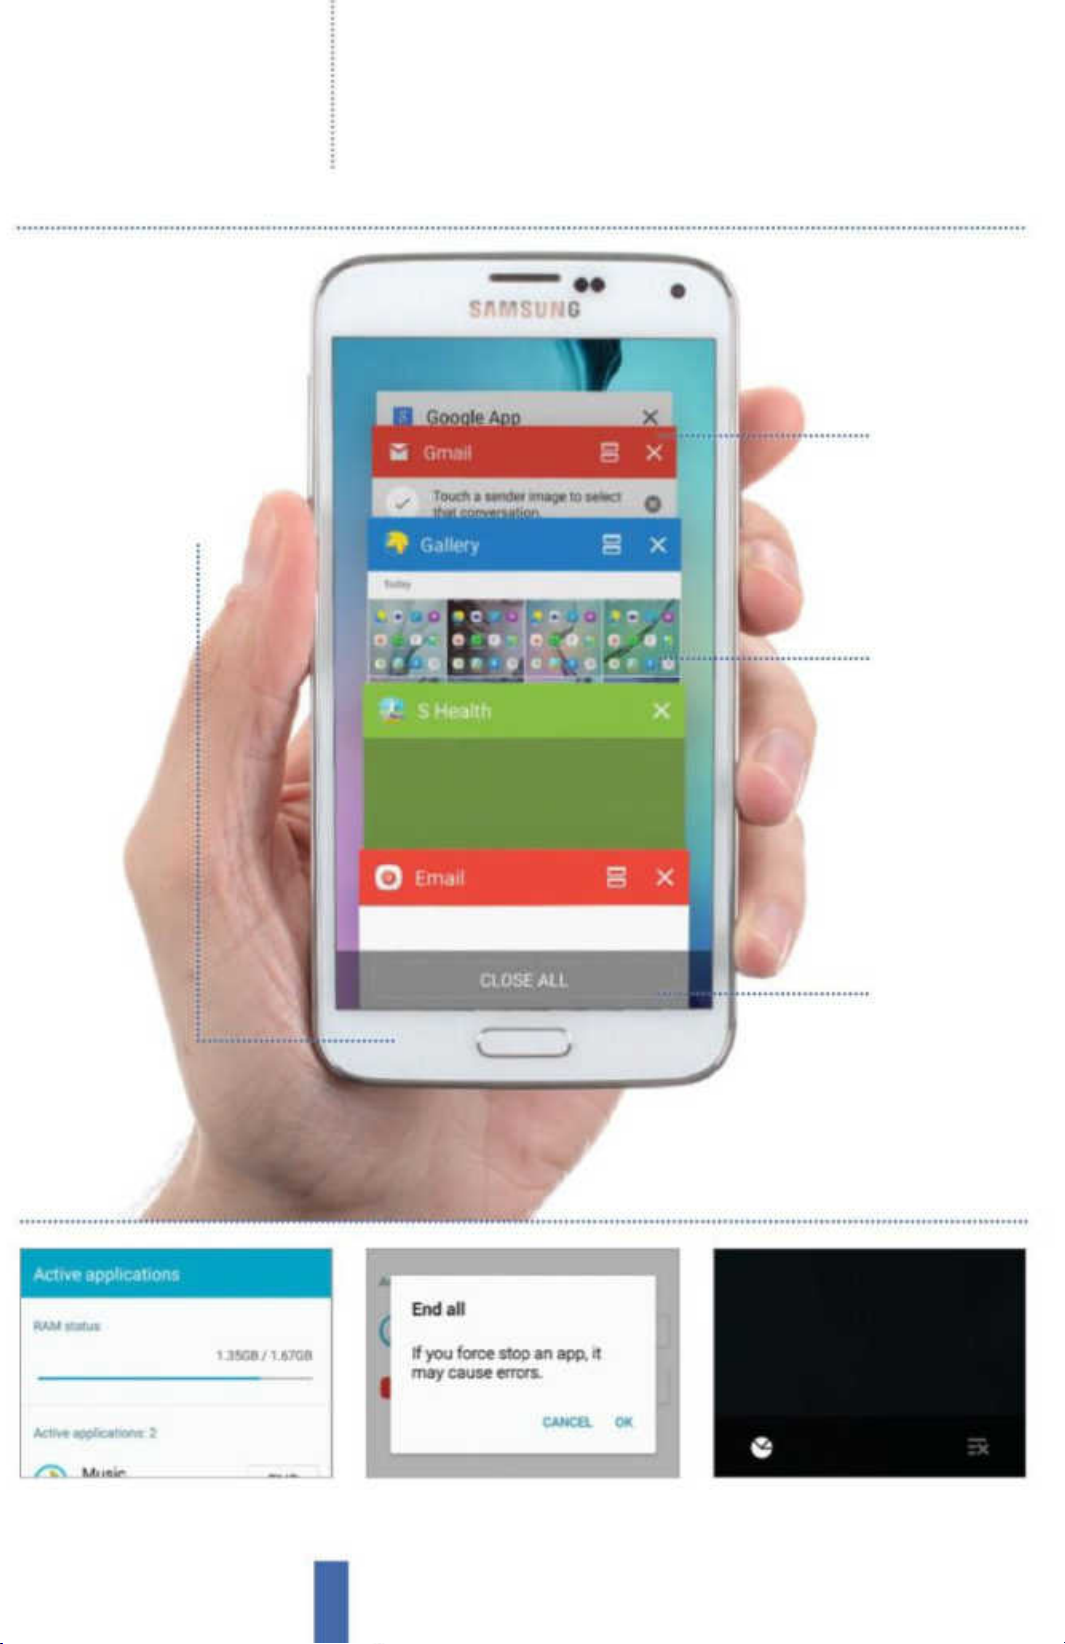
Multitasking on your device
Start multitasking
If you tap the recents key
on your device then you
will be t aken to this screen
All open apps
You can see all your
currently opened
apps here. Scroll
verti cally to see mor e
Swipe to close
To close a single app,
sweep it horizontally
off th e screen
1 Task manager Tap on the chart icon
in the lower-left corner (if available).
2 End all apps Hit the End All button
to deactivate all running apps.
Close all
Tap on this icon
to close all of the
opened apps in
one go
3 Clear apps Tap the right-hand icon
to instantly clear all active apps.
28
Page 29
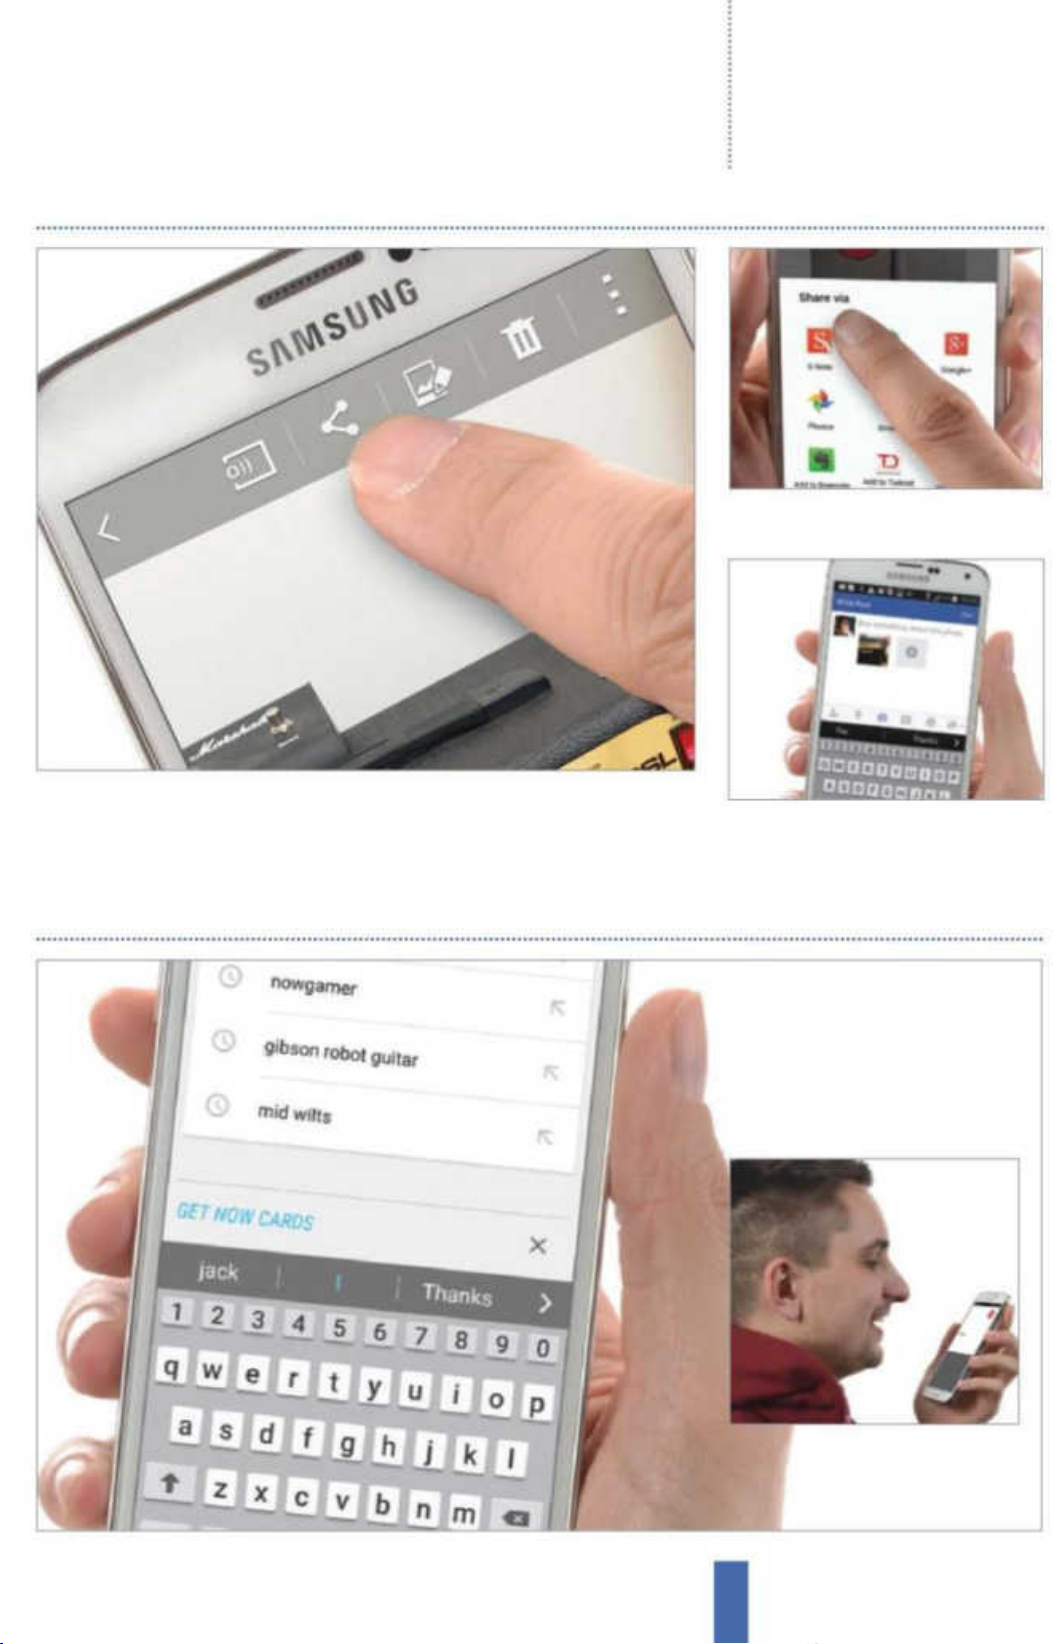
Share your content
Getting startedHow to use your Galaxy
2 Where to share Tap the icon and
then choose the app to share with.
1 Share files If you have files such as images or audio that you would like to share
with other people, you can tap the share icon that appears whenever it can be
used. The icon, shown above, looks like a little ‘less than’ mathematical symbol.
Search using Google
3 Attach and share Follow the
required procedure method.
1 Search quickly Long-press the
Home button while on the home
screen to open up Google Now.
2 Search now Type in your search
or tap the mic icon to speak it.
29
Page 30
Getting started Applications
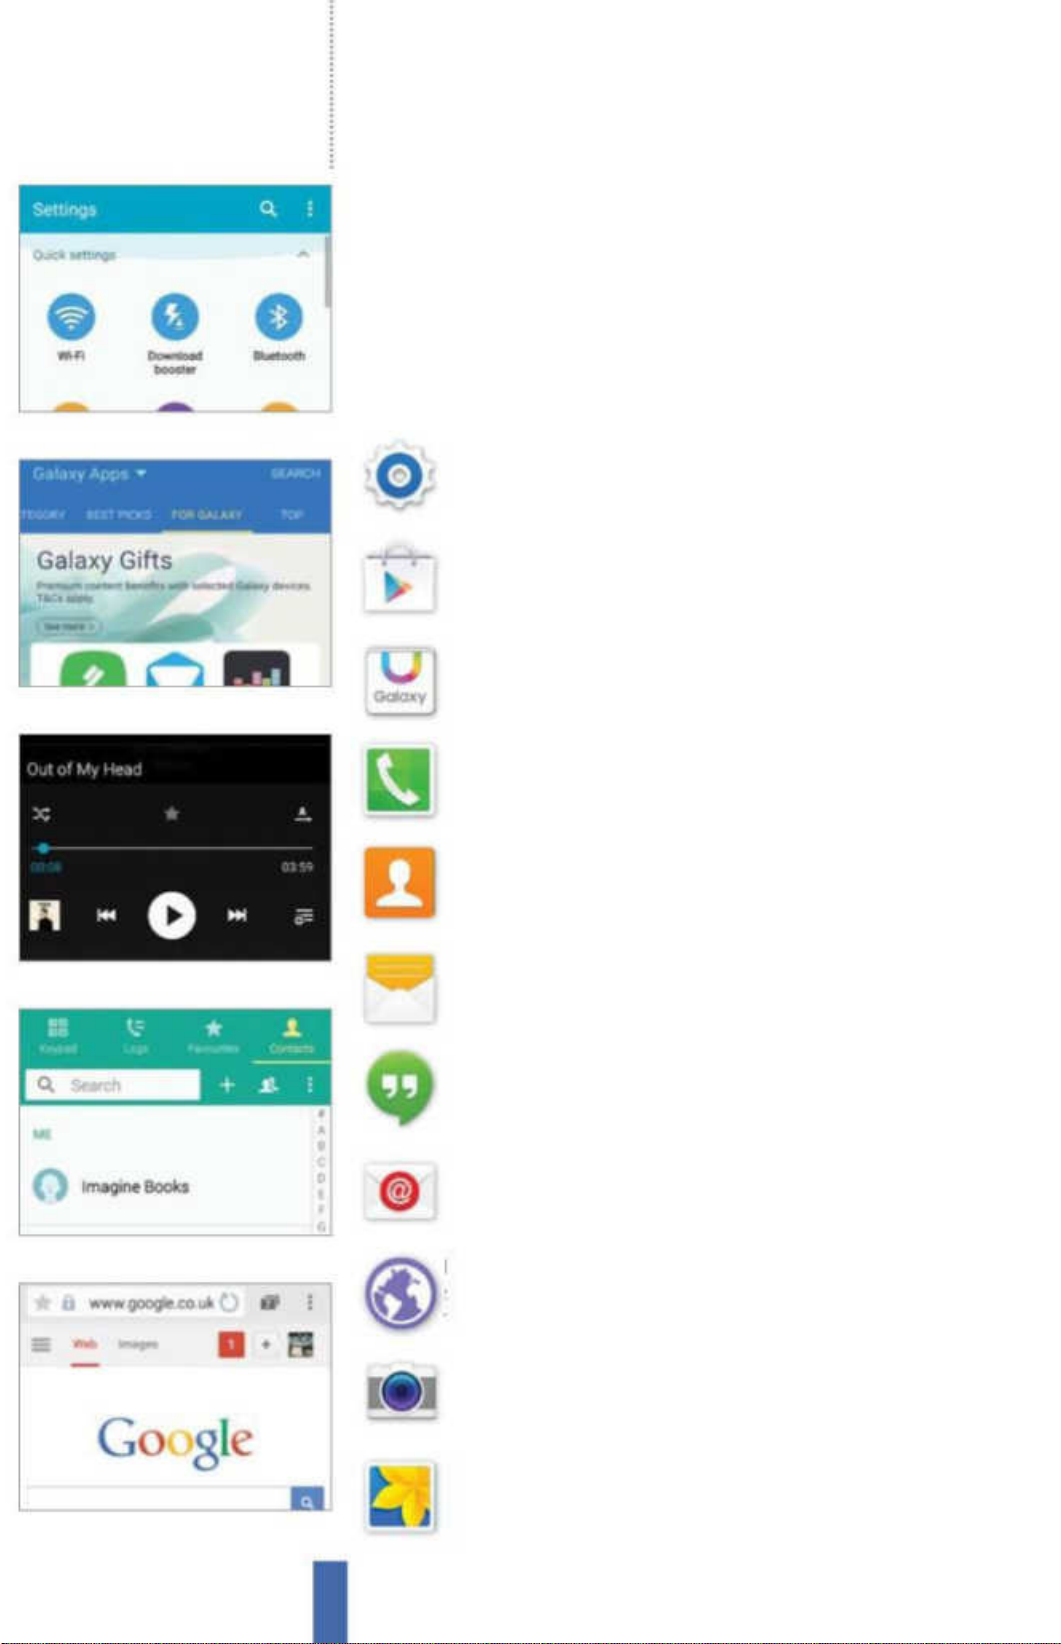
Fig 1 Control your Galaxy device
Fig 2 Find apps and discounts
Applications
These are the key applications that you will be using
every day with your Samsung Galaxy device
Settings The Settings area, accessible via its app icon or by pressing the
Menu button from the home screen and selecting Settings, allows you
to control every aspect of your device.
Play Store Google Play is the main hub for content on your Samsung
Galaxy device. Here you can browse, download and share apps, games,
movies, music, books and magazines.
Galaxy Apps Galaxy Apps is a portal to apps and games that offers
many discounts and deals as well as a fresh system of categories,
including apps selected by Samsung and featured collections.
Fig 3 Play top tunes on the move
Fig 4 Store phone numbers and more
Phone The mainstay of mobile devices, your Samsung Galaxy also has
its cornerstone Phone app. You can dial directly using the keypad or
start typing names to find your saved contacts.
Contacts The Contacts app is a powerful tool that amalgamates your
contacts data saved in a range of places, including Google, Facebook
and LinkedIn, and provides quick access to calls and messages.
Messages Messages allows you to keep in touch with everyone
important to you. You can send SMS or MMS messages, and make calls
by simply lifting your phone during a text conversation.
Hangouts Google’s new messaging service neatly wraps its
predecessors into a neat, functional app that lets you carry on the
conversation you’re having in your Circles on your Galaxy device.
Email Samsung’s Email app is a useful tool for managing multiple email
accounts, allowing you to direct all your mail to one handy app with full
search, folder and labelling capabilities.
Internet The Internet app is your first port of call when it comes to
surfing the web. Browsing is fast and simple, and you can zoom out to
the tab view by simply pinching.
Fig 5 Start browsing the web
Camera The Camera app is a very versatile tool that provides you with
a deluge of options ranging from fun filters to pro photographers’
settings, and it also has a number of handy launch shortcuts.
Gallery All the photos you take, as well as the screenshots you save, the
images you download and those you transfer from other devices, can all
be viewed from within the Gallery app.
30
Page 31
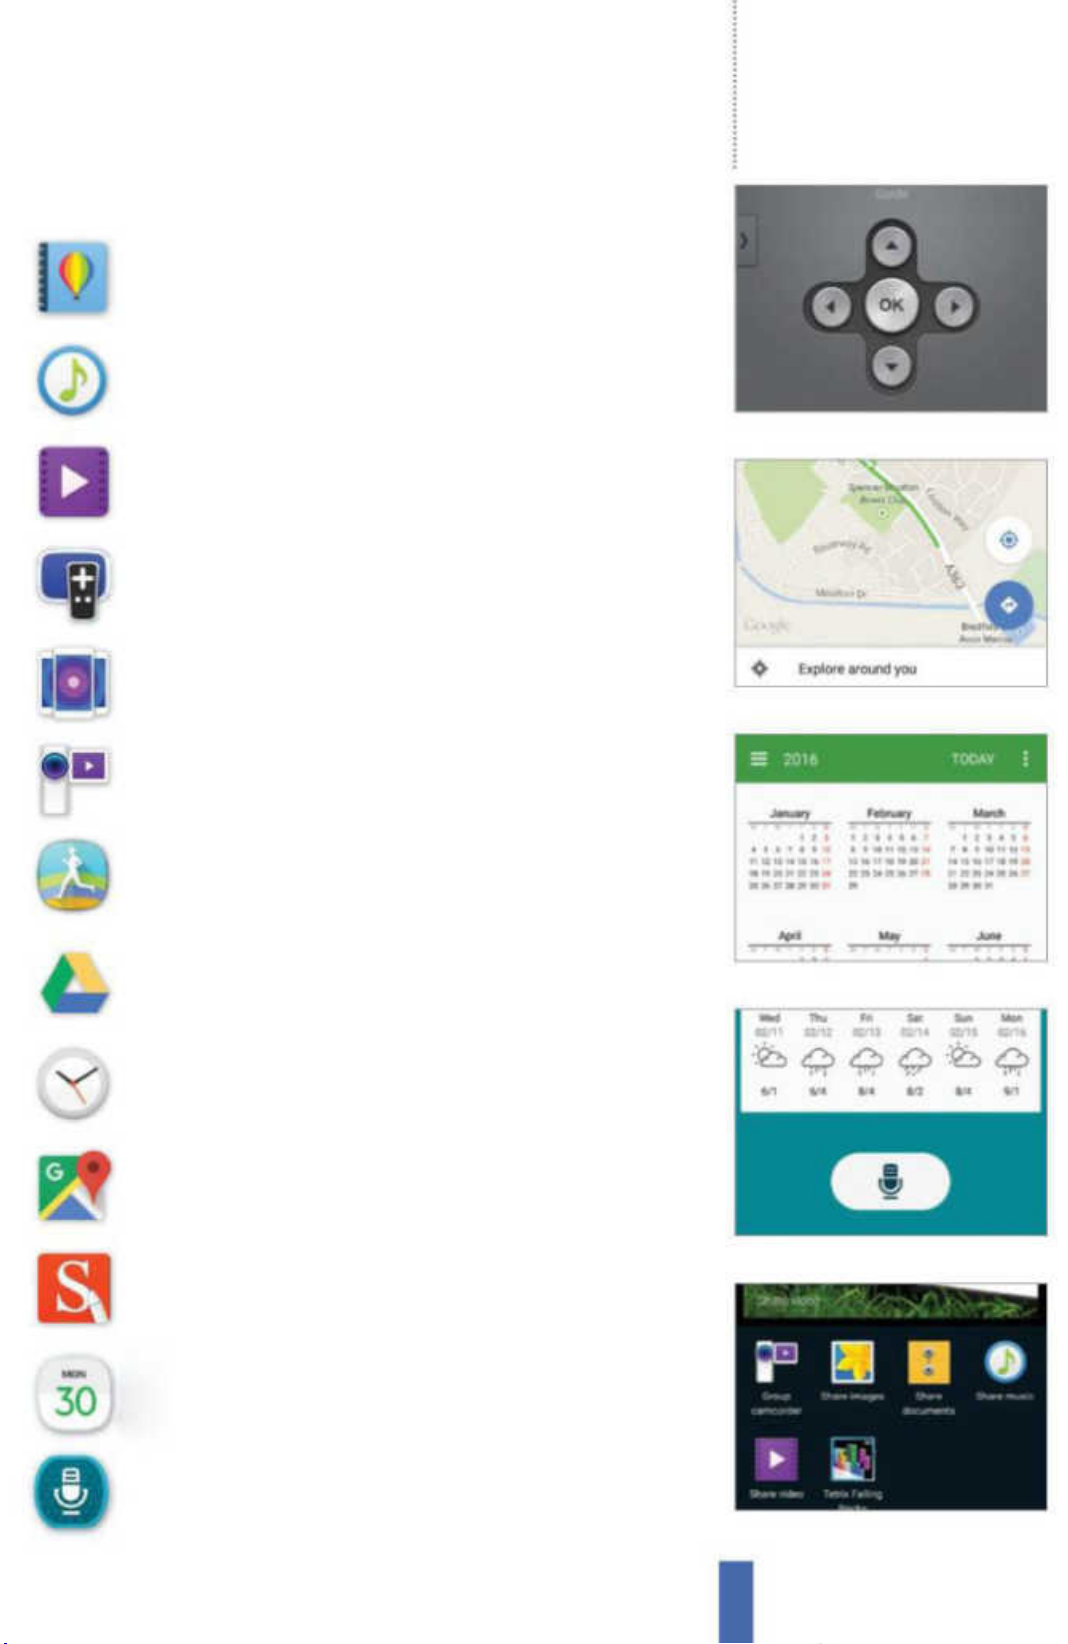
Story Album Import your images from the Gallery app into
customisable photo albums using Story Album. You can apply themes,
add captions and text, and share and print your albums.
Music You can play all your tunes from within the Music Player app or
by adding its widget to your home screen, and you can also have some
fun with Samsung’s mood-based track selector called Music Square.
Video Supporting subtitles and a range of file formats, Video Player is
your Samsung Galaxy’s main viewing screen. You can browse the files
on your device, queue videos up and hit play.
Smart Remote This versatile app not only transforms your Galaxy
device into a remote control for your TV and set-top box, but it also
sources and recommends shows to watch.
Group Play This app lets you pair-up multiple devices and share
pictures, documents and music among them in real-time. You can also
download and play multiplayer games through the interface.
Getting startedApplications
Fig 6 Control your viewing hub
Fig 7 Access turn-by-turn directions
Group Camcorder A new expansion of Group Play, this allows you, as
director, to view all camera feeds in the group and then edit and merge
them into the best shot sequence.
S Health This app helps you manage your health as well as lets you set
fitness goals, check your progress and keep track of your overall health.
Create a profile and monitor your diet and exercise.
Google Drive An incredibly useful tool for backing things up, as well as
sharing photos, documents and other files across devices, Google Drive
offers users plenty of free storage online.
Clock Use this handy app to set yourself alarms, see what time it is in
other places around the world and get instant access to a stopwatch to
record laps and a timer to assist you in the kitchen.
Maps Google’s Maps app shows you what’s going on nearby, places
to eat, drink and more. Plus, with turn-by-turn navigation for in-car or
in-pocket setups, you’ll never get lost again.
S Note Whether you’re using your finger or the S Pen, you can jot all
your important notes down for later using the S Note app (or its sibling,
S Memo) and even link them with your S Planner tasks.
Fig 8 Manage dates and reminders
Fig 9 Meet your Galaxy’s assistant
S Planner S Planner is both a comprehensive calendar, pulling in data
from your Google and Facebook calendars, and an organiser that you
can use to set reminders, manage to-do lists and more.
S Voice S Voice can be used to find information by asking questions and
also to control your device’s apps and settings. With a voice activation
command to wake up S Voice, you need never touch your device again.
Fig 10 Share files with other devices
31
Page 32
The apps Settings – Network connections
Settings –
Network
You’ll use it to…
Get online
Surf the web
Distribute music
Share tracks bet ween devices
Pass on pictures
Share photos between devices
Personalise your device
Change the rington e and more
Create a hotspot
Share the Internet between devices
Update your status
Tweet your thoughts
Get entertainment
Use downl oad and streaming services like
the BBC iPlayer
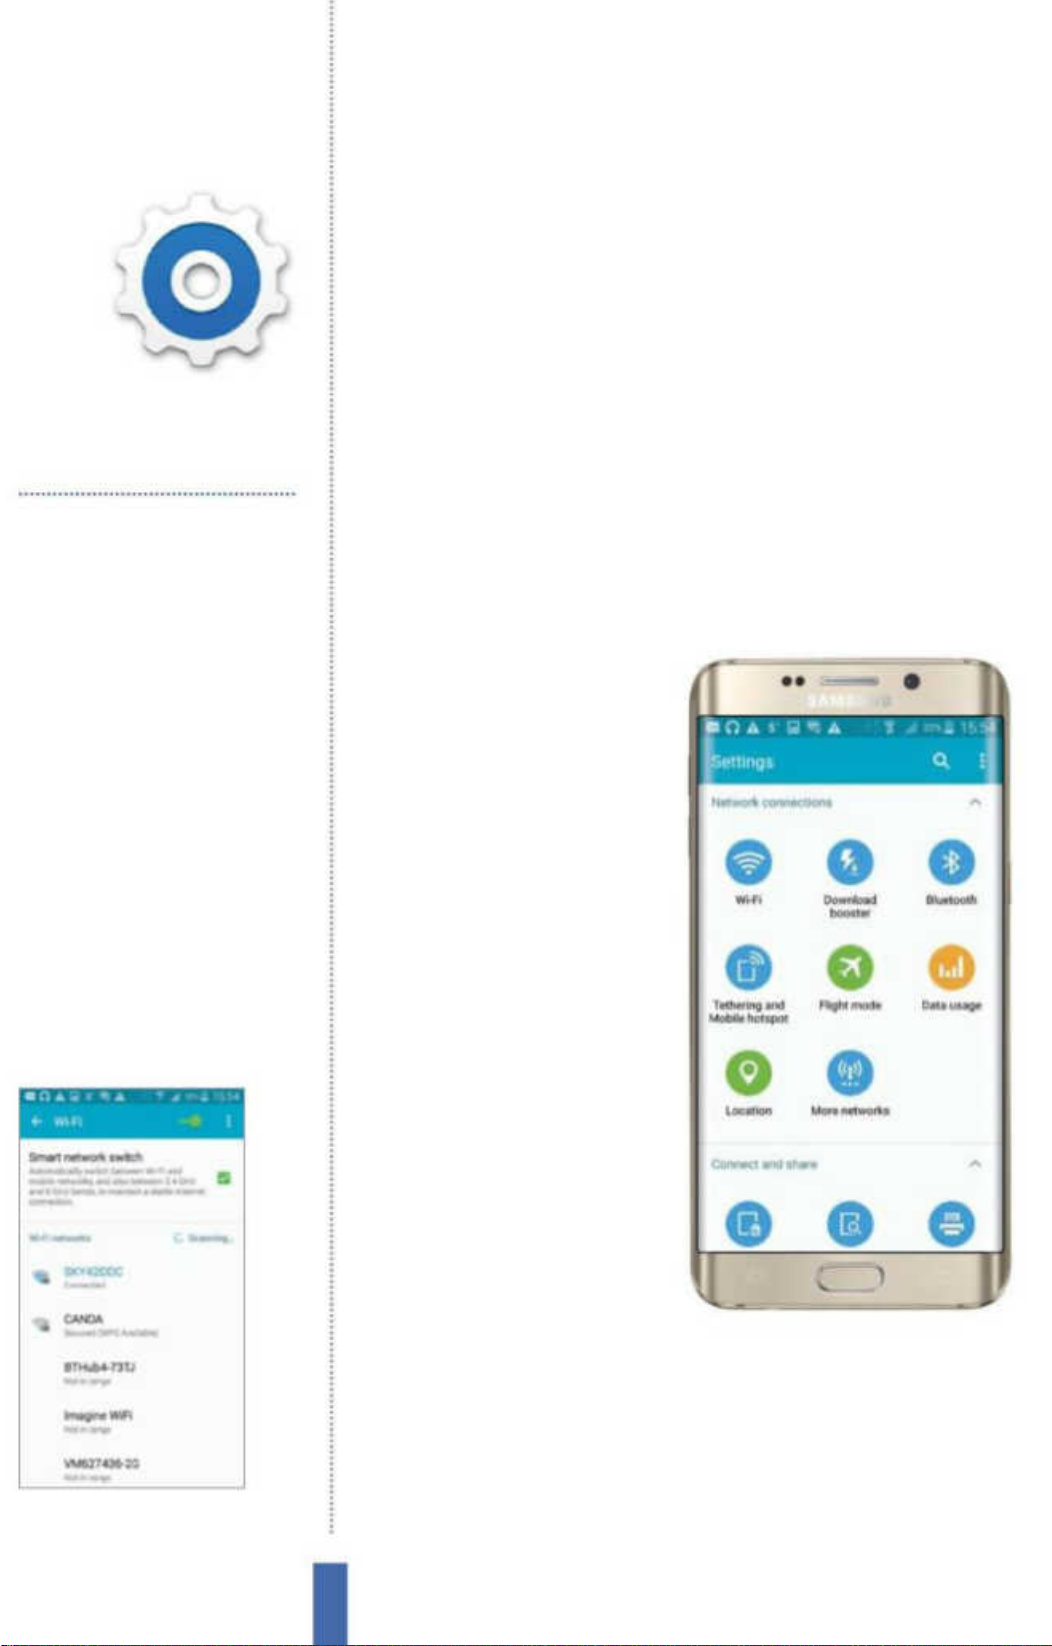
Fig 1 (right) On the home page, select your
App Drawer. Scroll to find Settings. Tap it
and you will be inside the settings area
connections
Use Wi-Fi and the mobile phone network to get in
contact with the world
Introducing Settings
Settings is where you can
con gure a wide range of
di erent aspects of your
device to get them just how
you like them, personalising
the look and feel, responses
to gestures and a lot more.
Settings is also where
you con gure wireless
connections and networks.
Connect to Wi-Fi
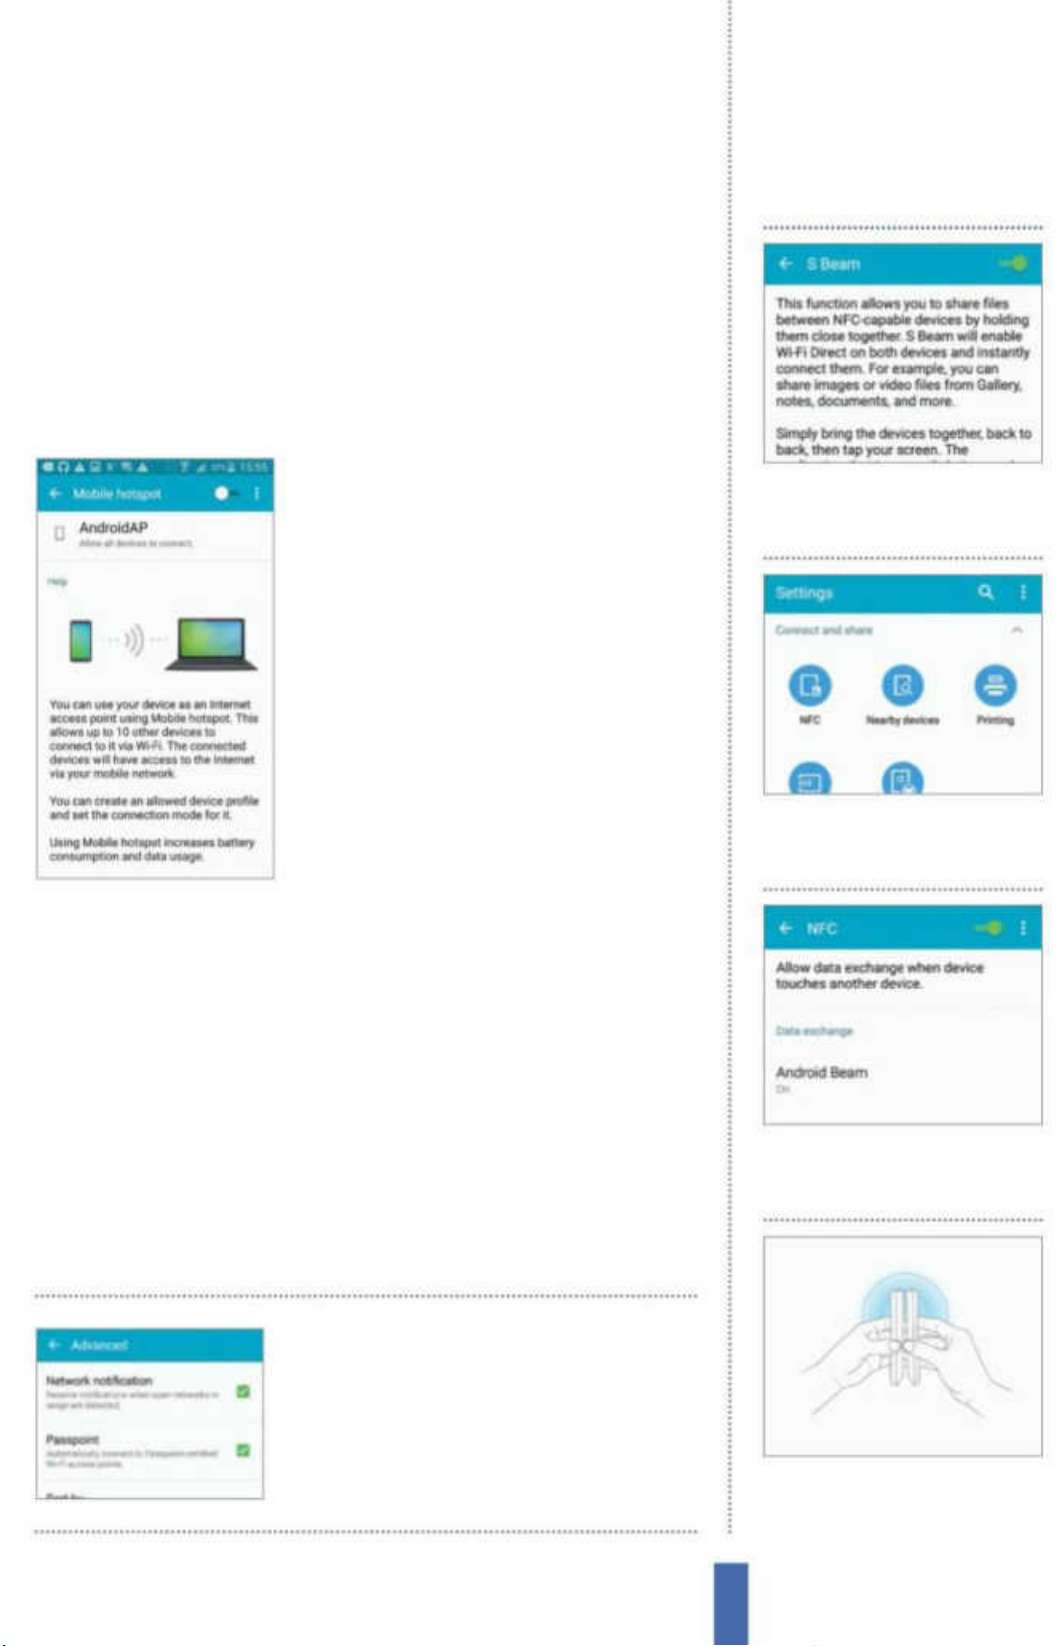
Fig 2 (above) Find a Wi-Fi network and
connec t to it via Settings
When it comes to Wi-Fi,
getting connected is really
easy. First you need to
make your way to the Wi-Fi
settings area on your Galaxy
(Fig 1). Then use the slider
to turn Wi-Fi on. This screen
also lists all of the Wi-Fi connections your Galaxy can nd (Fig 2).
Tap one, enter its password and then tap Connect. Your Galaxy
will remember networks it has connected to in the past, so there’s
no need to keep entering the passcode every time you want to
connect. Better yet, it will automatically connect whenever you
come into the vicinity of a network you’ve used before, so moving
32
Page 33
The appsSettings – Network connections
o your data connection and onto your home Wi-Fi is seamless.
This will matter a lot if your network data allowance is low.
Wi-Fi passwords can be a complex mix of letters and numbers,
and it can be tricky to enter them correctly. If you nd your Galaxy
won’t connect, maybe you are entering the information incorrectly.
Just choose Show password if you nd you are having a problem
and double-check what you are entering as the passwords
Create a Wi-Fi hotspot
If you have a Wi-Fi-only device you want
to connect to the internet when you’re
out and about, like a laptop, you can do
so via your Galaxy. Simply create a Wi-Fi
‘hotspot’ using your Galaxy and then
connect to it with the Wi-Fi-only device.
In Settings, under Network
Connections, tap on Tethering and Wi-Fi
Hotspot. Use the slider to turn Portable
Share via S Beam
1
Use S Beam Share files between
Galaxy devices by using Near
Field Communication (NFC).
Wi-Fi hotspot on, then make a note of
the password and use it in your other
device to connect.
Tethering via Bluetooth
As well as using Wi-Fi to allow other devices to share your Galaxy’s
internet connection, you can also use Bluetooth in the same way.
The setting is similar to using Wi-Fi.
To get the Bluetooth method to work, go to Settings and
tap on the Tethering and Wi-Fi Hotspot option under Network
Connections. Next you need to tick the box next to Bluetooth
Tethering. This will turn Bluetooth on and any device that’s paired
with your Galaxy will be able to get to the internet through the
connection – pretty impressive.
For open Wi-Fi network
2 Find S Beam Go to Settings and
under the Connect and Share,
settings, tap the NFC option.
3 Turn on Tap S Beam and use the
slider to turn S Beam on, then hit
the Back button.
alerts, under Wi-Fi, tap
on the menu icon and
choose Advanced
4 Trans fe r Activate S Beam on the
other device, hold the two backto-back and tap when told.
33
Page 34
The apps Settings – Personalisation
You’ll use it to…
Settings –
Personalisation
Change your Galaxy to suit your tastes
Change the font
Make your menus more re adable
Set your lock screen
Customise the available options
Pick ringtones
Give your friends bespoke alerts
Prevent cold calls
Block unwanted callers
Save battery
Set up Power saving mode
Choose wallpapers
Change your device’s background
Fig 1 (right) You can personalise your
Galaxy device in a number of ways
Customising your
Galaxy device
When you rst set up your
Galaxy device, many settings
will have been taken care of.
There’s a lot you can do to
personalise these, though, from
changing the home and lockscreen wallpapers to altering
the fonts or the sounds used
for ringtones, alerts and more.
Di erent Galaxy devices have
di erent features – here, we’re
looking at the Galaxy S5 (Fig 1).
Control the
system sounds
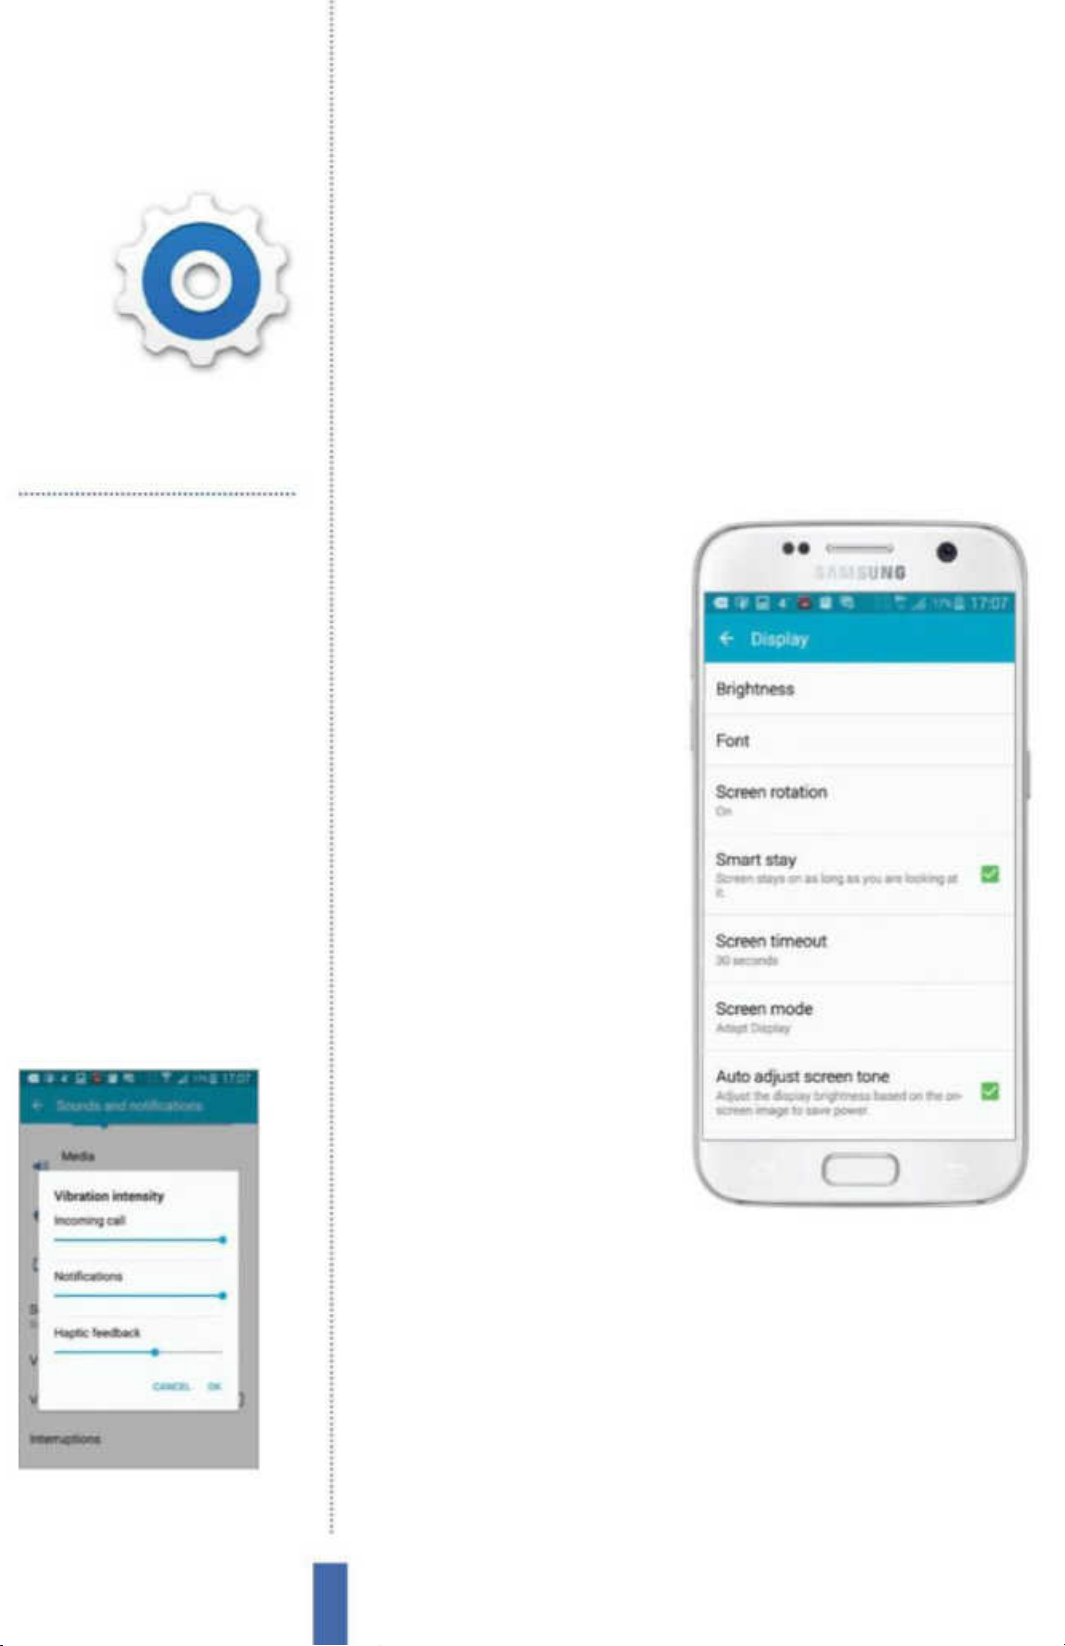
Fig 2 (above)
changes to the vibration intensity for
different circumstances
You can make precise
There are lots of di erent ways
in which your Galaxy device
uses sound. The one that
is likely to spring to mind is
ringtones, but there are lots more. How about all the di erent kinds
of noti cations for di erent incoming communications? There are
lots and lots of built-in sounds that you can use as ringtones and
noti cations, and experimenting with them can be an entertaining
experience.
In fact, some of the sounds aren’t really like noises at all. These
relate to vibrations and something called ‘haptic feedback’, which
refers to those small tactile jolts you get when you tap and hold
app icons on the screen. There is a sound associated with these, but
34
Page 35
The appsSettings – Personalisation
it’s really much more about vibration – as is full vibration, of course,
which you can use for an alert if you want to turn the ringtone
volume o . You can even make changes to that in order to make it
stronger or weaker in di erent circumstances (Fig 2).
Customise the display
Personalising the look of your Galaxy
device is a great way to make it truly
yours, and there are lots of features that
enable you to do this. For example, if
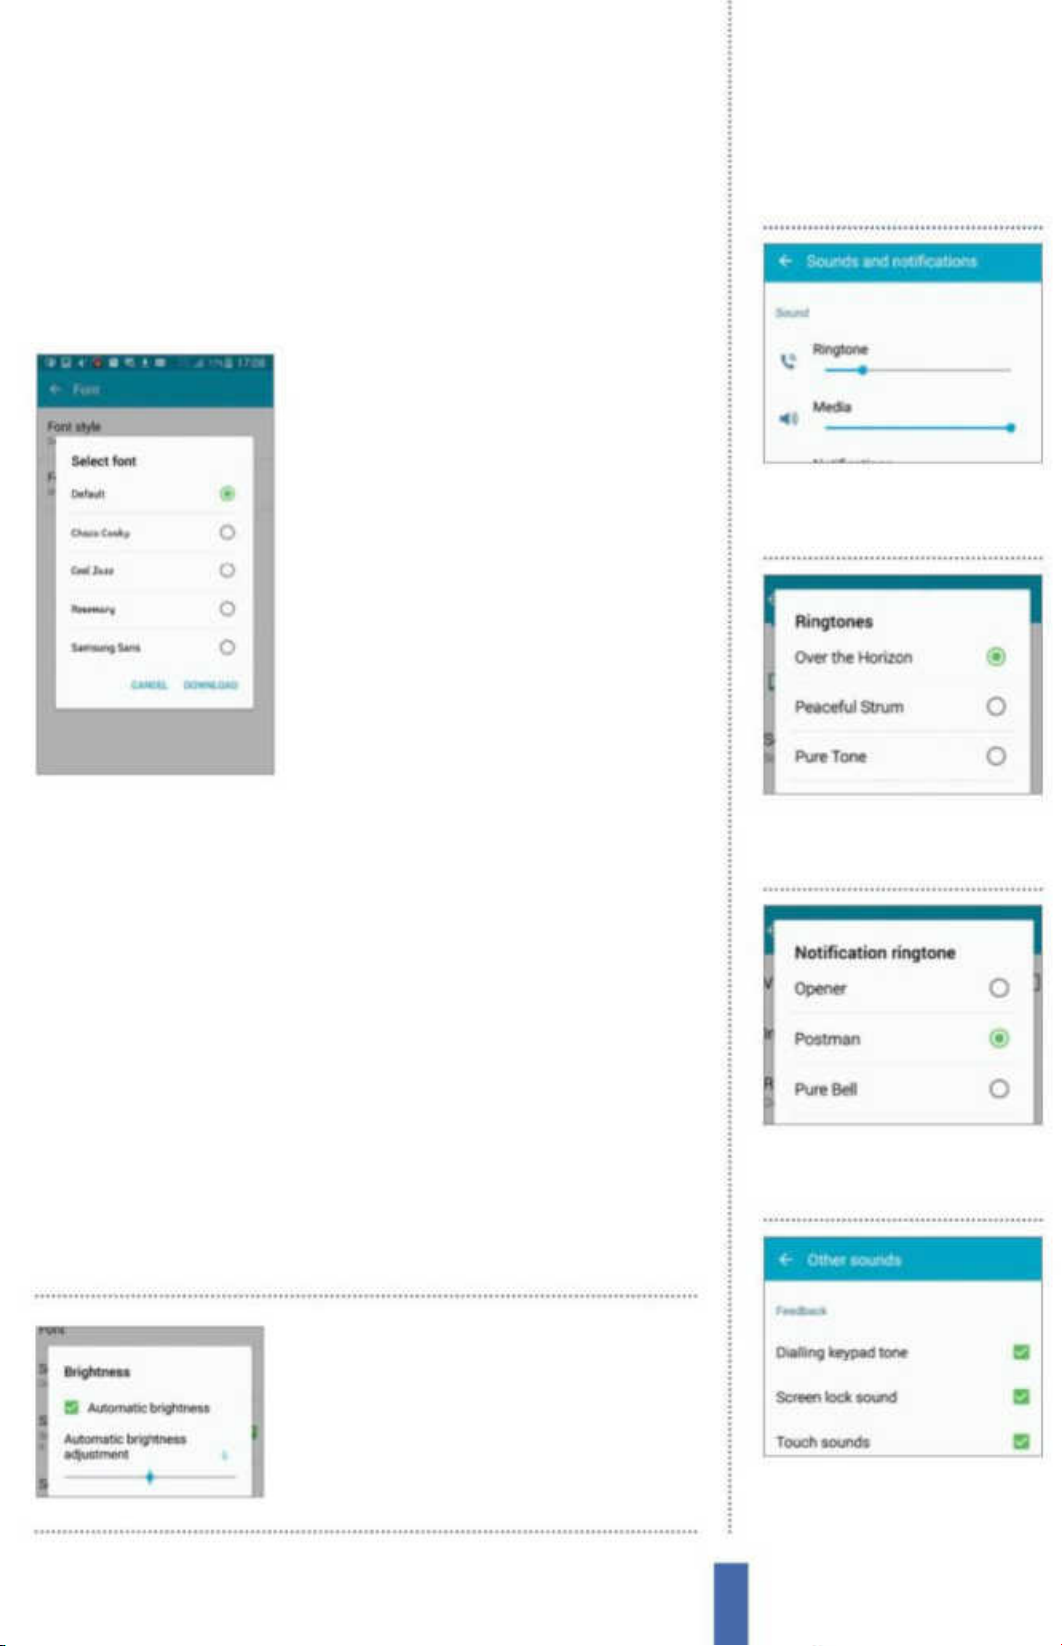
you tap Settings and go to Display, you
will see lots of choices. You can change
the display font and alter how the LED
indicator is used – by setting it to ash
red if the battery gets low, for instance.
You can also use the Smart Stay function
whereby the front camera is used to
keep the screen on if you are looking
Set ringtones and alerts
1
Go to settings Tap Set tin gs and
then Sound to get to the sound
settings area.
at the device, which instantly eradicates any frustration when the
screen dims and locks when you leave it idle for a few seconds.
Adjust the screen settings
The screen is the most power-hungry part of your device, so you’ll
want to ensure it works to a su ciently high standard but, at the
same time, doesn’t consume power at an unnecessarily fast rate.
There are some key options to help you get the best out of your
device, and you’ll nd them in the Display part of the Settings app.
Here, you can manually alter the screen brightness or set it to
automatically adapt. Moreover, you can set the screen to time out
after a period of inactivity – on the Galaxy S5 this ranges between
15 seconds and ten minutes. You can also use Smart Stay to keep
the screen on while you are looking at it.
You can alter the screen
2 Select a ringtone Tap D evice
ringtone, then tap the tones to
test them and hit OK to set one.
3 Alerts Tap Default Notifications
to go to the notifications area,
tap to test and hit OK to select.
brightness, choosing to
adjust it either manually
or automatically
4 Vibrate when ringing If you
want your Galaxy device to
vibrate, just tick the box.
35
Page 36
The apps Settings – Personalisation
Change the lock screen
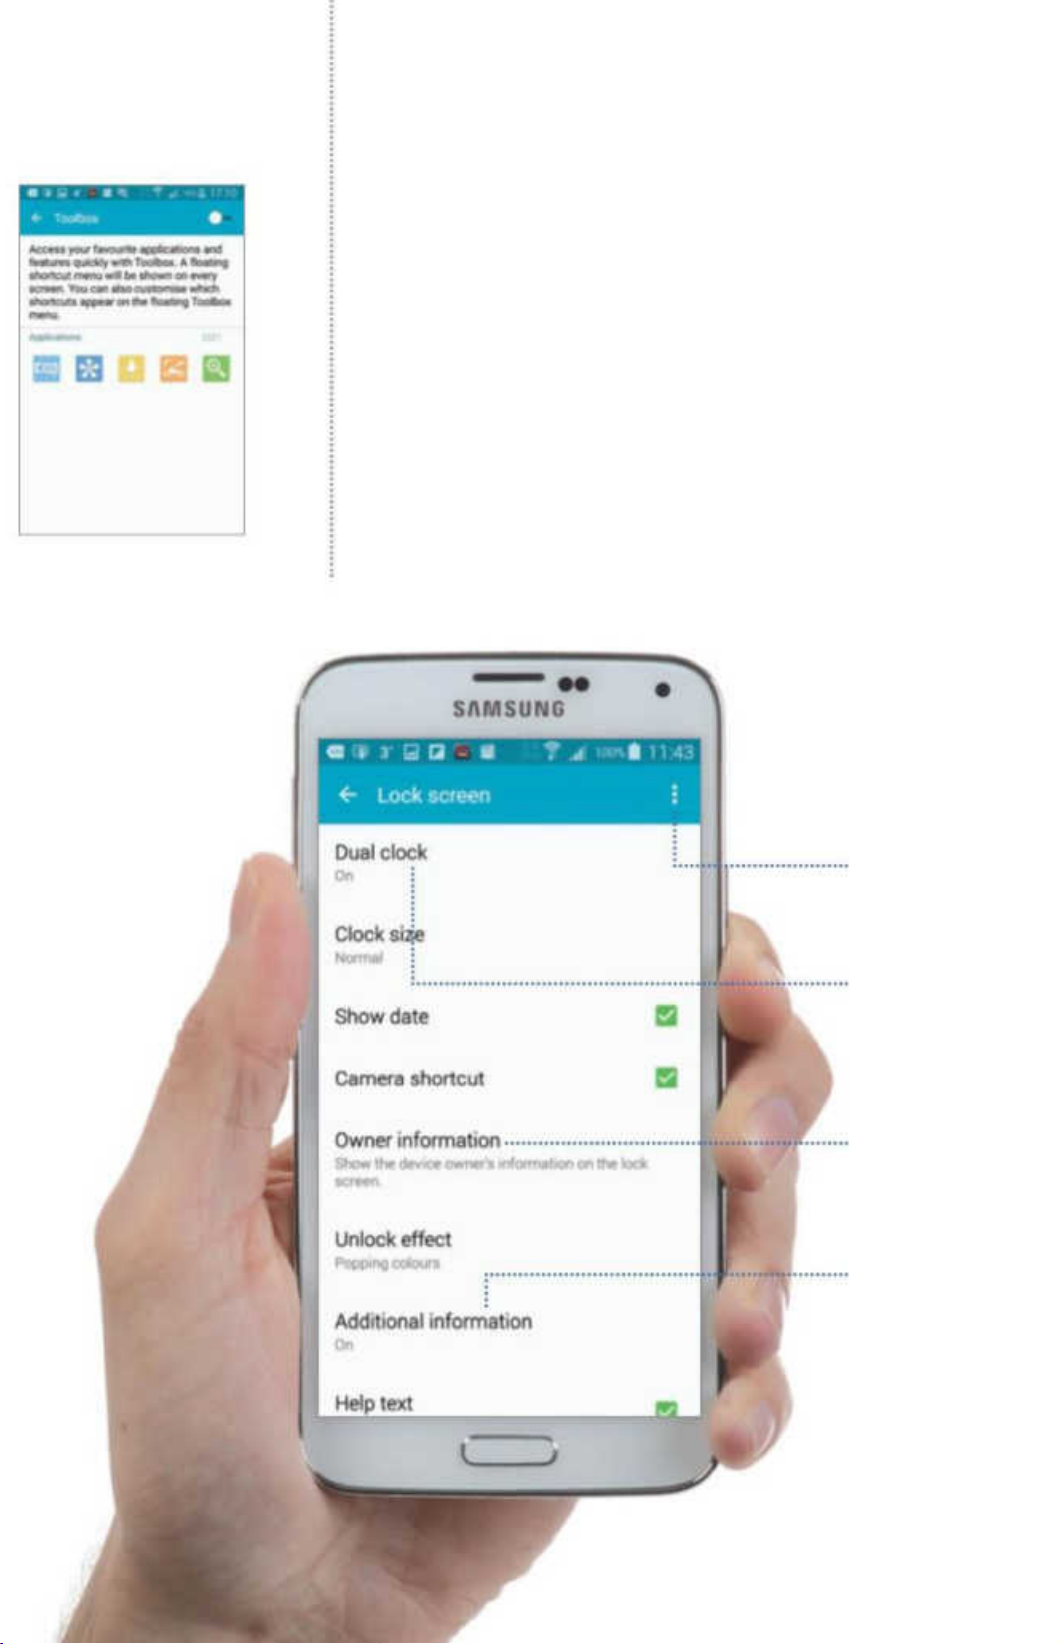
The lock screen isn’t just a screen that appears when your handset
has timed out; it can also provide you with some very useful
functions. On the Galaxy S5, you can set it to display lots of di erent
kinds of information, including a clock, weather data and a rolling
‘ticker’ of information from sources like Facebook.
The lock screen can open directly into ve di erent applications
– what they are is up to you (Fig 3). This is one of the best shortcuts
you can set up. If you frequently pick up your Galaxy device to make
a phone call, check your email, tweet, take a photo and so on, the
chances are that you can put a shortcut to the relevant app on the
lock screen and get there in an instant.
Fig 3 (above) You can set apps to
open directly from the lock screen
Clock
Add a clock icon
by selecting this option
Owner info
Add your ow n user info to
the lock screen
More info
Tap here to display the
weather and a pedom eter
Shortcuts
Go to Toolbox to create a
shortcut to apps
Page 37
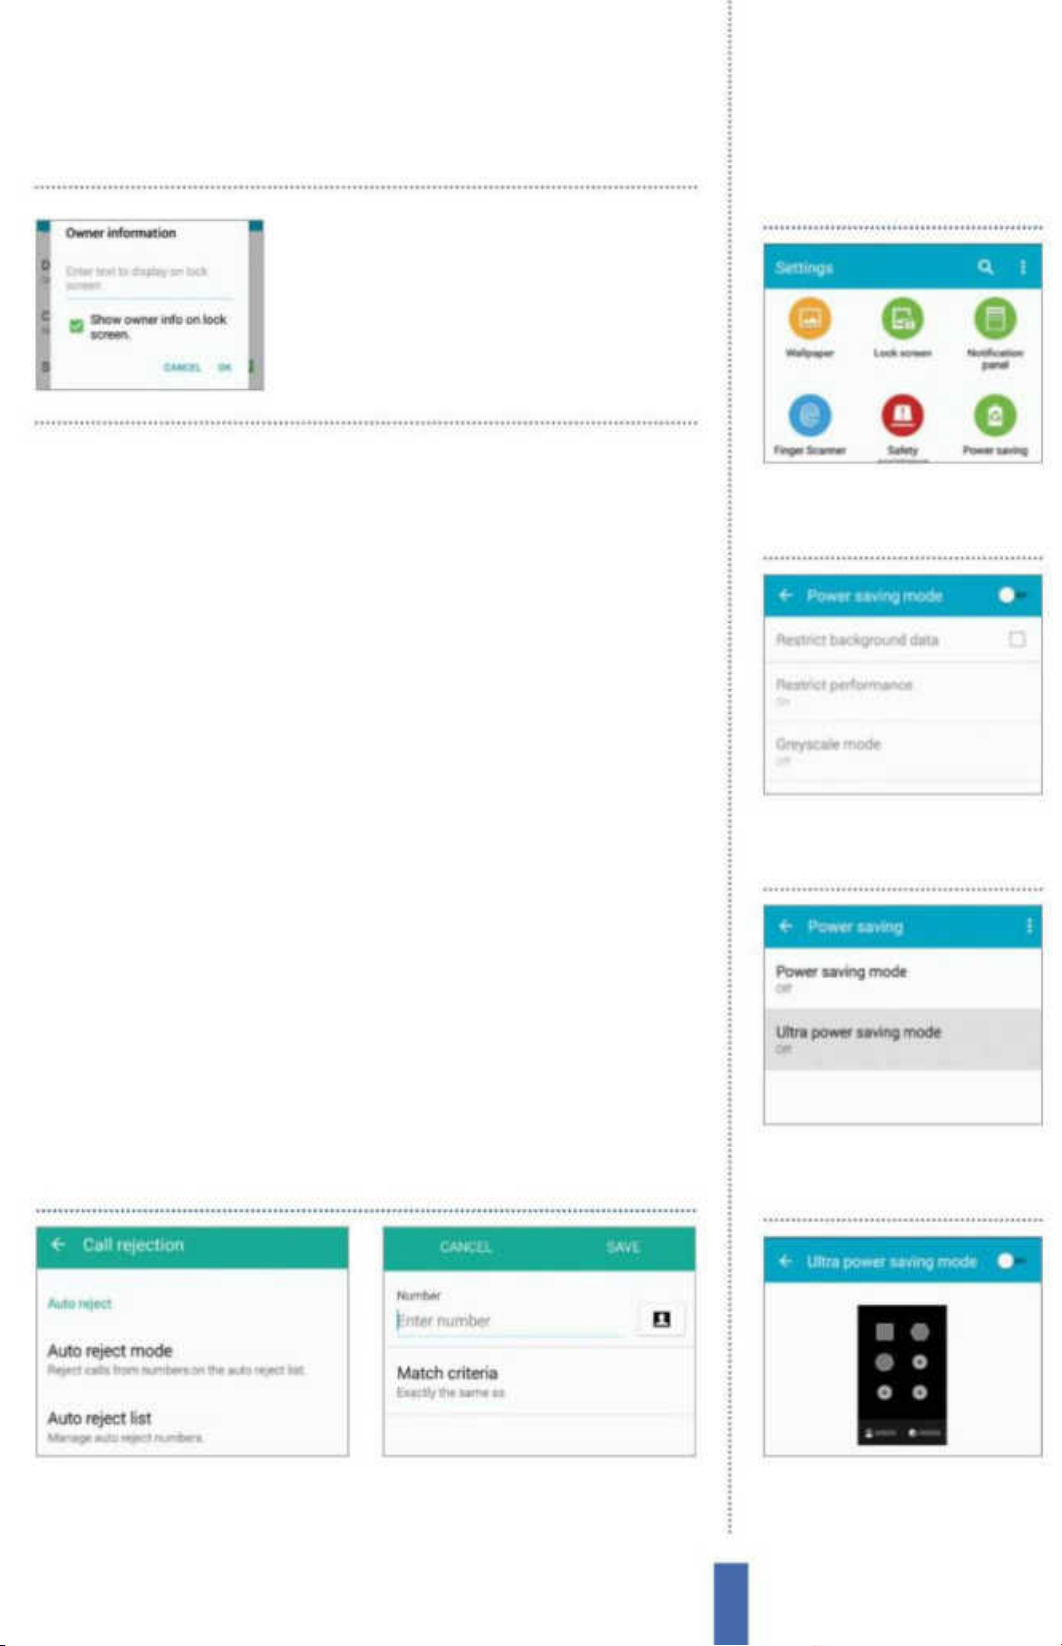
Add your owner details
to the lock screen in case
your missing device is
found by someone
The appsSettings – Personalisation
Enable Power saving
To get started with this feature, tap on Toolbox under the Sound
and Display settings and then move the Toolbox slider to the On
position. This will illuminate the default applications but you can
change these by tapping on Edit and then deselecting existing
apps before choosing new ones.
Set up Blocking mode
Most of the calls and texts we get are generally from people that we
actually want to hear from. However, as you will probably appreciate
by now, that’s not always the case since we occasionally, and for any
number of reasons, receive unwelcome phone calls from people
that we just don’t want to hear from. You will be happy to hear that
you can block incoming phone numbers to make sure that you
don’t have to take their calls. Go to the Call settings and then tap
on ‘Call Rejection’. Now select the Auto reject list and then tap on
the ‘+’ icon to add new numbers to block. You can also block callers
form within the Phone app by tapping on the number and then
tapping the three-dot icon in the top-right corner and selecting
Power saving Head over to the
1
Settings menu and slide on the
Power saving mode.
2 More settings Tap Power
saving mode in order to get to
more detailed options.
the ‘Add to Auto reject list’ option from the menu. You can always
remove numbers later if you wish.
Block calls
1 Find the Call settings Tap Call an d
then choose Call rejection>Auto
reject list.
2 Enter numbers Now tap on the ‘+’
icon and type in the number that
you wish to block.
3 Ultra power saving mode For
more extreme power-saving
methods, tap this option.
4 Drastic cutbacks This mode
greyscales the screen and limits
which apps you can access.
37
Page 38
You’ll use it to…
Settings – DeviceThe apps
Settings –
Device
Understand how to make Settings work for you
Set passcodes
Protect your Galaxy device
Update firmware
Make sure you have the latest OS
Check your number
Find your phone number
Simplify the device
Use the accessibility settings
Manage space
Check on your device’s storage
Remove apps
Uninstall unwanted apps
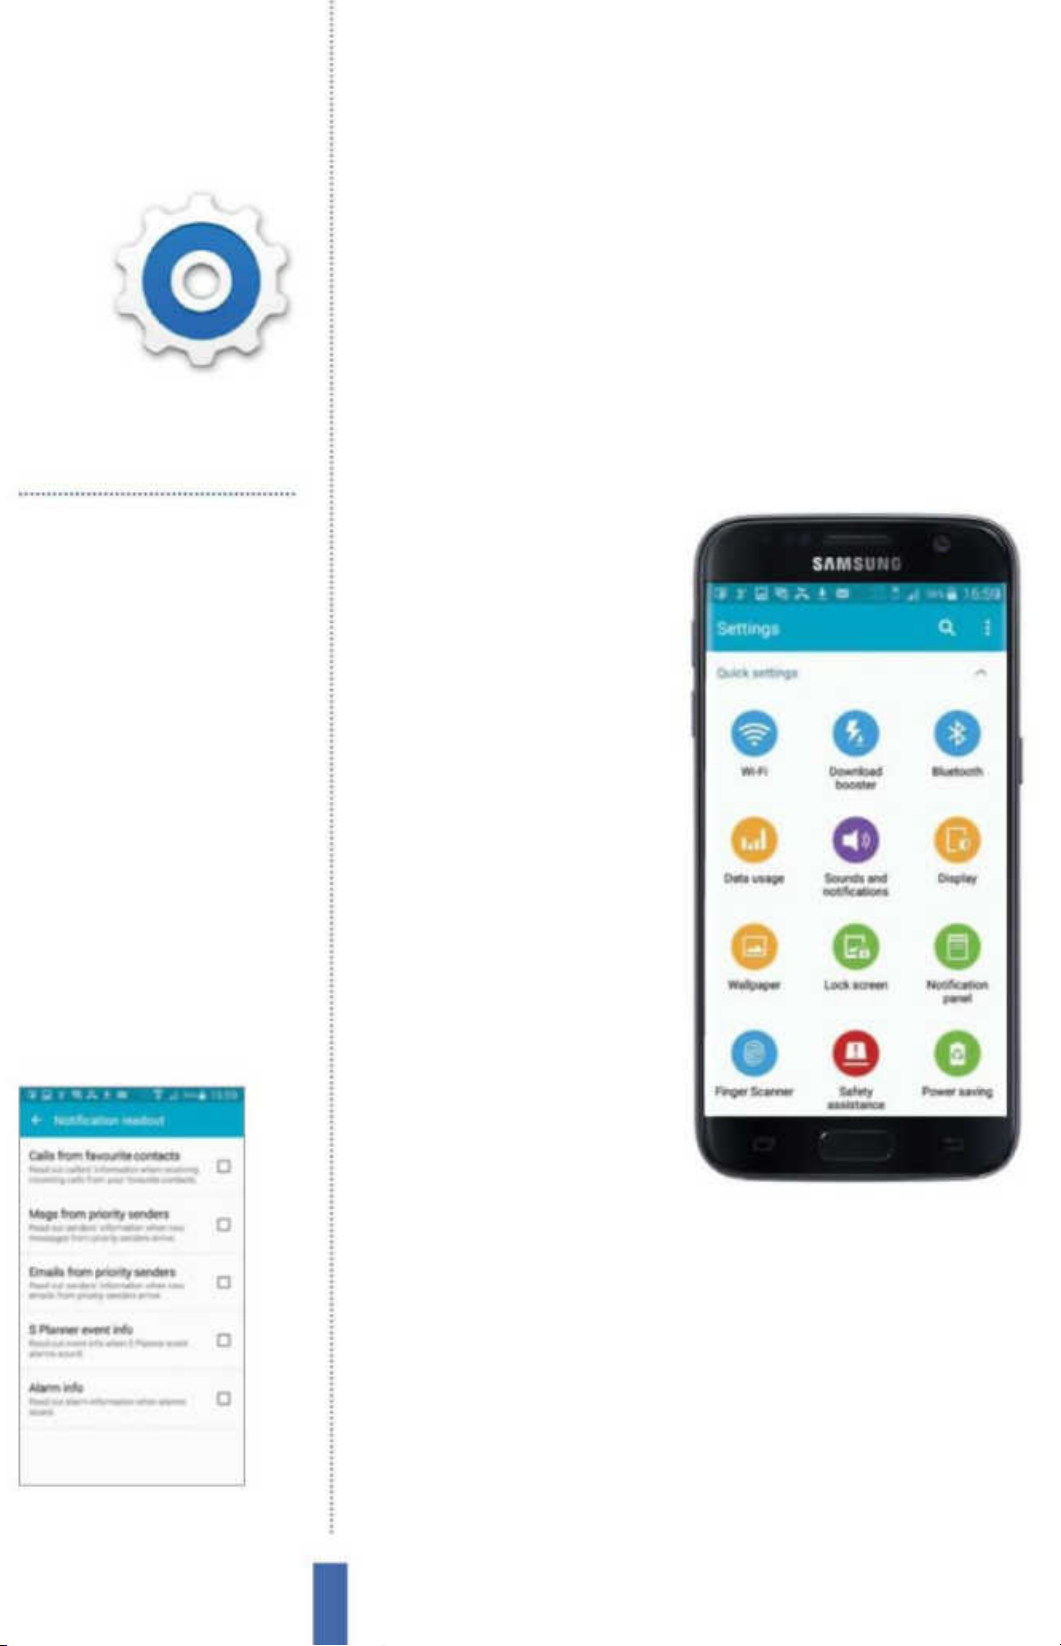
Fig 1 (right) The Settings area can be
complex but it is logically arranged
Managing your
Samsung device
Your Samsung Galaxy device
will work right out of the box,
but using it will be a more fun
experience if you personalise
its settings to meet your own
requirements. This is easy to
do, and the Settings area has
a lot on o er (Fig 1). What
you get will vary from device
to device, but it’s all logically
arranged and all of the settings
are handily placed into easy-to nd sections.
Change the
Fig 2 (above) You can set up Notification
readout mode on your device
language settings
When you set your Samsung
Galaxy device up for the rst
time, you need to tell it your preferred language. However, there’s
more to the language settings area than just telling your Galaxy
what language it should use as its main one; you can also set up a
range of other language and speech-related preferences. If you go
to the Settings area of your Galaxy device and tap Language and
input, you will have access to these settings.
So for example, you are able to change how voice search works
by setting a default language and then asking it to block o ensive
words. Moreover, you are also able to set some text-to-speech
options. You can also decide how fast speech synthesis runs, setting
38
Page 39
Settings – Device The apps
it to talk at di erent speeds depending on what your preference
might be.
There’s also a really useful Noti cation readout mode (Fig 2). This
enables you to set incoming calls and new noti cations to be read
out automatically. You can decide precisely what gets read out, and
in the process avoid getting overwhelmed.
Finger Scanner
One of the hottest features of the Galaxy S6 is the Finger Scanner,
which is used as an alternative to entering passwords. This
technology sits within the home button on your device and
Samsung has already made this feature available to third-party
developers to integrate into separate apps (the PayPal app is the rst
to utilise the Finger Scanner for added security).
Setting up the Finger Scanner is quick and easy, and can be done
in the Finger Scanner option in Settings (under Quick Settings). You’ll
need to slowly swipe your nger down over your home button a
number of times to register your ngerprint and then provide an
Set up Finger Scanner
1
Quick Settings Open Settings
and tap ‘Finger Scanner’ listed
under Quick Settings.
alternative password as a back-up option. Once your print has been
registered you will be taken to the Lock screen settings so that you
can set it as a high-security means of unlocking your device.
Use the accessibility options
To discover ways in which you can make your Galaxy device easier
to use, tap on the Accessibility heading in Settings. This area groups
together a lot of di erent options that you might nd useful if you
have a disability or would just like a bit of help with certain things.
For example, you can change the font size that’s used across the
device, and reverse the screen colours to make it easier for you to
read. You can also change the sounds from stereo to mono and set
up a front light for noti cations. There are even settings for the tapand-hold time and much more besides.
If you forget your phone
2 Fingerprint manager Tap on
the Fingerprint manager option
and then tap OK.
3 Register print Now slowly
swipe your finger down over the
home button multiple times.
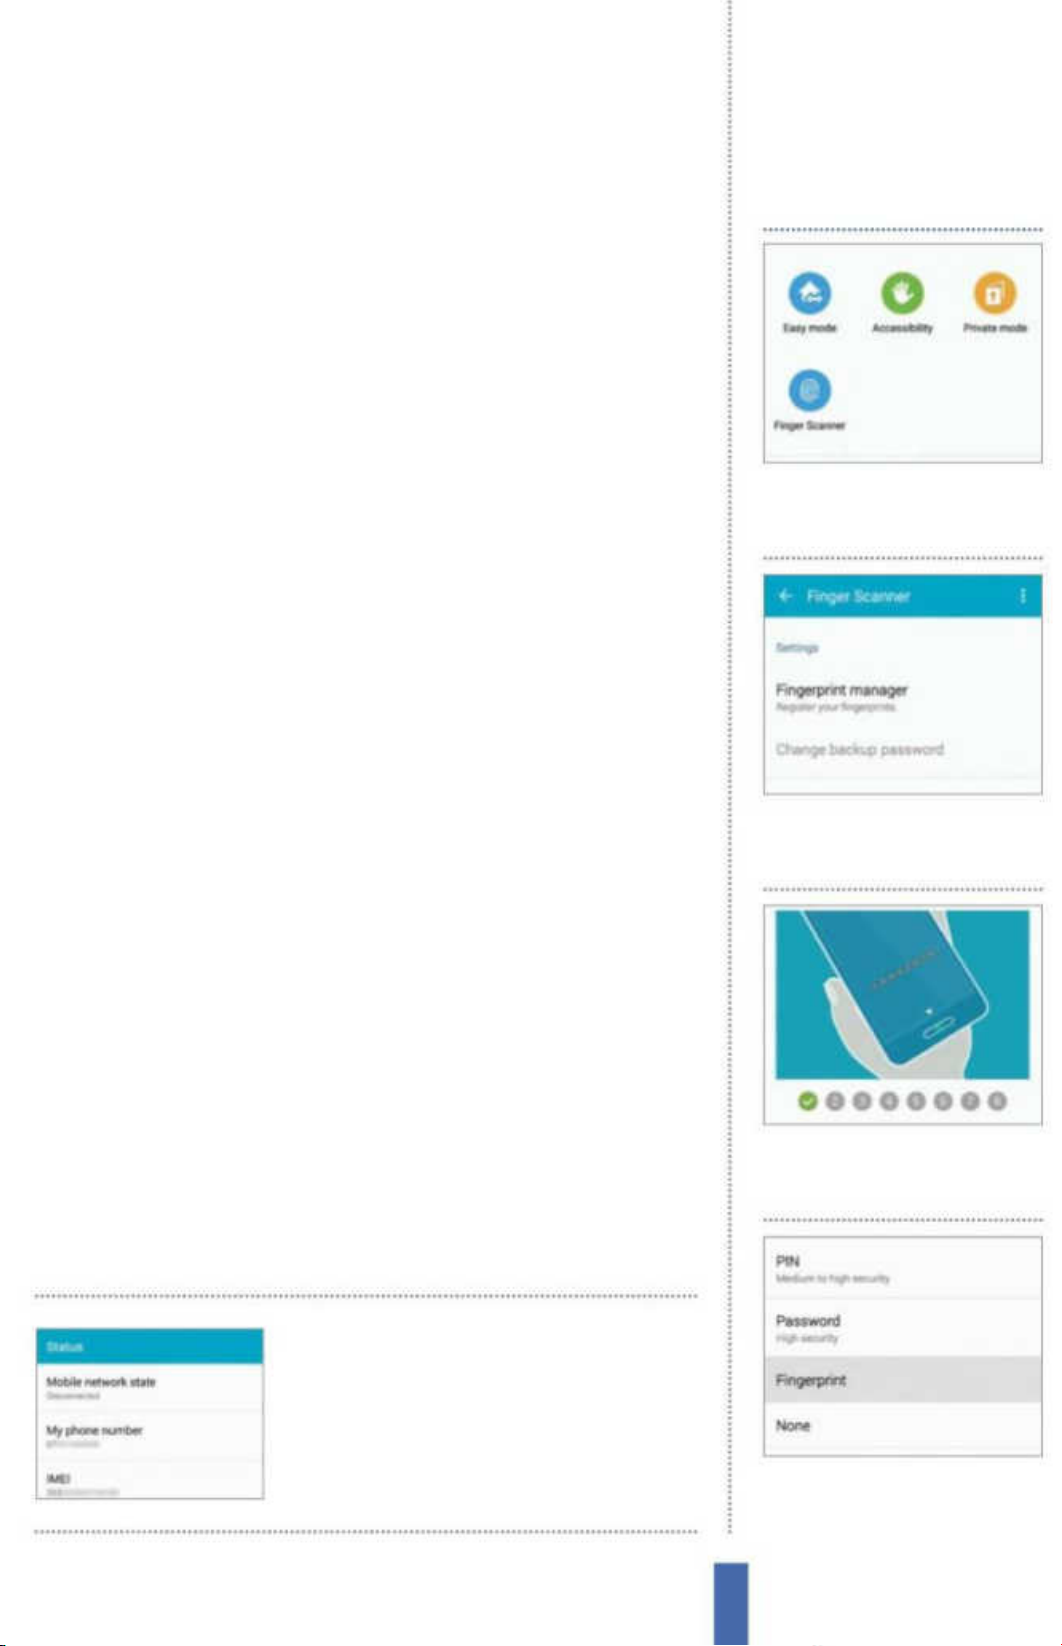
number, you can nd it
by heading to Settings>
About Device>Status
4 Screen lock You will then be
taken to the Lock screen settings
where you can select it.
39
Page 40
The apps Settings – Device
Check storage space
Your Samsung Galaxy has a set amount of space for storage,
and once that is full you will nd that you can’t cram anything
else onto it unless you remove something to save space.
Fortunately, most smartphones and tablets let you add to the builtin storage space using microSD cards, and the Samsung Galaxy
S5 has that feature. With cards available o ering storage of up to
128GB, you can add lots more storage space to your Galaxy, and
that space can accommodate both apps and data (including music,
movies and much more).
It is easy to check the amount of storage space that’s available on
Fig 3 Check the storage space on
your device and microSD card
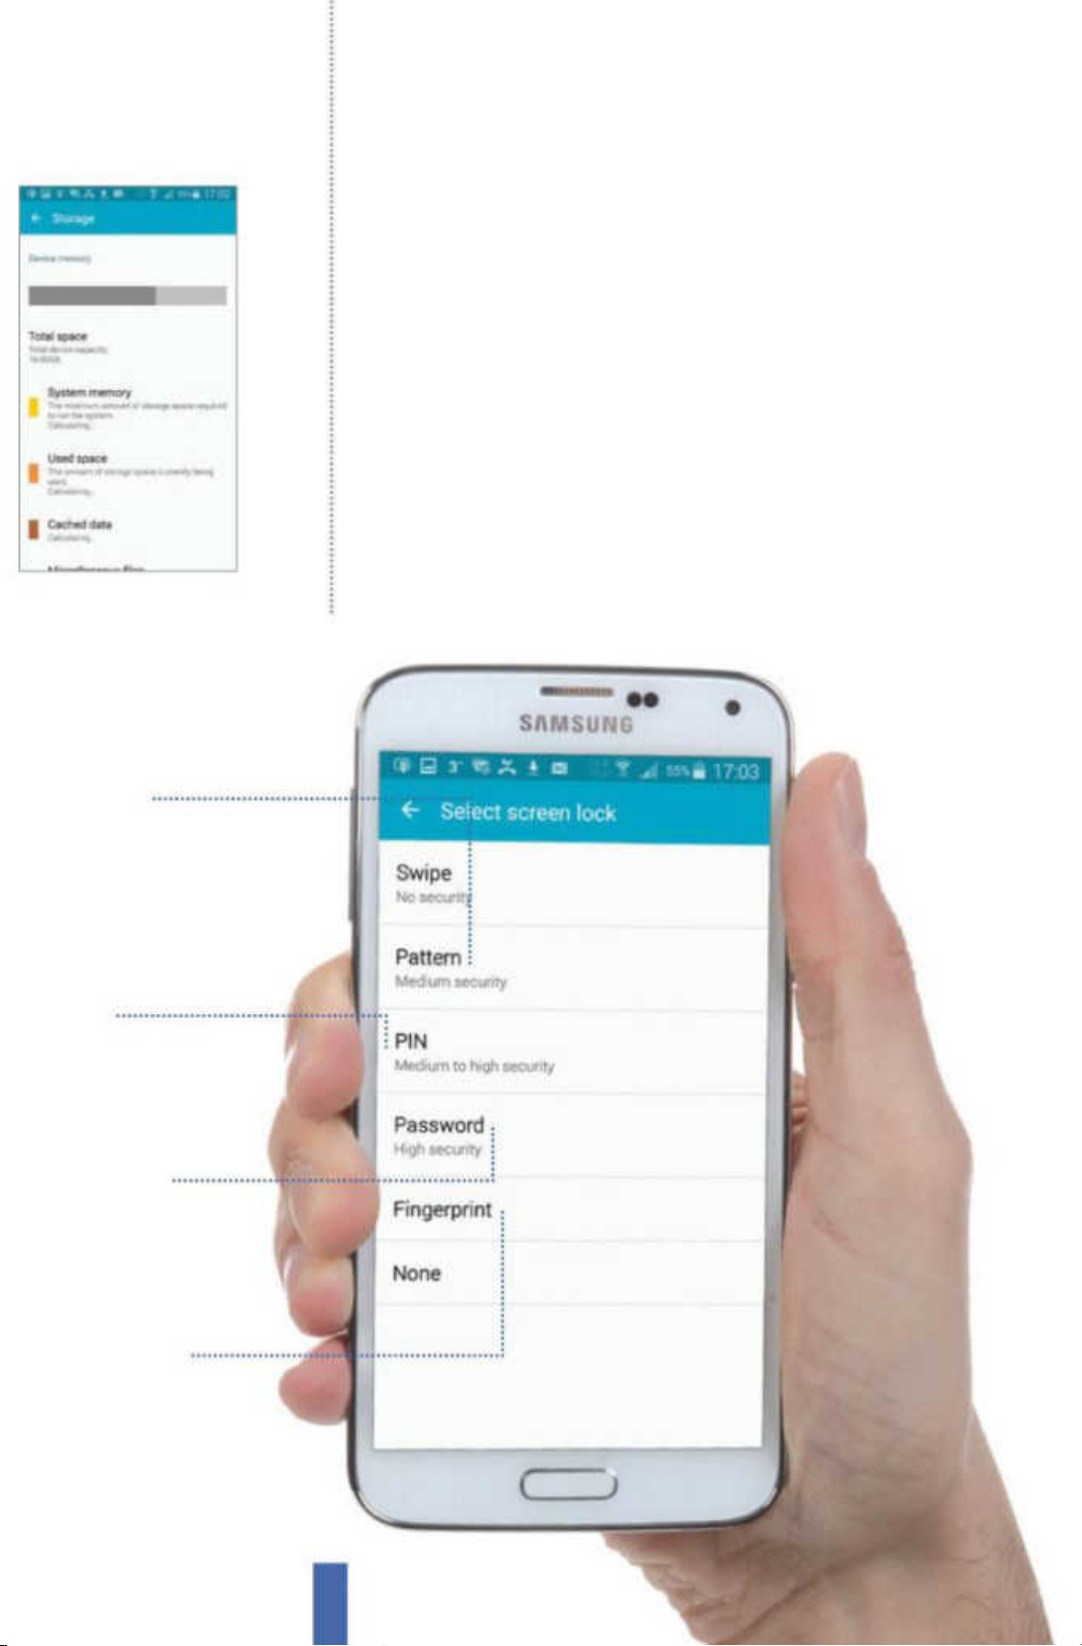
Pattern
recognition
Pattern recognition is easy
to use, and o ffers
reasonably good security
PIN
An old-fashioned PIN
offers good protection
your Galaxy. Simply head over to the Settings area and then scroll
down to Storage. Tap on that and you will be able to see how much
Password
Your phone is m ost secure
with a password that uses
a combination of let ters
and numbers
Fingerprint
You can scan yo ur
fingerprint using the
home bu tton for a higher
level of s ecurity
40
Page 41
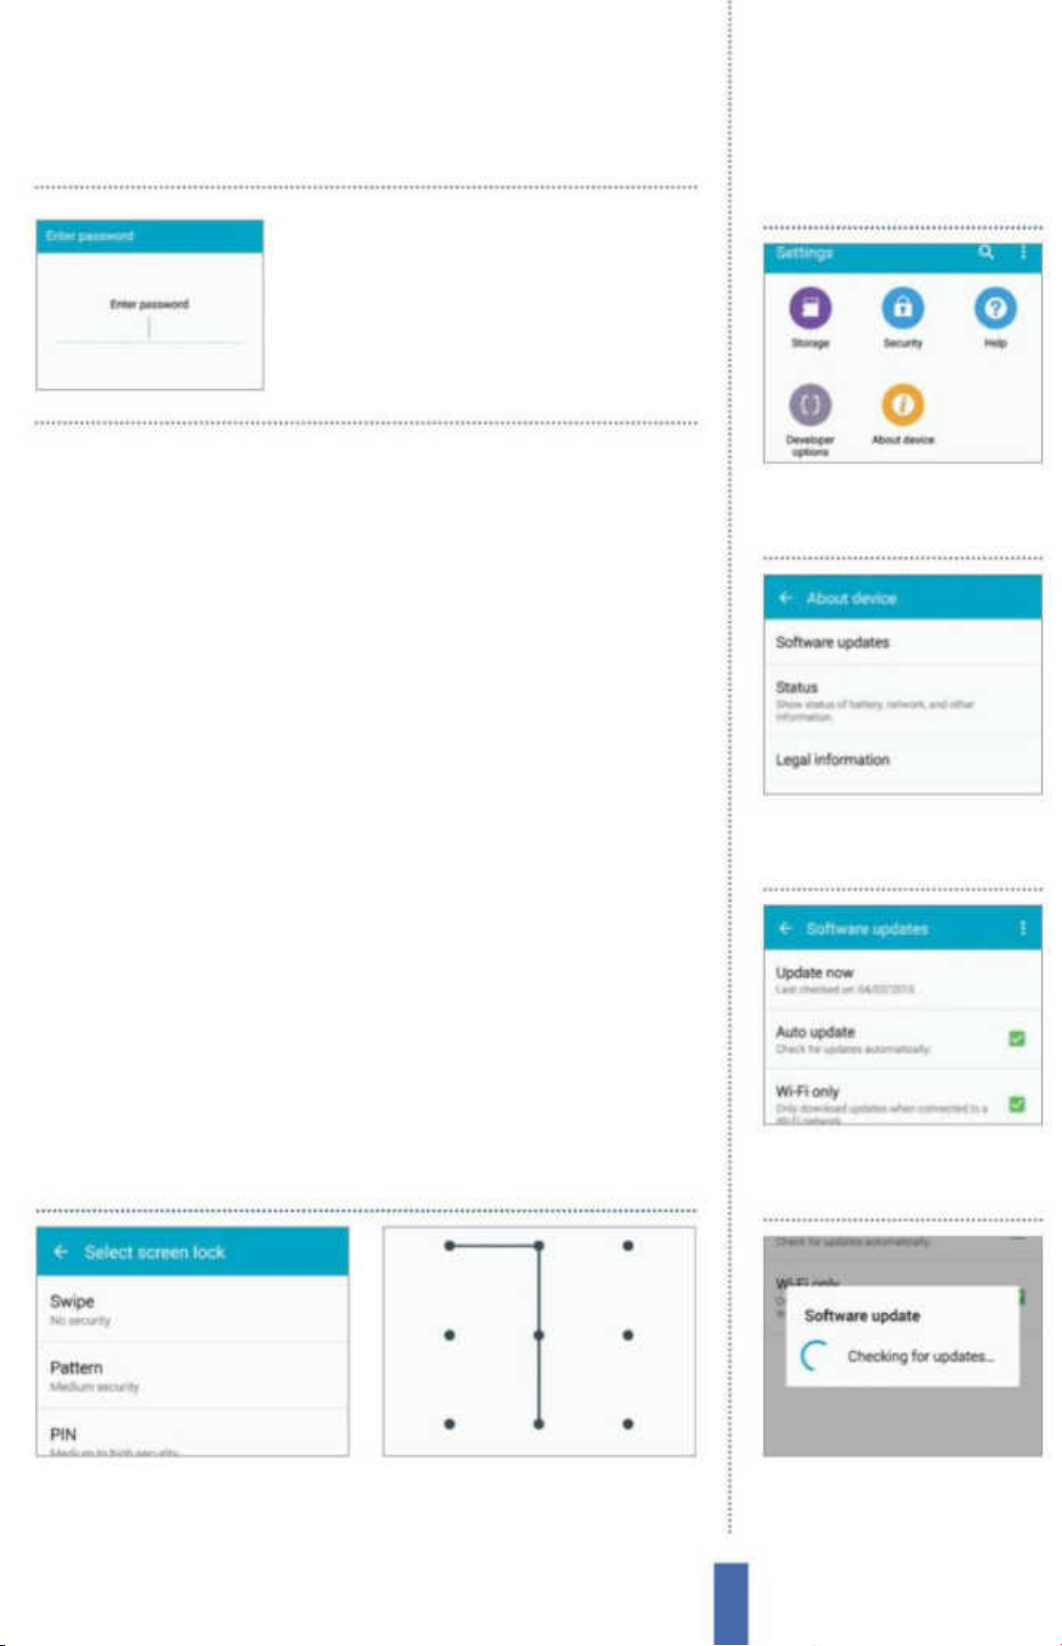
Think about how secure
the di erent lock systems
are. A password o ers the
highest level of security
The appsSettings – Device
Update your firmware
device memory is being used by di erent types of media. You can
also check the amount of storage that is free on your microSD card,
unmount the card so that you can remove it safely, and even format
it (wipe all the data o it).
Use the security settings
After you’ve owned a Samsung Galaxy for a little while, you will nd
that it will have all sorts of personal information stored on it. This
could include contact details, Facebook logins, logins for a range of
other apps, web-based services and more. However, you will need
to be careful, as these services could be used to give people access
to personal information like your bank account or other important
data that you don’t want others to see.
In order to protect your personal data, always log out of web
services when you’re done with them and take advantage of the
numerous security features that are available on your Samsung
Galaxy device. There are several options available, including the
remote Find My Mobile service that enables you to locate and even
1
Firmware update You can
check to find out if there’s an
update waiting. Tap Settings.
2 About Device Tap About
Device in order to progress to
the next screen.
wipe your Galaxy device from a distance, and you can also set up
your device to use PINs and logins for added protection.
Lock your screen
1 Screen lock options In the Settings
menu, tap Lock Screen followed by
Screen Lock to see the options.
2 Choose a method Decide what
kind of method you want to use and
then tap on it to set it up.
3 Software update Tap Software
Update and then set your
preferences for checking.
4 Check for updates Tap Update
and then follow through to
check for updates.
41
Page 42
The apps Android Wear
Android Wear
Get all of your Galaxy’s noti cations sent to your
smartwatch – even when you leave it at home
You’ll use it to…
Receive messages
View your message s and app notifications
with a flick of your wr ist
Set reminders
Dictate reminders to the watch and receive
alerts about your appointments
Check the weather
Glance the weather forecast for the day
ahead when wake up in th e morning
Track your fitness
Keep track of your activity and get updates
about your step count and heart r ate
Play music offline
Store your f avourite songs to your watch for
when your Galaxy’s not around
Get directions
Provided your watch and Galaxy have Wi-Fi,
get turn-by-turn navigation to places
View your Galaxy on your wrist
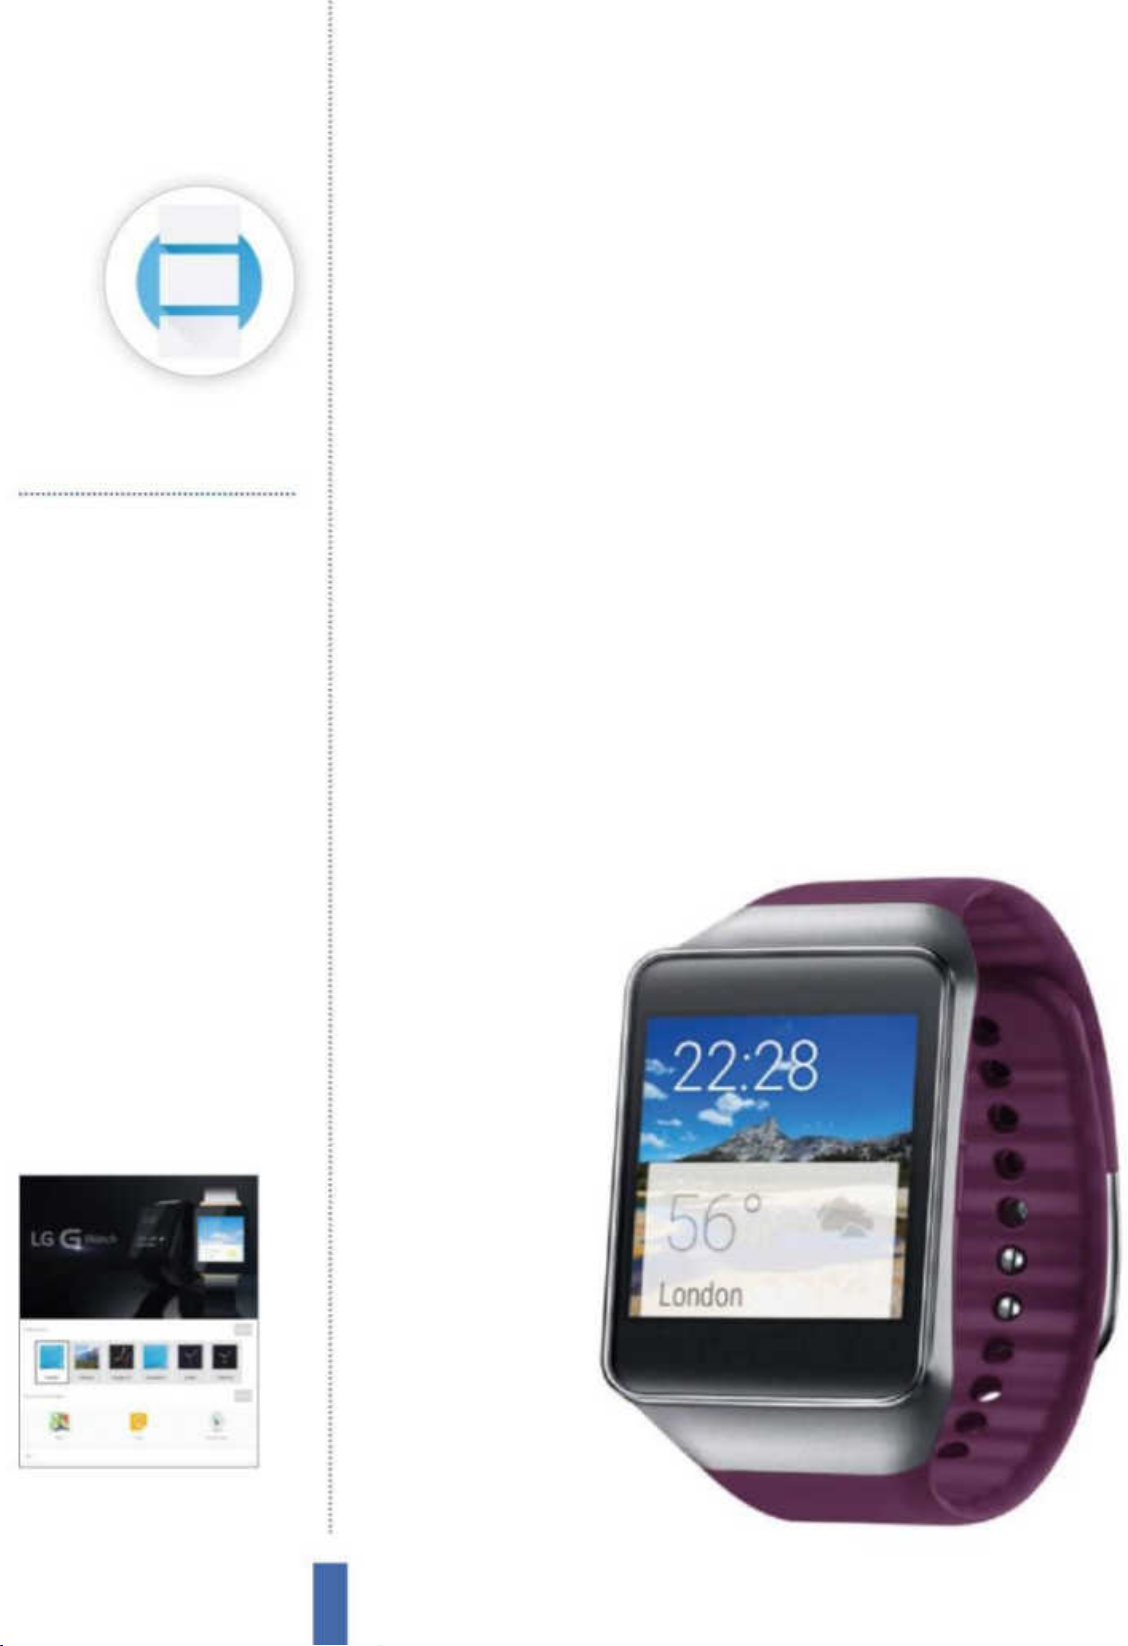
Smartwatches are all the rage right now, so you’ll be glad to hear
there are lots of models that work with your Galaxy device.
The most popular smartwatches run a system called Android
Wear. These come in a wide variety of designs, with a choice of
circular or square watchfaces and di erent watch straps, but all work
similar to your Galaxy’s Google Now assistant.
When set up, messages and noti cations from your device will be
sent to the watch as easy-to-understand information cards. Read on
to nd out more about how your Wear works in conjunction with
your Samsung Galaxy.
Get the companion app
However, Android Wear
watches can’t access
Wi-Fi in the
conventional
manner, so without
Fig 1 (below) To give your smartwatch
internet access, install the free Android
Wear app from the Google Play Store
Fig 2 (right)
updates on your wrist, so you can respond
to messages and notifications more easily
View all of your Galaxy’s
connecting it to
your device, your
smartwatch can’t do
much more than a
digital watch. To set
up this connection,
you will need to
install the Android
Wear app on your
device. From within
this app, you can then
connect your Galaxy with
your smartwatch via Bluetooth.
Once this connection is set up,
42
Page 43
Android Wear
The apps
all of your Galaxy’s noti cations will be redirected to your
smartwatch. Newer Android Wear models can then work
independently of your device, relaying messages and more, as long
as your smartwatch and smartphone or tablet are connected to
Wi-Fi networks, no matter the distance.
View Google Now cards
As well as displaying all the
messages and noti cations sent
to your device, your smartwatch
will display useful information from
Google Now in the form of simple
cards. These can include reminders
to leave on time for an upcoming
appointment, sports scores for
your favourite team and tra c alerts for your journey home. You
can slide up and down your watch screen to view various cards,
or swipe the card from right to left to see more information, such
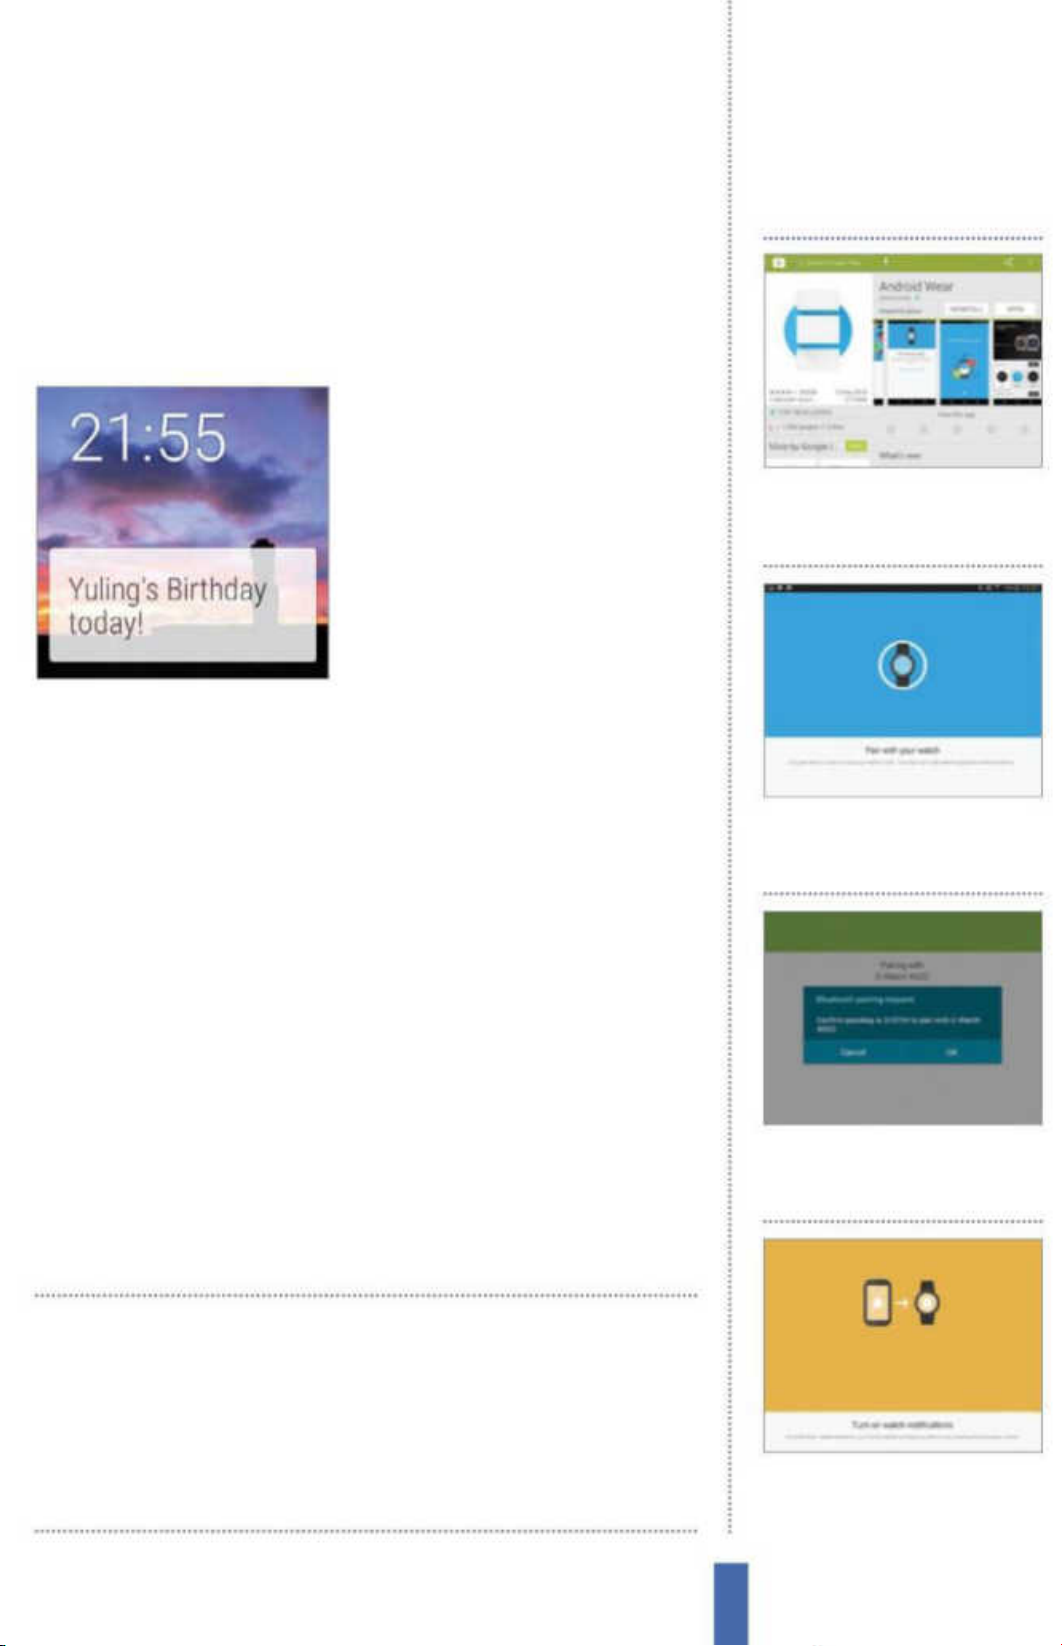
Pair your smartwatch
1 Download Android Wear app
Install the app from Google Play
store and open it on your device.
as view a weather forecast for the next few days, or open the
information on your Galaxy. Once you’re done with a card, you can
swipe left to dismiss it.
Track your health
As well as getting essential updates, the other advantage to using
Android Wear is being able to track your health. With a built-in
Google Fit app, every smartwatch can quietly count your footsteps
while you wear it, and some models also measure your heart
rate. You can then view this data as a short graph on your watch,
or in detail on your Galaxy. If you’re using a Samsung Gear Live
smartwatch, this will relay tness data directly to your Galaxy’s S
Health app instead. Some Android Wear watches have GPS sensors,
so they can also log your route when you go jogging.
To get a guided tour of your Android
2 Pair devices via Bluetooth
Select ‘Pair with a new wearable’
from the drop-down menu.
3 Confirm pairing To confirm
step up tap the tick mark on
watch and press OK on screen.
Wear device’s features, open menu
options and select Tutorial in the
smartphone/tablet app
4 Receive notifications Go to
Notification Settings in the app
to allow the watch to update.
43
Page 44
The apps Google Play
Google Play
Get more content onto your Galaxy device by using
the Google Play store
You’ll use it to…
Download apps
Add paid a nd free apps to your device
Rent movies
Watch the latest bloc kbuster films
Subscribe to magazines
Get digital copies of your favourite
magazines delivered instantly
Stream music
Listen to t he latest track s and albums
Read books
Download book s from a range of g enres
Update your content
Manually update your apps and other
assorted media
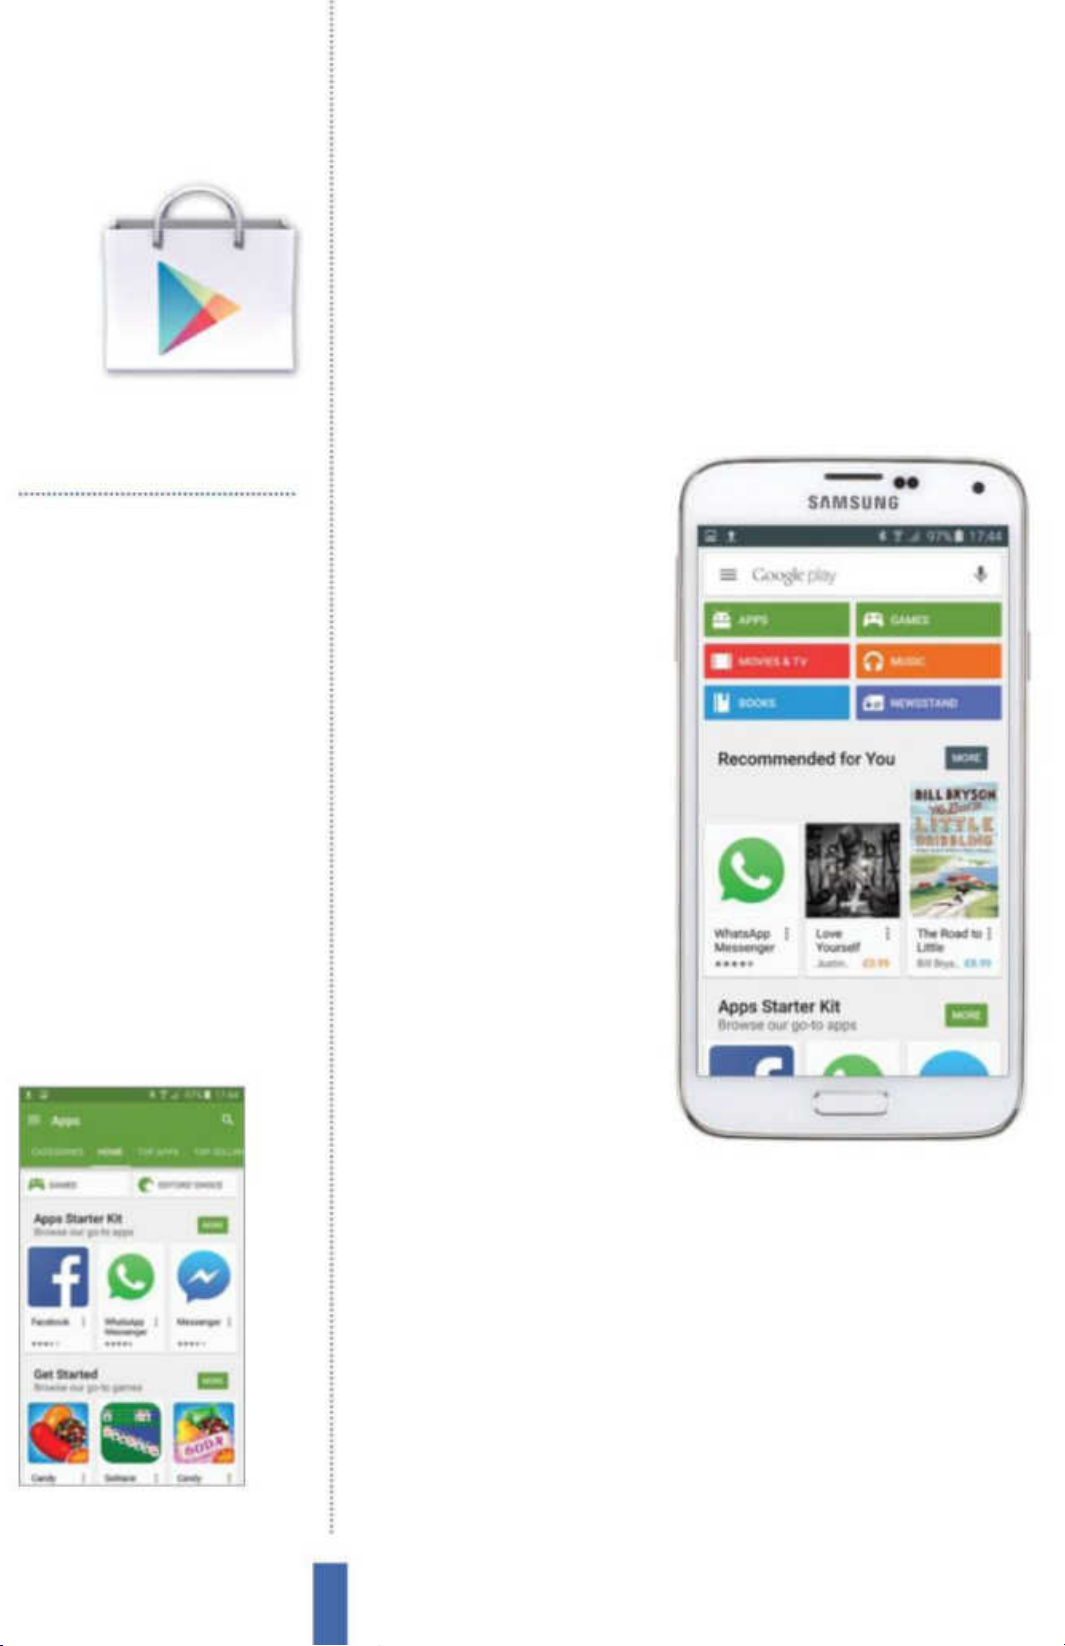
Fig 1 (right) The Play Store’s home screen
features links to all the different sections
Introducing
Google Play
Google Play is constantly
expanding with new content
on a daily basis. As well
as o ering over 850,000
apps and games, users can
now nd dedicated music,
movies, books and magazine
sections that are lled with
even more content than ever
(Fig 1).
Purchasing apps
With over 1 million apps at
your disposal, you’re never
going to run out of new
content to ll up your device.
What you’ll notice about
Fig 2 (above) Most paid apps need a one-
off payment before you can install them
some apps is that they’re free
to download, while the rest
require you to part with some cash before you can download them
(Fig 2). The payment process is simple through the Google Play
store and, thanks to Google’s own Wallet system, users can keep
their details safe while purchasing as many apps as they like. Google
does require you to input your card details to purchase apps, but
you can always remove them by going directly into the settings
menu within Google Play after purchasing all the apps you want at
that time.
All the paid apps require just a one-o payment to download
and each varies in its price. With some more of the expensive apps,
such as CoPilot Live, you’ll nd that after purchasing the main app
44
Page 45
The appsGoogle Play
you will then have access to further content, like additional maps
and routes, that can be purchased individually within the app. With
so much on oer, you should download some apps right away!
Managing apps
After downloading some apps, the chances are
that they will require an update at some point.
Most apps automatically update themselves,
if the setting is enabled, but the rest can be
manually updated by going in to the My Apps
section of the Play store (hit the Menu key for a
quick shortcut). On the other hand, you might
want to permanently delete an app from your
device. In this case, simply go to its corresponding page on the
Google Play store and select the Uninstall option. It’s as easy as that.
Apps and games
The selection of apps on oer covers 27 dierent categories, so
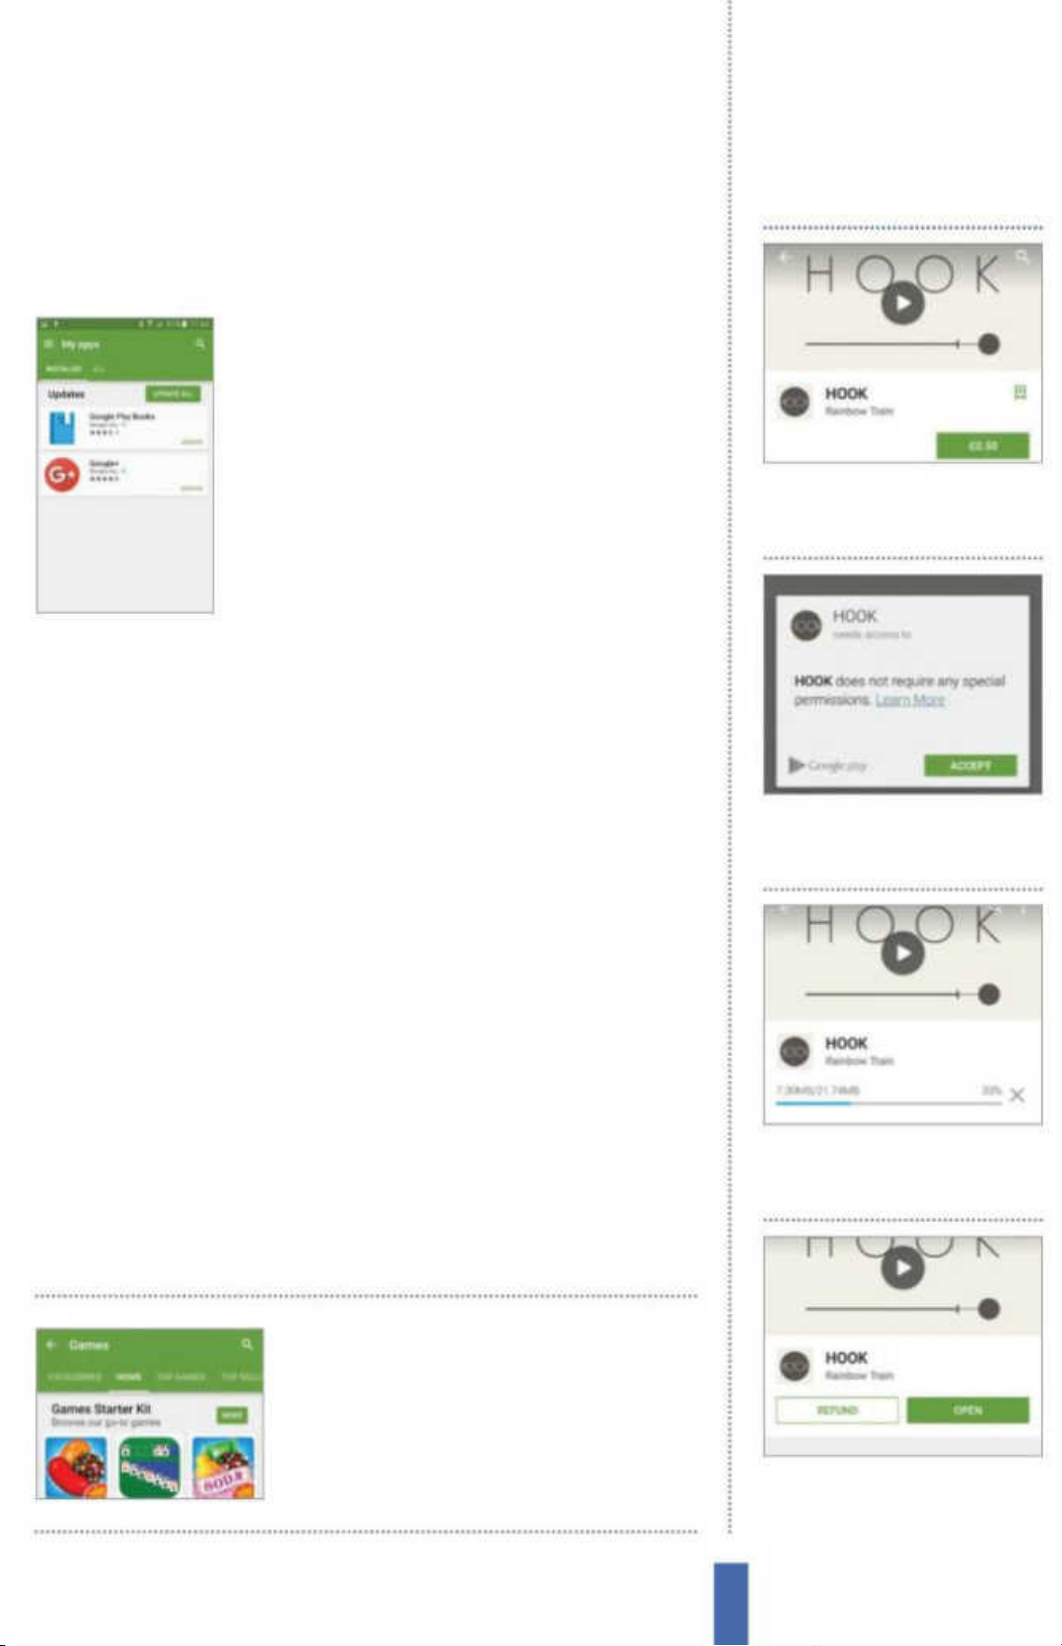
Refund an app
1
Find an app Go to the main
information page of the app you
want to download.
there’s always something for everyone. Within each category of
the Play store you can nd the most downloaded apps within that
section, as well as the highest rated ones. One particular area in
which Android apps have vastly improved over the past year or so is
in the quality of games that they now oer.
Many big brands have made the transition over to the smaller
Android screen, with the likes of The Simpsons, Sonic The
Hedgehog and Mass Eect to name but a few. There are also plenty
of indie games that are Android exclusives and provide something
quirky, original and compelling that you may not have experienced
before. With so many games on oer, the downside is that they can
take up lots of internal storage space on your device, so be careful
not to download too many of them or you’ll soon realise that you
have precious little space for anything else.
Android games have their
2 Purchase and download Tap
the price, enter your payment
details and download the app.
3 Trial period You now have 15
minutes to decide whether or
not you want to keep the app.
own dedicated section
on the Play store for you
to explore
4 Refund If you don’t, go back to
the app’s page and then press
the ‘Refund’ button.
45
Page 46
The apps Google Play
Play Music
One of the biggest areas of the Google Play store that has
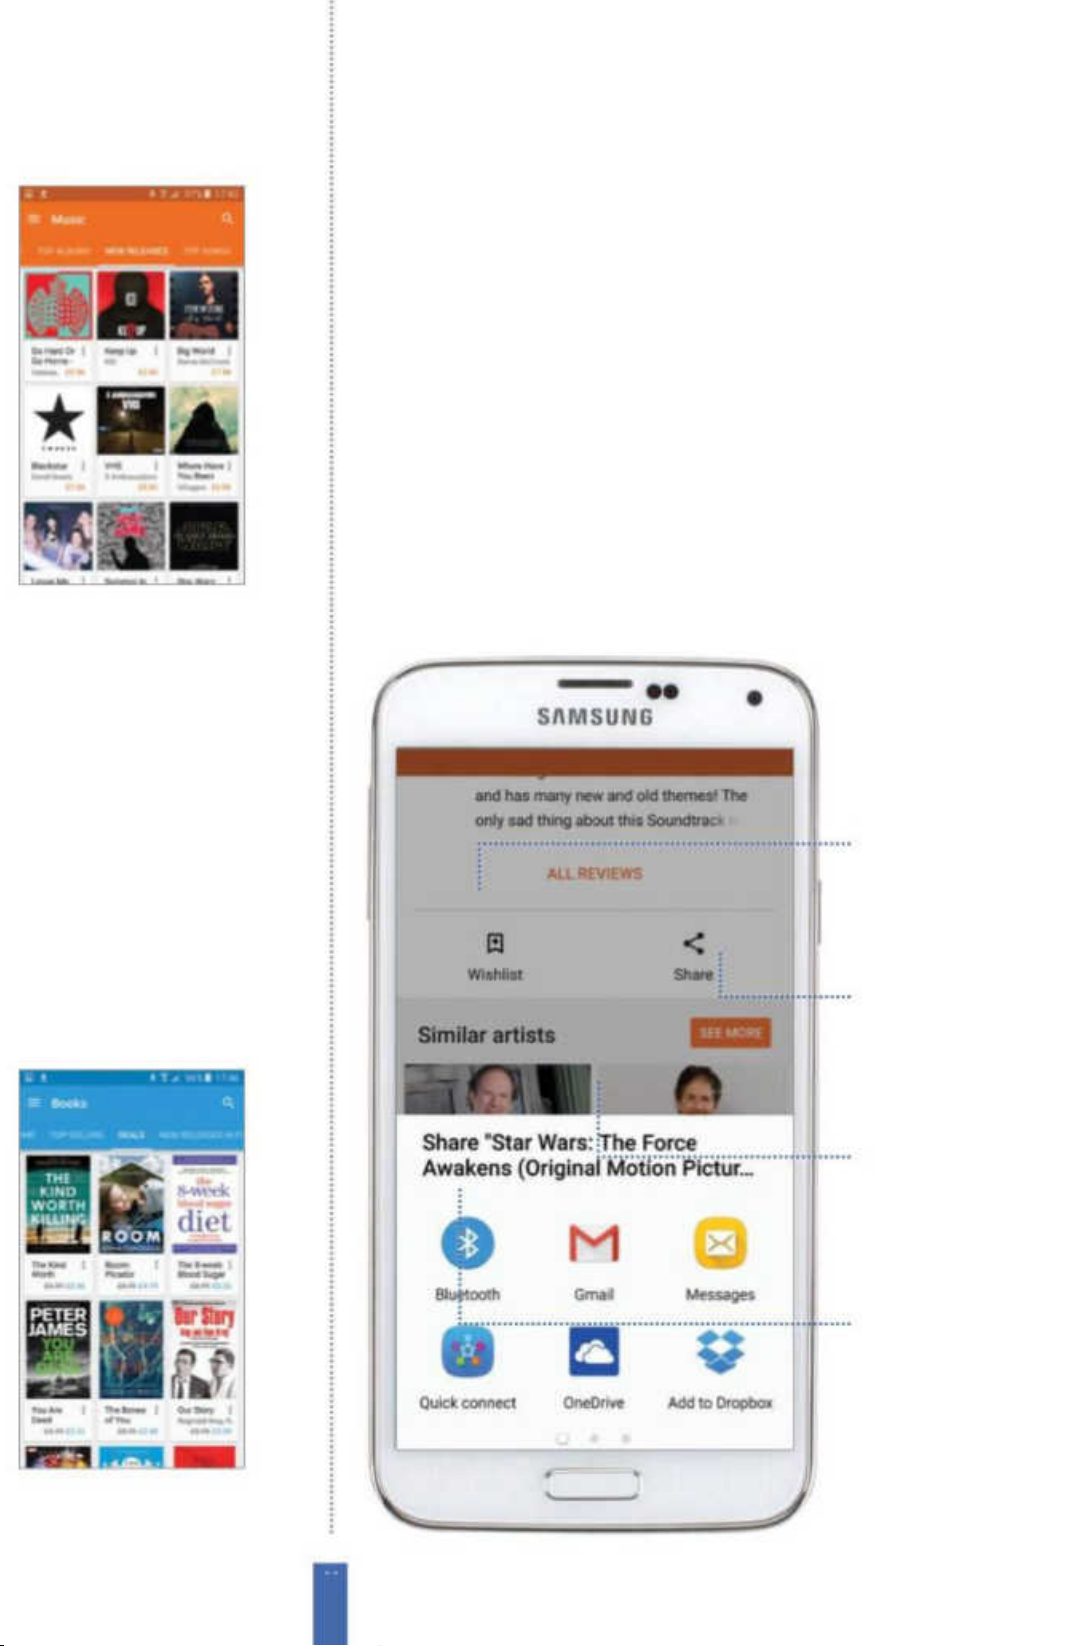
expanded recently is the Play Music section (Fig 3). After signing
contracts with numerous producers, Play Music now rivals the likes
of iTunes and Spotify, especially with its new All Access subscription
service. Singles and albums are competitively priced and you’ll
nd all the latest chart hits ready for you to download. Each listing
also has its own preview section that you can check out too. The
companion to Play Music is the Google Play Music Manager desktop
software, which enables users to upload all their tracks to Google’s
server and stream them from there. This stops you needing to take
up valuable internal storage on your phone with your whole music
Fig 3 (above) Album artwork looks
fantastic within Play Music
library. The streaming service works really well and it’s easy to create
Cloud storage
Upload the app link s
direc tly to a cloud storage
account so that other
people can access it
Social media
Post link s to the app directly
onto your Facebook or
Twi tte r pr ofi le
Email
You can email the info
directly to family and
friends by tapping one of
your email apps
Fig 4 (above) Play Books provides quick
access to both the ebook you’re reading
and some recommended titles
Other apps
Use other s ervices to
share apps and/or store
them for later
46
Page 47
Some of the biggest
novels are free to
download so keep an
eye out for them
The appsGoogle Play
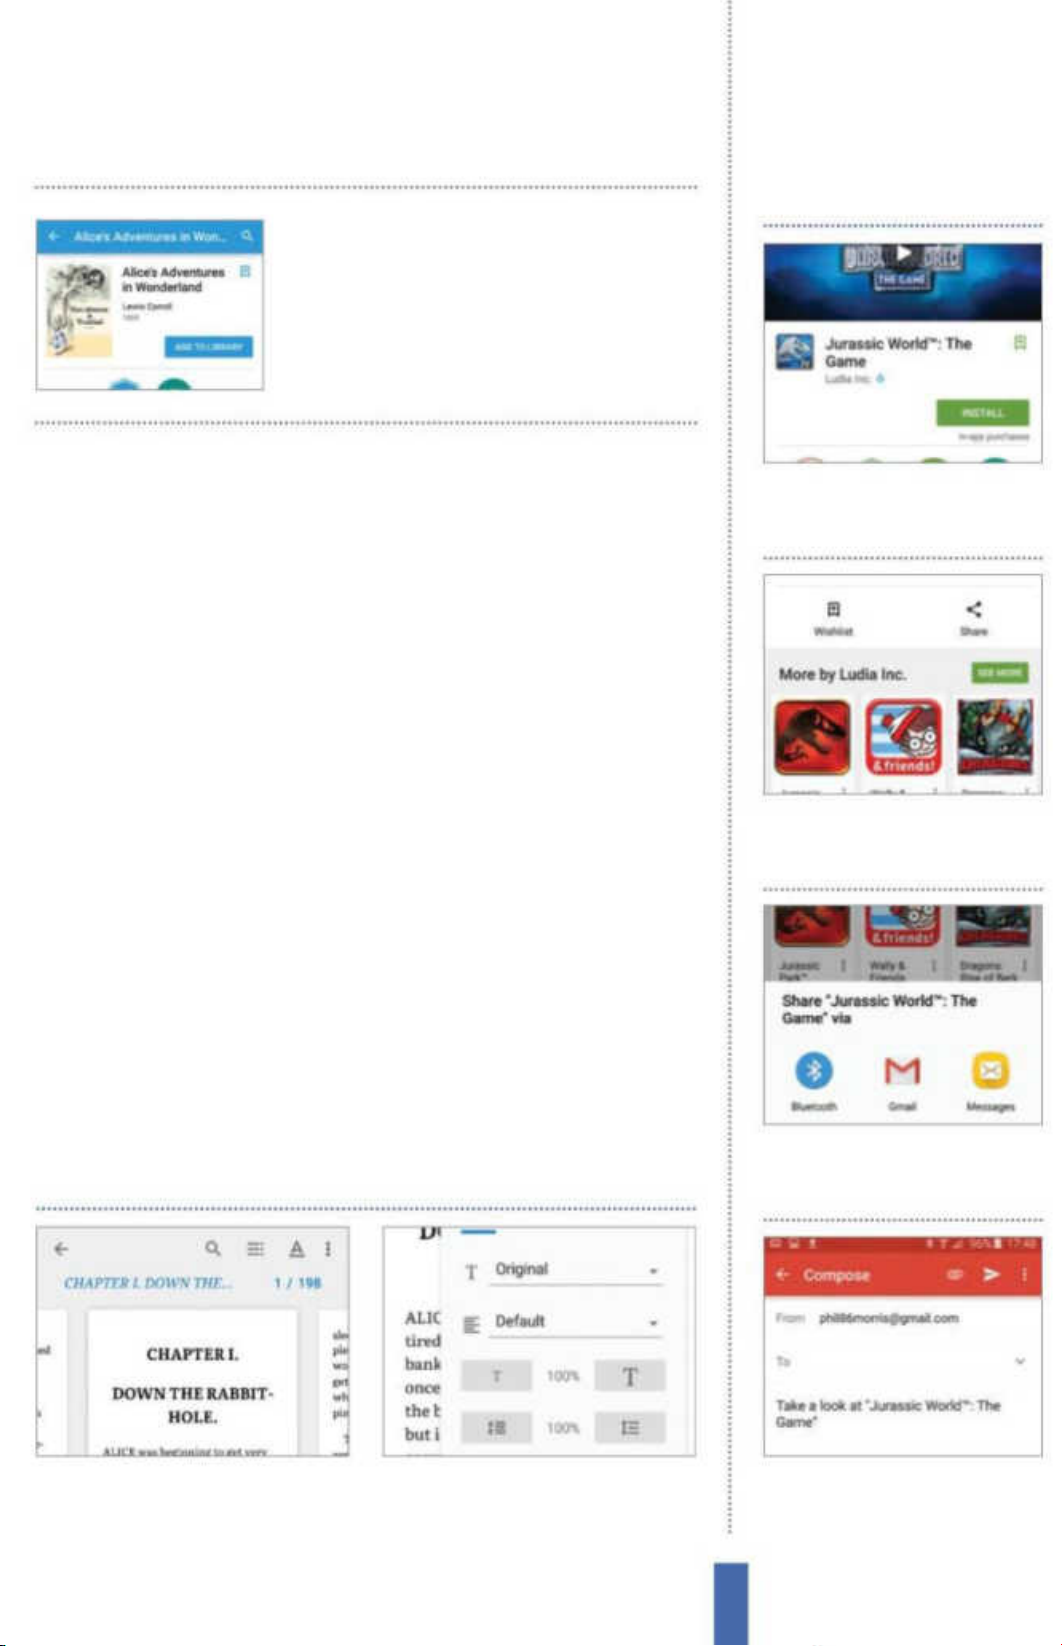
Share an app
playlists and perfect the sound quality using the built-in equaliser.
If you’ve any sort of interest in music then Play Music is denitely
something you need to check out.
Play Books
Despite facing heavy competition from the likes of Amazon, Play
Books has proved to be a big success on the Google Play store.
With the Play Books app, you have instant access to the latest and
greatest literature, all of which have been digitally optimised for your
device (Fig 4). The selection is amazing and, no matter what your
interests may be, there’s something for everyone to download.
Prices are competitive and the download process takes all but
a few minutes to complete, without taking up too much internal
storage either. Each book can be read in Play Books’ default reading
app, which also works really well. Text can be customised to help
your reading experience and you can even add virtual bookmarks
so that you remember where you’ve read up to. If you’re sick of
lugging around heavy books with you, then Play Books is a brilliant
1
Find an app Go to a specific
app’s information page on the
Google Play store.
2 Tap to share Scroll down and
locate the share icon further
down the page and then it.
solution for your literary needs that means you can carry a sprawling
virtual library around with you everywhere you go.
Enlarge text
1 Find settings While reading, tap the
screen to bring up various display
options around the page.
2 Which size? Choose the size option
and then customise the text until it is
more comfortable for you to read.
3 Choose a route Scroll the pop-
up list to find the share option
you want to use and tap on it.
4 In the app Finish off the share
process inside your chosen app
and then it’s job done.
47
Page 48
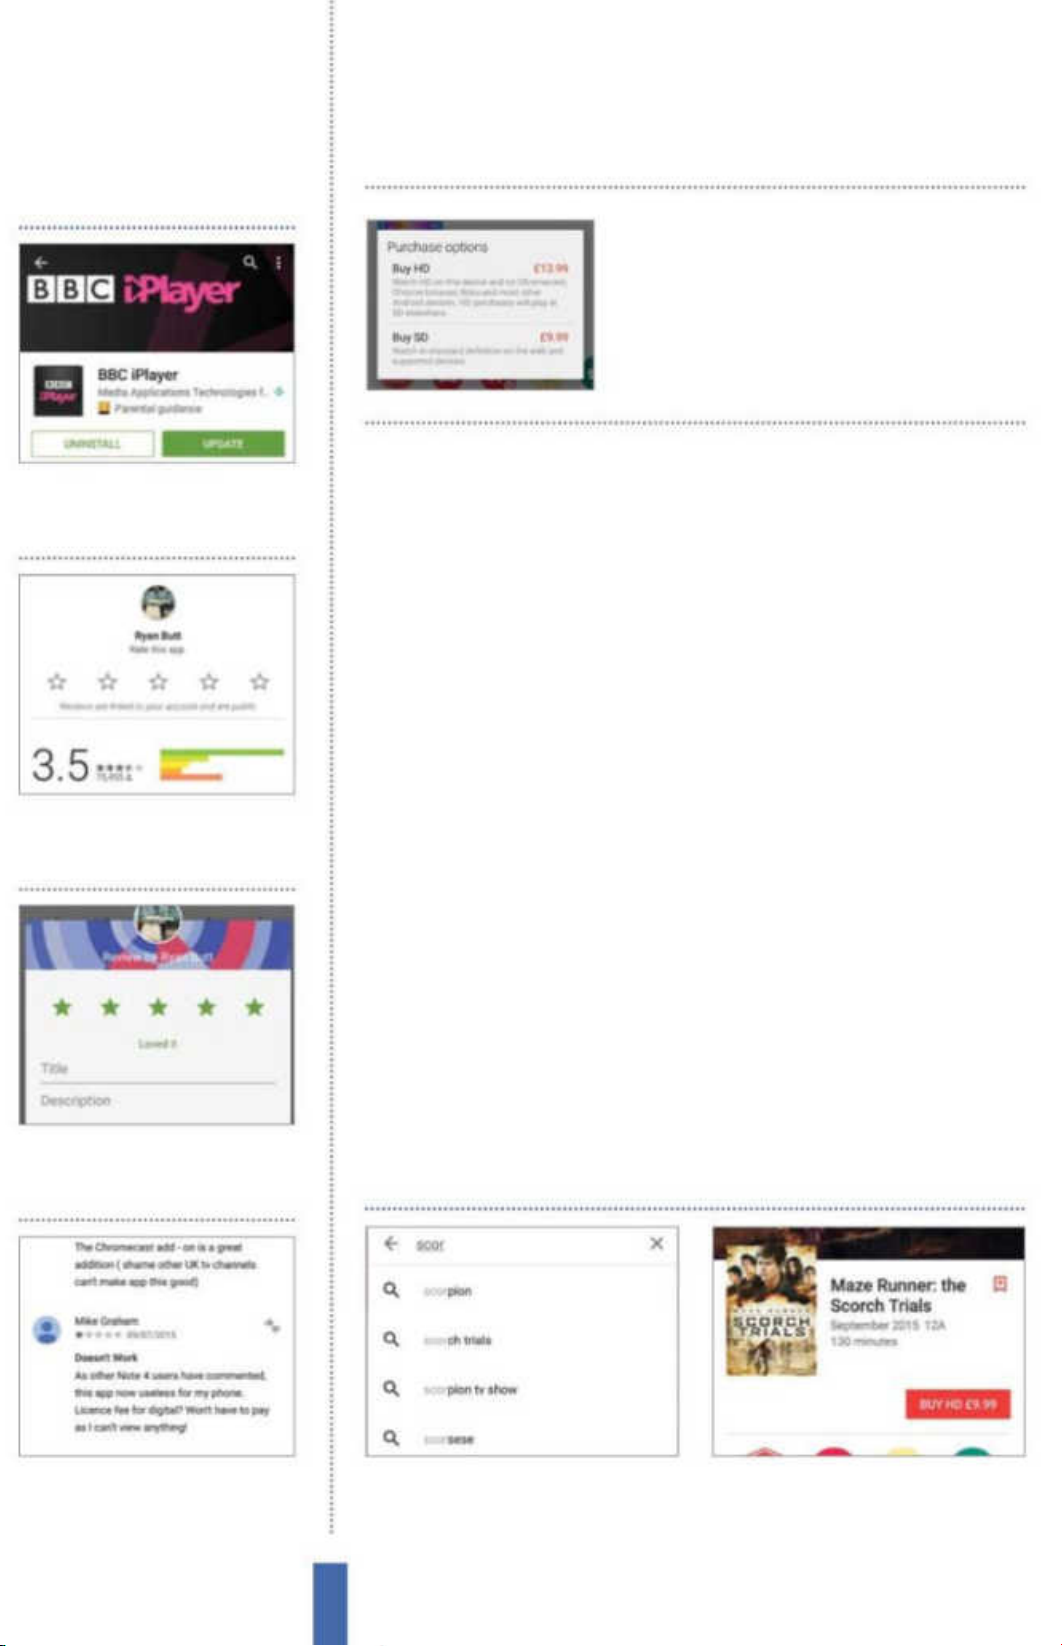
Rate an app
The apps Google Play
Some lms are also
available for you to watch
in HD so make sure you
explore all the options
1
Download an app Download
and install an app on your
Galaxy phone or tablet.
2 Rate and review Ta p on the
‘Rate this app’ button to start
reviewing the app.
Play Newsstand
Google Play Newsstand is a new app that replaces Play Magazines
and Google Currents by blending them together. It makes it
easier to find and subscribe to magazines and mixes in suggested
content from around the web based on what you’ve been
reading. The more you read with the app, the smarter it gets and
the more suggestions it can make. The first section is called Read
Now and this contains suggested stories and subscribed news
feeds. Tap on Read Now to see the other section headers which
include My News, My Magazines, Bookmarks and Explore (Fig
5). Tap on Explore to see links to the Play Store, Featured news
items, or sections of content such as entertainment, arts and
photography, news and politics. Tap on one of these to see a
choice of magazines or website to check out and subscribe to.
Play Movies
The nal area of the Google Play store to explore is the Play Movies
hub. As the name suggests, Play Movies contains the latest and
3 Add stars Give the app some
feedback and a star rating, with
five being the best score.
4 Post Add a message and then
press OK to add your review to
the list of other reviews.
greatest blockbuster titles that you can stream directly on your
device, and in a few countries including the UK and US you can buy
Rent a film
1 Find a film Tap the search bar and
enter the necessary keywords to find
the film you want to rent.
48
2 Pay and watch Choose the ‘Rent’
option, pay for the movie and then
sit back and enjoy.
Page 49
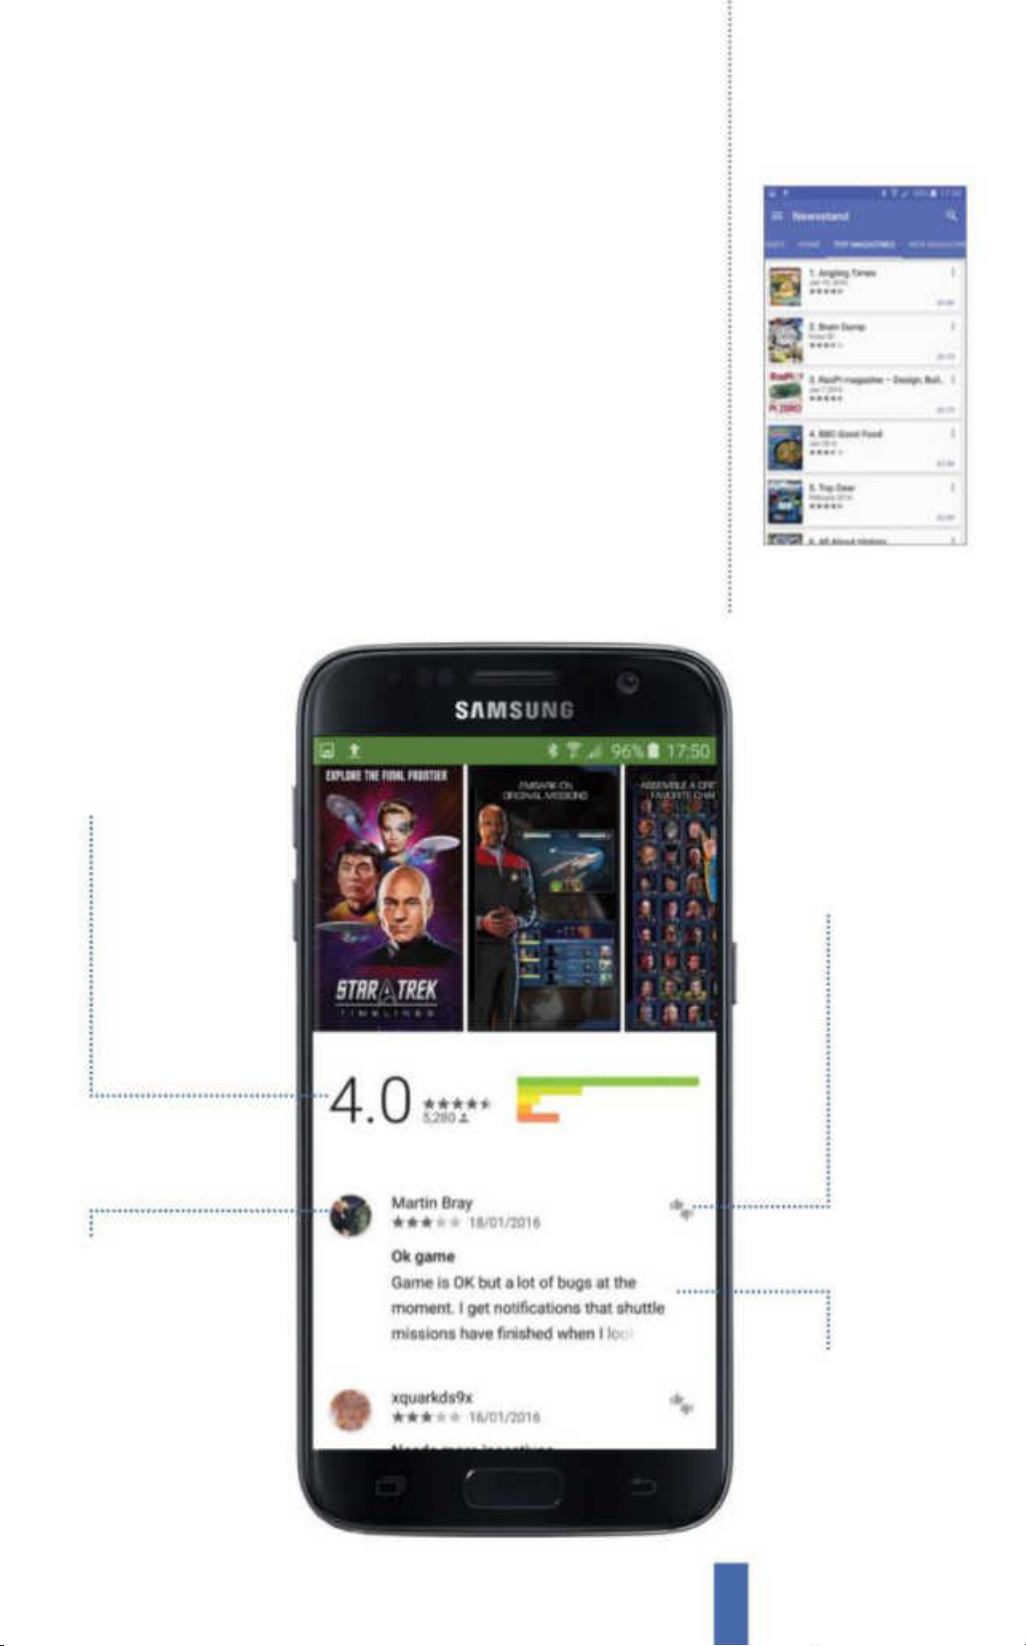
TV shows as well. The service is pretty similar to the likes of Net ix
but prices can be slightly cheaper depending on the movies that
take your fancy. Once you’ve rented a movie you will have access to
it for 24 hours, after which you will need to pay again to be able to
watch. TV shows can be purchased per episode or per season.
Every purchase is tied directly to your Google account, meaning
that you’ll have access to it on any device that is also linked with
the same account. Quality is great and if you’re lucky enough to
have a Samsung device with a Super AMOLED screen then your
movie-viewing experience will be even better. If you’re interested in
getting the latest movies on your phone or tablet, look no further
than the Play Movies hub where you’ll nd the history of Tinseltown
right at your ngertips.
The appsGoogle Play
Fig 5 (above) Use Play Newsstand to
download issues of your favourite
magazines wherever you are
Average rating
At the top le ft of the ratin gs
page is a qu ick summary
showing you the averag e rating
and the total number o f ratings
Filter reviews
You can rearr ange the reviews
by how old they are and how
helpf ul they are to you
Agree or disagree
Next to each review is a thumbsup-and-down icon enabling
you to choose if you agree or
disagree with the review
Edit your review
Click on yo ur own review to
amend it and make edit s to it
where necessary
49
Page 50
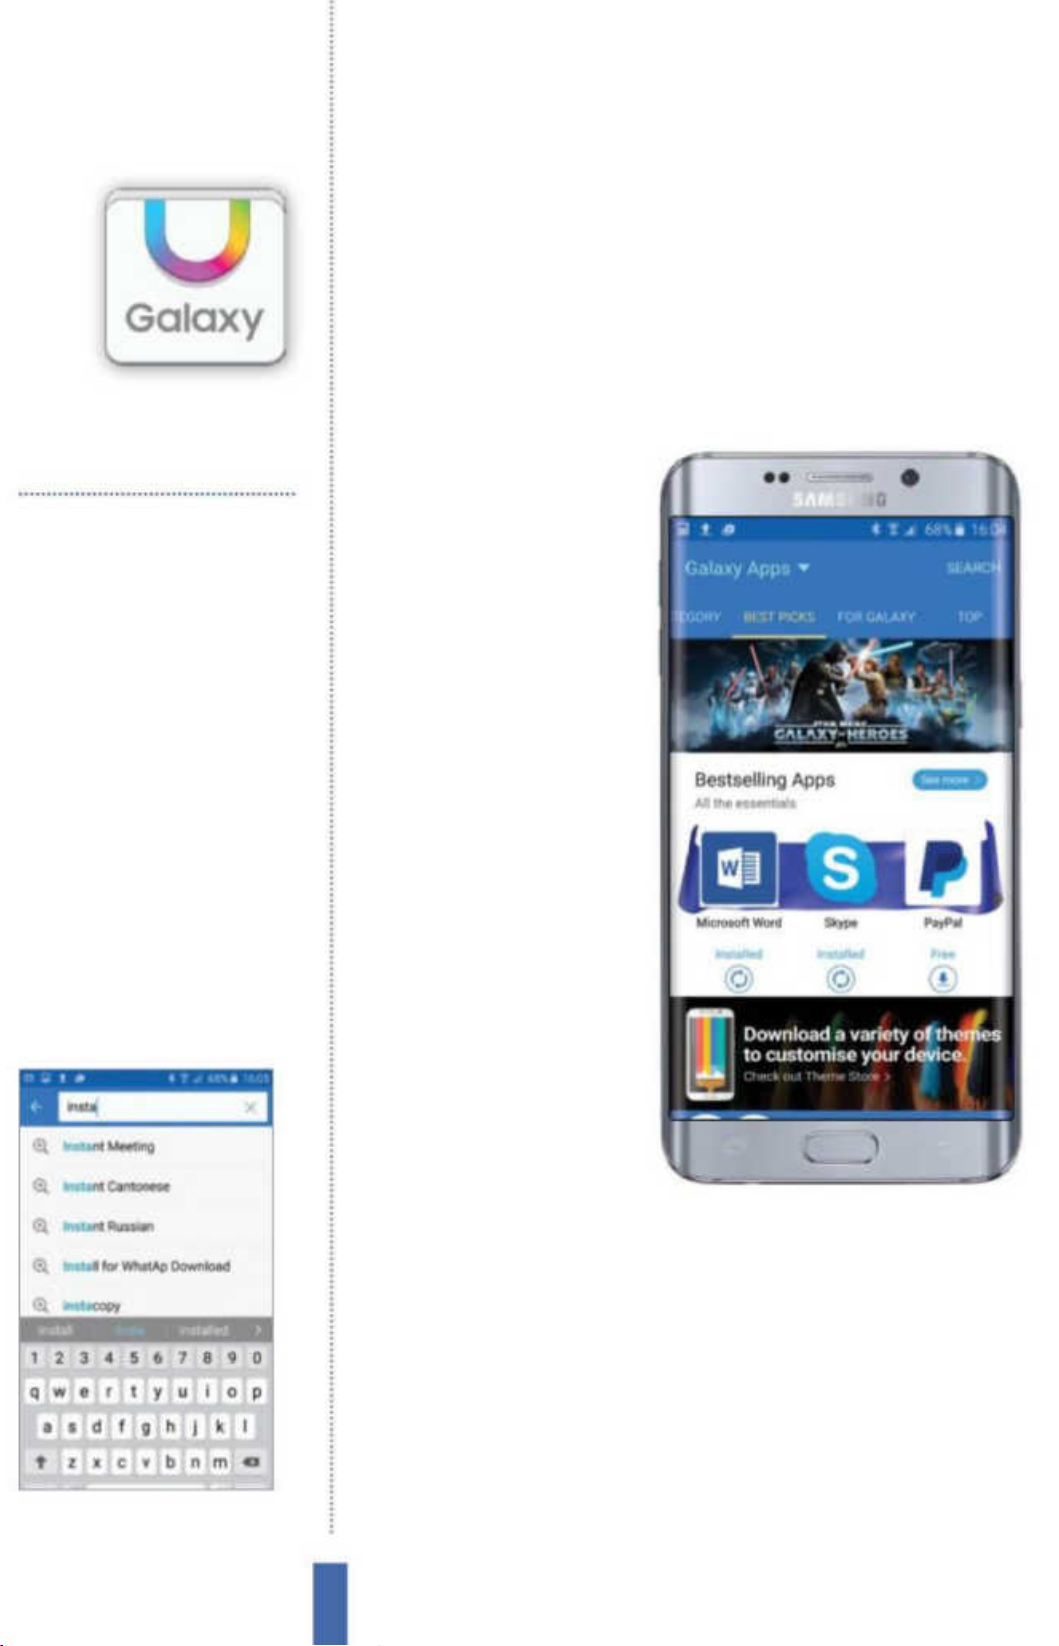
The apps
Galaxy Apps
Galaxy Apps
Fill your Samsung Galaxy device with the best apps
around using Galaxy Apps
You’ll use it to…
Download apps
Fill your Galaxy with different apps
Find recommendations
Get app s based on your se arch history
Get exclusive apps
Find apps only available for Galax y users
Manage installations
Look through previously installed apps
Discover updates
Get the l atest features for your most
favourite apps
Fig 1 (right)
to download
Galaxy Apps has plenty of titles
Explore Galaxy Apps
At its core, Galaxy Apps
is a one-stop store for
you to load your Galaxy
device with the latest and
greatest apps. Galaxy Apps
now boasts an impressive
number of titles to
download, most of which
are completely exclusive
to the range of Samsung
Galaxy devices, no matter
if you happen to own a
smartphone or tablet.
Discover and
download apps
Look around Galaxy Apps
Fig 2 (above) The search tool is a quick way
to find the app you want
and you’ll nd a wide
array of both paid for
and free apps (Fig 1). To
make navigation easier,
each of these are organised into di erent categories. The process
of downloading apps onto your Samsung Galaxy device is fairly
simple, but does require several steps. First and foremost you’ll need
to nd an app you want to download. You can do this by either
using the search tool at the top of the app (Fig 2), or going through
the correct category.
Once you’ve found the app you want, it’s just a case of pressing
the Download button and waiting for it to nish. If the app requires
you to pay for it, and you’ve not paid for an app before, you’ll be
taken to a payment screen where you can enter card details. To take
50
Page 51
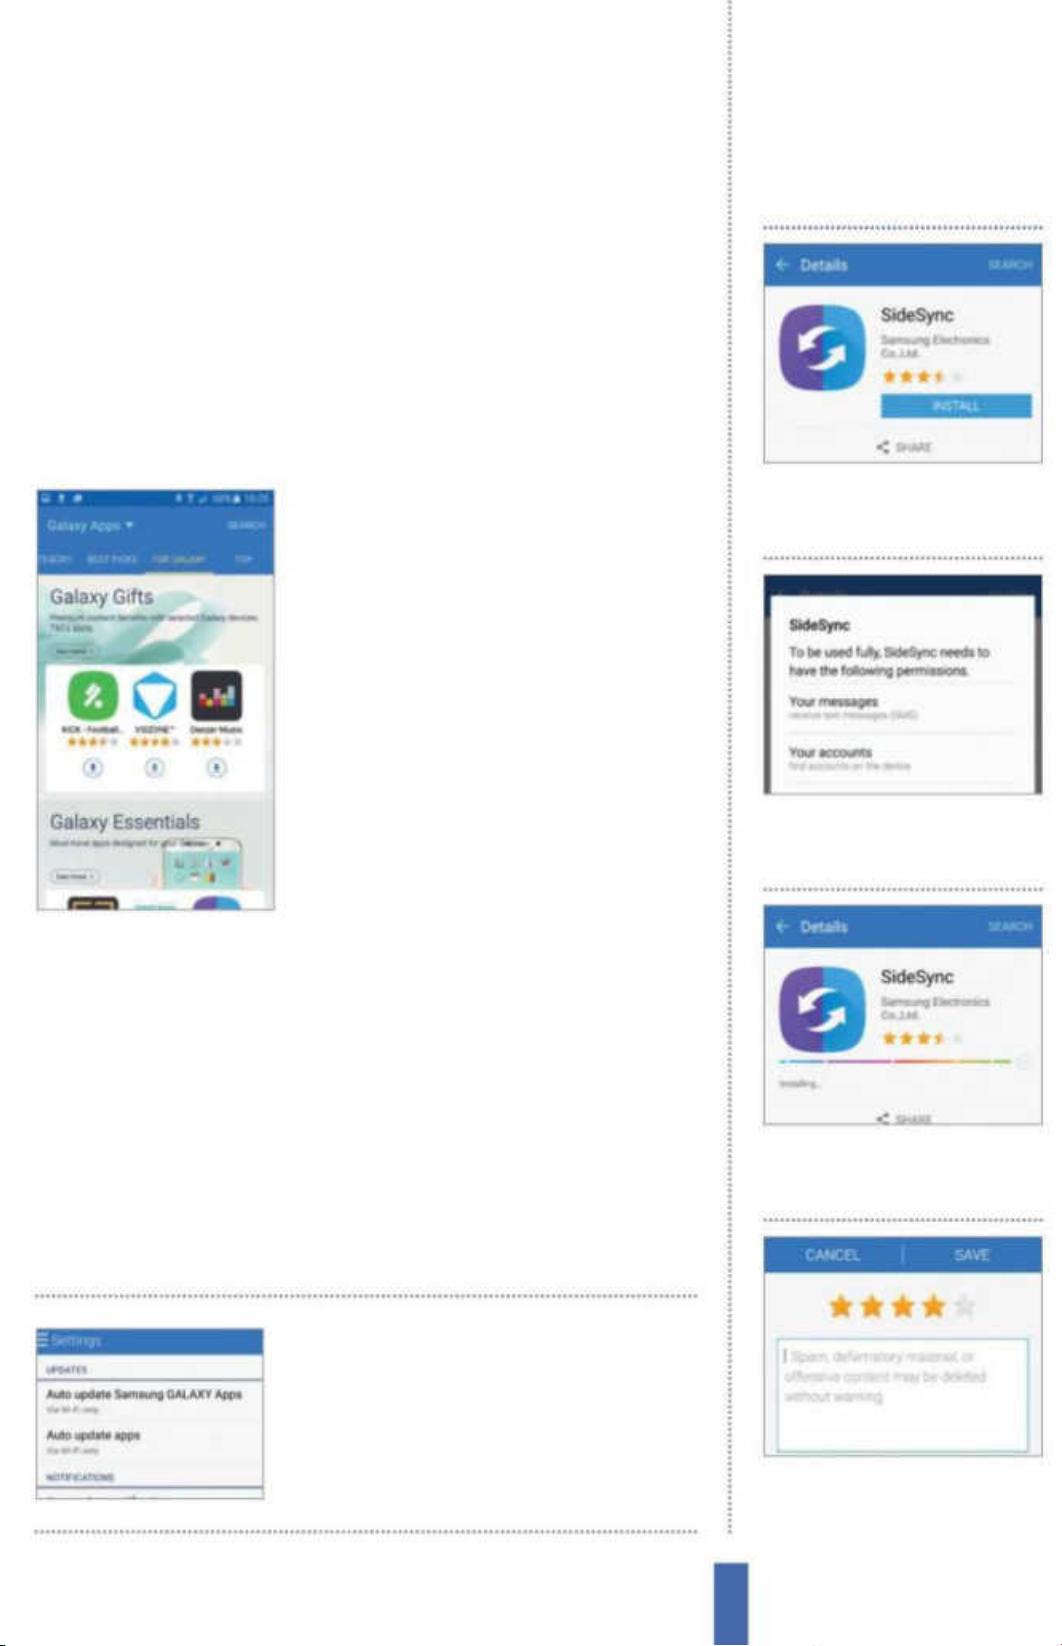
The appsGalaxy Apps
it one step further, you might also want to check out the reviews
before downloading an app. Scroll to the bottom of an app’s
page and you can nd genuine reviews posted by other Samsung
Galaxy users who have downloaded it. Also on the app’s page are
other essential details, including who the developer is, how many
downloads the app has had and the current version of the app. All
of these points together will help you decide if this app is worth
downloading on to your device.
Find exclusive Galaxy apps
While on the home page of Galaxy
Apps, locate and press on the For Galaxy
tab near the top of the page. You’ll now
be taken to the apps solely made for
Samsung Galaxy devices. There’s plenty
on oer and you can nd various types
of apps as you scroll through. Many
of the apps utilise specic features of
Download an app
1
Load app Search for an app
or game and open up its own
page on Galaxy Apps.
various Galaxy devices. For example, this
is the section you need to go to if you
want to nd compatible apps that work
with your Galaxy Note’s stylus, or apps
that cater for the Samsung Galaxy S6’s eye-tracking software.
Get the best Galaxy games
Galaxy Apps also provides a plethora of games. These range from
big blockbuster titles, which have been ported over from other
consoles, down to small independent games. The choice is superb
and no matter what your tastes are, there’s really something for
everyone. One thing to keep an eye on is that although some
games will be listed as free, once downloaded and installed you
might need in-app purchases to unlock features within them.
Only update your apps
2 Permissions Press the Install
button and read through the
app permissions.
3 Downloading The app will
download. Follow its progress
on the Galaxy Apps page.
over a Wi-Fi network
because updating over
4G can use a lot of data
4 Review it After testing the app,
leave a review by going to the
bottom of the app’s page.
51
Page 52
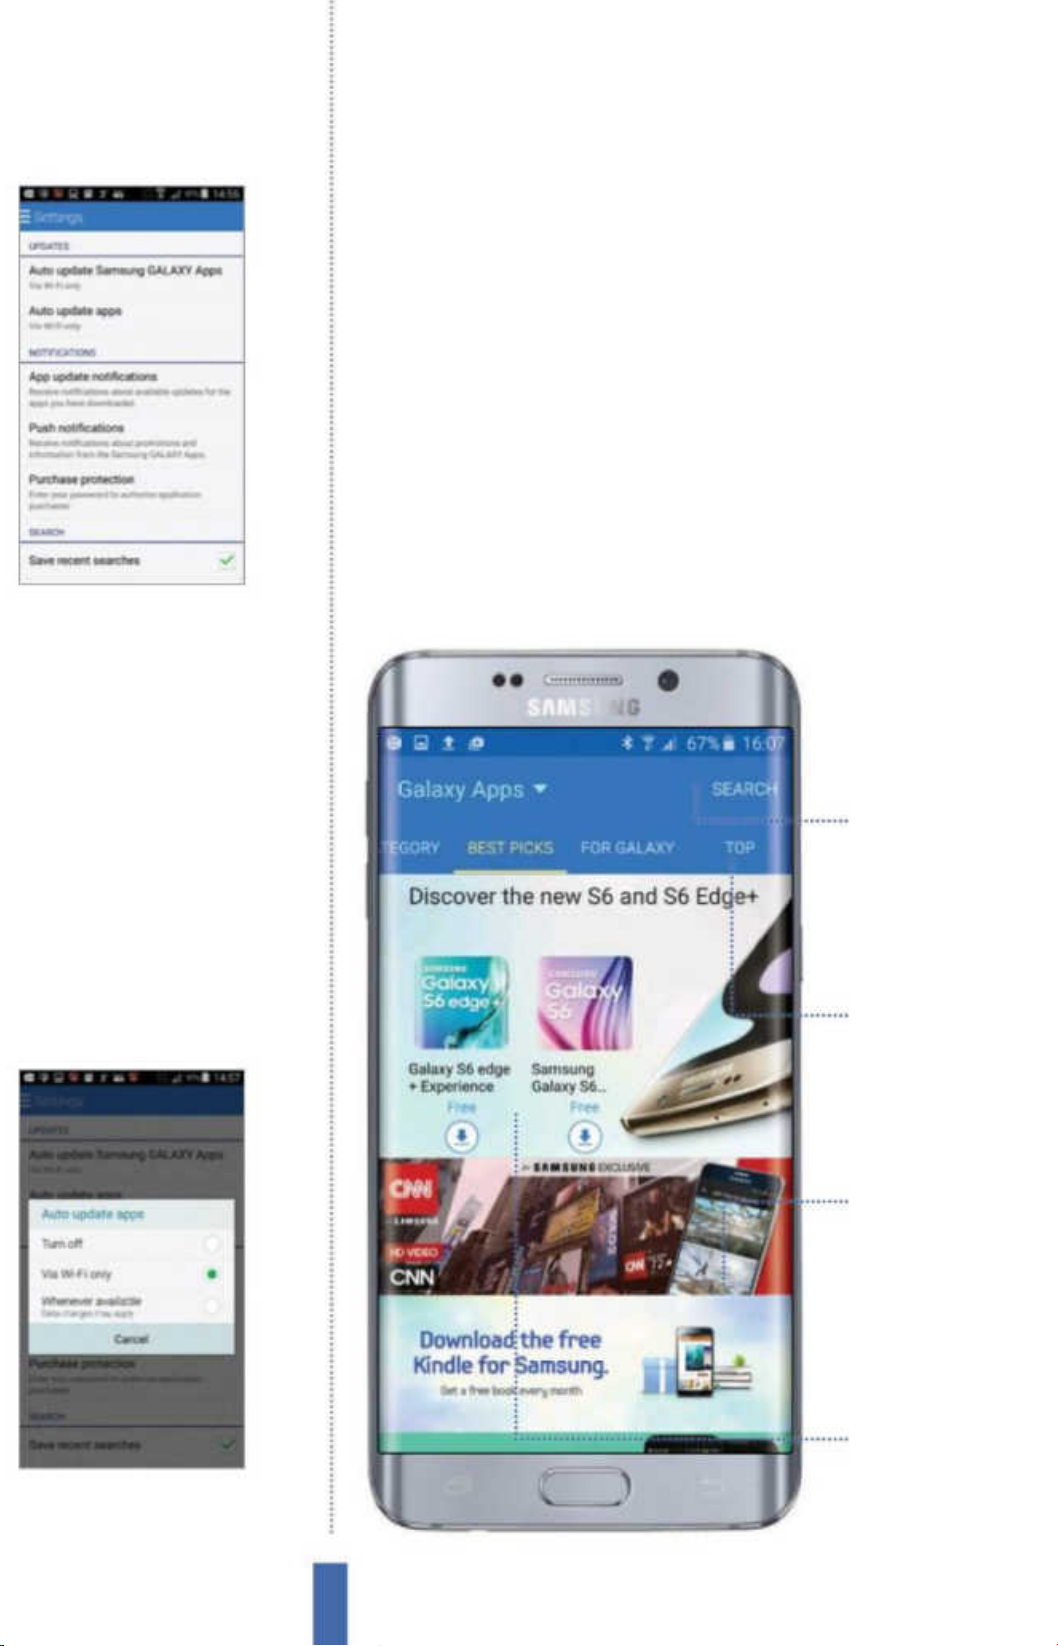
The apps
Galaxy Apps
Master the Galaxy Apps settings
Although the main use of Galaxy Apps is to download apps, it’s
important to also take care of the store’s settings. It may seem like
a tedious task but without proper care, you could experience a
massive slowdown on your device, apps not responding correctly
and your battery life greatly reduced. Press on the menu icon at
the top-left of the Galaxy Apps home page and select the Settings
option from the bottom of the menu. The rst setting you should
change is the Password Protection option. This is a great way of
stopping people from making unwarranted purchases on your
account as it requires the password linked with your Samsung
account to download the app. The next step is to make sure you’re
Fig 3 (above) Manage your sync
options from within the Settings
app easily
signed into your primary Samsung account at the bottom of the
Find apps
Press on th e magnifying
glass icon to commence
a search
Popular
Check out the most
popular apps by selecting
the Top tab
Fig 4 (above) You’ll find that
downloading over 3G/4G will quickly
use up your data allowance
Open an app
Open up an app’s page
simply by pressing its
listing on the homepage
Daily deals
Galaxy Apps has daily
deals on popular apps
52
Page 53
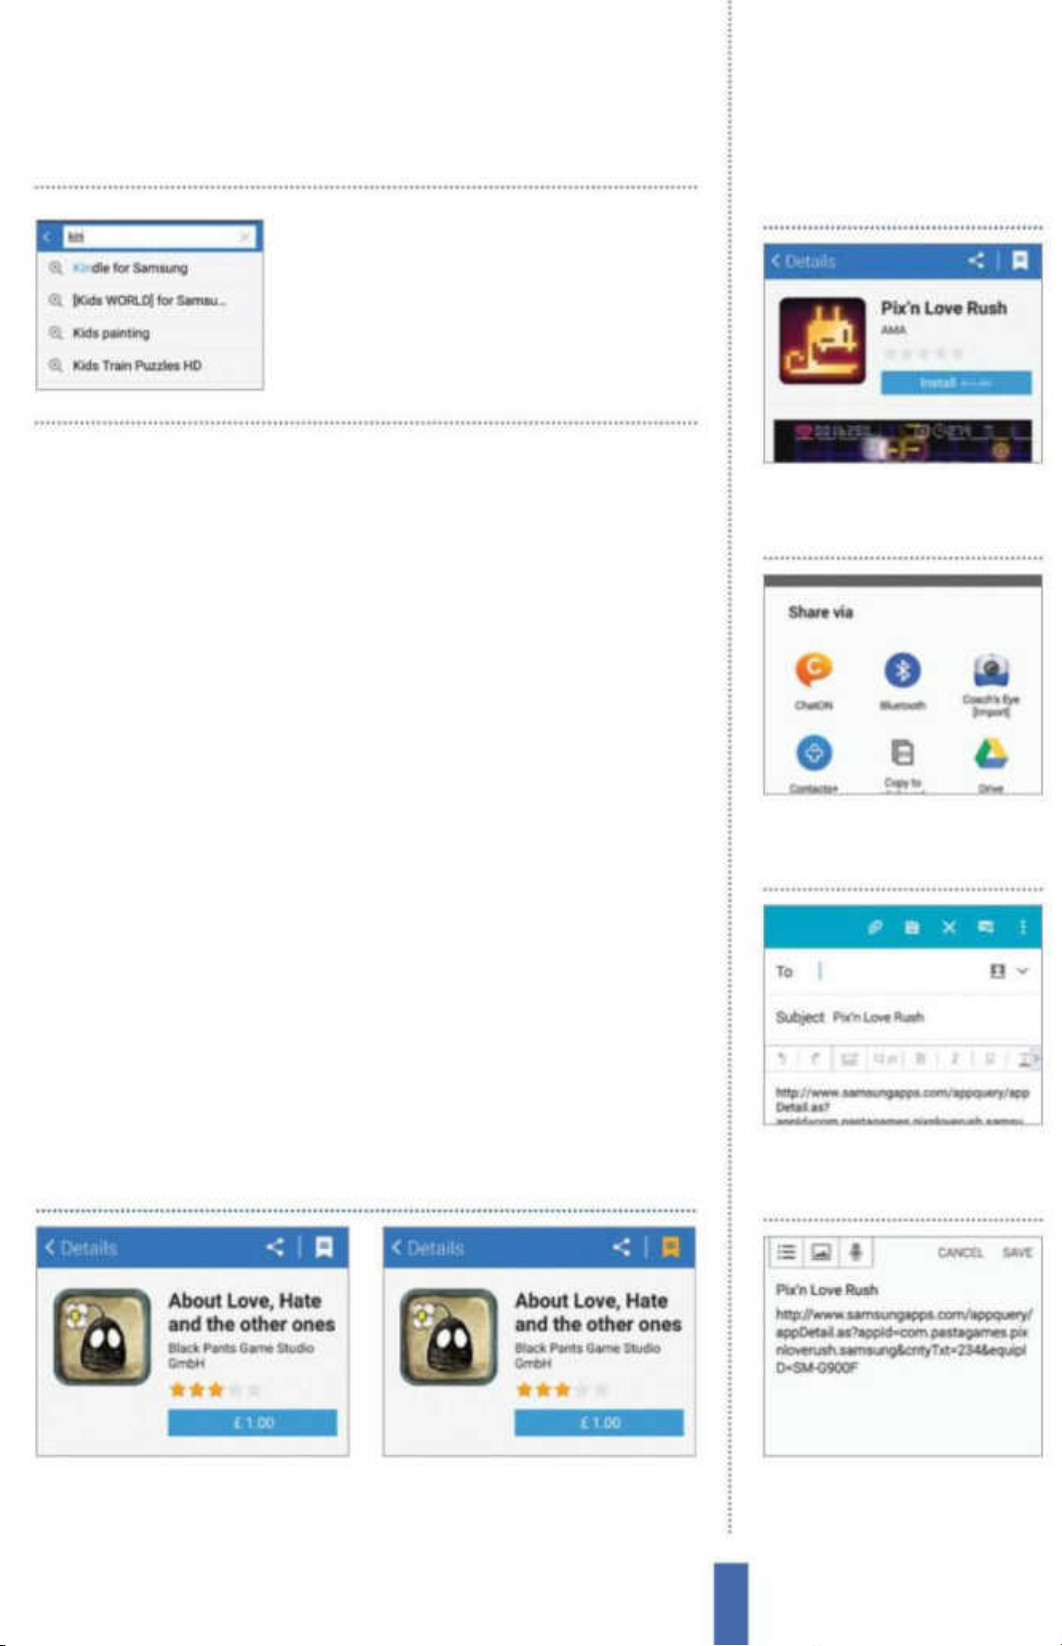
Galaxy Apps
The search function is
essential for nding a
specic app that you
know the name of
The apps
Share favourite apps
Settings menu. Downloading apps while signed into the wrong
account will stop all downloaded apps from appearing when you
eventually switch to the correct account.
The third and nal essential change is disabling the Push
Notications option. This will prevent you receiving promotional
messages regularly and can help save your battery life.
Keep all your apps updated
Now that you’ve lled your device with lots of apps and made some
essential changes to how Galaxy Apps performs, you need to tackle
how your device will update apps. By default, any app downloaded
from Galaxy Apps will update automatically. Although this sounds
good, it can actually lead to problems. Automatic app updates can
drain your battery and it leaves you no choice but to accept the
changes the update brings as well. Venture back into the Settings
menu in Galaxy Apps and disable the choice to download apps
automatically, which will put you back in control of how and when
you update apps. To then manually update an app, simply go to
Open app page Open the
1
page of one of your favourite
apps on Galaxy Apps.
2 Open Share menu Press on
the arrows icon at the top of the
page to open the Share menu.
that app’s page and press on the Update button where the Install
button is usually found.
Create an app wishlist
1 Select an app Find an app that you
want to download later and open up
its page on Galaxy Apps.
2 Wishlist it Locate the bookmark
icon at the top-right of the app to
wishlist it and save for later.
3 Share via email Press on one of
the apps listed to share the link
to a friend or contact.
4 S Memo Use S Memo to share
and sync the app link with other
Samsung devices.
53
Page 54
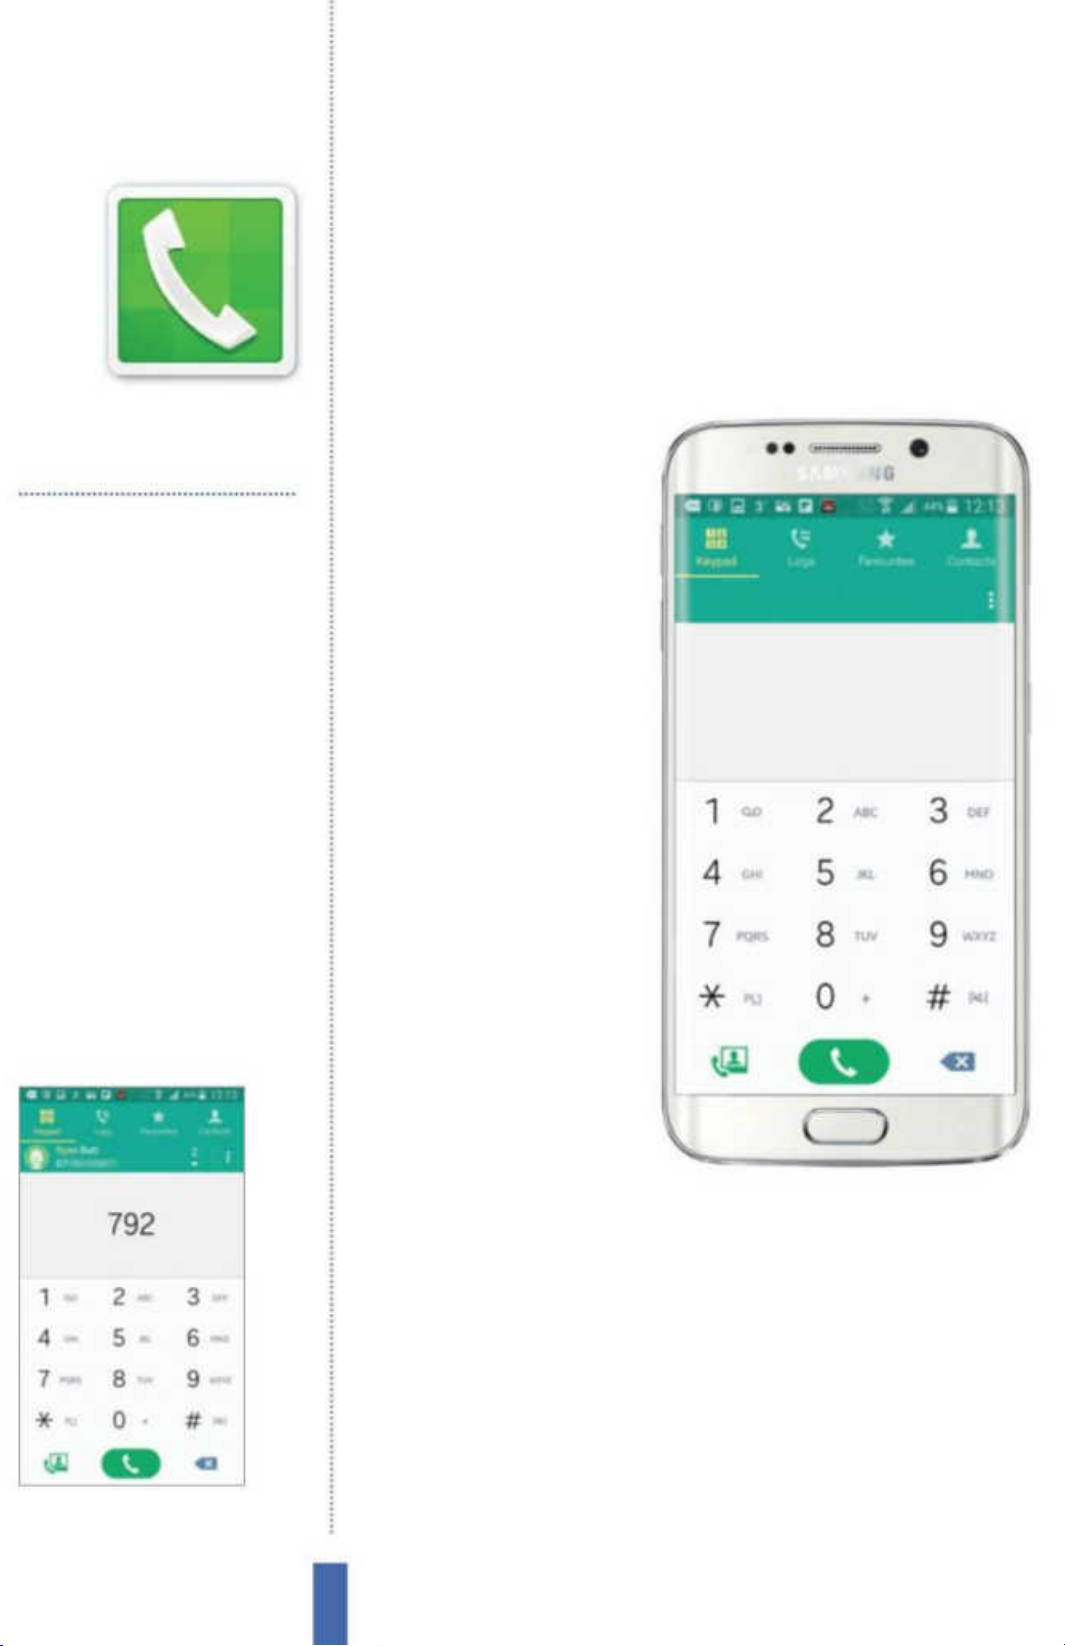
The apps Phone
Phone
You can do more than just call
Using your phone
You’ll use it to…
Talk to people
Make phone calls
Quickly dial numbers
Set up a favourites lis t
Stop calls
Reject calls with an explanatory SMS
Restrict calls
Set up blacklists to stop cold- callers
Find connections
Search for your contacts easily
Connect quicker
Set up sp eed dials
Fig 1 (right) No matter how little data you
have left to spend of your allowance, you’ll
always be able to place a phone call
Whatever else your Galaxy
can do, it will be able to
make and take phone
calls. That’s the essence
of any phone, and your
Galaxy manages to do it
very well indeed. Part of
this is its ability to handle
huge numbers of contacts;
it manages reams of
information about them,
including details of all the
calls you’ve made.
Keypad and Contacts
While the keypad of your
Galaxy might look, at rst,
as though you have to do
all the work entering in the
Fig 2 (above) It is easy to find specific
contacts by using the dial pad
numbers each time you
make a call (Fig 1), that’s
not the case. You don’t
have to remember the phone number of every person you know
– your Galaxy does that for you. You can designate some contacts
as ‘favourite’ people and they’ll be listed under the Favourites tab
inside the Phone app, while the full list of everyone whose details
you’ve saved is listed under the Contacts tab.
However, you don’t have to ri e through your contacts every
time you want to call somebody. Just go straight to the Keypad
screen. Work with the letters on each key rather than the numbers,
and start tapping out any part of someone’s name. Matches are
shown on-screen – the matching letters will be highlighted in blue
54
Page 55
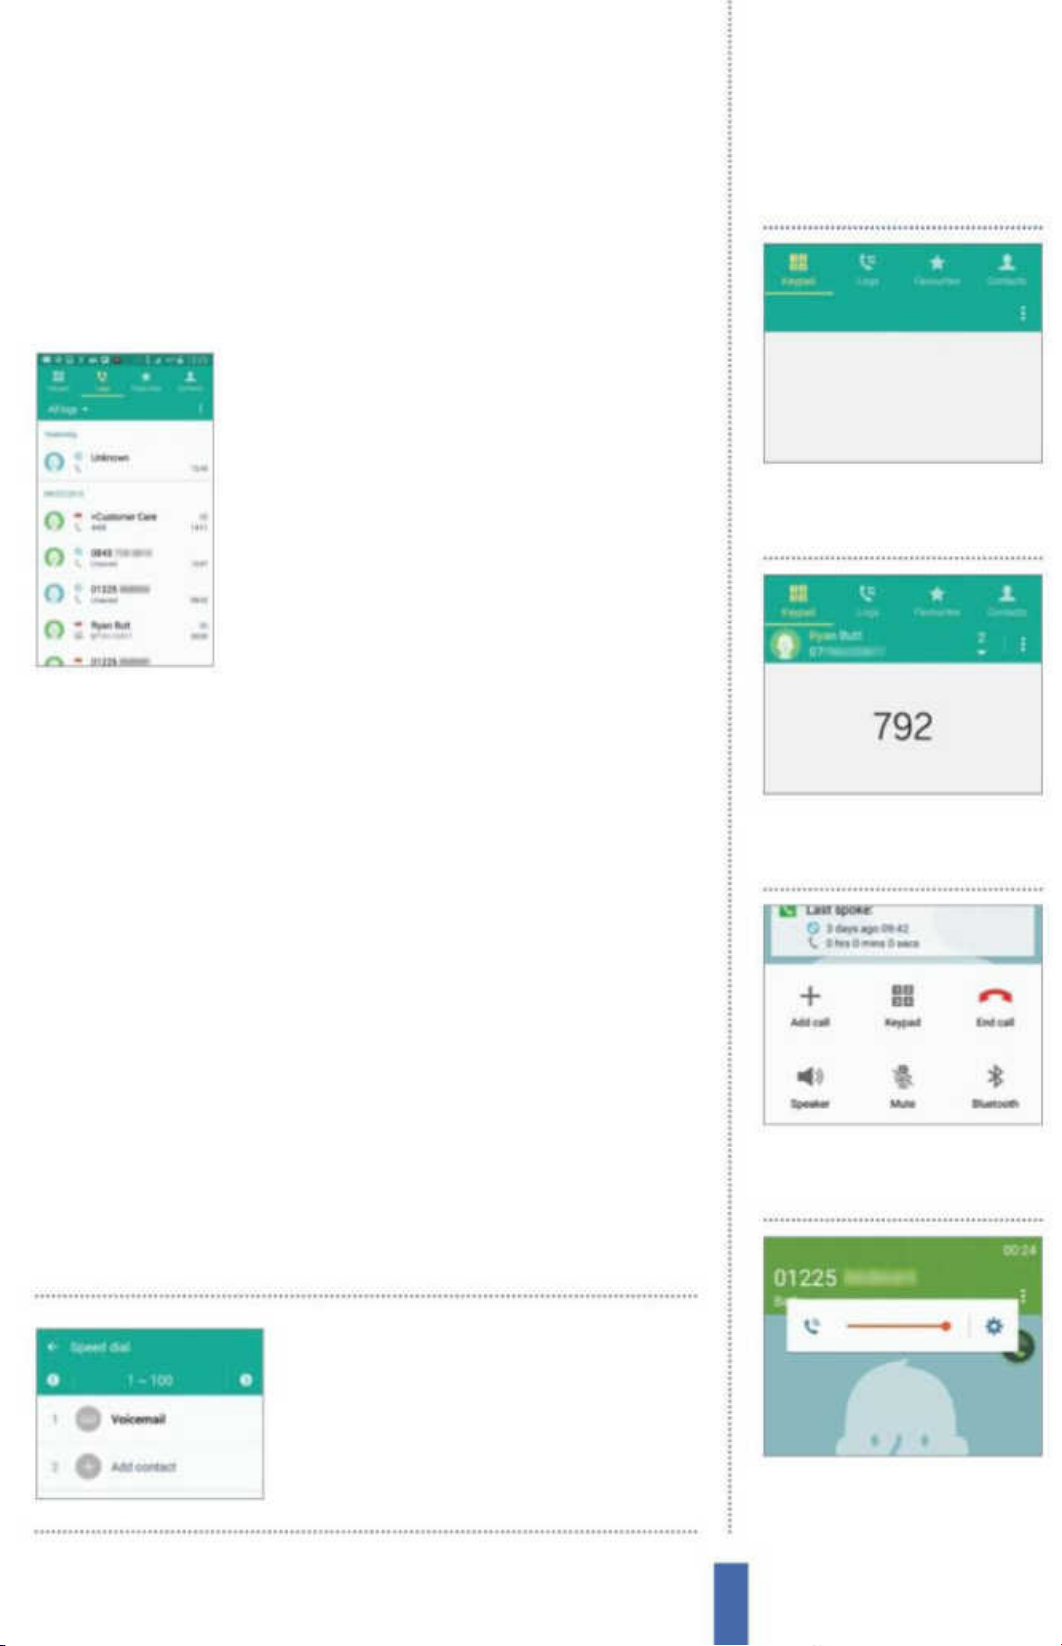
The appsPhone
(Fig 2). If there is more than one match then you can tap the dropdown arrow to the right to see them all or keep typing until there is
just one match. When you’ve found who you need, tap the green
dial button to make a call or the video call button instead.
Logs and Favourites
Your Galaxy remembers who you have called
and it is easy to see this information. If you ever
need to refer to your call history, just hit the
Logs tab along the top of the Phone app. On
the Logs screen you can see how many times
you’ve made and received calls to and from
a number, and tapping a number gives you
even more details, as well as a shortcut to their
Contacts page and some dial buttons.
Meanwhile, you can set up your favourite people in the Contacts
app and get to these by tapping the Favourites button. You could
use this for your closest friends and family so that reaching them is
Make a call
1
Go to the keypad Tap the
Phone icon on your home
screen to open the dialer.
only ever a couple of screen taps away.
Call settings
When you are in the Phone app, tap on the Menu button beneath
the device’s screen area to bring up options including Call settings.
Tap that and you’ll be able to set up a wide range of dierent
options that help you personalise how you make and take calls.
There are some really useful options here. Turning the screen o
during calls is great if you spend time in places where the screen
might irritate other people, like cinemas. You can set dierent ways
to answer and end calls too – perhaps you prefer using the Power
button to end a call, for example. There’s a useful setting that gets
your Galaxy to raise its ringtone volume when it is in your pocket or
bag, so you stand a better chance of hearing it in crowded places.
Tap the Menu button
2 Identify the caller Tap out the
name of the person you want to
ring, then tap the Call button.
3 Use the speaker While you are
inside the call, tap Speaker to
enable the speakerphone.
while on the Keypad
screen then Speed dial
to access these
4 Volume If the caller sounds
faint, turn up the volume and
use the extra volume button.
55
Page 56
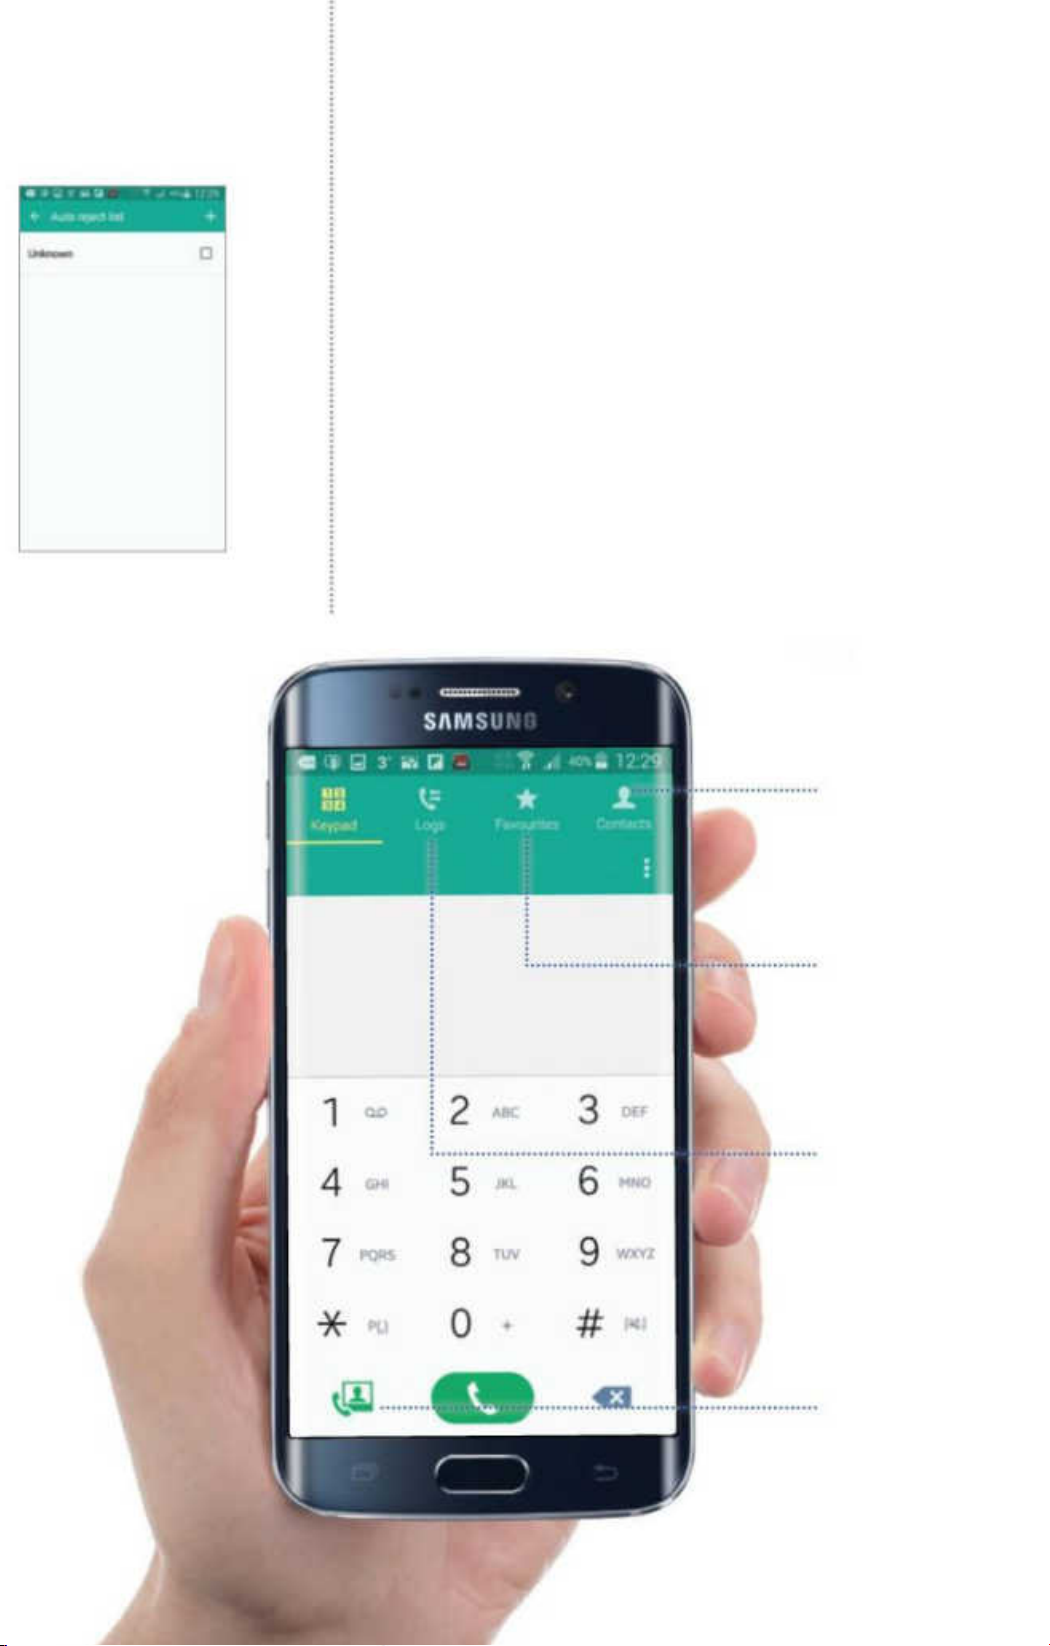
The apps Phone
Create a blacklist
There may be certain people who have your mobile number but
who you’d rather not take calls from. Whether they are ex-partners,
old clients or pesky call centres, we all have certain numbers we’d
like to block from our phones. Instead of having to manually stop
a call each time you’re called, you can set up a blacklist of numbers
whose calls will automatically be rejected (Fig 3).
In the Phone app, tap the Menu button that is located at the
top of the screen and then select the Settings. Next, tap Cell>Call
rejection and make sure that the slider for Auto reject mode is
showing green. If it is grey then the function won’t work, so simply
slide it to the right to ensure that you’re able to block numbers.
Next, tap Auto reject list.
Favourites
Tap on this tab
to see all o f your
favourite contacts
Logs
Check here for information
about past incoming and
outgoing calls
Video or voice?
Tap one of thes e to make
a video o r a voice call
Contacts
Tap here to jump across
to the Conta cts app
Fig 3 (above) You can create an
i
ntelligent blacklist to stop callers
who you don’t want to speak to
Page 57
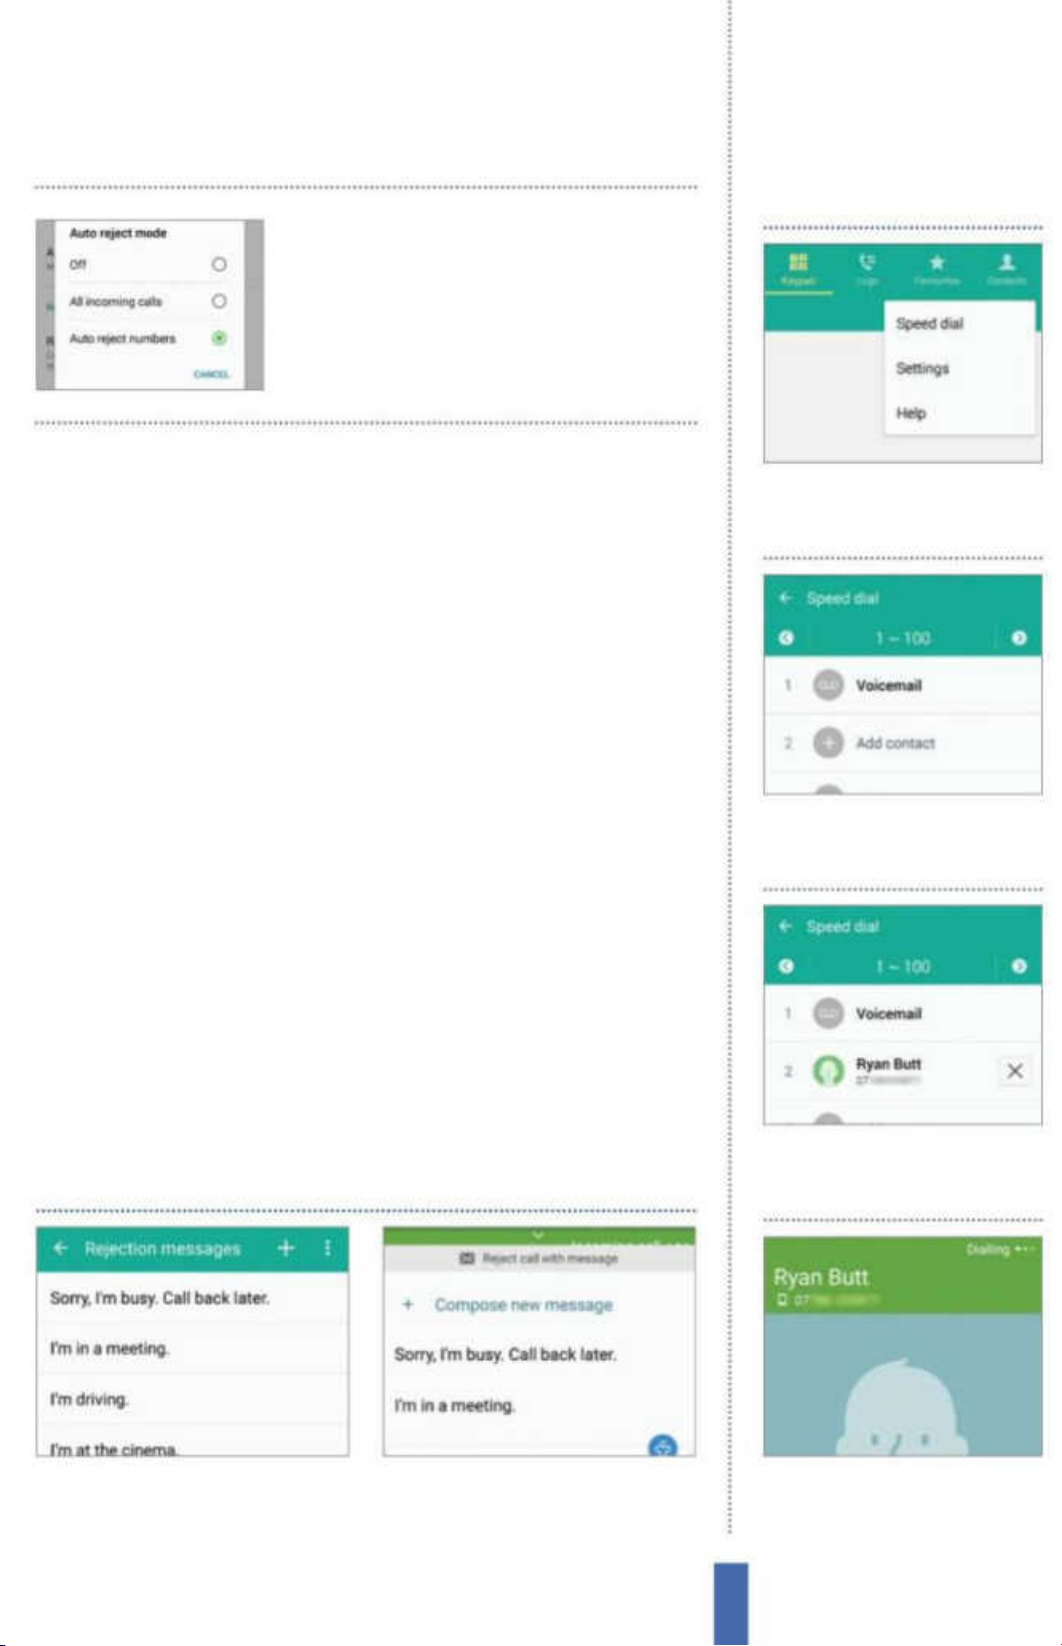
If you want to use Auto
reject mode, you must
ensure it is turned on in
the settings
The appsPhone
Speed dialling
If you check ‘Unknown’ then all calls from anyone who is not
listed in your contacts will automatically be rejected. Be careful if
you do this as some companies and establishments’ numbers are
never displayed. If you would like to add a specic number to the
blacklist then tap Create and add a number. Tap the photo icon
to search call logs or contacts for a specic number, or just type a
number into the box. Finally, tap Save to activate your blacklist.
Set auto-reject text
Sometimes a call comes in and you are interested in talking to that
particular person, but you just can’t take the call immediately for
whatever reason. However, it is possible to let them know you are
interested in talking rather than just sending their call directly to
voicemail. Your Galaxy lets you set up text messages that you can
easily send out as you are rejecting a call.
Once again, press the Menu button to bring up the options and
then choose Call Settings. Tap Set reject messages. There are several
template messages already in the system but you can easily add
Set up speed dials From the
1
Keypad screen, press the Menu
button then Speed dial.
2 Select a number Tap one of the
speed dial numbers that’s not
yet been allocated.
personalised ones by tapping Create. When a call comes in you can
then reject it by sending a pre-written text message.
Automatically reject calls
1 Set up SMS Go to Settings> Call>
Call rejection and tap on Rejection
messages to create or select one.
2 Reject the call When you reject a
call, select a specific message to let
the caller know you can’t answer.
3 Add a contact Search for a
contact in your list to add to the
speed dial.
4 Use speed dial Once added,
call them by long-pressing their
number on the keypad.
57
Page 58
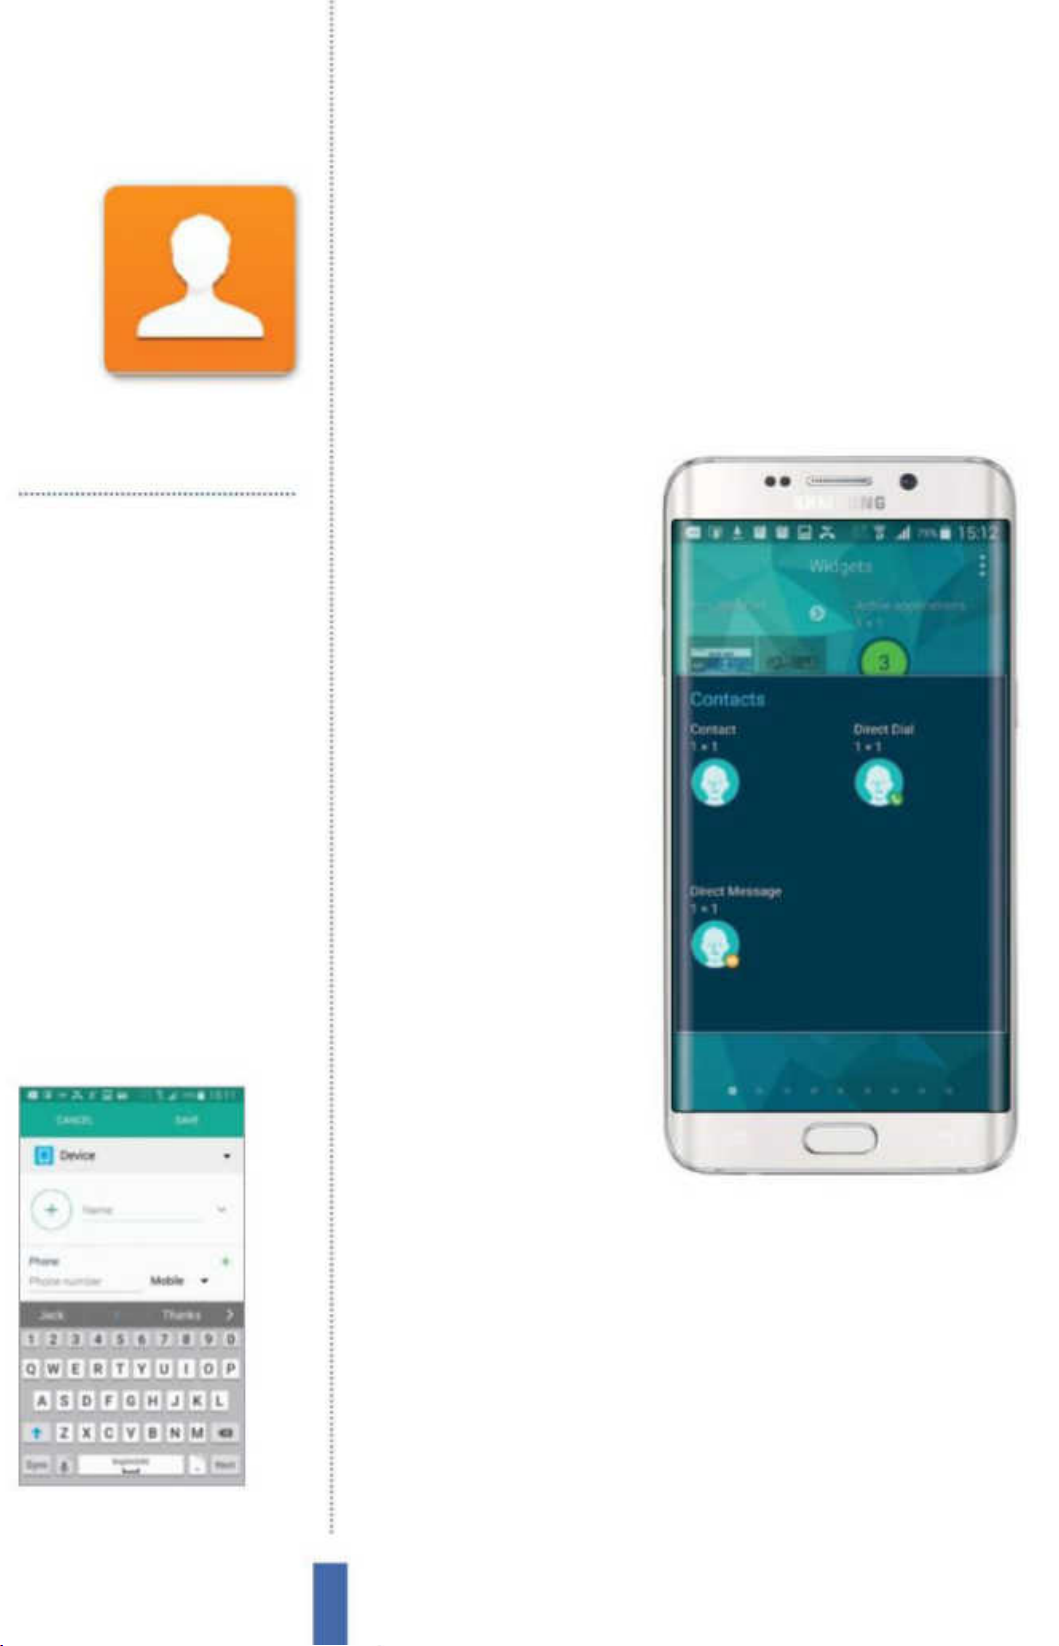
ContactsThe apps
Contacts
Manage the details of your friends, family and
colleagues in the Contacts app
You’ll use it to…
Manage contacts
Keep track of everyone impor tant
Organise groups
Put simil ar contacts to gether
Merge sources
Link information from multiple apps
Set ringtones
Give your friends a personal ringer
Mark favourites
Highlight contacts for quick access
Manage calls
Place calls or send tex ts directly
Fig 1 (right) You can keep all of your
favourite contacts on a screen widget
Keeping up
with contacts
One of the most handy
functions on any phone
is the ability to keep all
your contact details in
one place, in the process
enabling you to keep in
touch with your friends (Fig
1). Your Galaxy device can
be used to bring together
information about your
contacts from a whole
range of sources.
Create new contacts
There are lots of ways
to add contacts to your
Galaxy device; you can
Fig 2 (above) You can manually add people
to your Contacts app
import them from places
like your Google, Facebook
or Samsung ChatON
accounts; import contacts from a SIM, or simply add them manually.
In order to do this, all you have to do is go into the Contacts app
and tap the plus sign next to the search box near the top of the
screen. After this, all that’s left to do is add information (Fig 2).
You are given a simple set of elds at rst, like name, mobile
number, email address and home address. However, should you
wish to, you can expand these to add multiple numbers, email
addresses and home addresses. You can assign a contact to a
group such as work, family or friends, and in the process attach a
dedicated ringtone and vibration pattern to them.
58
Page 59
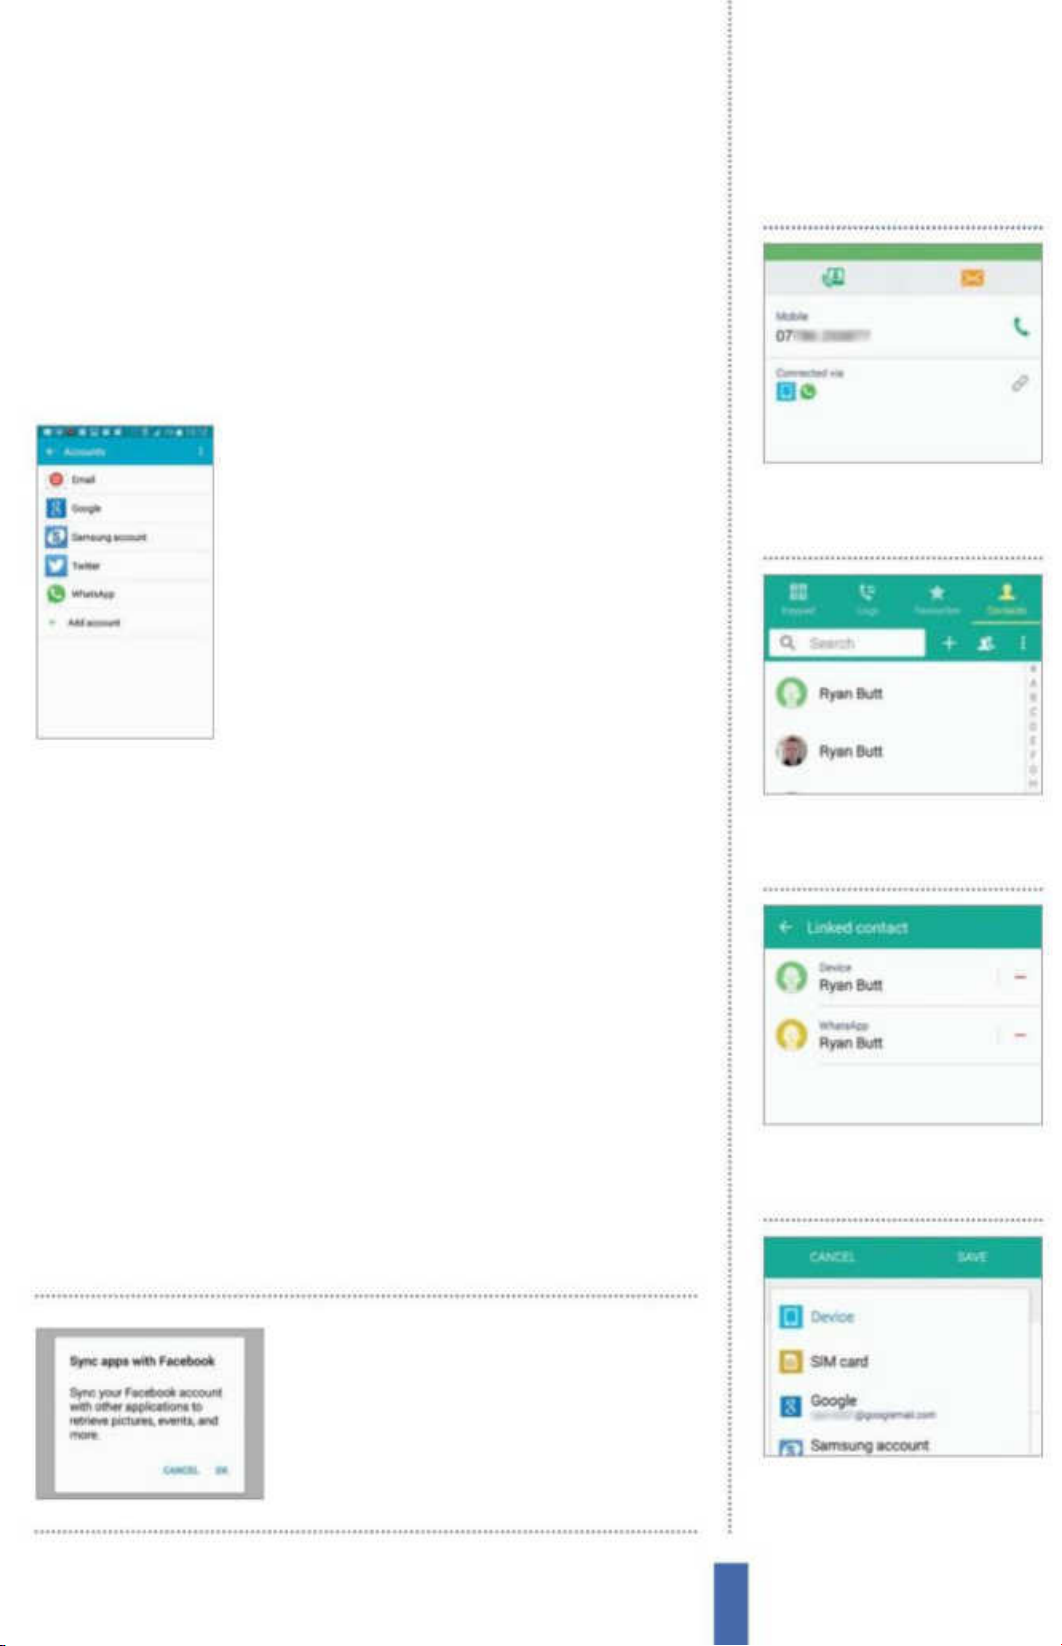
The appsContacts
Once these basic tasks have been completed, you can add more
elds such as website, organisation and even attach notes, as well
as change the contact’s photo by tapping on it. Manually adding
contacts in this way is slower and arguably less ecient than simply
adding them in bulk from existing accounts, but it is very useful if
you need to add or edit specic details, or you meet new people.
Add an app account
A great way to import contacts to your Galaxy
device is to do so through an app. One
example is to add your Facebook account so
that the contacts you have there are drawn
into the device’s contacts. In order to do this,
go to your main Settings app, then scroll down
to Accounts and select the Add Account
option. Select Facebook from the list, install the
app and then log in. Having done this, you will
be asked to set the sync preferences, after which synchronisation
Join or split contacts
1
Two people, one contact
Importing contacts can often
result in duplicated information.
will commence automatically and your data will move across.
Import/export contacts
Contacts can be imported to and exported from a range of
dierent places. You might nd that exporting contacts to USB
storage represents a good way to make a local physical backup
from time to time, or you may feel more secure leaving such data in
the cloud. Moreover, it also means that if you are upgrading from an
older phone and want to import the contacts you’ve got on your
SIM, then you can do so easily and without fuss.
In order to import or export your contacts, rst open Contacts
and make sure that you are in the main Contacts view screen. After
you’ve done this, tap the Menu button. On the screen that pops up,
select Import/Export and make your choice.
If you’re importing
2 Start the link Hit the linked
chain icon by the Connections
section to see linked accounts.
3 Find the connection Tap Link
another contact and you will
receive a recommendation.
contacts from a SIM, send
them to Google so they’ll
sync with your Galaxy
4 Join more Join more together
if you need to and view the
entries from the contact page.
59
Page 60
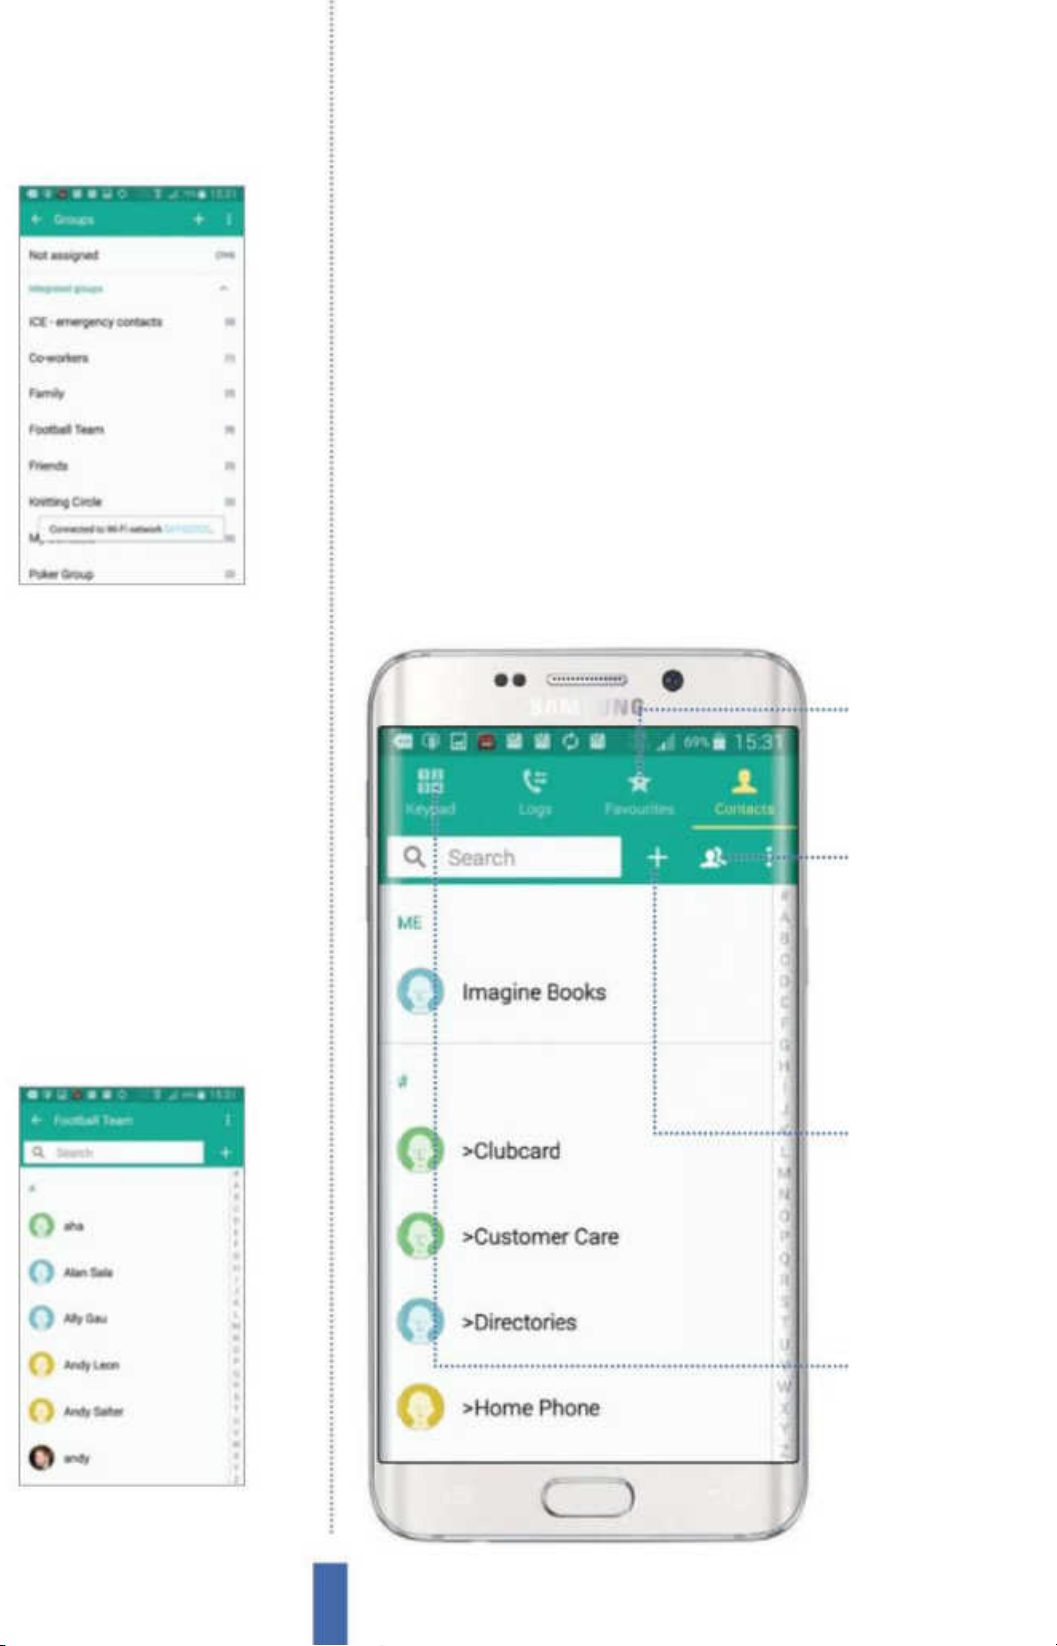
The apps Contacts
Set up groups
Once you have all your contacts in place, you might want to set up
some groups (Fig 3). This represents a great way of keeping people
you deal with in a particular way together. Perhaps you have a
special group of friends or a family group, or maybe a set of work
colleagues that you like to group together. Doing this is easy with
your Galaxy device, which comes with a number of groups set up
already, and also gives you the facility through which to create even
more groups quickly and easily. Simply hit the Menu key from the
Groups page, select Create, give your group a name and a speci c
ringtone or vibration pattern if desired, and nally tap Add member
at the bottom of the page. From there you can simply select the
Fig 3 (above) It’s easy to split your list of
contacts down into manageable groups
people you wish to add and then hit Done at the top-right.
Favourites
Tap on this big star to
quickly see your lis ted
favourite contacts
Groups
Give this tab a tap
to see all o f your
grouped contacts
Create groups
If the existing groups
aren’t specific enough for
you then you can always
create your own instead
Fig 4 (above) You can send text messages
and emails out en masse, if you like
Phone
This shortcut will take
you out of Contacts and
straight across to the
Phone app’s keypad
60
Page 61
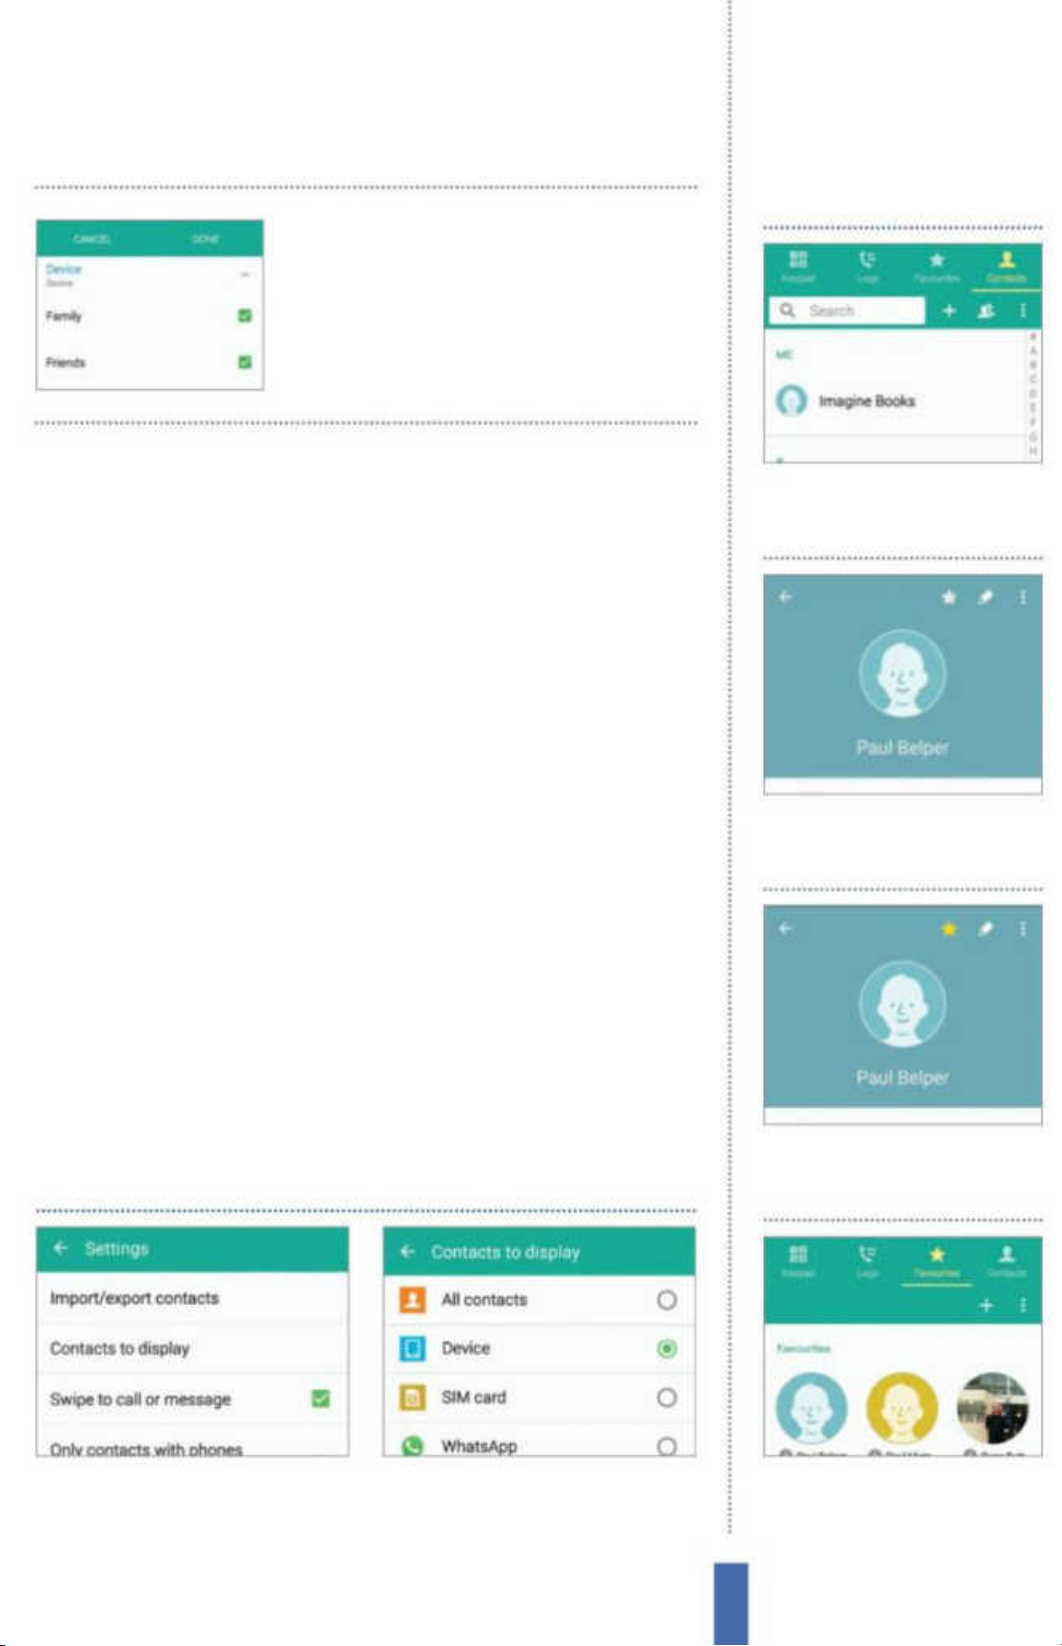
When choosing contacts
to display, tap the settings
icon beside Customised
List to specify groups
The appsContacts
Set Favourite contacts
You can very easily add to and delete from these groups as time
goes on so that they can reect your ever-evolving circles of friends
and your social life. Sometimes, though, a group won’t cover it if you
need to contact a bunch of people who aren’t usually connected.
In this case, hit the Menu key from the main contacts list and select
Send email or Send message. You can then select recipients (Fig 4).
Customise the list
As you can probably appreciate, you can easily end up with a lot of
contacts stored on your Galaxy device, and it is highly likely that you
won’t actually need to see them all at any given time. To help you
get to grips with a very large contacts list, you can customise it so
that not all of the contacts are available to view at once. You might
not want to make a customisation setting and use it all the time, but
it could be something that you use to lter through your large list
and make it more manageable.
For example, you can choose to narrow down your contacts so
that only those sourced from a particular place, such as your SIM or
Mark contacts as favourite
1
To begin with, open up the
Contacts app.
2 Select a contact Now pick a
contact who is important to you
so you can add them to the list.
Facebook account, are displayed. Alternatively, you can produce a
list that has been more heavily customised.
Customise contacts display
1 Menu option Tap the menu icon
and go to Settings then select
Contacts and tap Contacts to display.
2 Make selection Decide which
contacts you want to display – you
can even customise the settings.
3 Star the contact Tap the star
at the top-right of the contact
page so that it becomes yellow.
4 View favourites Tap Favourites
at the top of the Contacts screen
to see your starred contacts.
61
Page 62
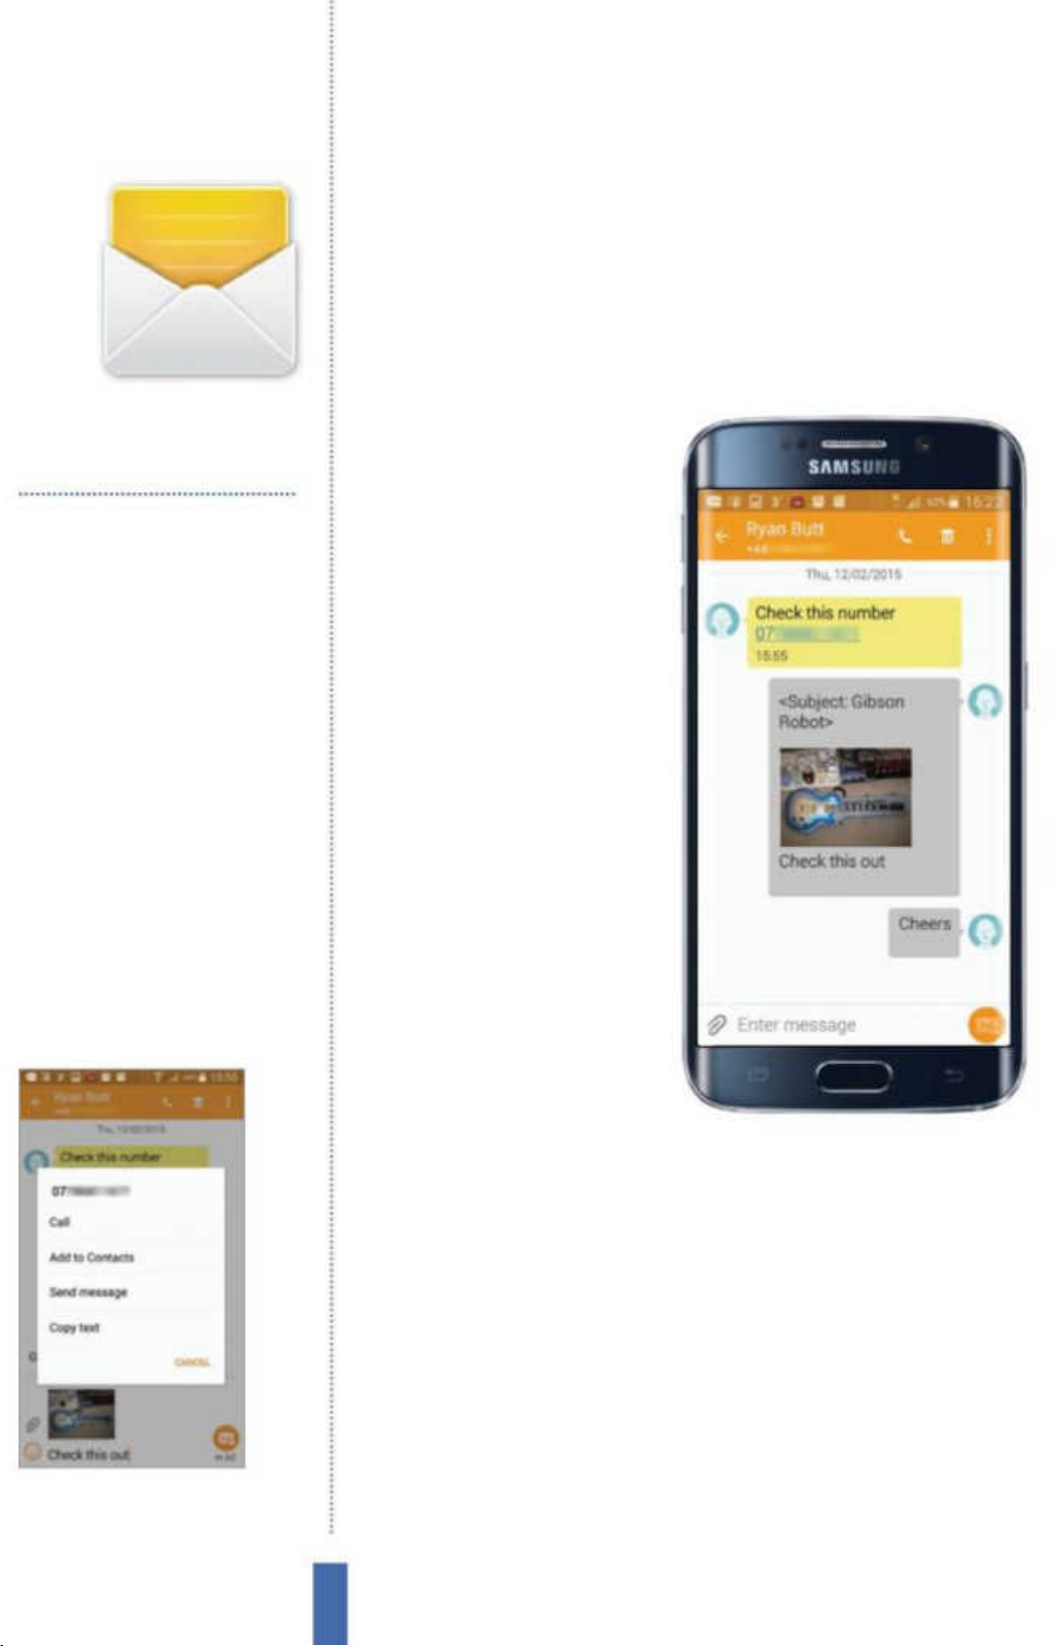
The apps Messaging
Messaging
Get to grips with messaging on your Galaxy
Texting friends
You’ll use it to…
Text people
Send and receive text messages
Share images
Attach pictures to MMS messag es
Dictate messages
Save time a nd keep your hands free
Stay organised
Manage spam messages
Reply with templates
Send short pre-written messages
Customise alerts
Set your own message notific ations
Fig 1 (right) Messaging provides you with
threaded conversations so that you don’t
have to keep digging through old texts
and family
Texting is one of the most
popular uses of any phone
and your Galaxy has texting
down to a ne art. It’s
easy to take advantage of
its simple and accessible
interface to keep in touch
with all your family and
friends (Fig 1).
Send a text message
Texting is about a lot
more than just creating
and sending messages.
Suppose someone sends
you a website address in a
text message – it becomes
Fig 2 (above)
inside a text message to either call the
sender or add them as a contact
Tap on a phone number
a live link and you can
tap it to go straight to the
site. Alternatively, if someone texts you a phone number then just
tapping it will bring up a menu from which you can call them or
add them to your contacts (Fig 2).
There’s another potentially useful item on that menu too: copy
message text. Imagine you want to take a bit of an SMS and put it
into an email, or even send text from one SMS to a new recipient –
with this command you can copy the text and then paste it straight
into any other app that supports text.
SMS messages are ‘threaded’, meaning that you can see a
conversational view between you and the person you are chatting
to. You might not always want to keep every message, though, and
if you long-press on any particular message you can delete it. You
62
Page 63
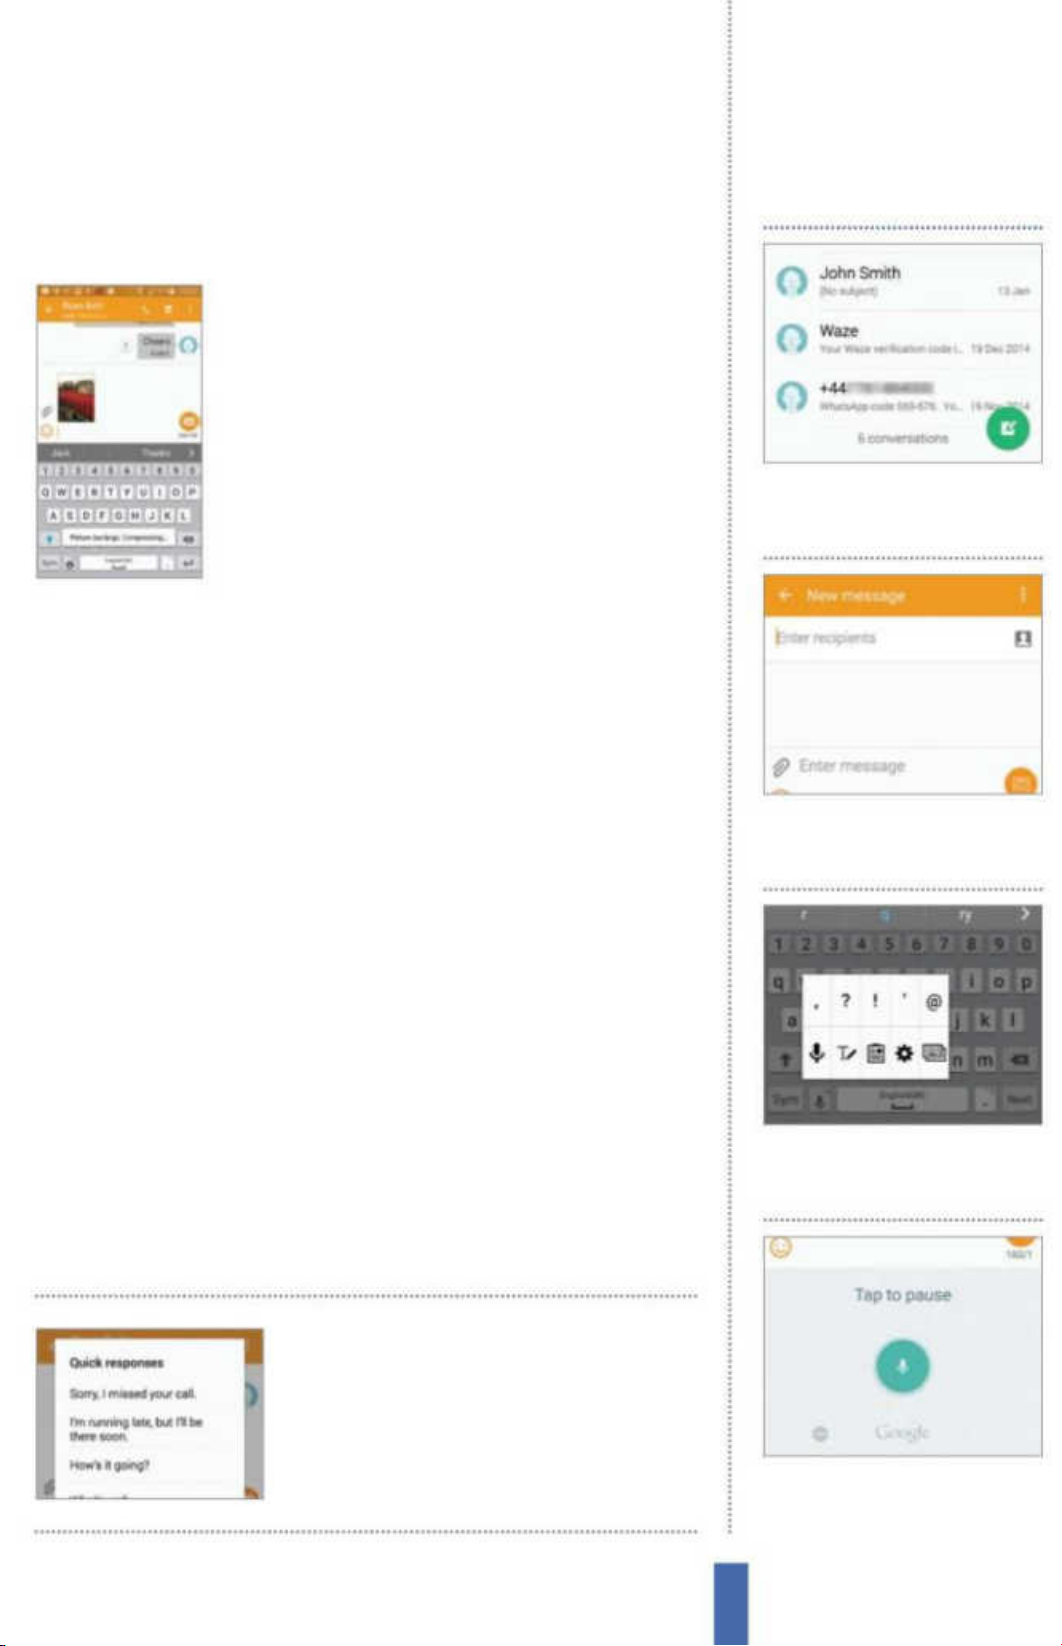
The appsMessaging
also get the option to forward the message on to someone else or
lock it so it can’t be accidentally removed, which is great for tickets.
Attach photos and videos
Messaging is often just about text, but it doesn’t
have to be. It is easy to attach a picture or video
to a text message, and in doing so convey so
much more. If you take a photo that you want
to share, start a text message and then hit the
attachment icon beside the typing area – it
looks like a paperclip. Now go to Images, then
Gallery and select the photo you want to
attach. It’ll be embedded within the body of the message, which is
upgraded from SMS to MMS, and you can send it when ready.
Message and display settings
You can make use of a range of settings to help you get more out
of the SMS messages you send and receive. In the main Messaging
Dictate an SMS
1
Start SMS Open Messaging and
tap the Compose button at the
top-right of the screen.
window, tap the Menu button on your device to see a number of
options, including Settings. Tap this and you can make all kinds of
changes to how your messages look and are managed.
You can switch between dierent viewing styles for messages
and change the font size too, helping you squeeze more onto the
screen at once. You can also tell the handset to automatically delete
older messages if you get past the limit for messages in any one
text conversation. This helps you manage the storage memory of
your device automatically.
So as we have seen, texting on your Galaxy is a simple exercise
that will soon become as eortless as breathing. Just take a few
moments to explore the range of options available and, once your
rst text has been sent, you’ll be completely familiar with the setup
and the procedure.
Tap menu and choose
2 Enter recipient Enter the
recipient(s) details in the box at
the top of the screen.
3 Voice entry Long-press the cog
icon to the left of the space bar
then tap the microphone icon.
Quick responses to send
standardised responses to
any messages you receive
4 Speak your text Now speak
and your words will be instantly
turned into an SMS message.
63
Page 64
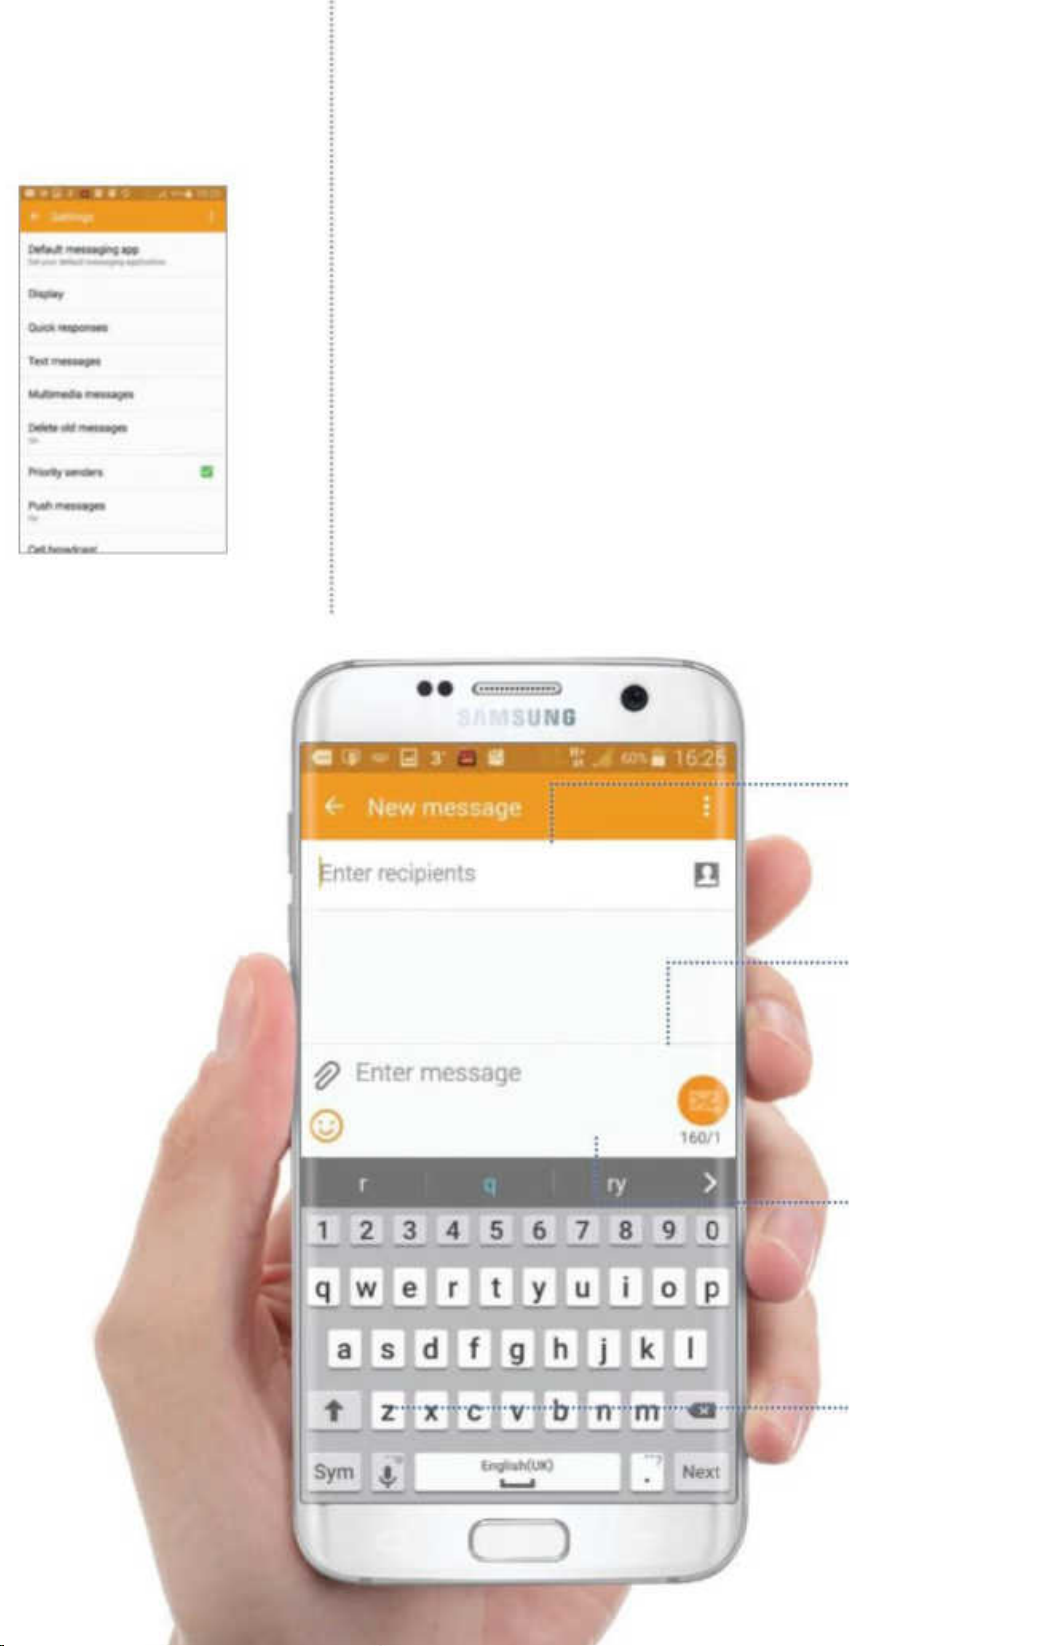
The apps Messaging
Noti cations, signatures and spam
There are other settings you can make to help you get more from
your messages. On the main Messaging screen tap the Menu
button beneath the screen and then select Settings. Then scroll
down the screen to see the full range of settings available (Fig 3).
You can request a delivery report so you can be absolutely certain
your message has arrived at the other end, and you can even get a
noti cation when the message has been opened by the recipient.
You can also make a range of settings to notify when you have
received an SMS, including repeating incoming message alerts,
setting a ringtone noti cation and getting a preview of a message
on the noti cations bar at the top of your device’s screen. That’s
useful if you don’t want to go into the Messaging app to get the
Composing
a message
You’ve got 160
characters for
each message,
and you ca n see a
countdown here
Predictive text
It can be f aster to tap the
word you want when it
appears here rather than
type the whole thing
To ol s
Access too ls like
handwriting and speech
recognition here
Recipients
All your recipients are
listed in this area at the
top of the s creen
Fig 3 (above) You can make sophisticated
settings for managing text messages and
tailoring the app to suit your needs
Page 65
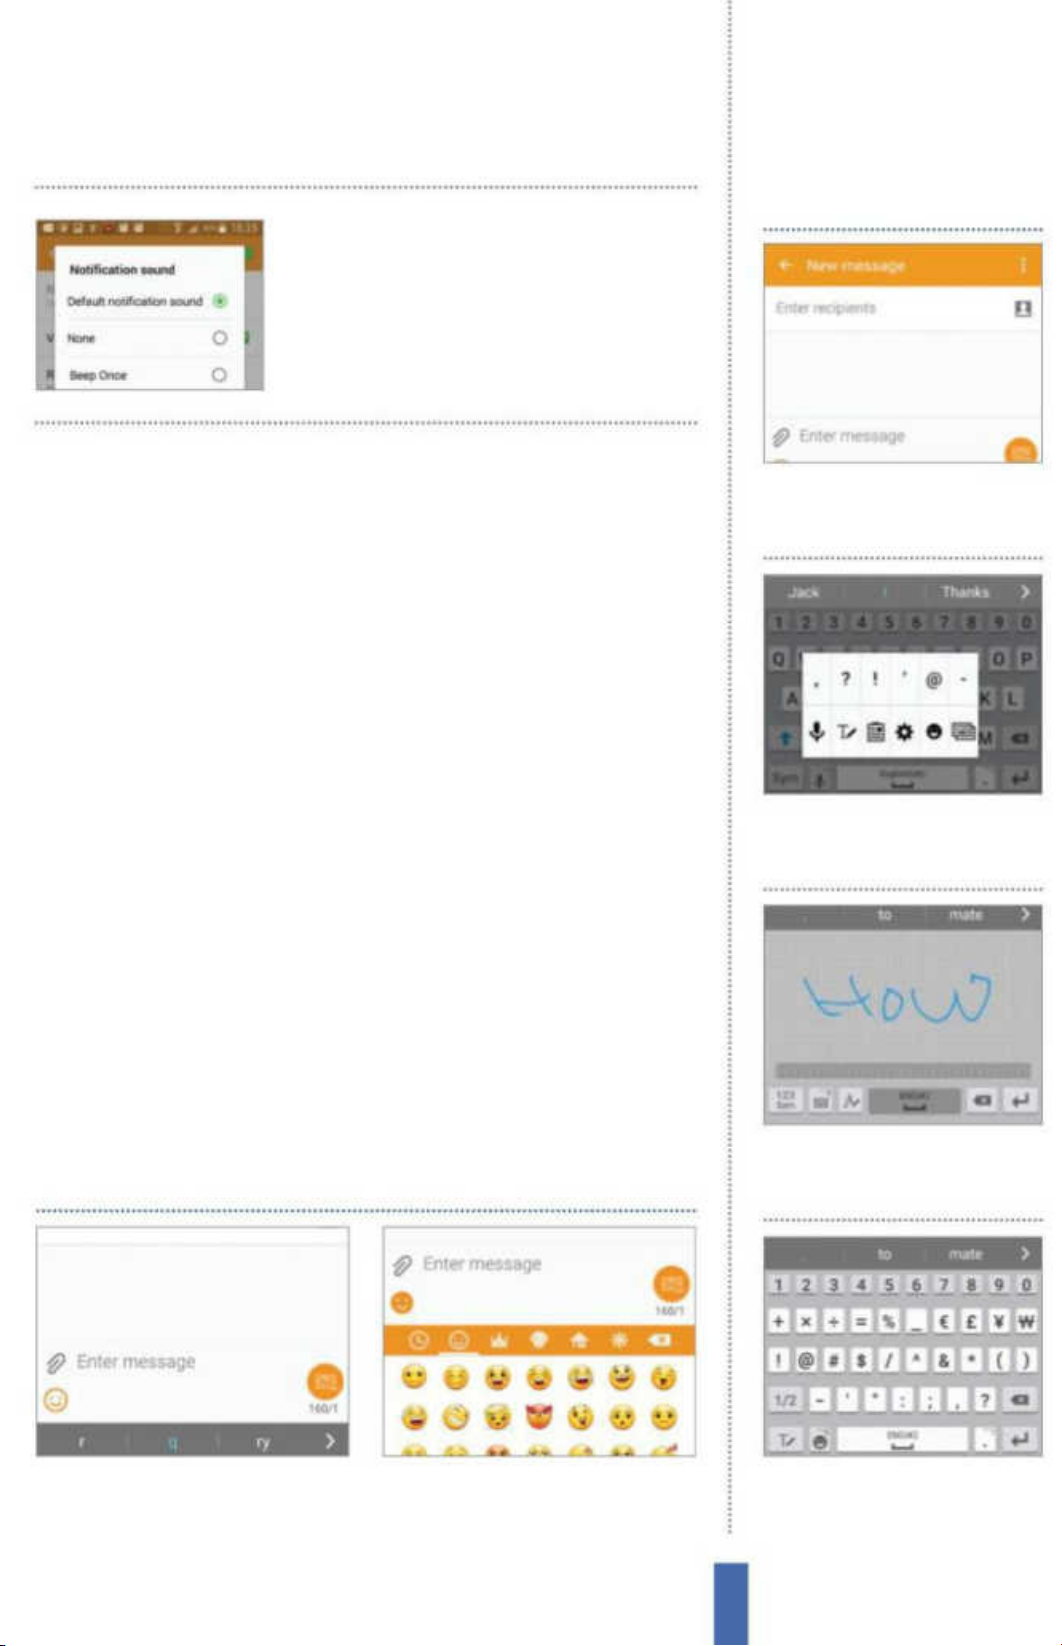
Selecting a ringtone for
your incoming messages
can help you distinguish
your phone from others
The appsMessaging
Handwrite a message
gist of what they are about. You can also block senders and register
particular phrases that block messages – this is handy if you get
a lot of SMS spam on a particular topic. You can even add a short
signature to your SMS messages.
Add ‘smileys’
We often use shorthand when writing SMS messages to save on
characters, since we’re only allowed 160, as well as to make typing
faster. We’ve also become addicted to ‘smileys’, the little characters
that express how we’re feeling. Happy and sad faces are the most
frequently used, but there are lots more. Your Galaxy has a host
of them built in, covering a wide range of dierent sentiments:
laughter, confusion, indecision, foot-in-mouth, surprise and more.
You can enter these into a text message using the characters that
combine to make them. For example, :-) makes up a happy face
and :-[ is the combination for the embarrassed smiley. If you type
these into a message then its Android symbol is sent instead of
the constituent characters. However, it’s more fun and often faster
Handwrite a message Ta p to
1
open Messaging and then opt
to start a new message.
2 Select handwriting Long-press
the button to the left of the
space bar and choose the ‘T’.
to use the menu to send smileys instead. Plus, you won’t have to
remember lots of dierent combinations of keys.
Find the ‘smileys’
1 Smiley menu When writing a
message tap the smiley face icon to
the left of the text field.
2 Insert smiley Pick a smiley to insert
by tapping on it and it will instantly
appear in your message.
3 Start to write Write your
message in the text area that
appears using your fingertip.
4 Symbols Use the symbol key to
place additional symbols inside
your message text.
65
Page 66
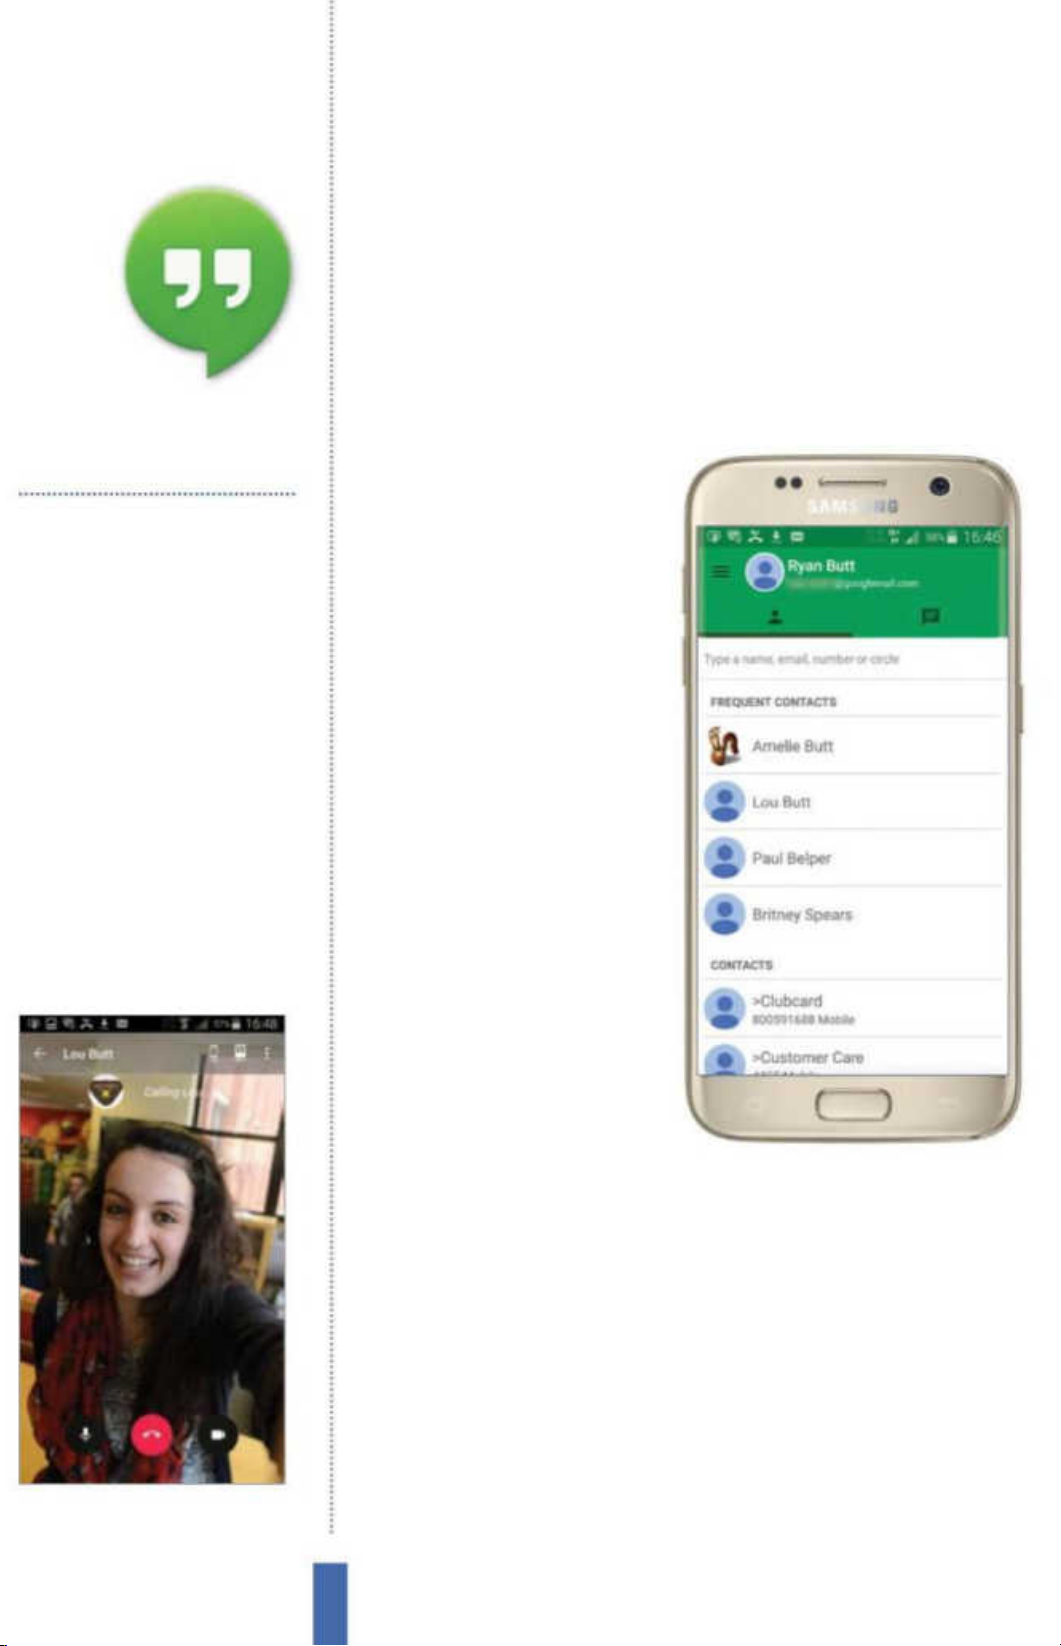
The apps Hangouts
Hangouts
Use Google’s own Hangouts service to keep in
contact with friends and family
You’ll use it to…
Chat to friends
Send unlimited free messages to your
frien ds and contact s
Work on projects with
your contacts
Edit and share documents in real time
Manage multiple accounts
Sync all your contact s into a single account
Start video calls
Create free video calls with cont acts
Talk to several contacts at the
same time
Add people to your conversations
Add funny effects to videos
Implement funny edits to your vi deo chat
Fig 1 (right) Your contacts are arranged by
most frequently contacted people up top
Chatting with
Google Hangouts
At its core, Google Hangouts
is a cross-platform messaging
service that allows you to
have text and video chats
with your friends and
contacts from your Galaxy
device (Fig 1). You can
send emoji and animated
GIFs, send and receive text
messages within the app,
and switch between SMS
and Hangouts. The app is
now available on iOS too.
Make a video call
With so many apps now
Fig 2 (above) Use the front-facing camera
on your phone to star t a video call
available from both the
Samsung App and Google
Play stores, there’s a real
plethora of video call apps available for download. The likes of
WhatsApp and Skype now have millions of users using their video
call functions on a daily basis completely free of charge and,
although Hangouts doesn’t yet have that amount of avid followers,
it does include a selection of cool features that can be applied to its
very own video call function.
Setting up a video call within Hangouts is easy enough; all that’s
required is for both you and your speci ed contact to have a front
facing camera on each device (Fig 2). You also need to make sure
the contact has Google’s Hangouts app installed on their device, or
that they are signed in to the web service. After that, just tap on a
66
Page 67
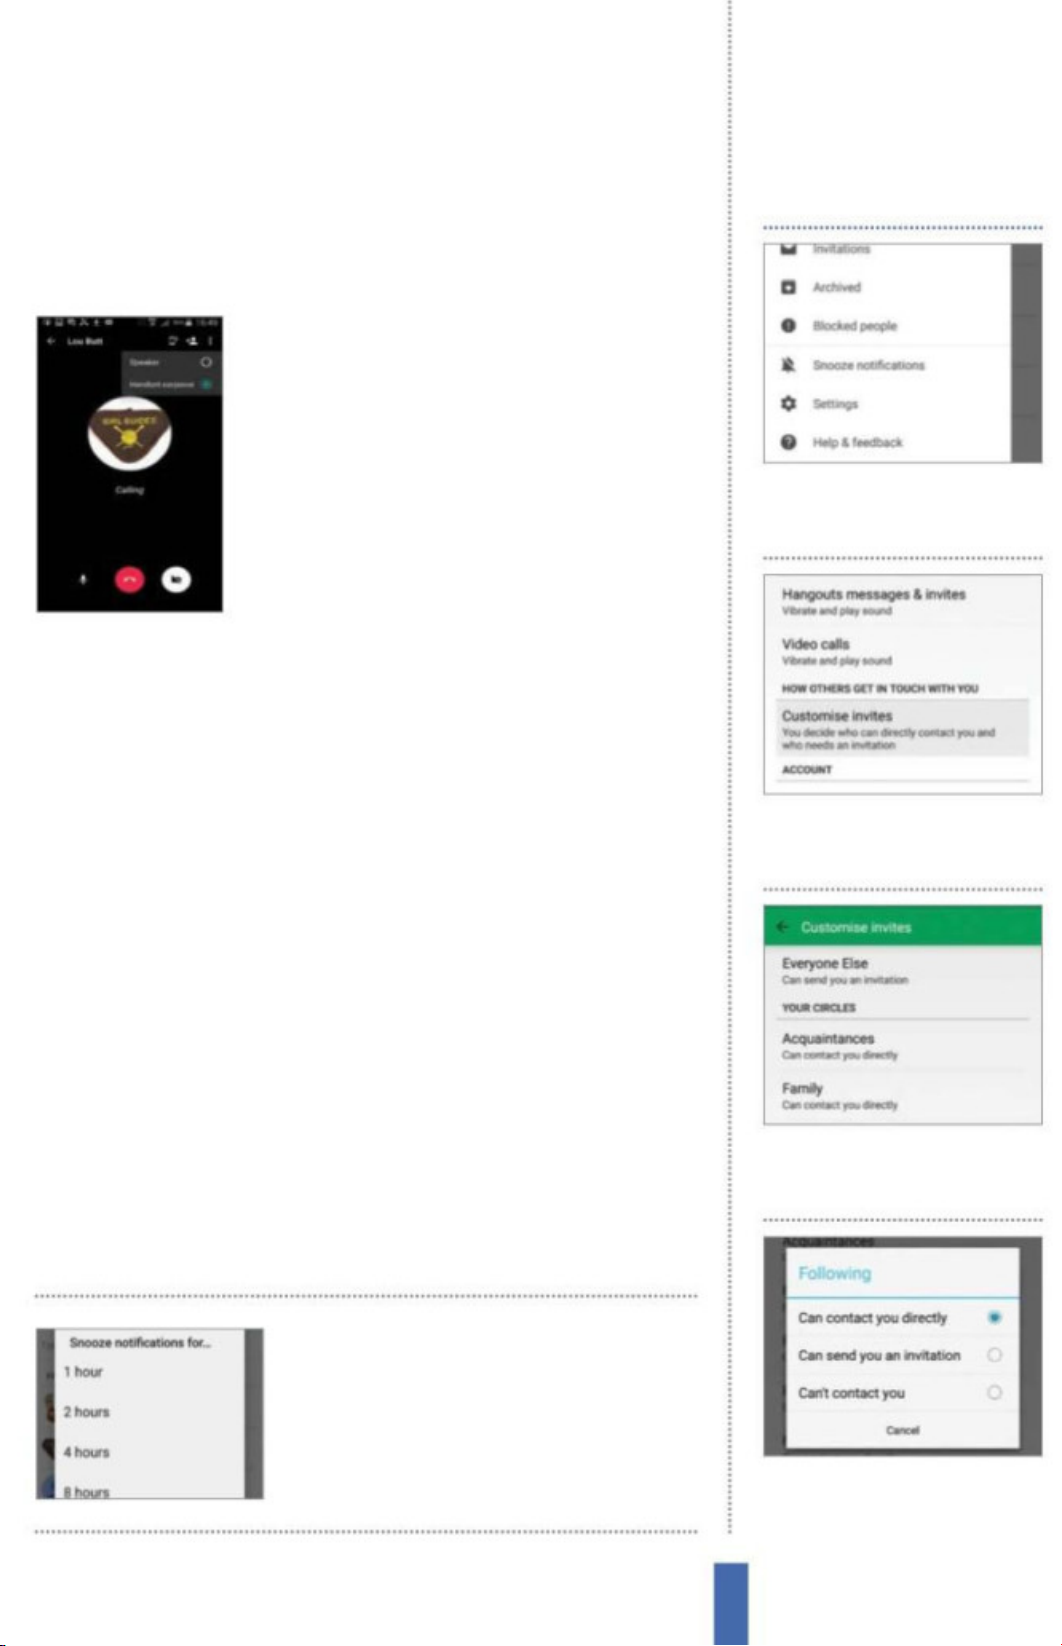
The appsHangouts
contact to select them and pick the video option. Once connected
you can then control your audio, switch between your front and
back cameras, and enjoy a video chat with up to ten of your friends.
Use in-chat options
Hangouts includes a few in-chat options,
located in the top and bottom bars, that you
can use to improve the quality of your chat.
The main in-chat options deal with the audio,
allowing you to choose between speakers
and headphones or Bluetooth devices, and
you can also disable the video link and return
to a text chat if your connection is a little poor.
If you decide to pop over to your desktop computer and sign in to
the web service then you can even add fun e ects to your videos.
Change the settings
As with any app of this type, you’ll want to have a range of settings
New request settings
1
Hangouts Hit the Menu button
while on the app’s main home
screen and select Settings.
that you can tinker with to perfect how the app functions, and
while the Hangouts app isn’t yet as fully featured as its predecessor,
Talk, you can still access the main settings.
You’ll nd options enabling you to control the noti cations that
you receive from the app, how people can make contact with you
and also the blocking of people you don’t want to hear from. If
you want to change any of the settings related to your Google+
account, or quickly nip across to set up a new circle, then tap the
Google+ pro le heading under Account and navigate from there.
Hangouts works from inside of Gmail as well so take a break from
writing an email and make a video call with a friend.
Hangouts is a versatile and incredibly useful app that will allow
you to communicate quickly and easily with your loved ones. Long
face-to-face video calls or quick text chats – the choice is yours.
The Snooze noti cations
2 Settings On the next screen,
scroll down to Customise invites,
just above Account.
3 Requests Tap the option to see
the various types of people who
can get in touch with you.
option in the settings
lets you silence noisy
conversations for a while
4 Set the limits Tap each group
to choose whether or not they
can start a Hangout with you.
67
Page 68
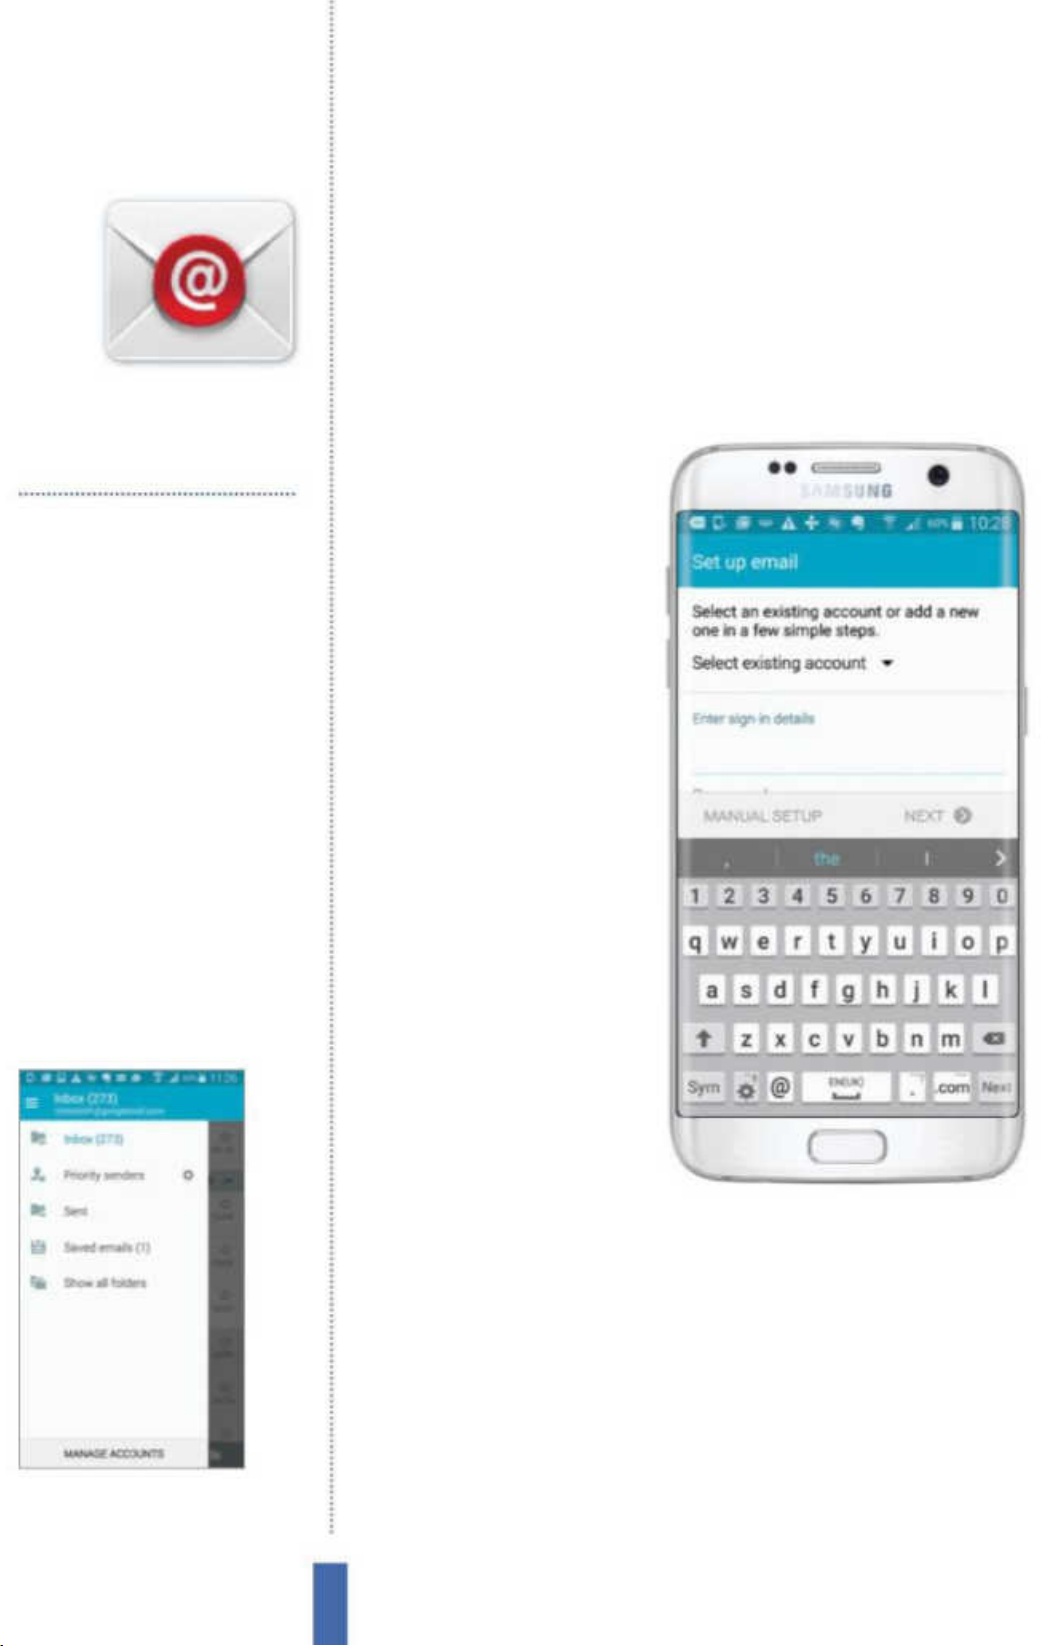
The apps Email
Email
The Samsung Galaxy o ers many options for email,
one of the most important communication features
You’ll use it to…
Send messages
Send and receive ema ils while on the go
Share photos
You can attach images to your emails…
Share videos
… and even video files, too!
Contact multiple people
You can send a single message to more than
one individual simultaneously
Manage accounts
Use different email accounts for
different purposes
Dictate emails
You can use the m ic to record your message
Fig 1 (right) Setting up your Email app
is a very simple process
Managing multiple
email accounts
There are obvious bene ts
to using multiple email
accounts during your dayto-day life, and the ability
to do this is right at the
heart of Samsung’s Email
app. It is a very useful
option to have because
it allows you to organise
your emails into di erent
categories, the most
obvious being one email
account for work-related
emails and then another
for your personal life.
Fig 2 (above)
on the Inbox button at the top to switch
between inboxes from different accounts
On the main email screen, tap
Add an account
Adding an email account
to your Galaxy device is
very easy. In order to do
so, just go to your Email app and press the Inbox button in the topleft corner of the screen. A pop-up menu will appear listing various
options, including your combined inboxes, priority senders and
sent emails. Tap on Manage accounts at the bottom of the screen
and here you can manage your accounts individually by tapping on
them or add a new account by tapping the ‘+’ icon in the top-right
corner of the screen. This is where you will be able to input details of
your new email account (Fig 1). There are two input boxes available.
Type your required email address at the top and your password
into the bottom box. If need be, you can tap the Show Password
68
Page 69
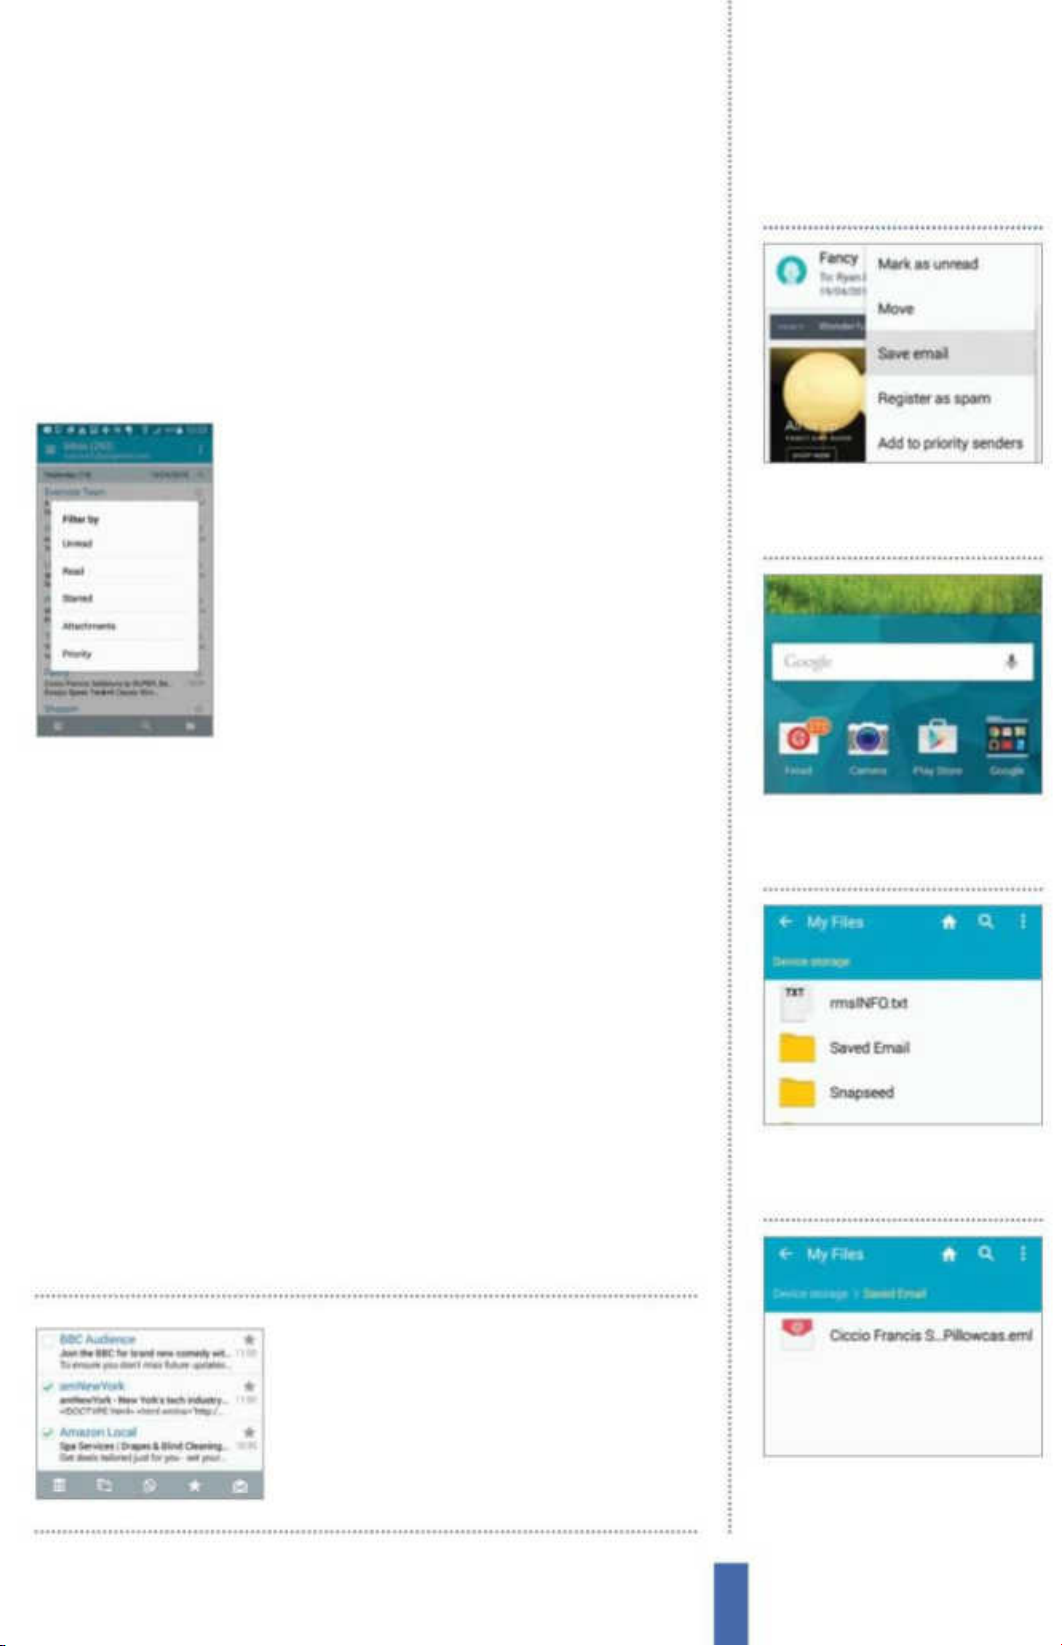
The appsEmail
box if you are unsure about your typing skills and would like to
seek reassurance. If you want this email account to be your default
one then tap on the next box down: Send email from this account
by default. Tap Next and your phone will subsequently negotiate
a series of checks. Select your Account Option, tap Next and then
Done. You can switch accounts by tapping the Inbox button (Fig 2).
Customise email display
With this option, you can easily customise
your email application so that it better suits
your life, if you so desire. Tap on the Menu key,
which will cause a pop-up menu to appear.
After doing this, tap on Filter By – this will allow
you to sort your emails by various categories,
such as Unread or Read, by whether they are
highlighted by a star, their priority or by those
with attachments linked to them – plenty of
lter options to choose from! From the menu icon you can also
View saved emails
1
Save email Within your
displayed email, tap the Menu
button and then Save email.
organise your email into the regular listings or link them into a
conversational mode. As well as this, you have the ability to increase
or decrease the font size and manage your email’s storage folders.
Respond to emails
When new emails arrive in your inbox, tap on them in order to read
them. Once you have done that, you can choose to respond by
tapping on the single left-curving arrow. Just type in your response
and tap the envelope icon up at the top-right to send. You can also
forward information to a contact by tapping the straight right arrow.
Moreover, you can also choose to move your message to a desired
folder. Just highlight your message within the Inbox, tap the menu
icon next to the sender at the top of the screen and choose the
folder into which you would like to move the email.
To sort messages, tap the
2 App menu To view saved
emails, exit the Email app and
return to the App Drawer.
3 My Files Tap the My Files app,
then ‘Device storage’. Look for
the Saved Email folder.
menu icon and choose
Select. Then pick emails
and sort with the icons
4 View mail You’ll see a list of
folders. Scroll to Save Email and
tap on it to view your email files.
69
Page 70
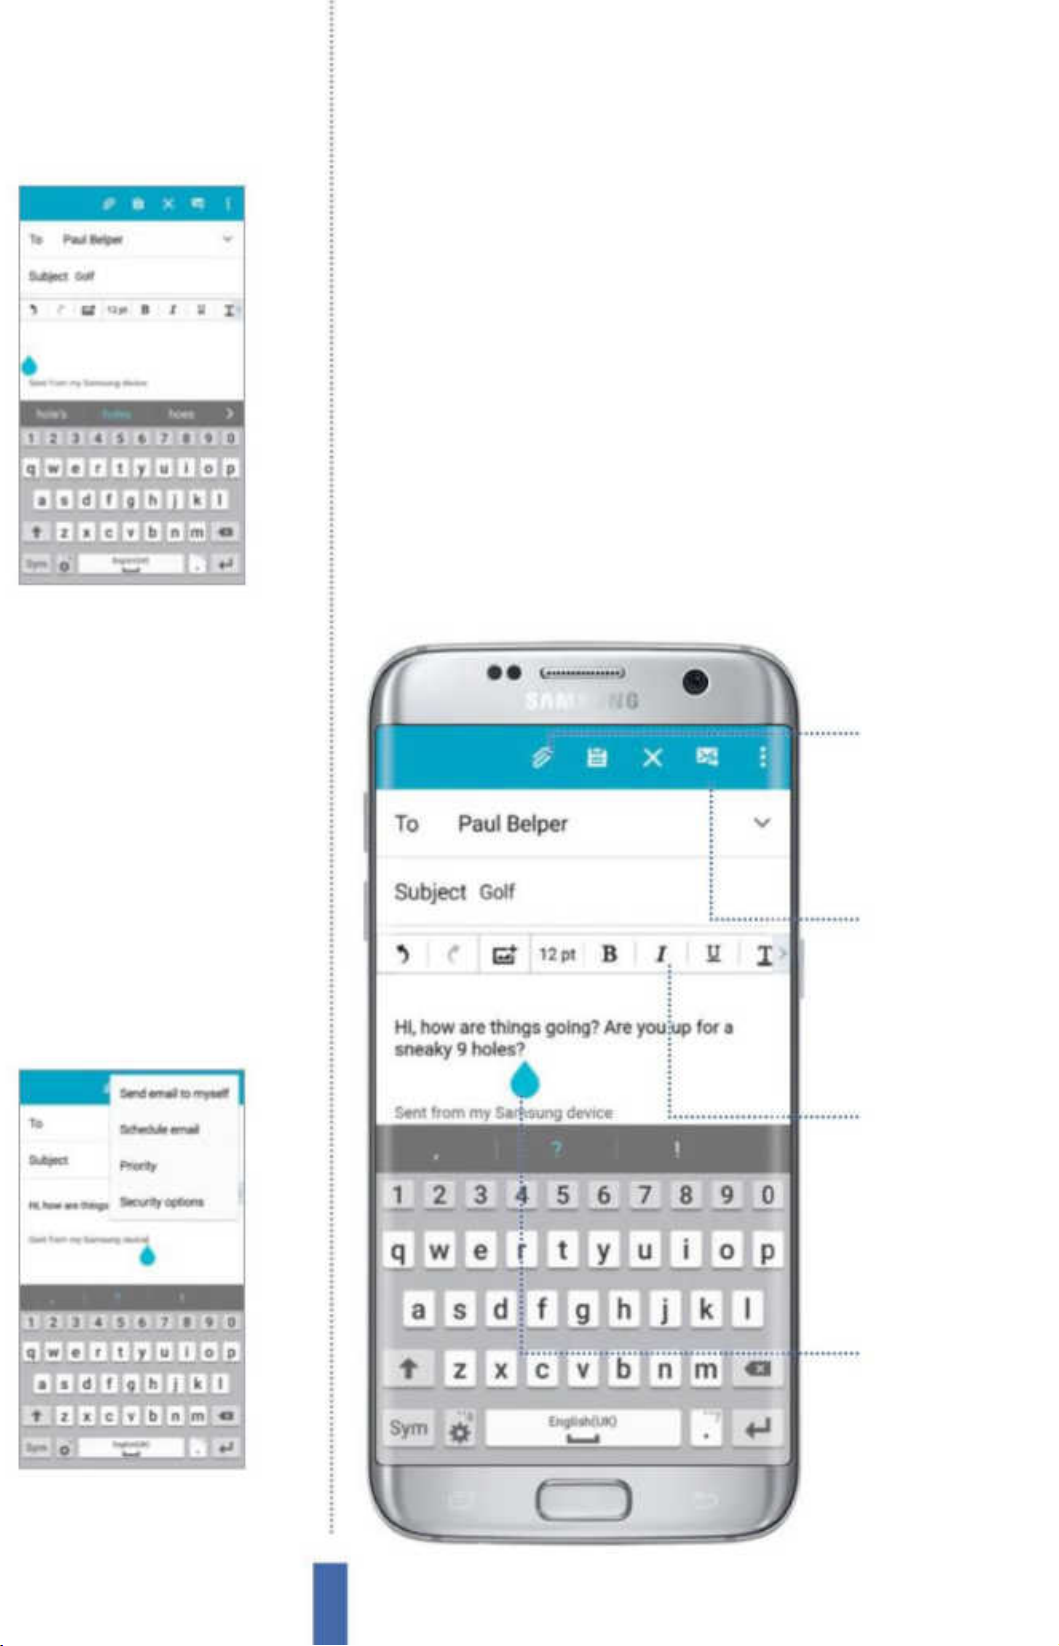
The apps Email
Compose an email
Composing new emails is quick and easy through the Email app.
While in an inbox, you will see a pencil and paper icon in the lowerleft corner. Tap on this icon to be taken to the email composition
screen. You need to insert the recipient’s email address in the To
box and then next to the word Subject, tap and type in the topic
of your email. Now, you can think about what you are going to say
within your email. Tap the large white area of the screen and begin
typing your email using the on-screen keyboard. Use the formatting
options by tapping the arrow icon to modify your text (Fig 3). You
might, for example, want to highlight a word or portion of text and
then tap on the B button within the formatting band – this will
Fig 3 (above) Use the array of formatting
options to modify your email text
embolden your text. Similarly, you can tap on the Undo and Redo
Attach
The pap erclip icon is
the att achment but ton
that let s you send
various media along
with your message
Send
The envelope icon
with the arrow running
through it is the Send
command, which
dispatches your emails
Formatting bar
The for matting bar
allows yo u to modify
the loo k of your email
text and insert objects
into it
Fig 4 (above) If you tap the menu icon while
writing a new email then you’ll have access
to even more options, like Priority
Message area
The white area in the
centre of the screen is
where yo ur text resides
70
Page 71
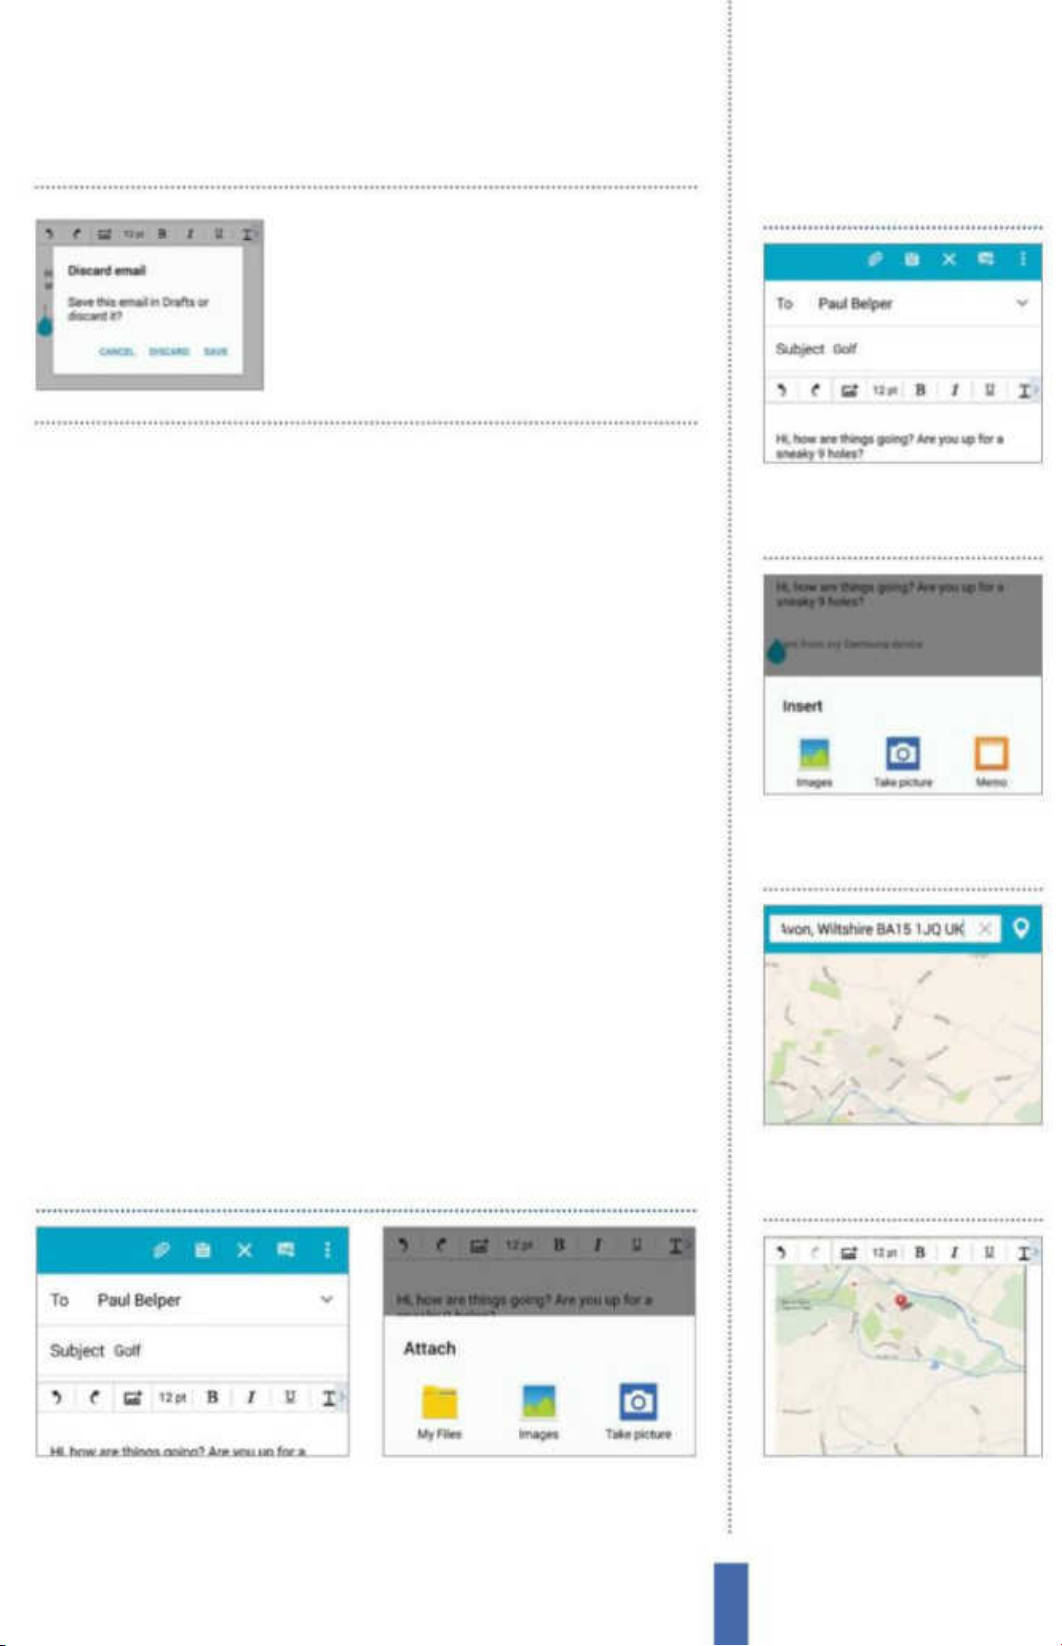
You can decide not to
send a message. Tap the
back button on your
device and ‘Discard’
The appsEmail
Attach a map
buttons in case of errors and also insert a number of elements, such
as images, memos and contacts, via the Insert button beside them.
Tap the envelope icon at the top of the screen to send your email.
Additional sending options
You can send an email in a straightforward manner or modify your
sending options. Within the composition screen, tap on the menu
icon and a range of new options will appear on the pop-up menu
(Fig 4). You can send an email to yourself or to others to provide
copies of the email to those who need them. Schedule email allows
you to send an email at a speci ed date and time, while the Priority
option allows you to mark each message with a low, normal or high
priority status to grade the importance of each message. Finally, you
also have the option of introducing Security options within your
sent email, such as the option to Encrypt the email to secure its
contents and ensure that only the intended recipient ever sees it. If
you wish to abandon an email during composition, you can either
tap the back button on your device or tap the ‘X’ icon on the top
Write email Open up the
1
Email app and write your email,
attaching the relevant addresses.
2 Insert Tap the Insert icon,
situated third from the left on
the formatting bar.
row of options. This latter method doesn’t even ask if you are sure,
which can save you time.
Attaching items
1 Tap paperclip While composing an
email, tap on the paperclip icon in
the top-left corner.
2 Select attachment You will be
presented with a screen full of
services to attach an item from.
3 Location Tap on the Maps icon
that is found within the pop-up
menu box.
4 Map Decide to include your
current location or find a map
reference to feature.
71
Page 72
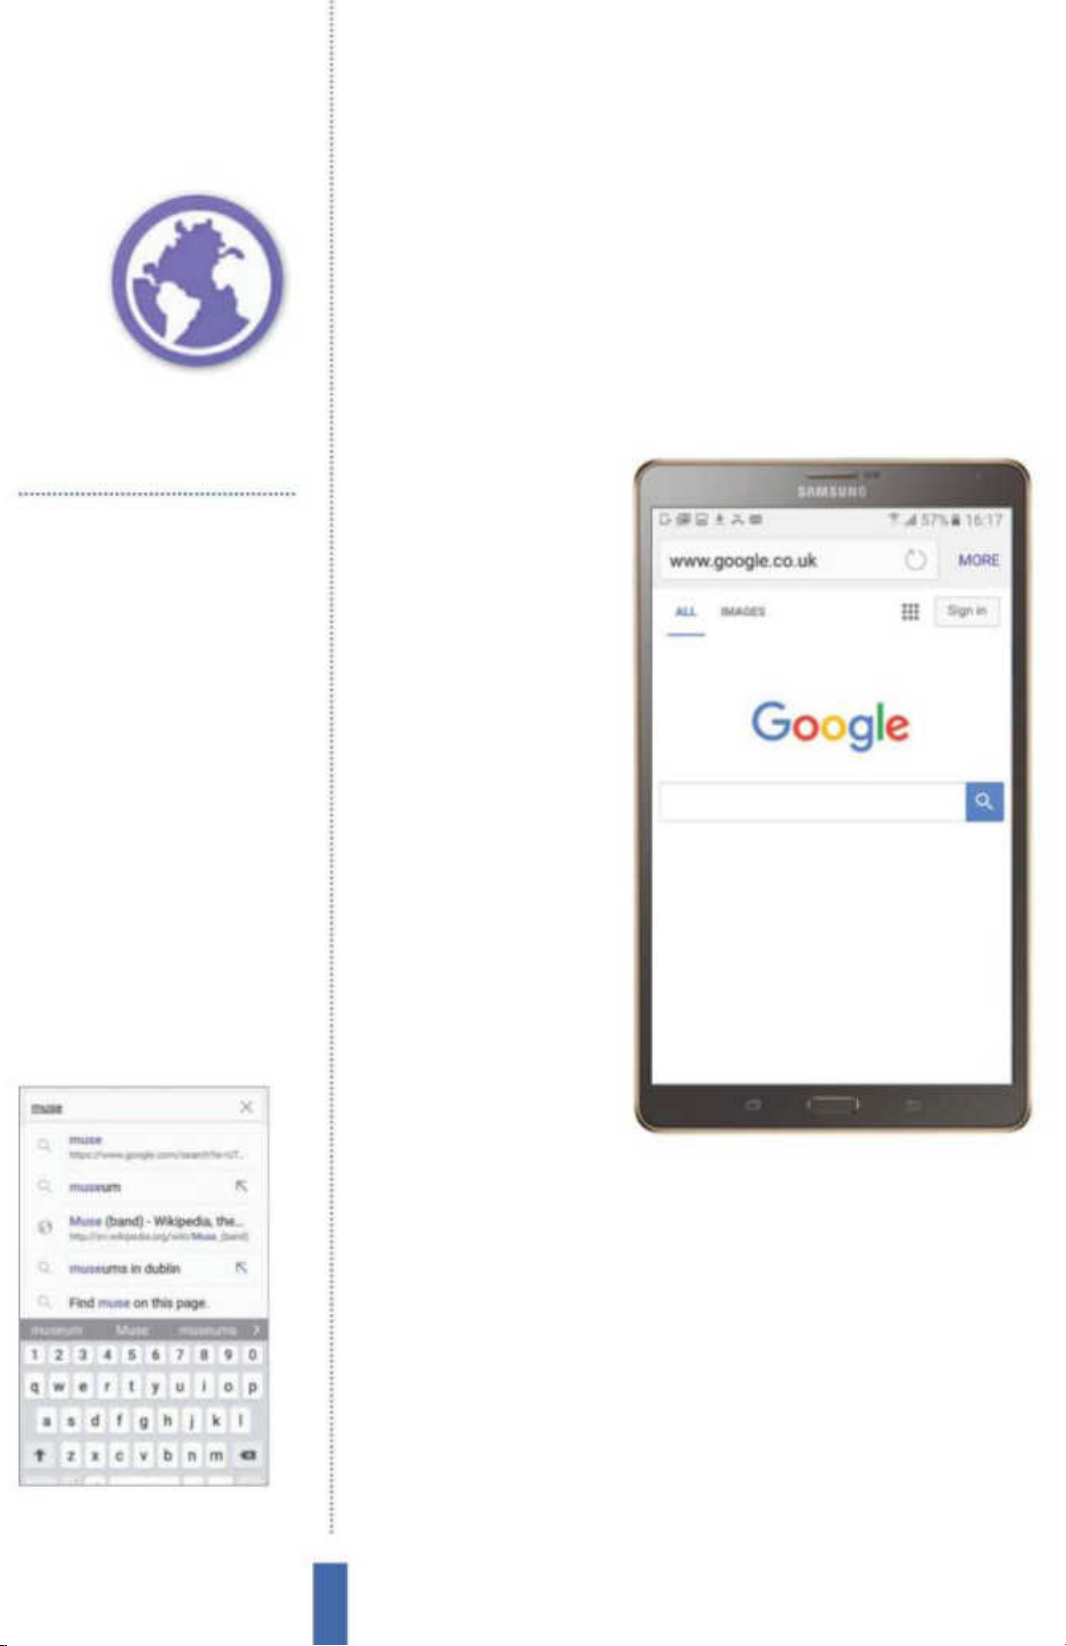
The apps Internet
Internet
Explore the vast resources of the internet with your
Samsung Galaxy device
You’ll use it to…
Browse the web
Explore a world of information
Save information
Retain information for offline viewing
Download files
Enjoy musi c, videos, images and more
View multiple websites
Keep mul tiple website windows open at the
same time while browsing
Stay private
Manage your privacy settings to keep you
safe online
Create shortcuts
Add Home Screen links for quick access
Fig 1 (right) You can input both search
terms, to be processed by a search engine,
and URLs into the multibar at the top
Browsing the web
The Internet app is one
of the native apps that
arrives pre-loaded onto
your Samsung Galaxy. It
is your window onto the
internet, allowing you to
roam the worldwide web
wherever you are and,
in the process, access a
wealth of information
that you can view and
manipulate. You can
even set up shortcuts to
any websites that you
frequently visit so that
they sit on your home
screen like any other app
shortcut, which is perfect
Fig 2 (above) The keyboard is a
multifunction affair that can save you time
for enabling speedy
access to your favourite
web watering holes. With the Internet app, there are no boundaries.
Navigate with the multibar
The heart of the Internet app is the multibar. This is the area of the
app in which you can not only search the internet, but also input
website addresses (Fig 1). If you decide to use the space as a search
engine then, when you begin to type out your search words, the
app will try to second-guess your instructions. This means that every
time you add another letter to the words you are typing, the search
engine will present a selection of results based on those letters. Tap
on the result to go to the connected website.
72
Page 73
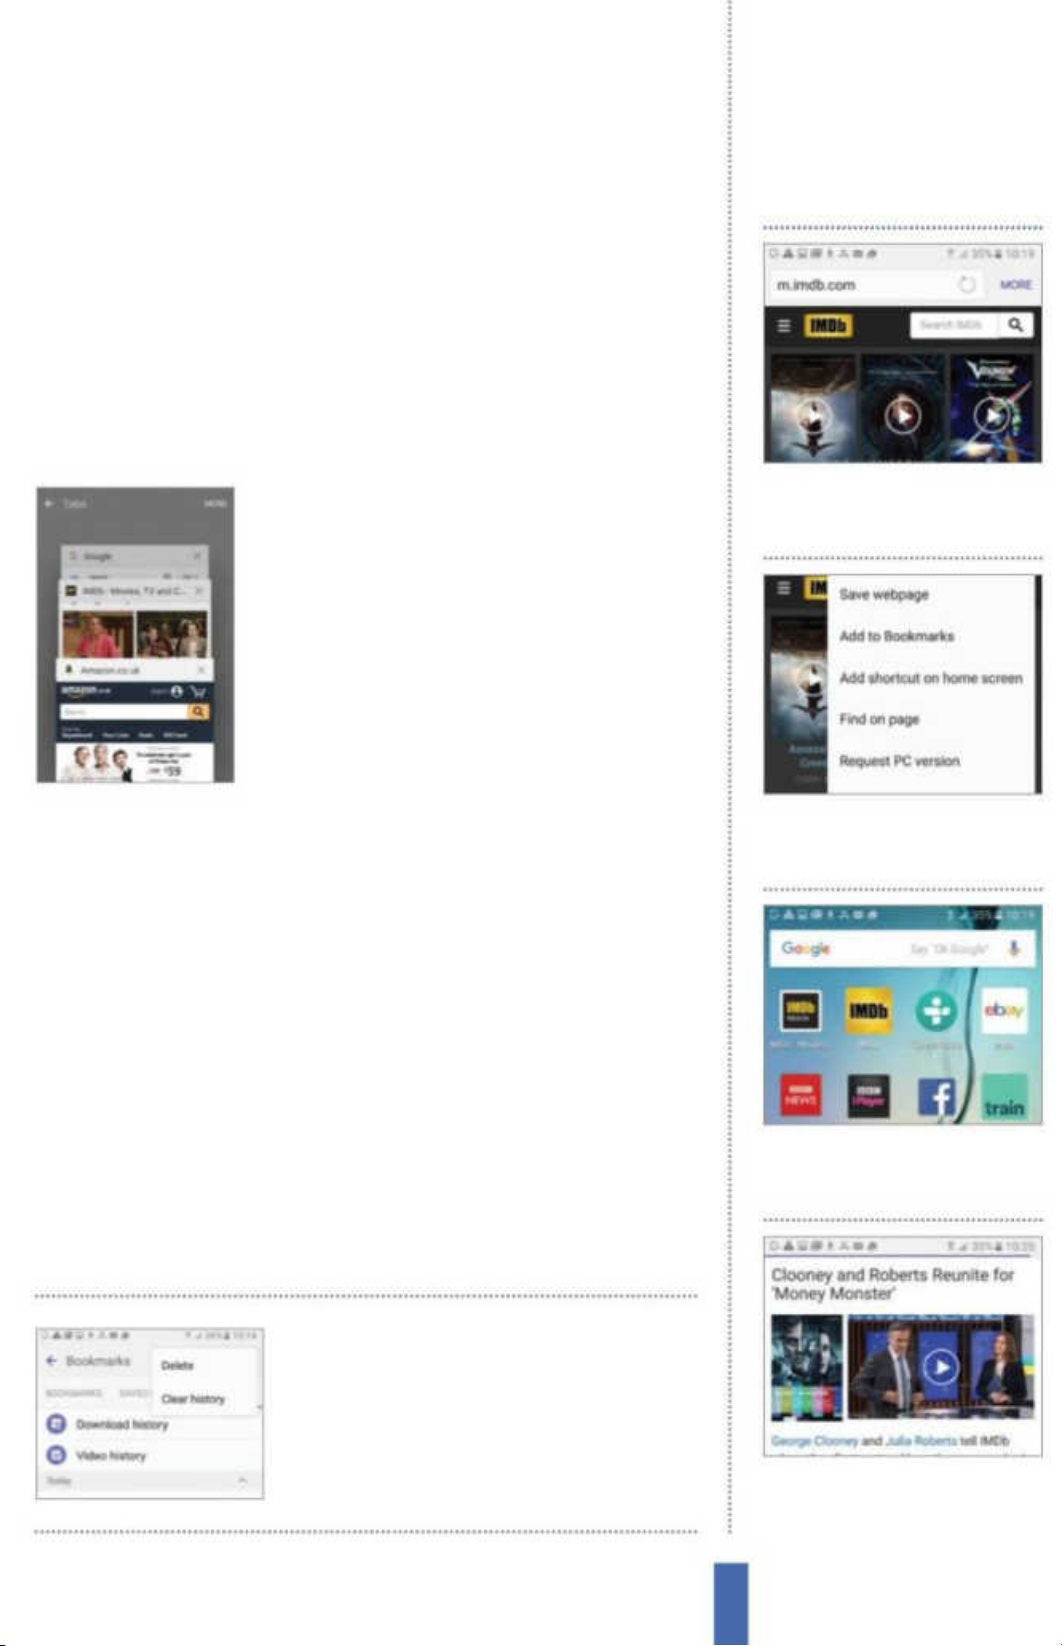
The appsInternet
Alternatively, you can simply enter a website address if you have
a particular location in mind. The keyboard keys can be utilised
to speed up the instructions (Fig 2). For example, there is a ‘.com’
button available that reects just how common this notation is
during website address entries, while tapping the settings icon will
take you directly to the keyboard settings area. Also, tap on the
bottom left key to be taken to a numbers and symbols layout. Tap
on the 1/2 key above in order to see further symbolic selections.
Switch between tabs
If you are adept at multitasking then you
may be pleased to hear that you can
examine more than one website at a time.
In order to open a new website window, tap
on the Tabs icon to the right of the bar at the
bottom of the screen. Tap ‘New Tab’ to open
a new window. Tap on the Tabs icon again
and swipe up or down to examine each
Home screen shortcuts
1
Options Within the Internet
app, tap the More button while
on the website of your choice.
window, switching between tabs in the process. Tap the Tabs icon
and choose ‘Enable Secret’ option to utilise a window that creates
no records in your browser or search history, thus adding extra
privacy enhancements to hide your browsing history.
Use your History and Bookmarks
If you wish to retain your place on the web so that you can revisit
a website without having to search for it all over again, just tap on
the More icon that sits at the top-right corner of the screen and tap
‘Add to Bookmarks’. You can access your saved pages by tapping
the Bookmarks icon at the bottom of the screen. While on the
Bookmarks screen, you may notice the History tab at the top of the
screen. Tap on this to see which websites you have been looking at
during the day and the previous day or week.
To clear your history,
2 Bookmark page Tap the ‘Add
shortcut on home screen’
option and it will be added.
3 Home screen To check, exit the
Internet app and search through
your home screens to find it.
while in the History tab
in Bookmarks, tap More
then ‘Clear history’
4 Final shortcut Tap on the
shortcut to go directly to the
indicated website.
73
Page 74
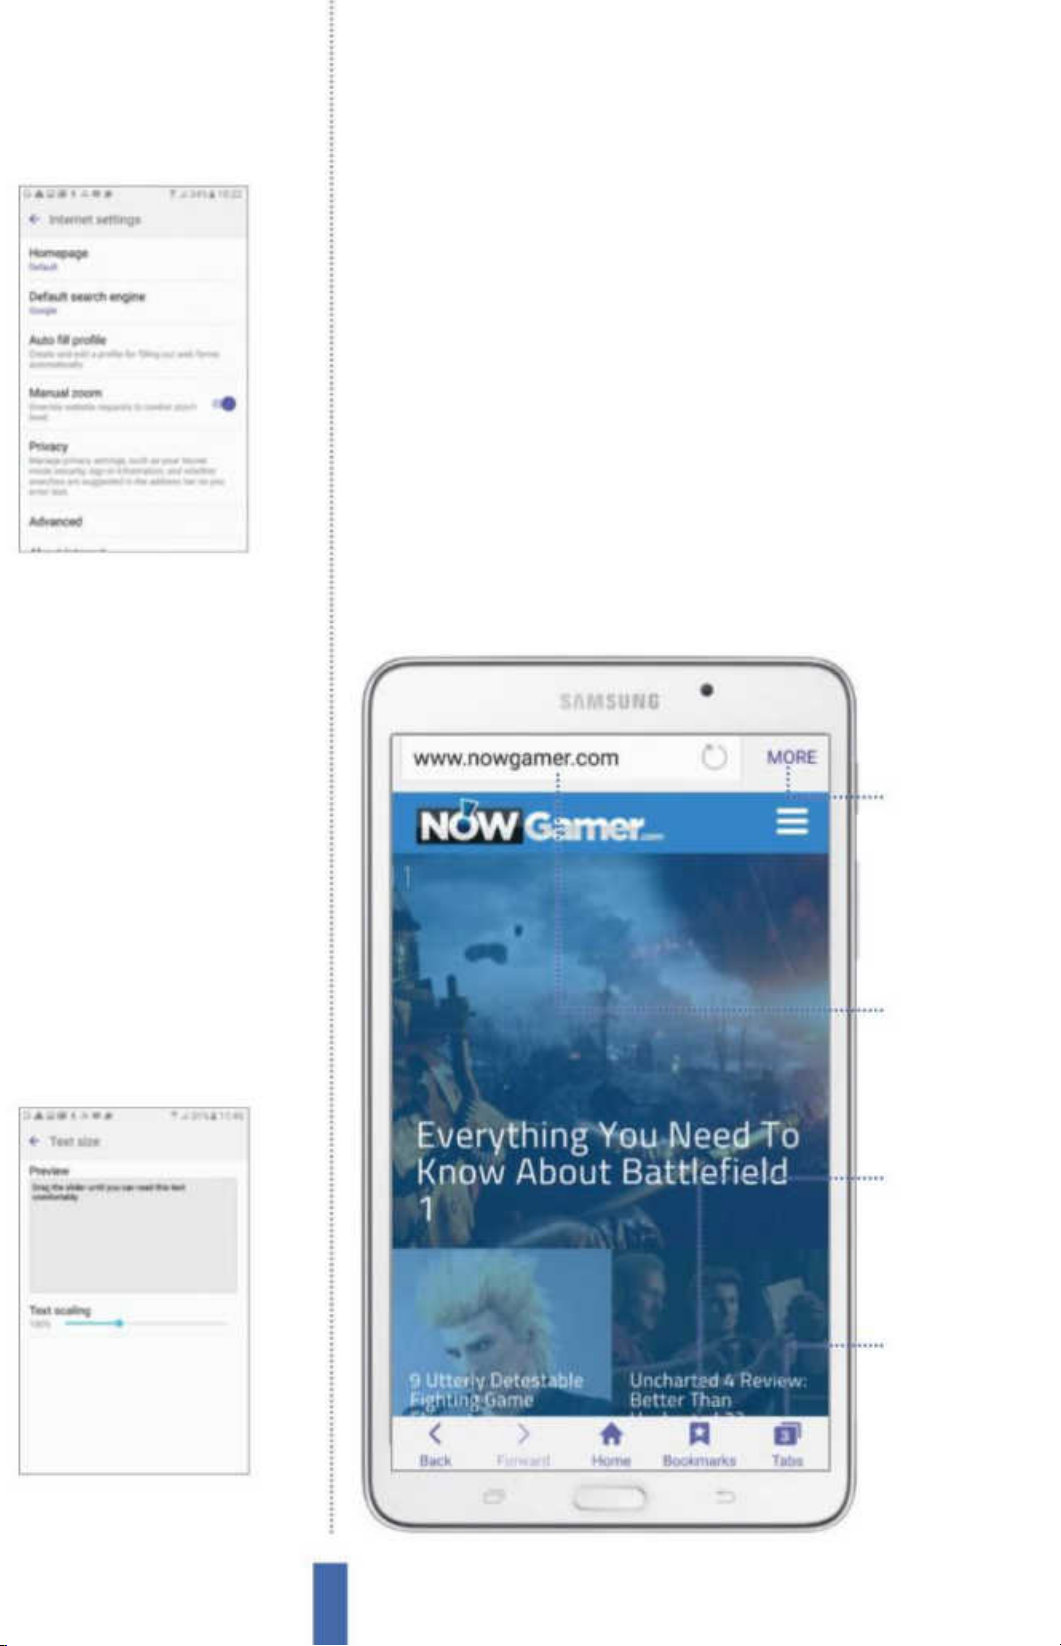
The apps Internet
Fig 3 (above) The Advanced settings
contain a number of useful options to
help customise your web experience
Control zoom and font size
Your Galaxy has the ability to modify just about every aspect of your
device and its interface. For example, you can change the zoom
function and how you control it. Yes, there is the familiar spread and
pinch to zoom in and out, but you can also add extra control. Tap
the More icon in the top-right corner of the interface and scroll to
Settings. Now tap the ‘Manual zoom’ category (Fig 3) and move the
slider to the ‘On’ position, which overrides a website’s request to
control zoom behaviour.
You can also change the font size to aid ease of use here. To do
this, tap on the Advanced option within the primary Settings screen
followed by the Text Size option (Fig 4). Now move the Text scaling
slider to change the way that text is resized. This should make
More options
Tap here to bring up
options to add new
bookmarks, save
pages to your Home
screen and more
Multibar
Use this area as both
a search b ar and
to directly input a
website address
Bookmarks
Tap on the Bookmark
icon at the bottomright of the screen to
save a pag e for later
Tabs
You can have several
tabs open in the app,
and you ca n open a
new one by tapping
this icon
Fig 4 (above) Changing the font size
will provide you with better accessibility
when you are browsing the web
74
Page 75
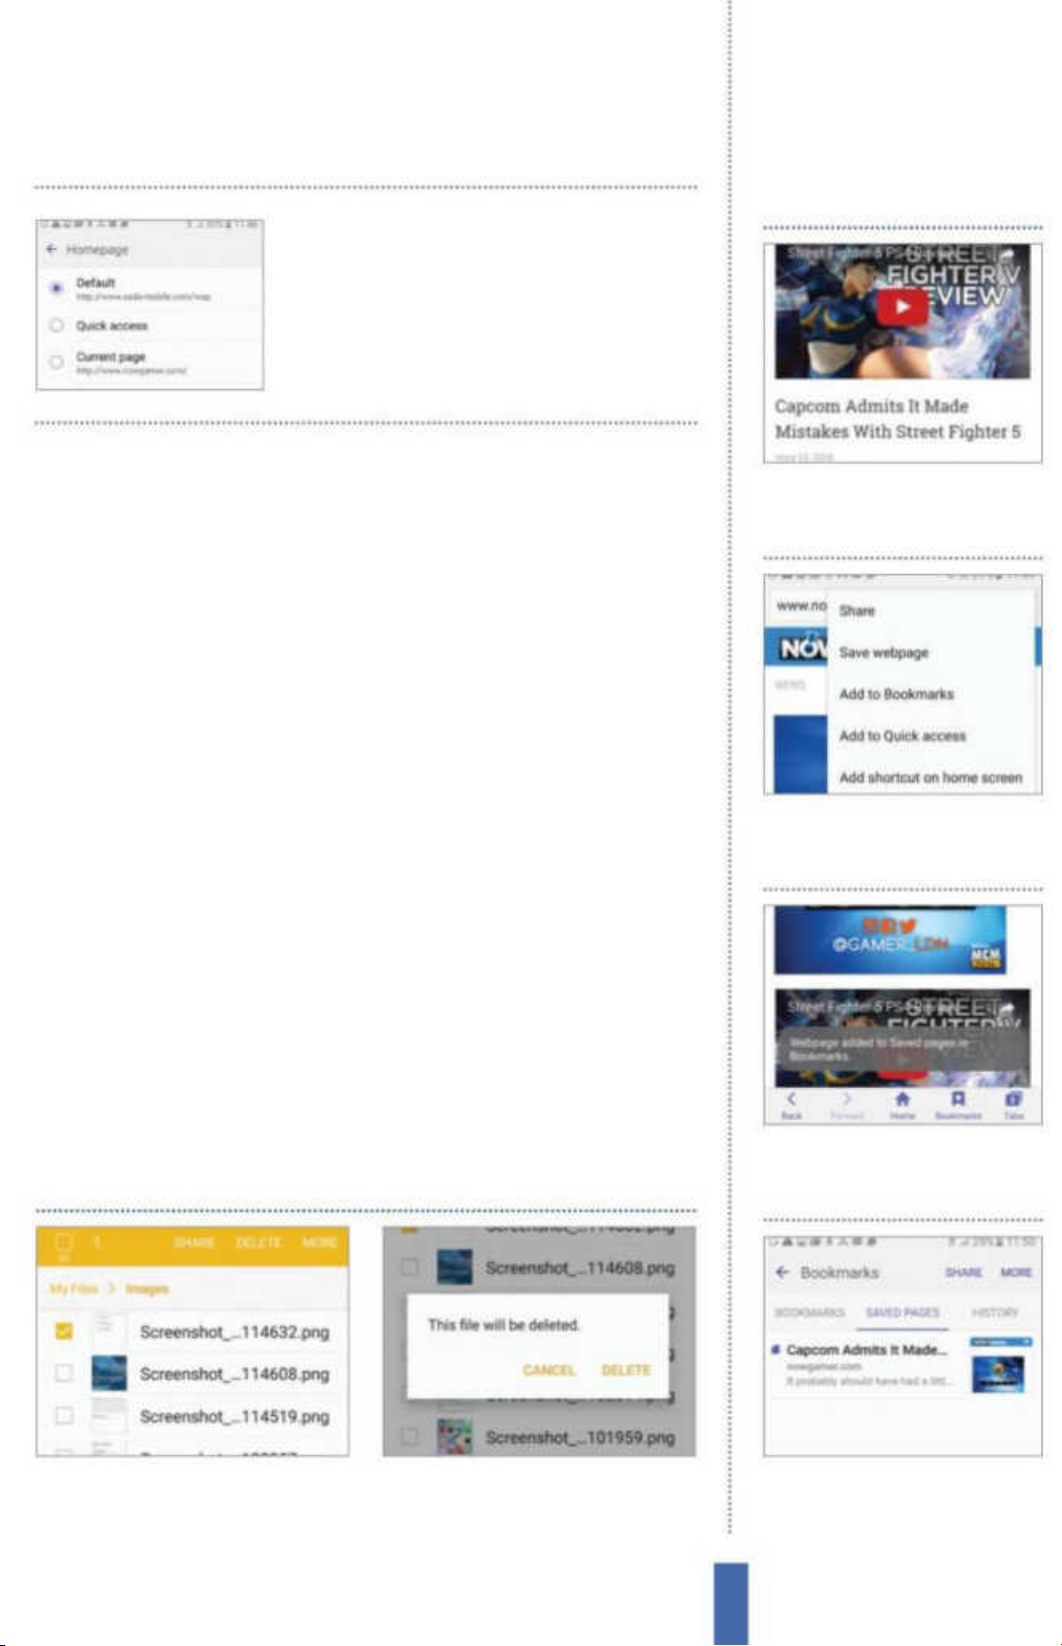
Change your home page
by going to Settings and
then tapping on the
Homepage option
The appsInternet
Save for offline reading
it easier for you to read the text on certain websites. You can, of
course, adjust this option at aanyn y time to suit your needs.
Manage your downloads
Once you download information from the internet, how do you
manage it? What happens if you download several pieces? Can
you move the information elsewhere after you have downloaded
it? All these things are possible with the associated app called My
Files. When you download something from the internet, a small
pulsating down-facing arrow appears in your notications bar. Go
to the My Files app to see the result. Tap to enter and then tap on
the Download history category to see all of your downloaded les.
Each will feature an icon indicating how you can play or view the
download. Tap the download to start that associated app, or instead
tap the menu icon and choose the Sort by option to arrange les by
date, name or size. Press and hold on a downloaded le to highlight
them and then either tap on the trashcan icon to delete them or
the share icon at the top of the screen to move them to the likes of
Select website Choose the
1
page of the website that you
would like to save.
2 Options Hit the More icon and
tap the Save page option from
the pop-up menu.
Dropbox, Email, Wi-Fi Direct and Bluetooth. The process is quick and
very easy to get to grips with.
Delete downloads
1 Highlight files To delete your
downloads, press and hold on a file
and highlight it with a green tick.
2 Delete After selecting the files you
wish to delete, tap on the trashcan
icon to delete.
3 Save page Your saved page
will then be confirmed with an
on-screen notification.
4 Access page To access your
saved pages, tap Bookmarks
then the Saved Pages tab.
75
Page 76
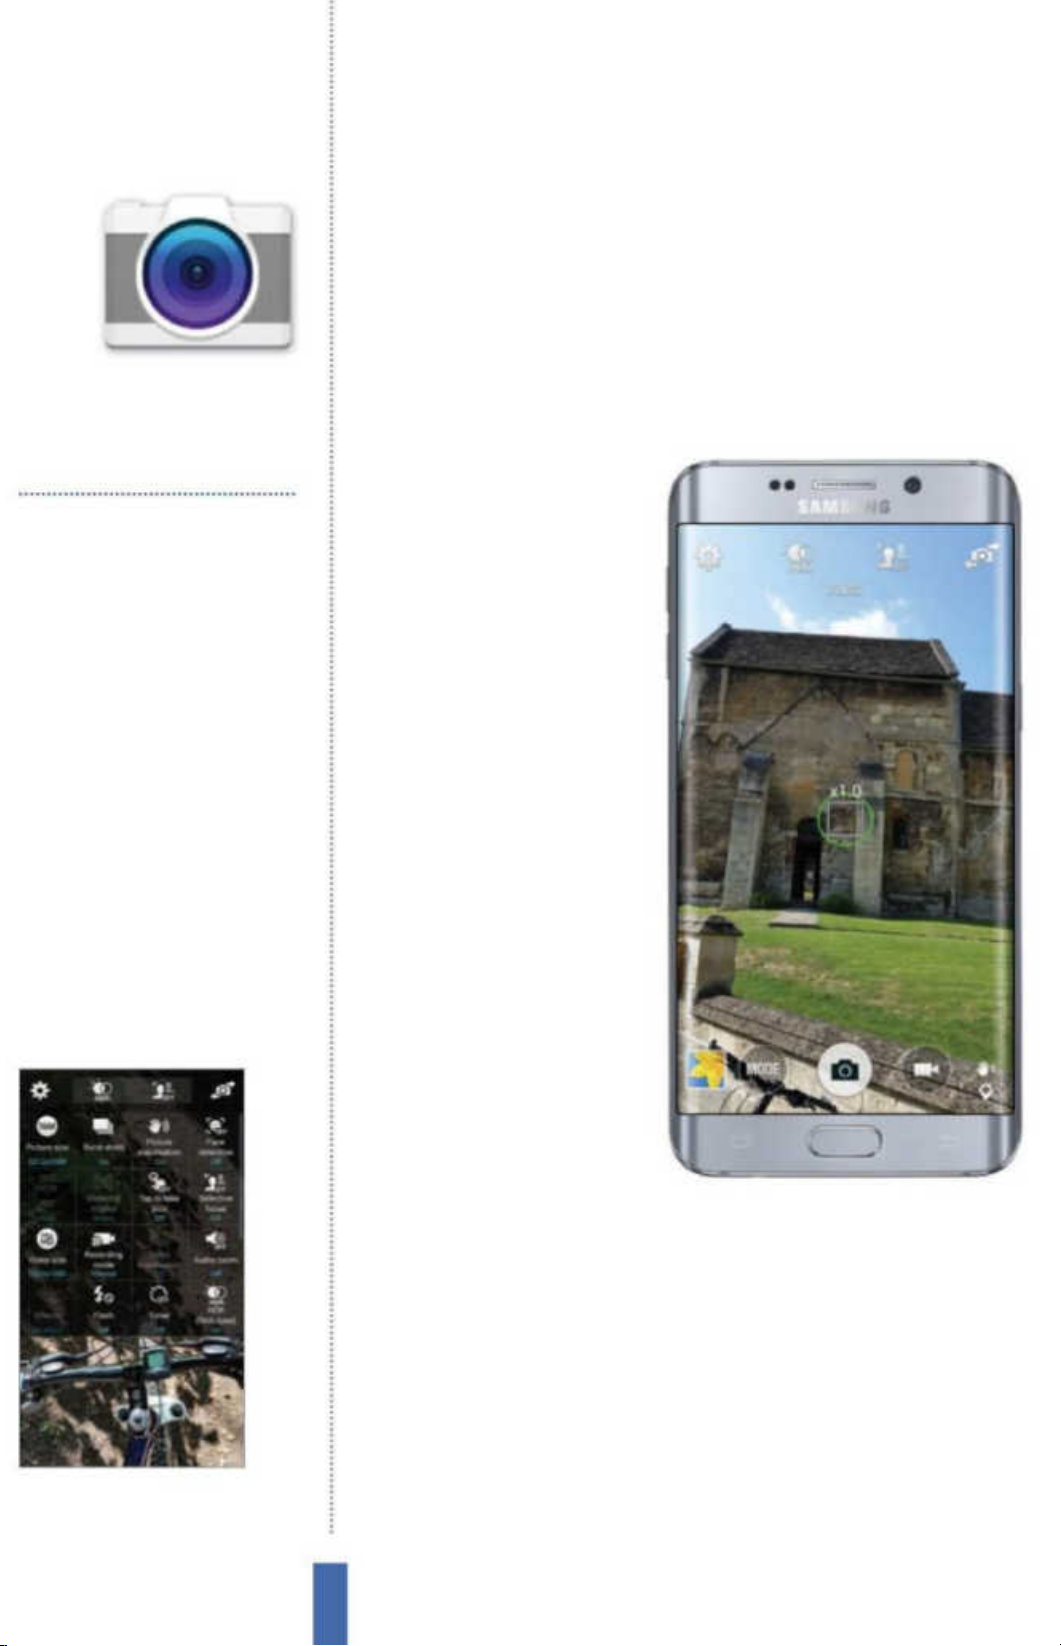
The apps Camera
Camera
Save space by using your Samsung
Galaxy device as a camera
You’ll use it to…
Take pictures
Capture moments while on the move
Shoot video
Record videos with your device
Get up close
Zoom right into your images
Share photos
Send your snaps via email and more
Print photos
Print out your images v ia Wi-Fi or USB
Become a pro
Use a variety of professional camera modes
Fig 1 (right) The Camera app will
automatically focus on your subject
Using the camera
To use the camera, you will
need to access your App
Drawer and tap on the
Camera icon. Now aim the
main camera lens at your
desired subject and make
any necessary adjustments
that you may require before
pressing the shutter button
at the bottom of the screen
in order to take the actual
picture. If you would like to
record a video instead, just
tap on the video camera
icon next to the shutter
button and video will
automatically record.
Fig 2 (above) Open up the camera
and adjust the settings before you start
taking photos
Take your
rst picture
Taking your rst picture will
reveal just how powerful the camera feature is on your Samsung
Galaxy. When you open the app, you will be presented with a host
of features that can a ect your nal image. In low light, for example,
the ash feature is an essential inclusion. The zigzag arrow in the
quick settings can be used to change this mode. Tap on either O ,
On or Auto ash if you want the camera itself to make the call as to
whether or not the ash function should be utilised. Of course, you
may choose to simply take a picture of what’s in front of you, but
you might also want to capture an image of yourself. With this in
mind, the option exists for you to toggle the front and back camera
76
Page 77
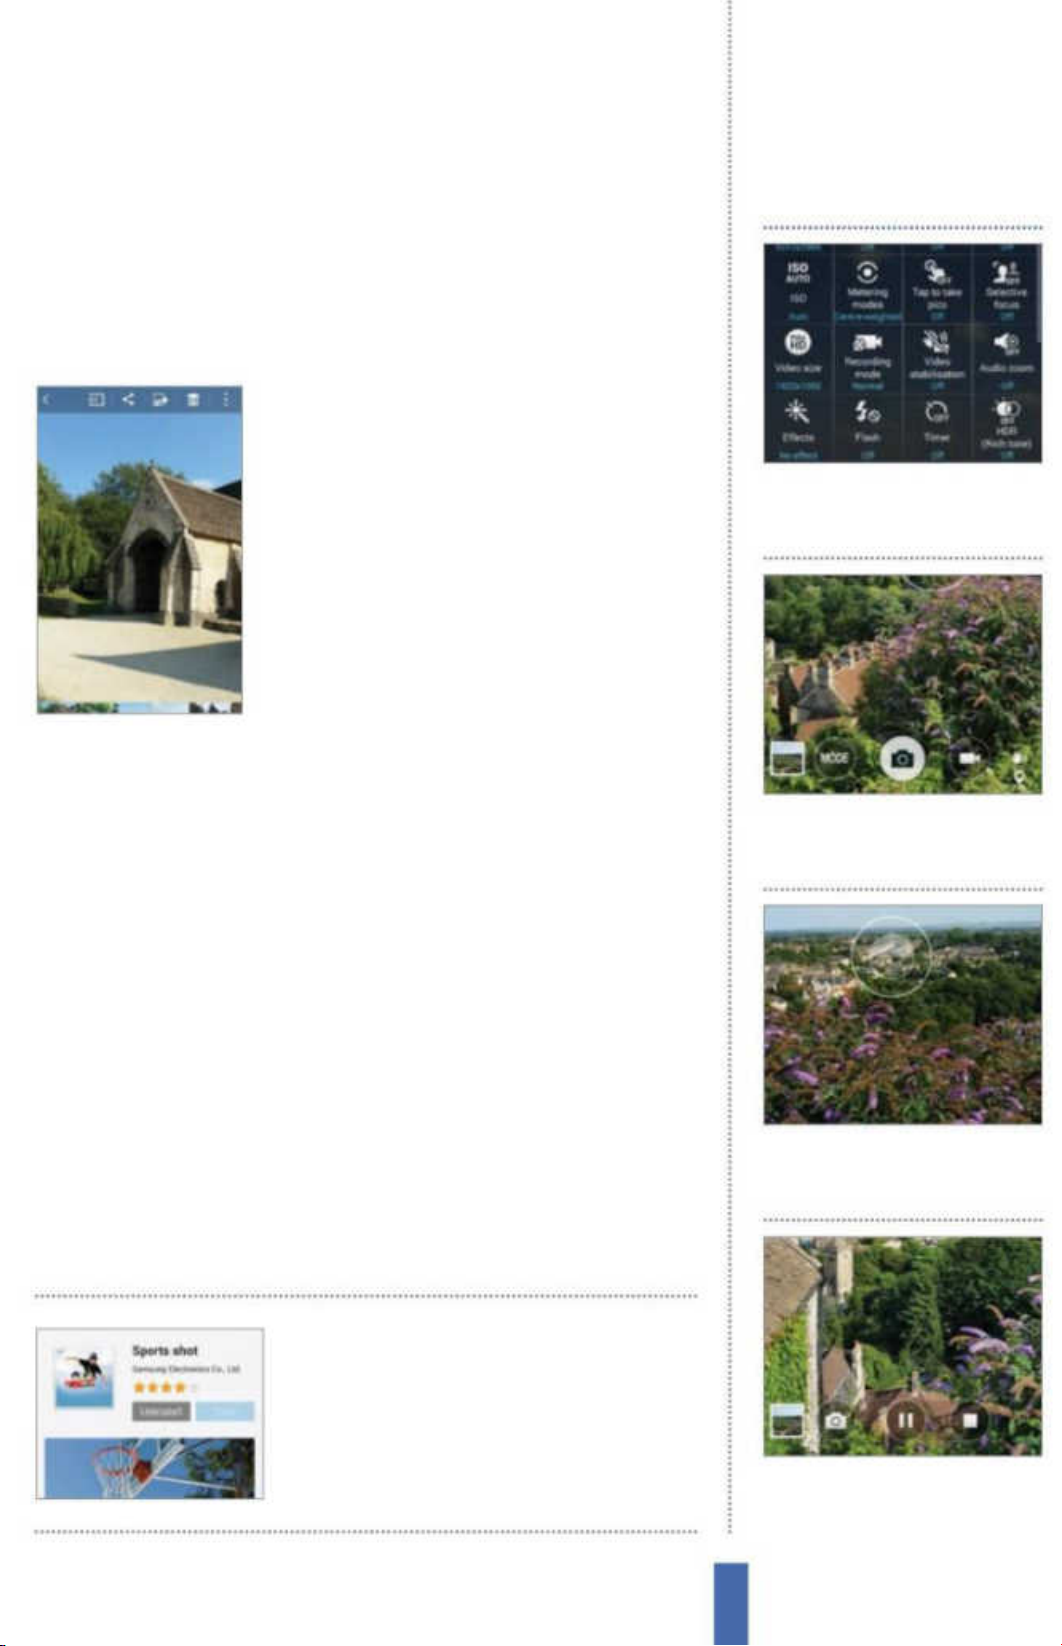
The appsCamera
in order to easily and accurately take a self-portrait. In order to do
this, tap on the camera icon in the top-right corner of the screen to
switch between the front and rear-facing cameras. Zooming into
your subject is very easy: simply place two ngers on the screen and
slowly spread them apart. To zoom out, pinch them together.
Share pictures immediately
Once you’ve taken a picture tap its
thumbnail at the bottom-right corner of
the screen to open the Gallery, followed by
the Share icon at the top of the screen, then
select a share option such as Bluetooth,
Dropbox or Email. To share images with
friends, tap the share icon, followed by Wi-Fi
Direct. Here, select the user that you want
to connect to and then the selected images
will be forwarded to the connected device quickly and easily.
Shoot a video
1
Adjust Tap on Settings and
make required adjustments to
video stabilisation and more.
Apply efects and night mode
Being able to take photos on your device is all well and good.
However, you should also be aware that you can add a little bit
more of a spark to your work by enhancing it with the various
additional modes and eects that are available. Tap on the Settings
cog in the top-left corner of the screen and tap Eects in order to
access a range of photo lter eects. Press and swipe sideways to
scroll through the various lters. Tap on a lter to apply that eect. In
fact, before you even take a picture, you can cycle through each of
the dierent eects to see how it will turn out if you apply it to the
image. You can manage your eects by scrolling all the way to the
right and choosing the Manage Eects option to determine which
eects you want displayed. You can also tap on Download to get
more eects from Galaxy Apps.
More eects can be
2 Switch Tap on the video
recorder icon to switch modes
and start recording footage.
3 Focus Tap where you want to
focus. This will cause the focus
box to change to a green colour.
downloaded for free from
the Galaxy Apps store
that you can visit in-app
4 Record The video will start
recording straight away. Tap the
Stop button to cease recording.
77
Page 78
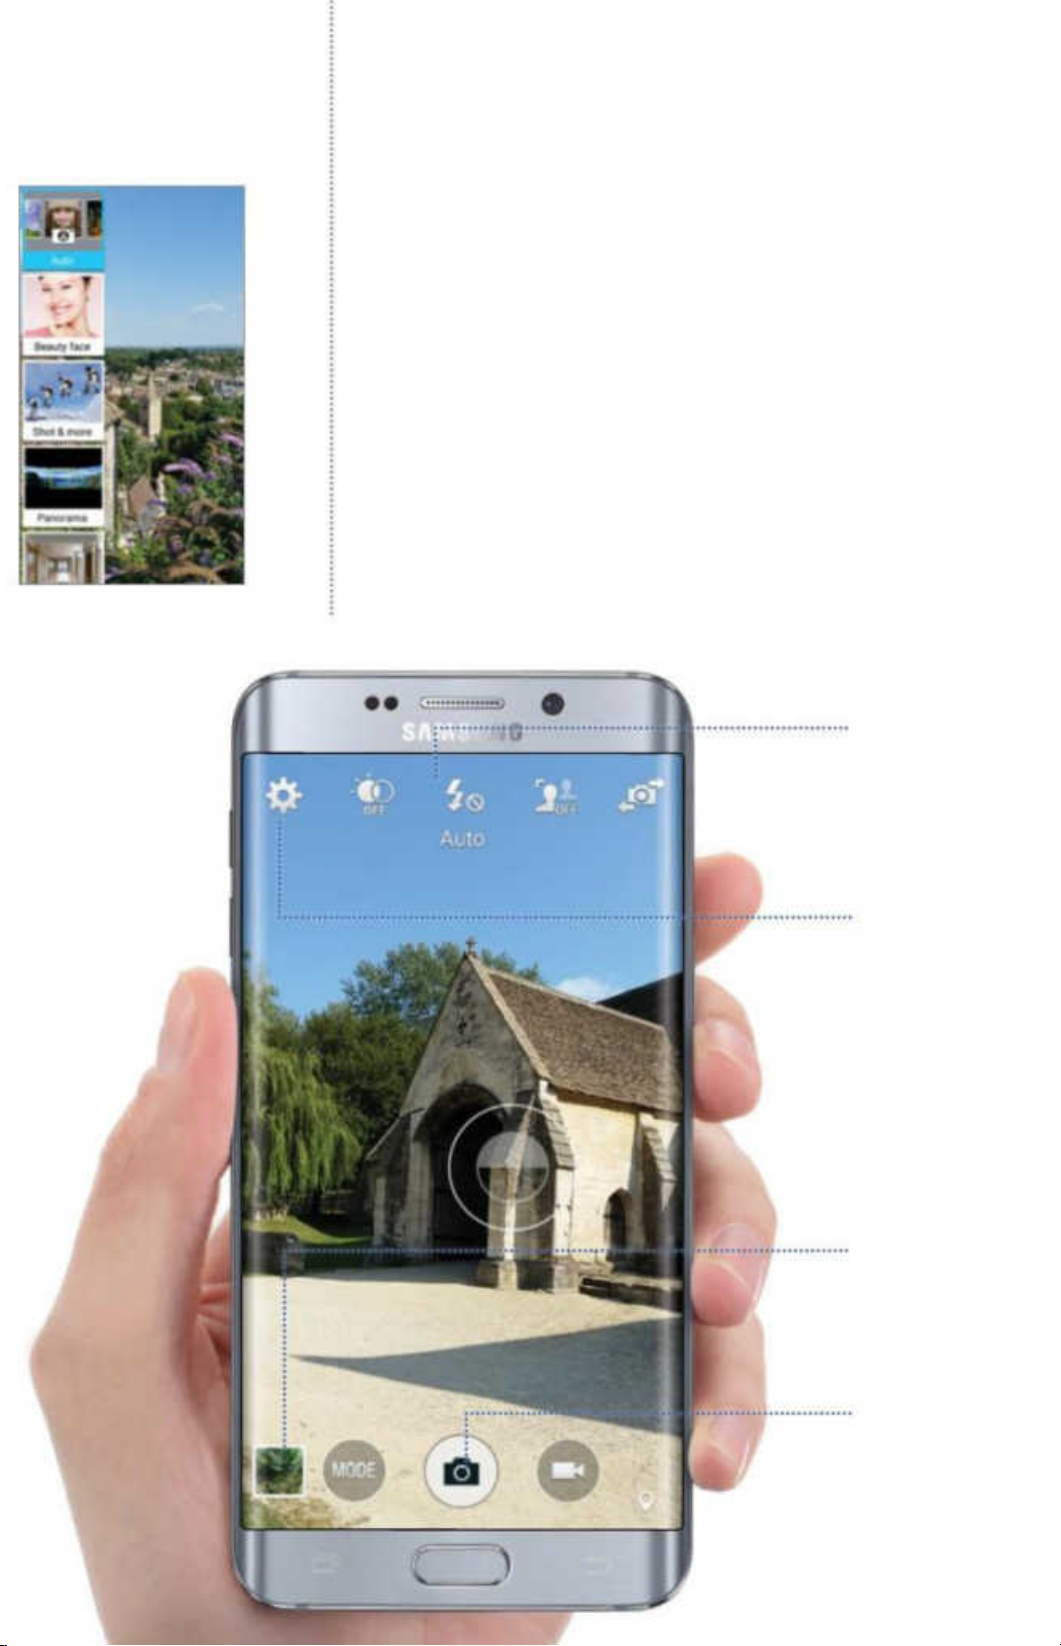
The apps Camera
Explore shooting modes
The built-in camera can take photos in the same way as any other
camera with a single shot. There are, however, other shooting
modes that can add a welcome level of variation, and Best Photo
does just that. The camera will take eight pictures, and subsequently
ask you to choose the best to save from the listed thumbnails. Best
Face takes ve photos of a person, and then presents you with a
selection of faces, from which you can choose the best one to save.
Moreover, there’s a face detection mode that allows you to take a
picture of a person and then, when the camera detects and places
a square around the face, tap on it to zoom into the face and then
take a sharp close-up picture. There is also the panorama option,
which works almost like a combination of the camera and video
Settings
The cogwheel icon
on the top -left of
the screen is your
entry point to a
host of settings
Shutter button
Take a photo by pressing
this but ton. When in vi deo
mode, the camera im age
turns into a red butto n
Picture thumbnail
The tiny image in the
bottom-lef t is your most
recent picture. Tap to view
it inside the Galler y app
Menu bar
The menu bar at the
top of the s creen (S4/
S5) features your most
popular settings. This
bar can b e modified
Fig 3 (above) The various shooting modes
available in the Camera app offer more
flexibility when taking photos
Page 79
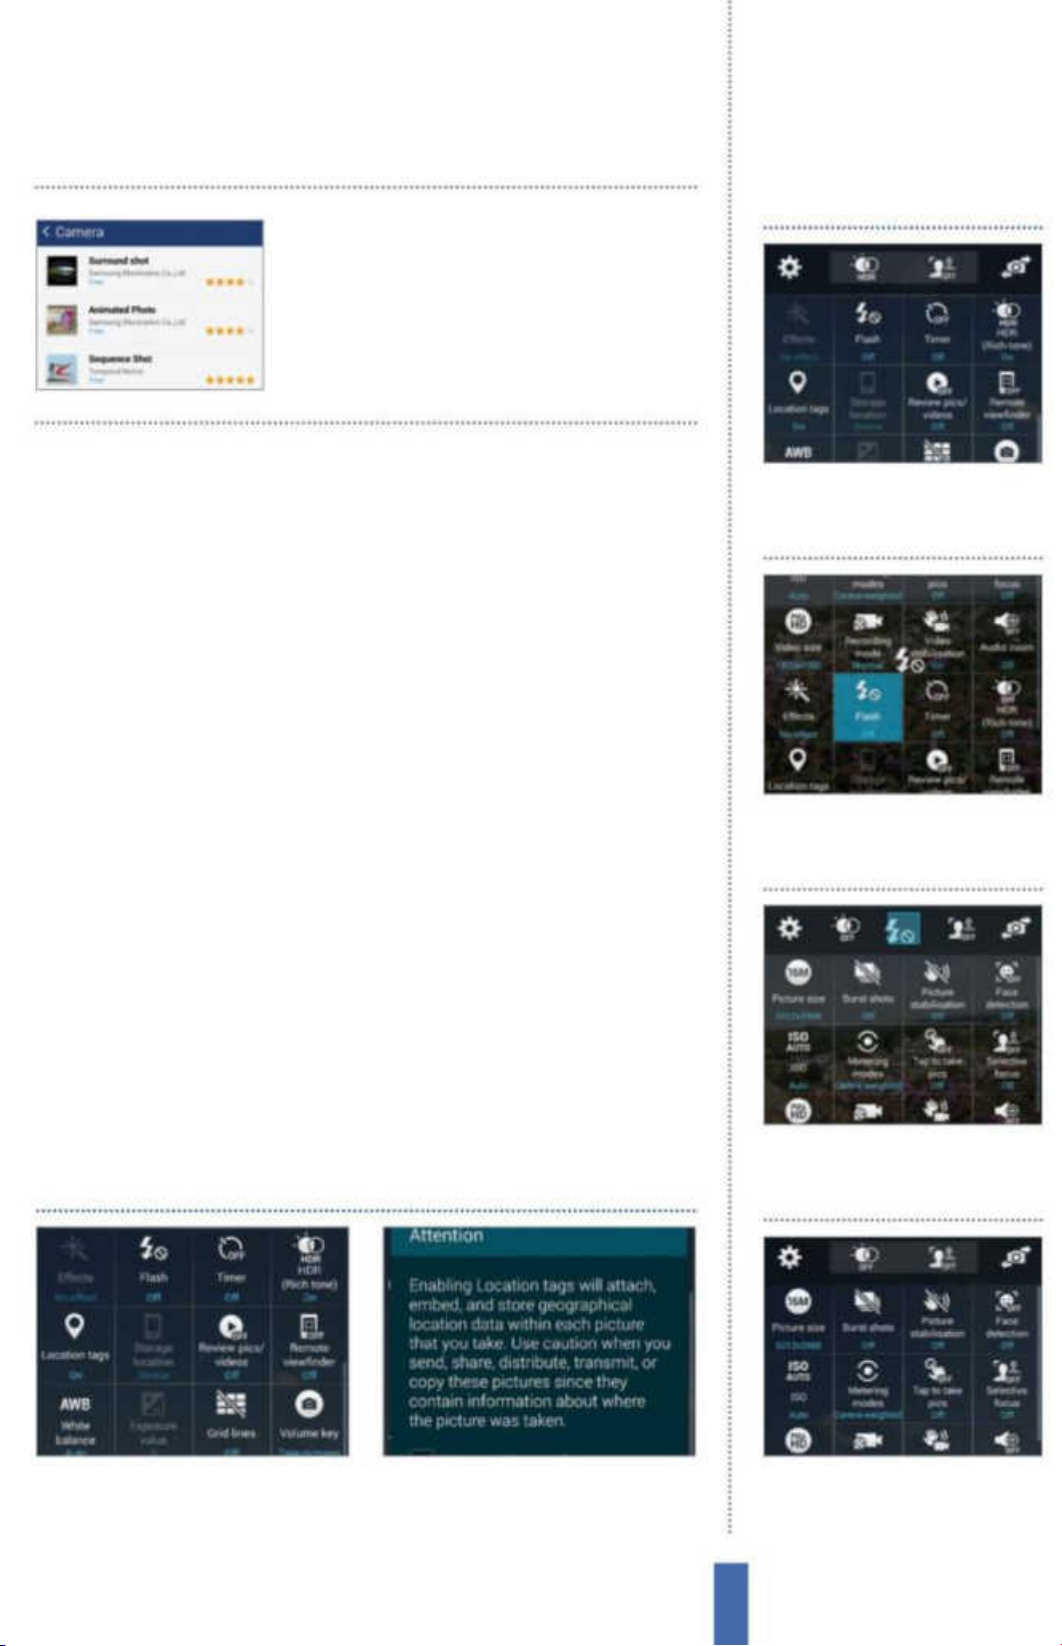
Tap Download in the
Eects settings to nd
a selection of other free
eects to download
The appsCamera
Edit shortcuts toolbar
modes, in that you use the camera to take a long, sweeping image,
in the process producing one very long photograph. To access
the various modes, simply tap the Mode button in the lower-left
corner and then scroll through the various options. What’s more, if
you scroll down to the bottom of the list you will nd the option to
download more modes.
Change the camera settings
While in the app, enter the Settings mode. Since the menu sits in
a oating box, it’s not immediately obvious that you can scroll to
the further settings below. Some of the settings available include
Exposure value, which is a sort of manual Scene mode; a Macro or
Auto focus mode; a timer that you can set between two and ten
seconds for picture-taking; and also an ISO setting, which aects the
shutter speed by taking into account the available light. Anti-Shake
should prevent blurry images while the White balance gives you a
choice between Daylight, Cloudy, Incandescent or Fluorescent.
Other useful settings include Metering, Outdoor visibility, Auto
Settings In the Camera app, tap
1
the Menu button to reveal the
Edit shortcuts option.
2 Tap shortcut Press and hold on
a shortcut to open the shortcut
edit window.
contrast, Guidelines (which places a grid on the screen according to
the rule of thirds) and GPS tagging to locate your images.
GPS tag
1 Settings In the Camera app, tap on
the Settings and scroll down to the
Location tag option.
2 Locate your pic Tap this option to
turn it on and your pictures will now
be tagged.
3 Select icon Tap and drag an
icon into a shortcut placeholder
to add it to your shortcuts list.
4 Remove Shortcuts You can
also remove items from the
menu by dragging them out.
79
Page 80
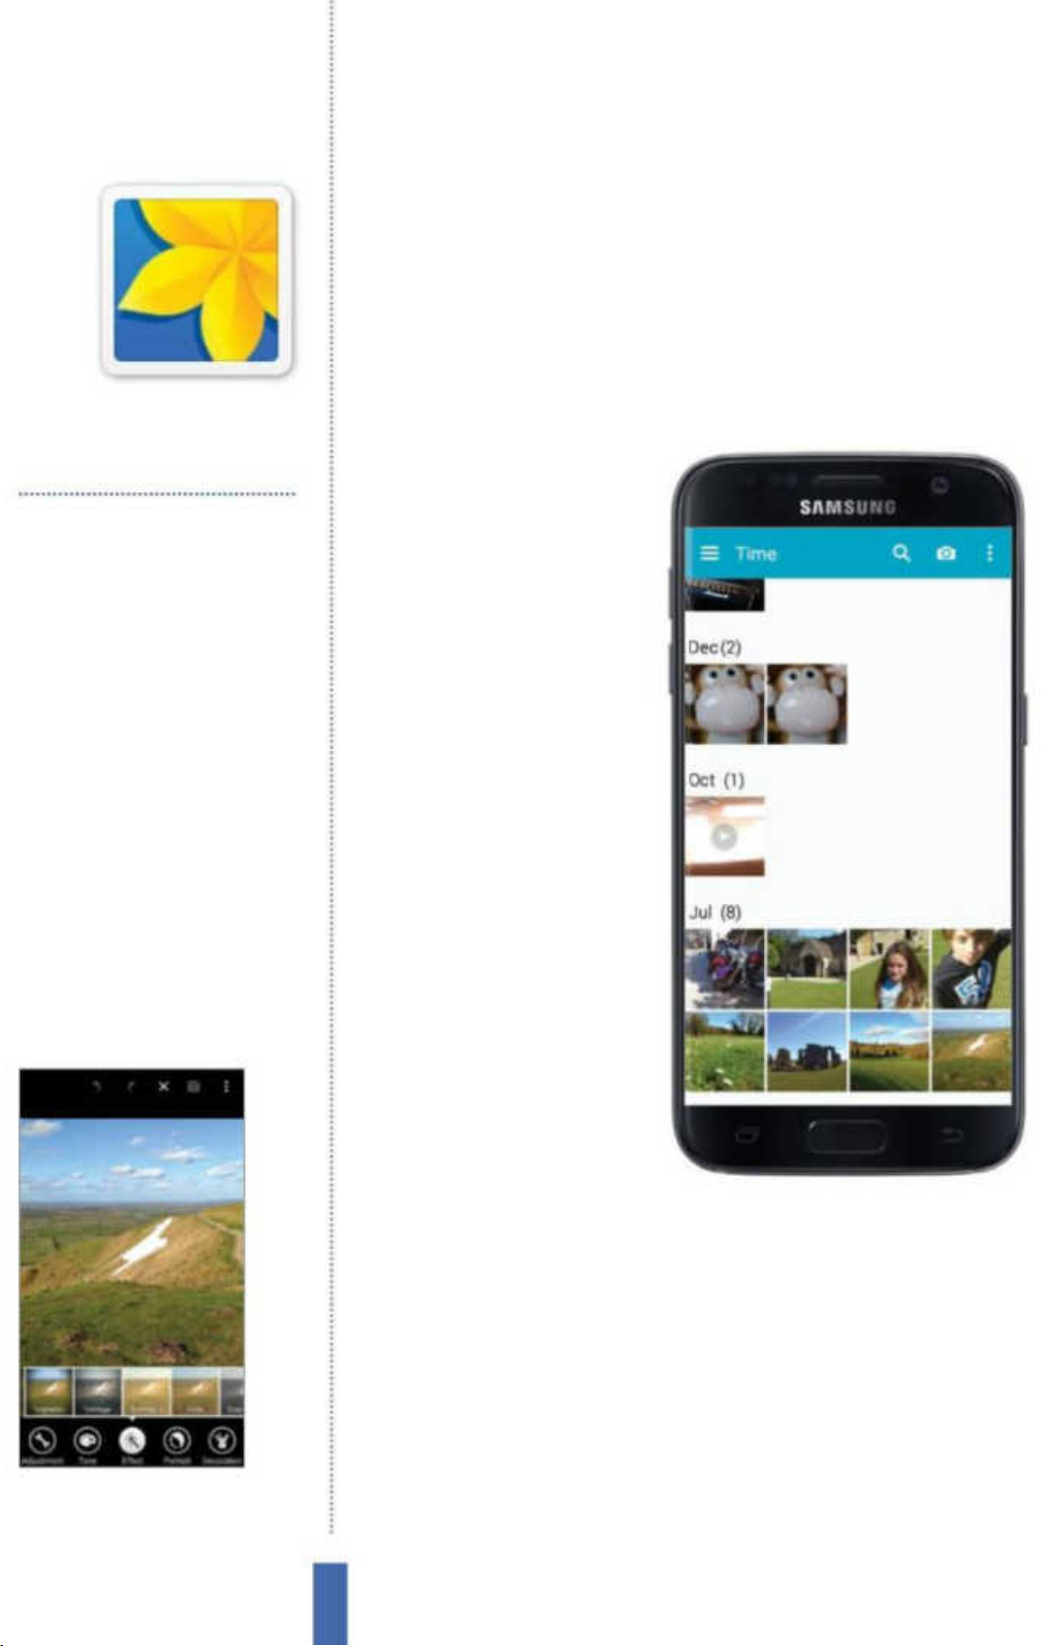
The apps Gallery
Gallery
The Gallery app isn’t just a place for storing photos
and videos, as you’ll soon discover…
You’ll use it to…
Store media files
Take full advantage of the various different
storage albums
Tag your friends
Use Tag Buddy to p ut names to faces
Edit your photos
Perform simple editing techniques on
your photos
Upload to social media sites
Enable auto-uploading of your photos
to Facebook
Share videos wirelessly
Use Kies to wirelessly share videos
Personalise your Galaxy
Apply a photo or video as wallpaper
Fig 1 (right) The carousel view is a
unique way to display your photos in
a dynamic and engaging way
Viewing photos
The Gallery app
fundamentally does what
its name suggests; it o ers a
great way of simply viewing
all your photos. In recent
updates the Gallery app has
now expanded into areas
of photo editing and video
management (Fig 1).
Navigate your albums
Whenever you save a photo
or video on your Galaxy
device, it’s automatically
added to a default album
within the Gallery app.
Which album it’s saved into
Fig 2 (above) The Gallery app now link s
to some great photo editing tools that
you can explore and play around with
depends on the size, type
and origin of the photo or
video. Most of the time you’ll
nd your les stored in the
Camera and Video folders, but occasionally you might nd them
in similar albums. Many third-party apps will add their own unique
albums to the Gallery app. An example of this is WhatsApp, which
adds its own album for all the photos that are sent to you through
the messaging platform. The way your albums are arranged is very
straightforward. All of your albums are arranged in a list down the
left side of the screen that lets you quickly hop between di erent
folders and by tapping on an album the contents will be displayed
to the right. The other screen furniture includes icons to create
new albums, launch the Camera app and access a menu of other
80
Page 81
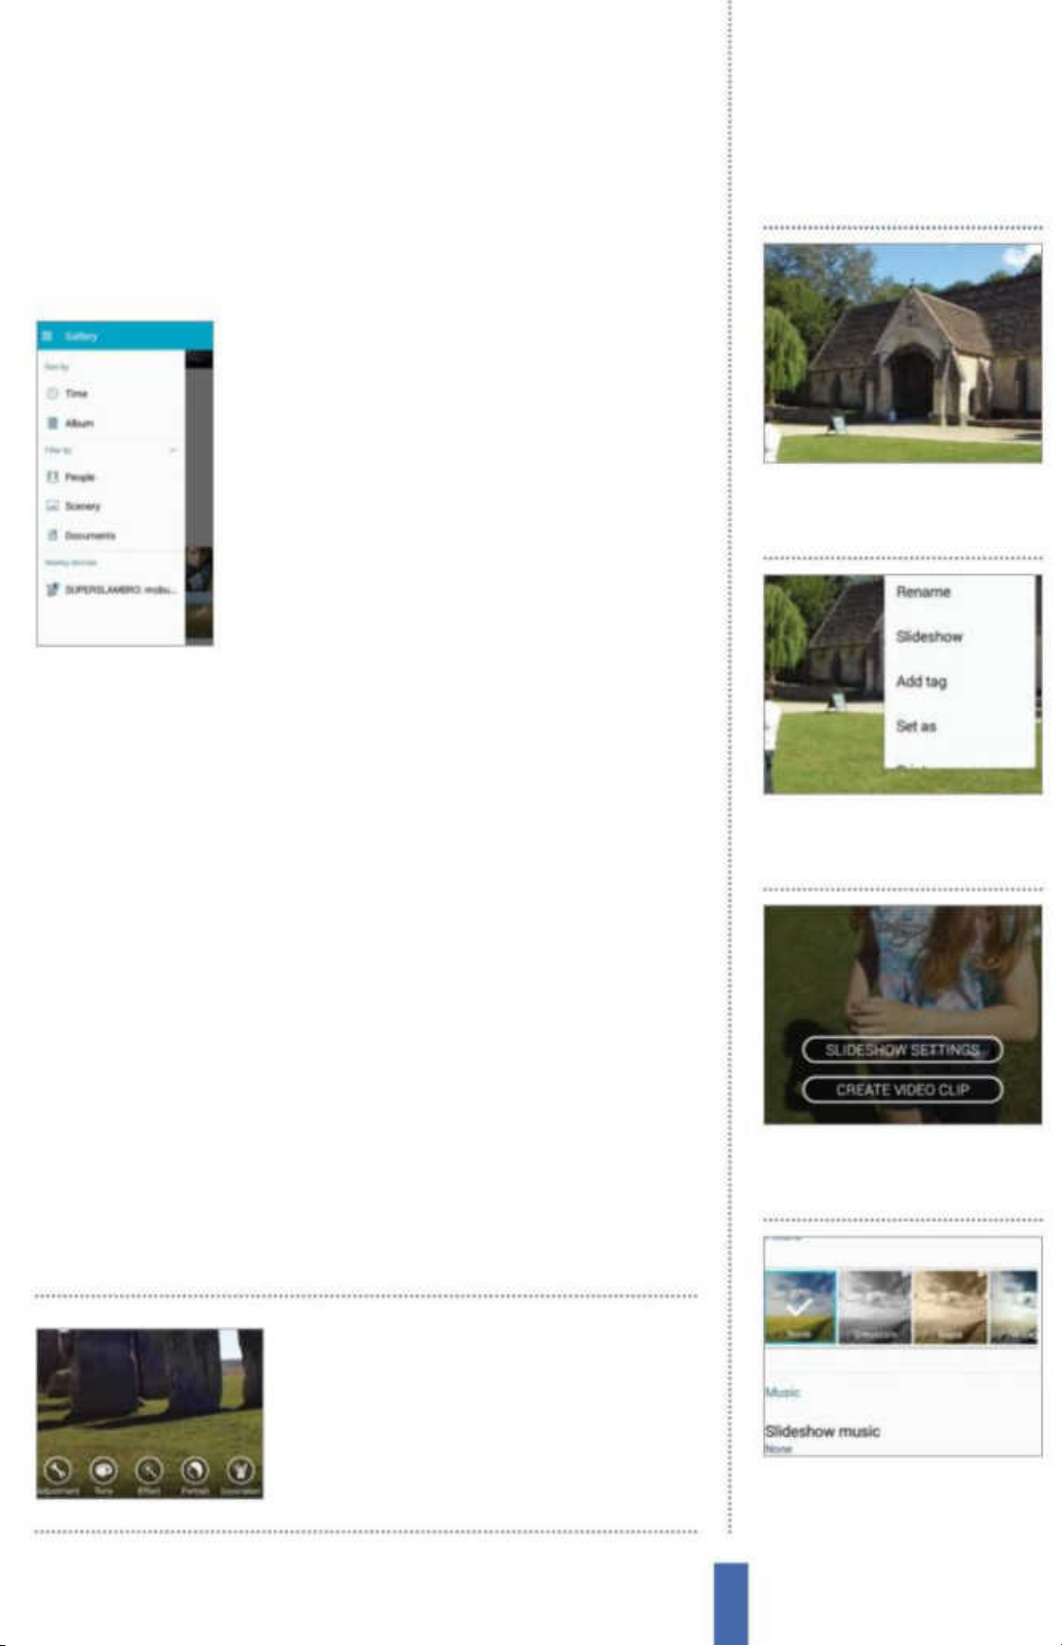
The appsGallery
features that let you select photos, delete photos, view an album
as a slideshow, access the Settings and visit the brilliant Studio,
whereby you can start getting really creative with your photos.
Sort your photos
If you’re a keen photo hoarder then being
able to sort through your photos will be of
vital importance. Luckily for Galaxy users, the
Gallery app includes a series of sorting options
that you can access by tapping the icon in the
top-left corner. By default your photos will be
stored inside albums, but this can be changed
so that your photos are stored in chronological
order, by subject matter, or even by the people
who were tagged in them. The Scenery view is a brilliant way to see
exactly where your holiday snaps were shot.
Organise your photos
View a slideshow
1
Starter image Open an album
and then select the first image
of your slideshow.
If you’re not happy with where some of your photos are being
stored then don’t worry, as the Gallery app is highly customisable.
Each photo can be renamed, moved and deleted to keep all your
albums organised. Moving said photos is an easy enough process;
all that’s required is a long-press on the photo in question to enable
the tickbox selection process, and then tapping the menu icon to
select a place to move them to. After a few minutes of sorting out
the contents of your Gallery app, you’ll have a much more organised
app that you can use without worrying it’ll get cluttered.
You may want to tweak the colours of your images a little, add
some fun e ects to them or even scribble notes on them. You can
do all of this with Gallery’s partner app, Studio. Simply hit the menu
icon while viewing an image and select Studio. You can also open
an image and tap the Edit icon to start making tweaks.
Make artistic adjustments
2 Choose Slideshow Press the
Menu button, then select
Slideshow from the list.
3 Settings The slideshow will
start to play but you can tap the
screen to change the settings.
and then share your
edited photos directly to
Facebook and Twitter
4 Tweak s ett ings Here you can
apply filters, music and more to
make your show captivating.
81
Page 82
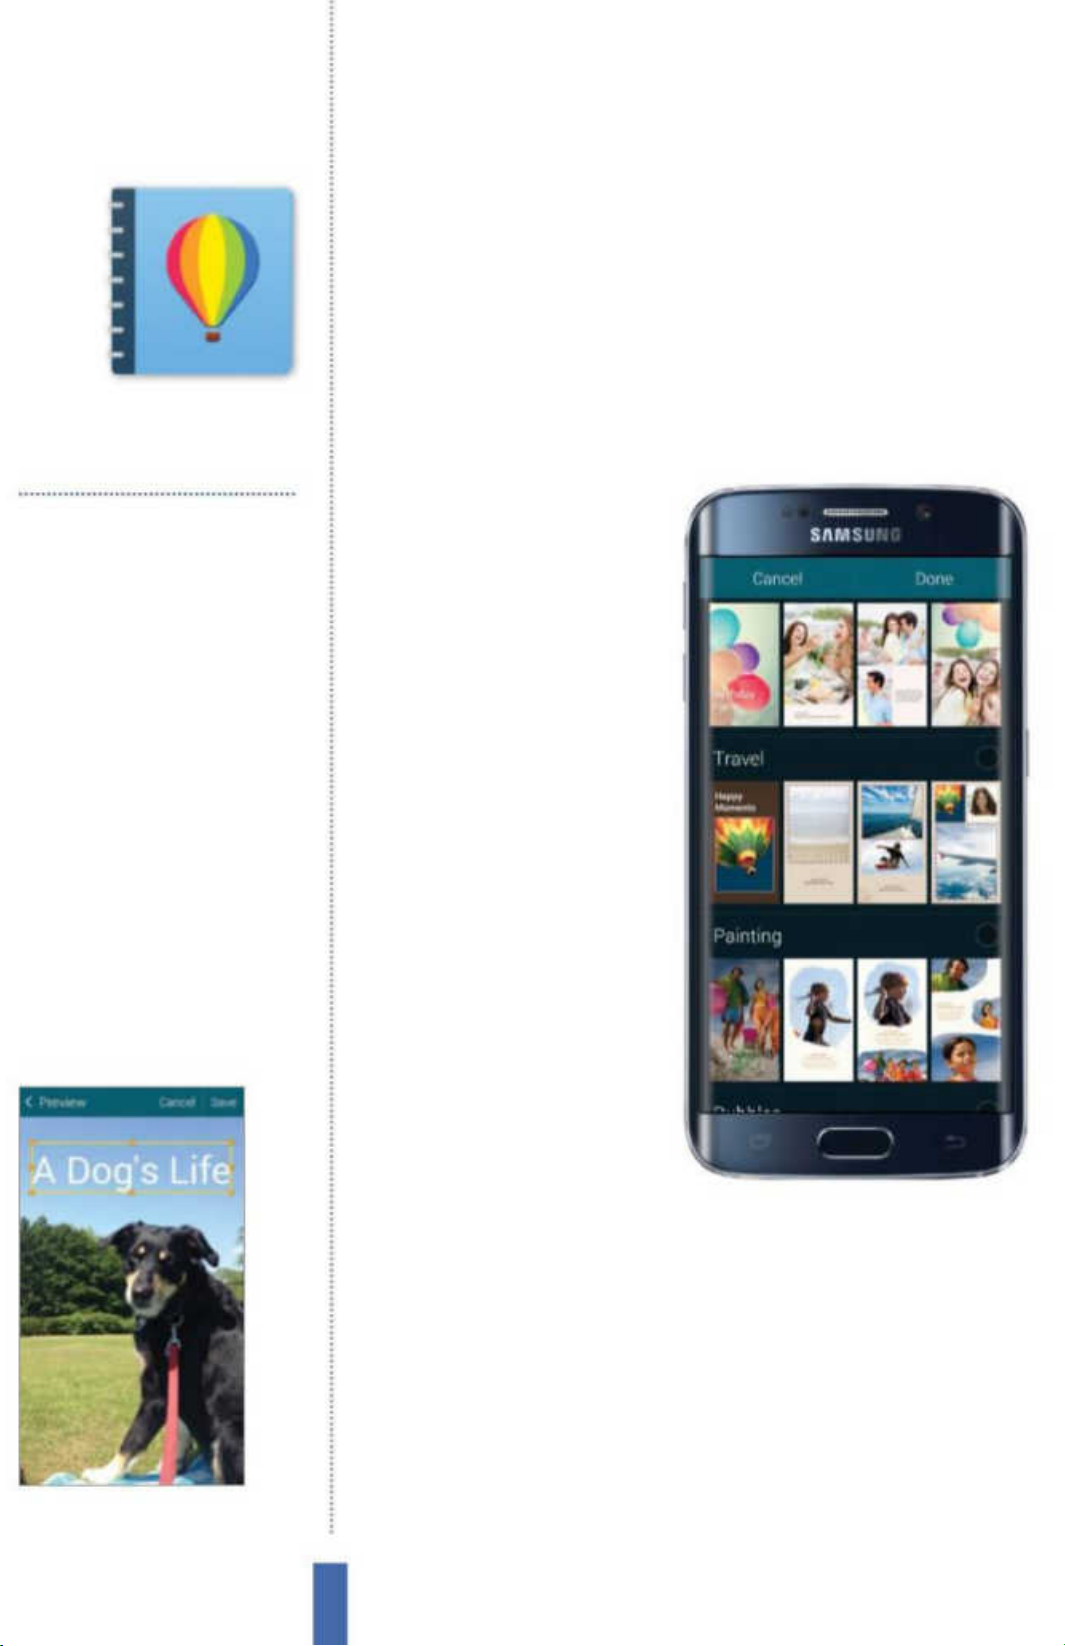
The apps Story Album
You’ll use it to…
Story Album
Save your favourite photo memories into
completely customisable photo albums
with Story Album
Arrange your images
Lay out yo ur photos however you like
Add a theme
Choose from a wide variety of dif ferent
album layouts
Tell a story
Add capt ions and maps to your albums
Customise layouts
Modif y, resize, crop and arrange your
photos to suit your nee ds
Share with friends
Publish your story albums online
Print your story
Print a physical book of your stor y album
Fig 1 (right)
the type of images you’re using
Select a theme that fits with
Exhibit your
favourite photos
With Samsung’s Story Album
app you can import and
arrange all of your favourite
images from your Galaxy
device into a comprehensive
photo album. By combining
photos, captions, maps
and titles you’ll be able to
compile a scrapbook of
memories using one of the
app’s beautifully designed
themes to present your
images exactly how you like.
Create a new album
To create a Story album
Fig 2 (above) Story Album places your
images into an interactive photo album
open the app and tap the ‘+’
icon in the top right corner
of the screen. Tap Gallery
albums and you’ll be directed to the Galleries app where you’ll be
able to select the images that you want to include in your album.
You’ll also be able to add or remove images at any point when
editing your album. Tap on images to select them then tap Done. In
the album creation window you can add a title and cover image to
your album. Tap on the menu icon in the top-right corner and then
choose the Edit cover option. Tap on the default image to choose
from any of the images that you’ve imported from Galleries as your
cover image. Tap on Theme to explore Story Album’s available
themes. Each theme has its own unique style, presenting your
82
Page 83
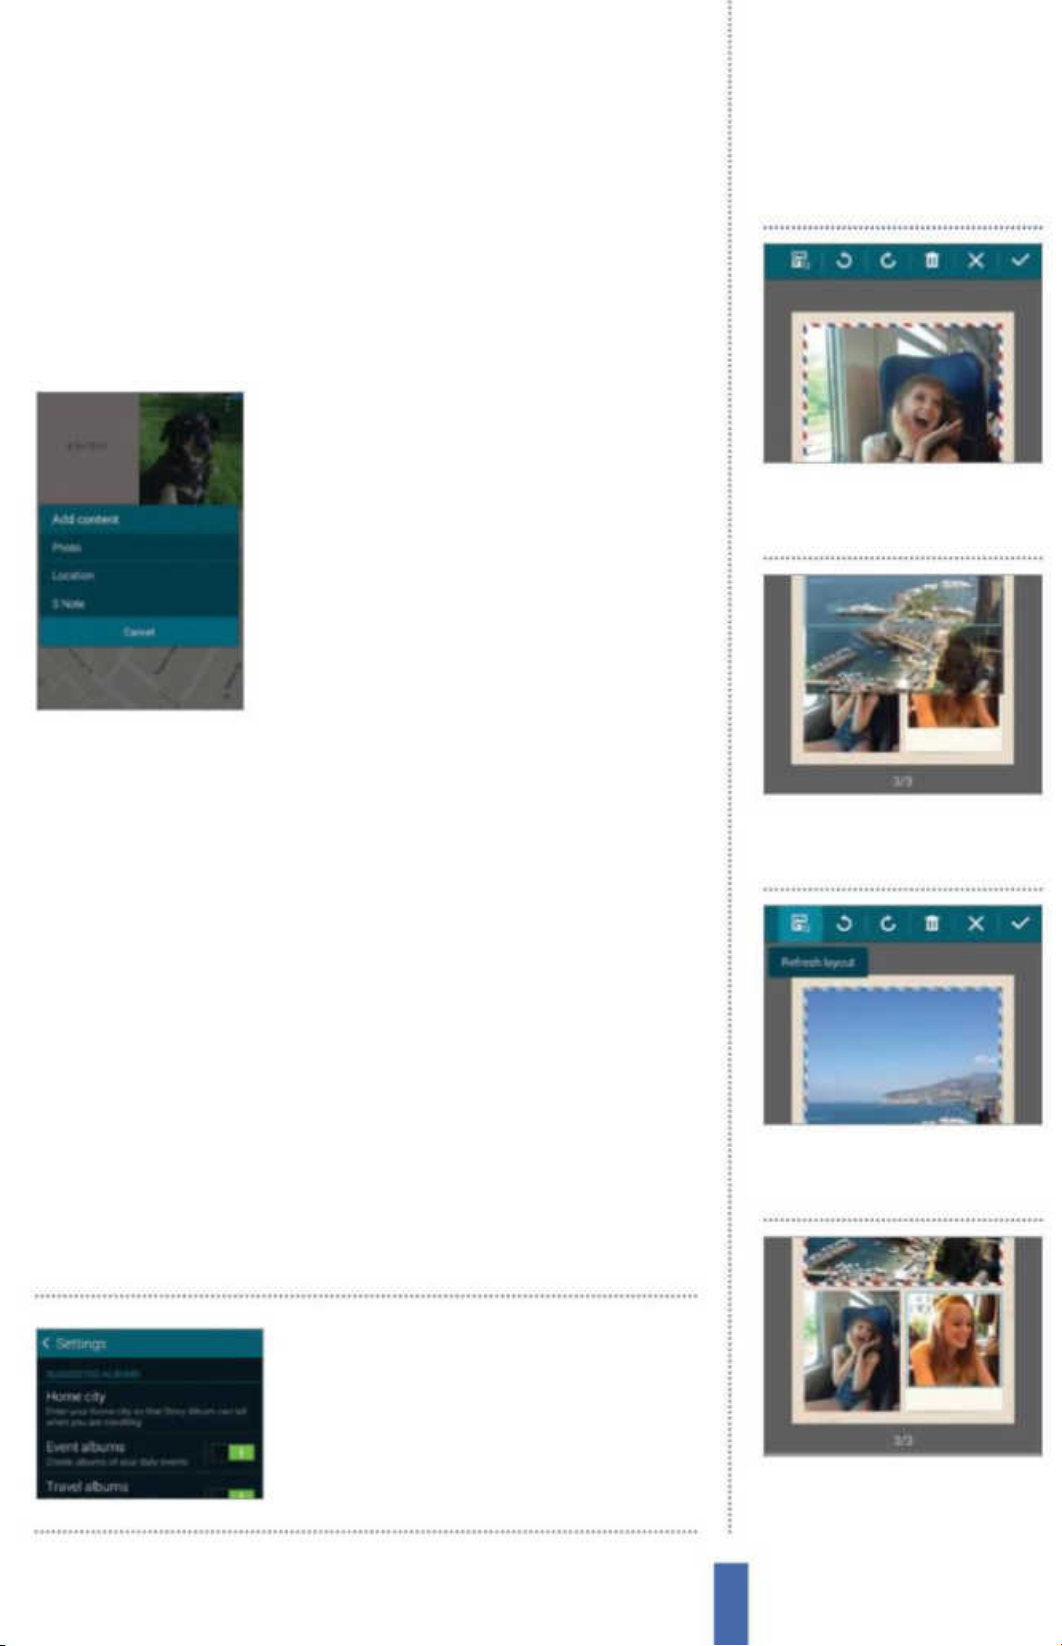
The appsStory Album
images in dierent arrangements and frames. Once you’ve picked
a title, theme and cover image tap Create album and all of your
selected images will be compiled into the album. With an album
open tap the menu button to edit your title, cover image or theme
as well as add new images and content to your Story Album.
Add more content
As mentioned before it’s possible to
add content other than images to your
albums. Tap the menu button then tap
Add content. Form here you can connect
to the appropriate app to add a location
(Google Maps) or text (S Memo). Once
you’ve input location details on Google
Maps or text into S Memo it will be
added to your album. Tapping on a map
or text element in Story Album will allow you to edit it. Tap the
menu button and tap Remove Content to extract an element
Edit an album
Edit Mode Press and hold on
1
any artefact within an album to
enter edit mode.
from the selected album page, replacing it with another image.
Share your Story Album
Once you’ve completed an album then it’s time to start sharing it.
Select one of your albums from the Story Album main menu and
tap the share button. There are multiple sharing options. Firstly
you can tap Share via to send the album as an image le, PDF or a
Story Album le (.scc) to people. Select a format you want to send
the album as then choose what app you want to share it via, such
as Gmail or ChatON. Keep in mind only those who have the Story
Album app will be able to view .scc les. Tap Export from the Story
Album menu to create a PDF or .scc le which will be stored on
your device. Tap Print to print the album using a Wi-Fi connected
printer, or tap Order Photo Book to order a physical copy.
Story Album can suggest
2 Move item Press and hold
on an image then drag it to
reposition it.
3 Tool bar Use the Tool bar to
rotate images, rearrange the
page and remove images.
albums to be created by
analysing images in the
Gallery app
4 Resizing Pinch and drag
inwards/outwards on an image
to resize it within its frame.
83
Page 84
The apps Kindle for Samsung
Kindle for
Samsung
Download your favourite books and read them on
You’ll use it to…
Browse for books
Choose from over one m illion book s
Subscribe
Receive issues of your favourite magazines
Sync across multiple devices
Start e xactly where you left off on any
Samsung device
Interact with a book
Make note s, highlight and look up words
in books
Download free books
Get a free book once a month with yo ur
Samsung account
Build a library
Manage and categorise your favourite reads
Fig 1 (right) Read and buy books on your
Galaxy with Amazon’s Kindle app
your Galaxy using Kindle for Samsung
Read on your Galaxy
The Kindle for Samsung
app was built exclusively for
Samsung devices. It o ers
all of the great features that
come with the standard
Kindle Android App with
the added bonus of being
formatted for your Galaxy,
making the app easier to
navigate, use and read
from. Samsung users are
also given a free download
every month.
Getting started
Fig 2 (above) Download a free Kindle Book
on your Samsung Galaxy device
You can download the
Kindle for Samsung app
from Galaxy Apps. On
opening the app tap Start
Reading. You’ll be asked
to login to your Amazon account. If you don’t have one tap Create
an account. Once signed in you’ll be taken to the home page. Any
books you have previously purchased through Amazon will be
added to the app automatically. Just swipe through your library and
tap on a book to download and read it. Tap the menu button in the
top-left. Under the Store heading tap Samsung Book Deals. You’ll
be prompted to sign into your Samsung account. Once signed in
you can return to the Samsung Book Deals page to view the books,
84
Page 85
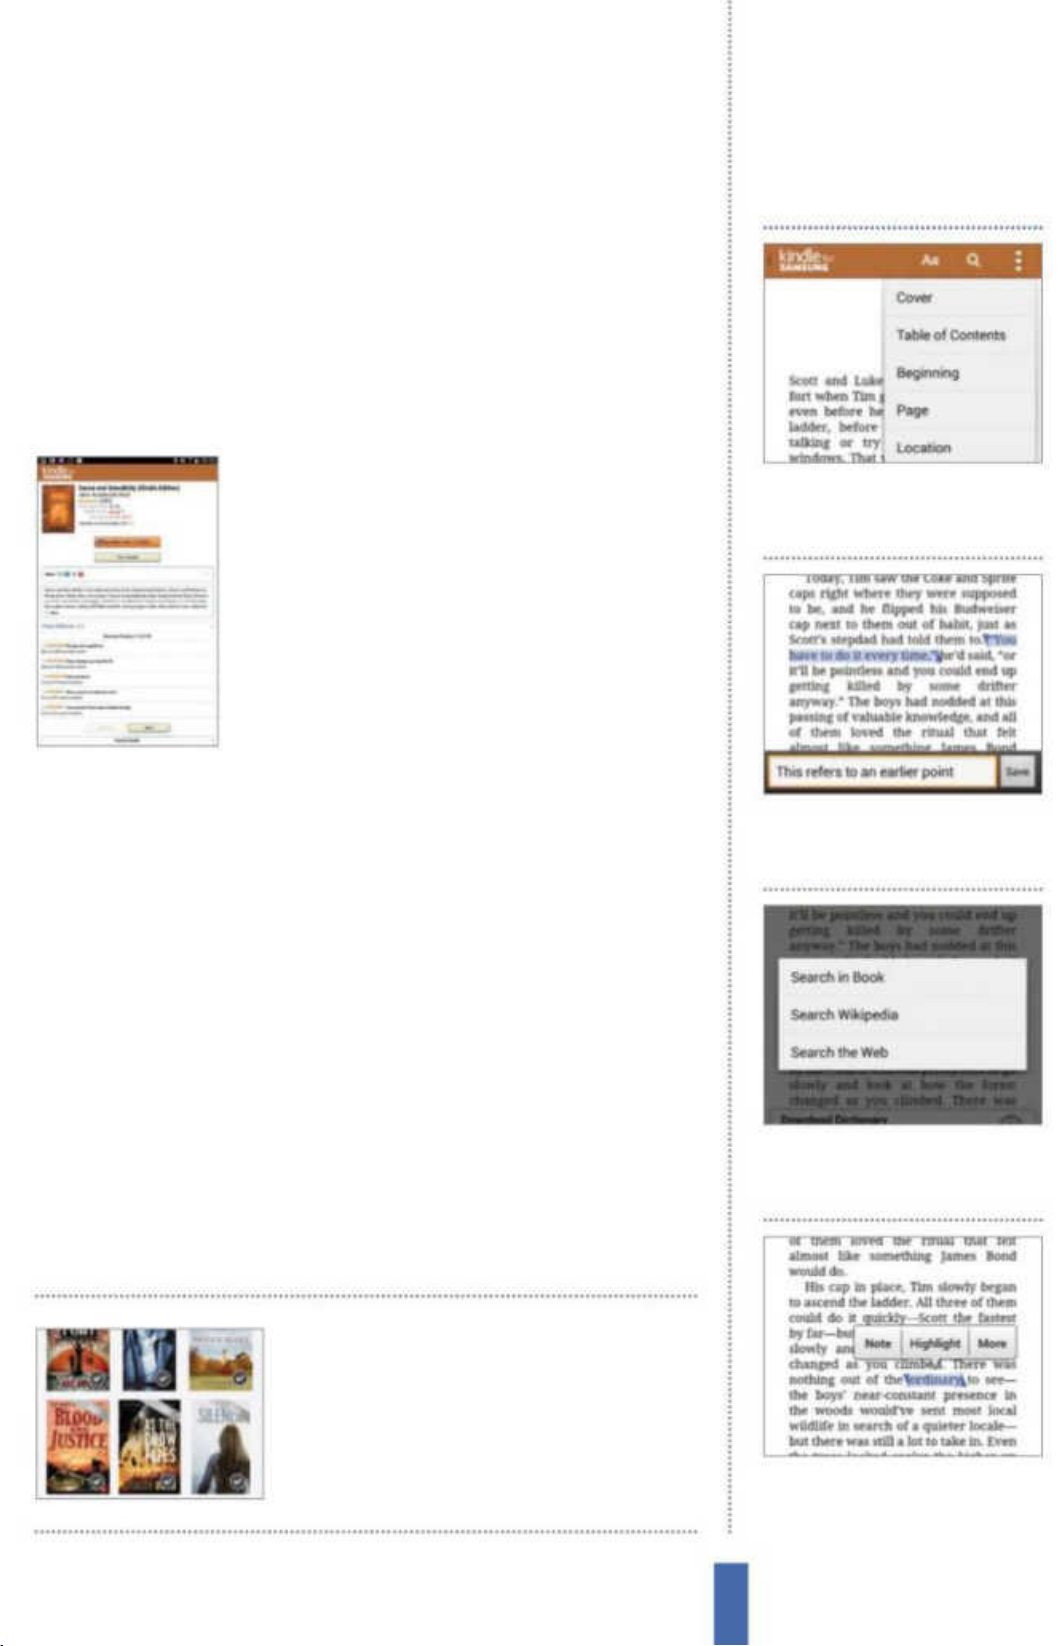
The appsKindle for Samsung
which are now available for free. Samsung users can download one
book per month from the available collection without charge. From
the selection tap on the book’s front cover to visit its details page.
From here you can read a synopsis and product details, check out
customer reviews or share the book’s details page through another
app. If happy with your choice tap Buy Now with 1-click and the
book will be added to your Kindle for Samsung Library.
Browse the Kindle Store
Tap the Shopping cart icon at the top right
hand corner of the app to access the Kindle
Store. Store items are broken into three
subsections. Kindle ebooks, Kindle magazines
& Journals and Kindle Newspapers. Tap on a
category to begin browsing or use the search
tool. Some Magazines or Newspapers can
be subscribed to, and a separate button for
Subscribing will appear on the items details page. You’ll need to
Navigate books
1
Navigation Tap on a page then
tap the options button. Tap Go
To, to navigate around the book.
have a payment method setup on your Amazon account to buy
books. This can be done from a computer by logging into
amazon.co.uk or an Amazon App.
Build a digital library
From the menu button tap All items to see all of your purchased
books. Tap and hold on a book thumbnail to display the book’s
options menu. Here you can Remove the book from your device
and manage the download in many other ways. Tap Add to
collection. Title your new collection, tap Create then tap OK. Repeat
this step for however many books you like. From the apps menu
under the Library Subheading tap Collections to view and modify
your existing collections. Collections are a great way to manage and
order your own personal library of digital literature.
Books not downloaded
2 Add notes Tap and hold on
a piece of text to select it. Tap
Note to add notes to the page.
3 Search With text selected tap
More to search for the selection
in the book or on the web.
to your Galaxy can be
accessed from the Cloud
tab on your library
4 Dictionary When making a
selection tap Download to
download the dictionary add-on.
85
Page 86
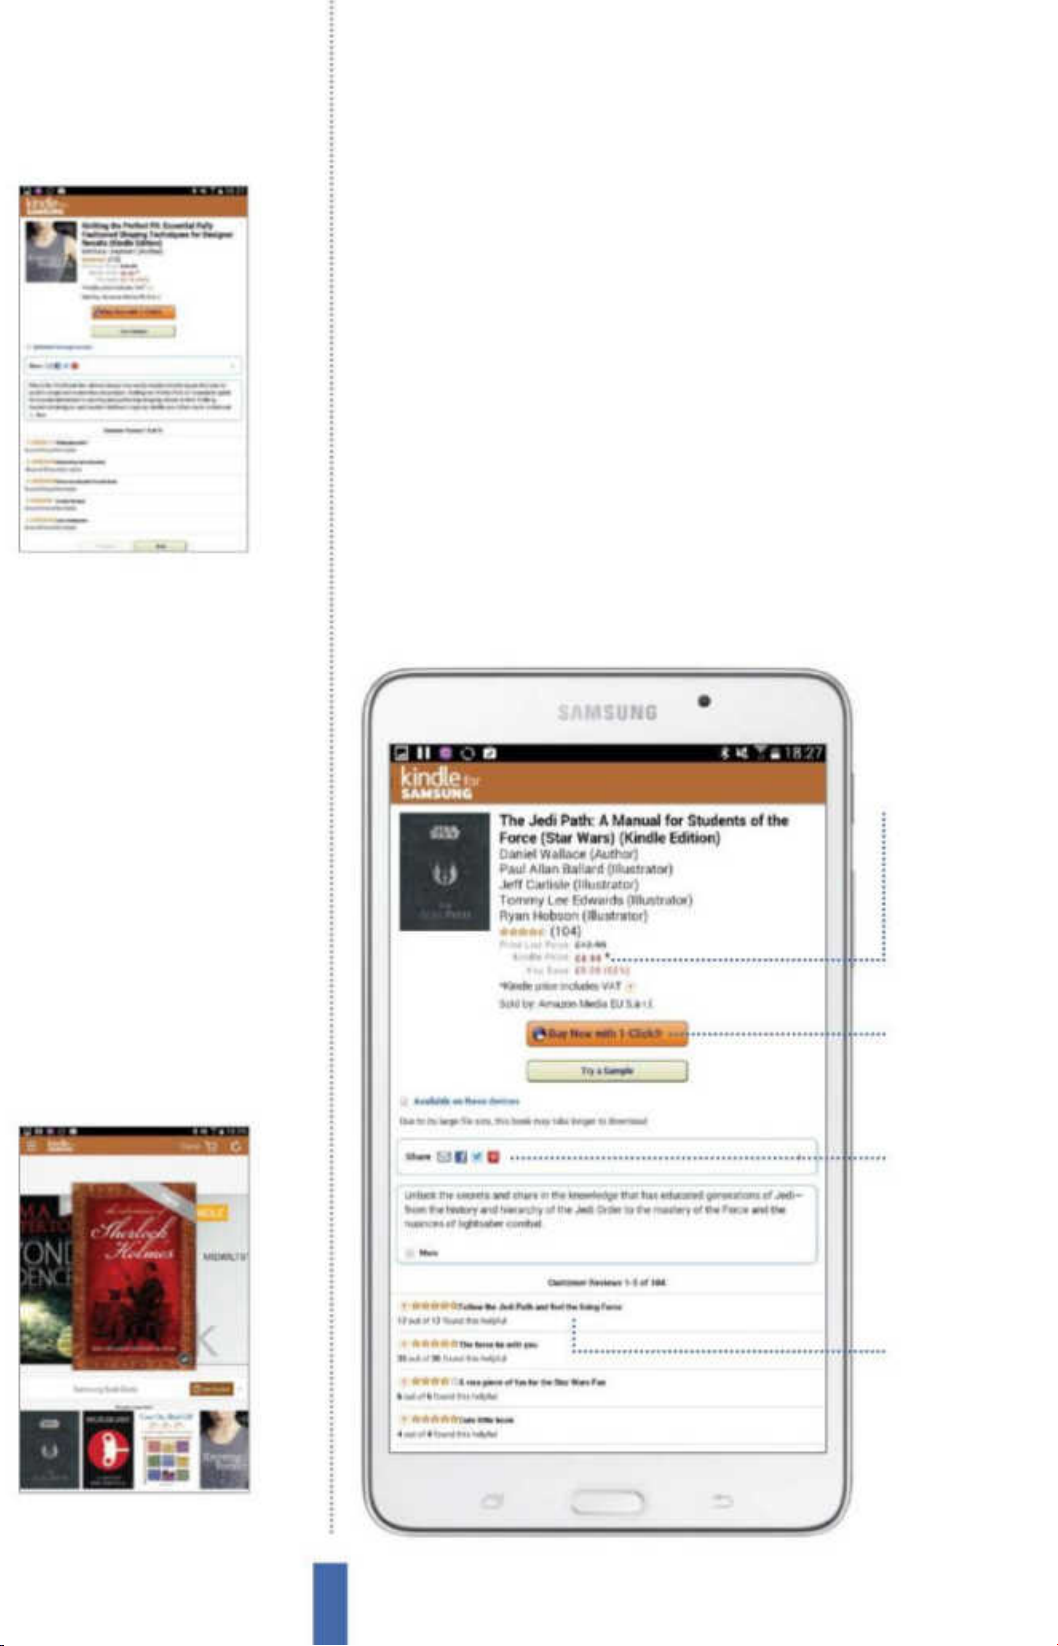
The apps
Fig 3 (above) Amazon will recommend
other authors and books based upon
your reading history
Kindle for Samsung
Get recommendations on ebooks
One of the best things about the Kindle app for Samsung is that
it’s constantly adding new and engaging titles across all genres
to provide the most thorough ebook storefront around. After
prolonged use, you’ll notice some gradual change in how the
app works for you. You’ll see lots of recommendations appearing
through several menus accessible from the home page of the
app. Scroll to the bottom of the app and eventually you’ll nd
a recommended list based on your previous purchases. The
app will also give you recommendations based on specied
authors that you access often; again this is all available through
the home page after prolonged use. The other ways users can
get recommendations through the Kindle for Samsung app is by
Pricing
Check to s ee the
listing price and
download price at
the top
Quick pay
Pay for your books
quickly with the
1-Click option
Share book
Use the Share tab to
link your friends to
the listing
Review it
Scroll down and
press Review in
order to leave
your opinion
Fig 4 (above) Download a book on
to your Samsung before reading
86
Page 87
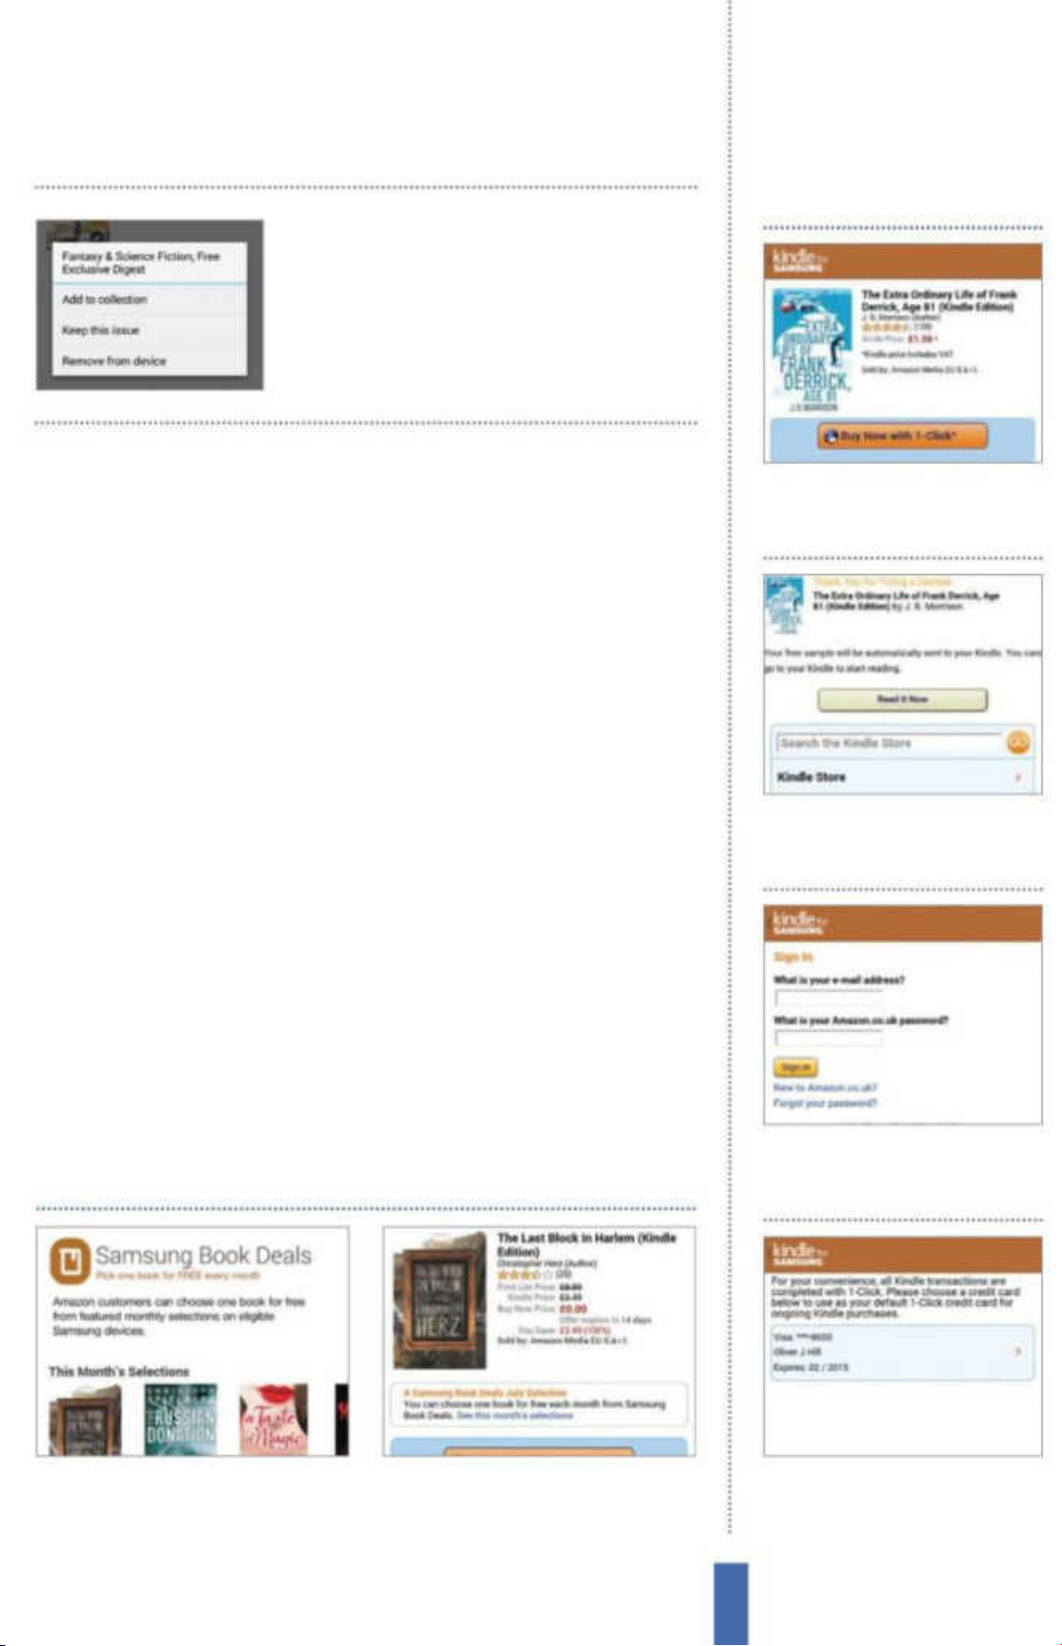
Kindle for Samsung
If you’re ever lost within
the Kindle app, make sure
to take advantage of the
superb side menu
The apps
How to buy a book
reading reviews on each dedicated ebook’s page. All reviews are
stored at the bottom of each page and will help you gure out if
a book is worth a download, or best worth avoiding. If you have
several friends who also use the Kindle app, then they can also send
you links and recommended reads, which you can open up and
look at on your Galaxy device.
Reading your ebooks
After you’ve put together a list of ebooks, you can begin reading
them. Amazon is famed for its simple Kindle reading software
and the app includes many great features that make it a decent
e-reader. First and foremost you’ll need to download the book onto
your Galaxy, before icking through pages of the book using your
volume keys. By pressing on a particular page, you can then change
things like the font size, colour, or simply highlight a word that you
don’t understand. On newer Samsung Galaxy devices, you’ll be able
to use the bookmark feature. As its name suggests, this will create
a virtual bookmark so that you can come back to the correct spot
1
Choose book Use the Kindle
Store and search function to find
a book you want to purchase.
2 Sample Before buying, use the
Try it Out tab to read a sample of
the book for free.
later. Once you’re nished with the book, you can choose to remove
it from your device to help save on internal storage.
Get free and exclusive books
1 Book deals Open the Samsung
Book Deals page through the side
menu to claim your free book.
2 Make a choice You’ll have a choice
between four books per month; just
select the one you want.
3 Login Go back to the book’s
screen and press the 1-Click tab
and log in to your account.
4 Payment Choose an existing
payment or add a new one
before confirming the purchase.
87
Page 88
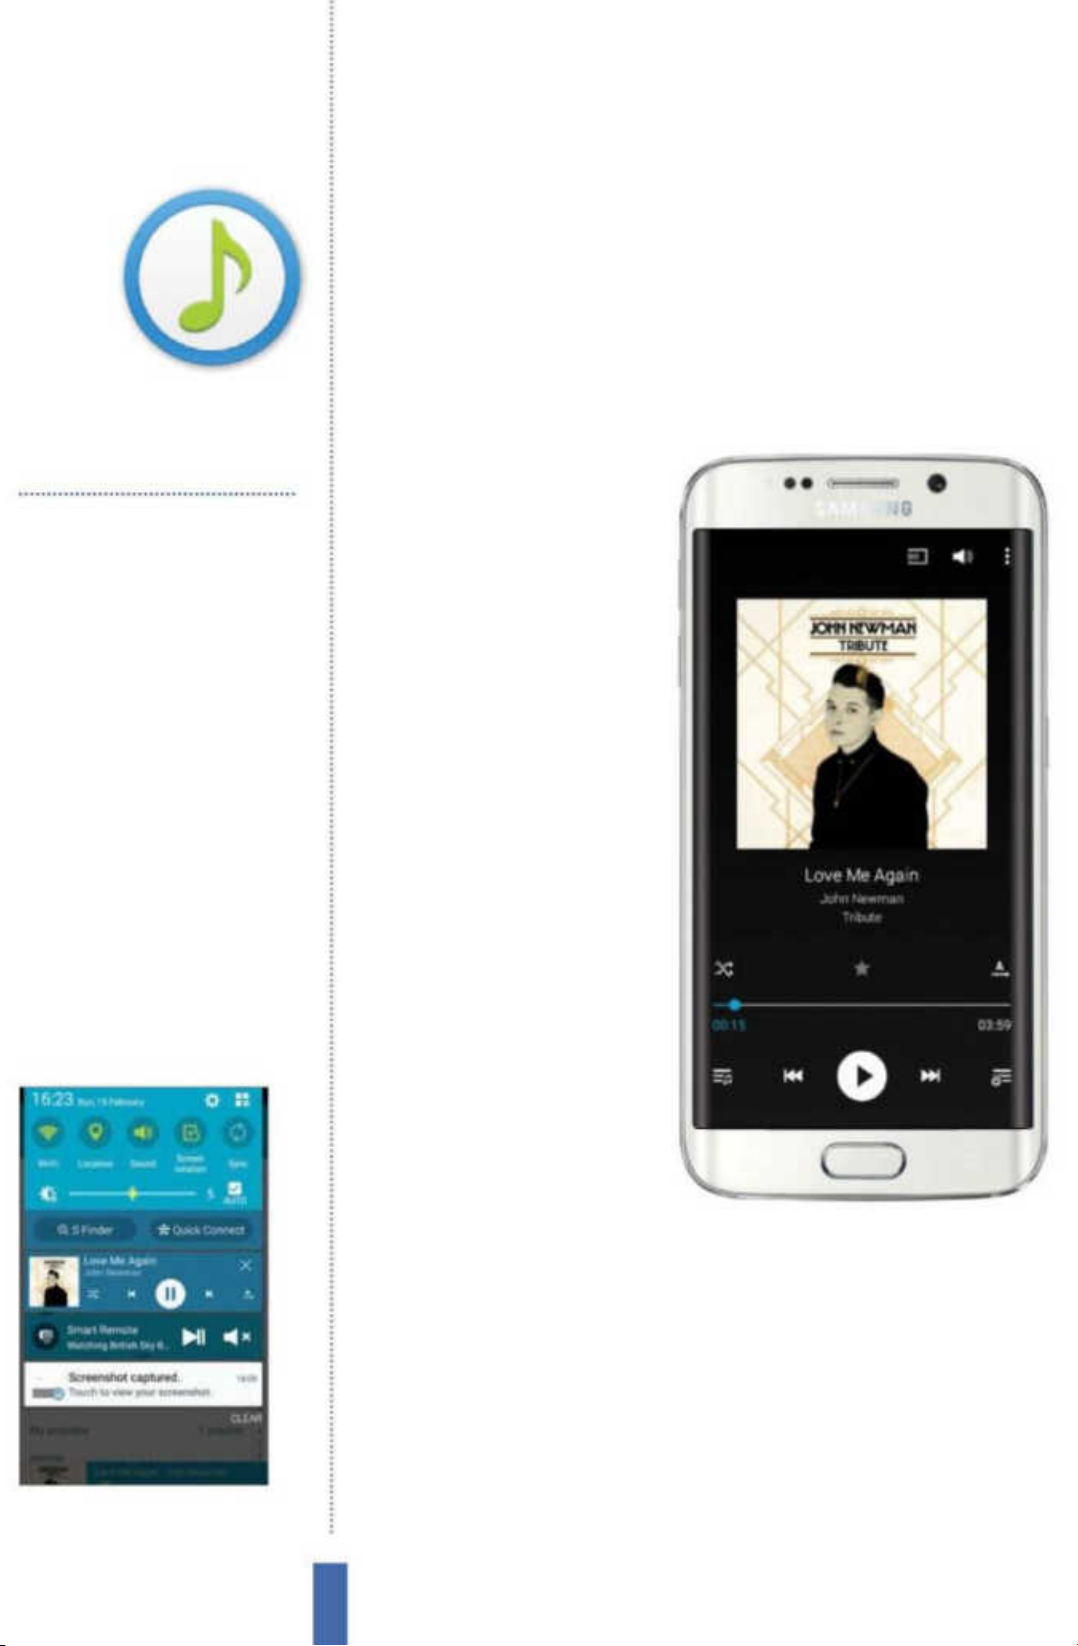
The apps Music Player
Music Player
Use the Music Player app to play your favourite
songs on the move
You’ll use it to…
Play music
Load music onto your Tab and lis ten to it
while on the move
Control track order
Modif y the order you p lay tracks via shuffle,
repeat and more
Make playlists
Create your own personal jukebox
Import music
Impor t your tunes via USB
Sing along
View song lyrics on your mobile screen
Twe ak sound
Change the equaliser settin gs
Fig 1 (right) You can shuff le tracks, toggle
playing order and even create your own
playlists in the playback screen
Listening to music
Listening to your favourite
music is simple on your
Galaxy device as it features a
cool little music-playing app
with a simple control set to
enable you to nd what you
want to listen to quickly and
then play it e ortlessly (Fig 1).
To access it, tap on the Music
Player app, which in turn
will reveal your music les.
Browse your music library
and then tap on a track to
start playing it. If you happen
to be on a home screen then
you can access a simple set of
playback controls to manage
your music by swiping down
Fig 2 (above) Pull down the notification
panel to reveal playback controls
from the top of the screen
to access your noti cations
panel (Fig 2).
Browse your library
If you currently have a gamut of music les on your Samsung Galaxy
then you can, with the aid of Music Player, organise them into a
library of songs. Tap on Music Player to reveal those music tracks
that you currently hold and then tap on the All button at the top of
the screen, at the far left of the menu bar, to see your music.
Moving to the right of the same menu bar, tap on Albums to
group all of your songs into their respective albums or instead
tap on Artists to list all of the tracks by the artist or band who
88
Page 89
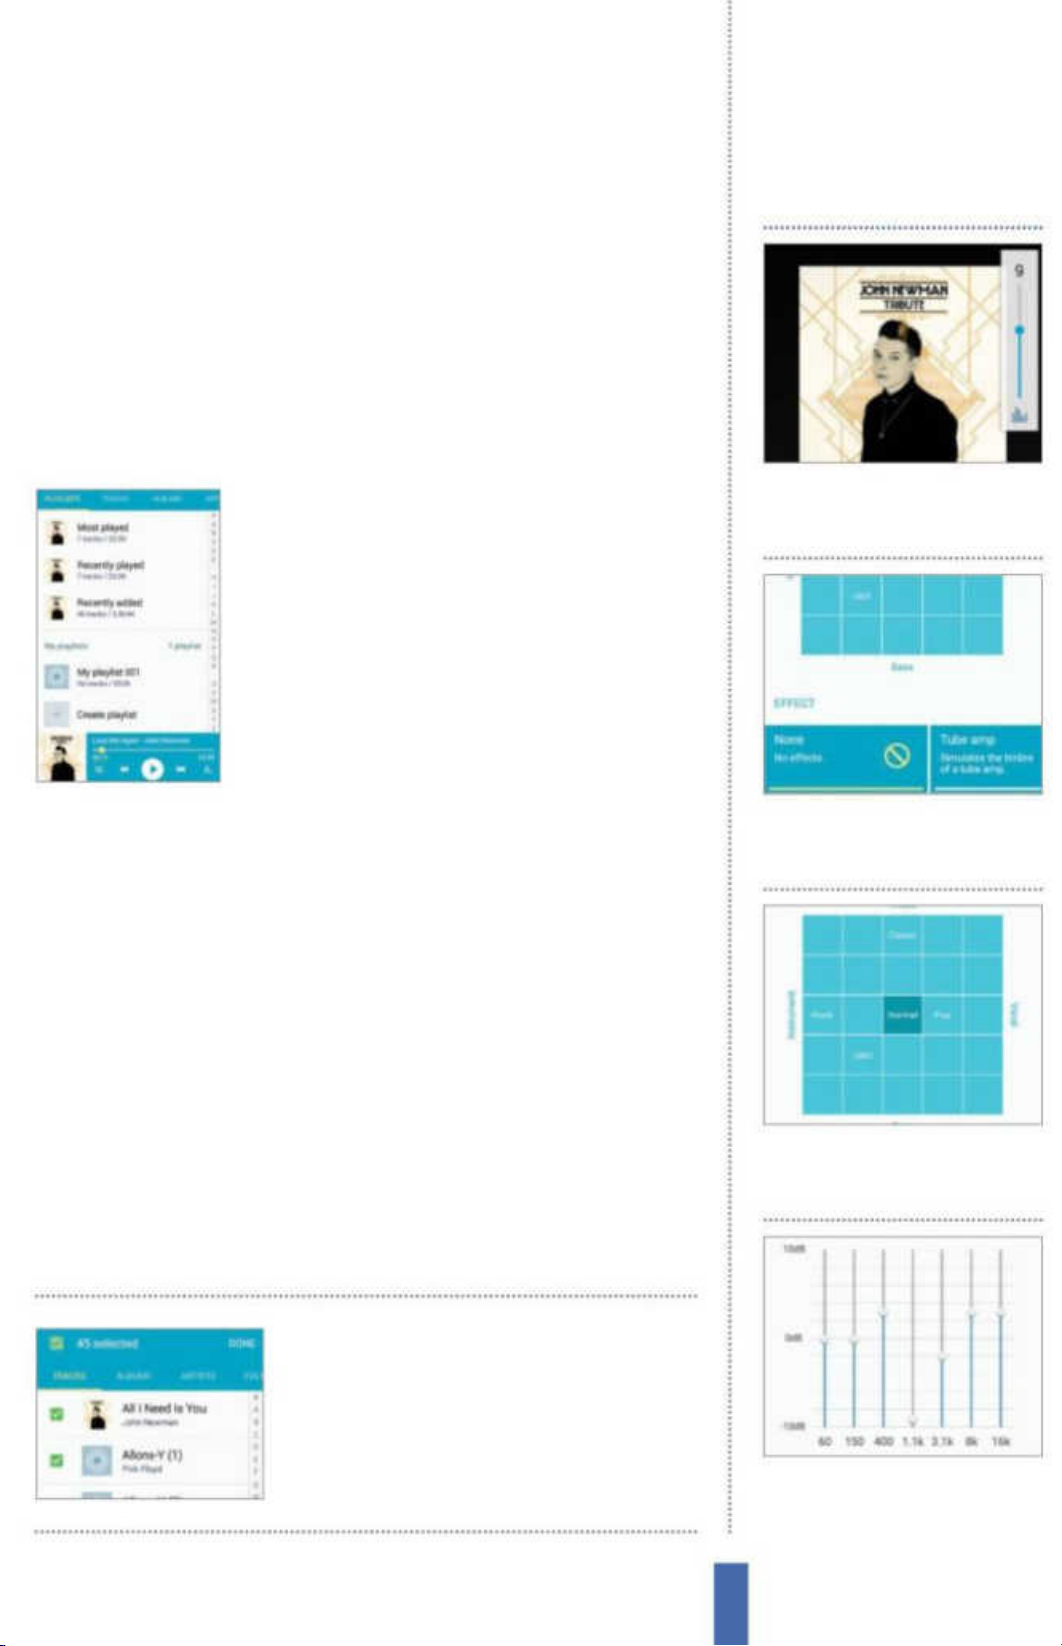
The appsMusic Player
performed them. You can swipe all the way to the far right in order
to reveal the Folder button. Tapping this allows you to see a basic
grouping of your tracks in terms of where they’re stored. This option
is ideal if you want to group music formats and styles together.
The MP3 is no longer the only popular format out there either.
Extra memory (the Galaxy S5 can reach the giddy heights of
128GB of storage) means that FLAC and WAV-format music les are
numerous and common nowadays.
Master playback controls
Playing music provides many additional
interface options. The base of the screen
shows the basic Play/Pause button in the
centre and the Forward and Backward
buttons to skip tracks on either side. Tap the
tiny button on the far right or tap on the
track name to be taken to a new play screen
showing the sleeve art. Swipe the artwork left
Set the equaliser
1
EQ button Tap on the speaker
icon at the top of the screen and
then press the EQ button.
and right to skip tracks, press the icon just underneath to the left
to shue tracks, the icon to the right of that repeats one or more
tracks. The interface is simple and accessible to every music fan.
Create playlists
To access a playlist, swipe through the options at the top of the
screen until you come to Playlists. If you wish to create a new
playlist, tap on the ‘+’ icon at the bottom of the screen under the
‘My playlists’ header. A new box will then appear on the screen.
Enter a catchy title for your new playlist and tap OK. Now you need
to start choosing tracks to add. Tap the ‘+’ icon and select the music
les you want to include in your playlist. Once you have completed
your list, tap Done. To delete a playlist, highlight it in the Playlists
section and then tap on the trashcan icon.
When selecting les for a
2 Select EQ A selection of preset
sound profiles are available by
swiping along the bottom.
3 New EQ Tap on a preset to
select it or make tweaks via the
grid in the main window.
new playlist, tick the box
in the top corner to select
all of your music
4 Custom Set the desired levels
and then tap on the Advanced
tab to go deeper.
89
Page 90
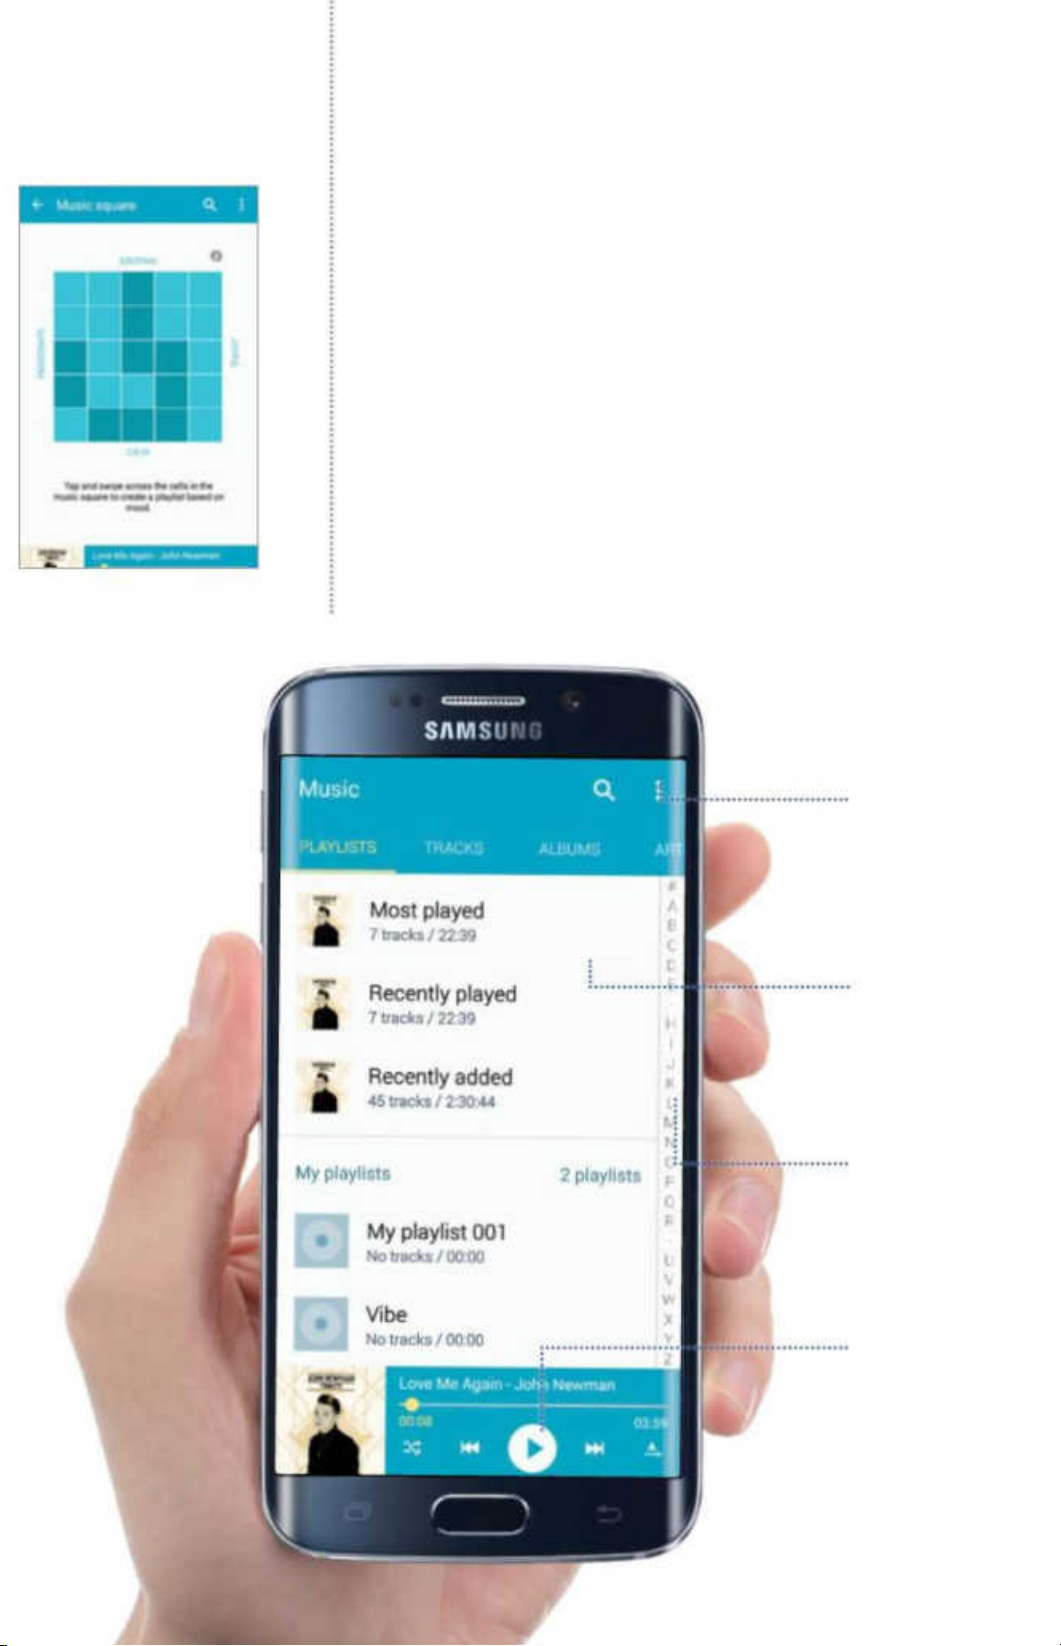
The apps Music Player
Use the Music Square
Is it a gimmick or a truly useful music-related feature? The Music
Square has been created to help you to choose music based upon
your mood (Fig 3). Getting it up and running, though, takes a little
e ort. To begin, you need a well of music to choose from, and we
recommend having a minimum of 25 tracks on your device for it to
work properly. Once you have loaded the tracks, tap on the threedot menu icon in the top-right corner of the screen and choose the
Music Square option. A screen full of tiles appears. Tap the Menu
button on your in the top-right corner and you can change the
horizontal axis of the interface to re ect years or moods. Tap a tile
in the box that best represents your blend of moods and a track is
chosen, played, and its sleeve art displayed on the tile. Pick a range
Main screen
Your music tracks are
listed here, Just tap to play
each one a nd you will be
able to control them
Play controls
The main music controls
are liste d at the bottom
of the screen. The EQ
buttons is also here
Index
An alphabetical search list
runs vertically down the
right side of the scre en.
Tap or drag her e to quickly
scroll t he list of track s
Menu bar
The main menu options
for the Music Player,
provide the majority of
settings and tweaks
Fig 3 (above) The Music Square function
pla
ys music according to your mood
Page 91
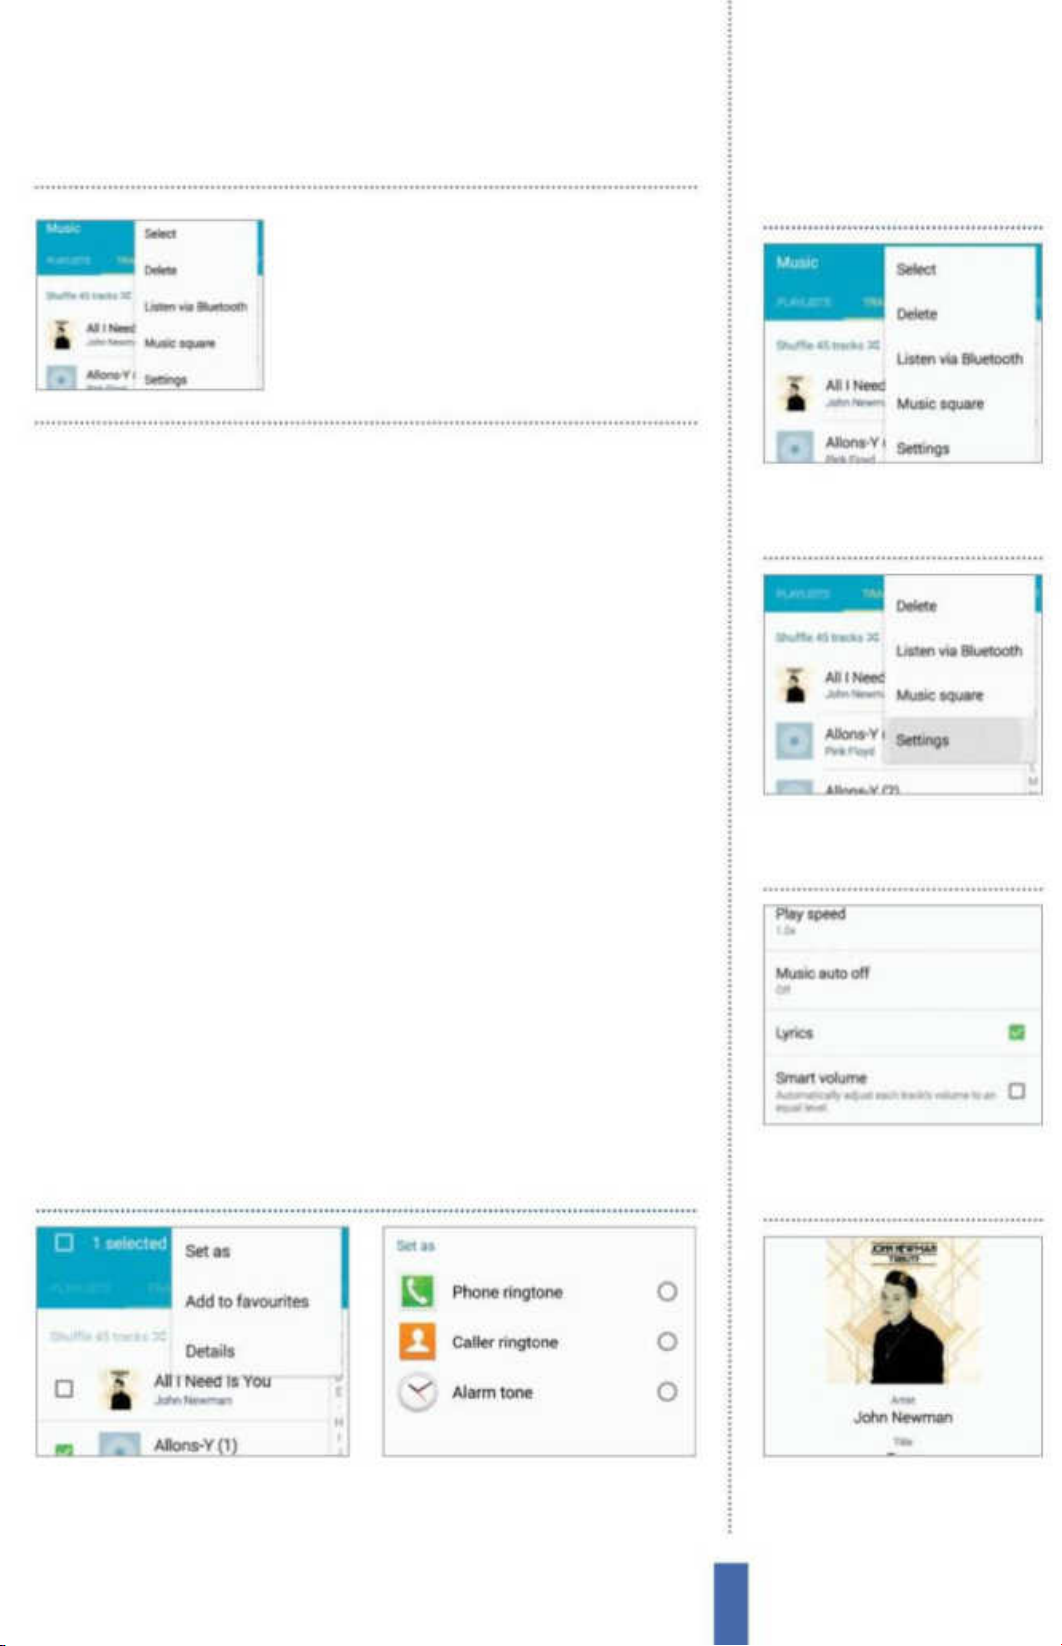
To delete a song, tap on
the menu button, choose
Delete and then pick
songs to remove
The appsMusic Player
View song lyrics
of tiles and tracks are chosen to best t them. If you are taken to a
play screen, tap the Music Square button to return.
Import more tunes
To import tunes via USB, plug the supplied cable into your Galaxy
and connect the other end to a computer housing your music
archive. We did have some issues utilising a Mac for this but a
Windows PC worked just ne. If your PC asks what you want to do
with the device after the USB is plugged in, choose the option to
examine the folders and les. Next, locate the Music folder within
the list.
You can then drag and drop les from your PC into the folder
with ease. These les are then ready to play on your Galaxy
instantaneously. To check that the copying process has completed
eectively, open the Music Player app and then, at the top of the
screen, swipe the menu bar to the right to see the Folders button.
Tap on this to reveal the folders and a new folder will now be
present. Tap on this to open it and see those les that you have just
Music player Open the Music
1
Player app and then tap the
menu button.
2 Settings Scroll down the menu
until you reach the bottom and
tap on the Settings option.
copied across from your PC. If you keep your nger on this folder,
you can add all of the les directly to your playlist.
Set as…
1 Select track Press and hold on a
track and then tap the menu icon
and choose the ‘Set as’ option.
2 Set as You can now choose a
song and use it as the alarm tone
whenever you set a wakeup call.
3 Locate Lyrics Scan the screen
to find the Lyrics option, then
tap to trigger the green tick.
4 Play song When you play a
song with the correct metadata
tags, lyrics will appear.
91
Page 92
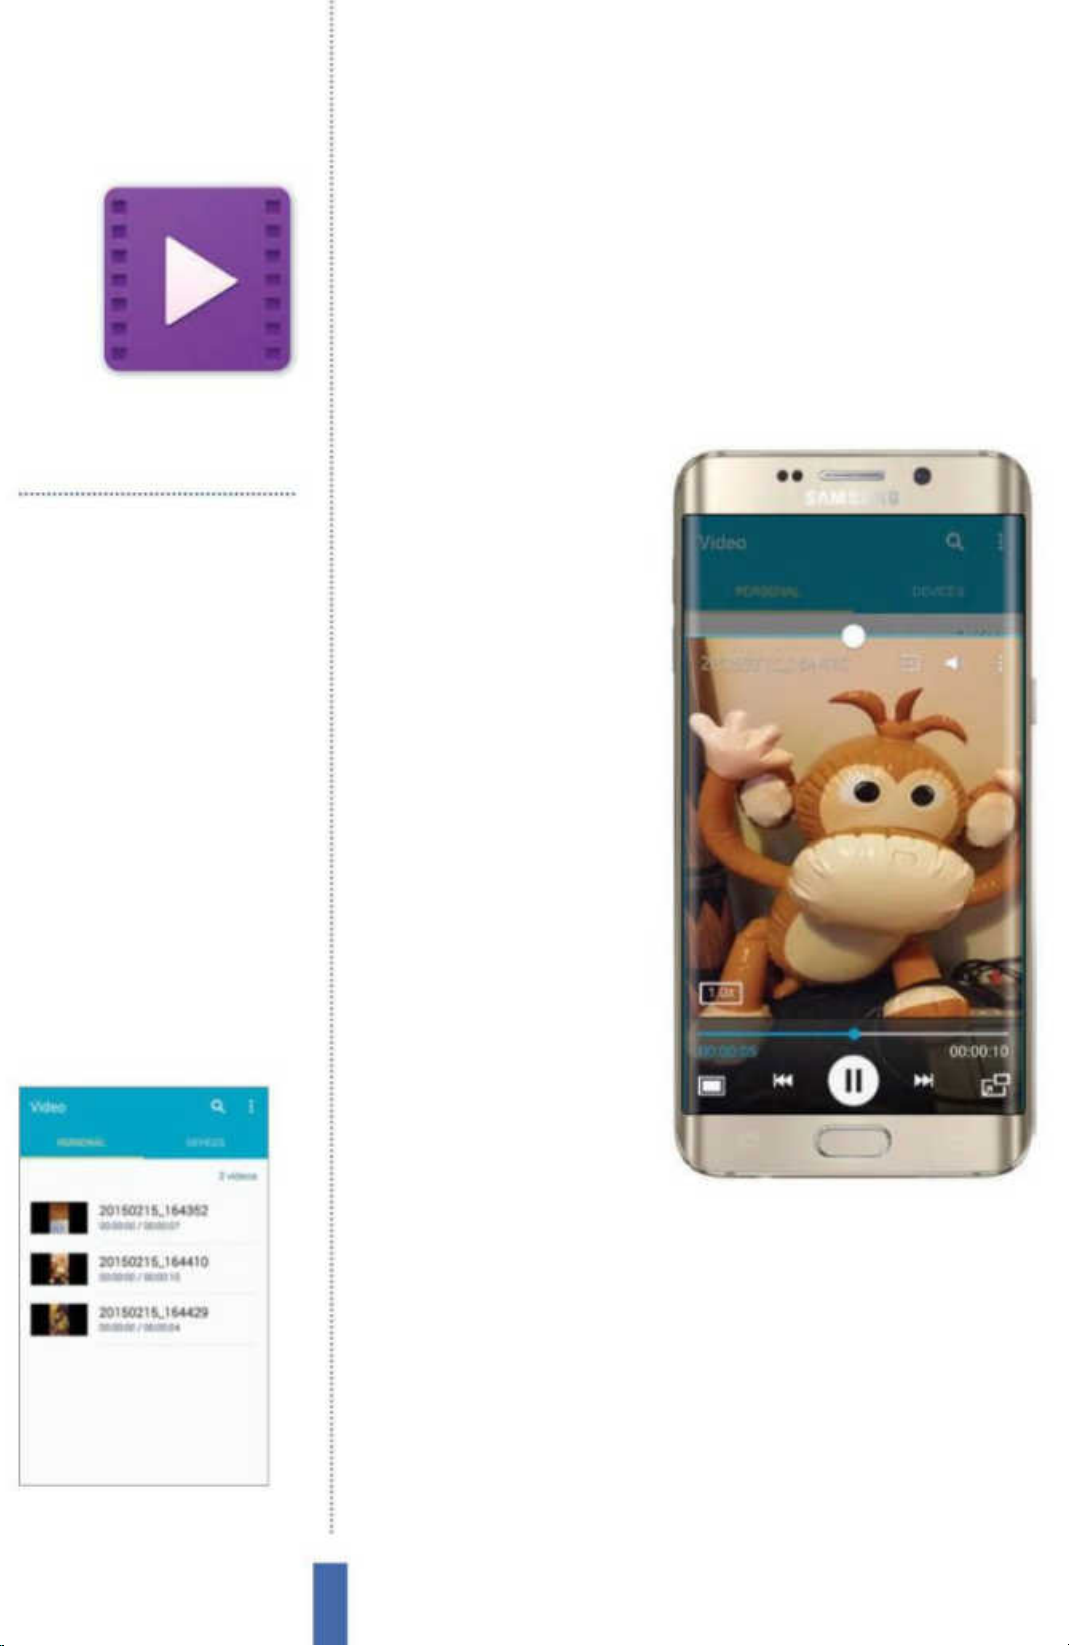
The apps Video Player
Video Player
You can play a wide variety of videos on your
Samsung Galaxy device
You’ll use it to…
Play movies
Watch a video file on your Tab
Edit videos
Trim your hom e video clips
Tag friends
Identify the people in your videos
Send via Bluetooth
Connec t to other Bluetooth devices
Float videos on-screen
Use the Pop up play option
Upload videos
Share your clips on YouTube
Fig 1 (right) Video Player makes great use of
your Samsung Galaxy’s powerful hardware
Watching videos
You have the ability to not
only play a range of videos
that are currently stored on
your Samsung Galaxy device,
but you can also choose to
manipulate them in a variety
of ways, such as tagging
people who appear inside
them or even trimming clips
down to focus on the main
action without having to
leave the Video app. You can
also share your videos via
other devices and apps, or
upload them to the internet.
Play a le
Playing a video le on
Fig 2 (above) Videos can be catalogued as
animated thumbnails. Tap to play one
the Samsung Galaxy is
straightforward, and the
Video app will appear to be
quite similar to many other devices playing the same sort of media,
albeit with a few tweaks relating to the particular platform, of course
(Fig 1). To begin, enter your App Drawer and tap on Video, which
will then open up the app and display the les. Decide on how you
would like the les to be displayed by tapping the menu icon in the
top-right corner and choosing ‘View as’. Now pick a display option
from Grid view, List view or Folder view (Fig 2). Once you have
scanned the list of les that are available, tap on the one that you
want to watch. As soon as you initiate the le, it will load and then
begin to play automatically.
92
Page 93
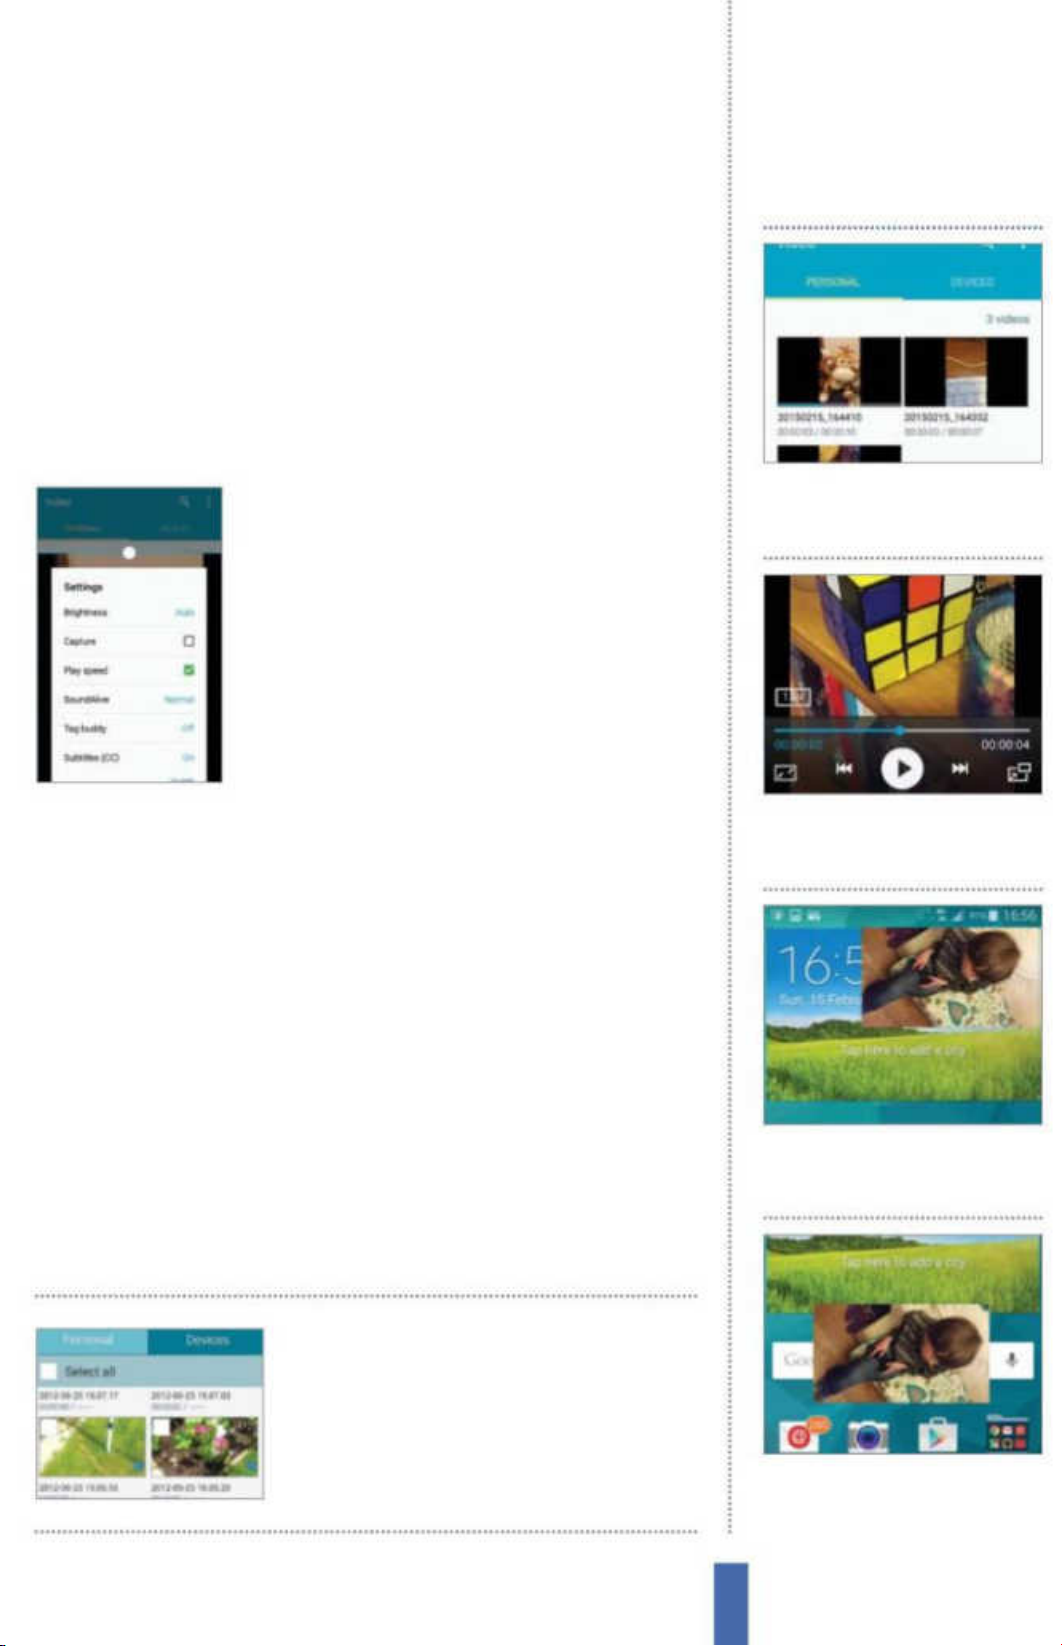
The appsVideo Player
Depending on the format of the video, you may need to rotate
your device in order to view the video at the correct aspect ratio. If
the playback controls are hidden from view (they tend to move out
of your way, giving you more screen real estate to enjoy the video
with, after a few seconds), just tap on the screen to display them
again. Press Pause and Play alternately to stop and start the lm, and
skip forwards and backwards to view other video les. Once the
video begins to play, the controls will disappear again.
Tweak playback options
While you are playing a video, tap on the
Menu button on your Galaxy and a new
pop-up menu will appear. Select Settings and
tap the Play Speed option, and you can then
increase the speed at which the video plays
so it is up to 1.5 times faster or instead lower
it to a minimum of 0.5X, which is half speed. If
the les are available on your device (usually
Use Pop up play
1
Choose video Open the Video
Player app and choose the video
you would like to play.
.srt les) then you can also switch on subtitles, and you can also get
your Galaxy to automatically play the next video le in the line-up
to save you manually selecting it. Also, from the Menu button, tap
Chapter preview to jump to specic points.
Shoot and tag videos
Of course, on a Samsung Galaxy, videos can also be shot as well
as viewed, although in this case the Video app must be placed to
one side for the moment as the Camera app comes back into play.
To shoot and tag your videos, open up the Camera app and then
tap to enter the Settings section at the top-left of the screen. Scroll
down the menu until you reach the GPS tag section. After tapping
this, a small window will appear on the screen. Tap on it and the
videos you shoot will now be tagged.
To select content to
2 Play video Tap on your chosen
video file and it will then appear
on-screen and start playing.
3 Pop-up Tap on the small Pop
up play icon in order to start
the function.
play from your Dropbox
account, tap the menu
icon and choose it
4 Move window Move the Pop
up play window around the
screen to work around it.
93
Page 94
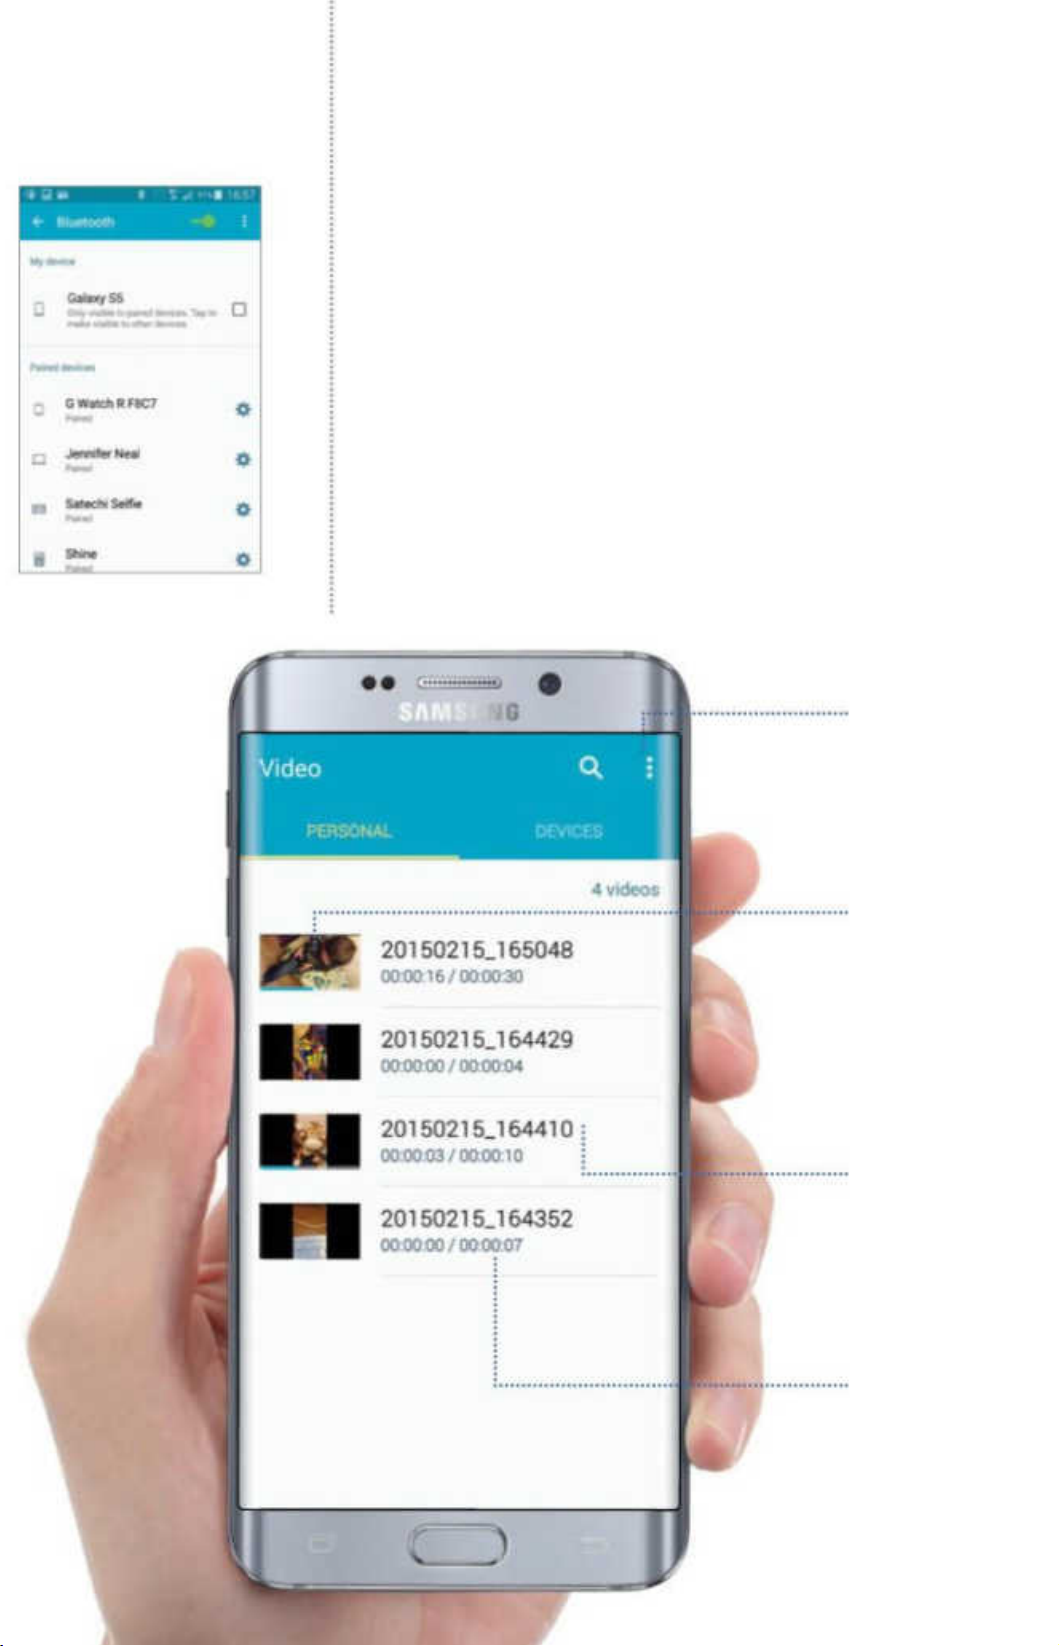
The apps Video Player
Connect to Bluetooth devices scanning and sharing
Sharing les has become almost second nature to users of Samsung
Galaxy devices – sharing a video via email, MMS or via social sites
such as Facebook is relatively common. You can choose to go
direct, however, and share it via Bluetooth – that is, transfer data
from one particular device to another. To do so, you will need to
switch on Bluetooth, which can be done by entering Settings from
the home screen. Under the Quick Settings section at the top is
the Bluetooth option. Flick the switch to On and the tiny Bluetooth
icon will appear at the very top of your screen. Now, you will need
to connect to a device to share data, so tap on Bluetooth beside
the switch and then Scan at the bottom of the next screen. When a
device is found, it will be listed under Available devices. Tap one to
Thumbnails
In thumbnail view,
the images for
each vid eo are
animated, giving
you a prev iew of
the content
Running time
Underneath the title is
the total running time.
Before that is the current
position in the video
Top men u
The menu at the top of
the scre en allows you to
decide how you will view
the video content on yo ur
Galaxy device
Fig 3 (above) Connect, or ‘pair’, with
a
nother device to send data via Bluetooth
Video title
The tex t situated next to
the file, is the fil e name of
that video
Page 95
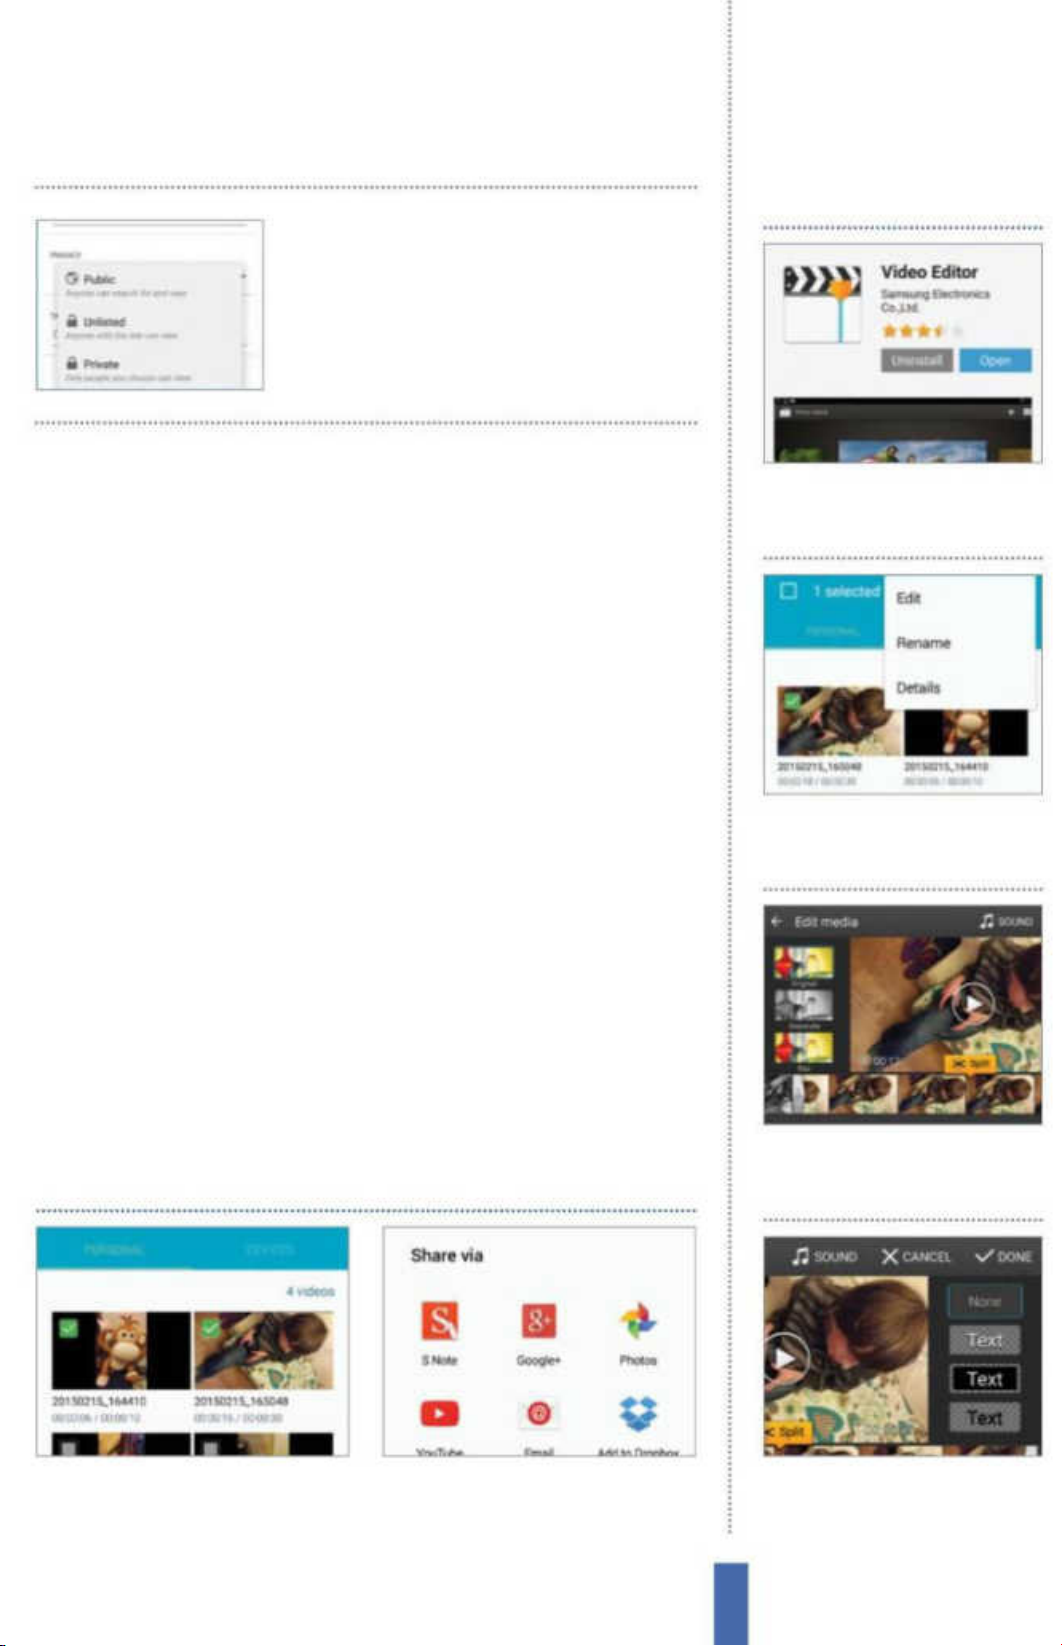
Before you post your
video to YouTube, tap on
Privacy so you can limit
who is able to view it
The appsVideo Player
Trim video clips
‘pair’, or connect, then follow the conrmation request that appears.
Now, return to the Video app, nd and play your selected video, tap
on the share icon at the top, select Bluetooth and tap your paired
device; the video will be sent directly to it.
Upload to YouTube
It is possible to share your video with many dierent devices and
services, but posting to YouTube is slightly dierent because, by
doing it this way, you are allowing the general public to view
your work instead of an individual or a select group of people.
The process of uploading to YouTube is, on the face of it, similar
to sharing data with other services. Hence, you open up Video
Player and select your video, and then tap on the Menu button
to examine the options. Near the top of the menu is the Share
via feature, which you can tap to enter a full screen of possible
destinations. This is where you can select YouTube. Tap YouTube,
and then enter the title of the video you want to upload, a
description, tags and, indeed, whether or not you want to make it
Get software Start off by
1
downloading the Video Editor
app from Galaxy Apps.
2 Open in Video In the Video
app, select a video, tap the
menu icon and choose Edit.
public. Then tap the upload key – which is the up arrow at the top
of the screen – in order to send the video to YouTube.
Select multiple videos for upload
1 Select Share To share multiple
videos at once press and hold on
any video and then tick them.
2 Select video Now tap the menu
icon, choose the Share Via option
and then pick a means to share.
3 Trim In Video Editor, tap on the
video and then move the frame
around the video to trim it.
4 Confirm Trim Tap the Done
icon, and the new parameters
will be saved.
95
Page 96
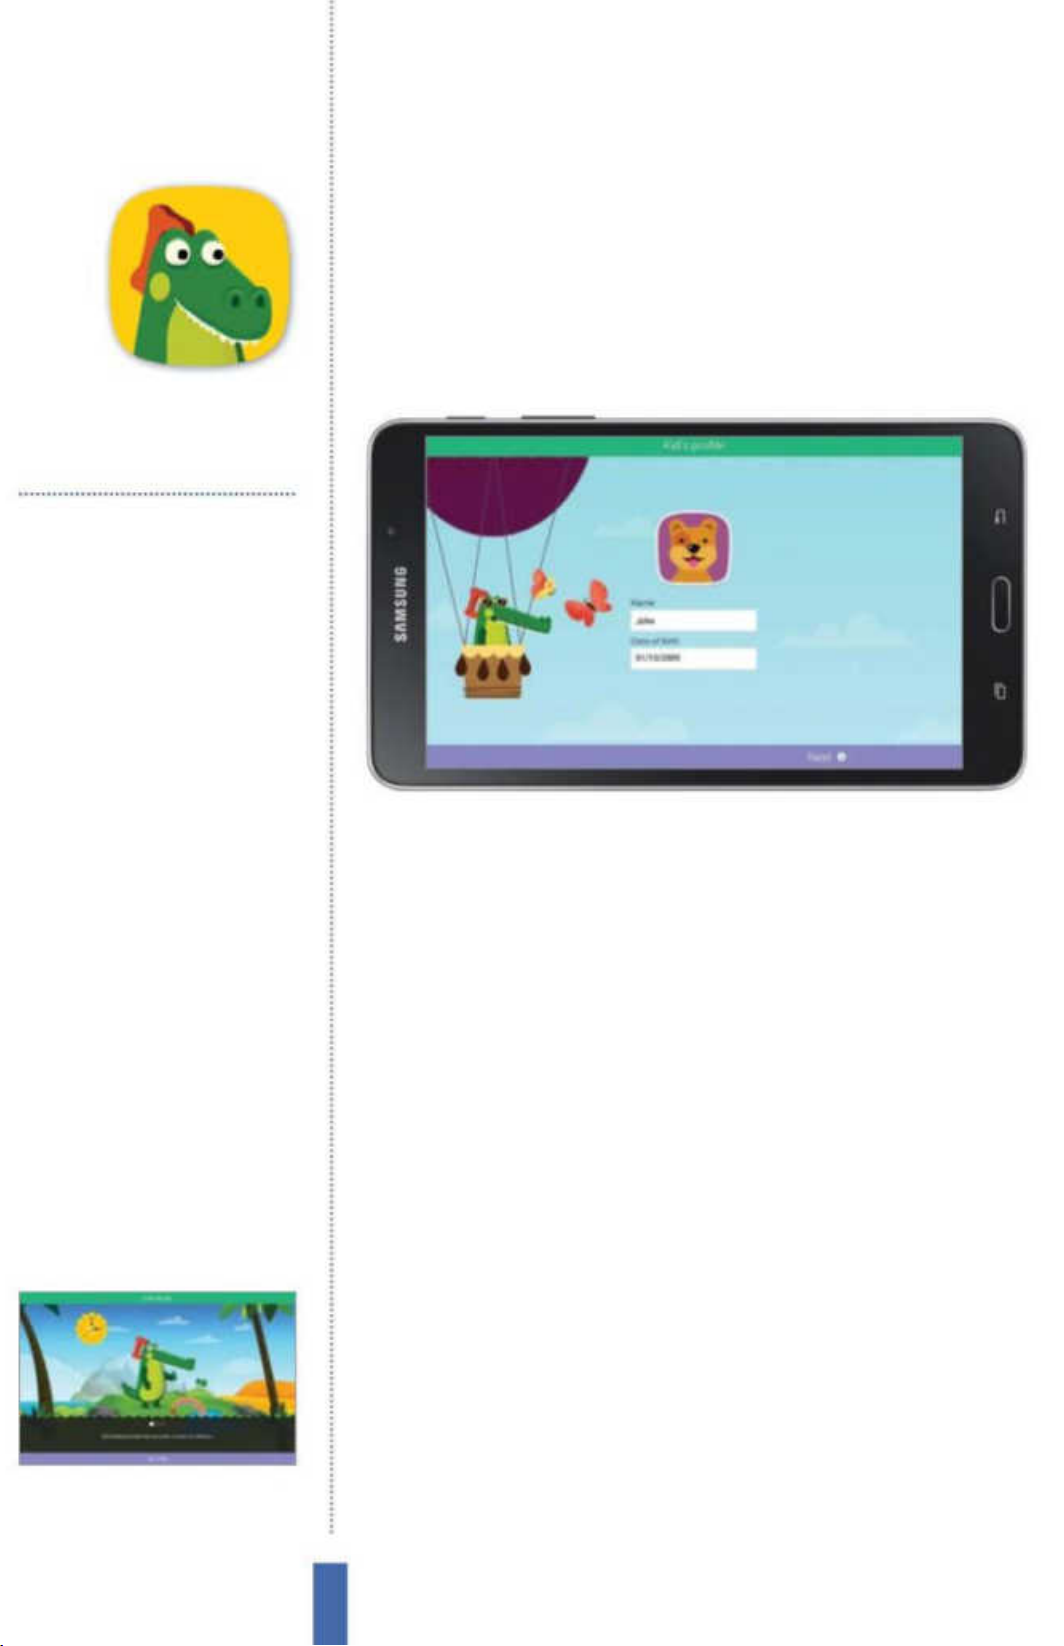
The apps Kids Mode
You’ll use it to…
Protect the settings on a Tab
Stop children accidentally wiping the device
Track the device usage
Understand how mu ch time is spent on
the tablet
Set daily usage limits
Control yo ur children’s access to t he device
and easily ensure use is n ot excessive
Kids Mode
Samsung’s Kids Mode allows you to control which
apps your children can use via an intuitive interface
Limit approved media
Ensure kids see only appropriate content
Keep children safe
Ensure they only use content that you
approve of
Fig 1 (above right) Access to features in
Kids Mode can be adjusted to suit each
user’s age
Installing Kids Mode
Some Galaxy devices don’t have Kids Mode installed by default,
instead they have a shortcut which redirects to Galaxy Apps. Click
the icon you’ll be presented with a download option. If the shortcut
is not included, try adding a widget to your home screen and see if
‘Kids Mode 1x1’ appears. If it does, add this to your home screen and
click to download and install the main app.
Explore the features
The Kids Mode application uses large, bright icons that are attractive
to children, together with an intuitive user interface and built-in
applications. There is also a ‘Kids Store’ section; this includes both
free and paid Samsung and third-party applications for Kids Mode
for additional functionality. Kids Mode already includes a drawing
Fig 2 (above)
screens, familiarise yourself with the
Kids Mode features
After the introduction
and colouring application in which children can either draw their
own pictures with a number of brushes or they can use one of a
large number of stickers before saving their creations to view in the
gallery. A sound recording tool allows children to alter the sound
of their voice to match on-screen characters and a camera app
enables them to take pictures or videos. Access and usage limits can
be controlled individually.
96
Page 97
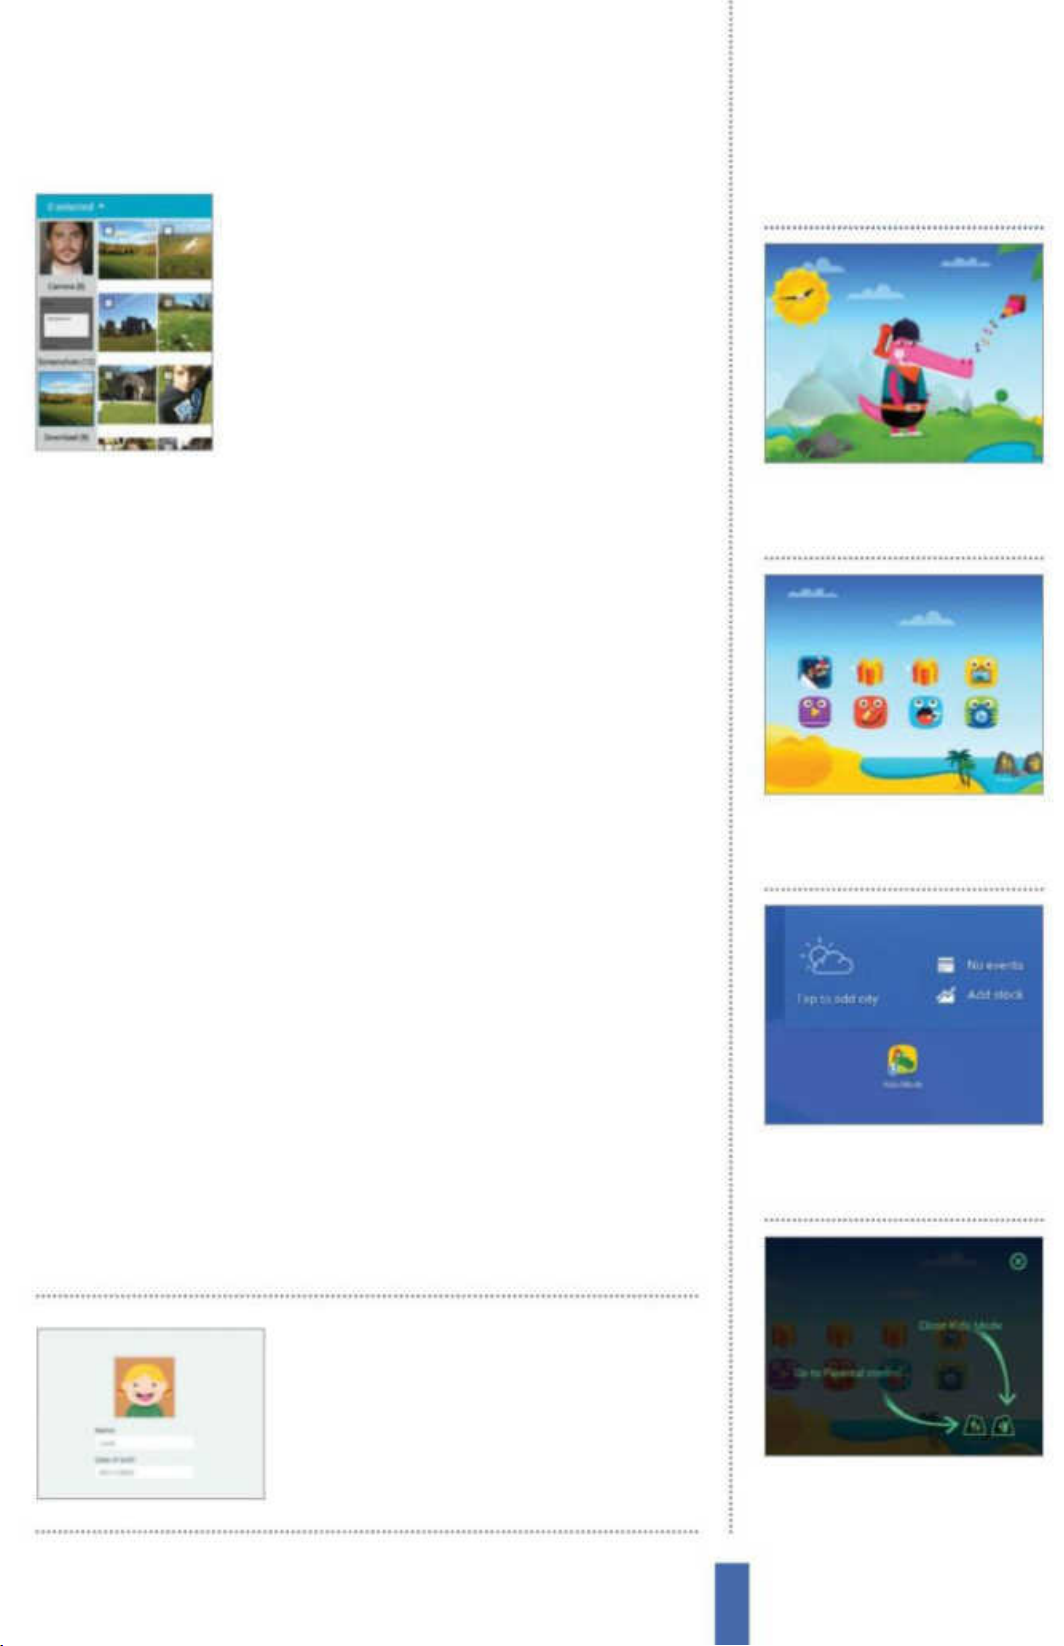
Adding your movies
Kids Mode includes a media player, allowing
you to load kid-friendly movies onto your
device. This too is subject to usage limits if you
have dened them. Internal storage is limited
but microSD cards of up to 128GB are available
on some devices, so to ensure that the device
continues to run smoothly it’s best to put
movies on the card. This also makes copying the les across from a
PC easier. Videos can be approved per item, allowing you to have
multiple videos on a card and allow access to them individually.
Change authorised applications
Within Kids Mode, it is possible to add applications that are
The appsKids Mode
More Kids Mode tips
1
Playful crocodile Your children
can interact with the crocodile
and the vibrant scenery.
downloaded via the Play Store or Samsung Apps in addition to
the purpose-built apps that can be installed from the Kids Mode
store. By default, all non-Kids Mode apps are disabled, so a parent
needs to log in (by entering the secure PIN) and authorise each
app individually. Although authorised apps eectively launch
outside of the Kids Mode app, children are still unable to break out
of the limited environment, because if they close the app or press
the home button, they will be returned back to the Kids Mode
interface. Conguration of the authorised applications can be found
in the parental control menu, which is accessed using the ‘handholding icon’ in the bottom right. When adding third-party apps,
it’s important to remember that they’re adapted for children, so you
should ensure that the content is appropriate and particularly that
they don’t allow the child to break out of the ‘walled garden’ of Kids
Mode via access to built-in web browsers, app launchers or similar.
You should also be aware that when applications are automatically
updated they will remain accessible from within Kids Mode.
2 Using gifts Authorised apps
first appear to your children as
gifts that they can click to reveal.
3 Launching Kids Mode be found
in the application launcher, and
can be added to the desktop.
Within Kids Mode, you
can customise your child’s
prole; multiple children
can have an account
4 Exiting A ‘door’ in the bottom
right is used to exit. It’s PIN
protected for restricted access.
97
Page 98
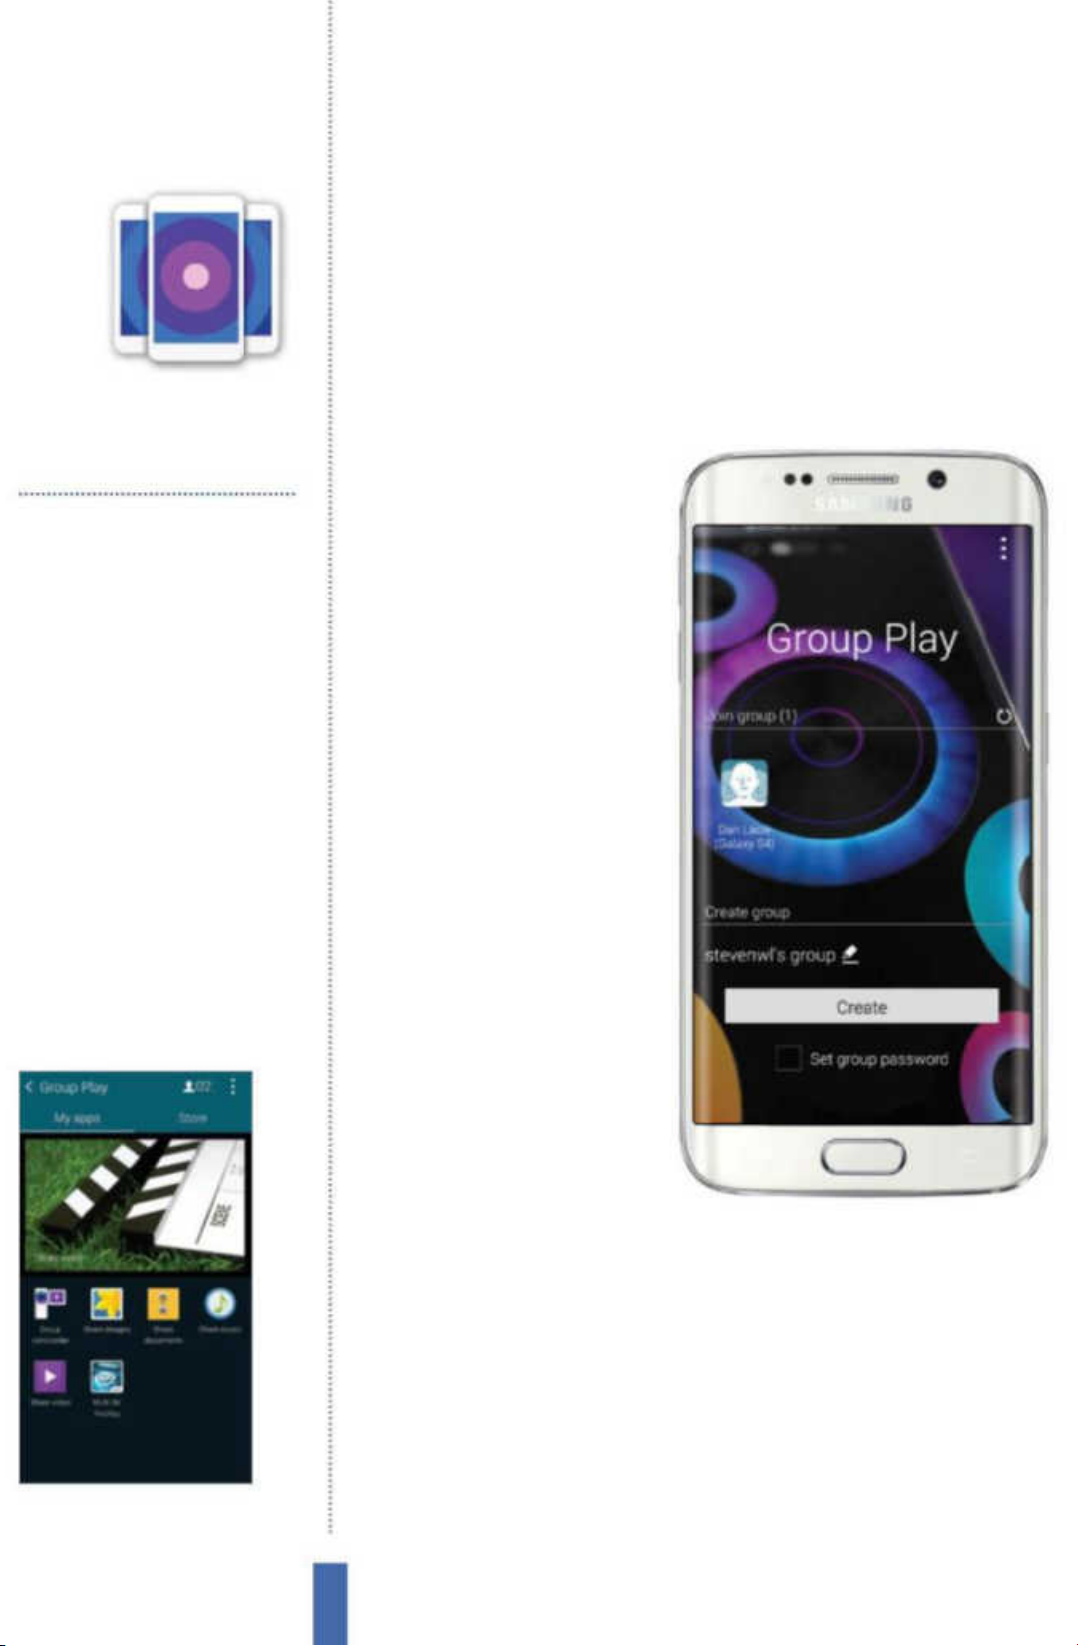
The apps Group Play
Group Play
Play games, and share videos, photos and more
with friends over multiple devices with Group Play
You’ll use it to…
Share content quickly
Share photos, videos and music
Challenge friends
Play multiplayer games
Share documents
Send files to users
Doodle over photos
Edit photos with friends
Connect multiple devices
Link up to f ive devices
Invite who you like
Create private groups for friends
Fig 1 (right) Newly created Groups in
Group Play can be accessed instantly
Share and play
with friends
Group Play from Samsung is
a great app for connecting
with other Samsung users,
regardless of whether you
have a Wi-Fi or 3G/4G
connection. This is possible
through the use of Wi-Fi
direct, which can create
a closed o connection
between multiple devices,
allowing you to transfer data
and share content with ease.
Host a group
play session
To start your Group Play
Fig 2 (above)
friends or users in other countries
Connect with local
session so you can connect
with another device, open
the Group Play app. The
start window is split into two
sections: Join Group, which
displays any groups available to access and Create group which
allows you to create your own group. As soon as another Group
Play user creates a Group it will appear in this window. Tap on the
Group name to join it. For more joining options tap the options
button at the top right of the window and tap settings. Here you
can edit your Group Play nickname and decide who can send you
invitations. Nearby Friend invitations will connect you with each
other via a Wi-Fi direct connection, whereas you will connect with
remote friends via a Wi-Fi or 3G/4G connection. When creating a
98
Page 99
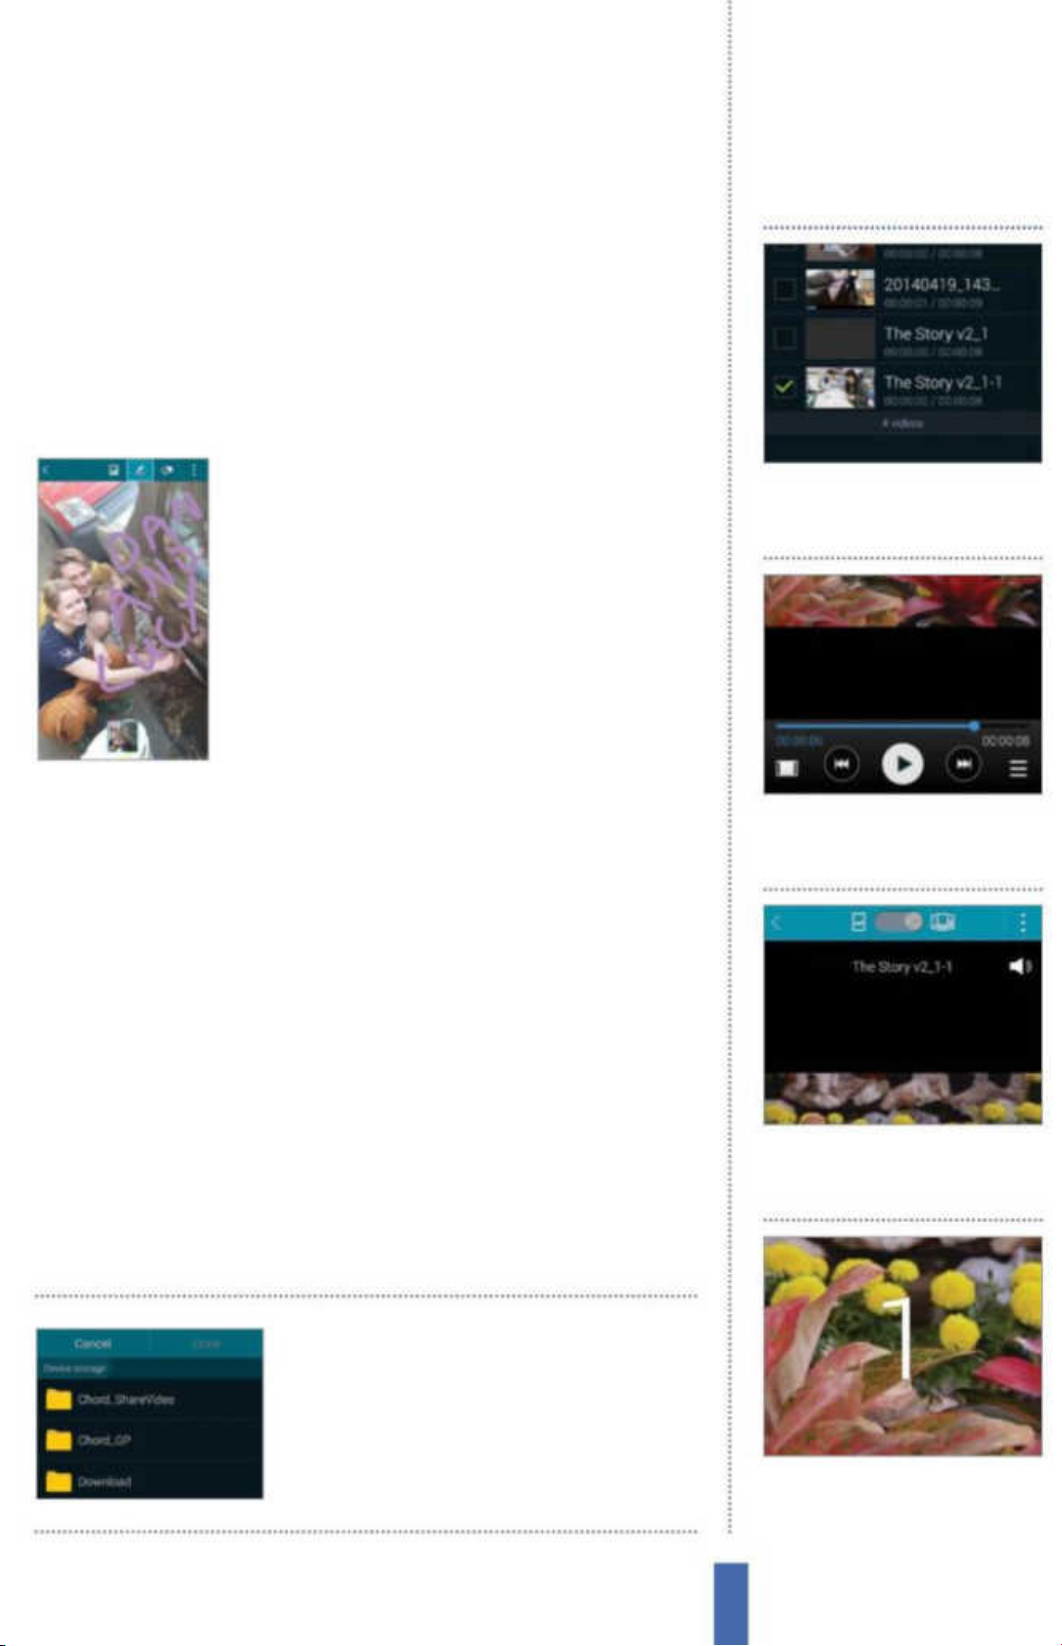
The appsGroup Play
group tap the pencil icon next to the group name to edit it. Tick
Set Group password if you would like to secure group access then
tap Create. You will be prompted to input a Group Play passcode.
Tap OK and you will be taken to your new Group Play session. Other
Group Play users within close range will be able to join your session.
You will receive a notication whenever someone new joins your
session. Now you can share and play together in Group Play.
What Group Play can do
Once you have started a Group Play session and
another user has joined, tap on the person icon
next to the options button to see which users
are active in the session. The model of Galaxy
you and the other user have will determine
what functions are available in Group Play.
Group Camcorder, which allows you to view
live camera feeds o other users’ devices, is
Video over two screens
1
Share video In Group Play tap
Share Video. Select a video file
to share then tap Done.
not available on all Samsung devices. All Galaxy smartphones
and tablets will allow you to share music, images, videos and
documents, and play games with other users in Group Play
How Wi-Fi Direct works
Whichever device is hosting the Group Play session will create
a Wi-Fi Direct signal. Other devices can connect to this signal in
the same way that you would connect your Galaxy to a Wi-Fi
connection. This is the reason why you can use Group Play without
a Wi-Fi or 3G/4G connection, because the connection is coming
from the hosting device itself. However this does mean that whilst
you’re connected to a Group Play session via Wi-Fi direct you won’t
be connected to a normal Wi-Fi connection, you’ll have to leave
Group Play to reconnect to the internet.
When sending les to
2 Playback Once another device
has opened it, tap the screen to
display playback options.
3 Multi-screen In the top tool bar
press and drag the slider to the
multiple device icon.
another user’s device you
can access any folder
structure on your Galaxy
4 Split video The video will be
split into two, dividing itself up
across the multiple devices.
99
Page 100
The apps
Private
mode
Private mode lets
you remove
shared content
from a group
Add more
Tap here to add more
content to the
viewing window
Doodling
Use the doodle tool to
add annotations to a
document or image
Save files
Tap the option button to
Save files or remove them
from Group play
Fig 3 (above) Send your favourite photos
with handwritten notes to friends
Share content in Group Play
In the Group Play session window under the My Apps tab you will
nd available sharing options. Tap on Share Images. You will be
connected to the Galleries app where you can browse through
your device’s images. Tap the menu icon in the top-right corner of
the window to view images by Time or Album. Tap on the image
you want to share or Select all to import all of the images from your
current gallery into the Group Play session. When happy with your
selection tap Done. A person icon will appear next to the Share
Images button in any other user’s Group Play app who are currently
linked to your session. When a Group Play user taps Share Images
they will instantly be taken to the photo that you just shared. When
viewing shared images, tap the options button then tap Save to
Group Play
 Loading...