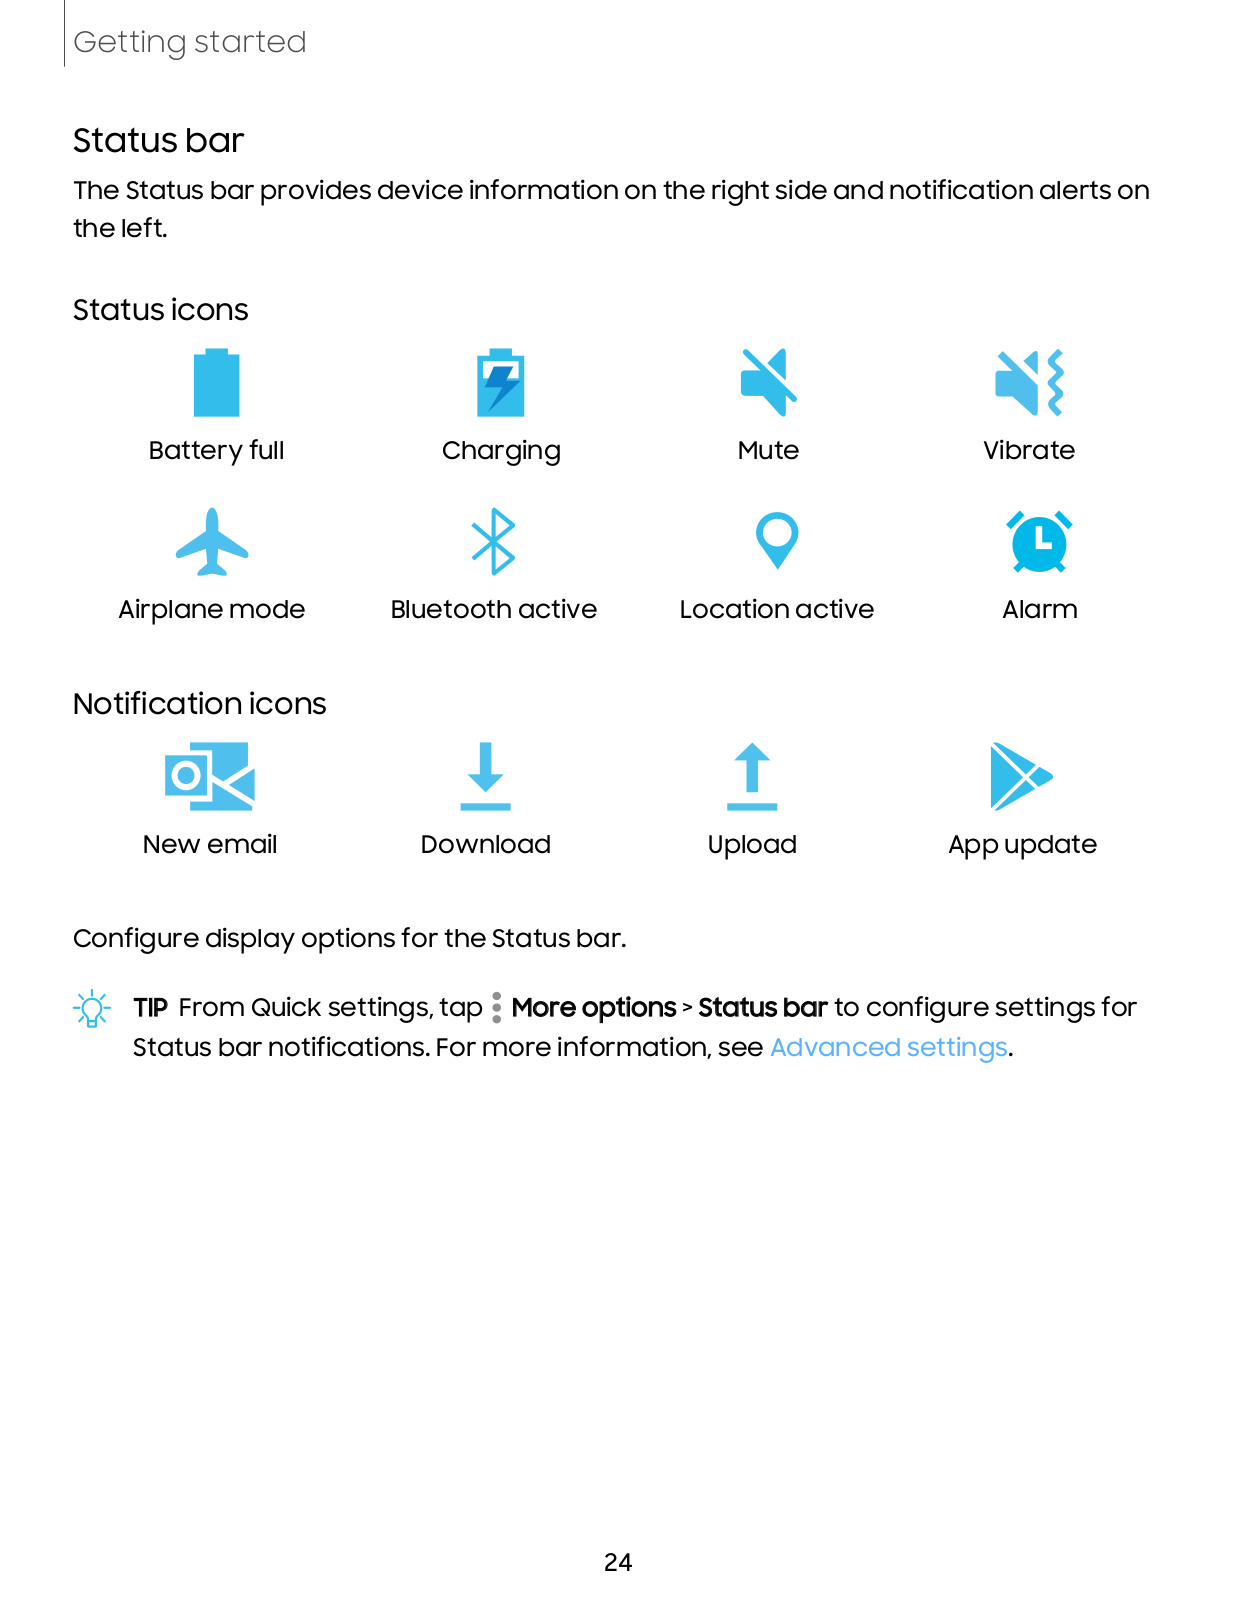
How it Works
Log In / Sign Up
Buy Points
How it Works
FAQ
Contact Us
Questions and Suggestions
Users
Samsung
Loading...
G
Galaxy Tab 4 7.0
2
GALAXY TAB 4 7 WI-FI
Galaxy Tab 4 8.0 4G
GALAXY TAB 4 8 4G
GALAXY TAB 4 8 SM-T335
Galaxy Tab 4 NOOK
Galaxy Tab 4 NOOK 10.1
2
GALAXY TAB 5
Galaxy Tab 7.0
2
Galaxy Tab 7.0 Plus
2
Galaxy Tab 7.0 Plus Wi-Fi
Galaxy Tab 7.0 Wi-Fi
3
Galaxy Tab 7.7
3
Galaxy Tab 7.7 GT-P6800
GALAXY TAB 7.7 GT-P6810
GALAXY Tab 7.7 Plus SC-01E
GALAXY Tab 8.9
9
Galaxy Tab 8.9 GT-P7300
2
Galaxy Tab 8.9 GT-P7310
GALAXY TAB 8.9 GT-P7320T
GALAXY TAB 8.9 LTE
Galaxy Tab 8.9 Wi-Fi
Galaxy Tab A
22
Galaxy Tab A 10.1
8
Galaxy Tab A 10.1 2019
Galaxy Tab A 10.1"" 2/32 GB Wi-Fi Złoty
Galaxy Tab A 10.1 4G
2
Galaxy Tab A 10.1 Wi-Fi
2
Galaxy Tab A 10.1 Wifi + 4G 32GB Zwart
Galaxy Tab A 10.5
4
Galaxy Tab A 10.5 4G
Galaxy Tab A 10.5 Wi-Fi
2
Galaxy Tab A 2016
Galaxy Tab A 2016 7.0 Wi-Fi
Galaxy Tab A3LSGHI987
Galaxy Tab A - 4G
2
Galaxy Tab A 7.0 SM-T280
Galaxy Tab A7 10.4"" 3/32 GB Wi-Fi Szary
Galaxy Tab A7 Lite
Galaxy Tab A7 Lite 8.7'' 3/32 GB Wi-Fi Srebrny
Galaxy Tab A7 Lite 8.7'' 3/32 GB Wi-Fi Szary
Galaxy Tab A7 Lite WiFi
Galaxy Tab A 8.0
5
Galaxy Tab A 8.0 2019
Galaxy Tab A 8.0 (2019) 32 GB Wifi Zwart
Galaxy Tab A8 10.5"" 4/128 GB Wi-Fi Szary
Galaxy Tab A8 10.5"" 4/64GB LTE Wi-Fi Srebrny
Galaxy Tab A 8.4
2
Galaxy Tab A8 LTE
Galaxy Tab A8 Wi-Fi
Galaxy Tab A9+ 11"" 4/64 GB 5G Wi-Fi Granatowy
Galaxy Tab A9+ 11"" 4/64 GB 5G Wi-Fi Szary
Galaxy Tab A9+ 11"" 4/64 GB Wi-Fi
Galaxy Tab A9+ 11"" 4/64 GB Wi-Fi Niebieski
Galaxy Tab A9+ 11"" 4/64 GB Wi-Fi Szary
Galaxy Tab A9+ 11"" 8/128 GB 5G Wi-Fi
Galaxy Tab A9+ 11"" 8/128 GB 5G Wi-Fi Niebieski
Galaxy Tab A9+ 11"" 8/128 GB 5G Wi-Fi Szary
Galaxy Tab A9+ 11"" 8/128 GB Wi-Fi
Galaxy Tab A9+ 11"" 8/128 GB Wi-Fi Niebieski
Galaxy Tab A9+ 11"" 8/128 GB Wi-Fi Szary
Galaxy Tab A - 9.7 - 4G
Galaxy Tab A 9.7 4G LTE
Galaxy Tab A - 9.7 - Wi-Fi
2
Galaxy Tab A 9.7 Wi-Fi con S Pen
Galaxy Tab A9 8.7"" 4/64 GB LTE Wi-Fi
Galaxy Tab A9 8.7"" 4/64 GB LTE Wi-Fi Granatowy
Galaxy Tab A9 8.7"" 4/64 GB LTE Wi-Fi Szary
Galaxy Tab A9 8.7"" 4/64 GB Wi-Fi
Galaxy Tab A9 8.7"" 4/64 GB Wi-Fi Niebieski
Galaxy Tab A9 8.7"" 4/64 GB Wi-Fi Szary
Galaxy Tab A9 8.7"" 8/128 GB LTE Wi-Fi
Galaxy Tab A9 8.7"" 8/128 GB LTE Wi-Fi Granatowy
Galaxy Tab A9 8.7"" 8/128 GB LTE Wi-Fi Szary
Galaxy Tab A9 8.7"" 8/128 GB Wi-Fi
Galaxy Tab A9 8.7"" 8/128 GB Wi-Fi Granatowy
Galaxy Tab A9 8.7"" 8/128 GB Wi-Fi Szary
Galaxy Tab Active
Galaxy Tab Active 2 4G
Galaxy Tab Active 2 Wi-Fi
Galaxy Tab Active2 Wifi + 4G Zwart
GALAXY TAB ACTIVE 8 4G
GALAXY TAB ACTIVE 8 WI-FI
Galaxy Tab Active Pro
Galaxy Tab Active Pro 64GB Wifi+4G Zwart
Galaxy Tab Active SM-T360
Galaxy Tab A SM-T357T
Galaxy Tab A SM-T380
2
Galaxy Tab A SM-T597V
Galaxy Tab A - Wi-Fi
2
Galaxy Tab E
19
Galaxy Tab E 8
GALAXY TAB E (9.6, 3G)
3
Galaxy Tab E 9.6 WiFi
Galaxy TAB E Lite
Galaxy Tab Elite kids
Galaxy Tab E Lite SM-T113
Galaxy Tab E NOOK
2
GALAXY TAB ET377P
Galaxy Tab Galaxy Tab 10.1 16GB
Loading...
Loading...
Nothing found
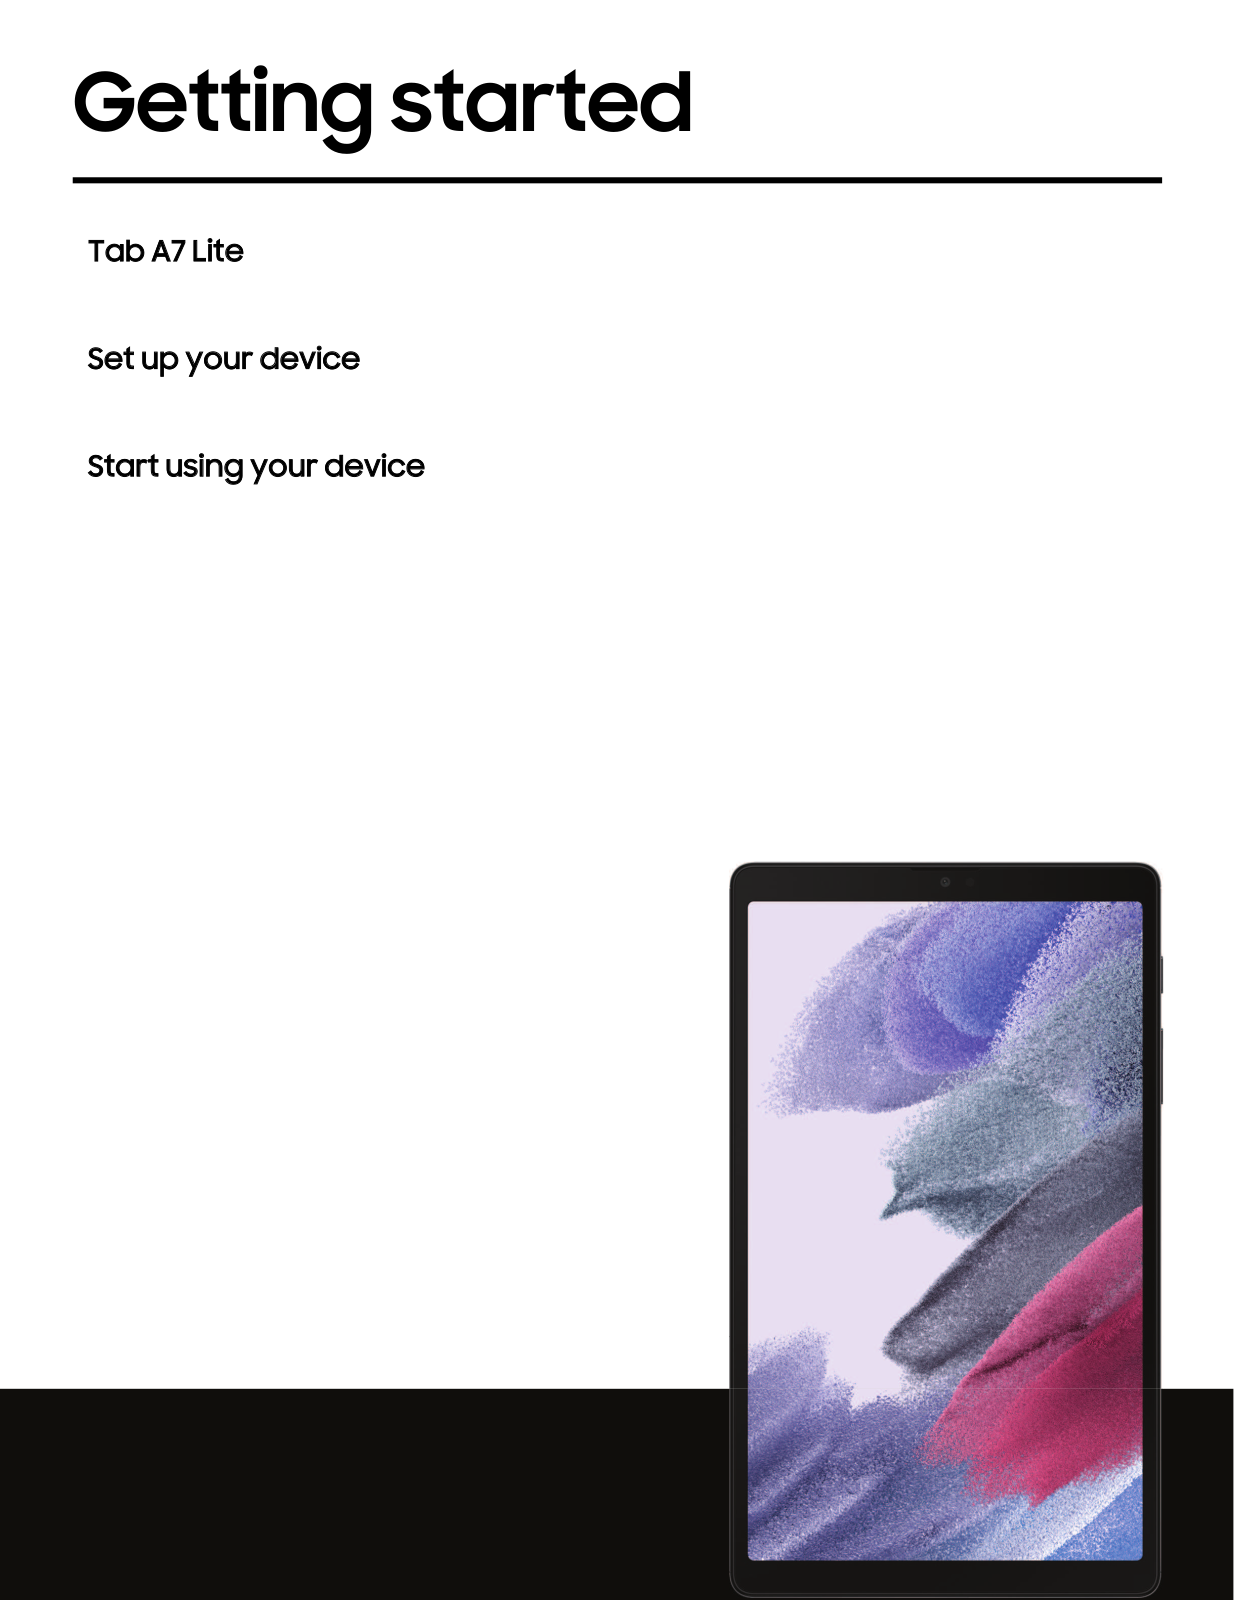
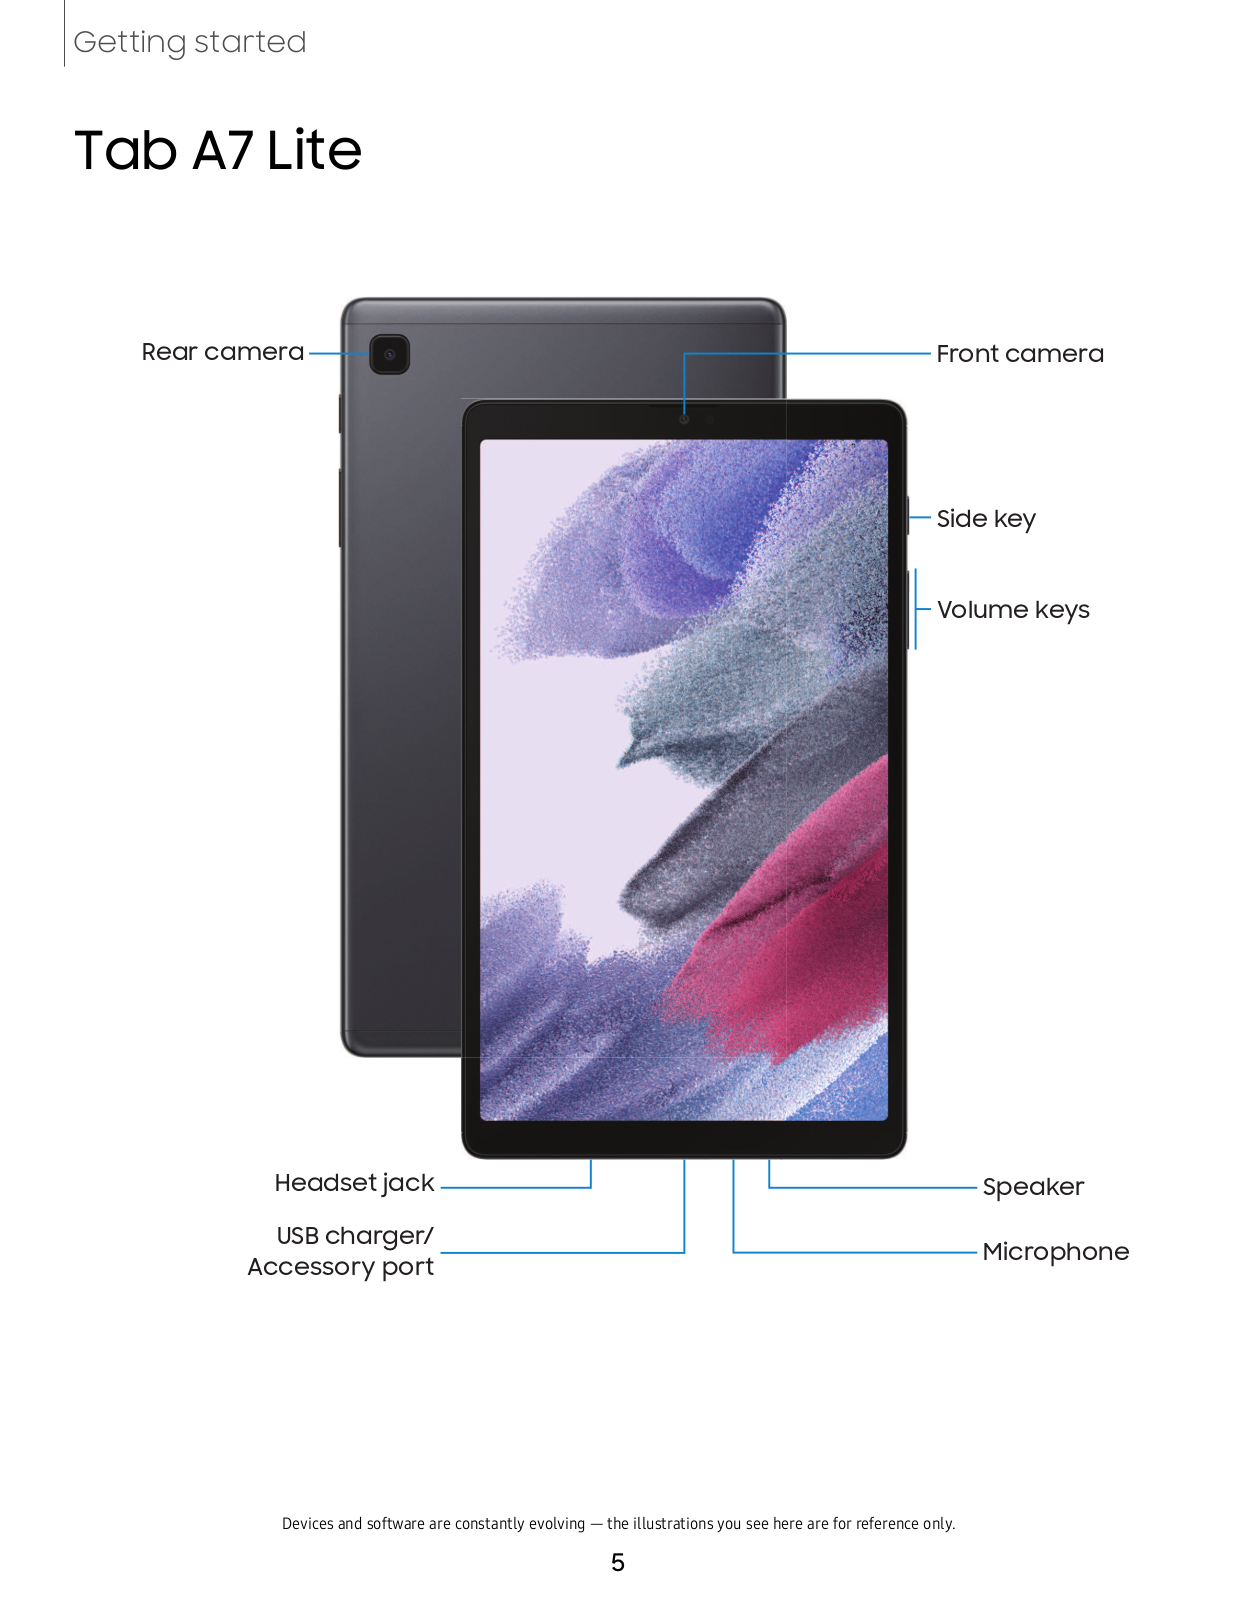
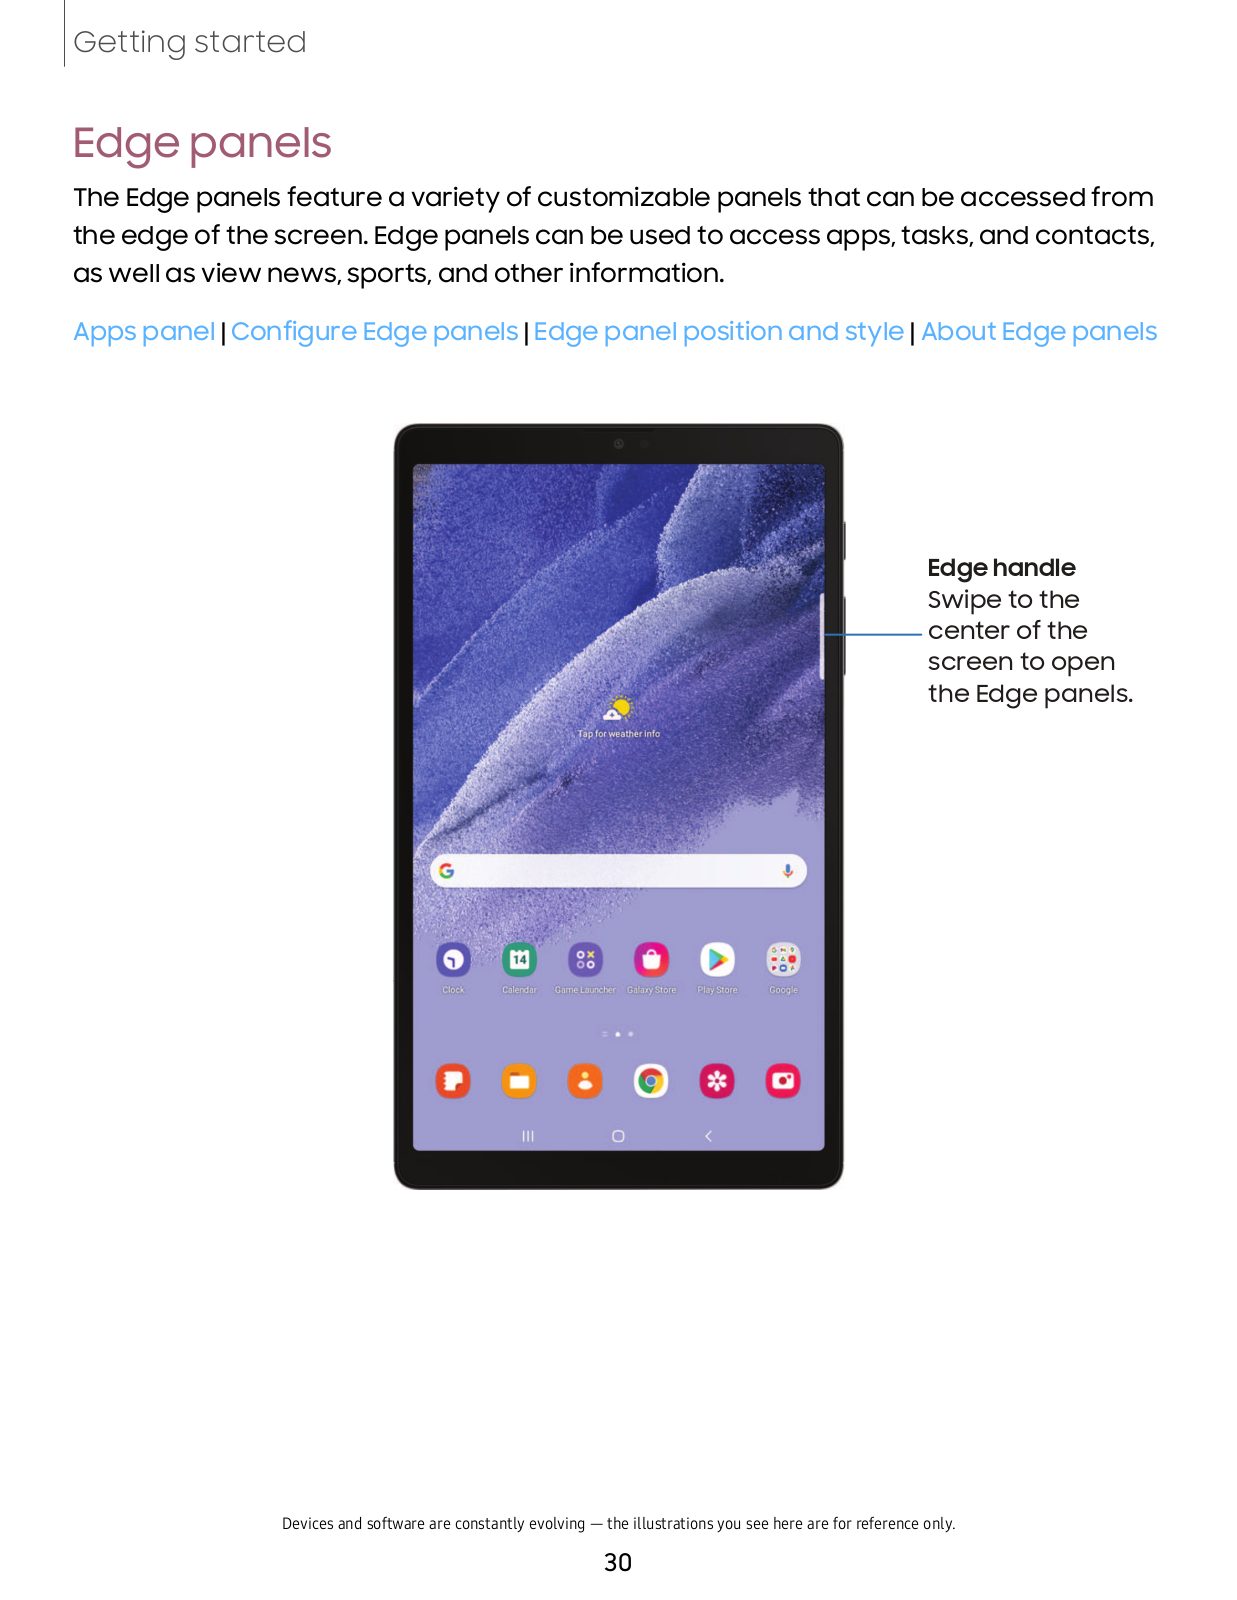
Galaxy Tab A7 Lite
User Manual
129 pgs
7.01 Mb
0
Table of contents
Loading...
Samsung Galaxy Tab A7 Lite User Manual
...
Samsung User Manual
Download
Specifications and Main Features
Frequently Asked Questions
User Manual
Download
Loading...
+
hidden pages
Unhide
You need points to download manuals.
1 point = 1 manual.
You can buy points or you can get point for every manual you upload.
Buy points
Upload your manuals
 Loading...