

Level
7.
Disassembly and assembly Instructions
7-1.
Repair
2
7-1-1.
1
Disassembly
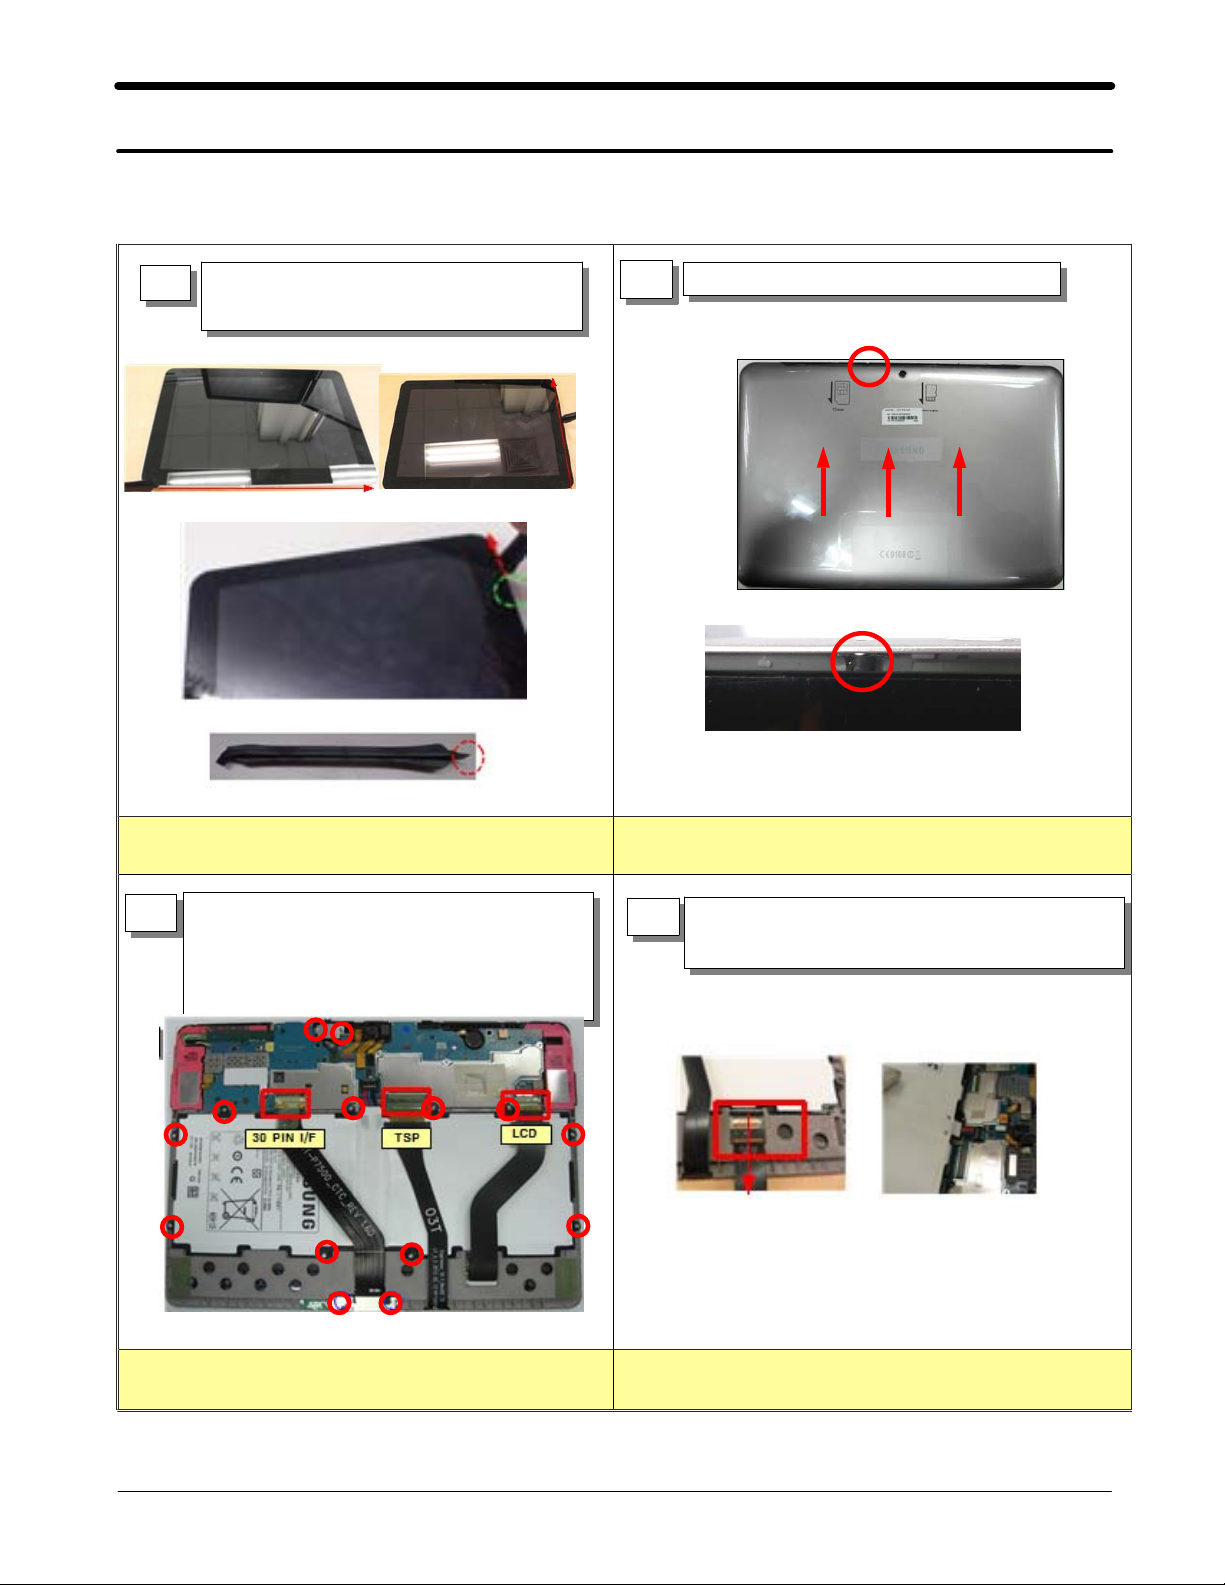
Disassemble the rear cover with the front
cover by using the hook
Caution) Be careful Earjack damage
(
2
Be careful not to scratch cover.
Follow the numbered sequence when you disjoint
Detach3insulation tapes.
3
Carefully release the screws at14different
locations from the Front.
L1.4*2.5, Torque
(
Be careful not to scratch cover
and damage to FPC.
1.1 ± 0.1
kgf.cm)
Be careful not to damage to EARJACK.
4
Separate LCD FPCB,IF FPCB, Battery from the
PBA.
Be careful not to damage the FPCBs
Be careful not to damage the wires
7-1
SAMSUNG Proprietary-Contents may change without notice
This Document can not be used without Samsung's authorization
Level2Repair
7.
5
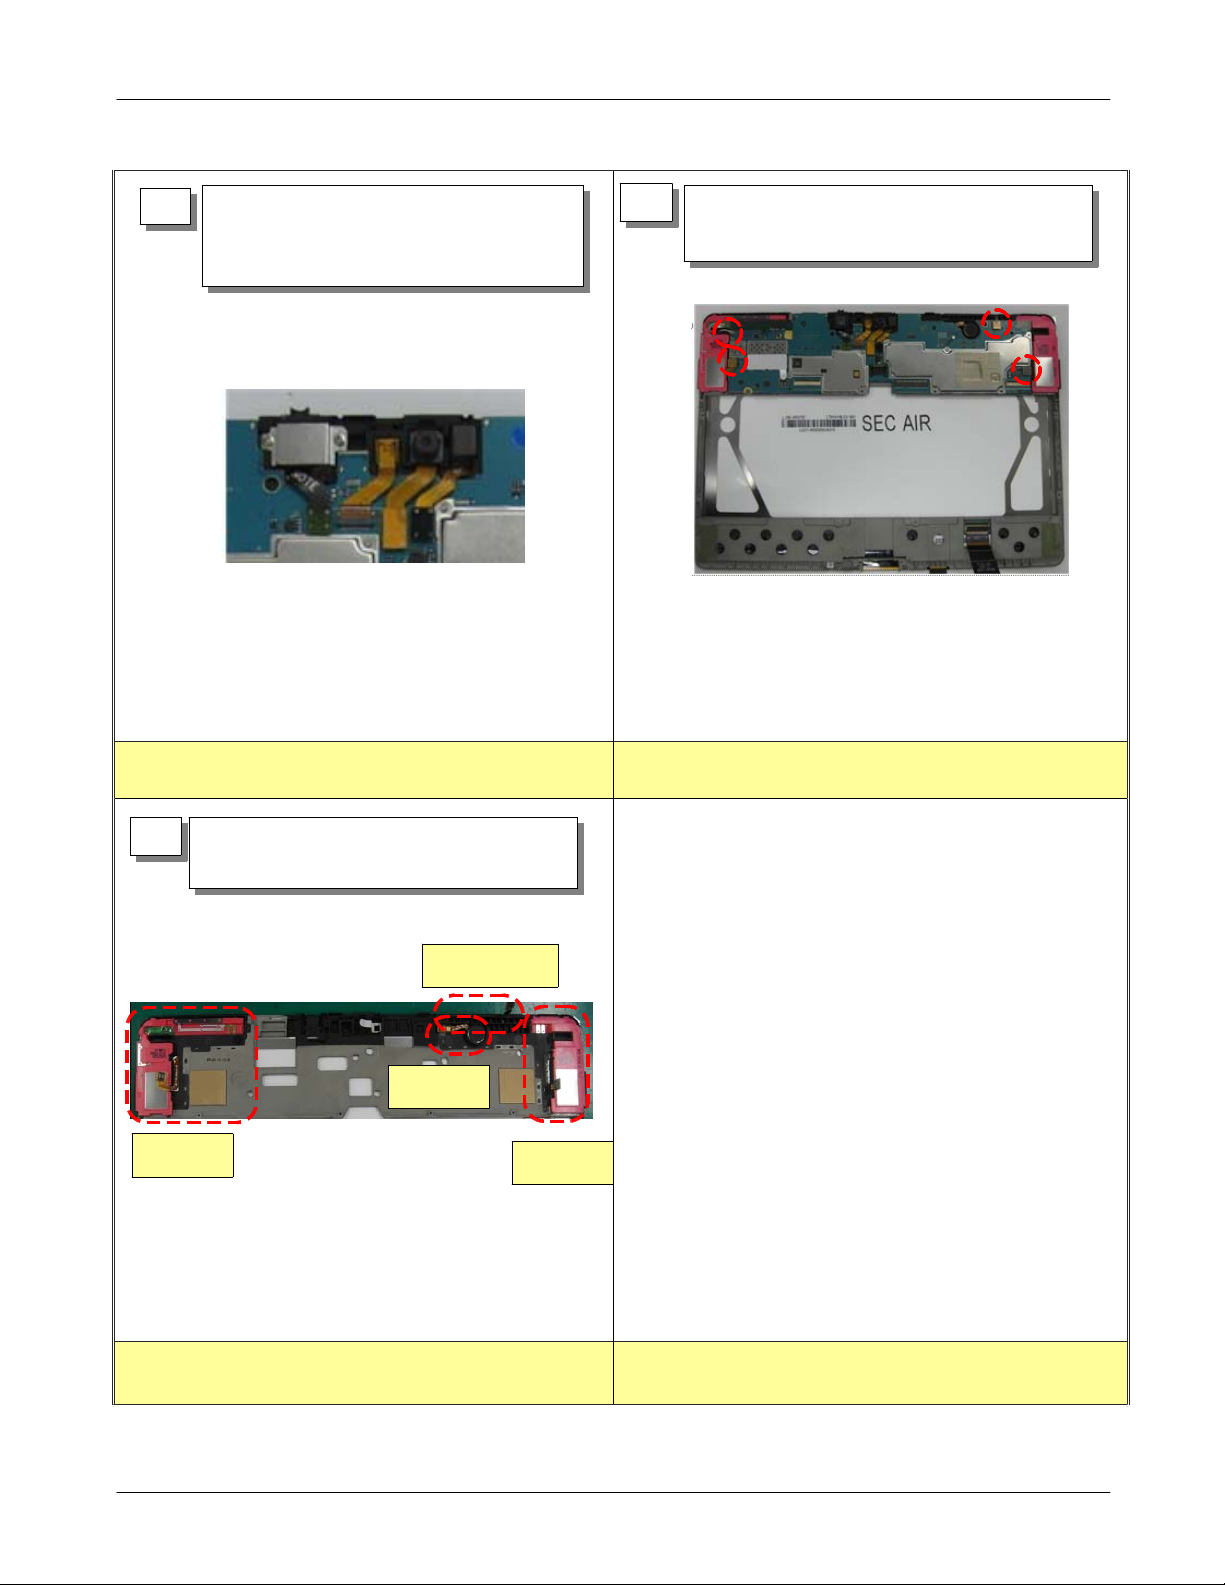
Separate Earjack SUS, Earjack,
camera, VGA camera, Light sensor from
the PBA
3M
Seperate SPK L/R connectors, Key connector
6
and GPS coaxial cable connector.
Separate PBA from the Front.
Be careful not to damage the FPCBs Be careful not to scratch cover
7
Separate the SPK L/R, KEY FPCB, MOTOR
from the Front.
KEY FPCB
MOTOR
SPK
R
SPK
L
Be careful not to damage the FPCBs
SAMSUNG Proprietary-Contents may change without notice
This Document can not be used without Samsung's authorization
7-2
 Loading...