

Page 1

i500.book Page i Friday, October 7, 2011 11:20 AM
Page 2

Intellectual Property
All Intellectual Property, as defined below, owned by or which is otherwise the property of Samsung or its respective suppliers relating to
the SAMSUNG Phone, including but not limited to, accessories, parts, or software relating there to (the “Phone System”), is proprietary to
Samsung and protected under federal laws, state laws, and international treaty provisions. Intellectual Property includes, but is not limited
to, inventions (patentable or unpatentable), patents, trade secrets, copyrights, software, computer programs, and related documentation
and other works of authorship. You may not infringe or otherwise violate the rights secured by the Intellectual Property. Moreover, you
agree that you will not (and will not attempt to) modify, prepare derivative works of, reverse engineer, decompile, disassemble, or
otherwise attempt to create source code from the software. No title to or ownership in the Intellectual Property is transferred to you. All
i500.book Page ii Friday, October 7, 2011 11:20 AM
Page 3

GH46-01289A
The Bluetooth® word mark, figure mark (stylized “B Design”), and combination mark (Bluetooth word mark and “B Design”) are registered
trademarks and are wholly owned by the Bluetooth SIG.
Nuance®, T9® Text Input, and the Nuance logo are trademarks or registered trademarks of Nuance Communications, Inc., or its affiliates
in the United States and/or other countries.
microSD™, microSDHC™ and the microSD logo are Trademarks of the SD Card Association.
i500.book Page iii Friday, October 7, 2011 11:20 AM
Page 4

Open Source Software
Some software components of this product incorporate source code covered under GNU General Public License (GPL), GNU Lesser General
Public License (LGPL), OpenSSL License, BSD License and other open source licenses. To obtain the source code covered under the open
source licenses, please visit:
http://opensource.samsung.com/category/mobile/mobile-phone/
Disclaimer of Warranties; Exclusion of Liability
EXCEPT AS SET FORTH IN THE EXPRESS WARRANTY CONTAINED ON THE WARRANTY PAGE ENCLOSED WITH THE PRODUCT, THE
i500.book Page iv Friday, October 7, 2011 11:20 AM
Page 5

Table of Contents
Section 1: Getting Started ..............................................5
Understanding this User Manual . . . . . . . . . . . . . . . . . . . . . . . . 5
Activating your Phone . . . . . . . . . . . . . . . . . . . . . . . . . . . . . . . 6
Battery . . . . . . . . . . . . . . . . . . . . . . . . . . . . . . . . . . . . . . . . . . . 6
Turning Your Phone On and Off . . . . . . . . . . . . . . . . . . . . . . . . 9
Set-up Wizard . . . . . . . . . . . . . . . . . . . . . . . . . . . . . . . . . . . . . 9
Widgets . . . . . . . . . . . . . . . . . . . . . . . . . . . . . . . . . . . . . . . . . 25
Shortcuts . . . . . . . . . . . . . . . . . . . . . . . . . . . . . . . . . . . . . . . . 27
Folders . . . . . . . . . . . . . . . . . . . . . . . . . . . . . . . . . . . . . . . . . 28
Wallpaper . . . . . . . . . . . . . . . . . . . . . . . . . . . . . . . . . . . . . . . 28
Applications . . . . . . . . . . . . . . . . . . . . . . . . . . . . . . . . . . . . . . 29
Section 3: Call Functions ............................................. 34
i500.book Page 1 Friday, October 7, 2011 11:20 AM
Page 6

Changing the Input Method . . . . . . . . . . . . . . . . . . . . . . . . . . . 54
Entering Text Using Swype . . . . . . . . . . . . . . . . . . . . . . . . . . 54
Entering Text Using the Samsung Keyboard . . . . . . . . . . . . . . 56
Entering Text Using the Android Keyboard . . . . . . . . . . . . . . . 58
Section 6: Messaging ...................................................60
Types of Messages . . . . . . . . . . . . . . . . . . . . . . . . . . . . . . . . . 60
Text and Multimedia Messaging . . . . . . . . . . . . . . . . . . . . . . . 60
Gmail . . . . . . . . . . . . . . . . . . . . . . . . . . . . . . . . . . . . . . . . . . . 62
Google Talk . . . . . . . . . . . . . . . . . . . . . . . . . . . . . . . . . . . . . . 65
VPN . . . . . . . . . . . . . . . . . . . . . . . . . . . . . . . . . . . . . . . . . . . . 90
Mobile Networks . . . . . . . . . . . . . . . . . . . . . . . . . . . . . . . . . . 91
Memory Card . . . . . . . . . . . . . . . . . . . . . . . . . . . . . . . . . . . . . 91
Section 11: Applications and Widgets ........................ 93
AllShare . . . . . . . . . . . . . . . . . . . . . . . . . . . . . . . . . . . . . . . . . 93
Amazon MP3 . . . . . . . . . . . . . . . . . . . . . . . . . . . . . . . . . . . . . 93
Apps . . . . . . . . . . . . . . . . . . . . . . . . . . . . . . . . . . . . . . . . . . . 93
Asphalt 5 . . . . . . . . . . . . . . . . . . . . . . . . . . . . . . . . . . . . . . . . 94
Barcode Scanner . . . . . . . . . . . . . . . . . . . . . . . . . . . . . . . . . . 94
i500.book Page 2 Friday, October 7, 2011 11:20 AM
Page 7

Market . . . . . . . . . . . . . . . . . . . . . . . . . . . . . . . . . . . . . . . . . 100
Media Hub . . . . . . . . . . . . . . . . . . . . . . . . . . . . . . . . . . . . . . 100
Memo . . . . . . . . . . . . . . . . . . . . . . . . . . . . . . . . . . . . . . . . . 101
Mini Diary . . . . . . . . . . . . . . . . . . . . . . . . . . . . . . . . . . . . . . 101
Music Player . . . . . . . . . . . . . . . . . . . . . . . . . . . . . . . . . . . . 102
My Files . . . . . . . . . . . . . . . . . . . . . . . . . . . . . . . . . . . . . . . . 103
Navigation . . . . . . . . . . . . . . . . . . . . . . . . . . . . . . . . . . . . . . 103
News & Weather . . . . . . . . . . . . . . . . . . . . . . . . . . . . . . . . . 104
Places . . . . . . . . . . . . . . . . . . . . . . . . . . . . . . . . . . . . . . . . . 104
Applications . . . . . . . . . . . . . . . . . . . . . . . . . . . . . . . . . . . . . 124
Accounts & sync . . . . . . . . . . . . . . . . . . . . . . . . . . . . . . . . . 126
Privacy . . . . . . . . . . . . . . . . . . . . . . . . . . . . . . . . . . . . . . . . 127
Storage . . . . . . . . . . . . . . . . . . . . . . . . . . . . . . . . . . . . . . . . 128
USB settings . . . . . . . . . . . . . . . . . . . . . . . . . . . . . . . . . . . . 128
Language & keyboard . . . . . . . . . . . . . . . . . . . . . . . . . . . . . 129
Voice input & output . . . . . . . . . . . . . . . . . . . . . . . . . . . . . . 131
Accessibility . . . . . . . . . . . . . . . . . . . . . . . . . . . . . . . . . . . . 132
Date & time . . . . . . . . . . . . . . . . . . . . . . . . . . . . . . . . . . . . . 134
i500.book Page 3 Friday, October 7, 2011 11:20 AM
Page 8

Other Important Safety Information . . . . . . . . . . . . . . . . . . . . 152
Product Performance . . . . . . . . . . . . . . . . . . . . . . . . . . . . . . 153
Availability of Various Features/Ring Tones . . . . . . . . . . . . . . 154
Battery Standby and Talk Time . . . . . . . . . . . . . . . . . . . . . . . 154
Battery Precautions . . . . . . . . . . . . . . . . . . . . . . . . . . . . . . .154
Care and Maintenance . . . . . . . . . . . . . . . . . . . . . . . . . . . . . 156
Section 14: Warranty Information .............................157
Standard Limited Warranty . . . . . . . . . . . . . . . . . . . . . . . . . . 157
End User License Agreement for Software . . . . . . . . . . . . . . 160
i500.book Page 4 Friday, October 7, 2011 11:20 AM
Page 9

Section 1: Getting Started
This section helps you to quickly start using your phone.
Understanding this User Manual
The sections of this manual generally follow the features of your
phone. A robust index for features begins on page 165.
Also included is important safety information beginning on
Special Text
In this manual, you’ll find text that is set apart from the rest.
These are intended to point out important information, share
quick methods for activating features, to define terms, and more.
The definitions for these methods are as follows:
•
Notes
: Presents alternative options for the current feature, menu, or
i500.book Page 5 Friday, October 7, 2011 11:20 AM
Page 10

Activating your Phone
If you purchased your phone from your carrier’s store, it is
activated and ready to use. If you received a new phone by mail,
it may need to be activated before you can use it.
To activate your phone, choose from the following:
•
Visit you carrier’s store.
•
Contact customer support.
Battery Indicator
The battery icon in the Annunciator Line shows battery power
level. Two to three minutes before the battery becomes too low to
operate, the empty battery icon will flash and a tone will sound. If
you continue to operate the phone without charging, the phone
will power off.
Tip:
Task Manager provides helpful information about extending battery life.
For more information, see “Task Manager” on page 11.
i500.book Page 6 Friday, October 7, 2011 11:20 AM
Page 11

Battery Cover
The battery is under a removable cover on the back of the phone.
Removing the battery cover
䊳
Pull up using the slot provided (1), while lifting the cover off
the phone (2).
Installing and Removing the Battery
Installing the battery
1. Remove the battery cover.
2. Insert the battery into the phone, aligning the gold contacts
on the battery with the gold contacts in the phone. Push
down on the bottom of the battery until it snaps into place.
3. Replace the battery cover.
i500.book Page 7 Friday, October 7, 2011 11:20 AM
Page 12

Charging the Battery
Your phone comes with a Wall/USB Charger (Charging Head and
USB cable) to charge your phone from any 120/220 VAC outlet.
Note:
The battery comes partially charged. You must fully charge the battery
before using your phone for the first time. A fully discharged battery
requires up to 4 hours of charge time.
After the first charge, you can use the phone while charging.
3. Connect the USB
cable to the
charging head.
4. Plug the charging
head into a
standard AC power
outlet.
Charging Head
USB Cable
i500.book Page 8 Friday, October 7, 2011 11:20 AM
Page 13

Turning Your Phone On and Off
Turning Your Phone On
䊳
Press and hold the
Power/Lock Key
for three
seconds.
While powering on, the phone connects with the network,
then displays the Home screen and active alerts.
Set-up Wizard
The first time you turn your phone on, the Set-up Wizard will
prompt you to customize your phone. Follow the prompts to set:
•
Add accounts
: Configure access to your Facebook, Twitter, MySpace,
Corporate or Google accounts. For more information, see
“Accounts”
on page 40.
•
My Location
: Configure your phone’s use of location services. For more
information, see
“My Location”
on page 121.
i500.book Page 9 Friday, October 7, 2011 11:20 AM
Page 14

Displaying Your Phone Number
䊳
From a Home screen, touch
Menu ➔ Settings ➔ About
phone ➔ Status
.
Your phone number displays under
Phone number
.
System Tutorial
Learn about important concepts to get the most out of your
phone.
Roaming
When you travel outside your home network’s coverage area,
your phone can roam to acquire service on other compatible
digital networks. When Roaming is active, the Roaming icon
appears in the Annunciator Line of the display.
Tip:
You can set your phone’s roaming behavior. For more information, see
“Mobile networks” on page 114.
i500.book Page 10 Friday, October 7, 2011 11:20 AM
Page 15

Task Manager
Your phone can run applications simultaneously, with some
applications running in the background.
Use Task Manager to see which applications are running on your
phone, and to end running applications to extend battery life. You
can also uninstall applications from your phone and see how
much memory is used by applications.
1. From a Home screen, touch
Applications
➔
Task Manager
.
2. Touch the Running tab to view applications running on your
phone. Touch
Exit
, or
Exit all
to close applications.
3. Touch the Downloaded tab to view information about
applications you’ve installed on your phone. Touch
Uninstall
to remove an application from your phone.
i500.book Page 11 Friday, October 7, 2011 11:20 AM
Page 16

Memory Card
Your phone supports removable microSD™ or microSDHC™
memory cards of up to 32GB capacity, for storage of music,
pictures, and other files.
Note:
You can only store music files that you own (from a CD or purchased
with the phone) on a memory card.
Installing a Memory Card
1. Remove the battery cover. For more information, see
“Removing the battery cover” on page 7.
2. With the gold contacts facing down, carefully slide the
memory card into the slot, pushing gently until it clicks into
place (1).
3. Install the battery cover. For more information, see
i500.book Page 12 Friday, October 7, 2011 11:20 AM
Page 17

Securing Your Phone
By default, the phone locks automatically when the screen times
out, or you can lock it manually. You can unlock the phone using
one of the default Unlock screens, or for increased security, use a
personal screen unlock pattern.
For more information about creating and enabling a Screen
unlock pattern, see “Screen unlock settings” on page 122.
Unlocking the phone
1. Press the
Power/Lock Key
to wake the screen.
2. Touch and swipe left or right to show the screen that was
visible when the phone was locked.
Note:
You can choose the type of Unlock screen. For more information, For
more information, refer to “Unlocking the Screen - general” on
i500.book Page 13 Friday, October 7, 2011 11:20 AM
Page 18

Unlocking the Screen - general
1. Press the
Power/Lock Key
to wake the screen.
2. If there are no Notification alerts on your phone, touch and
swipe left or right to show the screen that was visible
when the phone locked.
3. If there are Notification alerts on your phone, touch and
drag the unlock puzzle piece to fit it into the empty spare to
i500.book Page 14 Friday, October 7, 2011 11:20 AM
Page 19

Section 2: Understanding Your Phone
This section outlines key features of your phone, including keys,
displays, and icons.
Features
•
4-inch 800x480 Super AMOLED touch screen
•
CDMA 1X/EVDO Rev-A Wireless Technology
•
Android OS
•
5 Megapixel CMOS Camera/Camcorder
•
Picture Gallery, supporting JPEG, PNG, GIF, A-GIF, WBMP and BMP
formats
•
HD Video Player (720p), supporting H.263, H.264, MPEG4, 3GP,
3G2 (v9), Xvid and DivX formats
• DivX Certified
®
to play DivX® video up to HD 720p, including
i500.book Page 15 Friday, October 7, 2011 11:20 AM
Page 20
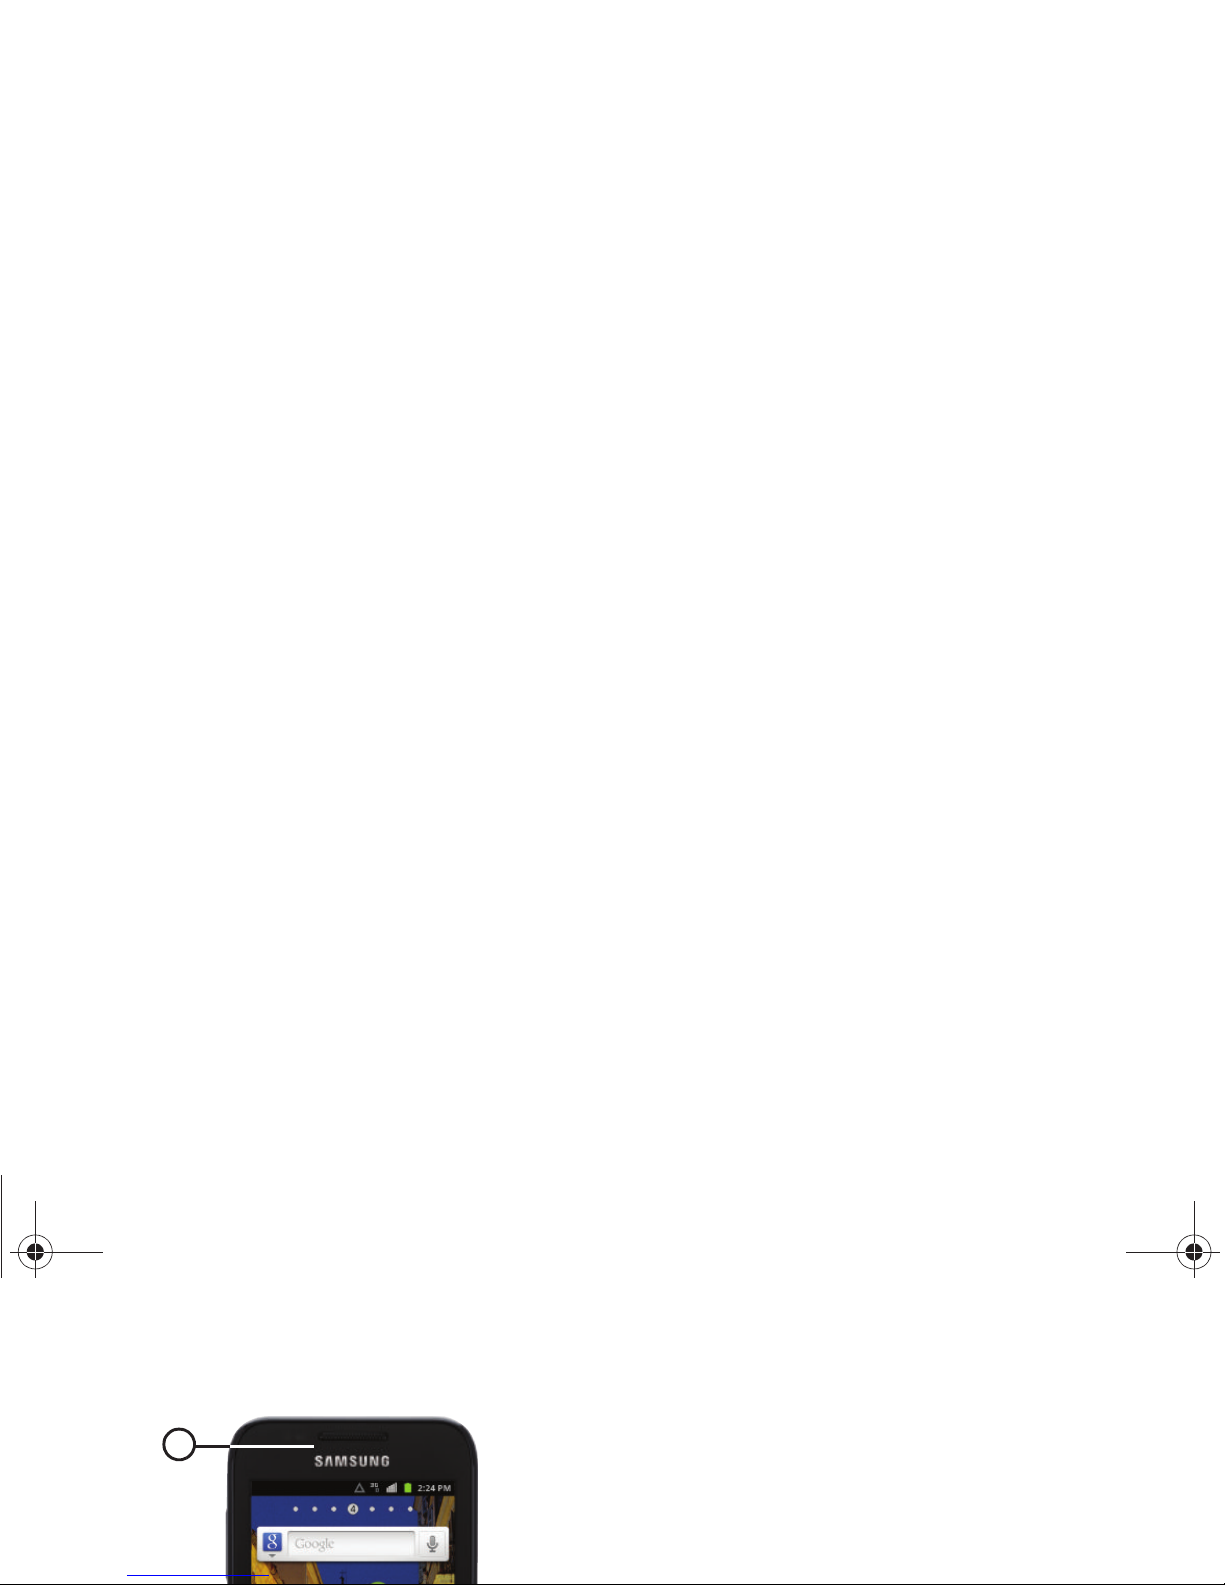
Front View
1.
Earpiece and Sub-microphone
: Listen to callers. In
Speakerphone mode, captures your voice. While recording
video, captures audio. Avoid covering the sub-microphone
during Speakerphone mode or when recording video.
2.
Microphone
: Using during calls to allow callers to hear your
voice, and when recording.
3.
Menu Key
: Touch to display options for the current screen.
1
i500.book Page 16 Friday, October 7, 2011 11:20 AM
Page 21

Side Views
1.
Strap holder
: Attach an optional carrying strap (not
included).
2.
Volume Key
: From the Home screen, press to adjust Master
Volume. During calls or music playback, press to adjust
volume. Press to mute the ringtone of an incoming call.
3.
Power/Lock Key
: Press and hold to turn the phone on or off.
Press to lock the phone, or to wake the screen for
1
2
i500.book Page 17 Friday, October 7, 2011 11:20 AM
Page 22

Back View
1.
3.5mm Headset Jack
: Plug in an optional headset or TTY
equipment.
2.
Camera Lens
: Used when taking photos or recording
videos.
3.
Camera Flash
: Used when taking photos.
4.
External Speaker
: Plays ringtones, call audio when in
Speakerphone mode, music and other sounds.
2
1
3
5
i500.book Page 18 Friday, October 7, 2011 11:20 AM
Page 23

Navigation
Navigate your phone’s features using the command keys and the
touch screen.
Warning!:
If your handset has a touch screen display, please note that a
touch screen responds best to a light touch from the pad of your
finger or a non-metallic stylus. Using excessive force or a metallic
object when pressing on the touch screen may damage the
tempered glass surface and void the warranty. For more
information, see “Warranty Information” on page 157.
Context-sensitive Menus
While using your phone, context-sensitive menus offer options
for the feature or screen. To access context-sensitive menus:
•
Touch
Menu
.
•
Touch and hold on an item.
Finger Gestures
Touch
i500.book Page 19 Friday, October 7, 2011 11:20 AM
Page 24

Notification Panel
The Notification Panel shows information about connections,
messages and other items.
䊳
Sweep your finger downward from the top of the screen.
Touch buttons at the top of the Notification Panel to toggle
settings:
•
Wi-Fi
: Turn Wi-Fi on or off.
•
Bluetooth
: Turn Bluetooth on or off.
•
GPS
: Turn Standalone GPS services on or off.
•
Mobile data
: Activate or deactivate your phone’s access to the mobile
data network.
•
Auto rotation
: Enable or disable the Auto rotation setting, to control
i500.book Page 20 Friday, October 7, 2011 11:20 AM
Page 25

Home Screen
The Home screen is the starting point for using your phone.
1.
Annunciator Line
: Presents icons to show network status,
battery power, and connection details. For a list of icons,
see “Annunciator Line” on page 23.
2.
Home screen
: The starting point for using your phone.
Place icons, widgets and other items to customize your
phone to your needs. For more information, see “Home
Screen” on page 21.
1
5
i500.book Page 21 Friday, October 7, 2011 11:20 AM
Page 26

Extended Home Screen
The Home screen consists of the Home panel, plus 6 panels that
extend beyond the display width to provide more space for
adding shortcuts, widgets and folders.
Slide your finger horizontally across the screen to scroll to the left
or right side panels. As you scroll, the indicator at the top of the
display shows your current position.
Adding and removing Home screen panels
Your phone comes with 7 Home screen panels. You can
customize the Home screen to include up to the seven default
panels, and set one panel as Home.
1. From the Home screen, touch
Menu ➔
Edit page
.
2. Touch and drag the panels to rearrange:
Remove
: Drag and drop the panel ontop of the
i500.book Page 22 Friday, October 7, 2011 11:20 AM
Page 27

Annunciator Line
The Annunciator line displays icons to show network status,
battery power, and other details.
Signal Strength
: Current signal strength. The greater the
number of bars, the stronger the signal.
Airplane Mode Active
: All wireless communications are
disabled. See “Airplane mode” on page 113.
3G Connection Active
: Phone is active on a 3G system.
USB Connected
:The phone is connected to a computer
using a USB cable.
New Message
: You have new message(s).
i500.book Page 23 Friday, October 7, 2011 11:20 AM
Page 28

Primary Shortcuts
Primary Shortcuts appear at the bottom of the display. You can
edit the Primary Shortcuts, except for the
Applications
/
Home
shortcut.
Note:
When you access
Applications
, the Home
shortcut replaces the
Applications
shortcut to provide quick return to the Home screen.
Bluetooth Active
: Bluetooth is turned on.
Bluetooth Connected
: The phone is paired with another
Bluetooth device.
Wi-Fi Active
: Wi-Fi is connected, active,
andcommunicating with a Wireless Access Point (WAP).
Wi-Fi Action Needed
: Action needed to connect to Wireless
i500.book Page 24 Friday, October 7, 2011 11:20 AM
Page 29

Editing the Primary Shortcuts
1. From the Home screen, touch
Applications.
2. Touch
Menu ➔ Edit
.
3. Touch and hold an icon, then drag it to replace a primary
shortcut.
4. When you are finished, touch
Menu ➔ Save
.
Widgets
Widgets
AccuWeather Clock
: Displays weather for customer
selected cities.
Amazon MP3
: Purchase and download DRM-Free
(digital rights management) music from Amazon
digital music store.
i500.book Page 25 Friday, October 7, 2011 11:20 AM
Page 30

Dual Clock
: Display two time zones.
Feeds and Updates
: Display feeds from your
Facebook, MySpace, and Twitter accounts, and post
an update to your accounts, right from the Home
screen. Appears on the Home screen by default. For
more information, see “Feeds and Updates” on
page 43.
Picture frame
: Display a picture from the Gallery on
the Home screen.
Power control
: Control Wi Fi, Bluetooth, and GPS
connections, and set automatic synchronization and
brightness settings.
Program Monitor
: Display the number of active
applications. Touch to launch Task Manager. For
i500.book Page 26 Friday, October 7, 2011 11:20 AM
Page 31

Shortcuts
Use Shortcuts for quick access to applications or features.
Adding Shortcuts from the Home screen
1. Navigate to a Home screen panel, then touch and hold on
the screen to display the
Add to Home screen
menu.
2. Touch
Shortcuts
, then touch a selection:
3. Follow the prompts to configure the Shortcut and add it to
the Home screen.
Adding Shortcuts from Applications
1. Navigate to a Home screen panel.
2. Touch
Applications
.
3. Touch and hold on an application icon. The Shortcut icon is
automatically placed on the selected Home screen.
Applications
: Launch an application. For a list, see
i500.book Page 27 Friday, October 7, 2011 11:20 AM
Page 32

Folder s
Place Folders on the Home screen to organize items together on
the Home screen.
1. Navigate to the desired Home screen, then touch and hold
on the screen to display the
Add to Home screen
menu.
2. Touch
Folders
, then touch a selection:
Removing Folders
䊳
Touch and hold the Folder until
Remove
appears at the
bottom of the display, then drag the Folder to the
Trashcan
.
Wallpaper
Choose a picture to display in the background of the Home
screen. You can choose from pre-loaded wallpaper images, or
select a picture you’ve taken with the Camera or downloaded.
i500.book Page 28 Friday, October 7, 2011 11:20 AM
Page 33

Applications
The Applications screen holds all applications installed on your
wireless device. Applications that you download and install from
Android Market or from the web are also added to the
Applications screen.
You can place shortcuts to applications on the Home screen, for
quick access to the application. For more information, see
“Adding Shortcuts from Applications” on page 27.
Customizing the Applications Screens
Choosing a view
By default, application icons appear in Grid view. You can change
the view to list view.
1. From the Home screen, touch
Applications.
2. Touch
Menu ➔ List View
.
Moving Application icons
i500.book Page 29 Friday, October 7, 2011 11:20 AM
Page 34

Applications
AllShare
: Synchronize your phone with your TV. For
more information, see “AllShare” on page 93.
Amazon MP3
: Download DRM-Free (digital rights
management) MP3 formatted songs and albums. For
more information, refer to “Amazon MP3” on
page 74.
Books
: Google eBooks is a new way to discover,
buy, and enjoy your favorite books online and
offline.
Browser
: Access the Internet. For more information,
see “Browser (Google)” on page 68.
Calculator
: Perform mathematical calculations. For
more information, see “Calculator” on page 94.
i500.book Page 30 Friday, October 7, 2011 11:20 AM
Page 35

Daily Briefing
: Monitor weather, financial information,
news and your schedule, from one application. For
more information, see “Daily Briefing” on page 97.
Desk Cradle
: Operate your phone with an optional
Desk Cradle accessory. For more information, see
“Desk Cradle” on page 97.
Downloads
: View, reopen, or delete items you have
Latitude
: Share your location with chosen friends
Maps
: Tracks your current location, provides a
real-time view of traffic issues, and displays detailed
destination directions. For more information, refer to
“Maps” on page 99.
Market
: Browse, download, and install Android
i500.book Page 31 Friday, October 7, 2011 11:20 AM
Page 36

Music Player
: Play music stored on an optional
installed memory card. For more information, see
“Music Player” on page 74.
My Files
: Find, view and manage files stored on an
optional installed memory card. For more
information, see “My Files” on page 103.
Navigation
: Google Maps Navigation (Beta) is an
Tex tC S
: Use TextCS to send a text message to
Customer Support (311) with questions for support or
account information. For more information, refer to
“TextCS” on page 105.
ThinkFree Office TM: View and manage files in a
Microsoft® Office-compatible software suite. For
more information, refer to “ThinkFree Office” on
page 105.
i500.book Page 32 Friday, October 7, 2011 11:20 AM
Page 37

Write & Go
: Capture ideas, then choose a format for
sending via Gmail, saving to the Calendar or as a
memo, or posting it to Facebook. For more
information, see “Write & Go” on page 109.
You Tub e
: View and upload YouTube videos, right from
your phone. For more information, refer to “YouTube”
on page 109.
i500.book Page 33 Friday, October 7, 2011 11:20 AM
Page 38

Section 3: Call Functions
This section describes how to make, answer or end calls.
Making Calls
Your phone offers multiple ways to make calls:
•
Use the touch screen
Phone Dialer
to enter the phone number or
speed dial number.
Making Calls Using the Phone Dialer
1. From a Home screen, touch
Phone
.
2. Touch the digits of the telephone or speed dial number on
the
Dialer
keypad. While dialing, use these options:
•
Touch
Menu
➔
Speed dial setting
to dial or set Speed
i500.book Page 34 Friday, October 7, 2011 11:20 AM
Page 39

Making Calls using Speed Dials
Speed Dials are 1-, 2-, or 3-digit shortcuts (1 to 100) you assign
to contacts, to allow you to quickly call the contact. For more
information about setting speed dials, see “Speed Dials” on
page 52.
1. From a Home screen, touch
Phone
.
2. Touch the digits of the speed dial number on the
Dialer
Making Calls using Favorites
Favorites are contacts that you designate as favorites by starring
them. For more information about creating favorites, see
“Favorites” on page 48.
1. From a Home screen, touch
Phone
.
2. Touch
Favorites
to display favorites.
3. Find the contact and touch it to open the Contact entry.
i500.book Page 35 Friday, October 7, 2011 11:20 AM
Page 40

Three-Way Calling
Merge two calls to set up a three-way call between you and two
other parties.
Setting up a Multi-Party Call
1. Establish a call, either by dialing or answering an incoming
call.
2. Touch
Add Call
. The first call is placed on hold, and the
Answering Calls
You can answer incoming calls when the phone is locked or
unlocked.
䊳
With the phone unlocked or locked, touch and drag
Answer
.
i500.book Page 36 Friday, October 7, 2011 11:20 AM
Page 41

Sending Calls to Voicemail
When your phone alerts you to an incoming call, you can ignore
the call to send the caller to voice mail, or ignore the call and
send a message to the caller.
Ignoring a call
䊳
With the phone unlocked or locked, touch and drag
Ignore
.
Ignoring a call with a message
䊳
With the phone unlocked or locked, touch and drag
Reject call with message
. (For more information, refer to
“Unlocking the phone” on page 13.)
Note:
For more information about creating ignore messages, see “Ignore
with message” on page 115.
i500.book Page 37 Friday, October 7, 2011 11:20 AM
Page 42

Ending a Call
䊳
Touch .
Call Log
When you place, answer, or miss a call, a record of the call is
saved in the Call log.
Accessing Call Log
䊳
From a Home screen, touch
Phone
➔
Call log
.
Creating or Updating Contacts Using Call Log
1. From a Home screen, touch
Phone
➔
Call log
.
2. Touch and hold on a call record, then select
Add to
Contacts
from the pop-up menu.
3. Choose
Create contact
or
Update existing
.
4. Continue entering contact information. For more
information, see “Contacts” on page 43.
i500.book Page 38 Friday, October 7, 2011 11:20 AM
Page 43

Filtering Call log records
1. From a Home screen, touch
Phone
➔
Call log
.
2. While viewing the Call log, touch
Menu
➔
View by
.
3. Select a filter type, from
All calls, Missed calls, Outgoing
calls
, or
Incoming calls
.
Viewing call durations
Voicemail
All unanswered calls to your phone are sent to voicemail, even if
your phone is turned off, so you’ll want to set up your voicemail
and personal greeting as soon as you activate your phone.
Setting up Voicemail
1. From a Home screen, touch
Phone
, then press and
hold to dial Voice mail.
1
i500.book Page 39 Friday, October 7, 2011 11:20 AM
Page 44

Section 4: Contacts and Accounts
This section explains how to manage your contacts and
accounts.
Accounts
Your phone provides the ability to synchronize information from a
variety of accounts, including Google, a Corporate Exchange
server, and social networking sites such as Facebook, Twitter,
Setting Up Your Accounts
Set up and manage your synchronized accounts with the
Accounts & sync setting.
For information about setting up other, non-synchronized email
accounts, see “Configuring Email Accounts” on page 65.
i500.book Page 40 Friday, October 7, 2011 11:20 AM
Page 45

Managing a Google account
1. From a Home screen, touch
Menu
➔
Settings
➔
Accounts & sync
.
2. Tap your Google account to display the
Data &
synchronization
screen.
3. Tap a setting to enable or disable synchronization. When
enabled, a check mark appears in the check box:
Adding a Corporate account
1. From a Home screen, touch
Menu
➔
Settings
➔
Accounts & sync
.
2. Touch
Add account
➔
Corporate.
3. At the
Set up email
screen, enter your
Email address
and
Password
, then touch
Next
.
4. At the
Server settings
screen, enter server settings, then
i500.book Page 41 Friday, October 7, 2011 11:20 AM
Page 46

Managing a Corporate Exchange account
1. From a Home screen, touch
Menu
➔
Settings
➔
Accounts & sync
.
2. Touch your Corporate account to display these settings:
•Sync Contacts
: When enabled, synchronizes your Exchange
contacts with your phone’s Contacts.
• Sync Calendar: When enabled, synchronizes your Exchange
Setting Up a Twitter account
Note:
You must register your phone with Twitter before using the phone to
access the site. From Twitter.com Settings, follow the instructions in
the Mobile area to register your phone.
1. From a Home screen, touch
Menu
➔
Settings
➔
Accounts & sync ➔ Add account ➔Twitt er
.
2. Enter your Email and Password, then touch
Log in
.
i500.book Page 42 Friday, October 7, 2011 11:20 AM
Page 47

Feeds and Updates
Feeds and Updates displays feeds from your Facebook, MySpace,
and Twitter accounts, and allows you to post an update to your
accounts, right from the Home screen.
Tip:
The Feeds and Updates widget is available by default on the Home
screen, or is available in the Samsung Widgets. For more information
about placing widgets on the Home screen, see “Widgets” on page 25.
• Phone
: Saves to the phone’s Contacts.
•Google
: Saves to your Google account.
•Corporate
: Saves to your Corporate Exchange account.
3. Touch contact fields to enter information:
•
To uc h
Photo ID
to choose a picture to identify the contact.
•
To uc h
First name
, then enter a first name for the contact.
•
To uc h
Last name
, then enter a last name for the contact. After
i500.book Page 43 Friday, October 7, 2011 11:20 AM
Page 48

•
Touch
Postal address
to enter a mailing address for the contact.
•
Touch
Organization
to enter a company or other affiliation.
•
To add more fields, tap More to enter
Notes, Nickname, Website
,
Birthday
, or
Anniversary
.
4. When you finish entering information, touch .
Creating Contacts from Call log
Save a phone number from a recent call record to create a new
Updating Contacts
Make changes to update an existing contact.
1. From a Home screen, touch
Contacts
.
2. Touch a contact to view its information, then touch
Menu
➔
Edit
.
– or –
Touch and hold on a contact, then select
Edit
from the pop-
Save
i500.book Page 44 Friday, October 7, 2011 11:20 AM
Page 49

Updating Contacts from Call log
Save a phone number from a recent call record to create a new
contact, or update an existing contact.
For more information, see “Creating or Updating Contacts Using
Call Log” on page 38.
Get Friends
Use the Get Friends feature to sync with your accounts. You can
Contacts Display Options
1. From a Home screen, touch
Contacts
.
2. Touch
Menu
➔
More
➔
Display options
to set these
options:
•
To uc h
Only contacts with phones
to restrict display to contacts
with phone numbers.
•
To uc h
Sort by
to sort by
first
or
last
name.
i500.book Page 45 Friday, October 7, 2011 11:20 AM
Page 50

Join Contacts
Your phone can synchronize with multiple accounts, including
Google, Corporate Exchange, and other email providers, plus
social networking sites like Facebook, Twitter, and MySpace.
When you synchronize contacts from these accounts with your
phone, you may have multiple contacts for one person.
Joining imported contact records to a phone contact allows you
to see all the contact’s numbers and addresses together in one
Joining contacts
1. From a Home screen, touch
Contacts
.
2. Touch a Phone contact (a contact with the icon) to
display its information.
3. Touch
Menu
➔
Join contact
.
4. Touch an imported contact record to join it to the Phone
contact.
i500.book Page 46 Friday, October 7, 2011 11:20 AM
Page 51

Sending Namecards
Sending a Namecard (vCard)
You can send a contact namecard as a vCards via Bluetooth to
other Bluetooth devices, or via Gmail as an attachment.
Important!:
Not all Bluetooth devices will accept contacts, and not all devices
support transfers of multiple contacts. Check the target device’s
documentation.
Sending multiple namecards via Bluetooth
You can send multiple contact namecards as vCards via
Bluetooth to other Bluetooth devices.
Important!:
Not all Bluetooth devices will accept contacts, and not all devices
support transfers of multiple contacts. Check the target device’s
documentation.
1. From a Home screen, touch
Contacts
.
i500.book Page 47 Friday, October 7, 2011 11:20 AM
Page 52

Exporting and Importing Contacts
You can export your contact list to an optional installed memory
card, or import a list of contacts (previously exported) from a
memory card.
1. From a Home screen, touch
Contacts
.
2. Touch
Menu
➔
Import/Export
.
3. Touch
Import from SD card
or
Export to SD card
, then follow
Creating Favorites
1. From a Home screen, touch
Contacts
.
2. Touch and hold on a contact, then select
Add to favorites
from the pop-up menu.
– or –
Touch a contact to display it, then touch the
Star
at
the top right of the screen.
i500.book Page 48 Friday, October 7, 2011 11:20 AM
Page 53

Sending My Profile
You can send My Profile as a vCard via Bluetooth to other
Bluetooth devices, or as an attachment to a Gmail.
1. From a Home screen, touch
Contacts
.
2. Touch
Menu
➔
My profile
to display your contact
information.
3. Touch
Menu
➔
Send namecard via
.
Creating a New Group
1. From a Home screen, touch
Contacts
➔
Groups
.
2. Touch
Menu
➔
Create
.
3. Touch the
Group Name
field to enter a Group Name.
4. Touch
Ringtone
to choose a ringtone for calls from
members of this group. Touch
Default ringtone, Sound
or
Phone ringtone
to select a new ringtone.
i500.book Page 49 Friday, October 7, 2011 11:20 AM
Page 54

Editing a Group
1. From a Home screen, touch
Contacts
➔
Groups
.
2. Touch a Group to display it.
3. Touch
Menu
➔
Edit group
.
4. Touch the
Group Name
field to change the Group Name.
5. Touch
Ringtone
to choose a ringtone for calls from
Adding Contacts to a Group
Tip:
You can also add a contact to a group when you create the contact. For
more information, see “Creating Contacts” on page 43.
1. From a Home screen, touch
Contacts
➔
Groups
.
2. Touch a
Group
to display it, then touch .
3. Touch contact(s) to mark them for addition, or touch
Select
i500.book Page 50 Friday, October 7, 2011 11:20 AM
Page 55

Removing Contacts from a Group
Tip:
You can also add a contact to a group when you edit the contact. For
more information, see “Updating Contacts” on page 44.
1. From a Home screen, touch
Contacts
➔
Groups
.
2. Touch a
Group
to display it.
3. Touch
Menu
➔
Remove member
.
Sending a Message to Group Members
1. From a Home screen, touch
Contacts
➔
Groups
.
2. Touch a
Group
to display it.
3. Touch
Menu
➔
Send Message
.
4. Touch contacts to mark them as recipients for the new
message, then touch .
Send
i500.book Page 51 Friday, October 7, 2011 11:20 AM
Page 56

History
History displays all calls, messages, emails, IMs, and Facebook,
MySpace and Twitter messages sent and received from contacts.
1. From a Home screen, touch
Contacts
➔
History
.
2. A list of calls, messages and emails displays, sorted by
time, with most recent first.
3. Touch
Menu
for these options:
Note:
Some Speed Dials are reserved by default, and cannot be assigned:
Speed Dial 1 is reserved for Voicemail.
Speed Dial 97 is reserved for balance inquiries.
Speed Dial 98 is reserved for minutes inquiries.
Speed Dial 99 is reserved for payment inquiries.
Speed Dial 100 is reserved for data call inquiries.
Assigning Speed Dials
1. From a Home screen, touch
Contacts
.
i500.book Page 52 Friday, October 7, 2011 11:20 AM
Page 57

Section 5: Entering Text
This section describes how to enter words, letters, punctuation
and numbers when you need to enter text.
Virtual QWERTY Keyboard
Your phone uses a virtual QWERTY keyboard for text entry. Use
the keyboard to enter letters, punctuation, numbers, and other
characters into text entry fields or applications. Access the
Text Input Methods
Your phone offers two text input methods:
•
Swype
: Swype is a new text input method that allows you to enter
words by gliding your finger over the virtual QWERTY keyboard, lifting
your finger between words. You can also enable Word prediction,
which matches your key touches to common words.
i500.book Page 53 Friday, October 7, 2011 11:20 AM
Page 58

Changing the Input Method
When entering text, you can select the text input method.
䊳
Touch and hold on a text input field, then select an input
method:
•Swype
• Samsung keypad
• Android keyboard
Entering Text Using Swype
Swype is a new way to enter text on touch screens. Instead of
touching each key, use your finger to trace over each letter of a
word. For each word, place your finger on the first letter and glide
to the subsequent letters, lifting on the last letter.
This example shows how to enter the word “this”. Put your finger
down on the “t”, and without lifting, glide it to the “h”, then to the
“i” then over to the “s”.
i500.book Page 54 Friday, October 7, 2011 11:20 AM
Page 59

Here are a few tips to get you started:
•
Spacing is automatic
: When you finish a word, just lift your finger and
start the next word.
•
Double letters
: Just “scribble” on the key.
•
Capitalization
: Swype recognizes and capitalizes the first word of
sentences. If you want to capitalize a word that isn’t at the beginning
of a sentence, just glide above the keyboard before gliding over the
next letter.
Swype Help
While entering text, you can get tips and help about using Swype.
•
Tap the
Swype Key
to show
Tips
.
•
Tap the
Swype Key ➔ Tutor ia l
for an interactive tutorial.
•
Tap the
Swype Key ➔ More Help
to view Help.
Entering Symbols and Numbers
Using the Swype Keyboard:
i
i
i
i500.book Page 55 Friday, October 7, 2011 11:20 AM
Page 60

Editing Keyboard
The Editing Keyboard provides a quick way to move the cursor
and highlight text. If the application in which you are working
supports editing, you can cut, copy or paste highlighted text.
To access the Editing Keyboard:
䊳
Swype from the
Swype Key
to the
SYM Key
.
Using Swype Speech Recognition
To use the Samsung keypad you must first configure the settings
for the Samsung keypad.
1. From a Home screen, touch
Menu ➔ Settings
➔
Language & keyboard ➔ Samsung keypad ➔ Portrait keypad
types
.
2. Touch
Keypad types
and select a text input method:
•
Qwerty Keypad
i
i500.book Page 56 Friday, October 7, 2011 11:20 AM
Page 61

7.
Touch the
Handwriting settings
field and select the speed
of response of the Samsung Handwriting keypad. You can
also access an explanation of Handwriting keypad use.
8. Touch the
Voice input
field to activate Voice input.
9. Touch the
Auto-full stop
field to activate Auto-full stop.
10. Touch the
Tuto ri al
field to view a short tutorial on use of the
Samsung keyboard.
4. Touch the
Spell correction
field. This option corrects
typographical errors by selecting from a list of possible
words that reflect the characters of the keys you touched
as well as the characters of nearby keys.
5. Touch the
Next word prediction
field to enable word
prediction.
6. Touch the
Auto-append
field to automatically add
i500.book Page 57 Friday, October 7, 2011 11:20 AM
Page 62

10.
To add a new word to the T9 dictionary:
Touch the
XT9 my words
field, then press
Menu
➔
Add
. Enter the new word in the Register to XT9 my words
field, then touch
Done
.
11. Touch
XT9 auto-substitution
to add words to substitute (for
example youve becomes you’ve). A list of substitutions
displays.
Entering Text Using the Android Keyboard
The Android Keyboard is a custom virtual QWERTY keyboard,
featuring predictive text. Input characters by tapping the
on-screen keys with your finger, or use speech recognition.
As you enter characters, predictive text matches your key
touches to common words and displays them. Select a word
from the display to insert it into your text.
i500.book Page 58 Friday, October 7, 2011 11:20 AM
Page 63

Configuring Android Keyboard
Configure the Android Keyboard to your preferences.
•
For more information, see
“Android keyboard”
on page 130.
•
While entering text,
touch and hold or
, then touch
Android keyboard settings
.
Tip:
To customize predictive text, configure the User dictionary settings. For
more information, see “User dictionary” on page 129.
Using Android Speech Recognition
Enter text by speaking. Android Keyboard recognizes your speech
and enters text for you.
Note:
Enable Speech Recognition in Android Keyboard settings. For more
information, see “Android keyboard” on page 130.
䊳
Touch the
Speech Recognition Key
.
i500.book Page 59 Friday, October 7, 2011 11:20 AM
Page 64

Section 6: Messaging
This section describes how to send and receive messages, and
other features associated with messaging.
Types of Messages
Your phone supports these types of messages:
•
Text messages
: Send and receive simple messages containing text to
Text and Multimedia Messaging
Your phone can send and receive text and multimedia messages
to other mobile phones and to email addresses.
Creating and Sending Messages
1. From a Home screen, touch
Messaging ➔ New
i500.book Page 60 Friday, October 7, 2011 11:20 AM
Page 65

3.
Touch the
Type to compose
field, or touch
Next
, and
compose your message. While composing a message,
touch
Menu
for these options:
• Add subject
: Add a subject field to the message and enter a
subject. (This option also converts the message to MMS.)
• Attach
: Add content to the message to convert it to MMS.
–
Pictures
: Add a picture.
Managing Messages
Threaded View
Messages you send and receive to the same contact, number or
address are grouped together as a “thread”. Threaded messages
allow you to see all the messages you exchanged with a contact,
or other recipient, with the latest message displayed first.
1. From a Home screen, touch
Messaging
.
i500.book Page 61 Friday, October 7, 2011 11:20 AM
Page 66

Message Settings
Configure message settings.
1. From a Home screen, touch
Messaging
.
2. Touch
Menu
➔
Settings
to set:
• Storage settings
–
Delete old messages
: Touch to enable or disable automatic erasure of
messages when stored message reach default limits. When disabled,
• Notification settings
–
Notifications
: Touch to enable or disable alerts in the status bar.
–
Screen On
: Touch to enable screen on for notification alerts.
–
Select ringtone
: Touch to select a ringtone for message alerts.
–
Vibrate
: Touch to enable or disable vibration for message alerts.
Gmail
Send and receive emails via Gmail, Google’s web-based email.
i500.book Page 62 Friday, October 7, 2011 11:20 AM
Page 67

3.
The phone communicates with the Google server to set up
your account and synchronize your email. When complete,
your Gmail appears in the Inbox.
Refreshing Your Gmail Account
Refresh your account to update your phone from the Gmail
servers.
1. From a Home screen, touch
Applications
➔
Account settings
• <Your Email Address>
: Customize your Gmail account.
–
Priority Inbox
: When active, Priority Inbox automatically identifies your
important email and separates it out from everything else.
–
Signature
: Create a text signature to add to outgoing messages.
–
Confirm actions
: Have your phone prompt you to confirm
archivals,deletions, and messages sent.
–
Reply all
: When active, responding messages are sent to
i500.book Page 63 Friday, October 7, 2011 11:20 AM
Page 68

Additional Gmail Options
1. From a Home screen, touch
Applications
➔
Gmail
➔
Menu
for additional options:
•Refresh
: Update Gmail on your phone from the Google servers.
•Compose
: Create a new email. For more information, refer to
“Composing and Sending Gmail”
on page 64.
• Accounts
: View and choose from your Google account(s).
Composing and Sending Gmail
1. From a Home screen, touch
Applications
➔
Gmail
.
2. Touch
Menu
➔
Compose
.
3. Touch the
To
field to enter recipients. As you enter names
or numbers, matching contacts display. Touch a contact to
add it to the field.
i500.book Page 64 Friday, October 7, 2011 11:20 AM
Page 69

Google Talk
Chat with other Google Talk users.
Tip:
Talk requires that you have a Google account set up on your phone. For
more information, see “Setting Up Your Accounts” on page 40.
䊳
From a Home screen, touch
Applications
➔
Talk
.
Configuring the first email account
1. From a Home screen, touch
Applications
➔
Email
.
2. Touch an email provider.
3. Touch
Email address
to enter your email address, then
touch
Password
or touch
Next
to enter your password.
4. Touch a setup option:
i500.book Page 65 Friday, October 7, 2011 11:20 AM
Page 70

5.
Touch the
Password
field or touch
Next
to enter your
password.
6. Touch a setup option:
• Manual setup
: Configure the account manually. Touch
POP3
or
IMAP
, then enter the account details.
•Next: Connect to the server to set up the account automatically.
Follow the prompts to complete set-up, then touch
Done
.
6. While composing a message, touch
Menu
for these
options:
• Add Cc/Bcc
: Create Cc (copy) and Bcc (blind copy) fields to the
message. After creating the fields, touch to enter recipients.
• Save as draft
: Close the message and save it in Drafts.
• Add text
: Add text from a Contact record, from the Calendar, or
from a Memo.
7. Touch
Attach
to add a file to the message.
i500.book Page 66 Friday, October 7, 2011 11:20 AM
Page 71

Email Account Settings
Use Account settings to configure handling of your email.
Note:
Some email accounts may have different, or additional, settings.
1. From a Home screen, touch
Applications
➔
Email
.
2. Touch an account to view it, then touch
Menu
➔
More
–
Out-of-office Settings
: Enter and out of office message.
–
Size to retrieve emails
: Set email retrieval size.
–
Security Policies
: View email policies sent by server.
• Notification settings
–
Email notifications
: Enable or disable alerts in the Status Bar.
–
Select ringtone
: Choose a ringtone to use for new email alerts.
–
Vibrate
: Enable or disable vibration with new email alerts.
• Server settings
:
i500.book Page 67 Friday, October 7, 2011 11:20 AM
Page 72

Section 7: Web and Social Networking
YouTube
View and upload YouTube videos, right from your phone.
䊳
From a Home screen, touch
Applications
➔
YouTube
.
Browser (Google)
Zoom
•
Tap the screen twice to zoom in or out.
Selecting items on a page
While browsing pages, use gestures and menus to navigate links
on pages:
i500.book Page 68 Friday, October 7, 2011 11:20 AM
Page 73

3.
As you enter characters, potential matches display.
Continue entering characters, or touch a match to
complete the URL.
4. Touch
Go
to load the page.
Using Browser Windows
You can have up to eight windows open at one time, switching
between windows.
3. The new website is displayed as a thumbnail with the
command
Add
. Touch the bookmark to add it.
4. At the
Add bookmark
prompt, confirm the Name and
Location for the bookmark, then touch OK to save the
bookmark.
Accessing bookmarks and history
Launch a bookmarked page, or reload recent pages.
i500.book Page 69 Friday, October 7, 2011 11:20 AM
Page 74

4.
On the
Most visited
tab, use these options:
•
Touch a page to reload it.
•
Touch the star next to a page to bookmark it.
•
Touch and hold on a page for these options:
–
Open
: Launch the web page.
–
Open in new window
: Launch the web page in a new window.
–
Add bookmark/Remove from bookmarks
: Bookmark the page, or
remove the bookmark for this page.
–
Copy link URL
: Copy the page’s URL to the clipboard to paste in
another location.
–
Remove from history
: Remove the record of this page.
–
Set as homepage
: Set this page as the default first page when
opening the Browser.
Copying Fields or Text
Copy information from a web page to the clipboard for pasting.
Copying text
i500.book Page 70 Friday, October 7, 2011 11:20 AM
Page 75

Browser Menu
While viewing a web page, touch
Menu
for these options:
•
New window
: Open a new browser window. Previous browser
windows remain open in the background (use the Windows option to
switch between windows).
•
Windows
: Switch between windows, or open a new window.
•
Brightness setting
: Set the brightness of the display, if the Brightness
setting is not set to Automatic.
Browser Settings
1. From a Home screen, touch
Browser
.
2. Touch
Menu
➔
More ➔ Settings
:
• Page content settings
–
Default zoom
: Choose a default zoom level for web pages.
–
Open pages in overview
: When enabled, displays an overview of
newly-opened pages.
i500.book Page 71 Friday, October 7, 2011 11:20 AM
Page 76

–
Default storage
: Set your default storage location.
• Privacy settings
–
Clear cache
: Delete content and databases stored on the phone.
–
Clear history
: Delete the list of previously-visited pages.
–
Accept cookies
: When enabled, allows Browser to save and read
cookie information used by web pages.
–
Clear all cookie data
: Delete cookie information saved to the phone.
–
Remember form data
: When enabled, stores information you enter
Maps
Use Google Maps to find your current location, get directions, and
other location-based information.
Note:
You must enable location services to use Maps, and some features
require Standalone or Google location services. For more information,
see “Location & security” on page 121.
䊳
From a Home screen, scroll the screen to panel 3, then
i500.book Page 72 Friday, October 7, 2011 11:20 AM
Page 77

Maps Menu
1. From a Home screen, touch
Applications
➔
Maps
.
2. While viewing a map, touch
Menu
for these options:
•Search
: Enter text criteria to find locations or points of interest.
•Directions
: Get driving, public transport, or walking directions.
• My Places
: Synchronize your starred map items with Google maps.
i500.book Page 73 Friday, October 7, 2011 11:20 AM
Page 78

Section 8: Music
Amazon MP3
Amazon MP3 is a digital music store owned and operated by
Amazon.com. Using Amazon MP3 you can download DRM-Free
(digital rights management) MP3 formatted songs and albums.
1. From a Home screen, touch
Applications
➔
2. Music Player scans your memory card and displays your
songs on the
All, Playlists, Albums, Artists
, or
Genres
tabs.
3. Touch a song or playlist to begin playback.
Volume
5.1 Channel Mode
i500.book Page 74 Friday, October 7, 2011 11:20 AM
Page 79

• Repeat
: Touch to repeat the current song, repeat all songs, or
disable repeat mode.
• List / Now Playing
: Touch
List
to switch to a list view of songs.
To uc h
Now Playing
to display the current song title and details.
• 5.1 Channel Mode
: When listening with optional headphones,
touch to enable 5.1 Channel Mode for stereo sound.
• Playback controls
:
–
Touch to advance to the next song. Touch and hold to scan
Disc view
When you rotate the phone, you can choose Disc view to view
disc artwork during playback, and control playback.
i500.book Page 75 Friday, October 7, 2011 11:20 AM
Page 80

Organizer view
From Disc view, switch to Organizer view to view and select
songs alphabetically, sorted by Playlist, Album, Artist, or Genre.
Creating a Playlist
1. From a Home screen, touch
Applications
➔
Music Player ➔ Playlists
.
2. Touch
Menu ➔ Create
, then touch the name field to
enter a name for the playlist.
3. Touch
Save
to save the new playlist.
i500.book Page 76 Friday, October 7, 2011 11:20 AM
Page 81

Adding multiple songs to a playlist
1. From a Home screen, touch
Applications
➔
Music Player
.
2. Touch
Menu ➔ Add to playlist
.
3. Touch songs to select them, or touch
Select all
. When
selected, a checkmark appears in the checkbox.
4. Touch
Add
, then select a playlist, or touch
Create playlist
to
i500.book Page 77 Friday, October 7, 2011 11:20 AM
Page 82

Section 9: Pictures and Video
Camera
Use your phone’s built-in Camera to take pictures and record
video.
䊳
From a Home screen, touch
Applications
➔
Camera
.
Taking Pictures
1. From a Home screen, touch
Applications
➔
Camera
.
2. Using the display as a viewfinder, compose your picture by
aiming the lens at the subject.
i500.book Page 78 Friday, October 7, 2011 11:20 AM
Page 83

Camera Options
Configure the camera.
䊳
While in Camera mode, touch the
Options
tab to configure:
•
Shooting mode
: Choose an automatic shooting mode, from:
–
Single shot
: Take a single photo.
–
Smile shot
: Touch the Camera button to automatically focus on the
subject’s face and take the picture.
• Settings
➔ Camera
–
Outdoor visibilit
y: Enable to enhance screen visibility.
–
Focus mode
: Choose a type of automatic focus.
–
Scene mode
: Choose a mode to match conditions.
–
Resolution
: Choose a size for the image.
–
White balance
: Choose a setting for the light source.
–
Effects
: Apply an effect to pictures.
–
ISO
: Choose a setting for imaging sensitivity.
i500.book Page 79 Friday, October 7, 2011 11:20 AM
Page 84

• Settings
➔ Settings
–
Guidelines
: Enable or disable an on-screen grid to aid in photo
composition.
–
Review
: Enable or disable the instant review feature, to display images
immediately after capture.
–
GPS tag
: Save location information with a photo.
–
Shutter sound
: Select a tone to play when the camera’s shutter opens
and closes.
Camcorder
Use your phone’s built-in Camcorder to record high-definition
video in 720p resolution.
䊳
From a Home screen, touch
Applications
➔
Camera
➔
Mode
.
Mode Button
i500.book Page 80 Friday, October 7, 2011 11:20 AM
Page 85

Capturing Video
1. From a Home screen, touch
Applications
➔
Camera
➔ Camcorder
.
2. Using the display as a viewfinder, compose your shot by
aiming the lens at the subject.
•
Press the
Volume Key
to zoom in or out.
•
To configure settings, see
“Camcorder Options”
on page 81.
Camcorder Options
Configure the camcorder.
䊳
While in Camcorder mode, touch the
Options
tab:
•
Recording mode
: Choose a recording mode, from:
–
Normal
: Record a video of any length.
–
Limit for MMS
: Record a video up to 450K in size, suitable for sending
in a Video message.
i500.book Page 81 Friday, October 7, 2011 11:20 AM
Page 86

• Settings
➔ Settings
–
Guidelines
: Enable to display a grid to aid in video composition.
–
Audio recording
: Enable to record sound along with video.
–
Review
: Enable or disable the instant review feature, to display videos
immediately after recording.
–
Reset
: Set all Camcorder settings to the defaults
Video Player
Your phone’s
4-inch 800x400 Super AMOLED screen
plays
HD videos
3. Touch a video to play it. While playing a video, touch the
screen to display or hide on-screen Forward, Pause,
Backwardplayback controls.
4. While playing a video touch
Menu
for these options:
• Share video
: Send the video via AllShare, Bluetooth, Messaging,
YouTube, Gmail, or Email.
• Add bookmark
: Place a marker in the video, to view later.
i500.book Page 82 Friday, October 7, 2011 11:20 AM
Page 87

Gallery
Your phone’s
4-inch 800x400 Super AMOLED screen provides high-
resolution
display of:
•
Pictures, including JPEG, PNG, GIF, A-GIF, WBMP and BMP formats.
•
HD videos up to 720p, including H.263, H.264, MPEG4, 3GP, 3G2 (v9),
Xvid formats.
DivX Certified® to play DivX® video up to HD 720p,
including premium content
Use Gallery to view, capture, and manage pictures and videos.
Viewing Videos
1. From a Home screen, touch
Applications
➔
Gallery
.
2. Touch a category, then touch a video to play it.
3. While viewing a video, touch
Menu
for these options:
• Share video
: Share the selected picture via AllShare, Messaging,
YouTube, Bluetooth or Gmail.
i500.book Page 83 Friday, October 7, 2011 11:20 AM
Page 88

Viewing Pictures
1. From a Home screen, touch
Applications
➔
Gallery
.
2. Touch a category, then touch a picture to view it.
3. While viewing a picture, tap on the the screen or touch
Menu
for options:
•Share
: Share the selected picture via
AllShare, Picasa
,
Sharing pictures and video
Share pictures and videos via Email, AllShare, Bluetooth,
Messaging, Picasa, or Gmail.
1. From a Home screen, touch
Applications
➔
Gallery
.
2. Touch a category to display thumbnails, then select items
for sharing:
i500.book Page 84 Friday, October 7, 2011 11:20 AM
Page 89

Setting a Picture as a Contact Icon
1. From a Home screen, touch
Applications
➔
Gallery
.
2. Touch a category, then touch a picture to select it.
3. Touch
Menu ➔ More ➔ Set as ➔ Contact icon
.
4. Select a contact, or create a new contact, with the
selected picture as the contact’s icon.
Media Hub
Samsung Media Hub is your one stop for the hottest movie and
TV content. With hundreds of titles available at your fingertips,
entertaining on the go has never been easier. You can rent or
purchase your favorite content and watch from the convenience
of anywhere. Featuring the stunning viewing quality Samsung is
known for, Samsung Media Hub is your gateway to mobile video
like you've never experienced it before.
i500.book Page 85 Friday, October 7, 2011 11:20 AM
Page 90

3.
Browse content using these options:
• What's new
: Recently-added titles for rent or purchase.
•My Media
: Content you have previously purchased or rented.
• Movie Store
: Movies you can rent or purchase.
• TV Store
: TV shows you can rent or purchase.
4. When you find media you want to view, use these options:
• Watch Preview
: View a short clip from the movie or show.
i500.book Page 86 Friday, October 7, 2011 11:20 AM
Page 91

Section 10: Connections
Your phone includes features to connect to the internet and to
other devices, via Wi-Fi, Bluetooth, VPN and Dial Up Networking.
Wi-Fi
Wi-Fi is a wireless networking technology that provides access to
local area networks. Use your phone’s Wi-Fi feature to:
Turning Wi-Fi On or Off
Turn your phone’s Wi-Fi service on or off. When you turn Wi-Fi
service on, your phone automatically searches for available, inrange WAPs (Wireless Access Points).
Turning Wi-Fi On
i500.book Page 87 Friday, October 7, 2011 11:20 AM
Page 92

Scanning and Connecting to a Wi-Fi Network
When you turn on Wi-Fi, your phone searches for available Wi-Fi
connections, then displays them on screen.
1. From the Home screen, sweep your finger downward to
display the Notification Panel.
2. Touch
Wi-Fi
to turn Wi-Fi On.
3. When your phone completes a scan, touch a Wi-Fi network
Adding a Wi-Fi Network Manually
1. From the Home screen, sweep your finger downward to
display the Notification Panel.
2. Touch
Wi-Fi
to turn Wi-Fi On.
3. On the pop-up Wi-Fi settings menu, touch
Add network
,
then enter these fields:
• Network Name (SSID)
: Enter the name of the Wi-Fi Wireless
i500.book Page 88 Friday, October 7, 2011 11:20 AM
Page 93

Bluetooth
Bluetooth is a short-range wireless communications technology
for exchanging information over a distance of about 30 feet.
You don’t need to line up the devices to send information with
Bluetooth. If the devices are in range, you can exchange
information between them, even if they are in different rooms.
Configuring Bluetooth Settings
Pairing with a Bluetooth Device
Search for a Bluetooth device and pair with it, to exchange
information between your phone and the device.
Note:
After pairing, your phone and the target device will recognize each
other and exchange information without having to enter a passcode or
PIN.
When paired, the
Bluetooth Paired
icon displays in the
Annunciator Line.
i500.book Page 89 Friday, October 7, 2011 11:20 AM
Page 94

•
If the device allows automatic or smart pairing, your phone will
attempt to pair with the phone automatically. Follow the prompts on
your phone and the target device to complete the pairing.
Airplane mode
When active, this option disables all wireless connections, voice
as well as data.
䊳
From a Home screen, touch
Menu ➔ Settings
➔
Wireless & network ➔ Airplane mode
.
Adding a VPN
1. From a Home screen, touch
Menu ➔ Settings
➔
Wireless & network ➔ VPN settings
.
2. Tou ch
Add VPN
to set up a connection to a VPN, using the
following settings:
• Add PPTP VPN
: Set up a connection to a VPN with Point-to-Point
tunneling protocol.
i500.book Page 90 Friday, October 7, 2011 11:20 AM
Page 95

Mobile Networks
Mobile Network settings let you control whether your phone
operates outside your home network location and/or whether
your phone’s data services operate outside your home network
location.
1. From a Home screen, touch
Menu ➔ Settings
➔
Wireless & networks ➔ Mobile networks
. The following
Important!:
To prevent damage to information stored on the memory card,
unmount the card before removing it from the phone.
Formatting a Memory Card
Formatting erases all content from the memory card and
prepares it for use with your phone.
Formatting a Memory Card using Your Phone
1. From a Home screen, touch
Menu ➔ Settings
➔
i500.book Page 91 Friday, October 7, 2011 11:20 AM
Page 96

Transferring Files to a Memory Card
1. From a Home screen, touch
Menu ➔ Settings ➔ USB
settings ➔ Mass Storage
.
2. Attach your phone to the computer with a USB cable.
3. At the USB connected screen, touch
Connect USB Storage
.
At the prompt, touch OK to enable copying of files between
your computer and the memory card.
i500.book Page 92 Friday, October 7, 2011 11:20 AM
Page 97

Section 11: Applications and Widgets
AllShare
Use AllShare to synchronize your mobile phone with your TV via
Wi-Fi to stream content to your TV.
Note:
You must activate Wi-Fi to use this application. For more information,
For more information, refer to “Wi-Fi” on page 87.
Apps
Discover Apps provides quick and easy access to the best
Android applications.
The Discover team reviews thousands of Android apps and
selects the most useful, and most fun Android apps, and then
i500.book Page 93 Friday, October 7, 2011 11:20 AM
Page 98

Asphalt 5
The Asphalt 5 game you can get behind the wheel of over 30
vehicles from prestigious manufacturers and race in 12 unique
locations, with varied track surfaces, short cuts and jumps.
䊳
From a Home screen, touch
Applications
➔
Asphalt 5
.
Barcode Scanner
Books
Google eBooks is a new way to discover, buy, and enjoy your
favorite books online and offline.
䊳
From a Home screen, touch
Applications ➔
Books
.
Browser
Your phone includes a full HTML Browser, to access the internet.
i500.book Page 94 Friday, October 7, 2011 11:20 AM
Page 99

Calendar
Record events and appointments to manage your schedule.
1. From a Home screen, touch
Applications
➔
Calendar
.
2. Touch a tab to choose a calendar view:
•Month
: Display the current month and scroll to other months.
•Week
: Display the current week, and scroll to other weeks.
Customizing the Calendar
1. From a Home screen, touch
Applications
➔
Calendar
.
2. Touch
Menu ➔ Settings
to configure these settings:
• View settings
–
Calendars
: View all your calendars.
–
Calendar sync
: Synchronize calendars from multiple accounts.
i500.book Page 95 Friday, October 7, 2011 11:20 AM
Page 100

Sending Events via Bluetooth
Send events as vCalendar files to other Bluetooth devices.
1. From a Home screen, touch
Applications
➔
Calendar
.
2. Touch an event to display its details.
3. Touch
Menu ➔ Send via
.
Clock
The Clock application includes these features:
•
Alarm
: Create alarms to go off once, or to repeat on specific days.
•
World clock
: Display the time and date in any time zone.
•
Stopwatch
: Record lap times.
•
Timer
: Measure elapsed time.
䊳
From a Home screen, touch
Applications
➔
i500.book Page 96 Friday, October 7, 2011 11:20 AM
 Loading...