

Samsung Galaxy S 9 Getting Started

Meet your
phone.
Para la versión en español, visite
verizonwireless.com/Support
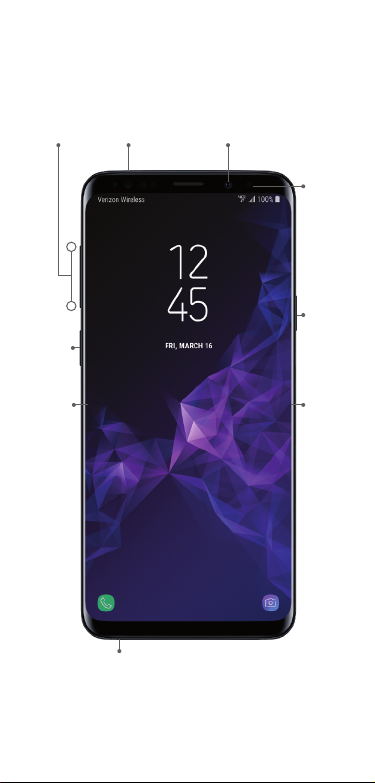
About your phone
Volu me
buttons
SIM/microSD
card slot
+
camera
Front
Iris
scanner
-
Bixby
button
Edge
screen
NOTE: Devices and software are constantly evolving—the
screen images and icons you see here are for reference
only.
FPO
Headset jack
Pow er/
Lock
button
Edge
screen
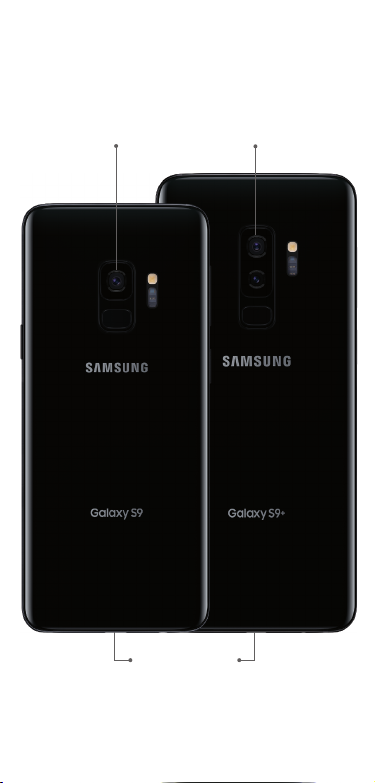
Rear
camera
USB/Charger port
Dual
camera
Setting up your phone
Your phone already has a SIM card installed.
Optional: Insert the microSD card
1. With the scre en facing up, i nsert the too l that came
with your ph one into the hole o n the SIM/mi croSD
card tray to ope n it.
2. Carefully s lide out the tray.
3. Insert th e microSD c ard into the tray with the g old
contacts fac ing down (as sh own).
4. Carefully s lide the tray bac k into place.
88%
Thu, January 4
SIM ca rd
microSD card
™
NOTE: microSD card sold separately.
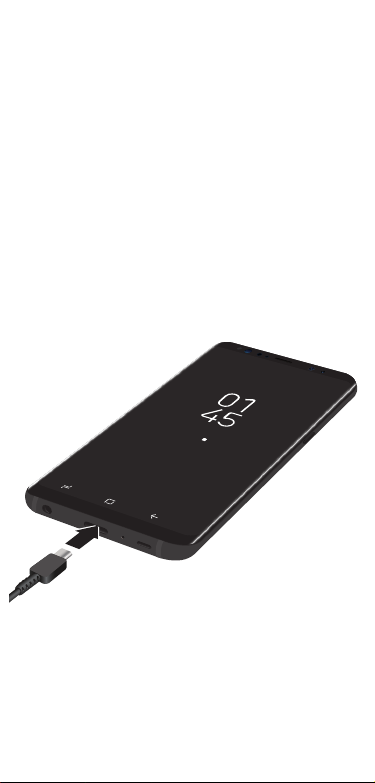
Charge the Phone
Thu, January 4
88%
Before turning on your phone, charge it fully.
Your phone comes with an Adaptive Fast Charging
charger and a USB cable. Plug the smaller end of the
cable into the USB/charger port on your phone and the
larger end into the charger. Then plug the charger into
an electrical outlet.
CAUTION: Use only charging devices that are approved
by Samsung. Samsung accessories are designed for your
device to maximize battery life. Using other accessories
may void your warranty and may cause damage.
 Loading...