

Samsung GALAXY S6, SM-G920 Schematics Direy
Level
)
WWW.AliFixit.COM
WWW.ALISALER.COM
7.
7-2. Disassembly
Repair
2
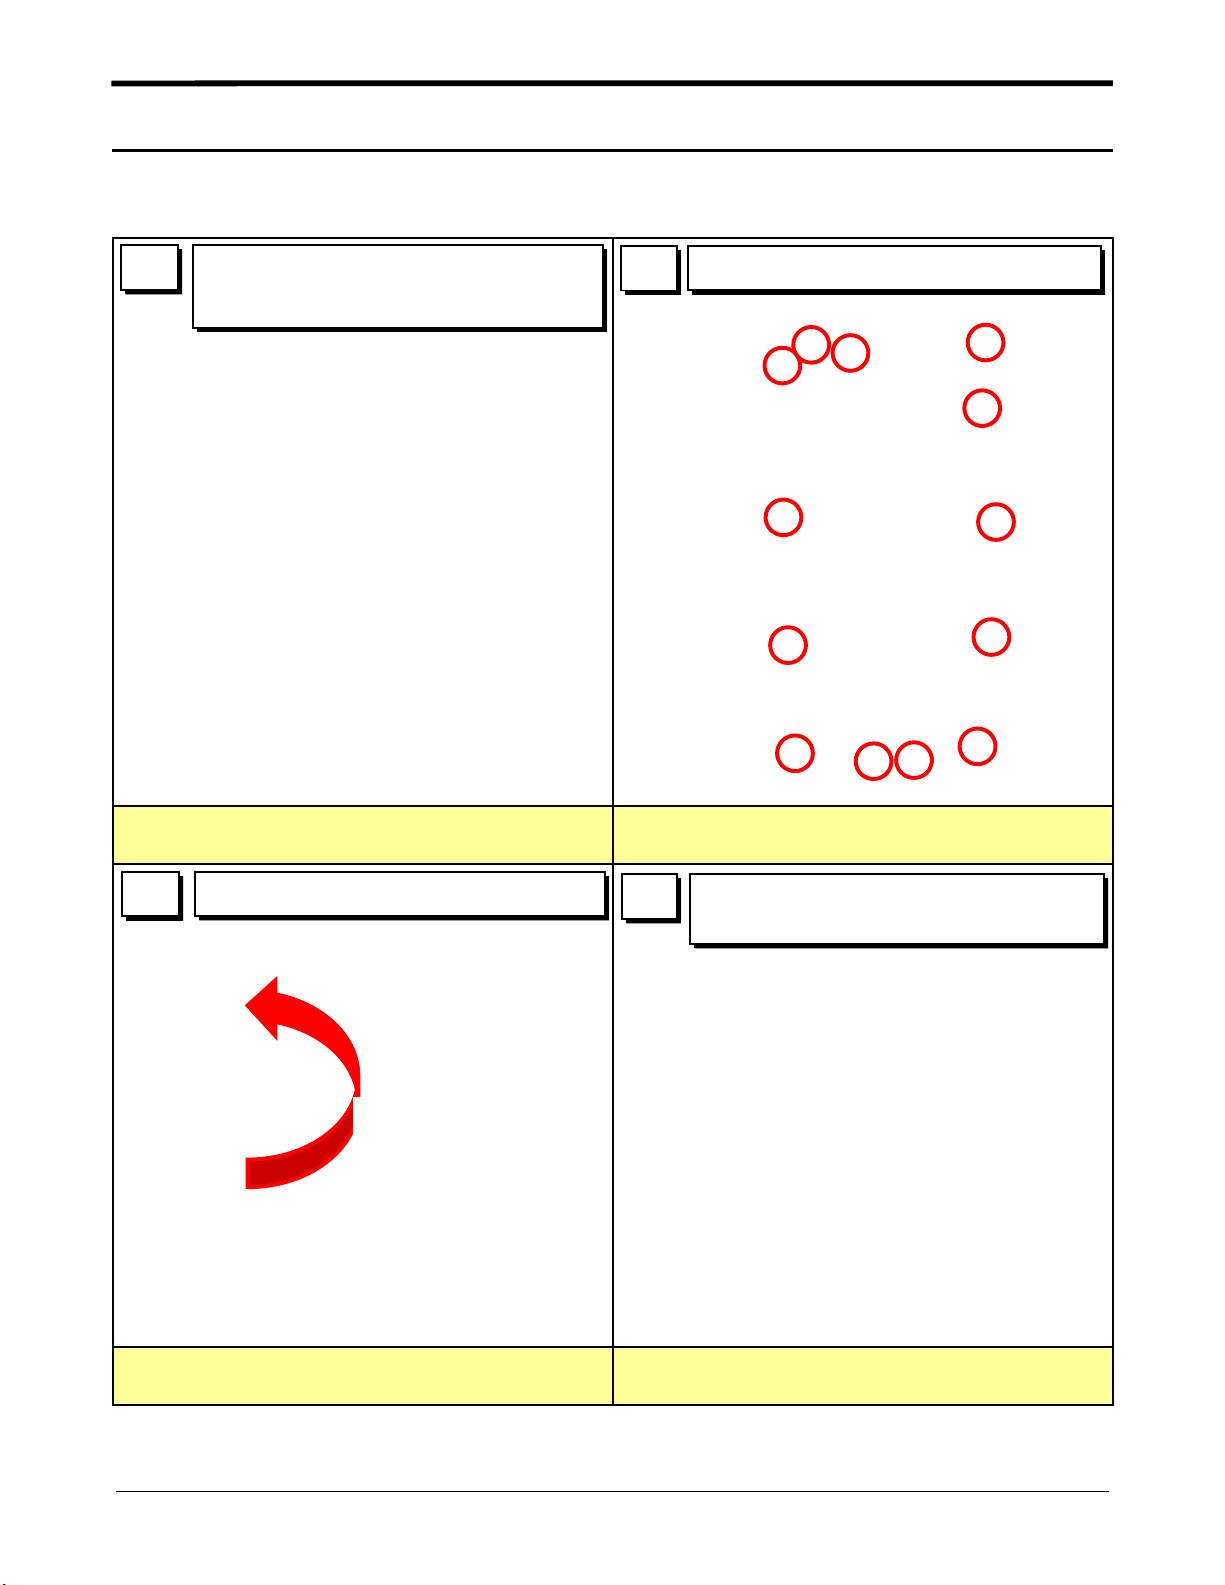
1
※Caution
1) Be care of scratch and time
1) Put the device in the chamber for
5 minutes under 70~80℃.
2
Detech the Back Glass.
2 Unscrew 13 Point.
※Caution
1) Be care of scratch
3 Disassemble the REAR.
※Caution
1) Be care of REAR damage
4
※Caution
1) Be care of connector/cable damage
Detach coaxial cable and connector.
(5 Point)
Confidential and proprietary-the contents in this service guide subject to change without prior notice.
Distribution, transmission, or infringement of any content or data from this document without Samsung’swritten authorization is strictly prohibited.
7-1
Level2Repair
WWW.AliFixit.COM
WWW.ALISALER.COM
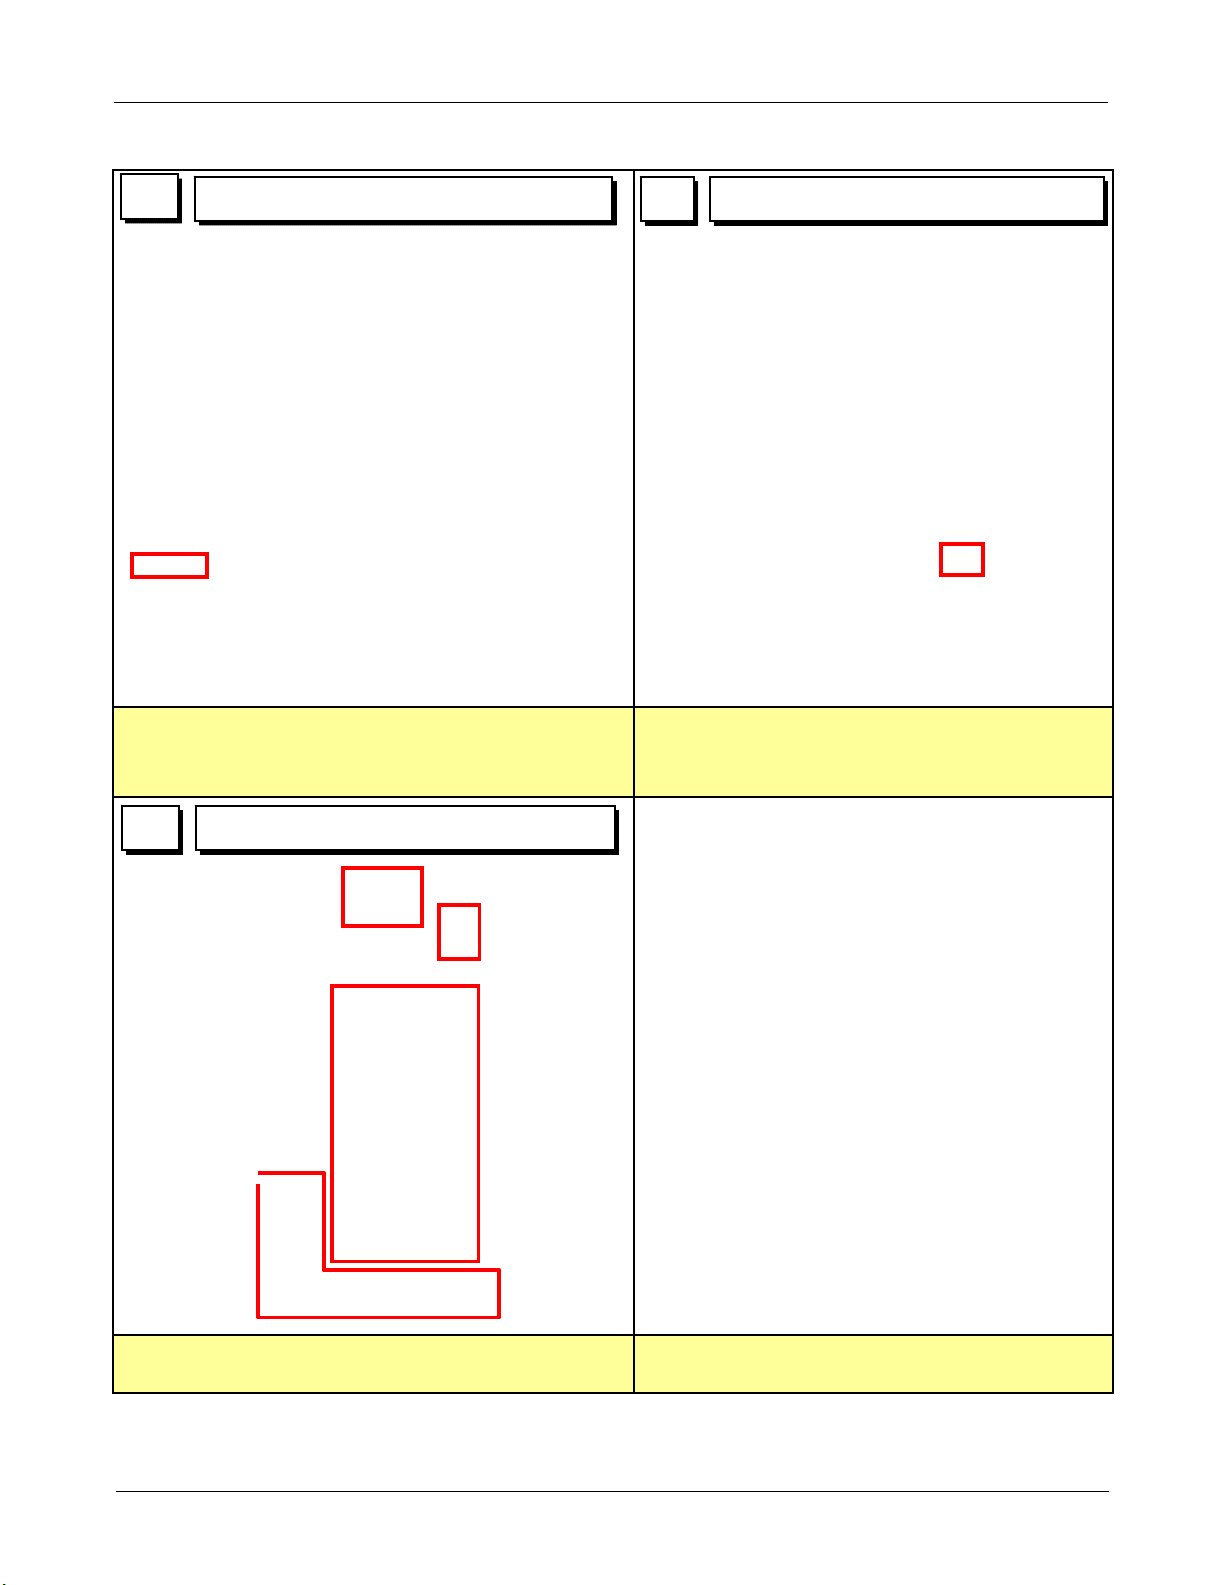
5
※Caution
1) Be care of FPCB damage
2) Be care of SUB PBA connector
Detach main PBA from bracket.
6 UnScrew 1 Point
※Caution
1) Be care of damage
7 Detach other components.
※Caution
1) Be care of FPCB damage
Confidential and proprietary-the contents in this service guide subject to change without prior notice.
Distribution, transmission, or infringement of any content or data from this document without Samsung’swritten authorization is strictly prohibited.
7-2
 Loading...