

Page 1
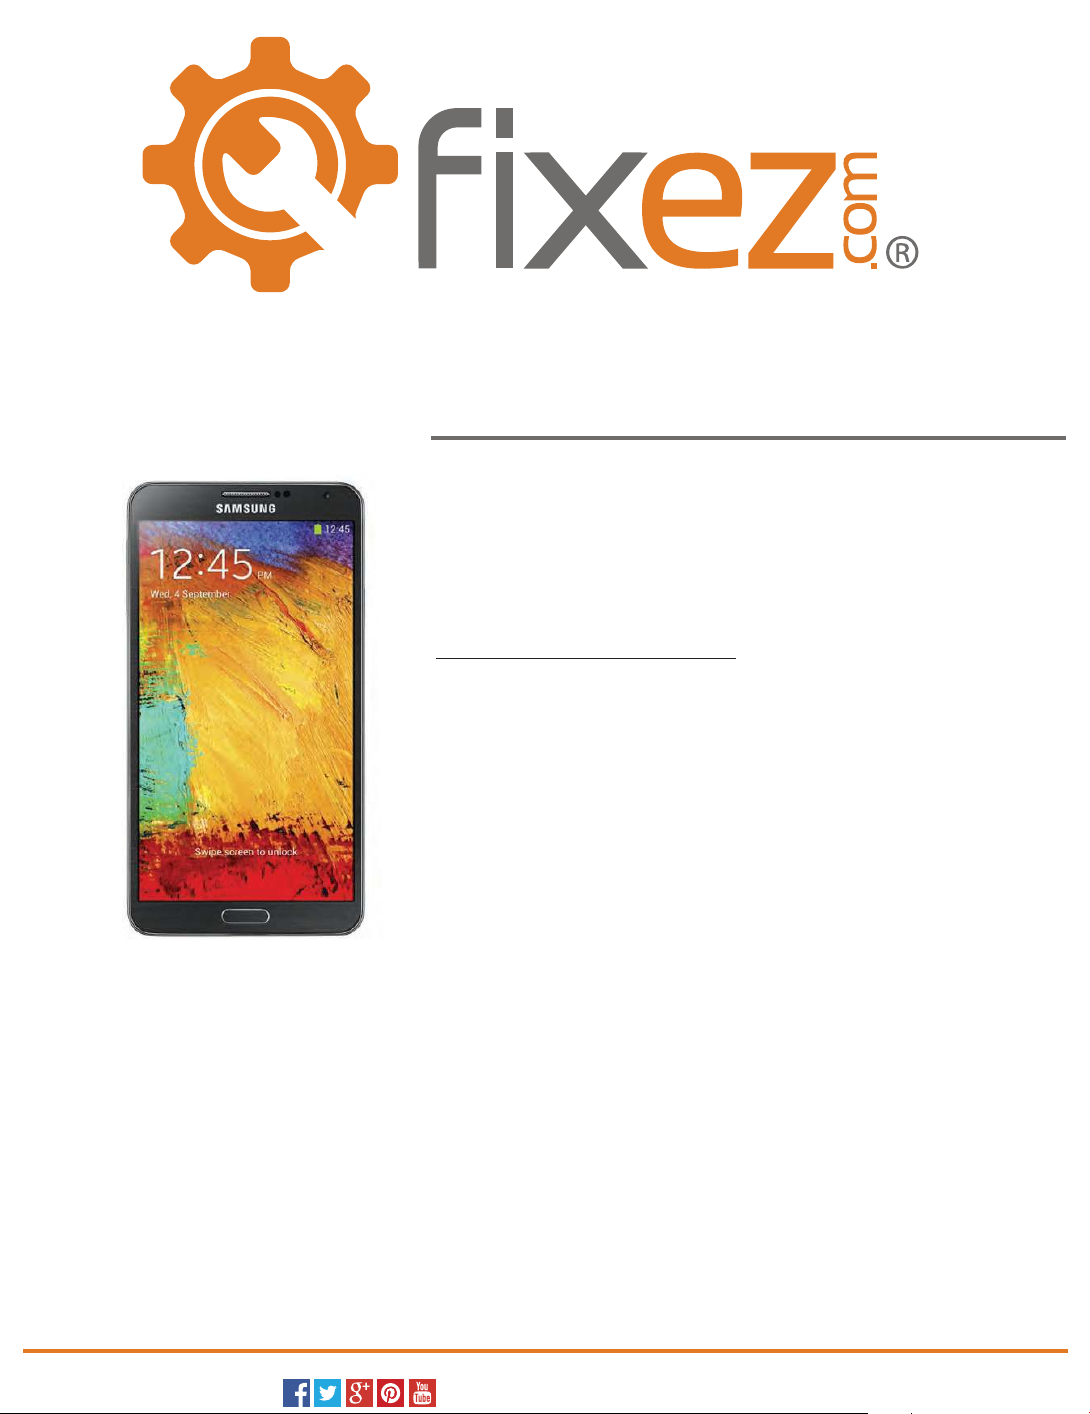
Samsung Galaxy Note 3 (SM-N900T)
DISASSEMBLE GUIDE
Recommended Tools
•
5-0016 Small Phillips Screwdriver
•
5-0019 Plasc Opening Tools
•
5-0022 Nylon Spudger
•
5-0458 An-Stac Wrist Strap
•
5-1370 Fine Tip Curved Tweezers
•
Heat Gun / Blow Dryer
This guide will show you how to completely disassemble the Samsung Galaxy Note 3 smartphone, assisng in
making the DIY repair of the device both simple, and safe. Following the comprehensive steps we have
provided will help you quickly replace not only a broken Note 3 display assembly, but also any other internal
components that may have become faulty or damaged.
You can find a full archive of fixez.com disassemble guides and HD repair videos, for numerous makes and
models of smartphones and tablets, by vising hp://www.fixez.com.
hp://www.fixez.com/
Page 1 of 7
Page 2
Samsung Galaxy Note 3 (SM-N900T) – Disassemble Guide
Baery
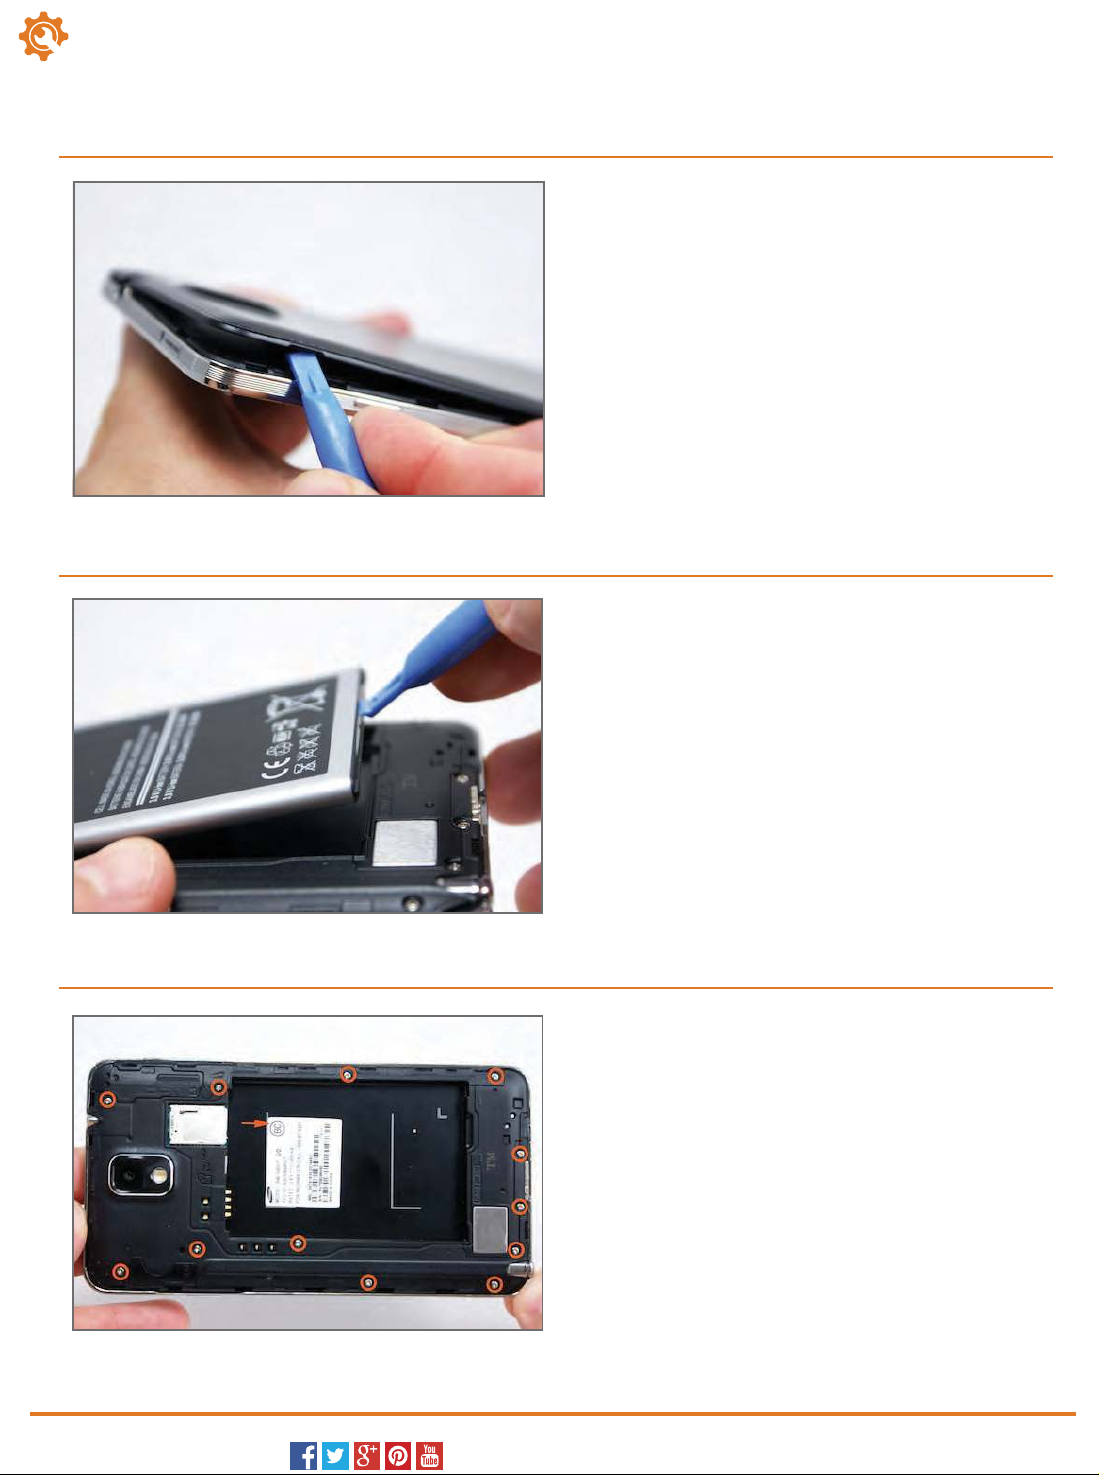
On the audio jack side of the smartphone, insert the
1.
plastic opening tool in the notch located in the back
cover. Work your way around the entire Note 3, gently
free the clips and then remove the back battery cover
from the smartphone.
Use the plastic opening tool to pry the battery up and
2.
out of its secured location.
Loud Speaker
hp://www.fixez.com/
The SIM card and the microSD card should now both be
3.
easily accessible, remove them from the Galaxy Note 3.
Next, locate and remove the twelve small Phillips screws
(#00) that secure the rear housing and loudspeaker to
the front housing and display assembly.
Page 2 of 7
Page 3

Samsung Galaxy Note 3 (SM-N900T) – Disassemble Guide
Slide the stylus pen out of its location and remove it
4.
from the smartphone.
The rear housing and loudspeaker can be removed
5.
using your curved tweezers. Begin the separation
toward the bottom of the smartphone and work
around the entire perimeter releasing the clips and
removing the rear housing.
hp://www.fixez.com/
Locate and release the coaxial cable connections, use
6.
the nylon spudger or fine tip curved tweezers to pry
them up from their sockets (marked with orange
circles).
Now locate and release the six wafer connections, use
the nylon spudger or fine tip curved tweezers and pry
them up from their sockets (marked with orange
rectangles).
Page 3 of 7
Page 4

Samsung Galaxy Note 3 (SM-N900T) – Disassemble Guide
You can now remove the motherboard from the Note 3.
7.
Carefully maneuver it around the released connections
and lift it away from the smartphone.
Rear-Facing Camera
With your fine tip curved tweezers, remove the
8.
rear-facing camera by prying up and releasing the cable
on the bottom side of the motherboard.
Front-Facing Camera & Proximity Sensor Assembly
There is a metal clip securing the front-facing camera
9.
and proximity sensor assembly into the smartphone.
Remove the clip and then use the fine tip curved
tweezers or nylon spudger to pry up and release the
front-facing camera and proximity sensor assembly
cable.
hp://www.fixez.com/
Page 4 of 7
Page 5

Samsung Galaxy Note 3 (SM-N900T) – Disassemble Guide
Audio Jack & Earpiece Speaker Assembly
Locate and remove the one small Phillips screw (#00)
10.
that secures the audio jack and earpiece speaker
assembly (marked with orange circle).
Now use the fine tip curved tweezers to gently
maneuver the assembly up and out of the Note 3.
Dock Connector Assembly
The dock connector assembly is held in place by
11.
adhesive, with your nylon spudger gently pry it up and
remove it from the Galaxy Note 3 (the use of a heat
gun is optional to soften the adhesive).
Display Assembly (LCD & Touch Screen Digizer)
At this time, the display assembly (LCD & touch screen) is
12.
fused together and cannot be separated. It is secured to
the front housing/frame of the smartphone with a lot of
adhesive that will require heat and patience in order to
separate.
This procedure is recommended only on a Note 3 with a
display assembly that is already cracked or damaged.
Using the heat gun, begin warming up the adhesive that
secures the LCD & touch screen digitizer assembly to the
smartphones front housing/frame.
hp://www.fixez.com/
Page 5 of 7
Page 6
Samsung Galaxy Note 3 (SM-N900T) – Disassemble Guide
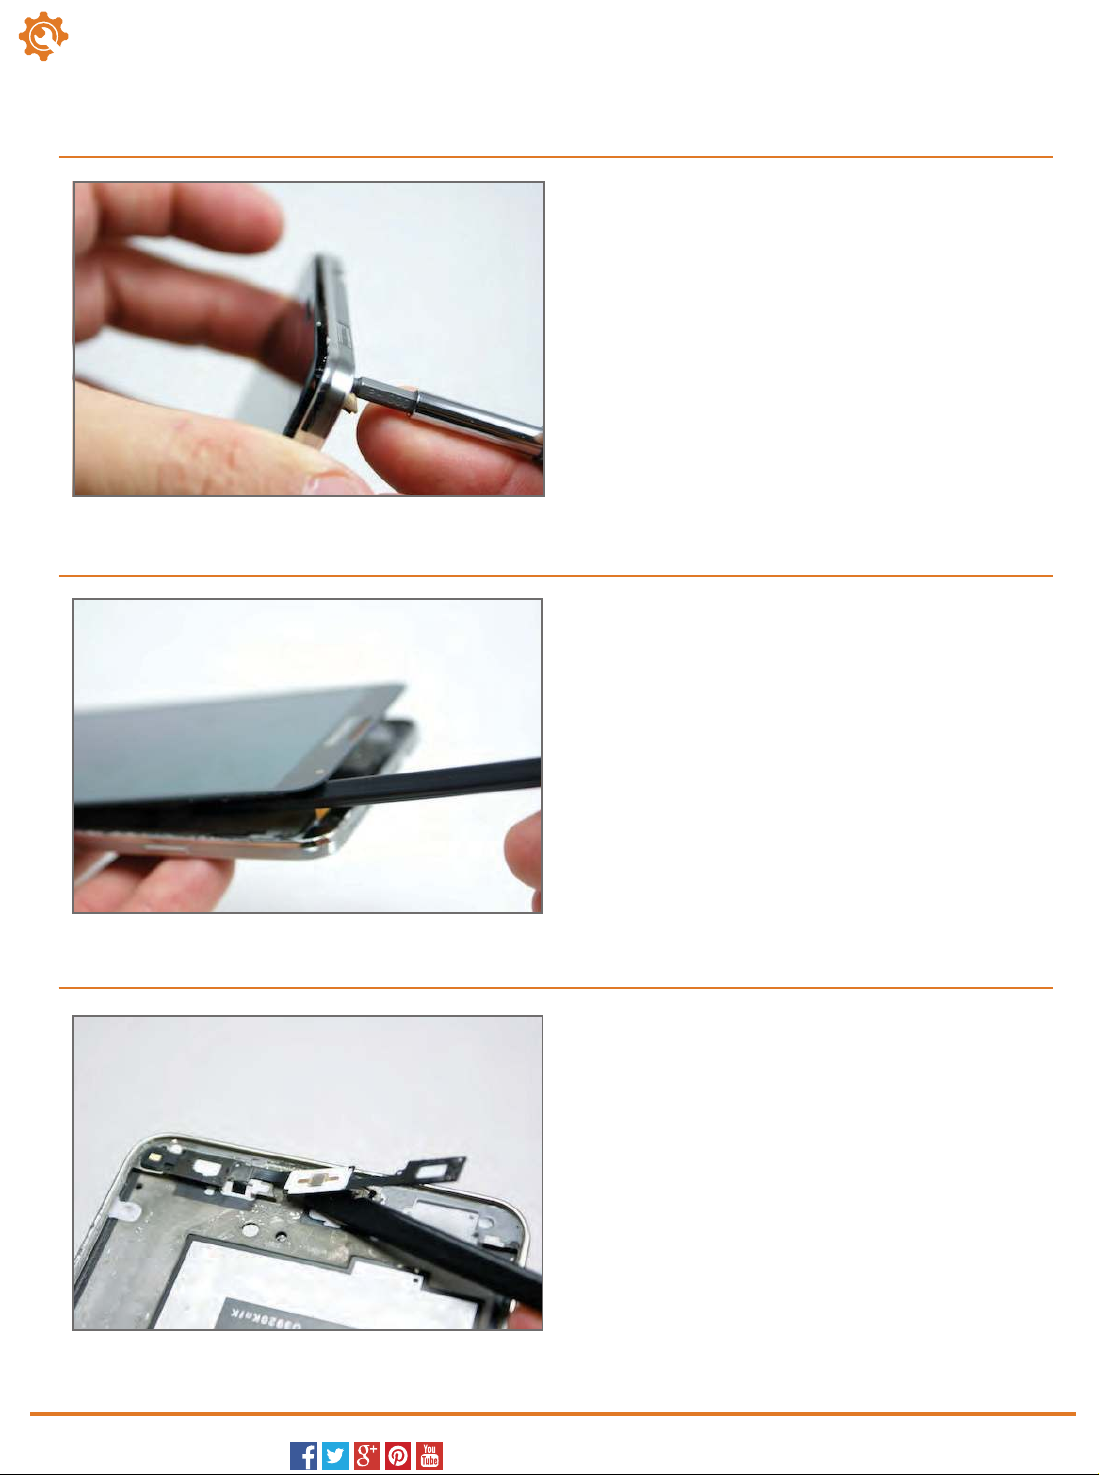
Next, to begin the separation of the display assembly
13.
from the front housing/frame, use a small screwdriver
and through the front-facing camera hole push the
damaged display away from the front housing/frame.
Make sure you have a firm grip of the front
housing/frame.
Using your nylon spudger or plastic opening tool, and
14.
additional heat if necessary, continue working the
display assembly away from the front housing/frame.
Home Buon Assembly
Be mindful of the home button assembly toward the
bottom of the Note 3, it can easily become damaged if
you’re too aggressive around its location.
With your display assembly completely peeled away
15.
from the front housing/frame, you can now use the
nylon spudger to carefully remove the home button
assembly.
hp://www.fixez.com/
Page 6 of 7
Page 7

Samsung Galaxy Note 3 (SM-N900T) – Disassemble Guide
Breakdown
1. Samsung Galaxy Note 3 Back Cover
2. Samsung Galaxy Note 3 Rear Housing
3. Samsung Galaxy Note 3 Frame/Front Housing
4. Samsung Galaxy Note 3 Display Assembly (LCD & Touch
5
1 2
3
4
6
4. Screen)
5. Samsung Galaxy Note 3 Motherboard
6. Samsung Galaxy Note 3 Battery
7. Samsung Galaxy Note 3 Home Button Assembly
8. Samsung Galaxy Note 3 Stylus Pen
9. Samsung Galaxy Note 3 Rear-Facing Camera
10. Samsung Galaxy Note 3 Front-Facing Camera & Proximity
10. Sensor Assembly
11. Samsung Galaxy Note 3 Audio Jack & Earpiece Speaker
11. Assembly
12. Samsung Galaxy Note 3 Home Button
13. Samsung Galaxy Note 3 Dock Connector Assembly
8
9
10
11
12
7
13
Noce/Warning:
FIXEZ.COM DOES NOT ACCEPT ANY LIABILITY FOR DAMAGE, OR INJURY CAUSED, WHILE YOU ARE
FOLLOWING OUR DISASSEMBLE GUIDES. WE MAKE NO REPRESENTATIONS, WARRANTIES, OR
CONDITIONS OF ANY KIND, EXPRESS OR IMPLIED. UTILIZING THESE GUIDES TO HELP ASSIST YOU IN
REPAIRING YOUR MOBILE DEVICES WILL VOID YOUR WARRANTY. FIXEZ.COM STRICTLY PROHIBITS
ALTERING OR MODIFYING OUR DISASSEMBLE GUIDES FOR COMMERCIAL USE, REPRODUCTION, OR
PUBLICATION.
hp://www.fixez.com/
Page 7 of 7
 Loading...