

Samsung FTQ352IWUX/XAA-03, FTQ352IWUX/XAA-02, FTQ352IWUX/XAA-01, FTQ352IWUX/XAA-00, FTQ352IWUW/XAA-00 Owner’s Manual
...
otr o ange
user manua
the poss_b_lut_es
Thank you for purchasing this Samsung product,
Toreceivemore comdete service, pleaseregister
your product at
www.samsung.com/global/register
u u u m
Enhanced convenience. Better cooking. Easy maintenance. Your new electric range has been designed to
bring you these benefits and more.
The latest in heat-distribution technology
Other ranges with just one fan tend to make a swirl of heat that fails to cover the whole inside of
the oven. This means uneven heat distribution and uneven cooking. Your new range has Surround
Airvection TM, which Samsung innovated by adding a third heating element and a multi-fan system
that circulates the heat evenly in all directions. You get more efficient energy consumption and
more even cooking.
Steam Quick cleaning
Thanks to Steam Quick TM, Samsung's unique technology for light-duty cleaning jobs, keeping
your oven spick-and-span is a snap -- no hassle, no odor, no chemicals. Steam Quick TM cleans
the inside of your range with high-temperature steam in just 20 minutes.
Bigger is better
With a capacity of 5.7 cubic feet, your new range is equipped with more space than any of its
competitors in the U.S. market. This means greater convenience for you when cooking for the
holidays or when entertaining.
A cooktop with 5 burners
Four main burners with two that dial heat up to different pot sizes.
A smaller warming burner in the center of the range top.
S
Read and follow all instructions before using your oven to prevent the risk of fire, electric shock,
personal injury, or damage when using the range. This guide does not cover all possible conditions
that may occur. Always contact your service agent or manufacturer about problems that you do not
understand.
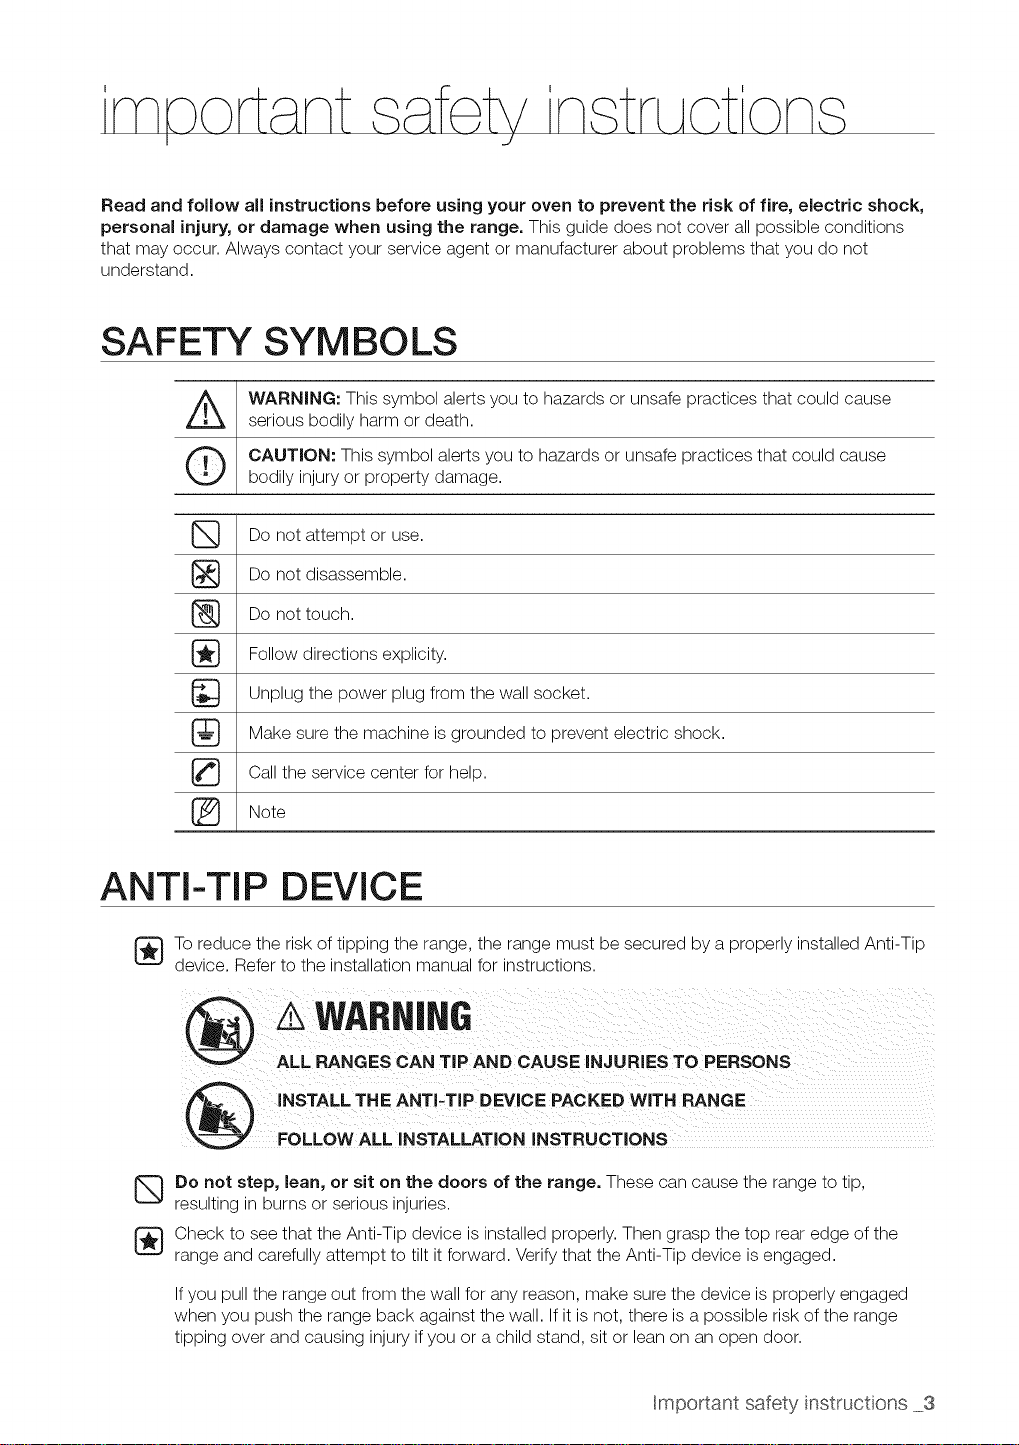
SAFETY SYMBOLS
WARNING: This symbol alerts you to hazards or unsafe practices that could cause
serious bodily harm or death.
O CAUTION: This symbol alerts you to hazards or unsafe practices that could cause
bodily injury or property damage.
Do not attempt or use.
Do not disassemble.
Do not touch.
Follow directions explicity.
Unplug the power plug from the wall socket.
Make sure the machine is grounded to prevent electric shock.
Call the service center for help.
_ Note
ANTI-TIP DEVICE
To reduce the risk of tipping the range, the range must be secured by a properly installed Anti-Tip
device. Refer to the installation manual for instructions.
@ wARNI.6
iNSTALL TH E ANTI_TIPD EvIO EPAC KED WiTH RAN GE
roL,oWA,, NSTALLAT ON NSTRUCT ONS
Do not step, lean, or sit on the doors of the range. These can cause the range to tip,
resulting in burns or serious injuries.
[_ heck to see that the Anti-Tip device is installed properly. Then grasp the top rear edge of the
range and carefully attempt to tilt it forward. Verify that the Anti-Tip device is engaged.
Ifyou pull the range out from the wall for any reason, make sure the device is properly engaged
when you push the range back against the wall. If it is not, there is a possible risk of the range
tipping over and causing injury if you or a child stand, sit or lean on an open door.
Hmportant safety instructions 3
FOR YOUR SAFETY
When using electrical appliances, basic safety precautions should be followed, including the
following:
Use this appliance only for its intended purpose as described in this Owner's Manual.
Potentially hot surfaces include the cooktop, areas facing the cooktop, oven vent opening,
surfaces near the opening, crevices around the oven door.
Be is installed and technician.
sure your appliance properly grounded by a qualified
[_ o not repair or replace any part of the appliance unless specifically recommended inthe manual.
All other servicing should be referred to a qualified technician.
_} lways disconnect power to appliance before servicing by removing the fuse or switching off the
circuit breaker.
Do not enter inside the oven.
Do not store items of interest to children in cabinets above a range or on the back guard
of a range. Children climbing on the range to reach items could be seriously injured.
Do not leave children alone. Children should not be left alone or unattended in an area where
appliance is in use. They should never be allowed to sit or stand on any part of the appliance.
Never use your appliance for warming or heating the room.
Do not use water on grease fires. Turn off the oven to avoid spreading the flame. Smother the
fire or flame by closing the door or use dry chemical, baking soda, or foam-type extinguisher.
Storage in or on appliance. Flammable materials should not be stored in an oven or near
surface units. Be sure all packing materials are removed from the appliance before operating it.
Keep plastics, clothes, and paper away from parts of the appliance that may become hot.
Wear proper apparel. Loose-fitting or hanging garments should never be worn while using the
appliance.
Use only dry potholders. Moist or damp potholders on hot surfaces may result in burns from
steam. Do not let the potholder touch hot heating elements. Do not use a towel or other bulky
cloth.
Teach children not to play with the controls or any other part of the range.
4 Hmportant safety instructions
SURFACE COOKING UNITS
_ ever leave surface units unattended at high heat settings. Boilovers cause smoking and
greasy spillovers that may ignite.
Do not lift the cooktop. Lifting the cooktop can lead to damage and improper operation of the
range.
Do not operate the cooktop when there is no cookware. If the cooktop operates without a
cookware, the control knob will become hot.
Never use the glass cooktop surface as a cutting board.
Use care when touching the cooktop. The glass surface of the cooktop will retain heat after
the controls have been turned off.
Be careful when placing spoons or other stirring utensils on glass cooktop surface when
it is in use. They may become hot and could cause burns.
Use proper pan sizes. This appliance is equipped with surface units of different size. Select
utensils having flat bottoms large enough to cover the surface unit heating element. The use of
undersized utensils will expose a portion of the heating element to direct contact and may result in
ignition of clothing. Proper relationship of utensil to burner will also improve efficiency.
Glazed cooking utensils. Only certain types of glass, glass/ceramic, ceramic,earthenware,
or other glazed utensils are suitable for range-top service without breaking due to the sudden
change in temperature.
Utensil handles should be turned inward and not extend over adjacent surface units. To
reduce the risk of burns, ignition of flammable materials, and spillage due to unintentional contact
with the utensil, the handle of a utensil should be positioned so that it is turned inward, and does
not extend over adjacent surface units.
Read and follow all instructions and warnings on the cleaning cream labels.
Be sure you know which control knob operates each surface unit. Make sure you turned on the
correct surface unit.
Always turn the surface units off before removing cookware.
When preparing flaming foods under the hood, turn the fan on.
Keep an eye on foods being fried at high or medium high heat settings.
Hmportant safety instructions 5
OVEN
DO NOT TOUCH HEATING ELEMENTS OR INTERIOR SURFACES OF THE OVEN. Heating
elements may be hot even though they are dark in color. Interior surfaces of an oven become
hot enough to cause burns. During and after use, do not touch or let clothing or other flammable
materials contact heating elements or interior surfaces of oven until they have had sufficient time
to cool. Other surfaces of the appliance may become hot enough to cause burns. Among these
surfaces are oven vent openings and surfaces near these openings, oven doors, and windows of
oven doors.
Do not heat unopened food containers. Build-up of pressure may cause container to burst
and result in injury.
Do not use the oven to dry newspapers. Ifoverheated, they can catch on fire.
Do not use the oven for a storage area. Items stored in an oven can ignite.
Use care when opening door, Let hot air or steam escape before you remove or replace food in
the oven.
Protective liners. Do not use aluminum foil to line the oven bottoms, except as suggested in the
manual. Improper installation of these liners may result in a risk of electric shock or fire.
Keep oven vent ducts unobstructed. The oven vent is located above the right rear surface
unit. this area could become hot during oven use. Never block this vent and never place plastic or
heat-sensitive items on vent
Placement of oven racks. Always place oven racks in the desired location while the oven is
cool. If the rack must be moved while oven is hot, do not let the potholder come in contact with
the hot heating element in the oven.
Do not allow aluminum foil or meat probe to contact heating elements.
WARMING DRAWER
[] O NOT TOUCH THE HEATING ELEMENT OR THE INTERIOR SURFACE OF THE
DRAWER. These surfaces may be hot enough to burn.
REMEMBER: The inside surface of the drawer may be hot when the drawer is opened.
_} he purpose of the warming drawer is to hold hot cooked foods at serving temperature.
Always start with hot food; cold food cannot be heated or cooked in the warming drawer.
Use care when opening the drawer. Open the drawer a crack and let hot air or steam escape
before removing or replacing food. Hot air or steam which escapes can cause burns to hands,
face and/or eyes.
Do not use the drawer to dry newspapers. If overheated, they can catch on fire.
Do not use aluminum foil to line the drawer. Foil is an excellent heat insulator and will trap
heat beneath it. This will upset the performance of the drawer and it could damage the interior
finish.
Do not leave paper products, plastics, canned food or combustible materials in the drawer.
Never leave jars or cans of fat drippings in or near your drawer.
Do not warm food in the drawer for more than three hours.
6 Hmportant safety instructions

SELF-CLEANING OVENS
Do not clean door gasket. The door gasket is essential for a good seal. Care should be taken
not to rub, damage, or move the gasket.
_ Never keep pet birds in the kitchen. The health of birds is extremely sensitive to the fumes
released during an oven self-clean cycle. Fumes may be harmful or fatal to birds. Move birds to a
well-ventilated room.
Clean in the self-clean cycle only parts listed in this manual. Before self-clean the oven,
remove the broil pan, rack, utensils, and food.
No commercial oven cleaner or oven liner protective coating of any kind should be used in or
on the outside of the oven. Use only a ceramic cooktop cleaner or the cleaner supplied with this
appliance on the glass cooktop.
Nickel oven shelves should be removed from the oven before beginning the self-cleaning cycle, or
they may discolor.
If the self-clean mode malfunctions, turn the oven off and disconnect the power supply. Have it
serviced by a qualified technician.
VENTILATING HOOD
,Z} lean ventilating hoods frequently. Grease should not be allowed to accumulate on the hood
or filter.
When flaming foods under the hood, turn the fan on.
GLASS/CERAMIC COOKING SURFACES
DO NOT TOUCH SURFACE UNITS OR AREAS NEAR UNITS. Surface units may be hot even
though they are dark in color. Areas near surface units may become hot enough to cause burns.
During and after use, do not touch, or let clothing or other flammable materials contact surface
units or areas near units until they have had sufficient time to cool. Among these areas are the
cook-top and facing the cook-top.
Do not cook on broken cooktop. Ifcooktop should break, cleaning solutions and spillovers
may penetrate the broken cook-top and create a risk of electric shock. Contact a qualified
technician immediately.
Clean cooktop with caution. Ifa wet sponge or cloth is used to wipe spills on a hot cooking
®
area, be careful to avoid steam burn. Some cleaners can produce noxious fumes if applied to a
hot surface.
BEFORE YOU BEGIN
(_Z!) Clean the oven thoroughly before using for the first time. Remove accessories and operate
the oven at the bake setting at 400°F for 1 hour before using. There will be a distinctive odor; this
is normal, but ensure your kitchen iswell ventilated during this conditioning period.
Hmportant safety instructions 7
content
INTRODUCING YOUR NEW RANGE
SURFACECOOKING
USING THE WARMING DRAWER
i
OPERATING THE OVEN
MAINTAiNiNG YOUR APPLIANCE
TROUBLESHOOTING
9 Overview
9 What's included with your range
'(S
10 About surface cooking
12 How to set the appliance for surface
cooking
2¸
14 Using the proper cookware
14 Choosing the proper cookware
15 Protecting the smoothtop surface
16 About the warming drawer
17 Turning the warming drawer on or off
18 The oven control panel
19 Setting the clock
20 Minimum and maximum settings
20 Setting the kitchen timer
21 Using the oven racks
22 Baking
23 Convection baking
25 Convection roasting
27 Timed cooking
28 Delay timed cooking
29 Broiling
31 Using the custom cook feature
32 Proofing
33 Using the keep warm function
33 Turning the oven light on and off
34 Extra features
38
Self-cleaning
4O
Steam-cleaning
41
Care and cleaning of the oven
43
Care and cleaning of the glass cooktop
45
Removing and replacing the oven door
46
Removing and replacing the warming
drawer
47
Changing the oven light
48 Troubleshooting
8 Contents
WARRANTY

OVERVIEW
Automatic oven
light switch
Surface controm knobs
See page 11 for mere
infermatien
Oven control
See page 18 for mere
infermatien
Oven light
Self/steam clean latch
Gmass surface
i •
Convection fan
Gasket
Shelf position _--
WHAT'S INCLUDED WITH YOUR RANGE
Wire racks
Broil pan Broil pan insert
Over door
_g drawer
Cleaner &
cleaning pad
htroducing your new range 9
ABOUT SURFACE COOKING
BEFORE COOKING
oAuT,o," DOnot use the glass cooktoD sJrface as a cutting board.
• Do hot olace or store items that can melt or catcn fire on the glass cooktoD, even
wnen t s not being used.
• Turn the surface units on onw after placing the cool<ware.
Do not store heavy items above the cooktop surface. They could fall and damage it.
DURING COOKING
®
CAUTIOk
o Do hot olace aluminum foil or olast c items such as salt and pepper snaKers, spoon
noiaers, or Dlastlc wrappings on the range when it s in use. The hot air from the vent
could melt plastics or ignite f ammable _tems
• Make sure the correct sb'face unit s turned on
o Never COOKdirectly on the glass. Always use COOKware.
• Always place the Dan n the center of the surface unit you are COOKingon.
o Never eave surface units unattended Wnlle using a nign neat setting. Boilovers cause
smoKing and greasy splllovers that may catch on fire.
o Turn the surface units off before removing COOKware.
• Do not use DlaStlCwrap to cover food. Plastic may melt onto the surface and be vet',
difficult to remove.
AFTER COOKING
oAuT,o,_ DOnot touch the surface units until they nave coo_ea down.
• The surface may be still be hot and bb'ns may occur if the glass surface is toJcnee
• mmediately c ean sD s cq the cool<_ngarea to orevent a tougn c_ean_ngchore later.
TemPeratures ma_ be unsafe for items such as volatile lioulas, cleaners or aerosol
About the radiant surface elements
The temperature rises gradually and evenly. As the temperature rises, the radiant element will glow
red. To maintain the selected setting, the element will cycle on and off. The heating element retains
enough heat to provide a uniform and consistent heat during the off cycle. For efficient cooking,
turn off the element several minutes before cooking is complete. This will allow residual heat to
complete the cooking process.
Radiant elements have a limiter that allows the element to cycle ON and OFF, even at the HI
%
setting. This helps to prevent damage to the ceramic cooktop. Cycling at the HI setting is
normal and can occur if the cookware is too small for the radiant element or if the cookware
bottom is not flat.
10 Surface cookng
before it has coolea down sufficiently ....
f cabinet storage _sprowaea a_rec[_yabove the cool<_ngsurface, maKe sure that the
terns are nfrequenuy usea and can be safely stored in an area suqected to heat
sprays.
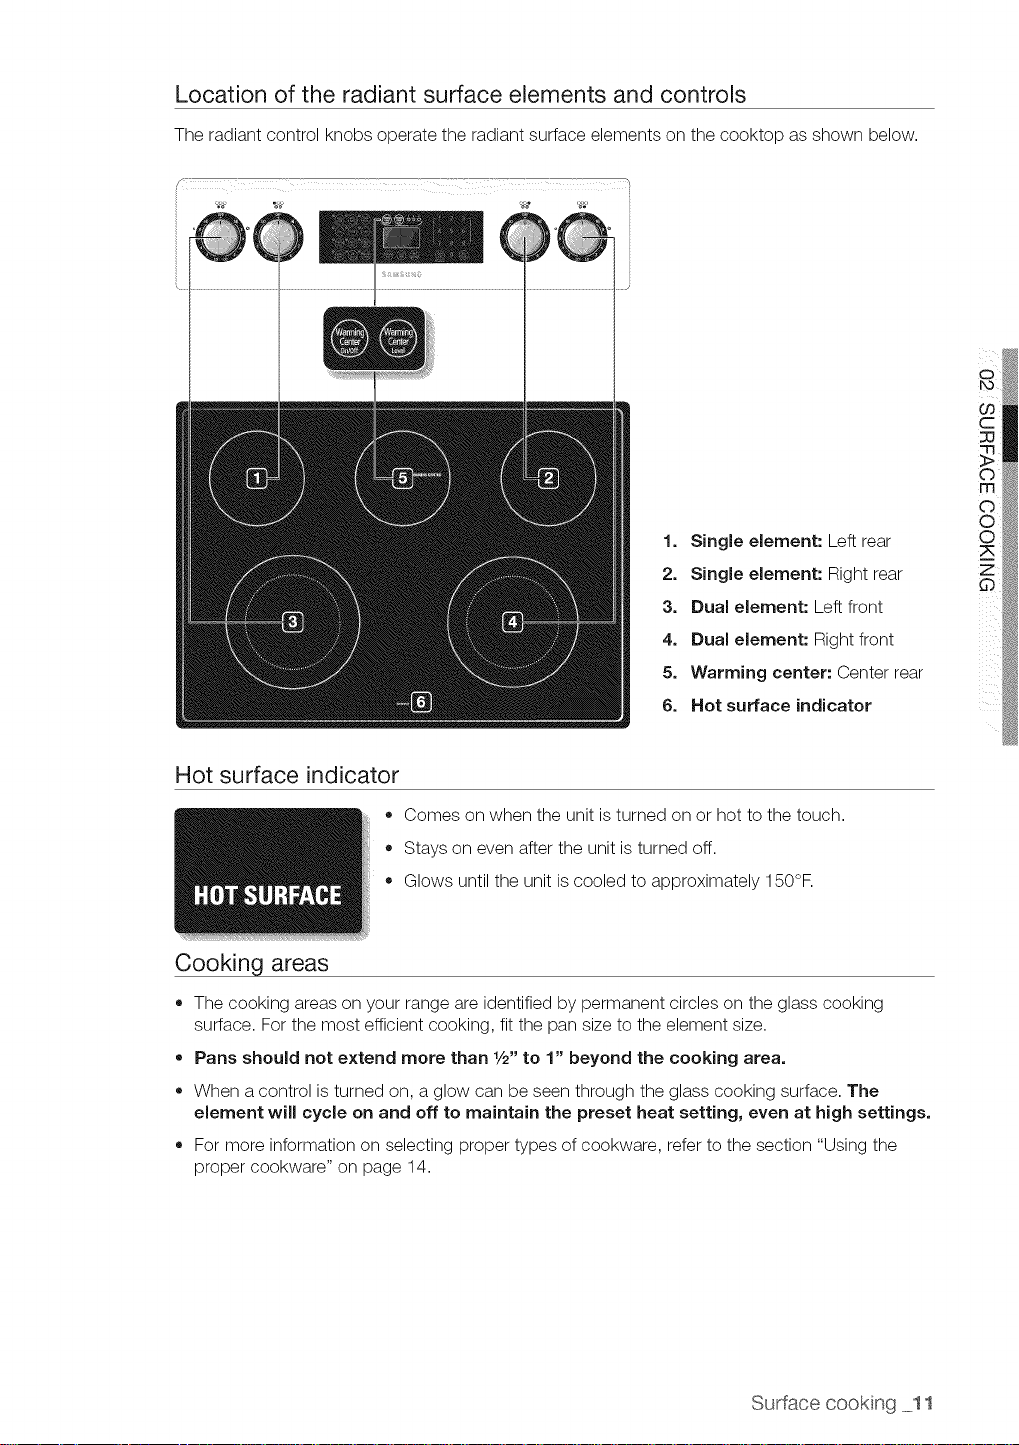
Location of the radiant surface elements and controls
The radiant control knobs operate the radiant surface elements on the cooktop as shown below.
/- ..........................., __ [
1. Single element: Left rear
2. Single element: Right rear
3. Dual element: Left front
4. Dual element: Right front
5. Warming center: Center rear
6. Hot surface indicator
Hot surface indicator
o
Comes on when the unit is turned on or hot to the touch.
®
Stays on even after the unit is turned off.
o
Glows until the unit is cooled to approximately 150°F.
Cooking areas
• The cooking areas on your range are identified by permanent circles on the glass cooking
surface. For the most efficient cooking, fit the pan size to the element size.
• Pans should not extend more than 1/2"to 1" beyond the cooking area.
= When a control is turned on, a glow can be seen through the glass cooking surface. The
element will cycle on and off to maintain the preset heat setting, even at high settings.
For more information on selecting proper types of cookware, refer to the section "Using the
proper cookware" on page 14.
Surface cookng 11
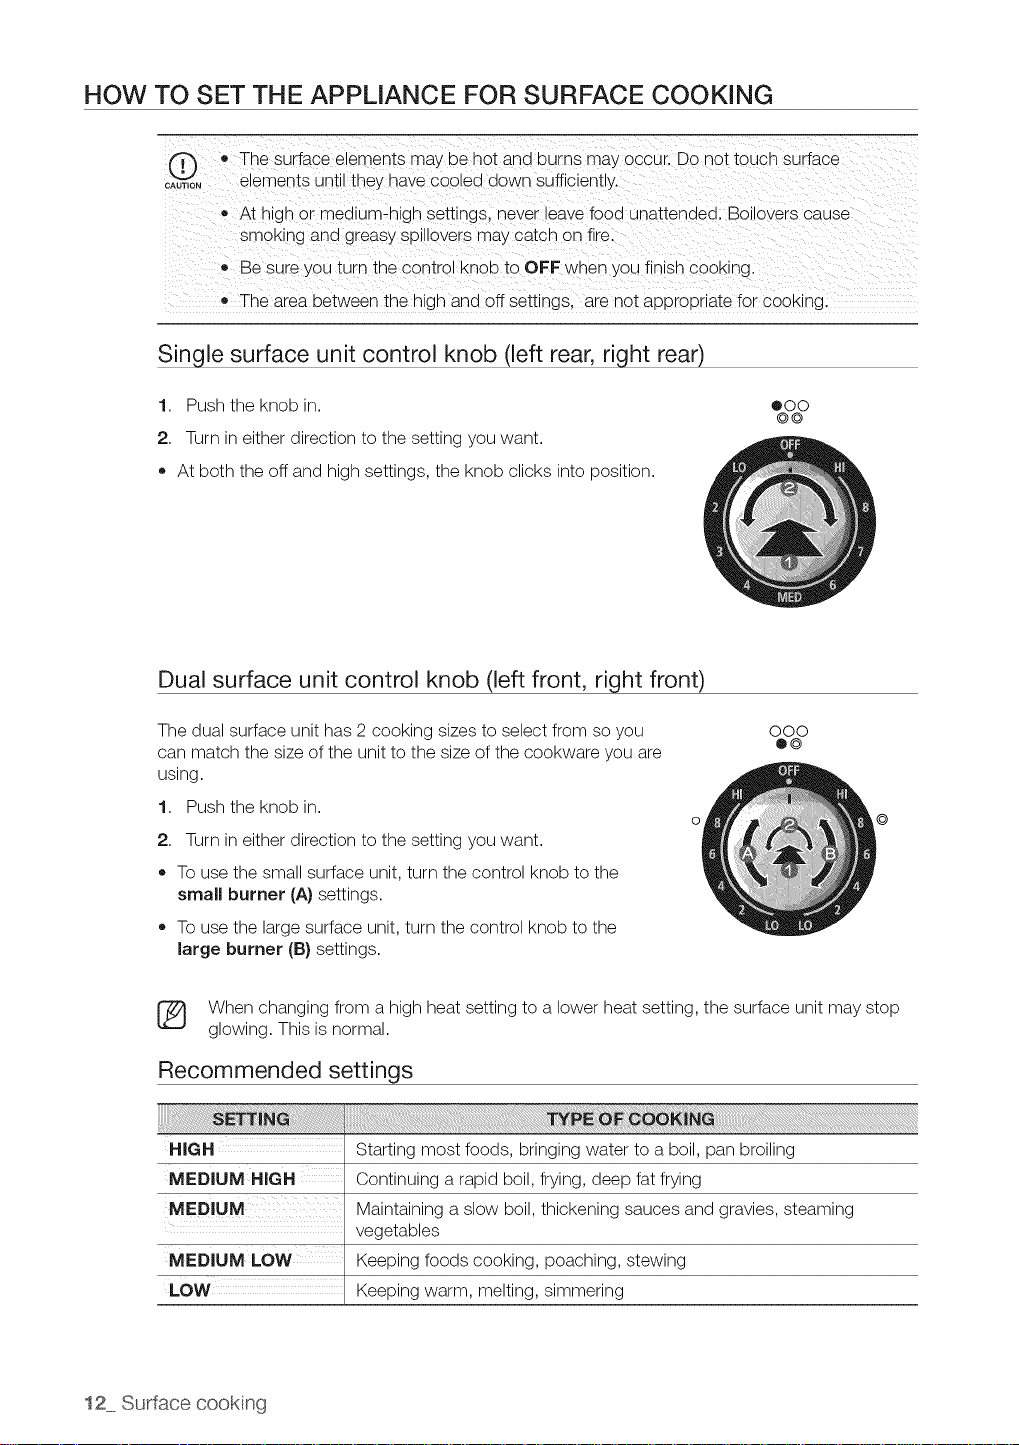
HOW TO SET THE APPLIANCE FOR SURFACE COOKING
• The surface elements may be hot and burns may occur. Do not touch surface
o;..... elements unt they have cooled down sufficient y.
_, At high or medium-high settings, never leave fooa unattended. Bo overs cause
sm3KIng and greasy Splllovers may catch on fire.
,, Be sure you turn the control knob to OFF when you finish cooking
e The area between the higq and off settings, are not appropriate for cooking.
Single surface unit control knob (left rear, right rear)
1. Push the knob in.
2. Turn in either direction to the setting you want.
• At both the off and high settings, the knob clicks into position.
Dual surface unit control knob (left front, right front)
The dual surface unit has 2 cooking sizes to select from so you
can match the size of the unit to the size of the cookware you are
using.
1. Push the knob in.
2. Turn in either direction to the setting you want.
To use the small surface unit, turn the control knob to the
small burner (A} settings.
To use the large surface unit, turn the control knob to the
large burner (B) settings.
®CO
©@
000
e©
©
[_ When changing from a high heat setting to a lower heat setting, the surface unit may stop
glowing. This is normal.
Recommended settings
HiGH
MEDIUM HiGH
MEDIUM
MEDIUM LOW
LOW
12 Surface cookng
Starting most foods, bringing water to a boil, pan broiling
Continuing a rapid boil, frying, deep fat frying
Maintaining a slow boil, thickening sauces and gravies, steaming
vegetables
Keeping foods cooking, poaching, stewing
Keeping warm, melting, simmering
Using the warming center
The warming center, located in the back center of the glass surface, will keep hot, cooked food
at serving temperature.
= Do notwarmfood on the warmingcenterfor more than two hours.
oA°T,oN" Use onlyCOOKwareanaalsnesrecommenaeaassafeforovenanaCOOK[ODJse.
® Alwa', s use Dotholders or oven mitts when remov ng fooa from the warming center as
COOKwareana plates will be hot
• When warm ng pastries and breads the cover snoula nave an opening to allow
moisture to escaDe.
Do not use DlastJcwrap to cover foods. Plastic may melt onto the surface and be very
difficult to clean.
• Food snou_a De keDt _n_tscontainer ana covered with a lid or aum_num foil to
maintain food quality.
• Always start with h3t food. Eating uncooked or cold food placed on the warming
center could result n mness.
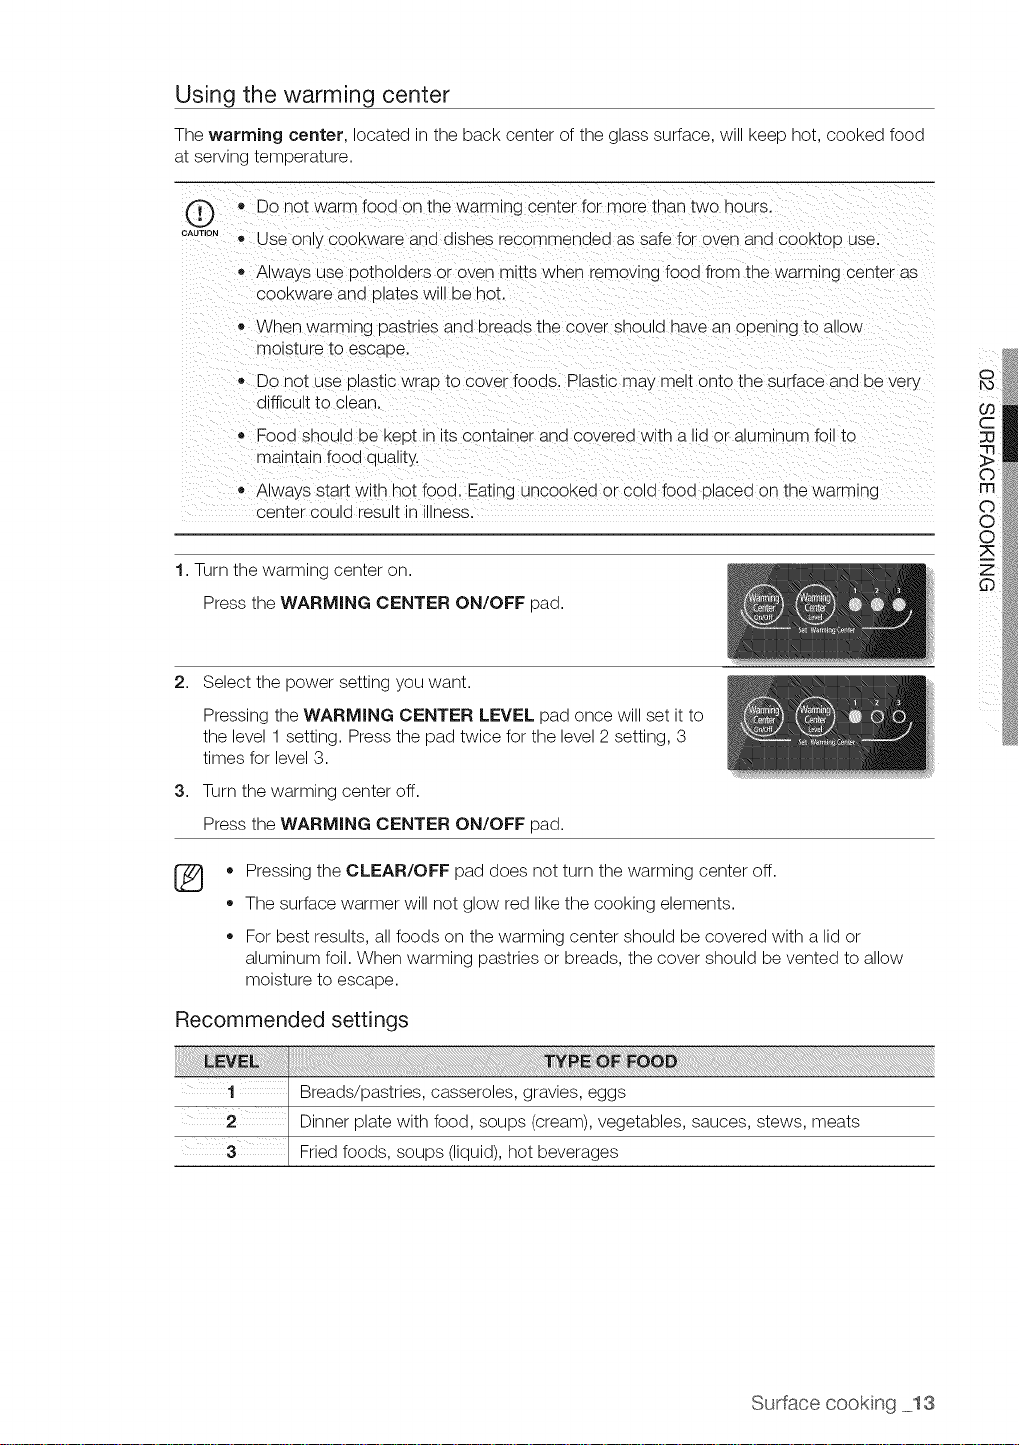
1. Turn the warming center on.
Press the WARMING CENTER ON/OFF pad.
c
o
m
o
o
2. Select the power setting you want.
Pressing the WARMING CENTER LEVEL pad once will set it to
the level 1 setting. Press the pad twice for the level 2 setting, 3
times for level 3.
3,
Turn the warming center off.
Press the WARMING CENTER ON/OFF pad.
• Pressing the CLEAR/OFF pad does not turn the warming center off.
®
The surface warmer will not glow red like the cooking elements.
For best results, all foods on the warming center should be covered with a lid or
aluminum foil. When warming pastries or breads, the cover should be vented to allow
moisture to escape.
Recommended settings
Surface cookng 13
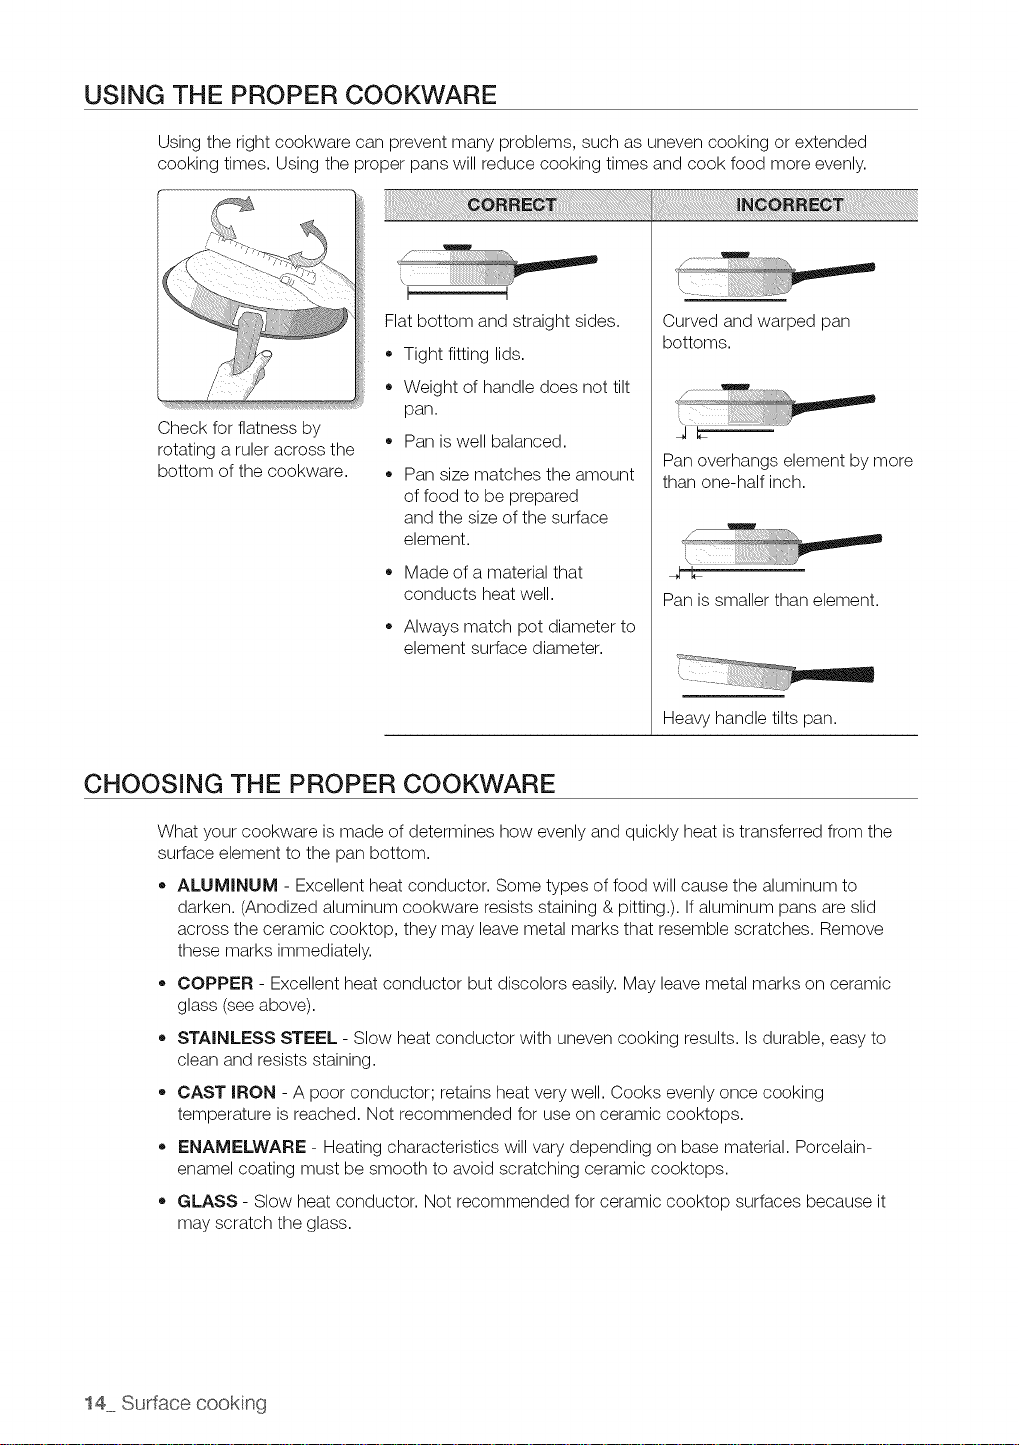
USING THE PROPER COOKWARE
Using the right cookware can prevent many problems, such as uneven cooking or extended
cooking times. Using the proper pans will reduce cooking times and cook food more evenly.
Flat bottom and straight sides.
• Tight fitting lids.
Weight of handle does not tilt
Check for flatness by
rotating a ruler across the
bottom of the cookware.
pan.
Pan is well balanced.
Pan size matches the amount
of food to be prepared
and the size of the surface
element.
,, Made of a material that
conducts heat well.
Always match pot diameter to
element surface diameter.
CHOOSING THE PROPER COOKWARE
What your cookware is made of determines how evenly and quickly heat is transferred from the
surface element to the pan bottom.
ALUMINUM - Excellent heat conductor. Some types of food will cause the aluminum to
darken. (Anodized aluminum cookware resists staining & pitting.). If aluminum pans are slid
across the ceramic cooktop, they may leave metal marks that resemble scratches. Remove
these marks immediately.
COPPER - Excellent heat conductor but discolors easily. May leave metal marks on ceramic
glass (see above).
STAINLESS STEEL - Slow heat conductor with uneven cooking results. Is durable, easy to
clean and resists staining.
CAST IRON - A poor conductor; retains heat very well. Cooks evenly once cooking
temperature is reached. Not recommended for use on ceramic cooktops.
,, ENAMELWARE - Heating characteristics will vary depending on base material. Porcelain-
enamel coating must be smooth to avoid scratching ceramic cooktops.
GLASS - Slow heat conductor. Not recommended for ceramic cooktop surfaces because it
may scratch the glass.
Curved and warped pan
bottoms.
JL-
Pan overhangs element by more
than one-half inch.
Pan is smaller than element.
Heavy handle tilts pan.
14 Surface cookng
PROTECTING THE SMOOTHTOP SURFACE
Cleaning
• Clean the cooktop before using it for the first time.
Clean your cooktop daily or after each use. This will keep your cooktop looking good and can
prevent damage.
If a spillover occurs while cooking, immediately clean the spill from the cooking area while it is
hot to prevent a tough cleaning chore later. Using extreme care, wipe the spill with a clean dry
towel.
Do not allow spills to remain on the cooking area or the cooktop trim for a long period of time.
• Do not use abrasive cleansing powders or scouring pads, which will scratch the cooktop.
Do not use chlorine bleach, ammonia, or other cleansers not specifically recommended for use
on a glass-ceramic surface.
Preventing marks and scratches
Do not use glass cookware. They may scratch the cooktop.
Do not place a trivet or wok ring between the cooktop and the pan. These items can mark or
scratch the cooktop.
Make sure the cooktop and the pan bottom are clean.
Do not slide metal pans across the cooktop.
Preventinq stains
Do not use a soiled dish cloth or sponge to clean the cooktop surface. A film will remain, which
may cause stains on the cooking surface after the area is heated.
,, Continuously cooking on a soiled surface may/will result in a permanent stain.
Preventing other damage
Do not allow plastic, sugar, or foods with high sugar content to melt onto the hot cooktop.
Should this happen, clean immediately.
Do not let a pan boil dry as this will damage the cooktop, and the pan.
• Do not use the cooktop as a work surface or cutting board.
Do not cook food directly on the cooktop without the proper cookware.
Surface cookng 15
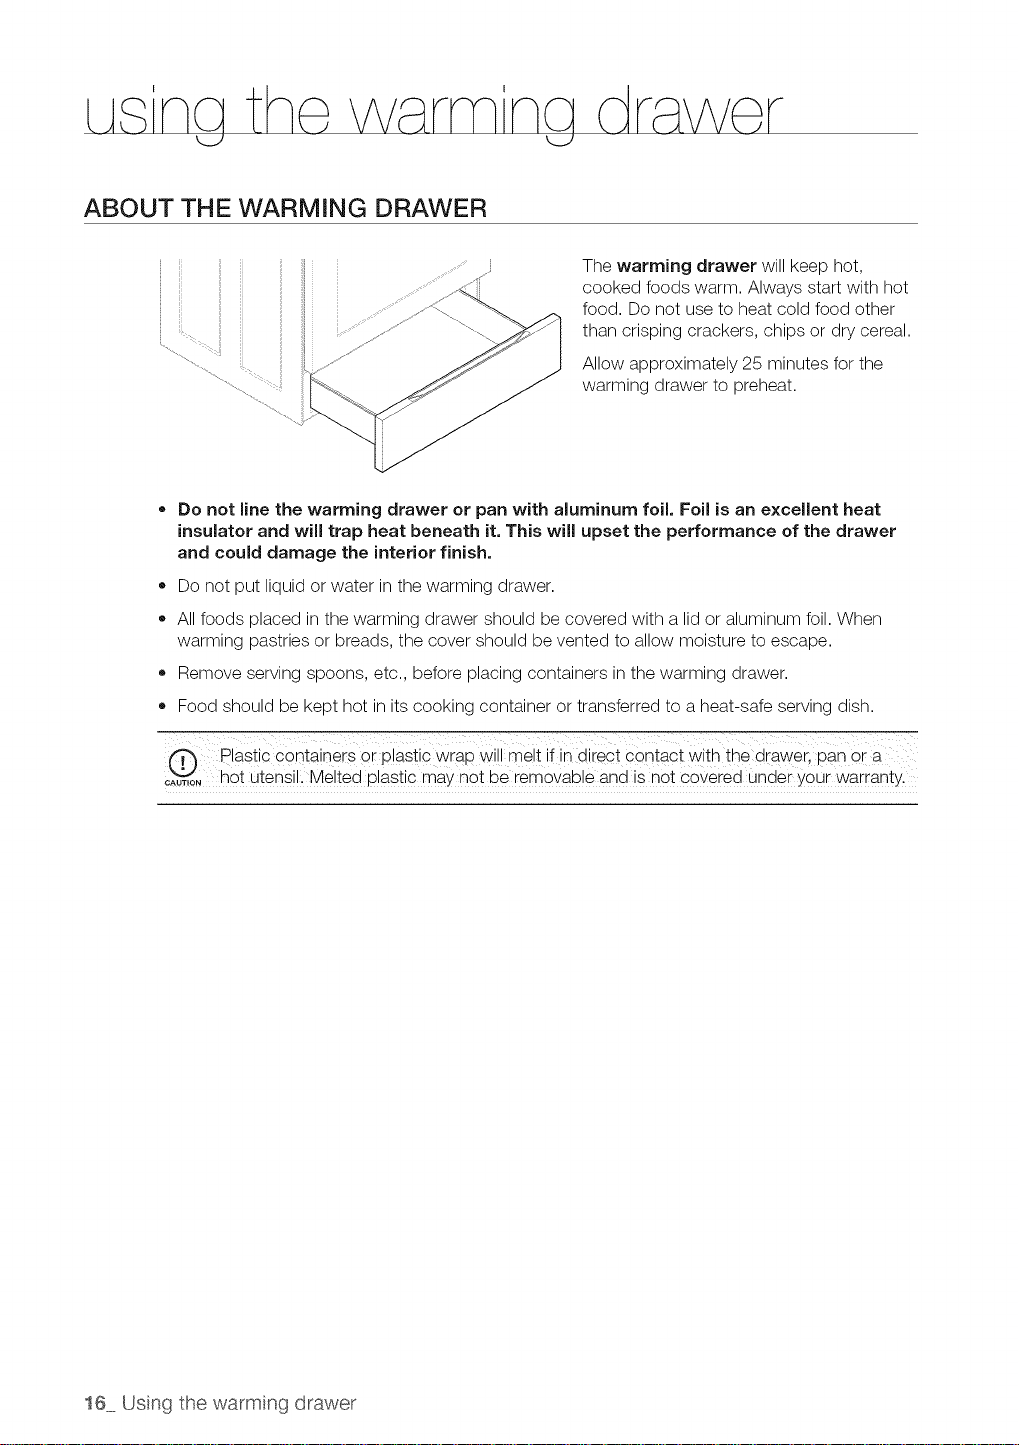
ABOUT THE WARMING DRAWER
• Do not line the warming drawer or pan with aluminum foil. Foil is an excellent heat
insulator and will trap heat beneath it. This will upset the performance of the drawer
and could damage the interior finish.
• Do not put liquid or water in the warming drawer.
All foods placed in the warming drawer should be covered with a lid or aluminum foil. When
warming pastries or breads, the cover should be vented to allow moisture to escape.
Remove serving spoons, etc., before placing containers in the warming drawer.
Food should be kept hot in its cooking container or transferred to a heat-safe serving dish.
O lastic containers or plastic wrap will melt if in direct Contact with the drawer, pan or a
_AUT,O"hot utenSi!: Melied plastic may n0t be iem0vab!e and iSn0t covered Undei y0ur warianty:
The warming drawer will keep hot,
cooked foods warm. Always start with hot
food. Do not use to heat cold food other
than crisping crackers, chips or dry cereal.
Allow approximately 25 minutes for the
warming drawer to preheat.
16 Using the warming drawer
 Loading...