

Page 1
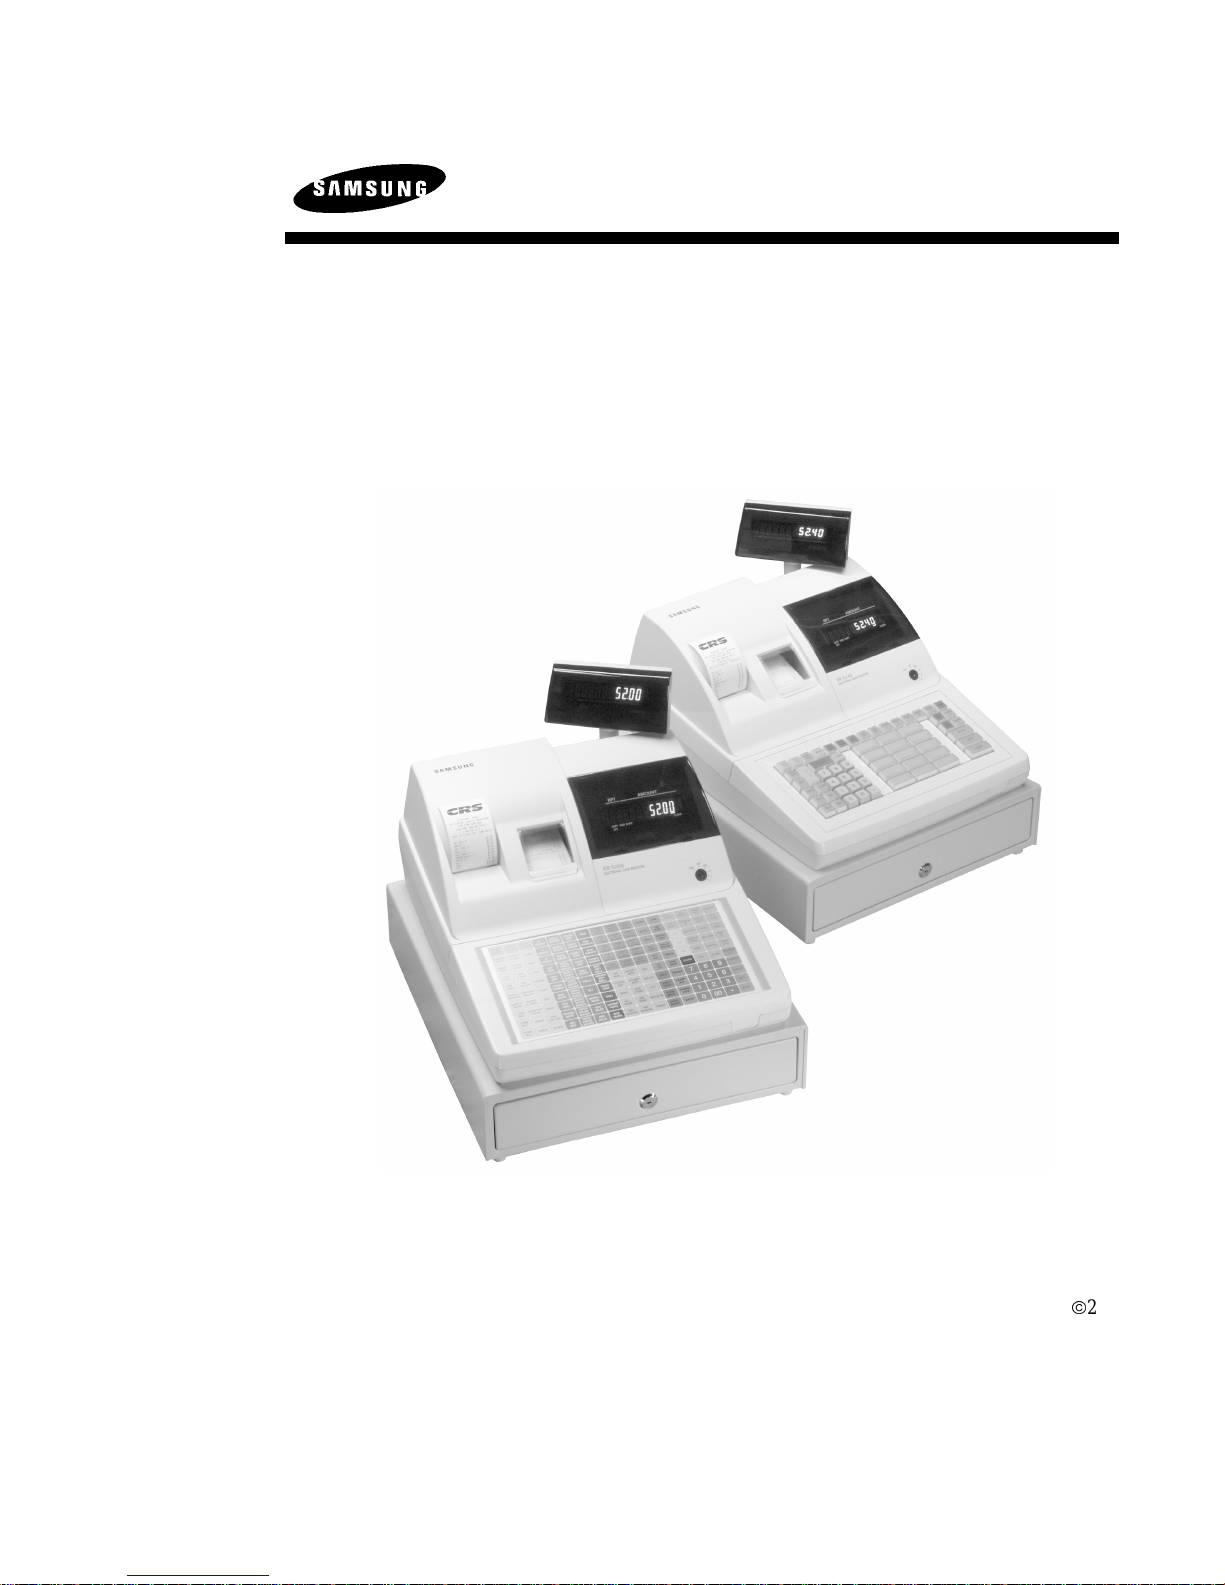
ER 5200/5240 Electronic Cash Register
Operator's and
Programming Manual
9/4/2003
v 1.9 or later
CRS, Inc.
All specifications are subject to change without notice 2005
Page 2

CRS, Inc.
Limited Warranty and Disclaimers of Warranty
This manual has been developed by CRS, Inc. It is intended for the use of its customers and service personnel and should be read in its
entirety before attempting to install, use or program the product(s).
Nothing contained in this manual shall be deemed to be, and this manual does not constitute, a warranty of, or representation with respect
to, the product or any of the products to which this manual applies. This manual is subject to change without notice and CRS, Inc. has no
obligation to provide any updates or corrections to this manual. Further, CRS, Inc. also reserves the right, without prior notice, to make
changes in equipment design or components as it deems appropriate. No representation is made that this manual is complete or accurate in
all respects and CRS, Inc. shall not be liable for any errors or omissions contained in this manual. In no event shall CRS, Inc. be liable for
any incidental or consequential damages relating to or arising out of the use of this manual. This document contains proprietary
information that is protected by copyright. All rights are reserved. No part of this document may be photocopied or reproduced without
prior written consent of CRS, Inc.
NOTICE
IF ANY WARRANTY IS EXTENDED TO YOU WITH REGARD TO THE PRODUCT(S) TO WHICH THIS MANUAL APPLIES, IT
IS A WARRANTY FROM THE ENTITY OR INDIVIDUAL FROM WHOM YOU DIRECTLY PURCHASED THE PRODUCT(S).
SUBJECT TO THE FOREGOING, UNLESS YOU ARE A DIRECT END USER CUSTOMER OF CRS, INC., CRS, INC. DOES NOT
EXTEND TO YOU ANY EXPRESS WARRANTY OR ANY IMPLIED WARRANTY AND EXPRESSLY DISCLAIMS ANY IMPLIED
WARRANTY OF MERCHANTABILITY, FITNESS FOR USE, OR FITNESS FOR ANY PARTICULAR PURPOSE, OR ANY
WARRANTY OF NON-INFRINGEMENT OF INTELLECTUAL PROPERTY RIGHTS IN CONNECTION WITH THE PRODUCT(S)
OR ANY SOFTWARE, DRIVERS, OR PROGRAMMING PRODUCT, WHETHER EMBEDDED IN PRODUCT(S) OR PROVIDED AS
A SEPARATE PROGRAM, OR USED IN CONJUNCTION WITH THIS/THESE PRODUCT(S). CRS, INC. SPECIFICALLY DOES
NOT WARRANT THAT THE OPERATION OF ANY DRIVERS, SOFTWARE, OR PROGRAMMING PRODUCTS LICENSED
HEREUNDER, WHETHER EMBEDDED IN PRODUCTS OR PROVIDED AS SEPARATE PROGRAMS, SHALL BE
UNINTERRUPTED OR ERROR FREE OR THAT FUNCTIONS CONTAINED IN SUCH DRIVERS, SOFTWARE OR
PROGRAMMING PRODUCTS SHALL OPERATE IN COMBINATION(S) WHICH MAY BE SELECTED FOR USE BY YOU OR
OTHERWISE MEET YOUR REQUIREMENTS.
CRS, Inc. is not responsible for any damages or loss, either direct, indirect, special, incidental or consequential, which you may experience
as a result of your purchase or use of the product(s). Your sole remedy in the event that you encounter any difficulties with the product(s)
is against the entity or individual from whom you purchased the product(s).
Revision 2.0 - April 1, 2005
WARNING - U.S.
THIS EQUIPMENT GENERATES, USES AND CAN RADIATE RADIO FREQUENCY ENERGY, AND IF NOT INSTALLED AND USED
IN ACCORDANCE WITH THE INSTRUCTIONS MANUAL, MAY CAUSE INTERFERENCE TO RADIO COMMUNICATIONS. IT HAS
BEEN TESTED AND FOUND TO COMPLY WITH THE LIMITS FOR A CLASS A COMPUTING DEVICE PURSUANT TO SUBPART J
OF PART 15 OF FCC RULES WHICH ARE DESIGNED TO PROVIDE REASONABLE PROTECTION AGAINST SUCH
INTERFERENCE WHEN OPERATED IN A COMMERCIAL ENVIRONMENT. OPERATIONS OF THE EQUIPMENT IN A
RESIDENTIAL AREA IS LIKELY TO CAUSE INTERFERENCE IN WHICH CASE THE USER, AT HIS OWN EXPENSE, WILL BE
REQUIRED TO TAKE WHATEVER MEASURES MAY BE REQUIRED TO CORRECT THE INTERFERENCE.
NOTICE - CANADA
THIS APPARATUS COMPLIES WITH THE CLASS “A” LIMITS FOR RADIO INTERFERENCE AS SPECIFIED IN THE CANADIAN
DEPARTMENT OF COMMUNICATIONS RADIO INTERFERENCE REGULATIONS.
CET APPAREIL EST CONFORME AUX NORMES CLASS “A” D’INTERFERENCE RADIO TEL QUE SPECIFIER PAR MINISTRE
CANADIEN DES COMMUNICATIONS DANS LES REGLEMENTS D’INTERFERENCE RADIO.
ATTENTION
The product that you have purchased may contain a battery that may be recyclable. At the end of its useful life, under various state
and local laws, it may be illegal to dispose of the battery into the municipal waste system.
Check with your local solid waste officials for details concerning recycling options or proper disposal
.
Page 3

Precaution Statements
Follow these safety, servicing and ESD precautions to prevent damage and to protect against potential hazards such as
electrical shock.
1-1 Safety Precautions
1. Be sure that all built-in protective devices are
replaced. Restore any missing protective shields.
2. When reinstalling the chassis and its assemblies, be
sure to restore all protective devices, including
nonmetallic control knobs and compartment covers.
3. Make sure there are no cabinet openings through
which people - particularly children - might insert
fingers and contact dangerous voltages.
Such openings include excessively wide cabinet
ventilation slots and improperly fitted covers and
drawers.
4. Design Alteration Warning:
Never alter or add to the mechanical or electrical
design of the SECR. Unauthorized alterations might
create a safety hazard. Also, any design changes or
additions will void the manufacturer’s warranty.
5. Components, parts and wiring that appear to have
overheated or that are otherwise damaged should be
replaced with parts that meet the original
specifications. Always determine the cause of
damage or over- heating, and correct any potential
hazards.
CAUTION
Danger of explosion if battery is incorrectly replaced.
Replace only with the same or equivalent type recomm-
ended by the manufacturer.
Dispose used batteries according to the manufacturer’s
instructions.
6. Observe the original lead dress, especially near the
following areas: sharp edges, and especially the AC
and high voltage supplies. Always inspect for
pinched, out-of-place, or frayed wiring. Do not
change the spacing between comp-onents and the
printed circuit board. Check the AC power cord for
damage. Make sure that leads and components do
not touch thermally hot parts.
7. Product Safety Notice:
Some electrical and mechanical parts have special
safety-related characteristics that might not be
obvious from visual inspection. These safety
features and the protection they give might be lost if
the replacement component differs from the
original - even if the replacement is rated for higher
voltage, wattage, etc.
Components that are critical for safety are indicated
in the circuit diagram by shading, (
Use replacement components that have the same
ratings, especially for flame resistance and
dielectric strength specifications. A replacement
part that does not have the same safety
characteristics as the original might create shock,
fire or other hazards.
ATTENTION
ll y a danger d’explosion s’il y a remplacement
incorrect de la batterie.
Remplacer uniquement avec une batterie du même type
ou d’un type équivalent recommandé par le constructeur .
Mettre au rebut les batteries usagées conformément aux
instructions du fabricant.
) or ( ).
ER 5200/5240 Electronic Cash Register 1
Page 4

1-2 Servicing Precautions
WARNING: First read the-Safety Precautions-section of this manual. If some unforeseen circumstance creates a conflict
between the servicing and safety precautions, always follow the safety precautions.
WARNING: An electrolytic capacitor installed with the wrong polarity might explode
.
1. Servicing precautions are printed on the cabinet.
Follow them.
2. Always unplug the units AC power cord from the
AC power source before attempting to:
(a) Remove or reinstall any component or assembly
(b) Disconnect an electrical plug or connector
(c) Connect a test component in parallel with an
electrolytic capacitor
3. Some components are raised above the printed
circuit board for safety. An insulation tube or tape
is sometimes used. The internal wiring is sometimes
clamped to prevent contact with thermally hot
components. Reinstall all such elements to their
original position.
4. After servicing, always check that the screws,
components and wiring have been correctly
reinstalled. Make sure that the portion around the
serviced part has not been damaged.
5. Check the insulation between the blades of the AC
plug and accessible conductive parts (examples :
metal panels and input terminals).
6. Insulation Checking Procedure:
Disconnect the power cord from the AC source and
turn the power switch ON. Connect an insulation
resistance meter (500V) to the blades of AC plug.
The insulation resistance between each blade of the
AC plug and accessible conductive parts (see
above) should be greater than 1 megohm.
7. Never defeat any of the B+ voltage interlocks.
Do not apply AC power to the unit (or any of its
assemblies) unless all solid-state heat sinks are
correctly installed.
8. Always connect an instrument’s ground lead to the
instrument chassis ground before connecting the
positive lead ; always remove the instrument’s
ground lead last.
1-3 Precautions for Electrostatically Sensitive Devices (ESDs)
1. Some semiconductor (solid state) devices are easily
damaged by static electricity. Such components are
called Electrostatically Sensitive Devices (ESDs);
examples include integrated circuits and some fieldeffect transistors. The following techniques will
reduce the occurrence of component damage caused
by static electricity.
2. Immediately before handling any semiconductor
components or assemblies, drain the electrostatic
charge from your body by touching a known earth
ground. Alternatively, wear a discharging wriststrap device. (Be sure to remove it prior to applying
power - this is an electric shock precaution.)
3. After removing an ESD-equipped assembly, place it
on a conductive surface such as aluminum foil to
prevent accumulation of electrostatic charge.
4. Do not use freon-propelled chemicals. These can
generate electrical charges that damage ESDs.
5. Use only a grounded-tip soldering iron when
soldering or unsoldering ESDs.
6. Use only an anti-static solder removal device. Many
solder removal devices are not rated as anti-static;
these can accumulate sufficient electrical charge to
damage ESDs.
7. Do not remove a replacement ESD from its
protective package until you are ready to install it.
Most replacement ESDs are packaged with leads
that are electrically shorted together by conductive
foam, aluminum foil or other conductive materials.
8. Immediately before removing the protective
material from the leads of a replacement ESD,
touch the protective material to the chassis or
circuit assembly into which the device will be
installed.
9. Minimize body motions when handling unpackaged
replacement ESDs. Motions such as brushing
clothes together, or lifting a foot from a carpeted
floor can generate enough static electricity to
damage an ESD.
2 ER 5200/5240 Electronic Cash Register
Page 5

Contents
Introduction 7
About the ER-5200 Series..........................................................................................................7
Using This Manual.....................................................................................................................8
Using Flowcharts.........................................................................................................8
Basic Features and Functions.....................................................................................................9
Display.......................................................................................................................10
Receipt Printer ...........................................................................................................13
Journal Printer............................................................................................................14
Control Lock..............................................................................................................15
Keyboards..................................................................................................................16
Initial Clear................................................................................................................18
Operations 19
Function Key Descriptions.......................................................................................................19
Clerk Sign-On/Sign-Off ...........................................................................................................24
Direct Sign-On...........................................................................................................24
Coded Sign-On...........................................................................................................25
Receipt On and Off ..................................................................................................................25
PLU Registrations....................................................................................................................26
NLU (Keyboard PLU) Entries...................................................................................26
Numeric PLU Entries.................................................................................................29
Modifier Entries.........................................................................................................31
Percentage Key (%) Registrations............................................................................................32
Void and Correction Operations ..............................................................................................35
Error Correct..............................................................................................................35
Previous Item Void....................................................................................................36
Merchandise Return...................................................................................................37
VOID Control Lock Position (Transaction Void)......................................................38
Cancel........................................................................................................................39
Subtotal Operations..................................................................................................................40
Subtotal......................................................................................................................40
Add Check (Tray Subtotal)........................................................................................40
Eat-In/Take-Out/Drive Thru Operations....................................................................41
Tax Shift Operations................................................................................................................42
Tendering Operations...............................................................................................................44
Cash...........................................................................................................................44
Check.........................................................................................................................44
Charge........................................................................................................................45
Split Tender ...............................................................................................................46
Post Tendering...........................................................................................................46
Receipt on Request...................................................................................................................47
Training Mode..........................................................................................................................47
Clerk Interrupt..........................................................................................................................47
ER 5200/5240 Electronic Cash Register 3
Page 6

Non-Add Number.................................................................................................................... 48
No Sale.................................................................................................................................... 48
Received on Account............................................................................................................... 49
Paid Out................................................................................................................................... 49
Table Service Restaurant Operations...................................................................................... 50
Overview................................................................................................................... 50
Posting Guest Checks Manually with the Previous Balance Key.............................. 52
Soft Check................................................................................................................. 53
Hard Check............................................................................................................... 56
Fast Food Drive Thru................................................................................................ 59
Promo Function......................................................................................................... 60
Waste Function ......................................................................................................... 60
Charge Posting Operations...................................................................................................... 61
Currency Conversion............................................................................................................... 64
Food Stamp Operations...........................................................................................................65
Scale Operations...................................................................................................................... 66
Direct Scale Entry..................................................................................................... 66
Manual Weight Entry................................................................................................ 66
Scale With Automatic Tare Entry............................................................................. 67
Scale With Manual Tare Entry.................................................................................. 67
Management Functions 69
Introduction............................................................................................................................. 69
Cash Declaration..................................................................................................................... 70
System Reports........................................................................................................................ 72
Running a Report – General Instructions.................................................................. 72
Report Table ............................................................................................................. 73
S-Mode Programming 75
Overview................................................................................................................................. 75
Clearing Memory..................................................................................................................... 76
Memory All Clear ..................................................................................................... 76
Clear All Totals and Counters................................................................................... 76
Clear Grand Total ..................................................................................................... 77
Clear PLU File.......................................................................................................... 77
Self Tests................................................................................................................................. 77
EPROM Information...............................................................................................................78
Memory Allocation................................................................................................................. 79
Memory Calculation Worksheet ............................................................................... 79
Memory Allocation Program..................................................................................... 80
Memory Allocation Program Scan............................................................................ 80
Function Key Assignment Programming................................................................................. 81
Function Key Codes.................................................................................................. 82
ER-5240 Keyboard Expansion................................................................................................ 83
RS-232 Communication Option Programs.............................................................................. 84
RS-232 Option Chart ................................................................................................ 84
Updating Firmware Program................................................................................................... 86
Update Files.............................................................................................................. 86
PC Connection Cable................................................................................................ 86
Update Boot Area ..................................................................................................... 87
Update Program Area................................................................................................ 88
P-Mode Programming 89
4 ER 5200/5240 Electronic Cash Register
Page 7

Default Program.......................................................................................................................89
Tax Programming.....................................................................................................................90
Straight Percentage Tax Rate Programming..............................................................91
Tax Table Programming............................................................................................92
PLU Programming...................................................................................................................94
Program 100 - PLU Status Programming...................................................................95
Program 110 - PLU Auto Tare Programming............................................................98
Program 150 - PLU Group Assignment.....................................................................99
Program 200 - PLU Price/HALO Programming......................................................100
Program 250 - PLU Stock Amount Programming...................................................101
Program 300 - PLU Descriptor Programming.........................................................102
Program 350 - PLU Link Programming...................................................................105
Program 400 – PLU Delete Programming...............................................................106
Program 450 – PLU Mix and Match Programming.................................................107
System Option Programming.................................................................................................108
System Option Table................................................................................................109
System Options - Reference Information.................................................................112
Print Option Programming.....................................................................................................114
Print Option Table ...................................................................................................115
Function Key Programming...................................................................................................120
Program 70 - Function Key Options........................................................................120
Program 80 - Function Key Descriptor....................................................................121
Program 90 - Function Key HALO..........................................................................122
Instructions for Currency Conversion Rate - Program 90........................................123
ADD CHECK - Function Key Options....................................................................124
CANCEL - Function Key Options...........................................................................124
CASH - Function Key Options ................................................................................125
CHARGE 1-8 - Function Key Options....................................................................126
CHECK - Function Key Options .............................................................................127
CHECK CASHING - Function Key Options ...........................................................128
CHECK ENDORSEMENT - Function Key Options...............................................128
CHECK # - Function Key Options ..........................................................................129
DRIVE THRU / EAT IN / TAKE OUT - Function Key Options............................130
ERROR CORRECT - Function Key Options .......................................................... 131
F/S Subtotal - Function Key Options.......................................................................131
F/S TEND - Function Key Options..........................................................................132
GUEST - Function Key Options..............................................................................132
#/NS - Function Key Options...................................................................................133
MDSE RETURN - Function Key Options...............................................................133
MODIFIER 1-5 - Function Key Options .................................................................134
PBAL - Function Key Options.................................................................................134
PROMO - Function Key Options............................................................................. 135
PAID OUT 1-3 - Function Key Options..................................................................135
PRINT CHECK - Function Key Options.................................................................136
RECD ON ACCT 1-3 - Function Key Options........................................................136
SCALE - Function Key Options ..............................................................................137
SERVICE - Function Key Options .......................................................................... 138
SUBTOTAL - Function Key Options......................................................................138
TARE - Function Key Options.................................................................................139
TAX EXEMPT - Function Key Options..................................................................140
TIP - Function Key Options.....................................................................................141
VALIDATE - Function Key Options.......................................................................141
VOID - Function Key Options.................................................................................142
WASTE - Function Key Options.............................................................................142
%1-%5 Function Key Options .................................................................................143
ER 5200/5240 Electronic Cash Register 5
Page 8

Mix and Match Discount Programming................................................................................ 144
Program 600 – Trip Level Programming................................................................ 145
Program 601 – Price Programming......................................................................... 145
Program 610 – Mix & Match Descriptor Programming.......................................... 146
Clerk Programming............................................................................................................... 147
Program 800 - Secret Code Programming............................................................... 147
Program 801 - Drawer Assignment......................................................................... 148
Program 810 - Clerk Descriptor Programming....................................................... 148
Group Programming.............................................................................................................. 149
Miscellaneous Programming................................................................................................. 151
Program 1500 - Macro Key Sequence Programming.............................................. 151
Program 700 – Logo/Endorsement Message Programming.................................... 152
Program 701 - Financial Report Descriptor Programming...................................... 153
Program 710 - Clerk Report Descriptor Programming ........................................... 155
Program 711 - Macro Name Programming............................................................. 157
Program 1000 - NLU Code Number Programming ................................................ 158
Program 1100 - Cash-In-Drawer Limit Programming............................................. 159
Program 1200 - Check Change Limit Programming............................................... 160
Program 1300 - Date and Time Programming........................................................ 161
Program 1400 - Scale Tare Weight Programming.................................................. 162
Program 1600 - Machine Number Programming.................................................... 163
Program Scans....................................................................................................................... 164
Sample Reports 165
Financial................................................................................................................................ 165
Time...................................................................................................................................... 169
PLU....................................................................................................................................... 170
Clerk...................................................................................................................................... 171
Individual Clerk..................................................................................................................... 172
Groups................................................................................................................................... 173
Stock...................................................................................................................................... 174
Open Check........................................................................................................................... 175
Balancing Formulas............................................................................................................... 176
Index 177
6 ER 5200/5240 Electronic Cash Register
Page 9

Introduction
About the
The ER-5200 Series is offered in two different versions:
This manual includes instructions for both models. The keyboard is the only significant difference
between the two models. All other features are the same, unless otherwise noted.
ER-5200
The ER-5200 features a flat 160-position keyboard with 117 NLU keys. Because it offers
protection from spills, this keyboard works best in restaurants, food service shops, or
convenience stores where food is served.
The ER-5240 features a 90-position keyboard with traditional raised keys. In the standard
configuraton, the keyboard provides 15 NLU keys – it can be expanded to 40 NLU keys.
The ER-5240 works best in retail stores, or shops where it is not necessary to place a large
number of preset item keys on the keyboard.
Series
ER 5200/5240 Electronic Cash Register Introduction • 7
Page 10
Using This Manual
With this manual we hope to provide you with a means to use your Samsung cash register to its fullest
potential.
This manual is divided into six sections:
"Introduction" on page 7, explains basic features and functions.
"Operations" on page 19, guides you through the basic operation sequences.
"Management Functions" on page 69, explains manager controlled func tions, along with
reports and balancing information.
"S-Mode Programming" on page 75 provides instructions for secure programming –
usually done by the installing dealer prior to installation.
“P-Mode Programming” on page 89 provides complete programming instructions,
including PLU, function key programs, and system options. This sec tion is recommended
for use by storeowners and managers. Call your Samsung dealer if you find you need
programming assistance.
“Sample Reports” on page 165 provides a sample of each register report.
The Samsung ER-5200/5240 allows many different configurations. This manual was written with this
in mind. Although we have tried to touch on all available options, your machine may differ.
If you have questions concerning the configuration of your ER-5200/5240, contact your authorized
Samsung dealer.
Using Flowcharts
Flowcharts are used to supple ment step-by-step instructions throughout this manual. For example, the
following flowchart describes how to register $1.00 into the PLU1 key:
1 0 0 PLU #1
This flowchart means:
1. Press numeric key 1.
2. Press numeric key 0.
3. Press numeric key 0.
4. Press PLU #1.
Follow the flowchart from left to right, pressing the keys in the order they are shown. Numeric keypad
entries are shown as square keys. PLU and function keys are shown as rectangular keys.
8 • Introduction ER 5200/5240 Electronic Cash Register
Page 11

Basic Features and Functions
The Samsung ER-5200/5240 is designed to fit into many different retail and restaurant environments.
Standard Features Include:
Separate receipt and journal thermal printers, featuring easy drop-and-print paper loading
and an optional receipt auto cutter.
Cash drawer with 5 bill and 5 coin compartments.
Ten position front and rear displays with a rear pop up display standard.
7-position control lock.
24-hour real-time clock with automatic day and date change.
Four tax rates with value added tax (VAT) capability. Each tax rate is programmable for
tax table look-ups and/or straight percentage tax programming. Tax rate 4 may be
programmed to accommodate Canadian goods and services tax (GST).
Operation for up to 10 clerks or cashiers with separate report totals. Your Samsung
dealer can provide an optional second drawer.
More than 1000 Price Look Ups (PLUs) are available for open or preset item registration.
(Your application may have significantly fewer, or up to about 1200 PLUs. The exact
number of PLUs is determined by memory allocation.) For direct registrations, up to 117
PLUs are on the ER-5200 keyboard, up to 40 PLUs are on the ER-5240 keyboard.
Up to 5 PLU modifier keys (i.e. small, medium, and large).
20 Group totals to accumulate totals of individual PLUs that are assigned to each group.
Each PLU can be assigned to up to three different groups.
A programmable keyboard allowing customized placement of functions, as they are
needed. (See "Function Key Descriptions" on page 19 for a list of available functions).
Function keys for posting charges and payments to accounts or guest checks. You can
choose manual previous balance posting or automatic balance tracking for up to 100
current balances.
Food stamp sorting and tendering for stores that accept food stamp payments.
Check, Cash, and up to eight Charge keys.
Management X and Z reports.
RS-232C communications port for connection to an optional POS peripheral. The ER-
5200 series can connect to a scale, kitchen printer, coin dispenser, pole display, modem,
or a PC for polling and/or remote programming. A second RS-232C port is available as
an option.
ER 5200/5240 Electronic Cash Register Introduction • 9
Page 12
Display
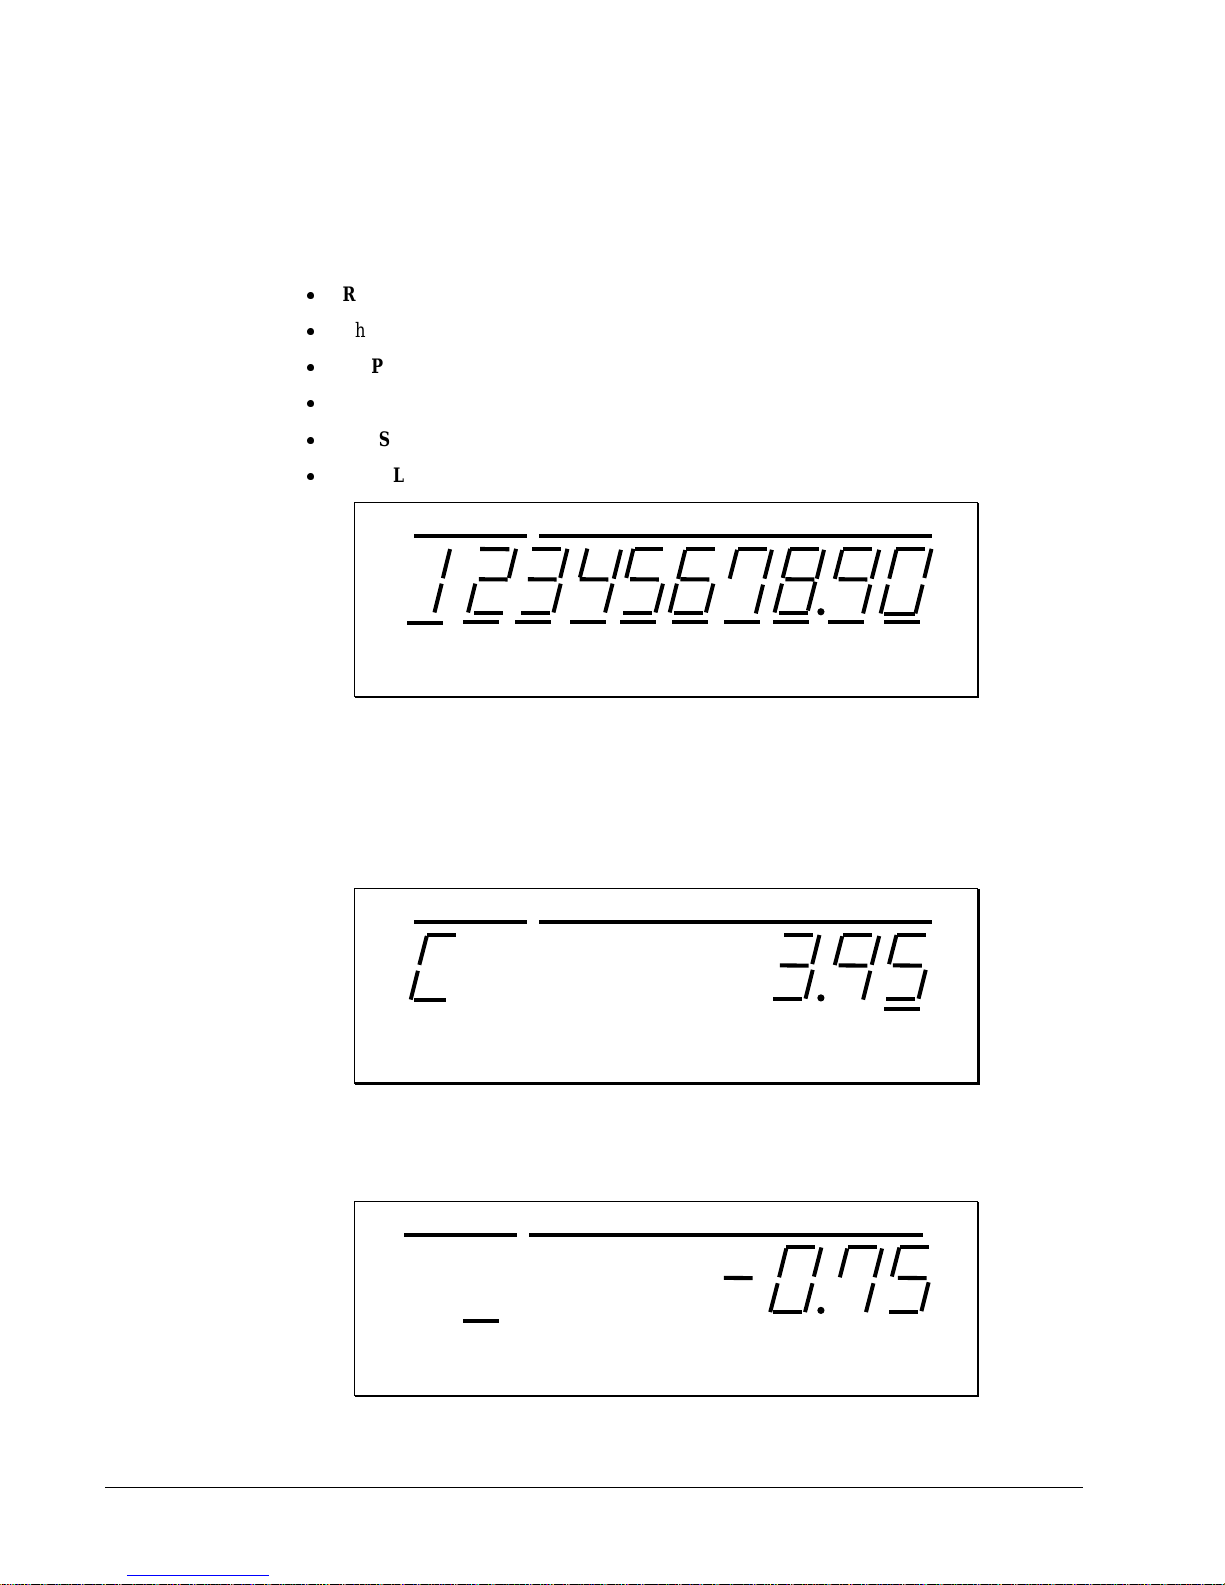
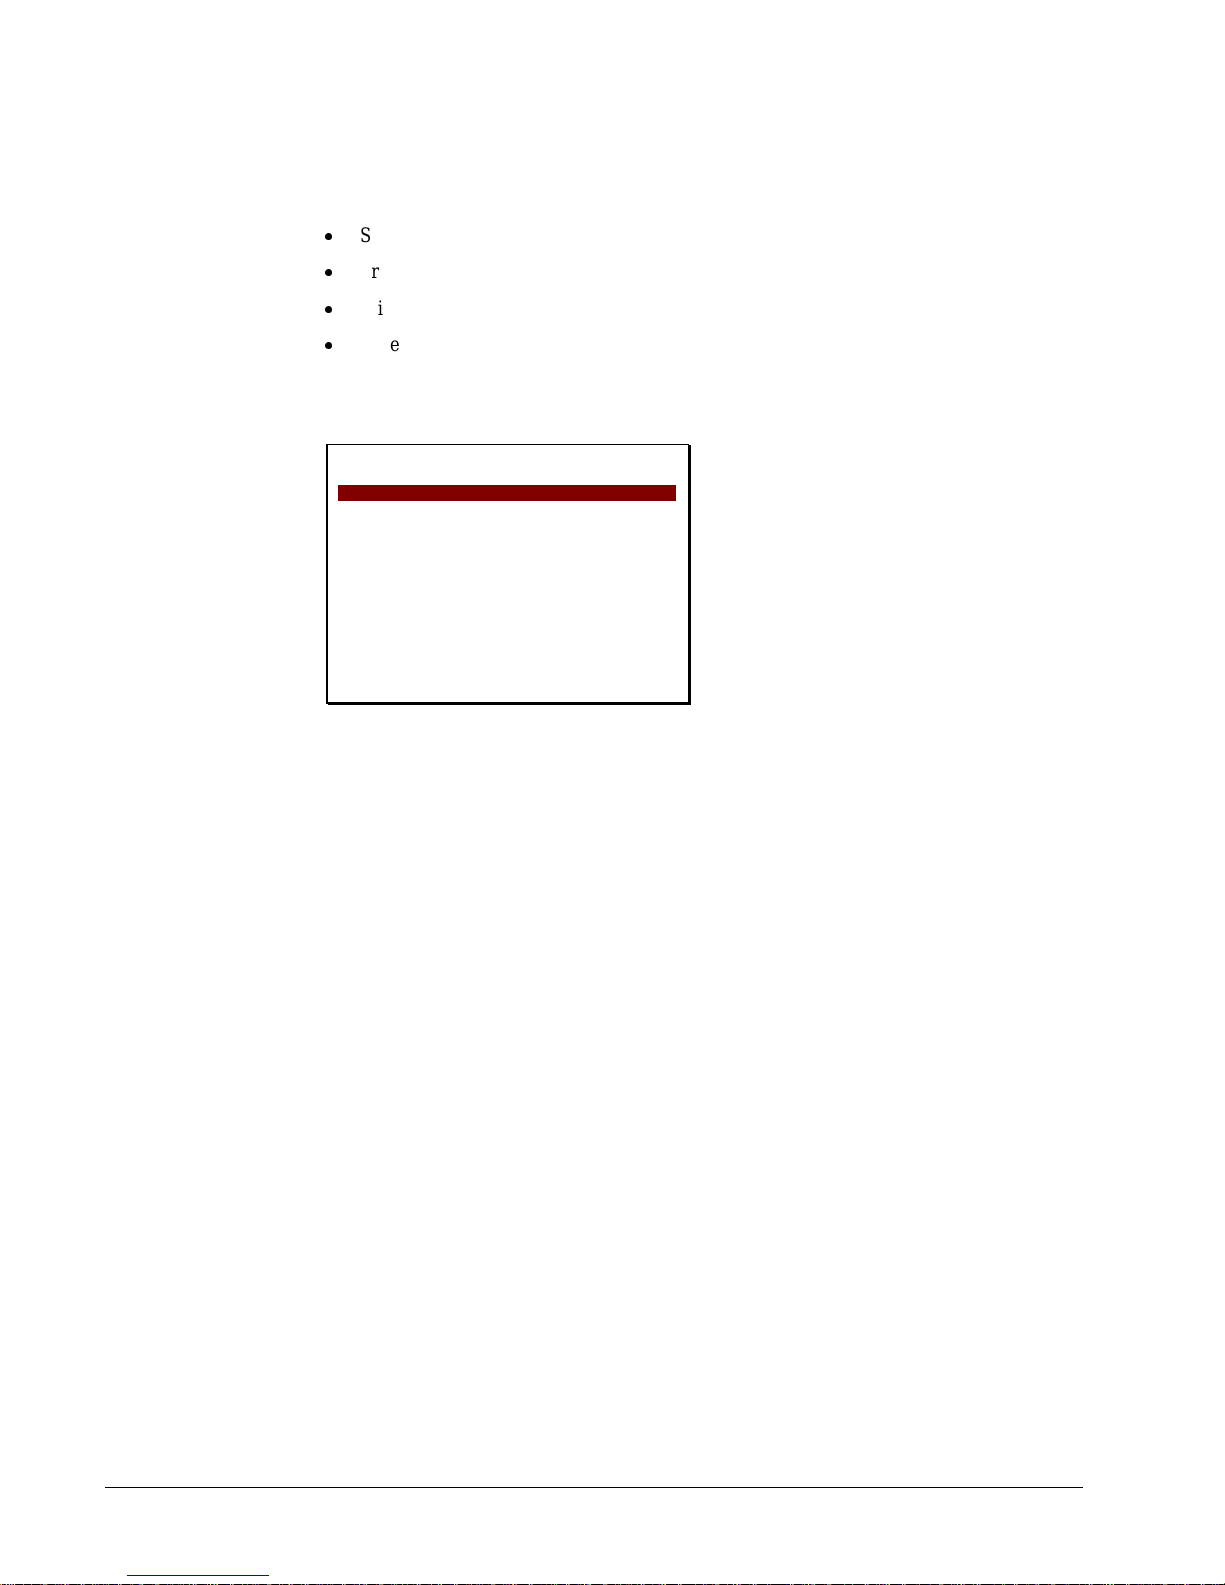
The ER-5200/5240 comes with a ten position front display. Annotations on the display window
include:
RPT, where a counter appears when the same item is multiplied or repeated.
The AMOUNT area shows the amount, i.e. price, subtotal or total.
RCPT OFF indicates when the receipt is turned off.
The VOID symbol illuminates during Void operations.
The SHIFT symbol illuminates during Tax Shift operations.
The CLERK segment remains illuminated as long as a clerk is signed on.
RCPT
OFF
RPT
VOID SHIFT
AMOUNT
CLERK
The front display offers supplemental descriptors that appear in the first two display positions (as
shown). These descriptors help the operator by supplying additional information while operating the
register, and may be accompanied by an error tone.
Supplemental descriptors include:
Change Due
RCPT
OFF
RPT
VOID
SHIFT
AMOUNT
CLERK
Negative Entry
RCPT
OFF
10 • Introduction ER 5200/5240 Electronic Cash Register
VOID SHIFT
CLERK
Page 13
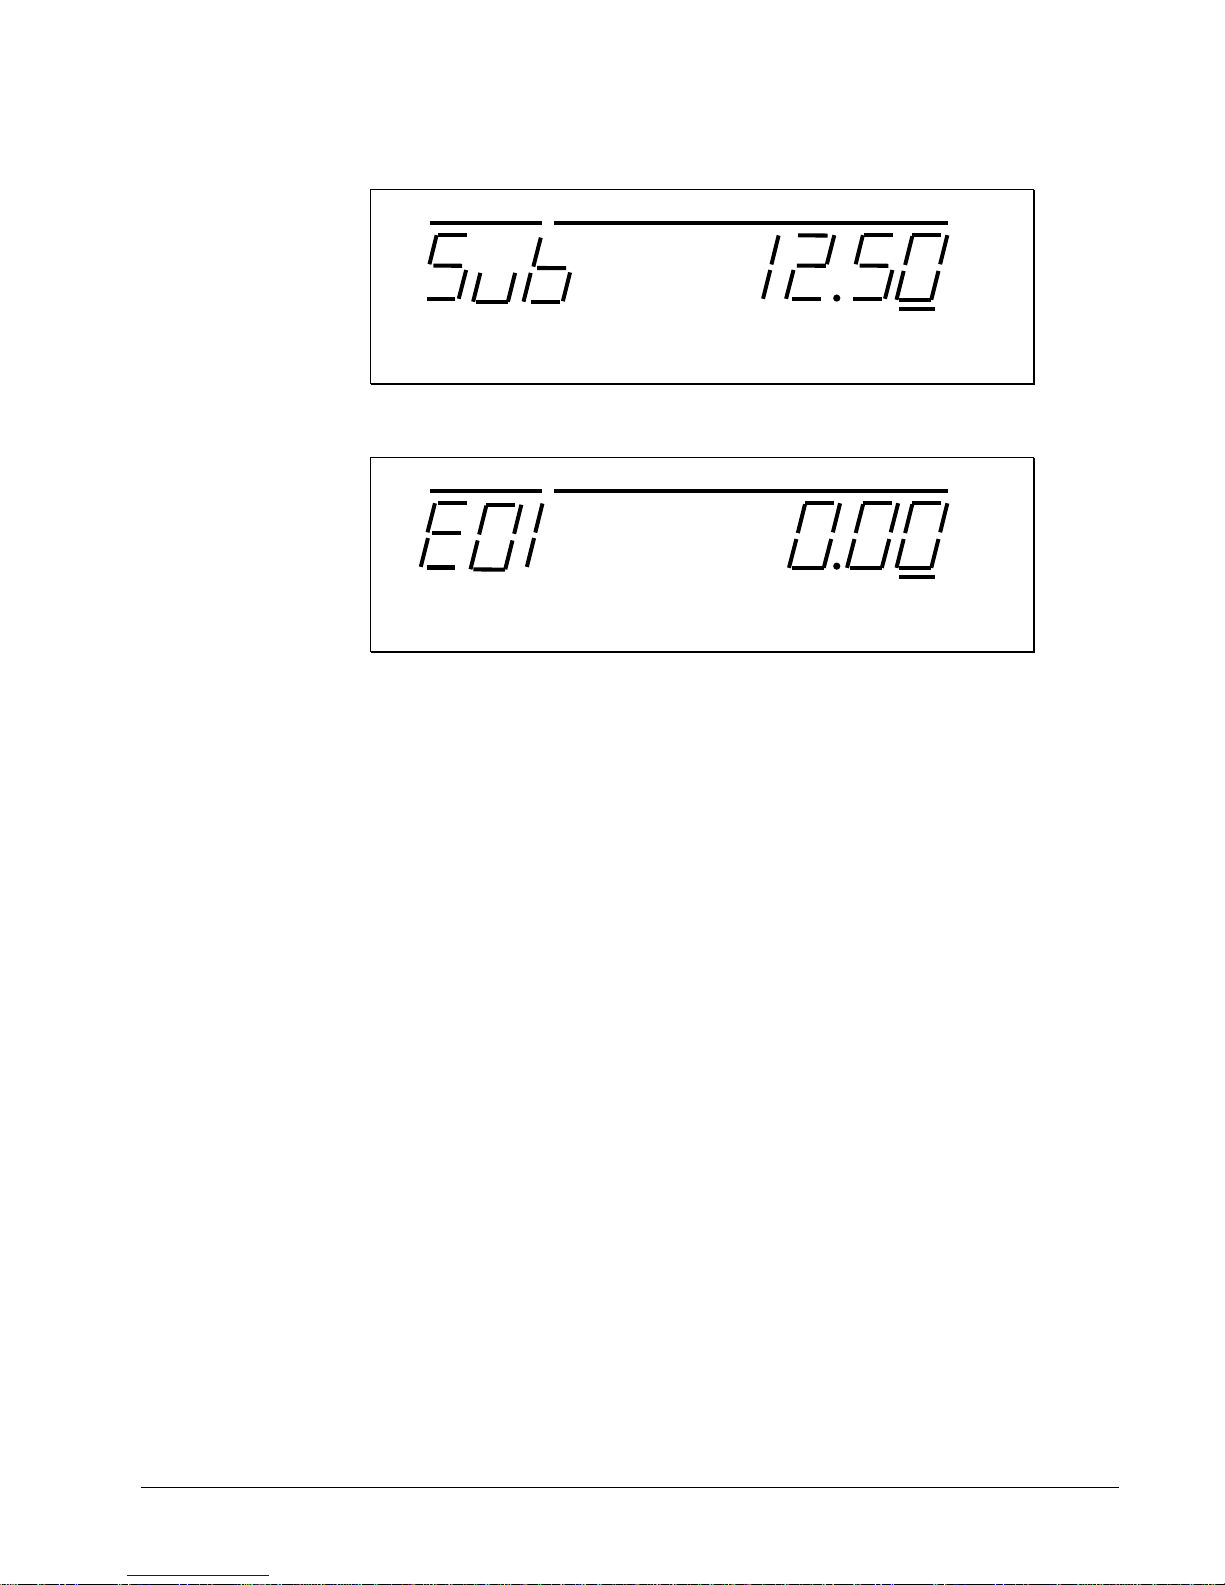
Subtotal
RCPT
OFF
RPT
VOID SHIFT
Numbered Error Conditions
RCPT
OFF
E00
E01
E02
E03
E05
E06
E07
E08
E09
E10
E11
E12
E13
E14
E15
E16
E17
E18
E19
E20
RPT
VOID
SHIFT
SEQUENCE ERROR
PLU NO DATA
CLERK ERROR
AMOUNT COUNT OVER
COMMUNICATION ERROR
TIME AND DATE
LIMIT OVER
INACTIVE
X MODE ONLY
NONADD
ADDCHECK ERROR
CONDIMENT ERROR
EAT IN REQUIRED
STOCK REQUIRED
CLOSE CASH DRAWER
GUEST ENTRY REQUIRED
SCALE
CHECK ASSIGNED TO DIFFERENT CLERK
COMPULSORY TARE
DECLARATION REQUIRED
AMOUNT
AMOUNT
CLERK
CLERK
ER 5200/5240 Electronic Cash Register Introduction • 11
Page 14

E21
E22
E23
E24
E25
E26
E27
E28
E29
E30
E31
E32
E33
E34
E35
E36
E37
E38
E39
PER
PEJ
PR
PJ
PCO
ACJ
PFP
SLIP END
OFF LINE
ENDORSEMENT REQUIRED
BUFFER FULL
REQ.SUBTOTAL
PROMO ERROR
CHECK OPEN
PASSWORD REQUIRED
NO VOID PLU
232C SETUP ERROR
PRESET VALUE REQUIRED
OPEN VALUE REQUIRED
AMOUNT REQUIRED
PAYMENT REQUIRED
INVALID FUNCTION
TABLE REQUIRED
PBAL REQUIRED
CHECK # REQUIRED
ONLY ONE CHECK PER TABLE
VALIDATION REQUIRED
RECEIPT PRINTER PAPER END
JOURNAL PRINTER PAPER END
RECEIPT PRINTER PAPER NEAR-END
JOURNAL PRINTER PAPER NEAR-END
PRINTER COVER OPEN
AUTO CUTTER PAPER JAM
SYSTEM ERROR (If this problem occurs, call the service
engineer.)
SLIP PRINTER OUT OF PAPER
12 • Introduction ER 5200/5240 Electronic Cash Register
Page 15
Receipt Printer
Samsung SMT-210
Print speed: 13.3 lines per second
Print columns: 32
Paper size: 2 ¼” (58mm) width
Auto cutter (optional)
Sample Receipt
CASH REGISTER
PREAMBLE MESSAGE
DATE 10/15/2002 SUN TIME 08:37
HAMBURGER T1 $1.00
TAX1 AMT $0.06
TOTAL $1.06
CASH $10.00
CHANGE $8.94
CASH REGISTER
POSTAMBLE MESSAGE
CLERK 1 No.000001 00001
ER-5200
ELECTRONIC
SIX LINE
PROGRAMMABLE
ER-5200
ELECTRONIC
SIX LINE
PROGRAMMABLE
User defined gr aphic logo
6 line programmable preamble
message
Date/Day
6 line programmable postamble
Clerk/Consecutive #/
Register #
User defined gr aphic logo
ER 5200/5240 Electronic Cash Register Introduction • 13
Page 16
Journal Printer
Samsung SMT-210
Print speed: 13.3 lines per second
Print columns: 32 (condensed format)
Paper size: 2 ¼” (58mm) width.
Sample Journal
DATE 10/15/2002 SUN TIME 08:37
HAMBURGER T1 $1.50
COUPON T1 $-0.50
TAX1 AMT $0.06
TOTAL $1.06
CASH $10.00
CHANGE $8.94
CLERK 1 No.000001 00001
DATE 10/15/2002 SUN TIME 08:38
HAMBURGER T1 $1.00
TAX1 AMT $0.06
TOTAL $1.06
CASH $10.00
CHANGE $8.94
CLERK 1 No.000002 00001
Journal print can be condensed to
save paper, or can be printed in
normal size.
Negative items can be printed in
reverse print to facilitate journal
review (see “System Option
Programming” on page 108.)
14 • Introduction ER 5200/5240 Electronic Cash Register
Page 17

Control Lock
The control lock has 7 positions, accessed with 5 keys. Each ECR is shipped with two full sets of keys.
VOID
Before performing any operations in Register Mode a clerk must be signed on. See “Clerk SignOn/Sign-Off” for a description of clerk operations.
Control Keys
The ER-5200/5240 includes two sets of keys that may be used to access the following control lock
positions.
OFF
REG
X
Z
VOID Use to void (co rrect) items outside of a sale.
OFF The register is inoperable.
REG Use for normal registrations.
X Use to read register reports.
Z Use to read register rep orts and reset totals to zero.
P
S
P Use to program the register.
S The S position is a hidden position reserved for dealer
access.
Key
Positions Accessible
REG
VOID
Z
P
C
OFF, REG
VOID, OFF, REG, X
VOID, OFF, REG, X, Z
VOID, OFF, REG, X, Z, P
ALL POSITIONS
Note: Keys may be removed from the control lock in the OFF or REG positions.
ER 5200/5240 Electronic Cash Register Introduction • 15
Page 18
Keyboards
ER-5200 Keyboard
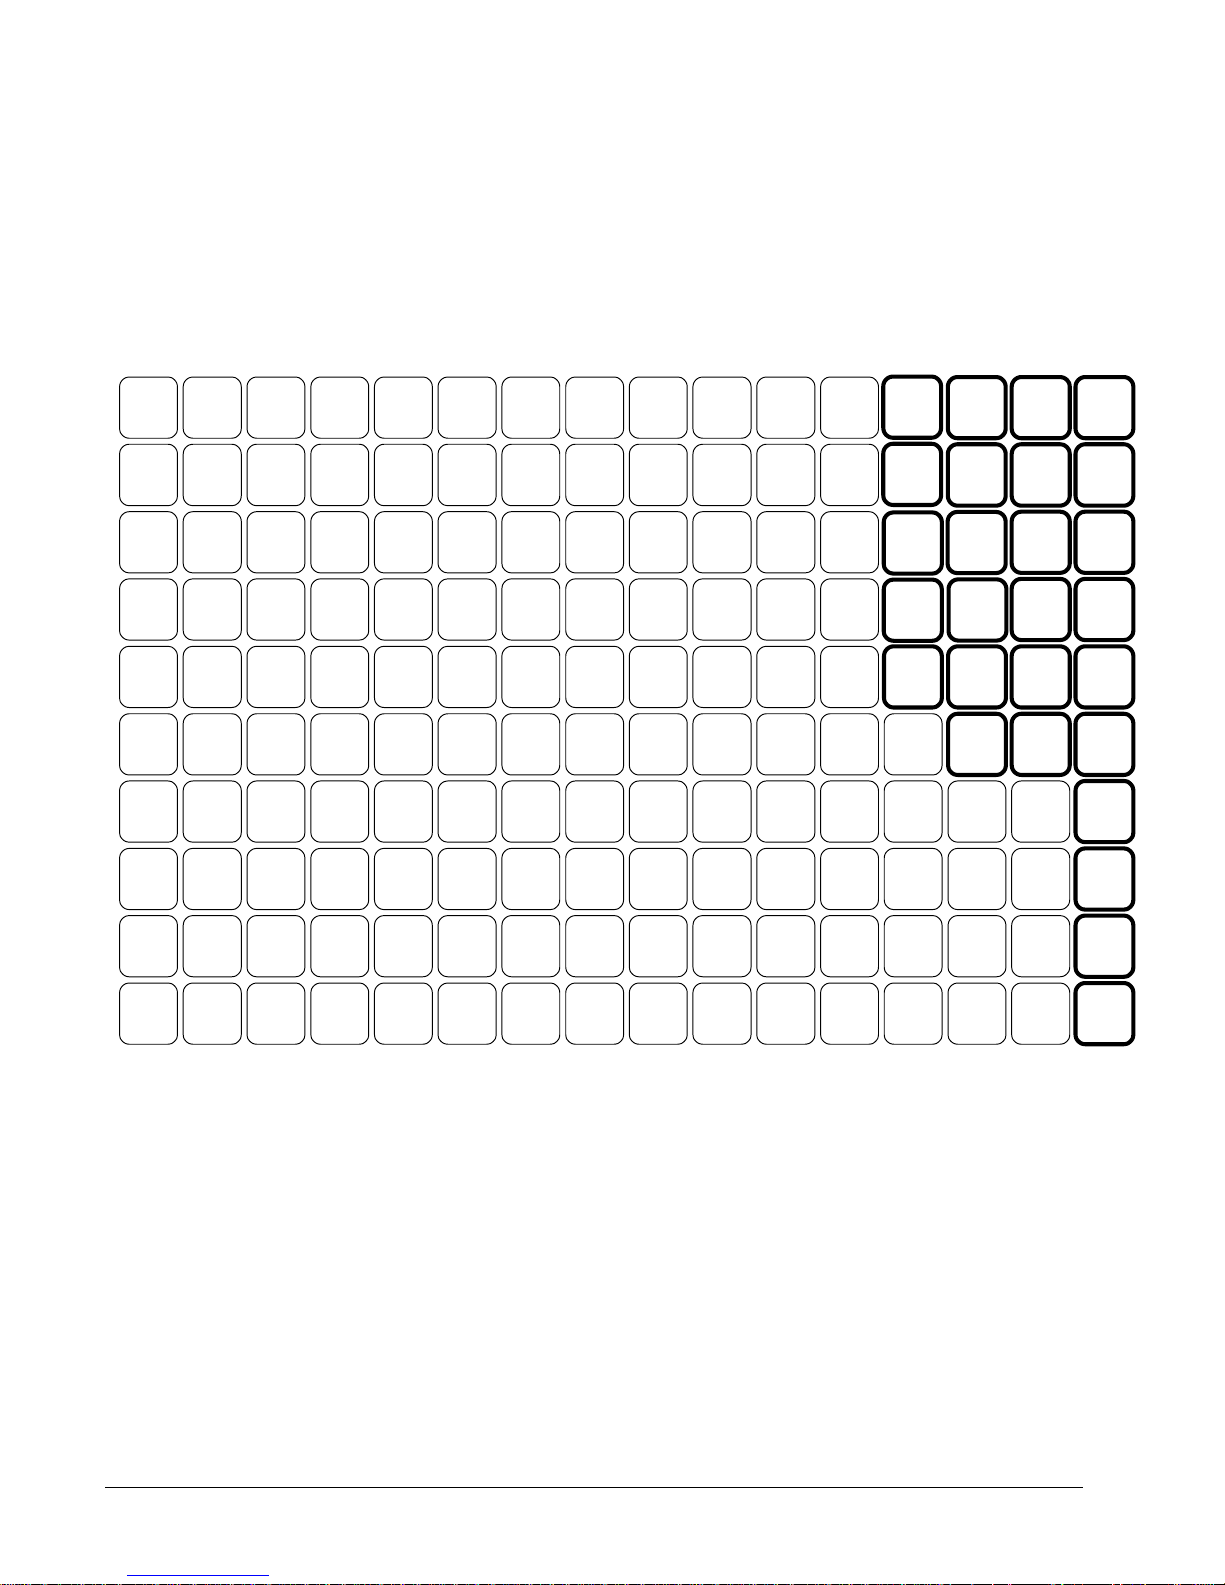
The ER-5200 keyboard includes 160 key positions with the default legends and key assignments as
shown below. The keyboard legend sheet can be replaced by lifting the protective plastic cover.
Programmable key locations are shown with a bold border.
RECT
FEED
DETL
FEED
ON/OFF
RCPT
TAX 1
SHIFT
TAX 2
SHIFT
F/S
SHIFT
CHECK
#
PAID
OUT
RECD
ACCT
CLERK
F/S
SUB
% 1
% 2
% 3
CLEAR
7
4
1
0
SERVICE
ERROR
CORR
8
5
2
00
VOID
RETURN
CANCEL #/NS
X/TIME PLU
9
6
3
.
F/S
TEND
EAT
IN
TAKE
OUT
CHARGE
2
CHARGE
1
CHECK
SBTL
CASH
16 • Introduction ER 5200/5240 Electronic Cash Register
Page 19
ER-5240 Keyboard – Default 15 NLU Configuration
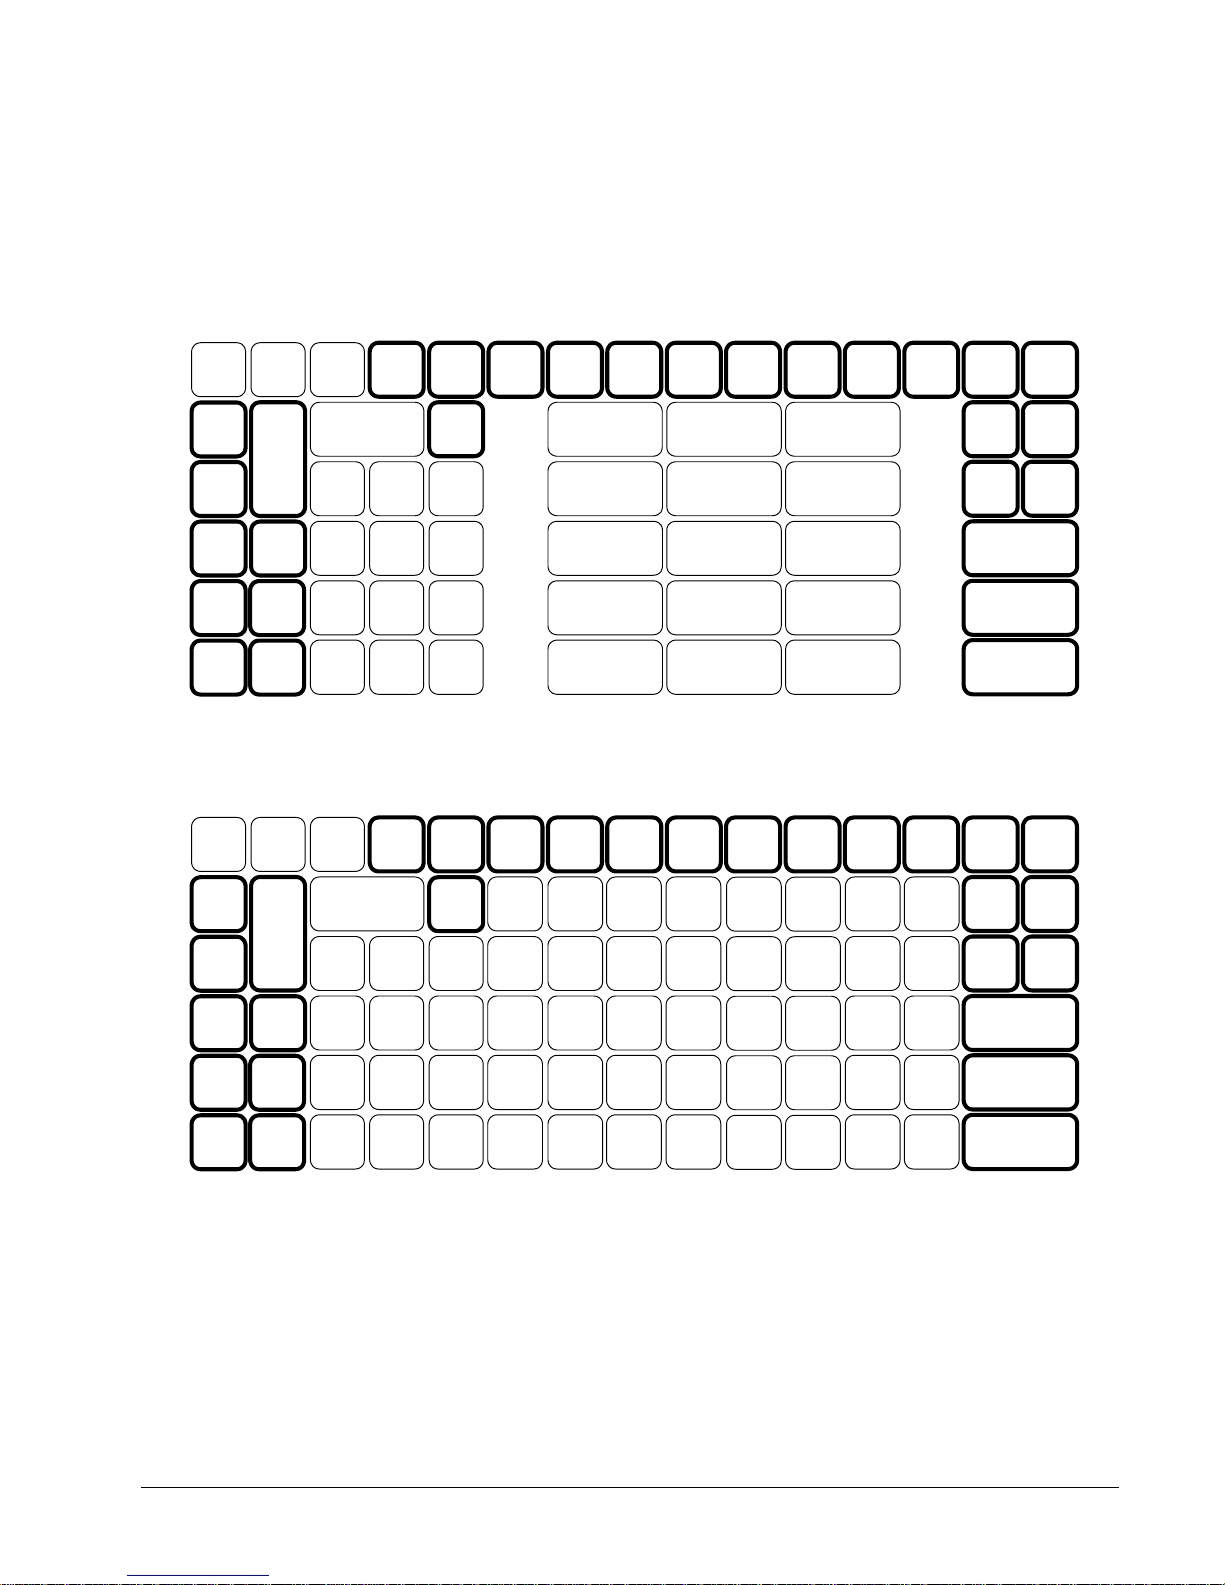
The ER-5240 keyboard is shown below with the default legends and key assignments. This
configuration has 15 keybo a rd NLU locations and can b e expanded to 40 N LU locations.
Programmable key locations are shown with a bold border.
RECT
FEED
ERROR
CORR
VOID
DETL
FEED
P
L
U
RCPT
ON/OFF
CLEAR
#/NS
8 7
TAX 1
X/TIME
9
TAX 2
F/S
SHIFT
RECD
ACCT
1
2
PAID
OUT
MACRO
MACRO
2
1
6 11
7 12
MACRO
3
MACRO
4
MACRO
5
F/S
SUB
F/S
TEND
CLERK
CHARGE
1
CHARGE
2
CANCEL
% 1
% 2
RECT
FEED
ERROR
CORR
VOID
CANCEL
% 1
RETURN
6
5 4
3
8 13
% 3
% 4
0
00
3
2 1
.
4
5
9 14
10 15
ER-5240 Keyboard – Expanded 40 NLU Configuration
RCPT
DETL
FEED
P
L
U
RETURN
% 3
ON/OFF
CLEAR
#/NS
8 7
5 4
2 1
TAX 1
X/TIME
9
6
3
TAX 2
1
2
3
4
F/S
SHIFT
6 11
7 12
8 13
9 14
RECD
ACCT
PAID
OUT
16
17
18
19
MACRO
1
21
22
23
24
MACRO
2
26
27
28
29
MACRO
3
31
32
33
34
MACRO
4
36
37
38
39
CHECK
MACRO
5
F/S
SUB
F/S
TEND
CHECK
SBTL
CASH
CLERK
CHARGE
1
CHARGE
2
SBTL
% 2
% 4
0
00
ER 5200/5240 Electronic Cash Register Introduction • 17
.
5
10 15
20
25
30
35
40
CASH
Page 20

Initial Clear
CAUTION: Do not share this information with unauthorized users. Distribute the P Mode key
only to those you may want to perform this function.
The initial clear function allows you to exit any register activity and return to a beginning or cleared
state. Any transaction that is in progress will be exited and totals for that transaction will not be
updated.
Here are some reasons you may want to perform an initial clear:
The register is in an unknown state, and you wish to exit the current program or
transaction without following normal procedures.
You have performed a function that includes a compulsory activity and you wish to
bypass the compulsion.
An initial clear may be necessary as part of servicing, or troubleshooting.
Perform this procedure only as necessary. Contact your SAMSUNG dealer first if you have questions
about operating or programming your Samsung ER-5200/5240.
To Perform an Initial Clear:
1. Turn the power switch located on the right side of the register to the OFF position.
2. Turn the control lock to the P position.
3. Press and hold the key position where the SBTL key is located on the default keyboard
layout.
4. While continuing to hold the SBTL key, turn the power switch to the ON position.
5. The message "INITIAL CLEAR OK!” prints when the initial clear is complete.
18 • Introduction ER 5200/5240 Electronic Cash Register
Page 21

Operations
Function Key Descriptions
Keys are listed in alphabetical order. Many of the keys described below are not included on the default
keyboard. See “Function Key Assignment Programming ” on page 81 to add or change programmable
keys.
Keyboard Legend
#/NS
X/TIME
00, 0-9, Decimal
ADD CHECK
CANCEL
CASH
Description
Use as a non-add key to print a numeric entry (up to 9-digits) on the
receipt and journal. This entry will not add to any sales totals. The #/NS
key is also used to open the cas h drawer without making a sale.
Use to multiply a quantity of item s or calculate split pricing on PLU
entries.
Use to make numeric entries in REG, X, Z, VOID, or P positions. The
decimal key is used for decimal or scale multiplication, wh en setting or
entering fractional percentage discounts, or when programming fractional
tax rates. Do not use the decimal key when making am ount entries into
PLUs.
Use to combine individual trays (such as in a cafeteria situation). Each
tray subtotal can advance the consecutive number, depending on
programming.
Cancels a transaction without updating PLU, or function key totals. The
Cancel function may only be used prior to tendering. Once tendering
begins, the Cancel function may no longer be used. The CANCEL key
corrects the appropriate totals and counters and the Financial report
records total of transactions canceled.
Use to finalize cash sales. Calculates the sale total including tax and
opens the cash drawer. Change computation is allowed by entering an
amount before pr essing the
if the amount tendered is equal to or greater than the total amount of the
sale. Post tendering is also available should a second change
calculation be necessary. Re-enter the tendered amount and press the
CASH key to show the new change computation.
Press the CASH key a second time to issue a buff ered receipt (u p to 200
lines) when the receipt on/off function is OFF.
CASH key. The cash drawer will open only
ER 5200/5240 Electronic Cash Register Operations • 19
Page 22

Keyboard Legend Description
CHECK
CHECK CASHING
CHECK ENDORSEMENT
CHARGE (1-8)
CHECK #
CLEAR
CLERK
CONV (1-4)
DETAIL FEED
Use to finalize check sales. Calculates the sale total including tax,
finalizes the sale, and opens the cash drawer. Change computation is
allowed by entering an amount before pressing the
CHECK key. The
cash drawer will open only if the amount tendered is equal to or greater
than the total amount of the sale. Change issued will be subtracted from
the cash-in-drawer total.
Use to exchange a check f or cas h . C as h - i n - drawer and check-in - drawer
totals are adjusted.
Use to print a check endorsement message on an optional slip printer. See
“Programming the Receipt/Check Endorsement Message” on page 152
to program an endorsement mes s ag e.
Use to f i nalize c harge s a l e s. Calculates the sale total including tax,
finalizes the sale, and opens the cash drawer. Change computation is
allowed by entering an amount before pressing the CHARGE key. The
cash drawer will open only if the amount tendered is equal to or greater
than the total amount of the sale. Change issued will be subtracted from
the cash-in-drawer total.
The CHECK # key is used to begin a new, or access an existing
balance (hard check) or itemized bill (soft check).
Check track numbers that are entered manually may be set at a fixed
length of one to nine digits. Che ck track numbers assigned
automatically will begin with #1.
Existing checks are accessed by entering the check track number and
pressing the CHECK # key.
Use to clear entries made into the 10 key numeric pad or X/TIME key
before they are printed. Also used to clear error conditions.
The register will not operate in register mode unless a clerk has been
signed on. Direct or secret code sign on procedu res accomplishes clerk
sign-on.
All entries made on the register will report to one of the 10 clerk totals.
When a clerk is signed on, all entries following will add to that clerk’s
total until another clerk is signed on.
To sign a clerk off, enter 0 (zero) and then pres s th e CLERK key. The
“CLOSEd” message displays. The register cannot be operated until
another clerk is signed on . The cu rren t clerk must first be si g n ed of f
before another clerk m a y be signed on.
The currency conversion function, allowed after subtotal, converts and
displays the new su btotal at a preprog rammed exchange rate. Tendering is
allowed after using the currency conversion function. Change is
calculated and issued in home currency. The am ou n t of f oreig n cu rren cy
tendered is stored in a separate total on the Financial report, but not added
to the drawer total.
Advances the detail paper one line, or continuously until the key is
released.
20 • Operations ER 5200/5240 Electronic Cash Register
Page 23

Keyboard Legend Description
EAT-IN
TAKE OUT
DRIVE THRU
ERROR CORR
F/S SHIFT
F/S SUB
F/S TEND
FINALIZE
GUEST #
MACRO (1-10)
MDSE RETURN
MODIFIER (1-5)
P/BAL
PAID OUT (1-3)
% 1 - % 5
PLU
PAYMENT
PAY TENDER
Eat-In, Take Out and Drive Thru are subtotal functions. In areas that
have different tax rules for eat-in and take out sales, the EAT-IN,
TAKE OUT and DRIVE THRU keys can be programmed to
automatically charge or exempt taxes.
Sales may not be split between Eat-In, Take Out and Drive Thru.
The EAT-IN, TAKE OUT and DRIVE THRU keys maintain separate
totals on the Financial report.
Use to correct the last entry. The ERROR CORR key corrects the
appropriate totals and counters.
When pressed before a PLU entry , th e F/S SHIFT key reverses the
preprogrammed f ood s tamp status of t h e PL U. F or ex ample, an item n ot
food stamp elig ibl e can be made food stamp el i g i ble.
Displays the amount of the sale t h at i s f ood s tamp eligible.
Use to tender food stam ps for eligible sales.
Pressing before closing a check will close the accou n t an d th e accoun t
number will no longer be reported on the open check report. The system
option for charge posting must be set to “Y” in order to use this function.
Use to enter the count of g u es ts s erv ed.
Macro keys may be programmed to record, an d th en later perform, up to
50 keystrokes. For example, a macro key cou ld be s et to ten der (preset
tender) a common curren c y, such as $5 into the cash key.
Used to return or refund merchandise. Returning an item will also
return any tax that may have been applied.
The MODIFIER key alters the next PLU registered, either by changing
the code number of the PLU so that a different item is registered, or by
adding the modifier descriptor (and not changing the code of the
subsequent PLU.)
Use to enter the amount of an outstanding balance.
Use to record money taken f rom the register to pay inv oices, etc. The
paid out amount subtracts from the cash-in-drawer total. Paid outs are
allowed outside of a sale only.
Up to five % key s may be placed on the ke yboard. Each % key is set
with a specific fun ction , s u ch as item discount or surcharg e, or sale
discount or surch arg e. The percen t rate may be entered or
preprogrammed, or th e percen t k eys can be programmed with a n eg at iv e
open or preset price, thus acting as cou pon k e ys.
PLU key is used to register price lookups by number entry. PLUs
The
can be programmed open or preset, and positive or negative.
Press to make a payment, partial payment, or pre-payment while posting
to a check (account). If the pay ment amount ex ceeds the ch eck balan ce, a
credit balance will be maintained. The system option for charge posting
must be set to “Y” in order to use this function.
Functions like the Payment key, ex cept if th e payment amou n t ex ceeds
the check balance, the overpayment will be issued as change and the
account balance will be zeroed. The sy stem option for charge posting
must be set to “Y” in order to use this function.
ER 5200/5240 Electronic Cash Register Operations • 21
Page 24

Keyboard Legend Description
PRINT CHECK
PROMO
RECT FEED
RCPT ON/OFF
RECD ACCT (1-3)
SCALE
SERVICE
SBTL
TABLE #
TARE
TAX EXEMPT
TAX (1-4) SHIFT
TIP
VOID
VALIDATION
Use to print a guest check. The check can be prin ted on an option al (R S232C) printer, or can be printed on the receipt printer. The PRINT
CHECK key can be set to autom atically service the check.
The PROMO key allows you to account f or promotional items, as in "buy
two, get one free". Pressing this key will remove an item's cost from the
sale, but will include the sale of the item in the item's sales counter.
Advances the receipt paper one line, or continu ou sly until the key is
released.
When 'OFF' no receipt will prin t du rin g a sale. (If th e receipt is of f , a
buffered receipt is available by pres si n g th e CASH key a second time.)
The RA (received on accoun t) k ey is used to record media loan ed to th e
cash drawer, or paym en ts receiv ed ou tside of a sale. The cash drawer will
open. The amount received adds to th e cash - in -drawer total.
Use to make weig h t en tries. Wh en a s cale is attach ed, press th e s cale key
to show the weight in the display, then press (or enter) a PLU to multiply
the weight times th e price. When a scale is not attach ed, you can enter the
weight (using the decimal key for fractions). PLUs may be programmed
to require an entry through the scale key.
Use to temporarily fin alize Previous Balance or C h eck /Table tracking
transactions.
Displays subtotal of sale including tax. Must be pressed prior to a sale
discount or sale surcharge.
Tracks the current balance for a guest ch eck or table.
Tares are container weights. If you are using the scale f u n ction , you can
preset up to 5 different tare w e ig h ts . The tare can be s u btracted
automatically when a specific PLU is registered, or manually inputting the
tare number and pressi n g th e TAR E k ey can subtract the tare. Tare #5 can
be programmed for entering tare weights manually.
Press the TAX EXEMPT key to exempt tax 1, tax 2, tax 3, an d/ or ta x 4
from the entire sale.
When pressed before a PLU entry, the tax s h if t k eys reverse the tax status
of the PLU, i.e., a PLU with non - tax st atu s would become taxable or a
PLU with tax status would become non-taxable.
The TIP key allows a gratuity to be added to a guest check before
payment. The tip amount is deducted from the Cash-in-Drawer amount
for the Clerk/Cashier closing the guest check.
The TIP key may be programmed as either a percentage or amount. If
programmed as a percentage, tax programming defines whether the
percentage is calculated on the net amount, or the amount after taxes.
Use to correct an item entered earlier w ith in a s ale. The VOID key
corrects the appropriate totals and counters. To correct the last item , u s e
the ERROR CORR key. For void operations outside of a sale
(Transaction Void), use the VOID position on the control lock. The
Financial report records totals for each type of v oid separately.
If you are using an optional slip printer, you can press the VALIDATION
key to print a one-lin e v alidation on a s eparate f orm or piece of paper.
Any item registration, discount or payment may be validated
22 • Operations ER 5200/5240 Electronic Cash Register
Page 25

Keyboard Legend Description
WASTE
The WASTE key allows control of inven tory by accounting f or items that
must be rem ov ed f rom stock due to spoil ag e, breakage or mistakes . Pres s
the WASTE key before entering wasted items, and then pres s the
WASTE key again to fin alize. The WASTE key may be under manager
control, requiring the control lock to be in the X position. The WASTE
key is not allowed within a sale.
ER 5200/5240 Electronic Cash Register Operations • 23
Page 26
Clerk Sign-On/Sign-Off
See "System Option Programming”, to review your clerk options: (System option #2 allows you to
select direct or code entry sign on, option #3 allows you to select stay-down or pop-up operation, and
option #26 allows you select clerk interrupt operations.)
Depending on how your machine has been programmed, sign-on will take place only at the beginning
of a shift (stay-down), or may have to be repeated for each transaction (pop-up). Normally, if your
machine has been programmed for stay-down clerks, the clerk currently signed on must be signed off
before another clerk may be signed on. If you have selected the clerk interrupt option, a new clerk can
be signed on in the middle of a transaction. In this circumstance, the initial transaction is suspended.
When the interrupt transaction is completed, the suspended transaction can be continued.
Check with your store manager to see which optio ns have been selected for your register.
Before any transaction may take place, a clerk must be signed on. Clerk sign-on is accomplished in one
of two ways:
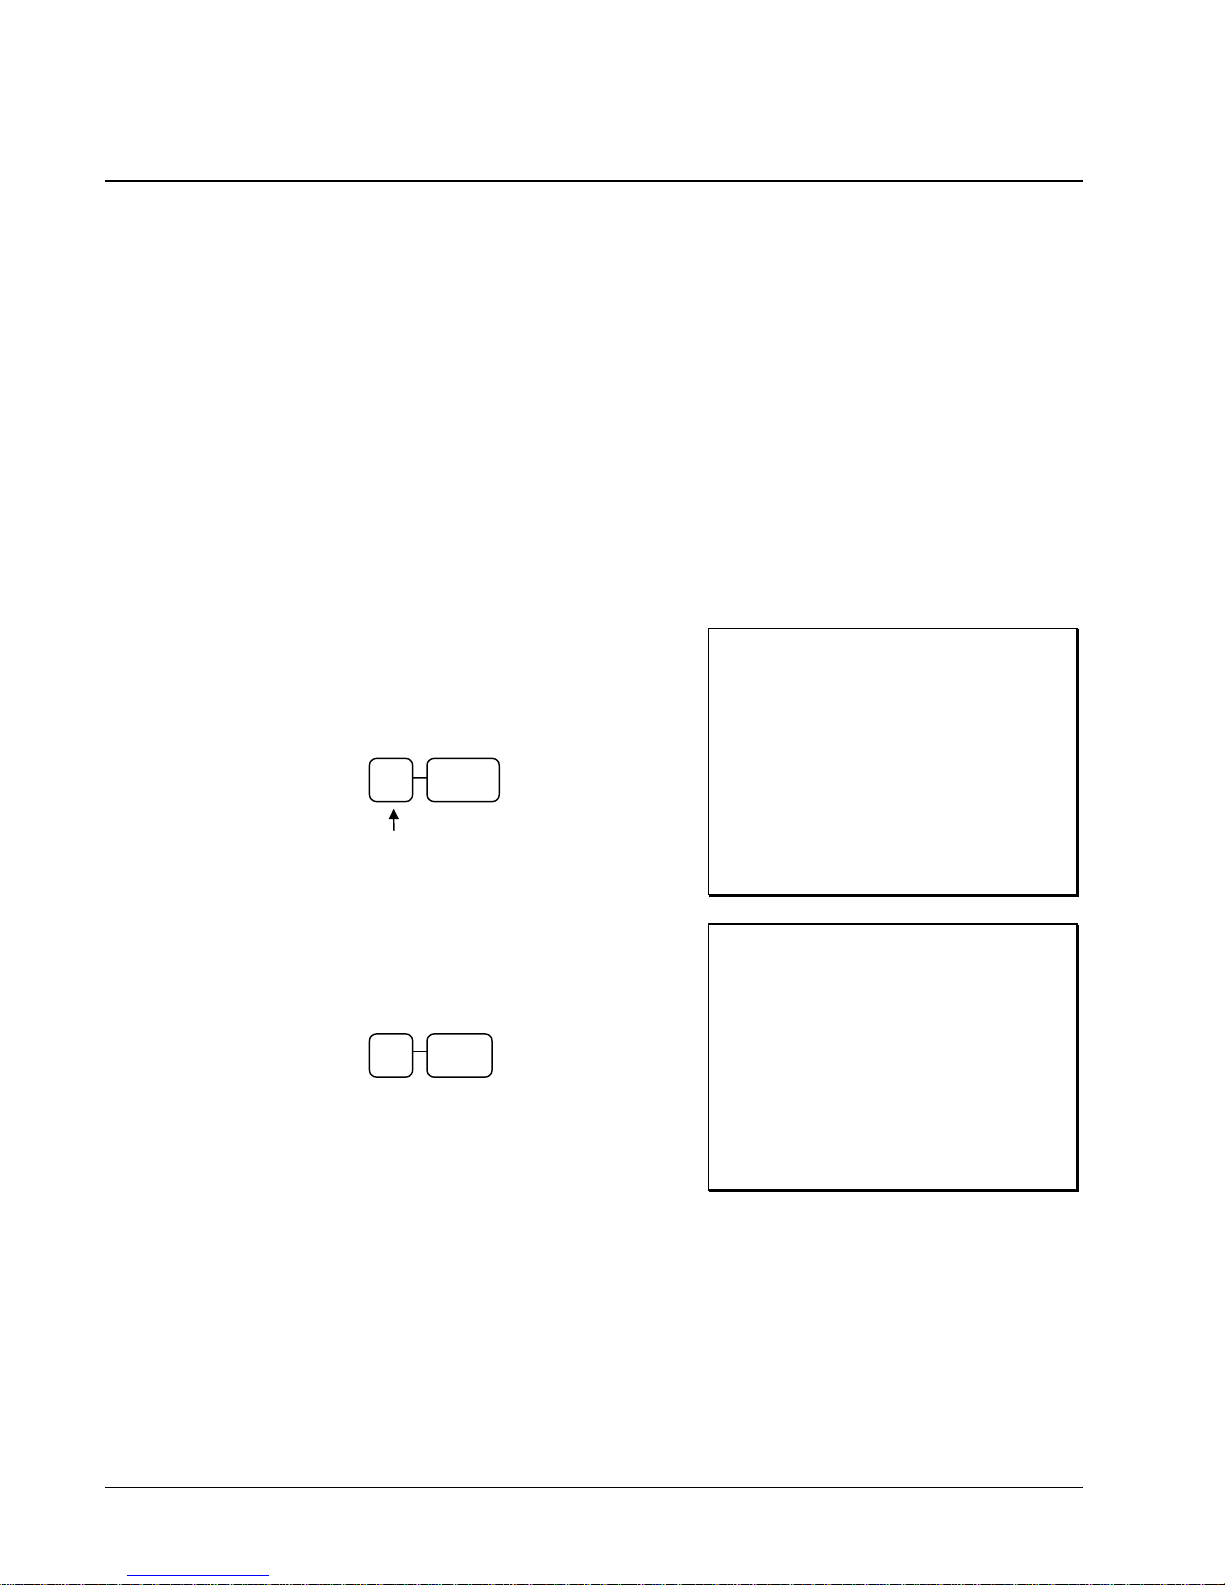
Direct Sign-On
If the direct sign-on method is selected, enter the
clerk number and press the clerk key.
CLERK
Clerk # (1-10)
To sign the clerk off, enter 0 (Zero) and press the
clerk key.
0 CLERK
DATE 10/15/2002 SUN TIME 08:37
================================
CLERK LOG IN
================================
CLERK 1 01
CLERK LOG IN TIME 09:06
CLERK 1 No.000001 00001
DATE 10/15/2002 SUN TIME 08:37
================================
CLERK LOG OUT
================================
CLERK 1 01
CLERK LOG OUT OUT 09:06
CLERK 1 No.000001 00001
24 • Operations ER 5200/5240 Electronic Cash Register
Page 27
Coded Sign-On
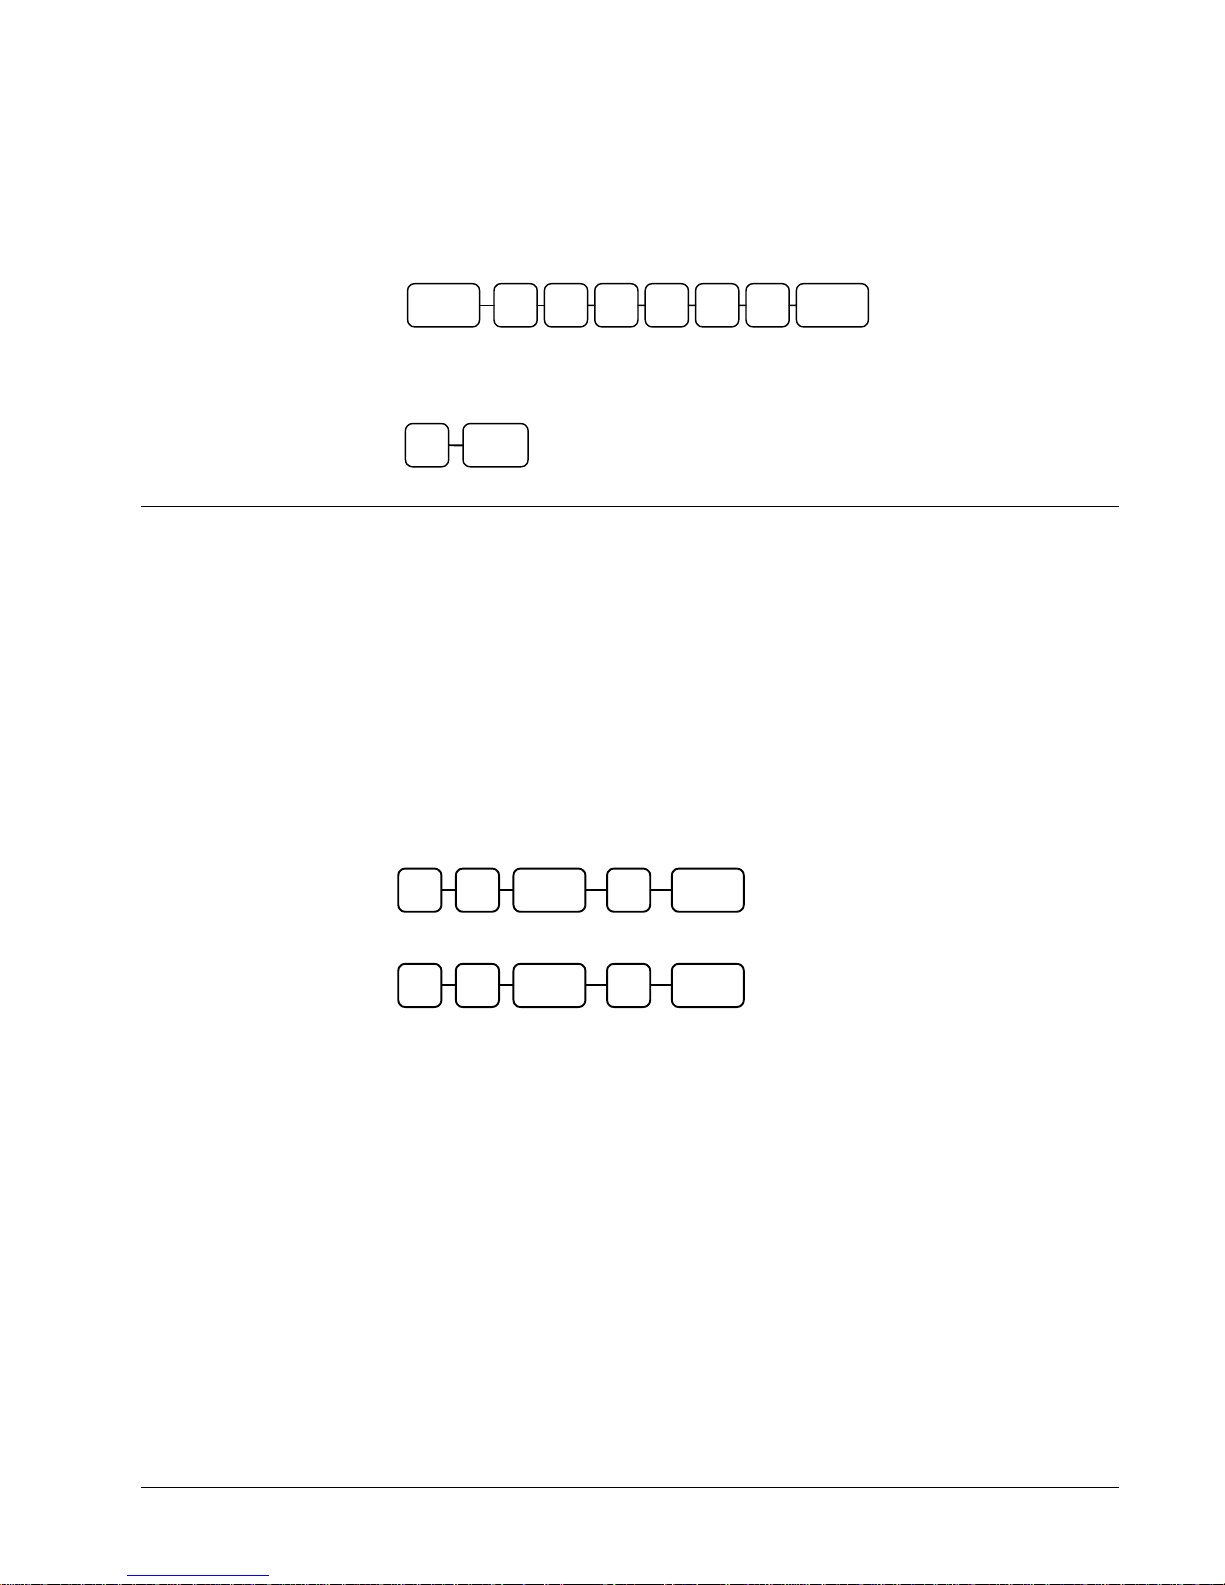
If the code entry sign-on method is selected, press the clerk key, enter the clerk code, and then press the
clerk key again.
To sign the clerk off, enter 0 (Zero) and press the clerk key.
0 CLERK
Receipt On and Off
The RECEIPT ON/OFF function key may or may not be located on your keyboa rd. (The RECEIPT
ON/OFF key is located on the default keyboard.)
If The RECEIPT ON/OFF Key Is Located On The Keyboard
1. Press the RECEIPT ON/OFF key once to turn the receipt off.
2. Press the RECEIPT ON/OFF key again to turn the receipt on.
If The RECEIPT ON/OFF Key Is Not Located On The Keyboard
CLERK CLERK
Clerk Code (up to 6 digits)
1. Turn the control lock to the X position.
2. To turn the receipt off, enter 9 9, press the SBTL key. Enter 1, press CASH.
3. To turn the receipt on, enter 9 9, press the SBTL key. Enter 0, press CASH.
1 SBTL 9 9 CASH
0 SBTL 9 9 CASH
ER 5200/5240 Electronic Cash Register Operations • 25
Page 28

PLU Registrations
All registrations on ER-5200/5240 are made into open or preset PLUs.
In place of traditional department keys, NLU (number look up) keys are located directly
on the keyboard. NLU keys are programmed to access a specific PLU. In the default
configuration NLU key #1 will access PLU #1. See “Program 1000 - NLU Code Number
Programming” on page 158 if you wish to change the PLU assigned to a NLU key.
When more items or categories are needed than the number of PLUs available on the
keyboard, registrations can be into PLUs by entering the PLU code number and pressing
the PLU key on the keyboard.
This system simplifies reporting by listing all items (regardless of how they are entered) on the PLU
report, while reporting for groups of items or categories is available from the Group report.
NLU (Keyboard PLU) Entries
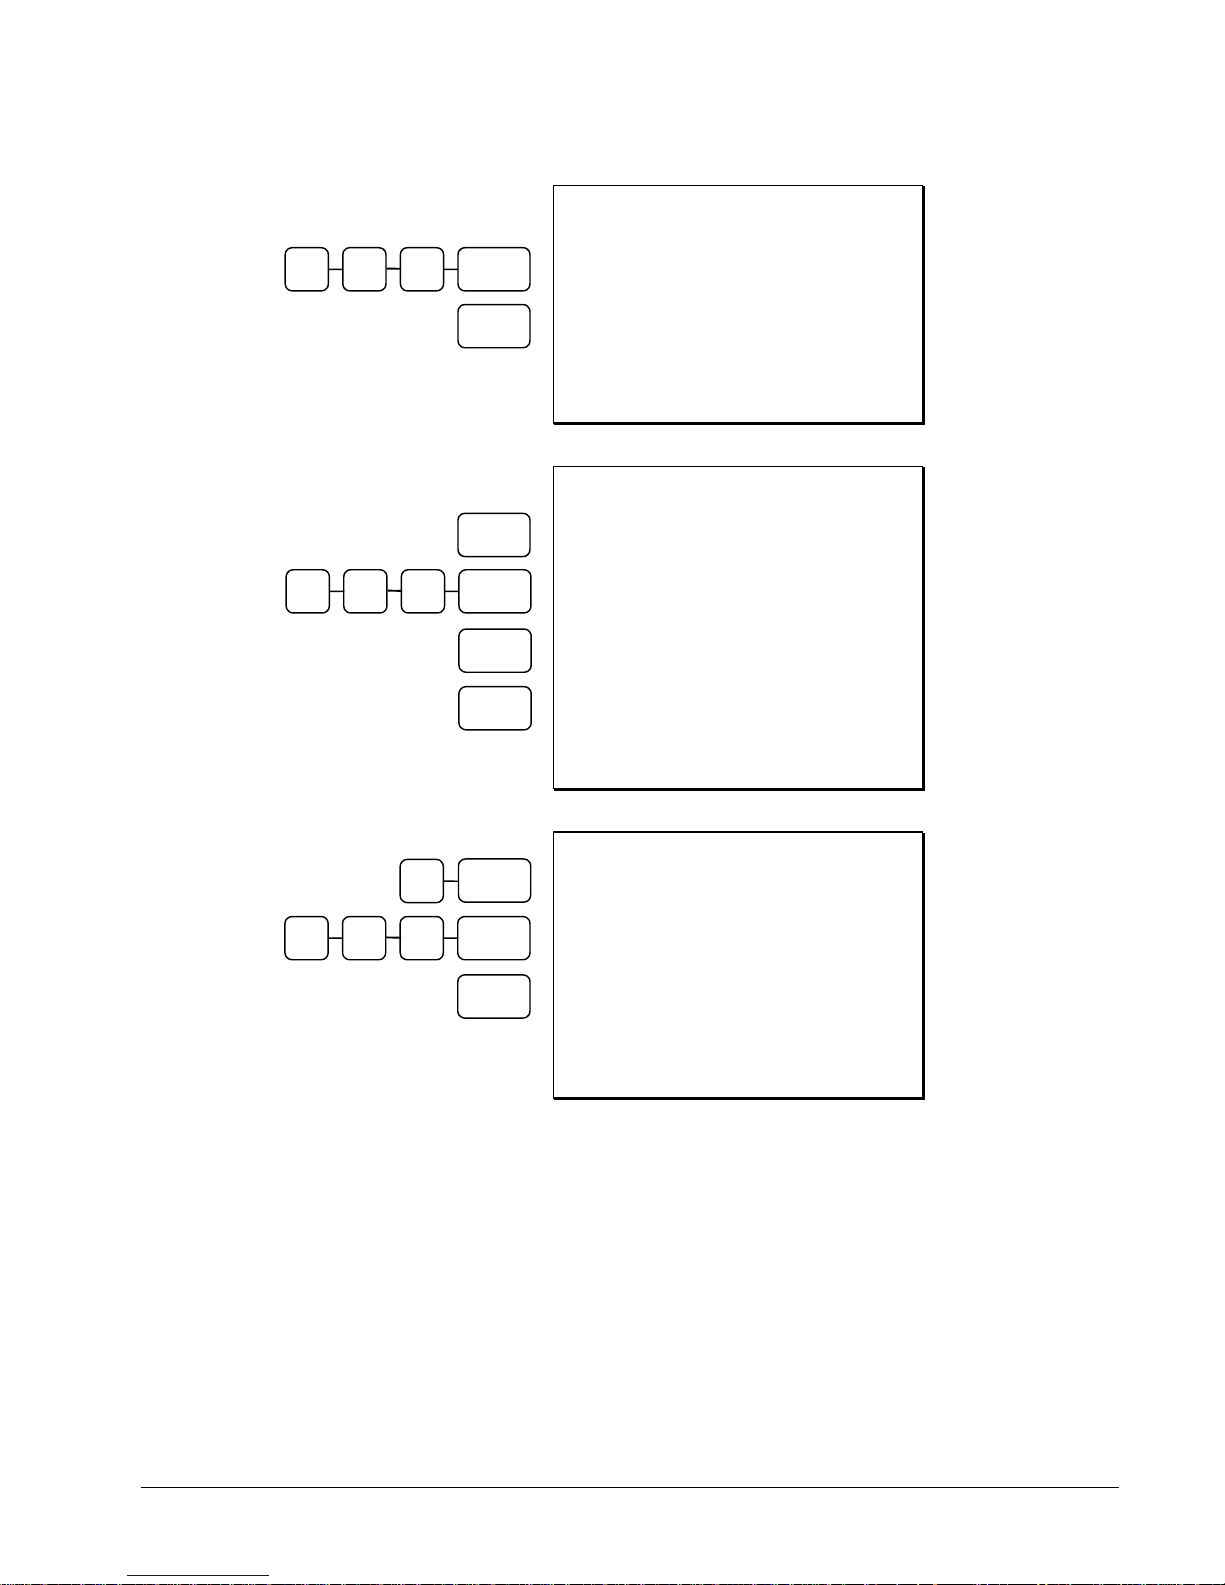
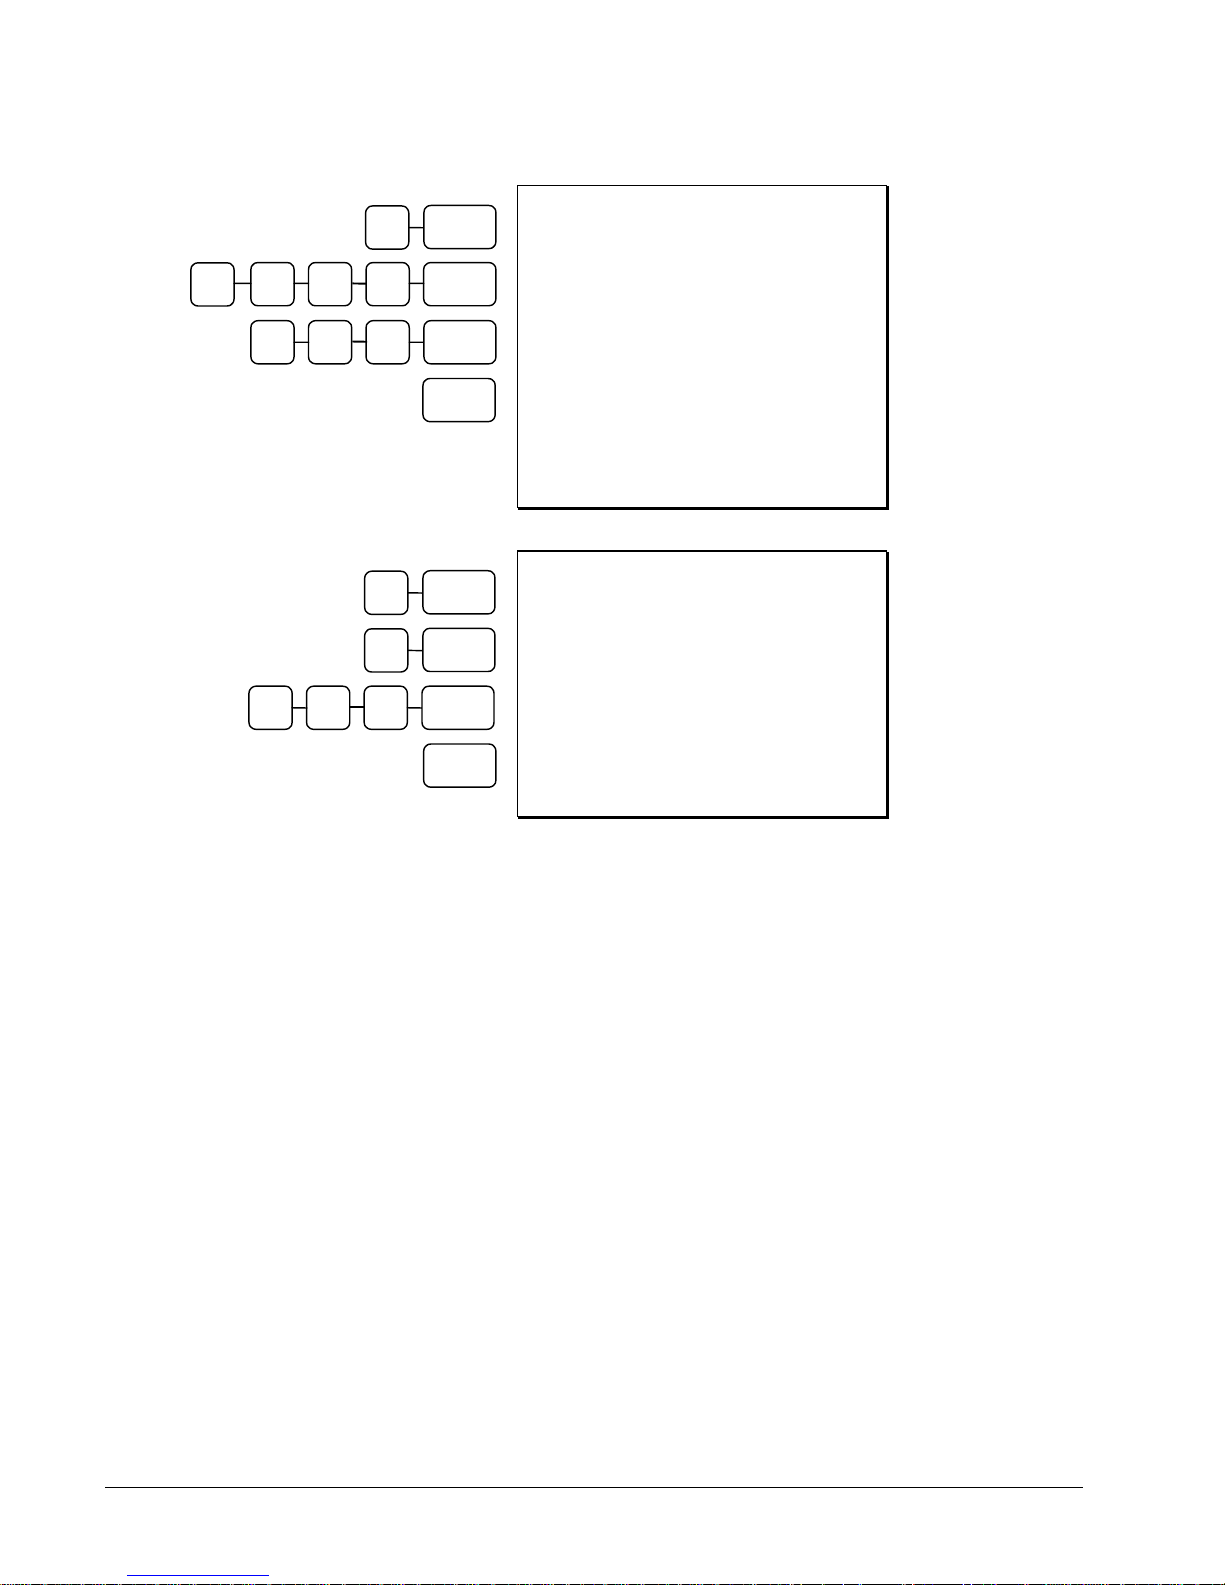
As you make PLU registrations, you can fo llow your entries by viewing the display. The digit marked
RPT counts items as they are repeated or multiplied.
In the following examples:
PLU1 is programmed for open entries, and is taxable by Tax 1.
PLU2 is programmed for open entries, and is taxable by Tax 2.
PLU3 is programmed with a preset price of $3.00, and is taxable by Tax 1 and Tax 2.
Tax 1 is programmed at 5%; Tax 2 is programmed at 10%.
26 • Operations ER 5200/5240 Electronic Cash Register
Page 29
DATE 10/15/2002 SUN TIME 08:37
1 0 0 PLU 1
CASH
PLU1 T1 $1.00
TAX1 $0.05
TOTAL $1.05
Open Keyboard
PLU Entry
CASH $1.05
CLERK 1 No.000001 00001
PLU 3
1 0 0 PLU 1
PLU 1
DATE 08/15/2002 SUN TIME 03:15
PLU3 T12 $3.00
PLU1 T1 $1.00
PLU1 T1 $1.00
TAX1 $0.25
TAX2 $0.30
Single Preset
PLU
Single Open PLU
Repeat PLU Item
TOTAL $5.55
CASH
CASH $5.55
CLERK 1 No.000001 00001
X/TIME
2
5 0 0 PLU 2
CASH
DATE 08/15/2002 SUN TIME 03:15
2X @5.00
PLU2 T2 $10.00
TAX2 $1.00
TOTAL $11.00
CASH $11.00
CLERK 1 No.000001 00001
Multiple Quantity
of a PLU Entry
ER 5200/5240 Electronic Cash Register Operations • 27
Page 30
X/TIME
1
DATE 08/15/2002 SUN TIME 03:15
1X @25.00
5 0 0 PLU 1
2
PLU1 T1 $25.00
HALO Override
on PLU Entry
PLU3 T12 $3.50
3 5 0 PLU 3
CASH
TAX1 $1.43
TAX2 $0.35
TOTAL $30.28
CASH $30.28
Preset Override
of a Keyboard
PLU
CLERK 1 No.000001 00001
X/TIME
2
DATE 08/15/2002 SUN TIME 03:15
2@3FOR @1.00
X/TIME
3
PLU1 T1 $0.67
Split Pricing PLU
Entry
TAX1 $0.03
1 0 0 PLU 1
TOTAL $0.70
CASH $0.70
CASH
CLERK 1 No.000001 00001
28 • Operations ER 5200/5240 Electronic Cash Register
Page 31
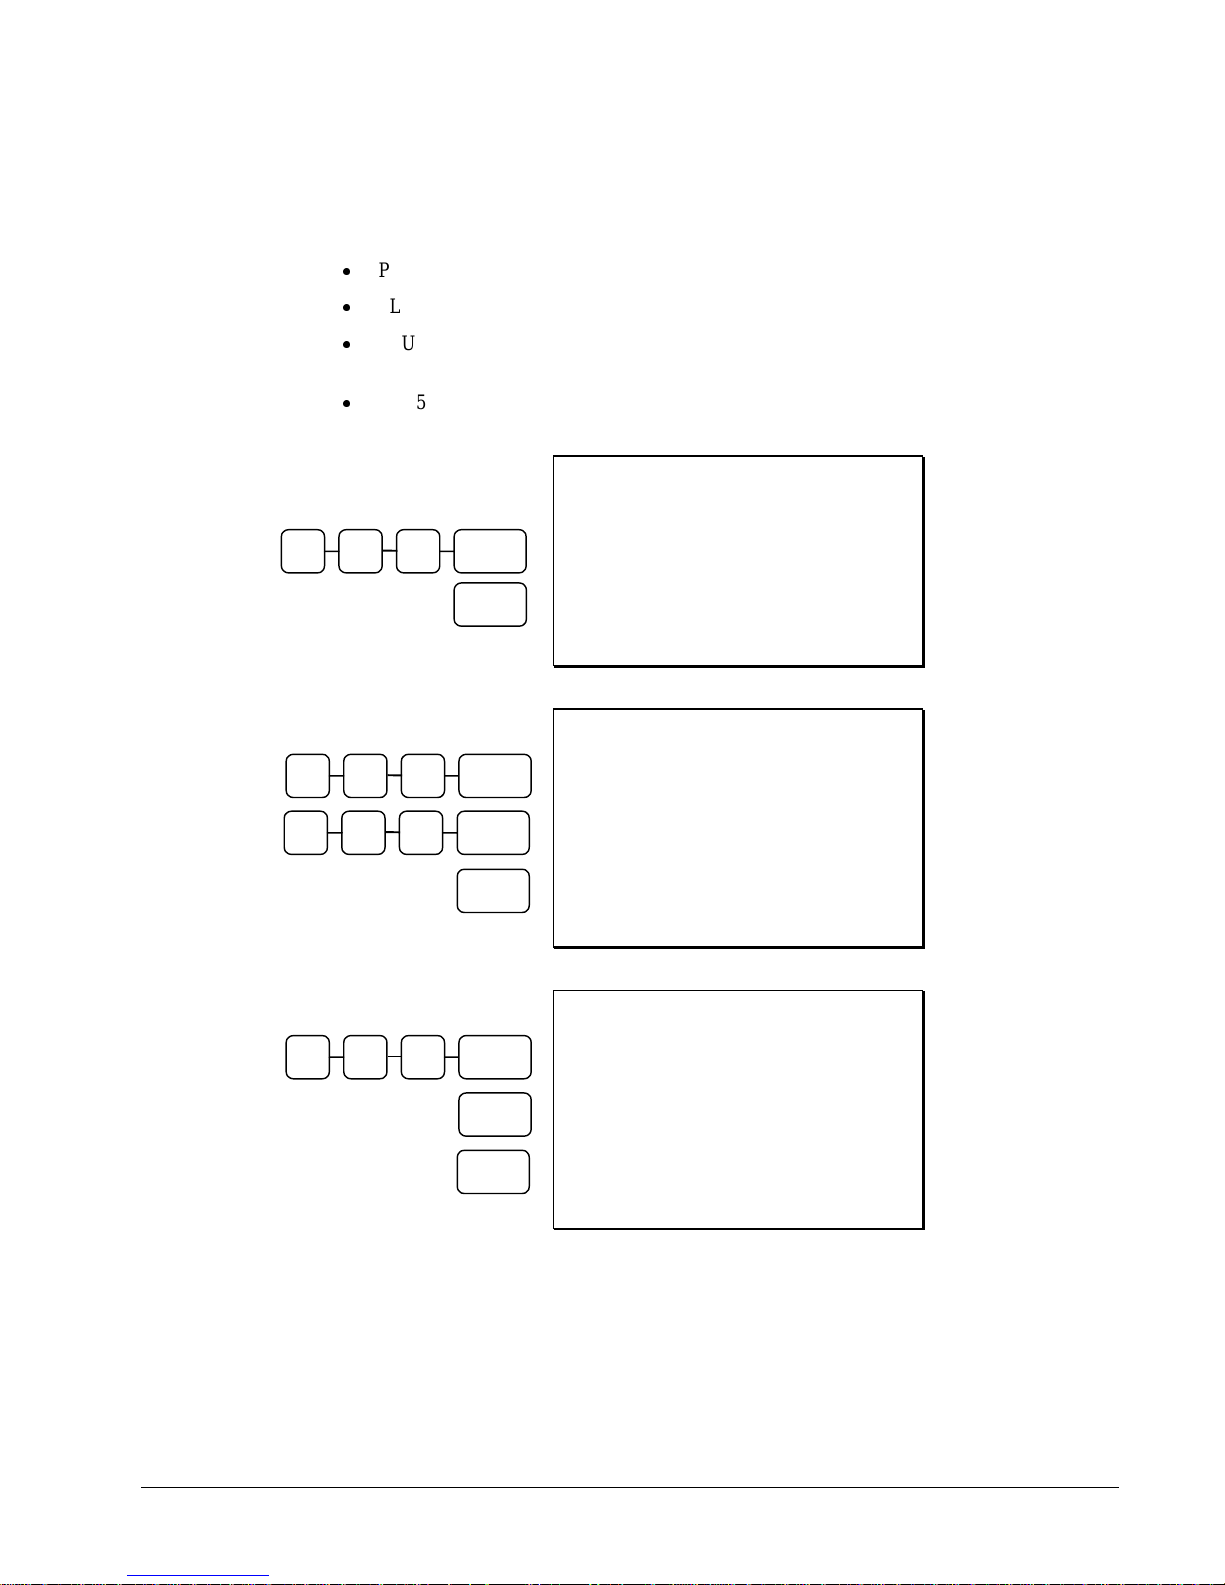
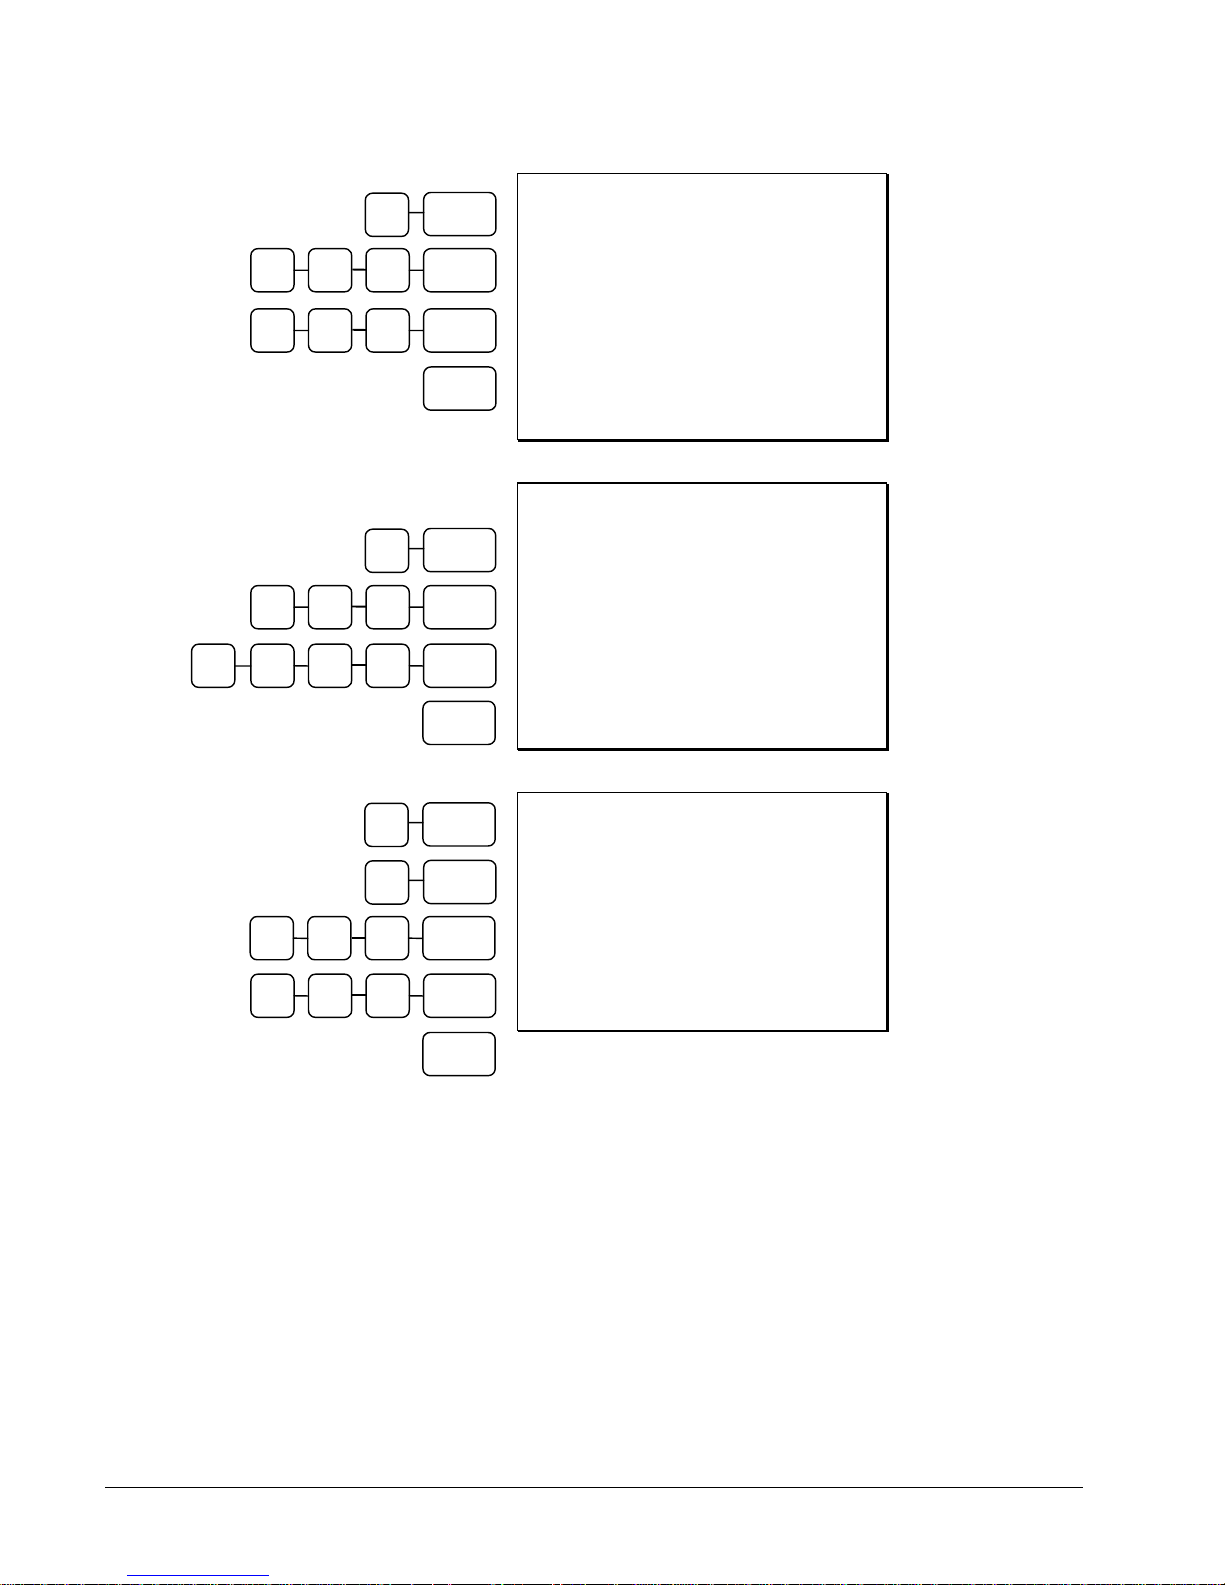
Numeric PLU Entries
In the following examples:
PLU510 is programmed open, and is taxable by Tax 1.
PLU520 is programmed open, and is taxable by Tax 2.
PLU530 is programmed with a preset price of $1.50, and is taxable by Tax 1
and Tax 2.
PLU540 is programmed with a preset price of $2.50, and is non-taxable.
5 4 0 PLU
CASH
DATE 08/15/2002 SUN TIME 03:15
PLU540 $2.50
TOTAL $2.50
CASH $2.50
CLERK 1 No.000001 00001
Preset PLU Entry
5 1 0 PLU
1 0 0 PLU
CASH
DATE 08/15/2002 SUN TIME 03:15
PLU510 T1 $1.00
TAX1 $0.05
TOTAL $1.05
CASH $1.05
CLERK 1 No.000001 00001
Single Open PLU
Entry
5 4 0 PLU
PLU
CASH
DATE 08/15/2002 SUN TIME 03:15
PLU540 $2.50
PLU540 $2.50
TOTAL $5.00
CASH $5.00
CLERK 1 No.000001 00001
Single Preset
PLU Entry
Repeat Entry
ER 5200/5240 Electronic Cash Register Operations • 29
Page 32
X/TIME
2
5 1 0 PLU
1 0 0 PLU
DATE 08/15/2002 SUN TIME 03:15
2X @1.00
PLU510 T1 $2.00
TAX1 $0.10
TOTAL $2.10
Multiple Quantity
of a Open PLU
Entry
CASH $2.10
CASH
CLERK 1 No.000001 00001
X/TIME
1
5 1 0 PLU
5 0 0 PLU 2
DATE 08/15/2002 SUN TIME 03:15
1X @25.00
PLU510 T1 $25.00
TAX1 $1.25
TOTAL $26.25
CASH $26.25
HALO Override
on PLU Entry
CLERK 1 No.00001 00000
CASH
X/TIME
2
DATE 08/15/2002 SUN TIME 03:15
X/TIME
3
5 1 0 PLU
2@3FOR @1.00
PLU510 T1 $0.67
TAX1 $0.03
Split Pricing PLU
Entry
TOTAL $0.70
1 0 0 PLU
CLERK 1 No.00001 00000
CASH
30 • Operations ER 5200/5240 Electronic Cash Register
Page 33
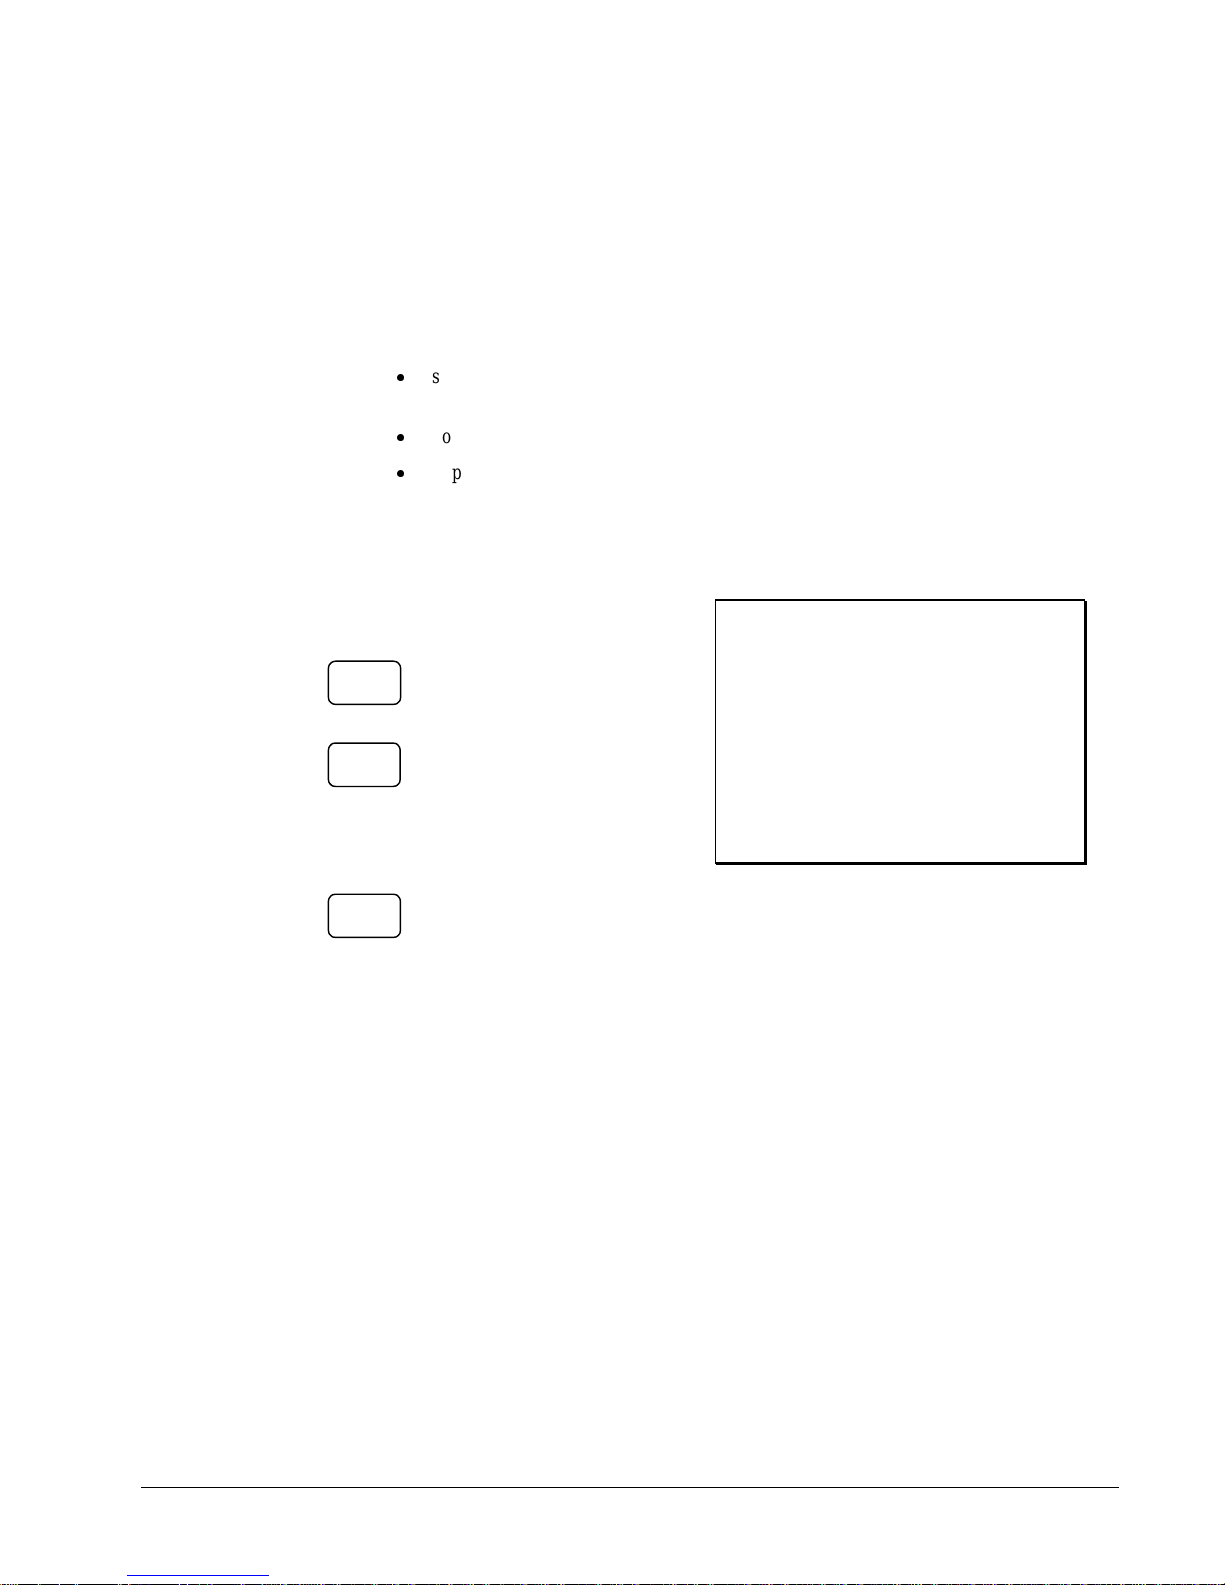
Modifier Entries
Pressing a modifier key alters the next PLU registered, either by changing the code number of the PLU
so that a different item is registered, or by just adding the modifier descriptor and registering the same
PLU. See "Modifier 1-5" in the "Program Mode Programming" chapter in order to determine how the
modifier key will affect the PLU entry.
Modifiers can be:
stay down so that registrations will be modified by the same modifier until another
modifier is selected,
pop-up after each item to register, for example large, medium or small soft drink,
pop-up after each transaction to register, for example, toppings of various pizza
sizes.
See "System Options" in the "Program Mode Programming" chapter to select stay down/pop-up status.
Pop-Up Modifier Key Affecting PLU Code
1. Press a preset PLU key. For example, press
PLU 1 with a price of $1.00.
PLU 1
2. Press the MOD 1 key.
MOD 1
3. Press the same PLU key. In this example the
modifier 1 will add the digit 1 to the third
PLU # position, resulting in the registration
of PLU #101.
PLU 1
4. Press another PLU key. In this example press
PLU 2 with a price of $1.50.
DATE 08/15/2002 SUN TIME 03:15
PLU1 $1.00
PLU101 $2.00
PLU2 $1.50
TOTAL $4.50
CASH $4.50
CLERK 1 No.000001 00001
ER 5200/5240 Electronic Cash Register Operations • 31
Page 34
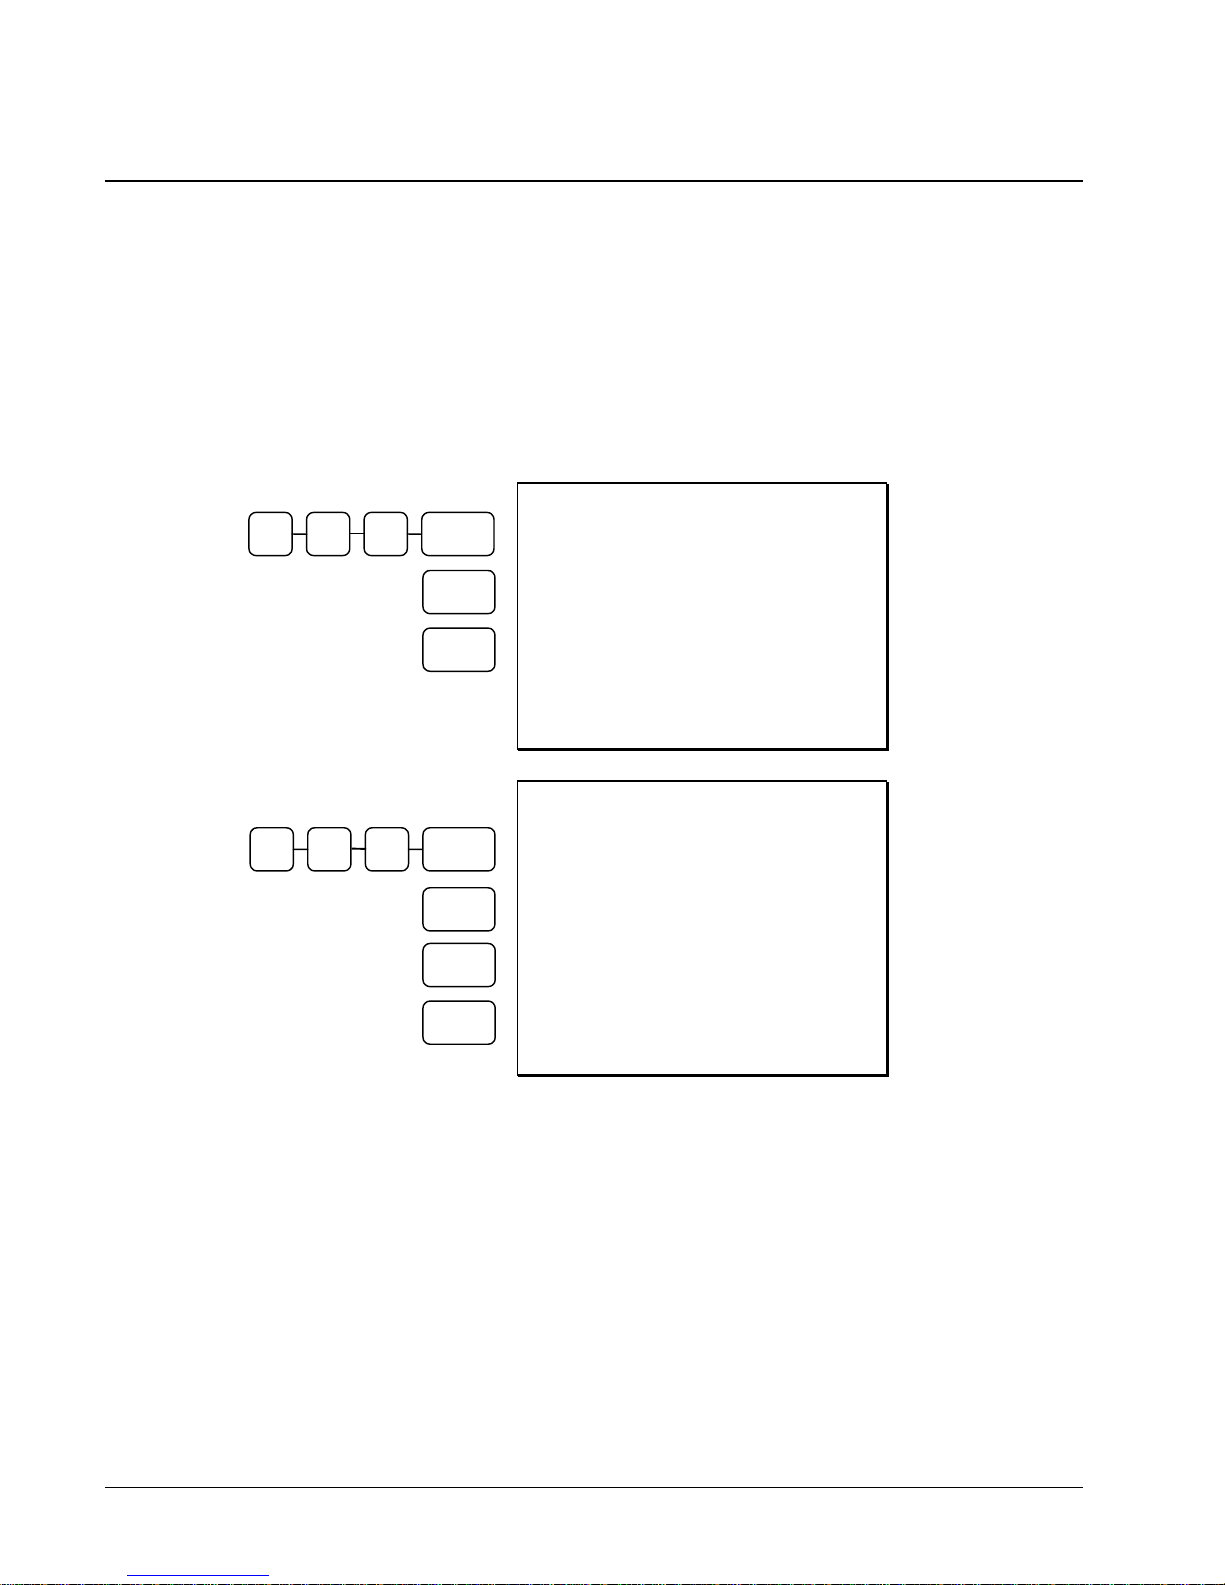
Percentage Key (%) Registrations
There are three percentage keys on the default ER-5200 keyboard; there are four percentage keys on
the default ER-5240 keyboard. Through "Functio n Key Assignment Programming" (see p age 81) up to
five percentage keys may be placed on the keyboard. Each key is individually programmable to add or
subtract, from an individual item or from a sale total, amounts (coupons) or percentages. You can also
program the percentage key taxable or non-taxable, so that sales taxes are calculated on the net, or
gross amount of the item or sale.
The operation examples in this section show the percentage key in a variety of configurations. See
"%1-%5 Function Key Options” on page 143 to assign a specific function to each percentage key.
1 0 0 PLU 1
%1
CASH
DATE 08/15/2002 SUN TIME 03:15
PLU1 T1 $1.00
% 1 10.000%
AMOUNT T1 $0.10
TAX1 $0.06
TOTAL $1.16
CASH $1.16
CLERK 1 No.000001 00001
Preset 10%
Surcharge on an
Item
DATE 08/15/2002 SUN TIME 03:15
1 0 0 PLU 1
SBTL
PLU1 T1 $1.00
% 1 -10.000%
AMOUNT T1 -0.10
Preset 10%
Discount on a
Sale
TAX1 $0.05
% 1
CASH
TOTAL $0.95
CASH $0.95
CLERK 1 No.000001 00001
32 • Operations ER 5200/5240 Electronic Cash Register
Page 35
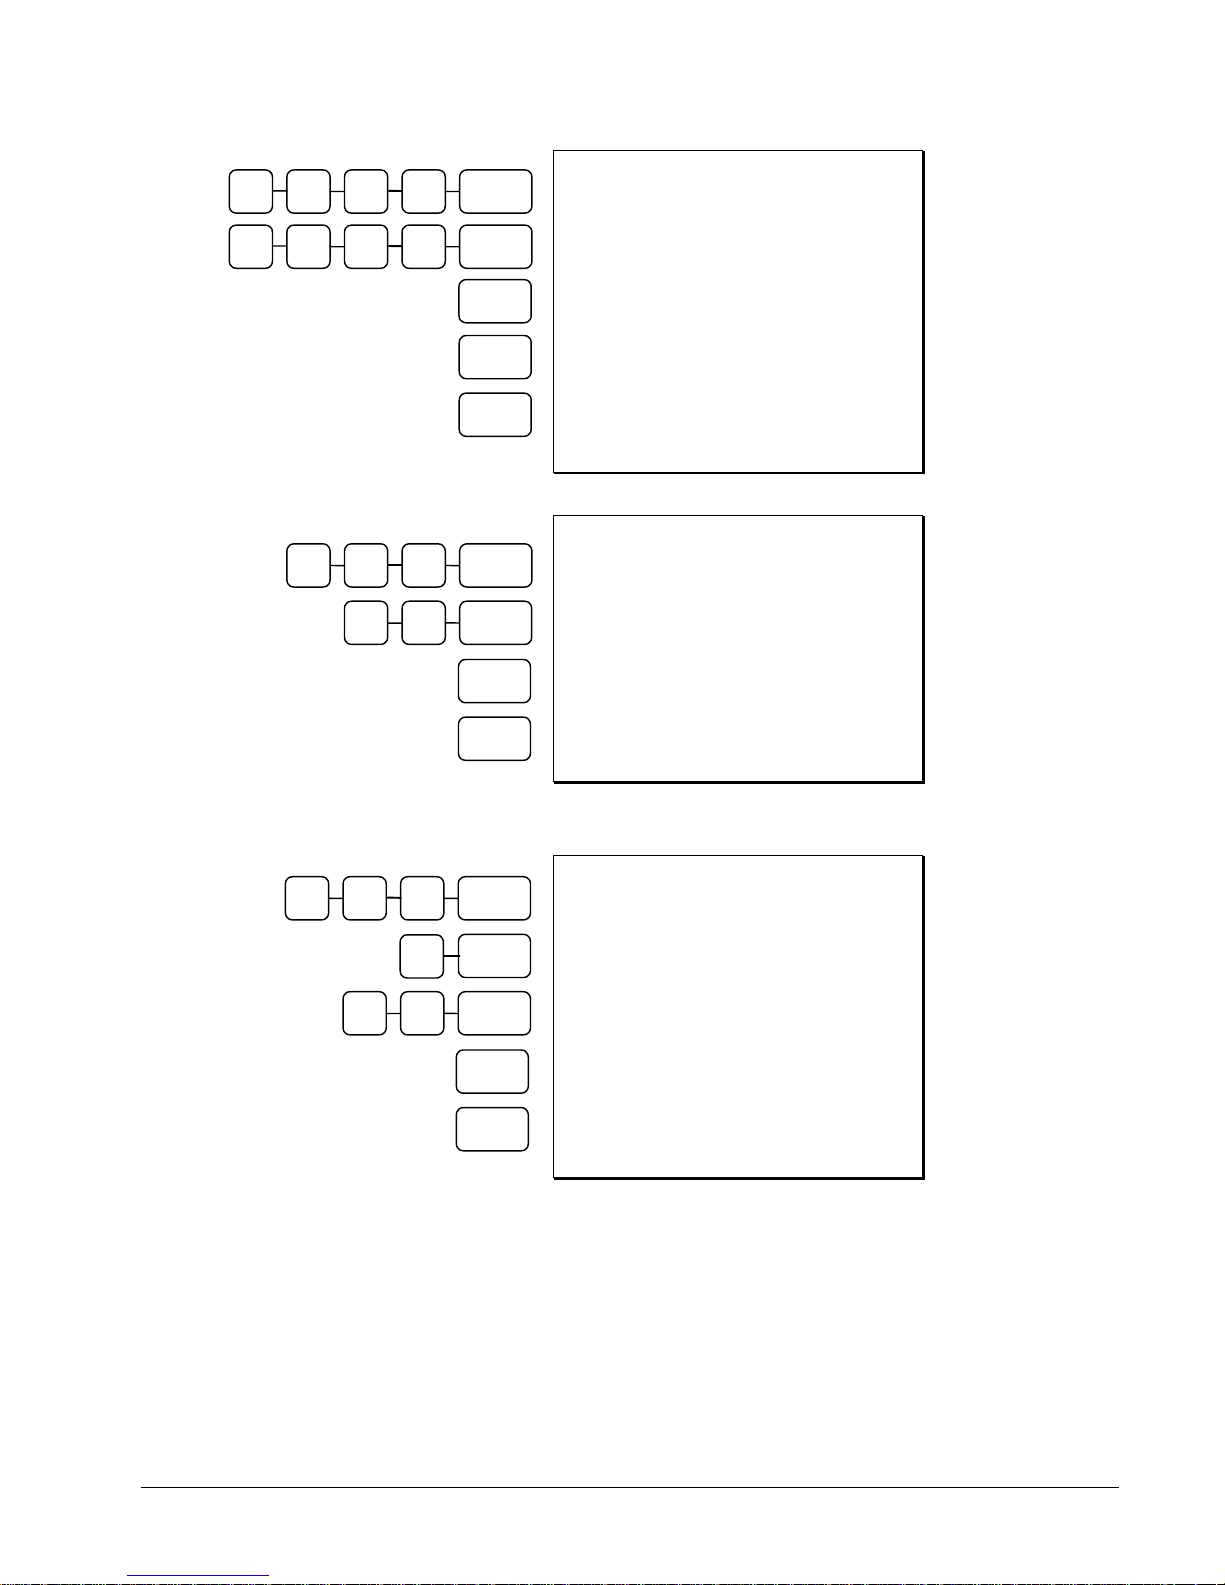
0 0 0 PLU #1 1
0 0 0 PLU #4 1
SBTL
CASH
1 0 0 PLU #1
2 5 % 1
PLU #1
CASH
% 1
DATE 08/15/2002 SUN TIME 03:15
PLU1 T1 $10.00
PLU4 $10.00
% 1 10.00%
Preset 10%
Surcharge on a
Sale
AMOUNT T1 $2.00
TAX1 $0.55
TOTAL $22.55
CASH $22.55
CLERK 1 No.000001 00001
DATE 08/15/2002 SUN TIME 03:15
PLU1 T1 $1.00
PLU1 CT1 -0.25
TAX1 $0.04
TOTAL $0.79
CASH $0.79
Store Coupon
Entry
(Open Amount
Discount on an
Item)
CLERK 1 No.000001 00001
2 0 0 PLU #1
X/TIME
2
1 0 % 1
PLU #1
CASH
DATE 08/15/2002 SUN TIME 03:15
PLU1 T1 $2.00
2X @0.10
PLU1 CT1 -0.20
TAX1 $0.09
TOTAL $1.89
Multiple Store
Coupon Entry
(Open Amount
Discount on an
Item)
CASH $1.89
CLERK 1 No.000001 00001
ER 5200/5240 Electronic Cash Register Operations • 33
Page 36

1 0 0 PLU #1
PLU #1
CASH
1 0 0 PLU #1
SBTL
2 5 % 1
CASH
% 2
DATE 08/15/2002 SUN TIME 03:15
PLU1 T1 $1.00
PLU1 CT1 -0.50
TAX1 $0.03
TOTAL $0.53
CASH $0.53
Preset Store
Coupon
(Preset Amount
Discount on an
Item)
CLERK 1 No.000001 00001
DATE 08/15/2002 SUN TIME 03:15
PLU1 T1 $1.00
%1 T1 -0.25
TAX1 $0.04
TOTAL $0.79
CASH $0.79
Vendor Coupon
Entry
(Open Amount
Discount on a
Sale)
CLERK 1 No.000001 00001
1 0 0 PLU #1
SBTL
X/TIME
2
1 0 % 1
CASH
DATE 08/15/2002 SUN TIME 03:15
PLU1 T1 $1.00
2X @0.10
%1 T1 -0.20
TAX1 $0.04
TOTAL $0.84
Multiple Vendor
Coupon Entry
(Open Amount
Discount on a
Sale)
CASH $0.84
CLERK 1 No.000001 00001
34 • Operations ER 5200/5240 Electronic Cash Register
Page 37

1 0 0 PLU #1
DATE 08/15/2002 SUN TIME 03:15
PLU1 T1 $1.00
SBTL
%1 T1 -0.50
TAX1 $0.03
% 2
TOTAL $0.53
CASH $0.53
CASH
CLERK 1 No.000001 00001
Void and Correction Operations
Error Correct
The error correct function voids the last item entered, provided no other key has been pressed.
1 0 0 PLU #1
1 0 0 PLU #4
ERROR
CORR
PLU #3
ERROR
CORR
CASH
DATE 08/15/2002 SUN TIME 03:15
PLU1 T1 $1.00
PLU4 $2.00
ERRCORR------------------------PLU4 -2.00
PLU3 T12 $3.00
ERRCORR------------------------PLU3 T12 -3.00
TAX1 $0.05
TOTAL $1.05
CASH $1.05
CLERK 1 No.000001 00001
Preset Vendor
Coupon Entry
(Preset Amount
Discount on a
Sale)
Error Correction
ER 5200/5240 Electronic Cash Register Operations • 35
Page 38
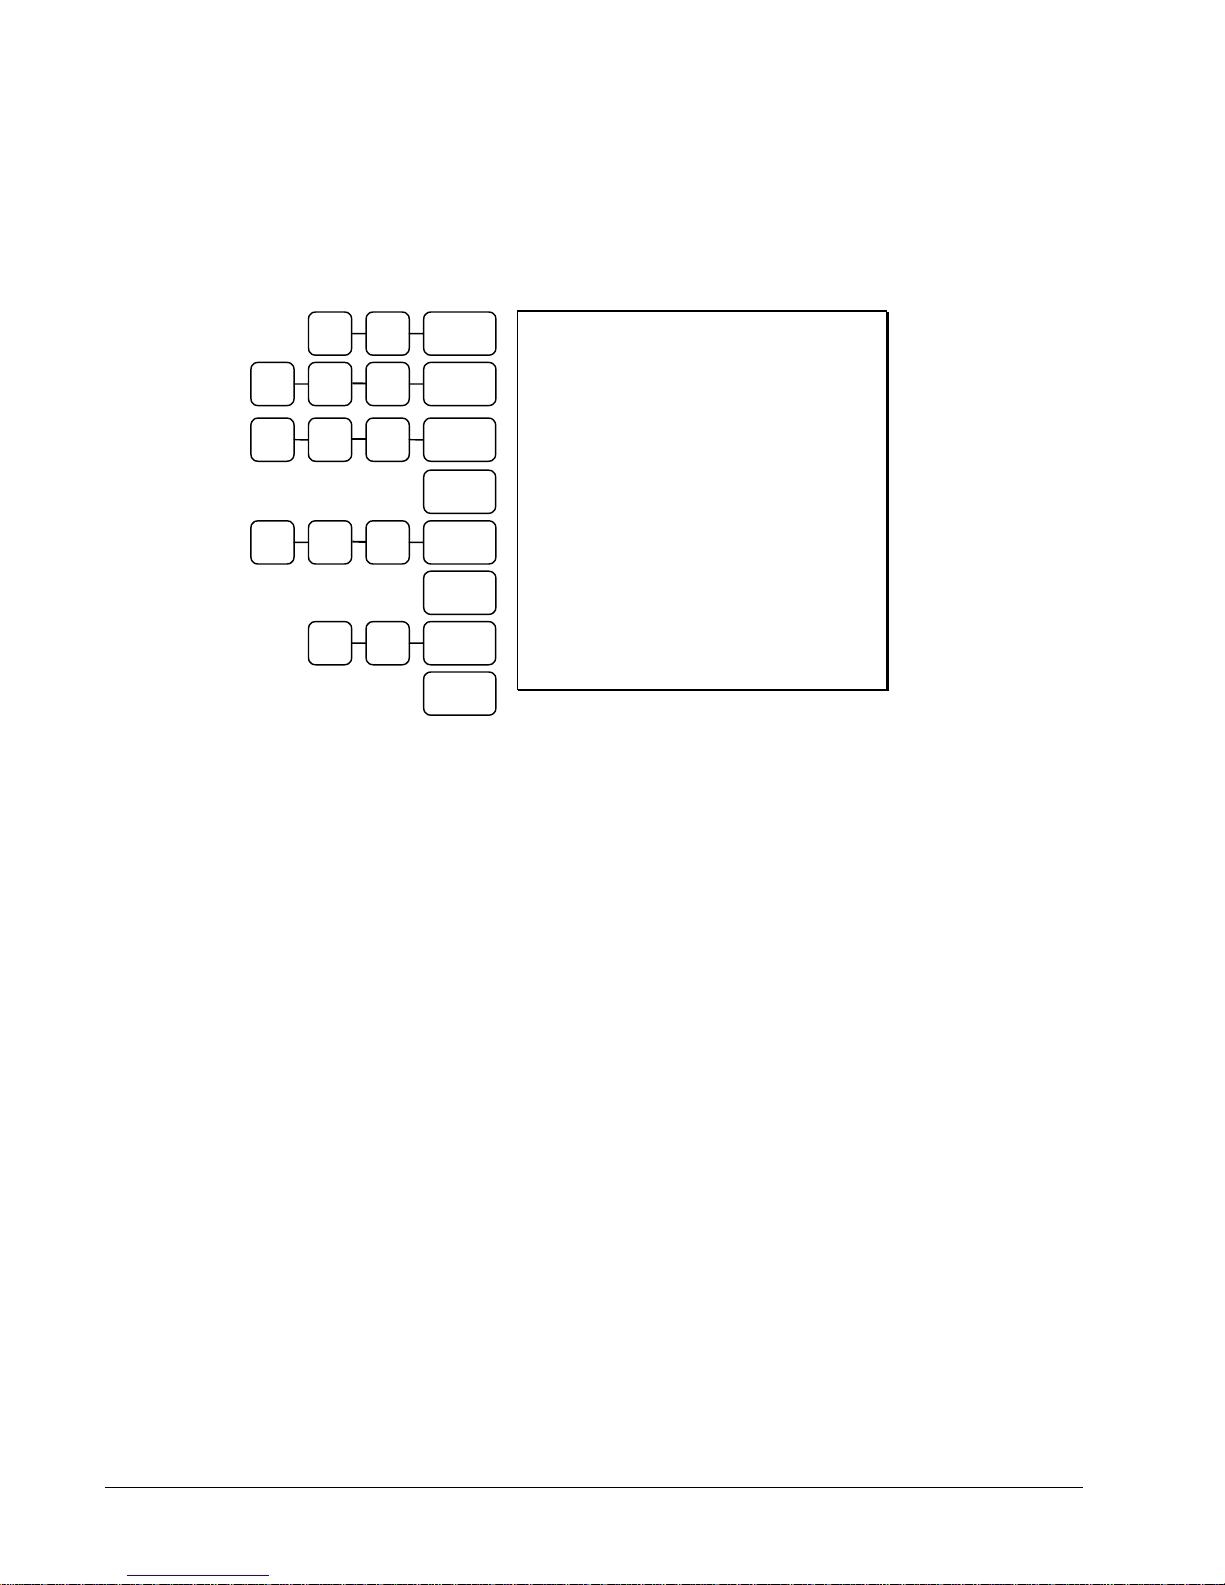
Previous Item Void
The previous item void function allows the correction of any item previously entered in the current
transaction.
5 0 PLU #2
1 0 0 PLU #1
2 0 0 PLU #4
1 0 0 PLU #1
5 0 PLU #2
VOID
VOID
CASH
DATE 08/15/2002 SUN TIME 03:15
PLU2 T2 $0.50
PLU1 T1 $1.00
PLU4 $2.00
VOID---------------------------PLU1 T1 -1.00
VOID---------------------------PLU2 T2 -0.50
TOTAL $2.00
CASH $2.00
CLERK 1 No.000001 00001
Previous Item
Void
36 • Operations ER 5200/5240 Electronic Cash Register
Page 39
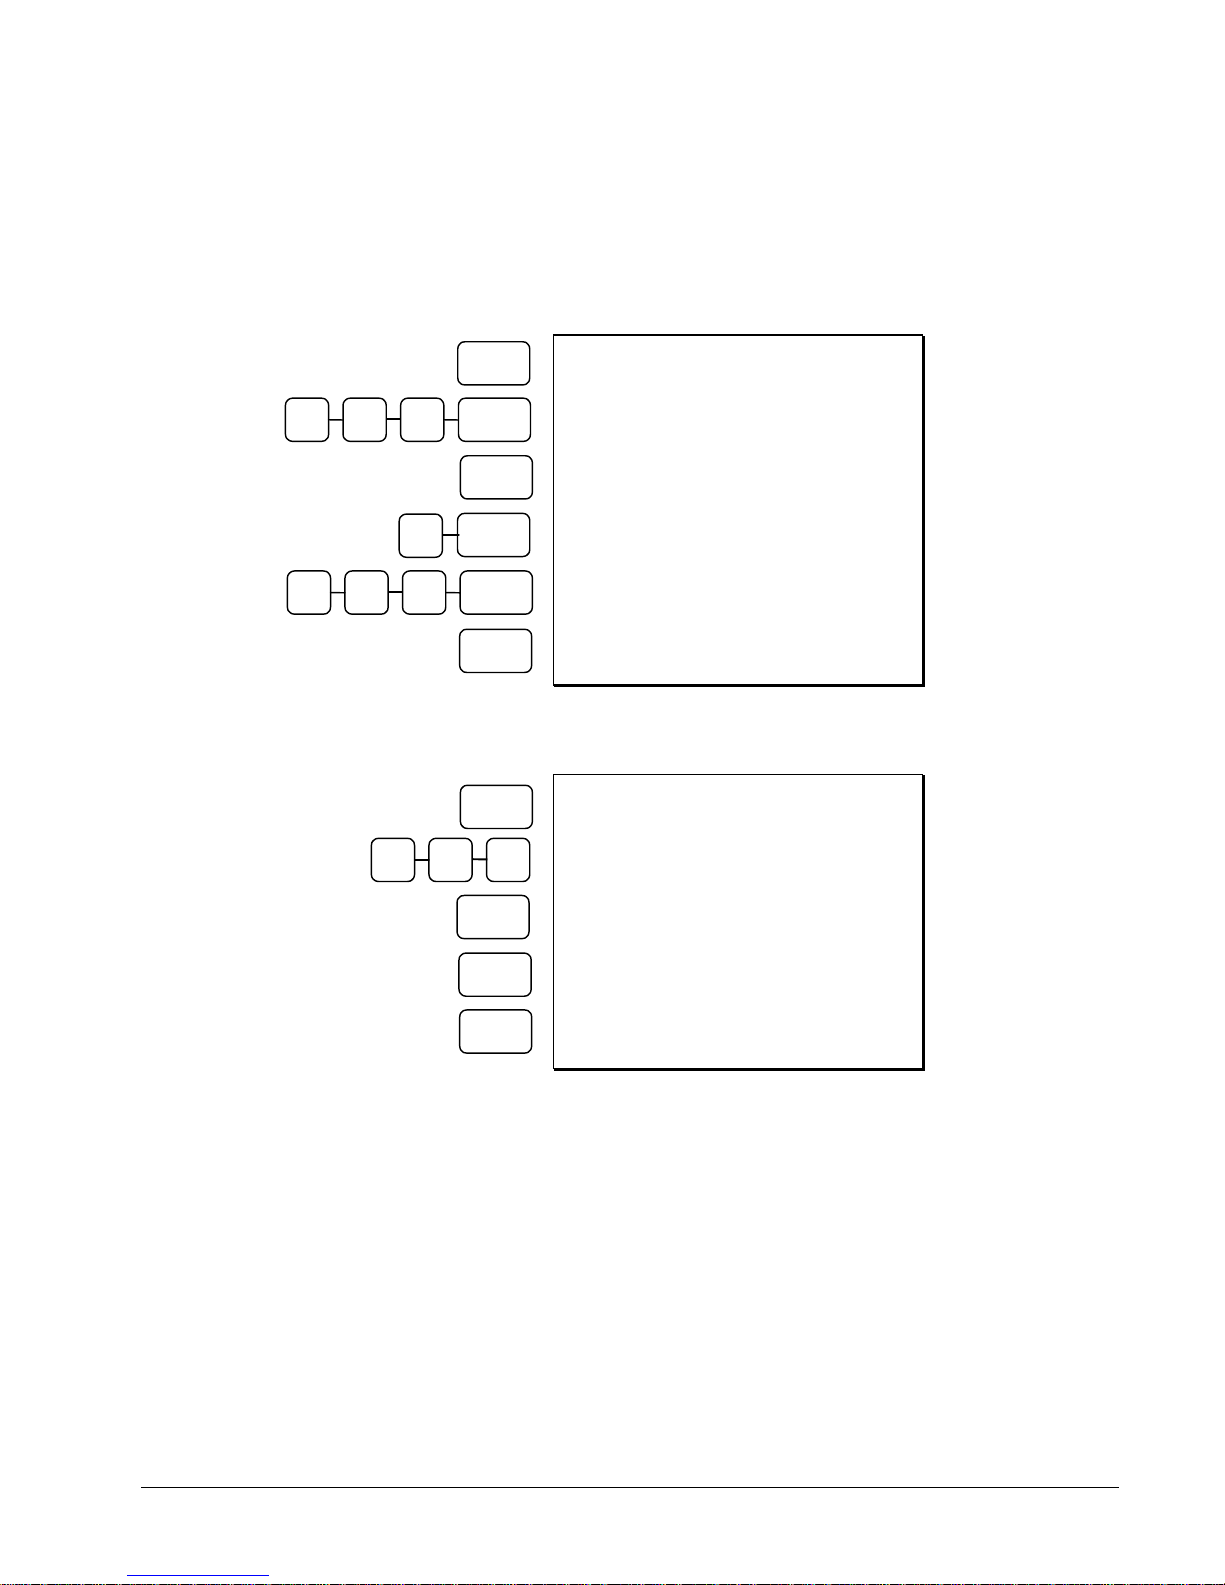
Merchandise Return
Merchandise returns may be registered as part of a separate transaction, or as part of a transaction
where other merchandise is sold. Press the RETURN key before entering the related PLU. Tax is
credited if the item being returned is taxable.
RETURN
DATE 08/15/2002 SUN TIME 03:15
5 0 0 PLU #1
RETURN
X/TIME
3
MDSE RETURN*********************
PLU1 T1 -5.00
Merchandise
Return
MDSE RETURN*********************
3X @2.00
PLU4 -6.00
TAX1 -0.25
2 0 0 PLU #4
CASH
TOTAL -11.25
CASH -11.25
CLERK 1 No.000001 00001
Multiple Item
Merchandise
Return
RETURN
1 0 0
PLU #4
%1
CASH
DATE 08/15/2002 SUN TIME 03:15
MDSE RETURN*********************
PLU4 -1.00
%1 -10.000%
AMOUNT $0.10
TOTAL -0.90
CASH -0.90
CLERK 1 No.000001 00001
Merchandise
Return of
Discounted
Merchandise
ER 5200/5240 Electronic Cash Register Operations • 37
Page 40
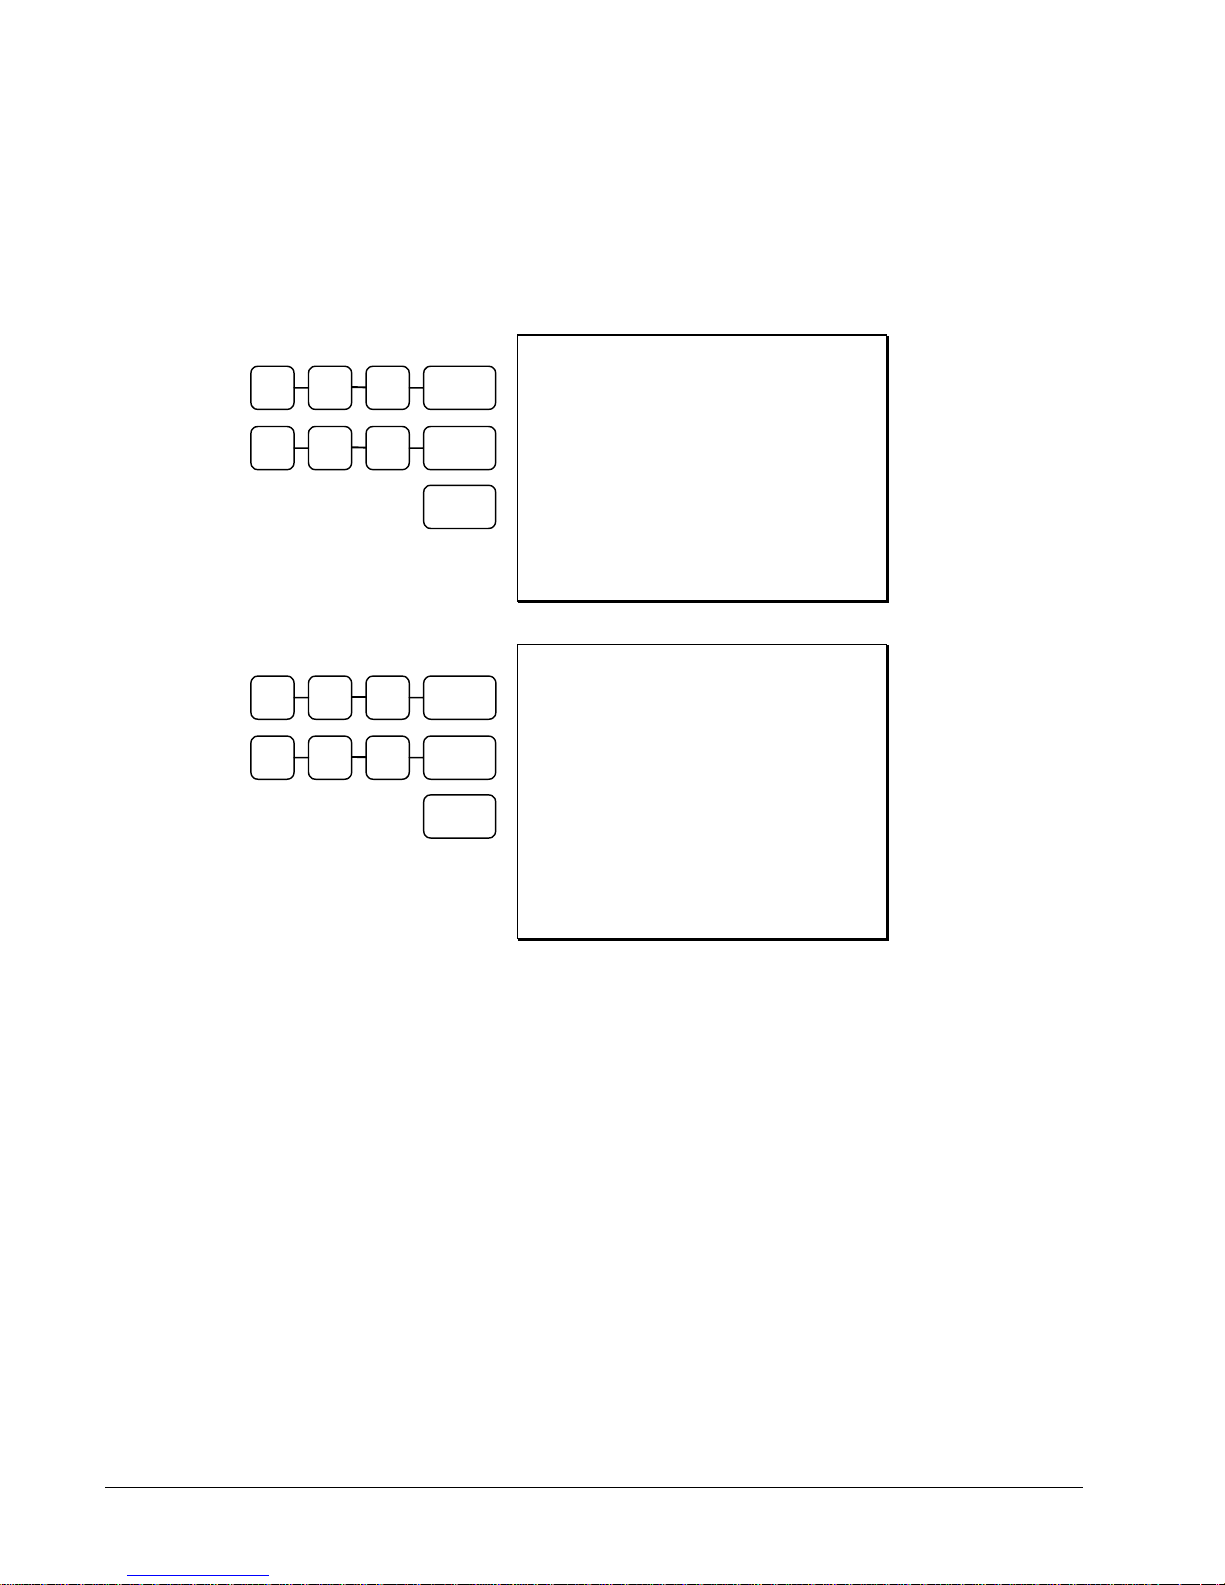
VOID Control Lock Position (Transaction Voi d)
Most operations that can be performed with the control lock in the REG position, can also be do ne with
the control lock in the VOID position. VOID position operations will adjust all sale totals, and the
VOID (Transaction Void) position carries its own total on the Financial report.
1 0 0 PLU #1
2 0 0 PLU #4
DATE 08/15/2002 SUN TIME 03:15
PLU1 T1 $1.00
PLU4 $2.00
Original
Transaction
TAX1 $0.05
CASH
TOTAL $3.05
CASH $3.05
CLERK 1 No.000001 00001
1 0 0 PLU #1
2 0 0 PLU #4
CASH
DATE 08/15/2002 SUN TIME 03:15
VOID MODE***********************
PLU1 T1 -1.00
PLU4 -2.00
TAX1 -0.05
Transaction Void
of Original
Transaction
TOTAL -3.05
CASH -3.05
CLERK 1 No.000001 00001
38 • Operations ER 5200/5240 Electronic Cash Register
Page 41
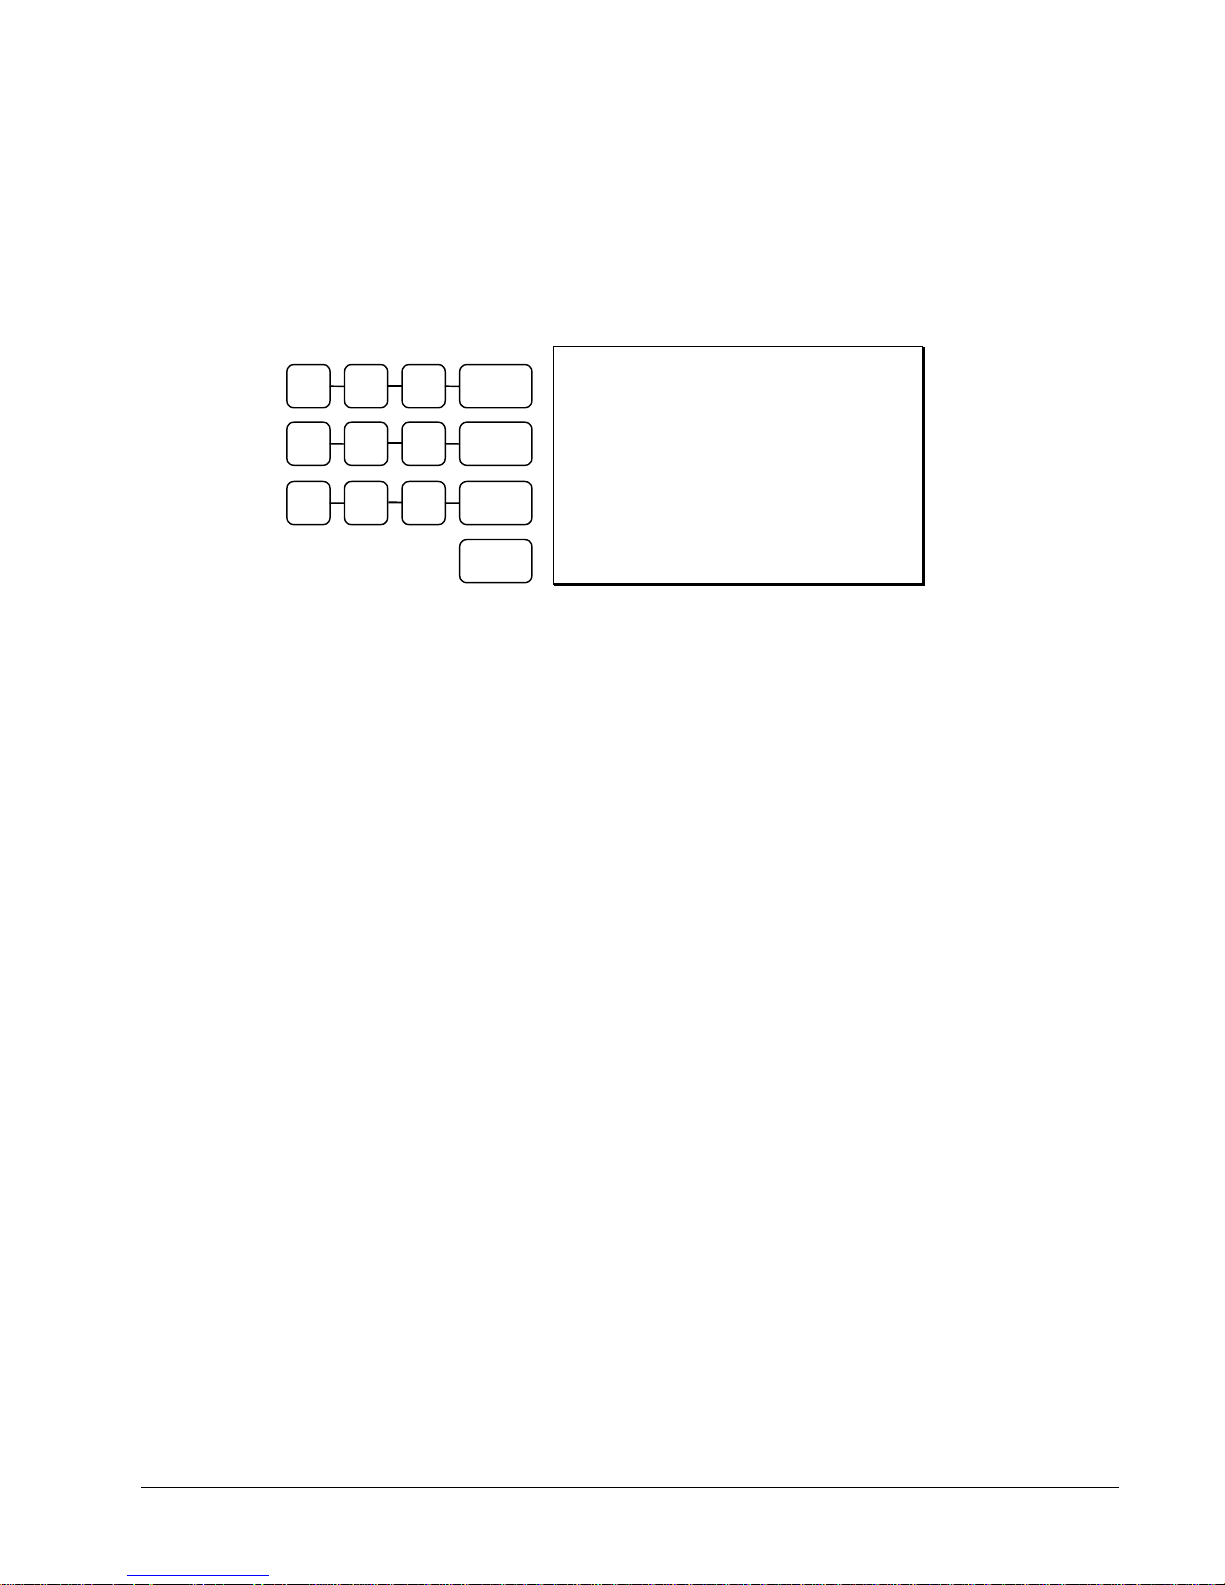
Cancel
Press the CANCEL key anytime during a transaction to cancel that transaction. (This is not a tender
key.) Transactions of up to a maximum of 49 items may be canceled.
The only total affected is the Cancel total, to which the total of all positive entries is added.
2 1 0 PLU #1
3 1 0 PLU #1
DATE 08/15/2002 SUN TIME 03:15
PLU1 T1 $2.00
PLU1 T1 $3.00
Canceled
Transaction
PLU4 $1.00
1 0 0 PLU #4
CANCEL**************************
CLERK 1 No.000001 00001
CANCEL
ER 5200/5240 Electronic Cash Register Operations • 39
Page 42
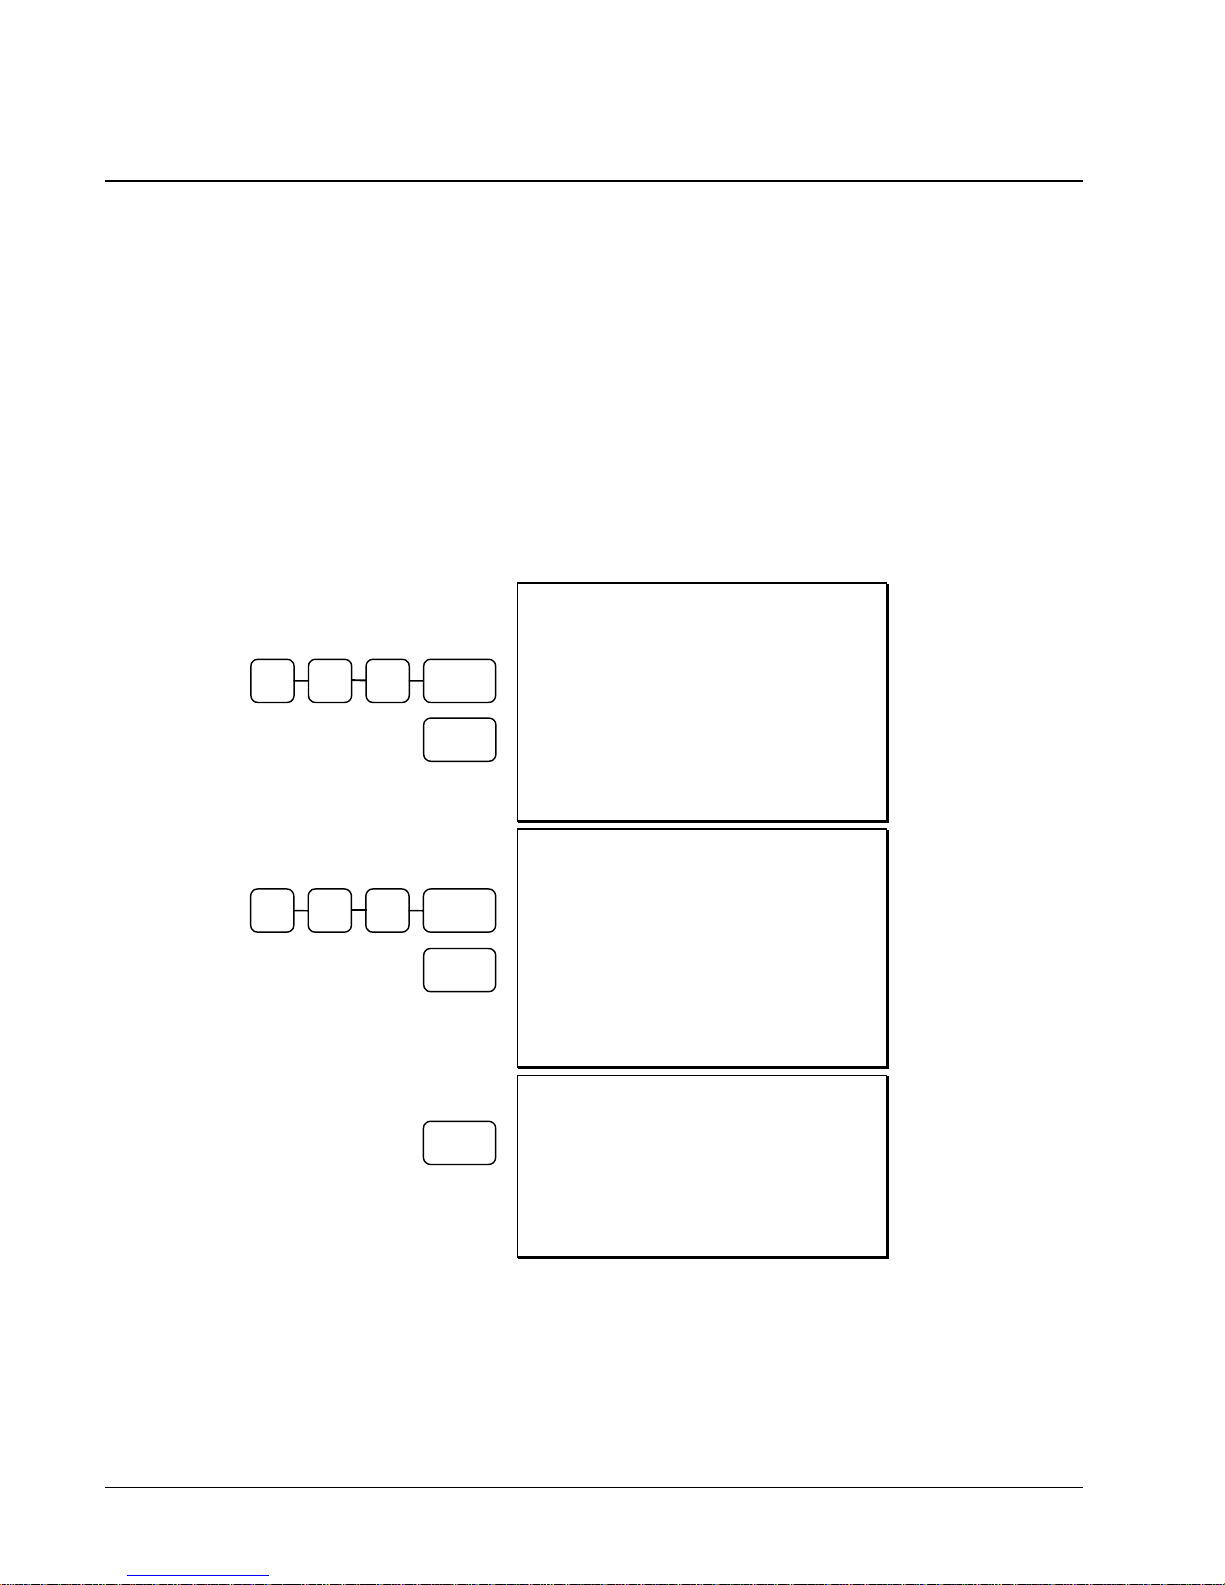
Subtotal Operations
Subtotal
Press the SBTL key at anytime during a transaction to view the total due, including tax and after
adjustments. The display will indicate Sub for subtotal.
Add Check (Tray Subtotal)
In a cafeteria, use the ADD CHECK key to add multiple trays that are paid by a single individual (i.e.
Dad pays all the trays for the family.)
Press the ADD CHECK key after each order, and SBTL for the total of all orders. Finalize with any
tender key as you would a normal sale.
4 0 0 PLU #1
ADD
CHECK
5 0 0 PLU #1
ADD
CHECK
DATE 08/15/2002 SUN TIME 03:15
PLU1 T1 $4.00
TAX1 $0.20
First Check
Added
TOTAL $4.20
ADDCHK $4.20
CLERK 1 No.000001 00001
DATE 08/15/2002 SUN TIME 03:15
PLU1 T1 $5.00
TAX1 $0.25
TOTAL $5.25
ADDCHK $5.25
CLERK 1 No.000002 00001
Second Check
Added
40 • Operations ER 5200/5240 Electronic Cash Register
CASH
DATE 08/15/2002 SUN TIME 03:15
Payment for Both
Checks
TOTAL $9.45
CASH $9.45
CLERK 1 No.000003 00001
Page 43
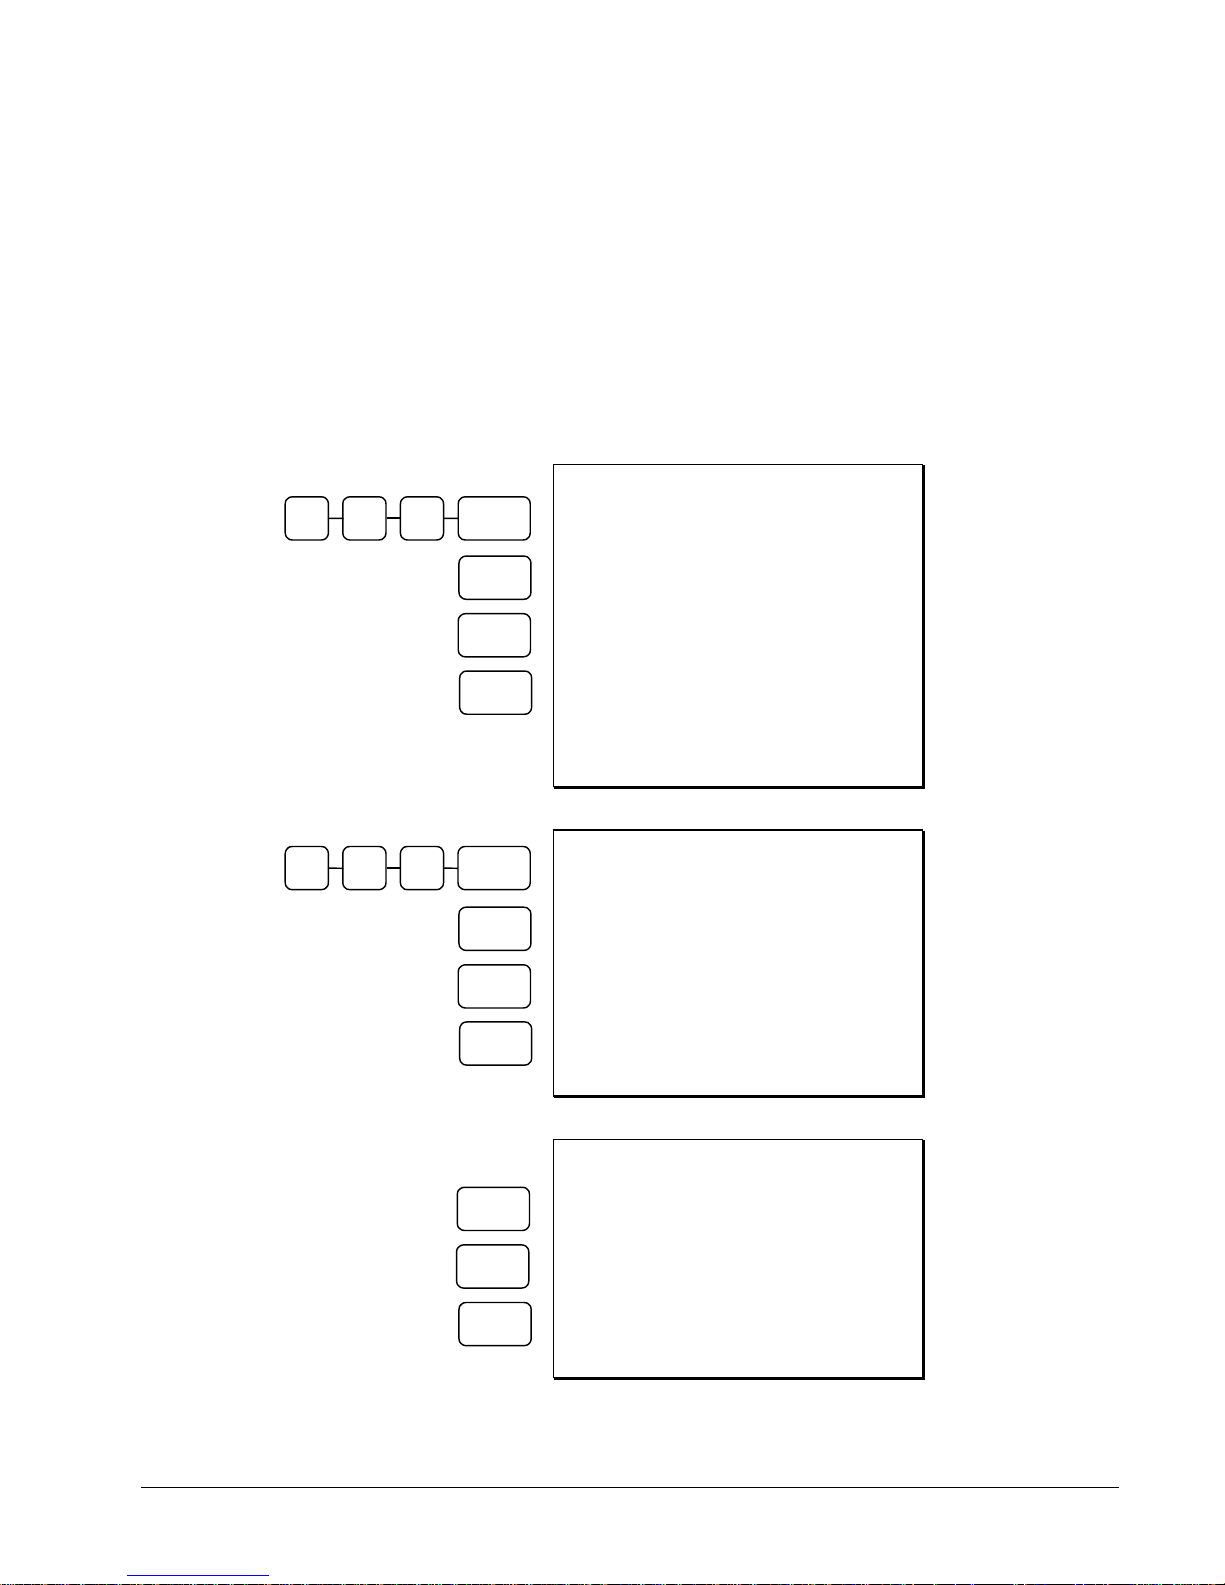
Eat-In/Take-Out/Drive Thru Operations
In a restaurant, EAT-IN, TAKE-OUT and DRIVE THRU keys can be set up to provide totals for
each type of sale. The EAT-IN, TAKE-OUT and DRIVE THRU keys may also be set up to remove
taxes. For example, if your state charges sales tax for food consumed on the premises, while not
charging sales tax for food taken home, sales tax can be exempted with the TAKE-OUT key. See
"DRIVE THRU / EAT IN / TAKE OUT - Function Key Options" on page 130 to set up tax status for
these keys.
After registering all items, press EAT-IN, TAKE-OUT or DRIVE THRU (as you would use the
Subtotal key), and then finalize the sale as you normally would.
1 0 0 PLU #1
PLU #3
EAT IN
DATE 08/15/2002 SUN TIME 03:15
PLU1 T1 $1.00
PLU3 T12 $3.00
TAX1 $0.20
TAX2 $0.30
EAT IN
Transaction (Tax
is Charged)
==== EATIN ====
CASH
TOTAL $4.50
CASH $4.50
CLERK 1 No.000001 00001
1 0 0 PLU #1
PLU #3
TAKE
OUT
CASH
PLU #3
DRIVE
THRU
CASH
DATE 08/15/2002 SUN TIME 03:15
PLU1 T1 $1.00
PLU3 T12 $3.00
==== TKOUT ====
TOTAL $4.00
TAKE OUT
Transaction (Tax
is Removed from
Taxable Items)
CASH $4.00
CLERK 1 No.000001 00001
DATE 08/15/2002 SUN TIME 03:15
PLU3 T12 $3.00
==== DVTHR ====
TOTAL $3.00
CASH $3.00
DRIVE THRU
Transaction (Tax
is Removed from
Taxable Items)
CLERK 1 No.000001 00001
ER 5200/5240 Electronic Cash Register Operations • 41
Page 44
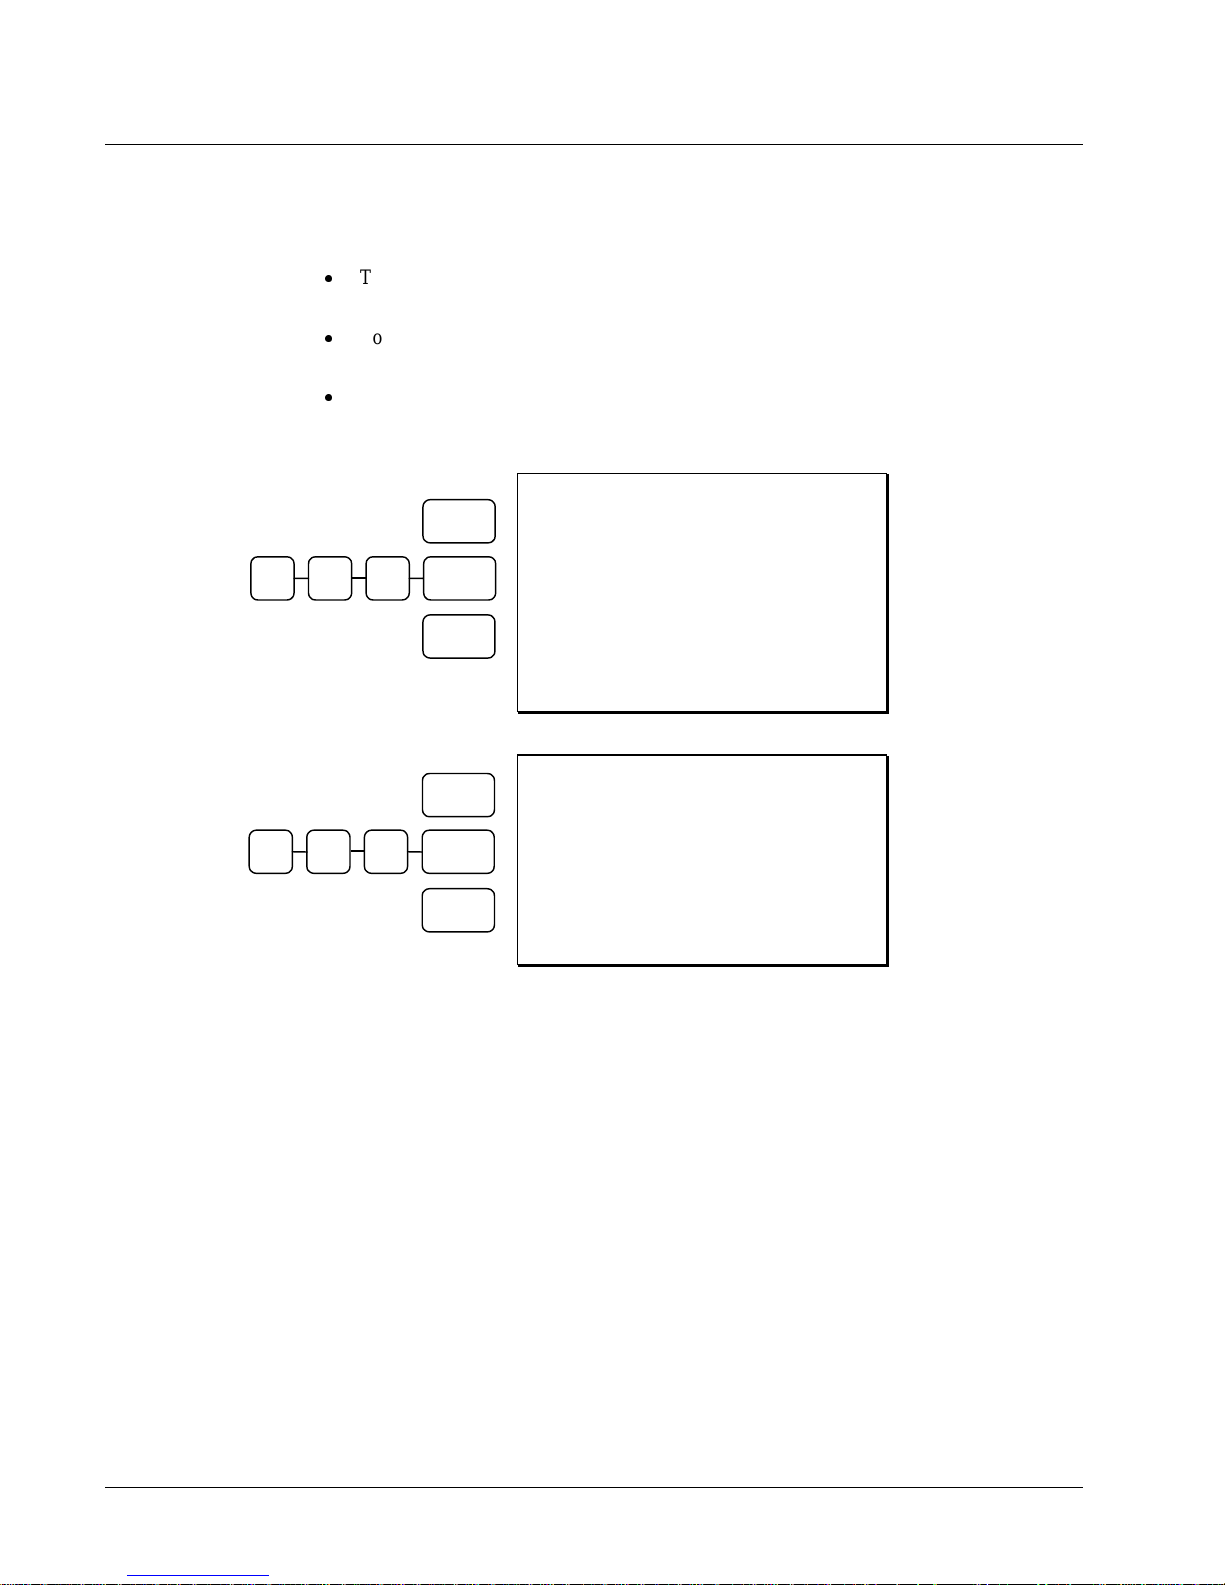
Tax Shift Operations
When tax shift operations are performed, the shift light on the display will illuminate.
To charge a tax or taxes on a non-taxable item press the appropriate tax shift key or keys
prior to making the non-taxable PLU entry.
To except a tax or taxes on a taxable item press the appropriate tax shift key or keys prior
to making the taxable PLU entry.
To except a tax or taxes from an entire sale, press the appropriate tax shift key or keys
prior to finalizing the transaction.
TAX 1
SHIFT
2 0 0 PLU #4
CASH
DATE 08/15/2002 SUN TIME 03:15
PLU4 T1 $2.00
TAX1 $0.10
TOTAL $2.10
To Charge Tax
On A
Non-Taxable PLU
CASH $2.10
CLERK 1 No.000001 00001
TAX 1
SHIFT
2 0 0 PLU #1
CASH
DATE 08/15/2002 SUN TIME 03:15
PLU1 $2.00
TOTAL $2.00
CASH $2.00
To Except Tax
On A Taxable
PLU
CLERK 1 No.000001 00001
42 • Operations ER 5200/5240 Electronic Cash Register
Page 45
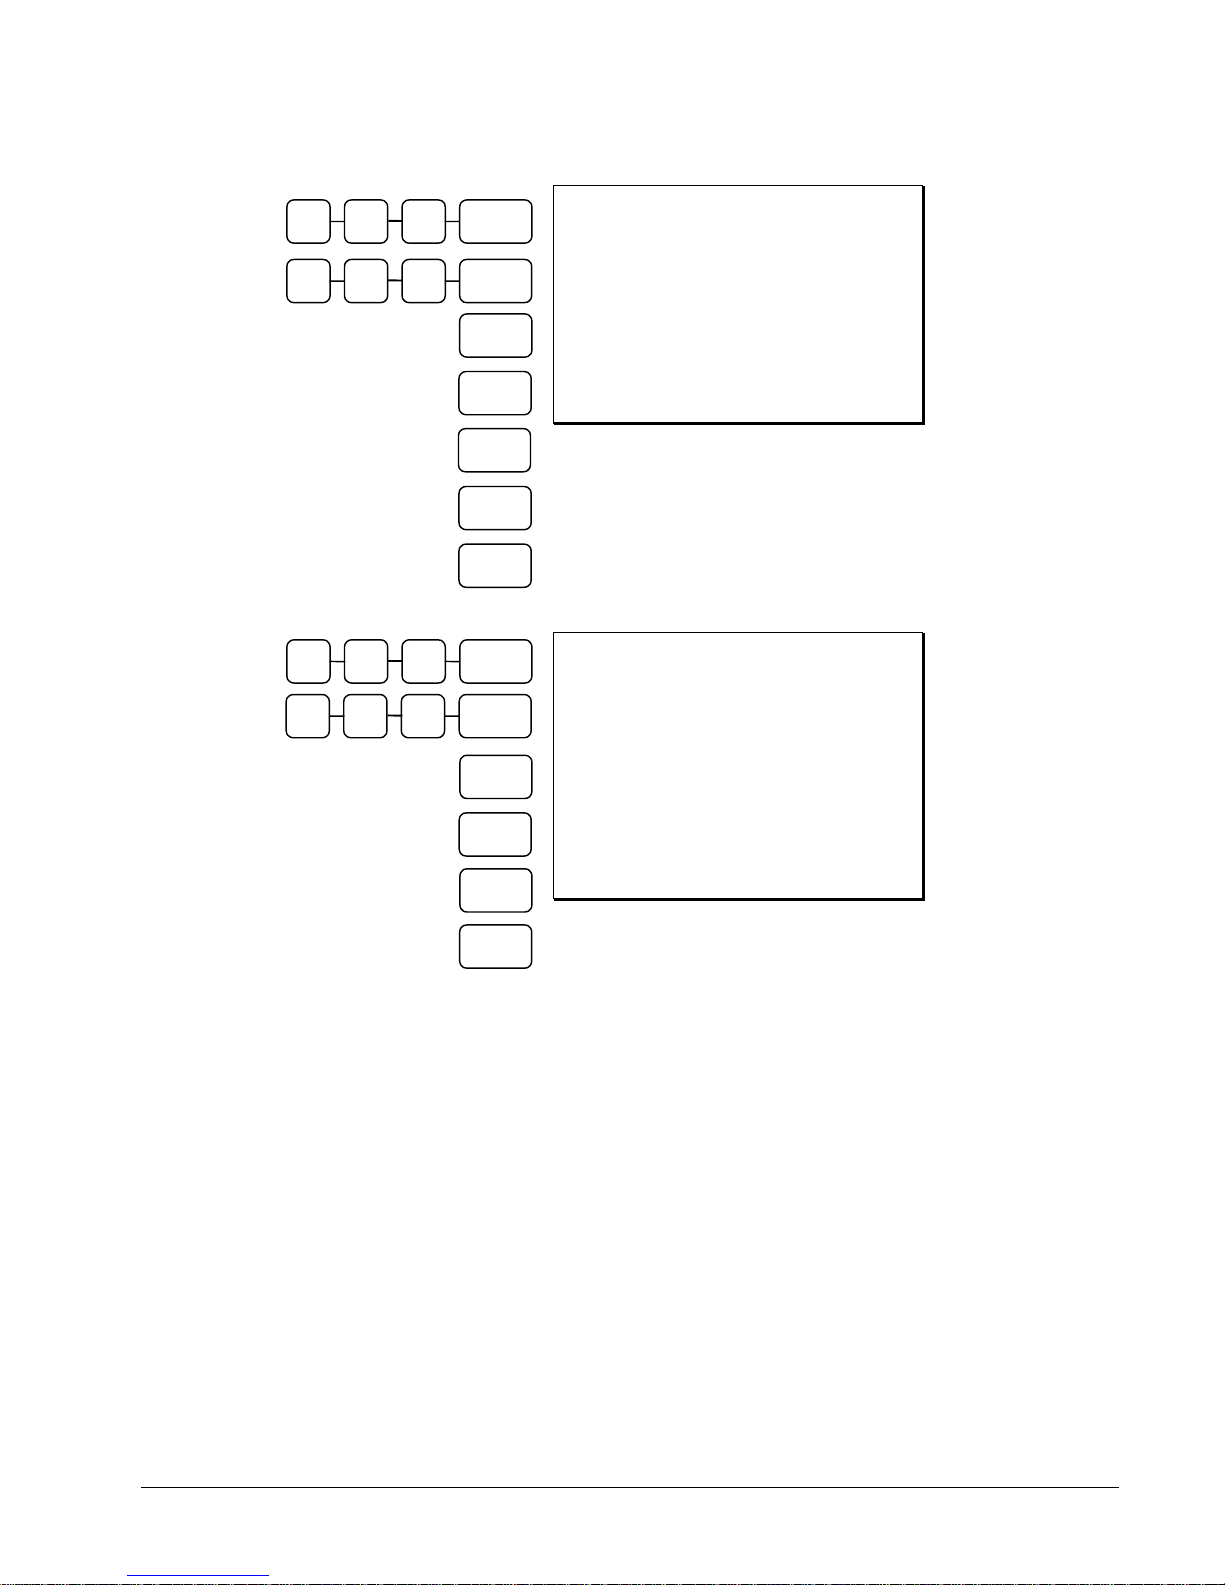
1 0 0 PLU #1
DATE 08/15/2002 SUN TIME 03:15
PLU1 T1 $1.00
2 0 0 PLU #3
SBTL
TAX 1
SHIFT
TAX 2
SHIFT
SBTL
CASH
1 0 0 PLU #1
PLU3 T12 $2.00
TOTAL $3.00
CASH $3.00
CLERK 1 No.000001 00001
DATE 08/15/2002 SUN TIME 03:15
To Except
Specific Taxes
On Entire Sale
2 0 0 PLU #3
SBTL
TAX
EXEMPT
SBTL
PLU1 T1 $1.00
PLU3 T12 $2.00
TOTAL $3.00
CASH $3.00
CLERK 1 No.000001 00001
To Except Tax
On Entire Sale
with PreProgrammed Tax
Exempt Key
CASH
ER 5200/5240 Electronic Cash Register Operations • 43
Page 46
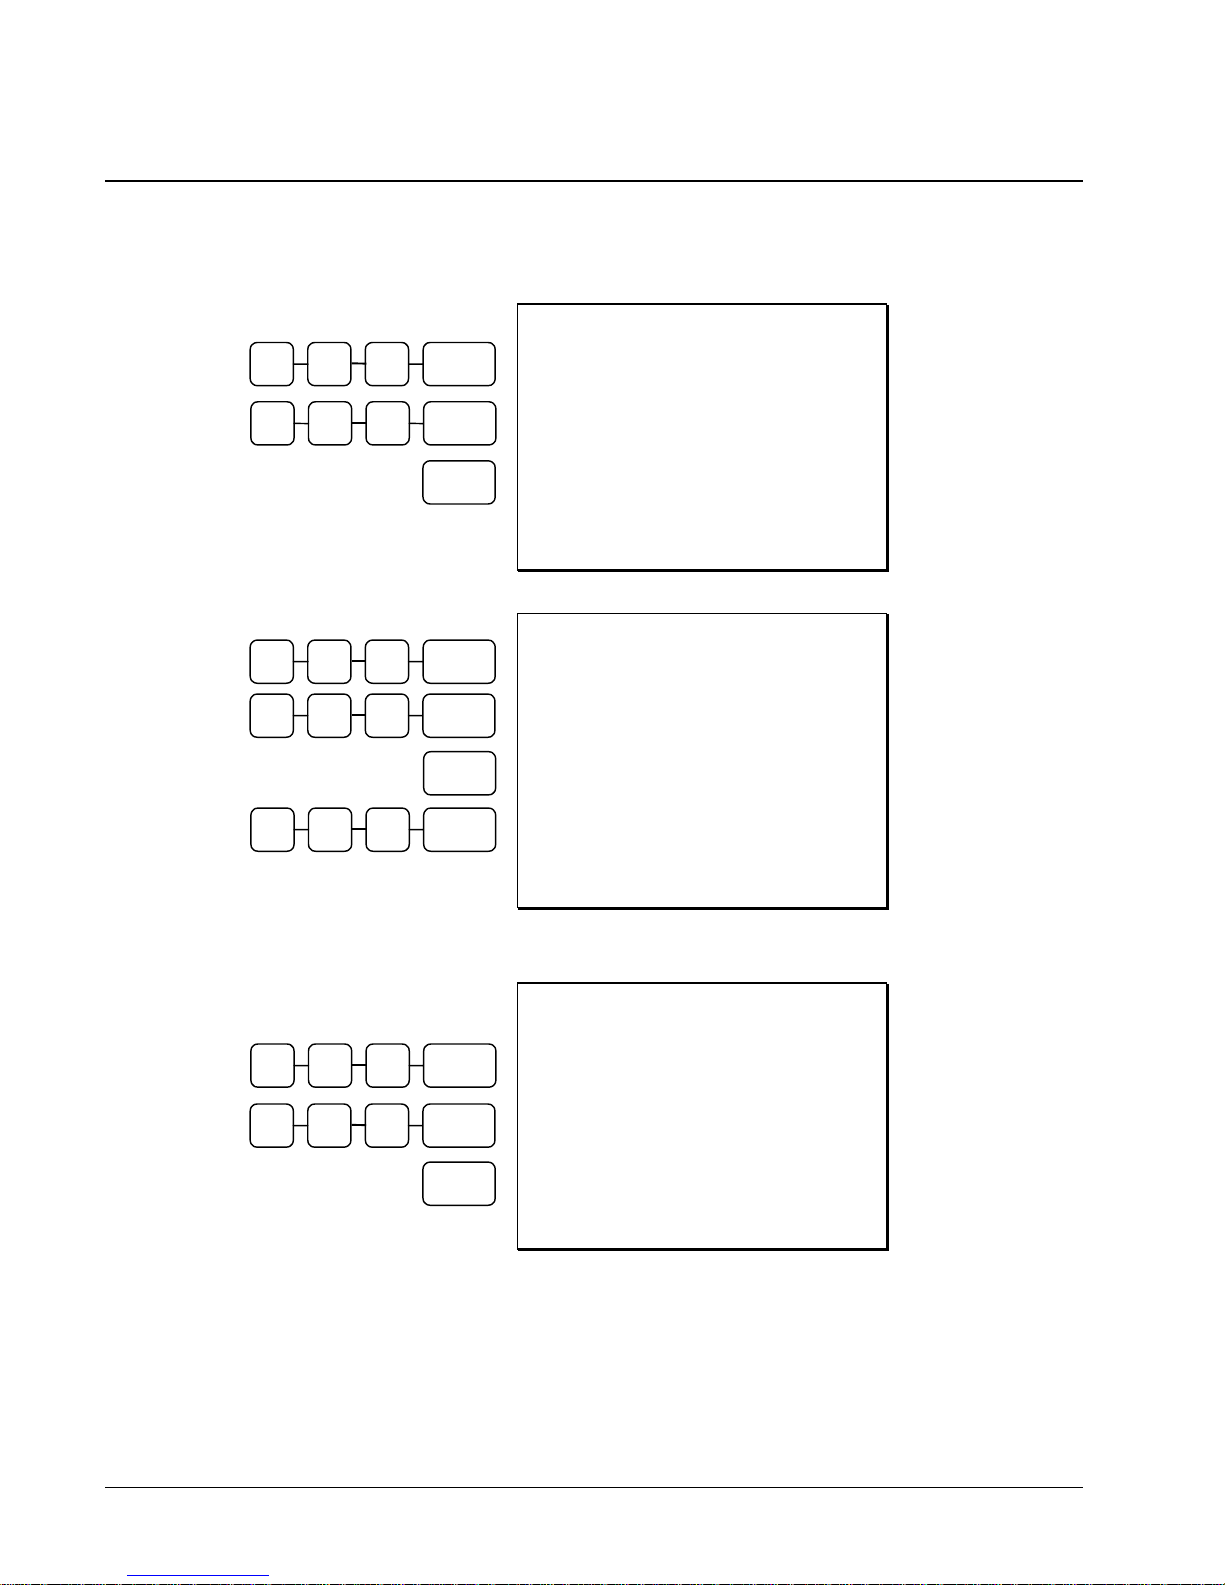
Tendering Operations
Cash
1 0 0 PLU #1
2 0 0 PLU #4
CASH
1 0 0 PLU #1
2 0 0 PLU #4
SBTL
4 0 0 CASH
DATE 08/15/2002 SUN TIME 03:15
PLU1 T1 $1.00
PLU4 $2.00
TAX1 $0.05
TOTAL $3.05
CASH $3.05
CLERK 1 No.000001 00001
DATE 08/15/2002 SUN TIME 03:15
PLU1 T1 $1.00
PLU4 $2.00
TAX1 $0.05
TOTAL $3.05
CASH $4.00
CHANGE $0.95
CLERK 1 No.000001 00001
Cash Tender
(exact amount of
purchase)
Cash Tender with
Change
Check
DATE 08/15/2002 SUN TIME 03:15
1 0 0 PLU #1
PLU1 T1 $1.00
PLU4 $2.00
2 0 0 PLU #4
TAX1 $0.05
TOTAL $3.05
CHECK
CHECK $3.05
CLERK 1 No.000001 00001
44 • Operations ER 5200/5240 Electronic Cash Register
Check Tender
(exact amount of
purchase)
Page 47
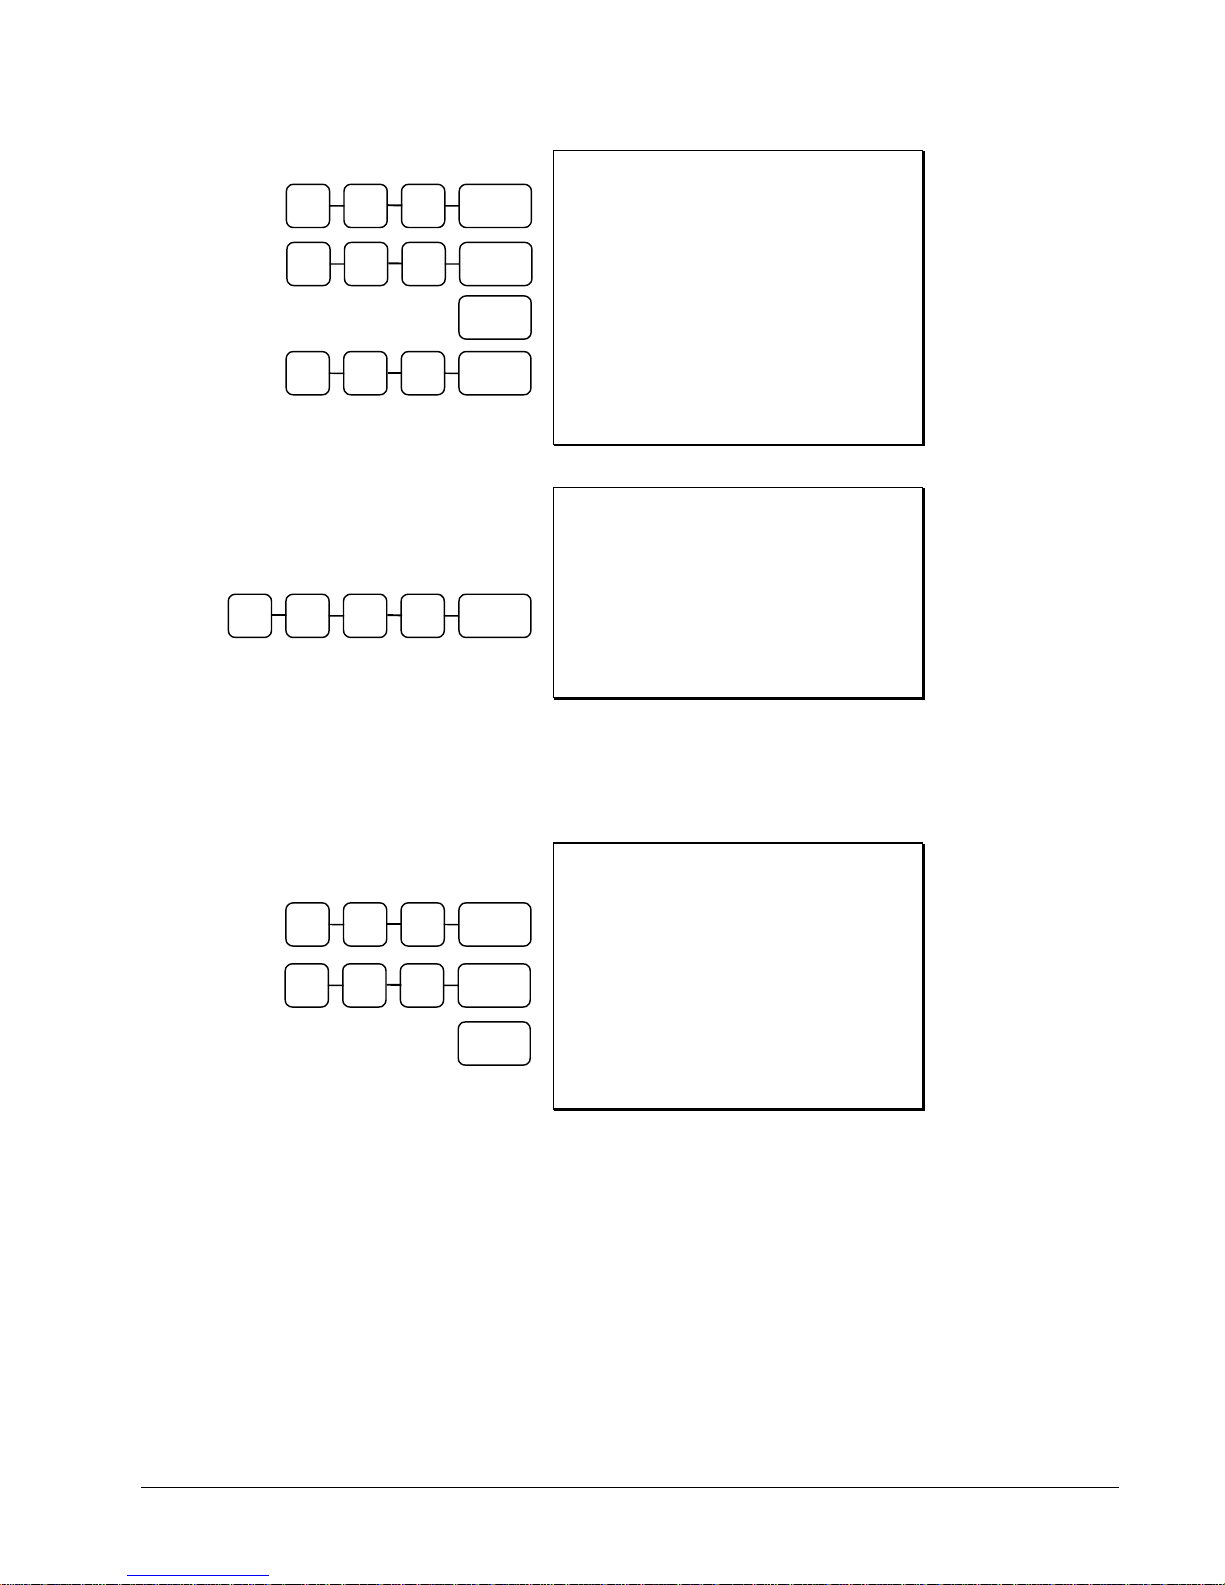
1 0 0 PLU #1
2 0 0 PLU #4
4 0 0 CHECK
0 0 0
1
SBTL
CHECK
CASH
DATE 08/15/2002 SUN TIME 03:15
PLU1 T1 $1.00
PLU4 $2.00
Check Tender
with Change
TAX1 $0.05
TOTAL $3.05
CHECK $4.00
CHANGE $0.95
CLERK 1 No.000001 00001
DATE 08/15/2002 SUN TIME 03:15
*** CHKCASH ***
Check Cashing
CHECK $10.00
CASH -10.00
CLERK 1 No.000001 00001
Charge
Tendering and over tendering into charge keys is allowed.
1 0 0 PLU #1
2 0 0 PLU #4
CHARGE
1
DATE 08/15/2002 SUN TIME 03:15
PLU1 T1 $1.00
PLU4 $2.00
TAX1 $0.05
TOTAL $3.05
CHARGE1 $3.05
CLERK 1 No.000001 00001
Charge Total
ER 5200/5240 Electronic Cash Register Operations • 45
Page 48
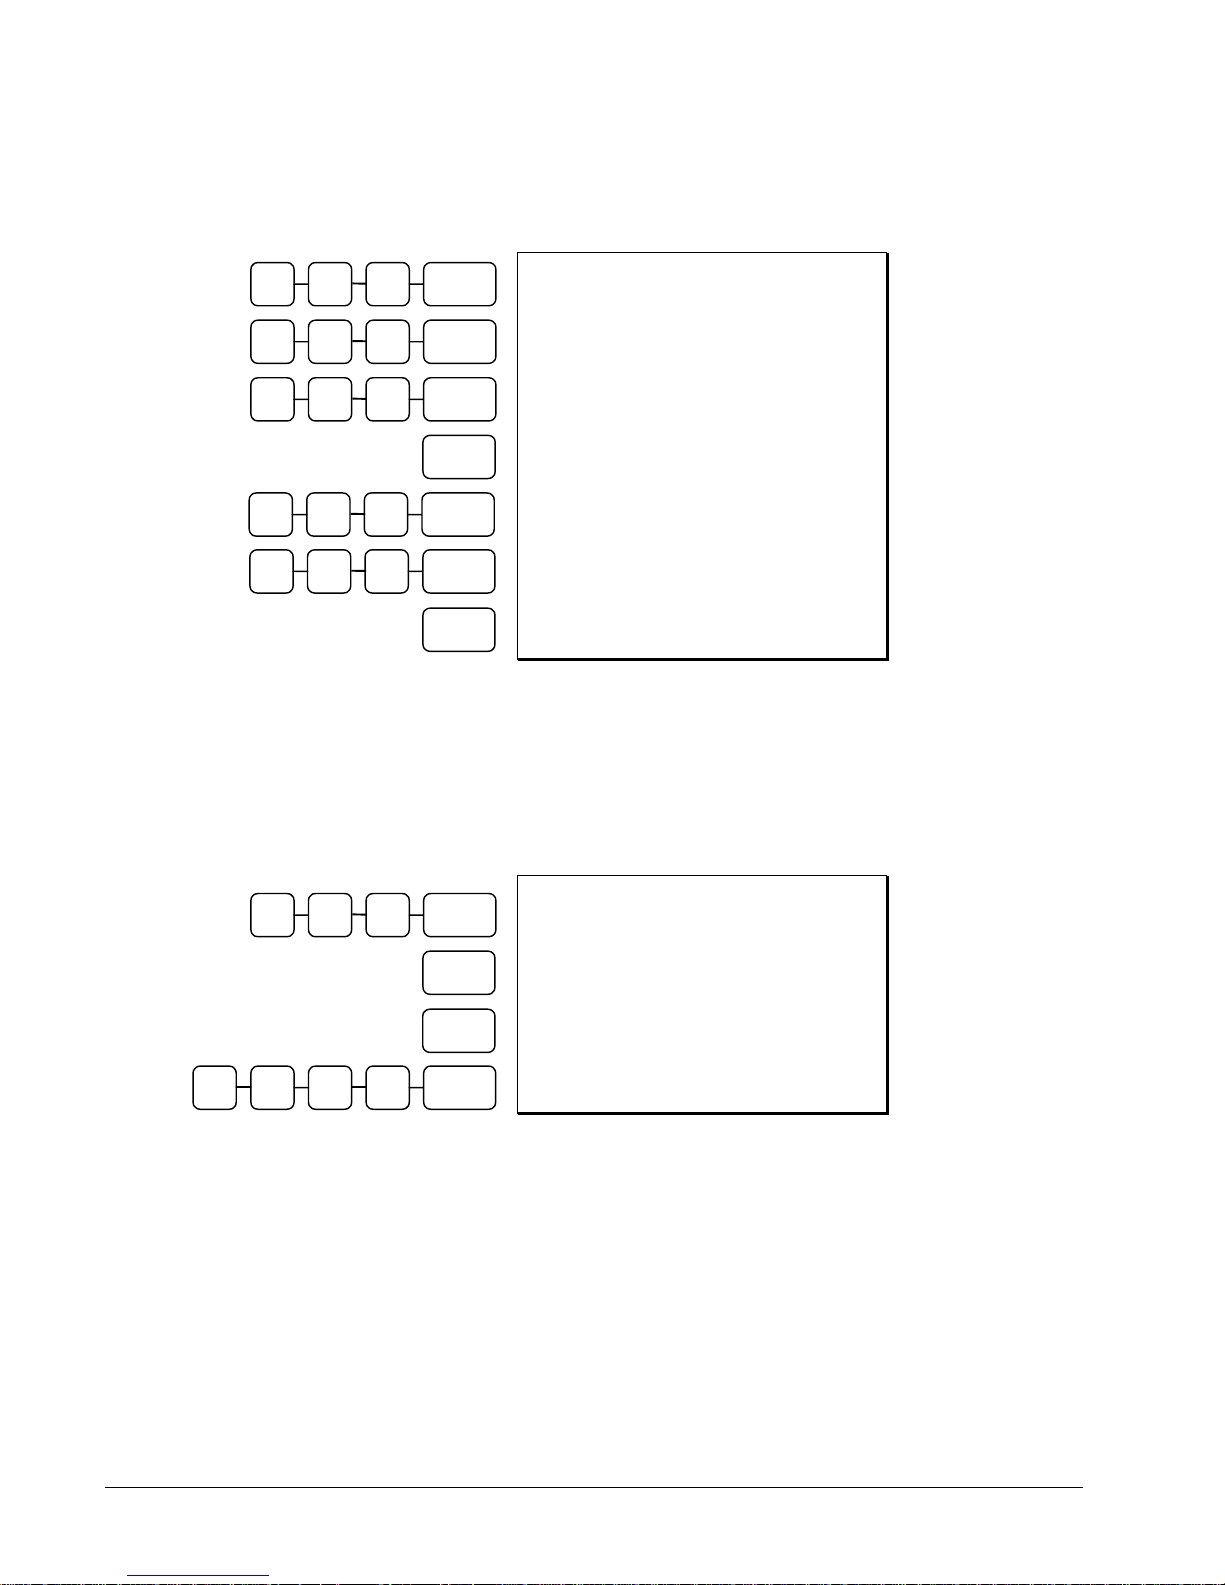
Split Tender
The drawer will not open until the final balance has been paid.
2 0 0 PLU #1
3 0 0 PLU #1
1 0 0 PLU #4
2 0 0 CASH
1 0 0 CHECK
SBTL
CHARGE
1
DATE 08/15/2002 SUN TIME 03:15
PLU1 T1 $2.00
PLU1 T1 $3.00
PLU4 $1.00
TAX1 $0.25
TOTAL $6.25
CASH $2.00
TOTAL $4.25
CHECK $2.00
TOTAL $2.25
CHARGE1 $2.25
CLERK 1 No.000001 00001
Cash, Check &
Charge
Payments on the
Same
Transaction
Post Tendering
Post tendering is available for computing change after a sale has been finalized. (See option #6 in
"System Option Programming" to enable post tendering.) The second cash entry is compared to the
sale total and the difference is displayed. (The
programmed with pop-up clerks.)
6 0 0 PLU #1
DATE 08/15/2002 SUN TIME 03:15
PLU1 T1 $6.00
SBTL
TAX1 $0.30
TOTAL $6.30
CASH
CASH $6.30
CLERK 1 No.000001 00001
1 5 0 CASH 1
CLEAR key must first be pressed for registers
Post Tender
46 • Operations ER 5200/5240 Electronic Cash Register
Page 49
Receipt on Request
If a customer requests a receipt after a sale has been finalized, a second depression of the CASH key
will issue a complete buffered receipt.
If more than 100 entries are made in the sale, the register will issue a stub receipt only, showing the
total net sale, correct tax totals and payment tendered.
Training Mode
A training mode is available so that you can operate the cash register without updating totals and
counters. Note the following conditions:
The receipt and journal print the message "TRAINING MODE BEGIN" when training
mode is activated.
The receipt and journal print the message "TRAINING MODE END" when training mode
is exited.
The message "TRAINING MODE" prints on each receipt printed while training mode is
active.
The journal does not print during training mode.
The total and counter on the financial report labeled "TRAIN TTL" is updated with the net
amount of each training transaction.
To Enter Training Mode
To Exit Training Mode
Clerk Interrupt
Clerk interrupt allows you to temporarily suspend a transaction in progress by allowing a new clerk to
sign on and register a new transaction. After the new transaction is complete, the original clerk can
sign on, the suspended transaction is recalled and may be completed.
You must select either check (table) tracking or clerk interrupt. You cannot use clerk interrupt with a
check tracking system.
To Enable Clerk Interrupt
1. Program Clerk Secret Code
2. Set system option #2 to a value of 1. See "System Option Programming".
3. Set system option #26 to a value of 1. See "System Option Programming".
Set system option #23 to a value of 1. See "System Option Programming".
Set system option #23 to a value of 0. See "System Option Programming".
ER 5200/5240 Electronic Cash Register Operations • 47
Page 50
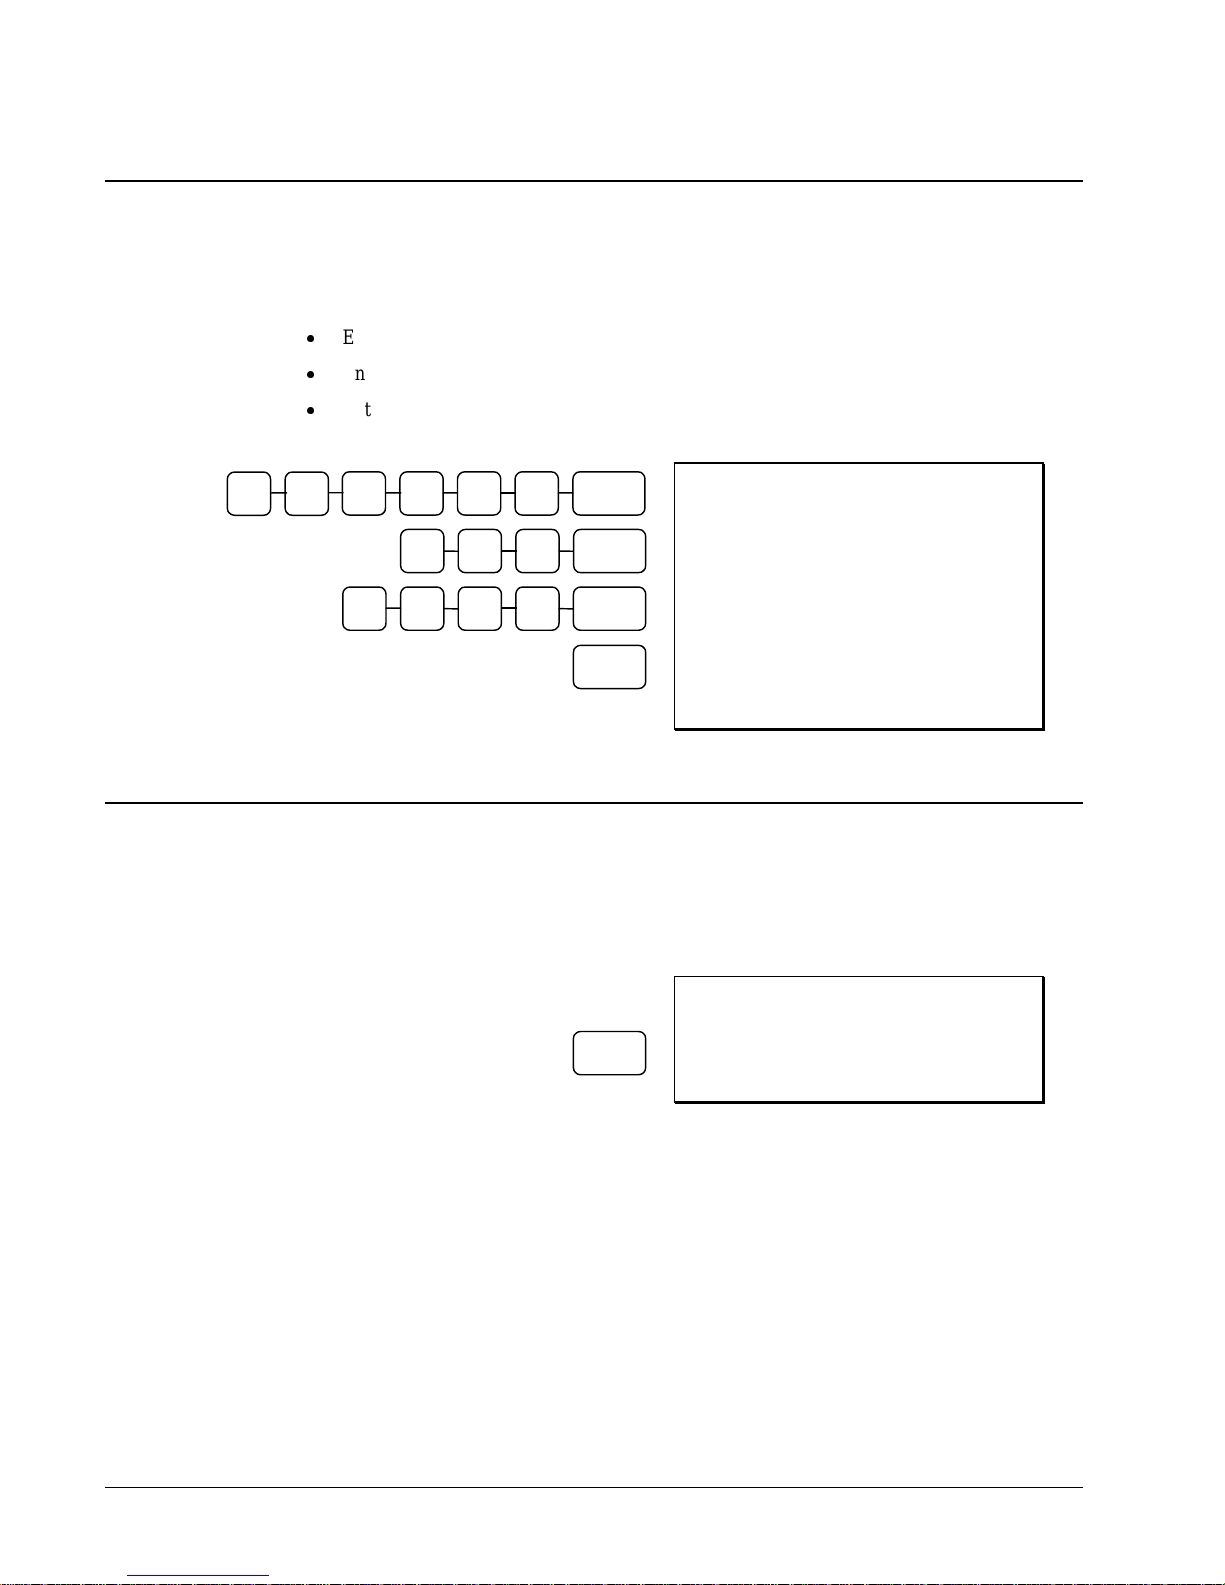
Non-Add Number
With the #/NS key, you can enter a memo number at any time and print the number on the receipt,
journal, or validation. The non-adding number is not added to the sale, nor is it added to any register
total, except the # key total itself. You can enter a number up of up to 9 digits. For example:
Enter a number prior to a PLU entry to print a record of the item's SKU number.
Enter a number prior to a Check tender to print a record of the check number.
Enter a number prior to a Charge to print a record of the charge account number.
2 1
4 5 6 #/NS 3
2 0 0 PLU #4
3 5 7 #/NS 1
CHECK
DATE 08/15/2002 SUN TIME 03:15
NON-ADD# 123456
PLU4 T1 $2.00
TAX1 $0.10
TOTAL $2.10
NON-ADD# 1357
CHECK $2.10
CLERK 1 No.000001 00001
No Sale
Outside of a transaction you can press the #/NS key to open the cash drawer. The number of no sales
are counted and reported on the financial report. The no sale function can also be placed under
management control, requiring the control key to be in the X position.
DATE 08/15/2002 SUN TIME 03:15
#/NS
NOSALE ------------------------CLERK 1 No.000001 00001
48 • Operations ER 5200/5240 Electronic Cash Register
Page 51
Received on Account
Use the RECD ACCT key to record payments or loans to the cash drawer. You can enter more than
one type of payment to the drawer. The Received on Account function can only be used outside of a
transaction.
2 5 0 CASH 1
0 0 0 CHECK 2
Paid Out
Use the PAID OUT key to record payments or loans from the cash drawer. You can enter more than
one type of payment to the drawer. The Paid Out function can only be used outside of a transaction.
RA
RA
DATE 08/15/2002 SUN TIME 03:15
RA1
CASH $12.50
CHECK $20.00
RA1 $32.50
CLERK 1 No.00001 00000
PO
DATE 08/15/2002 SUN TIME 03:15
2 5 0 CASH 1
PO1
CASH $12.50
0 0 0 CHECK 2
CHECK $20.00
P/O $32.50
PO
CLERK 1 No.00001 00000
ER 5200/5240 Electronic Cash Register Operations • 49
Page 52

Table Service Restaurant Operations
Overview
The Samsung ER-5200/5240 can be used to add items or receive payments on guest checks using a
manual previous balance, hard check, or soft check system. (Note that you must select hard or soft
check posting in memory allocation programming. The default selection is soft.)
If manual previous balance is selected, the check balance is not saved in memory and is
input manually by the operator (use the PBAL key).
If a hard check system is selected, only the previous balance is maintained in memory.
If a soft check system is selected, the check detail is kept in memory until the check is
paid. (The maximum size of the soft check is set in memory allocation programming.)
When a soft check system is used, the receipt can be used to print the final check that is
presented to the customer for payment.
Consolidation of like items can be selected for guest check printing. For example, if three
rounds of drinks are served, the check will print "3 TAP BEER" rather than
"1 TAP BEER" three times. (See “Print Option Programming” on page 114.)
Note: If you wish to print guest check transactions on a slip or a pre-printed guest check, an
optional printer must be installed. See your Samsung dealer for more information.
50 • Operations ER 5200/5240 Electronic Cash Register
Page 53
Function Keys and Options
Functions necessary for restaurant operations may not appear on the default keyboard. Any or all of
the following functions can be loc ated on the keyboard . See "Function Key Assignment Pro gramming”
on page 81 if it is necessary to locate these keys on your keyboard.
CHECK #
GUEST
P/BAL
SERVICE
TABLE
PRINT CHECK
TIP
The CHECK # key is used to begin a new, or access an existing balance
(hard check) or itemized bill (soft check.) Existing checks are accessed by
entering the check track number and pressing the CHECK# key. The
Check # key may be set with the following options:
A check must be started before items may be entered.
The clerk that opens the check has exclusive access.
Only one check may be allowed per table.
The check # may be automatically assigned by the register.
Check track numbers that are entered manually may be set at a fixed
length of one to nine digits. Che ck track numbers assigned
automatically will begin with #1.
In a drive thru system, simply pressing the PBAL key will recall the oldest
open balance (lowest check track #).
Use to enter the count of g u est s se rv ed as part of a guest check. The entry of a
guest count can be en f orced when opening a g u es t ch eck , or f or all
transactions.
Use to enter the amount of an ou ts tandin g balan ce. The P/BAL key will take
the recall function if the drive thru feature is enabled in CHECK # key
programmin g .
Use to temporarily fin alize Previous Balance or ch eck track in g tran saction s .
(If you are using a h ard ch eck s ystem, you must program th e SERVICE key
for the port where the slip printer is connected.)
You can enforce the entry of a table number for gues t ch eck tran s actions , or
for all transactions. If you are track ing g u es t ch eck balan ces, th e balan ce can
be recalled either by entering the ch eck n u mber or the table number.
Use to print a soft check. The ch eck can be prin t ed on an opti onal (R S- 232C )
printer, or can be printed on the receipt printer. The PRINT CHECK key can
be set to automatically service the check.
The TIP key allows a gratuity to be added to a guest check before payment.
The tip amount is deducted from the Cash-in-Drawer amount for the
Clerk/Cashier closing the guest check.
The TIP key may be programmed as either a percentage or amount. If
programmed as a percentage, tax programming defines whether the
percentage is calculated on the net (taxable = no) amount, or the amount
after taxes.
ER 5200/5240 Electronic Cash Register Operations • 51
Page 54
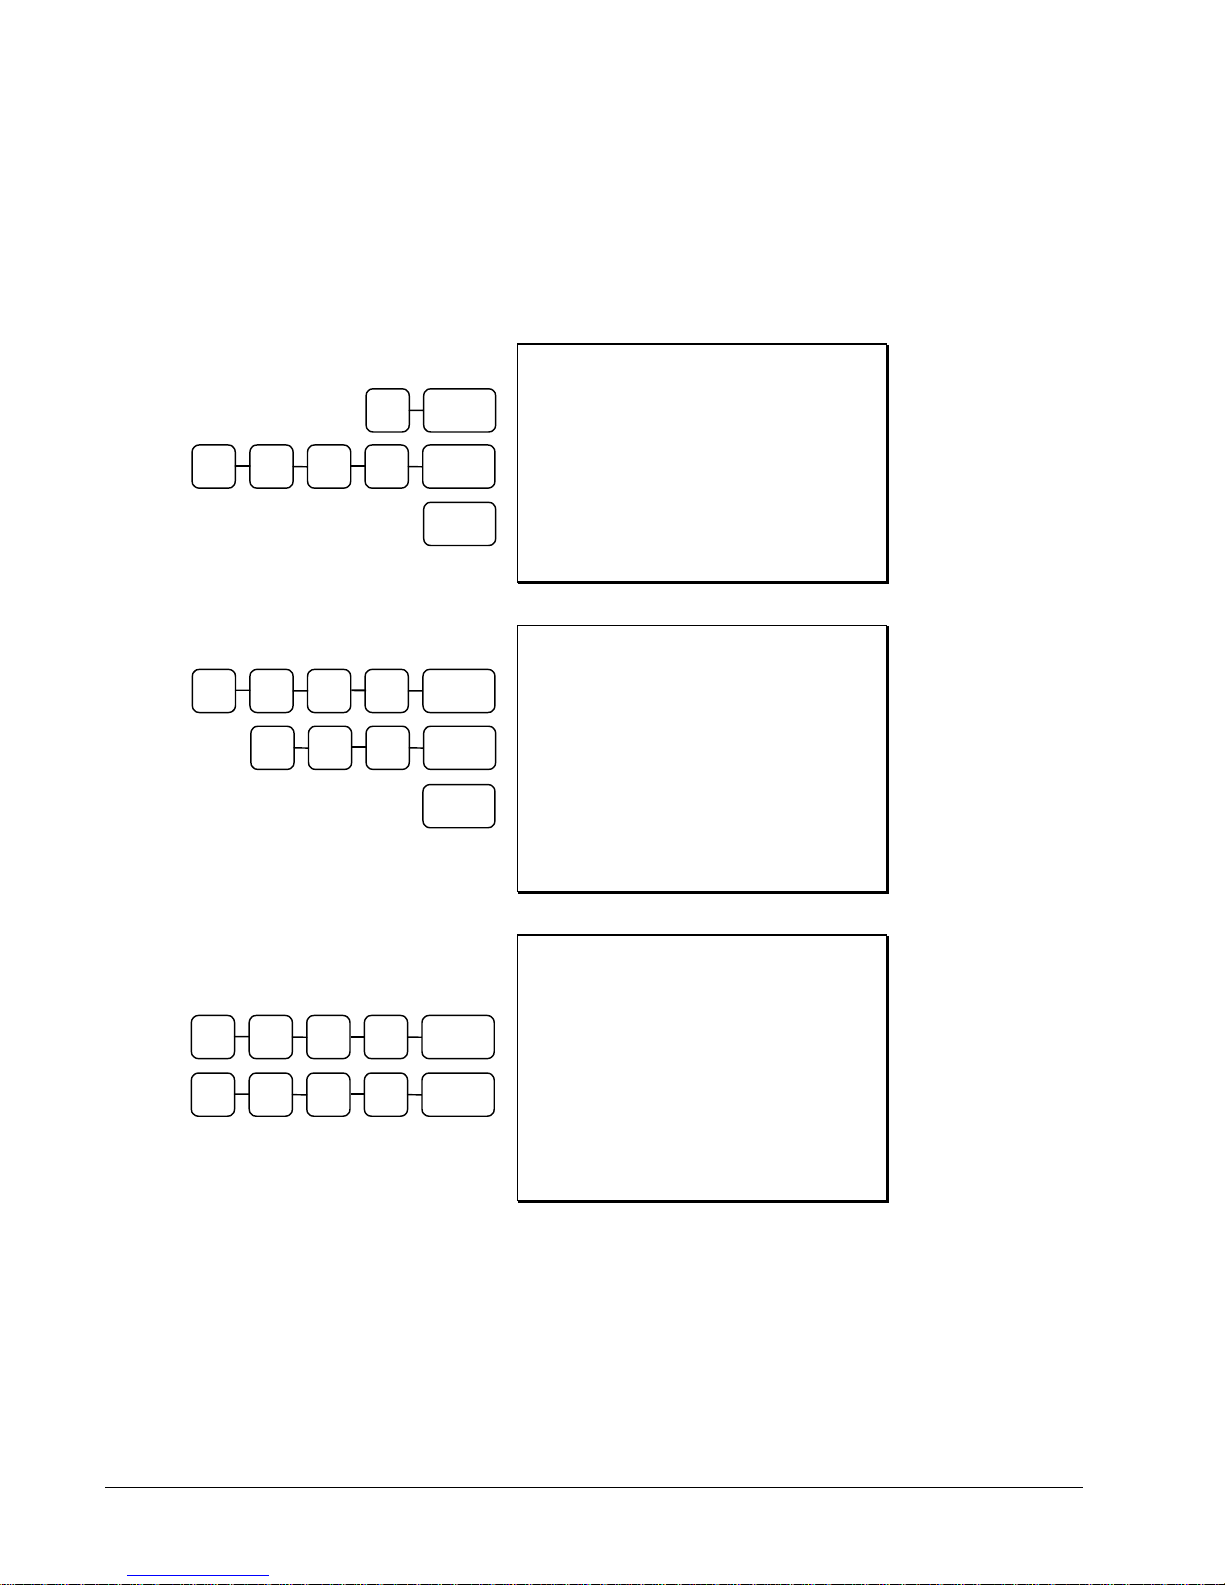
Posting Guest Checks Manually with the Previous Balance
Key
The previous balance key is used to enter the amount of the previous balance before adding new items
or making payments.
0 P/BAL
0 0 0 PLU #1 1
SERVICE
0 0 0 P/BAL 1
1 0 0 PLU #1
SERVICE
DATE 08/15/2002 SUN TIME 03:15
PBAL $0.00
PLU4 $10.00
SERVICE $10.00
BFWD
$10.00
CLERK 1 No.000001 00001
DATE 08/15/2002 SUN TIME 03:15
PBAL $10.00
PLU1 T1 $1.00
TAX1 $0.05
SERVICE $1.05
BFWD
$11.05
CLERK 1 No.000001 00001
Starting a Check
Adding to an
Existing Check
DATE 08/15/2002 SUN TIME 03:15
PBAL $11.05
1 0 5 P/BAL 1
CHECKS PAID $11.05
TOTAL $11.05
0 0 0 CASH 2
CASH $20.00
Paying a Check
CHANGE $8.95
CLERK 1 No.000001 00001
52 • Operations ER 5200/5240 Electronic Cash Register
Page 55
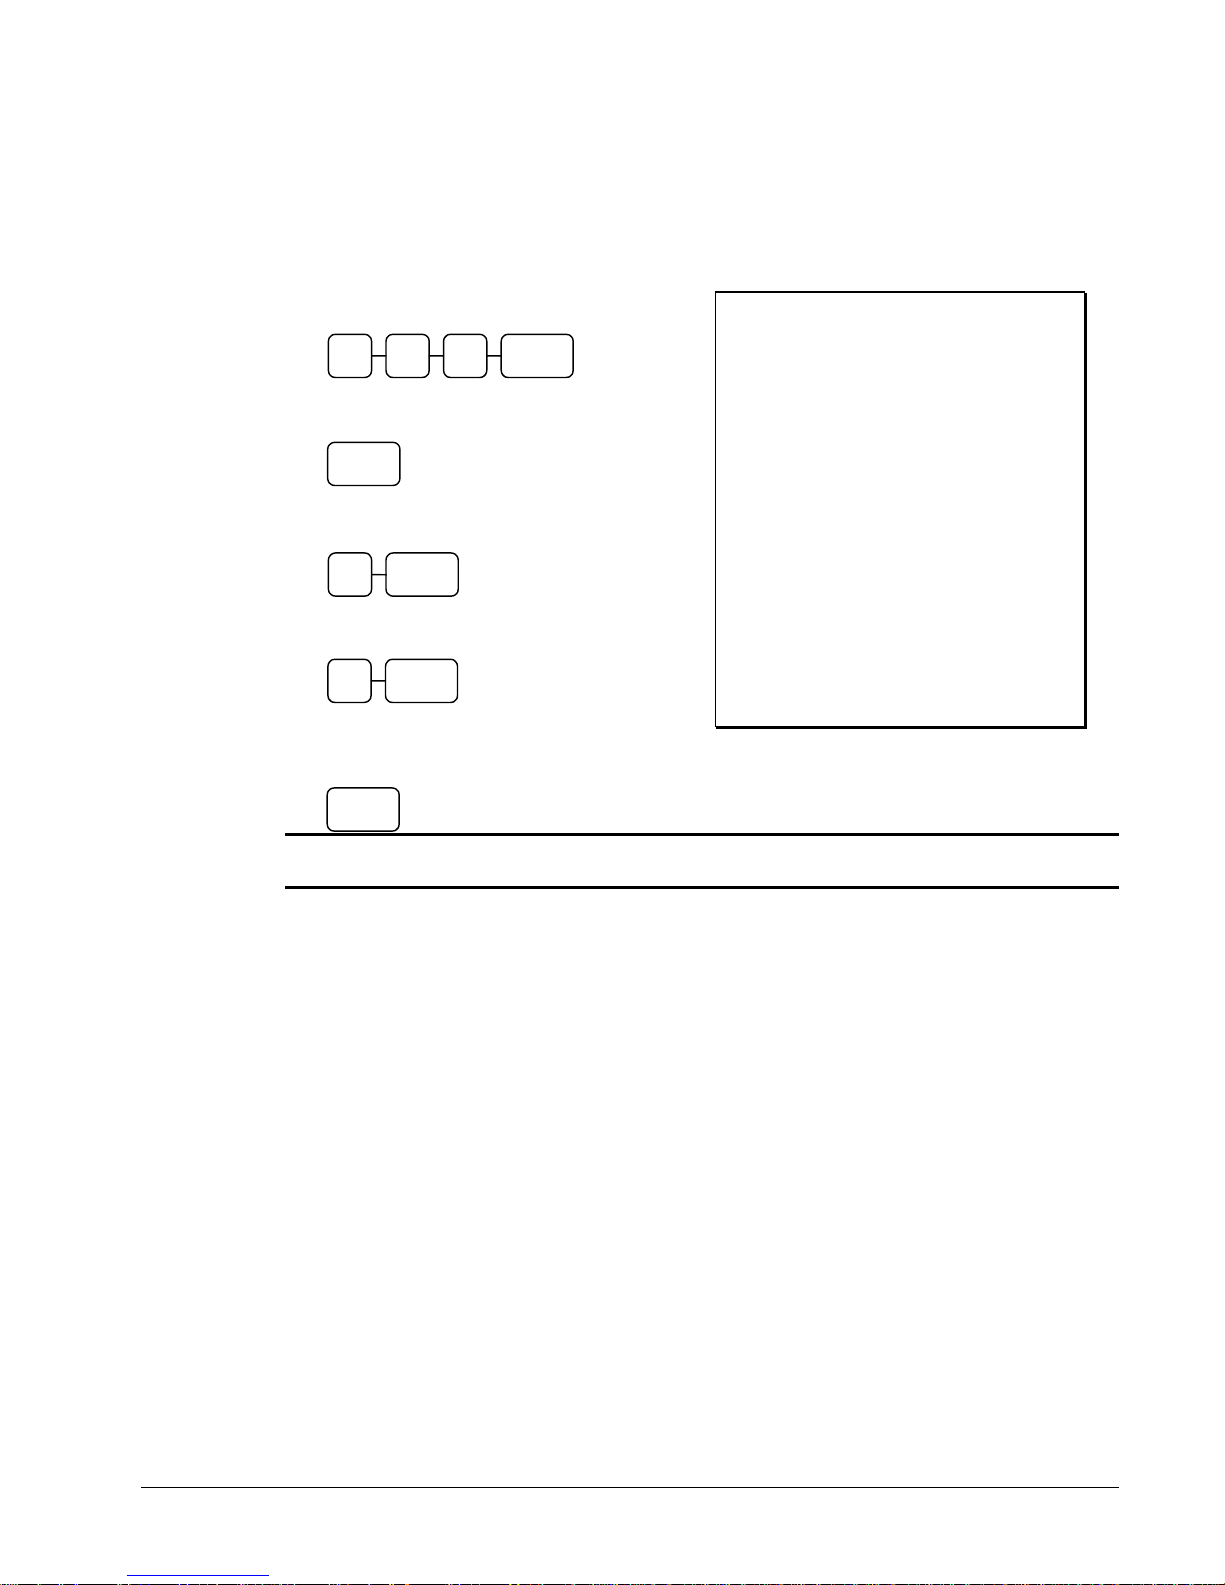
Soft Check
Opening a Soft Check
1. Enter the number of the guest check, press
the CHECK # key:
or, press the CHECK # key to automatically
assign a check:
CHECK#
2. If required, enter the table number and press
the TABLE key:
3. If required, enter the number of guests and
press the GUEST key:
4. Register the items you wish to sell.
TABLE 3
GUEST 2
CHECK# 3 1 2
Receipt Example:
DATE 08/15/1999 SUN TIME 08:33
CHECK #
#123
PBAL $0.00
TABLE #3
GUEST #2
LIQUOR T1 $7.00
STEAK T2 $10.00
TAX1 $0.35
TAX2 $1.00
SERVICE $18.35
BFWD
$18.35
CLERK 1 No.000011 00001
5. To total the posting, press SERVICE:
SERVICE
Note: If a table number entry is required for all guest checks, and checks are assigned by
register, the check will be assigned by the register when the table # is entered.
ER 5200/5240 Electronic Cash Register Operations • 53
Page 56
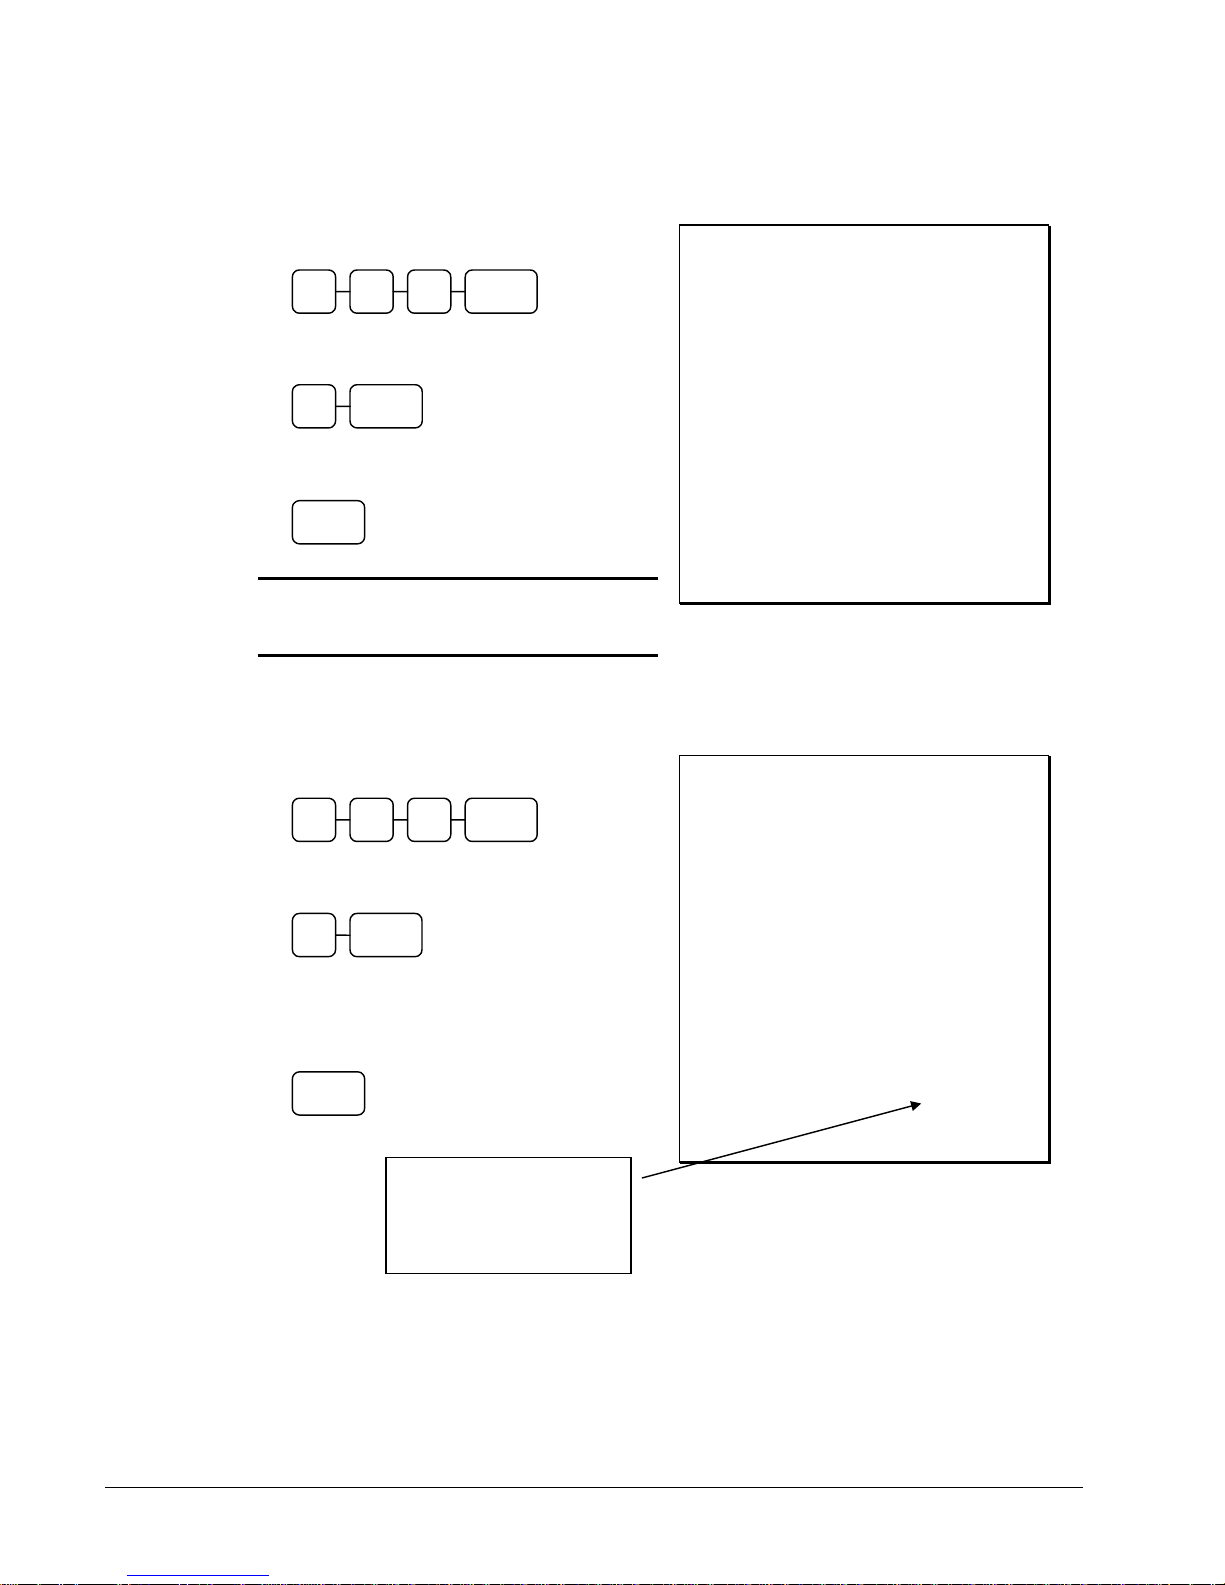
Adding to a Soft Check
1. Enter the number of the guest check, press
the CHECK # key:
or, if you entered a table number, enter the
table number and press the TABLE key:
2. Register the next items you wish to sell.
3. To total the posting, press SERVICE:
SERVICE
NOTE: Tax are recalculated and printed to
reflect total taxes for all items posted on the
check.
TABLE 3
CHECK# 3 1 2
Receipt Example:
DATE 08/15/1999 SUN TIME 08:33
CHECK #
#123
PBAL $18.19
TABLE #3
GARLIC BREAD T2 $2.00
TAX1 $0.35
TAX2 $1.20
SERVICE $2.20
BFWD
$20.55
CLERK 1 No.000012 00001
Printing a Soft Check
1. Enter the number of the guest check, press
the CHECK # key:
or, if you entered a table number, enter the
table number and press the TABLE key:
2. Press PRINT CHECK to print the complete
check. If programmed to do so, the PRINT
CHECK key will automatically service the
check:
CHECK
TABLE 3
PRINT
The number of times each
check has been printed is
counted and printed on the
check
CHECK# 3 1 2
Sample of soft check printed on the receipt:
DATE 08/15/1999 SUN TIME 08:33
CHECK #
#123
LIQUOR T1 $7.00
STEAK T2 $10.00
GARLIC BREAD T2 $2.00
TAX1 $0.46
TAX2 $0.87
SERVICE $0.00
BFWD
$20.33
CHK # : 1
CLERK 1 No.000012 00001
54 • Operations ER 5200/5240 Electronic Cash Register
Page 57
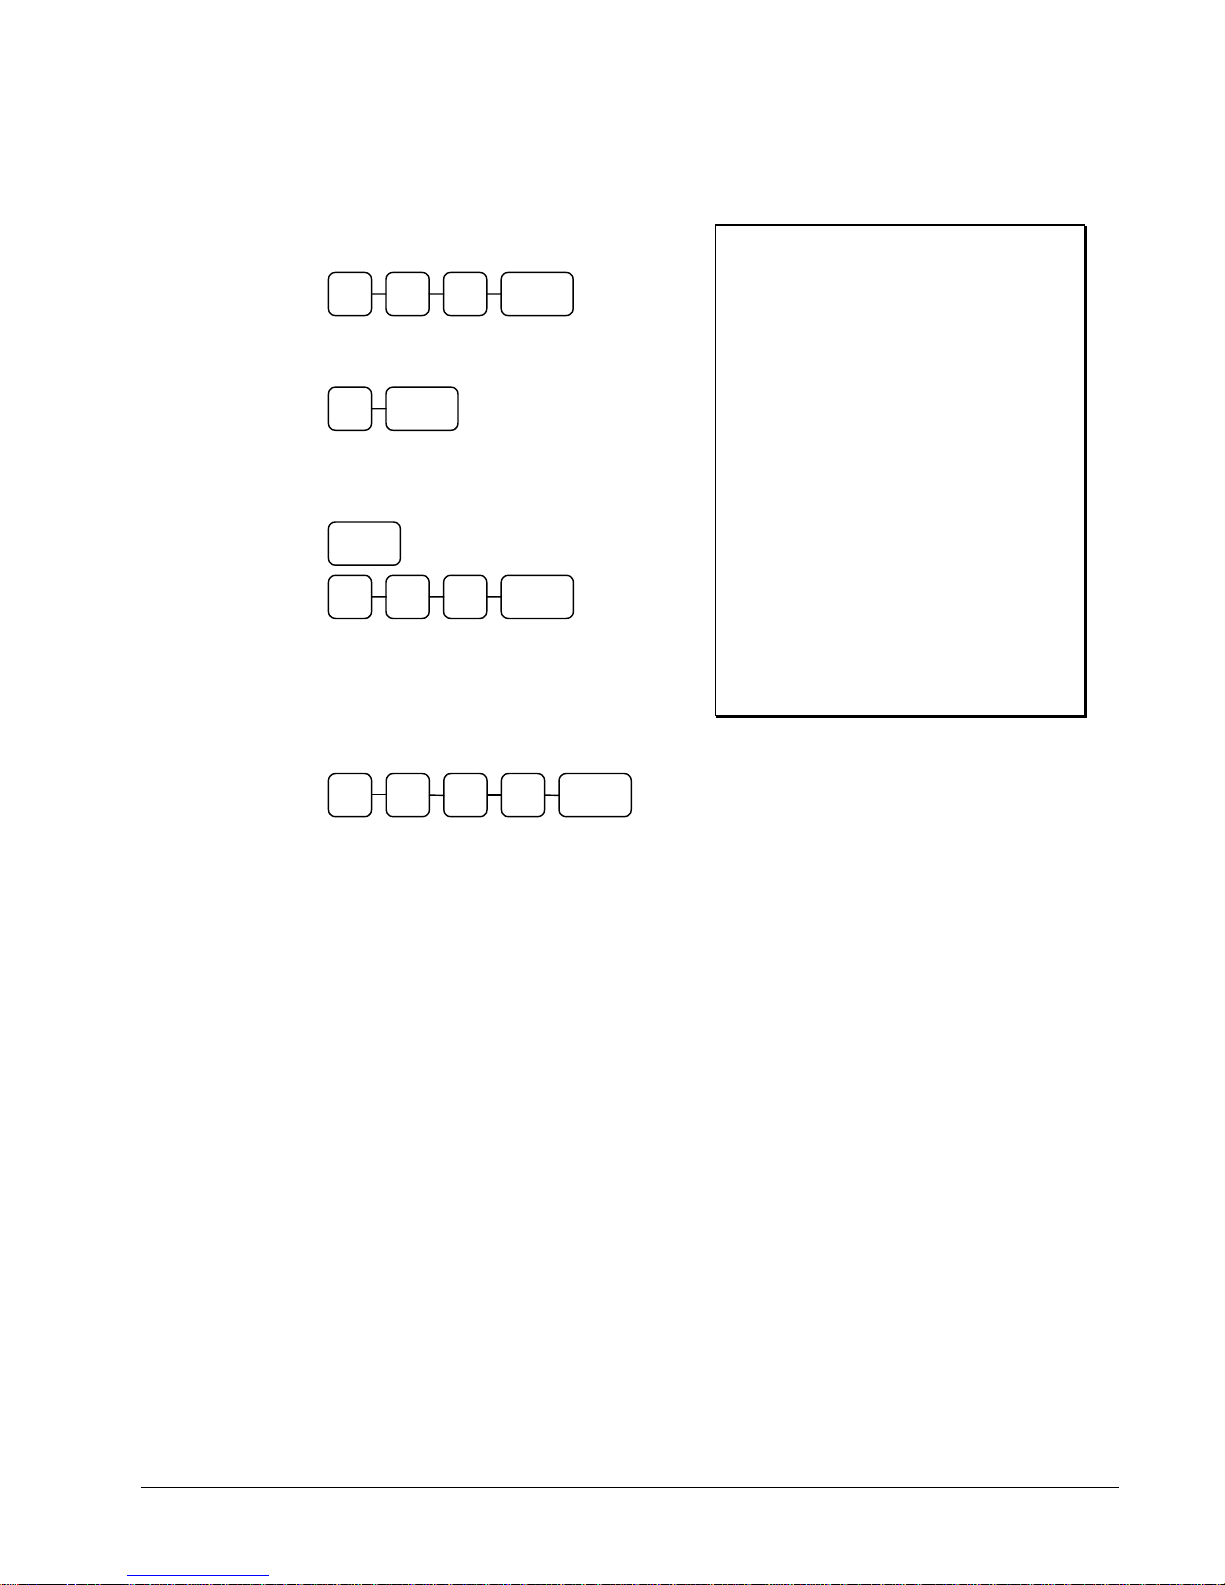
Paying a Soft Check
1. Enter the number of the guest check, press
the CHECK # key:
or, if you entered a table number, enter the
table number and press the TABLE key:
2. If necessary, add additional items. If you
wish to add a tip, press SBTL, then enter the
tip amount and press the TIP key:
3. Pay the balance, as you would normally
tender a transaction, with CASH, CHECK,
or one of the CHARGE functions. If the
tender is greater than the balance due, change
is displayed.
TABLE 3
SBTL
5 0 0 CASH 2
CHECK# 3 1 2
TIP 0 3 0
Sample of soft check printed on the receipt:
DATE 08/15/1999 SUN TIME 08:33
CHECK #
#123
LIQUOR T1 $7.00
STEAK T2 $10.00
GARLIC BREAD T2 $2.00
TIP $3.00
TAX1 $0.46
TAX2 $0.87
CHECKS PAID $23.33
TOTAL $23.33
CASH $25.00
CHANGE $1.67
CHK # : 2
CLERK 1 No.000013 00001
ER 5200/5240 Electronic Cash Register Operations • 55
Page 58
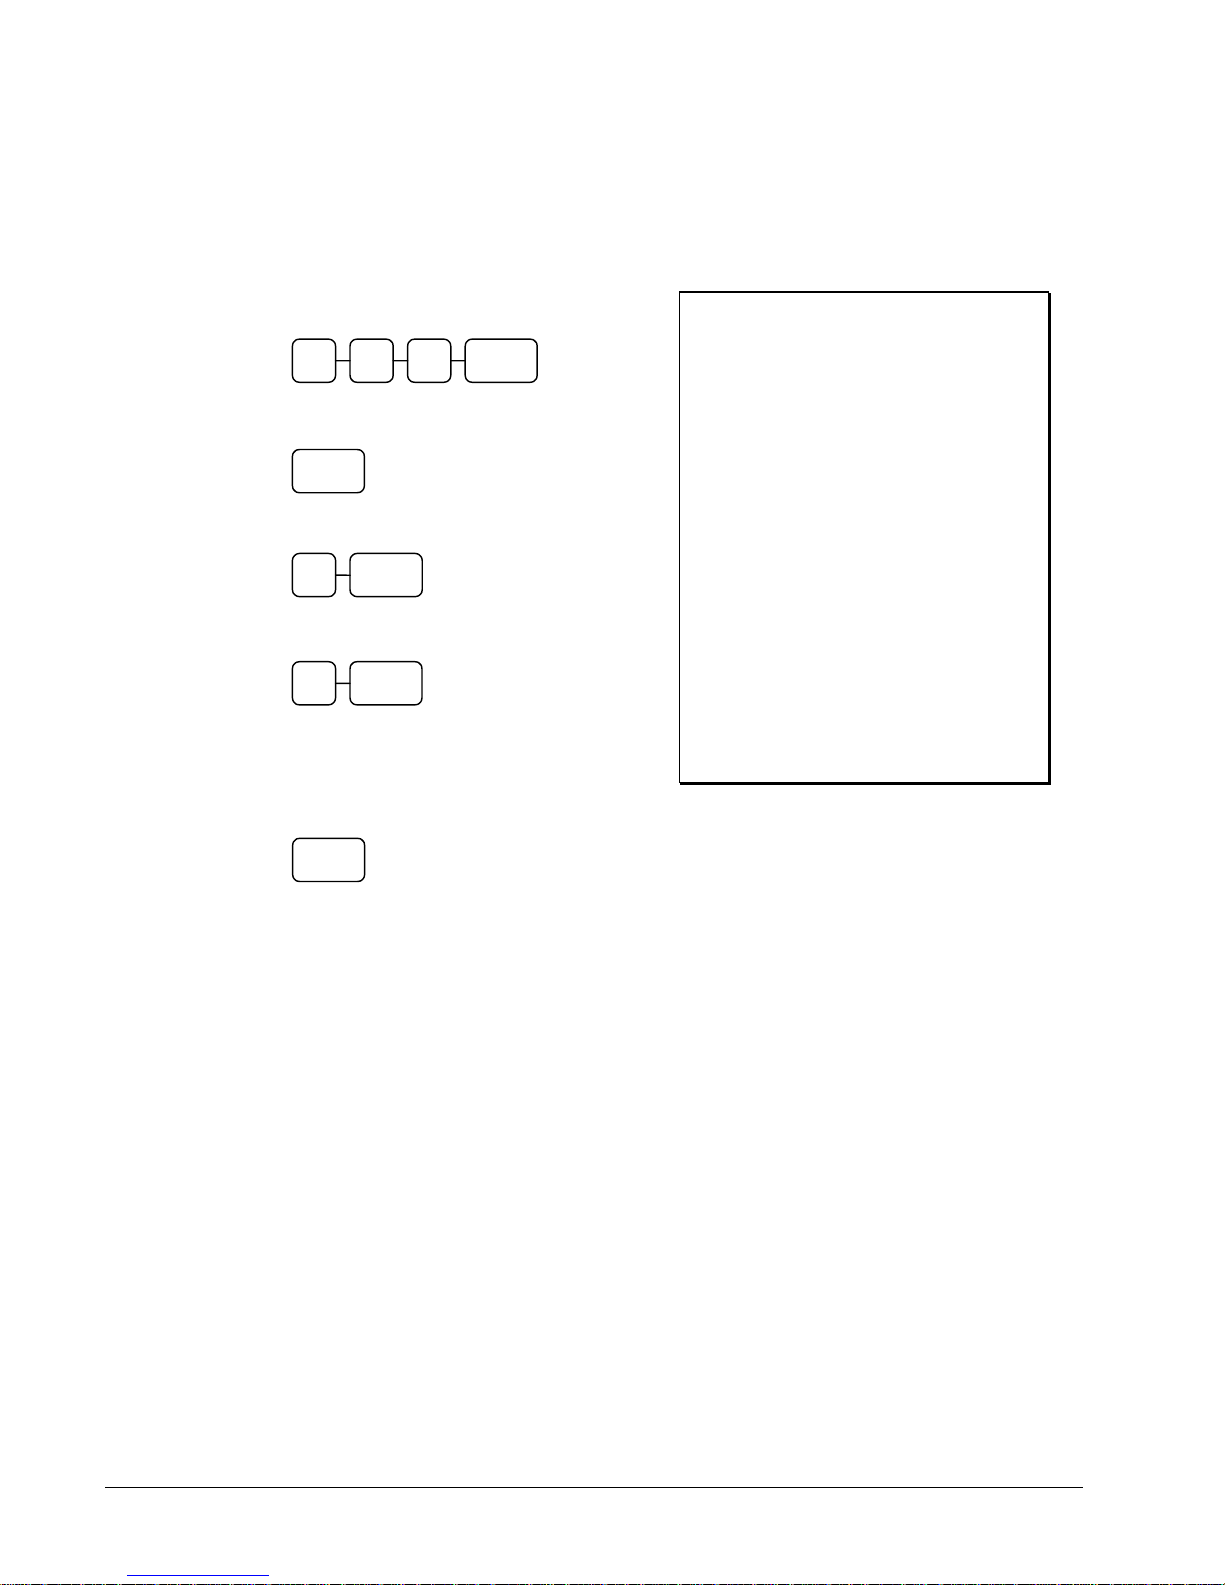
Hard Check
Opening a Hard Check
1. Enter the number of the guest check, press
the CHECK # key:
or, press the CHECK # key to automatically
assign a check:
CHECK#
2. If required, enter the table number and press
the TABLE key:
3. If required, enter the number of guests and
press the GUEST key:
4. Register the items you wish to sell.
5. Place a slip in an optional slip printer, the
check will print automatically when you press
SERVICE:
SERVICE
TABLE 3
GUEST 2
CHECK# 3 1 2
Receipt Example:
THANK-YOU
CALL AGAIN
DATE 08/15/1999 SUN TIME 08:33
CHECK #
#123
PBAL $0.00
TABLE #3
GUEST #2
LIQUOR T1 $7.00
STEAK T2 $10.00
TAX1 $0.46
TAX2 $0.73
SERVICE $18.19
BFWD
$18.19
CLERK 1 No.000011 00001
56 • Operations ER 5200/5240 Electronic Cash Register
Page 59
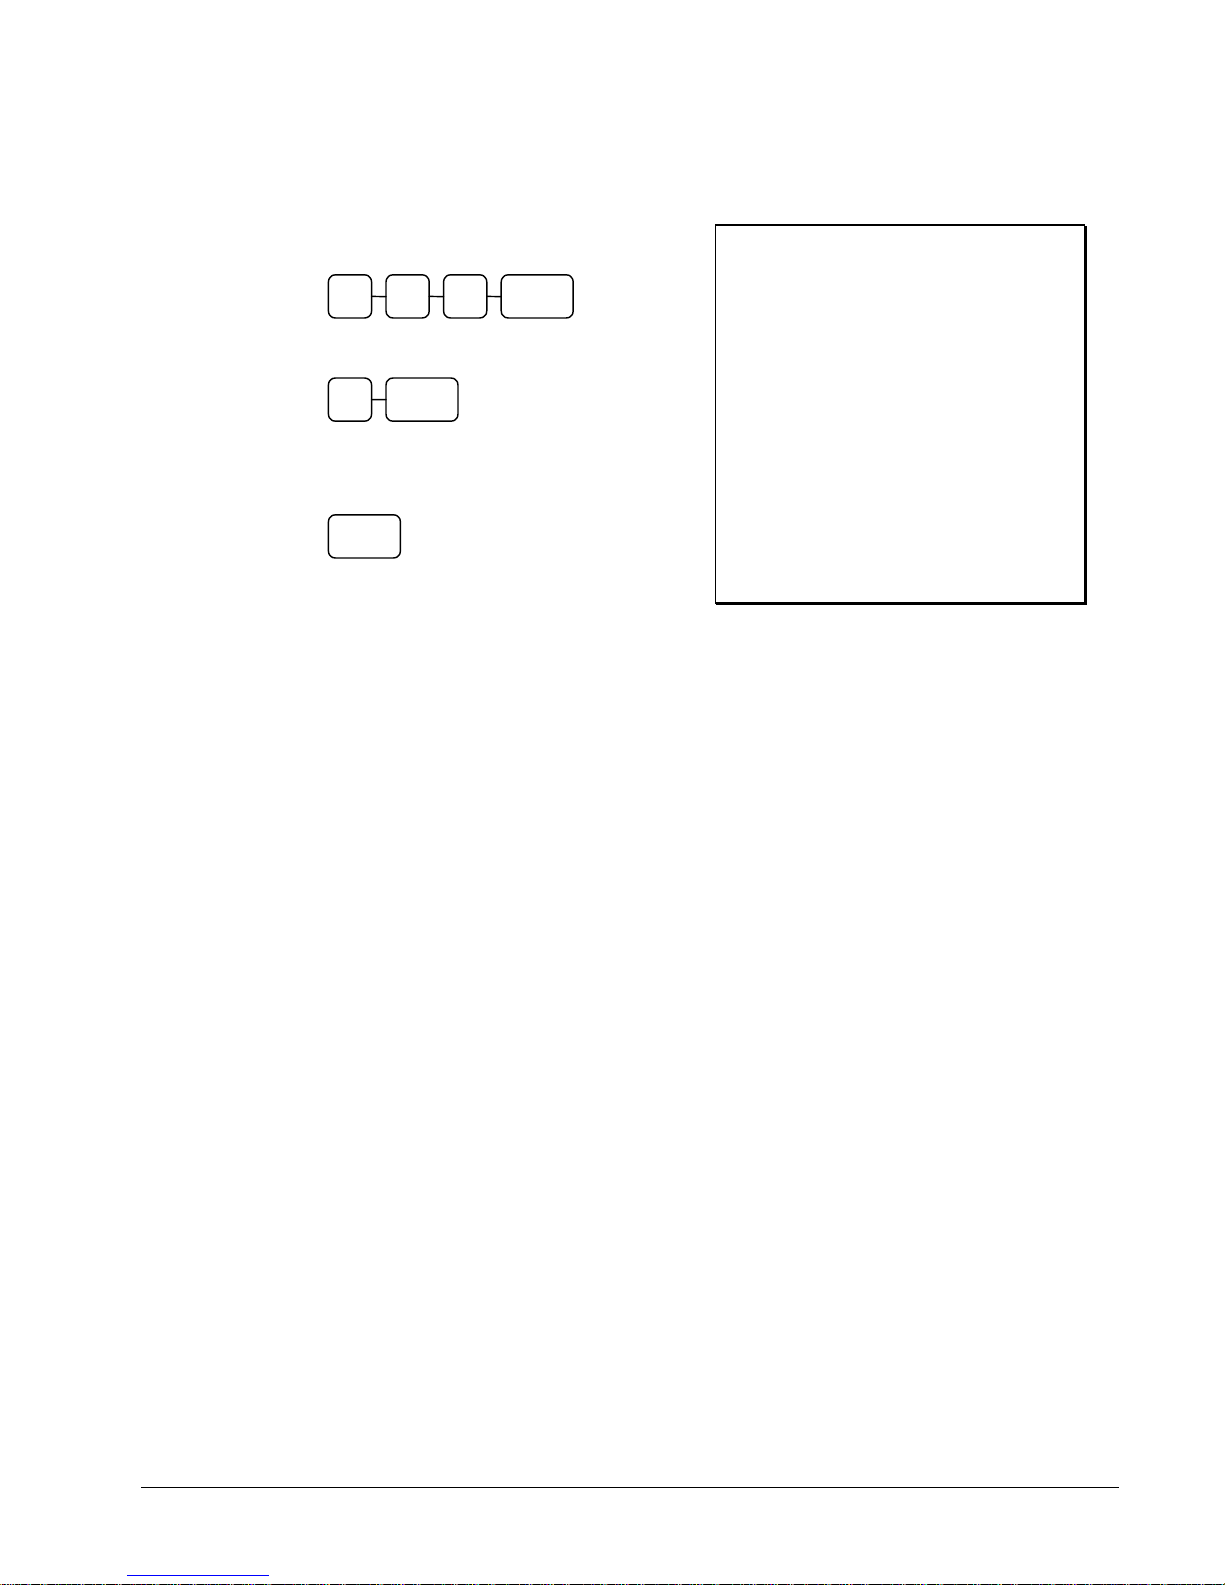
Adding to a Hard Check
1. Enter the number of the guest check, press
the CHECK # key:
or, if you entered a table number, enter the
table number and press the TABLE key:
2. Register the next items you wish to sell.
3. To total the posting, press SERVICE:
SERVICE
TABLE 3
CHECK# 3 1 2
Receipt Example:
DATE 08/15/1999 SUN TIME 08:33
CHECK #
#123
PBAL $18.19
TABLE #3
GARLIC BREAD T2 $2.00
TAX1 $0.46
TAX2 $0.87
SERVICE $2.15
BFWD
$20.33
CLERK 1 No.000012 00001
ER 5200/5240 Electronic Cash Register Operations • 57
Page 60
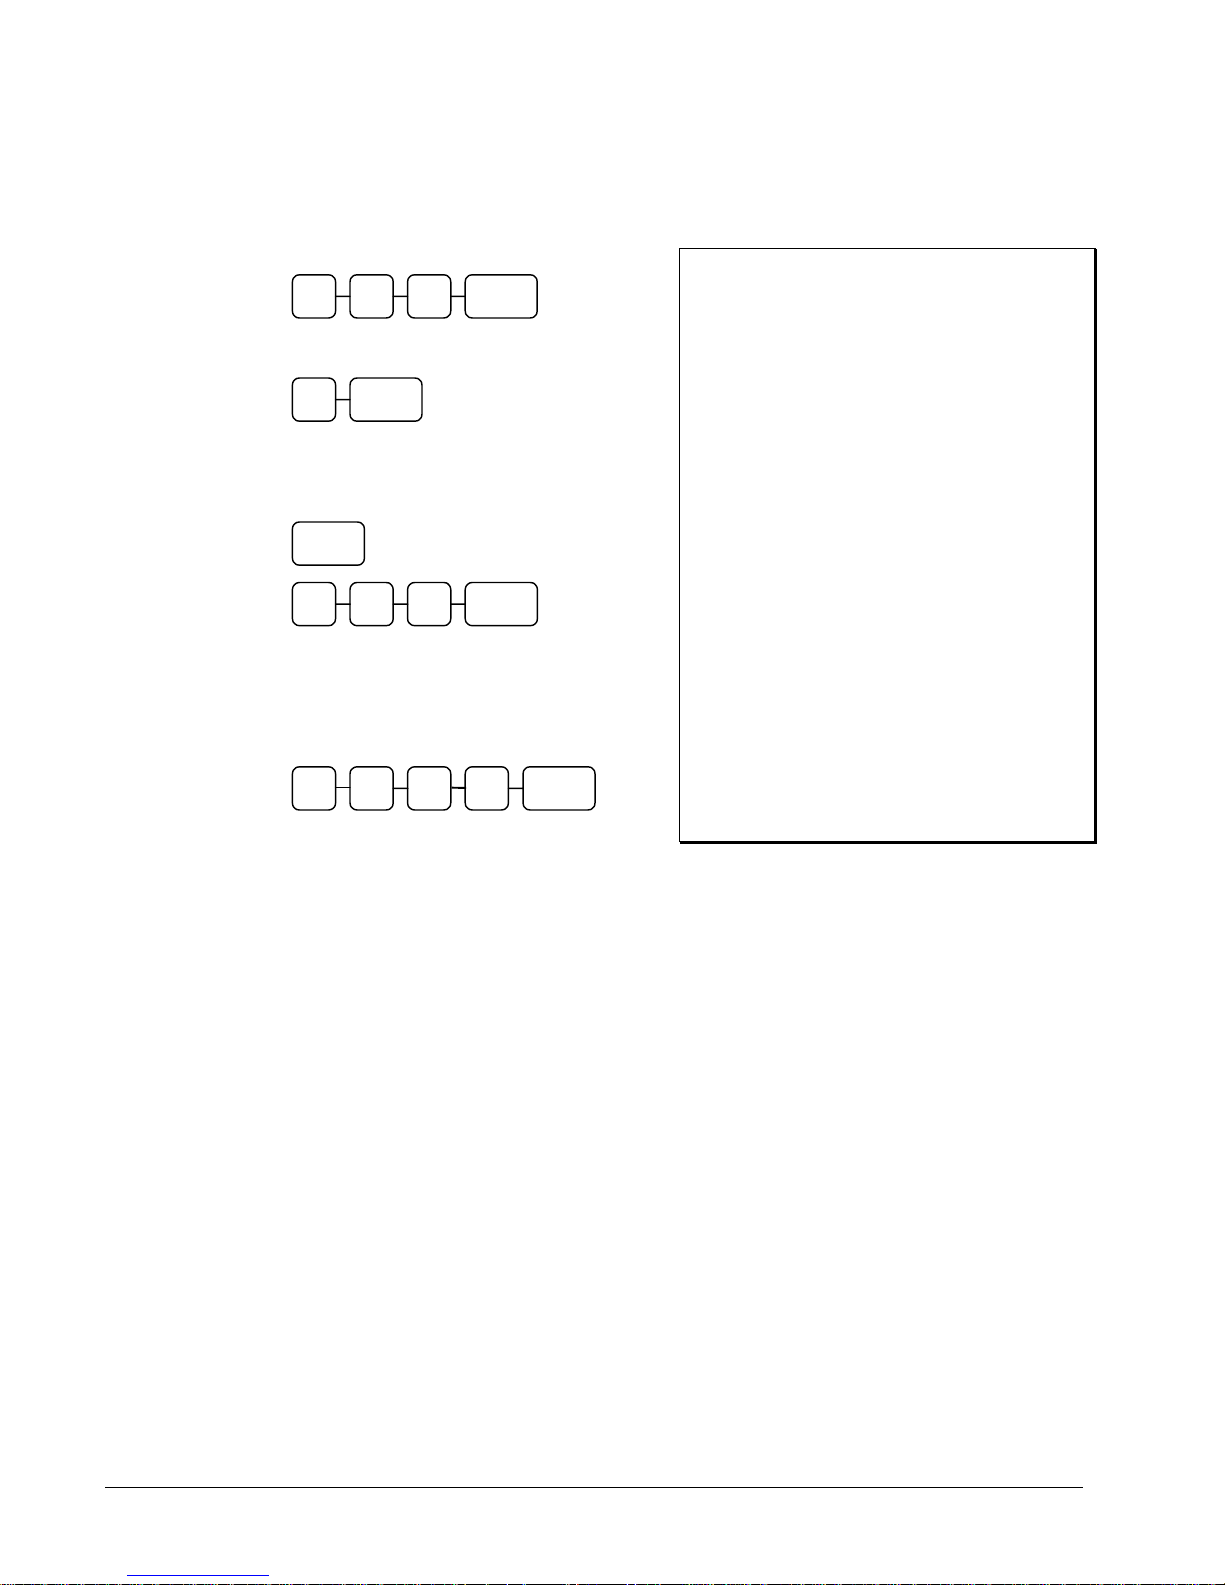
Paying a Hard Check
1. Enter the number of the guest check, press
the CHECK # key:
CHECK# 3 1 2
or, if you entered a table number, enter the
table number and press the TABLE key:
TABLE 3
2. If necessary, add additional items. If you
wish to add a tip, press SBTL, then enter the
tip amount and press the TIP key:
SBTL
TIP 0 3 0
3. Pay the balance, as you would normally
tender a transaction, with CASH, CHECK,
or one of the CHARGE functions. If the
tender is greater than the balance due, change
is displayed.
5 0 0 CASH 2
Sample of Hard Check postings printed on an
optional printer:
DATE 12/01/1999 WED
CHECK #
PBAL $0.00
LIQUOR T1 $7.00
STEAK T2 $10.00
TAX1 $0.46
TAX2 $0.73
SERVICE $18.19
BFWD
No.000017 REG 01 ETHAN TIME 09:15
PBAL $18.19
GARLIC BREAD T2 $2.00
TAX1 $0.46
TAX2 $0.87
SERVICE $2.15
BFWD
No.000019 REG 01 ETHAN TIME 09:47
PBAL $20.33
TIP $3.00
TAX1 $0.46
TAX2 $0.87
CHECKS PAID $23.33
CASH $25.00
CHANGE $1.67
No.000021 REG 01 ETHAN TIME 10:16
#123
18.19
20.33
58 • Operations ER 5200/5240 Electronic Cash Register
Page 61

Fast Food Drive Thru
For fast food drive thru windows, the ER-5200/5240 has the capability of storing orders when they are
taken, and then recalling the next order automatically at the payment window.
The PBAL function becomes a recall function when the drive thru feature is enabled in
the CHECK # function key program. Press the PBAL key to recall the lowest tracking
number balance.
Orders are stored by first pressing the CHECK # key to automatically assign the next
tracking number, then pressing SERVICE. (A macro sequence key could be created to
execute both functions sequentially.)
See "Function Key Programming" on page 120.
Taking a Drive Thru Order
1. Register the items you wish to sell.
2. Press the CHECK # key to begin an
automatically assigned check:
CHECK#
3. To store the posting, press SERVICE:
SERVICE
Receipt Example:
DATE 08/15/1999 SUN TIME 08:33
HAMBURGER $2.00
FRIES $1.00
CHECK #
#3
PBAL $0.00
SERVICE $3.00
BFWD
$3.00
CLERK 1 No.000011 00001
Paying a Drive Thru Order
1. Press the PBAL key:
PBAL
2. If necessary, add additional items, register
discounts or coupons.
3. Pay the balance, as you would normally
tender a transaction, with CASH, CHECK,
or one of the CHARGE functions. If the
tender is greater than the balance due, change
is displayed.
CASH 0 5 0
Receipt Example:
DATE 08/15/1999 SUN TIME 08:33
CHECK #
#3
PBAL $3.00
CHECKS PAID $3.00
TOTAL $3.00
CASH $5.00
CHANGE $2.00
CLERK 1 No.000012 00001
ER 5200/5240 Electronic Cash Register Operations • 59
Page 62
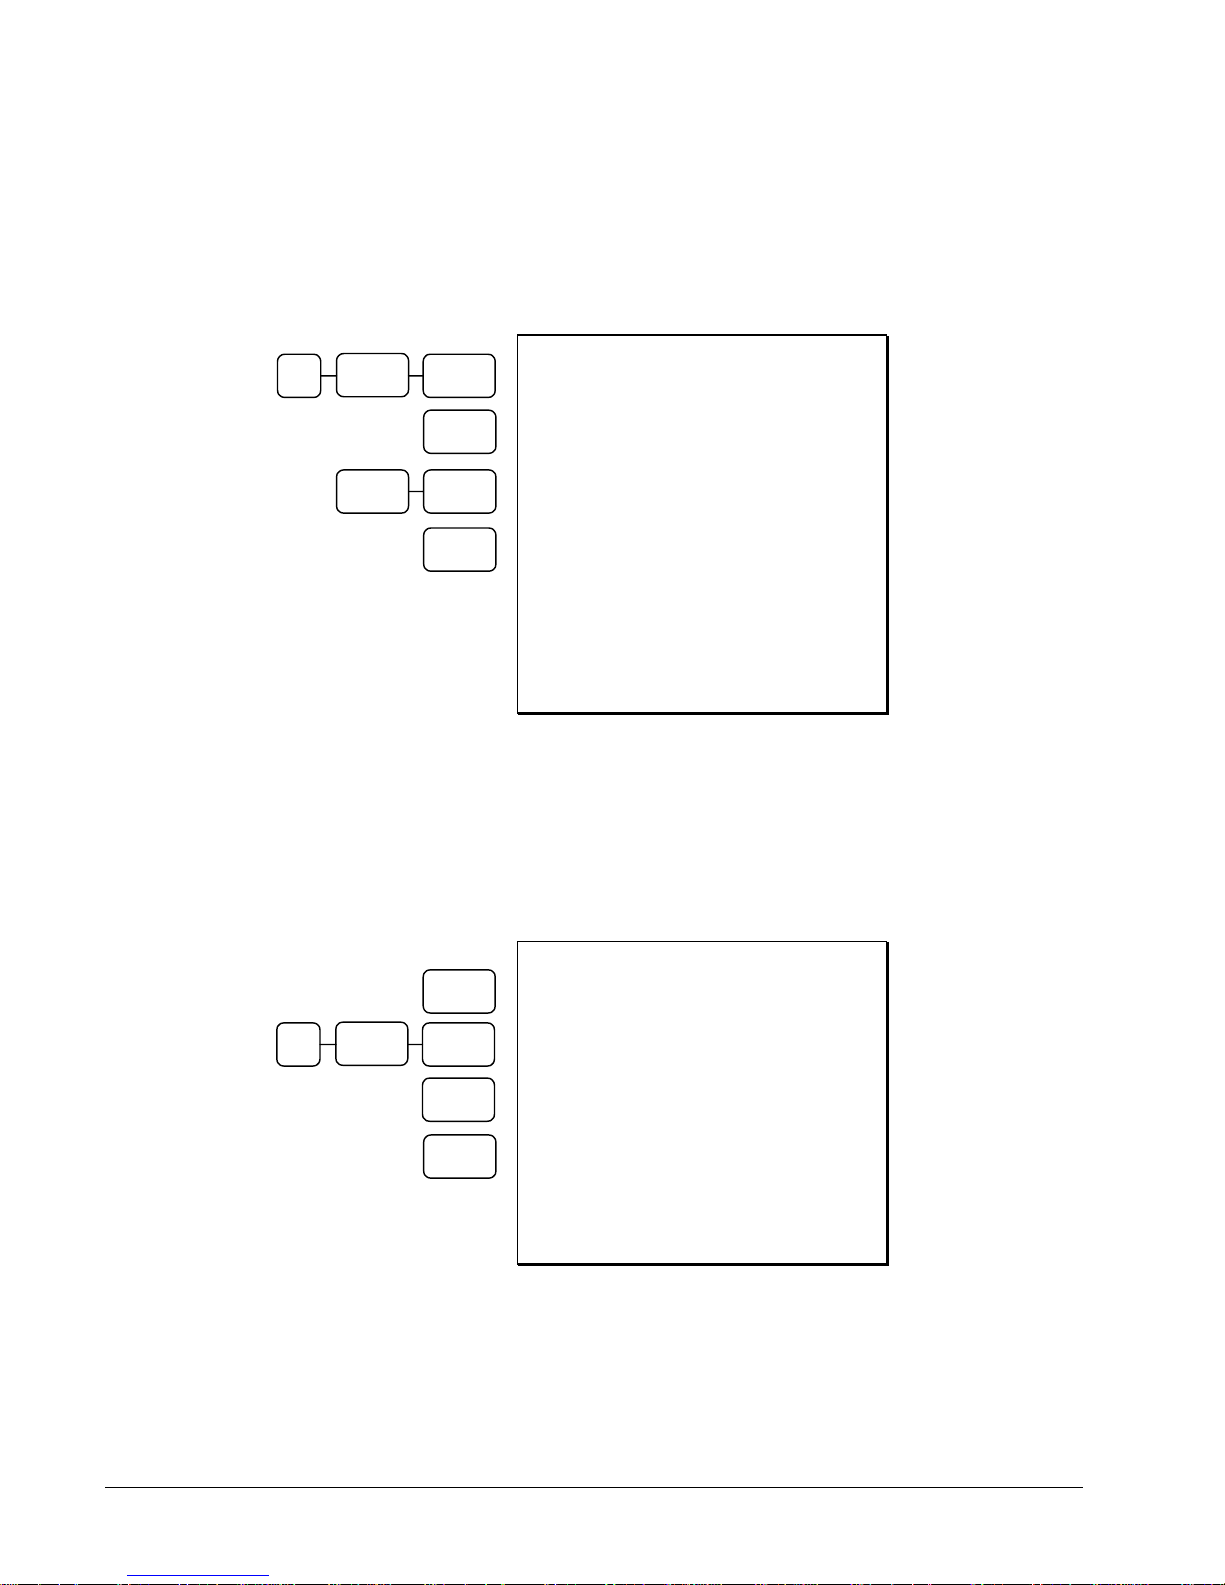
Promo Function
The PROMO key allows the operator to account for promotional items (i.e. buy two, get one free). By
design, this key will remove the items cost from the sale, but not the count. In the example of buy two,
get one free, the reported count remains three items, but the customer is only charged for two.
3
X/TIME
PROMO
TACO
COKE
TACO
CASH
DATE 08/15/2002 SUN TIME 03:15
3X @0.89
TACO T1 $2.67
COKE T1 $0.69
*** PROMO ***
TACO T1 $0.89
TAX1 $0.16
TOTAL $2.63
CASH $2.63
CLERK 1 No.000001 00001
Promo Entry
Waste Function
The WASTE key allows control of inventory by accounting for items that must be removed from stock
due to spoilage, breakage, or mistakes. With manager control, the WASTE key requires the control
lock to be in the X position. The WASTE key is not allowed within a sale.
Waste operations begin and end with by pressing the WASTE key.
WASTE
DATE 08/15/2002 SUN TIME 03:15
X/TIME
3
TACO
*** WASTE ***
3X @0.89
COKE
TACO T1 $2.67
COKE T1 $0.69
WASTE
*** WASTE ***
TOTAL $3.36
CLERK 1 No.000001 00001
Waste Entry
60 • Operations ER 5200/5240 Electronic Cash Register
Page 63

Charge Posting Operations
The ER-5200/5240 check tracking system can be used to post charges and payments to house accounts.
This posting system is ideal for small resorts, camgrounds, motels/hotels or retail stores that accept
house charges.
Charge posting features include:
Manual balance posting, soft check posting, or hard check posting. For house account
posting, the hard check posting method with an optional slip printer is recommended.
(Because house accounts are usually maintained over a period of time, the soft check system
may not have the memory capacity to track the ongoing account activity.)
Payments can be posted before charges are posted and credit balances can be carried forward.
Overpayments can be issued as change or carried forward.
Managers can control access to new account numbers or closing accounts.
Zero balance accounts can remain active.
The total of outstanding accounts prints at the end of the open check report and also on the
Financial report. (The total is not reset when the financial report is cleared.)
The total of house account charges (Service Total) and payments are reported to facilitate
accounts receivable balancing.
In order to implement this system, you must enable the charge posting features (see “System Option
Programming” on page 108”.) You must also assign the necessary function keys for your application.
ER 5200/5240 Electronic Cash Register Operations • 61
Page 64
Charge Posting Function Keys
CHECK #
(ACCT #)
P/BAL
SERVICE
(HOUSE CHRG)
PAYMENT
PAY TEND
PRINT CHECK
FINALIZE
The CHECK # key is used to begin a new, or access an existing balance
(hard check) or itemized bill (soft check.) Existing checks are accessed by
entering the check track number and pressing the CHECK# key. You may
wish to reprogram the descriptor of the CHECK # key to ACCT#.
Use to manually enter the amount of an outstanding balance. The P/BAL key
is not used when hard or soft check posting is used.
Use to temporarily fin alize Previous Balance or h ou se accou n t tran s action s. (If
you are using a h ard ch eck s ystem, you must program th e SERVICE key for
the port where the slip printer is connected.) You may wish to reprogram the
descriptor of the SERVICE key to HOUSE CHRG.
Press to make a payment, partial payment, or pre-payment while posting to a
check (account). If the pay ment amount ex ceeds the ch eck balan ce, a credit
balance will be maintained.
The PAY TEND key f unctions like the PAYMENT key, except if the
payment amou n t ex ceeds th e ch eck balan ce, th e ov erpayment will be issued as
change and the account balan ce will be zeroed.
Use to print a soft check. The ch eck can be prin t ed on an opti onal (R S- 232C )
printer, or can be printed on the receipt printer. The PRINT CHECK key can
be set to automatically service the check.
Pressing the FINALIZE key before closing a check will close the account and
the account num ber will no longer be reported on the open ch eck report.
62 • Operations ER 5200/5240 Electronic Cash Register
Page 65
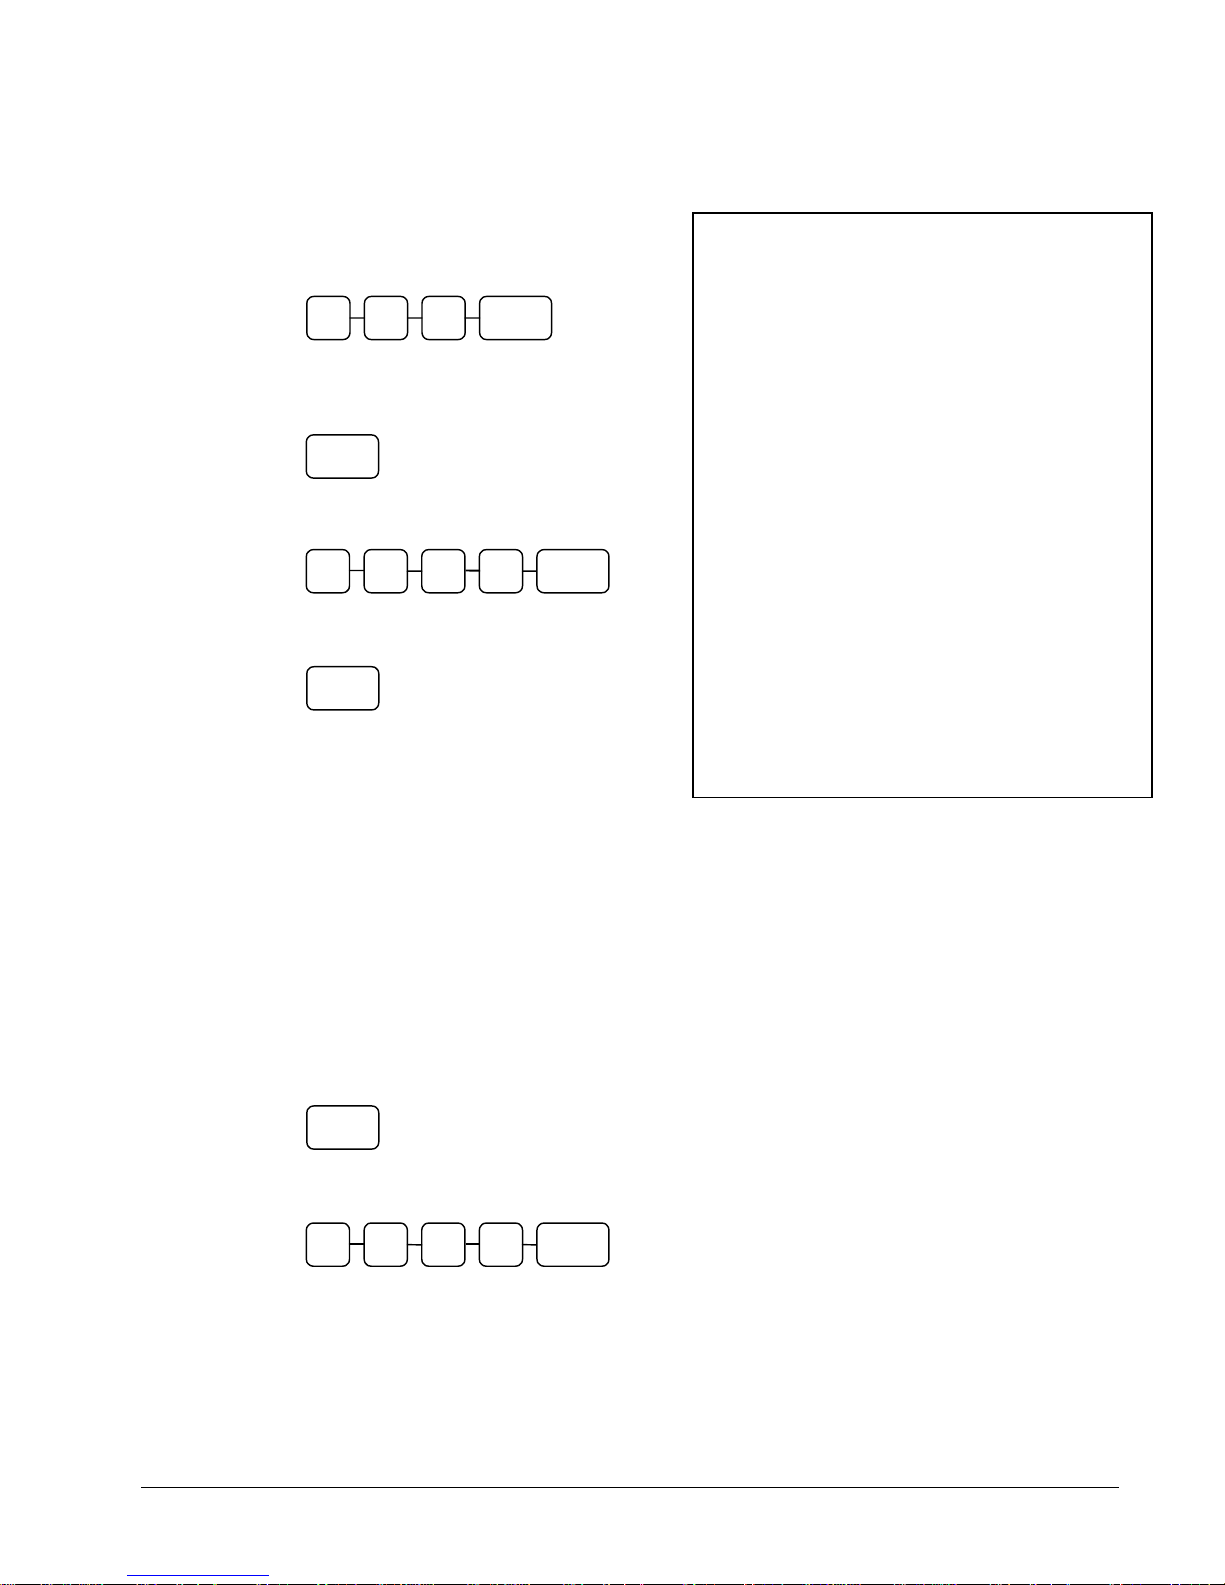
Sample of Hard Check postings printed on an optional
Opening an Account
1. Enter the number of the account and press the
CHECK # key. You may be required to turn
the key lock to the MGR position.
CHECK# 3 1 2
Accepting an Advance Payment
2. Press the PAYMENT key.
PAYMENT
3. Enter the amount of the payment and press the
appropriate tender key; cash, check or charge.
0 0 0 CHECK 5
4. Press the SERVICE key to finalize and store
the balance.
SERVICE
Posting New Charges
5. Enter the number of the account and press the
CHECK # key.
6. Enter items purchased.
printer:
DATE 12/01/1999 WED
CHECK #
PBAL $0.00
PAYMENT $50.00
CHECK $50.00
SERVICE $0.00
BFWD
No.000017 REG 01 ETHAN TIME 09:15
DATE 12/01/1999 WED
PBAL $50.00
ROOM $75.00
SERVICE $75.00
BFWD
No.000019 REG 01 ETHAN TIME 09:47
DATE 12/01/1999 WED
PBAL $25.00
CHANGE $5.00
TENDER $30.00
CASH $25.00
SERVICE $0.00
BFWD
No.000021 REG 01 ETHAN TIME 10:16
#123
-50.00
25.00
$0.00
7. Press the SERVICE key to finalize and store
the balance.
Accepting an Overpayment and
Issuing Change
8. Enter the number of the account and press the
CHECK # key.
9. Press the PAY TEND key.
PAY
TEND
10. Enter the amount of the payment and press the
appropriate tender key; cash, check or charge.
0 0 0 CASH 3
11. Press the SERVICE key to finalize and store
the balance.
ER 5200/5240 Electronic Cash Register Operations • 63
Page 66
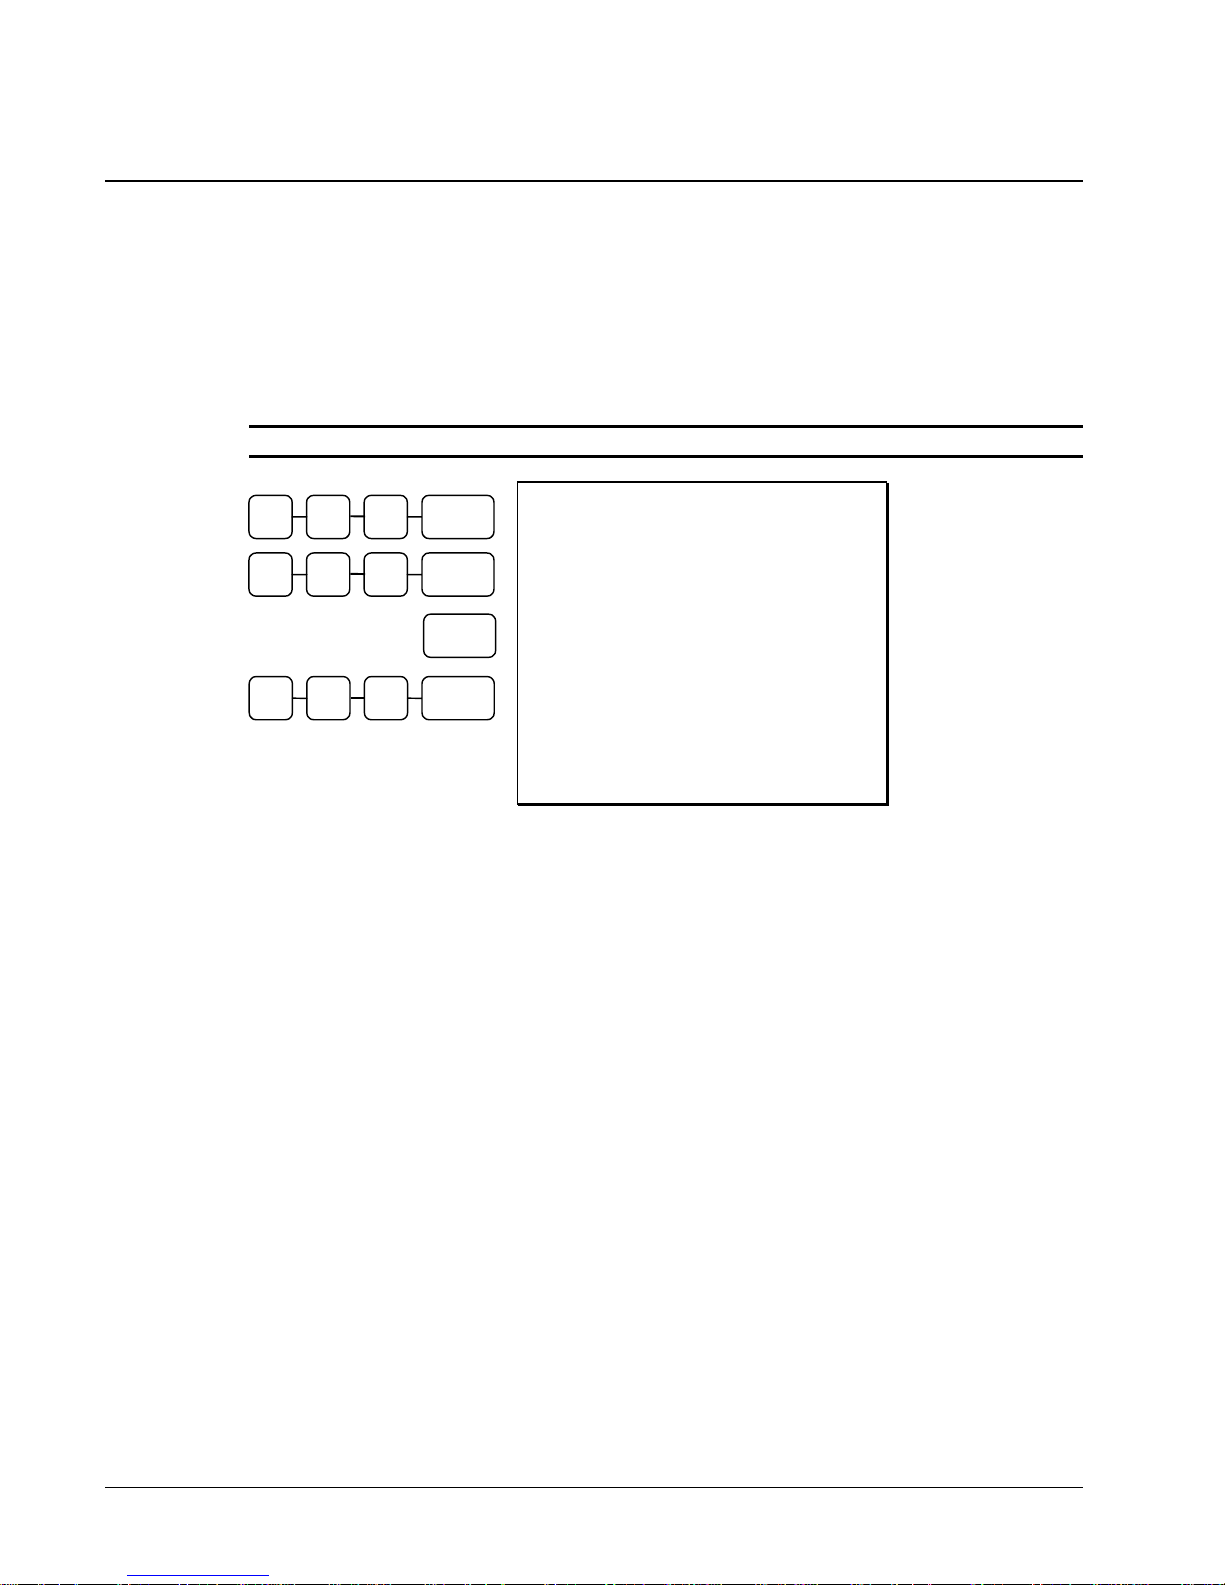
Currency Conversion
If you normally accept currency from a neighboring nation, you can program the Samsung ER5200/5240 to convert the subtotal of a sale to the equivalent cost in the foreign currency. Four foreign
currency conversion keys are available. See "Function Key Assignment Programming" on page 81 to
place currency conversion keys on the keyboard. You also need to program the conversion factor. For
example, if the US dollar (home currency) is worth 1.3720 Canadian dollars (foreign currency), the
conversion factor is 1.3720. See "Instructions for Currency Conversion Rate - Program 90" on page
123 to set a conversion rate.
Note: The change due is computed in home currency!
1 0 0 P L U #4
2 0 0 PLU #4
C/CONV
5 0 0 CASH
DATE 08/15/2002 SUN TIME 03:15
PLU1 $1.00
PLU4 $2.00
TOTAL $3.00
Currency
Conversion
Transaction
CONV1 @5.00
CHANGE RATE #1.3720
HOME AMT $3.64
CHANGE $0.64
CLERK 1 No.000001 00001
64 • Operations ER 5200/5240 Electronic Cash Register
Page 67

Food Stamp Operations
The Samsung ER-5200/5240 can be set up to sort food stamp eligible merchandise and accept food
stamp payments. See "Function Key Assignment Programming" on page 81 to place the necessary
function keys (F/S SHIFT, F/S SUB, F/S TEND) on the keyboard. You will also need to set food
stamp eligibility status for each open or preset PLU (see "Program 100 - PLU Status Programming" on
page 95.)
If necessary, you can use the F/S SHIFT key to shift the pre-programmed eligibility
status for any item as it is entered. For example, while produce is normally food stamp
eligible, certain produce department items, such as birdseed, cannot be paid for with food
stamps. In this case, program the produce PLU as food stamp eligible, then press F/S
SHIFT before registering a non-eligible produce item.
If a customer chooses to pay with food stamps, press the F/S SUB key to display a total of
food stamp eligible merchandise.
Tender food stamp payments into the F/S TEND key. Because food stamp currency is
issued in whole dollar amounts, the tender must be entered in whole dollar units. Change
less than $1 is given in cash, or applied to non-food stamp eligible items.
F/STAMP
SHIFT
1 2 9 PLU #4
1 0 0 PLU #4
F/STAMP
SBTL
5 0 0
1 0 0 CASH
F/STAMP
TEND
DATE 08/15/2002 SUN TIME 03:15
PLU1 F $1.29
PLU4 $1.00
TOTAL $2.29
F/S TOTAL $1.29
F/D TEND 5.00
Food Stamp
Payment
Transaction
F/S CRT AMT $0.71
TOTAL $0.29
CASH $1.00
CHANGE $0.71
FD/S CHANGE $3.00
CLERK 1 No.000001 00001
ER 5200/5240 Electronic Cash Register Operations • 65
Page 68
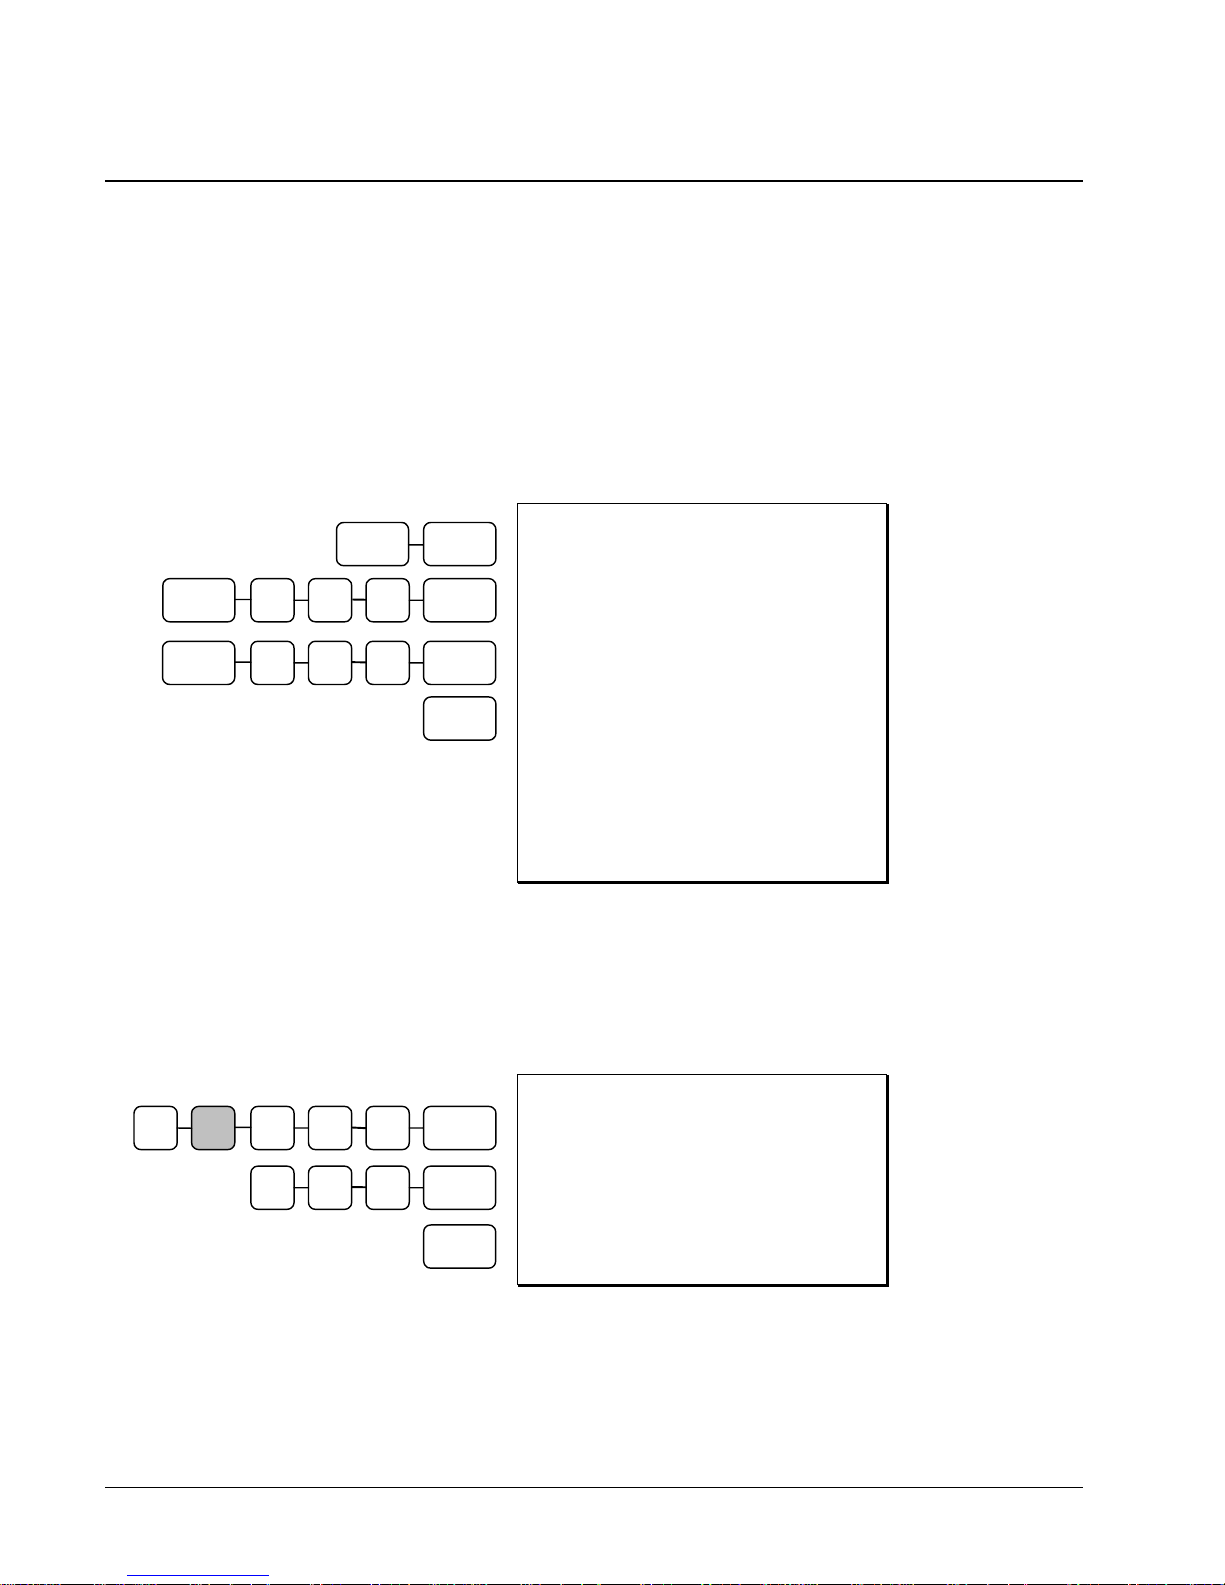
Scale Operations
The Samsung ER-5200/5240 can be interfaced to an optional load-cell scale, allowing direct entry of an
item's weight by using the SCALE key. If you attempt an entry into a PLU that has been programmed
to require scale entry, (see "Program 100 - PLU Status Programming" on page 95) an error tone will
sound and you will be prompted to make a scale entry.
Direct Scale Entry
Place a product on the scale and press the SCALE key to display the weight on the cash register. Then
make the appropriate PLU entry.
1 0 0 PLU #4 SCALE
5 4 0 PLU SCALE
PLU #3 SCALE
CASH
DATE 08/15/2002 SUN TIME 03:15
1.50 lb @ 3.00
PLU3 T12 $4.50
Preset Keyboard
PLU
1.75 lb @ 1.00
PLU 4 $1.75
1.25 lb @ 2.50
PLU540 $3.13
Open Keyboard
PLU
TAX1 $0.23
TAX2 $0.45
Preset PLU
TOTAL $10.06
CASH $10.06
CLERK 1 No.000001 00001
Manual Weight Entry
Operators can make manual weight entries if the item has been programmed to accept them (see
"Program 100 - PLU Status Programming" on page 95). You must use the decimal key to enter
fractional manual weights.
.
1
5 0 0 SCALE
DATE 08/15/2002 SUN TIME 03:15
1.50 lb @ 1.00
1 0 0 PLU #4
PLU4 $1.50
TOTAL $1.50
CASH
CASH $1.50
CLERK 1 No.000001 00001
66 • Operations ER 5200/5240 Electronic Cash Register
Manual Scale
Entry
Page 69
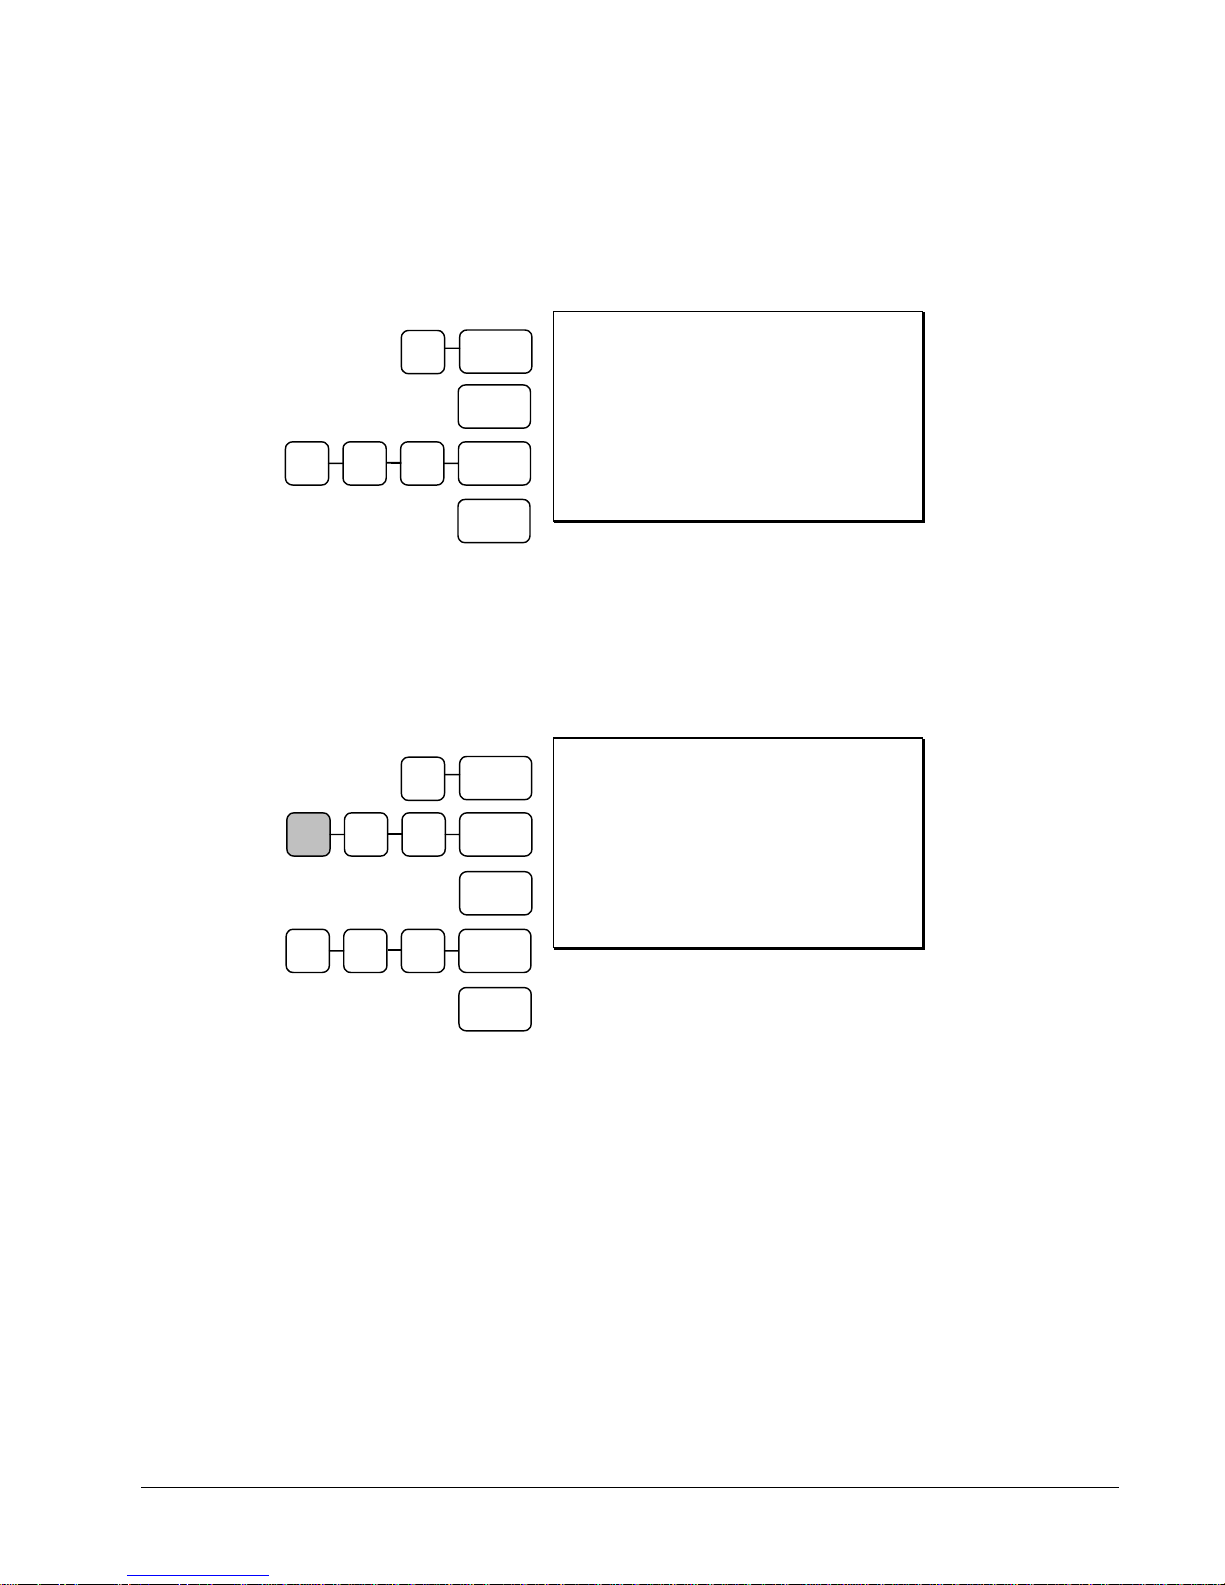
Scale With Automatic Tare Entry
Place a product on the scale, enter the preprogrammed tare number and press the SCALE key. The
weight, less the tare, will appear on the cash register display. Then make the appropriate PLU entry.
TARE
1
SCALE
DATE 08/15/2002 SUN TIME 03:15
1.50 lb @ 1.00
PLU4 $1.50
Automatic Tare
Entry
TOTAL $1.50
1 0 0 PLU #4
CASH $1.50
CLERK 1 No.000001 00001
CASH
Scale With Manual Tare Entry
Tare #5 can be used to manually enter tare weights. Place a product on the scale, enter 5 and press the
SCALE key. Enter the tare weight (using the decimal key), and press the SCALE key. The tare
weight will display. Press the SCALE key again, and the weight, less the tare will display. Then make
the appropriate PLU entry.
TARE
5
.
5 2 TARE
SCALE
1 0 0 P L U #4
CASH
DATE 08/15/2002 SUN TIME 03:15
1.50 lb @ 1.00
PLU4 $1.50
Manual Tare
Entry
TOTAL $1.50
CASH $1.50
CLERK 1 No.000001 00001
ER 5200/5240 Electronic Cash Register Operations • 67
Page 70

68 • Operations ER 5200/5240 Electronic Cash Register
Page 71

Management Functions
Introduction
All Management Functions take place with the control lock in the X position. In this way only those
with the correct key will have access to these functions. Some register operations may be programmed
to require the control lock in the X position in order to operate. All repor ts require a key that will
access the X or Z position.
ER 5200/5240 Electronic Cash Register Management Functions • 69
Page 72
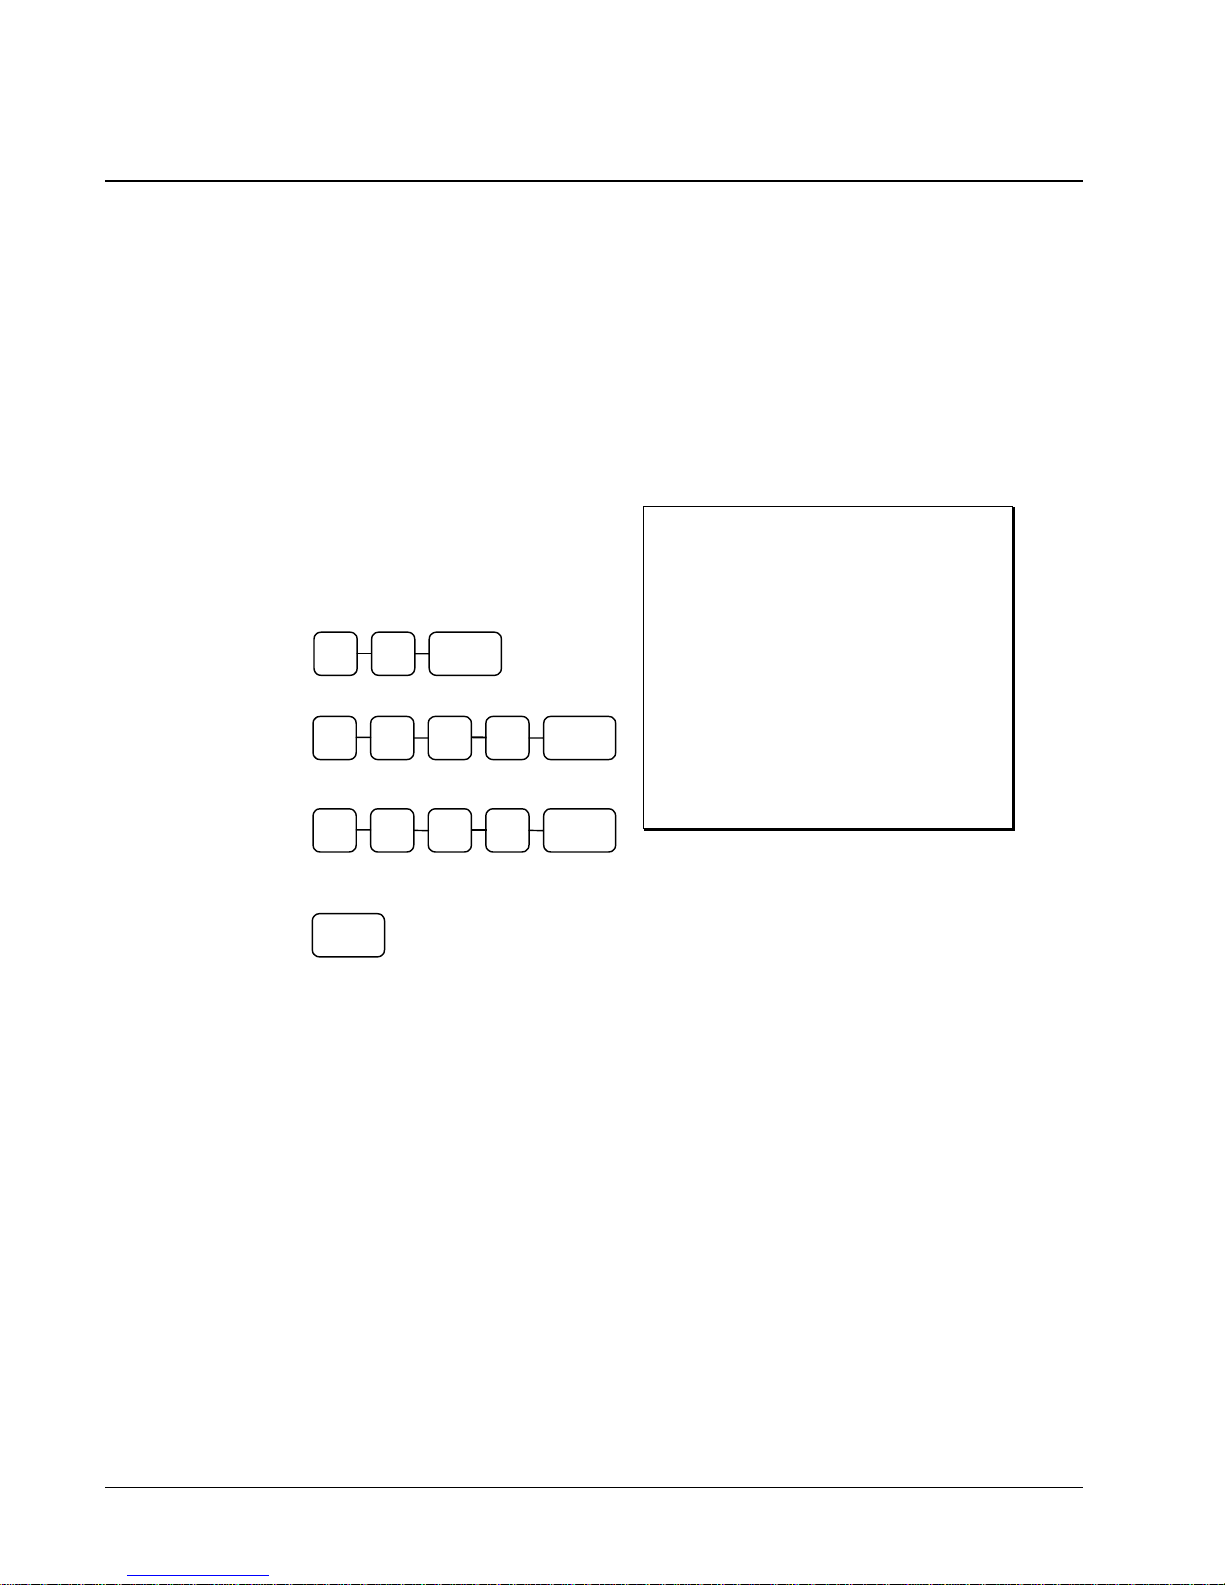
Cash Declaration
If compulsory cash declaration is required, you must declare the count of the cash drawer prior to
taking X or Z financial and clerk reports.
You can enter the cash drawer total in one step, or to facilitate the counting of the cash drawer, you can
enter each type of bill/coin and checks separately and let the register act as an adding machine. You
can also use the X/TIME key to multiply the denomination of currency times your count.
Either way you choose to enter cash, the register will compare your declaration with the expected cash
and check in drawer totals and print the over or short amounts on the report.
For example:
1. Turn the control lock to the X or Z
position (depending upon the type of
report you are taking.)
2. Enter 90 and press the SBTL key.
9 0 SBTL
3. Enter the total of cash.
4. Enter the total of checks.
DATE 08/15/2002 SUN TIME 03:15
*** CASH DECLARATION ***
CASH $98.76
CHECK $20.00
INPUT AMT $118.76
DRAWER TTL $23.53
8 7 6 CASH 9
0 0 0 CHECK 2
DIFFERENCE -95.23
CLERK 1 No.00001 00000
5. Press the CASH key to total the
declaration.
CASH
70 • Management Functions ER 5200/5240 Electronic Cash Register
Page 73
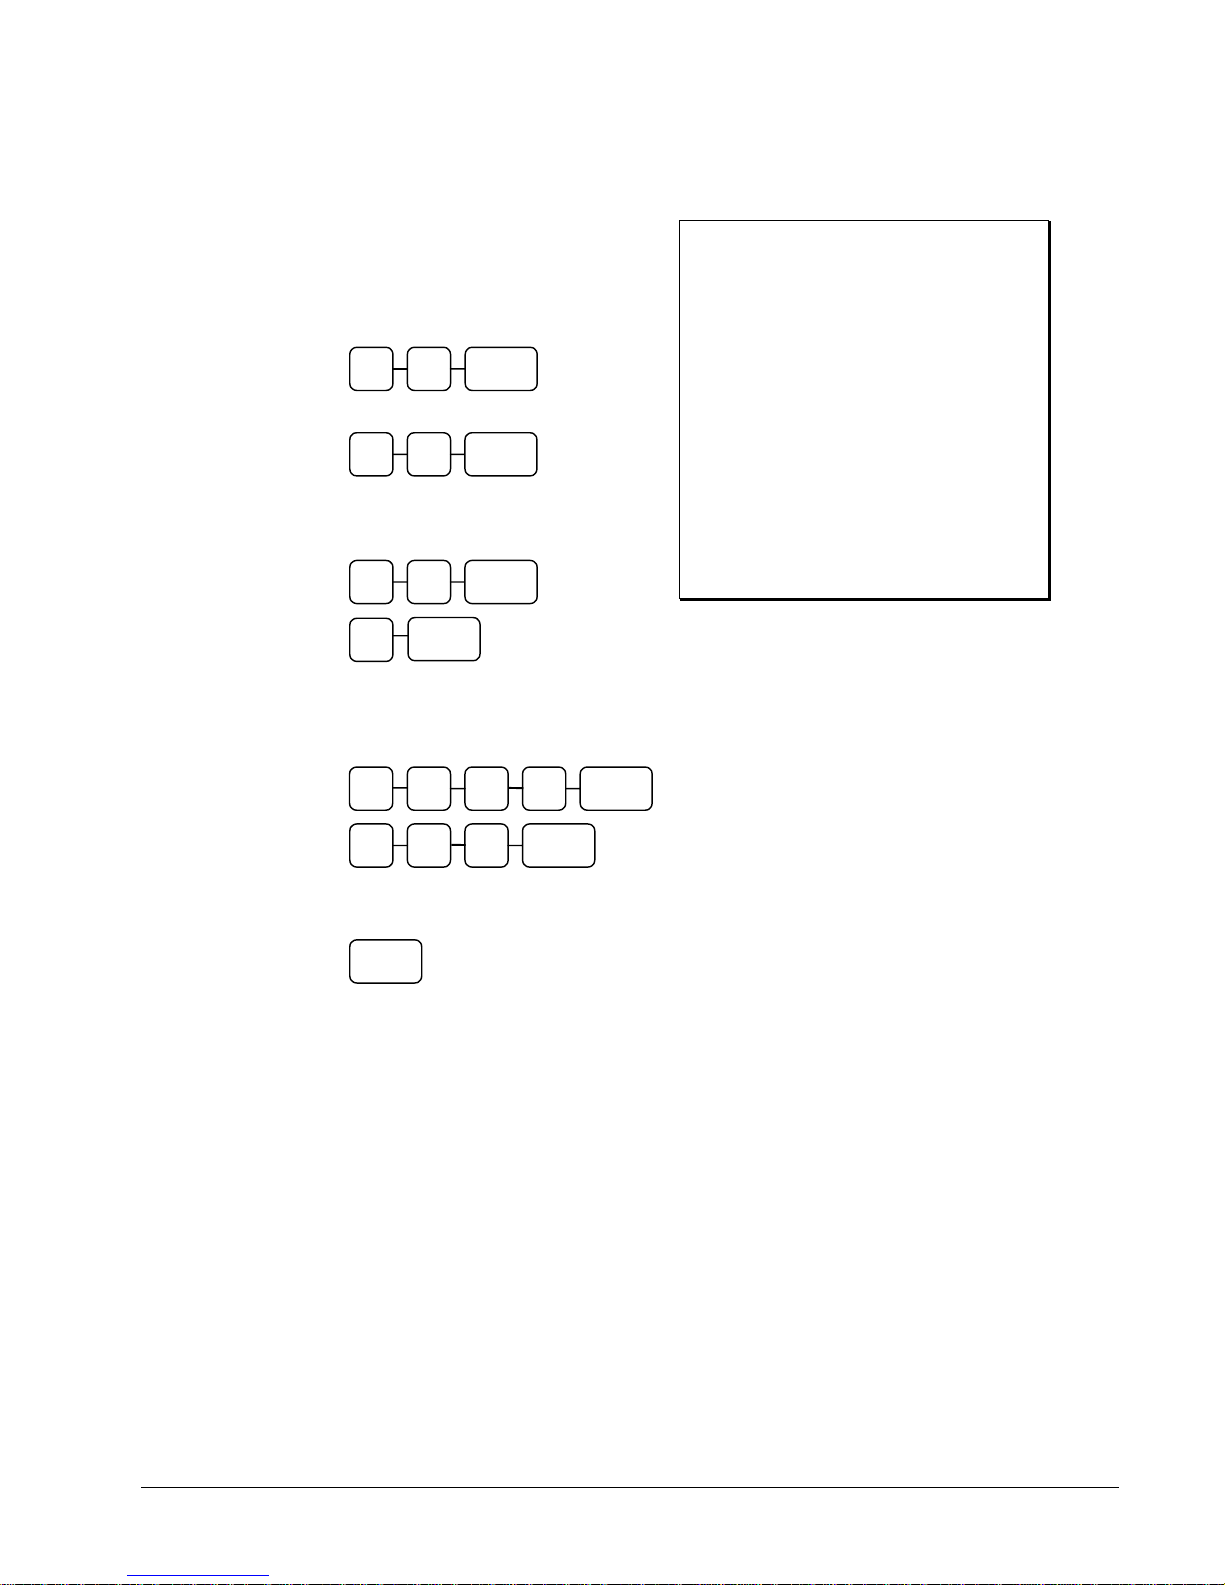
Or, enter each denomination separately:
1. Turn the control lock to the X or Z
position (depending upon the type of
report you are taking.)
2. Enter 90 and press the SBTL key.
9 0 SBTL
3. Enter the total of pennies:
7 6 CASH
4. If you wish you can multiply the count
times the denomination. Enter, for
example:
3 0 X/TIME
CASH
5
5. Enter the remaining cash separately by
denomination.
6. Enter each check:
2 0 0 CHECK 1
DATE 08/15/2002 SUN TIME 03:15
*** CASH DECLARATION ***
CASH $0.76
CASH $1.50
CHECK $12.00
CHECK $8.00
INPUT AMT $22.26
DRAWER TTL $23.53
DIFFERENCE -1.27
CLERK 1 No.00001 00000
8 0 0 CHECK
7. Press the CASH key to total the
declaration.
CASH
ER 5200/5240 Electronic Cash Register Management Functions • 71
Page 74

System Reports
System reports are divided into two basic categories:
X reports, which read totals without resetting
Z reports, which read totals and reset them to zero
Most reports are available in both categories. Some reports, such as the Cash-in-Drawer report and the
From-To PLU report are available only as X reports.
Some reports also provide identical but separate period to date reports. These reports maintain a
separate set of totals which may be allowed to accumulate over a period of days, weeks, months, or
even years. X2 reports read period to date totals without resetting, and Z2 reports read period to date
totals and reset them to zero. Period to date totals are updated each time a Z1 report is completed.
A complete list of available reports is presented in a chart on the following page.
See “Sample Reports” on page 165 for an example of each report.
Registers programmed with pop-up clerks must be signed on in the REG control lock position prior to
taking reports.
Running a Report – General Instructions
1. Refer to the “Report Table” on page 36.
2. Select a report type and the report mode.
3. Turn the control lock to the position indicated.
4. Enter the key sequence for the report you have selected.
72 • Management Functions ER 5200/5240 Electronic Cash Register
Page 75
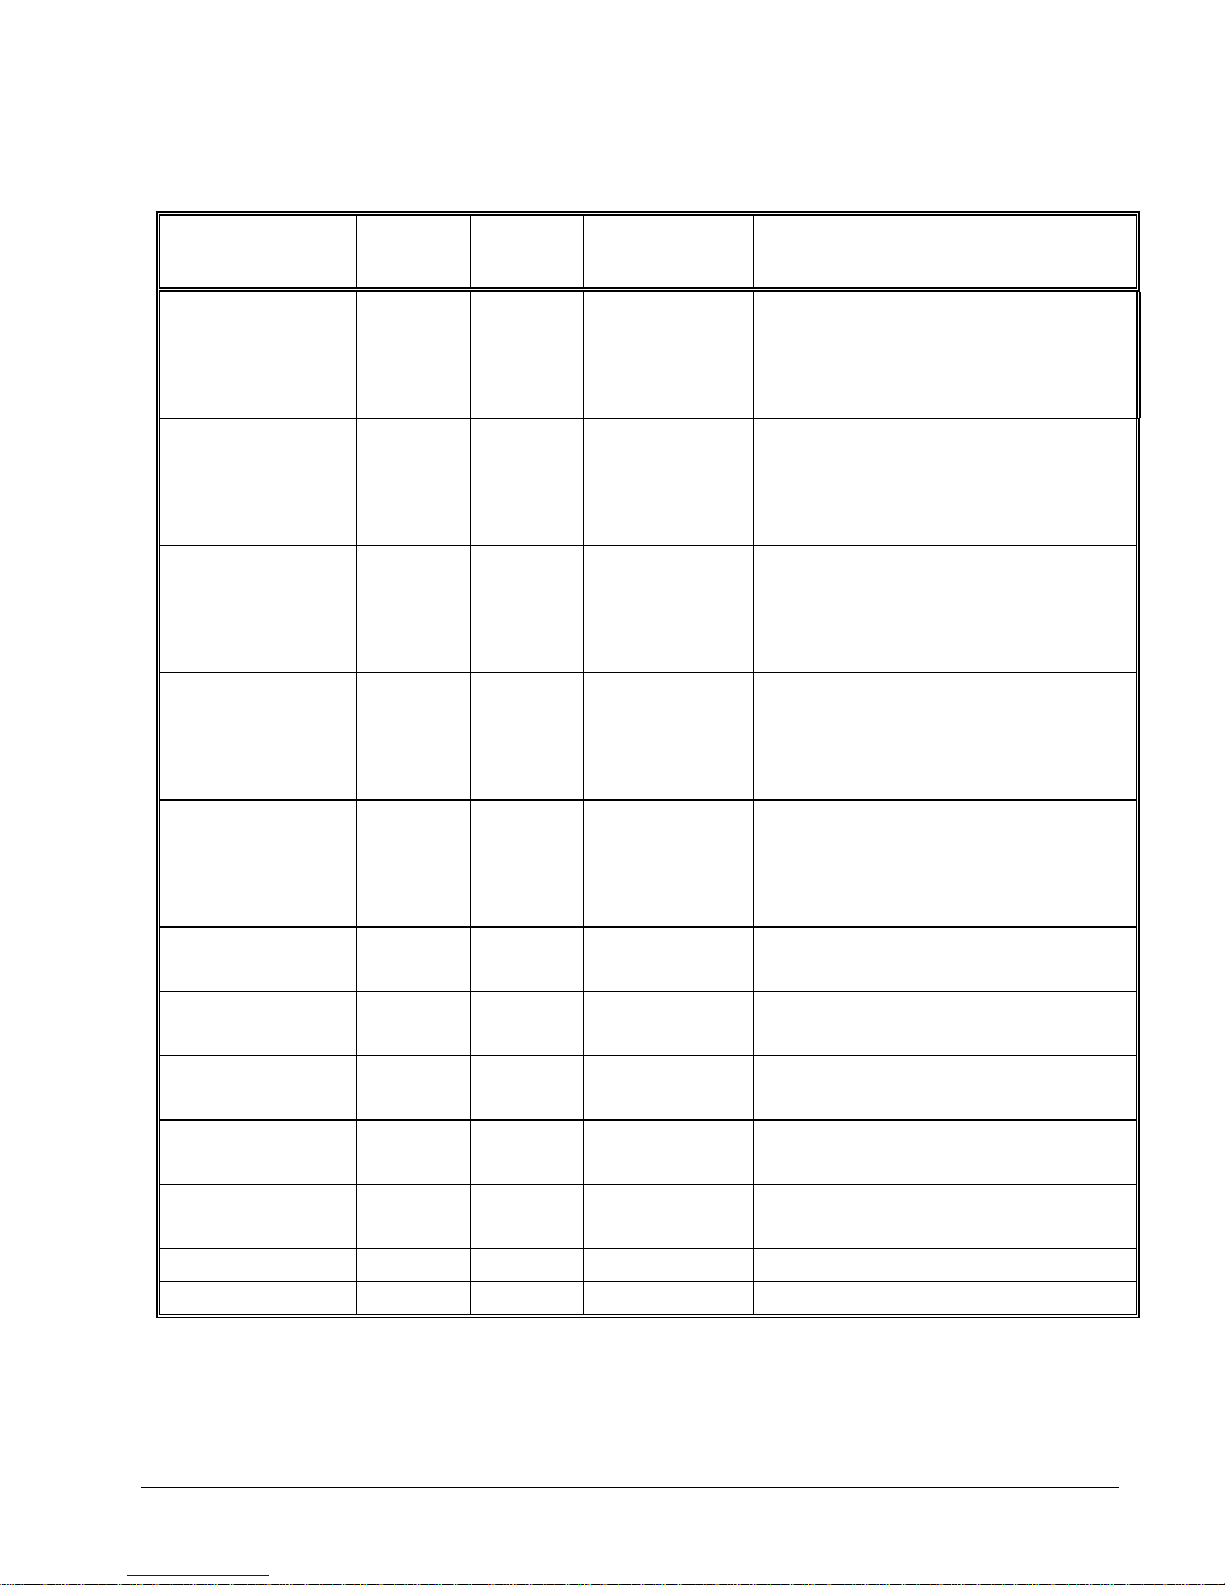
Report Type
Financial
Time
All PLU
All Clerk
Group
All STOCK
Daily Sales
Individual Clerk
Report
Open
Table/Check
From/To PLU
From/To STOCK
DRAWER TOTAL
Report Table
Report
Number
1 X X
Z Z
X2 X
Z2 Z
2 X X
Z Z
X2 X
Z2 Z
3 X X
Z Z
X2 X
Z2 Z
4 X X
Z Z
X2 X
Z2 Z
5 X X
Z Z
X2 X
Z2 Z
6 X X
Z Z
8 X2 X
Z2 Z
9 X X
X2 X
11 X X
Z Z
13 X X
X2 X
14 X X
111 X X
Report
Mode
Control Lock
Position
Key Sequence
1 – SBTL
1 – SBTL
201 – SBTL
201 – SBTL
2 – SBTL
2 – SBTL
202 – SBTL
202 – SBTL
3 – SBTL
3 – SBTL
203 – SBTL
203 – SBTL
4 – SBTL
4 – SBTL
204 – SBTL
204 – SBTL
5 – SBTL
5 – SBTL
205 – SBTL
205 – SBTL
6 – SBTL
6 – SBTL
208 – SBTL
208 – SBTL
9 – SBTL - # - CLERK - # - CLERK
209 – SBTL - # - CLERK - # - CL ERK
11 – SBTL
11 – SBTL
13-SBTL XXXX – PLU – XXXX – PLU
213-SBTL XXXX – PLU – XXXX – PLU
14-SBTL XXXX –PLU – XXXX – PLU
111-SBTL
ER 5200/5240 Electronic Cash Register Management Functions • 73
Page 76

74 • Management Functions ER 5200/5240 Electronic Cash Register
Page 77
S-Mode Programming
Overview
A separate key, marked “C” will access the hidden S key lock position one position clockwise from the
P key lock position.
Caution: For information security, distribute the “C” key only to owners or managers who will
need to use these procedures.
The following secure procedures are performed in the S-Mode.
Self Tests
Clearing Memory
EPROM Information
Memory Allocation
Function Key Assignment Programming
ER-5240 Keyboard Expansion
RS-232 Communication Option Programs
ER 5200/5240 Electronic Cash Register S-Mode Programming • 75
Page 78
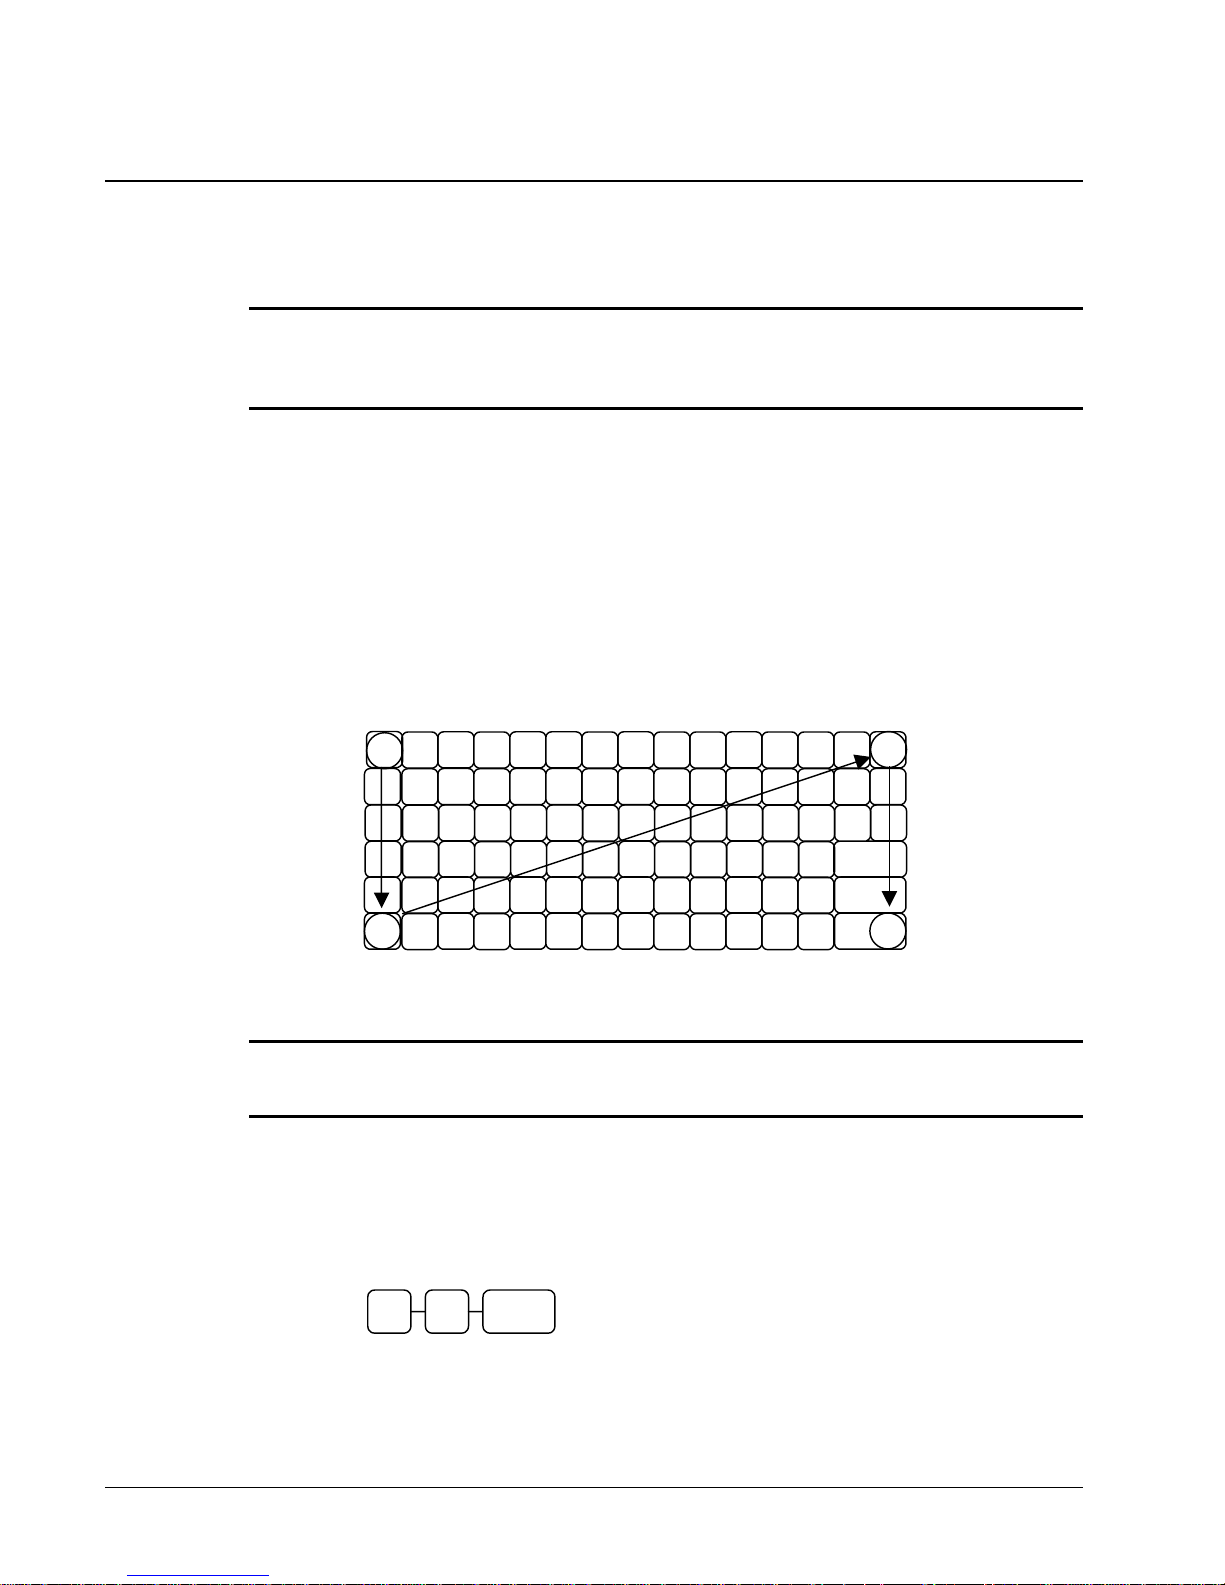
Clearing Memory
Before you use your ER-5200/5240 for the first time, you must perform a memory all clear to insure
that all totals and counters are cleared and that the default program is installed.
CAUTION: The procedures described in this area are security sensitive. Clearing the
ER-5200/5240 memory after the register is put into service will erase all programming as well as
totals and counters. Do not share this information with unauthorized users and distribute the
special SERVICE-Mode key only to those you may want to perform these functions.
Memory All Clear
1. Turn the power switch located on the right side of the register to the OFF position.
2. Turn the control lock to the S position.
3. Press and hold the key position where the CHECK key is located on the default keyboard
layout.
4. Continue to hold the CHECK key while turning the power switch to the ON position.
5. Press the upper left key of the keyboard, then the lower left key, then the upper right key,
and finally press the lower right key.
1
2
6. After a short delay, the printer will print the message: "RAM ALL CLEAR OK !"
Memory is cleared and the default program is installed.
Caution: After memory is cleared, the default program will set the register in the 15 key
configuration. If you are using 40 NLU keys, see “ER-5240 Keyboard Expansion” on page 82 to
reset the 40 key configuration.
3
4
Clear All Totals and Counters
1. Turn the control lock to the S position.
2. Enter 20 and press the SBTL key.
2 0 SBTL
76 • S-Mode Programming ER 5200/5240 Electronic Cash Register
Page 79
Clear Grand Total
Clear PLU File
Self Tests
1. Turn the control lock to the S position.
2. Enter 30 and press the SBTL key.
3 0 SBTL
1. Turn the control lock to the S position.
2. Enter 40 and press the SBTL key.
4 0 SBTL
Self-tests can be performed to check the functions of the register.
1. Turn the control lock to the S position.
2. Enter the test number from the chart below and press the SBTL key.
SBTL
Test Key Sequence Results/Instructions
Printer
Display
Keyboard
Mode Lock
RS232C
Endless Printing
10 SBTL
11 SBTL
12 SBTL
13 SBTL
14 SBTL
15 SBTL
The receipt printer generates a printer test pattern.
Displays illuminate a test pattern.
Press any key. The key’s hex value is disp layed. Turn
key lock to end the test.
Turn the mode lock to display the lock position.
Return the key to S to end the test.
Loop back connector must be connected. Displays
“900d” (good) if successful; displays “N0900d” if
unsuccessful.
The receipt prints a sample ticket. The print is
repeated until the key lock is turned.
ER 5200/5240 Electronic Cash Register S-Mode Programming • 77
Page 80
EPROM Information
The ER-5200/5240 register software is loaded in an EPROM (erasable programmable read only
memory). This procedure will provide a receipt with the current version, date and checksum for the
EPROM.
1. Turn the control lock to the S position.
2. Enter 50 and press the SBTL key.
5 0 SBTL
3. After a short delay, the register will print a receipt as in the example below:
DATE 10/15/2002 SUN TIME 08:37
ER-5240 EPROM INFO.
VERSION : 1.9 USA
CHECKSUM : 7AE2/3843
NOVEMBER 19 2002
CLERK 1 No.000001 00001
78 • S-Mode Programming ER 5200/5240 Electronic Cash Register
Page 81
Memory Allocation
The memory allocation program determines how memory is divided to support the following features:
PLUs - you must allocate a minimum of 117 PLUs
Guest Checks – you can allocate a maximum of 100 hard or soft checks
Soft Check Lines – you can allocate a maximum of 50 lines per check
Check Type – select hard or soft checks
NOTE: Using the clerk interrupt feature requires allocation of at least 2 guest checks and sufficient
soft check lines to support the interrupted transaction (i.e. if 20 soft check lines are allocated, a
transaction with up to 20 lines can be interrupted.) See system option flag # 26 to select clerk interrupt
operations instead of table management (check tracking) ope rations.
Memory Calculation Worksheet
Before beginning the memory allocation program, you may wish to complete the following memory
worksheet to verify that the memory variables you wish to use will be accommodated in the
ER-5200/5240 memory. Your memory calculation cannot exceed 67,572 bytes.
Variable Bytes per
PLU 60
Guest Check 294
Lines per Soft Check 32
Total Used
Total Available 67,572
unit
Quantity
x
=
Total
Memory Calculation Example
The default memory allocation is shown below as a calculation example:
Variable Bytes per
unit
PLU 60 900 54,000
Guest Check 294 10 2,940
Lines per Soft Check 32 30 x 10
Total Used 66,540
Total Available 67,572
ER 5200/5240 Electronic Cash Register S-Mode Programming • 79
Default
Quantity
(guest check
quantity)
Total
9600
The total memory used
must be less that the
total memory available
Page 82
Memory Allocation Program
Once you have determined the memory variable you wish to set, you can set them in the memory
allocation program. If you attempt to allocate more options than memory, the message “MEMORY
ALLOCATION SIZE OVER” will print on the receipt and journal.
1. Turn the control lock to the S position.
2. To Allocate Memory, enter 6 0 and press the SBTL key.
SBTL 6
3. Refer to the chart below and enter a digit to represent allocated area and press the
X/TIME key.
4. Enter the Number of the
allocated Memory size. If the check type is soft, enter 0; if the check type is hard, enter 1.
0
X X/TIME
X Allocated Area
PLU
1
CHECK#
2
SOFT CHECK LINES
3
CHECK TYPE : Hard(1), Soft(0)
4
CASH
5. Repeat from step 3 to allocate another area, or press the CASH key to finalize the
program. Upon finalization, the printer will print the new allocation.
CASH
Memory Allocation Program Scan
You can read the current memory allocation with the following sequence:
1. Turn the control lock to the S position.
2. Enter 6 0, press the SBTL key and then press the CASH key.
SBTL 6
0
DATE 10/15/2002 SUN TIME 08:37
================================
TTL AVALI : 67572
TTL USED : 66540
ALLOCATED PLU IS :900
ALLOCATED CHECK IS :10
ALLOCATED CHK LINE IS :30
CHECK IS :HARD(N),SOFT(Y):Y
CLERK 1 No.000001 00001
CASH
80 • S-Mode Programming ER 5200/5240 Electronic Cash Register
Page 83
Function Key Assignment Programming
Function keys may be relocated, inactivated or changed with this program. For example, you may wish
to place functions, such as PREVIOUS BALANCE and SERVICE, which are not placed on the
default keyboard. Or perhaps, you may wish to remove a function, suc h as CANCEL, for security
reasons.
Please note the following limitations:
If you assign a duplicate of a function code, the duplicate will function exactly as the
original - you will not get separate totals and counters on reports for the duplicated key.
You can reassign keys only in locations that are programmable. See "Keyboards" on page
16, where the key locations that may be programmed are identified.
To Assign a Function Key to a Location
1. Turn the control lock to the S position.
2. Enter 7 0 and press the SBTL key.
SBTL 7
0
3. Refer to page 82 to find the code for the key you wish to assign. Enter the code and press
the location you wish to program. Repeat this step to assign another key.
Key Code
Key
Location
4. Press the CASH key to finalize ke y assignment programming.
CASH
ER 5200/5240 Electronic Cash Register S-Mode Programming • 81
Page 84
Function Key Codes
Code Function Code Function Code Function Code Function
1 NLU 1 144 CHARGE 3 170 MACRO 3 196 SERVICE
117 NLU 117 145 CHARGE 4 171 MACRO 4 197 TABLE #
120 Numeric 1 146 CHARGE 5 172 MACRO 5 198 TARE
121 Numeric 2 147 CHARGE 6 173 MACRO 6 199 TAKE OUT
122 Numeric 3 148 CHARGE 7 174 MACRO 7 200 TAX EXEMPT
123 Numeric 4 149 CHARGE 8 175 MACRO 8 201 TAX SHIFT 1
124 Numeric 5 150 CHECK CASHING 176 MACRO 9 202 TAX SHIFT 2
125 Numeric 6 151 CHECK ENDORSE 177 MACRO 10 203 TAX SHIFT 3
126 Numeric 7 152 CHECK 178 MDSE RETURN 204 TAX SHIFT 4
127 Numeric 8 153 CHECK # 179 MODIFIER 1 205 TIP
128 Numeric 9 154 CLEAR 180 MODIFIER 2 206 VOID
129 Numeric 0 155 CLERK 181 MODIFIER 3 207 WASTE
130 Numeric 00 156 CURR. CONV. 1 182 MODIFIER 4 208 VALIDATION
131 DECIMAL 157 CURR. .CONV. 2 183 MODIFIER 5 209 RCPT ON/OFF
132 #/NS 158 CURR. CONV. 3 184 P/BAL 210 DETAIL FEED
133 %1 159 CURR. CONV. 4 185 PAID OUT 1 211 INACTIVE
134 %2 160 DRIVE THRU 186 PAID OUT 2 212 NON ADD
135 %3 161 EAT-IN 187 PAID OUT 3 213 FINALIZE
136 %4 162 ERROR CORR 188 RECT FEED 214 PAYMENT
137 %5 163 F/S SHIFT 189 PRINT CHECK 215 PAY TEND
138 XTIME 164 F/S SUB 190 PROMO
139 ADD CHECK 165 F/S TEND 191 REC ON ACCT 1
140 CANCEL 166 GUEST # 192 REC ON ACCT 2
141 CASH 167 PLU 193 REC ON ACCT 3
142 CHARGE 1 168 MACRO 1 194 SBTL
143 CHARGE 2 169 MACRO 2 195 SCALE
82 • S-Mode Programming ER 5200/5240 Electronic Cash Register
Page 85
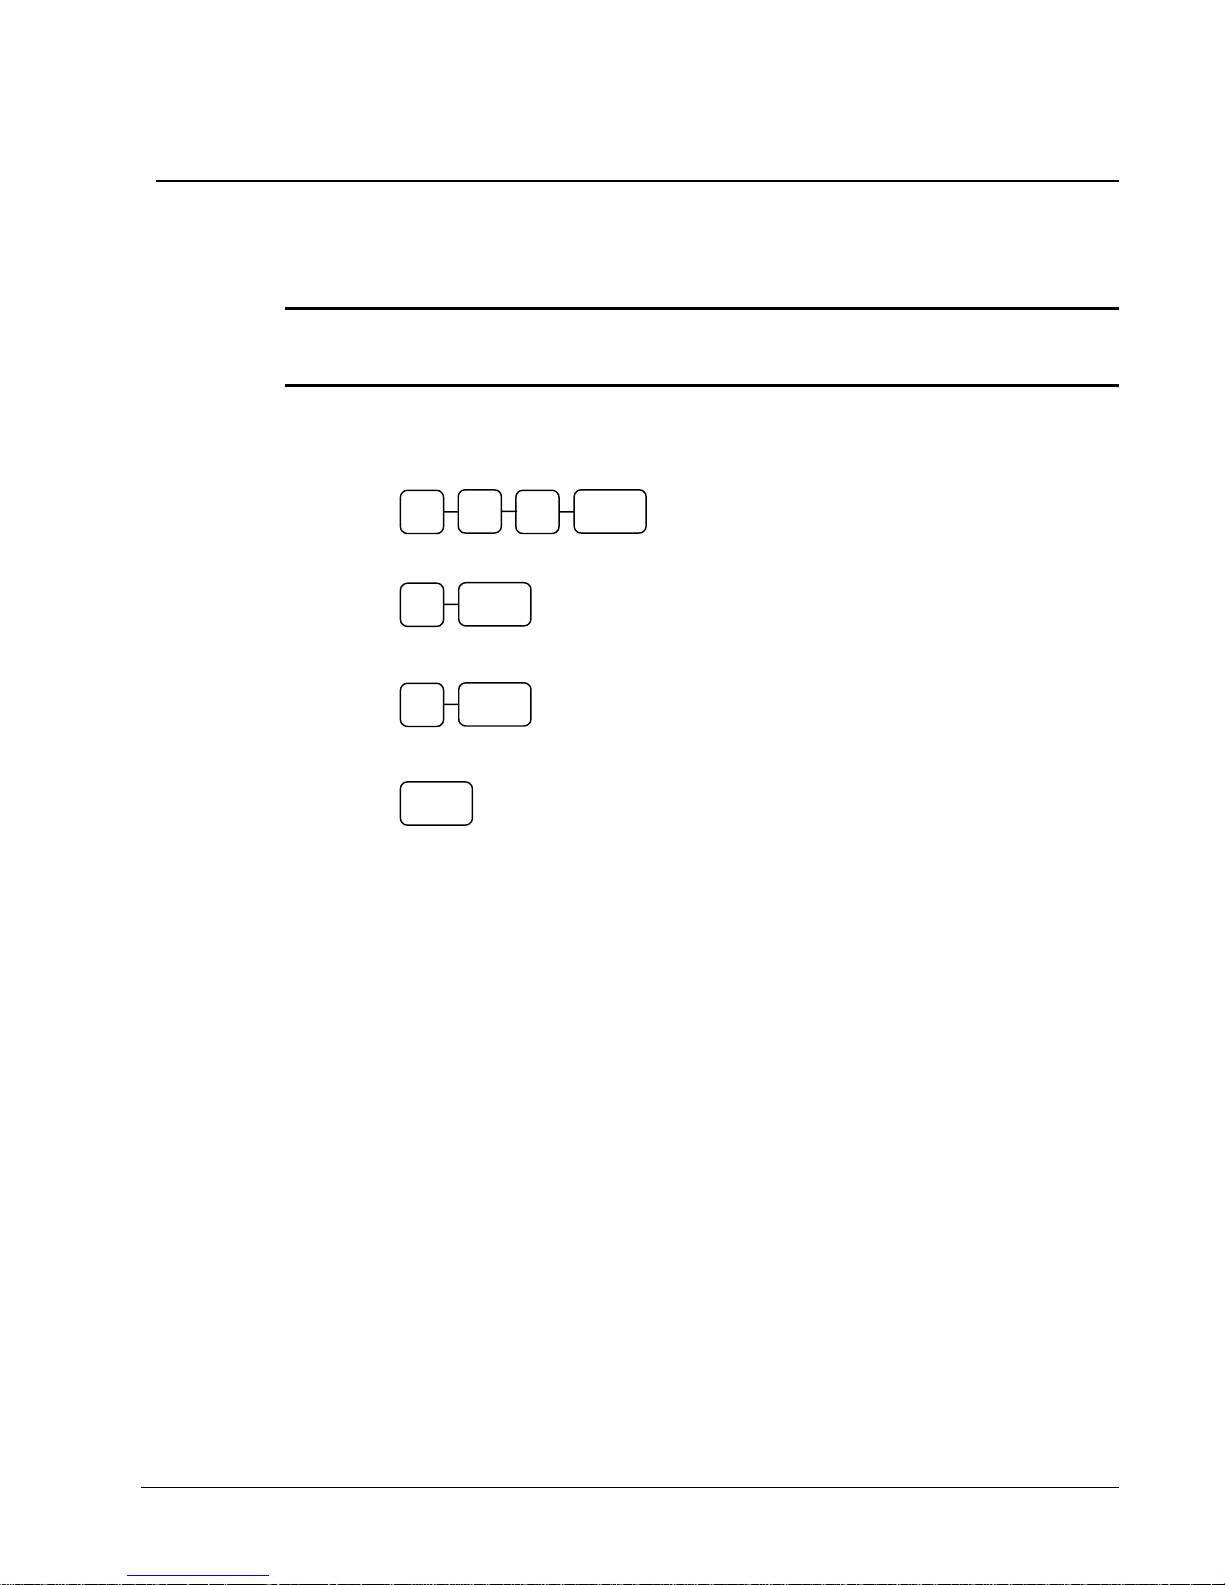
ER-5240 Keyboard Expansion
The default ER-5240 can be expanded from 15 to 40 NLU keys. This program sequence must be
performed to activate the expanded keyboard.
Caution: After memory is cleared, the default program will set the ER-5240 register in the 15
key configuration. If you are using 40 NLU keys, you must use this program to reset the 40 key
configuration.
1. Turn the control lock to the S position.
2. Enter 9 0 0 and press the SBTL key.
SBTL 0
9
3. For 15 NLU keys, enter 0 and press the CASH key.
0
0
CASH
For 40 NLU keys, enter 1 and press the CASH key.
CASH
1
4. Press the CASH key to finalize.
CASH
ER 5200/5240 Electronic Cash Register S-Mode Programming • 83
Page 86
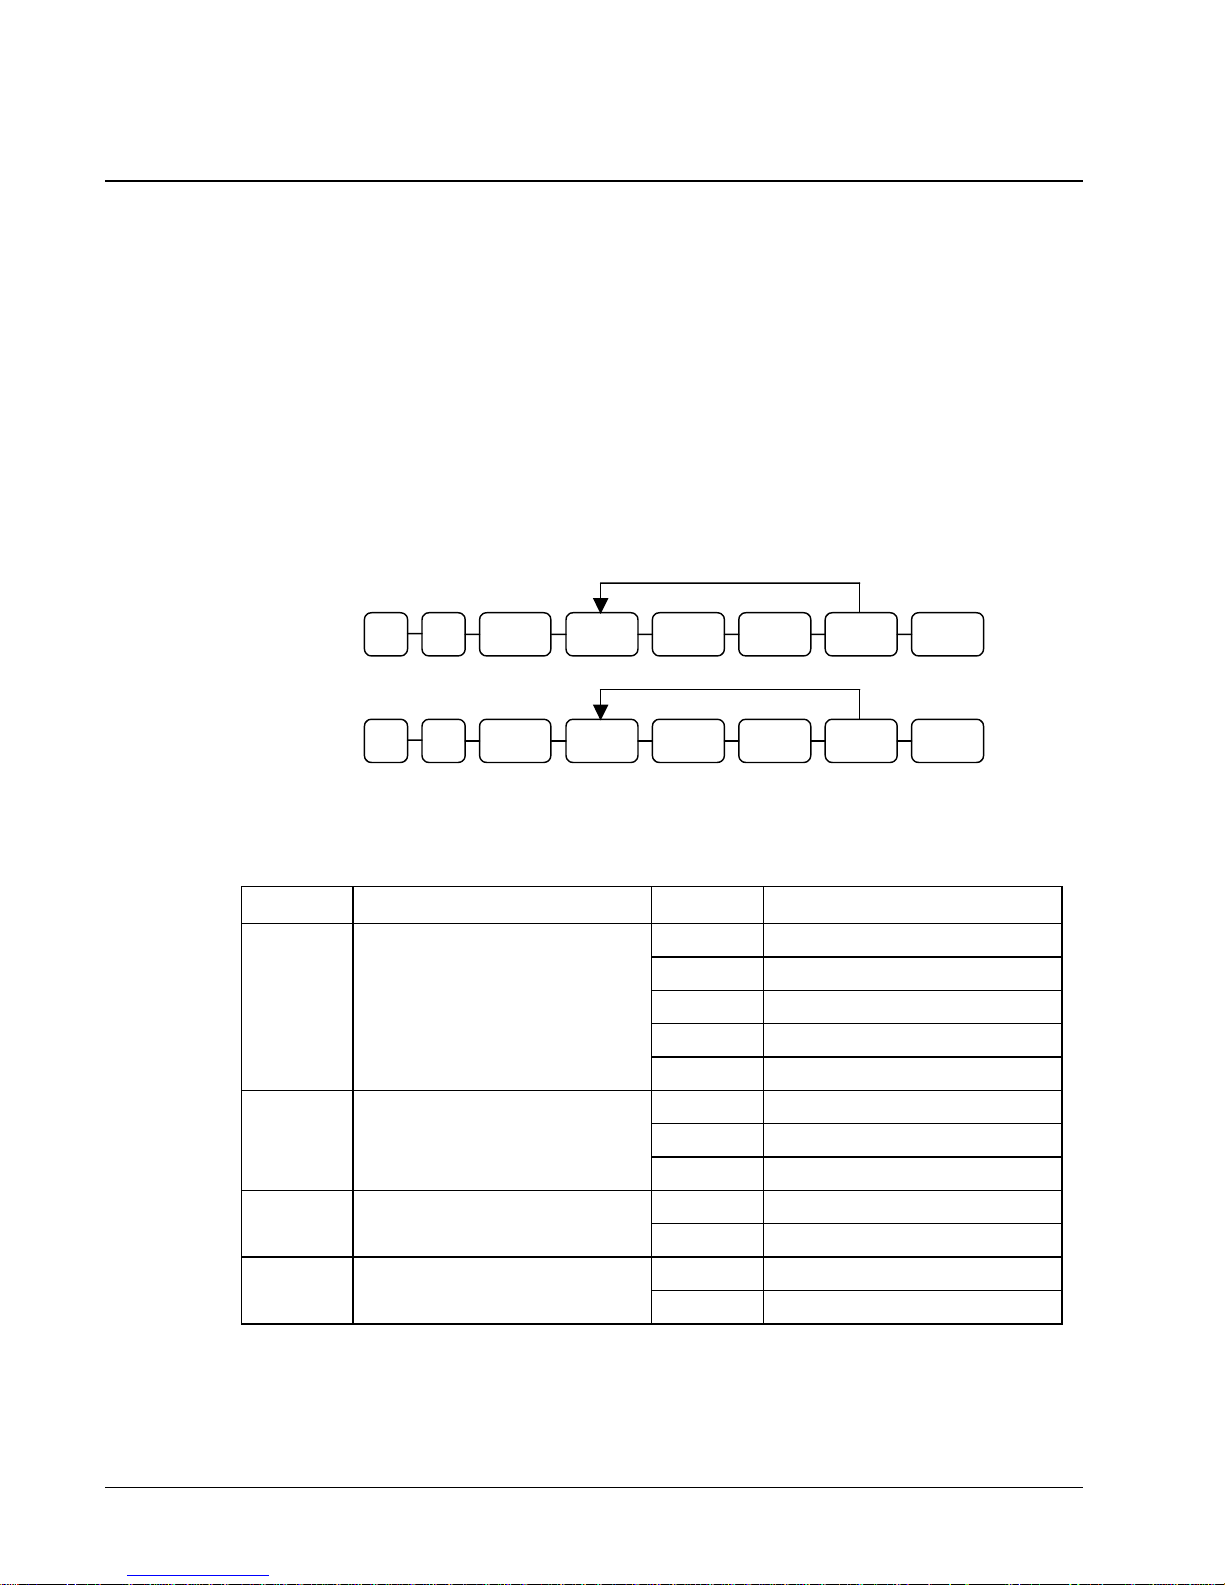
RS-232 Communication Option Programs
You must define the device that is attached to the RS-232C communications port, and the options for
the device. A second RS-232C port is available as a hardware option.
1. Turn the control lock to the S position.
2. Enter 8 0 (enter 8 1 to program the second port) and press the SBTL key.
3. Refer to the chart RS-232C option chart that follows and enter the number of the option
(N1) you wish to program and press the X/TIME key.
4. Enter the value (N2) that represents your selection and press the CASH key.
5. Repeat from step 2 for any additional options you wish to program.
6. Press CASH to exit the program.
Port 1
(standard)
Port 2
(option)
RS-232 Option Chart
Address Option Value Selection
1
2
3
4
Baud Rate
Parity
Data Bits
Stop Bits
Repeat for another
Index
XTIME OPTION SBTL 0 8 CASH VALUE CASH
XTIME OPTION SBTL 1 8 CASH VALUE CASH
0
1
2
3
4
0
1
2
0
1
0
1
9600 BPS
1200 BPS
2400 BPS
4800 BPS
19200 BPS
NONE
ODD
EVEN
8 BITS
7 BITS
1 BIT
2 BIT
84 • S-Mode Programming ER 5200/5240 Electronic Cash Register
Page 87
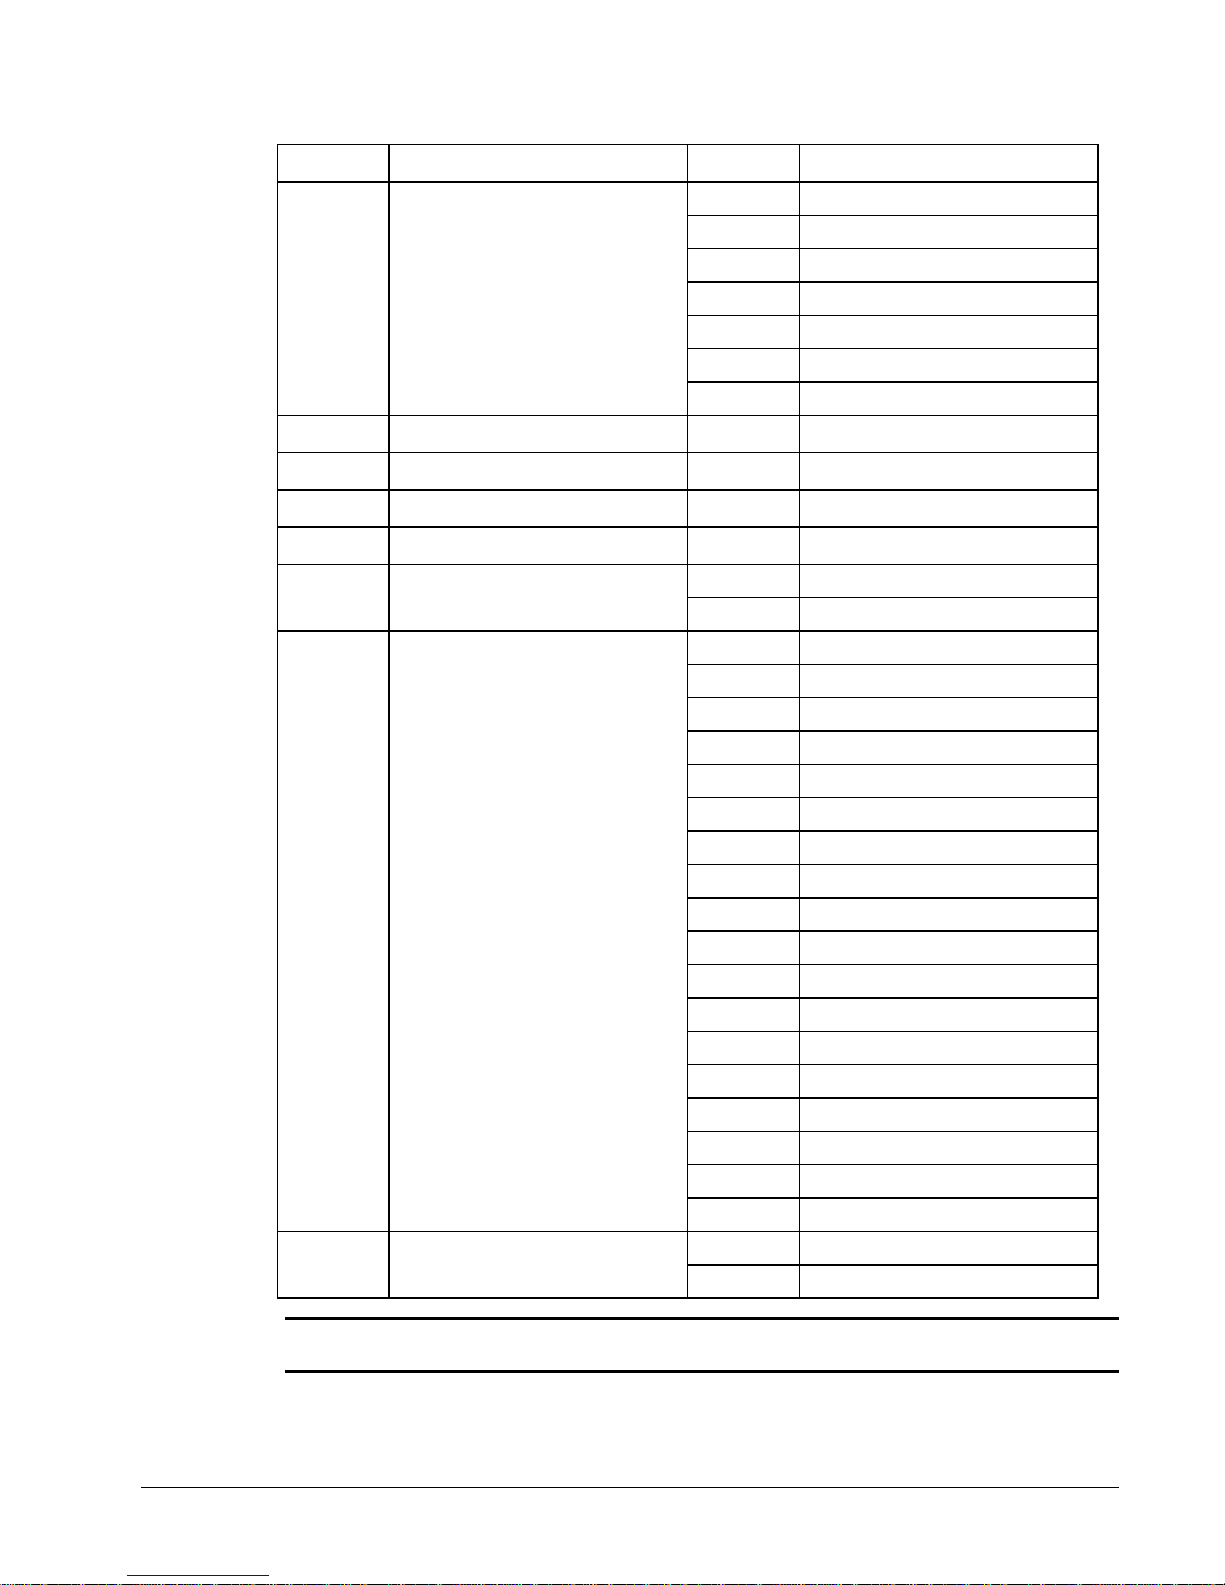
Address Option Value Selection
5
6
7
8
9
10
11
12
Device Function
Initial Feeding Line KP
End Feeding Line KP
Initial Feeding Line Slip
Print Line On Guest Check
Scale Type
Printer Type
Display Type
0
1
2
4
5
7
9
0 - 20
0 - 20
0 - 20
0 - 50
0
1
0
1
2
3
4
5
6
7
8
9
10
11
12
13
14
15
16
17
0
1
NONE
PC
SCALE
Remote Printer
Not used
COIN
Pole Display
NCI
CAS
NONE
SAMSUNG SRP-100
SRP-270/SRP-500
SRP-300
SRP-350
CITIZEN 3550
CITIZEN 810
CITIZEN 230
EPSON TM T88-2
EPSON U200
EPSON U295
EPSON U300
EPSON U325
EPSON U375
STAR SP-200
STAR SP-298
STAR SP-300
STAR TSP-200
EPSON
ICD
Note: If both ports are set to the same device, Port 1 runs first. For example, if you wish to use
Port 2 for PC, Port 1 must be set to another device, or None.
ER 5200/5240 Electronic Cash Register S-Mode Programming • 85
Page 88
Updating Firmware Program
The ER-5200/5240 firmware program is loaded in flash EPROM. Occasionally, CRS/Samsung may
provide updates to the firmware in order to fix bugs and/or update the register feature set. The
firmware program can be transferred from a PC to an ER-5200/5240 through the register’s RS-232C
port.
Note: There are two parts to the firmware program: Boot area and Program area. In most
cases, you will only need to update the program area. You will be notified where updates are
required.
Update Files
To complete the firmware update, you will be supplied with the following files:
Download.exe (The update utility program)
ER5200.bin and/or ER5240.bin
Samsung
DB-9M
DCD1
RXD2
TXD3
DTR4
GND5
DSR6
RTS7
CTS8
VCC9
PC Connection Cable
Use one of the following cables:
CRS Part # 522035 (Register DB-9M to PC DB-9F)
CRS Part # 522038 (Register DB-9M to PC DB-25F)
Part # 522035
PC
DB-9F
1DCD
2RXD
3TXD
4DTR
5GND
6DSR
7RTS
8CTS
9RI
Samsung
DB-9M
DCD1
RXD2
TXD3
DTR4
GND5
DSR6
RTS7
CTS8
VCC9
Part # 522038
PC
DB-25F
1ChGND
2TXD
3RXD
4RTS
5CTS
6DSR
7GND
8DCD
20DTR
86 • S-Mode Programming ER 5200/5240 Electronic Cash Register
Page 89
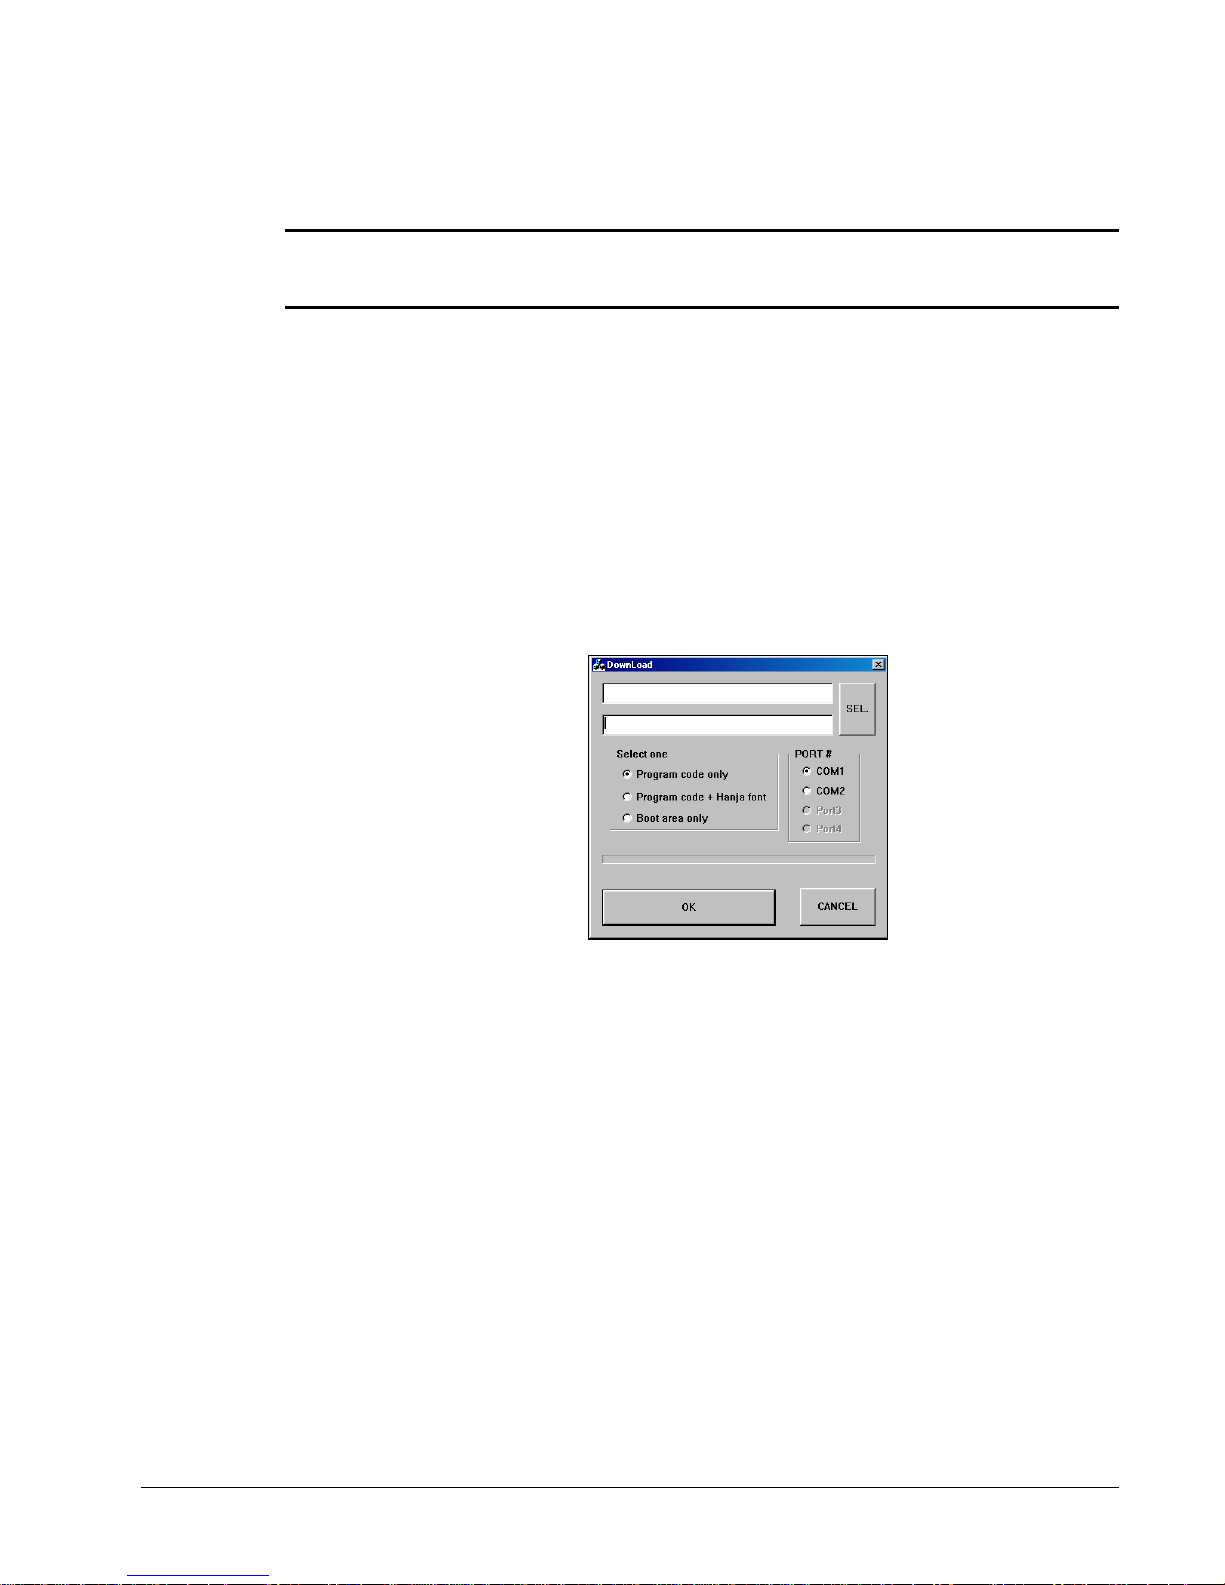
Update Boot Area
Note: There are two parts to the firmware program: Boot area and Program area. In most
cases, you will only need to update the pro gram area. You will be specifically notified when Boot
area updates are required.
1. Connect the Serial Cable From ECR to PC.
2. At the register, turn the control lock to the S position.
3. Turn the power switch to the OFF position.
4. Press and hold the CASH key.
5. While continuing to hold the CASH key, turn the power switch to the ON position.
(The display will show nothing and the error tone will sound.) Release the CASH
key.
6. Press CLEAR.
7. At the PC, execute the program “Download.exe”. The Download dialog box
displays.
8. Select the appropriate com port connection at your PC at the PORT# option buttons.
9. Click SEL. find the folder where the update files are located and select ER5200.bin
or ER5240.bin.
10. Select Boot area only in the Select One option buttons.
11. Press OK Button. The do wnload takes abo ut 15 seconds; the scroll bar will track the
progress of the download.
12. The message Completed displays. Click OK and the Download program will close.
At the register, turn the power switch to OFF.
ER 5200/5240 Electronic Cash Register S-Mode Programming • 87
Page 90
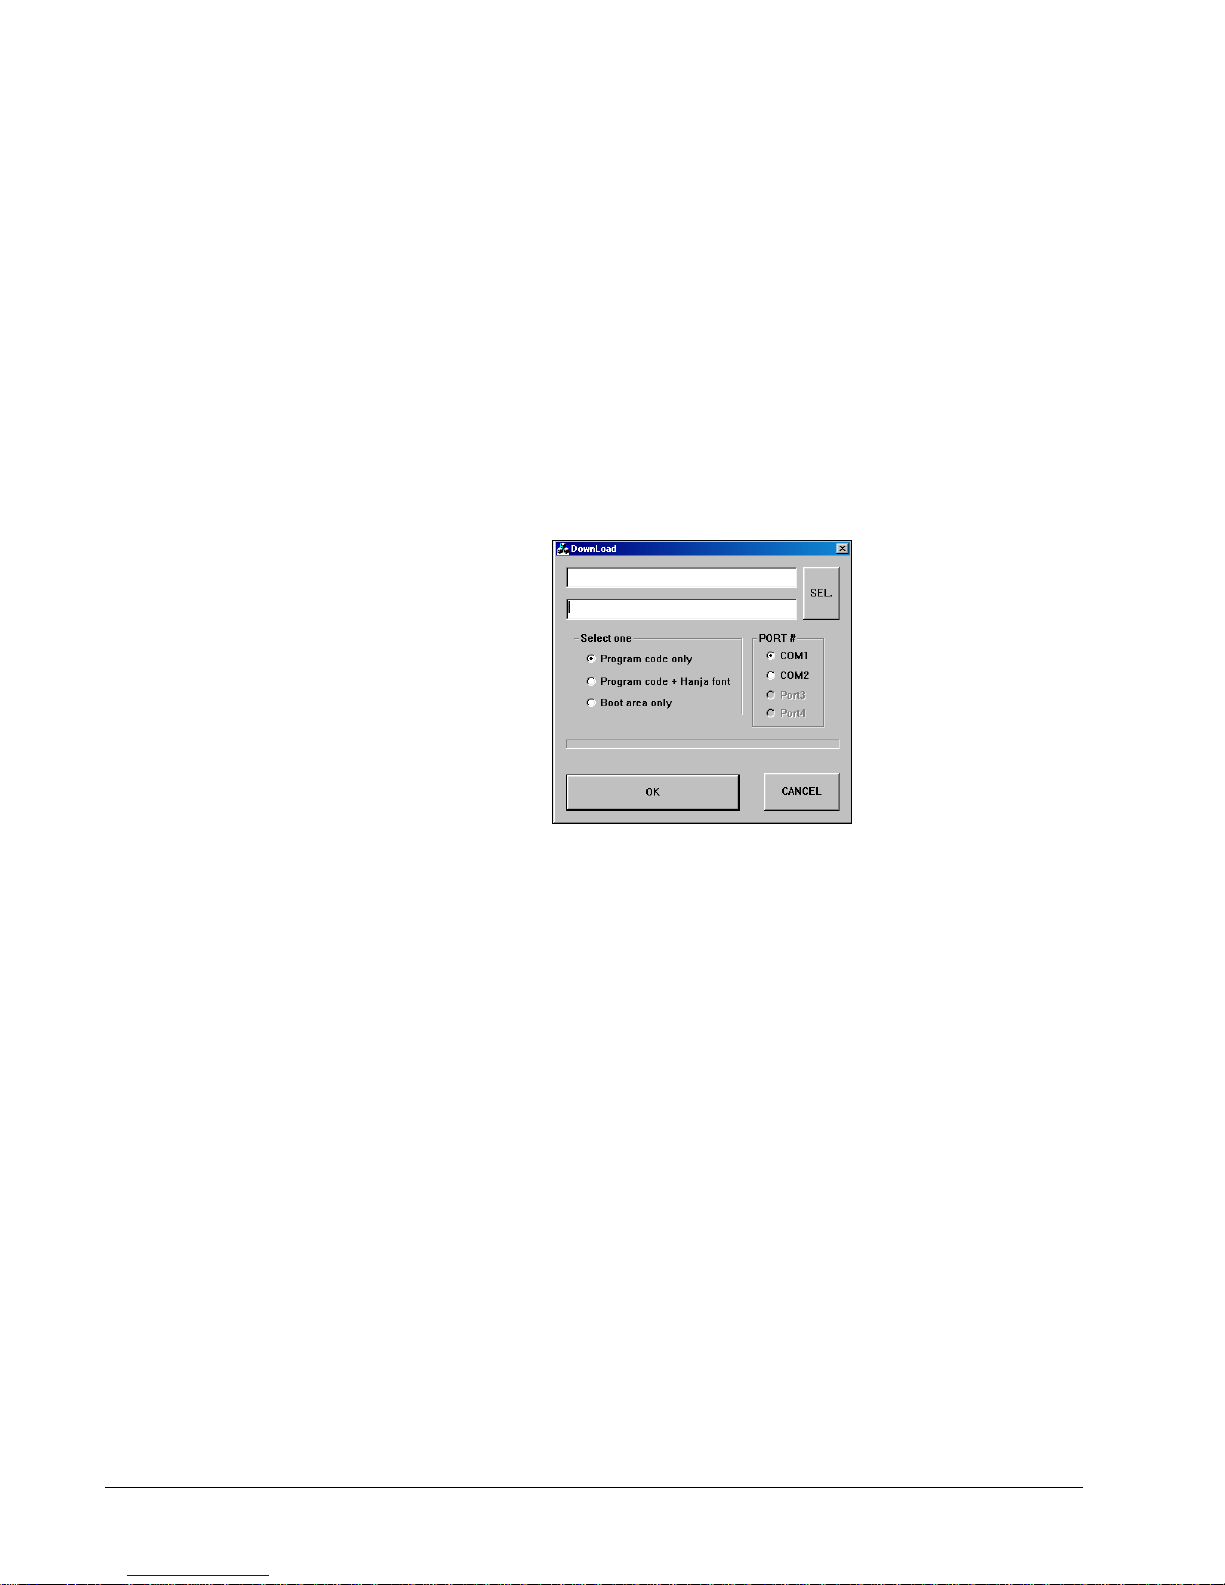
Update Program Area
1. Connect the Serial Cable From ECR to PC.
2. At the register, turn the control lock to the S position.
3. Turn the power switch to the OFF position.
4. Press and hold the CASH key.
5. While continuing to hold the CASH key, turn the power switch to the ON position.
(The display will show nothing and the error tone will sound.) Release the CASH
key.
6. Press CLEAR.
7. At the PC, execute the program “Download.exe”. The Download dialog box
displays.
8. Select the appropriate com port connection at your PC at the PORT# option buttons.
9. Click SEL. find the folder where the update files are located and select ER5200.bin
or ER5240.bin.
10. Select Program code only in the Select One option buttons.
11. Press OK Button. The do wnload takes abo ut 1-2 minutes; the scroll bar will track
the progress of the download.
12. The message Completed displays. Click OK and the Download program will close.
13. At the register, turn the power switch to the OFF.
14. See “Clearing Memory” on page 76 and perform a memory all clear in order to
install the default program.
88 • S-Mode Programming ER 5200/5240 Electronic Cash Register
Page 91

P-Mode Programming
Default Program
The ER-5200/5240 arrives with a default or generic program already installed. Program options are set
to 0 (Zero), unless otherwise noted, which means the machine can be operated immediately after a
RAM clear procedure is performed.
For example:
All keyboard PLUs are nontaxable and open, without entry limits by default status
programming of "000000000".
All system options are set to 0 in default programming, unless otherwise noted. Cha nge
only the options that will deviate from default programming. There is no need to re-enter an
option status of 0, since 0 is its original setting.
All programming (unless otherwise noted) is done with the control lock in the P position.
Each section details a specific area of register programming.
ER 5200/5240 Electronic Cash Register P-Mode Programming • 89
Page 92

Tax Programming
The ER-5200/5240 has the capability to support four separate taxes.
Taxes can be calculated as either a straight percentage rate of between .001% and 99.999%, or a 60
break point tax table. Each tax may be either an add-on tax (added to the cost of a taxable item), or a
value added tax (VAT) that is included in the price of the item.
Tax rate 4 may be set to function as the Canadian Goods & Services Tax (GST). If Tax 4 is
designated as GST, table programming for the rate is not allowed.
Definitions for tax rates 1, 2, 3 & 4 are made as part of tax programming.
If you are entering a tax rate (add-on or VAT), see "Straight Percentage Tax Rate
Programming" to enter the percentage rate.
If you are entering a tax table, see “Tax Table Programming” to enter the tax break points.
If you are entering a Canadian Goods and Services Tax (GST), use tax rate 4 for the GST
tax, and use tax rates 1, 2 and/or 3 for any other provincial tax or taxes. See "Straight
Percentage Tax Rate Programming" to enter the GST status and percentage rate.
Important Note: After you have entered your tax program(s), test for accuracy by entering
several transactions of different dollar amounts. Carefully check to make sure the tax charged
by the cash register matches the tax on the printed tax chart for your area. As a merchant, you
are responsible for accurate tax collection. If the cash register is not calculating tax accurately,
contact your dealer for assistance.
90 • P-Mode Programming ER 5200/5240 Electronic Cash Register
Page 93
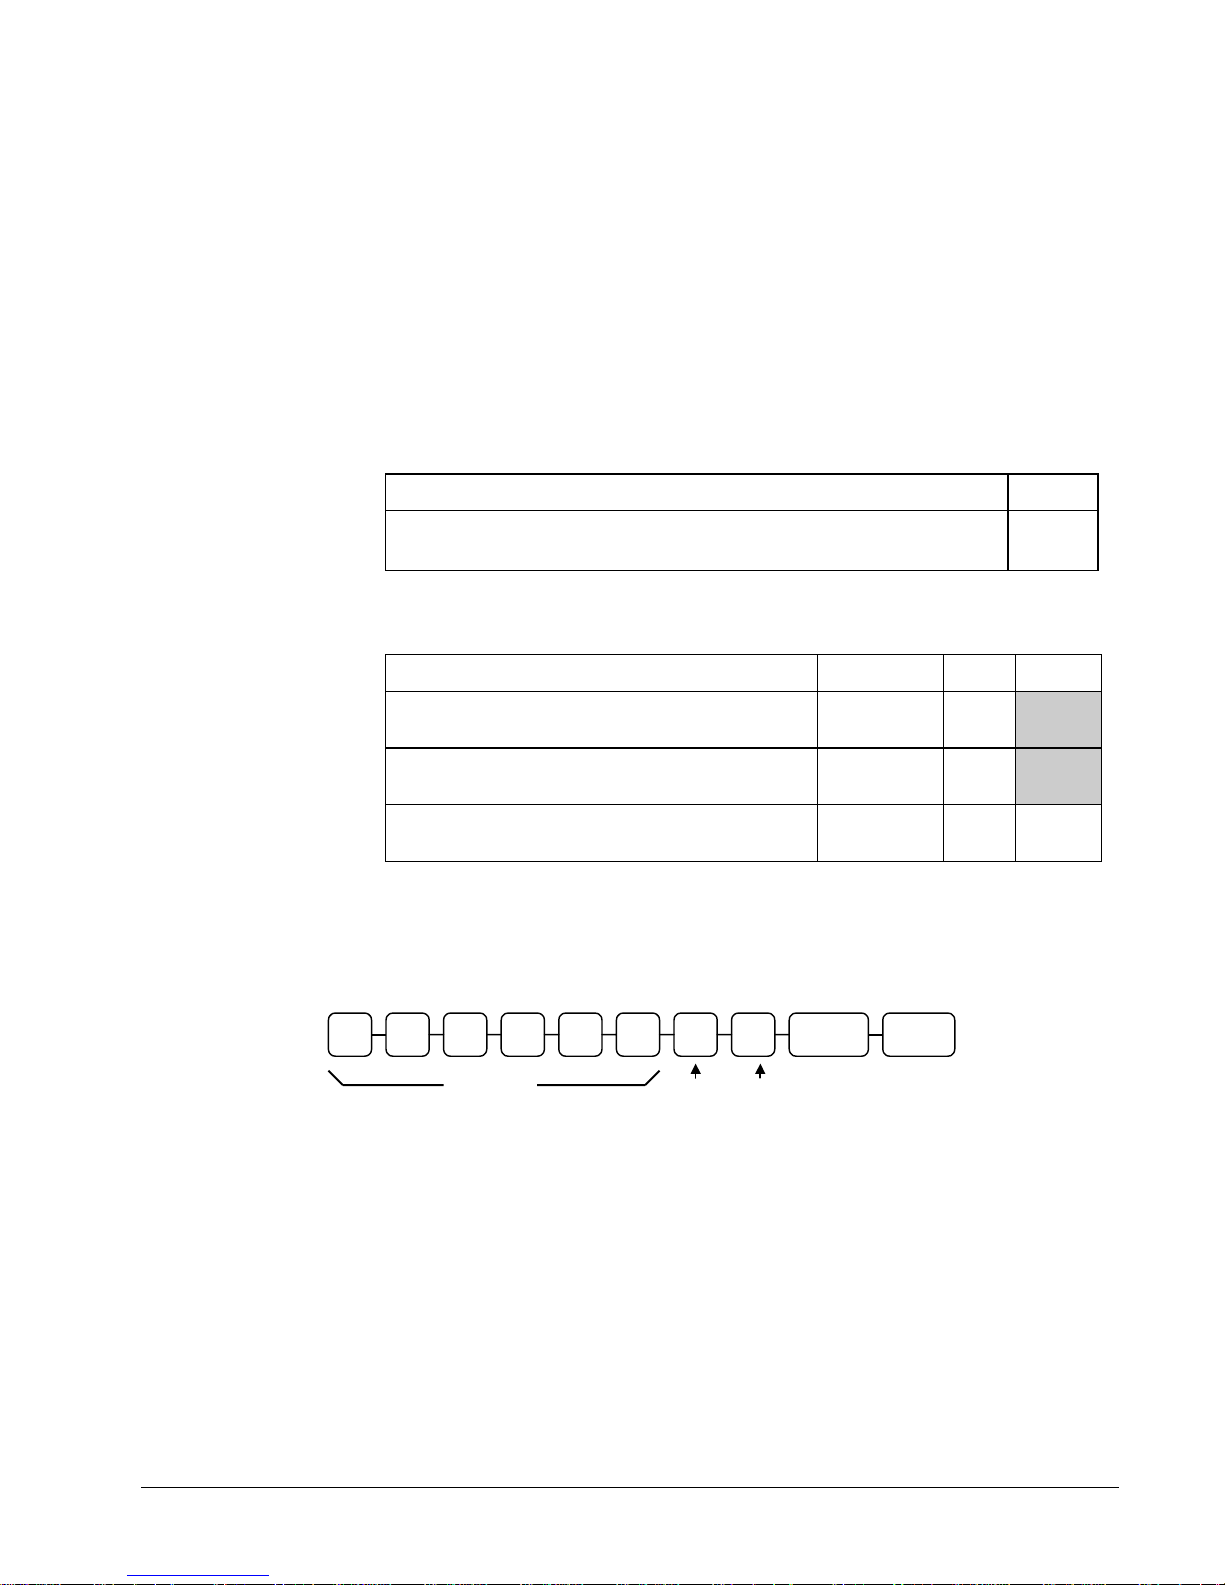
(
Straight Percentage Tax Rate Programming
When tax requirements may be met using a straight percentage rate, use the following method to
program a tax as a straight percentage.
Programming Straight Percentage Tax Rates and Status
1. Turn the control lock to the P position.
2. If the tax is a percentage rate, with a decimal. (0.000-99.999). It is not necessary to enter
preceding zeros. For example, for 6%, enter 06.000 or 6.000.
3. For the type of tax:
If the tax is a percentage added to the sale (normal add on tax), enter:
If the tax is a percentage value added tax (VAT; calculated as part of the
sale), enter:
4. Enter 0 here for all taxes, unless if you are pr ogramming tax 4 as a Canadian GST. If tax
4 is a Canadian GST, enter the sum of the options below:
OPTION VALUE = SUM
GST (tax 4) is taxable by rate 1? Yes = 1
No = 0
GST (tax 4) is taxable by rate 2? Yes = 2
No = 0
GST (tax 4) is taxable by rate 3? Yes = 4
No = 0
0
2
5. Press the Ta x Shift key for the tax you are programming.
6. Press the CASH key to end programming.
Tax Rate Programming Flowchart
.
Tax Rate
You must enter decimal
Tax
type
GST
tax
Info
TAX SH IFT
1/2/3/4)
CASH
ER 5200/5240 Electronic Cash Register P-Mode Programming • 91
Page 94

Tax Table Programming
In some cases, a tax that is entered as a percentage does not follow exactly the tax charts that apply in
your area (even if the tax chart is based on a percentage). In these cases, we recommend that you enter
your tax using tax table programming. This method will match tax collection exactly to the break
points of your tax table.
Before programming, obtain a copy of the tax table you wish to program. You will need the printed tax
table if you wish to determine the break point entries yourself.
Note: You can enter up to 60 break points.
Determining Break Point Entries
1. Examine the printed tax table for the tax you are programming.
2. Refer to the “Tax Table Programming Example - Illinois 6% Tax Table” to help with this
exercise.
3. Calculate the break point differences by subtracting the high side of the previous range
from the high side of the dollar range.
4. Examine the pattern of break point differences to determine when the break points begin
to repeat. Mark the beginning break points that do not fit a pattern as “non-repeat
breaks.” Mark the break points that are repeating in a pattern as “repeat breaks.”
Programming a Tax Table
1. Turn the control lock to the P position.
2. Enter 10; press the TAX SHIFT key for the tax you a re programming, i.e. TAX SHIFT
1, TAX SHIFT 2, TAX SHIFT 3 or TAX SHIFT 4.
3. Enter the maximum amount that is not taxed and press the appropr iate TAX SHIFT key.
4. Enter the first tax amount charged and press the appropriate TAX SHIFT key.
5. For each non-repeat break point, up to the last non-repeat break point, enter the high side
from the sale dollar range and press the appropriate TAX SHIFT key.
6. For the last non-repeat break point, enter the high side from the sale dollar range and
press the X/TIME key.
7. For each repeat break point, enter the high side from the sale dollar range and press the
appropriate TAX SHIFT key.
8. Press the CASH key to end the tax table program.
92 • P-Mode Programming ER 5200/5240 Electronic Cash Register
Page 95

Tax Table Programming Example - Illinois 6% Tax Table
Tax Charged
$0.00 $0.00 - $0.10
$0.01 $0.11 - $0.21 11
$0.02 $0.22 - $0.38 17
$0.03 $0.39 - $0.56 18 Non-Repeat
$0.04 $0.57 - $0.73 17
$0.05 $0.74 - $0.91 18
$0.06 $0.92 - $1.08 17
$0.07 $1.09 - $1.24 16 Repeat
$0.08 $1.25 - $1.41 17
$0.09 $1.42 - $1.58 17
$0.10 $1.59 - $1.74 16
$0.11 $1.75 - $1.91 17
$0.12 $1.92 - $2.08 17
$0.13 $2.09 - $2.24 16
$0.14 $2.25 - $2.41 17
Sale Dollar Range
Break point
Differences
To enter the sample program for the Illinois 6% tax table in tax 1:
1. Enter 1 0 press the TAX SHIFT 1 key.
2. Enter 1 0 (the maximum amount that is not taxed), press the TAX SHIFT 1 key.
3. Enter 1 (the first ta x amount charged), pre ss the TAX SHIFT 1 key.
4. Enter 2 1 (non-repeat break point), press the TAX SHIFT 1 key.
5. Enter 3 8 (non-repeat break point), press the TAX SHIFT 1 key
6. Enter 5 6 (non-repeat break point), press the TAX SHIFT 1 key.
7. Enter 7 3 (non-repeat break point), press the TAX SHIFT 1 key.
8. Enter 9 1 (non-repeat break point), press the X/TIME key.
9. Enter 1 0 8 (repeat break point), press the TAX SHIFT 1 key.
10. Enter 1 2 4 (repeat break point), press the TAX SHIFT 1 key.
11. Enter 1 4 1 (repeat break point), press the TAX SHIFT 1 key.
12. Press the CASH key to complete the tax program.
ER 5200/5240 Electronic Cash Register P-Mode Programming • 93
Page 96

PLU Programming
All PLUs, whether they are registered by pressing a PLU key on the keyboard, or by entering the PLU
number and pressing the PLU key, have the same programming options. These options are set through
separate programs:
“Program 100 - PLU Status Programming" determines whether the PLU is open, preset or
inactive. Also selected here are tax, food stamp, scale, negative, single item, hash,
gallonage, compulsory number entry, compulsory validation, compulsory condiment and
print options.
“Program 110 - PLU Auto Tare Programming” allows you to select up to three groups
where each PLUs sales will accumulate.
“Program 150 - PLU Group Assignment” allows you to select up to three groups where
each PLUs sales will accumulate.
“Program 200 - PLU Price/HALO Programming” determines the PLU price if the PLU is
preset, or the high amount lock out (HALO) if the PLU is open.
“Program 250 - PLU Stock Amount Programming” allows you to add stock to the PLU
sales counters for PLUs you have designated as sto ck keeping PLUs.
“Program 300 - PLU Descriptor Programming” allows you to set a unique descriptor, up
to 12 characters, for each PLU.
“Program 350 - PLU Link Programming” allows you to link a PLU to another PLU, so
that registration of the first PLU will automatically trigger registration of the linked PLU.
“Program 400 – PLU Delete Programming” allows you to delete a PLU.
“Program 450 – PLU Mix and Match Programming” allows you to designate items
eligible for mix and match discounts.
94 • P-Mode Programming ER 5200/5240 Electronic Cash Register
Page 97
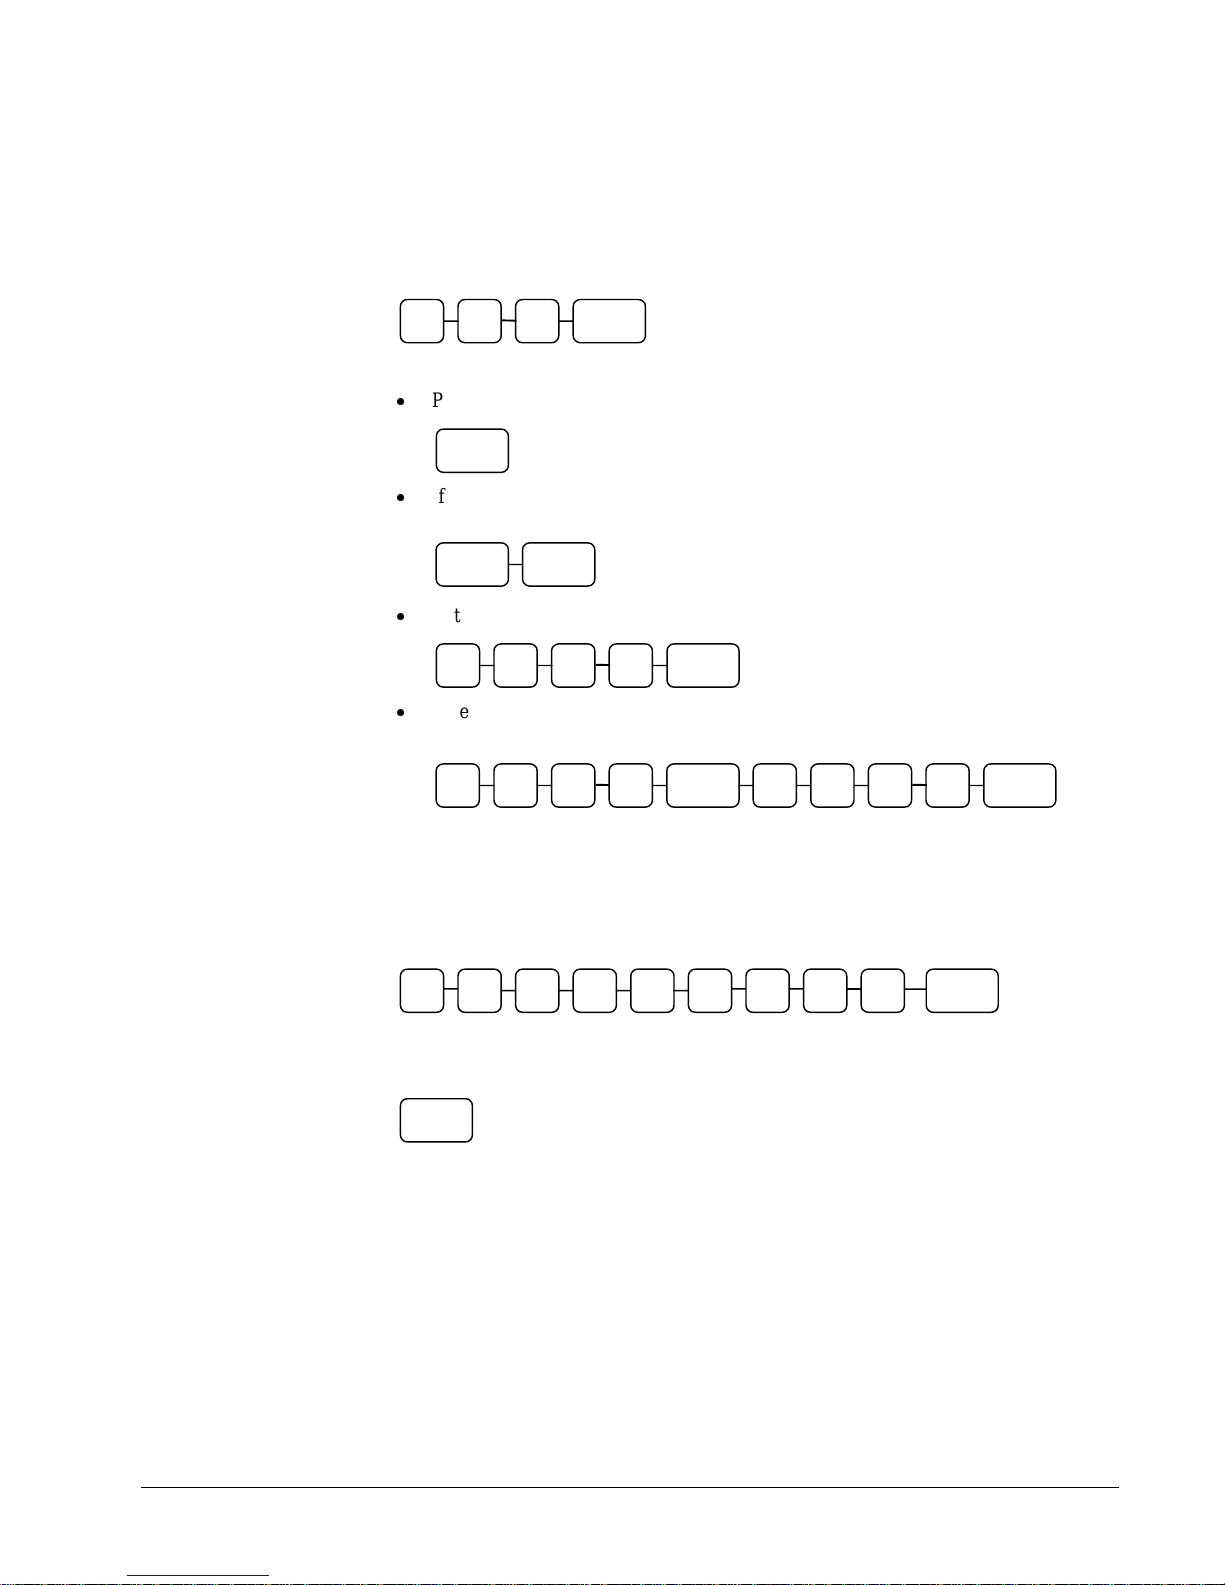
Program 100 - PLU Status Programming
1. Turn the control lock to the P position.
2. To begin the program, enter 1 0 0, press the SBTL key.
1 0 0 SBTL
3. Select the PLU or PLUs you wish to program in one of the following ways:
Press a PLU key on the keyboard, or
PLU
If sequential PLUs are to receive the same status, press the first PLU key and then
press the last PLU key, or
PLU PLU
Enter the number of the PLU and press the PLU key, or
Enter the number of the first PLU in a range of PLUs that are to receive the same
PLU
setting; press the PLU key. Enter the last number in the range; press the PLU key.
PLU PLU
4. Refer to the "PLU Status Chart" to determine the values for N1 through N9. (If an
address offers more than one option, add the values for each option and enter the sum.
For example, if you wish the PLU to be taxable by rates 2 and 4, add the values for your
choices, 1 + 4, and enter the sum "5" for address N2.) Enter the values you have selected,
press the X/TIME key. (You do not need to enter preceding zeros. For example, if
you are only selecting a value for N9, just enter that value.)
N3 N2 N1 N4 N5 X/TIME N6 N7 N8 N9
5. To program additional PLUs, repeat from step 3, or press the CASH key to finalize the
program.
CASH
ER 5200/5240 Electronic Cash Register P-Mode Programming • 95
Page 98
PLU Status Chart
Address Program Option
N1
PLU is preset?
PLU is override preset ?
PLU is taxable by rate 1?
N2
PLU is taxable by rate 2?
PLU is taxable by rate 3?
PLU is taxable by rate 4?
N3
PLU is food stamp eligible?
PLU is negative item?
PLU is hash?
N4
PLU is single item?
Compulsory non-add number ?
PLU is gallonage?
N5
PLU is stock?
PLU is inactive?
PLU is scalable?
N6
PLU is auto-scale entry?
PLU is a condiment?
Compulsory condiment entry?
N7
Print PLU on receipt?
Print PLU on detail?
Print PLU on check?
N8
Print item’s price on receipt?
Print item’s price on check?
PLU is disabled PROMO function?
N9
PLU counter is not reset when a PLU Z report is
done?
PLU is preset override in MGR control?
Value
Yes = 0
No = 1
Yes = 0
No = 2
Yes = 4
No = 0
Yes = 1
No = 0
Yes = 2
No = 0
Yes = 4
No = 0
Yes = 1
No = 0
Yes = 2
No = 0
Yes = 4
No = 0
Yes = 1
No = 0
Yes = 2
No = 0
Yes = 4
No = 0
Yes = 1
No = 0
Yes = 2
No = 0
Yes = 4
No = 0
Yes = 1
No = 0
Yes = 2
No = 0
Yes = 4
No = 0
Yes = 0
No = 1
Yes = 0
No = 2
Yes = 0
No = 4
Yes = 0
No = 1
Yes = 0
No = 2
Yes = 4
No = 0
Yes = 1
No = 0
Yes = 2
No = 0
= Sum
96 • P-Mode Programming ER 5200/5240 Electronic Cash Register
Page 99
PLU Options - Reference Information
Option Description
PRESET OVERRIDE
FOOD STAMP
ELIGIBLE
If Yes, you can enter a price to override the preset price.
Select Yes to accumulate a total of food stamp eligible items in the current
sale. The total can be viewed by pressing the F/S SUB key and food stamps
can be tendered with the F/S TEND key.
HASH Items designated with HASH status add to the current sale, but do not add to
the registers grand total. HASH items may or may not add to the net sales
total - see system option programming. Use hash for lottery sales or bottle
deposits.
SINGLE ITEM
Select Yes for a single item PLU. Single item PLUs automatically total as a
cash sale immediately after the PLU entry. Single item PLUs are used to
speed up one item sales.
NON-ADD # COMP
Select Yes to enforce the entry of a non-add number before a registration can
be made.
GALLONAGE ITEM
Select Yes to compute gallons sold. The gallons sold will print along with
the price entry on the receipt. The total gallons sold will accumulate in the
PLU counter. You must program the price per gallon (in tenths of a cent, i.e.
$1.299 for $1.29 and 9/10) in the PRICE/HALO field.
STOCK ITEM
Select Yes if you wish to track the number of items remaining in stock using
the Stock report.
SCALEABLE
If Yes, the PLU will work only when you are multiplying a weight from an
optional scale or when multiplying a manually entered weight. (For example,
enter weight, press SCALE, then register PLU.)
AUTO SCALE
Select Yes if you wish entries into this PLU to be automatically multiplied by
the weight on the optional scale.
CONDIMENT
Select Yes if you wish the item to act like a condiment on the kitchen printer.
Items with this status will satisfy the requirements of items with compulsory
condiment status.
COMPULSORY
CONDMNT
PRINT ON RECEIPT
PRINT ON DETAIL
Select Yes if you wish to force the entry of a condiment after this item is
entered.
Select No if you wish to suppress printing of the item at the designated
location.
PRINT ON CHECK
PRT PRICE ON
Select No if you wish to suppress printing of the item's price on the receipt.
RCPT
PRT PRICE ON CHK
DISABLE PROMO
COUNTER NOT
RESET
PRESET OVERRIDE
IN MGR CONTROL
Select No if you wish to suppress printing of the item's price on the check.
Select Yes to block the PROMO function on this PLU.
Select Yes if you do not wish to reset the PLU item counter on the Z PLU
report.
If preset override is Yes, then you can force manager control for preset
override.
ER 5200/5240 Electronic Cash Register P-Mode Programming • 97
Page 100
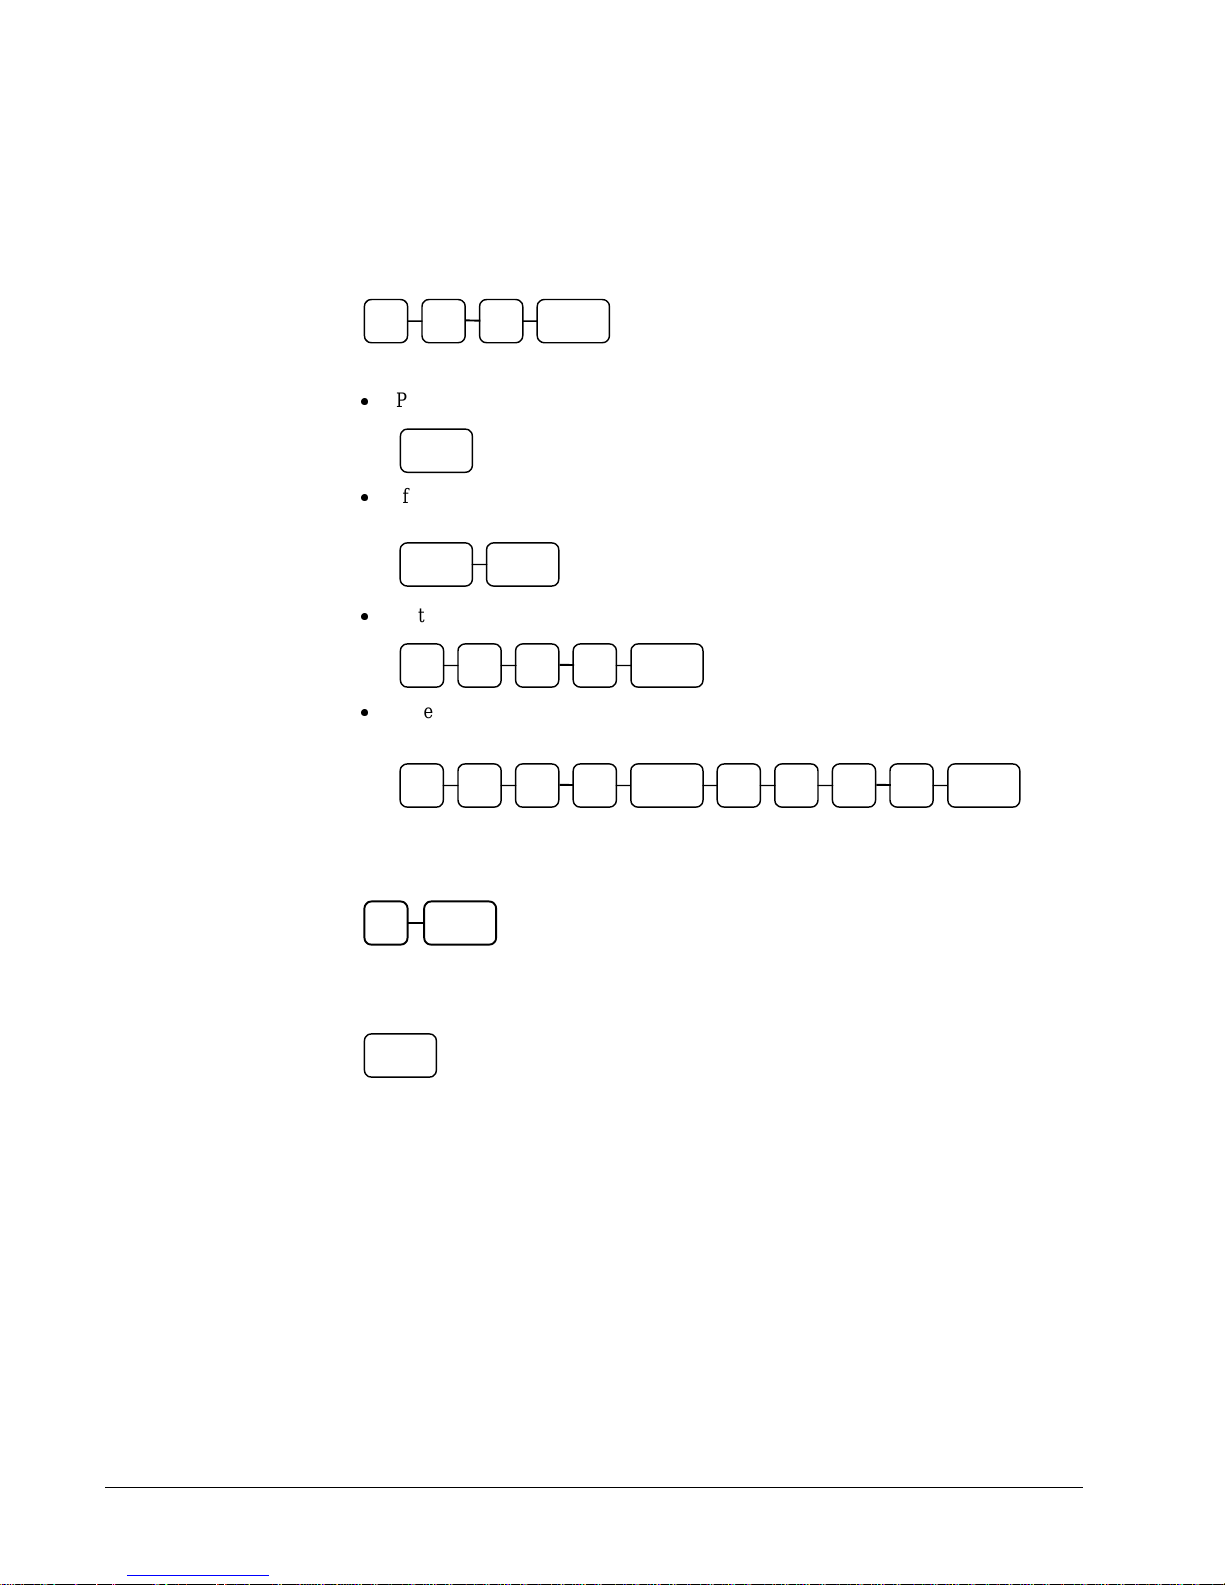
Program 110 - PLU Auto Tare Programming
1. Turn the control lock to the P position.
2. To begin the program, enter 1 1 0, press the SBTL key.
1 1 0 SBTL
3. Select the PLU or PLUs you wish to program in one of the following ways:
Press a PLU key on the keyboard, or
PLU
If sequential PLUs are to receive the same status, press the first PLU key and then
press the last PLU key, or
PLU PLU
Enter the number of the PLU and press the PLU key, or
PLU
Enter the number of the first PLU in a range of PLUs that are to receive the same
setting; press the PLU key. Enter the last number in the range; press the PLU key.
PLU PLU
4. Enter a value (1-5) to indicate the number of the preprogrammed tare weight you want to
automatically subtract when the PLU is used for scale entry (using an optional scale), and
then press the X/TIME key. Enter 0 to disable automatic tare subtraction.
X/TIME
5. To program additional PLUs, repeat from step 3, or press the CASH key to finalize the
program.
CASH
98 • P-Mode Programming ER 5200/5240 Electronic Cash Register
 Loading...