


This user manual includes detailed usage
instructions for your camera. Please read
this manual thoroughly.
Quick reference
Contents
Basic functions
Extended functions
Shooting options
Playback/Editing
Appendixes
Index
User Manual
TL320
Click a topic

1
Health and safety information
Always comply with the following precautions and usage tips to avoid dangerous situations and ensure peak performance of your camera.
Warning—situations that could cause injury to yourself or
others
Caution—situations that could cause damage to your
camera or other equipment
Note—notes, usage tips, or additional information
Do not use your camera near flammable or explosive
gases and liquids
Do not use your camera near fuels, combustibles, or flammable
chemicals. Do not store or carry flammable liquids, gases, or
explosive materials in the same compartment as the camera or its
accessories.
Keep your camera away from small children and pets
Keep your camera and all accessories out of the reach of small
children and animals. Small parts may cause choking or serious
injury if swallowed. Moving parts and accessories may present
physical dangers as well.
Safety warnings
Prevent damage to subjects’ eyesight
Do not use the flash in close proximity (closer than 1 m/3 ft) to
people or animals. Using the flash too close to your subject’s
eyes can cause temporary or permanent damage.
Handle and dispose of batteries and chargers with care
Use only Samsung-approved batteries and chargers. t
Incompatible batteries and chargers can cause serious injuries
or damage to your camera.
Never dispose of batteries in a fire. Follow all local regulations t
when disposing of used batteries.
Never place batteries or cameras on or in heating devices, t
such as microwave ovens, stoves, or radiators. Batteries may
explode when overheated.
Handle and store your camera carefully and sensibly
Do not allow your camera to get wet—liquids can cause serious t
damage. Do not handle your camera with wet hands. Water
damage to your camera can void your manufacturer’s warranty.
Safety precautions

2
Health and safety information
Protect batteries, chargers, and memory cards from
damage
Avoid exposing batteries or memory cards to very cold or very t
hot temperatures (below 0º C/32º F or above 40º C/104º F).
Extreme temperatures can reduce the charging capacity of your
batteries and can cause memory cards to malfunction.
Prevent batteries from making contact with metal objects, as t
this can create a connection between the + and – terminals
of your battery and lead to temporary or permanent battery
damage.
Prevent memory cards from making contact with liquids, dirt, or t
foreign substances. If dirty, wipe the memory card clean with a
soft cloth before inserting in your camera.
Turn off the camera when inserting or removing the memory t
card.
Do not bend, drop, or subject memory cards to heavy impact t
or pressure.
Do not use memory cards that have been formatted by other t
cameras or by a computer. Reformat the memory card with
your camera.
Never use a damaged charger, battery, or memory card.t
Do not expose the camera to direct sunlight or high t
temperatures for an extended period of time. Prolonged
exposure to sunlight or extreme temperatures can cause
permanent damage to your camera’s internal components.
Avoid using or storing your camera in dusty, dirty, humid, or t
poorly-ventilated areas to prevent damage to moving parts and
internal components.
Remove the batteries from your camera when storing it for an t
extended period of time. Installed batteries may leak or corrode
over time and cause serious damage to your camera.
Protect your camera from sand and dirt when using it on t
beaches or in other similar areas.
Protect your camera from impact, rough handling, and t
excessive vibration to avoid serious damage.
Exercise caution when connecting cables or adapters and t
installing batteries and memory cards. Forcing the connectors,
improperly connecting cables, or improperly installing batteries
and memory cards can damage ports, connectors, and
accessories.
Do not insert foreign objects into any of your camera’s t
compartments, slots, or access points. Damage due to
improper use may not be covered by your warranty.

3
Exercise caution when using the camera in humid
environments
When transferring the camera from a cold environment to a warm
and humid one, condensation can form on the delicate electronic
circuitry and memory card. In this situation, wait for at least 1 hour
until all moisture has evaporated before using the camera.
Check that the camera is operating properly before use
The manufacturer takes no responsibility for any loss of files or
damage that may result from camera malfunction or improper
use.
Use only Samsung-approved accessories
Using incompatible accessories may damage your camera,
cause injury, or void your warranty.
Protect your camera’s lens
Do not expose the lens to direct sunlight, as this may discolor t
the image sensor or cause it to malfunction.
Protect your lens from fingerprints and scratches. Clean your t
lens with a soft, clean, debris-free lens cloth.
Allow only qualified personnel to service your camera
Do not allow unqualified personnel to service the camera or
attempt to service the camera yourself. Any damage that results
from unqualified service is not covered by your warranty.
Ensure maximum battery and charger life
Overcharging batteries may shorten battery life. After charging is t
finished, disconnect the cable from your camera.
Over time, unused batteries will discharge and must be t
recharged before use.
Disconnect chargers from power sources when not in use.t
Use batteries only for their intended purpose.t
Important usage information
Health and safety information

4
©2009 Samsung Electronics America, Inc.
Camera specifications or contents of this manual may be
changed without prior notice due to upgrade of camera
functions.
Copyright information
Microsoft Windows and the Windows logo are t
registered trademarks of the Microsoft Corporation.
HDMI, the HDMI logo and the term "High Definition t
Multimedia Interface" are trademarks or registered
trademarks of HDMI Licencing LLC.
QuickTimet
®
and QuickTime® logo are trademarks or
registered trademarks of Apple Computer, Inc., used
under license.
Organization of the user manual
Basic functions 10
Learn about your camera’s layout, icons, and basic
functions for shooting.
Extended functions 25
Learn how to take a photo by selecting a mode and
how to record a video or voice memo.
Shooting options 37
Learn about the options you can set in shooting mode.
Playback/Editing 58
Learn how to play back photos, videos, or voice
memos and edit photos or videos. Also, learn how to
connect your camera to your computer, photo printer,
TV, or HDTV.
Appendixes 79
Refer to settings, error messages, specifications, and
maintenance tips.
5
Indications used in this manual
Shooting mode Indication
Smart Auto
S
Auto
a
Program
p
Aperture Priority
A
Shutter Priority
h
Manual
n
User
u
DUAL IS
d
Scene
s
Movie
v
Shooting mode icons
These icons indicate that a function is available in the
corresponding modes. The s mode may not support functions
for all scenes.
e.g.)
Available in the
Program, Aperture
Priority, Shutter
Priority, DUAL IS,
and Movie modes
Icons used in this manual
Icon Function
Additional information
Safety warnings and precautions
[ ]
Camera buttons; for example: [Shutter] (represents the
shutter button)
( )
Page number of related information
The order of options or menus you must select to
perform a step; for example: Select Functions White
Balance (represents select Functions, and then White
Balance)
*
Annotation
Abbreviations used in this manual
Abbreviation Definition
ACB
Auto Contrast Balance
AEB
Auto Exposure Bracket
AF
Auto Focus
DIS
Digital Image Stabilization
DPOF
Digital Print Order Format
EV
Exposure Value
OIS
Optical Image Stabilization
WB
White Balance
6
Expressions used in this manual
Pressing the shutter
tHalf-press [Shutter]: press the shutter halfway down
Press [t Shutter]: press the shutter all the way down
Half-press [Shutter] Press [Shutter]
Subject, background, and composition
Subjectt : the main object of a scene, such as a person, animal,
or still life
Backgroundt : the objects around the subject
Compositiont : the combination of a subject and background
Background
Subject
Composition
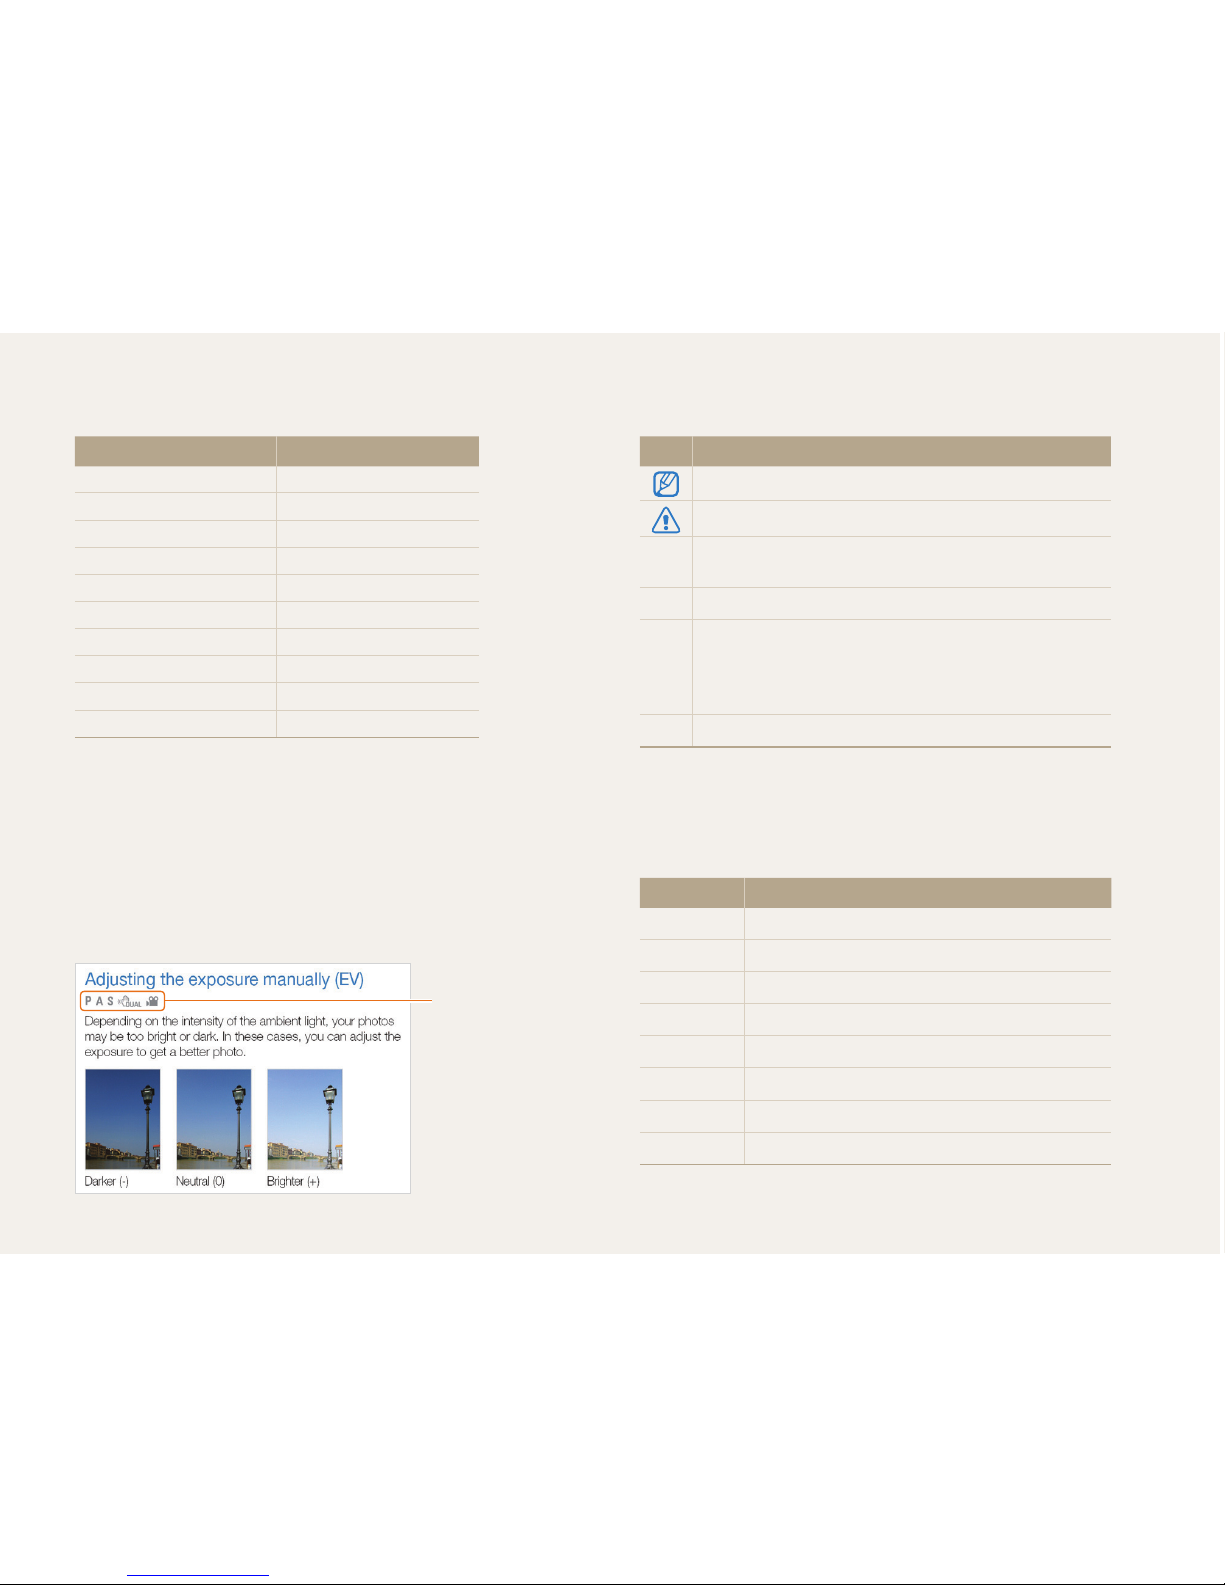
Exposure (Brightness)
The amount of light that enters your camera determines the
exposure. You can alter the exposure with shutter speed,
aperture value, and ISO speed. By altering the exposure, your
photos will be darker or lighter.
Normal exposure Overexposure (too bright)
7
Quick reference
Taking photos of people
s
t mode > Beauty Shot, Portrait, Children 28
Red-eye, Red-eye Fix (to prevent or correct red-eye) t
41
Face Detection t
47
Taking photos at night or in the dark
s
t mode > Night, Dawn, Firework 28
Flash options t
41
ISO speed (to adjust the sensitivity to light) t
43
Taking action photos
h
t mode 32
Continuous, Motion Capture t
55
Taking photos of text, insects, or
flowers
s
t mode > Close Up, Text 28
Macro, Auto Macro, Manual Focus (to take close-up t
photos)
44
White balance (to change the color tone) t
51
Adjusting the exposure (brightness)
ISO speed (to adjust the sensitivity to light) t
43
EV (to adjust exposure) t
50
ACB (to compensate for subjects against bright t
backgrounds)
50
Metering t
51
AEB (to take three photos of the same scene with t
different exposures)
55
Applying a different effect
Photo styles (to apply tones) t
56
Image adjustment (to adjust saturation, sharpness, or t
contrast)
57
Reducing camera shake
Optical Image Stabilization (OIS) t
22
d
t mode 27
Viewing files by category in t
Smart Album
60
Deleting all files on the t
memory card
61
Viewing files as a slide show t
63
Viewing files on a TV or HDTV t
70
Connecting your camera to a t
computer
73
Adjusting sound and volume t
81
Adjusting the brightness of t
the display
81
Changing the display t
language
81
Setting the date and time t
82
Formatting the memory card t
82
Troubleshooting t
90

8
Contents
Using the User mode ........................................................ 34
Configuring your settings ...................................................... 34
Using your custom settings .................................................. 34
Recording a video ............................................................. 35
Recording voice memos ................................................... 36
Recording a voice memo ..................................................... 36
Adding a voice memo to a photo .......................................... 36
Shooting options ................................................................... 37
Selecting a resolution and quality ...................................... 38
Selecting a resolution ........................................................... 38
Selecting image quality ........................................................ 38
Using the timer .................................................................. 39
Shooting in the dark .......................................................... 41
Preventing red-eye .............................................................. 41
Using the flash .................................................................... 41
Adjusting the amount of flash ................................................ 42
Adjusting the ISO speed ...................................................... 43
Changing the camera’s focus ............................................ 44
Using macro ....................................................................... 44
Setting the focus distance .................................................... 44
Using selection focus .......................................................... 45
Adjusting the focus area ....................................................... 46
Using face detection ......................................................... 47
Detecting faces ................................................................... 47
Taking a self-portrait shot ...................................................... 48
Taking a smile shot .............................................................. 48
Detecting eye blinking .......................................................... 49
Basic functions ...................................................................... 10
Unpacking ......................................................................... 11
Camera layout ................................................................... 12
Icons ................................................................................. 14
Turning your camera on or off ........................................... 15
Mini dashboard ................................................................... 15
Selecting options ............................................................... 16
Setting the display and sound ........................................... 18
Changing the display type .................................................... 18
Setting the sound ................................................................ 19
Taking photos .................................................................... 20
Zooming ............................................................................. 21
Reducing camera shake (OIS) .............................................. 22
Tips for getting a clearer photo .......................................... 23
Extended functions .............................................................. 25
Using the Smart Auto mode .............................................. 26
Using the DUAL IS mode .................................................. 27
Using the Scene mode ...................................................... 28
Adjusting face tone and hiding imperfections ......................... 28
Using the frame guide .......................................................... 29
Using the Program mode .................................................. 30
Using the Aperture Priority, Shutter Priority,
or Manual mode ................................................................ 31
Using the Aperture Priority mode ........................................... 32
Using the Shutter Priority mode ............................................. 32
Using the Manual mode ....................................................... 33

9
Contents
Adjusting brightness and color .......................................... 50
Adjusting the exposure manually (EV) .................................... 50
Compensating for backlighting (ACB) .................................... 50
Changing the metering option ............................................... 51
Selecting a light source (White balance) ................................. 51
Using burst modes ............................................................ 55
Improving your photos ...................................................... 56
Applying photo styles ........................................................... 56
Defining your own RGB tone ................................................ 56
Adjusting your photos .......................................................... 57
Playback/Editing ................................................................... 58
Playing back ...................................................................... 59
Starting Playback mode ....................................................... 59
Viewing photos ................................................................... 63
Playing a video .................................................................... 64
Playing voice memos ........................................................... 65
Editing a photo .................................................................. 66
Resizing photos .................................................................. 66
Rotating a photo .................................................................. 66
Applying photo styles ........................................................... 67
Defining your own RGB tone ................................................ 67
Correcting exposure problems ............................................. 68
Creating a print order (DPOF) ................................................ 69
Viewing files on a TV or HDTV ........................................... 70
Transferring files to your computer .................................... 72
For Windows users ............................................................. 72
For Mac users ..................................................................... 77
Printing photos with a photo printer (PictBridge) ............... 78
Appendixes ............................................................................ 79
Camera settings menu ...................................................... 80
Accessing the settings menu ................................................ 80
Sound ................................................................................ 81
Display ............................................................................... 81
Settings .............................................................................. 82
Error messages ................................................................. 85
Camera maintenance ........................................................ 86
Cleaning your camera .......................................................... 86
About memory cards ........................................................... 87
About the battery ................................................................. 88
Before contacting a service center .................................... 90
Camera specifications ....................................................... 93
FCC notice ........................................................................ 97
Index ................................................................................. 98

Unpacking ………………………………………………… 11
Camera layout …………………………………………… 12
Icons ………………………………………………………… 14
Turning your camera on or off ………………………… 15
Mini dashboard ……………………………………………… 15
Selecting options ………………………………………… 16
Setting the display and sound ………………………… 18
Changing the display type ………………………………… 18
Setting the sound …………………………………………… 19
Taking photos ……………………………………………… 20
Zooming …………………………………………………… 21
Reducing camera shake (OIS) ……………………………… 22
Tips for getting a clearer photo ………………………… 23
Basic functions
Learn about your camera’s layout, icons, and basic functions
for shooting.
Basic functions
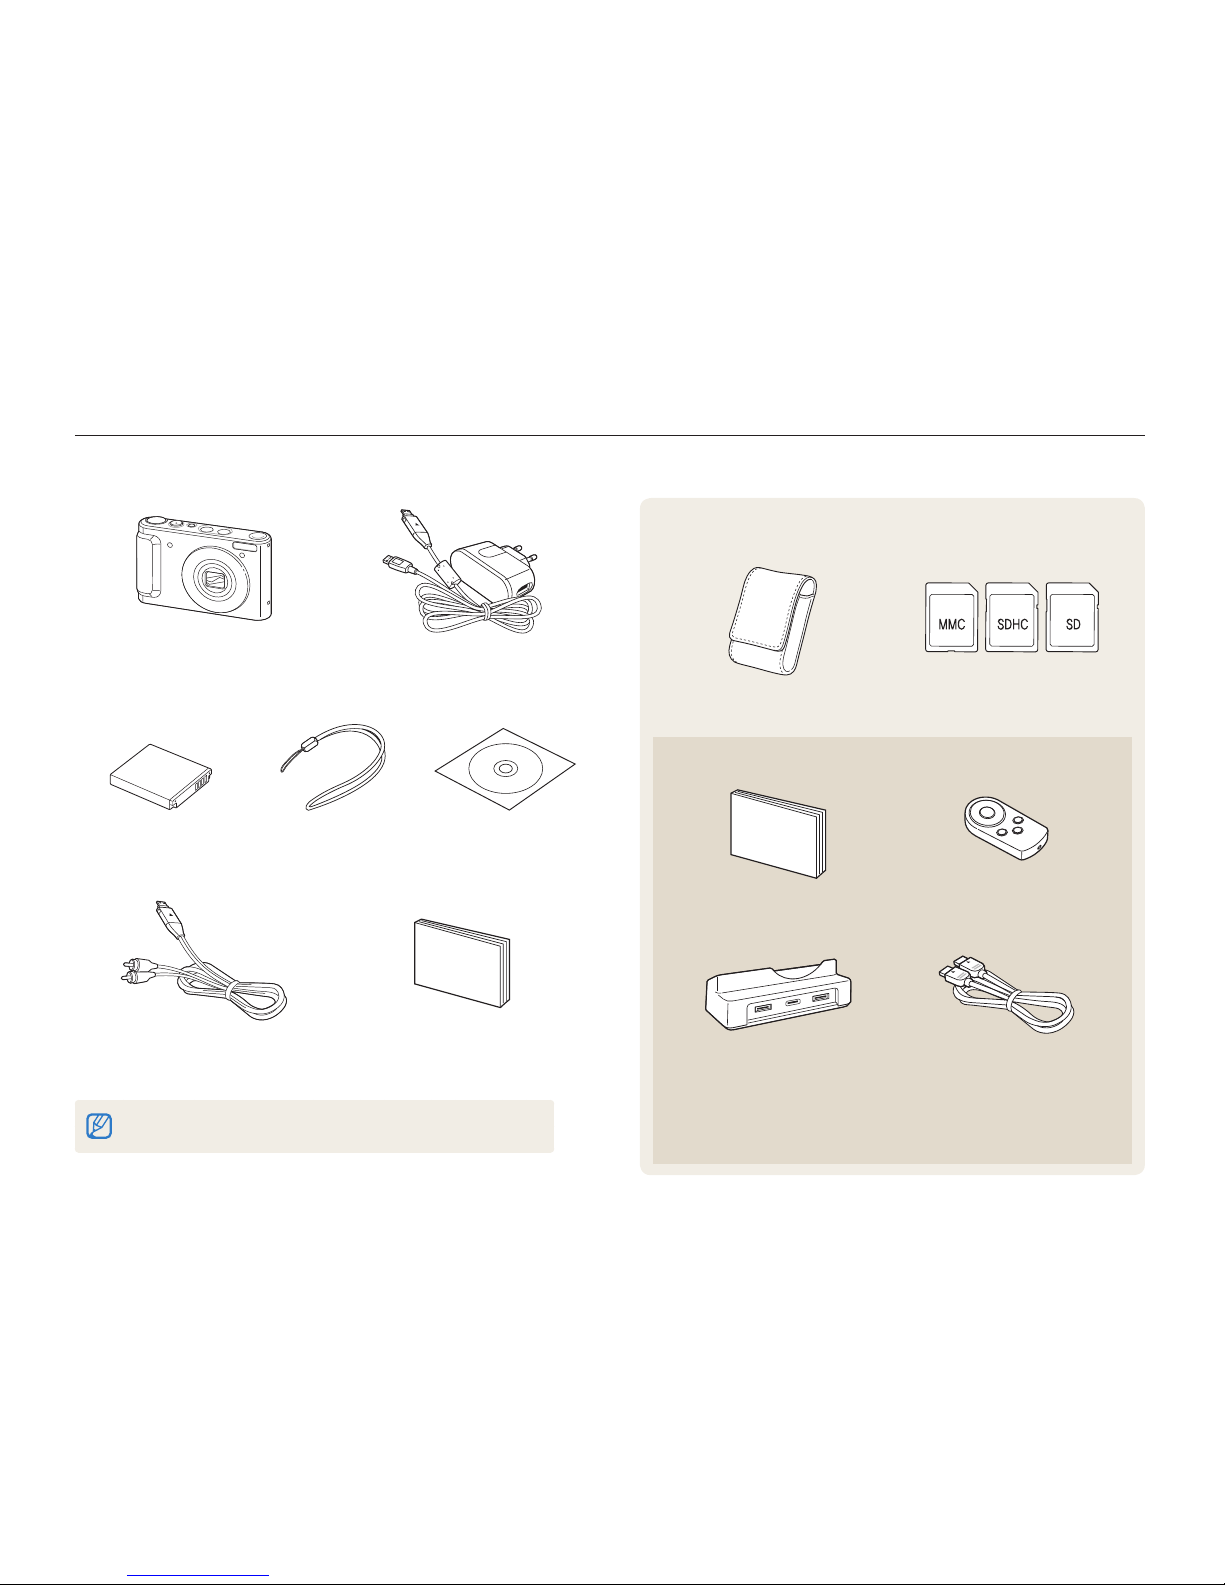
11
Camera AC adapter/USB cable
(
AD44-00143A)/(AD39-00166A)
Rechargeable battery
(4302-001226)
Strap
(
Silver: AD63-02596A
Black: AD63-02604A)
Software CD-ROM
(User manual included)
(AD46-00252A)
A/V cable
(
AD39-00163A)
Quick Start Manual
(AD68-03887A)
The illustrations may differ from your actual items.
Unpacking
Check your product box for the following items.
Optional accessories
Camera case Memory cards
Sold as a set
HDMI cradle manual
(AD68-03835A)
Remote control
(AD59-00164A)
Cradle
(for charging the battery
and connecting your camera
to an HDTV or PC)
(AD61-04147A)
HDMI cable
(for viewing high-resolution
images or playing videos)
(AD39-00160A)
Basic functions
12
Camera layout
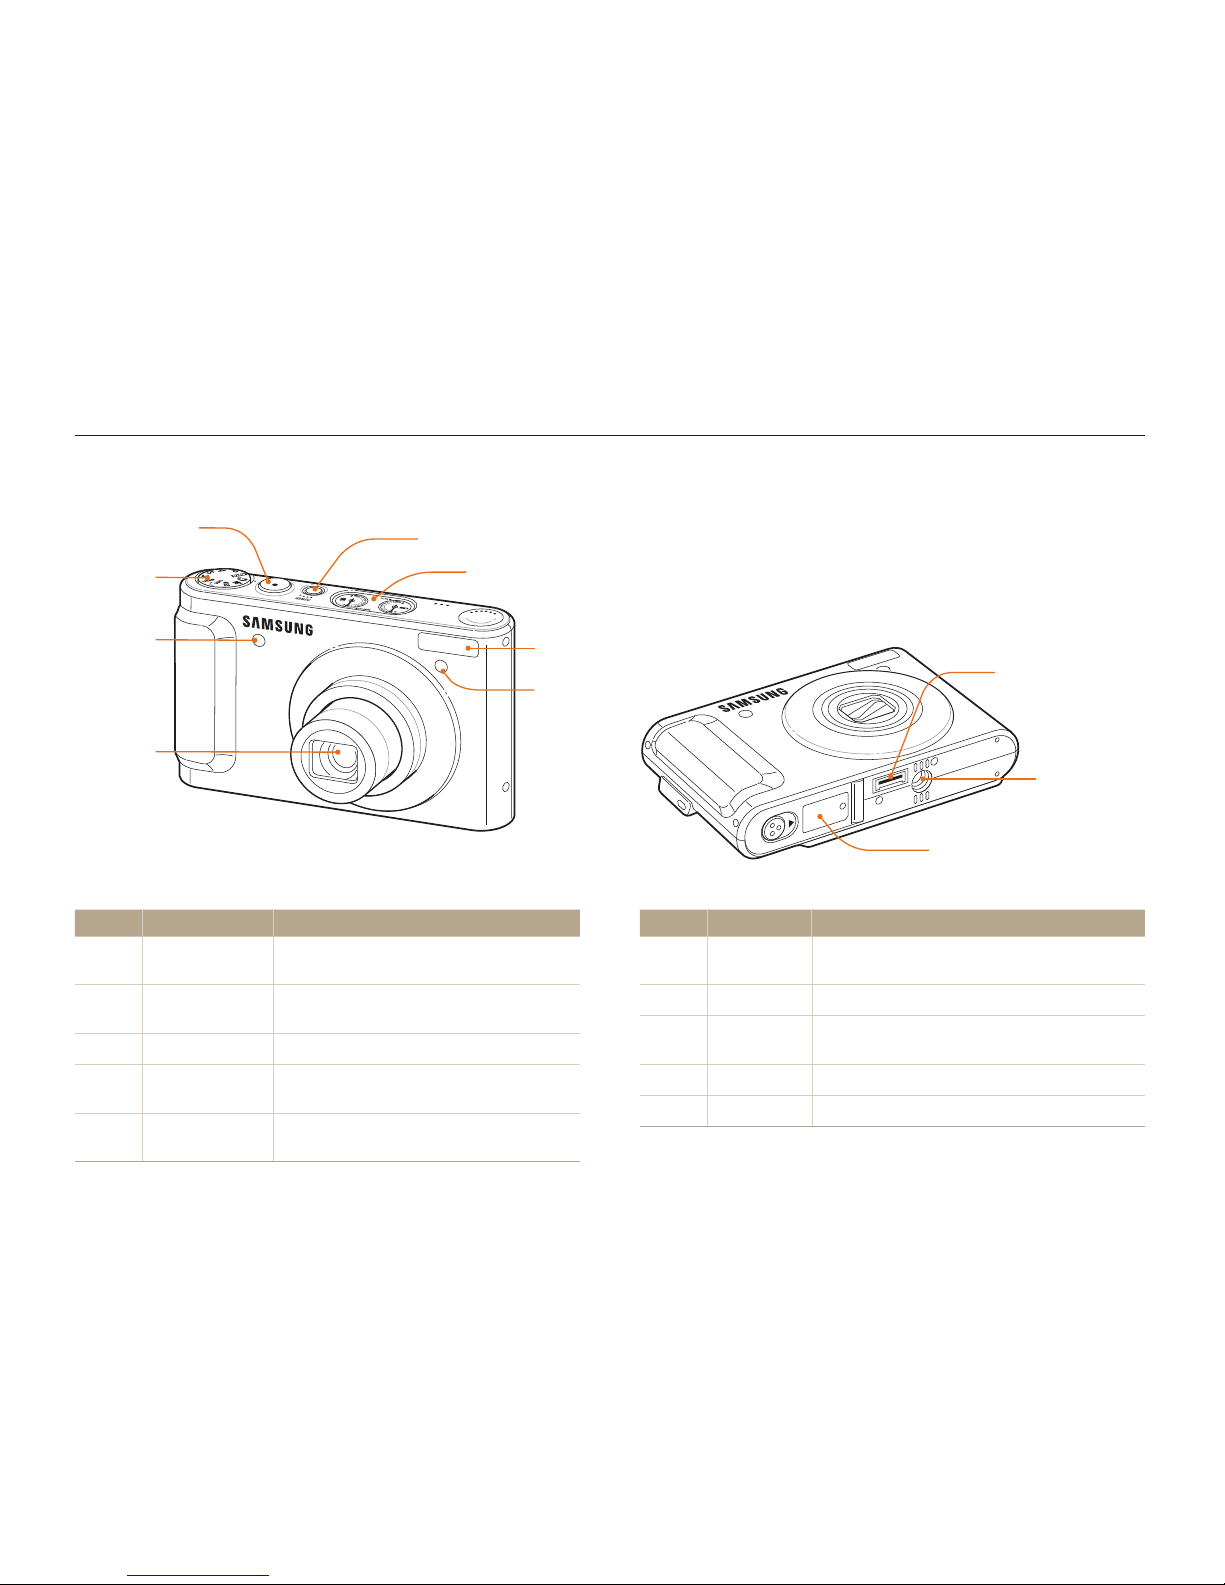
Before you start, familiarise yourself with your camera's parts and their functions.
Shutter button
POWER button
AF-assist light/
timer lamp
Flash
Battery chamber cover
Insert a memory card and battery
USB and A/V port
Tripod mount
Mini dashboard (p. 15)
Icon Mode Description
n
Manual
Take a photo by adjusting both the aperture value
and shutter speed
u
User
Take a photo with options that you have pre-set
d
DUAL IS
Take a photo with options suitable for reducing
camera shake
s
Scene
Take a photo with options preset for a specific scene
v
Movie
Record a video
Icon Mode Description
S
Smart Auto
Take a photo by letting the camera select a
scene mode as it detects
a
Auto
Take a photo quickly and easily with minimal
settings
p
Program
Take a photo by setting options
A
Aperture Priority
Take a photo by adjusting the aperture value
(The shutter speed is set automatically.)
h
Shutter Priority
Take a photo by adjusting the shutter speed
(The aperture value is set automatically.)
Mode dial
(See below)
Remote
control
sensor
Lens
Basic functions
13
Camera layout
Display
Status lamp
Blinkingt : When saving a photo or video, being read by
a computer or printer, or out of focus
Steadyt : When connecting to a computer or in focus
Zoom button
Zoom in or out in Shooting mode.t
Zoom in on part of a photo, view files as thumbnails, t
or adjust volume in Playback mode.
Speaker
(See below)
Microphone
Microphone
Button Description
o
Confirm the highlighted option or menu.
Playback
Enter Playback mode.
Function
Access options in Shooting mode.t
Delete files in Playback mode.t
* Referred to Navigation button in this manual
Button Description
m
Access options or menus.
Smart
Control Dial*
(Navigation)
When pressing:
Move up/down/left/rightt
Set the following options in Shooting mode: t
[
D
]: Display type/[M]: Macro/[F]: Flash/
[t]: Timer
When rotating:
Scroll to an option or menut
Adjust shutter speed, aperture, or exposure value t
in Shooting mode
Scroll through files in Playback modet
Basic functions
14
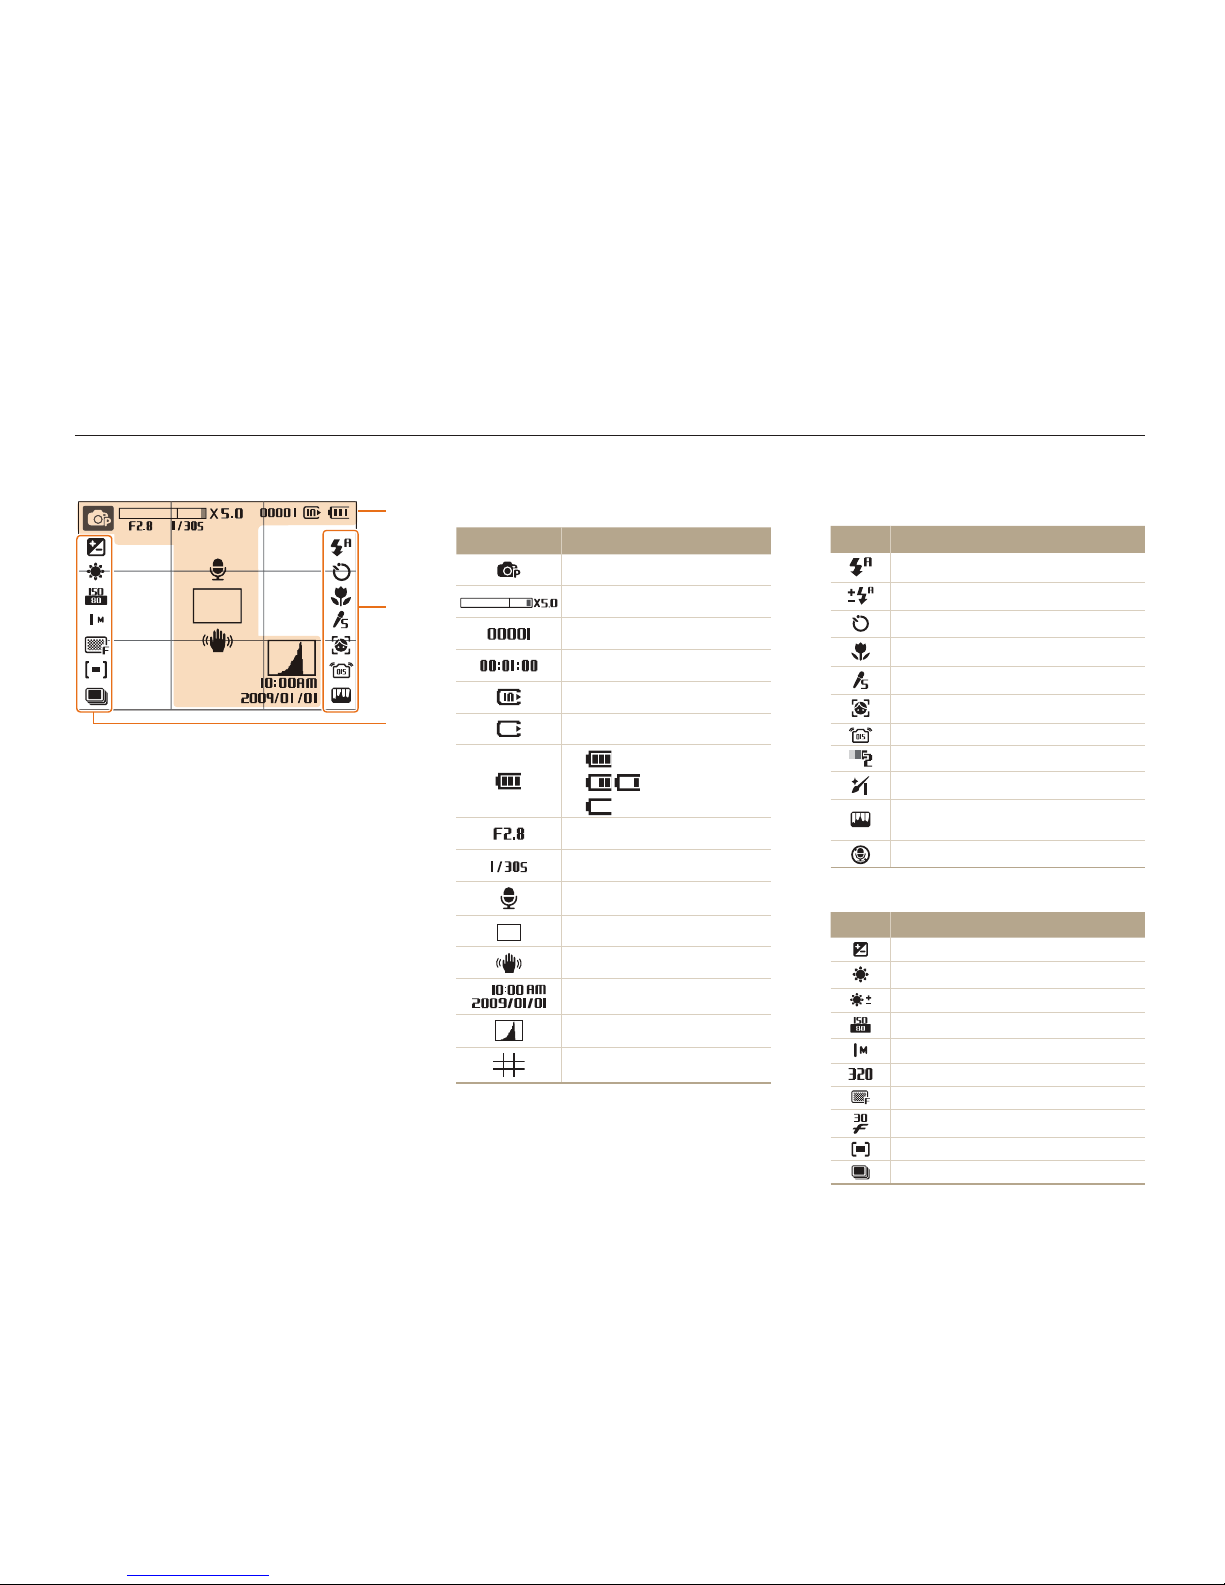
B. Icons on the right
Icon Description
Flash
Flash customized
Timer
Focus distance
Photo style
Face detection
Optical Image Stabilization (OIS)
Face tone
Face retouch
Image adjustment
(contrast, sharpness, saturation)
Voice muted
C. Icons on the left
Icon Description
Exposure value
White balance
White balance customized
ISO speed
Photo resolution
Video resolution
Photo quality
Frame rate
Metering option
Burst type
Icons
The icons displayed will change according to the mode you select or the options you set.
A. Information
Icon Description
Selected shooting mode
Zoom ratio
Available number of photos
Available recording time
Internal memory
Memory card inserted
t : Fully charged
t : Partially charged
t : Charging needed
Aperture value
Shutter speed
Voice memo
Auto focus frame
Camera shake
Current date and time
Histogram (p. 18)
Grid lines
A
B
C
Basic functions
15
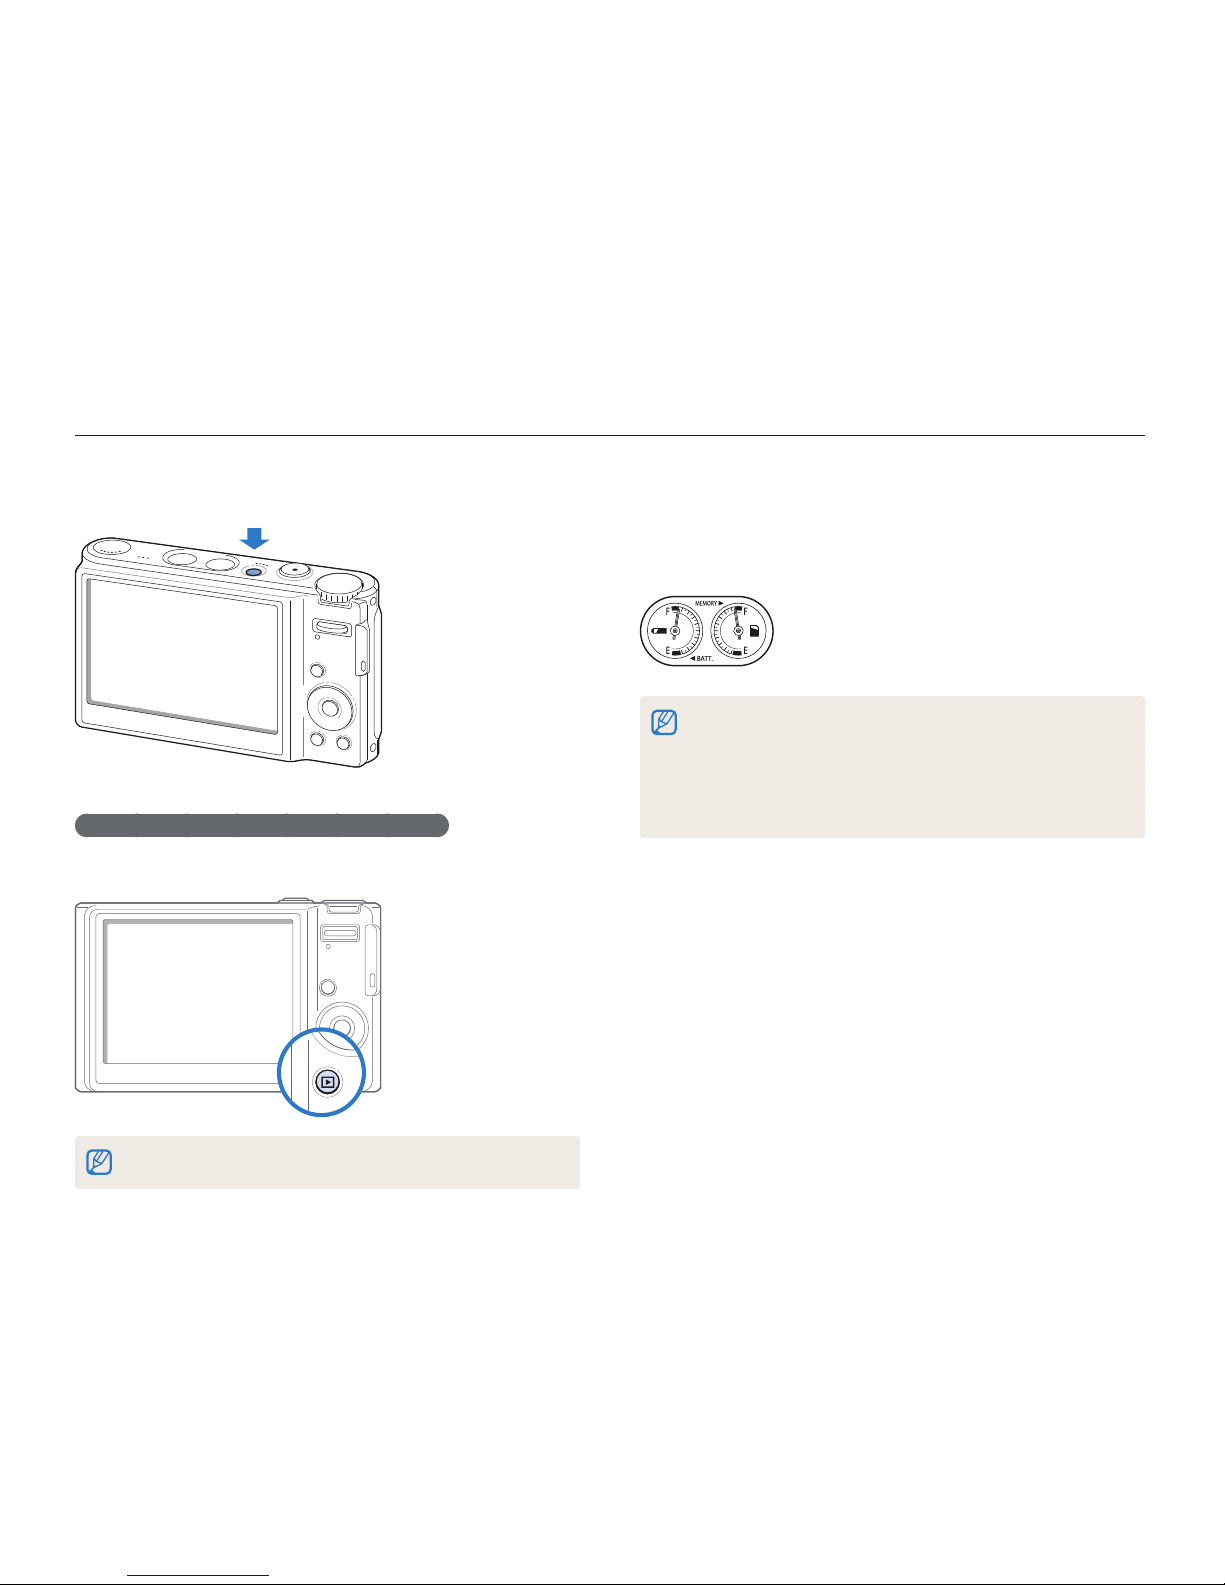
Turning your camera on or off
Learn how to start your camera.
Mini dashboard
While the camera is turned on, Mini dashboard shows you the
remaining capacity of the battery and memory card.
When exposing the camera to a hot and humid environment, t
condensation can form on the gauges.
If the hand of a gauge keeps spinning around, contact a service t
center.
The gauge and the battery and memory card icon on the display may t
show different capacities.
Press [POWER] to turn your camera on or off.
Turning on your camera in Playback mode
Press [P]. The camera turns on and accesses Playback mode
immediately.
Press and hold [P] to mute camera sounds.
Basic functions
16
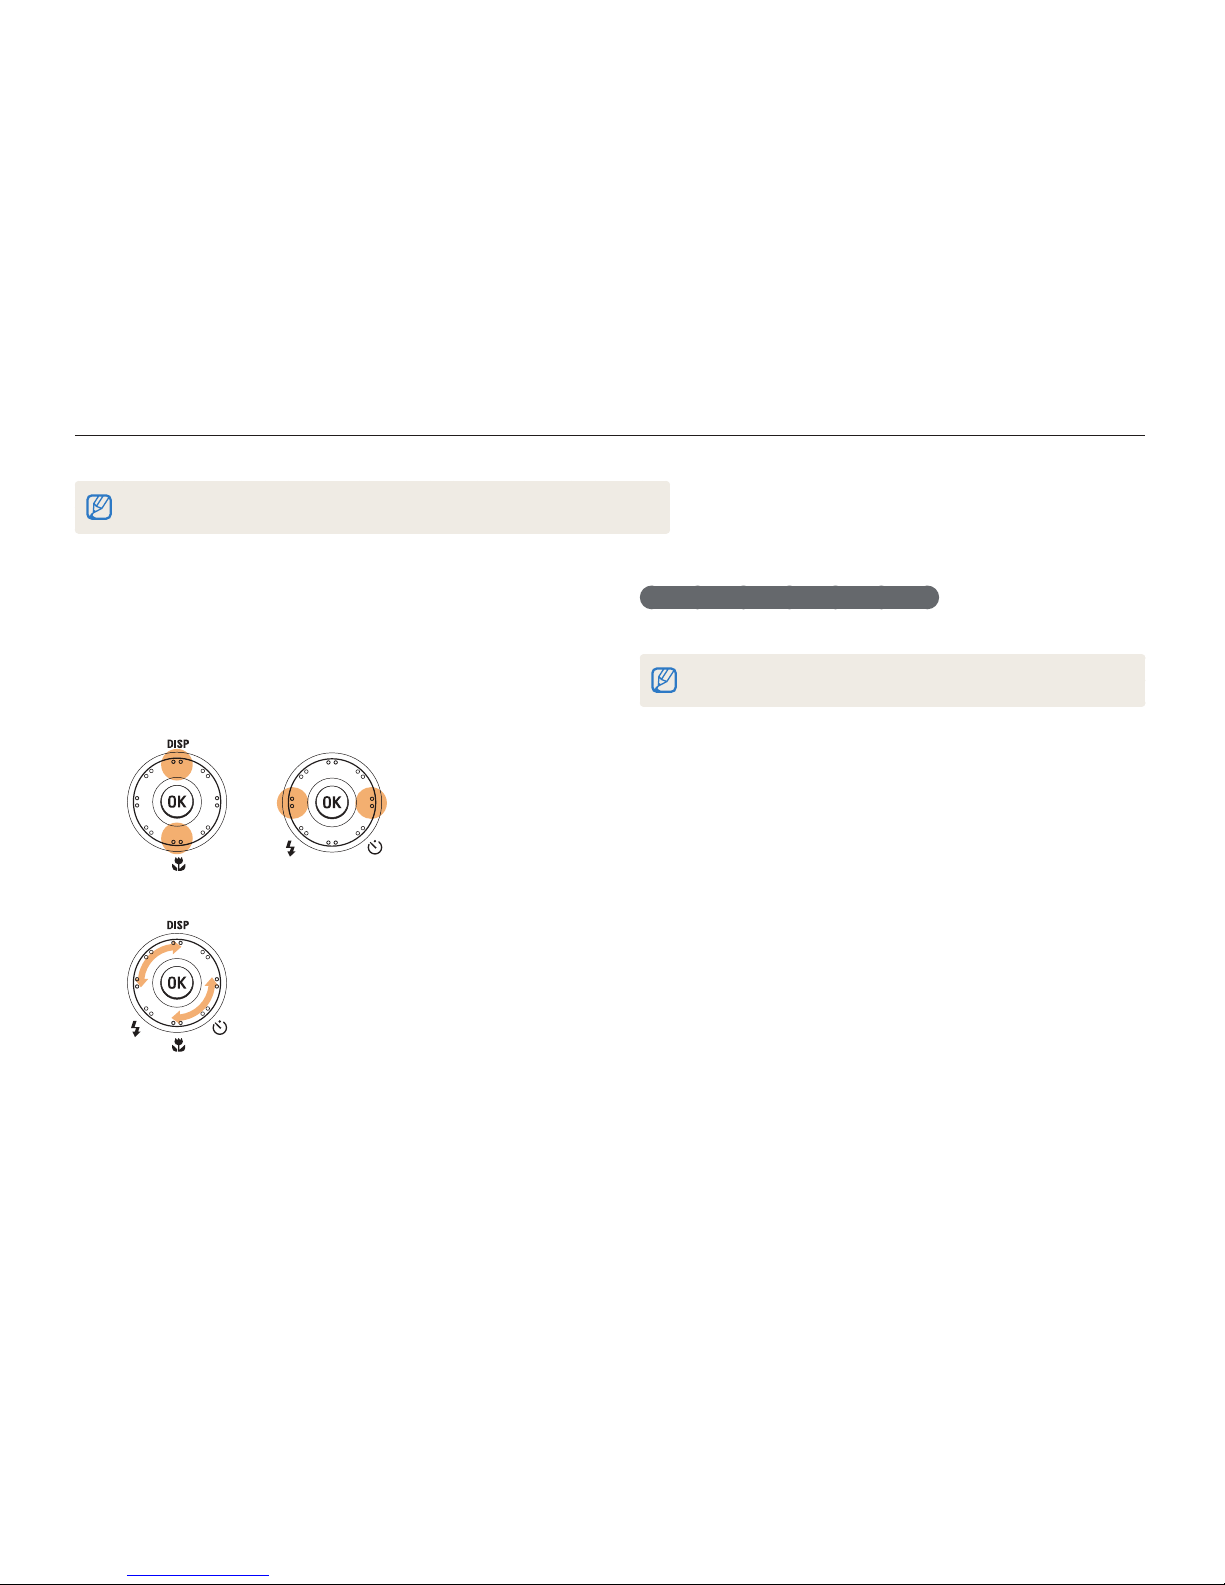
Selecting options
You can select options by pressing [m] and rotating or pressing the navigation button.
You can also access shooting options by pressing [f] but some options are not available.
Going back to the previous menu
Press [m] again to go back to the previous menu.
Press [Shutter] to return to Shooting mode.
In Shooting mode, press [1 m
].
Rotate or press the navigation button to scroll to an
2
option or menu.
Press [t
D
] or [M] to move up or down; press [F] or [t] to
move left or right.
Rotate the navigation button any direction.t
Press [3 o
] to confirm the highlighted option or menu.
Basic functions
17
Selecting options
Rotate the navigation button or press [4 D
] or [M] to
scroll to White Balance and then press [
t
] or [o].
EV
White Balance
WB Fine-tuning
ISO
Face Detection
Photo Size
Quality
Exit Back
Rotate the navigation button or press [5 F
] or [t] to
scroll to a white balance option.
Daylight
Back Move
Press [6 o
].
E.g. Selecting a white balance option in the P mode
Rotate the mode dial to 1 p
.
Press [2 m
].
Functions
Sound
Display
Settings
EV
White Balance
WB Fine-tuning
ISO
Face Detection
Photo Size
Quality
Exit
Change
Rotate the navigation button or press [3 D
] or [M] to
scroll to Functions and then press [
t
] or [o].
Basic functions
18
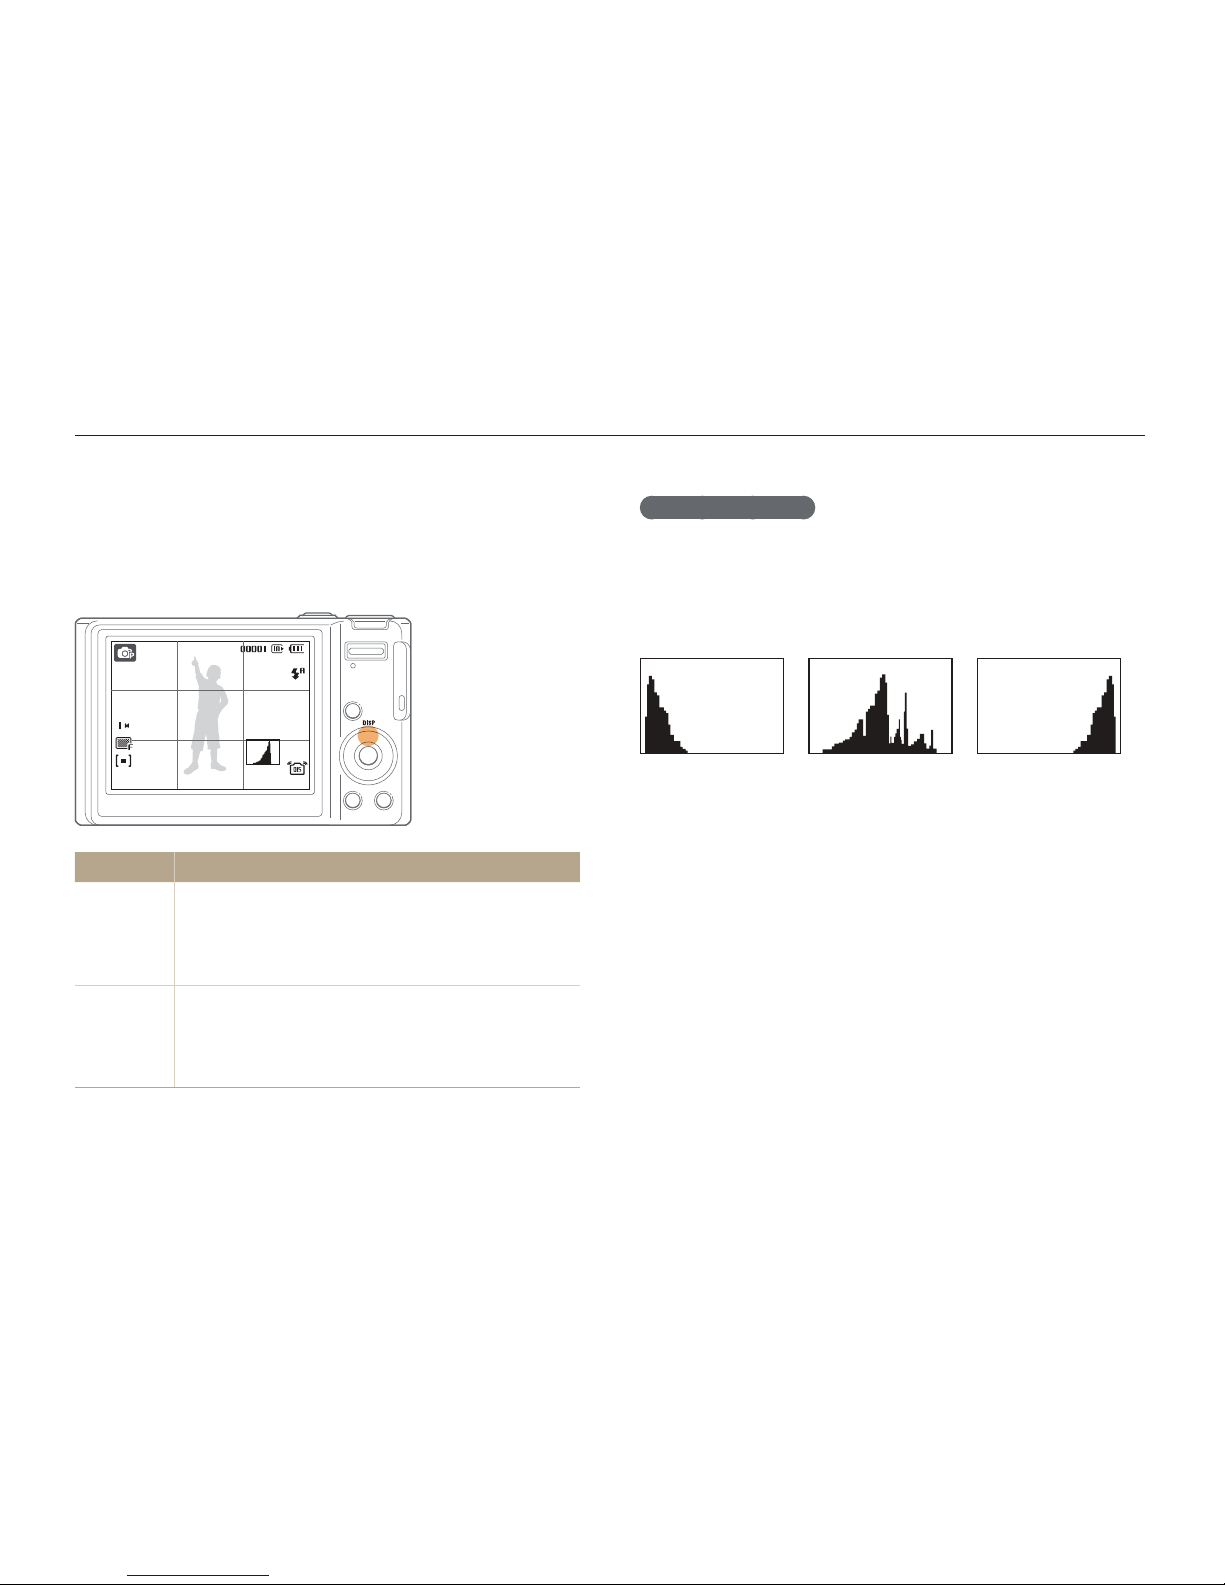
Setting the display and sound
Learn how to change the basic settings for the display and sound according to your preferences.
About a histogram
A histogram is a graph that displays how light is distributed in your
photo. If the histogram has a high peak on the left, your photos
are dark. A peak on the right of the graph means that your photos
are bright. The height of the peaks is related to color information.
The more of a particular color, the taller the peak.
Underexposed
W
ell Exposed Overexposed
Changing the display type
Select a style of display for Shooting or Playback mode.
Press [
D
] repeatedly to change a display type.
Mode Description
Shooting
Display all information about shootingt
Hide information about shooting, except the t
available number of photos
t Display grid lines and histogram
Playback
Display all information about the current photot
Hide all information about the current filet
Display information about the current file, except the t
shooting settings and histogram

Basic functions
19
Setting the display and sound
Setting the sound
Set whether your camera emits a specified sound when you
operate your camera.
In Shooting or Playback mode, press [1 m
].
Select
2
Sound Beep Sound an option.
Option Description
Off
The camera does not emit any sounds.
1/2/3
The camera emits sounds.
Press [3 m
] to return to the previous mode.
Basic functions
20
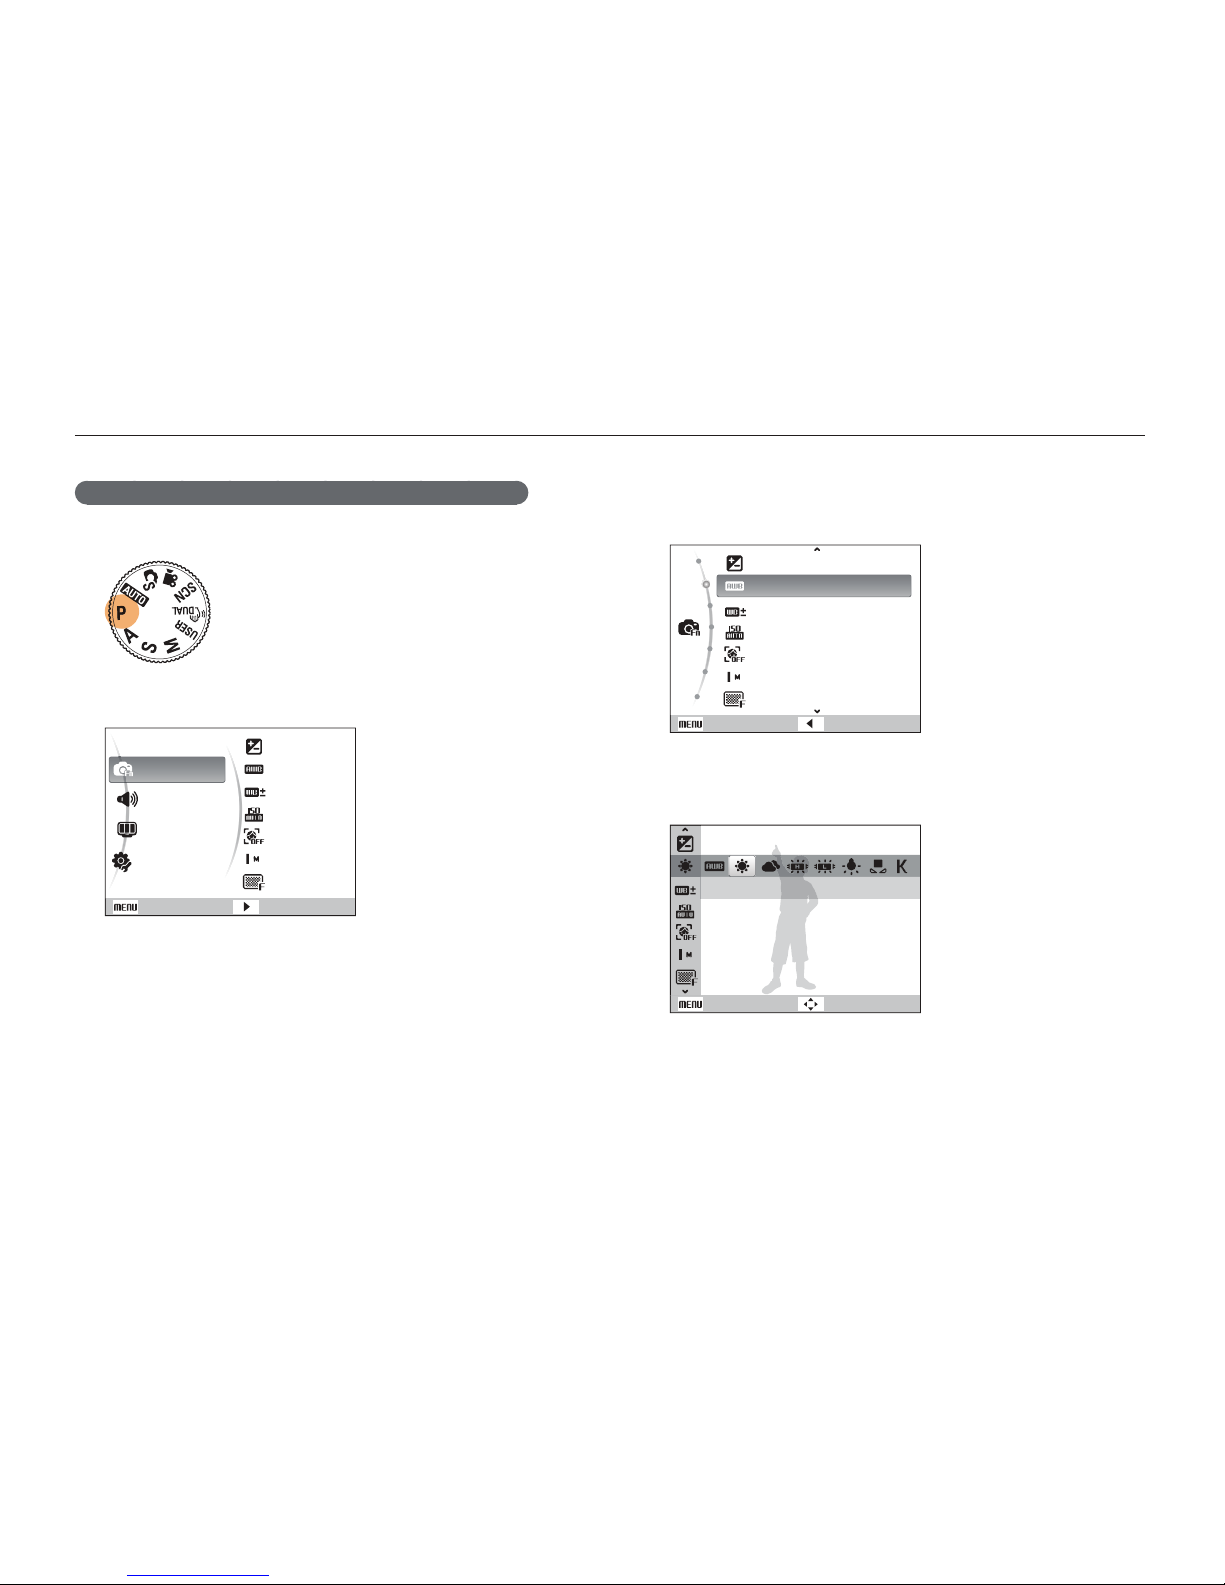
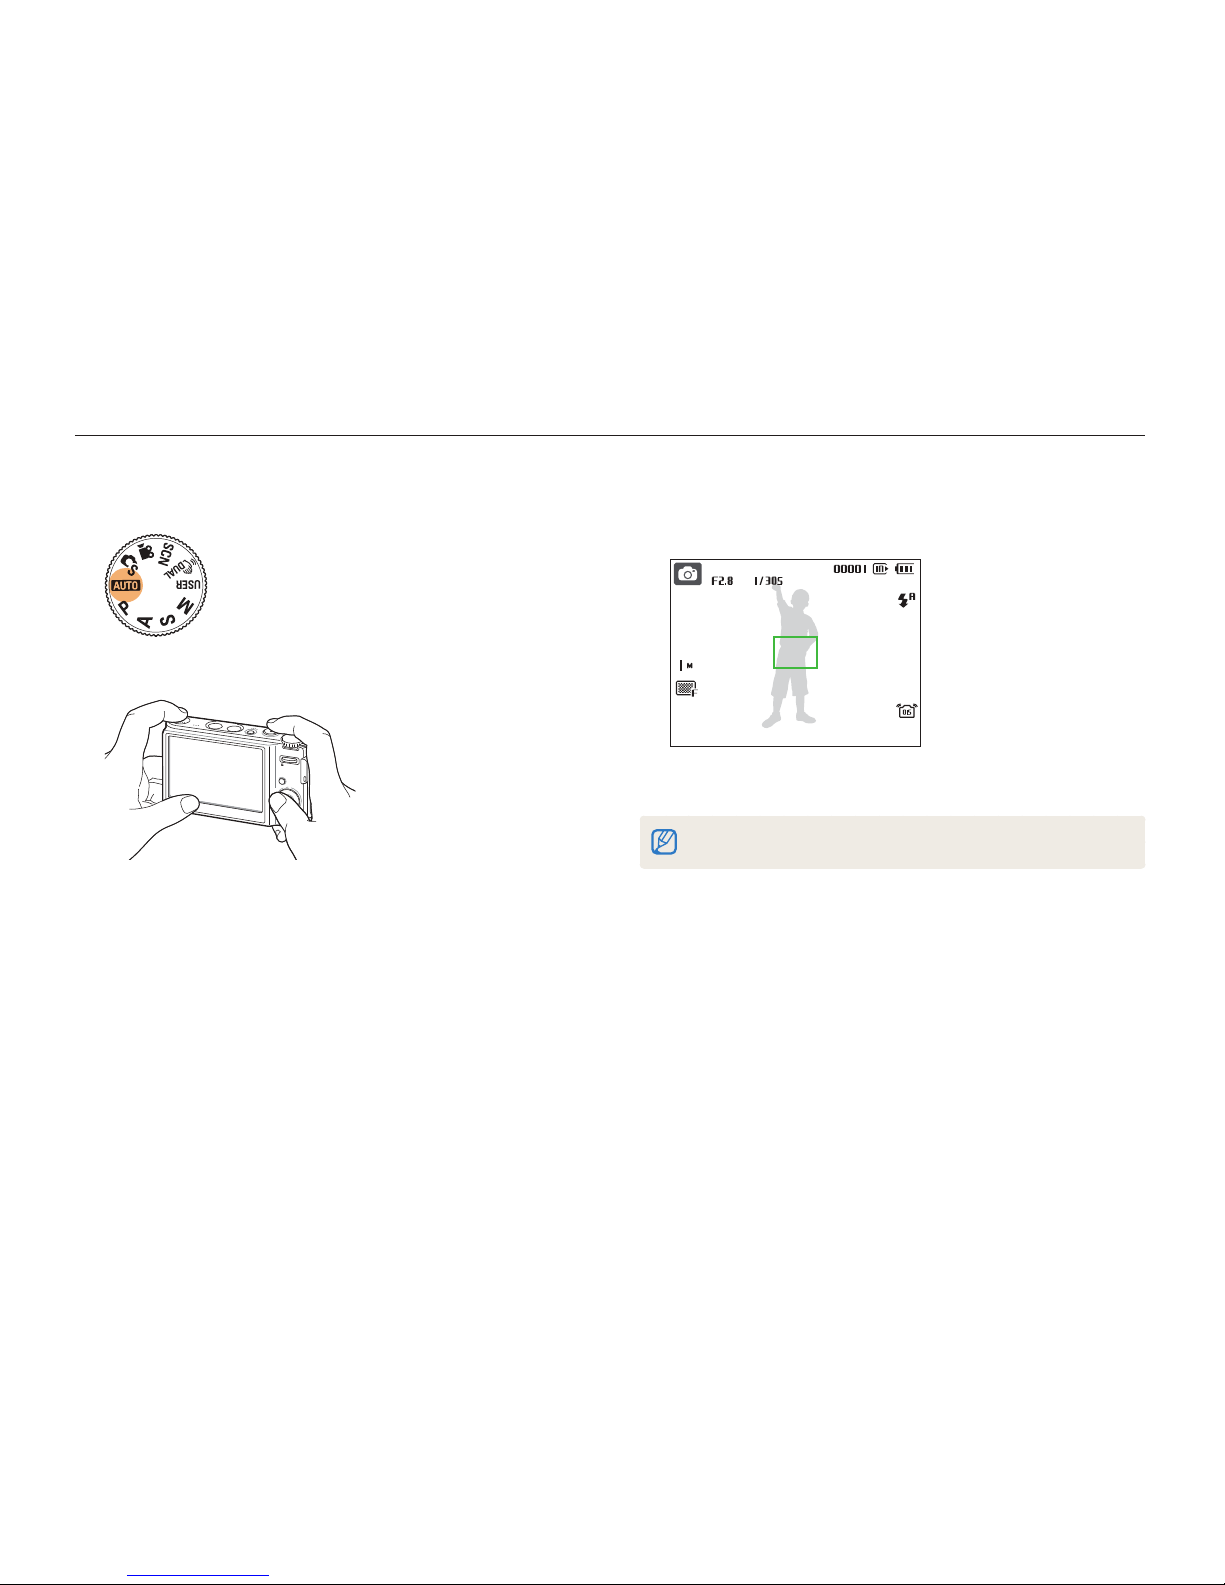
Taking photos
Learn basic actions to take photos easily and quickly in the Auto mode.
Rotate the mode dial to 1 a
.
Align your subject in the frame.
2
Half-press [3 Shutter] to focus.
A green frame means the subject in focus.t
Press [4 Shutter] to take a photo.
See page 23 for tips to get clearer photos.
Basic functions
21
Taking photos
Digital zoom
If the zoom indicator is in the digital range, your camera is using
the digital zoom. The picture quality may deteriorate when you
use the digital zoom.
Optical range
Zoom indicator
Digital range
The digital zoom is not available when using t
S, d, s
(in
some scenes), and v modes and when used with Face Detection.
It may take longer to save a photo when using the digital zoom.t
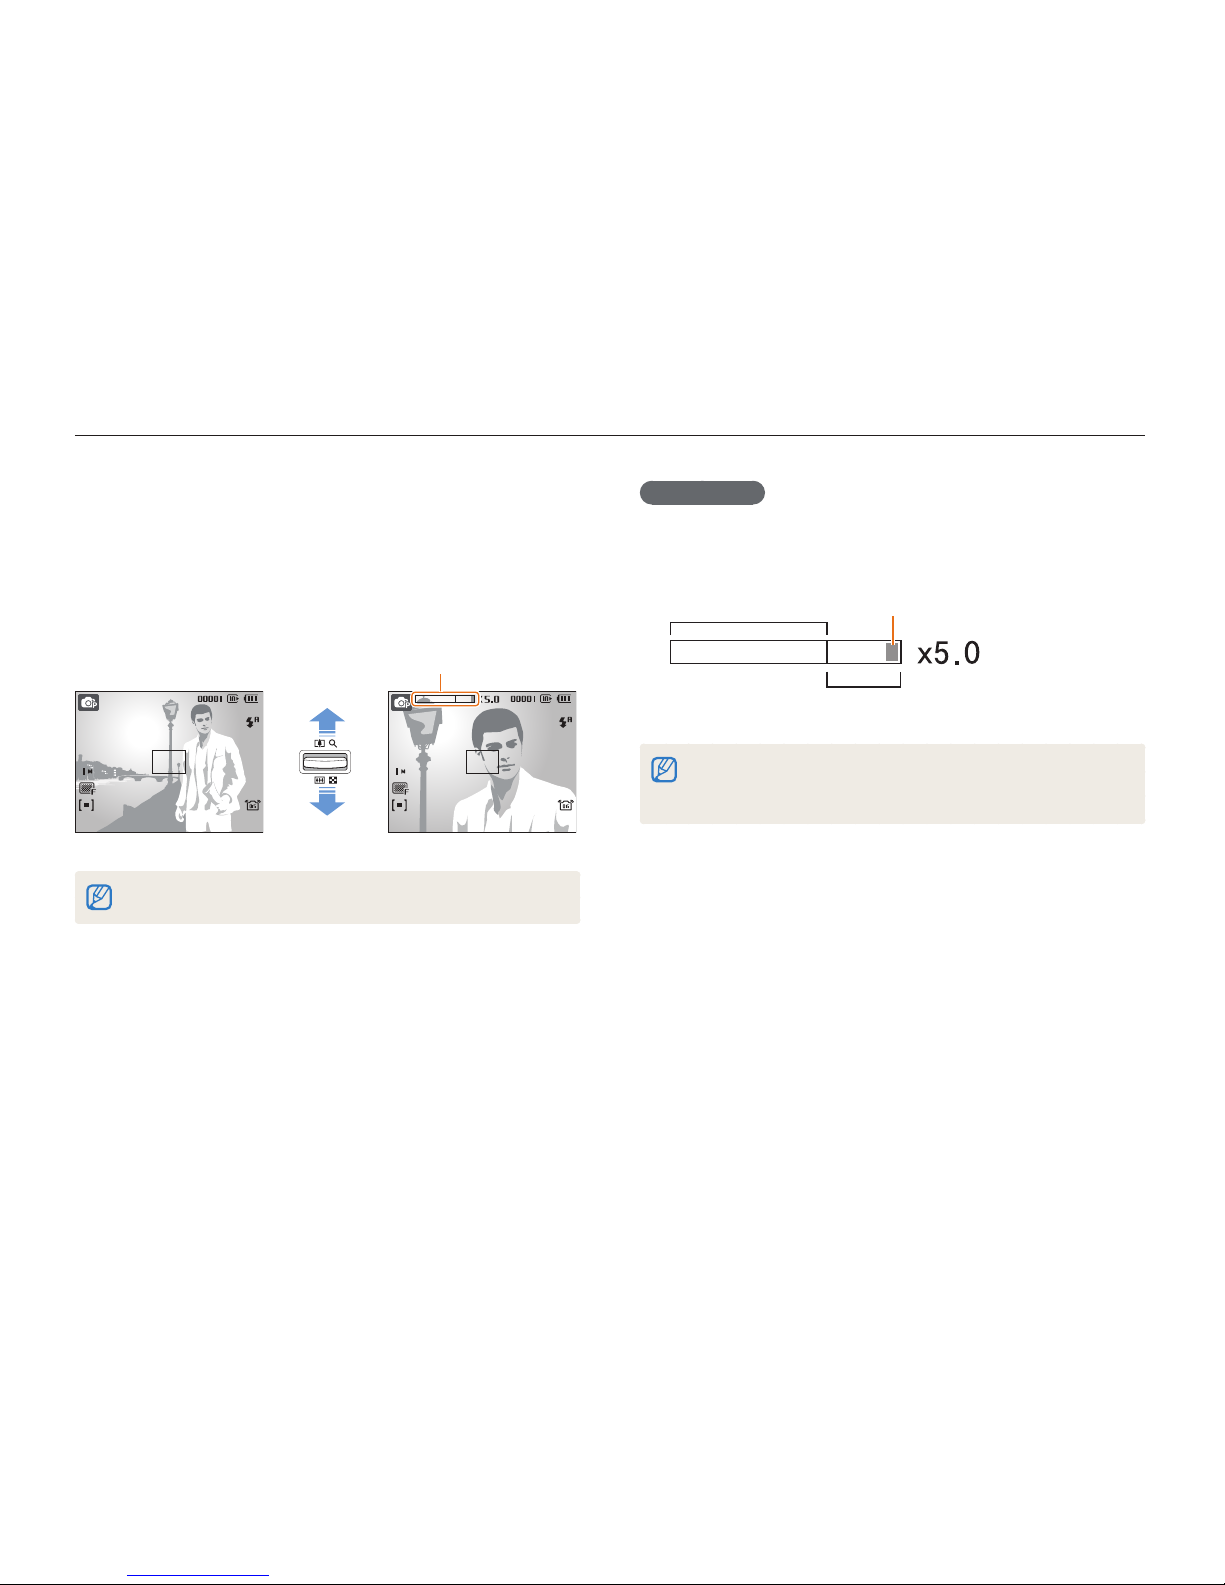
Zooming
You can shoot close-up photos by adjusting the zoom. Your
camera has a 5X optical zoom and 5X digital zoom. By using
both, you can zoom in up to 25 times.
Push [Zoom] up to zoom in on your subject. Push [Zoom] down
to zoom out.
Zoom in
Zoom out
Zoom ratio
The zoom ratio available for videos differs.
Basic functions
22
Taking photos
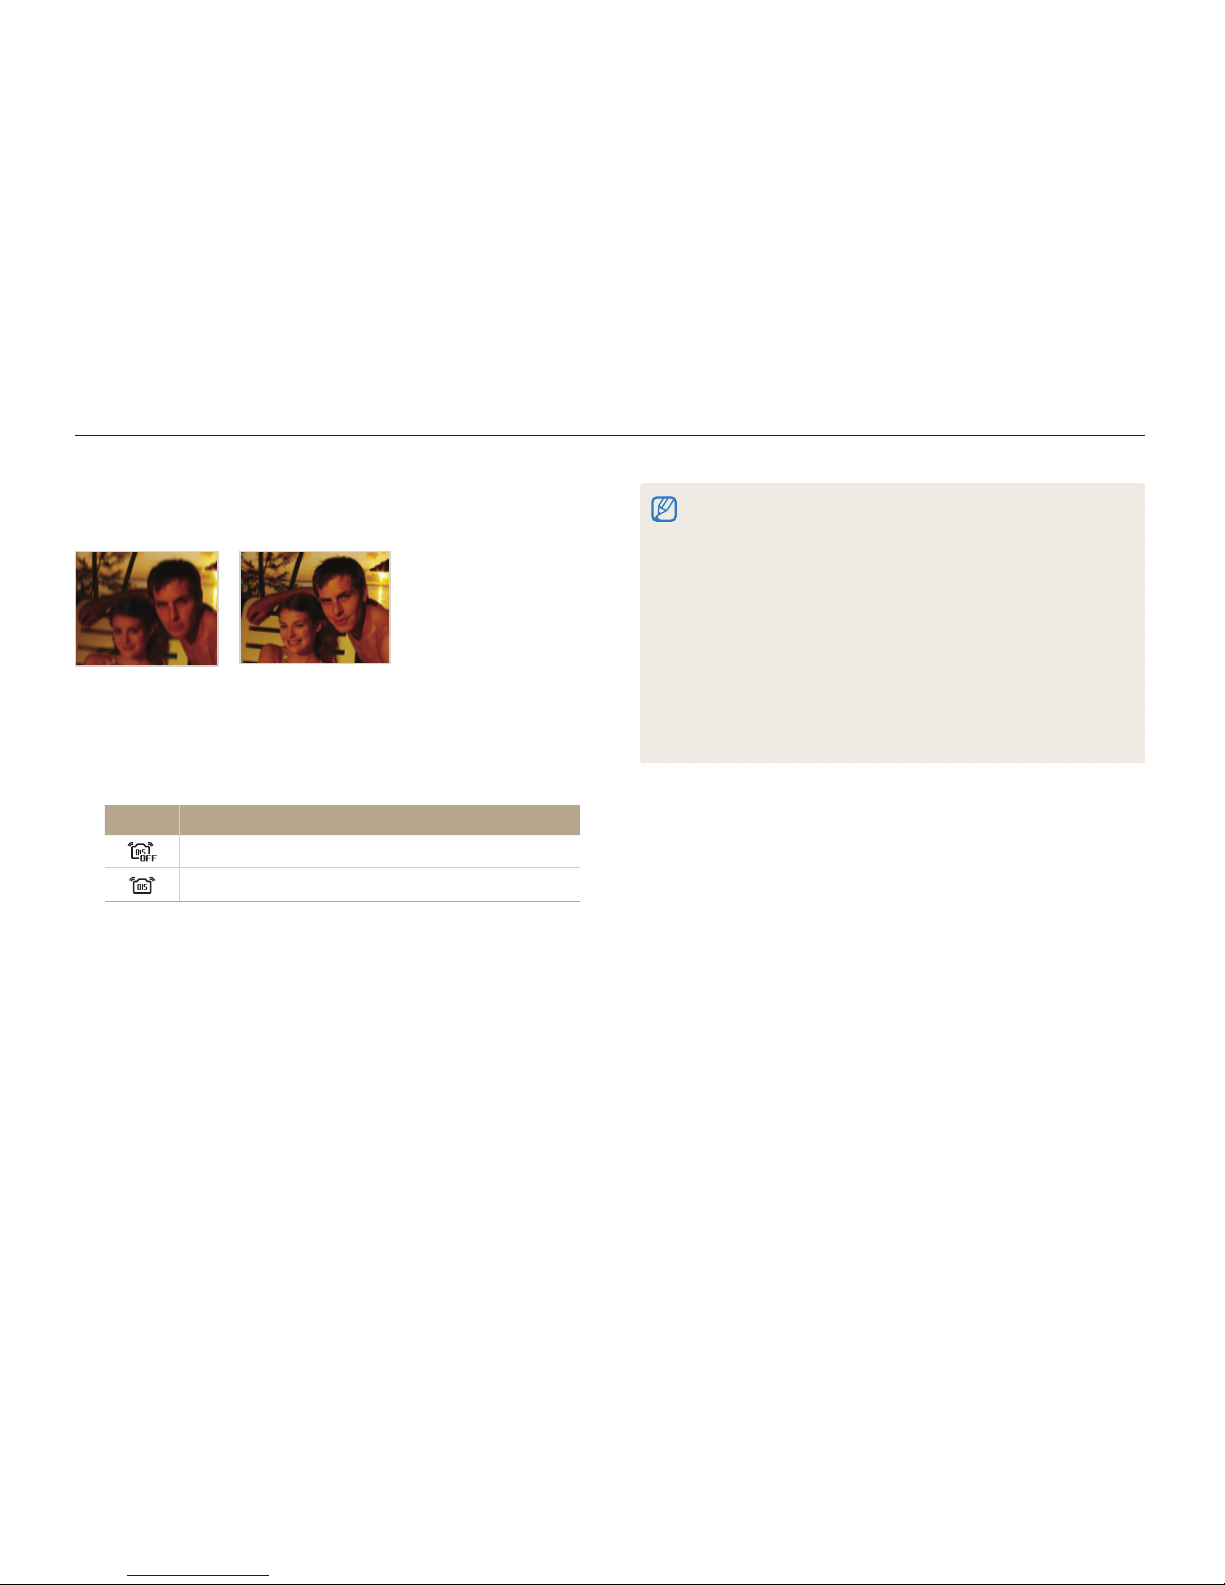
OIS may not function properly when:t
you move your camera to follow a moving subject you use digital zoom there is too much camera shake the shutter speed is slow (e.g., when you select - Night in the s
mode)
the battery is low -
you take a close-up shot If you use the OIS function with a tripod, your images may be blurred t
by the vibration of the OIS sensor. Deactivate the OIS function when
you use a tripod.
If the camera is impacted, the display will be blurry. In this case, turn t
off the camera and turn it on again to use the OIS function correctly.
Reducing camera shake (OIS)
Reduce camera shake optically in Shooting mode.
Before correction After correction
In Shooting mode, press [1 m
].
Select
2
Functions OIS an option.
Option Description
Off: Deactivate the OIS function.
On: Activate the OIS function.
Basic functions
23
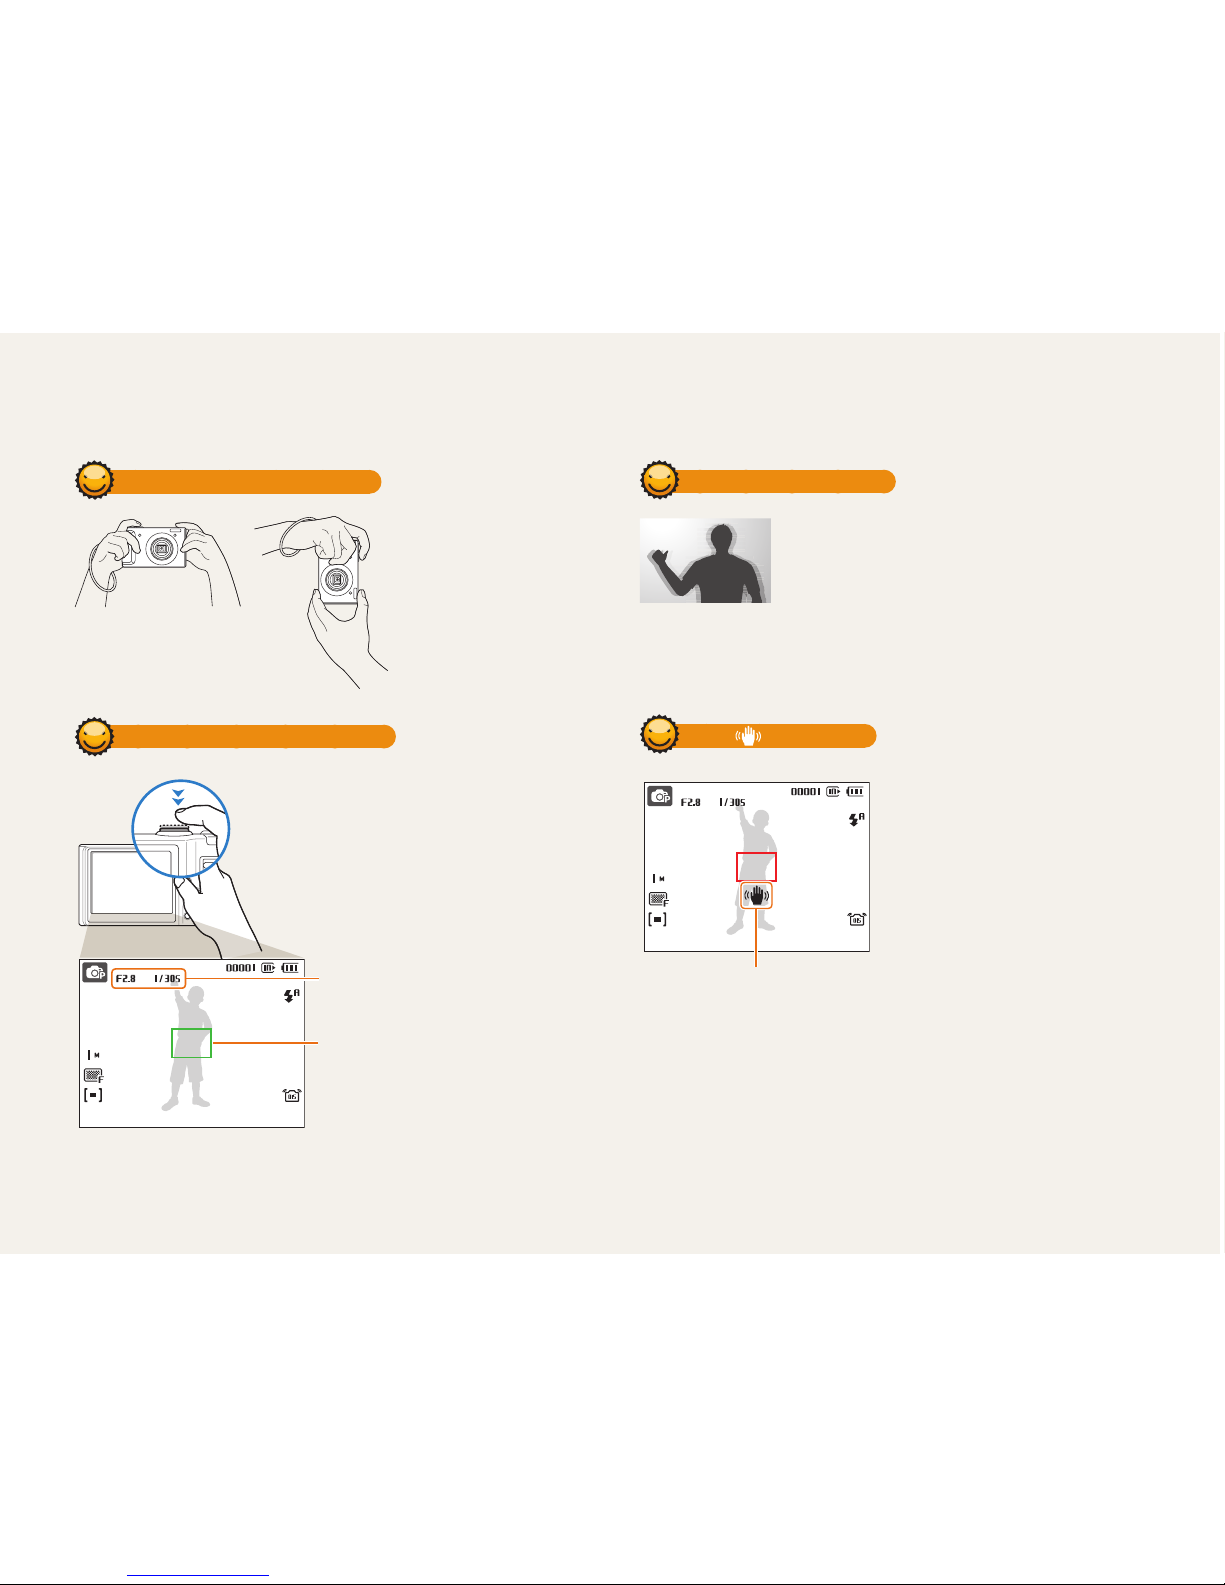
Tips for getting a clearer photo
Holding your camera correctly
Make sure nothing is
blocking the lens.
Half-pressing the shutter button
Half-press [Shutter] and adjust the
focus. Focus and exposure will be
adjusted automatically.
The aperture value and
shutter speed are set.
Focus frame
Press [• Shutter] to take the photo
if displayed in green.
Change the frame and half-press •
[Shutter] again if displayed in red.
Reducing camera shake
Set the Optical Image Stabilization option to •
reduce camera shake optically. (p. 22)
Select the •
d
mode to reduce camera shake
both optically and digitally. (p. 27)
When is displayed
Camera shake
When shooting in the dark, avoid
setting the flash option to Slow
Sync or Off. The aperture remains
open longer and it may be harder
to hold the camera still.
Use a tripod or set the flash •
option to Fill in. (p. 41)
Set ISO speed options. (p. • 43)

Basic functions
24
Preventing your subject from being out of focus
It may be difficult to get your subject in focus when:
there is little contrast between the subject and background -
(When your subject is wearing a color of clothing that is similar to the
background)
the light source behind the subject is too bright
-
the subject is shiny -
the subject includes horizontal patterns, such as blinds -
the subject is not positioned in the center of the frame -
Use the focus lock
Half-press [Shutter] to focus. When the subject is in focus,
you can reposition the frame to change the composition.
When you are ready, press [Shutter] to take your photo.
When you take photos in low lightt
Turn on the flash.
(p. 41)
When subjects are moving fastt
Use the continuous
or motion capture
function. (p. 55)

Using the Smart Auto mode …………………………… 26
Using the DUAL IS mode ………………………………… 27
Using the Scene mode …………………………………… 28
Adjusting face tone and hiding imperfections …………… 28
Using the frame guide ……………………………………… 29
Using the Program mode ……………………………… 30
Using the Aperture Priority, Shutter Priority,
or Manual mode …………………………………………… 31
Using the Aperture Priority mode ………………………… 32
Using the Shutter Priority mode …………………………… 32
Using the Manual mode …………………………………… 33
Using the User mode …………………………………… 34
Configuring your settings …………………………………… 34
Using your custom settings ………………………………… 34
Recording a video ………………………………………… 35
Recording voice memos ………………………………… 36
Recording a voice memo …………………………………… 36
Adding a voice memo to a photo ………………………… 36
Extended functions
Learn how to take a photo by selecting a mode and how to
record a video or voice memo.
Extended functions
26
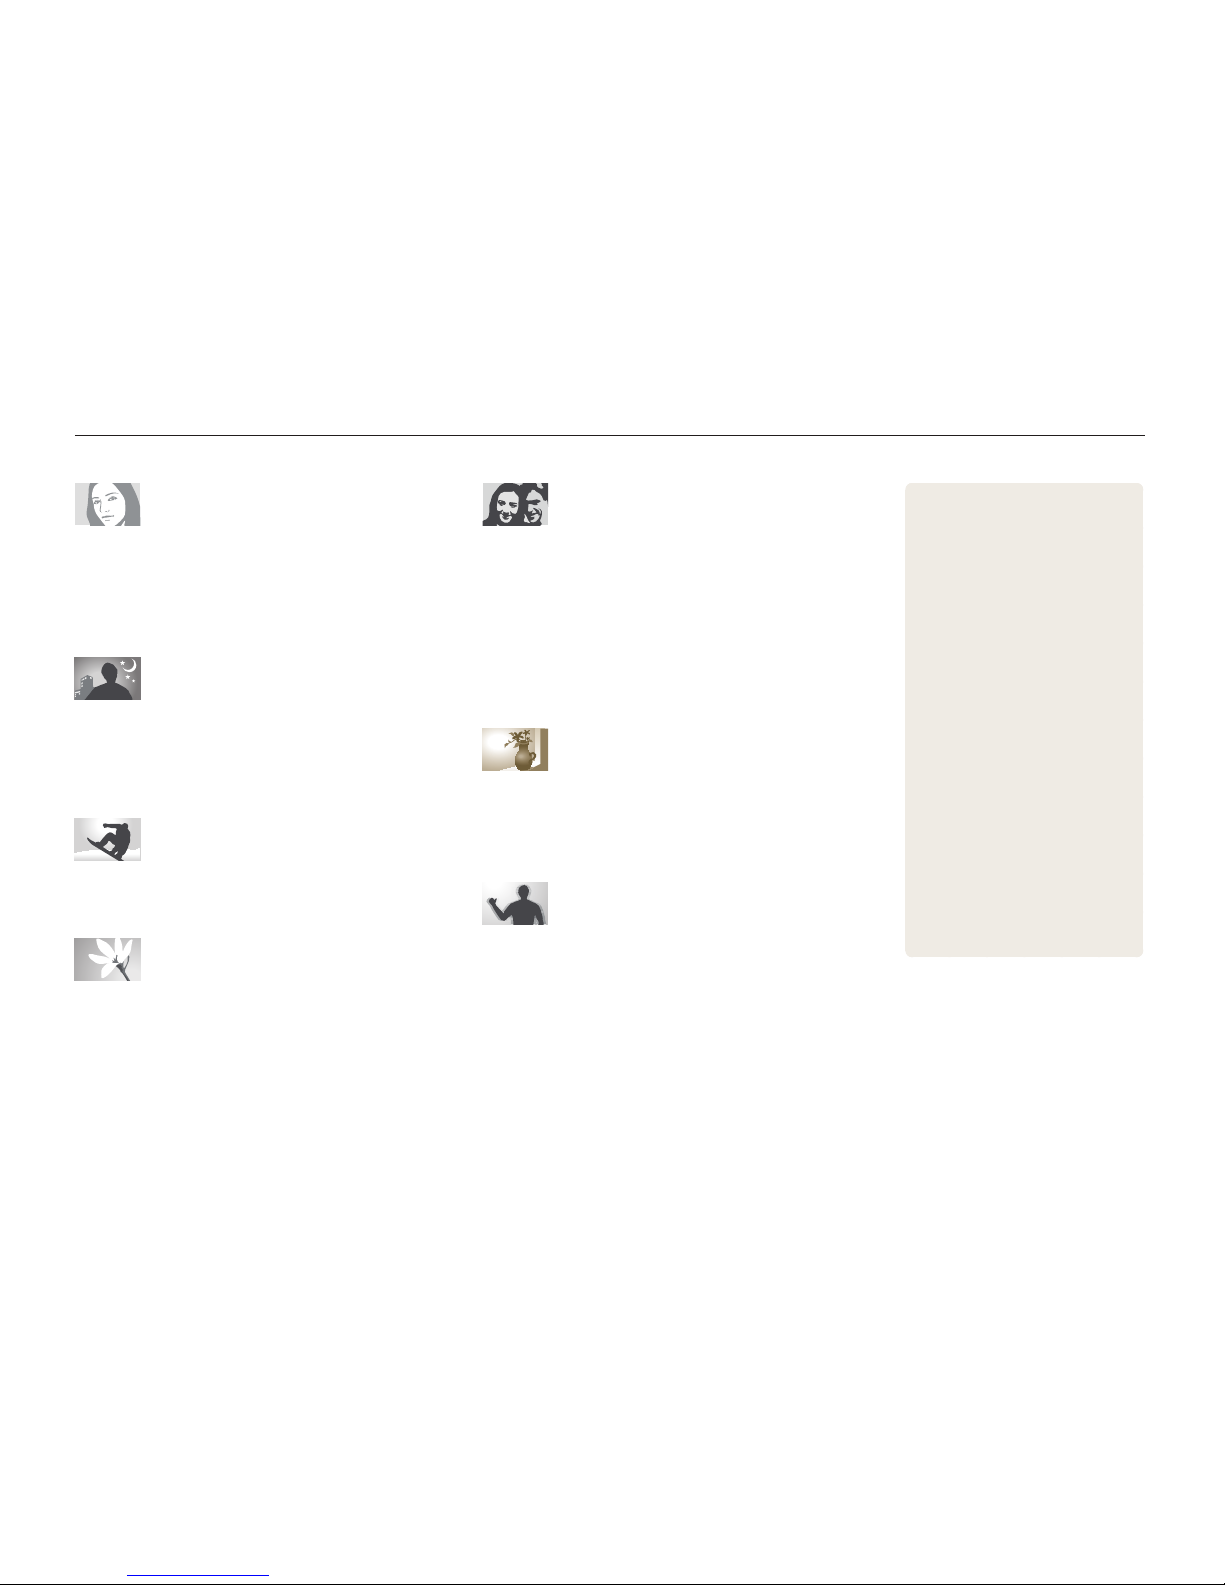
Using the Smart Auto mode
In this mode, your camera automatically chooses the appropriate camera settings based on a defected type of scene. It will be helpful if you
are not familiar with the camera settings for various scenes.
Icon Description
Appears when taking portraits.
Appears when taking close-up photos.
Appears when taking close-up photos of text.
Appears when the camera and subject are stable for a
while.
Appears when taking photos of actively moving subjects.
Half-press [3 Shutter] to focus.
Press [4 Shutter] to take the photo.
If the camera does not recognize a proper scene mode, t will not
change and the default settings will be used.
Even if there is a face detected, the camera may not select a portrait t
mode depending on the subject's position or lighting.
The camera may not select the correct scene depending on shooting t
environments, such as camera shake, lighting, and distance to the
subject.
Even if you use a tripod, the t
mode may not be detected depending
on the subject's movement.
Rotate the mode dial to 1 S
.
Align your subject in the frame.
2
The camera selects a scene automatically. An appropriate t
mode icon will appear at the top left of the screen.
Icon Description
Appears when taking photos of landscapes.
Appears when taking photos of bright backgrounds.
Appears when taking photos of landscapes at night.
This is available only when the flash is off.
Appears when taking portraits at night.
Appears when taking photos of landscapes with
backlighting.
Appears when taking portraits with backlighting.

Extended functions
27
Before correction After correction
Rotate the mode dial to 1 d
.
Align your subject in the frame and half-press [
2
Shutter]
to focus.
Press [
3
Shutter] to take the photo.
The digital zoom will not work in this mode.t
The photo will be corrected optically only when taken with a light t
source that is brighter than fluorescent light.
If your subject is moving rapidly, the photo may be blurry.t
Set the Optical Image Stabilization option to reduce camera shake in t
different shooting modes. (p. 22)
Using the DUAL IS mode
Reduce camera shake and prevent blurred photos with Optical and Digital Image Stabilization functions.
Extended functions
28
Adjusting face tone and hiding imperfections
Take a photo of a person with options to hide facial imperfections.
Rotate the mode dial to 1 s
.
Select
2
Beauty Shot.
3
To make the subject's skin tone appear lighter (face
only), press [
m
].
Select 4 Functions Face Tone an option.
Select a higher setting to make skin tone appear lighter.t
Level 2
Back Move
To hide 5 facial imperfections, press [
m
].
Rotate the mode dial to
1
s
.
Select a scene.
2
Frame Guide
This mode is appropriate for shooting with
pre-composed scenes.
To change the scene mode, press [t
m
] and select Scene
a scene.
For the Beauty Shot mode, see “t Adjusting face tone and
hiding imperfections.”
For the Frame Guide mode, see “t Using the frame guide” on
page 29.
Align your subject in the frame and half-press [3 Shutter]
to focus.
Press [
4
Shutter] to take the photo.
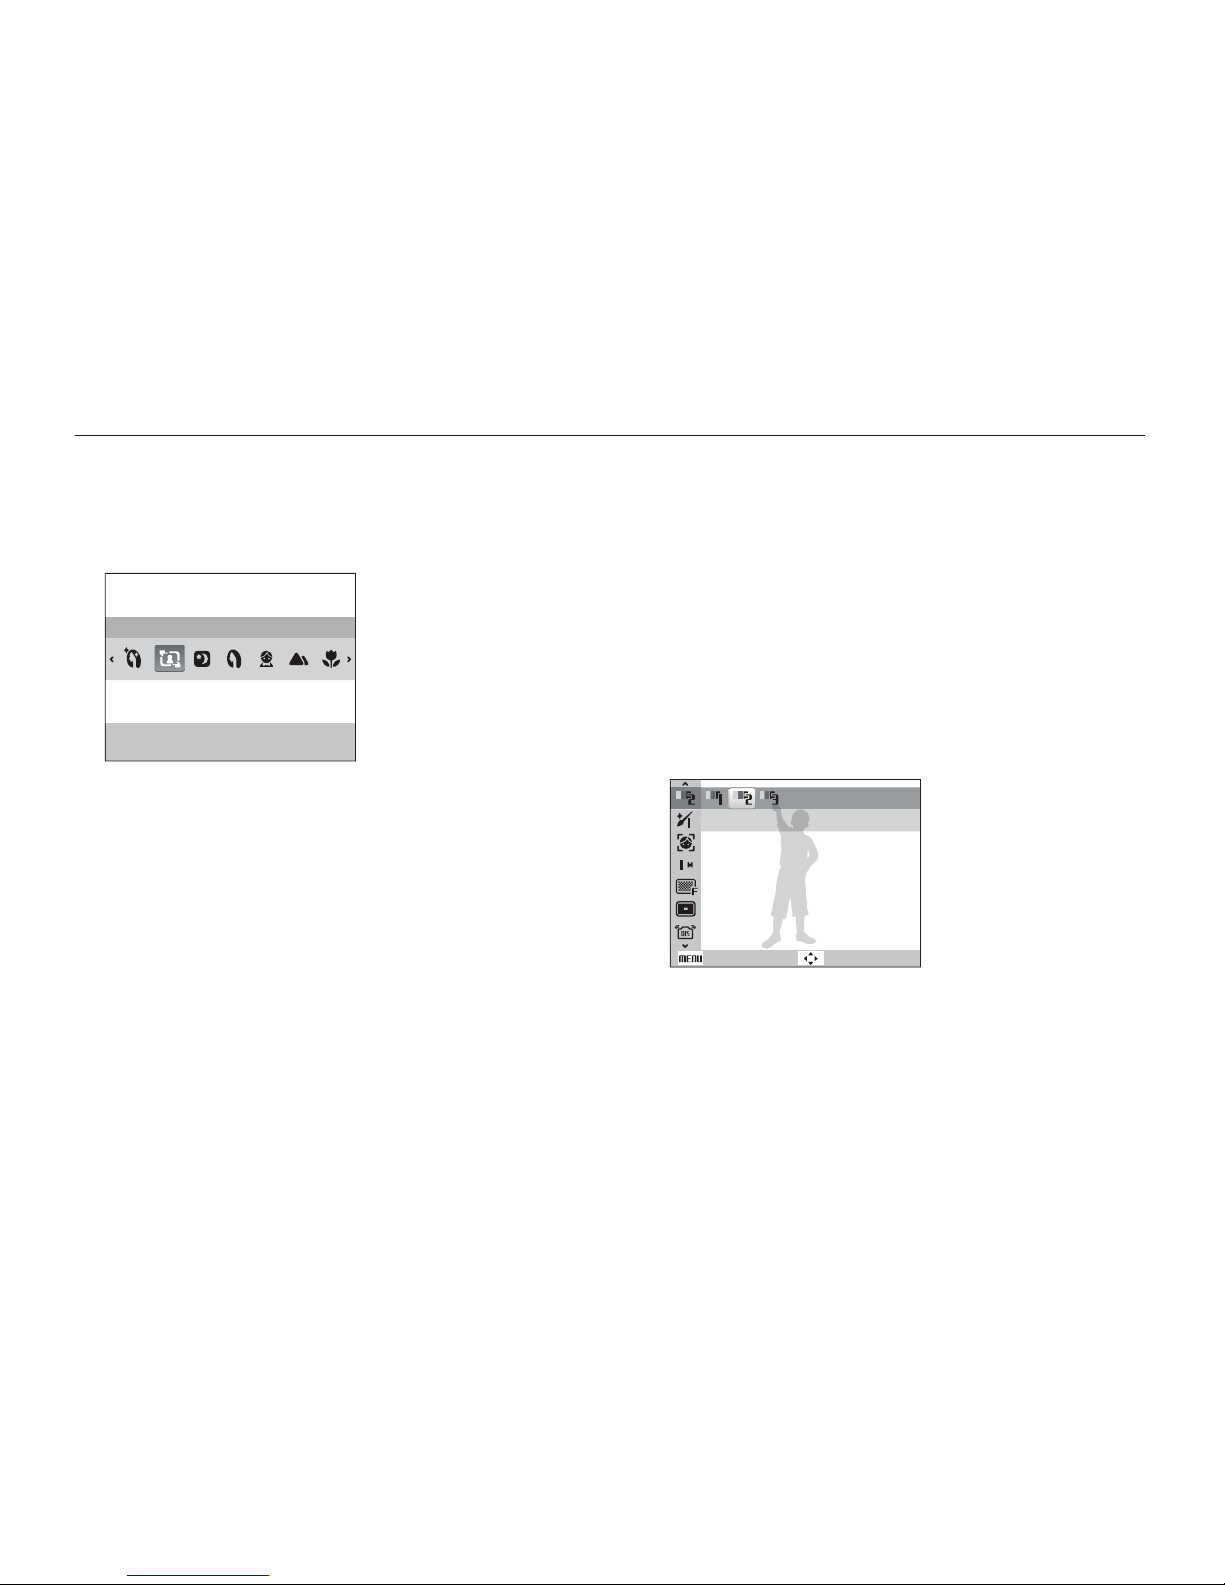
Using the Scene mode
Take a photo with options preset for a specific scene.

Extended functions
29
Using the Scene mode
Using the frame guide
When you want another person to take a photo of you, you can
compose the scene with the frame guide feature. The frame
guide will help the other person take a photo of you by showing
the part of the pre-composed scene.
Rotate the mode dial to 1 s
.
Select
2
Frame Guide.
Align your subject in the frame and press [3 Shutter].
Transparent guides will appear on the left and right of the t
frame.
Cancel Frame: OK
Ask another person to take a photo.
4
The person must align the subject in the frame by using the t
guides, and then press [Shutter] to take the photo.
To cancel the guides, press [5 o
].
Select
6
Functions Face Retouch an option.
Select a higher setting to hide a greater number of t
imperfections.
Level 1
Back Move
Align your subject in the frame and half-press [7 Shutter]
to focus.
Press [
8
Shutter] to take the photo.
The focus distance will be set to Auto Macro.