

Page 1
Page 2
Instructions
Getting to Know your camera
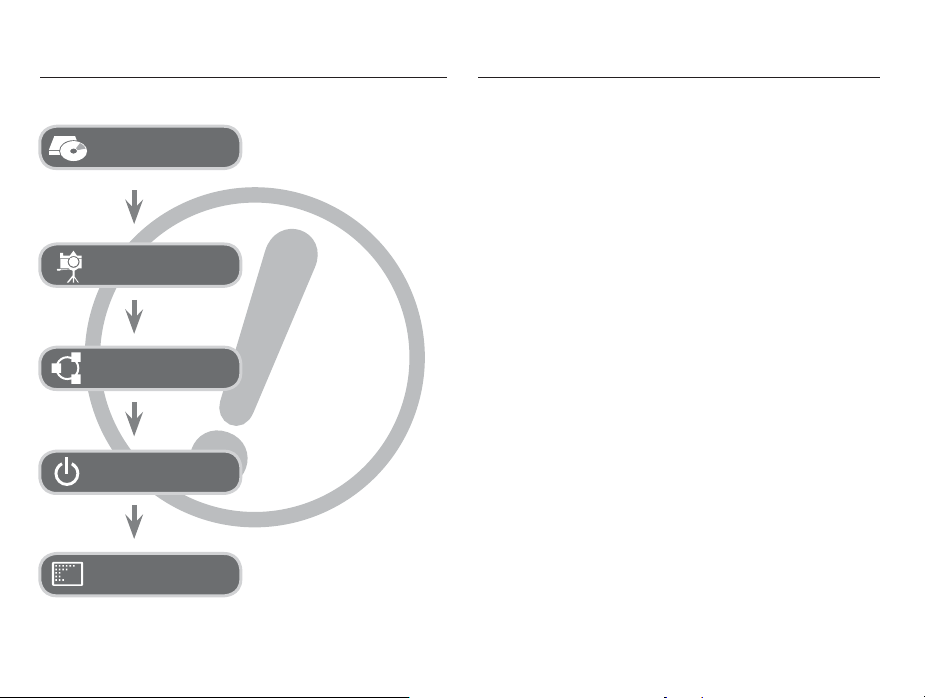
Use this camera in the following order.
Setting up the application
software
Take a picture
Insert the USB cable
Check the camera's power
Check [Removable Disk]
To use this camera with a PC, install
the application software fi rst. After
you have done this, you can move
the stored images in the camera to
you PC and can edit them using an
image editing program.
Take a picture. (p.23)
Insert the supplied USB cable
into the PC’s USB port and the
camera’s USB connection
terminal. (p.96)
Check the camera’s power. If the
power is turned off,
power button to turn it on.
Open Windows’s EXPLORER
and search for [Removable Disk].
(p.97)
press the
Thank you for buying a Samsung Digital Camera.
Prior to using this camera, please read the user manual thoroughly.
If you require After Sales service, please bring the camera and
the cause of the camera malfunction (such as battery, Memory
card etc.) to a Samsung Authorized Service Center.
Please check that the camera is operating properly before you
intend to use it (e.g. for a trip or an important event) to avoid
disappointment. Samsung takes no responsibility for any loss or
damage that may result from camera malfunction.
Keep this manual in a safe place.
If you use a card reader to copy the images on the memory card to
your PC, the images could be damaged. When transferring the
images taken with the camera to your PC, be sure to use the
supplied USB cable to connect the camera to your PC. Please note
that the manufacturer holds no responsibility for loss or damage of
images on the memory card due to the use of a card reader.
The contents and illustrations of this manual are subject to
change without prior notice for upgrading the camera functions.
It is advisable to replace waterproof components once a year to
maintain the waterproof performance. Contact your nearest Samsung
service center for the replacement of waterproof components.
Ä
Microsoft, Windows and Windows logo are registered trademarks
of Microsoft Corporation incorporated in the United States and/or
other countries.
Ä
Adobe and Reader are either trademarks or registered trademarks
in the United States and/or other countries.
Ä
All brand and product names appearing in this manual are
registered trademarks of their respective companies.
Ä
For Open Source License information, refer to the “OpenSourceInfo.pdf”
in the provided CD-ROM.
1
Page 3
Danger
Warning
DANGER indicates an imminently hazardous situation which, if not
avoided, will result in death or serious injury.
Do not attempt to modify this camera in any way. To do so may
result in fi re, injury, electric shock, or severe damage to you or
your camera. Internal inspection, maintenance and repairs should
only be carried out by your dealer or Samsung Camera Service
center.
Please do not use this product in close proximity to fl ammable or
explosive gases, as this could increase the risk of explosion.
Should any form of liquid or a foreign object enter the camera,
do not use it. Switch off the camera, and then disconnect the
power source. You must contact your dealer or Samsung Camera
Service center. Do not continue to use the camera as this may
cause a fi re or electric shock.
Do not insert or drop metallic or infl ammable foreign objects into
the camera through access points e.g. the memory card slot and
battery chamber. This may cause a fi re or electric shock.
Do not operate this camera with wet hands. This could pose a
risk of electric shock.
2
WARNING indicates a potentially hazardous situation which, if not
avoided, could result in death or serious injury.
Do not use the fl ash in close proximity to people or animals.
Positioning the fl ash too close to your subject’s eyes may cause
eyesight damage.
For safety reasons keep this product and its accessories out of
reach of children or animals to prevent accidents e.g.:
- Swallowing battery or small camera accessories. If an accident
should occur, please consult a doctor immediately.
- There is the possibility of injury from the camera’s moving parts.
The battery and camera may become hot during prolonged use
and it may result in camera malfunction. If the camera or battery
becomes hot, allow the camera to sit idle for a few minutes to
allow it time to cool.
Do not leave this camera in places subject to extremely high
temperatures, such as a sealed vehicle, direct sunlight or other
places of extremes in temperature. Exposure to extreme
temperatures may adversely affect the camera’s internal
components and could cause a fi re.
When in use, do not cover the camera or Charger. This may cause
heat to build up and distort the camera body or cause a fi re. Always
use the camera and its accessories in a well-ventilated area.
Page 4
Caution
CAUTION indicates a potentially hazardous situation which, if not
avoided, may result in a minor or moderate injury.
Leaking, overheating, or damaged battery could result in fi re or
injury.
- Only use battery with the correct specifi cations for the camera.
- Do not short circuit, heat or dispose of battery in fi re.
- Do not insert the battery with the polarities reversed.
Remove the battery when not planning to use the camera for a
long period of time. Otherwise the battery may leak corrosive
electrolyte and permanently damage the camera’s components.
Do not fi re the fl ash while it is in contact with hands or objects. Do
not touch the fl ash after using it continuously. It may cause burns.
Do not move the camera while it is switched on, if you are using
the AC adapter. After use, always switch off the camera before
unplugging the cable from the wall socket. Then make sure that
any connector cords or cables to other devices are disconnected
before moving the camera. Failure to do so may damage the
cords or cables and cause a fi re or electric shock.
Take care not to touch the lens to avoid taking an unclear image
and possibly causing camera malfunction.
Avoid obstructing the lens or the fl ash when you capture an image.
When using this camera in low temperatures, you may experience
the following. These are not camera malfunctions. The camera
usually recovers at normal temperature.
- It takes longer to turn on the LCD screen and the color may differ
from the subject.
- After changing to a different subject or scene, there may be an
after image on the LCD screen.
Credit cards may be demagnetized if left near case. Avoid leaving
magnetic strip cards near the case.
Never connect the 20 pin connector to the USB port of a PC. This
carries a high risk of computer malfunction.
Do not open the battery cover or the USB cover in the sea, a lake
or in similar underwater conditions. Do not open the battery cover
or the USB cover with a wet hand either. It may cause electric
shock or camera malfunction.
3
Page 5

Contents
READY
RECORDING
4
007 System chart
007 Package Contents
007 Sold Separately
008 Identifi cation of features
008 Front & Top
009 Back
010 Bottom
010 5 Function button
011 Self-timer lamp
011 Camera Status Lamp
011 Mode icon
012 Connecting to a Power Source
015 Inserting the memory card
016
Instructions on how to use the memory card
018 Waterproof management
When using the camera for the fi rst time
020
021 LCD screen indicator
022 How to use the menu
023 Starting the recording mode
023 Selecting modes
023 How to use the Smart Auto mode
024 How to use the Program mode
025 How to use the Scene modes
027 How to use the Movie clip mode
028
Recording HD (High Defi nition) movie clips
028
Recording a movie clip without sound
029 Things to Watch Out for When Taking
Pictures
Using the camera buttons to set the camera
030
030 POWER button
030 SHUTTER button
031 Zoom button
032 Info (DISP) / Up button
033 Macro / Down button
034 Focus lock
035 Flash / Left button
037 Self-timer / Right button
038 MENU button
038 OK button
038 Shooting
039 How to Enable Functions Using the
MENU Button
040 Photo Size / Movie Size
040 Quality / Frame rate
041 Exposure compensation
041 ISO
042 White balance
043 Face Detection
046 Smart FR Edit
(Image Resolution)
Page 6

Contents
SETUP
047 Face Tone
047 Face Retouch
047 Auto Focus type
048 Metering
048 Photo Style Selector
049 Smart Filter
050 Image Adjust
051 ACB
051 Drive mode
052 DIS
052 Movie Clip frame stabiliser
052 Smart Scene Detection
053 Voice Memo
053 Voice Recording
054 Recording
054 Setting movie recording
055 Sound menu
055 Sound
055 Volume
055 Start up sound
055 Shutter sound
055 Beep sound
056 AF sound
056 Setup menu
a movie clip without voice
056 Display
056 Language
056 Function Description
057 Start up image
057 Display Brightness
057 Quick view
057 Display Save
058 Settings
058 Formatting a memory
058 Initialization
059 Setting up the Date / Time / Date type
059 Time Zone
059 File name
060 Imprinting the recording date
060 Auto power off
061 Auto Focus lamp
061 Selecting Video out type
062 Setting the USB
063 Starting play mode
PLAY
063 Playing back a still image
063 Playing back a movie clip
064 Movie clip capture function
064 Playing back a recorded voice
065 Playing back a voice memo
5
Page 7

Contents
065 LCD screen Indicator
Using the camera buttons to set the camera
066
066 Play mode button
066 Thumbnail / Enlargement button
066 Smart Album
069 Info (DISP) / Up button
069 Play & Pause / OK button
070 Left / Right / Down / MENU button
070 Delete button
Setting the playback functions using the
071
Screen
LCD
072 Setting the playback PictBridge function
using the LCD
073 Edit
073 Resize
074 Rotating an image
074 Photo Style Selector
075 Smart Filter
076 Image Adjust
077 Starting the Multi Slide Show
077 Start the Multi Slide Show
078 Selecting Images
079 Setting play interval
079 Setting Background Music
079 Confi gure Multi Slide Show effects
6
screen
PICTBRIDGE
APPENDIX
SOFTWARE
080 File Options
080 Deleting images
080 Protecting images
081 Face List Edit
081 Voice memo
082 DPOF
084 Copy to Card
085 PictBridge
086 PictBridge : Picture Selection
086 PictBridge : Print Setting
087 PictBridge : Reset
087 Important notes
089 Warning indicator
090 Before contacting a service center
092 Specifi cations
095 Transferring fi les to your computer
for Windows
095 For Windows users
099 Transferring fi les to your computer
Mac
099 For Mac users
101 FAQ
for
Page 8
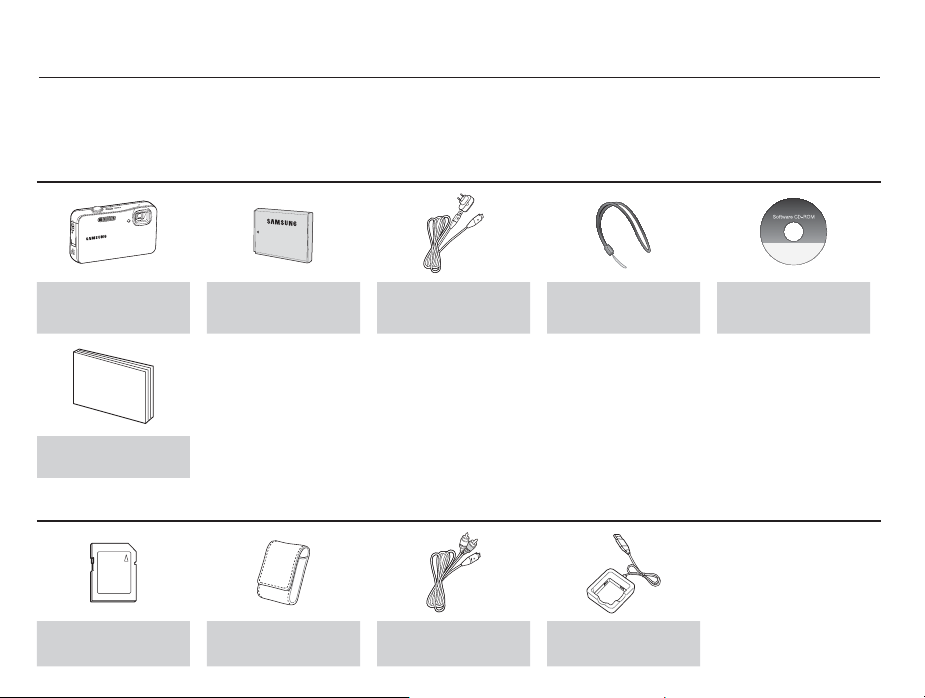
System chart
Please make sure your package contains the contents listed below before using this product. The contents can vary depending on the sales
region. To buy the optional equipment listed under Sold Separately, contact your nearest Samsung dealer or Samsung service center. The
appearance of the parts and accessories in your package may differ from the illustrations below.
Package Contents
Camera
Quick Start Manual
AD68-04852A
Sold Separately
SD/SDHC memory card
(see p.17)
Rechargeable battery
AD43-00194A
Camera case
AC adapter / USB cable
AD44-00143A /
AD39-00165A
AV cable
AD39-00146A
Camera strap
AD63-02604A
AD63-02596A
Battery charger
AD44-00164A
Software CD
(User manual included)
AD46-00331A
7
Page 9
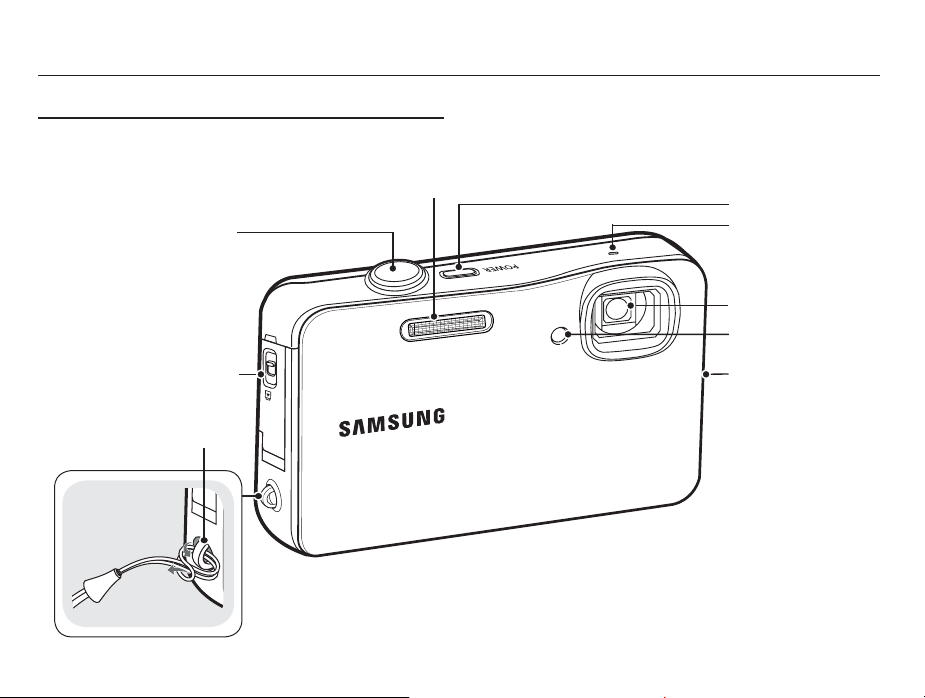
Identifi cation of features
Front & Top
Flash
Shutter button
USB / AV / DC terminal
Strap eyelet
8
POWER button
Speaker
Lens
Self-timer lamp /
AF Lamp
Microphone
Page 10
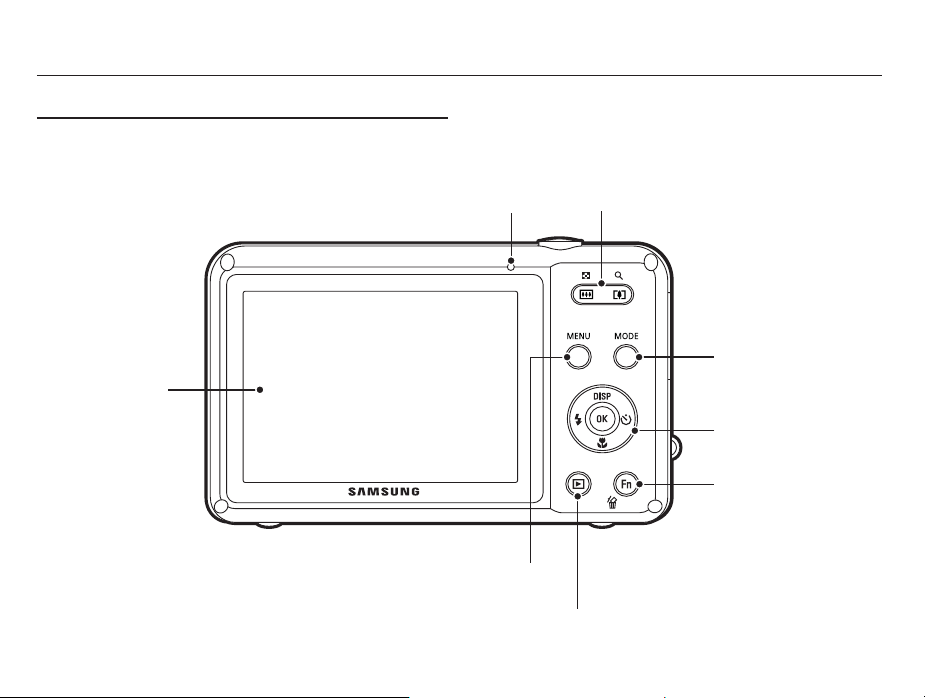
Identifi cation of features
Back
LCD
Screen
Camera status lamp
MENU button
Play mode button
Zoom button
MODE button
5 function button
Fn / Delete button
9
Page 11
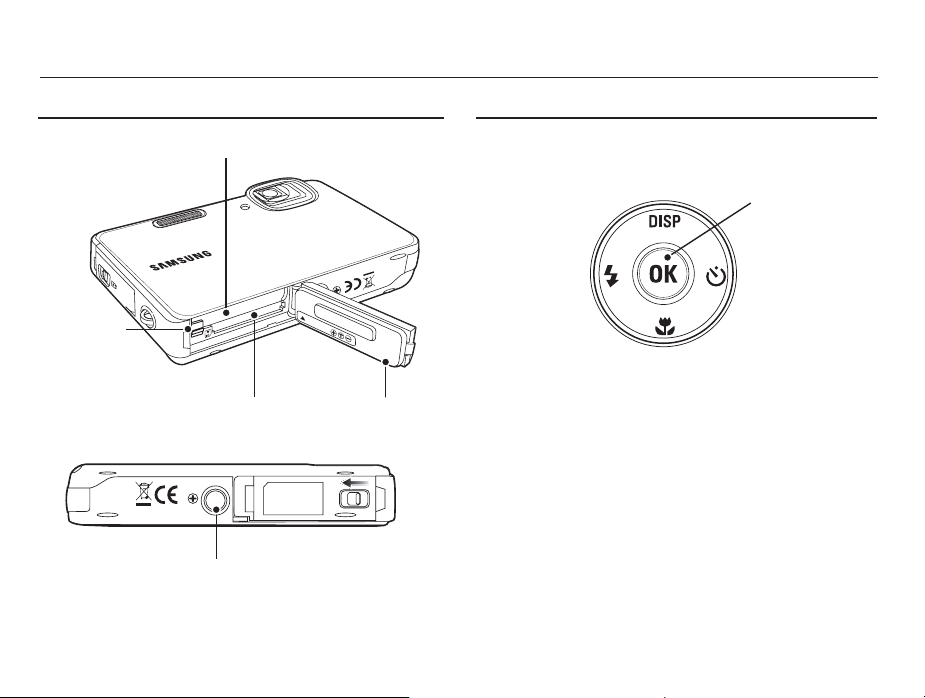
Identifi cation of features
Bottom
Battery chamber
Battery holder
Memory card slot
Tripod socket
Ä
To open the battery chamber cover, slide it in the direction shown
above.
10
Battery chamber cover
5 Function button
Flash /
Left button
Information / Up button
OK / Play & Pause
button
Self-timer /
Right button
Macro / Down button
Page 12
Identifi cation of features
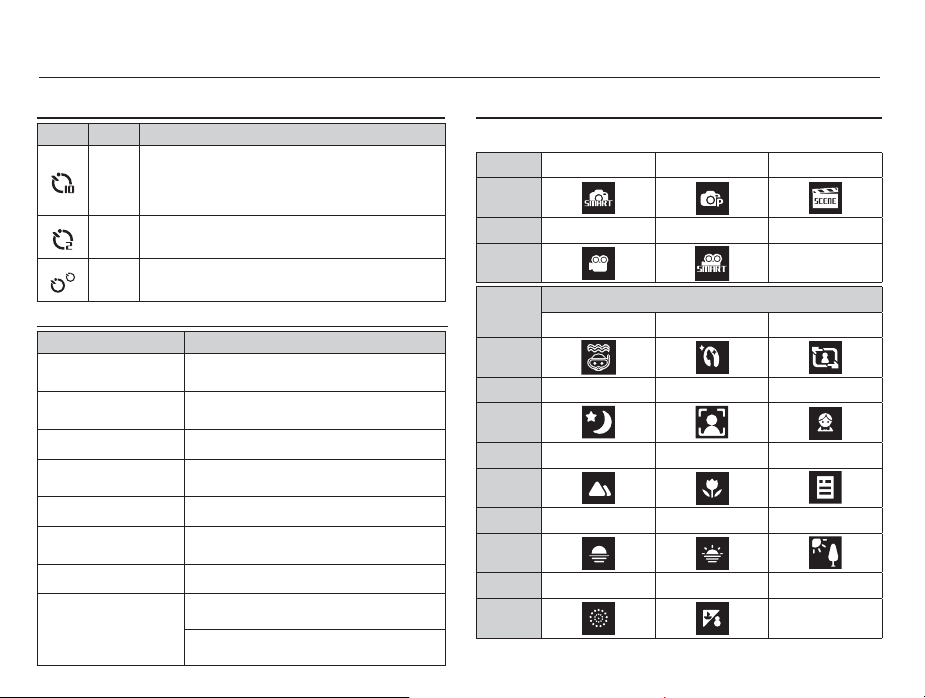
Self-timer lamp
Icon Status Description
- For the fi rst 8 seconds, the lamp blinks at 1 second
Blinking
Blinking
Blinking
intervals.
- For the fi nal 2 seconds, the lamp blinks quickly at
0.25-second intervals.
For the 2 seconds, the lamp blinks quickly at
0.25-second intervals.
A picture will be taken after about 10 seconds and 2
seconds later a second picture will be taken.
Camera Status Lamp
Status Description
Power on
After taking a picture
When fl ash battery is charging
When the USB cable is
into a PC
inserted
Transmitting Data with a PC
When the USB cable is
inserted into a printer
When the printer is printing
When the AF activates
The lamp turns on and off when the camera
is ready to take a picture.
The lamp blinks while saving the image data and
turns off when the camera is ready to take a picture.
The lamp blinks.
The lamp lights up.
screen turns off after initializing the device.)
(LCD
The lamp blinks. (LCD screen turns off.)
The lamp blinks.
The lamp blinks.
The lamp turns on.
(The camera focus on the subject.)
The lamp blinks.
(The camera doesn’t focus on the subject.)
Mode icon
Refer to page 23 for more information about the camera mode setting.
MODE Smart Auto Program Scene
ICON
MODE Movie Smart Movie -
ICON
MODE
ICON
MODE Night Portrait Children
ICON
MODE Landscape Close Up Text
ICON
MODE Sunset Dawn Backlight
ICON
MODE Fireworks Beach & Snow -
ICON
Aqua Beauty Shot Frame Guide
SCENE
11
Page 13
Connecting to a Power Source
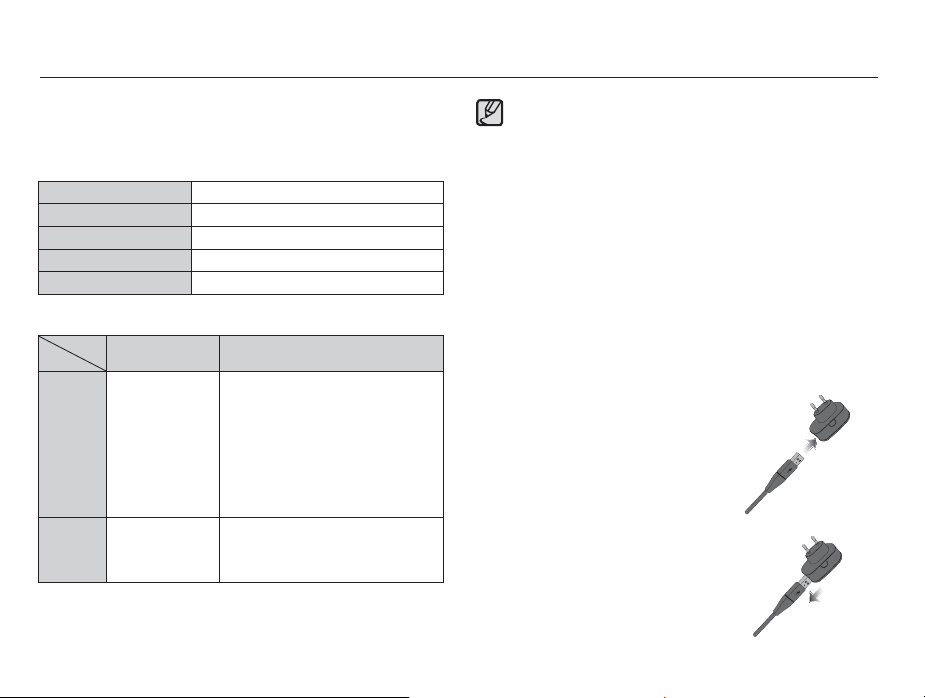
You should use the rechargeable battery BP70A supplied with the camera. Be sure to charge the battery before using the camera.
BP70A rechargeable battery Specifi cation
Model BP70A
Type Lithium lon
Capacity 740mAh
Voltage 3.7V
C
harging time
Number of images and battery life: Using the BP70A
Battery life /
Number of images
Still image
Ä
These fi gures are measured under Samsung’s standard conditions
Approx. 90 MIN /
Approx. 180 shots
Movie Approx. 70 MIN
Approximately 150 Minutes
Conditions
Using the fully charged battery,
Default settings, Program mode,
Shot to shot interval: 30Sec.
Changing the zoom position between
the Wide and the Tele after every shot.
Using the fl ash on every second shot.
Using the camera for 5 minutes and
then powering it off for 1 minute.
Using the fully charged battery
640x480 image size
30 fps frame rate
and shooting conditions and may vary depending on the user’s
methods.
12
Important information about battery usage.
When camera is not in use, turn off the power.
Please remove the battery if the camera will not be used
for long periods. Batteries can lose power over time and are
prone to leaking if kept inside the camera.
Low temperatures (below 0°C) can affect the performance
of the battery and you may experience reduced battery life.
Batteries will usually recover at normal temperatures.
During extended use of the camera, the camera body may
become warm. This is perfectly normal.
If you connect the AC adapter to the USB cable, you can use it
as an AC cable and recharge the spare battery with it.
- Using an AC cable
: Connect the AC adapter to the
USB cable. It can be used as a
power cable.
- Using a USB cable
: Remove the AC adapter.You can
download stored images to your
PC (p.96) or supply the power
to your camera through the USB
cable.
Page 14
Connecting to a Power Source
Important information about USB cable usage.
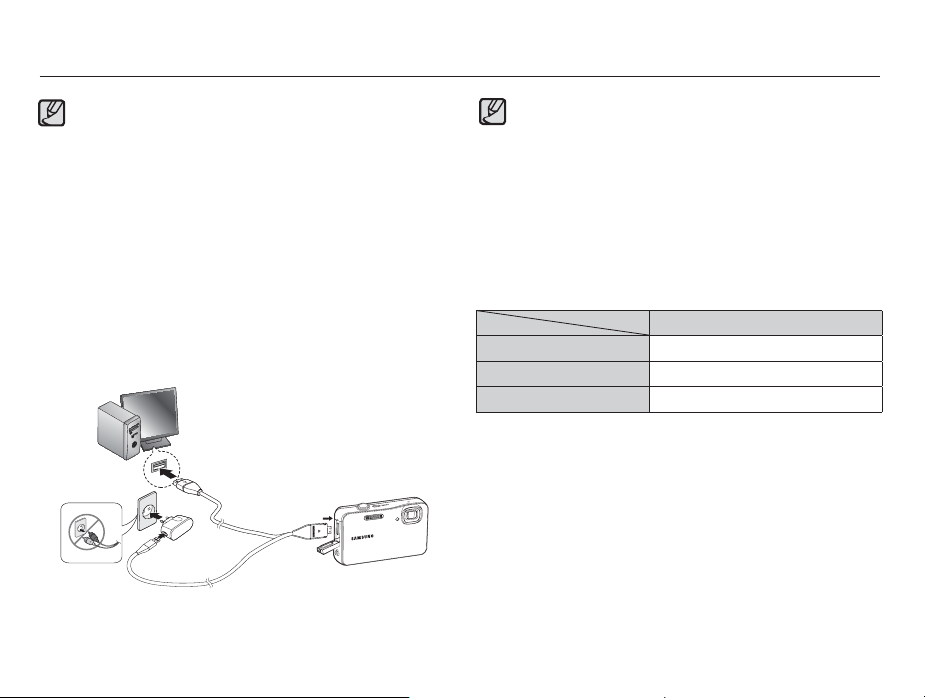
Use a USB cable with the correct specifi cation.
Do not connect the camera to a PC through a USB hub.
Connect the camera directly to the PC.
Do not connect the camera and other devices to a PC at the
same time. Connect the camera by itself.
If your PC can not detect the camera when you use the front
side USB port, use the back side USB port of computer.
If the USB port of the PC doesn’t meet the Power output
standard (5V, 500mA), the battery may not charge.
How to charge the rechargeable battery
Before inserting any cables or the AC adapter, make sure the
direction of the cable or adapter plug is correct. Do not insert
by force. It may cause breakage of cable or camera.
If the charging LED of the AC Charger does not turn on
or blink after you have inserted the rechargeable battery,
please make sure the battery is inserted correctly.
If you charge the battery with the camera power on, the
battery won’t be fully charged. Turn the camera off while
charging the battery to get a full charge.
Charging LED of the AC charger
Charging LED
Being Charged Red LED is on
Charging is complete Green LED is on
Charging error Orange colored LED is off or blinking
If you insert a fully discharged battery to charge it, do not turn on
the camera at the same time. If you do, the camera may turn off
unexpectedly. Charge the battery for more than 10 minutes before
using the camera.
Do not use the fl ash frequently or take a movie clip with the fully
discharged battery that has been charged for only a short time.
Even if the charger is inserted, the camera power may be turned
off because the rechargeable battery is discharged again.
13
Page 15
Connecting to a Power Source
When using the battery, please follow these guidelines. Failure
to do
so may cause heat, fire, or explosion.
Ɣ If you fi nd the battery
center. It may present
Ɣ Use only the recommended battery charger.
Ɣ Do not place the product close
source.
Ɣ Do not insert the product into a microwave oven.
Ɣ Do not
leave the product inside a car during the summer.
Ɣ Do not place the product in
Ɣ Do not place the camera on a carpet, comforter, or electronic
mattress for a long time.
Ɣ
Do not leave the camera turned on where there is no air circulation.
Ɣ Do not let accessories like necklaces, coins, keys, watches, and
and so on come in contact with the battery chamber.
Ɣ Use Advanced Lithium Batteries with a guarantee from the
manufacturing company.
Ɣ
Do not try to disassemble or perforate the camera or battery with
a sharp pin.
Ɣ Do not subject the camera to high pressure.
Ɣ Do not drop or strike the camera, or subject it to a harsh shock.
Ɣ Do not expose the product to temperatures over 60°C (140°F)
degree.
Ɣ Do not
expose the product to water or high humidity.
Ɣ Battery shall not be exposed to excessive heat such as sunshine,
fi re or the like.
is bulging or distorted, contact a service
a physical danger.
to a fi re or any high temperature
a hot, humid environment.
14
Guidelines for disposal
Ɣ Do not throw away a
Ɣ Do not dispose of a battery by throwing it in a fi re.
Ɣ Dispose of the battery according to the envronmental laws of
your country, state, or area.
Guidelines for recharging a battery
Ɣ
Do not recharge the battery using a method that differs from the
method detailed in this users manual.
instructions
battery that no longer charges.
Failure to follow these
may cause a fi re or explosion.
Page 16
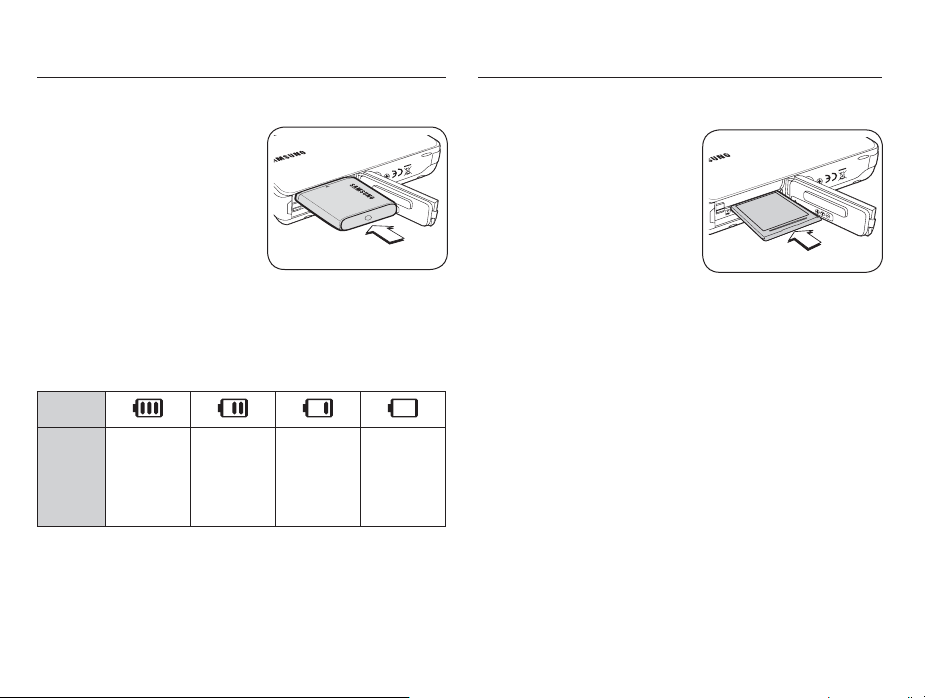
Connecting to a Power Source Inserting the memory card
Insert the battery as shown
- If the camera does not turn on
after you have inserted battery,
please check whether the
battery (+ / -) direction is right.
When opening the battery
chamber cover, do not use
excessive force. You may
damage it.
There are 4 battery status indicators displayed on the LCD screen.
Battery
indicator
Battery
The battery is
status
fully charged
Ä
When using the camera and the battery in a place that is excessively
cold or hot, the battery status on the LCD may be different from the
actual battery status.
Low battery
capacity
(Prepare to
recharge or
use spare
battery)
Low battery
capacity
(Prepare to
recharge or
use spare
battery)
Battery empty.
(Recharge
or use spare
battery)
Insert the memory card as shown.
- Turn off the camera’s power
before inserting the memory card.
- Have the front label of the
memory card facing toward the
front of the camera (Lens) and
the card pins toward the back of
the camera (LCD screen).
- Do not insert the memory card
the wrong way round. Doing so
may damage the memory card
slot.
15
Page 17
Instructions on how to use the memory card
Be sure to format the memory card (see p.58) if you are using
a newly purchased memory card for the fi rst time, if it contains
data that the camera cannot recognize, or if it contains images
captured with a different camera.
Turn off the camera power whenever the memory card is being
inserted or removed.
Repeated use of the memory card will eventually reduce the
memory card’s performance. Should this be the case, you will
need to purchase a new memory card. Wear and tear on the
memory card is not covered by the Samsung warranty.
The memory card is an electronic precision device. Do not bend,
drop or subject the memory card to any heavy impact.
Do not store the memory card in an environment with strong
electronic or magnetic fi elds, e.g. near loud speakers or TV
receivers.
Please do not use or store in an environment where there are
extremes in temperature.
Do not allow the memory card to become dirty or to come into
contact with any liquid. Should this happen, clean the memory
card with a soft cloth.
Please keep the memory card in its case when not in use.
During and after periods of extended use, you may notice that the
memory card is warm. This is perfectly normal.
Do not use a memory card that is used in another digital camera.
To use the memory card in this camera, format the memory card
using this camera.
Do not use a memory card formatted by another digital camera or
memory card reader.
16
The data on the memory card can be corrupted if:
- The memory card is used incorrectly.
- The power is switched off or the memory card is removed while
recording, deleting (formatting) or reading.
Samsung cannot be held responsible for lost data.
It is advisable to copy important data onto other media as back-up
e.g. fl oppy disks, hard disks, CD etc.
If there is insuffi cient memory available :
A [Memory Full] message will appear and the camera will not
operate. To optimize the amount of memory in the camera,
replace the memory card or delete unnecessary images stored
on the memory card.
Don't remove the memory card when the camera status lamp is
blinking as this may cause damage to data in the memory card.
Page 18
Instructions on how to use the memory card
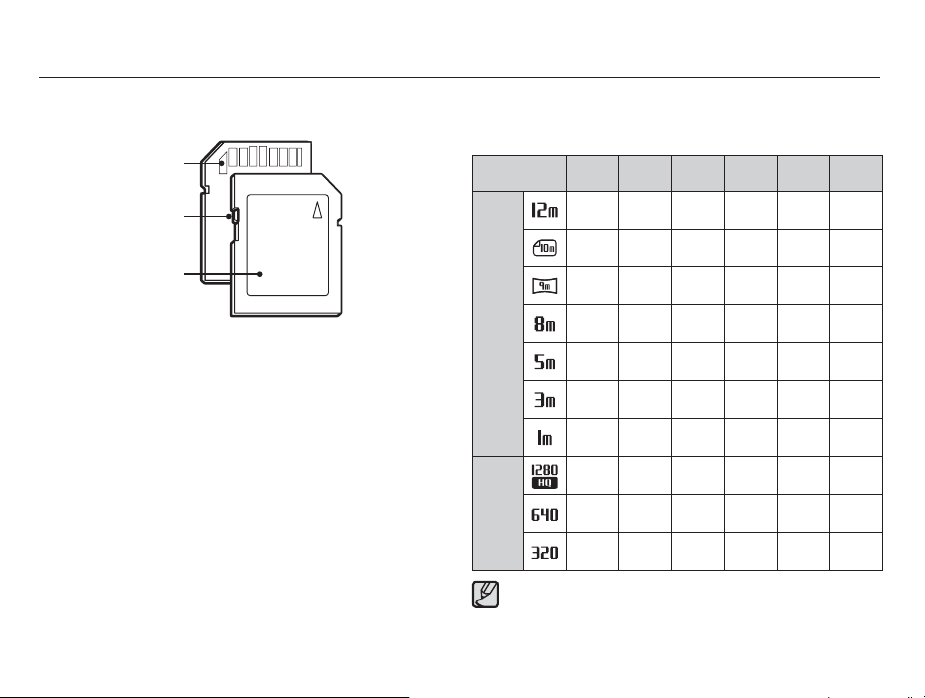
The camera can use SD/SDHC Memory Cards.
Card pins
Write protect switch
Label
[SD (Secure Digital) memory card]
The SD/SDHC memory card has a write protect switch that
prevents image fi les from being deleted or formatted. When you
slide the switch towards the bottom of the SD/SDHC memory
card, the data is protected. When you slide the switch towards
the top of the SD/SDHC memory card, the data protection is
cancelled.
Slide the switch to the top of the SD/SDHC memory card before
taking a picture.
When using a 1GB SD memory, the specifi ed shooting capacity will be
as follows. These fi gures are approximate as image capacities can be
affected by variables such as subject matter and memory card type.
Recorded
image size
Still
image
*Movie
clip
The zoom button doesn’t function during the movie recording.
Movie recording times may decrease when you use the zoom
function.
Several videos were recorded in succession to determine the total
recording time.
Super
Fine Normal 60 FPS 30 FPS 15 FPS
Fine
About
About
220
About
249
About
296
About
328
About
510
About
789
About
2597
About
329
About
371
About
438
About
487
About
751
About
115 4
About
3463
134
About
152
About
181
About
200
About
313
About
494
About
1731
----
----
---
---
---
---
---
---
---
---
00:14'25"
00:41'31"
About
01:29'48"
02:38'14"
About
About
About
About
00:28'17"
About
01:50'45"
About
03:47'36"
17
Page 19
Waterproof management
You can use this camera underwater to a maximum depth of 9.8 feet
(3m) in an ocean, lake, or similar underwater environment for one
hour. To ensure the camera operates properly underwater, you must
practice the correct waterproof management before and after using
the camera, as follows.
Ŷ Before using the camera
Make sure that there is no dirt, dust, or sand on the camera and
1.
that the lens is always kept clean.
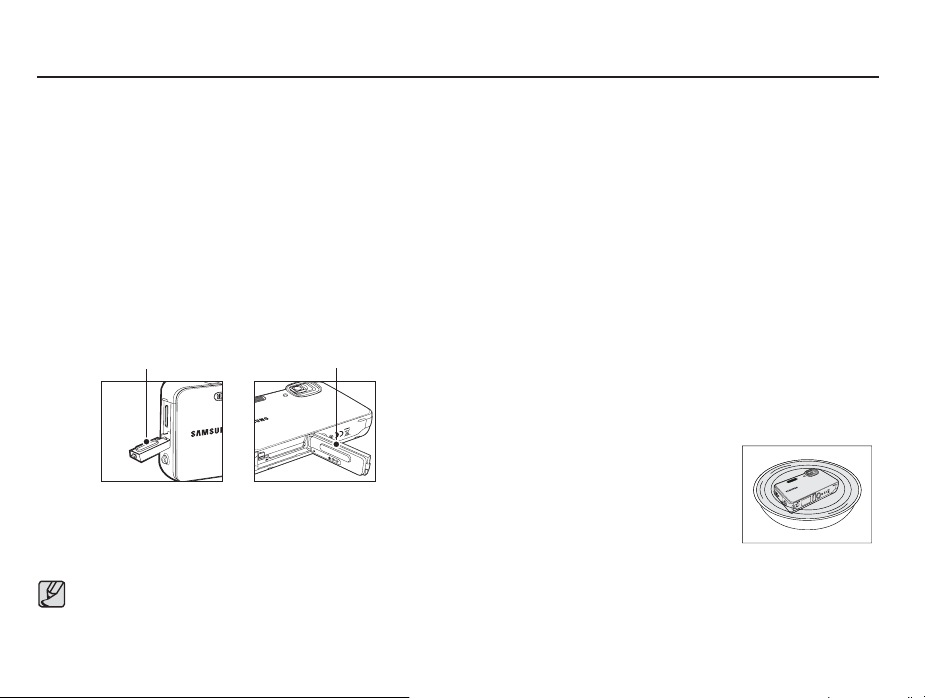
- If there is foreign matter or moisture on the battery chamber cover
or the USB cover, wipe them with a smooth, lint free cloth. Also
check if there are any scratches on the waterproof seal.
USB cover Battery chamber cover
2. Make sure that the battery chamber cover and the USB cover
make a clicking sound when closing them, so that they are fi rmly
shut.
Ɣ Do not open the battery chamber cover or the USB cover under-
water, with a wet hand, or in any environment that has a great
deal of moisture and dirt.
18
Ŷ While using the camera:
- Do not use the camera under water at a depth of more than 9.8 feet
(3m).
- Do not use the camera continuously for over one hour under water.
- Do not open the battery chamber cover and the USB cover under
water.
- Do not use the camera in hot water.
- Do not leave the camera on the sand. Sand may enter the speaker
or the microphone, and the camera may get hot if it is exposed to
direct sunlight for a prolonged time.
- The waterproof performance may deteriorate
dropped, subjected to strong pressure or to strong vibration.
- The accessories that came with the camera are not waterproof.
if the camera is struck,
Ŷ After using the camera
1.
Make sure that any water and dirt on the camera are removed with
a dry cloth after using the camera under water.
2.
Ensure the battery chamber cover and the
USB cover are closed, and then wash the
camera with fl owing water, making sure
to remove all sand, foreign matter, and
dirt. You can also submerge the camera
in clean water for 2 to 3 minutes before
washing it. See page 19 for details.
-
Do not wipe the camera with other
liquids such as soapy water, neutral
detergents, or alcohol.
3. Wipe the camera with a dry cloth, and then dry the camera in a
well ventilated place.
Page 20
Waterproof management
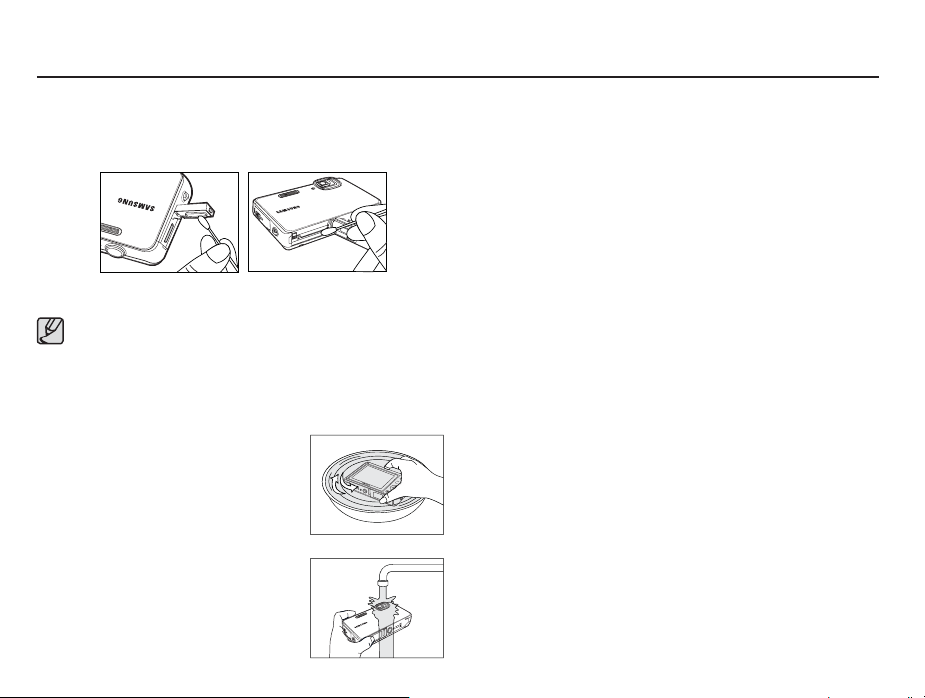
4. Open the battery compartment and the USB compartment and look for
water drops on the inside of the covers . If there are water drops on
either, use cotton swab to remove the drops before storing the camera.
Since your camera may fail if you use the camera when foreign
matter is on the camera lens, wash the camera using the following
procedure:
1. Make sure that the battery chamber cover and the USB cover
make a clicking sound when closing them, so that they are fi rmly
shut.
2. Fill a bucket or a large bowl with
water and submerge the camera in
the water
with the camera lens facing
downwards,
3. If the foreign matter is not removed
in the above procedure, wash the
camera directly under a strong fl ow of
water.
then shake the camera.
Ŷ Storage and maintenance
- Do not store the camera in an environment with high or low
temperature. The waterproof function may be damaged.
- Do not use any chemicals to clean, to prevent rust, or to repair the
camera. The waterproof function may be damaged.
-
Replace waterproof components once a year to maintain waterproof
performance, since they are consumable parts. Contact your nearest
Samsung service center for the replacement of waterproof components.
19
Page 21
When using the camera for the fi rst time
Charge the rechargeable battery fully before using the camera for
the fi rst time.
When the camera is turned on for the fi rst time, a menu will be
displayed on the LCD screen to set date, time, time zone and
language. This menu will not be displayed again after you set up
the date, time, time zone, and language. Set up the date, time,
time zone, and language before using this camera.
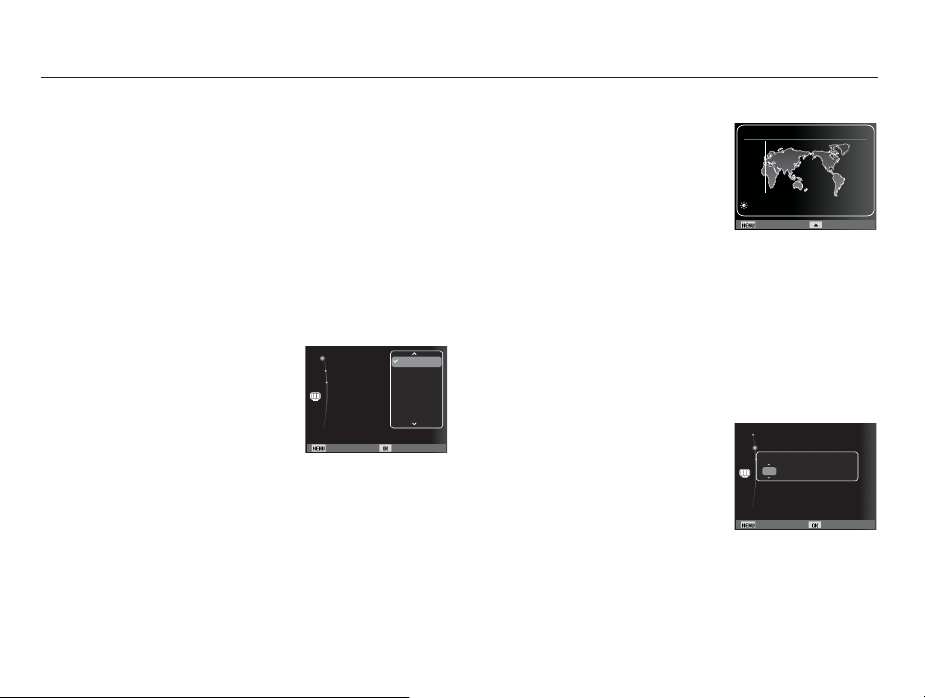
Setting up the language
1. Select the [Language] menu by
pressing the Up/Down button,
and then
press the Right button.
2. Select the desired sub-menu by
pressing the Up/Down button, and then
press the OK button.
Language :English
Date & Time :10/01/01
Time Zone :London
Back Set
English
䚐ạ㛨
Français
Deutsch
Español
Italiano
20
Setting up the Time Zone
1. Select the [Time Zone] menu by
pressing the Up/Down
button, and
Time Zone
then press the Right button.
2. Press the Left/Right button to select
the Time Zone.
Ä
For more information about the World Time, refer to the page 59.
Setting up the date, time, and date type
London
[GMT +00:00] 2010/01/01 01:00 PM
Back DST
1. Select the [Date&Time] menu by
pressing the Up/Down button, and then
press the Right button.
2. Select the desired sub menu by
Language :English
Date & Time :2010/01/01
yyyy mm dd
Time Zone :London
2010 / 01 / 01 13:00 Off
pressing the Up/Down/Left/Right
button, and then press the OK button.
Left/Right button : Selects world time/year/month/day/hour/
Back Set
minute/date type
Up/Down button : Changes the value of each item.
Page 22
LCD screen indicator
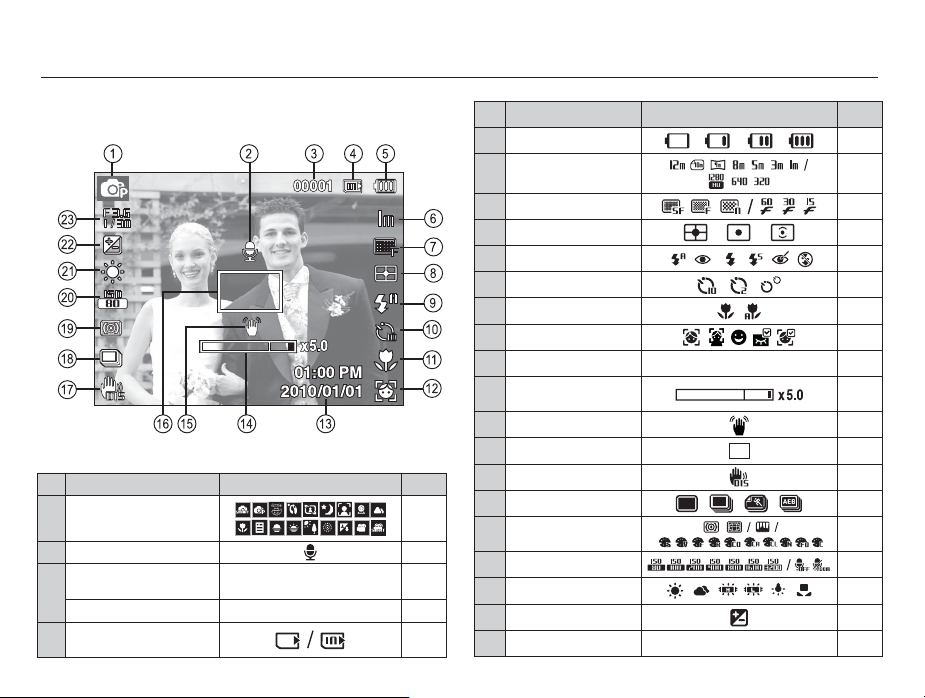
The LCD screen displays information about the shooting functions and
selections.
[Image & Full Status]
No. Description Icons Page
1 Recording mode
2
3
4
Voice Memo
Number of available shots
remaining
Remaining time 00:00:00 p.17
Memory card icon /
Internal memory icon
00001 p.17
p.23
p.53
-
No. Description Icons Page
5 Battery
6
Photo Size / Movie Size
7
Image Quality / Frame Rate
8 Metering
9 Flash
10 Self-timer
11 Macro
12 Face Detection
13 Date / Time 2010/01/01 01:00 PM p.59
Optical / Digital Zoom bar /
14
Digital Zoom rate
15 Camera shake Warning
16
Auto Focus Frame
17 DIS
18 Drive mode
Smart Filter / Image Adjust
19
/ Photo Style Selector
20 ISO / Voice
21
White Balance
Exposure compensation
22
23
Aperture Value / Shutter Speed
F3.6, 1/30 p.26
p.15
p.40
p.40
p.48
p.35
p.37
p.33
p.43
p.31
p.29
p.47
p.52
p.51
p.49/50
/48
p.41/54
p.42
p.41
21
Page 23
How to use the menu
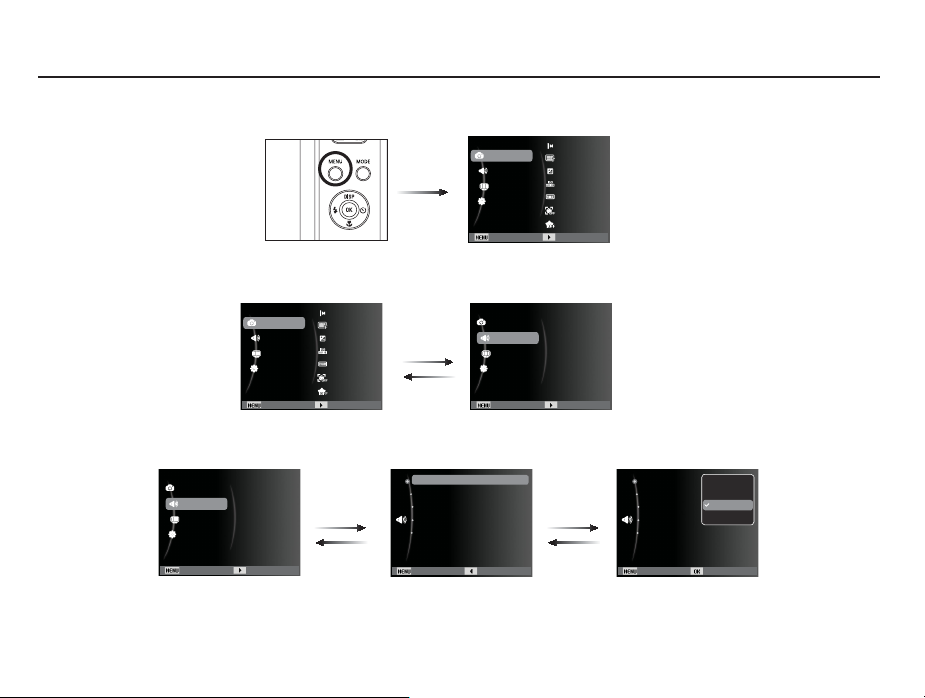
1.
Turn on the camera, and then the MENU button. A menu for each camera mode appears.
Shooting
Sound
Display
Settings
Exit Change
2. Use the up or down button to navigate through the menus.
Shooting
Sound
Display
Settings
Exit Change
Photo Size
Quality
EV
ISO
White Balance
Face Detection
Smart FR Edit
3. Use the left or right button to select a sub menu.
Shooting
Sound
Display
Settings
Volum e
Start Sound
Shutter Sound
Beep Sound
AF Sound
Press the
Left or Right
button.
Press the
Up or Down
button.
Volume :Medium
Start Sound :Off
Shutter Sound :1
Beep Sound :1
AF Sound :On
Shooting
Sound
Display
Settings
Exit Change
Photo Size
Quality
EV
ISO
White Balance
Face Detection
Smart FR Edit
Volume
Start Sound
Shutter Sound
Beep Sound
AF Sound
Press the
Left or Right
button.
Volume :Medium
Start Sound :Off
Shutter Sound :1
Beep Sound :1
AF Sound :On
Off
Low
Medium
High
Exit Change
4. Select a submenu and click the OK button to save
22
Exit Back
settings, and then return to the previous window.
Back Set
Page 24
Starting the recording mode
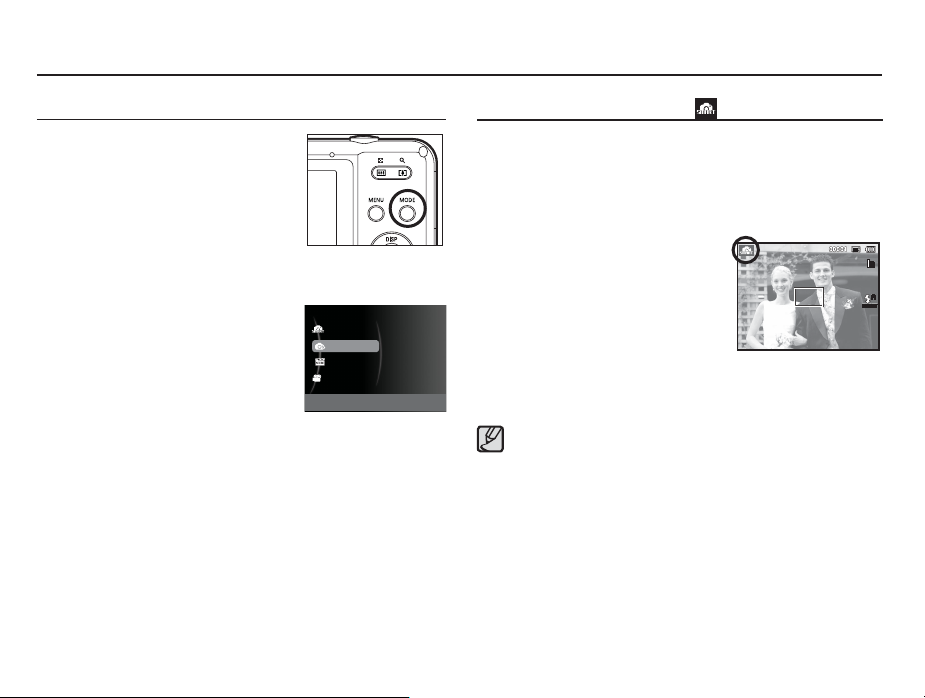
Selecting modes
You can select the shooting modes by
using the MODE button on the back of your
camera.
How to use the MODE button
1.
Press the MODE button. A menu appears.
2. Select a desired mode by pressing the
Up / Down button, and then press the
OK button.
Smart Auto
Program
Scene
Movie
This mode allows you to directly set various
features for shooting.
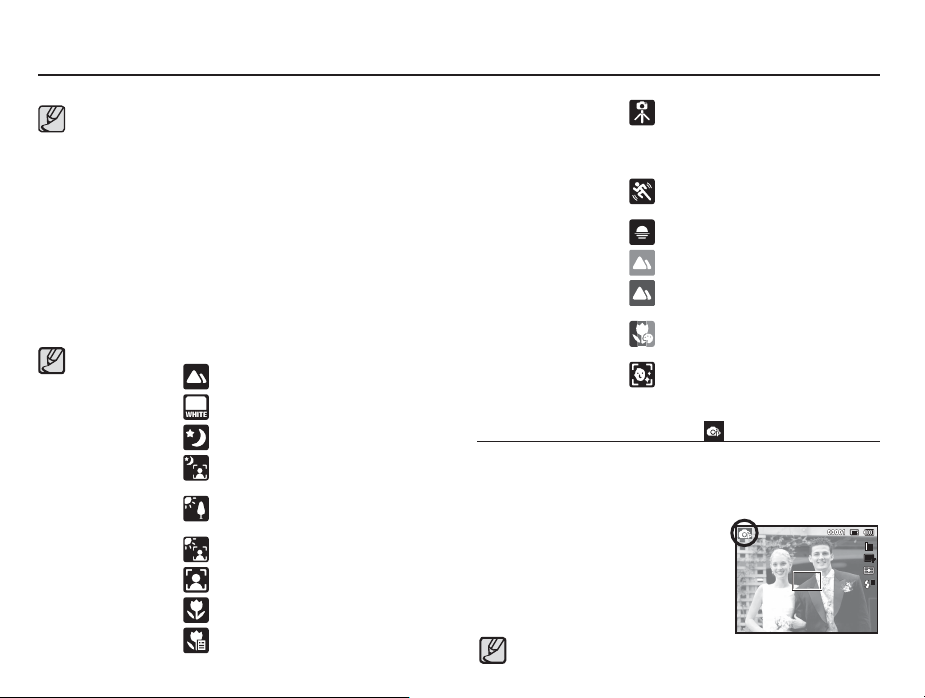
How to use Smart Auto mode ( )
In Smart Auto mode, the camera automatically chooses the appropriate
camera settings based on the type of scene (Night, Land-scape, etc.) it
detects. Use Smart Auto mode if you are unfamiliar with the camera’s
settings and functions. Note that you can still manually confi gure all
functions except the aperture value and shutter speed.
1. Press the POWER button to turn on
the camera.
2.
Select Smart Auto mode by using the
MODE button.
3. The camera selects a scene
automatically. An appropriate mode
icon appears at the top left of the
screen.
4. Press the Shutter button to capture an image.
If the auto focus frame turns red when you press the shutter
button down half way, it means that the camera cannot focus on
the subject.
image clearly.
Avoid obstructing the lens or the fl ash when you capture an image.
If this occurs, the camera is unable to capture the
23
Page 25
Starting the recording mode
If the camera does not recognize a proper scene mode, the
default settings are used.
Even if there is a face detected, the camera may not select a
portrait mode depending on the subject’s position or lighting.
The camera may not select the correct scene depending on
shooting conditions, such as camera shake, lighting, and
distance to the subject.
The [Night] mode recognizes scenes only when the fl ash is set
to off. The camera operates the [Tripod] mode after checking
the shooting conditions on the tripod for a certain length of time.
Despite being on a tripod, the camera may not select [Tripod]
mode depending on the subject’s movement.
Each scene is recognized under the following conditions;
[Landscape] (
[White] (
[Nights] ( ) : When shooting nighttime scenes
[Night Portrait] ( ) : When shooting portraits or people in a
[Backlight] (
[Backlight Portrait]
[Portrait] ( ) : When shooting a portrait
[Macro] ( ) : When shooting close-ups
[Macro Text] ( ) : When shooting texts
24
) : When shooting outdoor scenes
) : When shooting a white background
dark outdoor place
) : When shooting a backlit scenery without
a portrait
( ) : When shooting a backlit portrait
close up
[Tripod] ( ) : When shooting a subject who doesn’t
[Action] (
[Sunset] (
[Blue Sky] ( ) : When shooting blue sky
[Natural Green] ( ) : When shooting nature such as a forest
[Macro Color] (
[Macro Portrait] (
when the camera is mounted
move
on a tripod. (Available
camera recognizes it as nighttime)
) : When shooting a subject making
frequent movements
) : When shooting a sunset
and leaves
) : When shooting a close-up shot of a
subject with multiple colors
) : When shooting close-up portrait shot
only when the
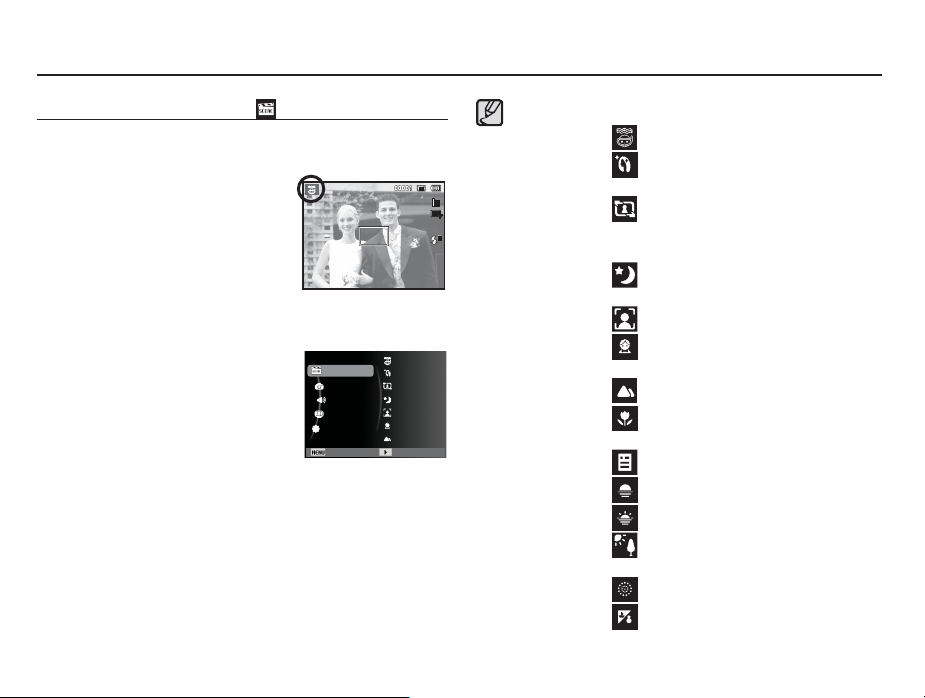
How to use the Program mode ( )
In the Program mode, you can manually confi gure all options
except the shutter speed and aperture value, which the camera
sets automatically to optimal settings.
1. Select the Program mode by using
the MODE button. (p.23)
2. Press the Menu button to confi gure
advanced functions.
See p.38 for further details.
Page 26
Starting the recording mode
How to use the Scene modes ( )
Using Scene modes, you can easily confi gure the camera so that it
automatically uses the optimal settings for a given shooting situation.
1. Select Scene mode by using the
MODE button. (p.23)
2. Point the camera towards the subject
and compose the image using the
LCD screen.
3. Press the shutter button to capture an
image.
Ä
You can also change the Scene mode
by pressing the MENU button, selecting
Scene, and then seleting a Scene in
the Scene menu.
Scene
Shooting
Sound
Display
Settings
Exit Change
Aqua
Beauty Shot
Frame Guide
Night
Portrait
Children
Landscape
The Scene modes are listed below.
[Aqua] (
) :
This mode is for underwater photography.
[Beauty Shot] ( ) : Use when shooting portraits. Clears
most facial imperfections.
[Frame Guide] ( ) : Use when you want someone else to
take a picture for you from the angle
you choose.
[Night] (
) : Use for shooting still images at night or
in other dark conditions.
[Portrait] (
[Children] (
) : To take a picture of a person.
) : To take a picture of children, pets, and
other subjects that don’t stay still.
[Landscape] ( ) : To take pictures of distant scenery.
[Close Up] (
) : Close-up shooting of small objects such
as plants and insects.
[Text] (
[Sunset] (
[Dawn] (
[Backlight] (
) : Use this mode to shoot a document.
) : For taking pictures of sunsets.
) : Daybreak scenes.
) : For portraits without shadows caused
by
backlighting.
[Firework] ( ) : Firework scenes.
[Beach&Snow] (
) : For ocean, lake, beach and snowscape
scenes.
25
Page 27
Starting the recording mode
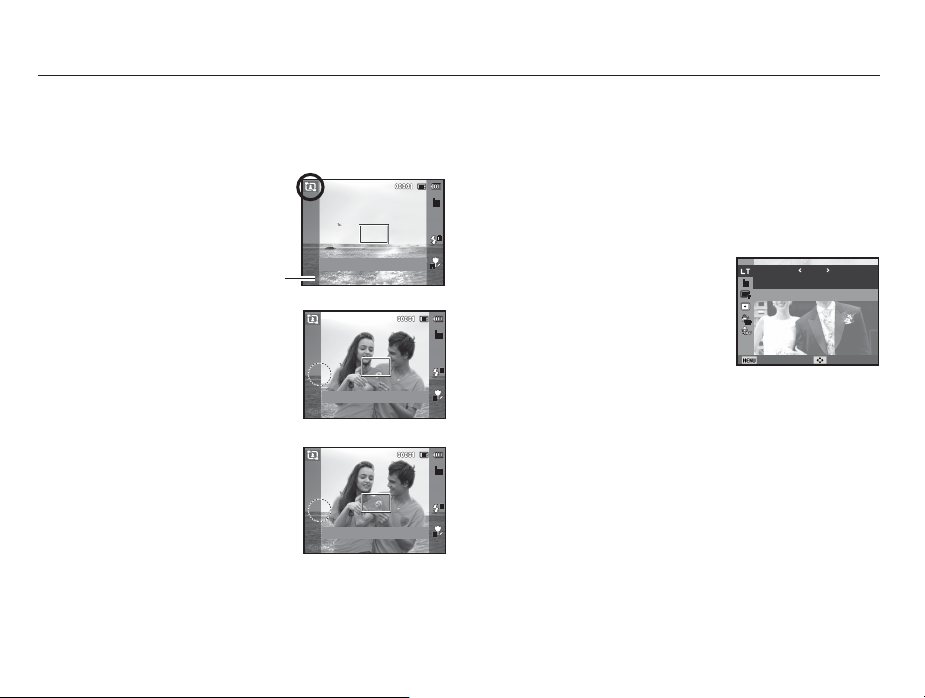
Ŷ How to use the [Frame Guide] mode
Set [Frame Guide] mode when you want someone else to take a
picture for you from the angle you choose.
1. Take a picture from the angle you
choose.
- A guide appears round the sides of
the picture.
Cancel Frame: OK
Guide
2. Then another person can take the
picture by aligning the edge of the
picture to be taken with the guide
framing the sides of the window.
Cancel Frame: OK
Cancel Frame: OK
26
Ŷ How to use the [Long Time Shutter] mode
This camera automatically adjusts the shutter speed and aperture
values to the shooting environment. However, in Night scene
mode, you can set the shutter speed and aperture values to your
preference.
Changing the Shutter speed and Aperture value in Night
scene mode.
1. Select the [Night] mode. (p.23)
2. Press the Fn button and the Long
Time shutter menu appears.
Long Time Shutter
Auto
Auto
3. Configure the Long Time shutter
value with the 5 function button.
4. Press the Fn button again. The
value you set is saved and the mode
Back Move
switches to Night scene mode.
Page 28
Starting the recording mode
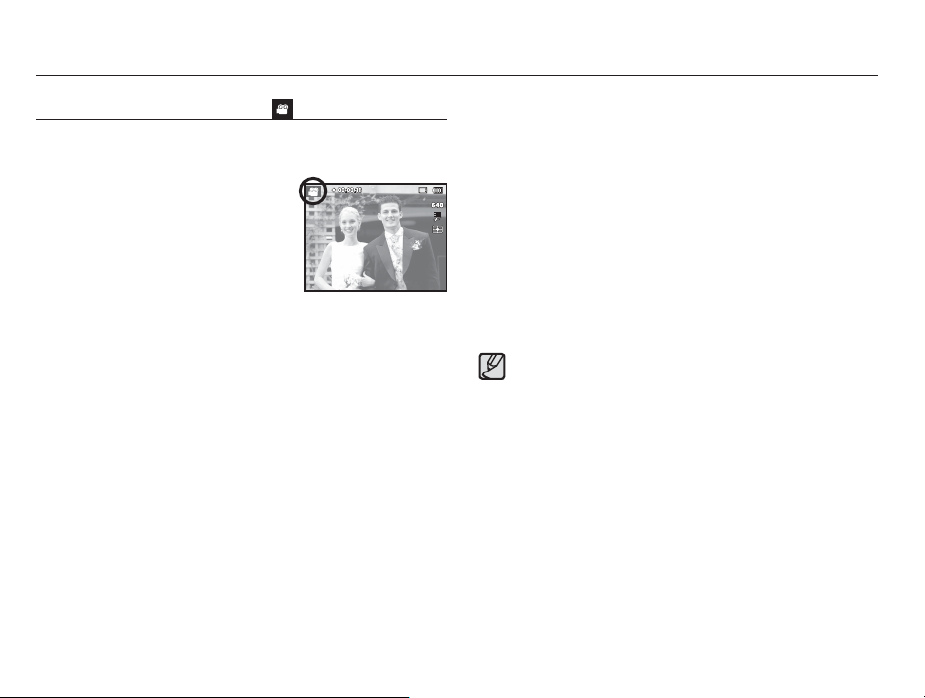
How to use the Movie clip mode ( )
You can record a movie clip for as long as there is recording time
available in the camera’s memory.
1. Select the Movie mode by using the
MODE button. (The camera displays
the Movie Clip icon and the available
recording time on the LCD screen.)
2. Point the camera towards the subject
and compose the image using the
LCD screen.
3.
Press the shutter button once and movie clips are recorded for as
long as the available recording time allows. The camera continues
to record movie clips even if you release the shutter button. To
stop recording, press the shutter button again.
Ä
Movie clip size and type are listed below.
- Movie clip size : 1280x720HQ, 640x480, 320x240
- Movie clip fi le type : MP4 (H.264)
- Frame Rate : 60 FPS, 30 FPS, 15 FPS (Selectable)
- You can select the frame rate when you select the following
image sizes:
1280x720HQ, 640x480: 30 FPS, 15 FPS selectable
320x240: 60 FPS, 30 FPS, 15 FPS selectable
-
The camera stops recording a movie clip automatically if the
recording time exceeds the maximum available recording time.
(You can record in 1280x720HQ for a maximum of 20 minutes.)
For smart movie recording, set [Smart Scene Detection] to [On].
(p. 52)
(Selectable) (1280x720HQ are the settings
for recording high-quality videos.)
27
Page 29
Starting the recording mode
Recording HD (High Defi nition) movie clips
You can record HD (High Defi nition) movie clips (1280x720HQ, 30 fps)
using H.264 (MPEG4.AVC) video compression. H.264 (MPEG4.AVC)
is the standard for digital video codecs. It supports high quality video in
small size fi les.
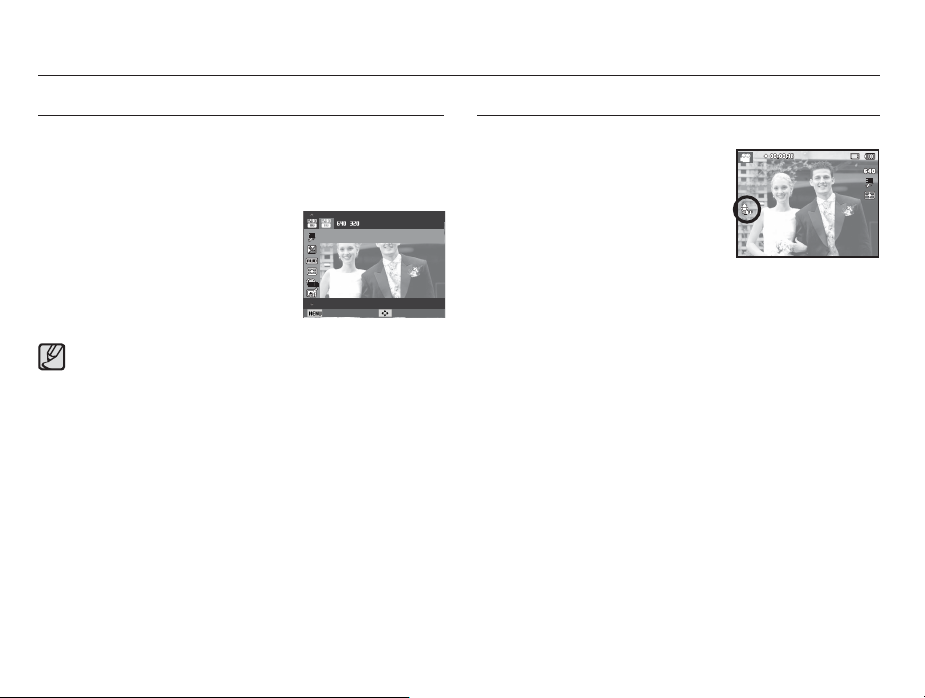
1. Select the Movie mode by using the
MODE button. (p.23)
2.
Press the MENU button to set the
resolution to [1280 X 720 HQ].
3. Press the Shutter button to record
video for the available recording time.
1280 X 720 HQ
Back Move
Recording a movie clip without sound
You can record a movie clip without sound.
Steps from 1 through 3 are the same as
those for MOVIE mode.
4. Press the Menu button.
5. Press the Up / Down button to select
6. Select the [Voice] menu by pressing the Up / Down button, and
7. Select the [Off] menu by pressing the Left / Right button.
8. Press the OK button. You can record a movie without sound.
What is H.264(MPEG4 part10/AVC)?
With its high-compression rate and the small fi le size, it is the
standard for digital video codecs, supporting top quality recordings
in high resolution.
28
the [Movie] menu, and then press the
Right button.
then press the OK button.
Ä
See p.54 for further details.
Page 30
Things to Watch Out for When Taking Pictures
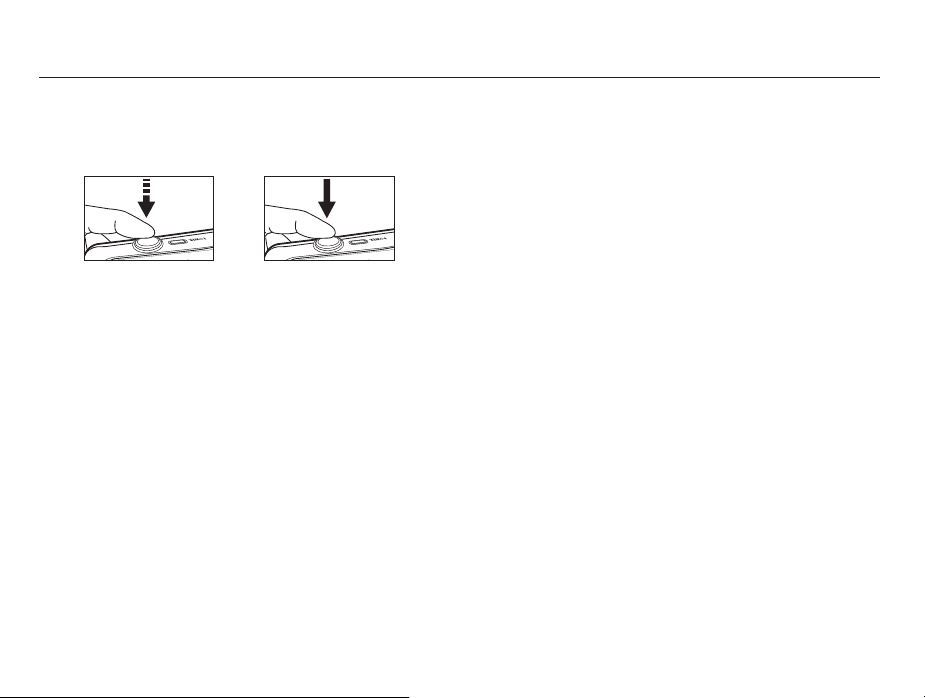
Pressing the shutter button down half way.
Lightly press the shutter button to confi rm focus and fl ash battery
charge. Press the shutter button all way down to take the picture.
[Lightly press the shutter button]
The available memory capacity may vary depending on shooting
conditions and camera settings.
When the Flash Off, Slow synchro mode, or DIS mode is selected in
a low lighting condition, the camera shake warning indicator ( Ã )
may appear on the LCD screen. In this case, use a tripod, support
the camera on a solid surface or change to fl ash shot mode.
It is best to take pictures with the sun behind you. Taking pictures
with the sun behind the subject may make the picture come out
dark. To take a picture against the light, please use [Backlight] in
scene shooting mode (see page 25), fi ll-in fl ash (see page 36),
spot metering (see page 48), exposure compensation (see page
41), or the ACB function (see page 51).
Avoid obstructing the lens or the fl ash when you capture an image.
Compose the image by using the LCD screen.
[Press the shutter button]
Under certain conditions, the auto focus system may not perform
as expected.
- When photographing a subject that has little contrast.
- If the subject is highly refl ective or shiny.
- If the subject is moving at high speed.
- When there is strong refl ected light, or when the background is
very bright.
- When the subject matter has only horizontal lines or the subject
is very narrow (such as a stick or fl agpole).
- When the surroundings are dark.
29
Page 31
Using the camera buttons to set the camera
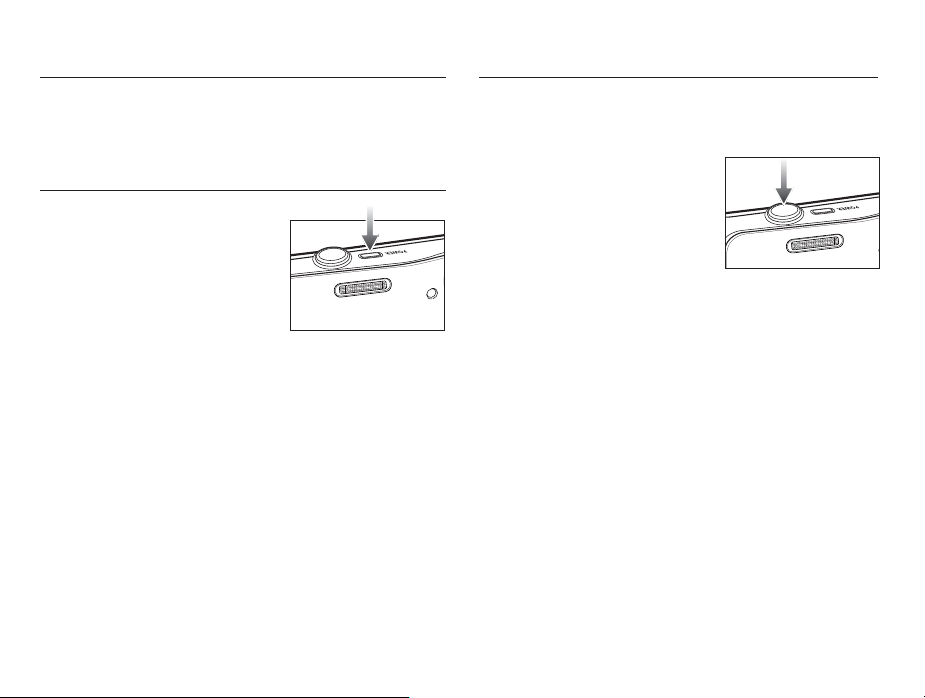
SHUTTER button
You can set the recording mode function can be set up by using the
camera buttons.
POWER button
Used for turning the camera’s power
on / off. If there is no operation during
specifi ed time, the the camera turns off
automatically to save battery life. Refer
to page 60 for more information about
the auto power off function.
30
a
Used for taking an image or recording voice in the Recording mode.
In MOVIE CLIP mode
Press the shutter button down once
fully to start a movie clip recording.
Press the shutter button down fully
again to stop recording.
In Still image mode
Press the shutter button down halfway
to activate the autofocus and check
the condition of the fl ash. Press the Shutter button down fully to
take and store an image. If you’ve selected voice memo recording, the recording starts after the camera has stored the image
data.
Page 32
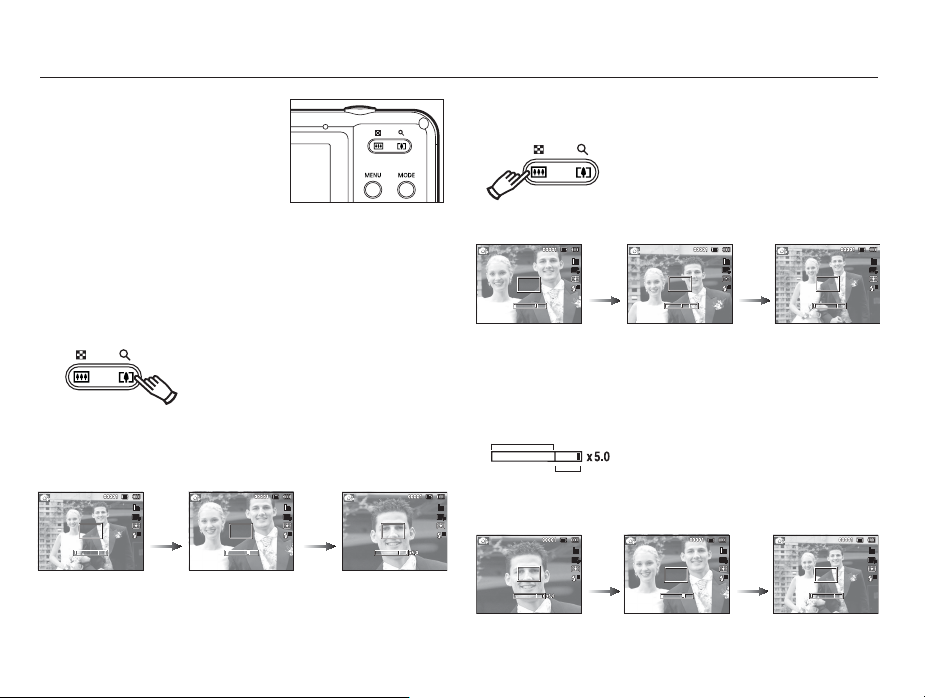
Zoom button
the menu is not displayed, this
When
button works as the OPTICAL ZOOM or
DIGITAL ZOOM button.
This camera has a 5X optical zoom and
a 5X digital zoom function. Using both
will offer a total zoom ratio of 25X.
TELE Zoom
Optical zoom TELE :
Digital zoom TELE : After the maximum (5X) optical zoom is
[WIDE zoom]
Press the ZOOM T button to zoom into
the subject. The subject will appear nearer
and larger.
reached, pressing the ZOOM T button
activates the digital zoom software.
Releasing ZOOM T button stops the digital
zooming at the required setting. Once the
maximum digital zoom (5X) is reached,
pressing the ZOOM T button will have no
effect.
Pressing
the ZOOM
T button
[TELE zoom] [Digital zoom 5.0X]
Pressing
the ZOOM
T button
WIDE Zoom
Optical zoom WIDE : Pressing the ZOOM W button to zoom
out from the subject. The subject will
appear further away. Pressing the ZOOM
W button continuously sets the camera
to its minimum zoom setting. The subject
appears at its farthest from the camera.
Pressing
the ZOOM
W button
[TELE zoom] [Optical zoom 2X] [WIDE zoom]
Pressing
the ZOOM
W button
Digital zoom WIDE : When the digital zoom is in operation,
pressing the ZOOM W button reduces
Optical zoom
digital zooming in steps. Releasing ZOOM
W button stops the reduction. Pressing the
Digital zoom
ZOOM W button continuously reduces
digital zoom, and then reduces optical
zoom until the minimum setting is reached.
Pressing
the ZOOM
W button
[Digital zoom 5.0X] [TELE zoom] [WIDE zoom]
Pressing
the ZOOM
W button
31
Page 33
Zoom button
Images taken using the digital zoom may take a little longer for
the camera to process. Allow time for this to take place.
You may notice a decrease in image quality when using the digital
zoom.
You can’t activate the digital zoom in the [Movie] and some Scene
modes.
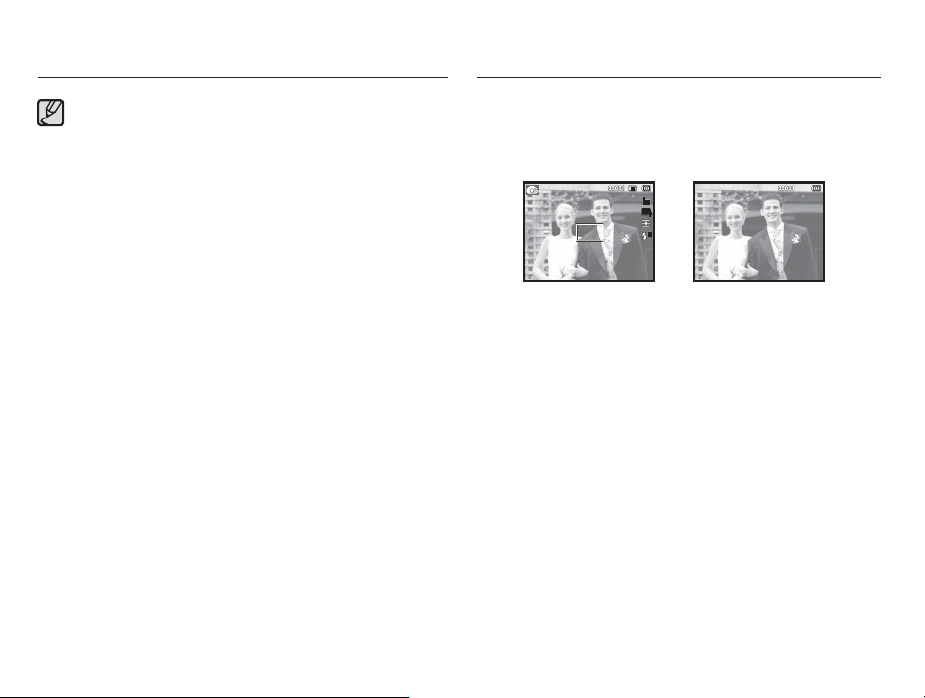
Info (DISP) / Up button
While the menu is showing, the Up button operates as a direction button.
In the recording modes or playback mode, pressing this button displays
the image information.
[Information screen][Filming screen]
32
Page 34
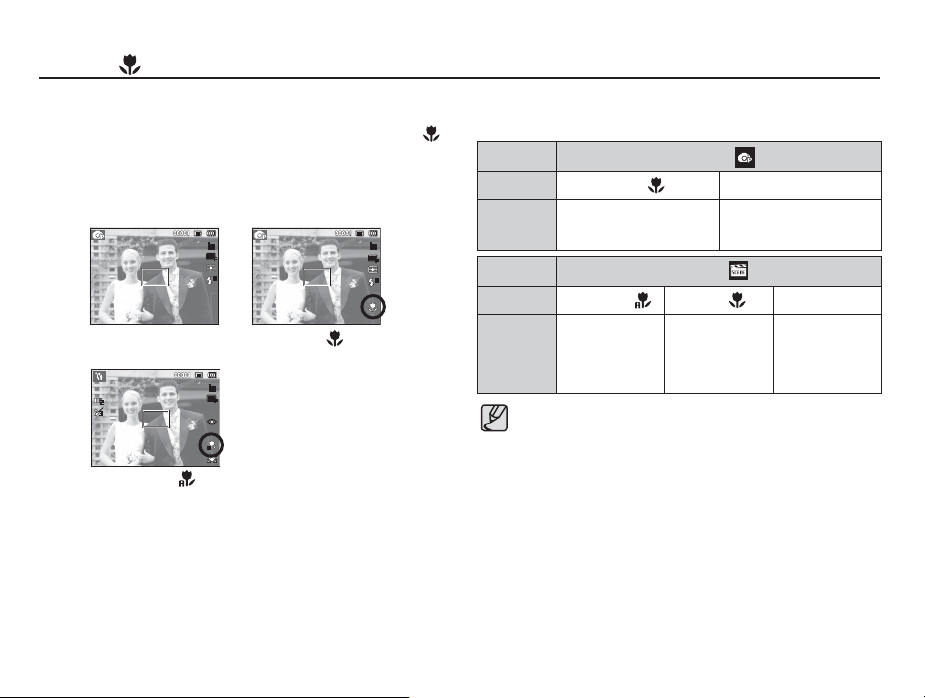
Macro
( )
/ Down button
While the menu is showing, the Down button operates as a direction
button. When the menu is not showing, you can use the Macro ( )
/ Down button to take macro pictures.
The distance ranges are shown below. Press the Macro button until
the desired macro mode indicator appears on the LCD screen.
[Auto Focus]
[Auto Macro ( )]
[Macro ( )]
Types of focus mode and focus range (W : Wide, T : Tele)
Unit: cm (inches)
Mode Program ( )
Focus Type Macro (
Focus range
Mode Scene ( )
Focus Type Auto Macro (
Focus range
W : 5 ~ 80 (2 ~ 31)
T : 50 ~ 80 (20 ~ 31)
W : 5 ~ Infi nity
(2 ~ Infi nity)
T : 50 ~ Infi nity
(20 ~ Infi nity)
When you select the macro mode, be particularly careful to avoid
camera shake.
When you take a picture within 40cm (16 inches) using Wide zoom
or 50cm (20 inches) using Tele zoom in the Macro mode, select
the Flash off mode.
) Normal
W : 80 ~ Infi nity (31 ~ Infi nity)
T : 80 ~ Infi nity (31 ~ Infi nity)
) Macro ( ) Normal
W : 5 ~ 80
(2 ~ 31)
T : 50 ~ 80
(20 ~ 31)
W : 80 ~ Infi nity
(31 ~ Infi nity)
T : 80 ~ Infi nity
(31 ~ Infi nity)
33
Page 35
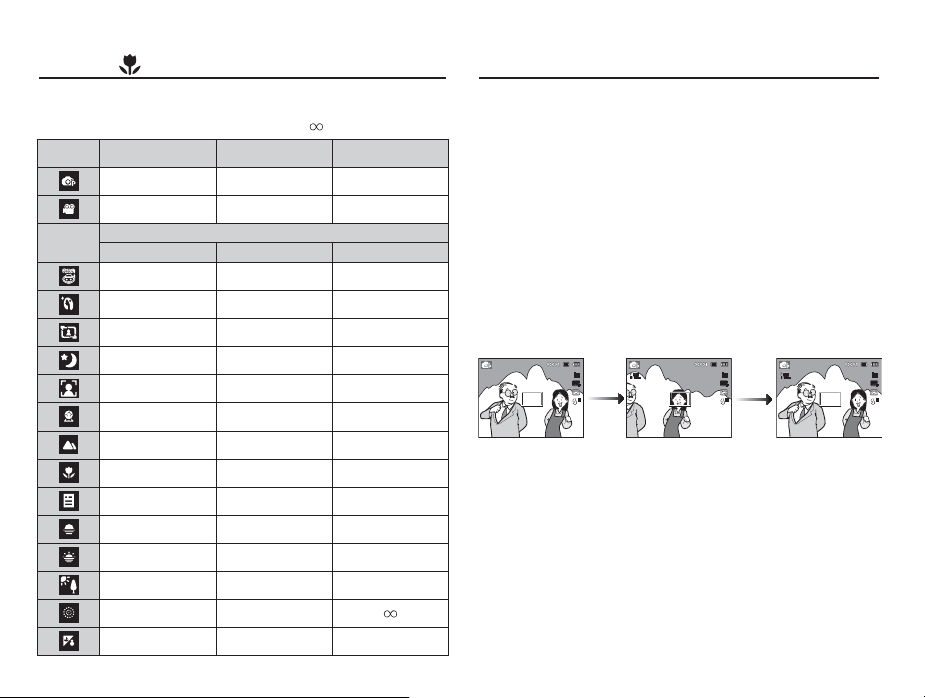
)
(
Macro
Focusing methods you can select, by recording mode
Mode Auto Macro Macro Normal
Mode
/ Down button
( o : Selectable,
SCENE
Auto Macro Macro Normal
o
o
o
o
: Infi nity focus range)
oo
oo
o
34
Focus lock
To focus on a subject not positioned in the center of the picture,
use the focus lock function.
Using the Focus Lock
1. Ensure the subject is in the center of the autofocus frame.
2. Press the shutter button halfway. When the green auto focus
frame lights up, it means the camera is focused on the subject.
Be careful not to press the shutter button all the way down to
avoid taking an unwanted picture.
3.
With the shutter button still pressed down only halfway, move the
camera to recompose your picture as desired, and then press
the shutter button completely to take the picture. If you release
your fi nger from the shutter button, the focus lock function will be
o
o
o
o
o
o
o
o
cancelled.
1. The image to be
captured.
2. Press the shutter
button halfway and
focus on the subject.
3. Recompose the
picture and fully
depress the shutter
button.
Page 36
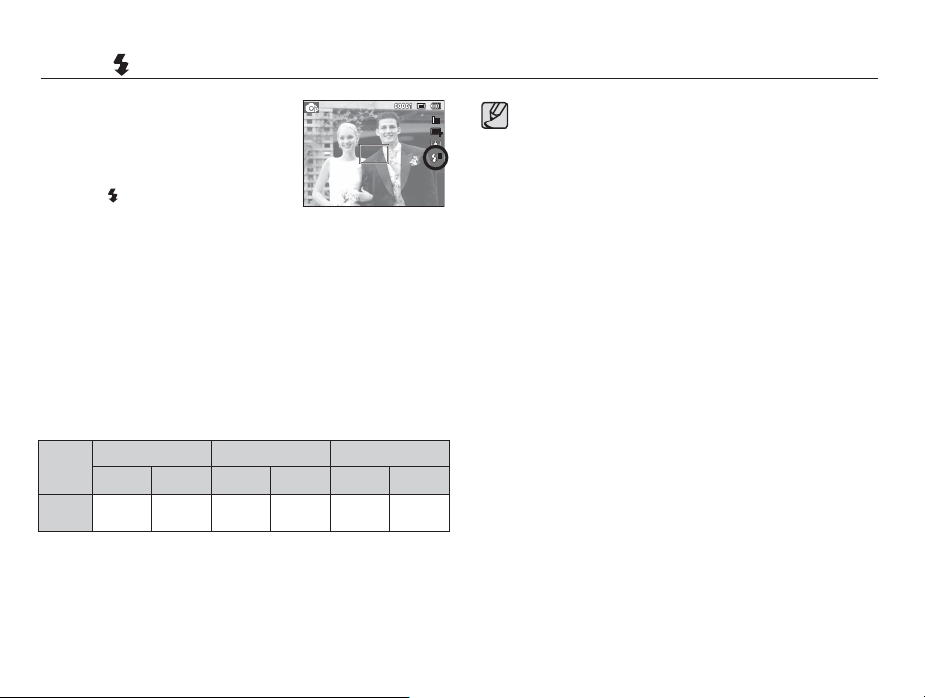
Flash
( )
/ Left button
When the menu is displayed on the LCD
screen, pressing the Left button makes
the cursor shift to the left tab.
When the menu is not displayed on the
LCD screen, the Left button operates as
the Flash ( ) button.
[Selecting the Auto fl ash]
Selecting the
Flash mode
1. Select the desired Recording mode, except for the [Movie]
mode. (p.23)
2. Press the Flash button until the desired fl ash mode indicator is
displayed on the LCD screen (Fill-in, Red-eye Reduction,etc.).
3. A fl ash mode indicator will be displayed on the LCD screen.
Use the correct fl ash mode to suit the environment.
Flash range
ISO
AUTO
Normal Macro Auto macro
WIDE TELE WIDE TELE WIDE TELE
0.8 ~ 3.0
0.8 ~ 2.0
0.2 ~ 0.8
(31 ~ 118)
(31 ~ 79)
(8 ~ 31)
0.5 ~ 0.8
(20 ~ 31)
Unit: m (inches)
0.2 ~ 3.0
0.5 ~ 2.0
(8 ~ 118)
(20 ~ 79)
If you press the shutter button after selecting the fl ash, the fi rst
fl ash fi res to check the shooting condition (Flash range and
Power ratio of fl ash). Do not move the camera until the second
fl ash fi res.
Using the fl ash frequently will reduce the life of the battery.
Under normal operating conditions the re-charging time for
the fl ash is usually within 4 seconds. If the battery is weak, the
charging time will be longer.
The camera fl ash does not operate in the [Movie] and some
Scene modes.
Take photographs within the fl ash range.
The image quality can be degraded if the subject is too close
or highly refl ective.
When taking an image in poorly lit conditions with the fl ash,
there may be a white speck in the captured image. The speck
is caused by the fl ash light refl ecting off atmospheric dust.
35
Page 37
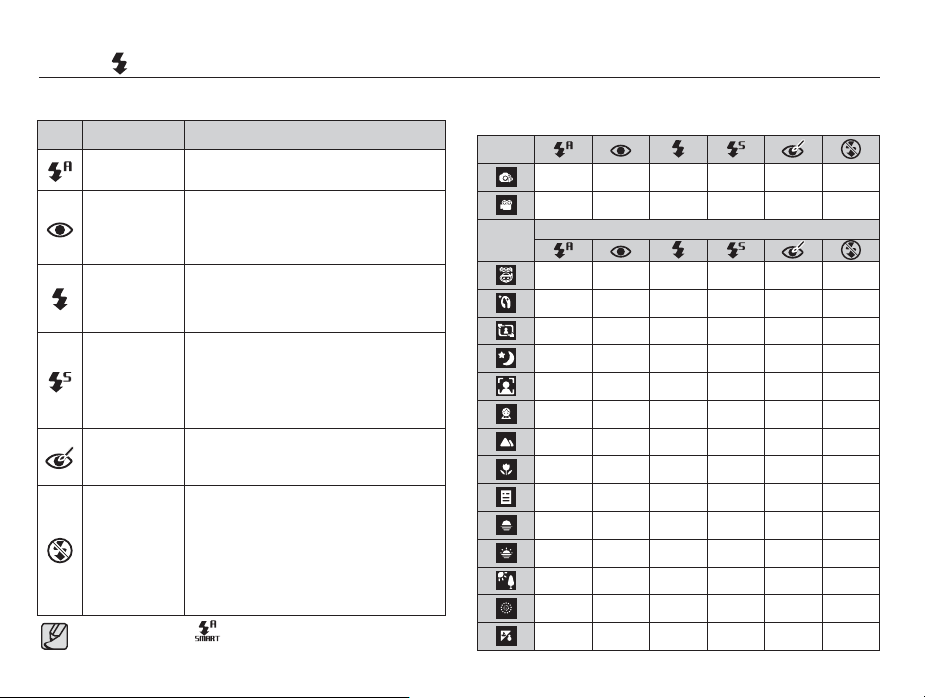
Flash
( )
/ Left button
Flash mode indicator
Icon Flash mode Description
Auto fl ash
Auto & Red eye
reduction
Fill in fl ash
Slow synchro
Red-eye reduction
Flash off
Smart Auto fl ash ( ) icon will appear in [Smart Auto]
If the subject or background is dark, the
camera fl ash will operate automatically.
If a subject or background is dark, the
camera fl ash will work automatically and will
reduce the red-eye effect by using the redeye reduction function.
The fl ash fi res regardless of the available light.
The intensity of the fl ash will be automatically
controlled to suit the prevailing conditions.
The fl ash operates with a slow shutter speed
to obtain a balanced correct exposure. In
poor lighting conditions the camera shake
warning indicator (
LCD screen.
When a shot with "red eye" is detected,
this mode will reduce the red-eye effect
automatically.
The fl ash does not fi re.
Select this mode when capturing images in
a place or situation where fl ash photography
is prohibited. When you capture an image in
poorly lit conditions, the camera shake
warning indicator (
LCD screen.
Ã
Ã
mode.
36
) will display on the
) will appear on the
Flash modes you can select, by recording mode
Mode
oooooo
Mode
SCENE
oo
ooo
ooo
ooo
ooo
oo
o
o
( o : Selectable)
o
o
o
o
o
o
o
Page 38
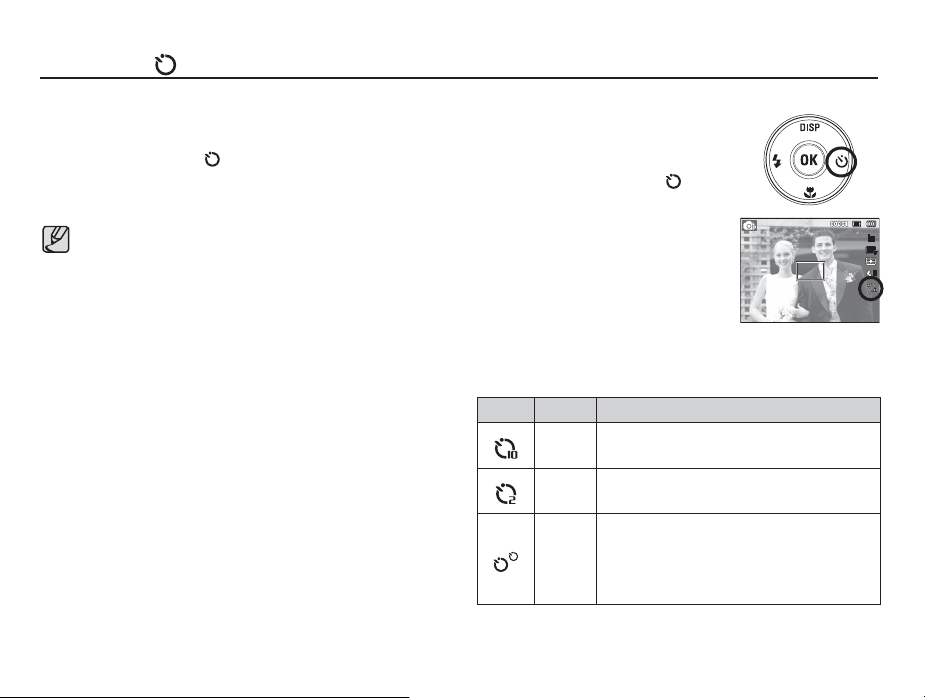
Self-timer
( )
/ Right button
When the menu is displayed on the LCD screen, pressing the Right
button makes the cursor shift to the right tab.
When the menu is not displayed on the LCD screen, the Right button
operates as the Self-timer ( ) button. Use the Self-timer when you
would also like to be in the picture.
If you press the Self-timer button during the self-timer
operation, the self-timer function is cancelled.
Use a tripod to prevent the camera from shaking.
In Movie Clip mode, only the 10SEC self-timer works.
Selecting the self-timer
1. Select a Recording mode with the
exception of Voice recording mode.
(p.23)
2. Press the Self-timer / Right ( )
button until the desired mode indicator
displays on the LCD
second, 2 second or Double Self-timer
icon appears on the LCD screen.
3. After you press the shutter button,
the picture is taken after the specifi ed
time has elapsed.
Self-timer mode indicator
Icon Mode Description
10SEC
self-timer
2SEC
self-timer
Double
self-timer
screen. A 10
Pressing the shutter button
of 10 seconds before the image is taken.
Pressing the shutter button provides an interval
of 2 seconds before the image is taken.
is taken after about 10 seconds and 2
A picture
later, a second picture is taken.
seconds
When using the fl ash, the 2-second self-timer
may be delayed for longer than 2 seconds
depending on the fl ash charging time.
[Selecting the 10 SEC
self-timer]
provides an interval
37
Page 39
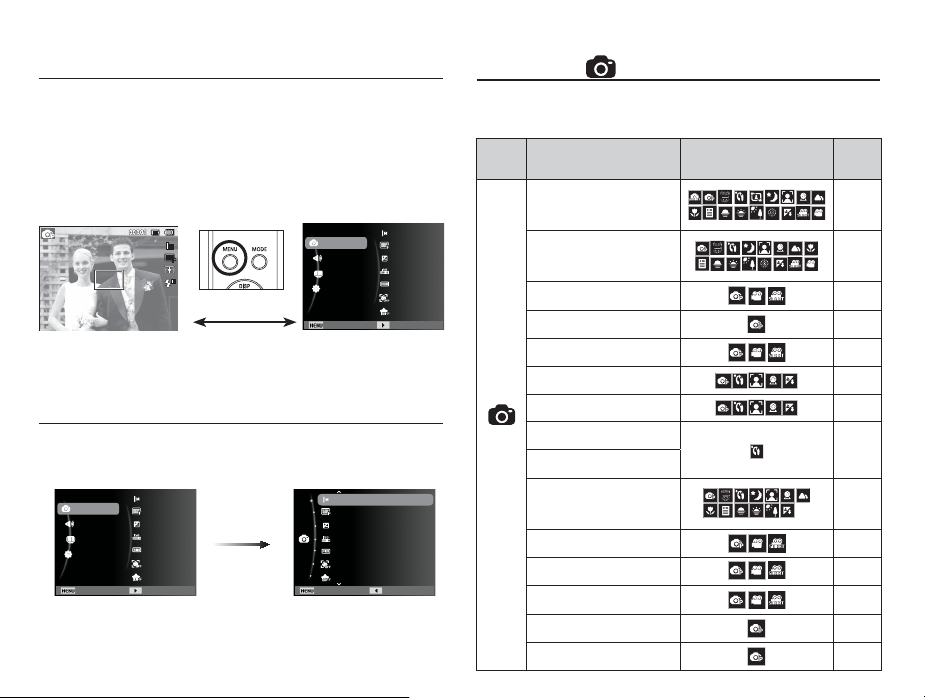
MENU button
- When you press the MENU button, a menu related to each of the
camera’s major functional areas is displayed on the LCD screen.
Pressing it again returns the LCD to the initial display.
- The menu screen is available in the [Smart Auto], [Program],
[Scene], [Movie] and [Smart Movie] modes, but it is not available
if you select the voice recording function.
[Menu off]
[Pressing the MENU button]
Shooting
Sound
Display
Settings
Exit Change
[Menu on]
Photo Size
Quality
EV
ISO
White Balance
Face Detection
Smart FR Edit
OK button
- When the menu is displayed on the LCD screen, this button is used
for shifting the cursor to the sub menu or for confi rming data.
38
Shooting
Sound
Display
Settings
Exit Change
Photo Size
Quality
EV
ISO
White Balance
Face Detection
Smart FR Edit
[Pressing the
OK button]
Photo Size
Quality
EV
ISO
White Balance
Face Detection
Smart FR Edit
Exit Back
Shooting ( )
To access a functional sub-menu, use the menu that contains the sub-menu,
or press the FN key. A list of Shooting sub-menus is below:
Mode Sub-Menu
Photo Size / Movie Size
Quality / Frame Rate
EV
ISO
White Balance
Face Detection
Smart FR Edit
(
Shooting
)
Face Tone
Face Retouch
Focus Area p.47
Metering
Photo Style Selector
Smart Filter
Image Adjust
ACB
Available When Camera
Set To
Page
p.40
p.40
p.41
p.41
p.42
p.43
p.46
p.47
p.48
p.48
p.49
p.50
p.51
Page 40
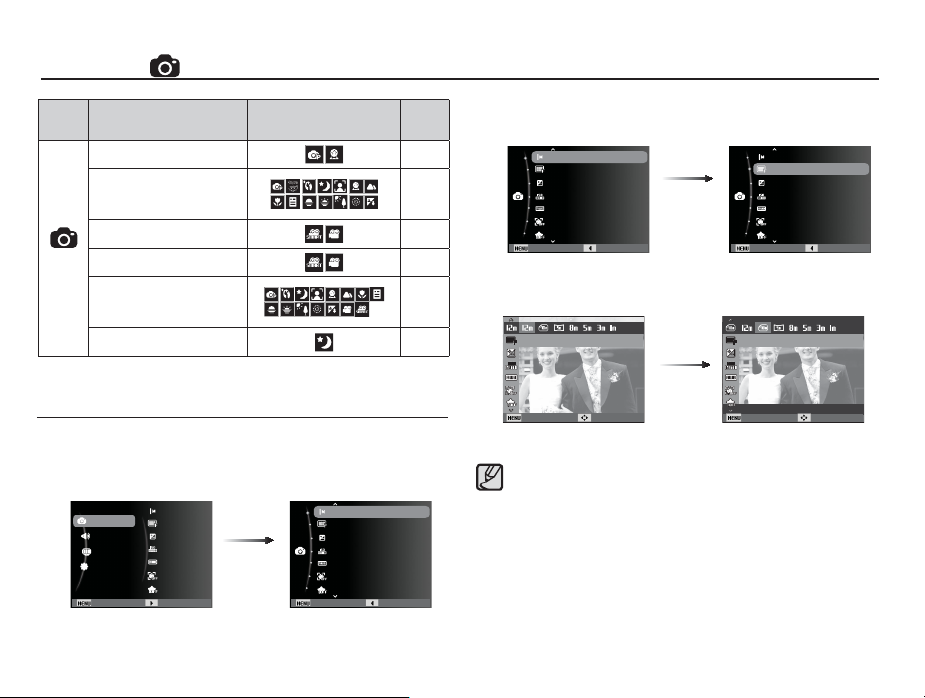
Shooting ( )
Mode Sub-Menu
Drive
DIS
Stabilizer
(
Shooting
)
Smart Scene Detection
Voice
Long Time Shutter
Available When Camera
Set To
Page
p.51
p.52
p.52
p.52
p.53
p.26
How to Enable Functions Using the MENU Button
1. Press the MENU button in an available mode.
2. Press the Up / Down button to select the [Shooting] menu and
press the Right/OK button.
Shooting
Sound
Display
Settings
Exit Change
Photo Size
Quality
EV
ISO
White Balance
Face Detection
Smart FR Edit
Right/OK
button
Photo Size
Quality
EV
ISO
White Balance
Face Detection
Smart FR Edit
Exit Back
3. Select a desired menu by pressing the Up / Down button and
then press the OK button.
Photo Size
Quality
EV
ISO
White Balance
Face Detection
Smart FR Edit
Exit Back
Up / Down
button
Photo Size
Quality
EV
ISO
White Balance
Face Detection
Smart FR Edit
Exit Back
4. Select a desired menu by pressing the Left / Right button and
then press the OK button.
Photo Size
Back Move
Left / Right
button
3984 X 2656
Back Move
Use the Fn button on the rear of the camera to bring up the
menus
that give you access to frequently used functions faster.
39
Page 41
Shooting ( )
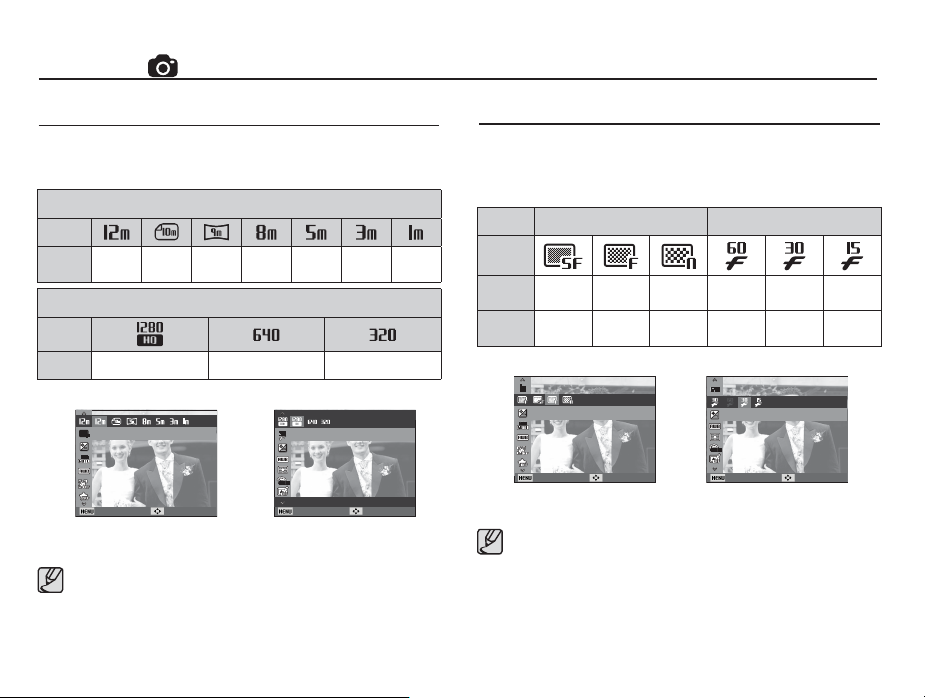
Photo Size / Movie Size (Image Resolution)
You can select the photo size / movie size appropriate for your application.
(Unit: pixel)
Quality / Frame rate
You can select the compression ratio appropriate for your application
of the captured images. The higher the compression ratio, the lower
the picture quality.
Still image mode
Icon
Size
Icon
4000X
3000
3984X
2656
3968X
3264X
2232
2448
Movie clip mode
2592X
1944
2048X
1536
1024X
768
Mode Still image mode Movie clip mode
Icon
Sub
menu
File
Format
Size 1280X720HQ 640X480 320X240
Photo Size
Back Move
[ Still image mode ]
The higher the resolution, the fewer the shots available because
Movie Size
Back Move
[ Movie clip mode ]
high resolution images require more memory.
40
Super
Fine Normal 60 FPS 30 FPS 15 FPS
Fine
jpeg jpeg jpeg MP4 MP4 MP4
Quality
Back Move
[ Still image mode ]
This fi le format complies with the DCF (Design rule for Camera
Frame Rate
Back Move
[ Movie clip mode ]
File system).
JPEG (Joint Photographic Experts Group) :
JPEG is the image compression standard developed by the
Joint Photographic Experts Group. This type of compression
is most commonly used for compressing photos and graphics
because it can compress the fi les effi ciently.
Page 42
Shooting ( )
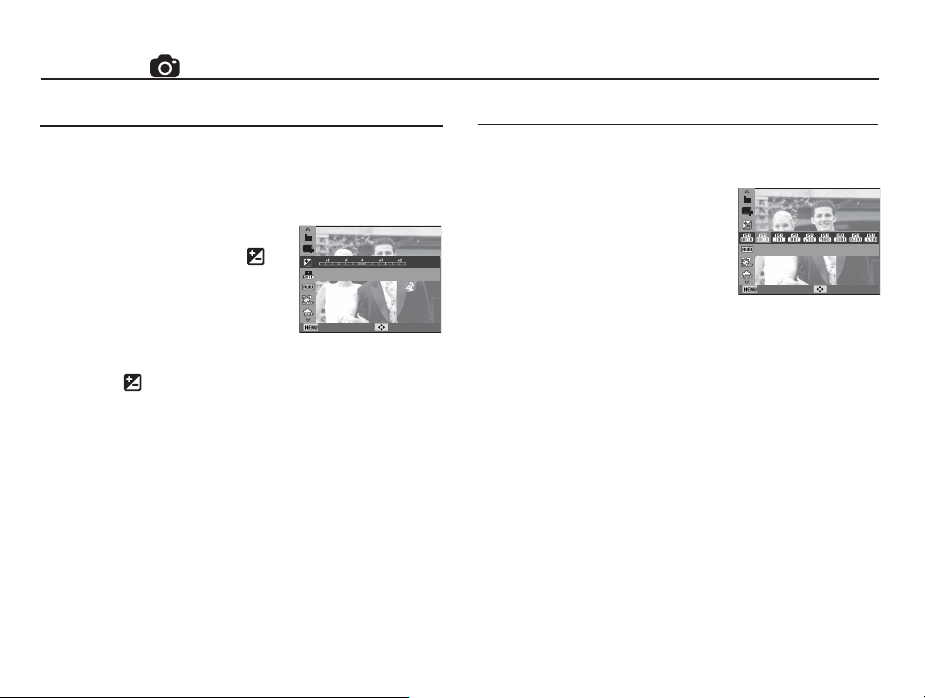
Exposure compensation
This camera automatically adjusts the exposure according to the
ambient lighting conditions.
by using the [EV] menu.
Compensating Exposure
1. Click the Up/Down button from the
Shooting menu to select [EV] (
2. Use the Left and Right buttons to set
the desired exposure compensation
factor.
3. Press the OK button. The value you
set will be saved and the Exposure Compensation setup mode
will be closed. If you change the exposure value, the exposure
indicator ( ) will be displayed on the Left of the LCD screen.
Ä
A negative exposure compensation value reduces the exposure.
Note that a positive exposure compensation value increases the
exposure and the LCD
get good pictures.
You can also select the exposure value
).
EV
Back Move
screen will appear white or you may not
ISO
You can select the ISO sensitivity when taking pictures.The speed or
specifi c light-sensitivity of a camera is rated by ISO numbers.
[Auto] : The camera's sensitivity is
automatically changed by
variables such as lighting value
or subject brightness.
[ISO 80, 100, 200, 400, 800, 1600, 3200] :
You can increase the shutter speed while
the same amount of light is present, by increasing the ISO sensitivity.
However, the image may be saturated in high luminance. The higher
the ISO value, the higher the camera’s sensitivity to light and therefore
the greater its capacity to take pictures in dark conditions. However,
the noise level in the image will increase as the ISO value increases,
making the image appear coarse.
Ä
When [Motion Capture] is set, ISO speed will be set to Auto.
Ä
[ISO] is enabled only in [Program] mode.
ISO
Back Move
41
Page 43
Shooting ( )
White balance
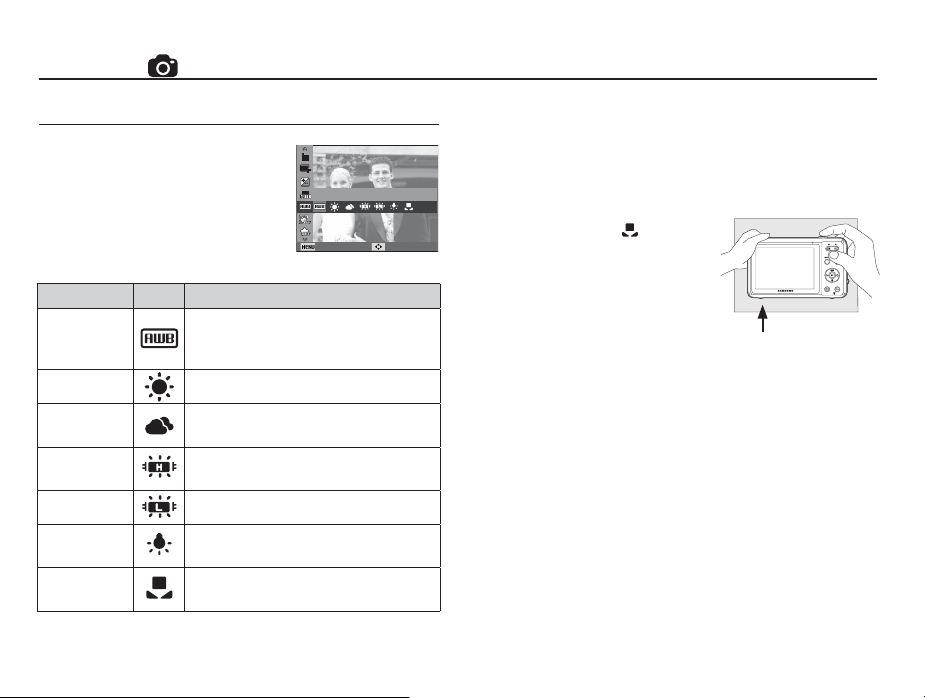
The white balance control allows you to
adjust the colors to appear more natural.
White Balance
Using the Custom White Balance
White balance settings may vary slightly depending on the
shooting environment. You can select the most appropriate
white balance setting for a given shooting environment by setting
a custom white balance.
up
Back Move
Mode Icon Description
The camera automatically selects the
Auto WB
Daylight For taking images outside.
Cloudy
Fluorescent_H
Fluorescent_L
Tungsten
Custom Set
Ä
Different lighting conditions may cause a color cast on your images.
appropriate white balance settings, depending
on the prevailing lighting conditions.
For taking images under a cloudy and
overcast sky.
For shooting under daylight
lights or three-way fl uorescent lighting.
For shooting under white fl uorescent lighting.
For shooting under tungsten (standard light
bulb) lighting.
Lets you set the the most appropriate white
balance for a given shooting environment.
fl uorescent
42
1. Select the Custom ( ) menu of
the White Balance, and then place
a sheet of white paper in front of
the camera so that the LCD screen
shows only white.
Do one of the following:
2.
White paper
Press the Shutter button to save the new custom white balance.
Press the OK button to select the previous custom white balance.
- The camera applies the custom white balance value, starting
with the next picture you take.
- Your custom white balance will be remain in effect until it is
overwritten.
Page 44
Shooting ( )
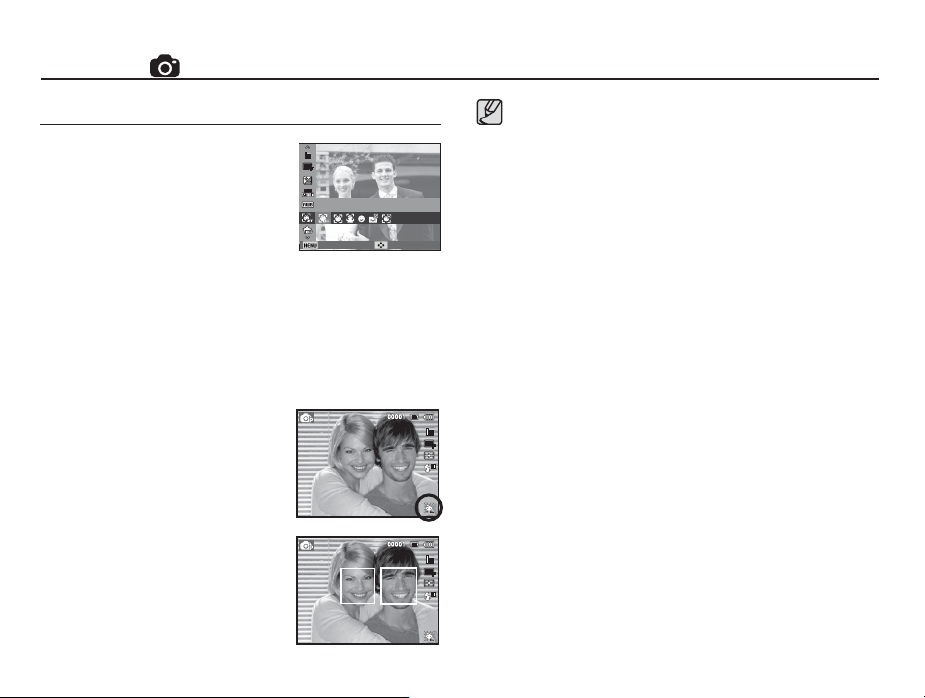
Face Detection
If you use face detection options, your
camera can detect a human face. When
focusing on a human face, the brightness
of the face is also adjusted. You can also
capture natural facial expressions by using
self portrait, smile shot or blink detection.
Normal
This mode detects the face of the subject automatically and then
sets the focus and exposure. Select this mode for quick and easy
pictures of faces.
Ä
Selectable modes: Program, Beauty Shot, Portrait, Children,
Beach & Snow
1. The size and position of the auto
focus frame is set
around the face of
the subject automatically.
2. Press the shutter button halfway.
The focus frame turns to green
when the focus is activated.
3. Press the shutter button fully to take
a picture.
Face Detection
Back Move
This function can detect up to 10 people.
When the camera recognizes many people at the same
time, it will focus on the nearest person.
The Digital zoom is not activated in this mode.
When the camera detects a target face, the white color
focus frame is displayed over the target face and the grey
color focus frame appears over the remaining faces. Press
the shutter button halfway down to focus on the face and
the white focus frame turns green.
Under some conditions, this function cannot work properly.
- When a person wears dark glasses or some part of the
face is hidden.
- When the person does not look at the camera.
- If the face is too dark or too bright.
- If the distance between the camera and object is too far.
The maximum available Face Detection range is 2.2m or
about 8 feet (Wide).
The nearer the subject, the faster the camera can recognize
the subject.
In [Beauty Shot], [Portrait], and [Children] mode, the
[Face Detection] function setting is set to its default value.
43
Page 45
Shooting ( )
Self Portrait
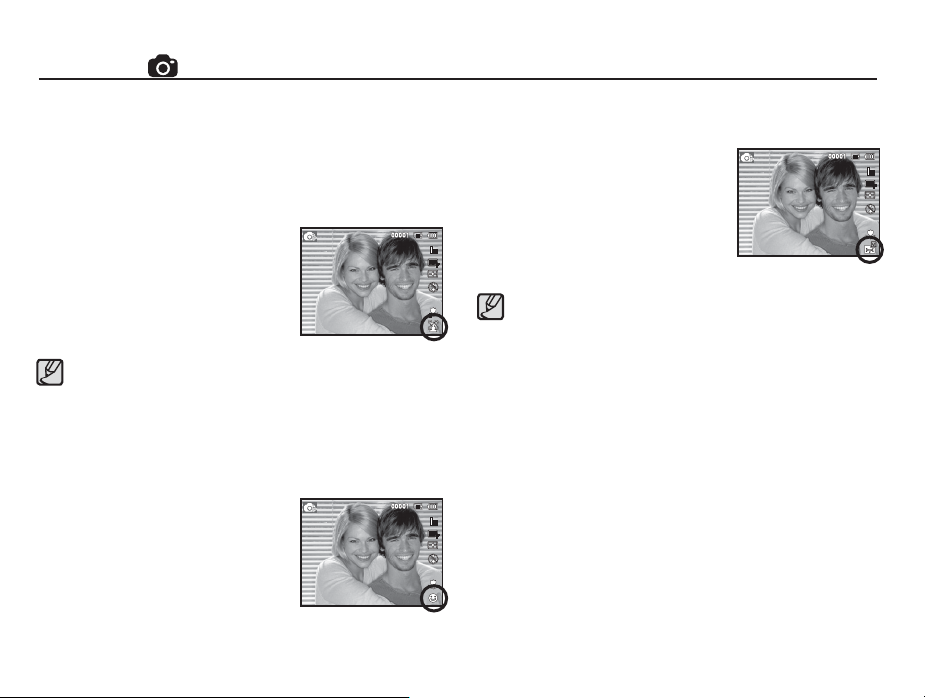
When taking pictures of yourself, the area of your face is
automatically detected so that you can take self portraits easily
and quickly.
Ä
Selectable modes: Program, Beauty Shot, Portrait, Children,
1. For self-fi lming, point the camera
lens towards your face. It automatically detects your face and emits a
guiding sound.
2. Start fi lming by pressing the shutter
button.
When locating the face in the center of the screen, it repeatedly
emits a faster sound unlike the sounds that are emitted when
the face is not in the center.
Smile Shot
Ä
Selectable modes: Program, Beauty Shot, Portrait, Children,
The camera automatically takes a
picture by detecting the face of the
subject although you don’t press the
shutter button. If you press the Shutter
button, the picture is taken in the
normal way.
shot, having the subject show teeth or
smile helps the camera to detect the
subject correctly.
44
Beach & Snow
Beach & Snow
When you take a smile
Blink Detection
Ä
Selectable modes: Program, Portrait, Children, Beach & Snow
If the eyes of the subject are closed
when the shutter button is pressed,
the camera takes 2 continuous shots
and then
saves the images. The
camera takes only one picture if the
eyes of the subject are open when the
Shutter button is pressed.
The camera may not be able to detect a smiling face or
blinking eyes if any of the following situations occur:
- The subject is wearing sunglasses.
- The subject is not facing directly to the camera.
- The ambient light is too bright or too dark for the camera to
detect the face of the subject.
- When the camera is far from the subject. (Orange colored
focusing mark)
-
Refl ections from the ambient light or back light are too bright.
Page 46
Shooting ( )
Smart Face Recognition
Ä
Selectable modes: Program, Beauty Shot, Portrait, Children,
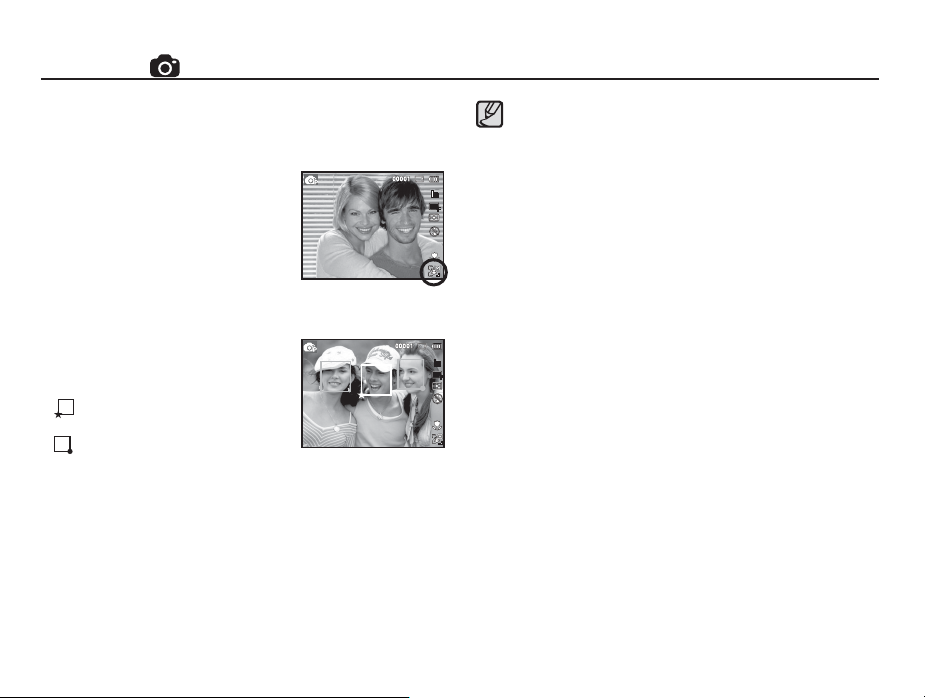
The camera automatically registers
faces that you frequently photograph.
This feature will automatically prioritize
the focus on those faces and favorite
faces. This feature is available only
when you use a memory card.
The nearest face appears in a white
focus frame and the rest of the faces
appear in gray focus frames.
:
Indicate favorite faces (To register
favorite faces, see page 46).
- : Indicate faces that the camera
automatically registers.
Beach & Snow
The same person can be recognized as a different person and
vice versa depending on glasses, brightness, extreme change
of pose or facial expressions.
If you register a new face when 12 faces are already registered,
the face with the lowest priority is replaced by the newly added
face.
The camera can recognize a maximum of 5 people in a scene.
The camera can categorize pictures in the playback mode
according to the priority of faces (p. 67).
Even though the camera a recognizes a face, it may not categorize
the face
in Smart Album according to priority.
45
Page 47
Shooting ( )
Smart FR Edit
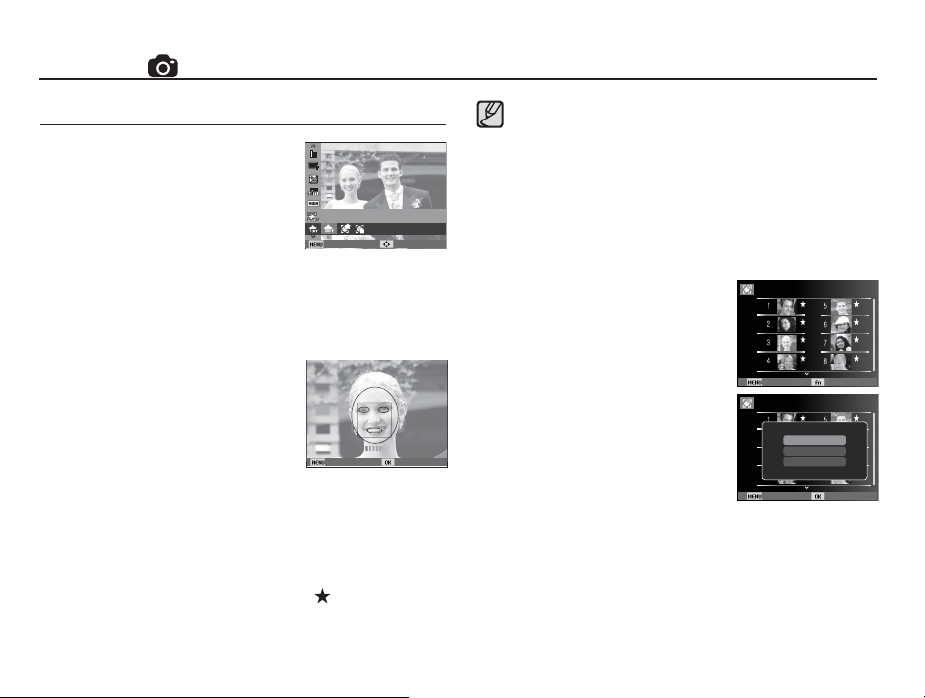
You can register frequently shot faces
or edit the registered face list prior to
shooting. This feature is available only
when you use a memory card.
Smart FR Edit
Back Move
You can register up to 8 favorite faces.
The fl ash option will be set to Off.
If you register the same face twice, you can delete one of the
faces in the face list.
Face List
You can change the ranking of your favorite faces or delete them.
My Star
You can register your favorite faces to prioritize the focus and
exposure on those faces.
1. Align your subject’s face with the
oval guideline and press [Shutter] to
register the face.
- If the subject’s face is not aligned
with the oval guideline, the white
frame will not appear.
Back Set
- You can take photos of a subject’s
face directly from the front, to the left side, to the right side,
from above, or from below.
- Take photos of one person at a time when registering faces.
2. Press the OK button to save after taking photos of the face.
3. Press the MENU button when the registered face list appears.
- Your favorite faces are indicated with a (
) on the face list.
46
1. Press the Fn button.
2. Select a desired menu by pressing
the Up / Down button and then press
the OK button.
Face List
Back Edit
Face List
Edit Ranking
Delete My Star
Cancel
Back Set
[Edit Ranking] : Change the rankings of people registered as
My Star.
[Delete My Star] : Delete people from My Star.
Page 48
Shooting ( )
Face Tone
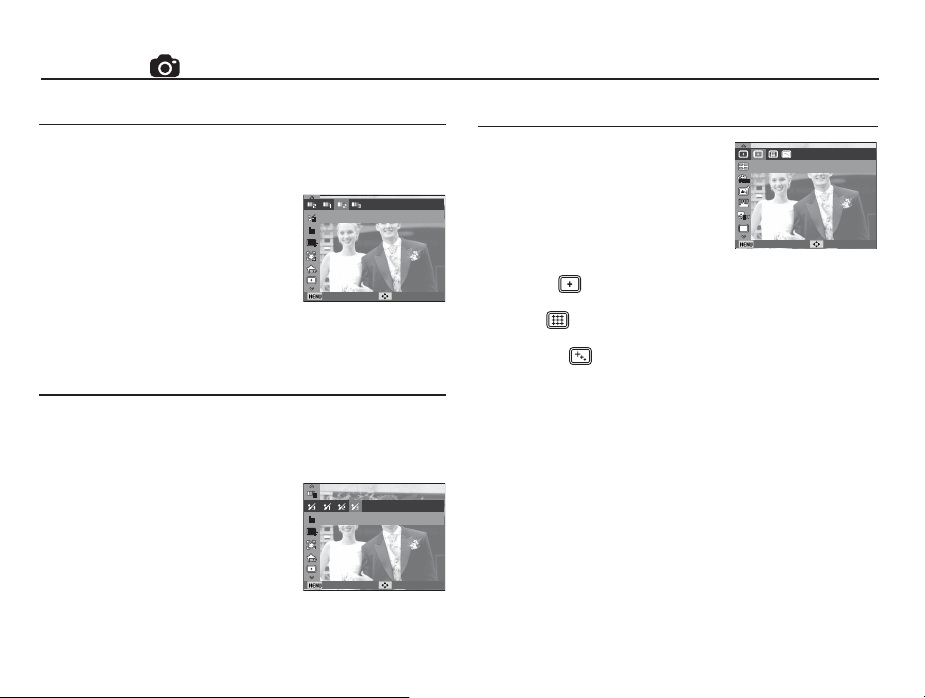
This menu lets you to control the skin tone in images in beauty shot
mode. The higher the level you select, the brighter the skin tone.
1. Select [Face Tone] by pressing the
Up/Down button.
Face Tone
2. Select a desired face tone by pressing
the Left / Right button, and then press
the OK button.
3. Press the Shutter button to capture an
image.
Back Move
Face Retouch
This menu lets you make skin appear clear and beautiful before
recording in beauty shot mode. The higher the level you select, the
more effective the control.
1. Select [Face Retouch] by pressing the
Up/Down button.
2. Select a desired face retouch by
pressing the Left / Right
button, and
then press the OK button.
3. Press the Shutter button to capture an
image.
Face Retouch
Back Move
Auto Focus type
You can select your preferred Focus Area
according to the shooting conditions.
[Center AF] (
) : The camera focuses using the rectangular
area in the center of the LCD
[Multi AF] (
) :
The camera focuses using all 9 of the available
AF points.
[Tracking AF] ( ) : The focus moves along with the movements
of a subject.
Ä
When the camera focuses on
a subject, the auto focus frame
turns green. When the camera doesn't focus on the subject, the
auto focus frame turns red.
Focus Area
Back Move
screen.
47
Page 49
Shooting ( )
Metering
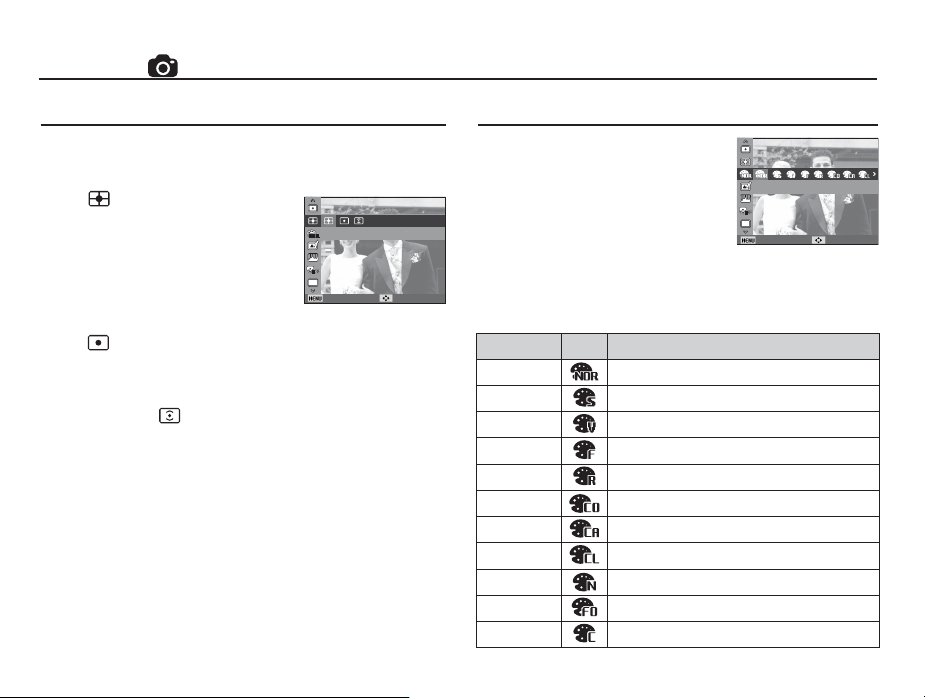
If you cannot obtain suitable exposure conditions, you can change
the metering method to take brighter pictures.
[Multi] ( ) : Exposure is calculated
[Spot] (
[Center-wei ghted] ( )
Ä
If the subject is not in the center of the focus area, do not use
spot metering as this may result in an exposure error. In this
case, it is better to use exposure compensation.
48
based on an average of
the available light in the
Metering
image area. However,
the calculation
towards the center of the
image area. This is suitable
is biased
Back Move
for general use.
) : Only the rectangular area in the center of the LCD
screen is metered for light. This is suitable when the
subject in the center is exposed correctly, regardless
of the back lighting.
: Exposure will be calculated based on an average of
the available light in the image area. However, the
calculation will be biased towards the center of the
image area. This is suitable for taking a picture of
small objects such as fl owers or insects.
Photo Style Selector
You can add various effects to an image
without using image editing software.
1. Select the desired Photo style selector by pressing the Left/Right
button, and then press the OK button.
2. Press the Shutter button to take an image.
Style mode Icon Description
Normal No style effect is applied.
Soft
Vivid
Forest
Retro
Cool
Calm
Classic
Negative
Defog
Custom RGB
Soft style is applied.
Vivid style is applied.
Forest style is applied.
Sepia style is applied.
Cool style is applied.
Calm style is applied.
Black & white effect is applied.
Negative effect is applied.
Distinct style is applied.
Defi ne an RGB tone to create your own photo style.
Photo Style Selector
Back Move
Page 50
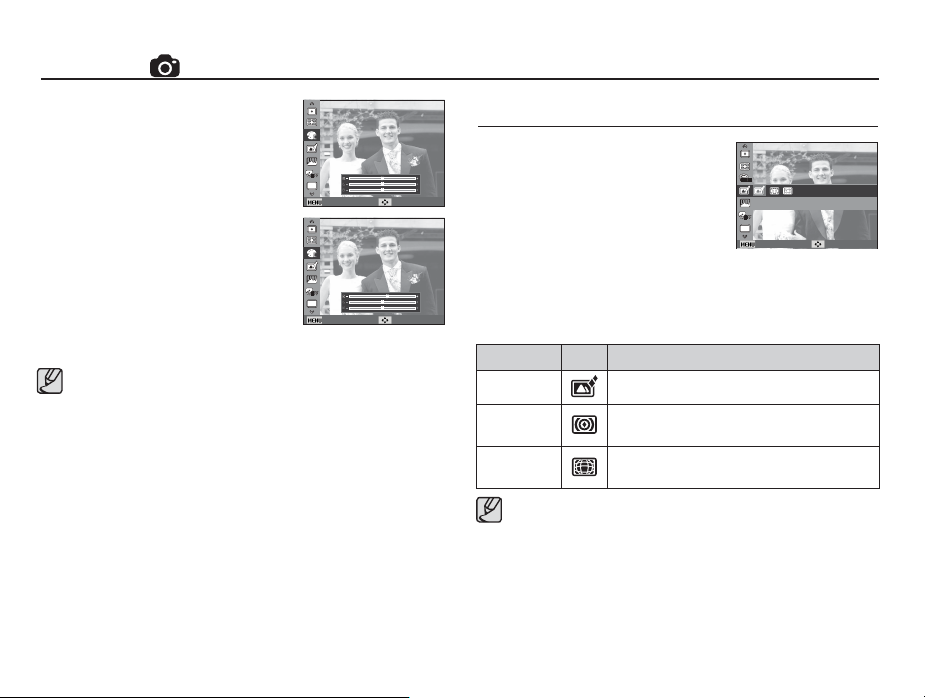
Shooting ( )
Custom RGB : You can change the R
- Up/Down button : Selects R, G, B
- Left/Right button : Changes the values
(Red), G (Green) and
B (Blue) values of the
image.
Back Move
Smart Filter
You can apply various fi lter effects to your
photos to create unique images.
Smart Filter
Back Move
Back Move
When you select any Photo style, Face detection is not available.
When you select Photo Style Selector, the Image Adjust function
is not available.
1. Select the desired Smart Filter by pressing the Left/Right
button,
and then press the OK button.
2. Press the Shutter button to take an image.
Smart Filter Icon Description
Normal
Vignetting
Fish-eye
When you apply a smart fi lter effect while recording a video, the
video will be automatically resized to (640x320) or smaller.
If you use this function, you cannot set the photo style and image
adjustment options.
No effect
Apply retro-looking colors, high contrast, and
strong vignette
Distort close objects to imitate the visual effect
of a
Fisheye lens.
effect.
49
Page 51
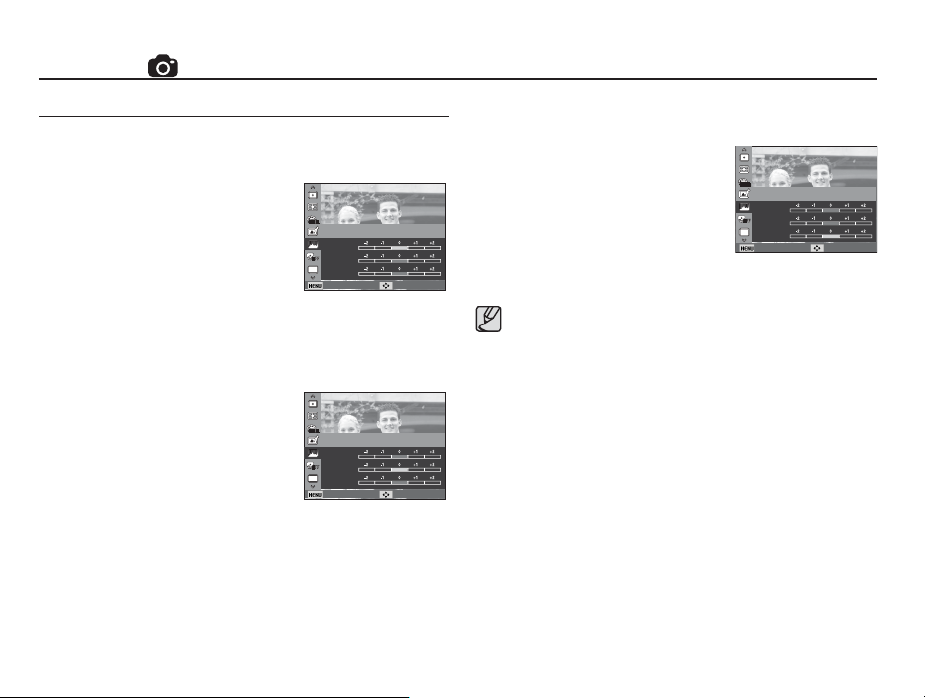
Shooting ( )
Image Adjust
Contrast
You can change the contrast of the image.
1. Select [Contrast] by pressing the
Up/Down button.
2. Change the contrast by pressing the
Left/Right button.
3. Press the Shutter button to
capture
an image.
Sharpness
You can adjust the sharpness of the
picture you are about to take.
You cannot check the sharpness effect
on the LCD screen before you take a
picture, because this function is applied
only when the captured image is stored
in the memory.
1. Select [Sharpness] by pressing the Up/Down button.
2. Change the Sharpness by pressing the Left/Right button.
3. Press the Shutter button to
capture an image.
Image Adjust
Contrast
Sharpness
Saturation
Back Move
Image Adjust
Contrast
Sharpness
Saturation
Back Move
Saturation
You can change the saturation of the image.
1. Select [Saturation] by pressing the
Up/Down button.
2. Change the saturation by pressing
the Left/Right button.
3.
Press the Shutter button to capture
an image.
When you select Image Adjust, Photo Style Selector function is
Image Adjust
Contrast
Sharpness
Saturation
Back Move
not available.
When you select Image Adjust, Face Detection is not available.
50
Page 52
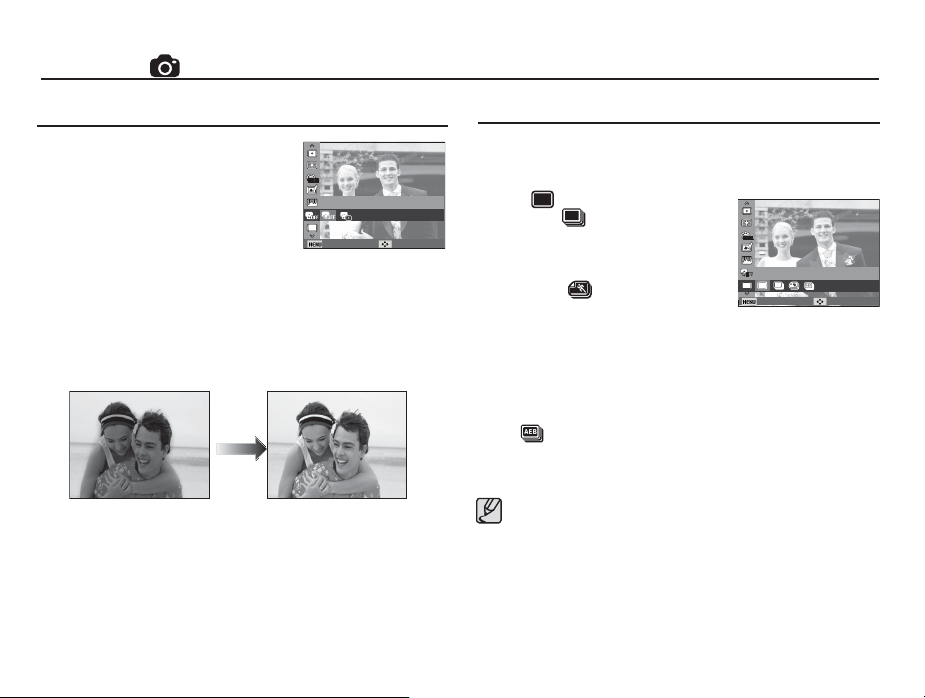
Shooting ( )
ACB
The ACB function adjusts the contrast
automatically when there are big differences in
brightness between objects in the photo frame
or between your subject and the surrounding
environment. This lets you photograph subjects
clearly.
- [ACB] Sub menus: [Off], [On].
Ä
you are using the [Program] mode, the ACB function will
When
operate.
ACB
Back Move
Drive mode
You can select single, continuous, motion capture, and AEB (Auto
Exposure Bracketing).
[Single] ( ) :
[Continuous] ( ) :
[Motion Capture] ( ):Takes 7 shots per
[AEB] ( ) :
High resolution and picture quality increases fi le saving time,
which increases stand-by time.
If you select the [Continuous], [Motion Capture], or [AEB] sub
menu, the camera automatically turns the fl ash off.
If there is space for less than 3 pictures are available on the
memory, the AEB shooting is not available.
It is best to use a tripod
each image fi le is
can occur.
Take one picture only.
Takes pictures
continuously until you
release the shutter
button.
second when you
Drive
Back Move
press and hold down the shutter button. After
you’ve completed continuous shooting, the
camera saves the images, and then plays
them back on the Rear LCD.
The maximum
number of shots is 30 and the image size is
fi xed as 1 Megapixel.
Takes three consecutive pictures using different
exposures: standard exposure (0.0EV), short
exposure (-1/2EV) and over exposure (+1/2EV).
for AEB shooting as the time to save
longer, and blurring caused by camera shake
51
Page 53
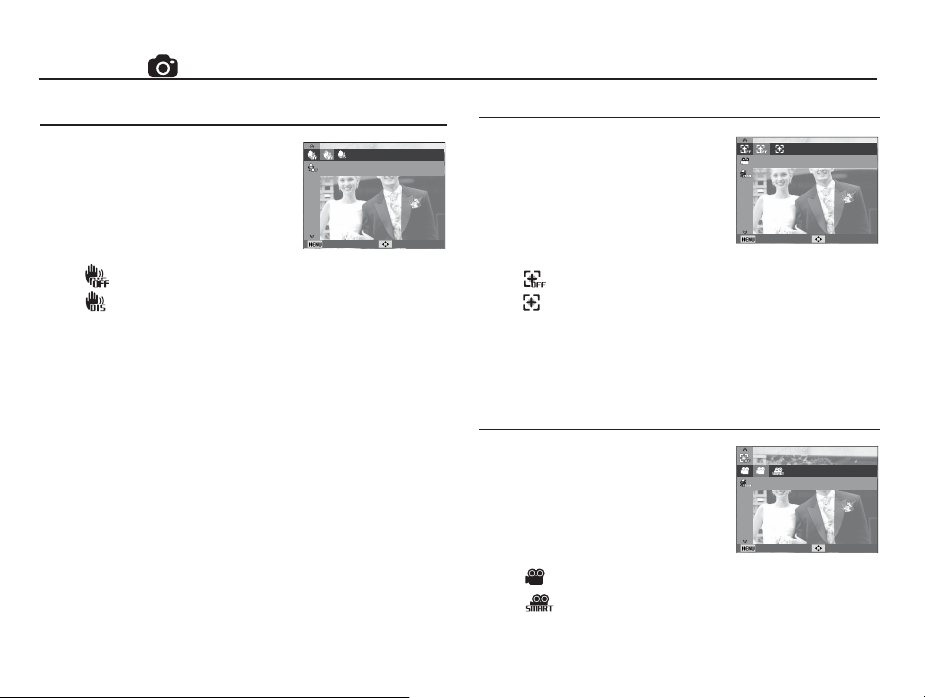
Shooting ( )
DIS
Digital Image Stabilization (DIS)
This function helps minimize camera shake
when capturing a still image.
[Off] ( ) : Disables the DIS function when capturing a still image.
) : Enables the DIS function when capturing a still image.
[On] (
Things to watch out for using the DIS function
Ɣ The digital zoom will not operate in the DIS function.
Ɣ If the lighting condition is brighter than fl uorescent lighting
conditions, the DIS will not activate.
Ɣ If the lighting condition is darker than fl uorescent lighting
conditions, camera shake warning indicator ( Ã ) will display.
For best results only take pictures in situations where the
camera shake warning indicator ( Ã ) is not displayed.
Ɣ If the subject is moving, the captured image may be blurred.
Ɣ As the DIS uses the camera's digital signal processor, it may
take a little longer for the camera to process and save the
images.
52
DIS
Back Move
Movie clip frame stabiliser
This function helps stabilize images
captured during movie recording. You
can select this menu only in the Movie
clip mode.
[Off] ( ) : Movie clip frame stabilizer function is off.
[On] ( ) :
Ä
The recording frame range becomes narrow when you select this
Minimises camera shake during movie recording.
menu.
Stabilizer
Back Move
Smart Scene Detection
You can set the smart scene detection during
movie recording.
[Off]( ) : Turn off the scene detection function.
[On](
Ä
) : Turn on the scene detection function.
Select [On] for smart movie recording.
Smart Scene Detection
Back Move
Page 54
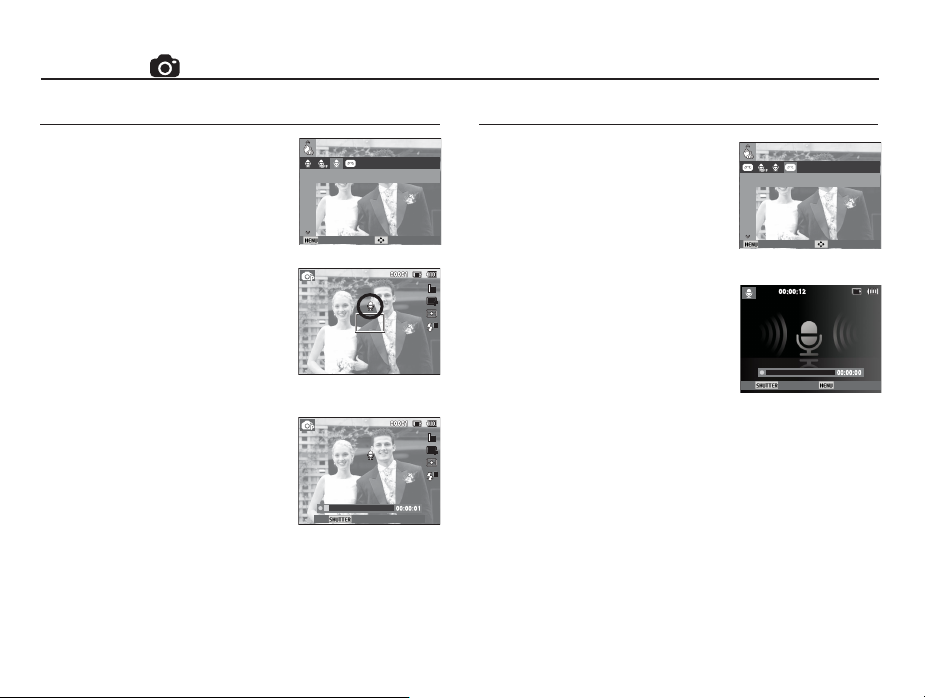
Shooting ( )
Voice Memo
You can add your voice-over to a stored
still image. (Max. 10 sec.)
-
Select Voice Memo in the menu.
When the Voice Memo indicator is
displayed on the LCD screen, the
Voice Memo function is ready.
- Press the shutter button and take a
picture. The picture is stored on the
memory card.
-
The Voice Memo function records for
ten seconds from the moment the
camera stores the picture. You can
stop the recording in the middle by
pressing the shutter button.
Memo
Back Move
Stop
Voice Recording
With Voice Recording, the camera can
record a voice for as long as the available
recording time allows (Max. 10 hours).
Select Voice Recording in the menu.
Press the shutter button to record a voice.
- Press the shutter button once and the
camera records for as long as there is
available recording time (Max.10 hours).
The recording time is displayed on the
LCD screen. The camera continues to
record audio even if you release the
shutter button.
- If you want to stop recording, press the
shutter button again.
- File type : *.wav
Record
Back Move
Record Exit
[Voice recording mode]
53
Page 55
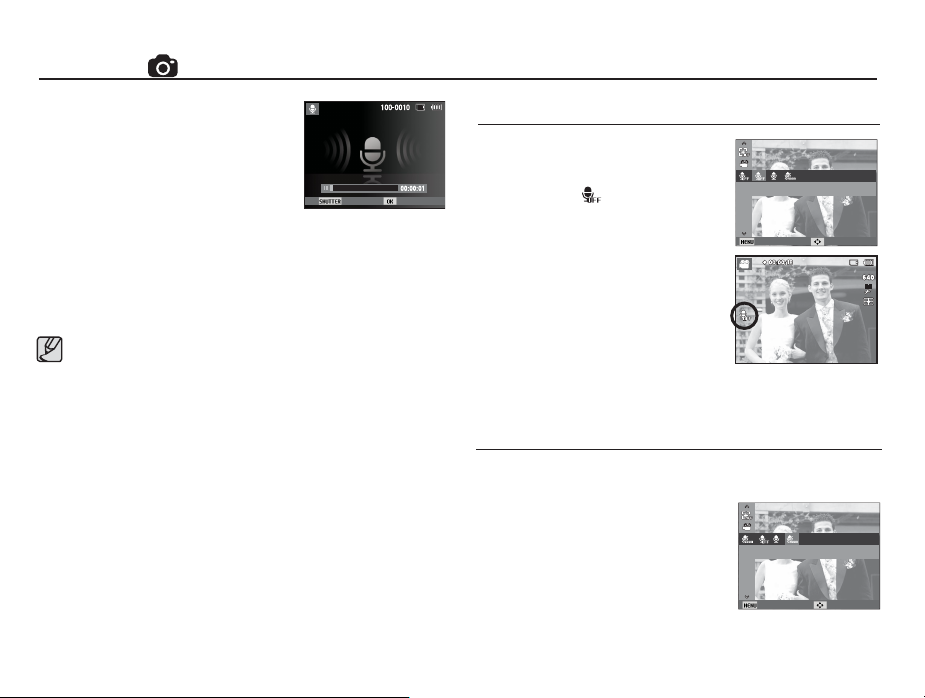
Shooting ( )
Pausing while recording a voice
Using this function, you can record your
favorite voice clips into a voice recording
fi le without having to create multiple voice
recording fi les.
1.
Press the OK button to pause recording.
2. Press the OK button again to resume the recording.
3. If you want to stop recording, press the shutter button again.
For optimal voice recordings, place the camera about 25 cm
(10 inches) from you.
If the camera power is turned off while the voice recording is
paused, the voice recording is cancelled.
The zoom sound may be recorded if you use the zoom while
recording a video.
Stop Record
[Voice recording mode]
Recording a movie clip without voice
You can record a movie without voice.
Select [Off] of [Voice] menu in the Movie
clip mode. The ( ) icon appears
on the LCD
screen. Press the Shutter
button and the camera records a movie
without sound for as long as there is
Off
Back Move
memory capacity.
Setting movie recording
You can set the desired voice recording mode in Movie mode.
- [Voice] sub menus
[Off] : Record a video without
[On] : Record a video with sound.
[Zoom Mute] : Record a video without
sound.
sound while zooming.
Zoom Mute
Back Move
54
Page 56
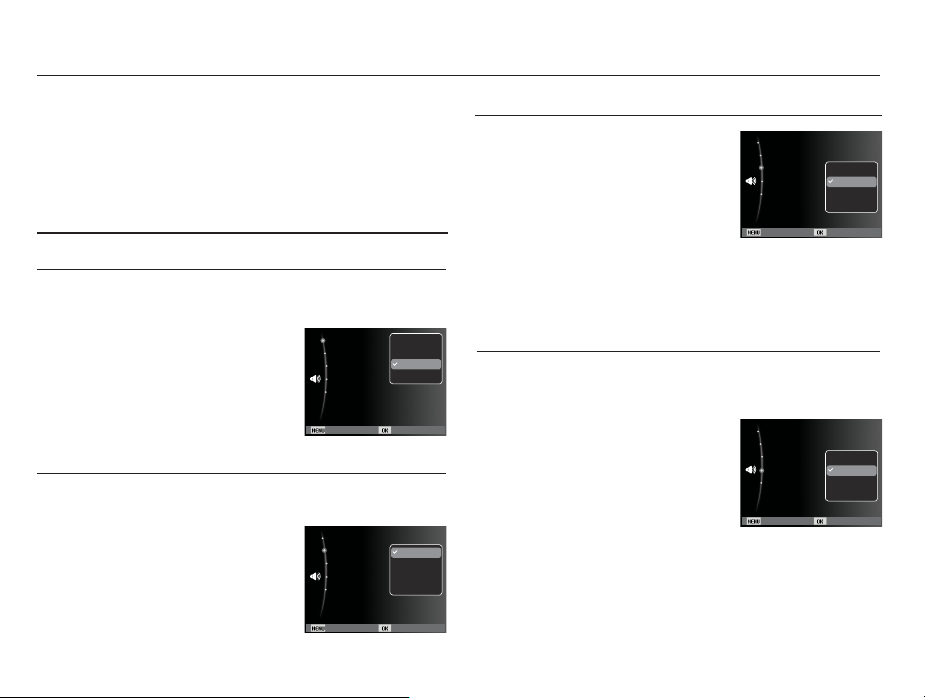
Sound menu
In this mode, you can set up sound settings. You can use the setup
menu in all camera modes, except the Voice Recording mode.
The items indicated by * are default settings.
Ä
Menus are subject to change without prior notice.
)
(
Sound
Volume
You can select
beep sound, and AF sound.
-
[Volume] sub menus : [Off], [Low],
the loudness of the start up sound, shutter sound,
[Medium]*, [High]
Volume :Medium
Start Sound :Off
Shutter Sound :1
Beep Sound :1
AF Sound :On
Back Set
Off
Low
Medium
High
Start up sound
You can select the sound the camera plays whenever you turn the
camera on.
- Start up sound : [Off]*, [1], [2], [3]
Volume :Medium
Start Sound :Off
Shutter Sound :1
Beep Sound :1
AF Sound :On
Back Set
Off
1
2
3
Shutter sound
You can select the shutter sound.
- Shutter sound : [Off], [1]*, [2], [3]
Volume :Medium
Start Sound :Off
Shutter Sound :1
Beep Sound :1
AF Sound :On
Back Set
Off
1
2
3
Beep sound
You can select the beep sound the camera plays when you press
the buttons.
- [Beep Sound] sub menus : [Off], [1]*, [2], [3]
Volume :Medium
Start Sound :Off
Shutter Sound :1
Beep Sound :1
AF Sound :On
Back Set
Off
1
2
3
55
Page 57
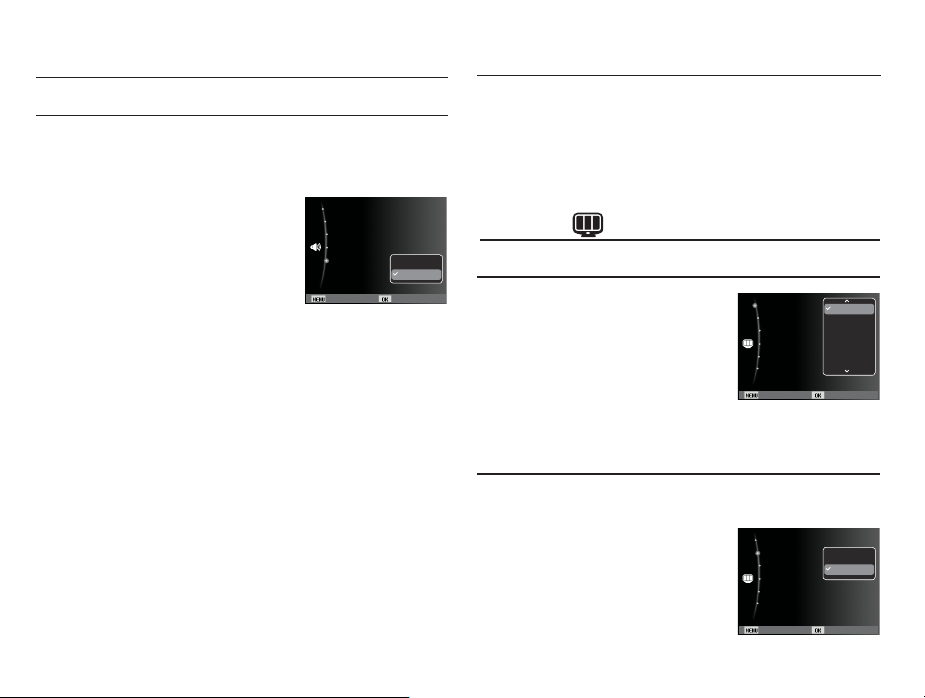
Sound
( )
Setup menu
AF sound
If you set the AF (Automatic Focus) sound to On, the camera plays
the AF sound when you press the shutter button down half way.
- [AF sound] sub menus : [Off], [On]*
56
Volume :Medium
Start Sound :Off
Shutter Sound :1
Beep Sound :1
AF Sound :On
Back Set
Off
On
In this mode, you can set up the basic settings. You can use the
setup menu in all camera modes, except the Voice Recording mode.
The items indicated by * are default settings.
Ä
Menus are subject to change without prior notice.
Display ( )
Language
You can choose the language the camera
uses on the LCD screen. Even if the battery
is removed and inserted again, the language
setting is preserved.
Function Description
You can choose whether the camera can display the function
descriptions on the LCD screen in recording mode.
- Function Description sub menus
[Off] : The function description
are not displayed.
[On]* : The names and descriptions of
the functions are displayed.
Language :English
Function Description :On
Start Image :Off
Display Brightness :Auto
Quick View :0.5sec
Power Save :Off
Back Set
Language :English
Function Description :On
Start Image :Off
Display Brightness :Auto
Quick View :0.5sec
Power Save :Off
Back Set
English
䚐ạ㛨
Français
Deutsch
Español
Italiano
Off
On
Page 58
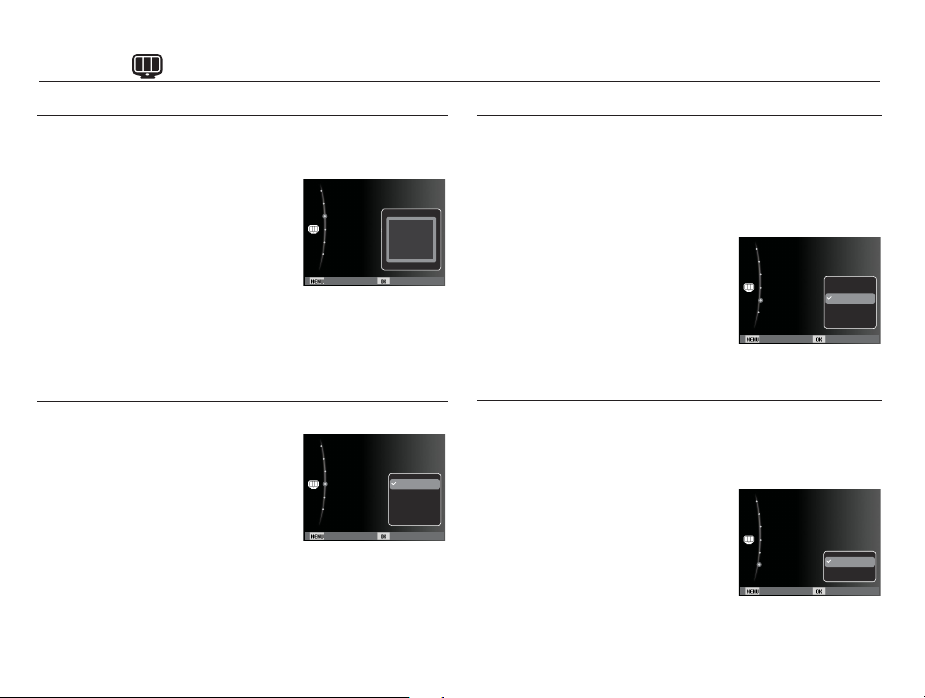
Display ( )
Start up image
You can select the image that is fi rst displayed on the LCD screen
whenever you turn on the camera.
- Sub menus : [Off]*, [Logo], [User Image]
- Insert a saved image for the start-up
image using [Start Image] in the [Resize]
menu in play mode.
- The start-up image will not be deleted by
[Delete] or [Format] menu.
- The user start up image can be deleted
Language :English
Function Description :On
Start Image :Off
Display Brightness :Auto
Quick View :0.5sec
Power Save :Off
Back Set
OFF
using [Reset].
Display Brightness
You can adjust the LCD brightness.
- Sub menus : [Auto]*, [Dark],
[Normal], [Bright]
Language :English
Function Description :On
Start Image :Off
Display Brightness :Auto
Quick View :0.5sec
Power Save :Off
Back Set
Auto
Dark
Normal
Bright
Quick view
If you enable Quick View before capturing an image, you can
view the image you just captured on the LCD screen for the time
specifi ed in the [Quick View] setup. You can use Quick view only
with still images.
- Sub menus
[Off] :
The Quick View function is off.
[0.5 sec]*, [1 sec], [3 sec]
: The captured image is
briefl y displayed during the
selected time.
Language :English
Function Description :On
Start Image :Off
Display Brightness :Auto
Quick View :0.5sec
Power Save :Off
Back Set
Off
0.5 sec
1 sec
3 sec
Display Save
If you set [Power Save] to On and the camera isn't operated during
the specifi ed time, the LCD screen turns off automatically.
- Sub menus
[Off]* :
The camera will not turn off the
LCD screen automatically.
[On] :
If the camera isn't operated
during the specifi ed time (about
30 SEC.), the LCD screen turns
off automatically. (Camera status
lamp:Blinking)
Ä
You can’t set [Power Save] menu in Playback Mode.
Language :English
Function Description :On
Start Image :Off
Display Brightness :Auto
Quick View :0.5sec
Power Save :Off
Back Set
Off
On
57
Page 59
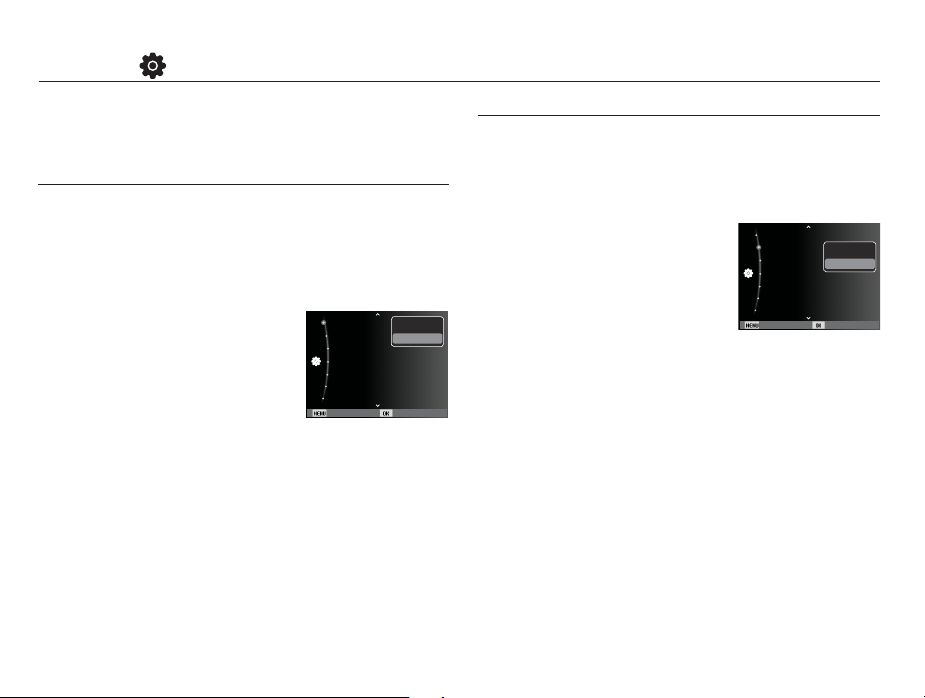
Settings
( )
The items indicated by * are default settings.
Ä
Menus are subject to change without prior notice.
Formatting a memory
The [Format] function formats the camera’s memory. When you run
[Format] all images, including protected images, are deleted. Be
sure to download important images to your PC before formatting
the memory.
- Sub menus
[Yes] :
A window for confi rming the
selection appears. If you Select
[Yes], a [Formatting] message
appears and the memory is
formatted. When a [Format is
completed] message appears,
formatting is fi nished.
[No]* :
The memory will not be formatted.
Be sure to run [Format] on the following types of memory card:
- A new memory card, or an unformatted memory card.
- A memory card that has a fi le this camera can't recognize or a
card that has been taken from another camera.
- Always format the memory card using this camera. If you insert a
memory card that has been formatted by another camera,
a memory card reader, or a PC, you will get a [Card Error]
message.
58
Format
Reset
Date & Time :
Time Zone :London
File No. :Series
Imprint :Off
Auto Power Off :3 min
Back Set
Yes
No
2010/01/01
Initialization
Initialization restores all camera menu and function settings to
their default values. However, values for Date & Time, Language,
and Video Out are not changed.
- Sub menus
[Yes] : A window to confi rm the selection
is displayed. Select [Yes] and
all settings are restored to their
defaults.
[No]* : Settings are not restored to their
defaults.
Format
Reset
Date & Time :Off
Time Zone :London
File No. :Series
Imprint :Off
Auto Power Off :3 min
Back Set
Yes
No
Page 60
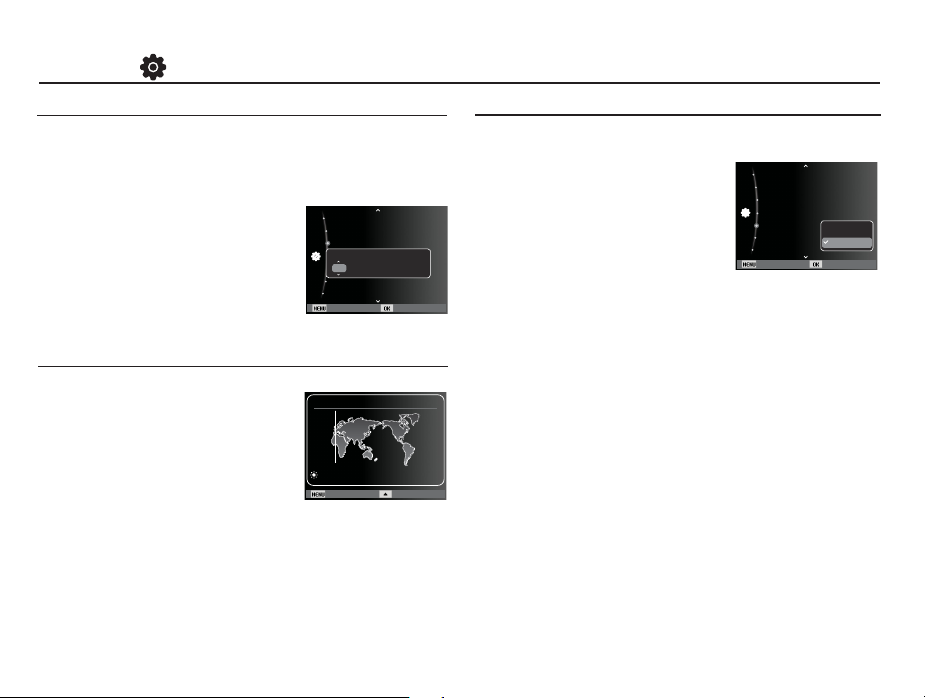
Settings
( )
Setting up the Date / Time / Date type
You can change the date and time that the camera displays on
captured images and set up the date type. Setting [Time Zone]
enables you to display the local date and time on the LCD screen
when travelling overseas.
-
Date type : [yyyy/mm/dd], [mm/dd/yyyy],
[dd/mm/yyyy], [Off]*
Format
Reset
Date & Time :
yyyy mm dd
Time Zone :London
2010 / 01 / 01 13:00 Off
File No. :Series
Imprint :Off
Auto Power Off :3 min
Back Set
2010/01/01
Time Zone
Available cities/Time Zones:
London, Cape Verde, Mid-Atlantic,
Buenos Aires, Sao Paulo, Newfoundland,
Caracas, La Paz, NewYork, Miami,
Chicago, Dallas, Denver, Phoenix, LA,
San Francisco, Alaska, Honolulu, Hawaii,
Samoa, Midway, Wellington, Auckland,
Okhotsk, Guam, Sydney, Darwin, Adelaide, Seoul, Tokyo, Beijing,
Hong Kong, Bankok, Jakarta, Yangon, Almaty, Kathmandu, Mumbai,
New Delhi, Tashkent, Kabul, Abu Dhabi, Teheran, Moscow, Athens,
Helsinki, Rome, Paris, Berlin
Ä
DST : Daylight Saving Time
Time Zone
London
[GMT +00:00] 2010/01/01 01:00 PM
Back DST
File name
This function allows you to select the fi le naming format.
After using the reset function,
[Reset] :
the next fi le name is started at
0001 even after you’ve formatted,
deleted all, or inserted a new
memory card.
[Series]*
: New fi les are named using
numbers that follow the previous sequence, even if
you’ve installed a new memory card, formatted the
memory, or deleted all pictures.
- The fi rst stored folder name is 100PHOTO, and the fi rst fi le
name is SAM_0001.
- File names are assigned sequentially from SAM_0001
SAM_0002to SAM_9999.
- The folder number is assigned sequentially from 100 to 999 as
follows: 100PHOTO 101PHOTO ~ 999PHOTO.
- The maximum number of fi les in a folder is 9999.
- The fi les used with the memory card conform to the DCF (Design
rule for Camera File systems) format. If you change the image
fi le name, the image may not play back.
Format
Reset
Date & Time :
Time Zone :London
File No. :Series
Imprint :Off
Auto Power Off :3 min
Back Set
Reset
Series
2010/01/01
59
Page 61
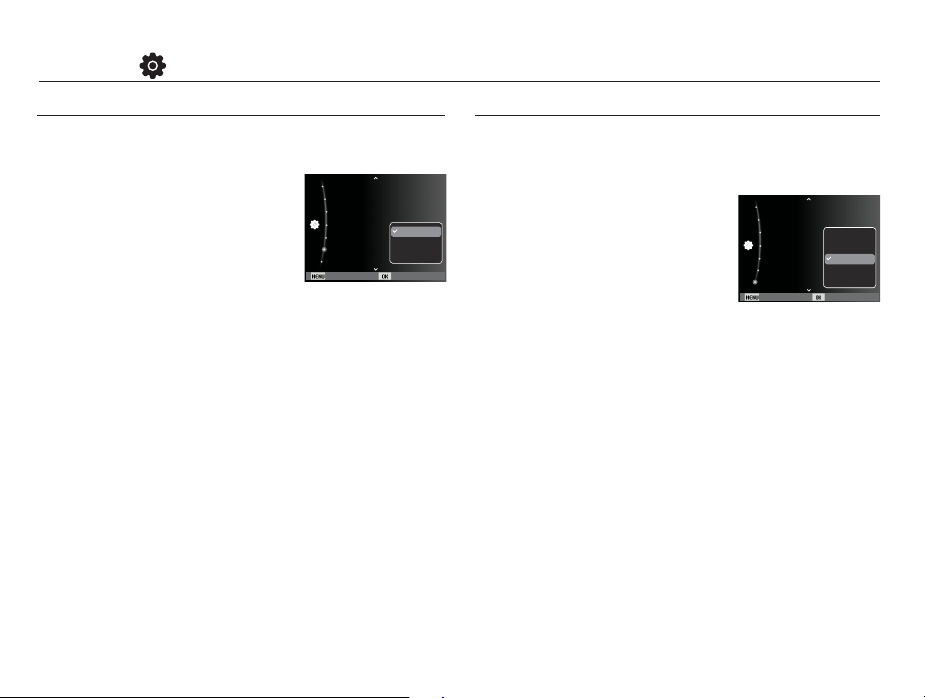
Settings
( )
Imprinting the recording date
There is an option to include Date & Time on still images.
- Sub menus
[Off]* : The Date & Time is not
imprinted on the image fi le.
[Date] : Only the Date is imprinted
on the image fi le.
[Date & Time] : The Date & Time is
imprinted on the image fi le.
Ä
The Date & Time are imprinted at the bottom right side of the still
image.
Ä
The imprint function is applied only to still images.
Ä
Depending on the manufacturer and print mode, the date printed
on an image may not be printed correctly.
60
Format
Reset
Date & Time :
Time Zone :London
File No. :Series
Imprint :Off
Auto Power Off :3 min
Back Set
2010/01/01
Off
Date
Date & Time
Auto power off
This function switches the camera off after a set amount of
prevent unnecessary battery drainage.
- Sub menus
[Off] : The power off function
not operate.
[1 min], [3 min]*, [5 min], [10 min]
:Thepower turns off automati-
cally if the camera is not used
for the period of time specifi ed.
When you replace the battery, the power off setting will be preserved.
-
does
Format
Reset
Date & Time :Off
Time Zone :London
File No. :Series
Imprint :Off
Auto Power Off :3 min
Back Set
- Note that the automatic power off function will not operate if the
camera is in the PC / Printer mode, running a slide show, playing
back a voice recording, or playing back a movie clip.
time to
Off
1 min
3 min
5 min
10 min
Page 62
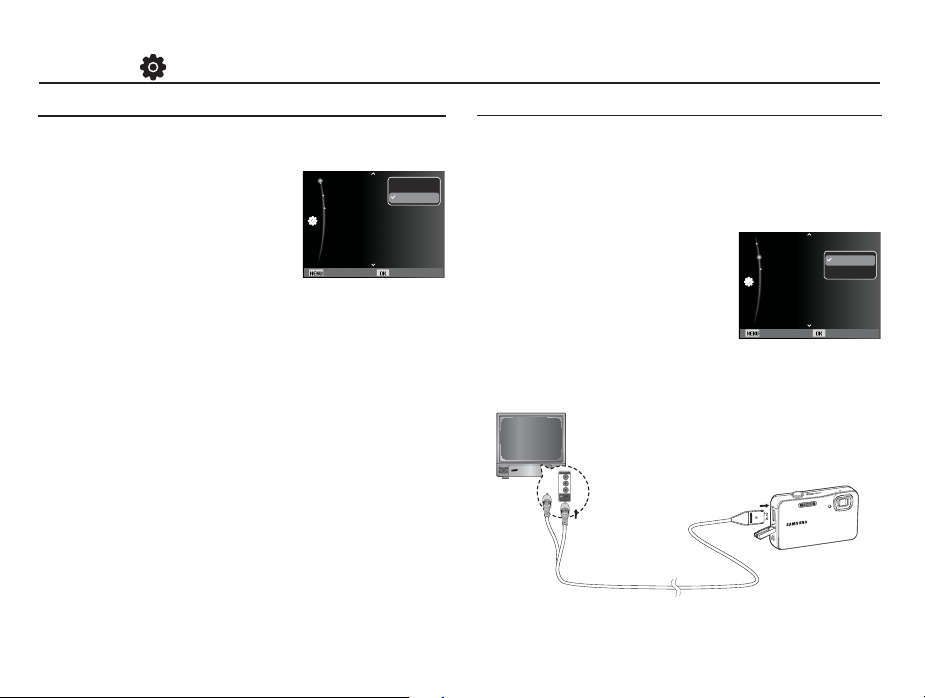
Settings
( )
Auto Focus lamp
You can turn the Auto Focus lamp on and off.
- Sub menus
[Off] : The AF lamp does not light up
in low light conditions.
[On]*
: The AF lamp lights up in low
light conditions.
AF Lamp :On
Video Out :NTSC
USB :Auto
Back Set
Off
On
Selecting Video out type
The Video output signal from the camera can be NTSC or PAL.
Your choice of output will be governed by the type of device
(screen or TV, etc.) to which the camera is connected. PAL
mode supports only PAL B, D, G, H, or I.
Connecting to an external screen
When the camera is connected to an
external screen, the image and menus
on the LCD screen will be visible on the
external screen.
Yellow - Video
White - Sound
AF Lamp :On
Video Out :NTSC
USB :Auto
Back Set
NTSC
PAL
61
Page 63
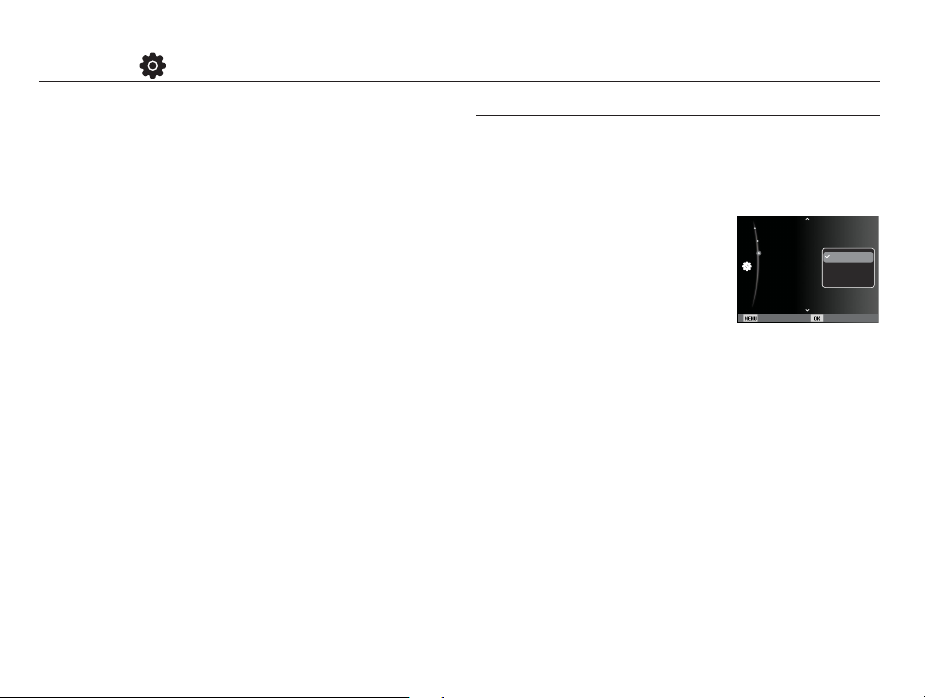
Settings
( )
- NTSC : U.S.A, Canada, Japan, South Korea, Taiwan, Mexico etc.
- PAL : Australia, Austria, Belgium, China, Denmark, Finland,
Germany, U.K., Holland, Italy, Kuwait, Malaysia, New
Zealand, Singapore, Spain, Sweden, Switzerland,
Thailand, Norway etc.
- When using a TV as an external screen, you need to select the
external or AV channel of the TV.
- There will be digital noise on the external screen, but it is not a
malfunction.
- If the image is not in the center of the screen, use the TV controls
to center it.
- When the camera is connected to an external screen, some parts
of the image may not be displayed.
- When the camera is connected to an external screen, the menu
will be visible on the external screen and the menu functions are
the same as those indicated on the LCD screen.
Setting the USB
If the camera has failed to connect automatically with a PC or a
printer through a USB cable, you can manually set [Computer] or
[Printer].
-[USB] sub menus:
[Auto]* : Automatically enables an
external device connected
with a USB cable.
[Computer] :
Sets the Computer connection
mode if the camera does
not recognize a connected
computer automatically.
[Printer] :
Sets the Printer connection mode if the the camera
does not recognize a connected printer automatically.
AF Lamp :On
Video Out :NTSC
USB :Auto
Back Set
Auto
Computer
Printer
62
Page 64
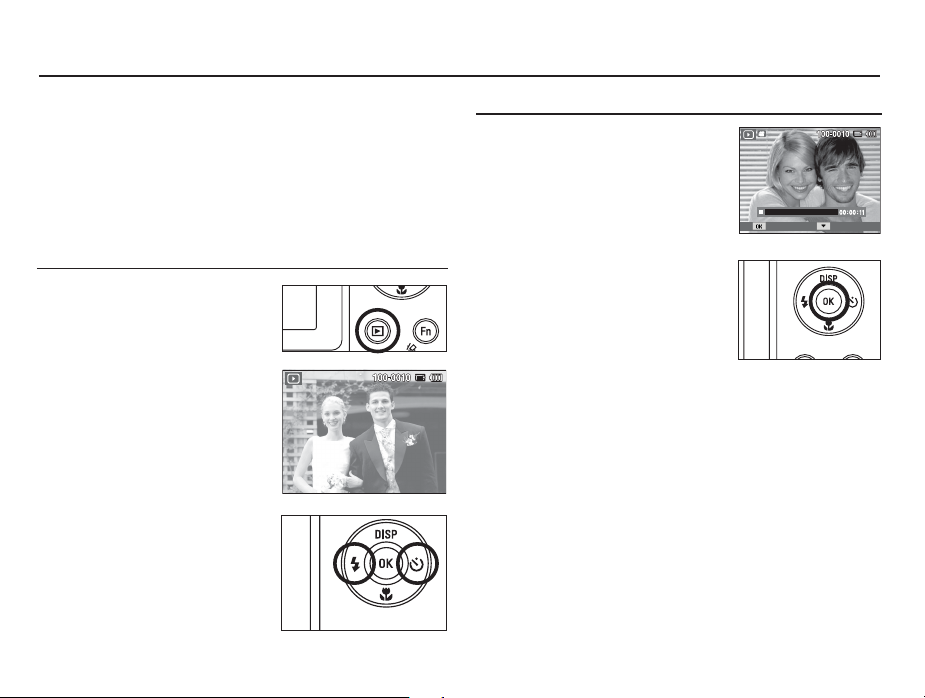
Starting play mode
Turn the camera on and select Play mode by pressing the play
mode button ( Î ). The camera can now play back the images
stored on the memory.
If the memory card is inserted in the camera, all the camera
functions apply only to the memory card.
If the memory card is not inserted in the camera, all the camera
functions apply only to the internal memory.
Playing back a still image
1. Select the Play mode by pressing
the play mode button ( Î ).
2. The last image stored in the
memory is displayed on the
LCD screen.
3. Select an image that you want to
view by pressing the Left/ Right
button.
Ä
Press and hold the Left or Right
button to play back the images
quickly.
Playing back a movie clip
1. Select the recorded movie clip that
you want to play back by using the
Left/Right button.
2. Press the OK button to play back a
movie clip file.
- To pause a movie clip file while playing
it back, press the OK button again.
Press the OK button again to restart
-
the movie clip.
-
To rewind the movie clip while it is
playing, press the Left button. To
fast forward the movie clip, press
the Right button.
- To stop playback of the movie clip, press the OK button, and
then press the Left or Right button.
Play Capture
63
Page 65
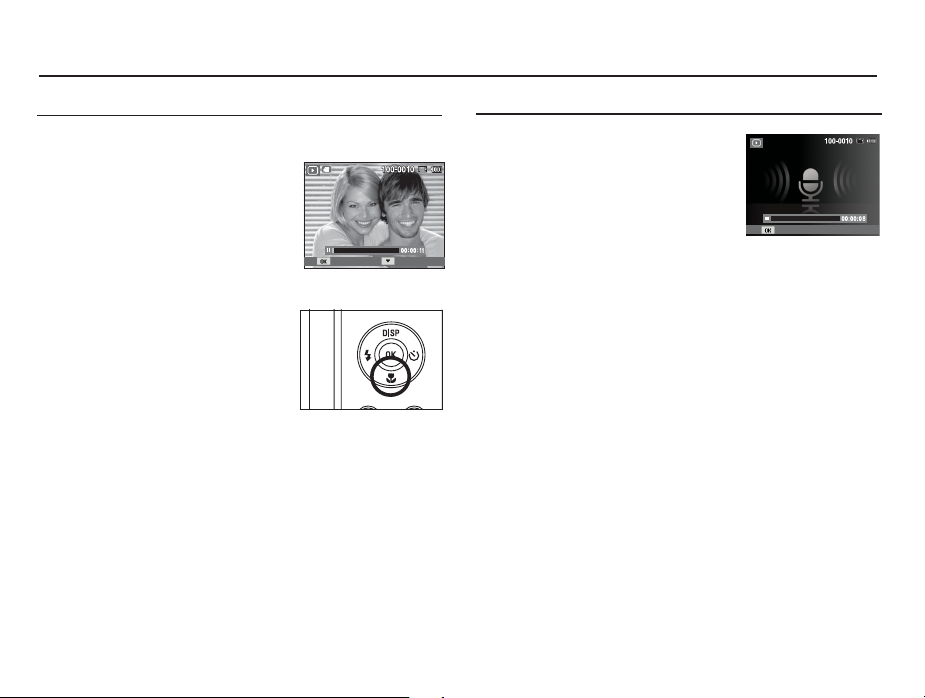
Starting play mode
Movie clip capture function
You can capture still images from the movie clip.
Capturing a still image from a movie clip
1. Press the OK button while playing the
movie clip. Then press the Down button.
2. A still from the movie clip is saved
under a new file name.
Ä
The captured movie clip still is the
same size as the original movie clip
(1280x720HQ, 640x480, 320x240).
Ä
When you press the down button at
the beginning of the movie clip, the first
frame of the movie clip is saved as a
still image.
[Press the down button]
64
Play Capture
[Paused]
Playing back a recorded voice
1. Select the recorded voice file that
you want to play back by using the
Left/Right button.
2. Press the OK button to play back a
recorded voice file.
- To pause a recorded voice file while
playing it back, press the OK button
again.
- To resume playback of the voice file, press the OK button.
- To rewind the voice file while it is playing, press the Left button.
To fast forward the voice file, press the Right button.
- To stop playback of the voice file, press the Down button.
Play
Page 66
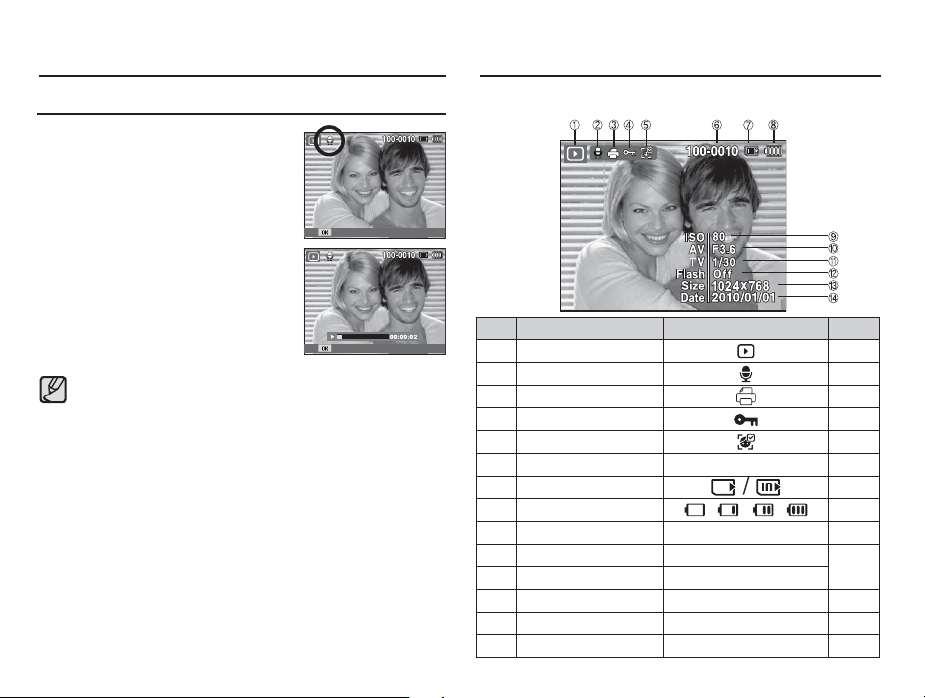
Starting play mode
LCD screen Indicator
Playing back a voice memo
1. Select a still image that has a voice
memo.
2. Press the OK button to play back the
voice memo.
- To pause the voice memo while
playing it back, press the OK button
again.
- To resume playback of the voice
memo, press the OK button.
Ɣ Still images with voice memos display a microphone icon on
the top left side.
Play
Pause
The LCD screen displays shooting information about the displayed image.
No. Description Icon Page
1 Playback mode
2 Voice Memo
3 DPOF
4 Protect p.80
5 Smart Face Recognition
6 Folder name & File name 100-0010 p.59
7 Memory indicator
8 Battery
9 ISO 80~3200 p.41
10 Aperture value F3.6 ~ F4.8
11 Shutter speed 8 ~ 1/1,000
12 Flash On/Off p.35
13 Image size 4000X3000 ~ 320X240 p.40
14 Recording date 2010/01/01 p.59
p.63
p.81
p.82
p.45
-
p.15
p.26
65
Page 67
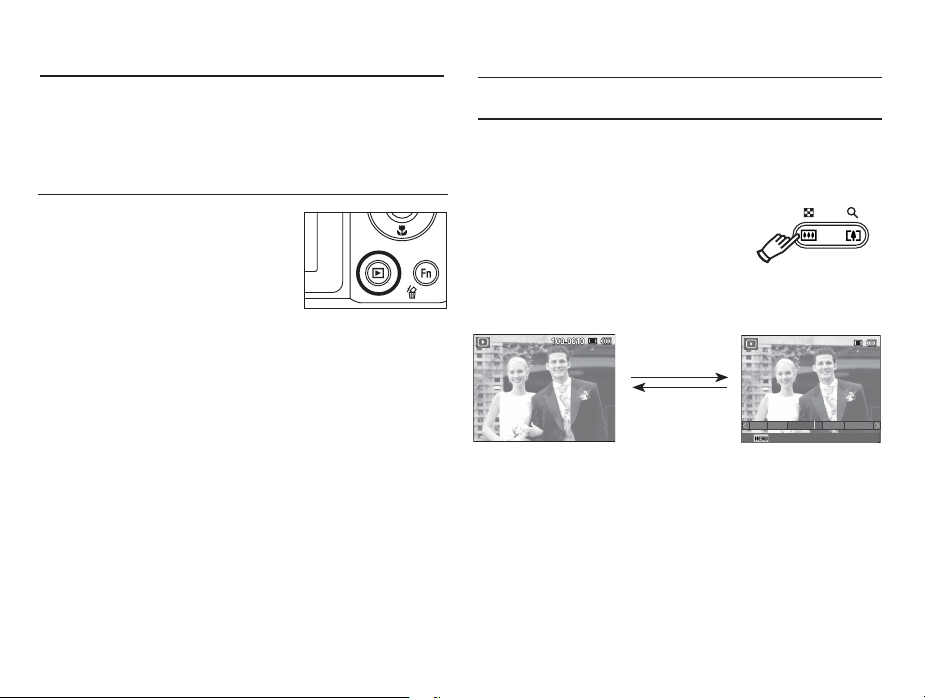
Using the camera buttons to set the camera
Thumbnail ( º ) / Enlargement ( í ) button
In Play mode, you can use the buttons on the camera to conveniently
set up the Play mode functions.
Play mode button
If you have turned on the camera by
pressing the POWER button, you can
press the Play mode button once to
switch to Play mode and press it again
to switch to Recording mode.
You can turn the power on with the Play
mode button. The camera is turned on in
play mode. Press the Play mode button
again to turn off the camera.
Manner mode: To select the Manner mode, press the Play mode
66
button for more than 3 seconds. In the Manner
the camera does not generate Operating
mode,
sound, Effect sound, Start-up sound, and Shutter
sound. To cancel the Manner mode, turn on the
camera by pressing the POWER button.
Smart Album
You can view multiple pictures, enlarge a selected picture, or crop
and save a selected area of an image.
1. Once a picture has been played back,
press the Thumbnail button to run
Smart Album mode.
2. Press the Left/Right button to move to
a desired image.
3. Press the Digital Zoom button to return
to the normal display mode.
Pressing the thumbnail
button ( º )
Pressing the enlargement
[Highlighted image]
button ( í )
[Smart Album 1-Thumbnail Window]
1 31 31211 5
Filter 2010.01.01
Page 68
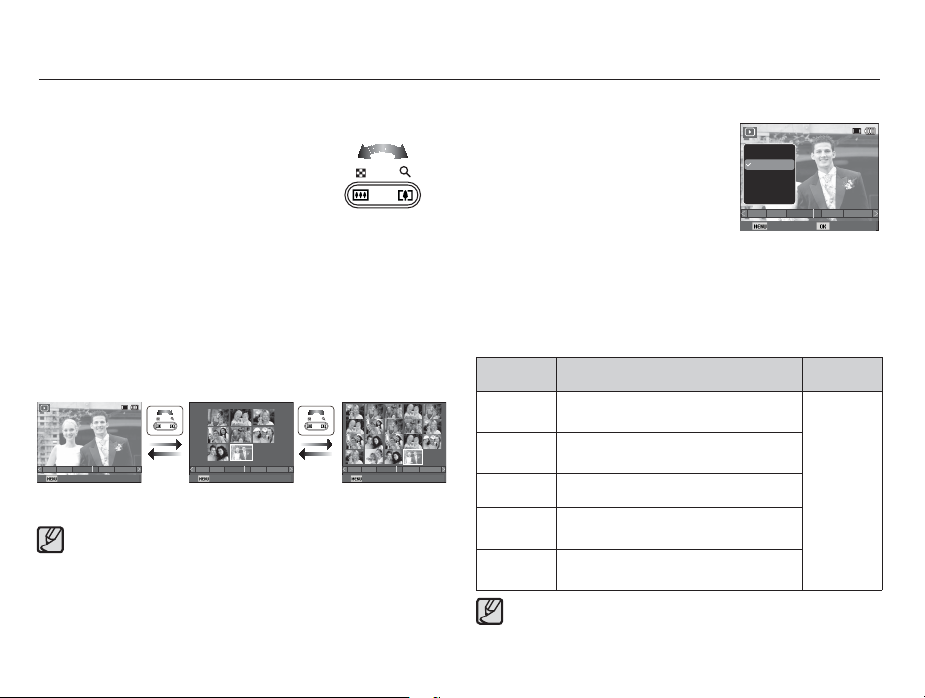
Thumbnail ( º ) / Enlargement ( í ) button
Ŷ To search for an image, follow these steps:
1. Press the Thumbnail button in Smart
Album.
Each time you press the Thumbnail
button, you increase the number of
thumbnails the camera displays, from 3
to 9 to 20. Pressing the button decreases
the number of thumbnails the camera
displays. See the illustrations below.
2. Use the Up/Down/Left/Right buttons to select an image.
Ŷ To delete an image, follow these steps:
1. Follow Steps 1 and 2 above.
2. Press the Delete button. The Delete window appears.
3. Press the Up/Down button to select Yes, and then press the OK
button.
1 31 31211 5
Filter 2010.01.01
[1-Thumbnail Window]
1 31 31211 5
Filter 2010.01.01
[9-Thumbnail Window] [20-Thumbnail Window]
1 31 31211 5
Filter 2010.01.01
Ɣ In Smart Album, it may take a few seconds for images to
appear, depending the number of images you’ve recorded.
This is not a malfunction. Please wait until the Smart Album
screen appears.
Ŷ Smart Album Filter
1. Press the MENU button in Smart
Album mode. A list of categories
appears on the left of the screen.
2. Use the Up/Down button to move up
or down the list.
3. Press the OK button to select a
category. The camera selects the
Type
Date
Color
Week
Face
Back Set
1 31 31211 5
images that fi t the category, then
displays them in the Smart Album
format.
Ŷ Details of Each Category
Category Description File Format
Type
Date
Color Categorized depending on the main color.
Week
Face
Categorized depending on the fi le type
(e.g., picture, video, or voice)
Categorized depending on the sequence
of recorded dates.
Categorized depending on the sequence
of recorded weeks.
Categorized depending on the faces
photographed in the Face Detection mode.
Pictures,
Videos,
Voice
Ɣ The [Face] category appears only if there are faces that
were photographed in the Face Detection mode.
67
Page 69
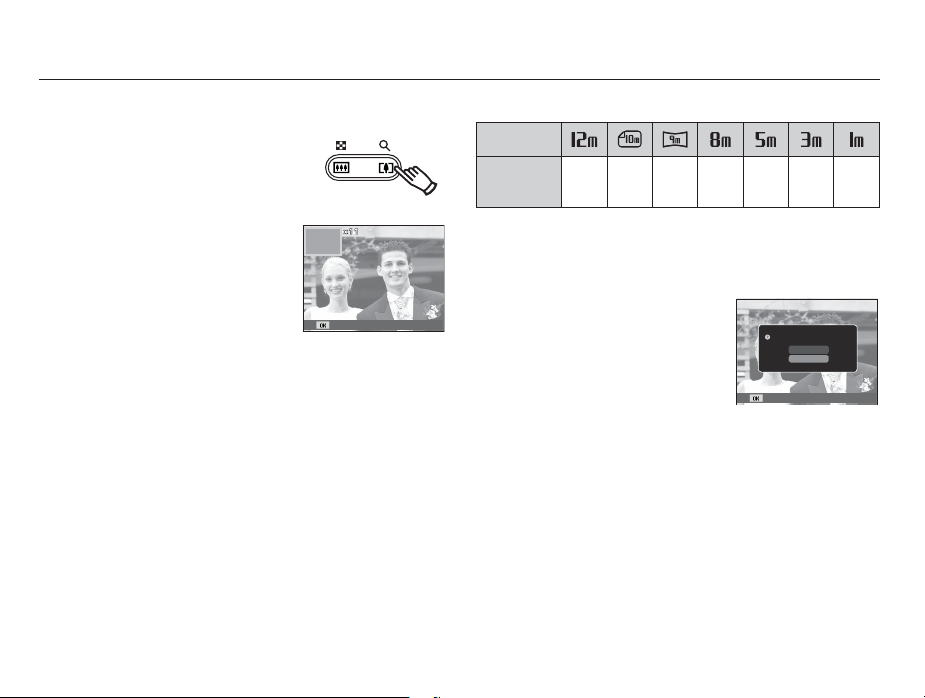
Thumbnail ( º ) / Enlargement ( í ) button
Image enlargement
1. Select an image you want to enlarge,
and then press the enlargement
button.
2. Press the Digital Zoom button
repeatedly to make the image larger.
3. Press the Up/Down/Left/Right sides
of the 5 Function button to view
different portions of the enlarged
image.
4.
Push the Thumbnail button repeatedly
to decrease the size of the image.
- You can tell whether the image
Trim
displayed is an enlarged view by
checking the image enlargement indicator shown at the top left
of the LCD screen. If the image is not an enlarged view, the
indicator will not be displayed. You can also check the area of
enlargement.
- Movie clips and WAV files can’t be enlarged.
- If an image is enlarged, a loss of quality may occur.
enlargement
1.
2. Select a desired sub menu by
Ä
The maximum enlargement rate in proportion to the image size
Image size
Maximum
X12.5 X10.4 X10.3 X10.2 X8.1 X6.4 X3.2
rate
Trimming : You can extract part of the image that you want and
save it separately.
Select an image that you want to
enlarge and press the enlargement
button. Press the OK button and a
message will be displayed.
pressing the Up / Down button,
and then press the OK button.
Trimming?
Confirm
Yes
No
- [Yes] : The trimmed image is saved as a new file name, and
appears on the LCD screen.
- [No] : The trimming menu will disappears.
If there is not enough memory space to save the trimmed
image, the image can’t be trimmed.
68
Page 70
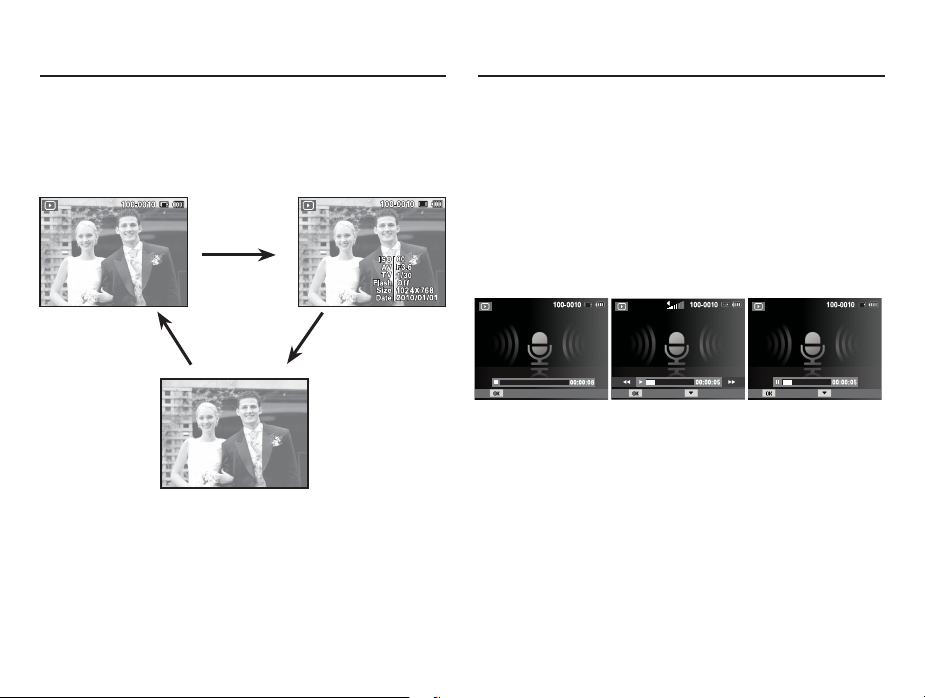
Info (DISP) / Up button
Play & Pause / OK button
When the menu is displayed on the LCD screen, the Up (DISP)
button operates as a direction button.
When an image is displayed on the LCD screen, pressing the Up
(DISP) button repeatedly displays image information on the LCD
screen.
Info (DISP) button
Info (DISP) buttonInfo (DISP) button
In Play mode, the play & pause/ OK button works as follows:
When the menu is displayed on the LCD screen, the OK button is
-
used for confirming data that you have changed using the 5
function button.
- If a still image with a voice memo, a voice file, or a movie clip is
playing
·In Stop mode : Plays a still image with a voice memo, a
·During playback : Temporarily stops playback.
·In Pause mode : Resumes playback.
Play Pause Stop Play Stop
[ Voice recording is stopped ]
voice file, or a movie clip.
[ Voice recording is playing ] [ Voice recording is paused ]
69
Page 71
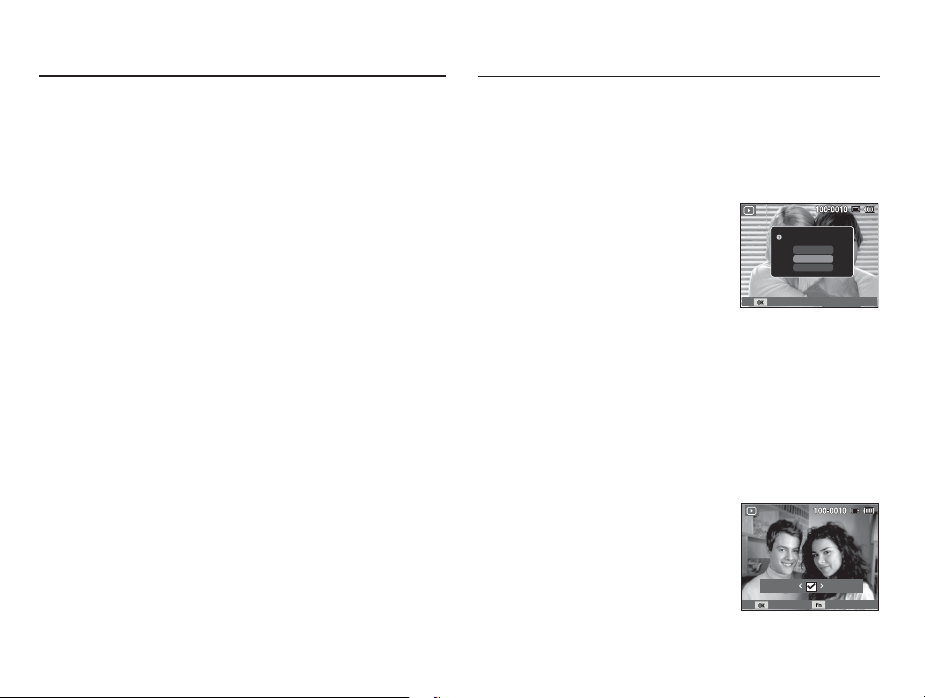
Left / Right / Down / MENU button
Delete
(Õ )
button
Left / Right / Down / MENU buttons activate the following.
- Left button : While the menu is showing, the Left button
operates as a direction button. While the menu is
not showing, press the Left button to select the
previous image.
- Right button : While the menu is showing, the Right button
operates as a direction button. While the menu is
not showing, press the Right button to select the
next image.
- Down button : While the menu is showing, the Down button
operates as a direction button.
- MENU button :
When you press the MENU button, the play mode
menu is be displayed on the LCD screen. Pressing it
again will return the LCD to the initial display.
70
This deletes images stored in the memory.
To delete a single image, follow these steps:
1. Press the Play mode button to view images.
Press the Left/Right button to select an image you want to delete.
2.
3. Press the Delete button. The camera
displays the Delete File window.
4. Press the Up/Down button to select
Yes, and then press the OK button.
Ä
You can also delete images in
Thumbnail mode. See page 67.
To delete multiple images, follow these steps:
Delete File?
Yes
No
Multiple Delete
Select
[Single Image]
1. Press the Play mode button to view images.
2. Press the Delete button. The camera displays the Delete File
window.
3. Use the Up/Down button to select Multiple Delete, and then
press the OK button.
4.
Use the Left/Right button to move to an image you want to delete.
5. Press the OK button to mark an image
for deletion. A check appears on the
image.
6.
After you’ve selected all the files you
want to delete, press the Delete button.
The camera displays a message asking
if you want to delete.
Prev Next
Select Delete
7. Use the Up/Down button to select Yes, and then press the OK
button.
Page 72
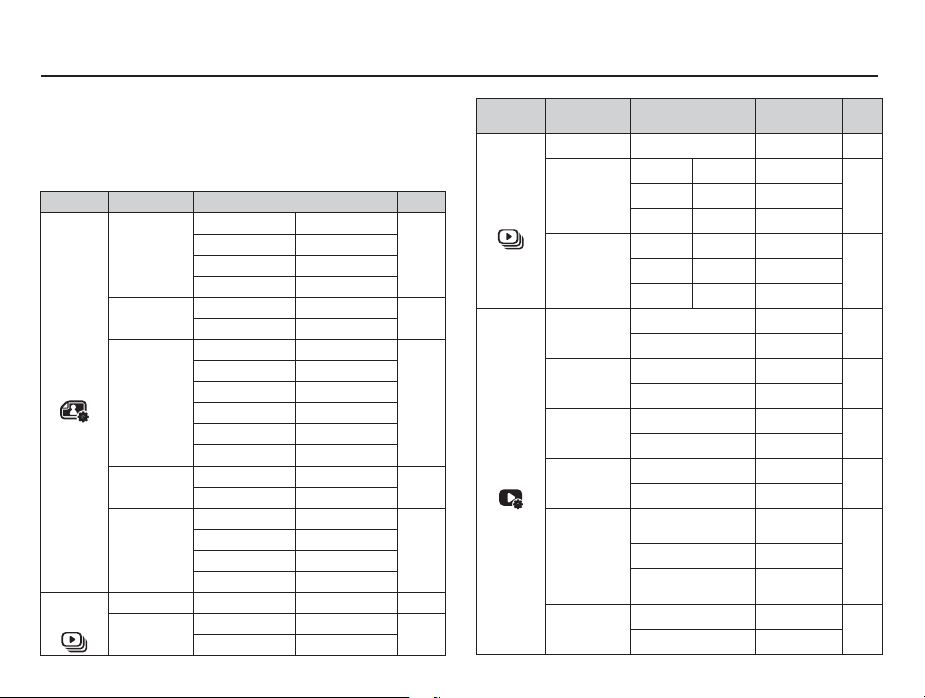
Setting the playback functions using the LCD Screen
You can change Playback functions using menus displayed on
the LCD screen. To display the Playback menus while in Playback
mode, press the Menu button. To close the Playback menus, press
the Play mode button or the Shutter button. The Playback menus
are listed in the tables below.
Menu Tab Main Menu Sub Menu Page
2592X1944 2048X1536
1024X768 2592X1728
1800X1200 2592X1456
1920X1080 Start Image
Right 90˚ Left 90˚
180˚ -
Normal Soft
Vivid Forest
Retro Cool
Calm Classic
Negative Sketch
Defog Custom RGB
Normal Miniature
Vignetting Fish-eye
Off ACB
Red-eye Fix Face Retouch
Brightness Contrast
Saturation Add Noise
All Date
Select -
p.73
p.74
p.74
p.75
p.76
p.77
p.78
Edit
(
)
Multi Slide
Show
( )
Resize
Rotate
Photo Style
Selector
Smart Filter
Image Adjust
Start Play / Repeat -
Images
Menu Tab Main Menu Sub Menu
Interval 1, 3, 5, 10 sec - p.79
Off Mist -
)
Face List Edit
Voice memo
Copy to Card
Music
Effect
Delete
Protect
DPOF
Trip Fall -
Off Calm -
Lively Sweet -
Select -
All Yes / No
Select -
All Unlock / Lock
Edit Ranking -
Delete My Star -
Off -
On -
Standard
Index Yes / No
Size
Yes
No
Multi Slide
Show
(
File
Options
( )
Secondary
Menu
Select / All /
Reset
Select / All /
Reset
-
-
Page
p.79Drops Muse -
p.79Shine Relax -
p.80
p.80
p.81
p.81
p.82
~
p.83
p.84
71
Page 73
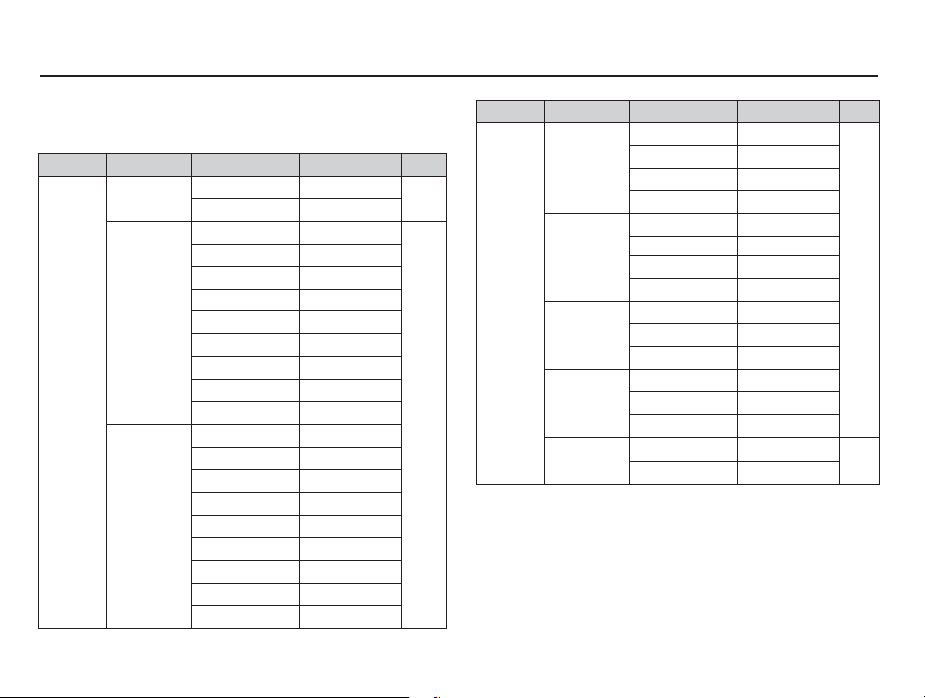
Setting the playback PictBridge function using the LCD screen
This menu is available while the camera is connected to a PictBridge
supporting printer (direct connection to the camera, sold separately)
with a USB cable.
Menu Tab Main Menu Sub Menu Secondary Menu Page
Images
Size
❹
Layout
One Photo -
All Photos -
Auto -
Postcard -
Card -
4X6 -
L-
2L -
Letter -
A4 -
A3 -
Auto -
Full -
1-
2-
4-
8-
9-
16 -
Index -
p.86
p.86
72
Menu Tab Main Menu Sub Menu Secondary Menu Page
Auto -
Type
Quality
❹
Date
File Name
Reset
Menus are subject to change without prior notice.
Ä
Plain -
Photo -
Fast Photo -
Auto -
Draft -
Normal -
Fine -
Auto -
Off -
On -
Auto -
Off -
On -
Yes -
No -
p.86
p.87
Page 74
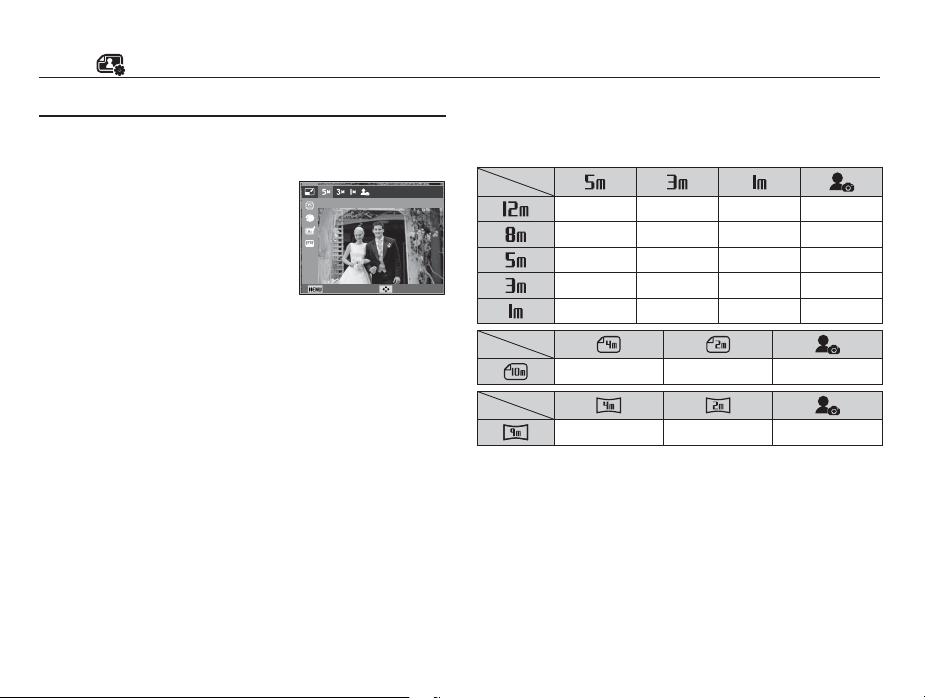
Edit ( )
Resize
Change the resolution (size) of pictures taken. Select [Start image]
to save an image to be the start-up image.
1. Press the Play mode button.
2. Press the Left/Right button to select an
image.
3. Press the Menu button.
4.
Press the Up/Down button (if necessary)
to select Edit, and then press the OK
button.
5. Press the Up/Down button (if necessary) to select Resize, and
then press the OK button.
6. Press the Left/Right button to select a size or the Start Image
icon to make this image the Start image, and then press the OK
button.
Resize
Back Move
Image Resize Tables
The current image sizes are on the left side of the table. The available
resize dimensions are on the top.
oooo
oooo
ooo
ooo
( o : Sizes you can select)
ooo
oo
o
- You can resize a large sized image to a smaller size,
but not vice versa.
- You can only resize JPEG images. Movie clip (MP4), Voice
recording (WAV) files can’t be resized.
- You can change the resolution of only those files compressed in
the JPEG 4:2:2 format.
-
The [Start Image] image is not stored in the memory card but in the
internal memory.
- If you save a new Start Image, the original Start Image is deleted.
- If the memory capacity is insufficient to store the resized image,
a [Memory Full] message appears on the LCD screen and the
resized image is not stored.
73
Page 75
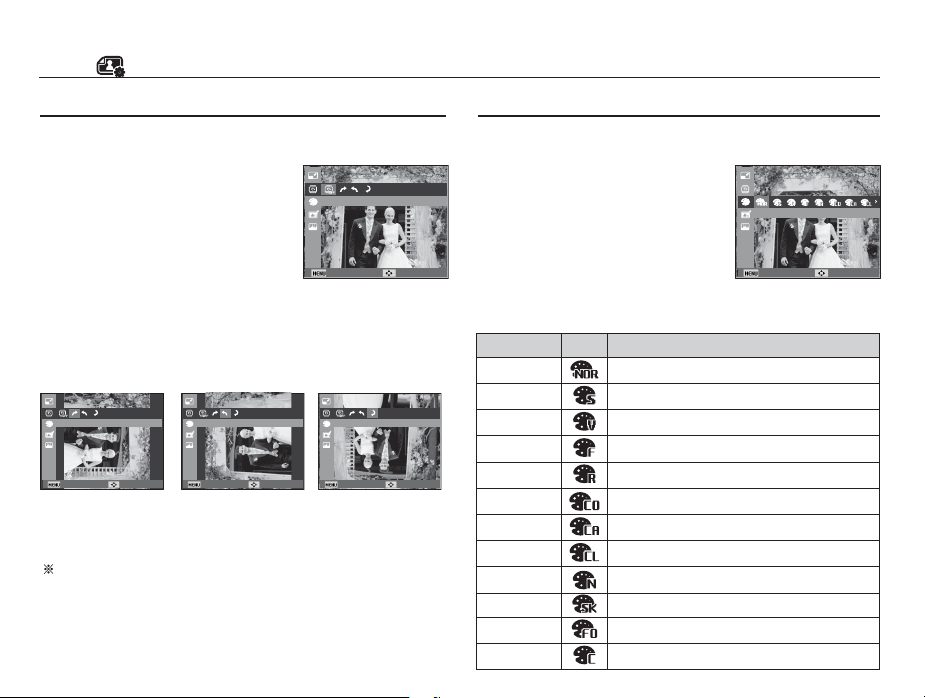
Edit ( )
Rotating an image
You can rotate stored images.
1. Press the Play mode button.
2. Press the Left/Right button to select an
image.
3. Press the Menu button.
4. Press the Up/Down button (if necessary)
to select Edit, and then press the OK
button.
5. Press the Up/Down button to select Rotate, and then press the
OK button.
6. Press the Left/Right button to select how much you want the
picture rotated, and then press the OK button. The camera saves
the rotated image as a new file.
[ô : Right 90˚]
: Rotate picture in a
clock-wise direction
[ó : Left 90˚]
: Rotate picture in a
counter-clock-wise direction
If you display the rotated image on the LCD screen, empty
spaces may appear to the left and right of the image.
74
Rotate
Back Move
180˚Left 90˚Right 90˚
Back MoveBack MoveBack Move
[õ : 180˚]
: Rotate picture 180
degrees
Photo Style Selector
You can apply various effects to your images by using this function.
1. Press the Play mode button.
Press the Left/Right button to select an image.
2.
3. Press the Menu button.
4.
Press the Up/Down button (if necessary) to
select Edit, and then press the OK button.
5. Press the Up/Down button to select
Photo Style Selector, and then press
the OK button.
6.
Press the Left/Right button to select a Photo Style, and then press
the OK button. The camera saves the changed image as a new file.
Style mode Icon Description
Normal
Soft
Vivid
Forest
Retro
Cool
Calm
Classic
Negative
Sketch
Defog
Custom RGB
No style effect is applied.
Soft style is applied.
Vivid style is applied.
Forest style is applied.
Sepia style is applied.
Cool style is applied.
Calm style is applied.
Black & white effect is applied.
Negative effect is applied.
Sketchy style is applied.
Distinct style is applied.
Defi ne an RGB tone to create your own photo style.
Photo Style Selector
Back Move
Page 76
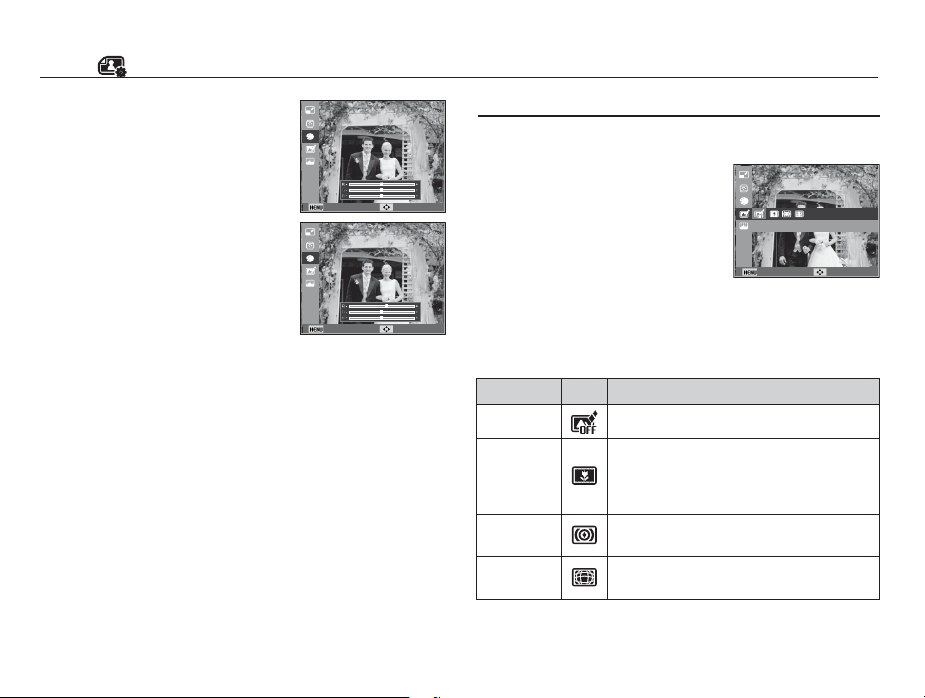
Edit ( )
Custom RGB
If you select the Custom RGB Photo
Style, you can change the Red (R),
Green (G), and Blue (B) values of an
image.
- OK button : Select / setup the Custom
- Up / Down button : Selects R, G, B
- Left / Right button : Change the R, G,
Color
or B value
Back Move
Back Move
Smart Filter
Apply various filter effects to your photos to create unique images.
1. Press the Play mode button.
2. Press the Left/Right button to select an
image.
3. Press the Menu button.
4.
Press the Up/Down button (if necessary)
to select Edit, and then press the OK
button.
5. Press the Up/Down button to select Smart Filter, and then press
the OK button.
6. Press the Left/Right button to select a Smart Filter function, and
then press the OK button. The camera saves the changed image
as a new file.
Smart Filter Icon Description
Normal
Miniature
Vignetting
Fish-eye 1
No effect
Make a photo of a life-size location or object
look like a photo of a miniature scale model.
Blurring parts of the photo makes the scene
seem much smaller than it actually is.
Apply the retro-looking colors, high contrast,
and strong vignette effect
Distort close objects to imitate the visual effect
of a fi sheye lens.
Smart Filter
Back Move
75
Page 77
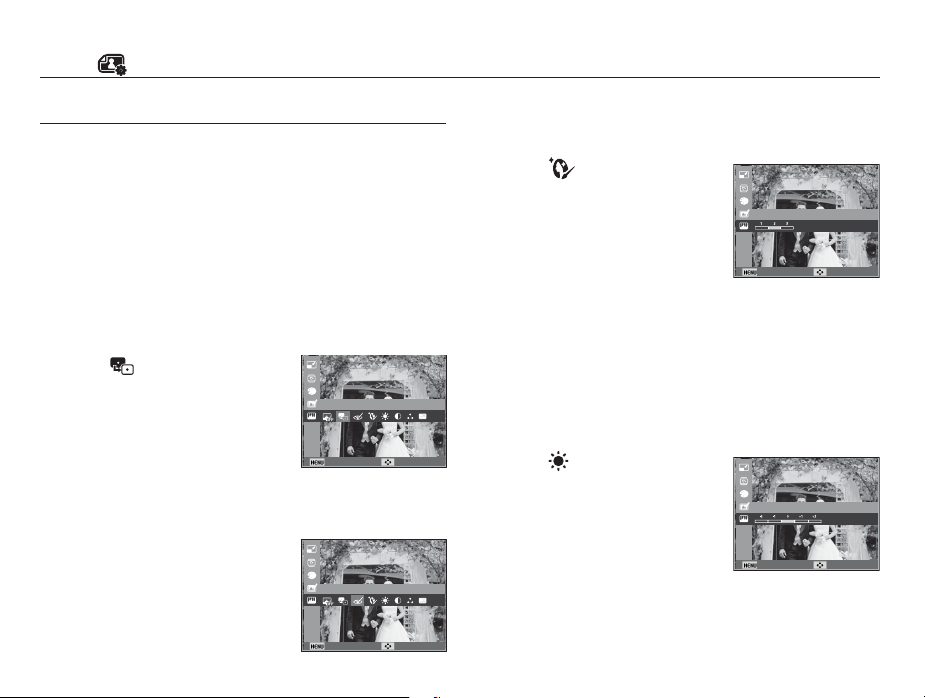
Edit ( )
Image Adjust
1. Press the Play mode button.
2. Press the Left/Right button to select an image.
3. Press the Menu button.
4. Press the Up/Down button (if necessary) to select Edit, and then
press the OK button.
5. Press the Up/Down button to select Image Adjust, and then press
the OK button.
ACB
You can automatically adjust the brightness of dark areas, caused
by under exposure to the light exposure.
1. Select ( ) by pressing the Left/
button, and then press the OK
Right
button.
2. The [Making New Image] message is
displayed and the camera saves the
image as a new file.
Red eye Removal
You can remove the red eye effect from the captured image.
1. Select (
Right button, and then press the OK
) by pressing the Left/
button.
2. The [Making New Image] message is
displayed and the camera saves the
image as a new file.
76
ACB
Back Move
Red-eye Fix
Back Move
Face Retouch
You can make the skin in an image appear clear and beautiful.
1. Select (
) by pressing the Left /
Right button. The [Processing]
message appears.
2. Press the OK button. The Face
Face Retouch
Retouch bar appears.
3. Use the Left / Right button to select
1, 2, or 3. The [Processing] message
Back Move
appears.
4. Press the OK button. The camera saves the adjusted image as
a new file.
Brightness control
You can change the brightness of the image.
1. Select ( ) by pressing the
Left/Right button, and then press
the OK button. A bar for selecting
the brightness appears.
Brightness
2. Change the brightness by pressing
the Left/Right button.
3. Press the OK button and the camera
Back Move
saves the image as a new file.
Page 78
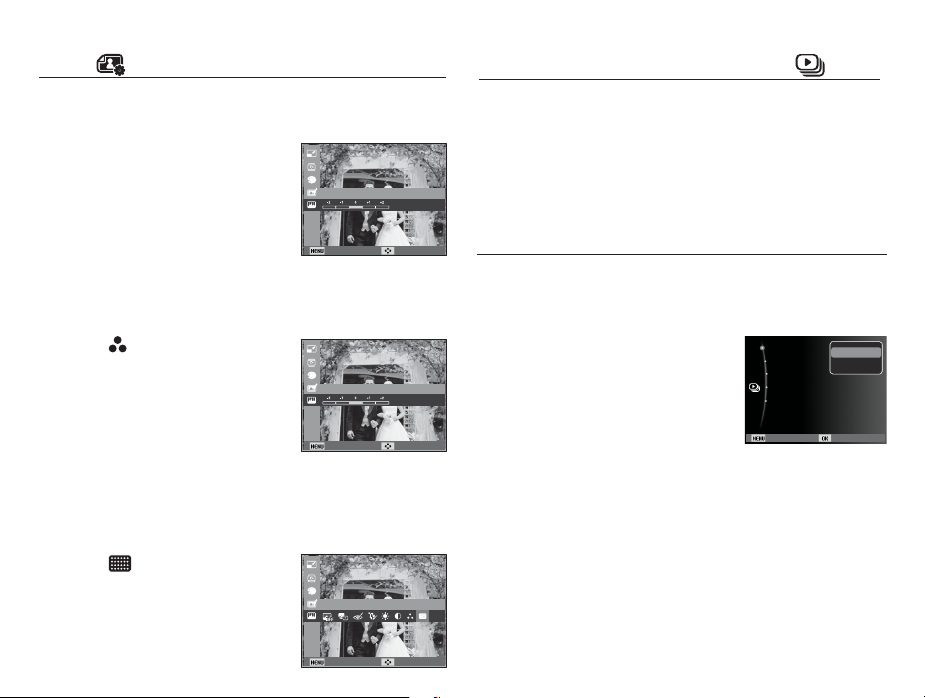
Edit ( )
Starting the Multi Slide Show
( )
Contrast control
You can change the contrast of the image.
1. Select ( ) by pressing the Left/Right
button, and then press the OK button.
A bar for selecting the contrast will be
appears.
Contrast
2. Change the contrast by pressing the
Left/Right button.
3. Press the OK button and the camera
Back Move
saves the image as a new file.
Saturation control
You can change the saturation of the image.
1. Select ( ) by pressing the Left/
Right button, and then press the OK
button. A bar for selecting the
saturation appears.
Saturation
2. Change the saturation by pressing the
Left/Right button.
3. Press the OK button and the camera
Back Move
saves the image as a new file.
Noise effect
You can add noise to an image to add a more classic feel to
your photo.
1. Select ( ) by pressing the Left/
Right button, and then press the OK
button.
2. The [Making New Image] message
Add Noise
appears and the camera saves the
image to a new file.
Back Move
Images can be displayed continuously at pre-set intervals.
You can view the Multi Slide Show by connecting the camera to an
external screen.
1. Press the play mode button and press the MENU button.
2. Press the Up / Down button and select the [Multi Slide Show]
menu tab and press the OK button.
Start the Multi Slide Show
The Multi Slide Show can start only in the [Start] menu.
1. Use the Up / Down button to select the [Start] menu and press
the Right button.
2. Select a desired
the Up / Down button.
[Play] : The Multi Slide Show is
[Repeat] : The Slide show is repeated
3. Press the OK button and the slide show starts.
- To pause the slide show while playing it back, press the OK
button again.
- Pressing the OK button again restarts the Multi Slide Show.
- To stop playback of the Multi Slide Show, press the OK button,
and then press the Left or Right button.
function by pressing
stopped after one cycle.
until cancelled.
Start
Play
Images :All
Repeat
Interval :1 sec
Music :Off
Effect :Off
Back Set
77
Page 79
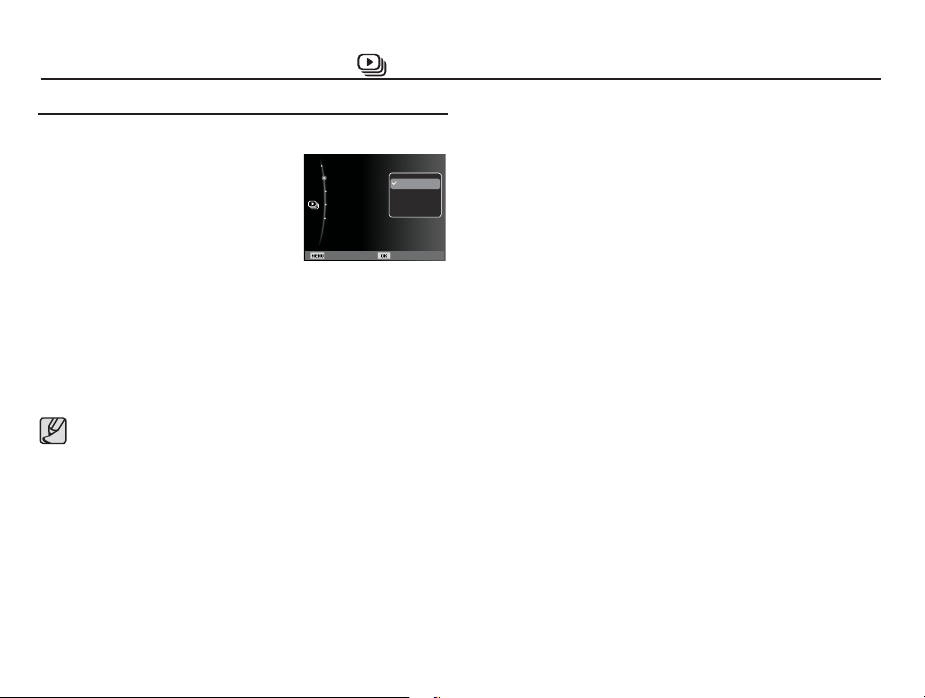
Starting the Multi Slide Show
( )
Selecting Images
You can select images to view in a slide show.
1. Use the Up / Down button to select the
[Images] menu, and then press the
Right button.
2.
Select a desired sub menu by pressing
the Up / Down button.
[All] : All images saved on the
Memory are played back. Press the OK button to
save the configuration.
[Date] : Images taken on a specified date are played back.
Press the OK button to save the configuration.
[Select] :
To play groups of selected images. [Select] lets you
collect images into separate groups labeled [Select1],
[Select2], or [Select3]. When you play a slide show,
you select the group you want to play.
To collect images into a group, follow these steps:
1. In the Multi Slide Show menu, use the Up / Down button to
select Images, and then press the OK button.
2. Use the Up / Down button to select [Select], and then press
the OK button. The Select window appears.
3. Press the Up / Down button to select [New Select] (if necessary), and then press the OK button. The camera displays
Processing, and then displays image thumbnails.
4. Press the Up / Down / Up / Down button to highlight an image. Press the OK button to select the image. A check mark
appears on the image. (The images will appear in the order
you select them.)
5. Repeat Step 4 for each image you want to included. Press
the Fn button when done.
78
Start
Images :All
Interval :1 sec
Music :Off
Effect :Off
Back Set
All
Date
Select
To play a slide show of a group of selected images, follow these
steps:
1. On the Multi Slide Show menu, use the Up / Down button to
select [Images], and then press the OK button.
2. Use the Up /Down button to select [Select] (or Select 1, 2, or 3,
depending on what your camera is displaying), and then press
the OK button. The Select window appears.
3. On the Select window, use the Up / Down button to select
the group you want to play, [Select 1, 2, or 3]. The thumbnail
screen for that group appears.
4. Press the Fn button. You are returned to the Main menu.
5. Select [Multi Slide Show] again, and then press the OK button.
6. Select [Start], and then press the OK button.
7. Select [Play] for single cycle play or [Repeat] for continuous,
repetitive play, and then press the OK button. The slide show
begins.
Notes:
- When you save the first group, it is saved as [Select1]. When
you save a second group, that group is saved as [Select1]
and the previous group is saved as [Select2]. When you save
a third group, that group is saved as [Select1], the previous
[Select1] group is saved as [Select2], and the previous [Select2]
group is saved as [Select3]. If you save a fourth group, the
fourth group supplants the previous [Select1], the previous
[Select1] group supplants the [Select2] group, and the [Select2]
group supplants the [Select3].
Page 80
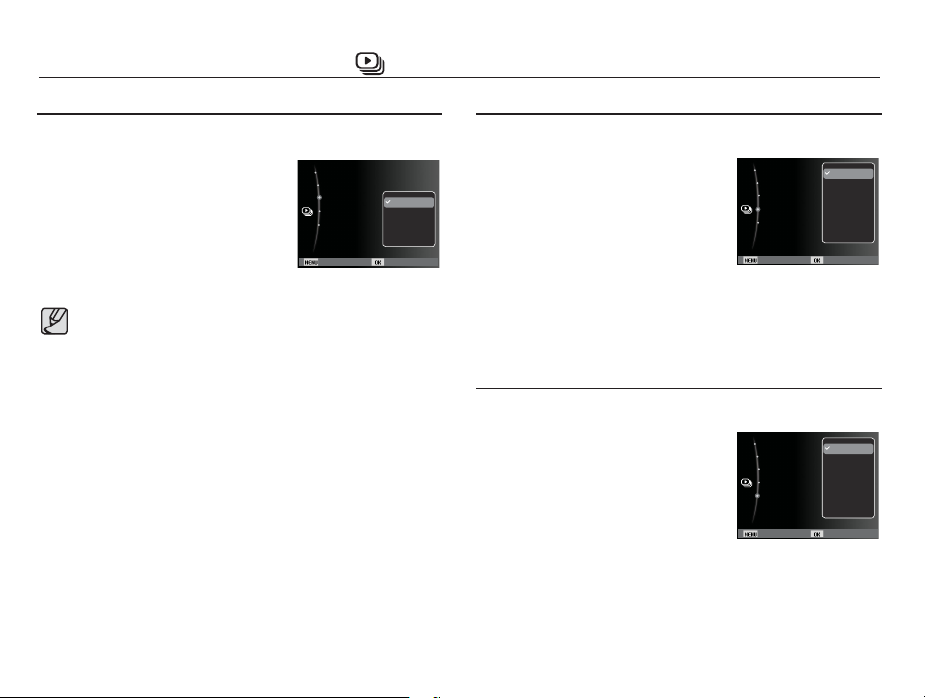
Starting the Multi Slide Show
( )
Setting play interval
To set the Multi Slide Show play interval:
1. Select the [Interval] sub menu by
pressing the Up / Down button, and
then press the Right button.
2. Use the Up / Down button to select
the desired interval.
3. Press the OK button to save the
configuration.
The loading time depends on the image size and quality.
While the Multi Slide Show is
recording file will not display.
The interval menu functions
playing, Movie clips and voice
only when Effect is set to [Off].
Start
Images :All
Interval :1 sec
Music :Off
Effect :Off
Back Set
1 sec
3 sec
5
10 sec
sec
Setting Background Music
To set the Multi Slide Show music:
1. Select the [Music] sub menu by
pressing the Up / Down button, and
then press the Right button.
2. Use the Up / Down button to select
the desired Music.
3. Press the OK button to save the
configuration.
Start
Images :All
Interval :1 sec
Music :Off
Effect :Off
Back Set
Configure Multi Slide show effects
You can apply unique screen effects to Multi Slide Shows.
1. Select the [Effect] sub menu by
pressing the Up / Down button, and
then press the Right button.
2. Use the Up / Down button to select
the type of effect.
3. Press the OK button to confirm the
setting.
Start
Images :All
Interval :1 sec
Music :Off
Effect :Off
Back Set
Off
Mist
Drops
Muse
Trip
Fall
Off
Calm
Shine
Relax
Lively
Sweet
79
Page 81
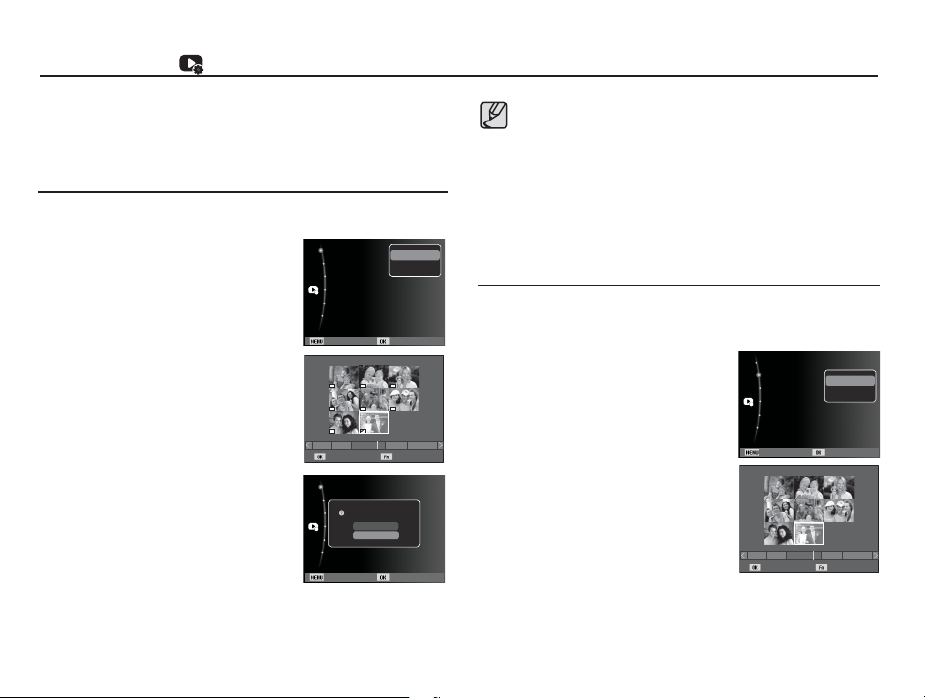
File Options
( )
1. Press the play mode button, and then press the menu button.
2. Press the Up / Down button, select the [File Options] menu tab,
and then press the OK button.
Deleting images
Use this to delete images stored in the memory.
1. Press the Up / Down button, select the
[Delete] menu tab, and then press the
Right button.
2. Press the Up/Down button to select a
desired sub-menu, and then press the
OK button.
If you chose [Select], a thumbnail
screen appears.
- Use Up/Down/Left/Right to select an
image.
- Press the OK button to mark an image
for deletion.
- Press the Fn button to display the
Delete Confirmation window. Select
[Yes], and then press the OK button to
delete the marked images.
If you chose [All], the Delete Confirmation
window appears. Select [Yes], and
then press the OK button to delete all
unprotected images. If there are no protected images, all images
are deleted and the [No Image File] message appears.
3. After deletion, the screen will be changed to the play mode screen.
80
Delete
Protect
Face List Edit
Voice memo :Off
DPOF
Copy to Card
Back Set
Select Delete
Delete
Protect
Face List Edit
Voice memo :Off
DPOF
Copy to Card
Back Set
1 31 31211 5
Delete All File(s)?
Yes
No
Select
All
The Delete function deletes unprotected images premanentiy.
Before you run the Delete function, store all important shots
on a computer.
The startup image is stored on the camera's
internal memory (i.e., not on the memory card) and it will
not be deleted even if you delete all files in the memory.
Protecting images
Use this to protect specific shots from being accidentally erased (Lock).
It also unprotects images that have been previously protected (Unlock).
1. Press the Up / Down button, select
the [Protect] menu tab, and then
press the Right button.
2. Press the Up/Down button to select
a desired sub-menu, and then press
the OK button.
If you chose [Select], a thumbnail
screen appears.
- Use Up/Down/Left/Right to select an
image.
- Press the OK button to protect an
image or remove protection from an
image. When you protect an image,
a key appears on the image. When
you unprotect, the key is removed.
- Press the Fn button to save your changes.
Delete
Protect
Face List Edit
Voice memo :Off
DPOF
Copy to Card
Back Set
Select Set
Select
All
1 31 31211 5
Page 82
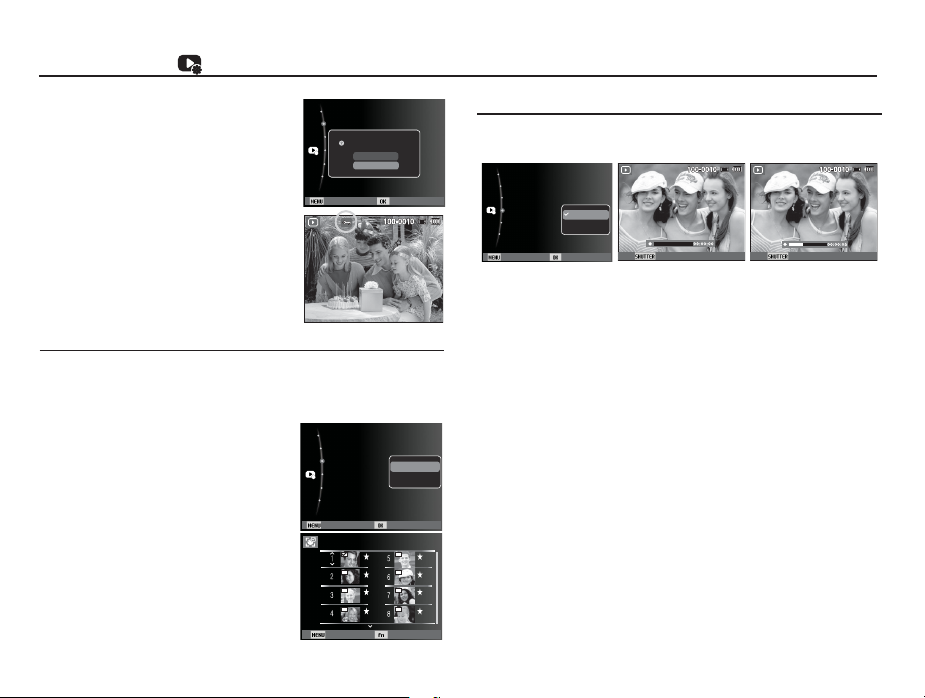
File Options
( )
If you chose [All], the Protect All window
appears. Select [Lock] to protect all
images. Select [Unlock] to remove
protection from all images. Press OK to
complete the process.
Delete
Protect
Face List Edit
Protect All?
Voice memo :Off
Lock
DPOF
Unlock
Copy to Card
Back Set
Face List Edit
You can classify or delete portrait images in the Smart Album
according to their ranking. This feature is available only when you
use a memory card.
1. Press the Up / Down button to select
the [Face List Edit] menu, and then
press the Right/OK button.
2. Select a desired menu by pressing the
Up / Down button, and then press the
OK button.
[Edit Ranking] : You can change
the rankings of
registered images.
[Delete My Star] : You can delete
selected images
from the list.
3. Press the MENU button to switch to
the Playback mode.
Delete
Protect
Face List Edit
Voice memo :Off
DPOF
Copy to Card
Back Set
Face List Edit
Back Set
Edit Ranking
Delete My Star
Voice memo
You can add your voice to a stored still image.
Delete
Protect
Face List Edit
Voice memo :Off
DPOF
Copy to Card
Back Set
1. Select a picture.
2. Press the Menu button.
3. Use the Up / Down button to select File Options, and then press
the OK button.
4. Use the Up / Down button to select Voice Memo, and then press
the OK button.
5. Select On, and then press the OK button.
6. Press the Shutter button. The 10 second recording period
begins momentarily.
7. To stop recording before the 10 seconds have elapsed, press
the Shutter button again.
Off
On
Start Stop
[Ready for recording] [Voice is recording][Voice memo menu]
81
Page 83
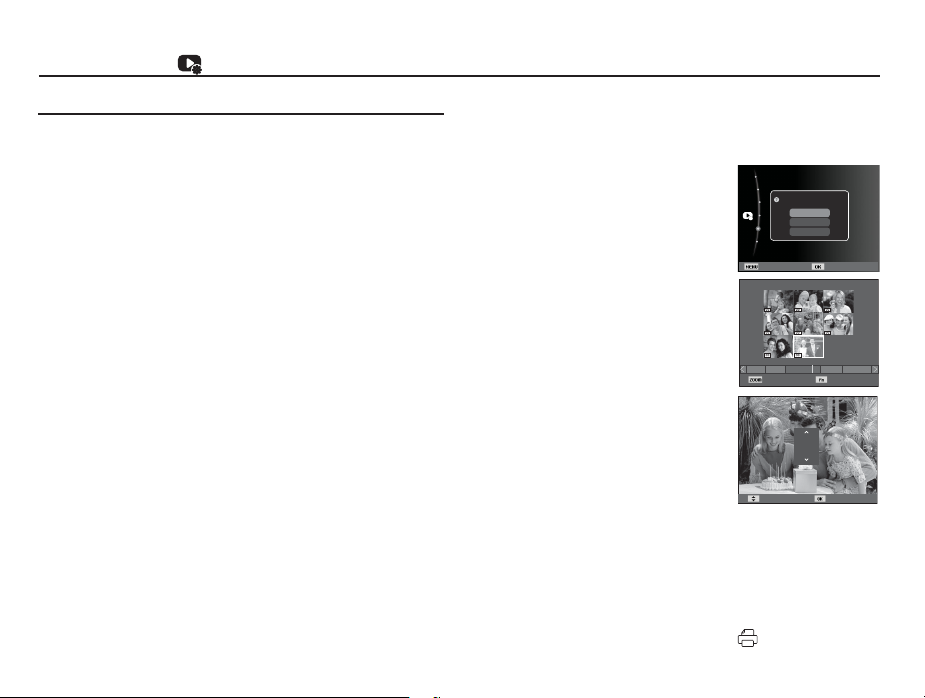
File Options
( )
DPOF
DPOF(Digital Print Order Format) allows you to embed printing
information in your memory card’s MISC folder. Select the
pictures to be printed and how many prints to make.
The DPOF indicator displays on the LCD screen when an image
that has DPOF information plays back. Images can then be printed
on DPOF printers, or at an increasing number of photo labs.
This function is not available for Movie clips and Voice recording files.
When the wide angle image is printed as a wide angle print, 8%
of the left and right side of the image may not be printed. Check
that your printer can support the wide angle image when you
print the image. When you get the image printed at a photo lab,
request that the image be printed as a wide angle image. (Some
photo labs may not support the wide angle size print.)
82
Standard
This function allows you to embed printing quantity information on
a stored image.
1. Press the Up / Down
[DPOF] menu tab, and then press the
Right button.
2. Press the Right button again and the
[Standard] sub-menu appears.
3. Select a desired sub-menu by pressing
the Up / Down button, and then press
button, select the
Delete
Protect
Select Image
Face List Edit
Select
Voice memo :Off
All
DPOF
Reset
Copy to Card
Back Set
the OK button.
[Select] : The selection window
appears. Lets you select
photos to print.
- Up / Down / Left / Right : Select an
image to print.
1 31 31211 5
Quantity Set
- Zoom button :
Select the number of prints. The number
appears on the thumbnail. You can
select the number of prints for multiple
0
photos. Press the Fn button to confirm.
[All] : Configure number of prints for all
pictures except movie and voice files.
Quantity Set
- Up / Down button : Select a number of prints. The number appears
on the LCD screen. Use the Up/Down button
to select a number. Press the OK button to
confirm.
[Reset] : Cancel the print setup.
4. Press the OK button to confirm the setting. If an image carries
DPOF instruction, the DPOF indicator ( ) appears on the
image.
Page 84
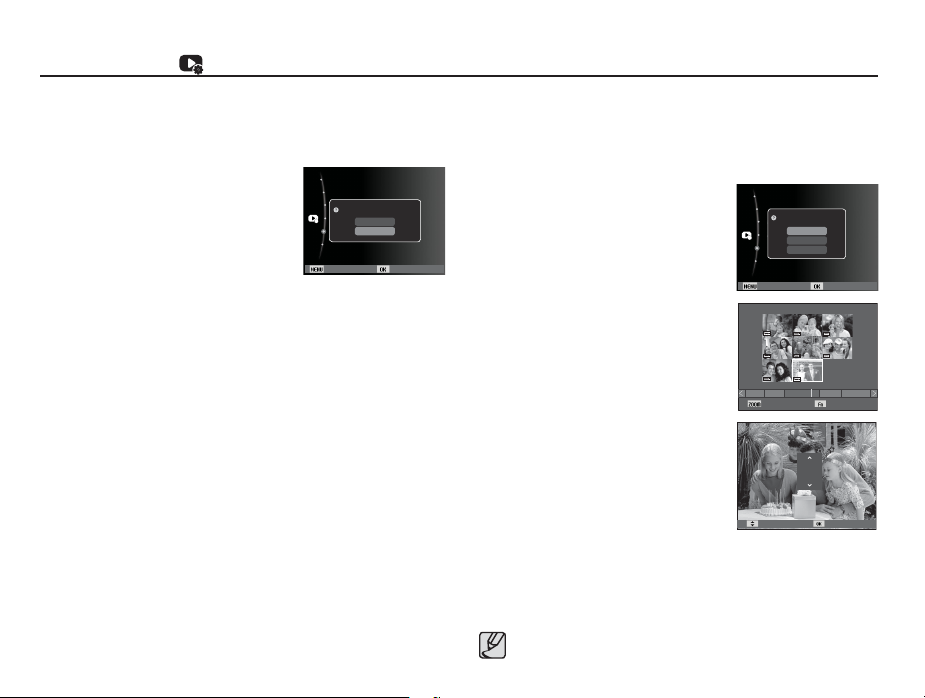
File Options
( )
Index
Images (except for movie clips and voice files) are printed as
index type.
1. Press the Up / Down
[DPOF] menu tab, and then press the
Right button.
2. Select the [Index] menu, and then press
the Right button again. Sub menu will
appears.
button, select the
Delete
Protect
Face List Edit
Setting Index?
Voice memo :Off
Yes
No
DPOF
Copy to Card
Back Set
3. Select [Yes] or [No] by pressing the Up / Down button.
If [Yes] is selected : The image will be printed in index format.
If [No] is selected : Cancel the index print setting.
4. Press the OK button to confirm the setting.
Print size
You can specify the print size when printing images stored on the
memory card. The [Size] menu is available only for DPOF 1.1
compatible printers.
1. Press the Up / Down button, select the
[DPOF] menu tab, and then press the
Right button.
2. Select the [Size]
the Right button again.
menu, and then
press
The Sub-menu
appears.
Delete
Protect
Select Image
Face List Edit
Select
Voice memo :Off
All
DPOF
Reset
Copy to Card
Back Set
3. Select a desired sub menu by pressing
the Up / Down button and press the
OK button.
[Select] :
The selection window appears.
Lets you choose the print size of
images to be printed.
- Up / Down / Left / Right : Select an image.
1 31 31211 5
Size Set
- Zoom button : Change the print size.
- Fn button : Press to save the sizes
you chose.The menu will
3X5
disappear. The size appears on the thumbnail.
[All] : Change print size of all saved images.
Size Set
- Up / Down button : Select a print size.
- OK button : Press to confirm the size you chose. The size
appears on the LCD screen.
[Reset] : Cancel all of the print size settings.
Ä
DPOF [Size] secondary menu : Cancel, 3X5, 4X6, 5X7, 8X10
Depending on the manufacturer and printer model, cancelling
the printing may take a little longer for the printer to process.
83
Page 85
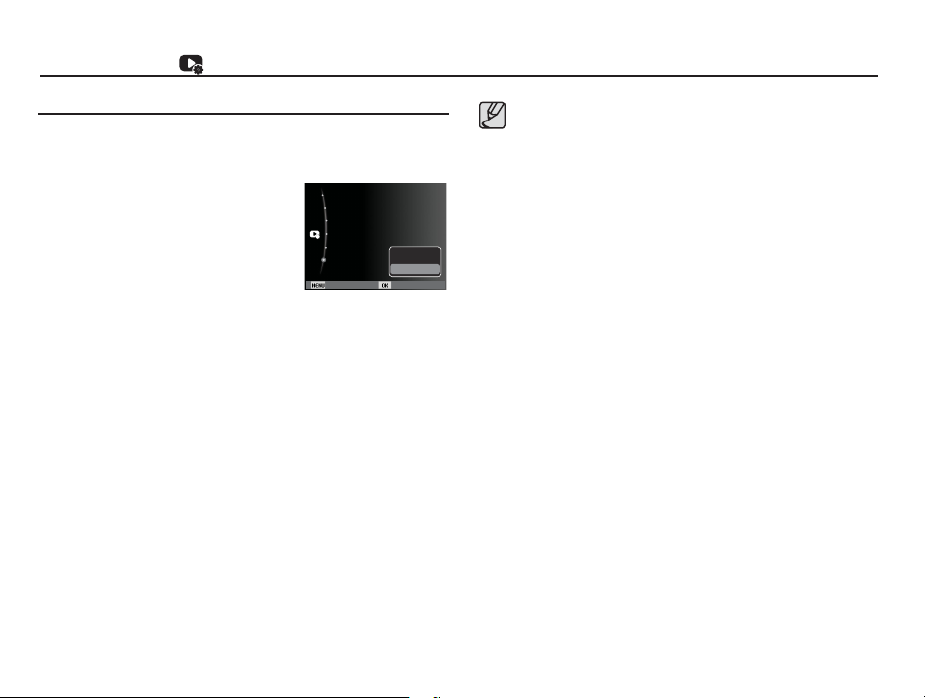
File Options
( )
Copy to Card
This enables you to copy image files, movie clips and voice recording
files to the memory card.
1. Select the [Copy to Card] menu tab by
pressing the Up / Down button, and
then press the Right button.
2. Press the Up/ Down button to select
[Yes] or [No], and then press the OK
button.
- [Yes] :
Copies all images, movie clips, and voice recording files
saved in the internal memory to the memory card after
the [Copying] message is displayed. After copying is
complete, the screen returns to Playback mode.
- [No] : Cancels "Copy to Card".
Delete
Protect
Face List Edit
Voice memo :Off
DPOF
Yes
Copy to Card
Back Set
No
If there is not enough space available on the memory card to
copy saved images from the internal memory (About 20MB),
the [Copy to Card] command copies only some of the images
and then displays the [Memory Full] message. Then, the
camera returns to the Playback mode. Please be sure to delete
any unnecessary files on the memory card to free space before
inserting the card into the camera.
When you move the images that are stored in the internal
memory to the card using [Copy to Card], the camera names the
files in the following two ways to avoid duplicating file names:
- When [File No.] in the Settings menu is set to [Reset], the
copied file names start from after the last stored file name.
- When [File No.] is set to [Series] in the Settngs menu, the
copied file names start from after the last captured image’s
file name. After completing [Copy to Card], the last stored
image of the last copied folder is displayed on the LCD
screen.
84
Page 86
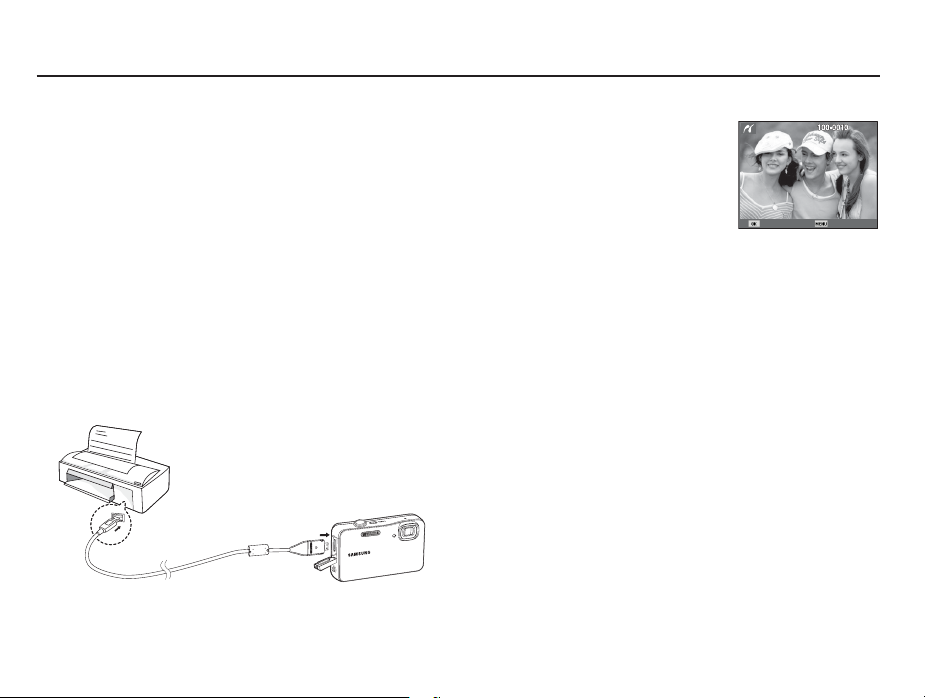
PictBridge
You can use the USB cable to connect this camera to a printer that
supports PictBridge (sold separately) and print the stored images
directly. Movie clips and voice files cannot be printed.
Connecting the camera to a Pictbridge compatible printer
1. Connect the camera to the printer with USB cable.
2.
Once the camera is turned on, the camera automatically recognizes
the printer and completes the connection.
Ä
If automatic connection fails, set the [USB] menu to [Printer].
(p.62)
Ä
For a printer that can enable a removable disk, set the [USB]
menu to [Printer].
Connecting the Camera to a Printer
Easy printing
When you connect the camera in
Playback mode to a Pictbridge
compatible printer, you can print a
picture easily.
- Pressing the Left / Right button :
Selects the previous / next image.
- Pressing the OK button :
Prints the currently displayed image using the printer’s default
settings.
Print Menu
85
Page 87
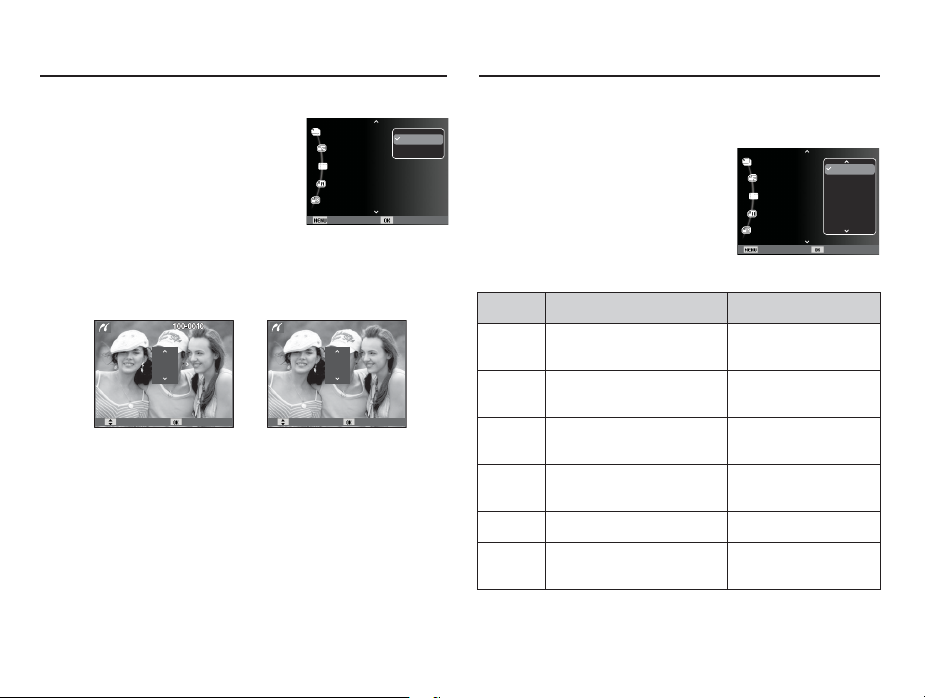
PictBridge : Picture Selection
PictBridge : Print Setting
You can select the images you want to print.
Setting the Number of Copies to Print
1. Press the MENU button and the
PictBridge
menu appears.
2. Use the Up / Down button to
select the [Images]
menu, and then
press the Right button.
3. Use the Up / Down button to select a desired
Images :One Photo
Size :Auto
Layout :Auto
Type :Auto
Quality :Auto
Back Set
One Photo
All Photos
sub-menu, and
then press the OK button.
- Select [One Photo] or [All Photos]. A screen where you can
set the number of copies to print will appear as shown below.
0
Quantity Set
[When [One Photo] is selected]
[When [All Photos] is selected]
1
Quantity Set
- Press the Up / Down button to select the number of prints.
- When [One Photo] is selected : Use the Left / Right button to
select another picture. After
selecting another picture, select
the number of prints for the
other picture.
- After setting the number of prints, press the OK button to save.
- Press the Shutter button to return to the menu without setting
the number of prints.
4. Press the play mode button (
) and images will be printed.
Î
86
You can select the Paper Size, Print Format, Paper Type, Print
Quality, Date Print, and File Name Print menus for printed pictures.
1. Press the MENU button and the
PictBridge
menu appears.
2. Use the Up / Down button to select
the desired menu, and then press the
Right button.
3. Use the Up / Down button to select
the desired
sub-menu value, and then
Images :One Photo
Size :Auto
Layout :Auto
Type :Auto
Quality :Auto
Back Set
Auto
Postcard
Card
4x6
L
2L
press the OK button.
Menu Function Sub menu
Size
Layout
Type
Quality
Set the size of the printing
paper.
Set the number of pictures to
be printed on a sheet of paper.
Set the quality of the printing
paper.
Set the quality of the picture
to be printed.
Auto, Postcard, Card,
4X6, L, 2L, Letter, A4, A3
Auto, Full, 1, 2, 4, 8, 9,
16, Index
Auto, Plain, Photo,
Fast Photo
Auto, Draft, Normal, Fine
Date Set whether to print the date. Auto, Off, On
File Name
Some menu options are not supported on all printers.
Ä
Set whether to print the file
name.
Auto, Off, On
If not supported, the menus are still displayed on the LCD, but are not
selectable.
Page 88
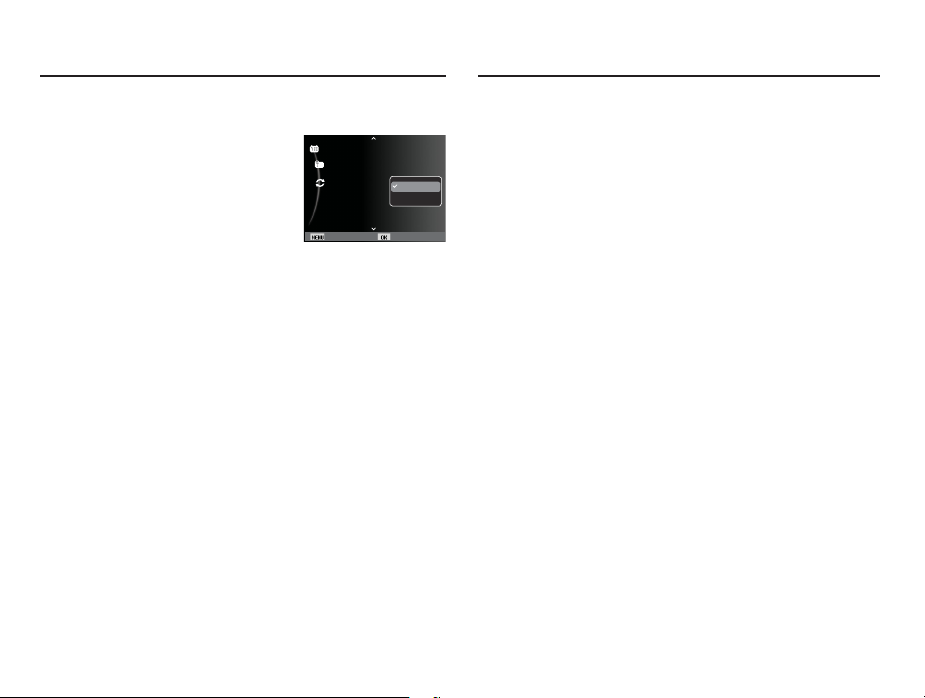
PictBridge : Reset
Important notes
Resets user-changed configurations.
1. Use the Up / Down button to select
the [Reset] menu
tab, and then press
the Right button.
Date :Auto
File Name :Auto
Reset No
2. Use the Up / Down button to select
[Yes] or [No], and then press the OK
button.
Back Set
If [Yes] is selected : All print and image settings are reset.
If [No] is selected : Settings are not reset.
Ä
Default print settings vary depending on the printer manufacturer.
For your printer’s default settings, refer to the user’s guide that
came with your printer.
Be sure to observe the following precautions!
This unit contains precision electronic components. Do not use or
store this unit in the following locations.
No
Yes
- Areas exposed to severe changes in temperature and humidity.
- Areas exposed to dust and dirt.
- Areas exposed to direct sunlight or the inside of a vehicle in hot
weather.
- Environments where there is high magnetism or excessive vibration.
- Areas with high explosives or highly flammable materials.
Do not leave this camera in places subject to dust, chemicals (like
naphthalene and mothballs), high temperature and high humidity.
Keep this camera with silica gel in a hermetically sealed box when
not planning to use the camera for a long period of time
Sand can be particularly troublesome to cameras.
- Do not let sand get inside the camera when using it on beaches,
coastal dunes, or other areas where there is lots of sand.
- Doing so may result in failure or may permanently render the
camera unusable.
Handling the camera
- Never drop the camera or subject it to severe shocks or vibrations.
- Protect the large size LCD screen from an impact. When this
camera is not used, keep it in the camera case.
- Avoid obstructing the lens or the flash when you capture an image.
87
Page 89

Important notes
Extremes in temperature may cause problems.
- If the camera is transferred from a cold to a warm and humid
environment, condensation can form on the delicate electronic
circuitry. If this occurs, turn the camera off and wait for at least
1 hour until all moisture is dispersed. Moisture
occur on the memory card. If this happens, turn off the
camera and remove the memory card. Wait until the moisture
has evaporated.
Caution on Using the Lens
- If the lens is subjected to direct sunlight, it could result in the
discoloration and deterioration of the image sensor.
- Take care not to get fingerprints or foreign substances on the
surface of the lens.
If the digital camera is not used for a long period, an electric
discharge can occur. It is a good idea to remove the battery and
the memory card if you do not intend to use the camera for an
extended period of time.
If the camera is exposed
off to protect the memory card.
to electronic interference, it will turn itself
build-up can also
Camera Maintenance
- Use a soft brush (available from photo stores) to gently clean the
lens and LCD assemblies. If this does not work, lens-cleaning
paper with lens cleaning fluid can be used.
Clean the camera body with a soft cloth. Do not allow this
camera to come into contact with solvent materials such as
benzol, insecticide, thinners etc. This may damage the body
shell of the camera and also affect its performance. Rough
handling can damage the LCD screen. Take care to avoid
damage and keep the camera in its protective carry case at all
times when not in use.
Do not attempt to disassemble or modify the camera.
Under certain conditions, static electricity can cause the flash unit
to fire. This is not harmful to the camera and is not a malfunction.
When images are uploaded or downloaded, the data transfer may
be affected by static electricity. In this case, disconnect and re-
connect the USB cable before trying the transfer again.
Before an important event or going on a trip, you should check
the camera condition.
- Take a picture to test the camera’s condition and prepare an extra battery.
- Samsung cannot be held responsible for camera malfunctions.
If the digital camera is not used for a long period, the date and time
may
return to the default settings because the battery has
discharged. In this case, reset the date and time before the
recording.
88
Page 90

Warning indicator
There are several warnings that may appear on the LCD display.
[Card Error]
Memory card error.
Turn off the camera power and turn it on again.
Insert the memory card again.
Insert and format the memory card. (p.58)
[Card Locked]
The memory card is locked.
SD/SDHC memory card : Slide the write protect switch to the
[Memory Full]
The memory card or internal memory is full.
Insert new memory card.
Delete the unnecessary image files.
[No Image File]
There are no images stored on the memory.
Take images.
Insert a memory card that is holding some images.
top of the memory card.
[File Error]
File error.
Delete the file.
Memory card error.
Contact a camera service center.
[Low Battery]
There is low battery capacity.
Insert a fresh battery.
Charge the battery.
89
Page 91

Before contacting a service center
Please check the following Camera does not take images when you press the Shutter button.
The camera doesn’t switch on.
There is low battery capacity.
Insert a fresh battery. (p.15)
Charge the battery.
Battery is inserted incorrectly with the polarities reversed.
Insert the battery according to the polarity marks. (+, -)
The camera power ceases while in use.
The battery is exhausted.
Insert a fresh battery. (p.15)
Charge the battery.
The Camera is turned off automatically.
Turn on the camera power again.
The camera has stopped working in a cold environment.
Take the battery out of the camera and warm both by placing
them in your pocket, etc. and then immediately before
shooting, place the battery in the camera and then shoot.
Water got inside the camera.
The battery chamber cover was accidentally opened under water.
The camera was dropped into water while its battery chamber
cover was not completely closed.
ĺ Turn the camera power off. Contact a Samsung service center
for repair.
90
There is insufficient memory capacity.
Delete unnecessary image files.
The memory card has not been formatted.
Format the memory card. (p.58)
The memory card is exhausted.
Insert a new memory card.
The memory card is locked.
Refer to the [Card Locked] error message.
The camera's power is off.
Turn the camera power on.
The battery is exhausted.
Insert a charged battery or recharge the battery. (p.15)
The battery is inserted incorrectly with the polarities reversed.
Insert the battery according to the polarity marks. (+, -)
The camera suddenly stops working while in use.
The camera stopped due to a malfunction.
Remove /re-insert battery and switch the camera on.
The images are unclear.
A picture was taken of the subject without setting an appropriate
macro mode.
Select an appropriate macro mode to take a clear image.
The picture was teken beyond the flash’s range.
Take a picture within the flash’s range.
The lens is smudged or dirty.
Clean the lens.
Page 92

Before contacting a service center
The flash does not fire.
Flash off mode has been selected.
Disengage flash off mode.
The camera mode can't use the flash .
Refer to the FLASH instructions (p.35).
Incorrect date and time is displayed.
The date and time have been set incorrectly or the camera has
adopted the default settings.
Reset the date and time.
The camera buttons do not operate.
The camera has malfunctioned.
Remove/re-insert battery and switch the camera on.
A card error has occurred while the memory card is in the camera.
The memory card format is incorrect.
Re-format the memory card. (p.58)
The images don't play back.
Incorrect file name (Violation of DCF format).
Do not change the image file name.
Color of image is different to the original scene.
White balance or effect setting is incorrect.
Select the appropriate White balance and effect.
Images are too bright.
Exposure is excessive.
Reset exposure compensation.
No image on external screen.
The external screen has not been connected properly to
the camera.
Check the connection cables.
There are incorrect files on the memory card.
Insert a memory card that has correct files.
The [Removable Disk] file does not appear in my computer’s file system.
The cable connection is incorrect.
Check the connection.
The camera is off.
Turn the camera on.
The operating system is not Windows XP, Vista, 7 / Mac OS 10.4.
Alternatively the PC does not support USB.
Install Windows XP, Vista, 7 on a PC or Mac OS 10.4 or later
on a computer that supports USB.
A part of the LCD screen does not occasionally turn on or a spot appears.
Although the LCD screen is manufactured with high precision
technology, the precision pixels
white, and
A vertical line appears on the LCD screen when taking a picture of a
bright object.
If a subject
purple vertical line may appear.
blue spots appear.
ĺ
This phenomenon does not affect the quality of the recorded
image and it is not a malfunction.
is reflecting a very bright light, a gray, black, red, or
ĺ
This is a phenomenon called smear and it does not affect the
quality of the recorded image. This is not a malfunction.
occasionally do not light or red,
91
Page 93
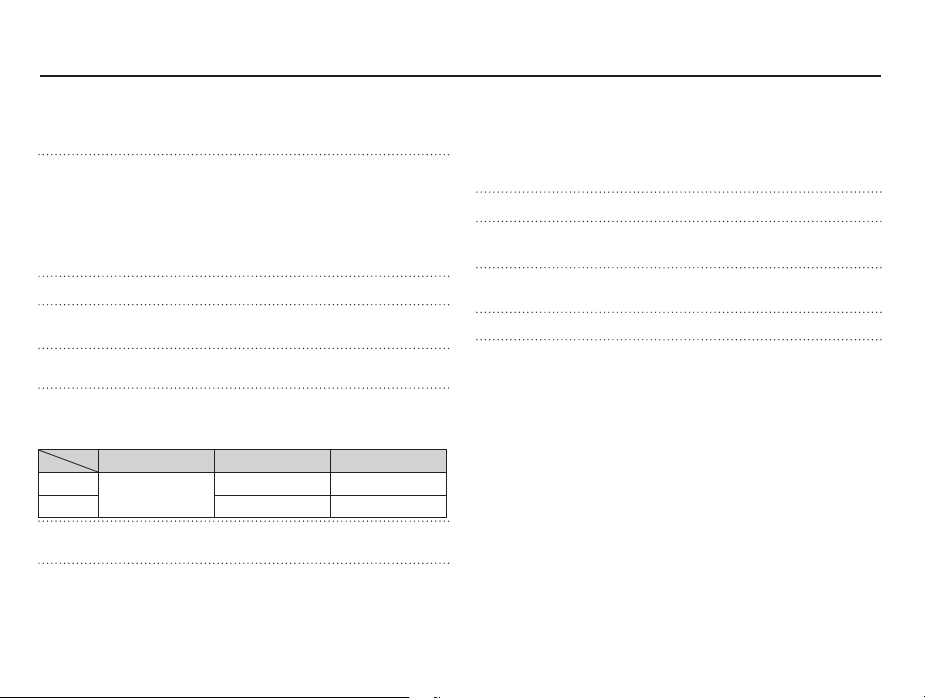
Specifications
Image Sensor - Type : 1/2.33" CCD
- Effective Pixel : Approx. 12.2 Mega-pixel
- Total Pixel : Approx. 12.4 Mega-pixel
Lens - Focal Length : SAMSUNG Lens f = 6.3 ~ 31.5mm
(35mm film equivalent : 35 ~ 175mm)
- F No. : F3.6(W) ~ F4.8(T)
- Digital Zoom : ·Still Image mode :1.0X ~ 5.0X
·Play mode : 1.0X ~ 12.5X
(depends on image size)
screen - 2.7" color TFT LCD (230,000 dots)
LCD
Waterproof
Specification
Dustproof
Specification
Focusing
- Max. 3 m underwater (IEC IPX8)
- IEC IP6X
-
Type : TTL auto focus (Multi AF, Center AF,
Face Detection AF, Tracking AF)
- Range
Normal Macro Auto Macro
Wide
80cm ~ Infinity
Tele 50cm ~ 80cm 50cm ~ Infinity
5cm ~ 80cm 5cm ~ Infinity
Shutter - Smart Auto : 1/8 ~ 1/1,000 sec.,
Program : 1 ~ 1/1,000 sec., Night : 8 ~ 1/1,000 sec.
Exposure - Control : Program AE
- Metering : Multi, Spot, Center-weighted,
Face Detection AE
- Compensation : ±2EV (1/3EV steps)
- ISO : Auto, 80, 100, 200, 400, 800, 1600, 3200
92
Flash - Modes : Auto, Auto & Red-eye reduction, Fill-in
flash, Slow sync, Flash off, Red Eye Fix
- Range : Wide : 0.2m ~ 3.0m (ISO Auto),
Tele : 0.5m ~ 2.0m (ISO Auto)
- Recharging Time : Approx. 4 sec
Sharpness - Soft+, Soft, Normal, Vivid, Vivid+
White Balance - Auto, Daylight, Cloudy, Fluorescent_H,
Fluorescent_L, Tungsten, Custom
Voice Recording - Voice Recording (max. 10 hours)
- Voice Memo in Still Image (max. 10 sec.)
Date Imprinting - Date, Date & Time, Off (user selectable)
Shooting - Still Image
·M
ode : Smart Auto, Program, Scene (Aqua,
Beauty Shot, Frame Guide, Night,
Portrait, Children, Landscape, Close Up,
Text, Sunset, Dawn, Backlight, Fireworks,
Beach & Snow)
· Smart Auto : Portrait, Night Portrait, Night,
Backlight Portrait, Backlight,
Landscape, White, Macro,
Macro Text, Tripod, Action,
Sunset, Blue Sky, Natural Green,
Macro Color, Macro Portrait
·Shooting : Single, Continuous, Motion Capture,
AEB
·Self-timer : 10 sec., 2 sec., Double
Page 94
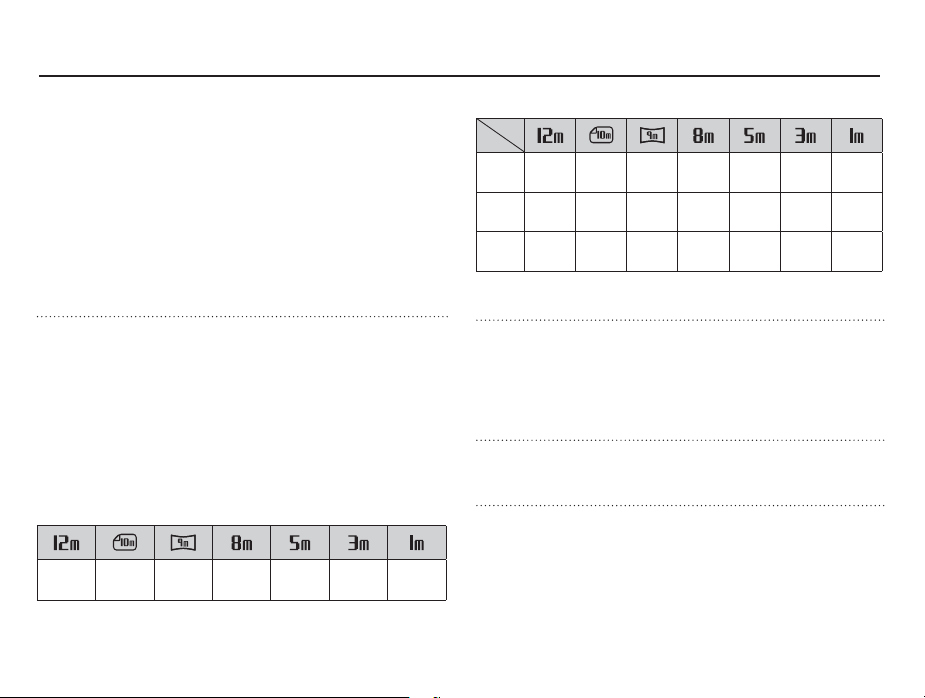
Specifications
- Movie Clip
·
With Audio or without Audio (user selectable)
·
Recording time : max 20 min. (1280x720HQ)
max 1 hours (640x480, 320x240)
·
Size : 1280x720HQ (30 fps & 15 fps),
640x480 (30 fps & 15 fps),
320x240 (60 fps & 30 fps & 15 fps)
·
Frame rate : 60 fps, 30 fps, 15 fps
· 5X Optical Zoom and Mute in Zooming,
sound recording on/ off selectable
· Movie Editing (Embedded): Movie Stabilization,
Still Image Capture, Time Trimming
Storage - Media
·Internal memory : About 20MB flash memory
· External Memory (Optional) :
SD card (Up to 2GB guaranteed)
SDHC card (Up to 32GB guaranteed)
- File Format
·Still Image : JPEG (DCF), EXIF 2.21, DPOF 1.1,
PictBridge 1.0
·Movie Clip : MP4 (H.264)
·Audio : WAV
- Image Size
4000X
3984X
3968X
3264X
2592X
2048X
3000
2656
2232
2448
1944
1536
1024X
768
- Capacity (1GB Size)
Super
About
About
About
About
About
About
Fine
134
152
181
200
313
About
About
About
About
Fine
220
249
296
About
About
Normal
329
Ä
These figures are measured under Samsung standard conditions and
371
About
438
328
About
487
About
510
About
751
494
About
789
About
115 4
About
1731
About
2597
About
3463
may vary depending on shooting conditions and camera settings.
Effect
- Effect : Photo Style Selector, Smart Filter, Image
Adjust (Sharpness, Contrast, Saturation)
-
Editing :
Resize, Rotate, Photo Style Selector,
Smart Filter, Image Adjust (ACB, Face
Retouch, Red Eye Fix, Brightness,
Contrast, Saturation, Add Noise)
Image Play - Type :
Single image, Thumbnails, Multi slide show,
Movie Clip, Smart Album
Ä
Multi slide show : Slide show with Effect & Music
Interface - Digital output connector : USB 2.0
- Audio : Mono
- Video output : NTSC, PAL (user selectable)
- DC power input connector : 4.2 V
93
Page 95

Specifications
Power Source - Rechargeable battery : BP70A
Dimensions (WxHxD) -
Weight -
Operating Temperature - 0 ~ 40°C
Operating Humidity - 5 ~ 85%
Software - Intelli-studio, Adobe Reader
Specifications are subject to change without prior notice.
All trademarks are the property of their respective owners.
94
Ä
Included battery may vary depending on
sales region.
93.8 x 61 x 18.5 mm (excluding protrusions)
Approx. 121 g (without battery and card)
Page 96
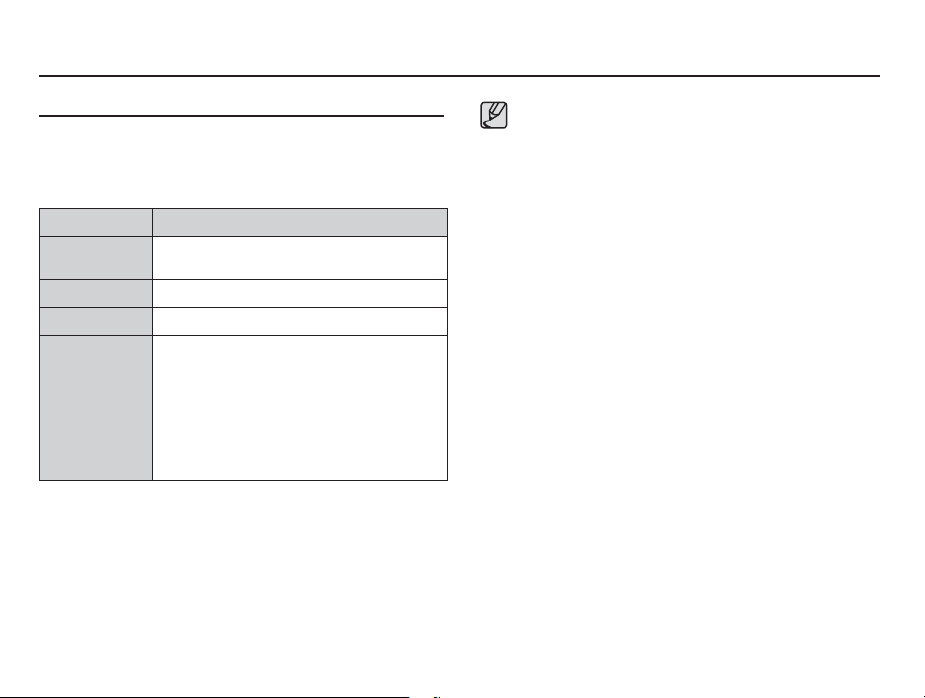
Transferring files to your computer (for Windows)
For Windows users
Transfer files by connecting your camera to your PC.
Installing programs
Hardware and software requirements
Item Requirements
CPU
RAM 512 MB or more (1 GB or more recommended)
OS Windows XP/Vista/7
Others
Intel® Pentium®4 3.2 GHz or higher
AMD Athlon™ FX 2.6 GHz or higher
- USB port
- CD-ROM drive
- nVIDIA Geforce 7600GT or higher
Ati X1600 series or higher
- 1024 X 768 pixels, 16-bit color display compatible
screen (1280 X 1024 pixels, 32-bit color display
recommended)
- Microsoft DirectX 9.0c or later
Using a self-assembled PC or a PC and OS that are not supported
may void your warranty.
The programs may not work properly on 64-bit Edition of Windows
, Vista, and 7.
XP
Intelli-studio may not perform correctly on some computers, even
when the computer meets the requirements.
If your computer does not meet the requirements, videos may not
play correctly or it may take longer to edit videos.
Install DirectX 9.0c or above before you use the program.
95
Page 97
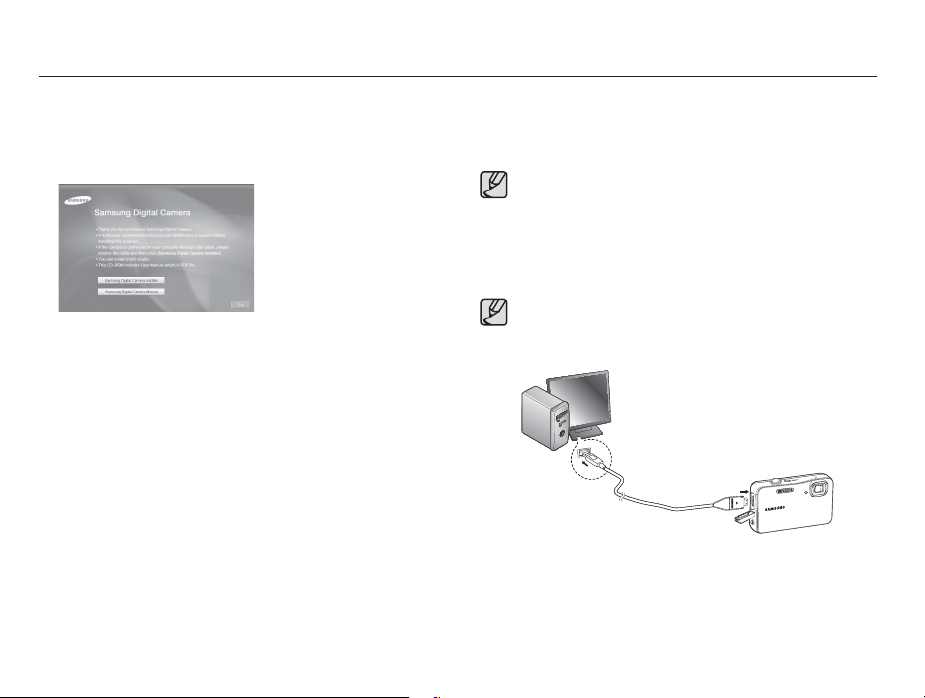
Transferring files to your computer (for Windows)
1. Insert the installation CD into a compatible CD-ROM drive.
2.
When the setup screen is displayed, click Samsung Digital Camera
Installer to start installation.
3. Select the programs to install, and then follow the on-screen
instructions.
4. Click Exit to complete the installation, and then restart your
computer.
96
Transferring files to your PC
Once you connect the camera to your PC, the camera will be
recognized as a removable drive.
The battery is be charged while the camera is connected to a
PC with the USB cable.
1. Connect your camera to your PC with the USB cable.
You must plug the end of the cable with the indicator light (Ÿ)
into your camera. If the cable is reversed, it may damage your
files. The manufacturer is not responsible for any loss of data.
Page 98
Transferring files to your computer (for Windows)
2. Turn on the camera.
- The computer recognizes the camera automatically.
If the camera fails to connect, a pop-up window will appear.
Select Computer.
3. On your PC, select [My Computer ĺ Removable Disk ĺ DCIM
ĺ 100PHOTO].
4. Select the files you
PC.
want, and then drag or save them to your
Disconnecting the camera (for Windows XP)
The way to disconnect the USB cable for Windows Vista / 7 is
similar.
1. If the status lamp on your camera is blinking, wait until it stops.
2. Click (
screen.
3. Click the pop-up message.
4. Remove the USB cable.
) on the tool bar at the bottom right of your PC
97
Page 99
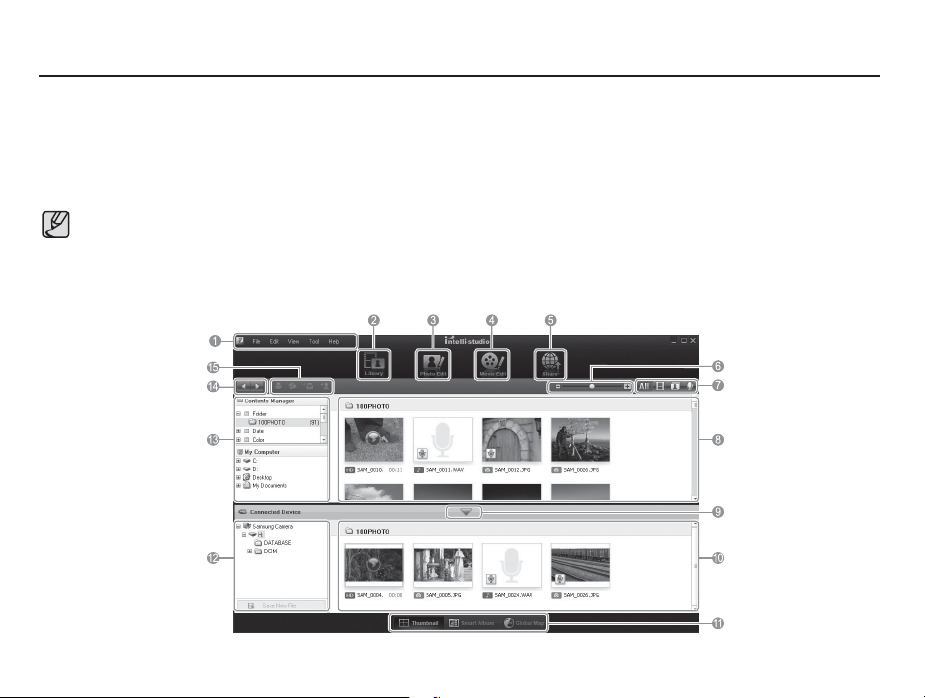
Transferring files to your computer (for Windows)
Using Intelli-studio
Once you have
does not start after you have connected the camera to your PC, double-click the Intelli-studio icon on your Windows desktop. Intelli-studio
allows you to play back and edit files. You can also upload files to websites, such as Flickr or YouTube. For details, select [Menu ĺ Help]
in the program.
installed Intelli-studio on your PC, Intelli-studio starts automatically when a camera is connected to your PC. If Intelli-studio
You cannot edit files directly on the camera. Transfer files to a folder on your computer before editing.
You cannot copy files in your computer to the camera.
Intelli-studio supports the following formats
- Videos: AVI(MJPEG), MP4 (Video: H.264, Audio: AAC), WMV (WMV 7/8/9)
- Photos: JPG, GIF, BMP, PNG, TIFF
98
Page 100
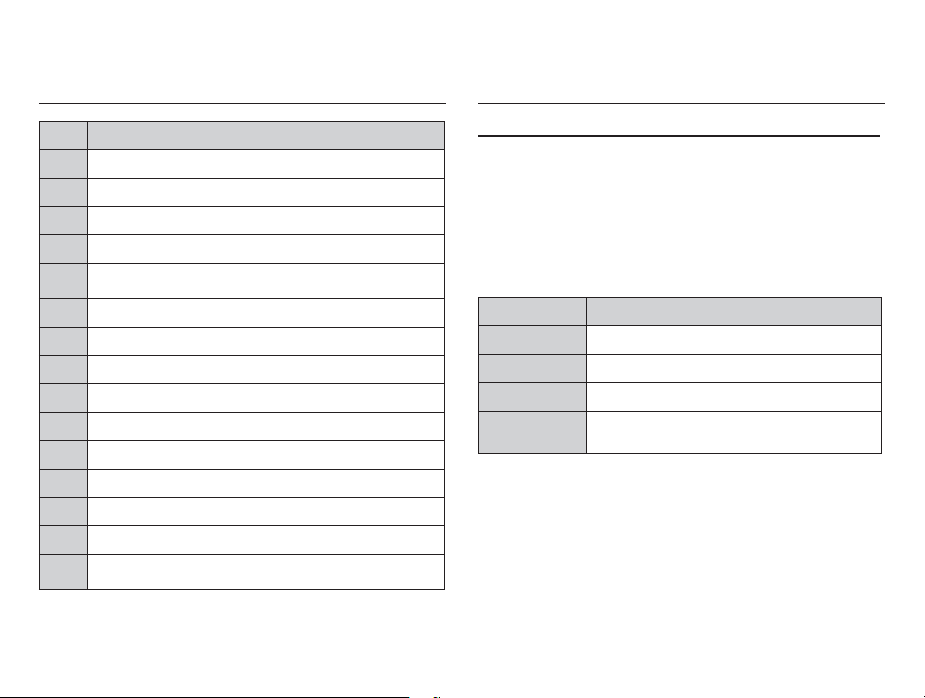
Transferring files to your computer
(for Windows)
Transferring files to your computer
for Mac
Icon Description
1 Open menus
2 Display files in the selected folder
3 Change to the Photo edit mode
4 Change to the Video edit mode
Change to the Sharing mode (You can send files by email or
5
upload files to websites, such as Flickr or YouTube.)
6 Enlarge or reduce the thumbnails in the list
7 Select a file type
8 View files of the selected folder on your computer
9 Show or hide files of the connected camera
10 View files of the selected folder on the camera
11 View files as thumbnails, in Smart Album, or on a map
12 Browse folders in the connected device
13 Browse folders in your computer
14 Move to the previous or next folder
Print files, view files on a map, store files in My Folder, or
15
register faces
For Mac users
When you connect the camera to a Macintosh computer, the
computer will recognize the device automatically. You can transfer
files directly from the camera to the computer without installing any
programs.
Installing programs
Hardware and software requirements
Item Requirements
CPU Power Mac G3 or later
RAM Minimum 256MB RAM
OS Mac OS 10.4 or higher
Others
- USB port
- CD-ROM drive
99
 Loading...