

Page 1
The Samsung E250V
Quick Start Guide
In just a few minutes we’ll show you how easy it is to use the
advanced features of your new Samsung E250V (customised for
Vodafone live!).
You’ll see how quickly you can take photos and videos with its
built-in digital camera, send photos, videos and sounds in MMS
messages, and connect to Vodafone live!. You’ll also be able to
personalise your phone by simply downloading new ringtones,
games and wallpapers.
Getting started
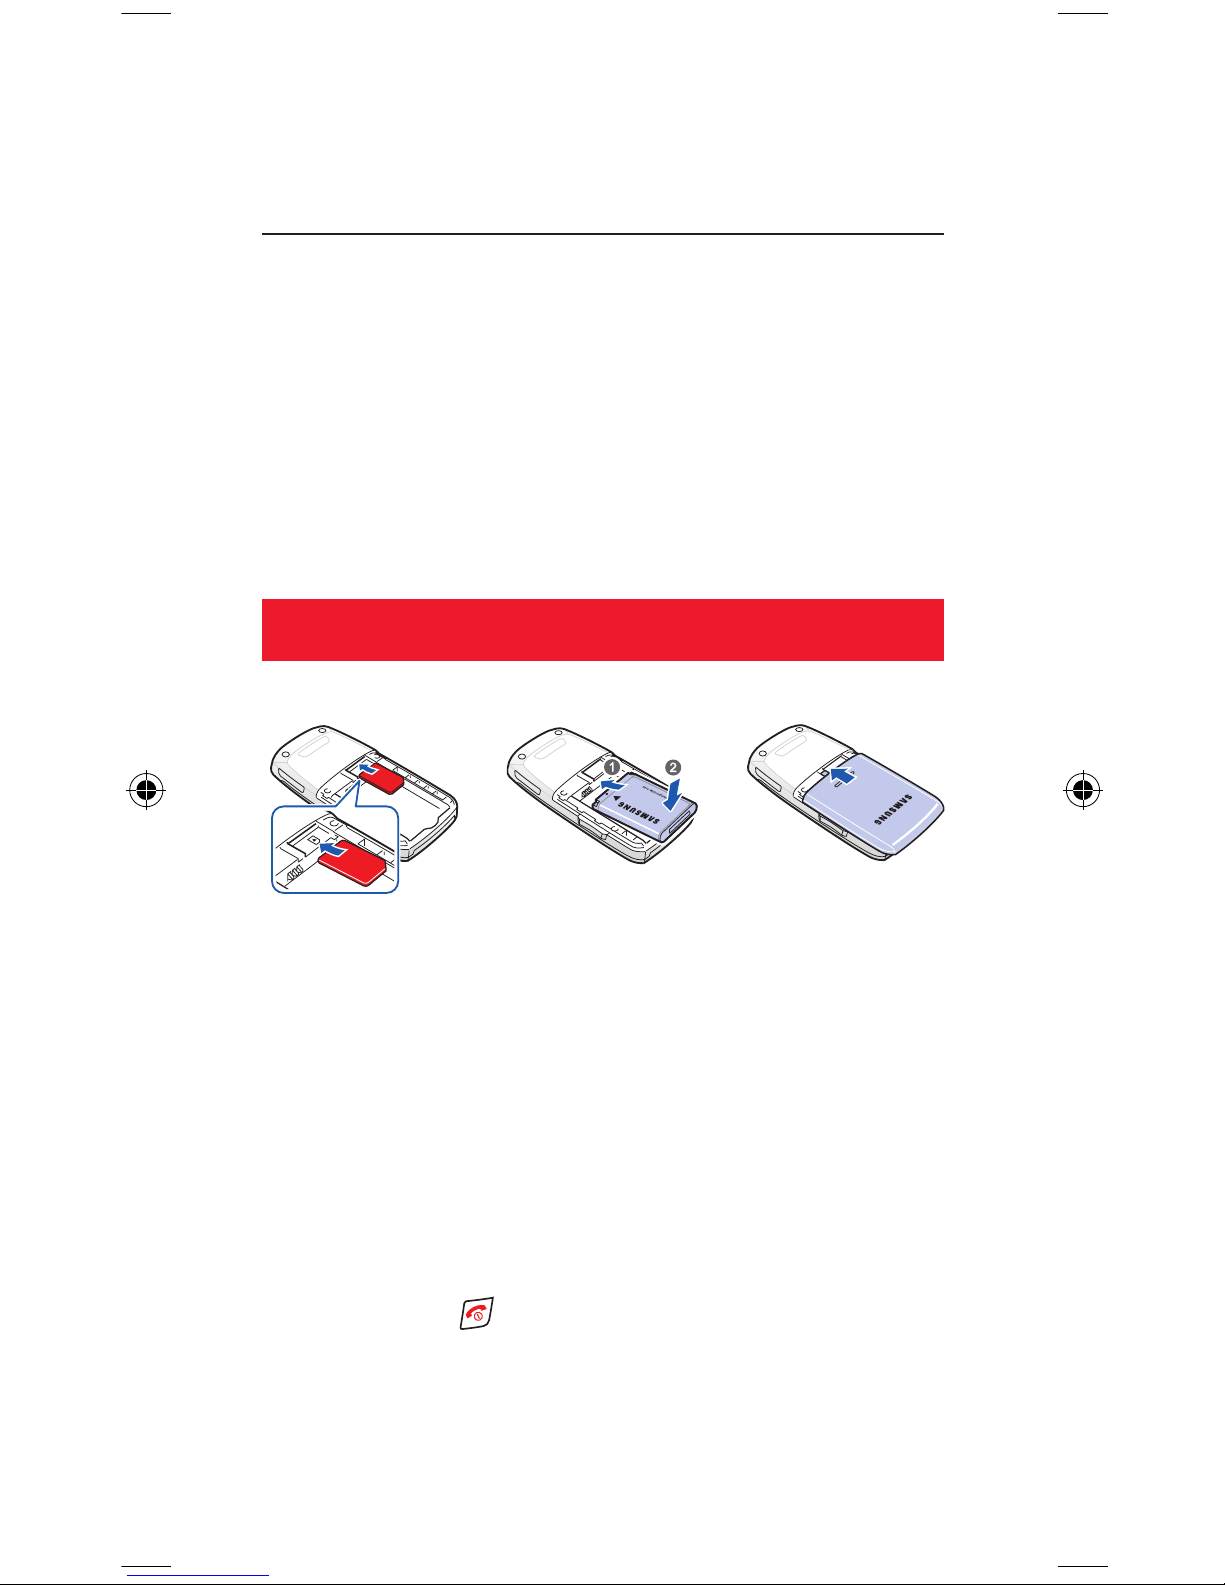
1. Insert your SIM card:
Slide your Vodafone SIM card into its slot, making sure that the
gold contacts of the SIM are facing down, and the cut-off edge is
correctly aligned.
2. Insert the battery:
Insert the battery (gold contact edge rst), and push it down until
it clicks shut. Then t the cover. The battery may need charging (a
full charge can take up to 3 hours).
3. Turn it on:
Press and hold the key. (Do the same to turn it off again.)
Page 2
1. The phone
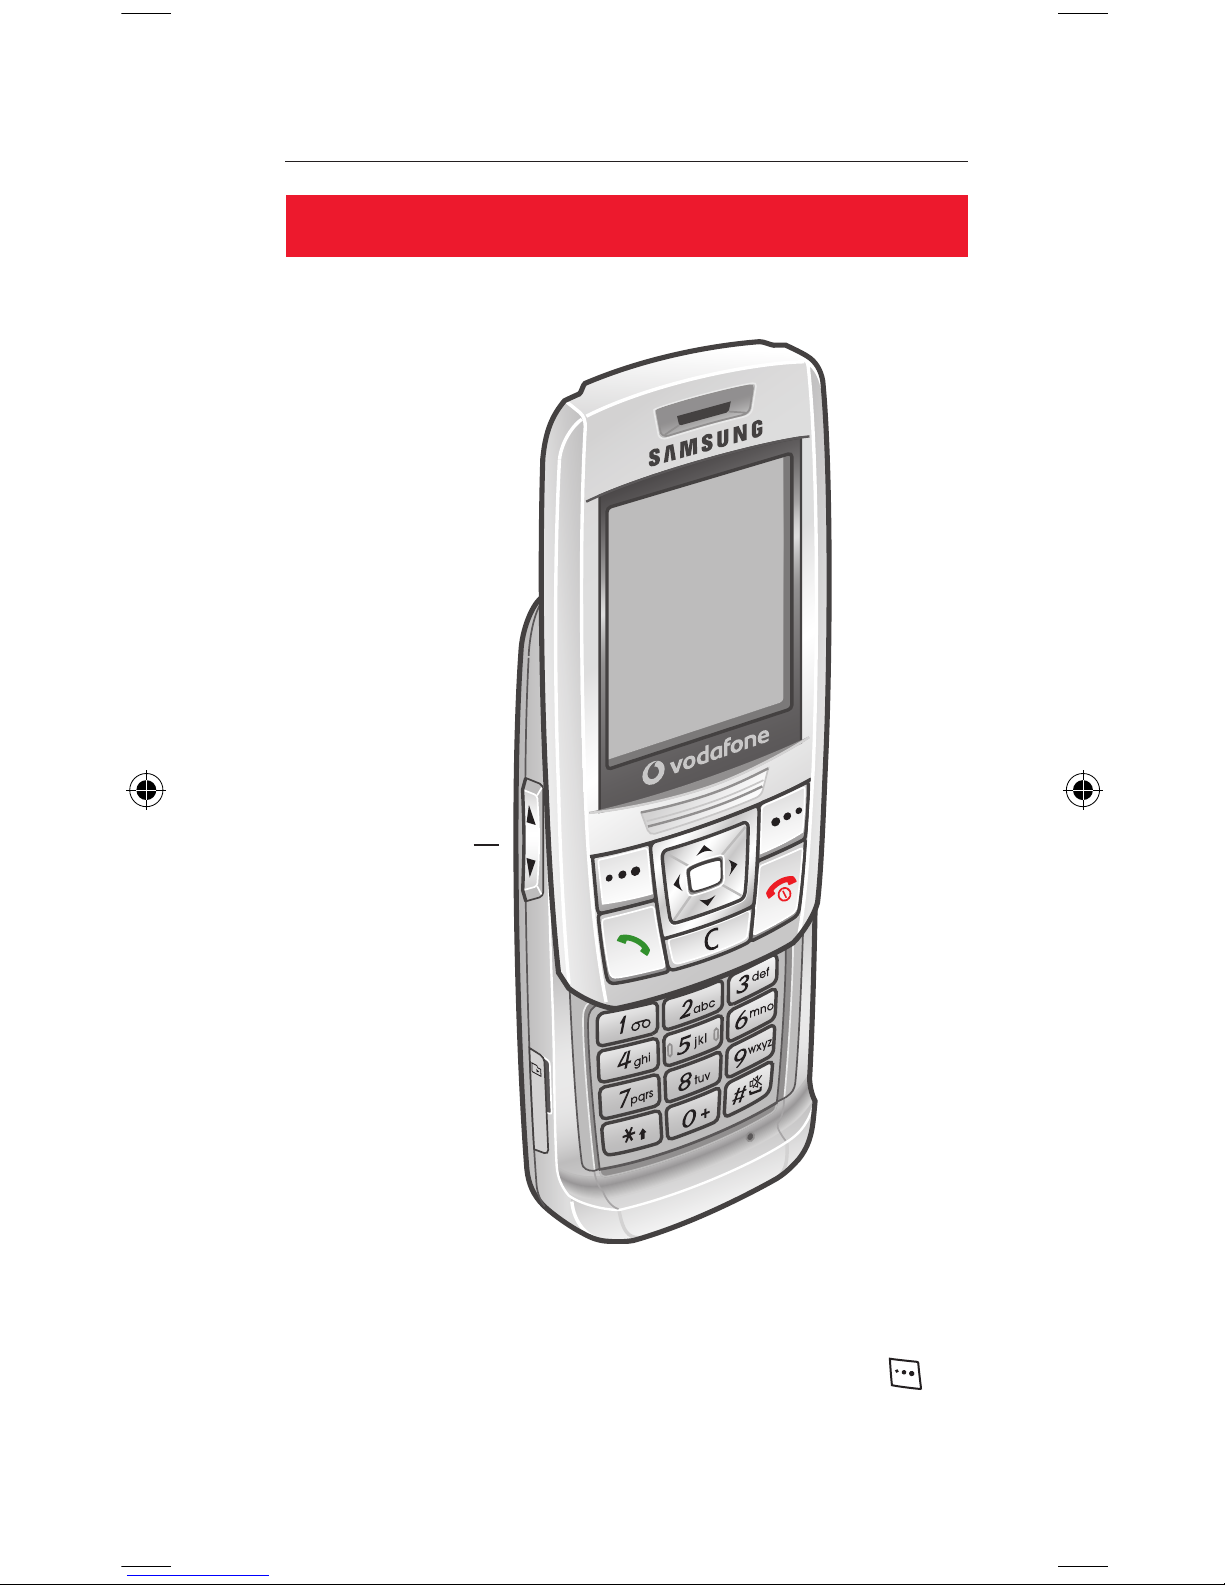
Keys and navigation
Volume keys
Note: sliding the keyboard out makes the phone active. Sliding it
shut will turn on the key lock and the screen will dim after a few
seconds. To make the phone active again, either press the key
and then OK, or slide the keyboard out.
Page 3
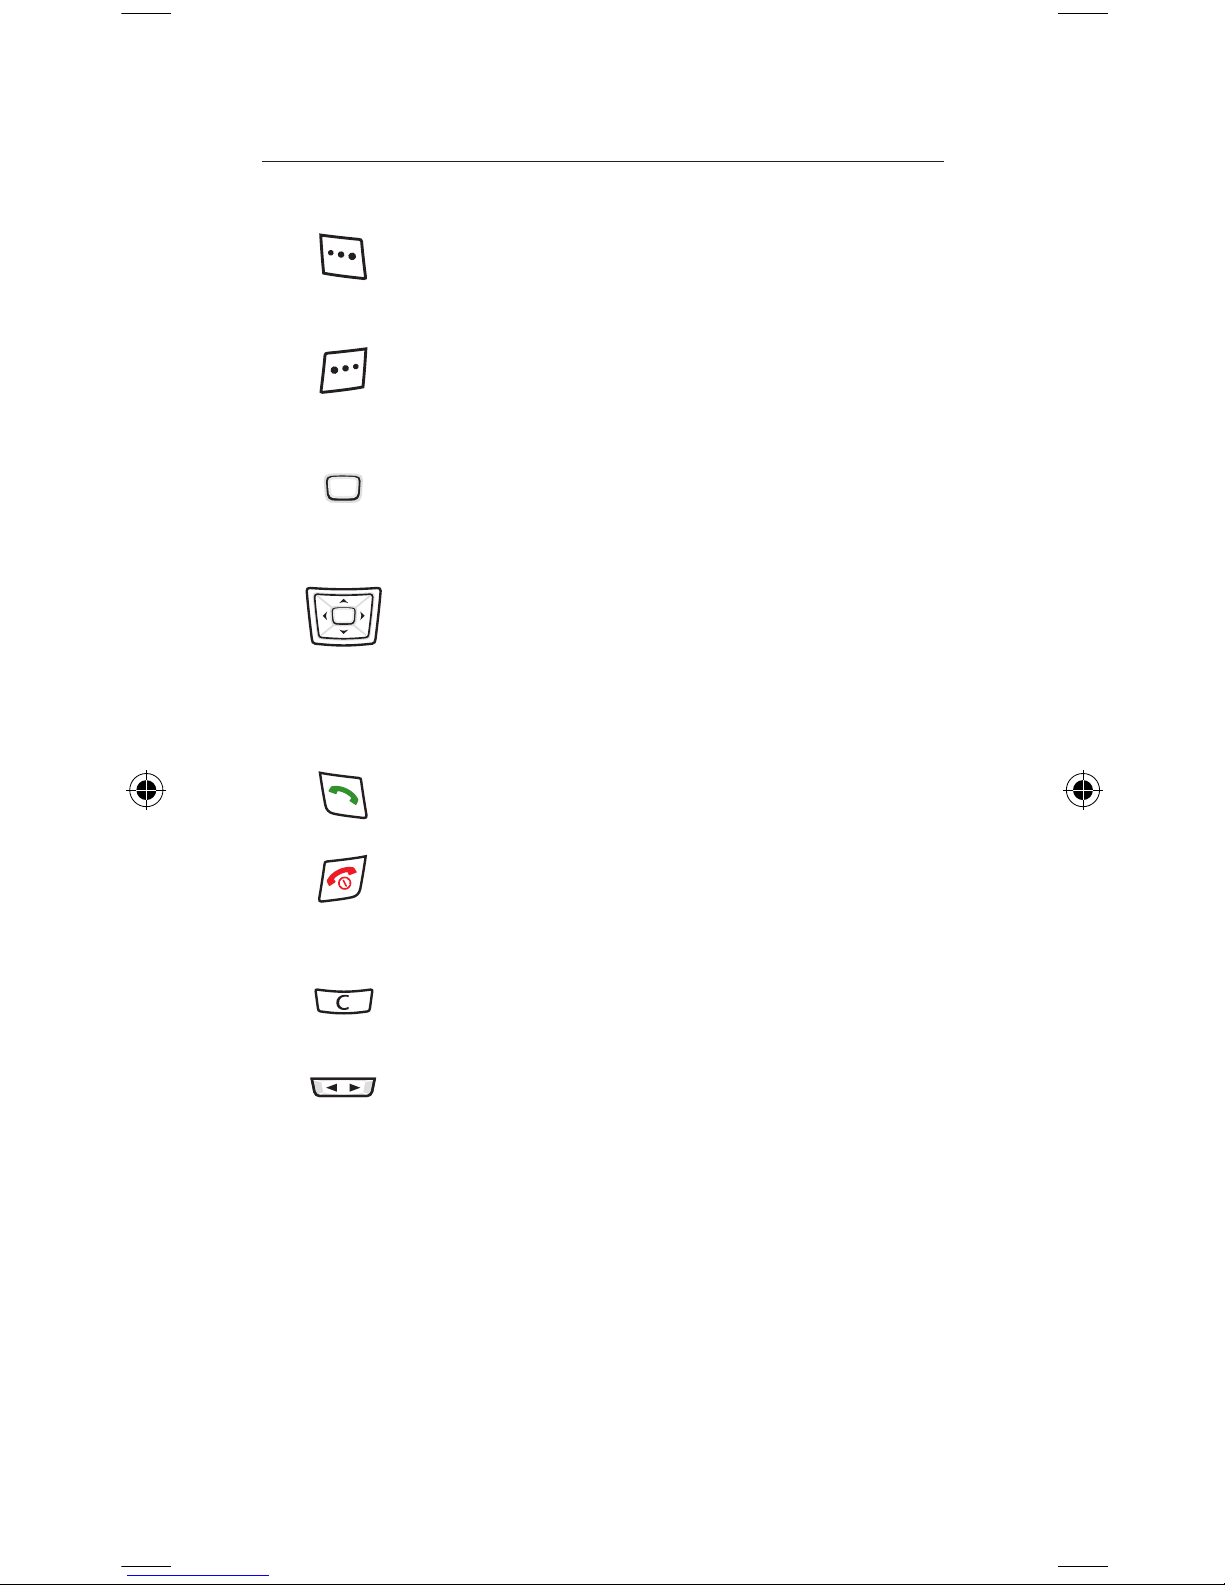
Left soft key: selects whatever option is displayed
in the bottom left of the screen (usually Select). In
standby mode it opens the main Menu.
Right soft key: selects whatever option is displayed
in the bottom right of the screen (usually Back). In
standby mode it opens Vodafone live!.
OK key: press to OK an action or select whatever
option is highlighted. In standby mode it opens the
main Menu.
Navigation key: move the navigation key sideways
to move around icons and menu lists. In standby
mode, up opens Vodafone live! (ofine), right
opens My les, down opens Contacts and left
opens Create new message.
Call key: Press to answer a call (or open the slider).
In standby mode it opens the Calls list.
End key: Press to end a call (or close the slider).
Press and hold to turn on and off. Press to return to
standby mode.
Clear key: press to delete a character of text.
Press and hold to delete all text.
Volume keys: press to change call and key volume.
Menu
Page 4
2. The camera
With the built-in digital zoom camera it’s easy to take photos and
videos. These can be sent to other people as an MMS (see Section
3).
Take a photo
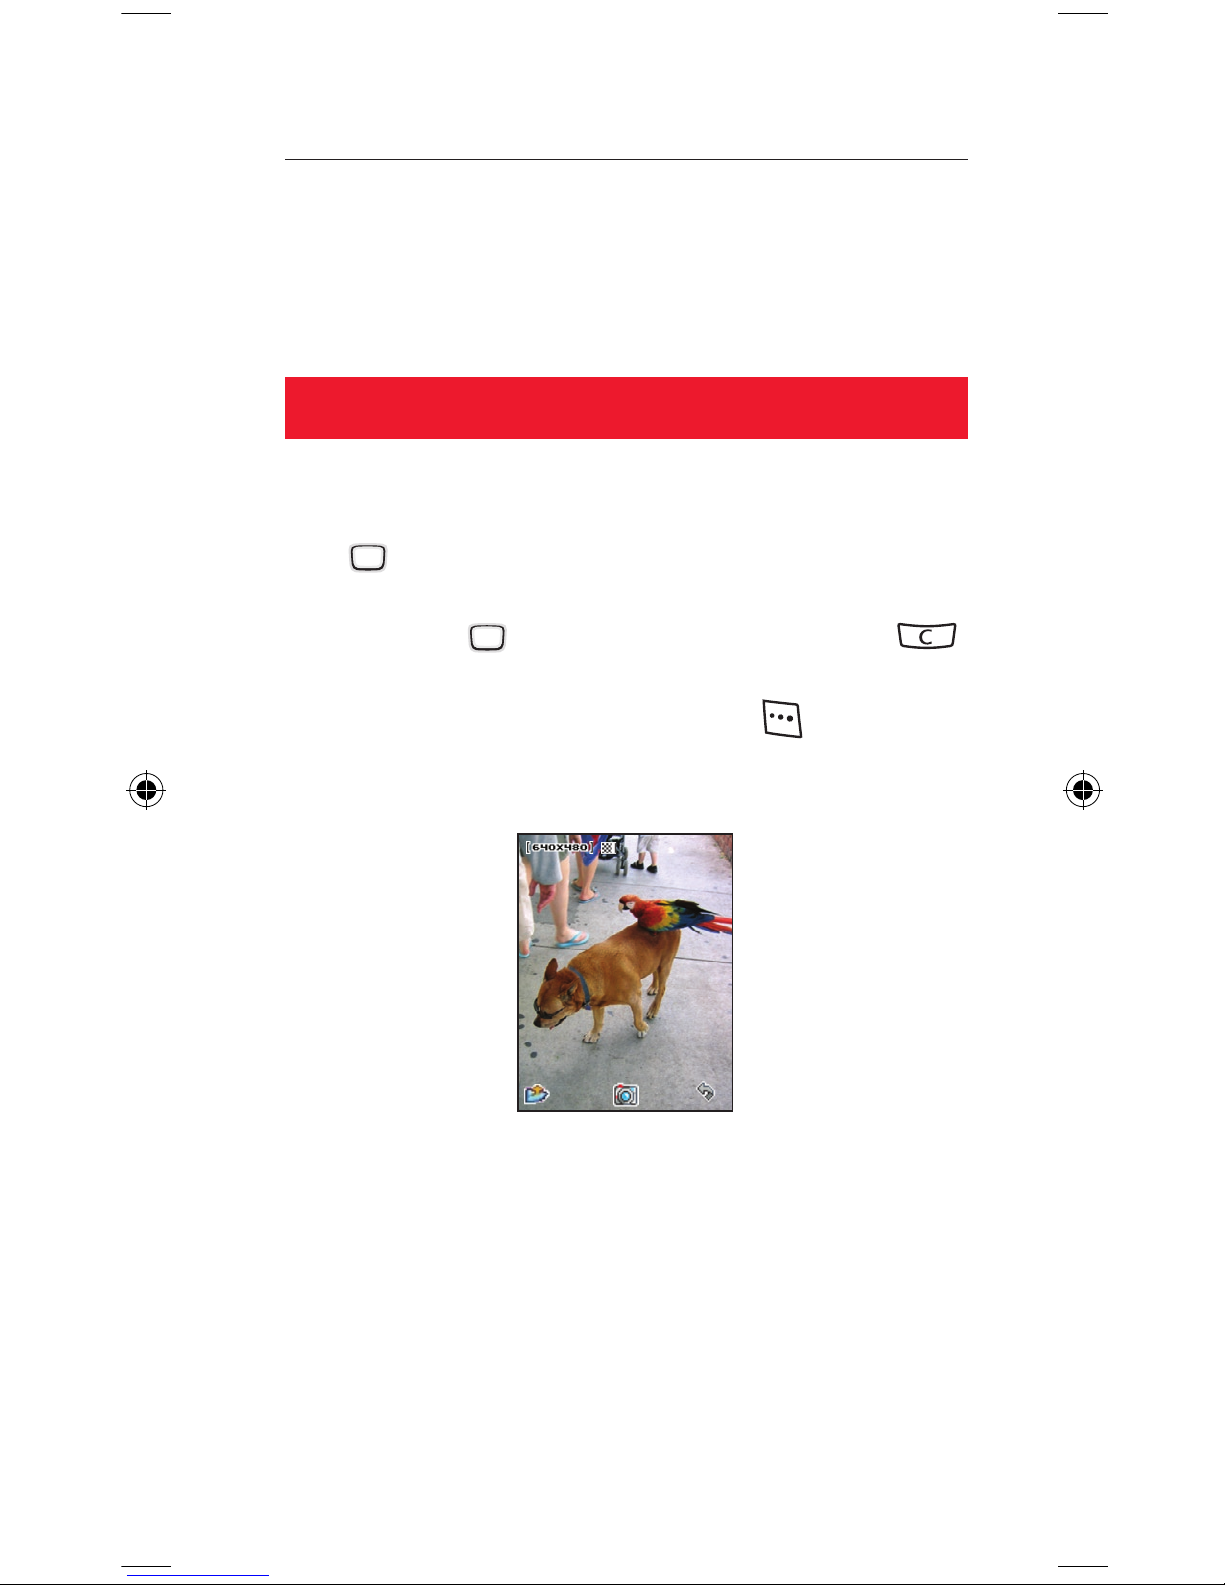
1. Turn on the camera:
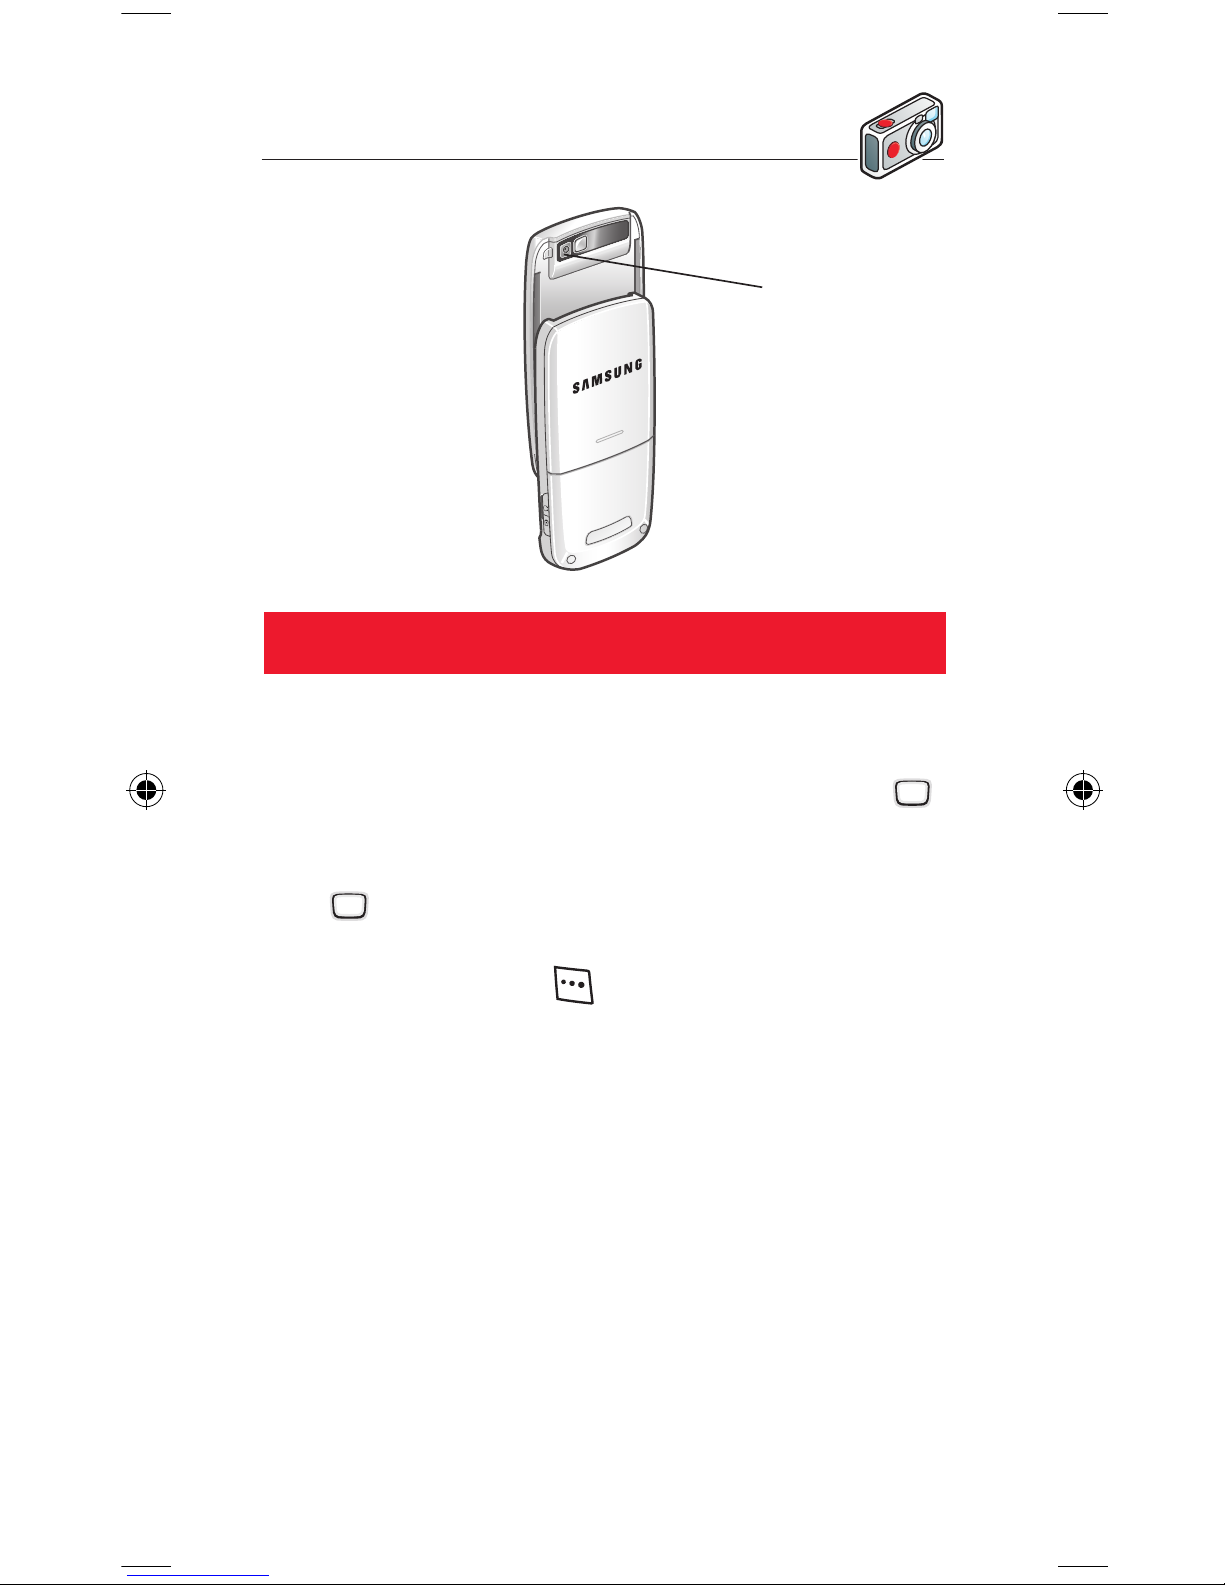
Open the slider to reveal the camera at the back. In standby mode,
press [Menu]. then select Camera.
2. Take the photo:
Press the OK key to take the photo. To discard it, press .
Tips: In viewnder mode, press p and q to zoom in or out.
Press t and u to adjust the brightness. Press to adjust the
settings.
3. Use your photo:
It’s saved automatically in My les > Pictures in the main Menu.
Press Back to take another photo, or press Options. Choose
Create message > Message to send it as a picture message, or
Set as > Wallpaper to use it as your screen background. Set as
> Caller image adds it to a contact detail so it will appear when
they call.
Page 5
Take a video clip
1. Take a video clip:
In camera mode, press Options > Record video to switch to video
recording. Use the navigation keys to adjust the zoom. Press
to start recording, then press it again to stop.
2. Use your video clip:
Press to play it (it’s saved in My les > Videos), or press
Options > Delete to discard it.
To send it as an MMS, press > Create message.
Lens
Page 6
3. MMS
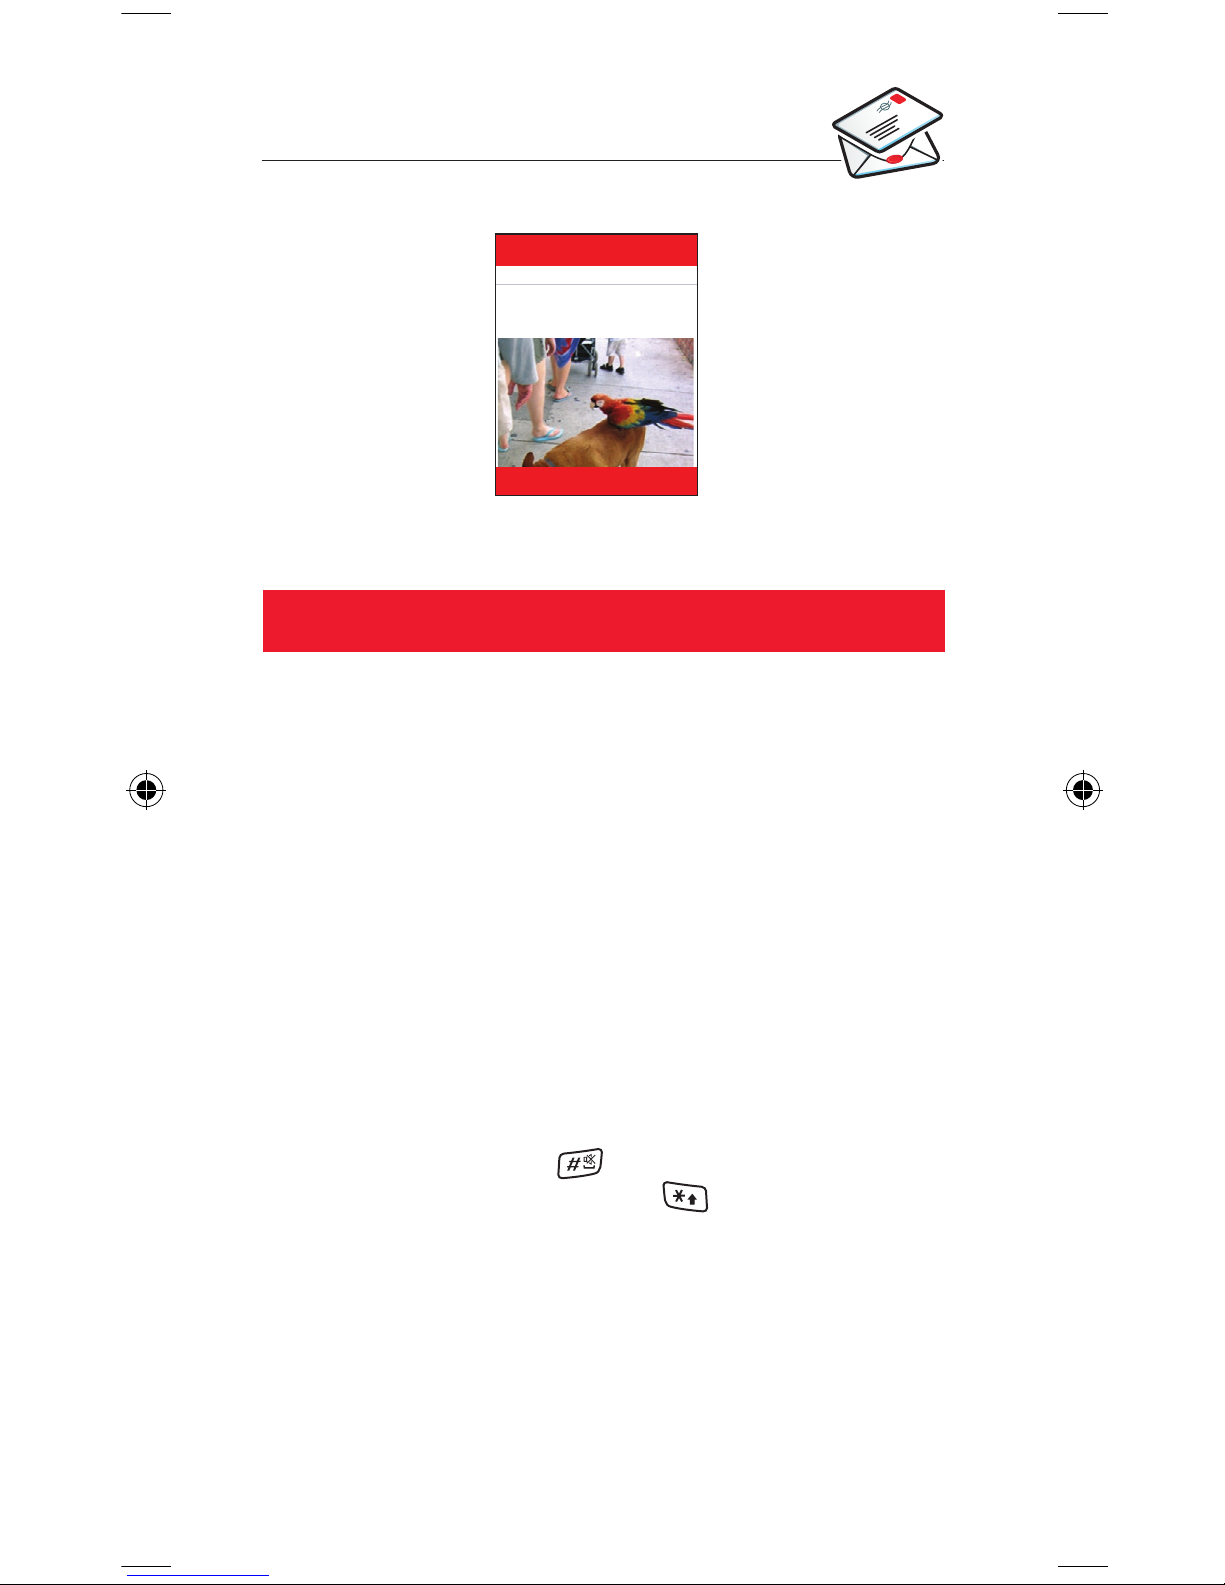
With multimedia messaging (MMS) you don’t have to just send a
text message. Now it’s just as simple to send pictures, videos and
sounds as well! Your E250V is already enabled to send and receive
MMS.
Create and send a new multimedia
message
1. Start a new message:
In standby mode, go to Menu > Messaging > Create and then
select Message.
2. Add text:
Enter your message using the keypad (use the key to
delete). Press the key when you’re nished. To send this as an
SMS, go to step 5. To make an MMS, choose Options > Add item.
3. Add a picture or video clip:
Choose Picture or Video. Scroll down to the photo or video you
want and press > Add.
Note: If you add a large video clip you may not be able to add
further items.
4. Preview:
Press Options > Preview message to see and hear it (press u to
see additional pages). Then press .
5. Send your message:
Press , then Send.
To enter an number or email address from your Contacts list,
press . Otherwise, enter a mobile number, or press the
key 3 times to go to abc text entry, and enter the email address
(use the 1 key to enter symbols). Then press .
Page 7
!
1. Adding more items to your message: When creating an MMS
you can also add sounds, or choose the Create item option to
record new sounds, videos or photos for your message.
If you add a saved video, or extra photos, sounds or text, another
page will be added to your MMS.
2. Sending to a mobile: Try sending one to yourself to see how
it works.
Note that if you send a message to a phone that isn’t picture
message compatible, they’ll be sent a web address to view it on.
3. Sending to more than one person: To send your message to
more than one person, select another To eld and add another
number or email address.
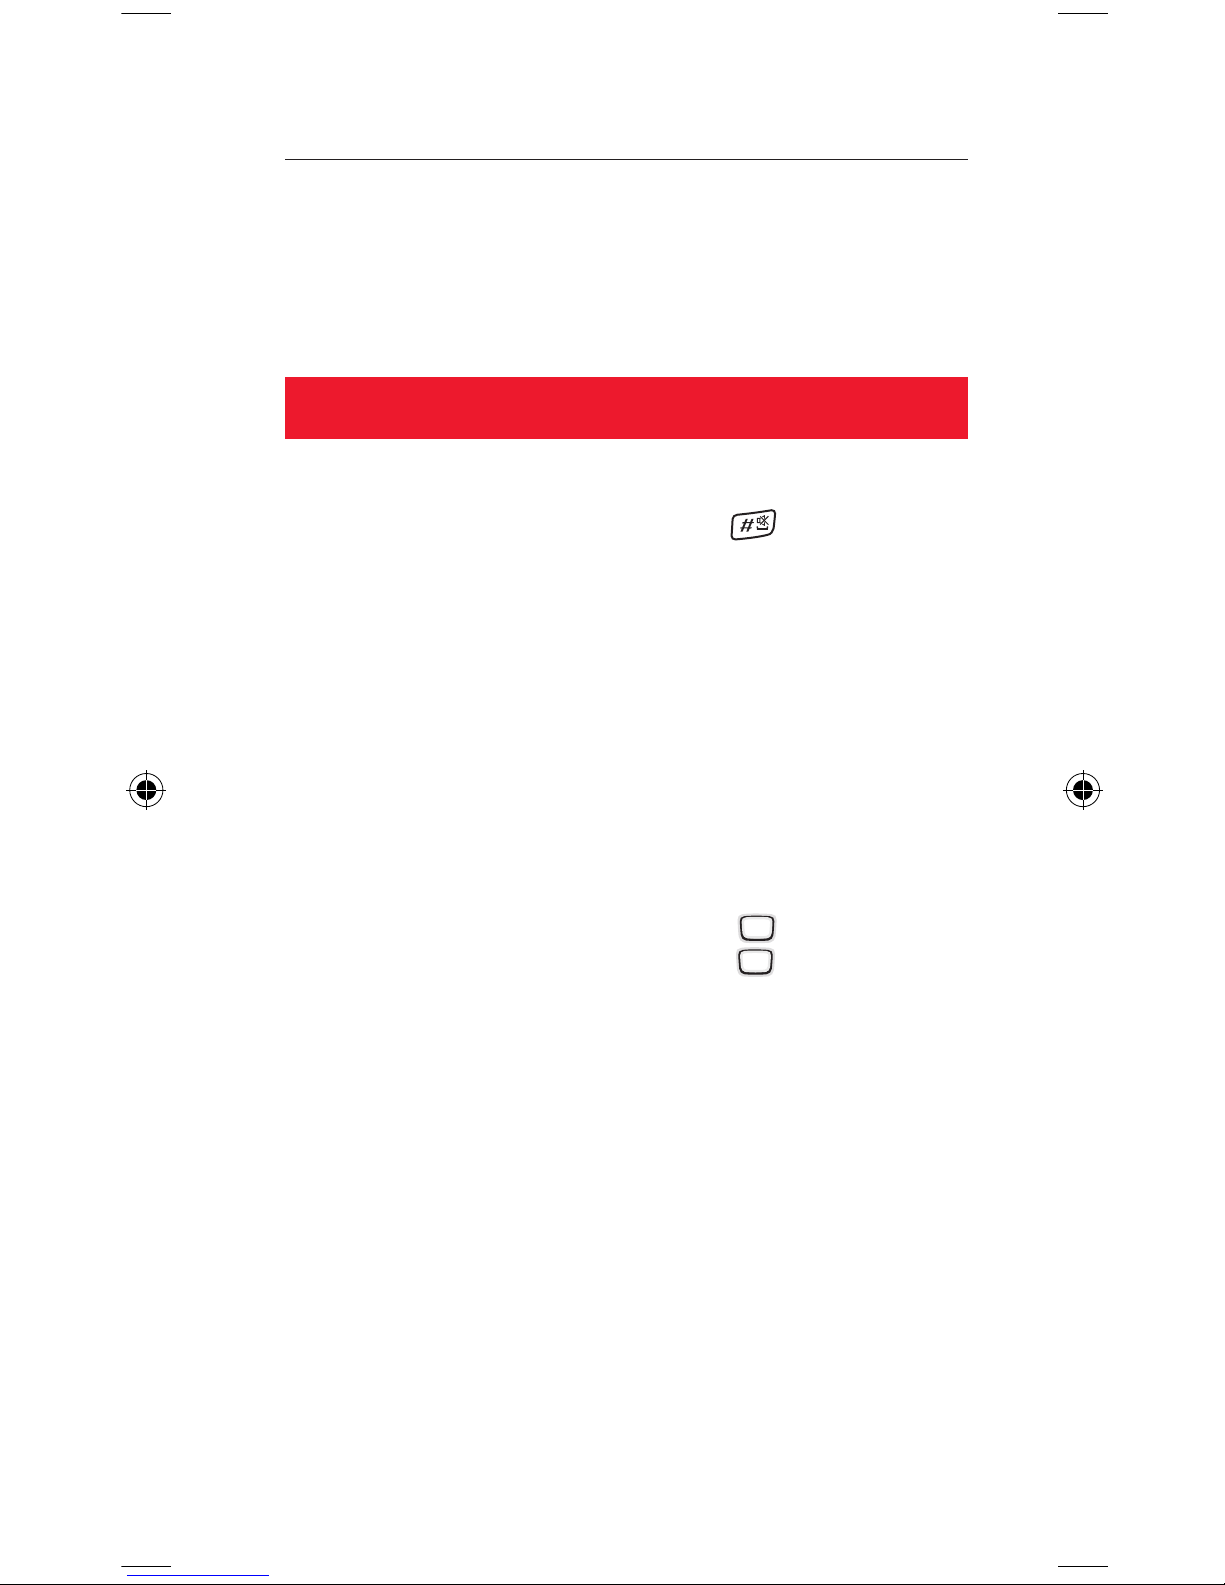
4. Text entry: The Hash key adds a space, the 1 key cycles
through punctuation, and the Star key cycles between upper
case, lower case, numbers and symbols. Pressing and holding the
Star key turns predictive text (T9) on and off.
Multimedia messaging tips
OK
Wait till you see this!
Hi there!
Page 8
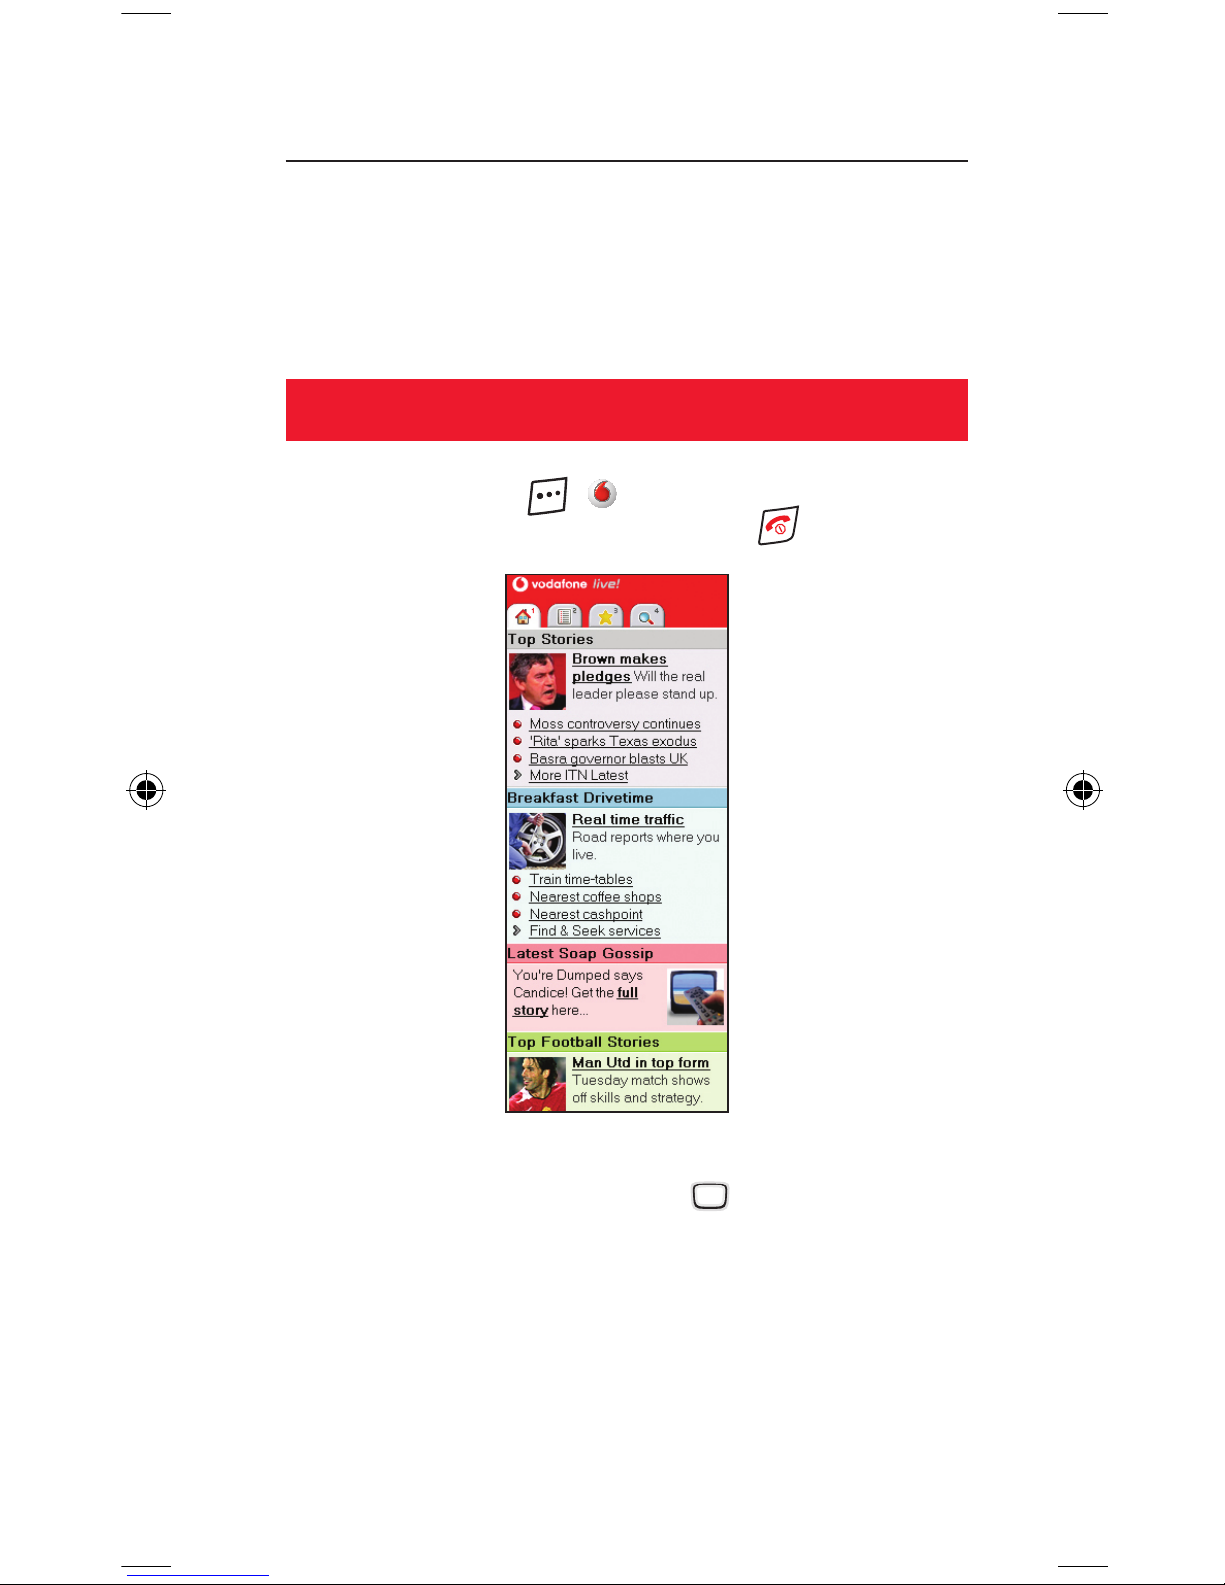
It works just like an ordinary web browser. Simply highlight the
item you want to select, then press the key to open that
page.
Press Back to go back a page. Press Options to enter a new web
address, or to save and view bookmarked pages.
Note: your view of the home page may be slightly different.
4. Vodafone live!
Vodafone live! brings your mobile to life: full of information,
downloads, games, music and services. It’s easy to use, and the
connection can be ‘always on’ so there’s no wait for dialling up.
Connect to Vodafone live!
In standby mode, press [ live!] to connect you to the
Vodafone live! main menu. To exit, press the key.
Page 9
Vodafone live! links
You can also link directly to the Vodafone live! service you want
using your phone’s built-in links.
1. Links:
Go to Menu > Vodafone live!. This page is ofine, so you won’t be
connected until you choose a link. Here are some of the services
you can choose:
Vodafone live!: connect to the Vodafone live! home page.
Games: download games for your E250V.
Ringtones: download sounds and ringtones.
Pictures: download images, animations and background
wallpaper.
News: get the latest news reports and weather forecasts.
Sports: for all the sports news, results and the latest scores.
Tip: Vodafone live! is growing and changing all the time, so the
options may vary. Keep checking it out to see what’s new.
2. Bookmarks:
Go to Menu > Vodafone live! > Bookmarks to create, view and
connect to your personal bookmarks.
Page 10
!
5. Downloads
Make your phone your own by downloading new ringtones, games
and background wallpaper from Vodafone live!.
Download more
1. Download a new ringtone:
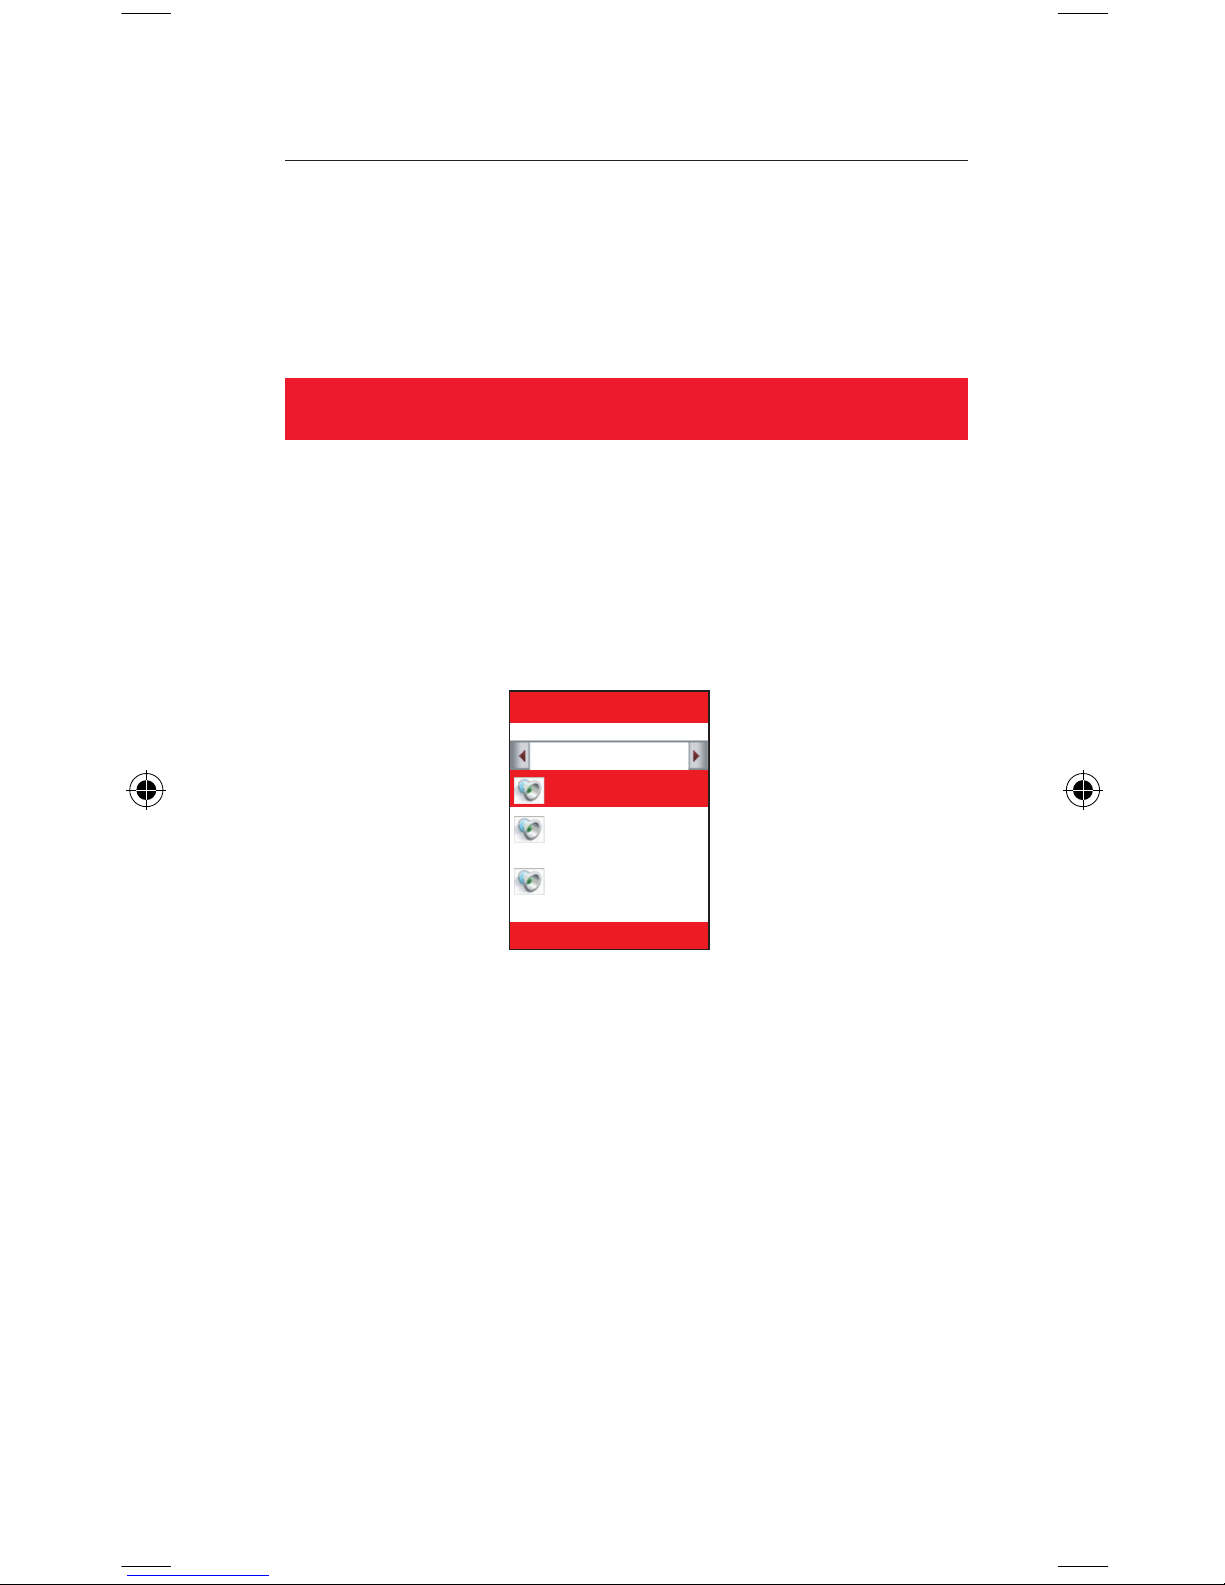
Go to Menu > My les > Sounds & Ringtones and choose More
ringtones. Choose the ringtone and follow the instructions
to download it. To activate your ringtone, go to My les >
Ringtones. Highlight your downloaded ringtone and select
Options > Set as > Ringtone.
My les
More ringtones
Well-balance...
Tango.mid
Options Back
2. Download new background wallpaper:
To choose a new background image for your phone, go to My
les > Pictures > More pictures. Choose the image you’d like
and follow the instructions to download it. Then go to My les >
Pictures, select your downloaded image and choose Options >
Set as > Wallpaper.
3. Download new games and videos:
To add more high quality games to your handset, select My les
> Games > More games. Choose a game to download, and you’ll
nd it in Menu > Entertainment > Games (there are some great
games there already). Go to My les > Videos > More videos to
download and view new videos.
Ringtones
Page 11
6. Other services
Now you can use your phone to send a postcard, or send pictures
to an online album.
Postcard and live! Studio
1. Postcard:
Now you can send a photo from your handset as an actual
postcard. Go to Messaging > Create > Postcard, and add a
picture, text and the address. Press Options > Send. Vodafone will
have it printed on a postcard and sent by mail. (Note: the Postcard
service is not available in every country.)
2. live! Studio:
Now you can upload photos to an online album with our Vodafone
live! Studio where you and your friends can access them remotely.
Go to My les > Pictures, select the picture you want and choose
Options > Upload > To media album. To see your album on the
Vodafone live! portal, go to Vodafone live! > live! Studio. You can
also log in to your homepage on your local Vodafone website and
select the live! Studio option.
Page 12
7. Other functions
Here are a few other functions for your new phone. There’s much
more information in the manual – or you could just explore all the
menus and options screens...
Phone hints
1. Silent mode:
To go into Silent mode, press and hold the key in standby
mode (you’ll see an icon at the top of the screen and feel the
phone vibrate). Do the same to restore your ring volume.
2. Alarms:
Go to Menu > Organiser & Tools > Alarms for a variety of alarm
functions.
3. Bluetooth:
Go to Menu > Organiser & Tools > Bluetooth to turn Bluetooth
on, and to pair your phone with other devices.
4. Radio:
Plug in the supplied headset (this acts as an aerial), then go to
Menu > Entertainment > FM Radio. Press to turn the radio
on, then t or u to nd new stations. Press to turn the radio
off again.
 Loading...