

Samsung CT2Z45, CT2Z47, CT2Z57, CT2Z50, CT2Z58 Owner's Instructions Manual
...
English - 1
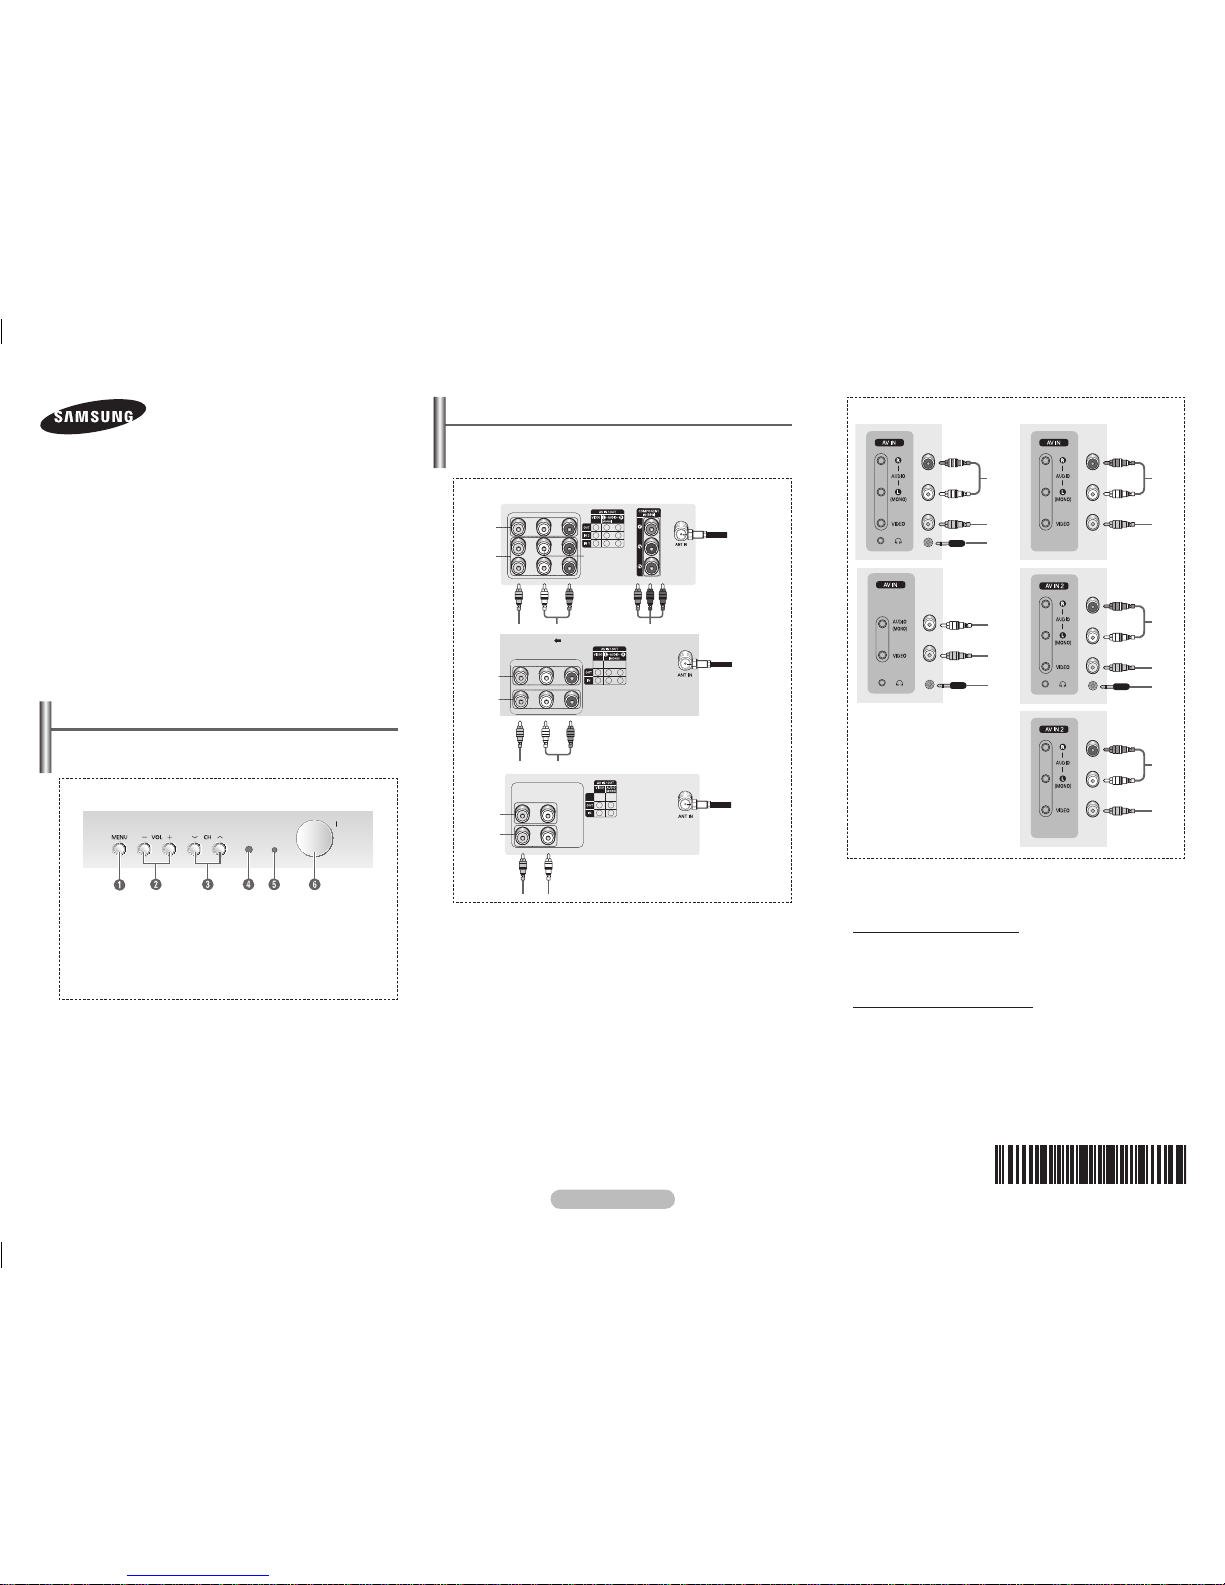
Control Panel (depending on the model)
➢
The product colour and shape may vary depending on the
model.
You can use the 3 buttons to switch the TV on when it is
in standby mode depending on the model.
The 2 and 3 buttons also have the same function as the
◄/►/▲/▼ buttons on the remote control.
If the remote control no longer works or you have
misplaced it, you can use the controls on the panel of the
television.
COLOUR TELEVISION
Owner’s Instructions
Before operating, please read this manual thoroughly,
and retain it for future reference.
Register your product at www.samsung.com/global/register.
Record your Model and Serial number.
▪ Model __________ ▪ Serial No. __________
CT21Z43/21Z45/21Z47/21Z50/
21Z55/21Z57/21Z58/21AJ0/
21AE0/21AF0/21AM0
1 On-screen menu display
2 Volume adjustment
3 Channel selection
4 Remote control sensor
5 Standby indicator
6 Power on/off
Front (or Side) Panel
➢
Whenever you connect an audio or video system to your
television, ensure that all elements are switched off.
Please be sure to match the colour coded input terminals
and ca
ble jacks.
1 Audio/Video Output Jacks
Connect to the audio/video input jacks of a recording VCR.
2 Audio/Video Input Jacks
Connect to the
audio/video output jacks of VCRs, DVD players
and similar devic
es.
3 Component Video Input Jacks (Y, PB, PR)
Connect to the Co
mponent video outputs of a DVD or DTV
set-top box. 480i video signal input is available.
When using the Component Video input, connect audio jacks
to “AV IN 2 (AUDIO-L/R)”.
4 ANT IN
Connect to an antenna or to a cable TV system.
☛
Please be sure to match the colour coded input terminals
and cable jacks.
Connecting to the RCA Input
The 1 (AUDIO-L/R) and 2 (VIDEO) connectors are used for
equipment, such as a camcorder, video disc player, or video
game device.
Connecting to the Headphones
The 3 (headphone) jack is used for watching a television
programme without disturbing the other people in the room.
Prolonged use of headphones at a high volume may damage
your hearing.
➢
When both the front (or side) AV and rear connectors are
connected to external equipment, the front (or side) AV
receives priority.
Front (or Side) Panel
1 Audio input
2 Video inpout
3 Headphone jack
Connection Panel (depending on the model)
➢
The product color and shape may vary depending on the
model.
Rear Jack
1
2
4
1
2
4
1
2
3
4
3
1
3
2
1
3
2
1
2
1
3
2
1
2
AA68-04004A-01
AA68-04004A-01Eng_0724.indd 1 2008-07-24 오전 11:39:03
English - 2
Turning the TV On and Off
Press the POWER button on the remote control.
You can also use the
POWER button on the TV.
➢
Caution: One pole switch is totally not off(one line still live)
if power cord is not unplugged.
Viewing the Menus
1 Press the MENU button.
The main menu is displayed on the screen. Its left side
has five icons: “Input”, “Picture”, “Sound”, “Channel”, and
“Setup”.
2 Press the ▲ or ▼ button to select one of the icons.
Press the
ENTER button to access the icon’s sub-menu.
3 Press the ▲ or ▼ button to move to items in the menu.
Press the
ENTER button to enter items in the menu.
4 Press the ▲/▼/◄/► button to change the selected items.
Press the
MENU button to return to the previous menu.
5 Press the EXIT button to exit from the menu.
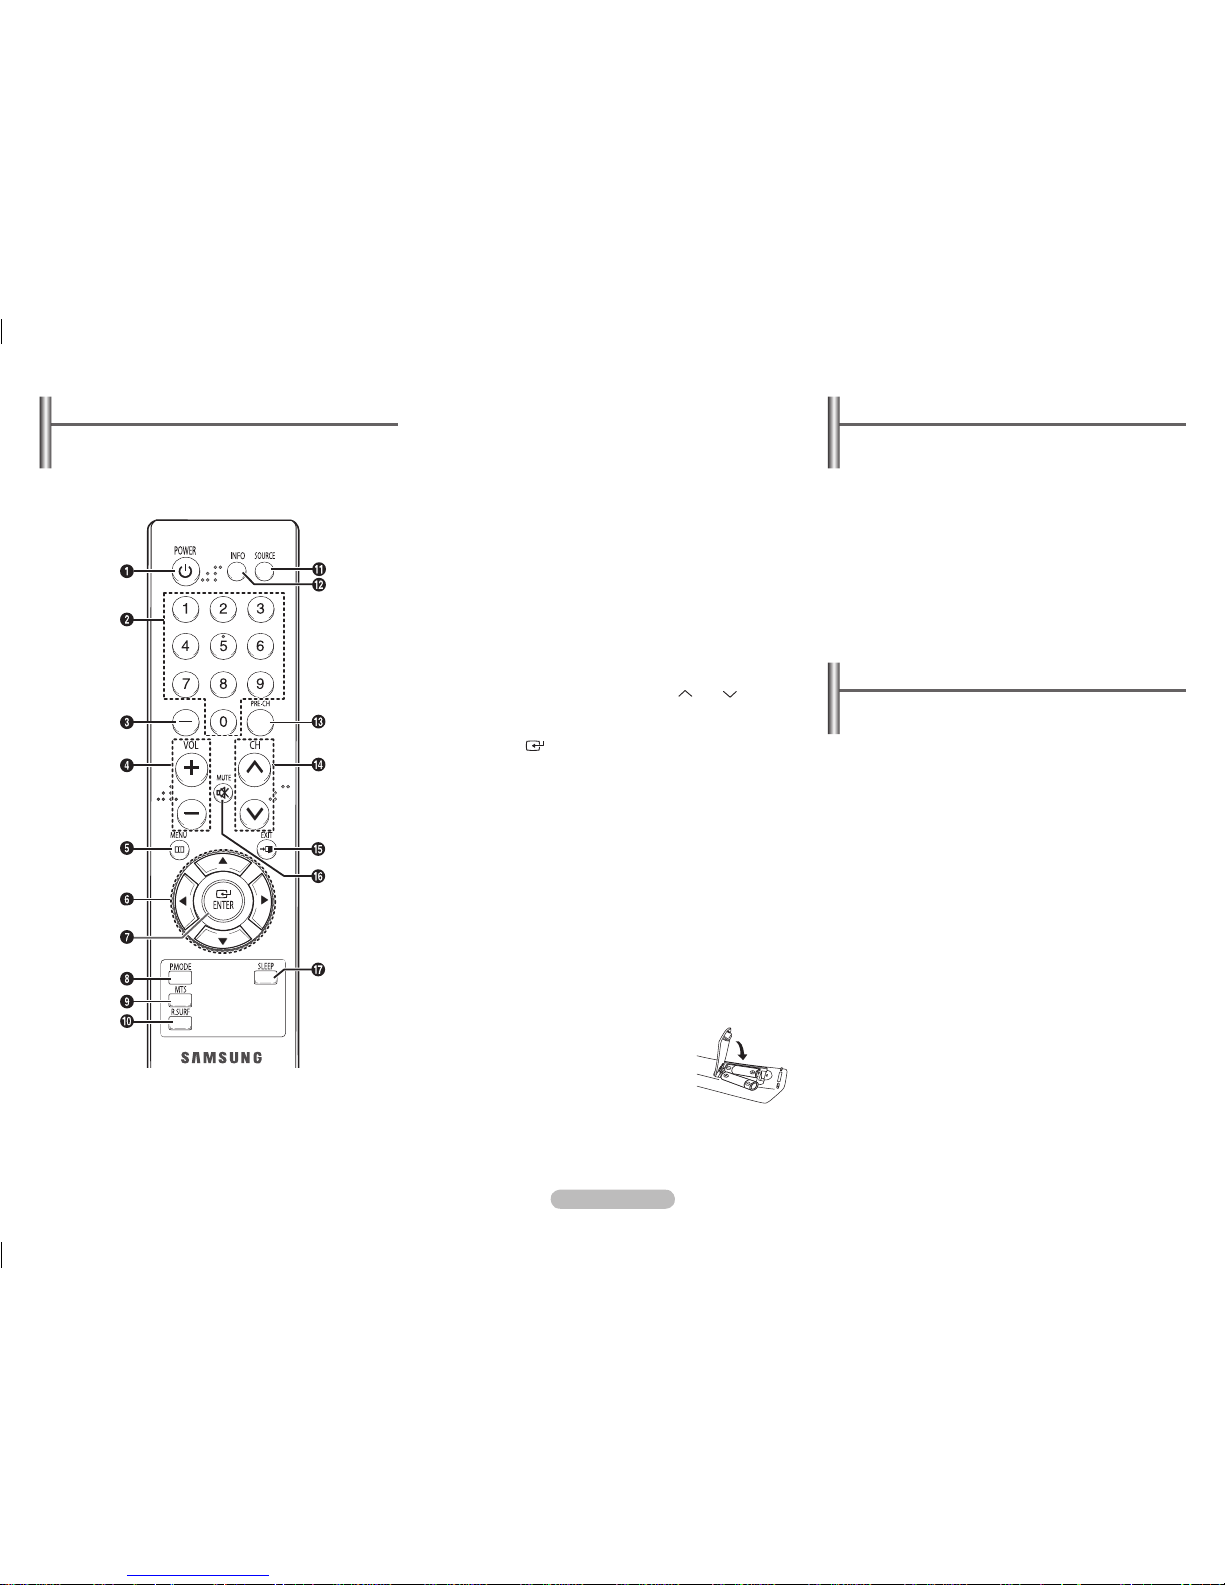
Remote Control (depending on the model)
➢
Operation of remote control may be affected by bright
artificial light near to the TV.
➢
This is a special remote control for the visually impaired,
and has Braille points on the POWER, Channel and
Volume buttons.
1 POWER
Turns the TV on and off.
2 Number buttons
Press to select channels
directly on the TV.
3 –
Press to select channels
over 100. For example,
for channel 122, press
“-”, then “2”, then “2”.
4 VOL +, VOL -
Press to increase or
decrease the volume.
5 MENU
Displays the main
on-screen menu.
6 ▲/▼/◄/►
Controls the cursor in
the menu.
7 ENTER
While using the
on-screen menus, press
ENTER to activate
(or change) a particular
item.
8 P.MODE
Used to select the
picture effect.
9 MTS
(Multi-channel Television
Sound)
Press to choose
“Stereo”, “Mono”, or
“SAP” (Secondary Audio
Program).
0 R.SURF
Press to automatically
return to a preferred
channel after a
userpreset time delay.
! SOURCE
Press to display all
of the available video
sources.
@ INFO
Press to display
information on the TV
screen.
# PRE-CH
Tunes to the previous
channel.
$ CH , CH
Press to change
channels.
% EXIT
Press to exit the menu.
^ MUTE
Press to temporarily cut
off the sound.
& SLEEP
Press to select a
preset time interval for
automatic shut off.
Installing Batteries
Remove the cover. Install two AAA size
batteries, then replace the cover.
When the remote control does not operate
normally, check that the “+” and “–” ends of
the batteries are inserted correctly or the
batteries are drained.
➢
Do not mix battery types, i.e. alkaline and manganese.
AA68-04004A-01Eng_0724.indd 2 2008-07-24 오전 11:39:04
English - 3
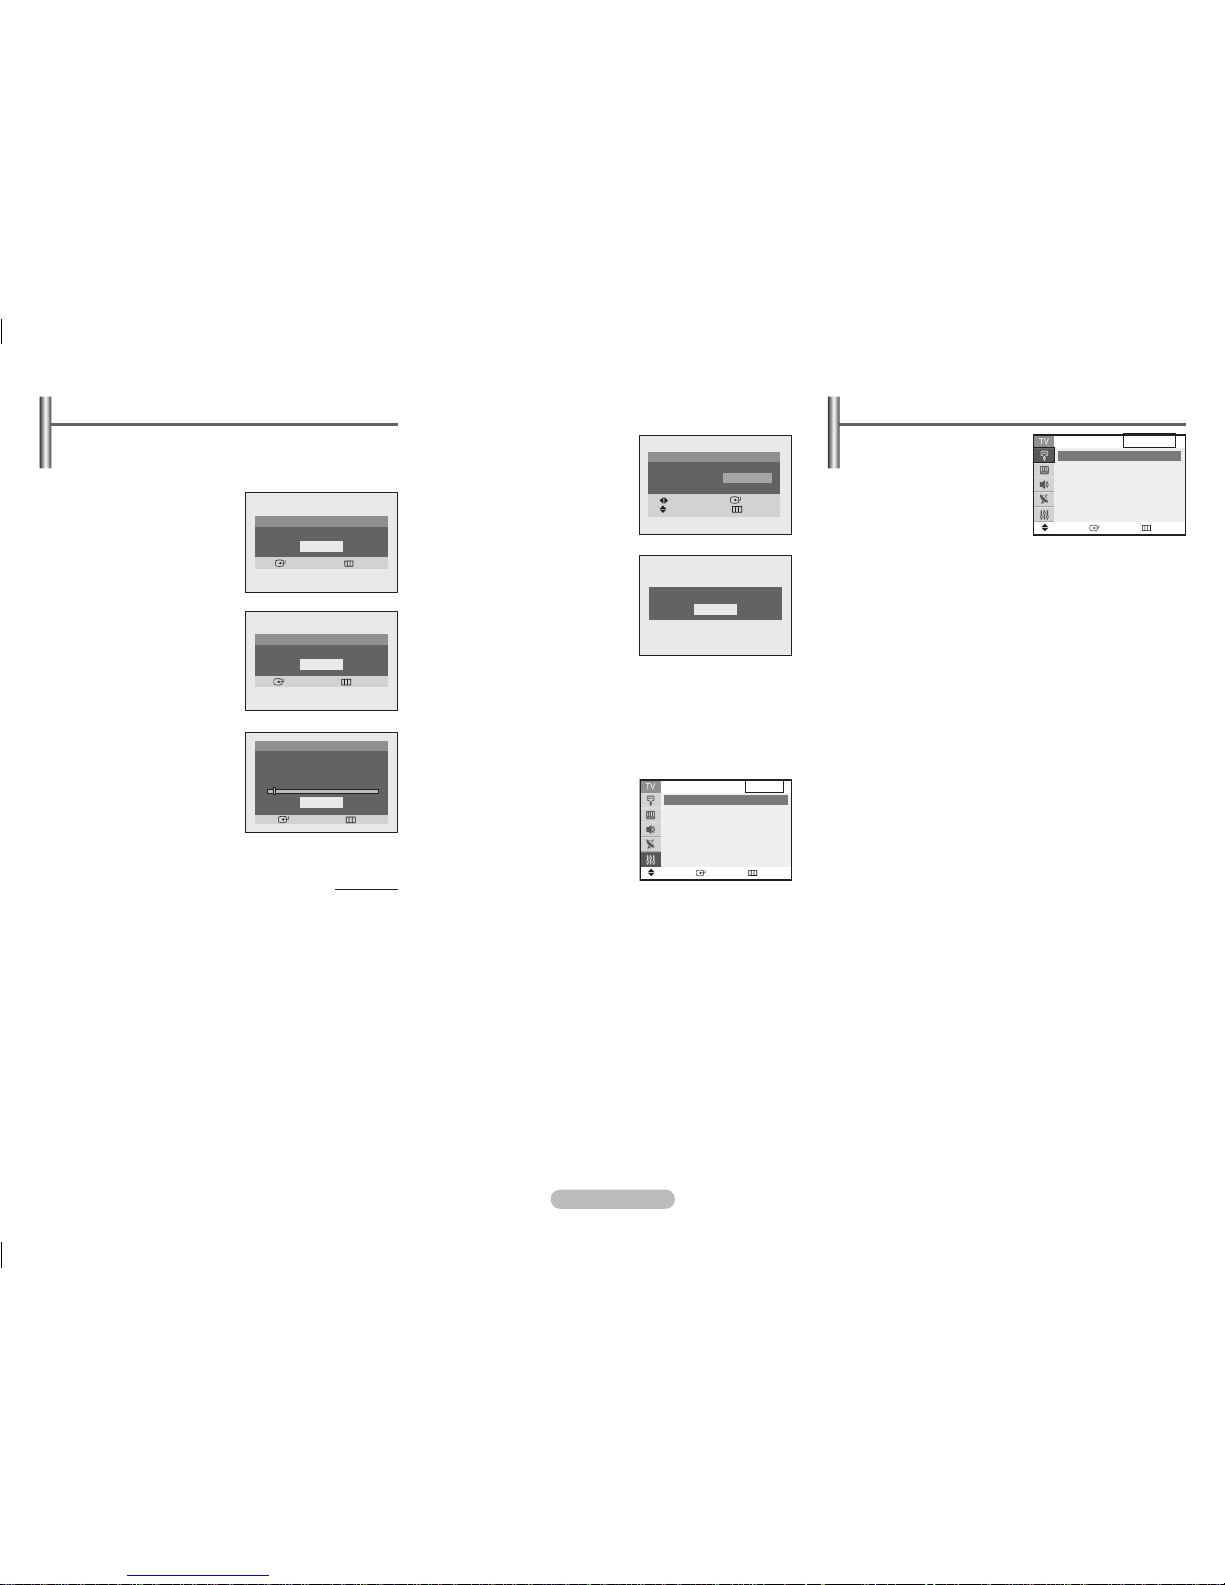
Input - Source List (depending on the model)
Source List
You can switch between
viewing signal from
connected equipment, such
as a VCR, DVD, set-top
box, and the TV source
(broadcast or cable).
➢
Press the SOURCE
button on the remote control repeatedly to select the
desired signal source.
Setup - Plug & Play (depending on the model)
When the TV is initially powered on, several basic customer
settings proceed automatically and subsequently.
The following settings are available.
1 Press the POWER button on
the remote control.
The “Start Plug & Play.” is
displayed. Press the
ENTER
button, then the “Check
antenna input.” is displayed.
2 Make sure that the antenna
is connected to the TV.
Press the
ENTER button,
then the “Auto Program” is
displayed.
3 Press the ENTER button
to start. The TV begins
memorizing all available
channels. Press the
ENTER
button to stop.
continued...
4 After all available channels
are stored, the “Clock Set”
is displayed.
Press the ◄ or ► button to
move to the hour or minute.
Set the clock by pressing
the ▲ or ▼ button.
5 When you have finished,
press the
MENU button.
The “Enjoy your watching.”
is displayed.
➢
Plug & Play feature
doesn’t work in the AV
mode.
Re-setting the Plug & Play
Method:
MENU ▲/▼ (Setup) ENTER ▲/▼ (Plug & Play)
ENTER
Plug & Play
Enter Exit
OK
Start Plug & Play.
Plug & Play
Enter Skip
Auto Program
Air 3
3%
Stop
Enjoy your watching.
OK
Move
Enter
Return
Source List
TV
AV1
AV2
Component
Plug & Play
Enter Skip
OK
Check antenna input.
Plug & Play
Move Enter
Adjust Skip
Clock Set 12 : 00 am
Move
Enter
Return
Setup
Plug & Play ►
Language : English ►
Time ►
Caption : Off ►
Child Lock ►
Blue Screen : On ►
AA68-04004A-01Eng_0724.indd 3 2008-07-24 오전 11:39:05
 Loading...