

Samsung CS-29Z58M5, CS-29Z45M1 User Manual
COLOUR TELEVISION
CS29Z45 / CS29Z47 / CS29Z50 / CS29Z57
CS29Z58 / CS29A730 / CS29A760 /
CS29A750
Owner’s Instructions
Before operating, please read this manual thoroughly,
and retain it for future reference.
Register your product at
www.samsung.com/global/register
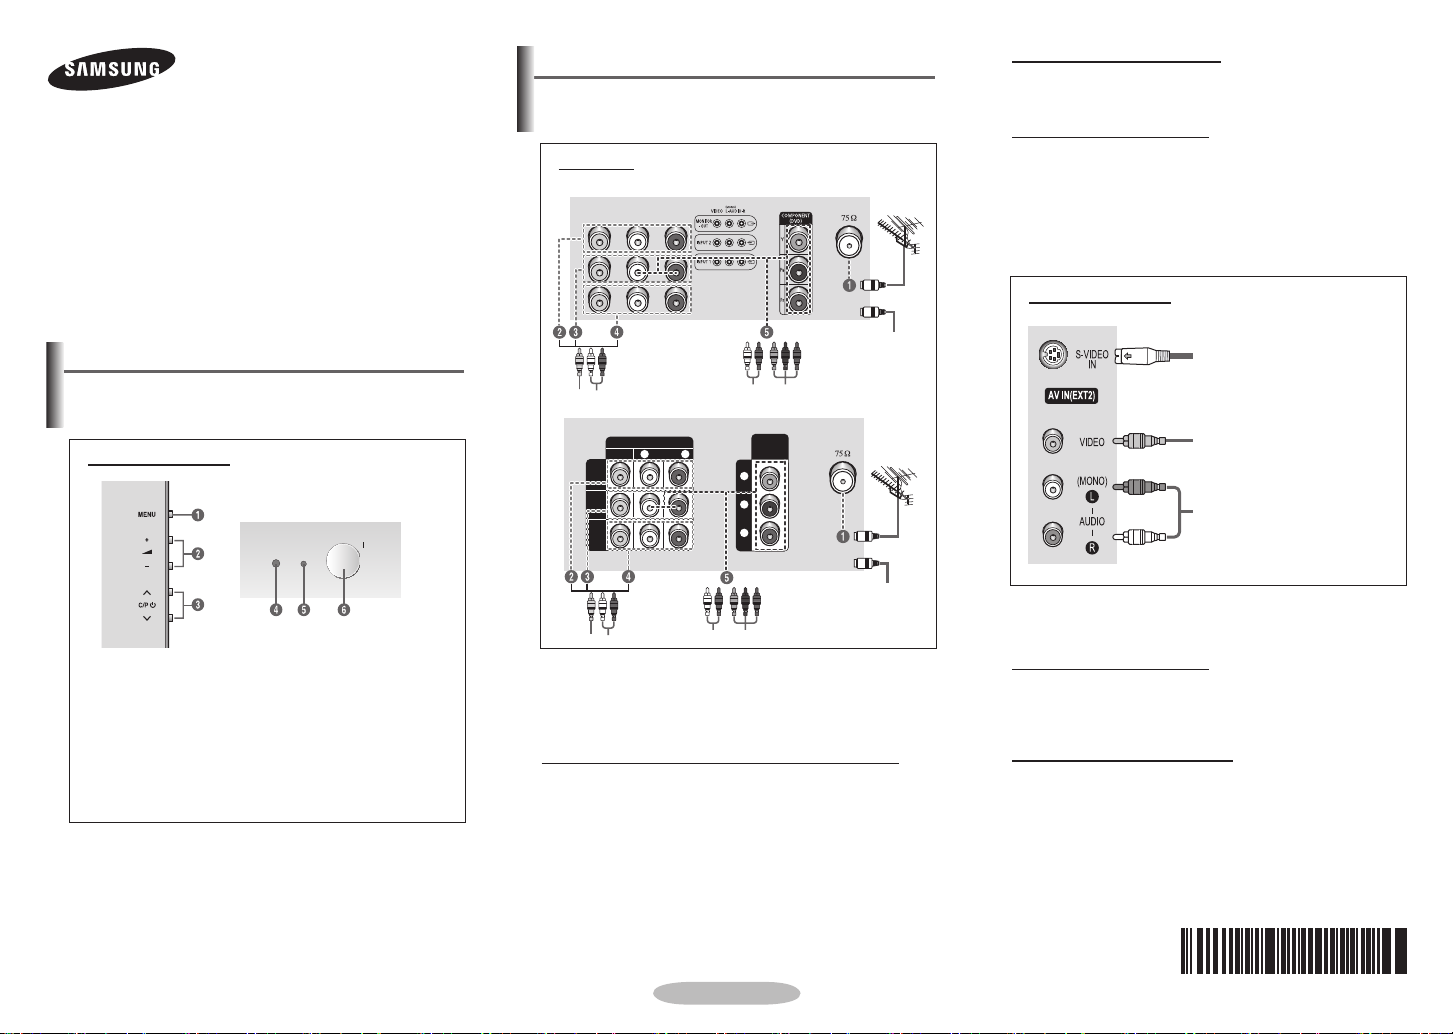
Connection Panel (depending on the model)
The actual configuration of your TV may be different,
➢
depending on your model.
Rear Panel
Connecting to the RCA Output
The RCA2 connectors are used for equipment, such as a
recording VCR or audio system.
Connecting to the RCA Input
The RCA3 and RCA4 connectors are used for equipment,
such as a VCR, DVD, decoder, satellite receiver, video
game device, or video disc player. (When using the mono
equipment, connect to the
The RCA
connectors are used for equipment such as a
5
AUDIO-L input connector.)
DVD with component output.
or
Front (or Side) Panel
Control Panel (depending on the model)
The actual configuration of your TV may be different,
➢
depending on your model.
Front (or Side) Panel
On-screen menu display
1
Volume adjustment
2
Channel selection
3
Remote control sensor
4
Standby indicator
5
Power on/off
6
You can use the 3 buttons to switch the TV on when it is
in standby mode depending on the model.
The 2 and 3 buttons also have the same function as
the ◄/►/▲/▼ buttons on the remote control.
If the remote control no longer works or you have
misplaced it, you can use the controls on the panel of the
television.
cable television
network
COMPONENT IN
(480i/480p/576i/576p/�
720p/1080i/1080p)
Y
P
B
R
P
OUT
IN 2
IN 1
VIDEO
AV IN / OUT
L - AUDIO - R
or
cable television
network
Whenever you connect an audio or video system to your
☛
television, ensure that all elements are switched off.
Please be sure to match the color coded input terminals
and cable jacks.
Connecting to an Aerial or Cable Television Network
Connect the aerial or network input cable to the 1 (75 Ω
coaxial socket).
To view television channels correctly, a signal must be
received by the set from one of the sources: an outdoor
aerial, cable television network, or satellite network.
If you are using an indoor aerial, you may need to adjust it
when tuning your television until you obtain a picture that is
both sharp and clear.
1 S-Video input
2 Video input
3 Audio input
Please be sure to match the colour coded input terminals
☛
and cable jacks.
Connecting to the RCA Input
The 3 (AUDIO-L/R) and 2 (VIDEO) connectors are used
for equipment, such as a camcorder, video disc player, or
video game device.
Connecting to the S-Video Input
The 1 (S-VIDEO input) and 2 (VIDEO input) connectors
are used for equipment with an S-Video output, such as a
camcorder or VCR.
When both the front (or side) AV and rear connectors are
➢
connected to external equipment, the front (or side) AV
receives priority.
English - 1
AA68-03967L-00
Remote Control
2
1
MUTE
-/--
LNA
Operation of remote control may be affected by bright
➢
artificial light near to the TV.
(depending on the model)
/
4
Used to increase or
decrease the volume.
5
MENU
Used to display the onscreen menu or return
to the previous menu.
6
▲/▼/◄/►
Used to control the
cursor in the menu.
7
S.MENU
Used to display the
sound menu.
8
TURBO
Used to select the turbo
sound option.
9
DUAL I-II
Used to select the
sound mode.
0
SOURCE
Used to display all of
the available video
sources.
!
INFO
Used to view the
channel information
and setting status you
selected.
@
PRE-CH
Used to switch
repeatedly between
the last two channels
displayed.
#
P /
Used to display the
next or previous stored
channel.
$
EXIT
Used to exit from any
display or return to
normal viewing.
%
MUTE
Used to switch the
sound off temporarily.
To turn the sound back
on, press the MUTE,
, or button.
^
ENTER
While using the onscreen menus, press
the ENTER button to
activate (or change) a
particular item.
&
S.MODE
Used to select the
sound effect.
*
P.MODE
Used to select the
picture effect.
(
TV
Used to return to the
TV mode when it is in
external input mode.
)
EZ.VIEW
Used to display
Channel Grouping,
Channel Minimizer,
Channel Schedule,
Music Mode, Half Mute
menu.
Switching the Television On and Off
The mains lead is attached to the rear of the television.
1 Plug the mains lead into an appropriate socket.
The main voltage is indicated on the rear of the
➢
television and the frequency is 50 or 60Hz.
2 Press the “I” button (On/Off) on the front (or side) of the
television.
3 Press the
switch the television on. The programme that you were
watching last is re-selected automatically. If you have
not yet stored any channels, no clear picture appears.
Refer to “Channel - Auto Store” on page 3 or “Channel Manual Store” on page 3.
➢
4 To switch the television off, press the “I” button (On/Off)
on the front (or side) of the television.
POWER button on the remote control to
If the television is initially powered on, several basic
customer settings proceed automatically. Refer to
“Setup - Plug & Play” on page 3.
Placing the Television in Standby Mode
The television can be placed in standby mode, in order to
reduce power consumption and wear of the cathode ray
tube. Standby mode can be useful when you wish to interrupt
viewing temporarily (during a meal, for example).
1 Press the POWER button on the remote control while
viewing.
The television is in standby mode.
2 To switch the television back on, simply press it again.
1 POWER
Used to switch the TV
on and off.
2 Numeric buttons
Used to select channels
directly.
-/--
3
Used to select a
channel numbered ten
or over.
Press this button, then
“--” symbol is displayed.
Enter the two-digit
channel number.
Installing Batteries
Remove the cover. Install two AAA size
batteries, then replace the cover.
When the remote control does not
operate normally, check that the
“+” and “-” ends of the batteries are
inserted correctly or the batteries are drained.
Do not mix battery types, i.e. alkaline and manganese.
➢
English - 2
Do not leave the television in standby mode for long
☛
periods of time (when you are away on holiday, for
example). Turn the television off by pressing the “
button (On/Off) on the front (or side) of the television.
It is best to unplug the set from the mains and aerial.
I”
English - 3
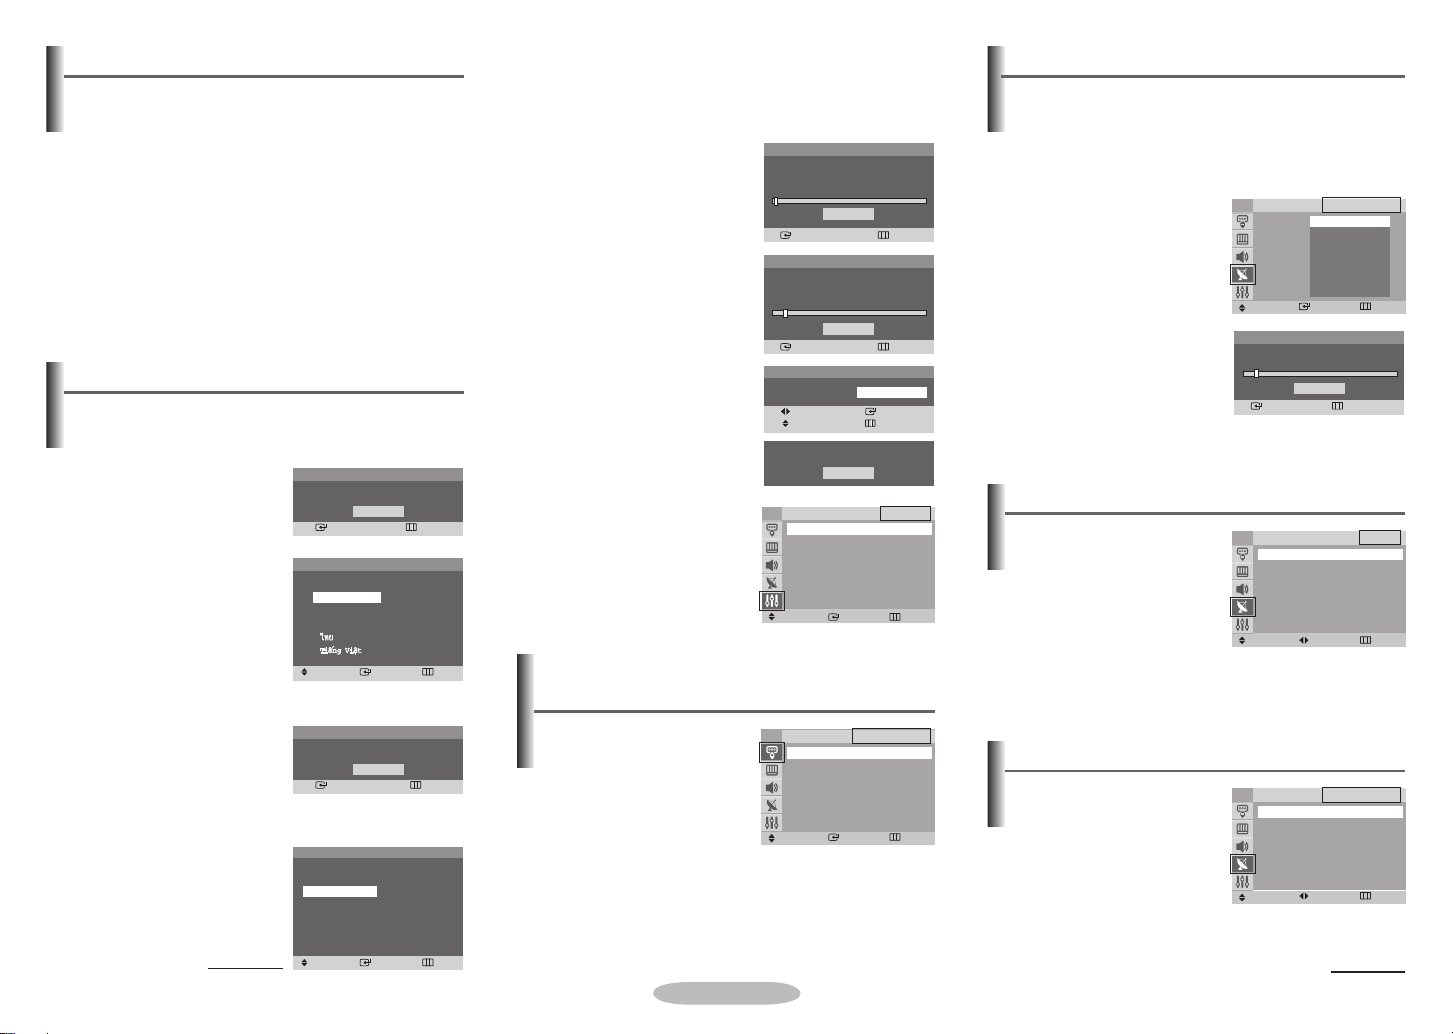
Viewing the Menus
Channel - Auto Store
1 Press the MENU button.
The main menu is displayed on the screen. Its left side
has five icons: Input, Picture, Sound, Channel, and
Setup.
Press the ▲ or ▼ button to select one of the icons.
2
Press the ENTER button to access the icon’s sub-menu.
Press the ▲ or ▼ button to move to items in the menu.
3
Press the ENTER button to enter items in the menu.
4 Press the
▲/▼/◄/► button to change the selected
items. Press the MENU button to return to the previous
menu.
5 Press the
EXIT button to exit from the menu.
Setup - Plug & Play
When the television is initially powered on, several basic
customer settings proceed automatically and subsequently.
The following settings are available.
1 If the television is in standby
mode, press the POWER
button on the remote control.
The Start Plug & Play is
displayed. To start Plug
& Play, press the ENTER
button. The Language
menu is displayed.
The Language menu
➢
will automatically appear
after several seconds,
even if the
ENTER
button is not pressed.
2 Select the appropriated
language by pressing the
▲ or ▼ button. Press the
ENTER button. The Check
antenna input. is displayed.
If any language is not selected, the language menu
➢
will disappear about 30 seconds later.
3 Make sure that the antenna
is connected to the
television (refer to page 1).
Press the ENTER button.
The Area menu is displayed.
continued...
Start Plug & Play.
Enter
Language
English
Indonesia
Melayu
Move
Check antenna input.
Enter
Area
Asia/W.Europe
CIS/E.Europe
China
Hong Kong/UK
Australia
NZL/Indonesia
Move
Plug & Play
OK
Plug & Play
Enter
Plug & Play
OK
Plug & Play
Enter
Return
Skip
South Africa
America
Skip
Skip
4 Press the ▲ or ▼ button to select your area. Press the
ENTER button.
5 To search the channels,
press the
ENTER button. To
Plug & Play
Auto Store
stop the search, press the
ENTER button.
When the channel searching
has finished, the
Clock Set
menu is displayed.
6 Press the ◄ or ► button to
move to the hour or minute.
Set the hour or minute by
pressing the ▲ or ▼ button.
7 When you have finished,
press the
MENU button.
The Enjoy your watching.
is displayed, and then the
channel which has been
stored will be activated.
Re-setting the Plug & Play
Method:
MENU ➜ ▲/▼ (Setup) ➜
ENTER ➜ ▲/▼ (Plug & Play)
➜ ENTER
Auto Store
P 1 C-- 102MHz
7 %
Clock Set 1 1 : 0 0 am
TV
Start
Enter
Plug & Play
Stop
Enter
Plug & Play
Move
Adjust
Enjoy your watching.
OK
Plug & Play
Language : English
Time
Child Lock
Blue Screen : On
Melody : On
Music Mode : Off
Move
Enter
Enter
Skip
Skip
Skip
Setup
Return
Input (depending on the model) - Source List
Enter
Source List
Return
Source List
◆
You can switch between
viewing signal from
connected equipment,
TV
TV
AV1
AV2
S-Video
Component
such as a VCR, DVD, settop box, and the TV source
(broadcast or cable).
You can change the required external source simply
➢
by pressing the SOURCE button on the remote
Move
control. It might take a short period of time for
pictures to be switched. To return to the TV mode,
press the TV button on the remote control.
You can scan for the frequency ranges available to you (and
availability depends on your country). Automatically allocated
programme numbers may not correspond to actual or desired
programme numbers. However you can sort numbers
manually and clear any channels you do not wish to watch.
Channels are sorted and stored
in the order which reflects their
position in the frequency range
(with lowest first and highest
last). The programme originally
selected is then displayed.
To stop the search before
➢
it has finished, press the
ENTER button.
When finished, the
Sort menu
is displayed. To sort the stored
channels into the desired
numerical order, refer to
TV
Area : Belgie
Search
Move
P 1 C-- 102MHz
7 %
Enter
Asia/W.Europe
CIS/E.Europe
China
Hong Kong/UK
Australia
NZL/Indonesia
South Africa
America
Enter
Search
Stop
Return
Auto Store
Return
“Channel - Sort”. To exit without
sorting, press the
EXIT button.
Channel - Sort
This operation allows you to
change the programme numbers
of stored channels. This
operation may be necessary
after using auto store.
From: Channel number to
◆
TV
Move
From : P 1
To : P-Store : ?
Adjust
be changed.
To: New channel number to be identified.
◆
Store: Confirmation the exchange of channel numbers.
◆
Sort
Return
Channel - Manual Store
Manual Store
You can store channels,
including those received via
cable networks. When storing
channels manually, you can
choose:
-
Whether or not to store each
of the channels found.
-
The programme number of
each stored channel which you wish to identify.
TV
Programme : P 3
Colour System : AUTO
Sound System : BG
Search : 46MHz
Channel : C 4
Store : ?
Move
Adjust
continued...
Return
 Loading...